Home Blog Page 146

100+ Bushcraft Skills – The Ultimate Resource for Survival

0

Bushcraft skills are often thought of as survival skills. While they are certainly useful in a survival situation, they are most helpful in taking our time in the woods beyond survival and making it comfortable.

These abilities are often referred to as pioneer skills, as they were necessary for survival before the advent of electricity, gasoline engines, and indoor plumbing.

Due to modern conveniences, many people do not build a fire or boil drinking water daily as our ancestors did in the 19th century. Learning these skills is important not only for recreation but also for emergency preparedness and self-sustainability.

Bushcraft Skills Bushcraft Campsite with an axe, pile of firewood, and a cooking stove

These bushcraft skills can be practiced in your backyard or at a simple campsite. As I mentioned in What is Bushcraft, most bushcrafters I know are outdoorsmen that just like to be outside and make things with their hands.

Keep reading to find out the bushcraft skills that are most important both for survival and making your time in the woods comfortable. I also have a tip on the best place to read more about these skills.

Keep an eye out for my link to a free first-aid training course and easy camp meals!

Bushcraft Camping Skills – Campsite Selection

While it’s not really an exciting skill to practice, selecting the wrong place to camp can make all of the other skills ineffective. Or it can make your situation even worse.

When choosing a place to camp, there are a few factors to keep in mind. Although it may seem overwhelming at first, with time, selecting a bushcraft campsite will become second nature.

  • Length of Stay: How long do you plan to camp here? Shorter stays will require less resources than longer ones.
  • Firewood: If you plan to have a fire, ensure it is legal. Can you cut down trees? Is there enough deadfall around camp to use instead?
  • Weather: Which way does the wind usually blow? Ideally, the wind should be parallel to your shelter and fire so smoke doesn’t blow into your shelter.
  • Elevation: Warm air rises, so low valleys tend to get cold. Ridgetops tend to be windy. The ideal location is halfway up a hill between a ridge and a valley, if possible.
  • Water: Do you have a water source nearby? Are you close to a water source that could flood? Don’t forget that floods start upstream. Just because it is not raining where you are doesn’t mean the river or stream can’t flood from rain miles away.
  • Overhead Hazards: Make sure for safety that there are no dead trees or branches overhead that could fall with the wind. Cliff sides or overhangs where rocks could fall into your campsite are also dangerous.
  • Make sure you are allowed to camp in the area you have selected. Get permission from the landowner if it is private land, or make sure you don’t need a permit if you are on public land. Also, find out if you can have a fire, cut trees, hunt, fish, etc.

Bushcraft Knife Skills – Knifecraft

Using a bushcraft belt knife is one of the most important bushcraft skills to master. Without anything else, you have a chance to survive in the wilderness if you have a good belt knife.

Just like any other cutting tool, knowing how to use one safely is what you should focus on. Avoid the “triangle of death,” the area around your upper legs and groin where your femoral arteries are.

This is just as important with a smaller knife as you would find on a multitool or a Swiss Army knife. Keep the blade and direction of the cut away from the triangle.

Here are some bushcraft knife skills to focus on:

  • Safe grips such as the knee lever and chest lever grip for carving
  • Batoning wood to make kindling
  • Cutting notches like a V notch, stake notch, bail notch, and cabin notch
  • Shear cuts for making feather sticks or cutting small saplings.
  • Shaving bark for fire tinder
  • Cutting holes in sticks to craft items
  • Cutting fine splits and end nocks
  • Sharpening a knife – both field touchup and restoring a damaged edge

Always ensure you have a proper sheath for your belt knife, and keep it in the sheath when you are not using it.

Bushcraft Axe Skills – Axecraft

Axecraft is a bushcraft skill focused on effectively and safely using a bushcraft axe or hatchet. Besides the knife, the axe is an important tool for the bushcraft camper. Much of what we use at camp involves processing wood, and the axe can make quick work of a tree or log.

Some bushcraft axe skills are:

  • Cutting down trees (felling) for firewood or shelter materials
  • Limbing a tree
  • Splitting wood for fuel
  • Carving large pieces of wood to make tools
  • Notching or bucking logs for shelter or other structures
  • Using an axe as a hammer for tent stakes or spikes
  • Using an axe with a baton to make shingles or planks
  • Sharpening an axe
  • Replacing an axe Handle

When working with an axe in the woods, safety is crucial. Felling a large tree with an axe is an extremely hazardous activity, as both the swinging axe and the falling tree pose a risk of injury. It’s important to understand the proper techniques for using an axe to minimize these risks.

While it is not practical to get into all the ways to safely use an axe here, always keep a sheath on your axe head when it is not in use. Mors Kochanski’s book Bushcraft is one of the best I have seen on how to use an axe. See our Best Bushcraft Books review for details on this book.

Bushcraft Saw Skills – Sawcraft

Knowing how to use a bushcraft folding saw, and a bow or buck saw is a bushcraft skill at the top of my list. While safer than an axe, attention to safety is still required.

I have seen most injuries occur from people trying to use a saw that is too large for the task. While big saws seem generally better, they may not be for you.

Here is some bushcraft saw skills to master:

  • Felling trees – This is safer than using an axe, but you still have the falling tree to worry about.
  • Limbing a tree
  • Splitting wood – Yes, you read that right, see our best bushcraft saw article for a video
  • Notching logs or sticks for structures or for crafting other utility items
  • Processing deadfall for firewood
  • Sharpening a saw blade
  • Selecting the correct saw blade for the job
The author
Larger notches are easier to cut with a saw.

While a saw is much easier to use than an axe, there are still nuances that must be learned. For example, some saws are designed to cut in only one direction. If you don’t recognize this in your technique as you are cutting, it can lead to frustration and possibly a broken blade or injury.

Bushcraft Fire Starting Skills – Firecraft

Starting and maintaining a fire is essential for maintaining body heat in cold weather, purifying water, and signaling for help. Without it, your time in the woods will be short and uncomfortable.

While starting a fire may seem simple, there is a ton to learn.

Here are some bushcraft skills for starting a fire to focus on before you head into the woods. These skills will also help you better understand what tools you need. Look at our bushcraft fire starting kit review and guide to help you as you are starting out.

  • Finding and identifying natural dry fire tinder
  • Constructing a “birds nest” and twig bundle
  • Using a Ferro rod
  • Using flint and steel (or a hard rock and your bushcraft knife or saw)
  • Building and using a bow drill
  • Gathering and cutting kindling
  • Making a feather stick
  • Making char cloth
  • Starting a fire with a magnifying lens
  • Building a fire lay
  • Choosing a safe fire site
  • Maintaining a fire
  • Properly extinguishing a fire

While this is not an extensive list, it is the basics that you should focus on. Start with how to gather and use tinder and kindling and light it with a trusty Bic lighter.

Starting a fire with a bow drill should be the last thing you do after you have mastered starting and maintaining a fire with the other methods.

I’ve found that many people face difficulties when it comes to choosing the right type of fuel to use for their fire. They may use sticks that are too large or lack enough dry material to sustain the fire, regardless of how they initially ignite it.

Keep local regulations in mind when starting a fire. Make sure there are no fire bans, and fires are allowed in your area. Starting a fire in a no-burn zone is a serious offense.

Bushcraft Shelter Building Skills – Sheltercraft

Building a bushcraft shelter in the woods is a huge topic (which is why we have a 4000-word article called “Bushcraft and Survival Shelters”).

There are many variables at play here. How long do you plan to camp? Is cutting trees or building a shelter even allowed where you are? How much time do you really want to spend building a shelter?

If you own the land, you can take your time and build a long-term bushcraft shelter. For me, this is a lot of fun for the family.

If you are camping where building your own shelter is not allowed, you can use a bushcraft tent or just a bushcraft tarp for a shelter.

Lay flat hammocks are also great, especially where it is hard to find flat ground. See my full Haven Tent Hammock Review to find out if a hammock is right for you and save 10% off with our discount code!

In a survival situation, a lightweight tarp, a survival blanket like the Arcturus heavy duty survival blanket, and a bivy bag are great to keep in your kit and can be deployed in minutes.

Simply put, you need something to sleep on, in, and under.

Here are some bushcraft shelter skills to focus on.

  • Make your own oil-cloth for a canvas tent
  • Pitching a tarp in various configurations for shelter
  • Make and tie a ridgeline for a tarp shelter
  • Make your own tent stakes
  • Make your own ground pad or mattress for sleeping
  • Build a lean-to shelter
  • Build a debris hut shelter
  • Build an A-Frame shelter
  • Build a raised bed inside your shelter
  • Construct a safe heat source inside your shelter
  • Identify natural material for coverage and insulation
  • Build a wall to reflect heat from a fire toward the shelter

You can study and practice building shelters for years. At the end of the day, the second priority of survival is maintaining your core body temperature. Even if you plan to build your own shelter, have a backup plan and basic items in your kit to get you out of the weather.

Water Sourcing and Purification Skills

Clean drinking water is essential for humans. While the survival rule of 3 gives a general guideline that we can only survive for 3 days without water, this could vary depending on the person and environment.

Water is needed not only for drinking but for cooking, cleaning, and personal hygiene during a long-term stay in the woods.

No matter if you are just planning a day hike or a weeklong bushcraft trip, you absolutely must have a plan to obtain clean drinking water.

Remember that most natural water is contaminated with bacteria or parasites that can make you sick. Even if you find a clear mountain stream, it is likely naturally contaminated and unsafe to drink.

Here are some skills to focus on to ensure water does not become an issue.

  • Finding a water source in the woods
  • Judging the safety of standing vs moving water
  • Selecting the proper water container
  • Selecting the proper bushcraft pot
  • Building a pot hanger
  • Prefiltering with a coarse filter to remove turbidity
  • Boiling water to purify it
  • Using a water filter (proper use and cleaning)
  • Identifying water indicator trees from a distance
  • Extracting water from birch trees
  • Building a multilevel tripod water filter from natural materials

It is important to remember that you always need a metal container to purify water. It is ideal to have two: one to gather and purify water and the second to store clean drinking water. This also prevents cross-contamination.

The best method I have found is the combination of a Grayl Geopress water filter and the pathfinder nesting cup. With this setup, I can quickly purify water, and I have a second container for food that doesn’t take up any additional space.

Bushcraft Cordage Skills – Bindcraft

Bindcraft is an all-encompassing bushcraft skill that includes making cordage from natural materials, using manmade cordage like paracord, and tying knots.

Cordage can be used in nearly all of the skills we are discussing. From building a shelter to first aid, being able to tie and use the correct knots makes life much easier in the woods.

Here are some bushcraft skills to practice with cordage.

  • Selecting the proper paracord and bank line
  • Identifying natural materials to use for cordage
  • Weaving and braiding natural cordage
  • Tying basic knots (see below)
  • Tying lashings (Cross, Shear, Square, Diagonal, Tripod, Round)
  • Making bindings (for tying arrowheads, for example)
  • Making fish nets
  • Making cordage from rawhide
  • How to make and use toggles

Here are some basic knots to learn and practice that are useful around camp.

  • Lark’s Head
  • Stop knot
  • Marline Spike Hitch
  • Prusik knot
  • Jam knot
  • Half Hitch
  • Fisherman’s knot
  • Reef Knot
  • Bowline
  • Trucker’s hitch
  • Clove hitch
  • Timber hitch
  • Slip knot

Knots are fascinating to me. You would think that a knot is a knot, but things like a prusik knot are just amazing. Simply taking two pieces of cord and using it for pitching a tarp or climbing without untying it is so simple yet so useful.

I keep a piece of paracord and bank line beside my chair to practice tying knots. If I don’t practice, I find that I forget.

Bushcraft Forestry Skills

When you are in the woods, trees are one of the most abundant natural resources. Identifying each species and its uses will make your time in the woods much more comfortable.

I will admit being able to identify trees is one of my weaknesses. It mostly requires memorization, and comparing pictures in books to what exists in nature is not straightforward.

Learning the leaves is the easiest way to identify most trees. It just takes time and repetition to learn the trees in your area.

Here are some forestry bushcraft skills to focus on in the woods.

  • Identifying trees based on their leaves and bark
  • Which wood is the best for firewood
  • Which wood is the best for building material
  • Which trees have nutritional or medicinal uses
  • How to identify “Fatwood”
  • How to use pine sap as an adhesive
  • Making containers from wood bark

Trees are a resource that we can use all year long. Bushcraft is essentially “living with nature.” Ultimately, we all look at trees a little differently if we understand just how important they are.

Bushcraft Foraging Skills

The wilderness is literally full of plants that have benefited humans for thousands of years.

But, with modern conveniences, we have forgotten so much. Being able to walk through the woods and understand what you can and can’t eat, what makes a good seasoning, and what can make your headache go away are all very rewarding bushcraft skills.

Here are some foraging bushcraft skills to learn:

  • Identifying plants (learn the harmful ones first)
  • Understanding which plants have poisonous lookalikes
  • Harvesting wild edibles in your area
  • Which plants have medicinal properties
  • Identifying edible nuts
  • Identifying edible fruits
  • Where the most beneficial plants usually grow

Food usually isn’t an issue in a short-term survival situation. But, it is hard to live with just foraging for an extended period. This skill is one of the hardest and could be dangerous if you consume a poisonous plant.

I think of foraging as a supplement to the overall outdoor experience and a way to understand nature better.

Start with some wild onions or garlic as a seasoning. Or, just pick some blackberries. I have an area on my property full of them, and we enjoy them every summer.

Bushcraft Trapping Skills

Trapping is an ancient skill that is very rewarding when you need food in a survival situation. Since it is passive, it should be your primary method of harvesting food from nature. You can just set traps and check them a couple times of a day while completing other tasks.

For a typical bushcraft trip in the US, trapping is somewhat problematic to practice since there are wildlife seasons and regulations for trapping. Most states have specific trapping seasons, limit the animals you can trap, and limit what type of traps you can use.

Most of us interested in bushcraft have watched and studied the 10 items the contestants on Alone selected. Many chose snare lines, but many did not use them for snares. A few winners made it because they had an effective trap line set up with their snares.

Here are some trapping bushcraft skills to review:

  • Locating and identifying game animals
  • Identifying game trails
  • Recognizing animal behavior
  • Identifying game animal tracks and sign
  • Understanding what game animals eat
  • Identifying and harvesting the correct bait
  • How to make and set a snare
  • How to make and set a deadfall trap
  • How to make and set a cage-type trap

While trapping can be difficult considering state regulations, it is worth trying if you have an area available. Keep your initial expectations low, and be patient. It is a primitive skill that takes time to master and could be very useful when you need it.

Bushcraft Hunting Skills

While trapping is a passive way to harvest game animals, hunting is an active way. While you can hunt any game animal, it has more benefits for the time you spend if you hunt big game animals.

Similar to trapping, rules, and regulations are depending on the state for when, where, and what type of weapon you can use.

Going on a hunting trip in a remote area where you can camp at night is an amazing experience. For many, hunting is the primary reason for the trip, and bushcraft takes a back seat.

Regardless, in a survival situation, having hunting experience is a huge advantage. I recommend that everyone at least try hunting just to have a connection with nature and a better understanding of what is involved.

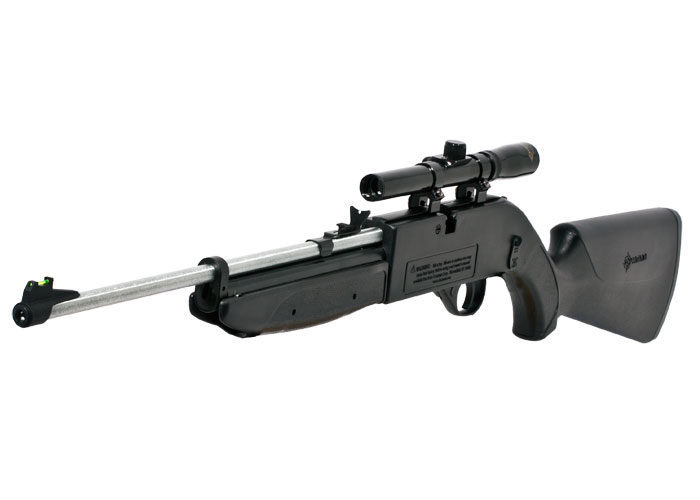
Here are some bushcraft hunting skills to explore:

  • Take a hunter education course
  • Understand how firearms work
  • Learn the different types of hunting firearms
  • Learn the different types of hunting ammunition
  • Learn how to shoot a rifle and a shotgun
  • Understand the different types of bows
  • Learn how to shoot a bow and arrow
  • Reload a spent shotgun shell in the woods
  • Learn how to scout for big game in your area
  • Understand the behavior patterns of game animals
  • Learn the different ways to hunt (still or stalk)
  • Understand the effects that weather has on game animals

Over 25 Million people hunt in the US every year. It is one of the world’s oldest primitive activities that is still done today. Having the experience is certainly valuable when you really need it.

Bushcraft Fishing Skills

Fishing is interesting since there are so many ways to do it. I think that it can be one of the most exciting and one of the most frustrating ways to get food.

There are both active and passive ways to fish. All of them have their challenges. In some ways, active fishing is harder than hunting because you not only have to find fish, but you have to convince them to take your bait.

However, like hunting and trapping, there are rules and regulations that you must follow. Be sure to review them before trying any of these methods.

Some bushcraft fishing skills that you can learn are:

  • Fishing with a standard rod and reel
  • Fishing with a handline
  • Setting a trot line
  • Natural and Artificial bait selection
  • Where fish tend to be at certain times of day/year
  • How to make and use a dip net
  • How to make and use a gill net
  • How to make and use a Seine net
  • How to make a fish trap (funnel and tube style)

Almost twice as many people fish than hunt in the US every year. Since fishing is a year around sport in most areas, it is much easier to practice modern and primitive methods.

Bushcraft Cooking Skills

Cooking at camp is essential for purifying water and cooking food. In many cases, depending on where and when you are camping, you may be unable to trap, hunt, fish, or even forage for food. In these cases, you will have to pack in your own food.

Due to the weight and no refrigeration, this can become a challenge as well.

Not only is cooking at camp an essential bushcraft skill, but preserving food is also. If you harvest a big game animal, what do you do with all the meat?

Here are some bushcraft cooking skills to think about and focus on:

  • Understand foods that can be packed that have high nutritional value and do not need refrigeration
  • Research pre-packaged camp food or dehydrated meals
  • Understand simple camp foods that do not spoil quickly
  • Review substitutes for common ingredients that can be packed
  • Selecting the proper tools for cooking at camp
  • Preserving foraged food and game
  • Cleaning and butchering game animals
  • Cleaning and cooking fish
  • How to bake with a Dutch oven on a campfire
  • Crafting utensils from wood
  • Building a pot crane, tripod, and rotisserie over a fire
  • How to dry and smoke meat
  • Building a rocket stove
  • Building a can stove

There are many survival recipes online for both bringing stable food with you and for cooking once you are at camp. Trail mixes and prepackaged foods are the easiest and what I normally use.

For a very easy option, Nutrient Survival has freeze-dried meals that only require hot water to be added. Their Grab and Go packs include a full day of meals and even include my morning coffee and some snacks and dessert. They are a great way to “smooth it.”

I enjoy cooking and experimenting with different ingredients. Beef jerky, seasoned rice, and a drizzle of olive oil make for a simple yet tasty addition to any camping meal.

Bushcraft First Aid Skills

Inevitably an injury will happen to you or someone you are with. When you are out in the woods, it is important not to panic and know how to react since you are likely hours from help.

The most common injury in the wilderness that you will see are breaks, strains, and sprains. While these usually are not life-threatening, they cause mobility issues which make the other bushcraft skills harder to do.

Another common occurrence in the winter is falling into cold water. If you have your bases covered with shelter and fire, as we discussed above, you should have the resources with you to make a quick shelter and get a fire going in a few minutes.

If this seems crazy, put some gear together and start practicing. Once someone’s body temperature starts dropping, you don’t have long to recover.

In the summer, heat stroke from excessive exertion is also common. Knowing how to identify and rectify it is just as important as treating hypothermia. While being cold is obvious, heat stroke can sneak up on you.

Here are some bushcraft first-aid skills to study:

  • Build/purchase an IFAK and know how to use each item
  • Learn CPR
  • Mobilizing a limb with tree limbs and cordage
  • Understand how to Stop bleeding
  • How to use a tourniquet
  • How to apply bandages and dressings
  • How to treat gunshot wounds, knife wounds, and axe wounds
  • How to treat foot rot/trench foot
  • How to treat burns
  • Identify and treat shock
  • Learn the Heimlich maneuver, both on someone else and yourself
  • Identifying stroke and heart attacks
  • How to treat digestion issues
  • How to treat insect or animal bites
  • Learn medicinal plants in your area
  • How to make a decoction and a salve from plants

First aid skills are great to learn not only for bushcraft but for emergency preparedness in general. Before you focus on any other skills, focus on this one.

Mountain man medical has great purpose built med kits and a video training course that is free.

My Medic also has some great first aid kits specialized for different situations. I like to keep the Sidekick Pro kit attached to my pack when I am out in the woods.

For more details on the kits that MyMedic offers, see our Full MyMedic Review guide. You can also save 15% by using code “SURVIVALSTOIC15” at checkout!

Bushcraft Navigation Skills

Navigating your way through the wilderness is a basic bushcraft skill that you should practice before heading deep into a remote area.

The first rule to always follow before heading out is to let someone know where you are going and when you will be back. If they don’t hear from you when you are supposed to return, they should call for help.

People naturally walk in big circles when they do not have a bearing to focus on (called lateral drift). This is why you always hear people say if you are lost, stay where you are.

It is common when hunting in a remote area to travel a few miles from camp. It is easy to get disoriented at different times of the day.

With basic navigation skills, you won’t have to wait until someone finds you.

Some wilderness navigation skills to learn are:

  • How to use a compass
  • How to use a topographical map
  • How to keep a pace count
  • How to use the terrain to navigate
  • How to identify north from the vegetation
  • Finding your location on a map
  • How to navigate around an obstacle
  • How to mark a trail
  • Using the sun to navigate
  • Using the moon to navigate
  • Using a stick and a star to navigate at night

Using a compass and map requires practice. It is not something you can just read about and pick up. Take a look at our full guide on the best survival compass. Get a good topo map of your area and start small. If you spend a lot of time outdoors, this one skill could save your life.

How to Learn More about Bushcraft Skills

To learn more about all of these bushcraft skills, review our guide of the best bushcraft books. Buy a few of them, study, and focus on one skill and practice it.

Make sure you follow a logical progression. For example, it makes no sense to start a fire with a bow drill if you can’t keep one going.

Go on a camping trip first at a regular campground and just practice cooking, for example. Try out your water filter from water at the lake on a fishing trip. Take one step at a time and be patient. Before long, most of these bushcraft skills will be second nature.

Final Bushcraft Skills Thoughts

The main reason people bushcraft is because they like to be outside. In a survival situation when you don’t have modern conveniences, knowing these skills and tools and having the correct bushcraft gear are life savers.

With some experience, you can thrive living outdoors like our ancestors did. Just think of all the pioneers that headed out west in the 1800s. They all had to survive in the wilderness with just what they had. While it may seem crazy today, humans have survived for thousands of years.

Like “Nessmuk” said in his classic Woodcraft book, “We do not go to the green woods and crystal waters to rough it, we go to smooth it. We get it rough enough at home.”

This article sums up the bushcraft guides and gear reviews that we have created. Take a look at our emergency preparedness and self defense sections as well!

What is the Best Broadhead for Elk Hunting?

0

When you strip away all the fancy gear, the expensive packs, boots, garments, etc.. hunting elk with archery tackle really boils down to two very simple yet ultra important concepts.

1. Be accurate and precise at distance with your equipment

2. Maximize penetration of your arrow

There is zero argument about elk hunting popularity being on the rise. The influx of new archery hunters, difficulties of legally travel abroad to hunt, and increased content around western hunting all has played a part of the elk hunting surge! With that in mind, we’ve also seen a continuous rise in the questions surrounding the business end of your arrow.

“What is the best broadhead for my elk hunting trip?”

“What broadhead should I be using for elk?”

“What is the best broadhead for elk?”

Elk are certainly not whitetails, but they are certainly not water buffalos either! Outside of the animal itself having a reputation of carrying tough hides and a more dense skeletal structure, what other factors should you be considering when trying to pick the best broadhead to harvest an elk with?

YOUR SHOOTING PLATFORM

Regardless of the animal you are hunting, the very first stop in your process of selecting the right broadhead is your shooting platform. Your bow is the largest factoring part of the equation, PERIOD.

Someone shooting a recurve should not be choosing the same arrow and broadhead setup as someone shooting a crossbow or compound. Taking that a step further, draw weight and length, arrow speed, arrow weight, etc, should all factor in to your broadhead choice.

If we’re talking about a crossbow platform, I am shooting fixed blade broadheads. It’s really that simple. I don’t have to think about it, and I don’t have to consider anything else… I don’t even have to wonder. A fixed blade broadhead that is tough, has excellent penetration statistics, something that has thick blades is what I’m looking for. Flight characteristics at high speeds is critical when shooting a crossbow. A general rule of thumb is vented blades tend to perform better than solid blades and cutting diameters no more than 1 1/2″ tend to be more accurate at longer distances. Our K2-Fixed and Fixed EXT broadheads offer everything a crossbow hunter dreams of.

When we’re talking about compounds you really have a wide variety of broadhead choices. Fixed blades, hybrid blades, and mechanicals are all options but not all are created equal. Pending your bow and arrow setup you have some really good options. The key factor is, again, your bow setup. Understanding your bow’s capabilities with your exact draw length and total arrow weight is ultra important. Low poundage shooters and, in some cases, you folks with short draw lengths really need to take a hard look at fixed blade broadheads. Having the understanding that in certain setups you just can’t afford to lose any KE, these types of scenarios IS THE REASON Afflictor’s hybrid broadheads were created. The patented drive-key design offers next to no loss of KE, and with blades opening at impact, you have a true fixed blade broadhead when entering the animal. We can’t say that about other mechanicals. Across the board, whether you are looking at Afflictor’s fixed blade or hybrid blade broadhead offerings, there’s multiple solutions for all compound shooters. Regardless of your broadhead choice, the important message is make sure you understand your setup and that your bow is a fine tuned machine!

When we are looking at the more traditional setups, these guys tend to like a traditional broadhead, right? A single bevel or potentially other fixed blade options, but some trad guys are actually shooting different hybrid broadheads. Something like our Hybrid X or our K2 Mini in the heavyweight stainless steel versions where they’re getting into 175 grains, are really gaining popularity. An outside the box solution for traditional archers, but hybrid designs can be a viable option.

YOUR ARROW BUILDS

The other consideration on your setup is around your arrow builds.

For seasoned elk hunters, their arrow builds and broadheads go hand in hand with their shooting platform. Since the western hunting is growing and evolving, there’s a lot more new elk hunters in the mountains, and we’re a trend of eastern guys thinking elk are just big deer. “I’m a whitetail hunter and I’m going elk hunting. That mindset is a mistake.

You need to understand you WILL need more Kinetic Energy and Momentum for pass through shots on elk…regardless if you are shooting a mechanical, hybrid, or fixed blade broadhead. You need to understand that the average archery shot on an elk is much longer than the average shot on a whitetail. You need to understand and plan for this. If you are an eastern guy and truly just want to shoot the same arrows for both species, the best advice is to take the “reverse engineer” approach. Build and shoot what will work for the tougher animals and it will work for whitetails.

HUNTING STYLE AND POTENTIAL SHOT OPPORTUNITIES

  • Where are you going to be hunting?
  • Are you going to be hunting a waterhole with a standard blind placement?
  • Are you going to be spot and stalk?
  • Are you going to be calling?
  • Are you willing to take a shots that is pushing your limits?

Not all western states have the same elk hunting regulations when it comes to archery equipment. Make sure you read and fully understand the regs of the state where you hold your elk tag. Some states have specific requirements around broadheads. For a quick break down you can check out one of our other blogs by clicking here.

Your hunting style will certainly impact the potential for tough shots. If you are planning to only ambush hunt elk, similar to whitetails, shot opportunities tend to be closer and with less obstructions. If you’re like the majority of elk hunters, calling and glassing to locate animals and then closing the distance, it’s pretty common to face less than ideal shot angles, obstructions, and some serious distance.

All these variable influence what type of broadhead will perform best, but the common theme doesn’t change. Make sure you have enough KE and Momentum with great long distance flight characteristics.

CUTTING DIAMETER

One consistent theme over the years, no matter what part of this industry I’ve been, it seems that elk hunters have a preference for a certain diameter cut, no matter what broadhead that they’re shooting….1 1/2″. Now, of course, there’s highs and lows to that, but I’m just saying as an average, in our experience for most people, what they’re looking for is 1 1/2″ cutting diameter.

The discovery behind that is that seems to be the cut that offers the greatest penetration for most people’s set up. When that broadhead hits that 1 1/2″ mark, it seems to really be able to pass through elk and still carry good flight characteristics.

Why does size make a difference? Well, when you start getting into broadhead diameters that are 2″ and up, you really have to have the right setup to drive that home for enough penetration to do fatal damage. You may also be handicapping yourself a little bit because the larger blades sometimes are a little more fragile. They require a lot more energy to open, penetrate, and to pass through. So you really have to be considerate of your overall setup when you’re considering using a larger cut blade. On top of that, larger blade diameters typically do not fly as well as smaller blade diameters.

FIXED VS MECHANICAL

This debate also lives in the elk bowhunting world too. It will never end…it’s like the old Chevy vs Ford talk.

Fixed broadheads are simple in our eyes. They take out some of the performance variables out of the equation, and you know, with the right placement you’re not going to have any problem with an elk. The challenge is long distance flight characteristics. Even though this shouldn’t be any issue with a well tuned bow, folks still want to shy away from the added work in tuning their setup.

Mechanicals have come a long way since their inception. They’re tougher and more reliable than before. Now you can get them with thick blades and some designs don’t require a lot of energy to open. Again, you have to do a little bit of research around your setup to make sure you’re making the right purchase.

When push comes to shove, you need a sharp broadhead that performs at distance. Outside of understanding the archery regulations in the state you are hunting in, confidence in executing a well place shot is king. What ever broadhead gives you these three things is the broadhead you should be shooting.

Author: Chris Creed, Afflictor Broadheads

How to Build an Electrolysis Tank for Cast Iron Restoration

0

One of the great things about cast-iron cookware is that it is nearly indestructible. Short of dropping one on the floor and cracking it or breaking off a handle, a cast-iron pan in just about any condition can be restored to better-than-new condition with some work.

The same skillet, before and after a soak in the E-tank and reseasoning.

How much work? Quite a bit if you try to scrub away the rust, and a little less if you use oven cleaner and let the pan set in a garbage bag for a few days. But who has time to scrub a layer of rust away, and who wants to mess with caustic chemicals if you don’t have to?

Don't pass up a good deal on vintage cast iron just because it might be rusty.

Making and using an electrolysis tank (E-tank for short) is much easier. An E-tank will clean even the rustiest and most neglected pan in a matter of days without any work on your end. An E-tank works by using electrical current to transfer the rust from the pan to a sacrificial piece of metal submerged in water. The electrical current comes from a battery charger. The positive clamp gets clamped to the sacrificial piece of metal, while the negative clamp gets clamped to the piece of cast iron you are trying to restore. The current flows through water, pulling the rust particles from the negatively charged cast iron to the positively charged sacrificial metal.

You probably have just about everything you need for this project in your garage.

The list of materials needed to build the tank is simple. You probably have most of them laying around the garage already.

You’ll need:

  • A plastic 20- to 25-gallon tote
  • A 12-volt battery charger
  • Water
  • A sacrificial piece of metal. Stainless steel works best, but any scrap steel or iron will work. It could be piece of angle iron, an old brake hub, a piece of sheet metal, or an old lawnmower blade, as long as it’s metal. The larger the surface area of the sacrificial metal, the faster the tank will work.
  • Sodium Carbonate: The easiest source for this is Arm and Hammer Washing Soda (not baking soda) found in the laundry detergent section of your local grocery.
  • String
  • A clamp
  • A stick or section of pvc pipe to extend over the tote to suspend the cast iron with string

Get Started

First some safety notes. It goes without saying that you need to take care when working with electricity around water. Don’t place the charger above the tote so that it might accidently get knocked into the water. Never touch the water without unplugging the charger first.

The gas that escapes from the tank is flammable. Do this outdoors or in a garage with great ventilation. Don’t set your tank up next to a pilot light or any other possible ignition sources.

  1. Fill the tote 2/3 or so with water, making sure the water level is deep enough to submerge your cast iron.
  2. Add 1/2 cup of the washing soda per 5 gallons of water. This isn’t a crucial measurement. Just get close. Mix well to dissolve.
  3. Place the sacrificial metal into the tank. I like to leave a corner up out of the water to clamp the charger to, but it can be submerged if you like. I use the clamp to hold the metal in position to one side of the tank.
  4. Extend the stick or pvc pipe across the tote, and tie a section of string to the center of it. Attach your rusty pot to the string and let it sink into the water with only a small amount of metal exposed above the water level.
  5. Clamp the negative clamp from your battery charger to the piece of cast iron you are cleaning just above the water’s surface. Clamp the positive clamp to the sacrificial metal.
  6. Set your charger to a manual, 12-volt setting. (Don’t use the quick-start setting if your charger has one; just the standard 12-volt setting.)
  7. Plug in the charger and go about your daily business. In a day or two, depending on the rust level, your pan will be cleaned and ready to season. You should see tiny foam bubbles start to form around your cast iron after a bit. Foamy rust will rise to the surface after several hours.

Attach the negative clamp from the battery charger to the cast iron, the positive to the sacrificial metal.

If you are like me, you are probably going to be curious about the progress and want to check on your pot from time to time. Always remember to unplug the charger before touching the water. The 12-volt current won’t hurt you, but you don’t want to take a chance on the charger falling into the tank while you are contacting the water.

Once the pan has soaked for 24 to 48 hours, remove it from the tank and and check to see if the rust has loosened to the point that you can wipe it away with your finger. If so, wash well with soapy water. If the pan still looks and feels rusty, return it to the tank for another 24 hours or so.After a 24- to 48-hour soak in the tank, the rust should wipe away with just a bit of pressure.
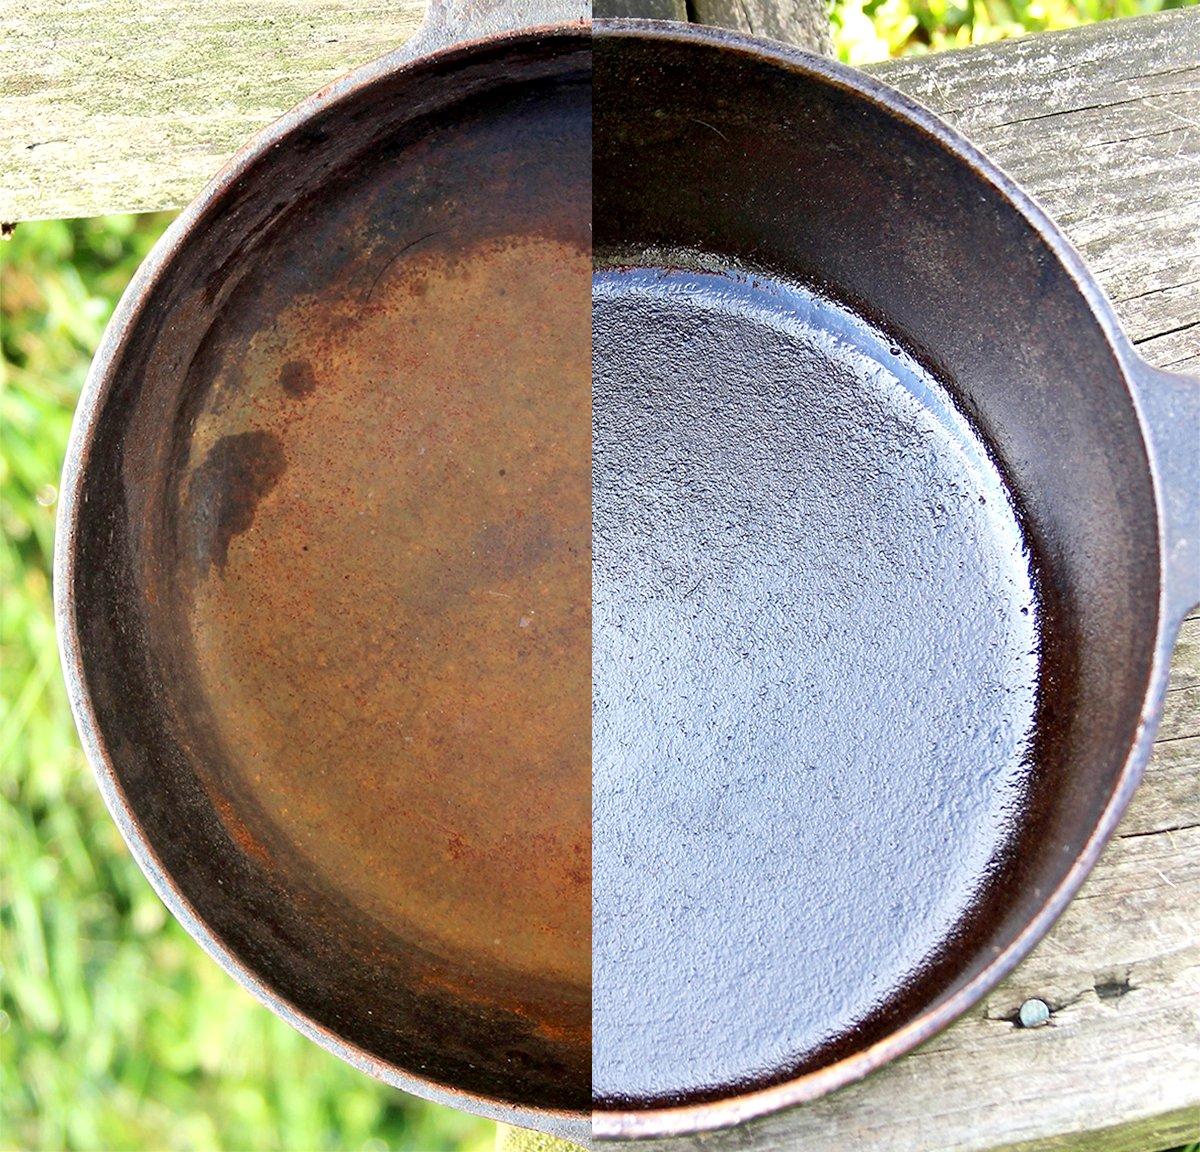
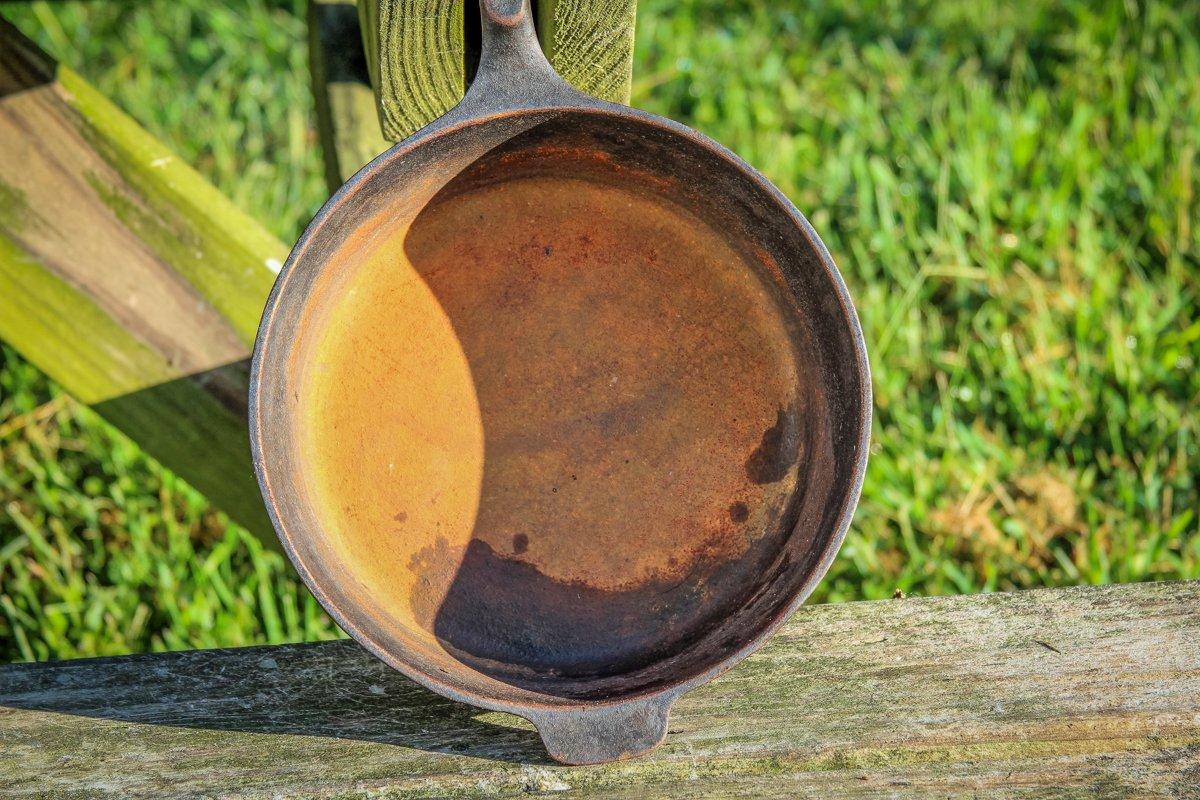
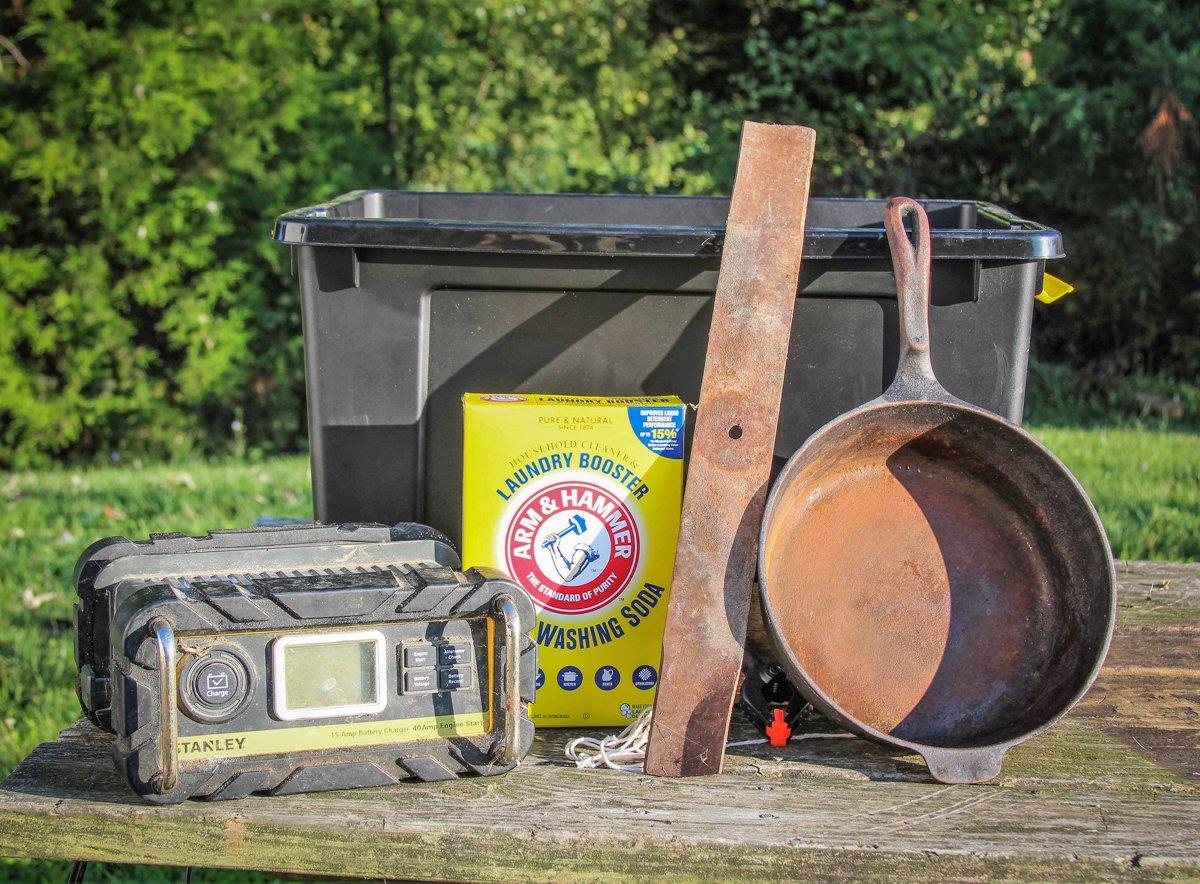
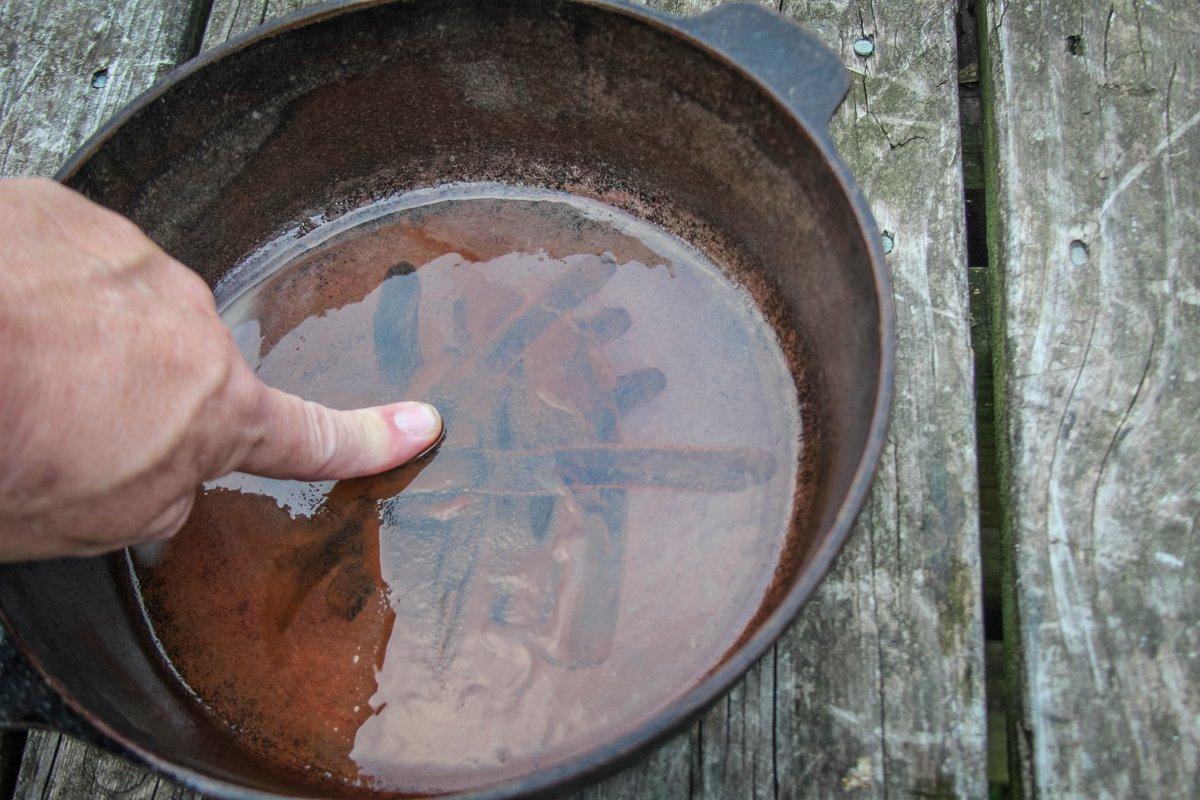
Once washed, immediately dry the pan (a bare iron pan will rust if you look at it wrong) and begin the seasoning process using this method or one of the newer cast-iron seasoning products on the market like Crisbeepuck, Buzzywax or Lodge Seasoning Spray.

Once your skillet has been scrubbed clean, season it and put it into regular use in your kitchen.

The water in the tank may look nasty after a use or two, but it never goes bad. Simply refill your water level when you need to due to evaporation loss. If the water gets to the point that it looks too funky to use, just dump it and start fresh.

260 Remington vs. 270 Winchester | Which One is Better and Why

0

The 260 Remington and 270 Winchester are 2 cartridges that are only 10 calibers off from each other and are often used for the same tasks. So it would only make sense to compare the two to see which one is better.

Here is the short answer:

The 270 Winchester will have more energy and a flatter trajectory than the 260 Remington. However, the 260 Remington has less recoil and a better ballistic coefficient. Overall unless you are hunting big game animals like elk or moose, both cartridges will perform very similarly.

With the short answer out of the way, we can look in-depth at each cartridge, which cartridge is better for which situations, why one cartridge might be better overall, and the best applications for each cartridge.

The 270 Winchester is a 30-06 case that is necked down to a 27-caliber bullet. The 270 was first introduced in 1925 in the Winchester model 54 bolt action. After a not-so-successful launch, the 270 eventually would eventually gain popularity among big game hunters.

The 270 Winchester is most popular among big game hunters and is often considered one of the best calibers for animals like hogs, deer, elk, and caribou. The 270’s claim to fame is that it has high energy and a flat trajectory making it ideal for big game animals and mountain hunting.

The 270 Winchester at 500 yards with a 150-grain bullet, a 270 Winchester has 44-inches of drop and 1200 foot-pounds. Compared to the 30-06, the 270 has only 200 less foot pounds and 10 inches less drop so it is basically just a lighter recoiling, flatter shooting, and slightly less powerful 30-06.

The 260 Remington is a cartridge that is common for bench rest shooting and big game hunting. The 260 Remington was released in 1997 and is basically a 308 Winchester case that is necked down to a 26-caliber bullet.

The 260 Remington is a cartridge that is very popular among bench rest shooters and deer hunters. The 260 Remington has a high BC (ballistic coefficient), so it is great at not being affected by wind or gravity. Because of this high BC, the 260 Remington is good for long-range shooting and hunting.

The 260 Remington, with a 140-grain bullet at 500 yards, has just under 1000 foot-pounds and 48 inches of drop. When compared to the 270 the 260 Remington has 4 inches of more drop and 200-300 less foot-pounds.

Since we have looked closely at each caliber we can see which caliber is the best.

If you want a cartridge that is good for long-range shooting, you will want the 260 Remington. The 260 Remington has a better BC, nearly the same drop, and nearly the same wind drift as the 270, all with less recoil. Because of this, it makes the 260 Remington a better long-range cartridge.

If you need a big game cartridge, you will want the 270 Winchester. The 270 Winchester has more energy than the 260 Remington making it better for hunting big game such as elk or even moose.

For your standard deer hunting scenarios (shooting 200 yards across farm fields), then you will want the 260 Remington. The 260 Remington has plenty of energy to take down a deer, will do less damage to meat, and will have less recoil.

If you were to pick one cartridge for the best overall performance, you would want the 270 Winchester. The 270 is a more common cartridge and can be used for more scenarios than the 260 Remington. While there are very specific times you may want the 260 Remington, it is often a better choice to go with the 270.

How Does Cold Weather Affect Your Air Gun?

0

Most air gunners know that shooting in cold weather has its challenges. The air is thinner, so the pellet loses velocity faster. But what exactly happens to an air gun in cold weather? Here’s a breakdown of how different types of air guns are affected by the cold.

CO2

CO2-powered air guns use small cartridges of pressurized CO2 to propel the pellet. These cartridges are sensitive to temperature changes, and can actually freeze in colder weather. When this happens, the gas inside the cartridge expands and can rupture the cartridge. So, if you’re using a CO2-powered gun in cold weather, be sure to keep extra cartridges on hand in case your gun freezes up. It’s also a good idea to keep your cartridges in an insulated pouch close to your body to keep them warm.

how-does-cold-weather-affect-your-air-gun

Spring-piston (springer)

Guns with steel springs are commonly used for hunting and target shooting because they’re very powerful. But that power comes at a price—namely, these guns are very sensitive to changes in temperature. Cold weather can cause the metal spring inside the gun to contract, which decreases the power of the shot. So, if you plan on using a steel spring gun in cold weather, be sure to sight it in at the range first so you know how much compensation you need to make for the reduced power.

Gas springs

Gas springs are similar to steel springs, but they’re made from a high-strength alloy that is less affected by temperature changes. However, gas springs can still lose some power in colder weather. They also tend to be louder than steel springs, so if you’re hunting in cold weather, be aware that your gas spring gun may give away your position if you take a shot.

Precharged guns (PCP guns) and other pneumatics

Precharged pneumatic (PCP) guns are powered by compressed air or nitrogen instead of a spring or gas cylinder. This makes them much more resistant to changes in temperature since compressed gases don’t expand or contract as metal springs do. PCP guns also have fewer moving parts than other types of air guns, so they tend to be more reliable overall. If you plan on doing any shooting in cold weather, a PCP gun is your best bet.

For more on the best PCP air rifle on the market, see this post

Walk Back Tuning Your Bow

0

Why You Should Walk Back Tune Your Arrow Rest

As I said, I have recently been experimenting with different broadhead options and while I did my testing at a maximum range of 30 yards, it wasn’t until I stretched the distance that the weakness in my system began to show its face. And, despite the fact that the average treestand bow-shot happens between 15-20 yards, I like to push the limits of my equipment and increase my maximum, effective killing range (MEKR) whenever possible.

Walk back tuning of your bow can dramatically improve accuracy of your arrows

My broadhead, which seemed to fly so precisely at 30 yards (matching my field points) suddenly began to develop a mind of its own when I hit 40 paces. However, instead of looking at the head in question with a skeptical eye, I knew exactly where the problem lies. It could be found in my arrow rest. The only way to fix the problem was to Walk Back Tune it.

How Do You Walk Back Tune Your Rest?

While the term might sound complicated the procedure is rather simple to perform. But, before we discuss the “how” let’s cover the necessary items you will need.

  1. Large Target: Try to find the biggest one possible.
  2. Duct Tape or Blue Painters Tape
  3. Shooting distance of at least 40 yards
  4. Allen Wrenches
  5. Range Finder
  6. Calm or No Wind.

Start by using the tape to make a T on your target face starting at about 6 inches below the top of the target. Depending on the speed of your bow, the vertical portion of the T might need to be longer or shorter.

Once you have made the T on the target face it is then time to shoot your first arrow. Starting at 10 or 20 yards, aim exactly where the horizontal and vertical portions of the T connect. If your arrows don’t hit the mark then adjust your sight only. Keep adjusting your sight until your arrow impacts the intersecting lines. Once that happens it is time to move further away from the target.

Using the same pin you used for the first arrow (20 yards) walk back to 30 yards and launch an arrow at the same intersecting point on the T. Then, walk back to 40 yards and, using the same 20-yard pin to aim with, shoot an arrow at the intersecting lines on the T. Repeat this process for 50 and 60 yards if possible. Again, all shots are taken while aiming at the same intersecting line of the T using only your 20-yard pin.

View of the T, starting six inches above the target

Once completed, you will find that of course, your arrows will fall from the top to the bottom. However, the critical detail will be which side of the tape they landed on; either right or left of the centerline on the T. You will notice that the further the distance of the shot, the further away from the centerline your arrows will be. This is normal as the greater the distance the greater the influence on arrow impact.

Adjusting Your Arrow Rest

Unlike sighting in your bow (when you chase the arrow with your sight’s pin), walk back tuning requires that your arrow rest be moved in the direction you want the arrow to go. For example, if your arrows are falling to the left of the centerline on the T then you will want to move your arrow rest to the right. Conversely, if your arrows are falling to the right of the centerline on the T then you will want to move your arrow rest to the left.

If an arrow is to the left of the blue T line, adjust your rest to the right.

Believe me when I tell you it only takes a minute amount of movement in order to drastically change your arrow’s point of impact. More than once I have overcompensated and pushed my arrow beyond the desired impact point.

So, after making a small adjustment to your rest repeat the process to determine if more movement is necessary and in what direction. Pretty soon all of your arrows should impact the vertical line on the T from top to bottom. Remember, use only your top pin for all shots.

The Basics of 2nd and 3rd Axis Adjustments

I once thought that the 2nd and 3rd axis adjustments on my bow sight were more suited for the western big-game bowhunter. However, while prepping for a western hunt I realized the importance of setting these adjustments not only for elk in September but also for my favorite whitetail stand in November. As it turns out, the 2nd and 3rd axis adjustments are both critical for dead-on accuracy; especially in hill country or when shooting uphill, downhill, and even side-hill.

The 2nd Axis adjustment (which can be done with your bow leveled and resting) is probably the easiest to understand as it runs through the shooter’s line of sight and is adjusted by rotating the sight housing like the hands on a clock (clockwise or counterclockwise). Up close you might not recognize any effects if things are out of whack. However, at longer distances, your accuracy will suffer.

The 3rd Axis adjustment (which should be done while you are at full draw) influences the rotational axis that your sight level moves on. In other words, it is like a door swinging open either toward the shooter or away. Both of which you do not want.

Instead, when you reach full draw, your bow’s bubble level should be exactly perpendicular to your line of sight. You don’t want the level to angle (or hinge) toward you or away from you. If it does, even if slightly, the difference in angle will be enough to ruin your uphill and downhill shots. This typically results in left and right misses.

Second and Third Axis adjustments are made differently depending on what type of sight you are using and the manufacturer. Therefore, it is best to refer to your owner’s manual when attempting to adjust them. My intent with this article isn’t to show you how to do it but the importance of doing it.

However, one universal tool that will be needed is a level that attaches to your bow. You can either purchase one or you can build your own. I built my own and spent the money I saved on something else hunting-related.

Conclusion

While you might be knee-deep in hanging tree stands and organizing trail camera images, don’t neglect the most important variable in your whitetail efforts-your bow. After all, nothing else matters if it isn’t tuned to its maximum potential. With Walk Back Tuning and 2nd and 3rd Axis adjustments, you can rest assured that it will be.

Can Deers Eat Bread?

0
Can Deer Eat Bread?

Deers are scavengers and eat a variety of things. They will eat most anything from plants to carrion. Deer will eat anything from bread to apples. Deer will eat anything, so long as it is in the right spot. It would be best if you cared to keep your house and yard clear of anything enticing a deer to eat it. It would help if you keep your trash can covered or take it to the curb for pick-up.

Will Deer Eat Bread?

Deer are often seen nibbling on grass and other plants, but people sometimes wonder if deer will eat bread. The answer is yes, deer will eat bread, but it is not their preferred food source. Deer are mostly herbivores, and their diet consists mostly of plants. However, deer are opportunistic feeders, meaning they will eat other things if their preferred food is unavailable. Bread is not as nutritious as plants, so deer will only eat it if they are hungry enough.

Is It a Good Idea to Feed Deer Bread?

No, it is not a good idea to feed deer bread. Deer are herbivores, and their diet consists mostly of plants. They can digest plant-based material better than bread. Bread is also not a natural food for deer and can cause them to become overweight and lazy.

White Bread or Brown Bread: Which One is Better for Deer?

While white and brown pieces of bread can provide deer with a good source of nutrition, brown bread is generally considered to be better for them. This is because brown bread contains more fiber and nutrients than white bread. Additionally, brown bread is less likely to cause digestive problems in deer than white bread.

What Amount of Bread Should a Deer Eat?

Deer love bread and will eat as much as they can find. If you are feeding deer bread as a supplement to their diet, it is important not to overfeed them. A general rule of thumb is to offer 1-2 slices of bread per day per deer. If you are feeding a large group of deer, it is best to scatter the bread around so that all deer can eat.

Risks Involved In Feeding Deer Bread

While bread may not be the healthiest food for deer, it is not poisonous to them, and deer will eat bread if they are hungry enough. However, there are some risks associated with feeding deer bread. The first is that deer may become accustomed to being fed and become a nuisance. The second is that bread does not provide the deer with all the necessary nutrients and can cause health problems if fed in large quantities.

Bread is not a natural food for deer, but they will eat it if they are hungry enough. Bread is high in carbohydrates and low in nutrients, so it is not a good food for deer to eat regularly. If you see deer eating bread, it is best to give them other, more nutritious food.

Deer can technically eat moldy bread, but it’s not the best thing for them. Moldy bread can cause digestive issues for deer and is also not the most nutrient-rich food. If you’re going to feed deer bread, it’s best to give them fresh or stale bread instead of moldy bread.

Moldy bread can cause digestive issues for deer and is also not the most nutrient-rich food. If you’re going to feed deer bread, it’s best to give them fresh or stale bread instead of moldy bread.

Yes, deer can eat bread, but it is not their favorite food. Deer prefer to eat acorns, leaves, and grass. However, if no other food is available, bread can be a good option.

Conclusion:

Deers will eat bread if they are hungry enough, but it is not the healthiest food for them. Bread is not a natural part of a deer’s diet, and their stomachs can have difficulty digesting it. If you must feed deer bread, do so in moderation and supplement their diet with other healthy foods.

Deer are browsers, meaning that they primarily eat leaves, twigs, and other vegetation. In the wild, they rarely eat anything else. However, if they are desperate for food, they eat just about anything, including bread. While bread is not the healthiest food for deer, it will not kill them. If you must feed deer bread, do so in moderation and supplement their diet with other healthy foods.

Chester White Pig Pros And Cons – The Pet Well

0

Chester White Pig Pros And Cons

When thinking of pigs and the icons among them the Chester White has been severely overlooked. A colonial legend, this pig breed has been around for almost two centuries.

In heartland U.S.A, Chester County Pennsylvania, the larger than life and charismatic Chester White was born and bred on every pig farmers land in the county.

Originally known as the Chester County White, the unique breed is a product of the Woburn Pig which mated with other white pigs that were brought over from England to America somewhere between 1815 and 1817.

This Breed has the iconic pinkish white colouration like the pot belly and Yorkshire breeds, but usually present bulkier and grow quite large.

In 1890, the unification of the American Chester White Record Association and the Standard Chester White Record Association into the “Chester White Swine Record Association” saw the permanent recognition and moderation of this sought-after breed in America.

One of the many reasons this breed became so popular in the states among farmers is this pig’s ability to gain mass at an incredible rate. When conditions are optimal and the right quality food is used, the pig can convert 1.4 kg of grain into 620 grams of weight.

Thus, this breed is quick to increase flesh content which is known for a savoury taste and high-fat percentage. In a video, by Akudinulo Farms it is explained that these pigs are the “king of crossbreeding” as they represent all the desirable intermediate traits of the races that precede them.

This crossbreeding king has thus set a standard for modern pigs to adhere to in terms of flavour and family values.

A well-known consideration for pale pig owners is the fact that these animals require permanent access to shaded areas to avoid getting sunburn. Sunburn in livestock such as pigs can have deleterious effects on their health and well-being.

Despite these concerns with white skinned breeds, the Chester White Pig is the most durable of the pale breeds when considering this qualm. These breeds are known for their docility as well as other trait associated with positive sociality towards humans and other animals.

These pigs are wanted for their brilliant mothering abilities, which is essential for producing healthy generations of future mothers and fathers. With an iconic white belly and slightly dished face, this breed has superior bone density and structure when compared to other breeds.

The feet of these pigs are often used as a good indicator of overall animal well-being, as they tend to indicate how well these animals are being fed when considering the age that the trotter indicates.

A statement of an animal, these larger-than-life pigs are iconic when one thinks of the classic big hog, but what makes a Chester White a Chester White?

The defining characteristics between selection bred animals can get complex, but typically a Chester White will have a completely white coat with no significant colour variations, and drooping ears within a few days of births are also a strong indicator.

The texture of the coat is associated with a straight hairstyle rather than a curly one. When viewed from the side, a Chester white has a flat (horizontal) to slightly arched back.

The legs are stretched with good body depth without obstructing walking excessively. Strong hind legs with straight hinges and smooth ham forms are also charismatic in the breed.

The white and clean look of the fat and flesh when packed into meat production is associated by farmers and marketers alike with good taste and high quality.

The highly efficient and nutritious nature of this pig breed, combined with its desirable reproductive habits, will see that the Chester White remains an important breed in the world of Pig Farming for the foreseeable future.

Chester White Overview Table

Size Medium-sized

Mature weights:

Female: 227-295kg

Male: 250-363kg

Personality Docile breed of pig with high intelligence. Temperament Kind and easy to bond with. These pigs are selected for their kind mothering nature. Tendency To Bite When compared to animals of the same social stature these pigs have a very relaxed calm nature with low to no tendency for biting. It is to be considered that all pigs can bite painfully and first aid attention might be necessary in such a case. Dangerous? Because all pigs have tusks and can grow to a considerable size, they are to be respected and treated with admiration. However, when respected and comfortable, these animals pose no danger to humans. Tendency To Root? Their social nature and low energy personality mean they have a low tendency to root. Maintenance 6/10

These animals require basic clean shelter food and water with shaded shelter during summer months. They are not particularly high maintenance.

Family Pet 3/5

They could potentially be wonderful pets and only have their size and spatial requirements to consider as setbacks.

Intelligence These animals have been selected for their gentle nature and before this selection, these animals have evolved highly social cognitive abilities making them exceptionally intelligent for a domesticated farm animal. Exercise Needs Low to moderate. If these animals are offered mud and stimulation such as tyre toys or hay bales, they should have more than enough to be happy with. Health Issues Health considerations for this pig breed include skincare and caution when the animal is kept in a tropical area with a high UV index. They are also quite fatty animals, making exercise very important. Life Expectancy These animals are relatively short-lived but given proper care and attention they will live six to eight years. Price Approximately six dollars per pound

Chester White Pros

Hardy animals

Apart from desirable traits associated with the breeding behaviour of this animal, it also is known to thrive in relatively extreme environments. The most durable pale breed, it can withstand temperatures associated with arid environments, such as South Africa’s Northern Cape province where they are successfully farmed.

However, an animal that produces that much fat and protein while living in warm environments are ultimately faced with a temperature problem. The key to their thermoregulatory success is in the fact that they are a relatively medium-sized pig breed.

This intermediate size provides them with a body surface to volume ratio that is not too low to not let heat escape, and not too high so as not to let extra moisture escape.

Intelligent

They are intelligent animals that can adapt behaviourally to escape intense heat when the necessary shade is provided. In suitable conditions with relatively low maintenance, these pigs are quick to reward owners with high yields in both flesh and litter.

Docile

Since the ham and loin make up approximately 58% of the animal’s body, this is especially good for Chester White’s as their energy stores and nutrients are accumulated in these areas, giving them their characteristically delicious salty taste.

Family animals

Their keen senses and evolutionary development have given them the ability to communicate using pheromones secreted in saliva. The males often use this as a medium to signal mating urges and communicate other social cues which helps these animals’ bond.

Chester White Cons

They need stimulation

In the case of poor living conditions or neglect, these animals with their large intellect can sometimes develop some dysfunctional traits. Without stimulation or the necessary social bonding, it is not uncommon for pigs to become aggressively territorial.

They could be dangerous

If these pigs are neglected to the point of deleterious behaviour trait forming, they could pose a danger to people they meet. A wound sustained from these animals would typically not be fatal if medical treatment is available.

Not the most popular breed

Typically used for bacon, chops, or sausage meat the Chester White is surpassed in popularity only by breeds such as the Duroc and Yorkshire.

Need shade

Where this breed falls short is as with many other pale breeds in that it is susceptible to sunburn and associated health impacts. Without sufficient shade these pigs are in danger of dehydration and in the worst-case scenario, prolonged sun exposure can lead to skin cancer in your pigs.

Slow growing

When compared to their more popular cousins like the Duroc and Yorkshire, these pigs are relatively slow-growing and contain more fat per unit of body mass. Although they have a reputation for being durable, it is vital that these pigs are taken care of as far as their hydration needs are concerned.

Need a lot of water

These large animals require significantly large amounts of water just to thermoregulate and keep their bodies from overheating. Thus it is essential to fit a filtered trough with clean water into the habitat of your Chester White.

The Chester White is famous for being

Tips and facts for potential owners

a good mother. Producing litters of up to eight or more piglets, these animals are adapted to being patient and kind when it comes to feeding and tolerating their young.

The breed also has a great track record of being kept in spaces that are shared with other animals. They will often play or engage in social activities if given the chance.

The historic legacy of Chester County has a rich multi-faceted story to tell about how the Chester Pig has both its genetic and naming origins in the U.K. T

he first pigs in the valley came along much earlier from Swedish and Dutch settlers who introduced the first landrace white pigs, and ancestors of the Chester White.

More than a century ago the literature source known as the Chester White Journal was founded in 1910 by three elder sons of F.F. Moore: Fred, Levi and Jim.

Even though they are considered a “medium” sized breed, the Chester White is often entered into the Largest Boar competition in its hometown of Chester, where it competes and wins against supposedly larger breeds.

Conclusion

With its roots in Europe and the U.K. and made famous and powerful in the land of the free, the Chester White Pig is a classic All-American hog with flavour to boot.

Excellent in terms of meat quality, and extraordinary when it comes to mothering, this animal is obviously an incredibly important part of the human success story.

In many ways this pig ticks the iconic boxes of what we think of when we think modern-day pig, and not only that its kind nature and nutritional excellence is a testament to what we as a species has accomplished in the field of agricultural technology.

The beauty of these creatures lies somewhat in the fact that they can be perceived as so much more than just sustenance. With large brains and many other human-like features, this animal can surprise us with its emotional depth and capacity to form long-standing interpersonal bonds.

Their slightly smarter cousins are known to be used in organizations such as the FBI to sniff out narcotics as well as serve as emotional support animals. Clearly, the versatility of these incredible creatures has made impressions across the globe in more than one way.

Pale-faced and pretty, this humble hog will probably be around on pastures and plates for many generations to come.

The North American Wild Sheep Grand Slam is the Toughest Challenge in Hunting

0

So you’re feeling like you’ve done it all and are now looking for a real hunting challenge? Maybe the North American Wild Sheep Grand Slam is the next big hunting goal for you. This is the kind of hunting challenge that will not only test all your skills, but will give some major bragging rights with your buddies.

Here’s all that sheep hunters need to know about the Grand Slam of North American Wild Sheep. These animals are not only challenging to hunt, but getting a license to hunt them is just as difficult.

That makes this grand slam one of the hardest fair chase challenges to accomplish in hunting.

Qualifications

There are six species of wild bighorn sheep that actually qualify for the grand slam, but you only need to harvest four of them. These potential species you can harvest include a Dall sheep, a stone or Fannin sheep, a rocky mountain or California bighorn and a desert bighorn. While a few of these animals can be found in the Lower 48, for the most part it’s going to be some hard hunting in some really remote places like Alaska and parts of Canada.

1. Dall Sheep

The beautiful Dall sheep is going to be one of the harder ones on the list to bag. Your only option to hunt this species in the United States is going to be Alaska. And if you want to get a license, you have to draw a tag. Outside of the U.S., Dall sheep can be found in the northwest corner of British Columbia, Northwest Territories and the Yukon Territory.

No matter where you choose to hunt, you’ll likely be hiring an outfitter to work with. These hunts aren’t cheap. A quick check of the web reveals you can might have to pay up $20,000 for a remote guided Dall sheep hunt.

2. Stone Sheep

The stone sheep is actually a subspecies of the Dall sheep. As you might already guess, this means it inhabits some of the same extremely remote parts of North America including Alaska and Canada. Your best bet for a stone sheep is likely going to be British Columbia, but the Yukon and Northwest Territories offer opportunities for this sheep, too.

Just like the dall’s sheep, booking a guided hunt for stone sheep isn’t cheap. The good news is, if you’re simply looking to complete the grand slam, you can substitute the fannin sheep in its place because people sometimes use the terms for these two species interchangeably. It is worth noting there are two distinct species however. The stone sheep goes by the scientific name ovis dalli stonei while the fannin goes by ovis dalli fannini.

3. Fannin Sheep

As noted above, Fannin sheep are very similar to the stone sheep. They are so similar that some don’t even recognize the difference between the two distinct species, including Boone & Crockett Club! Just like the stone and Dall sheep, you’re going to primarily find hunting for them through an outfitter out of British Columbia or the Yukon and Northwest Territories.

While Fannin sheep do appear in Alaska, the numbers are low. The Fannin sheep, for the most part, is much lighter in color than the stone sheep. For purposes of the grand slam club, they have a special definition in areas where Dall sheep are also found. Keep in mind, a black tail on a ram indicates a Dall sheep as far as the GSCO is concerned.

“If a ram has only a small amount of black hair within the body and/or down the legs, the trophy owner can choose to call it either Fannin or Dall,” the GSCO website states.

If you’re just looking to avoid the confusion, it might be easier to stick with going after a stone sheep unless you are specifically targeting some larger slam in the future.

4. Rocky Mountain Bighorn Sheep

Finally, we get to a sheep with more widespread hunting options available. While the first three species are restricted to remote areas of Canada and Alaska, this sheep can be found in the lower 48 states of the U.S. But with more places to hunt comes another downside, you’re still looking at a drawing for a chance at a bighorn sheep.

Competition for a chance at a bighorn can be fierce. A few years ago, a hunter paid $305,000 for a guaranteed bighorn sheep license through an auction by the Montana Fish, Wildlife and Parks department. There are similar auctions/raffles and ways to increase your odds in other states.

Washington, for example, offers the chance to increase your odds by purchasing multiple raffle tickets through the Washington Wild Sheep Foundation. If the slam is a long-term goal, you might be able to get away with buying just a few and crossing your fingers every year. Otherwise, you’re probably going to have to pony up some money just to get a tag.

Washington, Oregon, Idaho, Montana, South Dakota, Nebraska, Wyoming, Colorado, Nevada, Arizona, Utah and New Mexico all hold Rocky Mountain bighorns and offer hunting. Make sure to check local regulations to find out the draw process for them where you plan to hunt them. Also be aware that some states may only dole out these tags to people who are residents.

Bighorns are also found in British Columbia and Alberta. But guided hunts in these provinces aren’t cheap either. It’s interesting that the one sheep with by far the most hunting opportunities may also be the one of the more expensive to hunt.

A Rocky Mountain bighorn can be swapped out in the grand slam with our next sheep, the California bighorn.

5. California Bighorn Sheep

Despite the name, you can’t actually take a California bighorn in the Golden State because there’s no season there anymore. Weird, right? Might lead to some confusion when taking people around your trophy room, but it’s another beautiful sheep that your buddies aren’t likely to have in their trophy room. There is also a population in Utah, but you can’t hunt them there either. So that leaves Washington, Oregon, North Dakota, Nevada or Idaho. British Columbia is the only Canadian option for this sheep.

This is another very hard-to-get tag. Some areas, like Idaho, may only hand out one or two tags for a given area. Much like the Rocky Mountain bighorn, it may be difficult to get your hands on one.

6. Desert Bighorn Sheep

The official grand slam records Grand Slam Club Ovis, cites the desert bighorn as the one species that may keep many hunters from completing their slam. Unfortunately, the desert sheep is the hardest tag to procure. “Some are lucky enough to draw a coveted permit in one of the western states while others usually have to pay premium prices for a Mexico permit or special Governors permit,” the GSCO’s website states.

This is also the only sheep of the six in which is not found in Canada. You’ll have to stick with Arizona, New Mexico, Texas, Utah, Arizona, California or Colorado on this hunt.

Your other options are south of the border in Mexico. Sonora, North Baja and South Baja Mexico.

With a total population numbering somewhere just under 20,000 for all the U.S. states the desert bighorn calls home. It’s little wonder landing a hunt for a desert ram is such a difficult thing to do.

As you can see, completing the North American Wild Sheep Grand Slam isn’t an easy thing to do. Half of your trouble will just be in getting your hands on a permit for some of these species. Make sure to properly document everything about your hunts, you will need it when submitting your slam to the GSCO.

Other information on submitting details of your harvests can be found here.

But one thing is for sure, you’ll get to see a lot of awesome country across North America and you’ll certainly have some adventure stories to tell if you take this adventure on!

Products featured on Wide Open Spaces are independently selected by our editors. However, when you buy something through our links, we may earn a commission.

For more outdoor content from Travis Smola, be sure to follow him on Twitter and check out his Geocaching and Outdoors with Travis YouTube channels.

NEXT: THE AXIS DEER AND HOW THEY’RE IMPACTING PARTS OF THE UNITED STATES

WATCH

Crosman 764SB Review

0

The Crosman 764SB rifle is an upgraded version of the Crosman 760 (see this post for more)

While in keeping with classic design, Crosman adds some extra features,

But let’s see if it deserves a place on your Christmas shopping list in this review.

Crosman 764SB – Guntype

This is a pump pneumatic rifle.

Pump pneumatic air gun is compact, lightweight, recoilless and it gives you control over the power of the gun.

For more on the 5 types of air rifles you need to know before buying, see this post.

The barrel is a smooth bore with a caliber of .177 (4.5 millimeters).

What makes this gun special is its shiny silver barrel.

For more on how to choose the right air gun caliber for your game, see this post.

This Crosman 764 SB is a BB repeater .

With a BB repeater gun, you don’t have to open up and reload or cock every time you want to shoot BBs.

Each time you shoot, a new BB is reloaded automatically.

This rifle is not only a BB gun but also a single-shot pellet gun.

Single-shot rifles tend to be cheap and simple. You can teach a newbie how to handle a single-shot gun in only a few hours.

For more on things you should know about air rifle barrels before buying, see this post.

Having the ability to shoot both BBs and pellets, this Crosman 764 SB gives you an awesome option to switch to pellets in case you get bored with shooting BBs.

All in all, your kids could be both BB shooters and pellet gunners at the same time, how cool is that?

Stock

Now a very important part of the gun: the stock.

Crosman 764SB has a durable, all-weather synthetic stock.

While wooden stock is heavy and easily affected by moisture and temperature, synthetic stocks are lighter

And provide you with stable performance in any weather condition.

Furthermore, synthetic stocks are virtually maintenance-free and are the best choice for shooters who don’t want to waste time with stock preservation.

For more on the in-depth comparison between synthetic and wood stock, see this post.

This gun has a plastic buttpad that helps absorb recoil when you shoot.

In addition, the checkering on the grip and on the pump handle makes it much easier to get a grip and stay on the target.

Also, the stock is ambidextrous: you’ll have the same shooting experience whether you are left or right-handed

Ammo

The Crosman 764 SB uses .177 BBs and .177 pellets as its sources of ammunition.

BBs are cheap: you can buy thousands of rounds of premium BBs for just a few bucks.

.177 is also budget-friendly compared to other types of pellets on the market (more on that here).

Therefore, you can expect thousands of hours of fun shooting without worrying about money spent on ammo.

In addition, this gun gives you the fun of a BB gun and a pellet gun combined in one place.

=> Read Daisy Red Ryder 1938 Review here

Velocity, accuracy and power

For 10 pumps, this Crosman 764 SB delivers up to 615 FPS with lead pellets, up to 700 FPS with alloy, and up to 645 FPS with steel BBs.

This velocity is in the medium range compared to other air rifles.

It’s pretty decent for target shooting and plinking but lacks a bit of power for small pest control.

Cocking and loading

Loading BBs:

To load BBs into this gun, first put the gun ON SAFE.

Swap the BB loading port to the left side, and pour BBs into the gun.

Close the port so the BBs don’t fall out.

On top of the rifle is the button that you need to pull backward.

This allows BBs to flow from the reservoir into the magazine.

To do that, you point it down, shake and twist it till you see BBs line up in the magazine.

It will hold 18 BBs at a time.

Once it’s full, slide the button forward.

That will keep the BBs in the magazine so they don’t fall back into the reservoir.

To shoot BBs:

Slide the bolt rearward, the bolt has a magnetic pole on the front so it will pick up BBs automatically.

When the BB is picked up, slide the bolt forward and you are ready to shoot.

Loading pellets:

Included with Crosman 764SB is the pellet clip containing 5 pellets.

To load the pellet into the clip, place a pellet (with the pellet’s nose pointing forward) into each of five chambers.

It’s best to put the pellet’s skirt level or slightly below the rim of a pellet chamber to avoid jamming.

To shoot pellets:

Move the bolt rearward.

Insert the pellet clip right into its position.

Every time you fire, you move one pellet over to shoot.

When you’re done, reload the clip and five other pellets.

Cocking action:

Point the gun in a safe direction.

Hold the forearm firmly and open it all the way until it stops.

Return the forearm into its position with a straight stroke.

And you just pump the gun one time.

You should pump at least 3 times but no more than 10 times to achieve the best results.

Sight

crossman 764 sight

This gun has a traditional open sight with a fixed blade and ramp in the front sight.

The rear sight is fully adjustable for windage, allowing you to adjust the sight left and right, and elevation (up and down).

crossman 764sb scope

After you teach your kids how to use iron sight as a real shooter, you can put a 4×32 scope for more precision shooting.

The scope has a focusing eyepiece, coated lenses, and turret adjustment

So you can achieve better focus and sharpness of your target image for better accuracy.

For more on how many types of air gun sights are out there and which one is suitable for you, see this post.

Shooting Ability

This gun is ideal for shooting very small rodents at close range, plinking, and target shooting.

It’s suitable for younger shooters (with adult supervision) and for smaller shooters.

Velocity, accuracy and power

For 10 pumps, the Crosman 764 SB produces velocities up to 615 FPS with lead pellets, 700 FPS with alloy, and up to 645 FPS with steel BBs.

This is a medium velocity compared to other pellet guns and a high velocity compared to other BB guns.

More on the power of 764SB in the video below:

Besides, it has a 3/4″ shooting group at 10 yards so this is a great starter gun for kids and beginner shooters.

click for the lowest price

Shooting Ability

The effective shooting range of this gun is up to 20 yards.

It is ideal for shooting very small rodents (like rats) at close range, plinking, and target shooting.

Maintenance

Use this gun with Crosman RMCOIL special oil and you have to put very little effort into its maintenance.

Loudness

This rifle is very quiet. It has a bunch of online reviews without a single complaint about noise.

Specifications

  • Caliber: .177
  • Velocity: 625 FPS
  • Loudness: 3- Medium
  • Barrel Length: 17.0”
  • Overall Length: 33.5”
  • Shot Capacity: 18
  • Cocking Effort: 3-10 pump
  • Barrel: Smoothbore
  • Front Sight: Blade and Ramp
  • Rear Sight: Adjustable for elevation
  • Scopeable: 11mm dovetail
  • Buttplate: plastic
  • Suggested for: Plinking/Fun
  • Trigger pull: 4.5 lbs
  • Action: Bolt-Action
  • Safety- Manual
  • Powerplant: Multi-pump pneumatic
  • Function: Repeater
  • Body Type: rifle
  • Weight: 2.1 lbs
  • Double as a BB repeater or single shot pellet gun

Customer review

Customers love the fun this double-action gun brings.

They find it great value and don’t leave any notable issues in their reviews

Pros and Cons

ProsCons
  • Easy to handle
  • Accurate
  • Awesome double function
  • Adequate scope
  • Made in the USA
  • No notable issue for this gun

Price

The price of the Crosman 764SB is about 60 dollars.

Is it a good or high price?

To answer this question, let’s take a look at the comparison between the 764SB and its twin brother – Crosman 760.

These 2 guns have the same power plant, same scope, same construction.

There are some differences, though: the 760 has the fiber optics sight, while the 764 SB has a traditional iron sight and a silver barrel.

At the time this review was written, the 760 costs about 40 dollars which are 13 dollars cheaper than the 764. 

Therefore, in terms of value for the price, the 760 is definitely the best bang for the buck.

Unless you fall in love with the silver barrel, I think you will be better off going for the 760.

click for the lowest price

Best Air Rifle Deals

Popular Posts

Can a 22 air rifle kill a deer?

0
"Debate over whether a 22 air rifle can effectively take down a deer has sparked curiosity among hunting enthusiasts. With its lower muzzle velocity...

Air Rifle Scope vs. Rifle Scope – Which One Fits Your Shooting Needs?

0
"Air Rifle Scope vs Rifle Scope: Unveiling the Ultimate Precision Optics. Discover the essential differences and benefits of these two optical devices, empowering shooters...

Guide to find Best Scope for Break Barrel Air Rifles

0
"Unlock the Perfect Shot: Discover the Best Scope for Break Barrel Air Rifles. Enhance your shooting experience with precision and accuracy, as we delve...