When it comes to shotguns, Benelli and Franchi are two of the most well-known brands. Both companies make high-quality shotguns that are popular among shooters all over the world. So, which one is better? In this article, we will take a closer look at both brands and compare them head-to-head. We will discuss their history, their products, and their customer service departments. By the end of this article, you should have a good idea of which brand is right for you.
Benelli was founded in 1967 by Bruno Civolani. The company is headquartered in Urbino, Italy. Benelli has a long history of making high-quality shotguns. In fact, they are one of the most well-known shotgun manufacturers in the world. Benelli’s shotguns are used by many different law enforcement agencies and militaries around the globe. They are also popular among competitive shooters and hunters.
Franchi was founded in 1868 by Pietro Franchi. The company is headquartered in Brescia, Italy. Franchi has a rich history of making high-quality firearms. In addition to shotguns, they also make rifles and pistols. Franchi’s products are popular among both recreational shooters and professional shooters.
When it comes to customer service, both Benelli and Franchi are excellent. Both companies have knowledgeable staff members who are always willing to help. They also have a wide variety of resources available on their websites, including FAQs, manuals, and instructional videos. If you ever have any problems with your shotgun, you should be able to find the information you need from either company’s customer service department.
Are Franchi shotguns good?
There are a lot of factors that go into whether or not a Franchi shotgun is good. The make and model of the gun, how well it is maintained, and the intended use all play a role in its quality. For example, a Franchi 48 AL used for trap shooting might be very different than a Franchi SPAS-12 used for home defense. Ultimately, it depends on the individual gun and situation.
That said, Franchi shotguns generally have a good reputation. They are known for being reliable and well-made firearms. Many people who own them report being happy with their purchase. If you’re considering buying a Franchi shotgun, doing some research to find out which model best suits your needs is a good idea. You can also talk to other gun owners to get their opinion on the matter. Whatever you do, make sure you’re comfortable with the gun before you buy it.
Franchi shotguns cons
-Not great for home defense: While a Franchi shotgun can be used for home defense, it is not the best weapon for this purpose. A pump action or semi-automatic shotgun would be a better choice.
-Relatively expensive: Franchi shotguns are not cheap, with most models costing over $1000. If you are looking for a budget-friendly option, there are better choices out there.
-Limited ammunition capacity: Most Franchi shotguns have a limited ammunition capacity (usually no more than five rounds). This can be an issue if you need to defend yourself against multiple attackers or if you simply want to go hunting with friends.
All in all, Franchi shotguns have some pros and cons that you should consider before making a purchase.
Are Benelli shotguns good?
There is no simple answer to this question as it depends on what you are looking for in a shotgun. Benelli shotguns are certainly well-made and reliable, but they may not be the best choice for everyone. It really depends on your individual needs and preferences.
If you are simply looking for a good, reliable shotgun that will get the job done, then a Benelli might be a good option for you. However, if you are looking for something with more features or customization options, then there may be better choices out there for you. Ultimately, it all comes down to what you want and need from your shotgun.
Benelli shotguns cons
In spite of all its advantages, the Benelli shotgun also has some disadvantages that should be considered before making a purchase. One such disadvantage is its price tag; Benelli shotguns are generally more expensive than other brands on the market. Additionally, some users have reported issues with the gun’s reliability, particularly when it comes to firing shells that have been damaged or deformed in some way.
Finally, the Benelli shotgun’s recoil can be significant, which may be an issue for shooters who are inexperienced or sensitive to recoil. Overall, the pros and cons of the Benelli shotgun should be carefully considered before making a purchase. With its high price tag and potential reliability issues, it may not be the best choice for everyone.
Did Benelli buy Franchi?
The answer is yes, and no. In 2000, Benelli purchased Franchi from the Beretta Holding Company. However, Franchi still operates as an independent brand under the Benelli umbrella. This means that while Benelli now owns the company, it still produces guns separately from its new parent company.
Who is Franchi shotgun made by?
Franchi is an Italian company that has been making high-quality shotguns for over a hundred years. Their guns are used by many professional shooters and hunters, and they have a reputation for being very reliable and well-made. Franchi shotguns are made in several different models, each designed for a different purpose. Some of their most popular models include the AFP Over/Under, the AL 48 semi-automatic, and the Vinci pump-action.
If you’re looking for a high-quality shotgun that will last you for many years, then Franchi is definitely a brand to consider. Their guns are used by professionals all over the world, and they offer a wide variety of models to choose from.
Are you looking for a way to comfortably carry your firearm & help you quickly switch between a rifle and sidearm?
If so…you need a good ‘ole rifle sling.
Rifle slings are perfect for ensuring a steady and accurate shot, which is why they’re a favorite among many sharpshooters.
But there’s a bazillion of them out there.
So to help you out, I’ll go over choosing the right material, types of sling, and sling mounting systems. Oh…and, of course, some specific models.
We also have a video going over the benefits of 2-point slings and our favorite ones…
And now, after years of using all the slings out there, we’ve come out with our own.
We’re focusing on the AR-15 since it’s America’s favorite rifle…but a lot of these options will also work for other long-guns and even precision rifle rigs.
We would obviously sew our fingers together so we began our search of new manufacturers out there that were making a name for themselves.
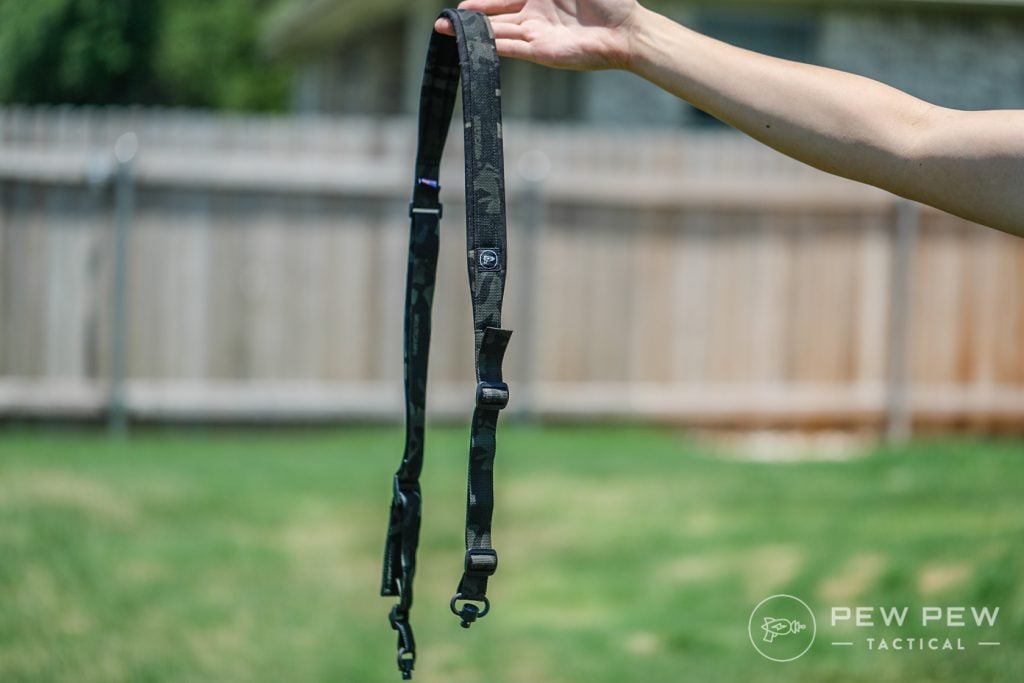
We went with Flatline Fiber to create the Pew Pew Tactical Sling.
Made by hand in Georgia…and with plenty of stellar reviews to boot. Us being one of them.
We have our PPT laser gun logo on Multicam, both regular and black, of course.
Pew Pew Tactical Slings, Multicam & Black Multicam
A very nice pull tab…these things make a big difference.
Pew Pew Tactical Sling Pull Tab
And just the right amount of padding that’s slightly less than the Vickers padded version. If you’re not on sentry duty with a 15-pound behemoth this amount of padding is perfect.
Pew Pew Tactical Sling Padding
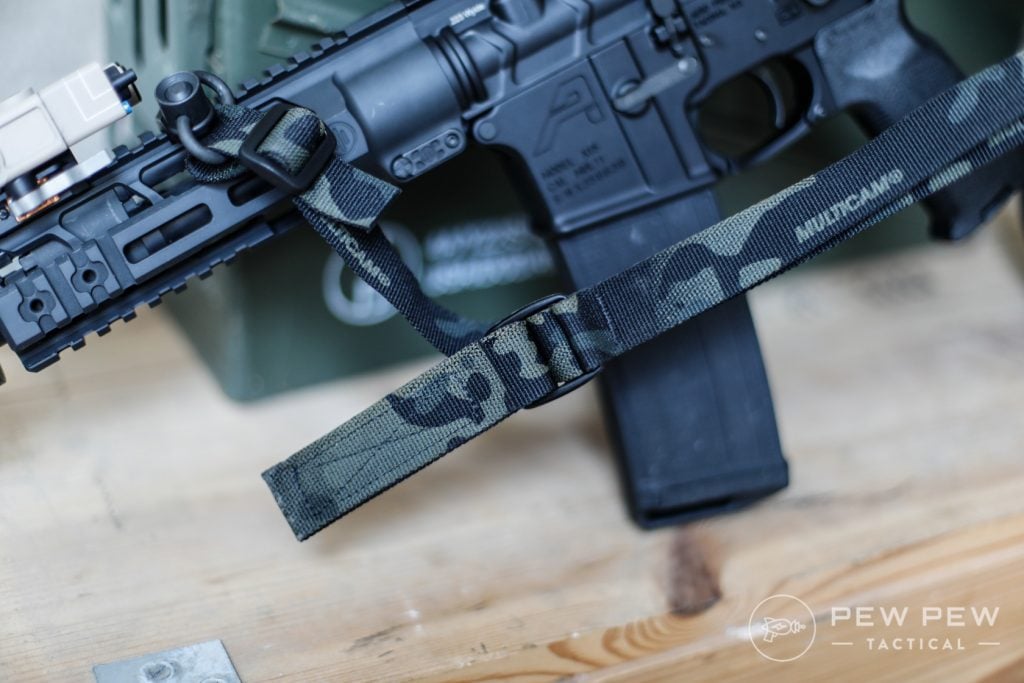
Also one thing that’s overlooked…it has the right amount of length so you’re not ending up cutting material when attaching.
Pew Pew Tactical Sling, Multicam
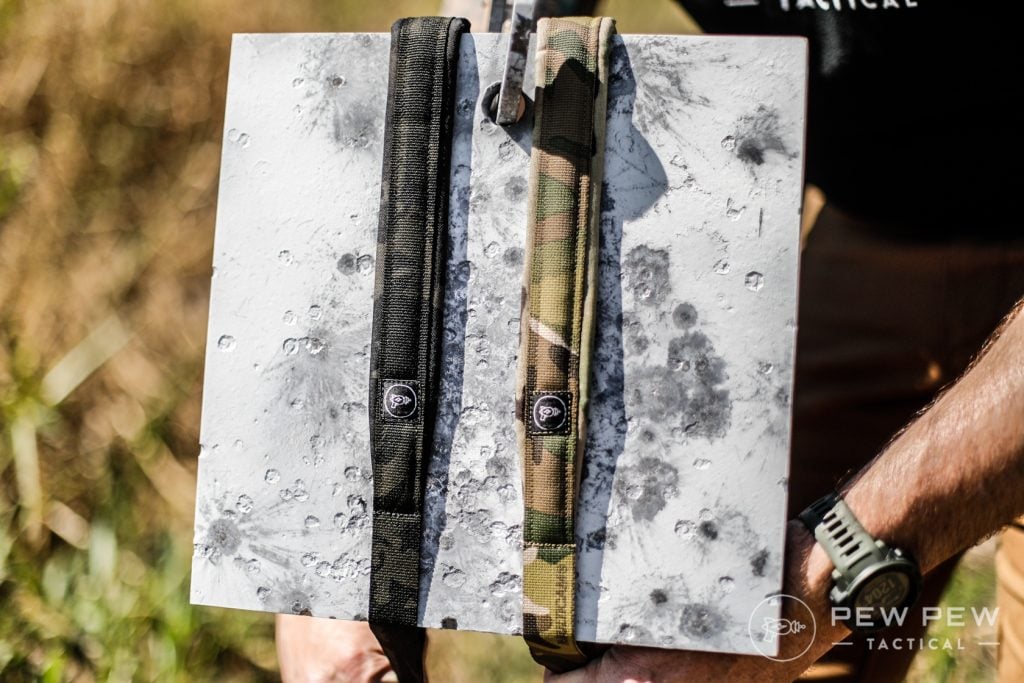
Check them out at TriStar Trading where you can find more of our goodies…as long as it’s Multicam!
Pew Pew Tactical Flatline Slings
And don’t forget the Quick Detach Sling Mounts!
Troop Favorite AR-15 Sling – VTAC
The Viking Tactics is a popular two-point sling that’s designed to boost comfort and freedom of movement.
The upgrade/hybrid version has stronger hardware and feels lighter. Used by tons of U.S. troops.
One common complaint is that it is built for an 8-foot monster. However, that’s because the extra length is set for people wearing armor or using it on a long shotgun.
I follow Kyle Lamb’s advice and use some duct tape to tape off the excess…never know when it might come in handy.
One thing that sets it apart from other slings is that it feels light but still super strong.
Also, there are two pull tabs you use to adjust the length — one to cinch it and one to let it go.
Highly recommend watching this video of Kyle Lamb for install and use.
And also highly recommend going with at least something padded if you’re going to be standing around for a few hours on patrol (or even a class).
The VTAC’s padding is thin but makes a world of difference. Especially if you’re going to be standing around a while with your rifle at your side.
My specific version that I use is the padded upgraded/hybrid multicam.
Also Great AR-15 Sling – Blue Force Gear Vickers Sling
Another used by tons of US troops is the Vickers Sling by Blue Force Gear.
There’s also a padded version for enhanced comfort.
Check it out in action…
Note that it only has one tab to deal with…
The length is also more manageable…no duct tape is needed but you might not be able to put it on very long shotguns (or if you’re huge and/or wearing a lot of gear).
The padding is also a little thicker than the VTAC.
But the nylon of the sling itself feels stiffer and is definitely thicker.
And given the choice between padded and not padded versions, definitely go with padded.
What’s your take on the Vickers?
Best Single Point Sling – Magpul MS4 Dual QD Gen2
If you’re looking for a single-point sling that’s comfortable, durable, and easy to adjust, try the Magpul MS4 Sling.
Its 1.25-inches wide nylon material is strong enough to resist wear and tear from constant use but soft enough to prevent chaffing and discomfort.
Additionally, it can be converted to a two-point sling when you grow tired of hitting yourself in the nuts.
The newest Gen2 model has two heavy-duty QD sling swivels and a better quick-adjust slider.
Best 3 Point Sling – Specter Three Point Sling
When it comes to three-point slings, comfort is key.
You don’t want to have something strapped to your body that feels excessively tight or restricts your movement more than it should. Many people prefer Specter Three Point Slings because they’re less likely to cause chafing or affect the wearer’s range of motion.
However, like we go over down below…unless you’re already trained in three point slings and don’t want to try something else…we’d forego this for a two-point option.
Best Precision Sling – Ching Sling
It is made up of two straps, a standard two-point sling and an additional smaller strap connected to the gun’s center stud.
Think of the Ching sling as a two-point sling that was optimized for the “hasty sling” method of shooting.
As you’re carrying a rifle with the Ching sling, the small strap can be slid up and out of the way. When it comes time to shoot, simply loop your arm through the first loop, between the first and center studs, to get a steadier aim.
Works for the AR platform but used more for hunting or precision rifles.
I use a variant of this in NRL22 competition shooting to make unsupported standing shots a little easier.
Best Cuff Sling – Tactical Intervention
Cuff sling variations are a favorite among sharpshooters because they allow you to get a stable and accurate shot without the use of a bipod.
They’re easier to set up than loop sling methods like the “USGI sling” and are an excellent way to improve your aim.
The Tactical Intervention is a popular cuff sling that’s developed with military-grade nylon and is able to withstand regular wear-and-tear.
Again…geared more towards non-AR rifles and precision rigs. We see these more and more in rifle competitions such as NRL and NRL22.
Best Sling Accessories
Once you’ve got the sling, you’ve got to make sure you can attach it to your rifle.
Almost all of the slings mentioned will hook into your butt stock without any additional hardware…whether into the slits or using a QD (quick disconnect) mount.
If you don’t have that…or like having a connection on your end place…check out the BCM QD End Plate (perfect for single point slings).
You might need something for your handguard if it doesn’t already come with QD holes…however I found the factory ones are either too forward (gets in the way of lights) or too rear (too short for slinging on your back).
In that case you’ll need something like a Troy Rail Mount.
However, my current favorite is the Magpul RSA QD since it is adjustable and keeps the sling on one specific side. My loadout below gives me space to activate my light.
It also has anti-rotation so your sling doesn’t get jumbled up
And for actual QD mounts and swivel combos…
We go with Magpul QD Slings (exposed for easier pressing).
or the Midwest Industries (flush fit for added security).
My preference is the flush model since I don’t take on/off my slings that much…and having something accidentally disconnect your sling would suck.
Choosing the Right Material
Gun slings are typically made from one of two options: leather or nylon.
There is no clear-cut answer when it comes to which sling material is better.
Some people believe that nylon slings are better because they’re not as heavy, while others prefer leather because they feel it gives a slight elastic feel that nylon doesn’t.
I personally go with the nylon slings.
If you are someone who prefers the traction and style that comes with a leather sling, it’s important to note that they can stretch over the years.
Types of Gun Slings
There are three main types of gun slings: single-point, two-point, and three-point slings. Then some more specific ones applicable for sharpshooting.
I’ll give a brief explanation of each type first then list the pros and cons of each type of sling so that you can get an idea of which type suits your specific needs.
Single Point Slings
The single-point sling receives its name because it uses one connection point to attach to the gun.
The single-point sling is a favorite for a lot of gun enthusiasts.
The sling wraps around the user’s body while the point attaches to the rear of the weapon.
Pros
What makes the single-point sling a favorite among tactical shooters is that it makes dropping and picking up your weapon simple.
The beauty of the single-point sling is that it always sits directly in front of you (and most likely pointing in a safe direction down).
This makes it ideal for situations where you need to go quickly hands-free, but also must have the ability to quickly grab your weapon at a moment’s notice.
Another benefit of using the single-point sling is that it allows you to perform a wide range of movements such as transitions due to a barrier.
Additionally, your gun doesn’t have to be in front of you with a single-point sling.
You can also wear it in a way that keeps your weapon at your side or on your back. However, those options aren’t ideal for scenarios where you need quick access to your gun.
Cons
Despite the convenience and easy accessibility that comes with single-point slings, they aren’t without their drawbacks.
For starters, single-point slings provide little shooting support. Your aim with a single-point sling won’t be much better than it would be with no sling at all.
Another con of the single-point sling is your gun will sway a lot when you’re not holding it.
For some people, moving hands-free with a single-point sling can be especially annoying because they constantly get knocked in the groin or knees with their gun.
Here’s an example of a loose two-point sling but you can imagine it with merely one.
Once you find the proper tightness adjustment for your body, your single-point sling shouldn’t move as much.
And overall, it’s a great tactical piece for anyone who’s not in situations that require a lot of running.
Two Point Slings
The two-point sling is one of the most commonly-used gun slings and is sometimes known as a carrying strap.
As you may have guessed, two-pointslings are named because they are attached to the gun with two connection points.
They are my favorite and the most versatile for the AR-15 and other rifles.
This sling connects to the rear and front of the firearm, on the bottom of the stock. It’s perfect for carrying a long gun over the shoulder during long hunting treks.
Pros
Not only are two-point slings great for carrying your weapon, but they can also be used to improve your aim.
There are three ways to carry a gun using the two-point sling:
American carry – slung over back of the shoulder, muzzle up.
European carry – slung over the front of the shoulder, muzzle up.
African carry – slung over the back of the shoulder, muzzle down.
Some people prefer the African carry because they feel it makes it easier to grab and aim your weapon. The downside to the African carry is that you risk clogging your muzzle with dirt and debris as you walk.
Remember when I said it can improve your aim?
Simply loop the sling around your non-dominant arm and use the tension to keep your weapon stable. This is called the “hasty sling” method.
Another type of shooting modification that can be used with the two-point sling is the “loop sling.”
This is achieved by disconnecting the rear portion of the sling and pulling a loop through the adjustment slide. Then, slide your arm through the loop and pull tightly:
This will help stabilize your long gun and provide you with the opportunity to shoot more accurately. This tactic is referred to as the “USGI sling.”
Cons
The downside of the two-point sling is that it can be difficult to retrieve your gun in a situation where time is of the essence.
It’s also a little harder to transition from side to side unless you leave some extra length to free up your neck area.
Three Point Slings
The three-point sling also connects to the front and back of the firearm like its two-point counterpart. However, the three-point sling differs in that it has an additional loop that goes around your torso.
When it comes to the three-point sling, I find that people either love it or hate it.
Pros
Overall, I think it’s a good sling that keeps your gun within reach, just like its single-point counterpart.
In addition, the three-point sling has more control than the single-point sling when you’re moving hands-free. That means you don’t have to worry about having your gun bang up your shin or groin area as you move.
The biggest benefit of the three-point sling is that you can easily transition from a rifle to a sidearm without having to fumble between guns.
Cons
However, the three-point sling doesn’t come without its own set of cons. Some shooters complain that three-point slings tend to get caught on bolt release mechanisms and block ejection ports of rifles.
Also, this…
In case you’re wondering…yes that rifle was loaded and no this was not a drill/test/skit. This is, in all its glory, the three-point sling in the field.
The Ching sling is a special shooting sling that incorporates principles of the “hasty sling” and two-point slings. It requires three connection points and can be used for carrying and aiming.
The Cuff sling is a shooting sling designed to help marksmen get an accurate shot without the use of a bipod.
Conclusion
For almost all users…you’re probably good to go with a two point sling.
Remember, a good gun sling can work wonders by increasing your accuracy or helping quickly switch between your long gun and sidearm. Check out more of our essential gear and guns such as Best Weapon Lights or Best Scopes/Optics.
What sling did you end up getting? How do you like it? Let us know in the comments! For more AR gear, check out our round-up of the Best AR-15 Furniture & Accessories.
Have you ever gone to pick up your air gun, only to find that it no longer functions after a few hundred shots? Air guns are delicate machines, and even with the best care, they will eventually break down. But how long do air guns last on average? Keep reading to find out!
When an airgun’s life is over, it means that there are no longer any spare parts available to repair the gun. This could be because they have run out or been destroyed entirely so you will need a new one for your collection. Here is a breakdown of the common types:
The durability of a BB gun is unparalleled. The U.S Army has documented that these guns shoot over 20 million shots before needing parts replacement. The barrel of a centerfire firearm wears rapidly and may get 1,000 to 5,000 proper shots in its lifetime. It is difficult to replace when needed. A BB gun shot tube, by contrast, is an inexpensive part that any owner can replace.
CO2 guns
This class of air guns contains all the single shots like the Crosman 180s and Sheridan 2260. These longer-lasting action-type CO2-powered guns can be entirely built from parts if needed with no effect on their life span! As long as those proprietary pieces exist, they’ll continue working indefinitely
Pneumatic airguns
It’s true that pneumatic air rifles (variable pumps and PCPs) have an indefinitely long life, but there are some known issues. For example, the guns with barrels soldered to their pump tubes can separate at this point and no one has yet devised a commercial method for resoldering them either. The other major failure happens when too much stress builds up on your pivot pins–they break off inside where you cannot reach them without professional help; repairing these failures is a thankless task requiring lots more money than buying a brand new gun.
Spring piston airguns
You can expect your spring piston air gun to last for 10,000 – 75 thousand shots before it needs repairs. This all depends on which model you have and how well they were made!
With proper care and maintenance, a spring piston air gun can last hundreds of thousands of rounds without any signs of failure or wear. An overhaul (new spring, piston seal, and breech seals) can make your springers last for decades.
We’re still dreaming of the day when suppressor ownership is legal in all 50 states. Thankfully, great progress has been made in recent years and it is now legal to own a suppressor in 42 of the 50 states.
Making suppressed hunting legal in states where it is legal to own a suppressor has been equally taxing, but also very rewarding. To date, it’s legal to hunt with a suppressor in 41 states.
The most obvious benefit of hunting suppressed is safety, particularly when it comes to protecting your hearing. Noise-induced hearing loss is the most common affliction for hunters. A lot of this comes from hunters forgoing hearing protection year after year for their entire hunting career so that they can hear their surroundings. After all, hearing nature around you is one of the best parts of hunting.
A secondary benefit is that it protects the hearing of your hunting companions. There’s nothing better than sharing an elk hunt with your friends or family, but it can easily be tainted by the sound of an unsuppressed gunshot. Maybe it won’t bother them right away, but over time, it will.
Animals like varmints or predators will go into hiding when they hear a gunshot, so a suppressor is almost a necessity in these instances. Some game animals like deer or elk may completely avoid an area if they are alerted to gunshots. We have seen this firsthand with small game such as ground squirrels that go into hiding for hours after the sound of the first shot and on other occasions not changing a thing because we were shooting suppressed.
Along with not disturbing the game in a given hunting area, suppressors also let you avoid disturbing local residents. Remember, not all hunting is done in the vast majesty of elk country. It may be small in the grand scheme of things, but a decrease in noise complaints is a good thing for everyone.
In this guide, we’re going to dig into all things hunting with a suppressor, including why you need to have one on your next elk hunt.
WHY HUNT WITH A SUPPRESSOR?
As we mentioned, in addition to protecting your hearing, a suppressed firearm allows you to use your unencumbered ears to listen for elk bugling, communicate with fellow hunters, and avoid alerting predators. Quite simply, it allows you to be fully aware of your surroundings from a hearing perspective.
In 2015, Montana Governor Steve Bullock of Montana said it best in a letter to the Montana Speaker of the House, stating: “Suppressors mitigate the sound of a shot, but do not silence it. The use of suppressors for hunting, when hunters cannot wear ear protection because they need to be aware of their surroundings, can help protect against hearing loss. This is especially true for our younger hunters, even those who are not actually hunting but are accompanying their parents in the field.”
Hearing protection in the form of muffs or plugs is as effective but only while being worn. In the field, it is important to be aware of your surroundings, especially in bear, mountain lion, or rattlesnake country. The hunter can easily become the hunted without the situational awareness that hunting with a suppressed firearm offers.
BENEFITS OF HUNTING SUPPRESSED
In summary, suppressed hunting offers a number of benefits that you may have not considered. Here’s a list of those benefits:
Protect your hearing
Protect the hearing of others
Maintain awareness of your surroundings
Enjoy sounds of nature, like elk bugling
Avoid disturbing other game
Reduce noise complaints
Reduce recoil
IS IT LEGAL TO HUNT WITH A SUPPRESSOR?
Suppressors are legal to own in 42 states. Only one of those 42 doesn’t allow hunting with a suppressor, and that’s Connecticut. So, if you’re a suppressor owner and a hunter in Connecticut, get in touch with your state legislators and let them know it’s time to join the other 41 suppressor legal states that also allow hunting. Hunters’ voices in the other states made the difference in the other states and they can make the difference in Connecticut, too.
WHAT CAN I HUNT WITH A SUPPRESSOR?
In terms of what you can hunt with a suppressor, the sky is virtually the limit so long as you’re in one of the 41 states where suppressed hunting is legal.
As with all types of hunting – suppressor or otherwise – it’s still a good idea to check with your state and local game laws every year to make sure that things haven’t changed.
ELK HUNTING
Part of the thrill of elk hunting is the challenge. These majestic animals can give even the best and most experienced elk hunter a run for their money season after season. Therefore, any extra leg up you can get on them is welcomed when you’re out on the hunt.
Using a suppressor will keep your sound signature down so that you don’t disturb the rest of the herd when making your shot. This is especially important if, for some unfortunate reason or another, you miss your first shot. The less noise your rifle makes, the better chance you’ll have of getting off a second shot.
Since most elk hunting involves carrying all of your gear with you on the hunt, many hunters try to pack as simple and light as possible. This means that hearing protection often gets left behind. It’s not that a pair of electronic muffs are heavy; it’s simply that they’re one more piece of equipment to carry around. With a suppressor on the end of your barrel, you can protect your hearing without having to keep track of an extra piece of equipment.
DEER HUNTING
Deer hunting is greatly enhanced when using your suppressor. This is because most rifle suppressors offer a reduction in recoil. You may not need a .300 Winchester Magnum for a whitetail deer on the east coast at 50 yards but in the western states, but mule deer are larger and often taken at greater distances. Therefore, a bigger caliber may be more beneficial. The same holds true for other game animals such bighorn sheep and caribou.
Even if you’re using a rifle with lighter recoil for whitetail deer and don’t need the recoil reduction, it’s still nice to have the reduced sound signature to protect your ears.
COYOTE HUNTING
Whether you consider them to be varmints or predators, coyotes are some of the most intelligent and cagey animals to hunt. They recognize gunshots for what they are and even the youngest or most naïve of these creatures will keep a smart distance in spite of your best predator calls once they hear one. To sum it up, like their cartoon namesake, they are wily.
FERAL HOG HUNTING
Another animal with excellent hearing and one that knows the sound of gunshots for what they are is the feral hog. These animals have bred to out of control numbers in the wild and are a pestilence when it comes to agricultural, property, and other forms of damage. Suppressed hunting rifles are a necessity when taking out large numbers of them to protect crops and other things that they like to destroy.
VARMINT HUNTING
Prairie dog and ground squirrel hunters often benefit the most from the use of a silenced hunting rifle while varmint hunting. Animals such as these are well aware of what gunfire means and a large group will retreat to their burrows until they no longer hear gunfire.
A suppressed hunting rifle will allow you to maximize your efforts when you need to take them out in a small amount of time. It will allow you to take shots at them for hours on end, if that’s your intent.
BEST SUPPRESSORS FOR HUNTING
There are a lot of suppressors designed with hunting in mind that all share the same characteristics. You want it to be quiet, but also lightweight. Versatility and the ability to share it among different host guns is always a plus. We took a quick overview of a few different centerfire suppressors.
If you want a suppressor that was purpose-built with hunting in mind, then the BANISH Backcountry is one you should give serious consideration. It only weighs 7.8 oz and is only 5.5” in overall length. It’s also rated for use all the way up to .300 Remington Ultra Mag (RUM), so no matter what your choice for elk hunting, the BANISH Backcountry can handle it. The goal is to pack in ounces and pack out pounds, and the Backcountry will help you do just that.
One of the most versatile suppressors in the world is the BANISH 30. A fully user-serviceable can, it works with all of your rifle calibers from .17 HMR to .300 Weatherby. Testing shows that BANISH 30 reduces the report of a .308 Winchester by as much as 34 decibels. It is made from a strong, titanium alloy for unmatched durability at an extremely light weight.
If you are looking for a suppressor that can handle pistol calibers such as .45 ACP as well as large rifle calibers such as .45-70 Government, give the BANISH 46 a look. Made of titanium and Inconel, the BANISH 46 provides the ultimate combination of durability and weight reduction. The BANISH 46 weighs only 16.3 oz in the short configuration of 7.9”, and 20.4 oz in its 10” configuration.
FREQUENTLY ASKED QUESTIONS
As beneficial as suppressors are to the hunter, one would think that they would be easier to come by. Here are some frequently asked questions that may help you understand the buying process as well as their capabilities.
HOW QUIET ARE THEY, REALLY?
Actually measuring sound reduction with a suppressor can be tricky. We have all seen the various decibel rating charts, but they only tell a part of the story. The actual level of sound reduction and the sound meter, itself, can be affected by humidity, barometric pressure, altitude, and echo.
In general, hunting with a suppressor can lessen the sound of most gunshots by anywhere from 25 to 35 decibels, depending on the silencer and caliber in question. This is below the threshold for most hearing protection commonly worn in or over the ears. If you hunt with dogs, it protects their hearing as well.
The other item of note here is that the vast majority of elk hunting rifles (bolt-action, lever-action, pump-action, single-shot) make the best suppressor hosts because the sealed action means there is no gas leakage. A silenced elk hunting rifle will truly live up to its name in this regard.
HOW DO I BUY A SILENCER WITH SILENCER CENTRAL?
Silencer Central takes the formalities out of the paperwork with our digital process. You select the right suppressor for your firearm and let our expert compliance staff handle the paperwork which is emailed to you to digitally sign. With the fingerprint kit, taking your prints and passport-style photo can be accomplished from the privacy of your own home. To make it even easier, we offer a 4-month, eZ-Pay option so you can pay for your silencer in installments. Our free NFA Gun Trust (a $249 value) is set up for you to better protect the ownership of what is really a lifetime investment. Once approved, you receive notification via email and text message, and we ship the silencer directly to your doorstep.
Additionally, we realize that not all hunting rifles ship from the factory with threaded barrels to attach to your silencer. Silencer Central’s in-house machine shop can thread your rifle for you and ship the barrel straight back to your house.
In addition to stocking popular brands, we also offer BANISH multi-caliber suppressors, a 100% titanium and user-serviceable line exclusively built to our demanding specifications.
SHOULD I PURCHASE A SILENCER USING AN NFA GUN TRUST?
At one time, it seemed like purchasing a suppressor by means of using an NFA Trust was the only way to go. This was mainly to avoid wait times from local law enforcement, obtaining fingerprints, photos and, in some extreme cases, chief local law enforcement figures would flat out refuse to sign any NFA paperwork. Much of this is no longer an issue due to an ATF ruling a few years ago that stated the CLEO only needed to be notified of silencer purchases.
However, an NFA gun trust is not a bad thing to have for estate planning purposes, particularly if firearms and silencers are involved.
HOW LONG ARE WAIT TIMES?
Perhaps the biggest drawback to buying a suppressor is the long wait time to go through the FBI background check. The background check is not long in and of itself, but the time it takes for the application to complete the entire ATF approval process is definitely longer.
At times, trusts can be quicker than individuals but at other times this dynamic can change. E-forms filed online are quicker than paper forms filed by mail. Over the years, we have seen approval times as short as 9 days and as long as 27 months. As of this writing, suppressor approval wait times are running about 270 days.
DO SUPPRESSORS AFFECT PERFORMANCE OR ACCURACY?
This is a bit of a mixed bag. In general, suppressors improve performance and accuracy. The right suppressor will lessen felt recoil and eliminate noise flinch, making your silenced hunting rifle more accurate.
However, attaching a suppressor will often change the rifle’s Point of Impact (POI). Often this shift in POI is minimal and can be corrected by adjusting the optic or iron sights. The important thing to remember is that if you sight your rifle in without a suppressor, you will need to re-zero with the suppressor attached.
Some suppressors will need this every time you reattach if they are the QD (Quick Detach) type that attaches to a flash suppressor or muzzle brake. If you are going the direct thread or thread over muzzle brake (TOMB) route, the shift will be negligible unless you are shooting at extremely long ranges ( greater than 1,000 yards).
WHY IS THERE A $200 TAX STAMP?
In 1934, due to concerns about high-profile bank robberies and interstate crime sprees from Depression-era criminals, Congress passed the National Firearms Act. This was the first major piece of gun control legislation passed in the United States.
Although the original intent was to outlaw specific types of firearms, including all handguns, legislators decided to tax them out of circulation by imposing a $200 transfer tax.
The reason why the NFA tax is $200 is because that was the retail price of a Thompson submachine gun in 1934. It was intended to be a 100% excise tax on a firearm that caught the public’s imagination. When adjusted for inflation, that tax today would be $4,500. This is a reason why silencer development languished for so many years until the 21st century.
Products affected by this tax were machine guns, short-barreled rifles (SBR), short-barreled shotguns (SBS), and, of course, suppressors. Firearms that were not quite short-barreled long arms and those that were disguised to not look like a firearm were classified as Any Other Weapon (AOW) and subject to a $3 tax.
The NFA has undergone some minor changes over the past nine decades, including raising the AOW tax from $3 to $5 and changing the SBR length from 18” to 16”. There have been a few attempts by lawmakers to deregulate silencers and remove them from the purview of the NFA, but as of this writing, there is still a $200 tax on this safety device.
READY FOR YOUR FIRST SUPPRESSED ELK HUNT?
Hopefully, by now you have a better understanding of what to look for in a suppressor for hunting. Weight and length are a factor especially if you must walk a few miles on your first suppressed hunt. You also want one that will reduce sound to a comfortable level and maybe even help in the recoil department.
Armed with the knowledge laid out here we hope we can get you ready for that first suppressed hunt. A suppressor is as important to a hunter as a quality firearm, skinning knife, or optic.
The key to having a great hunt is to do your research, hire experts and guides. Let Silencer Central be your suppressor “hunting guide” and redefine the way you buy a silencer. We deliver silencers the simple way. You select your silencer; we manage your paperwork, and your silencer is shipped directly to your doorstep. It’s the service that’s unheard of.
Call our silencer specialists at 888-781-8778 to get started on your next suppressor purchase or visit SilencerCentral.com to buy online.
In the late 1990s the spinning-wing decoy crashed onto the duck hunting scene like a tsunami. Two decades later, it has become the most widely used motion decoy, and most hunters have at some point integrated spinners into their decoy spreads. A superstar to some hunters and pariah to others, these decoys have definite strengths and weaknesses.
The first spinning-wing decoy traces its roots to California’s Sacramento Valley. The initial prototype was rather basic and consisted of a single spinning blade, powered by a small electric motor, atop a stake. The blade’s alternating colors produced a strobe effect. The magic comes from the strobe. Unlike humans, ducks can see in the ultraviolet spectrum, which allows them to pick out a hunter’s face shining in the sunlight as well as a spinning-wing decoy from two to three times farther than the human eye can see it. Likewise, a duck’s sharp vision and eyes on the side of its head allow it to see a wide panorama of motionor lack thereofin a decoy spread.
While some hunters achieve tremendous results with their motion decoys, others insist that they cause more harm than good. Here are a variety of tips from experts who make motion work.
The spinning-wing concept spread like wildfire. Terry Denmon, an engineer by trade, was approached by a friend who owned a sporting goods store. Their goal was to develop a small, battery-powered motor that could drive spinning wings on a duck decoy. The idea quickly morphed into MOJO Outdoors, which has since established itself as a major manufacturer of spinners and other motion decoys.
Denmon separates his theory of motion into two categories: “long-range strobe” and “simple motion.” Long-range strobe, he says, is “the flash of a spinning-wing decoy generated by turning a wing at a certain minimum speed.” Simple motion, he continues, is “any movement not within the spinning-wing concept. This could be movement of decoys, water, or wings that do not produce the strobe or flash.”
If motion decoys were duck calls, the strobe would be the highball, and simple motion would be the lonesome hen. Like the highball, the strobe is very effective at attracting ducks from long ranges but can cause them to flare when they’re in close, particularly later in the season. Simple motion, on the other hand, is not visible to ducks from a distance but is more likely to help finish birds, just like the lonesome hen call.
While MOJO made the spinning-wing decoy famous, Higdon Outdoors pioneered the development of other types of motion decoys. In 1994, Mark Higdon built a goose decoy with a moving head, which went on to become the first mass-produced motion decoy.
Brook Richard, corporate relations manager for Higdon Outdoors, explains Higdon’s idea of motion. “Visual motion,” he says, “is produced by decoys that can be seen from a distance, but visual motion is not always useful when you’re trying to finish ducks. Water motion, on the other hand, is the process of putting a ripple on the water to make decoys move. With visual motion you’re trying to attract ducks from a long distance. With water motion you’re trying to get circling ducks to commit.”
The message is simple. Some motion decoys attract ducks from long distances, while others put ducks at ease when they are circling your spread. Understanding the difference helps you to be more strategic and creative when using motion.
EXPERT TIP #2 Get Creative
It’s no secret that decoy positioning is crucial to successful duck hunting, and that is especially important with the placement of motion decoys. Conventional wisdom indicates that if a decoy looks like a duck landing, it should be positioned in a spread where you want ducks to land. While placing a decoy in the middle of a landing hole may not be a terrible idea, a little more thought and creativity can yield better results.
Mark Kirsten has been hunting the rice fields of his family’s Sacramento Valley farm for nearly 30 years, and he has experienced the evolution of spinning-wing decoys firsthand. “When the original spinners were invented, they were almost unfair,” Kirsten says. “Their effectiveness has lessened over time, however, and the farther south you go, the less effective they can be.” As ducks move down the flyway, he explains, and especially as the season progresses, they can begin to see the strobe produced by the spinning wings as something unnatural.
“In my experience,” Kirsten continues, “as the season moves on, ducks don’t always finish as well when the spinners are spinning. I use one only if it has a remote, and we always turn it off as ducks get closer. As the season moves on, I also tend to place them farther and farther away from my blind. If ducks begin to act leery of a spinning-wing decoy, I’ll even put it outside my spread and partially behind cover so ducks can see it only at certain points in their circle. I think it can be a great tactic to continue attracting ducks without sacrificing the ability to finish them.”
Denmon endorses the tactic. “One of the biggest misconceptions for spinning-wing decoys is that they are good finishers,” he says. “The decoy was always intended to be a long-range attractor. But if ducks become shy and you remove it completely from your spread, you give up the ability to attract ducks from far off. If they aren’t finishing because of your spinning-wing decoy, move it to the far end of your spread, out of your landing hole. If you need to, move it a hundred yards outside your spread. It might not look as natural to us, but at least you’re still attracting ducks from far away. Once they are close enough to be shy of the strobe, the spinners have already done their job.”
EXPERT TIP #3 How Conditions Can Affect Motion
Ron Kee is a lifelong New Yorker who cut his teeth hunting ducks in the saltwater marshes of Long Island. A Wall Street veteran and former New York state DU vice chairman, he now hangs a shingle as a pro staffer for several waterfowling manufacturers including Mossy Oak, Drake Waterfowl, Buck Gardner Calls, and Tanglefree.
Changing weather conditions can present a challenge for any hunter, but those on our nation’s coasts also have to deal with tides. “Sometimes, the tide can shift six to eight feet over the course of a hunting day,” Kee says. “In a falling tide, a decoy on a pole will eventually stand too far out of the water. In a rising tide the same decoy will quickly be covered with water. We usually hunt from boats and almost always use floating spinning-wing decoys so our profile and motion adjust automatically with the tide.”
Hunters logging hours on coastal waters can also see a higher frequency of strong winds. “Most of the time we hunt sea ducks in a stout wind,” Kee continues. “We frequently use wind-powered spinning-wing decoys. While many inland hunters won’t see winds with enough power to spin motorless decoys, we commonly hunt in winds that produce the strobe that ducks can see from a long way away. They’re also lightweight and very affordable.”
Kee also encourages hunters to remember some tried and true old-school motion tactics. “Flagging passing ducks is one of the most effective techniques we use,” Kee says. The flag he uses is a black, square flag on a handle, similar to a black golf flag. Hunters grip the handle and flap the flag to simulate a duck or goose flapping its wings. “When ducks are at a distance, I’ll hit them with a few flaps,” Kee continues. “I just use a few flicks to get their attention, and once they start coming, I’ll stop flapping. Unlike dabblers, many divers and sea ducks don’t respond well to a duck call, so flagging gives me the same feeling of involvement that calling does. It really is an art form and can be a lot of fun.”
EXPERT TIP #4 Finesse Finishes Ducks
If the waterfowling community crowned a “King of Motion,” Ronnie Capps would be a strong contender. A retired game warden and current professional outfitter, Capps is widely regarded as an expert at bringing life to a dull decoy spread, to the point that clients have referred to his Reelfoot Lake timber hole as “Duck Disneyland.”
Capps believes that shy ducks require a more delicate approachsomething many decoy spreads lack. “You will scare far more ducks with erratic motion than subtle motion. Many hunters use what I call ‘The Haunted House Scenario,'” he says. “If you use too much motion at the wrong time, it’s like a guy with a chainsaw popping out at a haunted house.
“Keep your motion decoys on a remote or a hardwire switch, and don’t ever hit your heavy motion decoys when the ducks are looking right at your spread. When they get downwind and aren’t looking directly at you, hit your motion decoys a few times to stir up the water and create ripples and motion out of the corners of their eyes. I am also a big believer in swimming decoys, especially in and around my landing hole. I believe they are extremely beneficial when used for finishing ducks.”
Higdon’s Richard agrees. “Ducks move, and they move a lot,” he says. “I think the biggest mistake people make is devaluing the power of water motion, especially when there’s no wind or if you’re in the woods. Water motion is critical for finishing ducks.”
“With decoys arranged in a classic half-moon pattern, there are several different ways to use motion best,” Richard adds. “First, make sure your motion decoys are slightly upwind in the spread so the ducks will continue flying over them as they circle. Also consider placing a motion decoy among static decoys to compound their effectiveness. Putting a low-key motion decoy, like a swimmer, exactly in the spot where you want the ducks to land is also a great tactic.”
EXPERT TIP #5 Be Strategic
Supplementing your decoy spread with motion isn’t guaranteed to increase your harvest, but it’s hard to argue against it. The key is being strategic. While some decoys are meant to function like a hammer, others play subtler but equally important roles. Success comes when you understand the hunting conditions, read the birds’ behavior, and use the right tools for the job.
Greg Bohn of Hazelhurst, Wisconsin, enters the Freshwater Fishing Hall of Fame as a Legendary Guide in 2016. He’s spent decades developing fishing patterns for walleyes in weedgrowth. Greg Bohn of Hazelhurst, Wisconsin, enters the Freshwater Fishing Hall of Fame as a Legendary Guide in 2016. He’s spent decades developing fishing patterns for walleyes in weedgrowth.
A pair of marble eyes suspended in green shadows. Last thing seen by many a baitfish. The weed-walleye connection is well documented, and many walleye tournaments have been won by targeting walleyes above, outside, and buried in weeds.
Species of aquatic vegetation used by walleyes vary with environments. Seasons ordain certain species of vegetation as walleye kingdoms while evicting walleyes from others. So what weeds do walleyes use most, or in what order as the environment changes with the seasons?
Clasping Leaf Pondweed (Cabbage)
Some think it’s simple: Follow the forage. But it’s hard to find weeds without forage. Other factors are afoot. Where to start on any given day — in green cabbage? Elodea or coontail? Tobacco cabbage? Some other pondweed. Perhaps milfoil?
Wisconsin’s Greg Bohn puts clients on 10-pound walleyes like Miguel Cabrera hits baseballs — at a record pace. He can take clients trophy hunting or go for numbers, day or night. Either way, count on fishing around weeds. For Bohn, vegetation is more than cover. Plants are indicators, gauges, pointers, and signs on his dashboard. “I’m always excited anticipating how the weeds are going to be developed when the season opens in Wisconsin,” he says. “Lakes can be frozen on opening day, and I’ve seen openers with stalks already three feet high. It’s a guessing game until you get out there and investigate.”
In a warm spring, plants grow quickly and chances are good walleyes are in and around some variety of “cabbage.” What anglers commonly refer to as cabbage is mostly clasping-leaf pondweed. But most seasons start with a different plant species — the first one standing, and Bohn’s best early indicator. “Takes time for some types to develop,” he says. “So you have a growth shallow right away, and it progresses deeper during that first month of the season until you’re fishing around different species at different depths in May than in June.”
Bohn’s walleye compass when the season opens is elodea, sometimes called waterweed. “It’s available right at ice-out,” he says. “Elodea grows from a couple feet out to about 8 feet — sometimes in depths of 10 feet. Walleyes love it early. Find elodea and you find walleyes because it’s the only game in town. Perch are looking for vegetation to spawn on most years when the only greenery is elodea, which grows to a height of 10 inches to a foot. Start searching for it early in 2- to 4-foot depths. It generally appears first in bays where the water warms up sooner than the lake.”
Then he looks for what some call broadleaf, tobacco, or brown cabbage, soon followed by clasping leaf pondweed, also called green or narrow-leaf cabbage. “When green cabbage reaches maximum height, the buds pop out above the surface,” he says. “It’s a tough plant. The main stalk can break light line when a big fish wraps in it. It comes up quick and it’s fast growing. It’s the next thing to take off after elodea, and it’s the first type of vegetation most anglers begin to pattern walleyes in.”
Broadleaf, Brown, or Tobacco Pondweed (Cabbage)
Once a big-fish weedbed, always a big-fish weedbed. “There’s something about certain weedbeds that draw big fish almost every year,” he says. “One particular weedbed in a lake may continue producing big fish all your life at a certain point of the season. The attraction sometimes is a steep drop along one edge into deeper water. Sometimes it’s boulders along it. Sometimes it’s consistency of growth year-to-year. It could be they spent a lot of their young lives there, because it’s close to spawning habitat. Little idiosyncrasies that make it attractive in ways we can’t see — that progression is the neatest thing to follow.”
Walleyes are attracted to peak growths of different species of vegetation, but other conditions may determine how walleyes use it. “Walleyes come in-and-out of weeds a lot,” he says. “They react immediately to a change in the surface chop or a change in the light around weeds. They use vegetation differently, based on conditions and weather. They travel half way across the lake to find warmer water in spring. Your temperature gauge becomes your guide. In the 40°F- to 60°F-range, a few degrees makes all the difference. When it gets cold at night early in the season, deeper water is warmer than shallow water and walleyes are in deeper weeds. On sunny days, you find them moving shallower as the water warms — always to a peaking species of vegetation growing in some slightly different substrate.
“As the season progresses, walleyes might be less concerned about a few degrees of temperature change, but temperature remains critical all summer,” he says. “Plant species shift and walleye preferences change, too. They follow the vegetation to an edge, gradually shifting deeper as vegetation extends downward. The 4-foot plants are unproductive by late June, when 8- to 10-foot weededges become prime. It’s a combination of two things — water temperature and maturity of plant growth.”
Elodea
Bohn always works vegetation from the outside edge inward. “Don’t pile right into the vegetation,” he says. “Our initial casts don’t even reach the weededge. Any clumps or points off the edge — that’s where the big fish are. Start well outside the weedline and feel for the edge. You often can tell what kind of plants are present by jigging. If not, try to get a look. Most days, the type of vegetation is important. When you start catching walleyes, you have to know what plants to look for on the next spot.”
Mid-summer cabbage lines and coontail clumps stop between 6 and 20 feet, depending on water clarity. “It takes time for the food chain to get going down there,” he says. “Minnows may not inhabit those deep edges for a while. Until the plants mature, baitfish continue to use shallower vegetation. But those plants may become too thick and walleyes seem to avoid beds that are overly dense. They like newer growth coming into peak height. It’s like a stair-step progression. Walleyes use plants at 4 to 6 feet, then within a week or two they move down to those at 8 to 10 feet, and so on. The deepest are coontail and sandgrass down to about 20 feet and that’s the end of the cycle. That’s where they stay until ice-up.”
Patterns and Presentation
“Walleyes are there big-time or not at all,” Bohn says. “It takes a short time to figure out which plants to focus on. Move quickly because walleyes do. It’s amazing what can happen in seven days as the ‘right weeds’ suddenly become too thick for walleyes and they move to a new restaurant just a few feet deeper. Sometimes walleyes cross the lake to find the next stage of weedgrowth. These movements aren’t necessarily taking place on the same piece of structure or in the same area of the lake. Sometimes it seems like the entire walleye population moves into one particular weedbed for a short time. Usually, though, when they move it’s a pattern that persists around the lake. Say they move to a type of vegetation growing at 10 feet on a sandbar. Every sandbar on the lake that has that type of vegetation has walleyes.
“Wind pushes walleyes shallower,” he says, “but I love to fish vegetation on flat, sunny, calm days right after a cold front. Bluebird days after fronts can be awesome in weeds. Walleyes favor shade and hold where feeding is easy. Look for fish activity on the surface. Young perch dimple the surface and outline a weedbed in calm water. Watch for them skipping out of the water, indicating predators on their tail. But windy days are great, too. In either case, I catch walleyes in weeds with 1/16- to 1/8-ounce perch-colored jigs.”
Milfoil
As surface temps warm between 60°F and 68°F, Bohn switches from fatheads and chubs to leeches, then to crawlers under slipbobbers from 68°F and up — but he uses more artificial softbaits than anything else. “When plant growth is developing, panfish become a nuisance, especially at the leech-and-crawler stages,” he says. “Softbaits take off when the water reaches 60°F. At a certain point every summer, I stop bringing livebait. Softbaits outproduce livebait in warm water.”
He jigs with 10-pound Stren Magnathin. “I like mono with plastics,” he says. “Braids work in vegetation, but the drop is less radical with thicker mono. And when you lift with braid, action is more abrupt because of the lack of stretch. It removes the arc in your lift-drop, too. Walleyes tend to hit on the drop, so having that arc, that pause at the top, and that slower fall is critical. Braid is too abrupt. No need for long casts, either. In weeds, short casts are a must.”
Bohn pitches with a rod at least 7 feet long with a medium power and a fast tip. “G. Loomis makes the BSR852, a 7-foot 1-inch stick,” he says. “It’s better known as a bass rod, but it’s an awesome jigging rod for plastics and walleyes. Medium power and fast action are needed to rip weeds free. For jigging I use a slightly heavier jig with plastics. If I’m using a 1/16-ounce jig with minnows, I use a 1/8-ounce one with softbaits. There are many differences between jigging livebait and plastics. To be productive, you have to appreciate those differences.”
Bohn uses 4-inch soft jerkbaits in minnow shapes in 55°F to 75°F water. “Once leeches and crawlers start working, Kalin’s and Berkley grubs excel,” he says. “Paddletail minnows and small swimbaits — a lot of softbaits work, but I have my best luck in warm water with 3-, 4-, and 5-inch action tails that resemble leeches and crawlers. Ring worms and grubs are good in warm water. Once the water starts to cool and days get shorter, minnow-style baits come back. We began catching bigger fish faster with softbaits than we did with livebait years ago. It’s so effective. I was strictly a livebait guy for years, but now I rarely have livebait on board once the water warms.”
After becoming a “plastics guy,” he designed the Walleye Limit Minnow. “It has the right texture and lifelike flexibility,” he says. “Stiff plastics don’t work well for walleyes. They get bumped and tapped, but not eaten. I think those bumps sometimes indicate walleyes are testing the texture of the bait. The Walleye Limit Minnow is the best soft jerk for walleyes I’ve used.”
Coontail
Most people jig upward all the time. “With softbaits, you need something a little different,” he says. “Every day can be different. Some days it’s pop it up and let it fall, but sometimes they want it moving horizontally then dropping. You have to incorporate a pull, a short swim, or a slow lift, giving walleyes the opportunity to move under the jig. I freeze the rod tip at 11 o’clock, never go beyond noon, and never drop it below 10 o’clock. I watch the bow in the line. When you lower the rod you lose contact with the jig long enough for fish to pick it up and spit it out without feeling a thing. Freeze that rod at 11 o’clock and you feel everything. You see more line strikes and feel more ticks and light bites.”
A jig has to be rigged perfectly with softbaits. “It has to be straight,” he says. “If it’s spinning, circling, or running sideways, it won’t produce. Make sure the lure looks symmetrical and straight — not off balance, bunched up, or crooked. With minnow-shaped softbaits you do more twitching. With action-tails you twitch less and swim more. Hopping them is good, but a slow, steady swim can be best. With livebait, you give them time to get a good hold on it. With softbaits, you want to set the hook immediately. Clients often get bites without setting the hook right away. It’s in and out of their mouths so quickly. Weeds feel almost the same. If you feel a tip or a tap like a perch tapping a nightcrawler, that’s a strike. A lot of strikes are weight strikes — if you feel weight, set the hook.”
With softbaits, you get a lot of “let’s-get-acquainted bumps,” he says. “The best way to get that walleye to strike after a bump is to keep going. Act as if nothing happened and keep jigging. Once you get the lure near the boat, don’t raise it up immediately. Walleyes follow more than muskies. After the lure gets to the boat we catch tons of walleyes by jigging up and down right under the boat. Maybe 6 to 8 inches, and just a couple lift and drops. If they’re there, they react to that abrupt change in retrieve angle. Work it all the way in.”
As mentioned before, Bohn likes perch colors. “Walleyes are on perch-imitating jigs and baits based in green,” he says. “Chartreuse-and-lime, glow watermelon — any shade of green. A perch-glow head in firetiger or parrot is my favorite. All green or green-back, pearl-belly plastics are key in weeds.”
A soft jerk on a small jig swimming through green shadows. Last thing seen by many a marble eye near Greg Bohn.
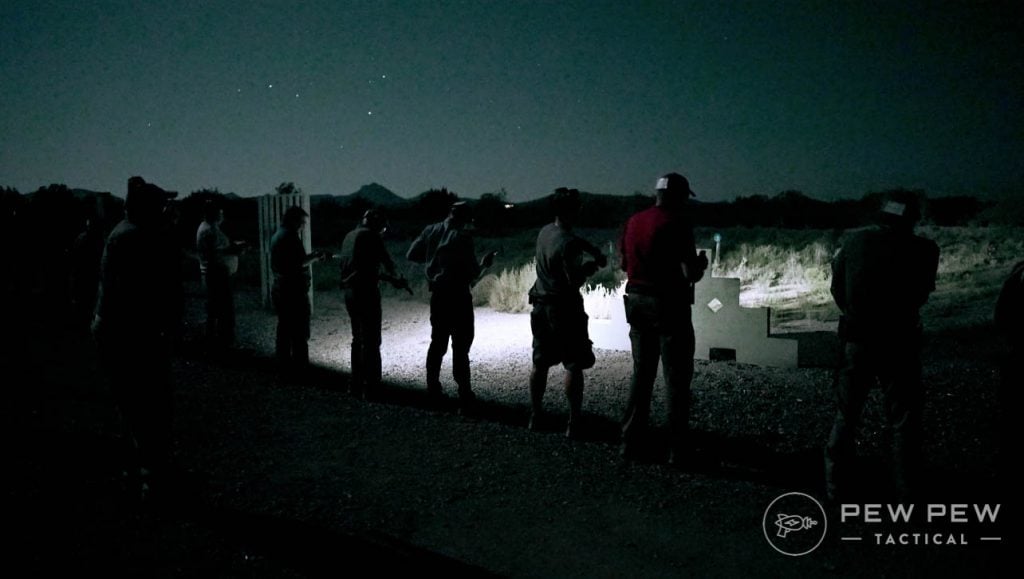
Of course, you do! So…can you attend a defensive firearms course across the country…basically once a month?
Classes are a great way to develop skills.
If you can, great! But if you can’t…welcome to the club.
So what do you do in between classes? Drills!
Defensive firearm drills are a great way to work on new skills and keep the ones you have sharp.
We’ve put together a few defensive firearms drills to keep your skills sharp & build a solid base in defensive firearms use, all from the comfort of your local range.
There are lots of great drills out there to improve your shooting ability. The ones I’ve chosen here were done for a purpose.
First, they are great drills to master.
It is easy to get lost in the fun of recreational shooting, but building a solid defensive foundation with drills is just as important.
Second, they can be done with minimal supplies.
Third, they can most likely be done or modified to be done in accordance with your range’s rules.
1. Malfunction Clearing
This drill is all about learning to get your gun back into the fight when it goes down with a malfunction. This specific drill is designed to teach shooters how to defeat a malfunction.
All standard PPE is required.
Safety first!
Start the drill in the ready position, as if you had just fired and are going to fire again.
If you are using a timer, wait for it to sound off. When it sounds, the drill begins.
If you aren’t using a timer for this drill, just start when ready.
Pistol
Use an empty brass case or a Snap Cap to simulate a complication.
With a pistol, remove the magazine — retain it or drop it (if you’re carrying a spare mag).
Pull the action to the rear several times as you tilt the weapon ejection port down. Once the malfunction is cleared, reload the weapon and fire.
Firing a shot on target completes the drill.
Want to see it in action? Check out the Brownells’ Daily Defense video below.
Rifle
Each rifle functions slightly differently, but this drill assumes you are using a modern rifle. If not, adapt the drill the best you can.
Starting in the firing position, drop the magazine with the firing hand as the nonfiring hand locks the bolt to the rear.
With the bolt to the rear, the jam should clear; if it does not, clear the brass with your hand.
Reinsert the magazine and fire a single shot, and the drill is over.
Shotgun
This drill is for shotguns with tubular magazines — revert to the rifle drill for box mags.
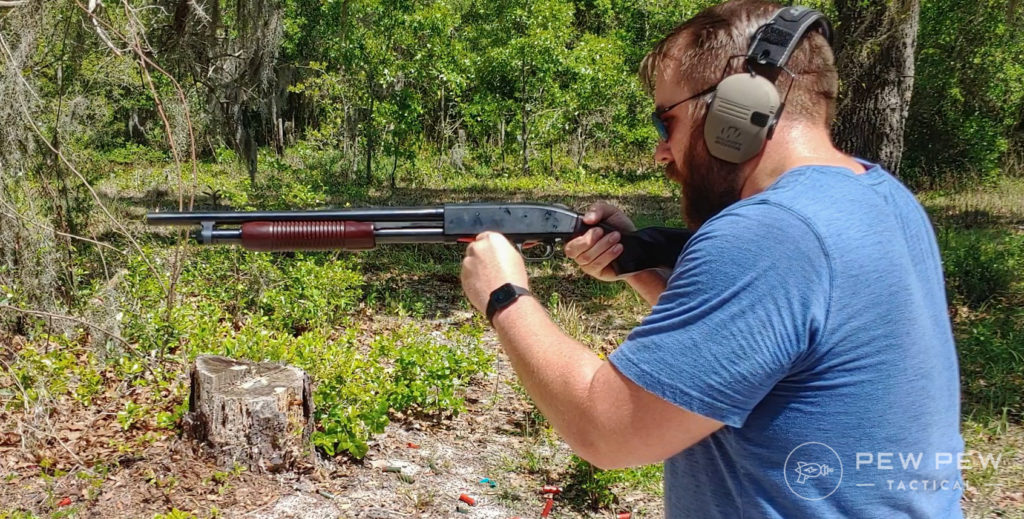
With a pump shotgun pull the pump fully to the rear. If necessary, reach in and remove the malfunction.
With an automatic, lock the bolt back to the rear and clear the malfunction with your hands.
Put another round in the chamber and fire a round.
Make It Harder — Randomly load an empty case into the magazine and let the malfunction surprise you.
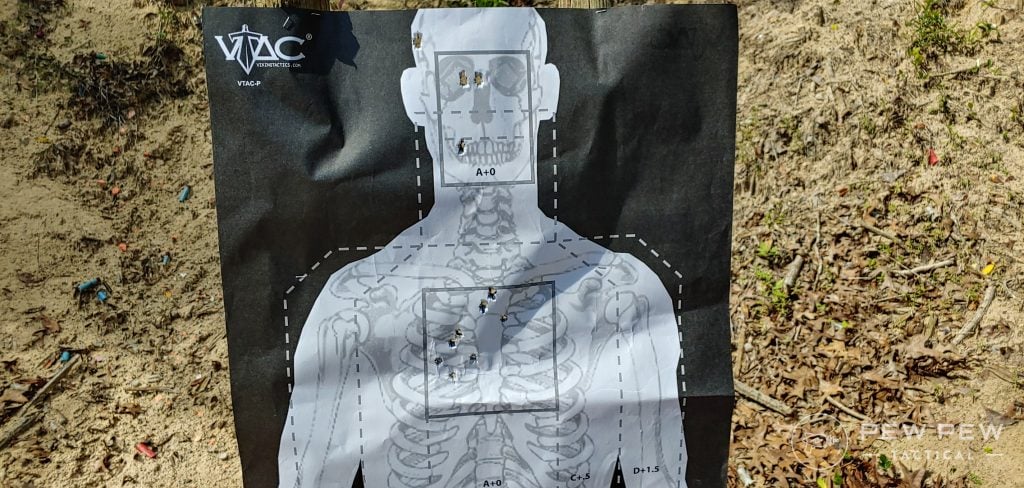
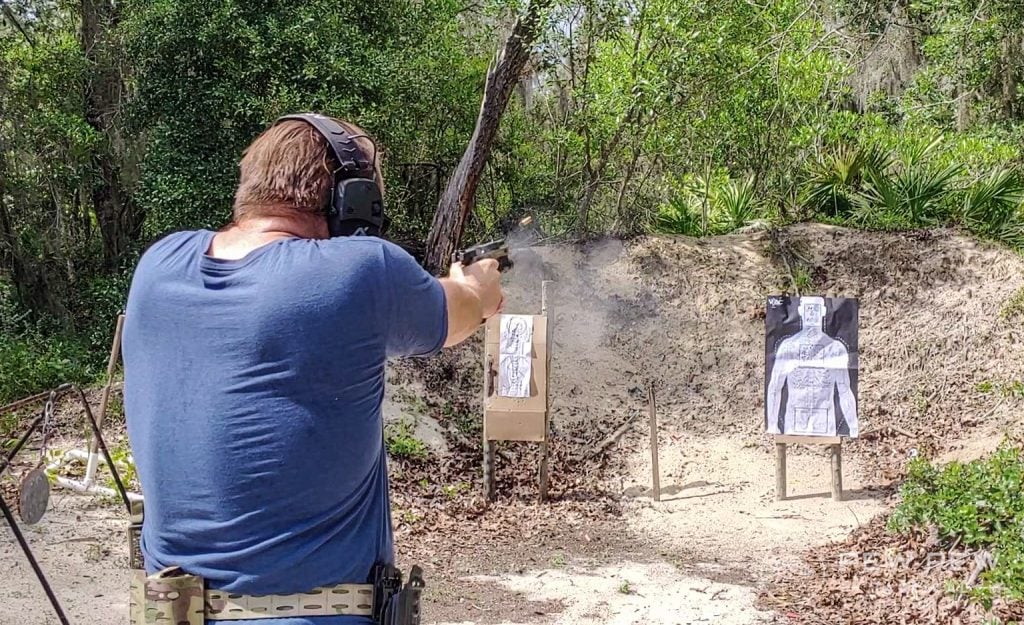
2. Failure to Stop a.k.a Mozambique
This drill involves two shots to the chest and one to the head, and it’s the same drill as any weapon platform.
The Failure to Stop Drill, or Mozambique, is mostly useful with a rifle or pistol.
A failure to stop drill with a shotgun tends to be unnecessary, but can be done.
Mozambique
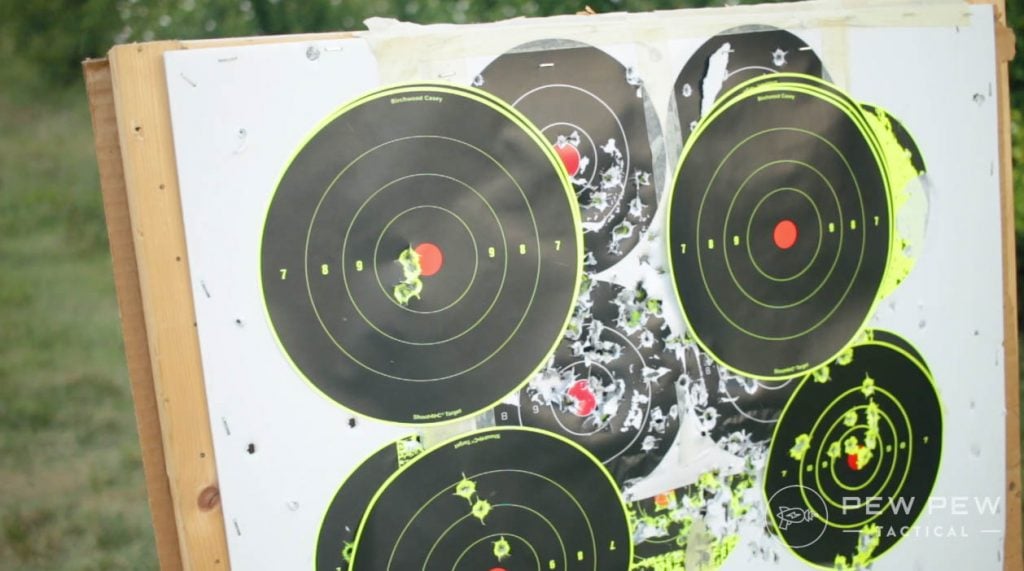
Using a silhouette target with distinguished chest and head areas, set your target up anywhere from 7 to 10 yards with a handgun and 15 to 25 yards with a rifle or shotgun.
If range rules allow, start with the handgun holstered or long gun at the low ready.
On the go signal, fire two rounds into the chest of the target and one round to the head.
Then keep the weapon aimed at the target to ensure it’s down.
Mozambique Shooting
This drill stresses shot placement into critical areas of an opponent and also teaches shot transition drills on the same target.
Shot placement is the most critical factor in ending a defensive encounter, more so than any kind of supposed knockdown power.
Make it Harder – Place a 3×5 index card on the chest of the target and a playing card on the head of the target. Shots will only count if they hit the index or playing card. This challenges the shooter’s shot placement skills even more.
Read more about the Mozambique and its origins in our article here!
3. Box Drill
The Box Drill is almost identical to the FSD drill; however, it’s shot on two targets.
Like the FSD, you can use any weapon’s platform to complete this drill…as long as it can hold six rounds.
I place the targets about a yard apart because it’s faster to engage with your dominant hand.
Box Drill
Engage the first target with two to the chest, transition to the second target, and fire two to the chest.
On the second target, take your headshot, then transition and finish the drill with a final headshot on the first target.
This drill stresses shot placement and multiple target engagement.
You need two targets for this one.
It forces you to think under stress and focus on kicking ass in a proactive way.
Make it Harder – You can make it a little harder by placing the targets further apart if possible. If not, mix in a reload in between shots. Make it interesting by loading three rounds per magazine and reloading right in the middle of the drill.
4. El Presidente
The El Presidente was designed by the King of Combat handgun shooting, Jeff Cooper. This drill challenges a pistol shooter’s ability to draw, engage, transition targets, reload, and then re-engage multiple targets again.
The drill should be completed in 10 seconds — five if you’re an advanced shooter.
You’ll need three man-sized targets set 1 meter apart, with the targets staged 10 meters from you.
El Presidente
Start with a holstered handgun and a spare mag carried as you please — six rounds in each mag.
You’ll need a timer to really gauge your ability, but if running it just for fun, don’t worry about it.
Begin with your back to the targets, and hands in the air, in the false surrender position.
On the go signal, turn, draw and shoot each target twice. Then reload, and shoot each target two more times.
The drill is quite challenging and does have a lot of moving parts. As such, finding a range that will accommodate it might be tough.
We offer an in-depth dive into El Presidente here.
5. 1 to 5 Drill
Designed by Kyle Lamb, the 1 to 5 Drill is perfect for any modern defensive rifle.
Kyle Lamb was a Sergeant Major in the U.S. Army, a Delta Force Operator, and participated in numerous deployments, including the Black Hawk Down incident. He’s the lead instructor at Viking Tactics and the subject of a serious man-crush on my part.
Kyle Lamb (Photo: Sig Sauer)
Lamb designed the drill to stress shooting until the target is down. Instead of focusing on the double-tap and transition, you’ll place a multitude of rounds on multiple targets.
You’ll need three man-size silhouettes set about a yard apart. The targets are only 5 yards from you.
Load one magazine with 15 rounds, insert it and make ready with your rifle.
Start in the low-ready position with your rifle. On the signal, put one shot on the left-most target, two shots into the center target, and three shots into the rightmost target.
Next, you shoot four shots on the center target and finish with five shots on the left target.
You should be able to do this in about five seconds. Anything less means you are doing pretty dang good.
6. Shotgun Casino Drill
I love my shotguns, and there is a drought of shotgun-specific drills.
However, I did see John at Active Self Protection post something called the Shotgun Casino Drill, which is new to me.
Shotguns are low-capacity weapons that require you to learn to reload to run one properly. This drill stresses speed combined with reloads and makes the shooter think.
You’ll need four targets, a pump or semi-auto shotgun, ten rounds of ammo, and a means to carry spare ammo on the gun or body. I prefer side saddles, but it’s up to you.
A shot timer is also required, with the par time set to 30 seconds. All four targets should be set up in a row, placed five yards from the shooter. Load the gun with four rounds.
The targets can be slightly staggered, as shown here, or all the same height. (Photo: Gat Daily)
Your goal is to fire one round into target one, two rounds into target two, three rounds into target three, and four rounds into target four. That’s ten rounds, but you start with only four in the gun.
How you achieve the goal and the method by which you reload is up to you. You can start loading extra rounds as soon as the timer goes off if you choose, reload as needed, or run port reloads after the first four.
This drill is great for getting an idea of the time difference and efficiency between different shotgun reloading methods. (Photo: Gat Daily)
It doesn’t matter as long as you get the appropriate amount of rounds into the appropriate targets within 30 seconds.
This drill stresses your recoil mitigation, target transitions, reloading skills, and ability to think under pressure. It’s a fair bit of fun, and you’ll likely have no problems passing.
If you’re faster than the clock, you can always adjust the par time as necessary to make you move faster.
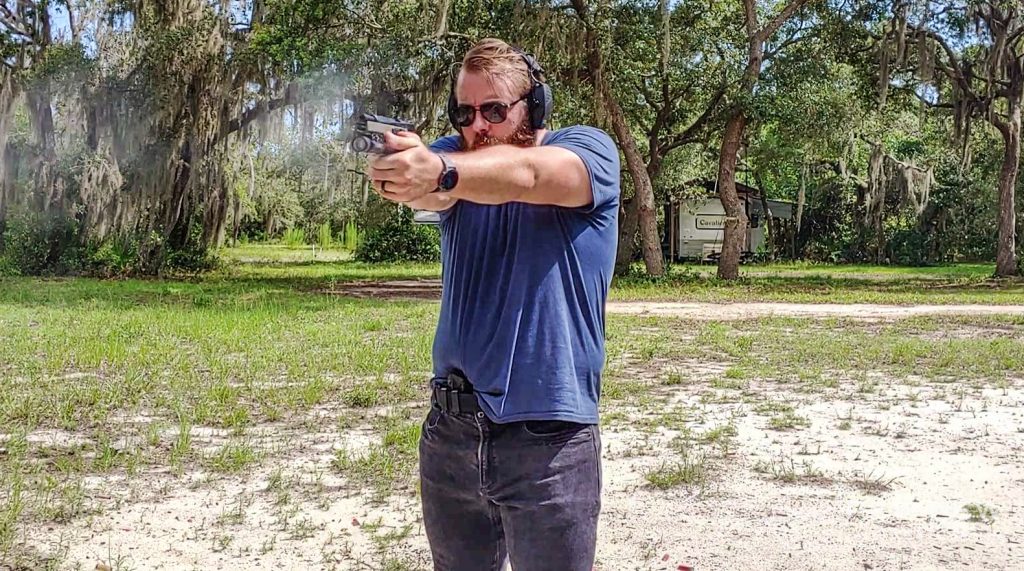
7. Shooting and Moving Multidirection Live Fire Drill
Mike Seeklander is the real deal. He’s a pro shooter, Marine, and an all-around awesome guy.
He teaches classes, has written numerous books, and has contributed to the firearms world in a very positive way. One of his creations is the Shooting and Moving Multidirection Live Fire Drill.
This rifle drill incorporates movement in nearly every possible direction and stresses shooting on the move and proper footwork.
The drill requires a rifle, at least ten rounds, and two obstacles.
Obstacles can be poles, barrels, or anything else suitable. They should be in line with each other and spaced about five feet apart. The target should be set fifteen yards down range.
Cinder blocks or similar items work great as obstacles. (Photo: Gat Daily)
Start by standing in between the two barrels and then begin walking in a figure 8 around the two obstacles. While walking, have your rifle at the ready and engage the target as you move around the barrels.
This forces you to focus on proper footwork, movement, and accuracy. Use a relatively small target to demand excellent accuracy. Using an IPSC target and focusing only on the A-Zone is a great option.
Make sure you are using a fighter’s style of movement. Avoid crossing your ankles, and move one leg at a time without dragging your feet.
Shoot and move, shoot and move. (Photo: Gat Daily)
There is not necessarily a par time for this drill; the focus is on moving and shooting.
Due to the movement required, it is wise to practice without live ammo a few times. I run this drill with my Mantis Blackbeard system fairly frequently and get a lot of practice even without live ammo.
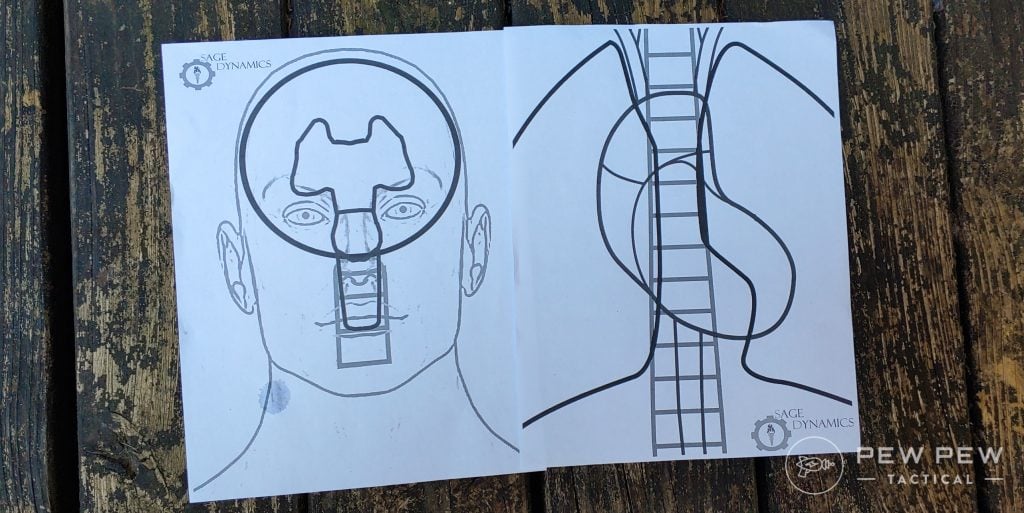
8. Sage Dynamics Eleanor
Aaron Cowan at Sage Dynamics was a driving force in the widespread acceptance of optics on duty and defensive handguns.
Aaron Cowan is at the forefront when it comes to pistol optics, including his widely accepted and referenced durability tests. (Photo: Locked Back)
He’s a soldier and law enforcement officer that now spends his time educating the masses on firearms.
Today we are talking about a drill he devised specifically for handguns and rifles with red dots, although it’s also applied to rifles.
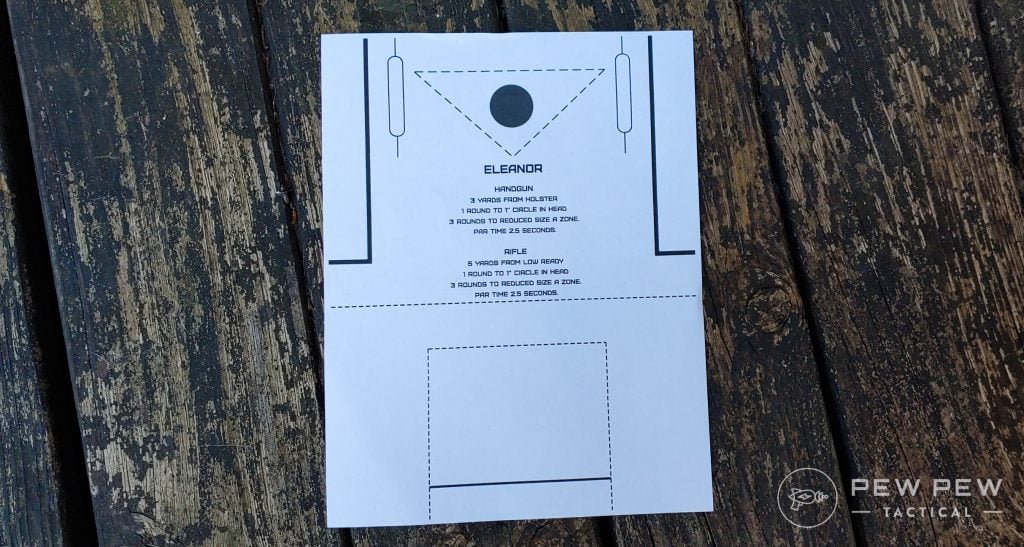
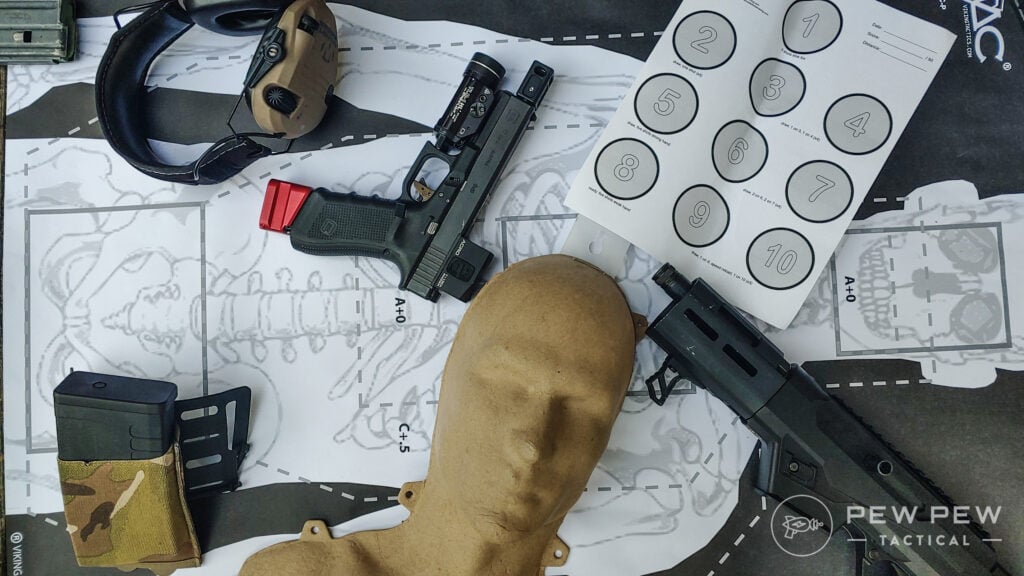
The drill is called the Eleanor and requires you to be both fast and accurate at very close range. It requires a specific target, which is free to print from the Sage Dynamics website.
The target for this drill is free and easy to print, making this drill relatively low-cost and easily accessible.
The idea behind the drill is to practice rapid close-range shooting with excellent accuracy while also being aware of the height over bore issues with a red dot. Depending on your platform, the drill may change slightly.
With a rifle, you fire at five yards from the low ready. With a handgun, you fire from three yards from a holster. For both styles, you’ll need a magazine loaded with four rounds, a shot timer, and the Eleanor target.
At the beep, you’ll shoot the dot in the top of the target with a single round, then transition to the reduced size A zone (aka the square) and fire three rounds into it. Par time is 2.5 seconds to land those four shots.
This drill can be quite a challenge. I’m not ashamed to say I failed it several times and only barely passed when I eliminated concealment as part of the drill.
It’s fast and requires you to remember that height over bore issue and land those shots with a good degree of accuracy.
9. Shoot Two – Load Two
Even in the most kitted-up combat shotguns, you are likely only getting nine rounds or less. So, it’s essential for any shotgunner to know how to reload their weapon.
The S&L drill helps shooters master how to load a shotgun in the middle of using it.
A shotgun’s tubular magazine is an advantage since you can constantly load the gun as you shoot. Being a speedy reloader is the key to mastery.
Mossberg Retro Shotguns loading
Place any target downrange, and start 10 yards from it. I prefer to use clay pigeons set on the berm for shotgun training. Shotguns rip targets apart, so paper targets are kind of not needed. Clay pigeons explode and are fun to shoot.
You’ll need at least five shotgun rounds — Three in the tube and two secured outside of the shotgun to load the gun.
Shoot two rounds, reload two shells.
You want to reload with your non-dominant hand and keep the shotgun pointed at the targets.
The key to this drill is repetition. The faster you get, the better.
A way to measure your progress is by keeping time. Shoot two, reload two and observe your time.
Accessories to Maximize Training
I’ve mentioned a few accessories above, and I want to go ahead and double down on just how handy they are.
These tools will make it a lot easier to train and ensure you get the most out of your training.
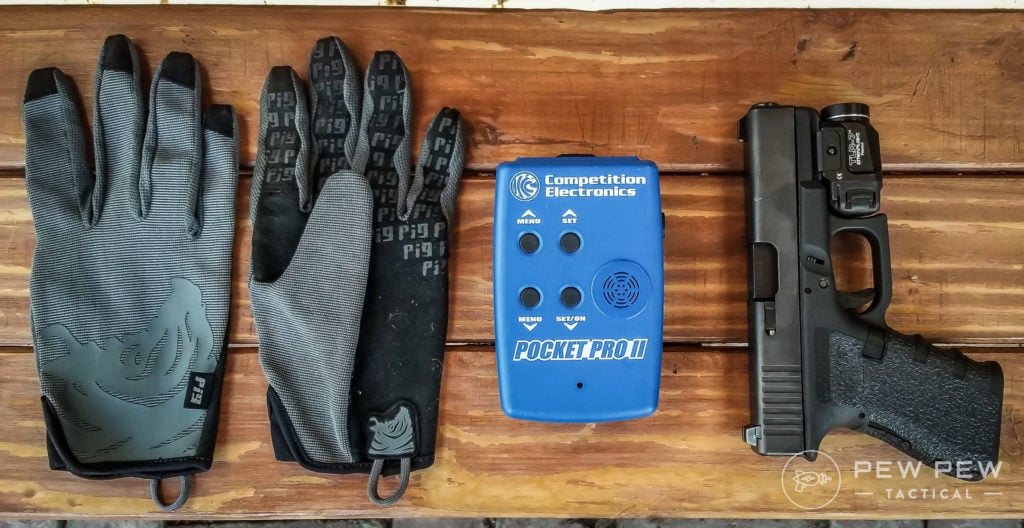
Shot Timer
A shot timer is an invaluable tool for tracking your skills and ability to shoot.
Sure, a target makes it possible to see how accurate you are, but a shot timer shows how fast you are. You can record the data and track your progress.
Shot Timer and Gear
A shot timer also adds stress to your shooting, making you work to overcome that stress.
If you can’t afford a shot timer, there are several apps that function decent enough. They aren’t perfect, but they’re better than nothing.
See our round-up of the Best Shot Timers!
Good Targets
While just about any target can work, I prefer targets that resemble an actual opponent. This makes it easy to determine how I’d deal with a real defensive situation.
Best Targets
For a round-up of our faves, see the Best Targets & Stands.
Snap Caps
Snap Caps are invaluable training aids in general — be it dry fire, basic firearm safety, or inducing malfunctions. These rounds are quite distinct from actual rounds but are built perfectly to the spec of a real cartridge. Snap Caps are cheap, easy to find, and are made for nearly any caliber imaginable.
Our faves are below:
A-Zoom 12 Gauge Snap Caps
9mm Luger Snap Caps
.223 Remington Snap Caps
But we also have an entire article dedicated to the Best Snap Caps for you to look at.
Final Thoughts
When it comes to training, remember that success is not measured overnight. You tend to get better in increments. Be patient and keep training.
Practice makes better!
For more on basic drills to do at the range, check out the Brownells’ Daily Defense videos below.
Or, for some basic rifle mounting exercises, check out this other video from Brownells.
Or check out the TC Drill below.
Got drills of your own…or any of your favorites we’ve missed? Let us know in the comments below. And if you’re looking to save some money on ammo, check out the Best Low-Round Count Drills and our guide on Dryfire Training.
“Discover the Art of Air Rifle Break-In: Unlocking Optimal Performance with Expert Tips and Techniques. Master the essential steps to properly break in your air rifle, ensuring longevity, precision, and enhanced shooting experience. Unleash its true potential and achieve unparalleled accuracy with our comprehensive guide.”
air rifle break in
When purchasing a new air rifle, it is important to understand the concept of break-in. Just like any mechanical device, an air rifle needs to go through an initial period of use to ensure optimal performance and longevity. This process, known as break-in, involves shooting a certain number of pellets through the gun to allow the components to settle and work smoothly together.
During the break-in period, it is recommended to shoot a variety of pellets and avoid using high-powered or heavy pellets that could potentially damage the gun. The goal is to gradually increase the power and accuracy of the rifle while allowing its internal parts such as the piston seal and spring to settle into their proper positions. It is advised to clean and lubricate the air rifle regularly during this phase to maintain its performance.
By properly breaking in your air rifle, you can expect improved accuracy, reduced vibration, and increased longevity. It allows all the moving parts within the gun to mesh properly, ensuring smooth operation. Neglecting this crucial step may result in subpar performance and potential issues down the line. Taking the time for a thorough air rifle break-in will pay off in terms of consistent accuracy and overall satisfaction with your new firearm.
In conclusion, it is essential to properly break in an air rifle to optimize its performance and longevity. Following the manufacturer’s guidelines and using high-quality pellets during the break-in period will ensure smooth operation and accuracy. By investing time in this process, shooters can enjoy a reliable and efficient air rifle experience.
In the vast expanse of the animal kingdom, power is often exemplified not just by size or speed but by the sheer force of an animal’s bite. This force, a lethal combination of anatomy and strength, defines an apex predator’s ability to capture and consume prey, assert dominance, and even defend territory.
Among the impressive list of creatures with formidable jaws, the lion, often dubbed the ‘King of Beasts,’ holds a respectable position. But where exactly does this majestic big cat stand in the rankings of the strongest bite forces in the animal world?
At its core, bite force is a measure of the pressure exerted by an animal’s jaws when biting down. Think of it like the pressure one might feel when pressing down on something using one’s hand, but in the case of animals, particularly with powerful jaws, this pressure is exponentially greater and can be the difference between life and death in the wild.
This force is often measured in units called PSI (pounds per square inch) or kg/cm², which gives an understanding of how much force is applied over a particular area.
Several factors play a crucial role in determining an animal’s bite force. The jaw structure is paramount; the mechanical advantage provided by the length and shape of the jaws, along with the placement of the teeth, can significantly impact bite power. Next, muscle power is essential.
Strong, robust muscles surrounding the jaw allow for a more forceful clampdown. Finally, the teeth anatomy complements bite force. In lions, for instance, their long and sharp canine teeth are designed to pierce and hold, while their carnassial teeth at the back help in shearing flesh off the bone.
The Lion’s Bite Force: Numbers and Comparisons
When it comes to raw power, the lion’s bite force is a force to be reckoned with. Adult male lions have a bite force that averages around 650 PSI (or approximately 45.86 kg/cm²). To put this in perspective, it’s a force more than enough to crush a human skull or snap a spine. However, as with many things in nature, everything is relative.
Compared to other animals, especially other big cats, the lion’s bite isn’t the strongest, but it’s specifically adapted for its hunting needs and lifestyle. For example, the jaguar, renowned for its ability to pierce through skulls and turtle shells, has a bite force even stronger than that of a lion.
To offer a clearer picture, let’s compare the lion’s bite force with other big cats and notable African savannah predators:
Comparison Table: Bite Force Among Various Animals
AnimalBite Force (PSI)Bite Force (kg/cm²)Lion65045.86
It’s evident from the table that while the lion’s bite is formidable, some animals, particularly the crocodile and jaguar, possess even more powerful jaws. However, it’s crucial to remember that bite force is only one aspect of an animal’s hunting and defensive capabilities.
Anatomy Behind the Bite
A closer look at the lion’s anatomy reveals why it possesses such a powerful bite. The lion’s skull is robust, with a broad muzzle providing ample space for large jaw muscles. The temporalis and masseter muscles, primarily responsible for the up and down movement of the jaw, are well-developed in lions, allowing them to exert immense pressure when they bite.
Furthermore, a lion’s canine teeth, measuring up to 10 cm in length, are not just for show. These sharp, conical teeth are designed to pierce deeply into the flesh, effectively clamping onto prey. Once the lion has a firm grip, its powerful neck muscles come into play, allowing it to drag or even suffocate larger prey.
Behind the canines, the carnassial teeth play a critical role. These are specialized molars and premolars that work like scissors, cutting flesh as the lion chews, ensuring that meat is sheared off the bone and consumed efficiently.
All these anatomical adaptations combined, from the skull structure to the muscle placement and teeth design, make the lion’s bite a potent tool, tailored for its life in the wild.
Why is a Strong Bite Crucial for Lions?
A potent bite is more than just a show of strength for lions; it’s a survival tool. In the unforgiving landscapes of the African savannah and the limited regions of India where Asiatic lions reside, every hunt counts.
A lion’s strong bite ensures it can efficiently penetrate the thick hides of its prey, typically large ungulates like wildebeest or zebra. Once the lion latches onto its prey, the bite force aids in suffocating it, a common technique employed by these big cats.
Beyond hunting, a robust bite plays a crucial role in the social dynamics of lion prides. Males frequently spar for dominance and control over a pride, and in these disputes, displaying a powerful bite can be a deterrence or a weapon.
Additionally, territorial clashes between different prides or nomadic lions can get fierce, with bite force playing a significant role in establishing dominance and securing territories.
Bite Force vs. Killing Technique
While the bite force of a lion is certainly impressive, it’s only a part of the equation when it comes to hunting success. Lions, unlike some other big cats, often rely on teamwork and strategy. Once prey is isolated and ambushed, lions use their weight and strength to knock it down.
The actual killing technique usually involves suffocating the prey by biting down on its throat or sometimes its mouth and nose, cutting off air supply. This method contrasts, for instance, with jaguars that employ their superior bite force to pierce the skull or brain of their prey, ensuring a quick kill.
Similarly, cheetahs, despite having a weaker bite force compared to lions, rely on their unmatched speed and agility to chase down prey, using their bite to strangle and incapacitate.
It’s evident that while bite force is a significant factor, the technique and strategy employed are just as crucial, if not more, in determining hunting success.
Frequently Asked Questions
Learn More About Lions
Lion: Characteristics, Diet, Facts & More [Fact Sheet]
Lion Teeth: Nature’s Deadly Arsenal
Lion vs. Elephant: Interactions & Confrontations of Two Heavyweights
Lion vs. Crocodile: Confronting Two of Nature’s Titans
Mountain Lion vs. Lion: Main Differences & Who Would Win a Fight?
Lion vs. Lioness – How Do They Differ and What Are Their Roles in The Pride?
Komodo Dragon vs. Lion: Detailed Comparison & Who Would Win a Fight?
Lion Sleep Patterns: How Many Hours Do Lions Sleep?
")
")
")
")
")