Splitting wood is a common task for homeowners who use wood for heat or various outdoor projects. Having the right tools for the job is essential, and one of the most critical tools is a splitting axe. A maul or splitting axe is ideal for larger logs and hardwoods, while a splitting maul is better for knotty or thick wood. A traditional axe offers versatility and precision for smaller logs or softer wood, and a double-bit axe is less commonly used for wood splitting. In this blog, we will explore the different types of axes available for splitting wood and help you determine which is best suited for your needs.
A splitting axe is a heavy, wedge-shaped axe for splitting wood. It typically has a long handle, usually between 28-36 inches, and a heavy head, weighing up to 10 pounds. The head is often wider and flatter than a traditional axe, with a blunt, rounded edge designed to deliver maximum force and easily split wood. The long handle provides leverage, allowing you to generate more power with each swing and split wood more efficiently.
A maul, or splitting axe, is ideal for splitting larger, hardwood logs that are difficult to handle with a regular axe. The weight and wedge-shaped head make it effective for splitting wood along the grain, allowing you to separate logs into smaller pieces with minimal effort. Due to its weight and size, it may not be suitable for smaller logs or tasks that require more precision.
Splitting Maul
A splitting maul is another type of axe for splitting wood. It looks similar to a splitting axe, with a heavy head and a long handle, but it typically has a more pronounced wedge shape with a sharper edge. The sharp edge allows the splitting maul to penetrate the wood more easily, making it suitable for splitting logs with knots or thicker boards.
A splitting maul is ideal for splitting large logs or logs with knots that may be challenging to cut with a regular axe. The sharp edge helps create a clean split, and the head provides the necessary force to split the wood effectively. Like the maul or splitting axe, a splitting maul may not be as suitable for smaller logs or tasks.
Traditional Axe
A traditional axe, also known as a felling axe or a chopping axe, is a versatile tool that can be used for several tasks, including splitting wood. It typically has a shorter handle, usually 24-28 inches, and a narrower, sharper head than a maul or splitting axe. The head is designed for cutting across the grain rather than splitting along the grain.
A traditional axe can split smaller logs or softer wood with more precision than a maul or splitting axe. Due to its smaller size and narrower head, it may require more effort and multiple swings to split larger logs or hardwoods.
Double-bit Axe
A double-bit axe has two cutting edges on the same head, with a blade on each side of the axe. This axe is less commonly used for splitting wood and is typically used in forestry or logging applications. The double-bit design allows for versatility in cutting from both sides, but it may not be as efficient or suitable for splitting wood as other types of axes.
Safety Considerations
Remember to prioritize safety when using an axe for wood splitting. Wear appropriate protective gear such as gloves, safety goggles, and sturdy footwear. Properly maintain your axe by keeping it sharp and in good condition. Always use proper technique and caution when swinging the axe to avoid injury.
Conclusion
Ultimately, the best type of axe for splitting wood will depend on your specific needs, the wood you are working with, and your personal preference. Consider the size and type of logs you will be splitting, as well as your physical ability and comfort level with different types of axes. With the right axe and proper technique, you can make wood splitting a breeze and enjoy the benefits of a well-stocked woodpile for your heating or outdoor projects.
“Unleash your precision with the 22 cal air rifle 1400 fps: Experience unparalleled accuracy and power with our cutting-edge air rifle. Achieve incredible velocities of up to 1400 feet per second, ensuring superior performance for your shooting needs. Discover the perfect balance between control and force, making this rifle a must-have for any shooting enthusiast.”
22 cal air rifle 1400 fps
When it comes to power and precision, the 22 caliber air rifle with a velocity of 1400 feet per second (fps) stands out from the rest. This high-powered air rifle is designed to deliver exceptional accuracy and efficiency for shooting enthusiasts. Whether you are a seasoned hunter or a target shooter, this rifle offers the perfect combination of speed and accuracy to enhance your shooting experience.
The 22 cal air rifle with a velocity of 1400 fps is ideal for small game hunting and pest control. With its impressive muzzle energy, it can take down varmints and pests swiftly and humanely. Additionally, its high velocity allows for an extended effective range, making it suitable for longer distance shots. The precision-engineered rifling ensures consistent shot placement, allowing you to make accurate shots even at challenging distances.
Moreover, this air rifle is equipped with advanced features that enhance its performance. It may include features such as adjustable triggers, noise reduction technology, ergonomic stocks, and easy-to-use safety mechanisms. These features not only improve your shooting experience but also contribute to the overall comfort and convenience while handling the rifle.
In conclusion, the 22 cal air rifle with a velocity of 1400 fps offers superior accuracy and power for various shooting applications. Its high velocity ensures precise shots and efficient target penetration. With its compact design and ease of use, this air rifle proves to be a reliable choice for both beginners and experienced shooters alike.
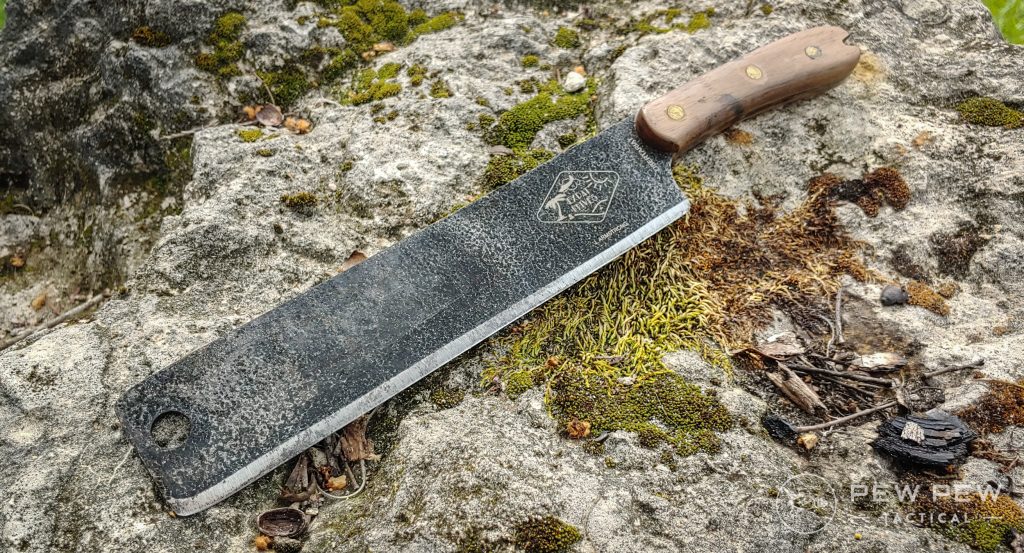
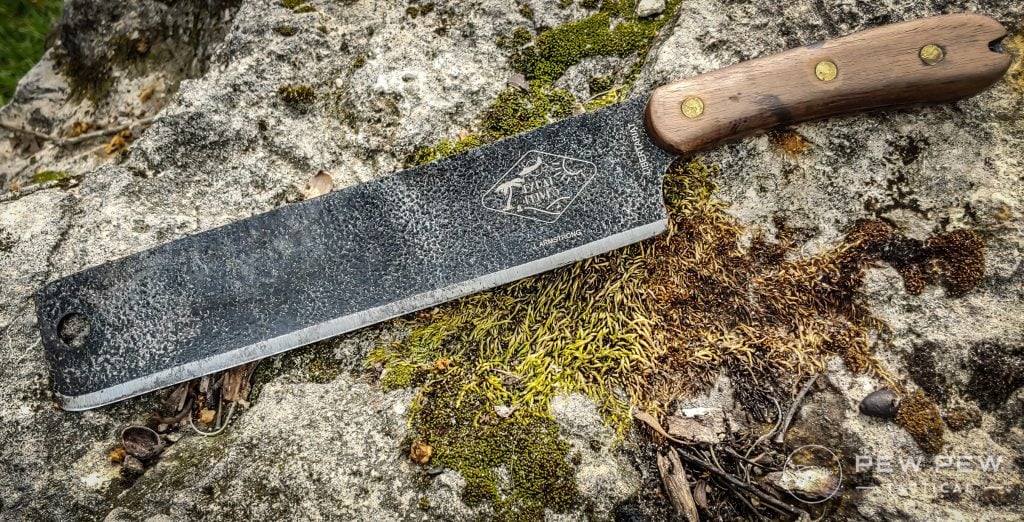
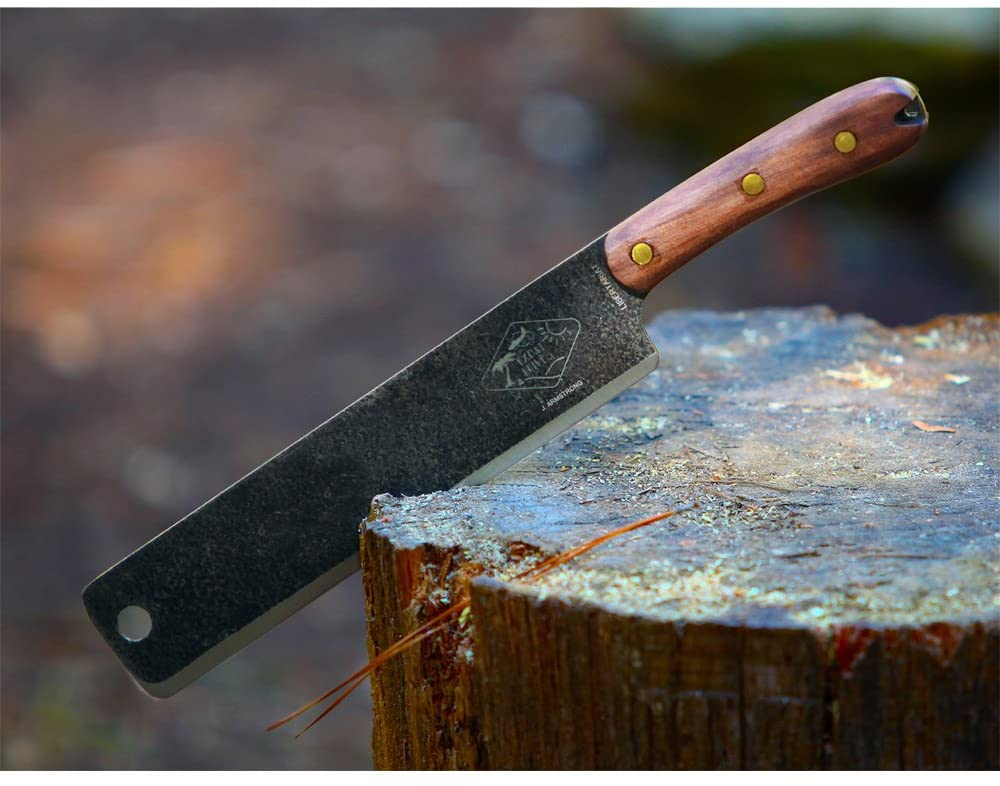
I won’t rattle on and on about the intricacies of choosing the absolute perfect machete. But I do have some tips to ensure you get your money’s worth.
Blade: Blade length will vary depending on your task. Long machetes provide a longer reach and more weight behind your swing. They tend to be best for thick brush but are heavier and take up more room.
Compact machetes are way easier to carry while hiking, patrolling, or doing primitive camping. They still provide a slasher versus a regular blade but expect to do more work.
Are you going to be waking limbs? That might dictate a specific kind of blade
I like machetes with round tips that do better when smashing through thick vegetation — Pangas, bolos, and Latin-style blades.
Steel: Carbon steel blades provide a balance of cost-effectiveness and functional material. They get nice and sharp and hold an edge for quite some time.
It’s all about what you want to do with it.
Carbon steel can be vulnerable to rust, so keep the blade oiled or make sure it has a corrosion-resistant finish.
Handle: I like a good soft handle that provides a good grip. Most machete handles are functional but rarely super comfortable.
You’ll get blisters fast but handles like the Gerber Gator’s help a fair bit. Ultimately, you want a rounded handle that absorbs some shock.
7 Best Machetes
1. Gerber Gator Jr.
If you deployed to Helmand Province, Afghanistan, in the 2009 to 2011 push, you likely carried or knew someone who carried the Gerber Gator Jr.
This machete became a quick favorite for Marines deploying.
Favorite
Why? Well, it was at the PX and super affordable. Not to mention, this deployment was more primitive than previous ones to the urban areas of Iraq.
The Gerber Gator Jr. was also one helluva awesome machete.
I didn’t bring one, but several of my squadmates did. I now own one after using it overseas.
The Gerber Gator Jr. is the smaller variant of Gator and packs a hefty blade covered with a reverse sawback that doubles its utility.
Gerber Gator Jr.
I use my Gerber Gator Jr. around the house almost every other weekend.
It’s a short and handy tool that cuts through brush both thick and thin. The sawback allows you to chop hefty branches and wood.
I’ve taken down several small trees without much difficulty.
The handle is a soft material called Gator Grip Overmold.
It’s extremely comfortable and helps you resist hot spots, blisters, and sore hands after a day of chopping.
The compact size also makes it relatively easy to carry and pack in and out of the great outdoors.
2. Outdoor Edge Brush Demon
The Brush Demon is an appropriate name for this machete.
Oddly enough, it satisfies my sword fantasy with its similarities to the Greek Kopis sword.
The Kopis was the sword of the citizen soldier and was a very simple chopping and stabbing tool. Average Greek citizens could wield it necessary.
Experienced Kopis designer Jerry Hossom created the Brush Demon, and it’s good.
The blade feels heavy and features a slight inward curve. So, this thing is an eater of weeds, palmettos, and saplings – chewing through without remorse.
Brush Demon
At 13.5-inch, the lightweight blade is efficient and reduces the effort you need to finish the job.
The Brush Demon grants you a good deal of control, making the machete a very precise tool.
It can strip limbs of leaves and scratch away bark to form a stake or spear. On the flip side, you can carve a path through a jungle easily with the tool.
The handle is a Zytel material that’s ‘skin’ molded.
It’s soft and makes for an easy and comfortable grip. No gloves are required, even for the softest of hands.
It also ensures you can control your whacks with a single hand without worrying about a loose grip.
3. ESEE Knives EXPAT Libertariat Machete
If you want a super compact and simple machete, I got you, fam.
The Libertariat just wants to end brush and weeds. It’s also the most compact machete on this list — a hair bigger than a KA-BAR.
Libertariat
Its blade and handle shape make it more of a chopper than a knife.
Made in El Salvador, those fine folks know a thing or two about chopping through jungles.
The Condor blade style makes it easy to use, even though the blade is a mere 9-inches long.
The wood handles and high carbon blade aren’t fancy, but both are proven well for long-term use.
I use the Libertariat almost weekly for chopping the little branches, saplings, and annoying fast-growing weeds from the edge of the property.
It’s so small and light that it rides shotgun on the lawnmower with me.
For the more adventurous type, it offers a blade that takes up minimal space and offers lots of chopping potential.
A short blade means you’ll expend more effort to chop through the jungle, but you’ll expend less carrying it everywhere.
It’s perfect for adventures that you don’t plan to need a machete, but just might.
Have you tried The Libertariat? Give it a rating below!
4. Cold Steel Latin D Guard Machete
Latin America might as well be considered the heartland for machetes.
The simple designs coming from South America have long been awesome designs made to last. And they’re often affordable.
Latin D Guard (Photo: Cold Steel)
Cold Steel adapted the Latin design and the famed D guard handguard.
The D guard is a fully enclosed handguard that works well with the Latin’s 24-inch blade. (There’s also an 18-inch variant available.)
Users can swing the machete broadly to create a path without worrying about losing their grip. The machete won’t fly into the woods if your hand tires or grip slips.
Not only is this great for tool retainment, but also safety’s sake. A wild machete is never a good thing.
This is a true jungle machete that would serve Rambo well in the jungles of Vietnam. The traditional machete-style blade allows it to whack through both thick and thin materials.
A carbon steel blade means it will take abuse and resist chipping and breaking after years of heavy use.
The propylene handle is quite comfortable, helping your hands stay soft and free from blisters.
Old, calloused hands will still appreciate the handle design because blisters suck for everyone.
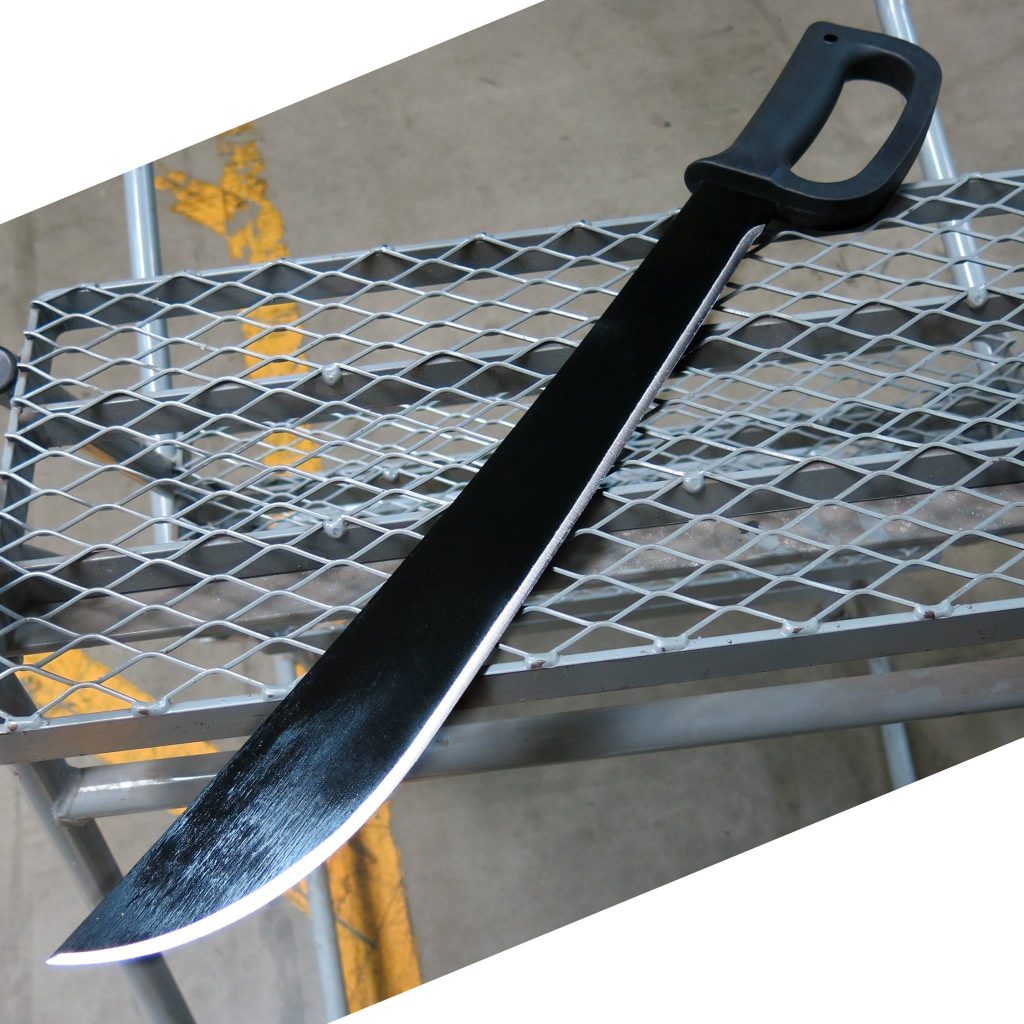
5. Ontario Knife Company Military Machete
Do you just want to keep things simple? I hear you.
The Ontario Knife Military Machete is incredibly simple, providing you the same machete issued to military troops.
I saw this exact machete in the armory, and eventually, it was issued to our team 2-point man.
Ontario Knife Company Military Machete
These things took all the abuse a 19-year-old PFC can toss at them…and shrugged it off.
The design isn’t fancy, but it doesn’t need to be to work. The big 18-inch blade design rips through brush and most thin wood.
It’s a true whacker that leads with a big belly and thick blade.
Between this model and the Gerber Gator Jr., we chopped down several small trees outside of our patrol base to open fields of fire and gather firewood to keep warm as Afghan winter set in.
Take that tree!
When used properly, there isn’t much that stands up to the Ontario Military Machete.
The biggest downside is the hard plastic handles. They don’t offer a great grip and can cause quick hot spots and blisters. Wield with gloves for best results.
It’s a classic design that doesn’t pack any fancy features in, but the price tag reflects the simplicity.
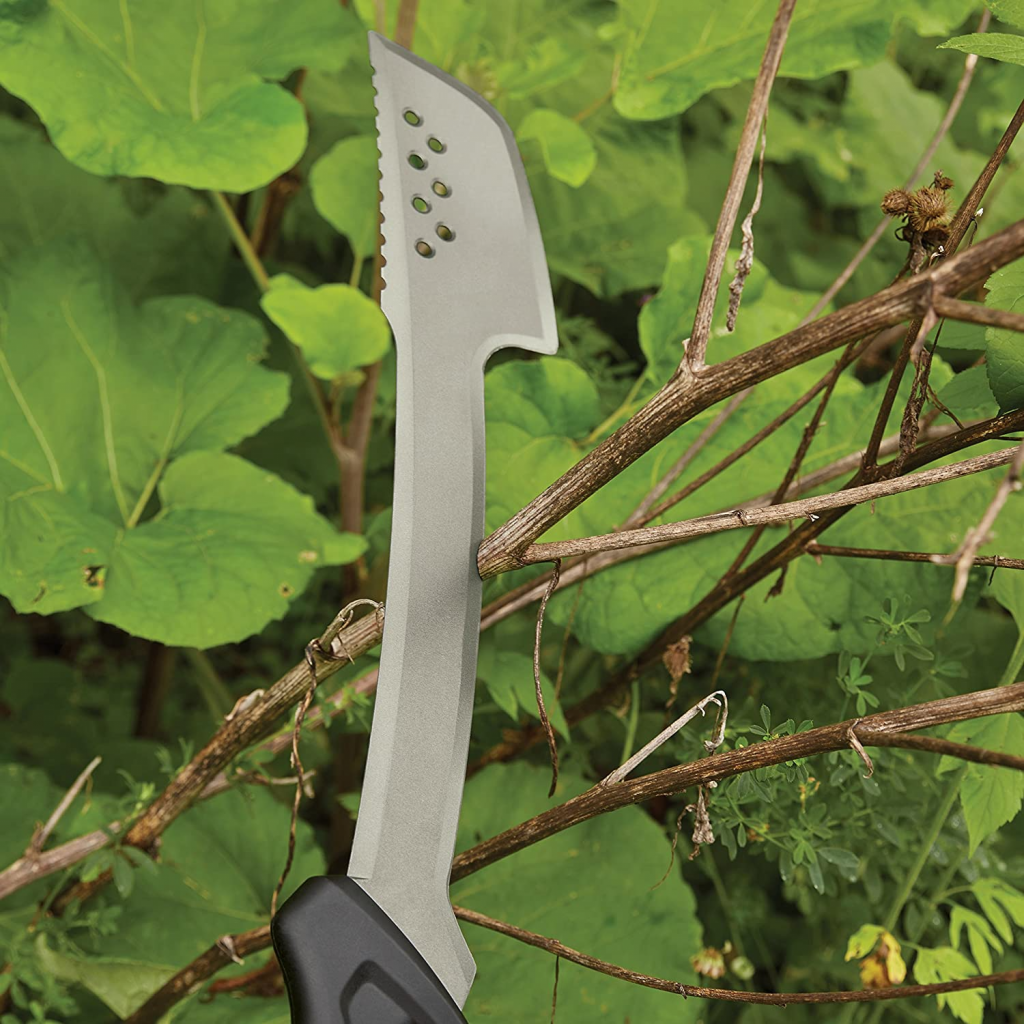
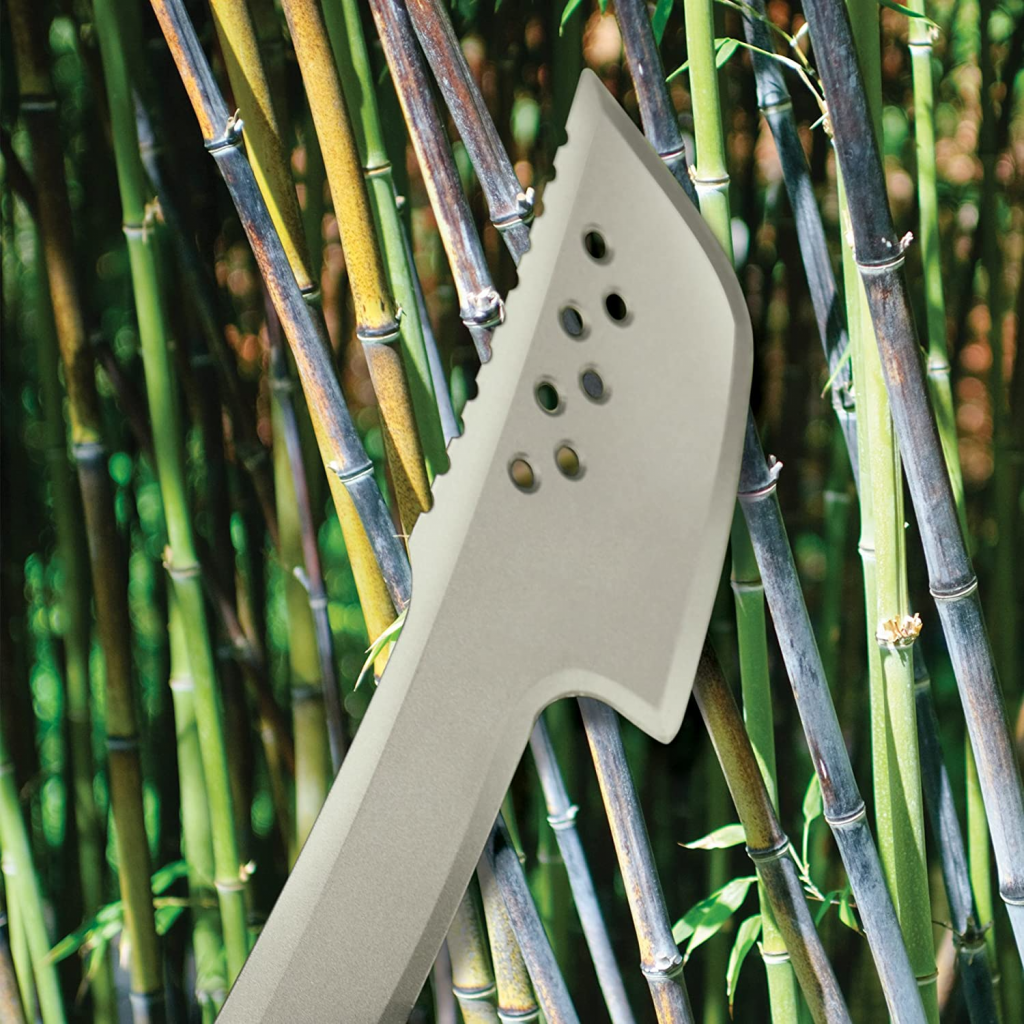
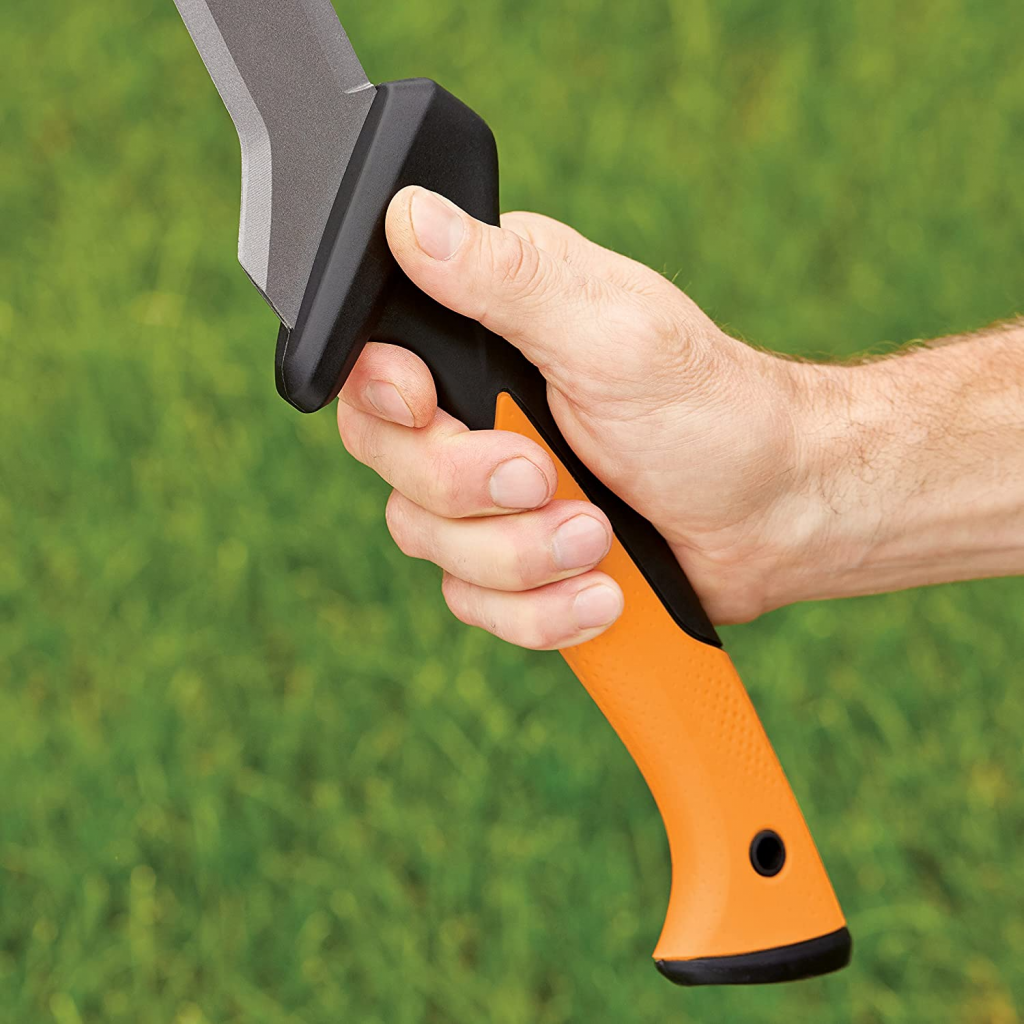
6. Fiskars Machete Axe
What’s better than just a machete? How about a machete ax!
The Fiskars Machete Axe looks like a State of Decay 2 melee weapon but is actually a functional but unique machete variant.
Fiskars Machete Axe
It’s part panga and part ax, and all kick ass.
The Fiskars uses a traditional machete blade for about three-quarters of its length; at the tip, it grows into an ax.
That hefty end gives you so serious swinging power. It will make short work of brush and slightly longer work of saplings and small trees.
Got a thick limb in your way? Well, you won’t after a few swings of the machete ax.
Need to kill some roots? You won’t have a problem making sure they’re dead with the Fiskars.
The rear blade of the ax portion has a saw tooth back for a little sawing in tight quarters. It can’t split wood as well as a regular ax, but it’s much easier to wield when broad slashes are required.
Be warned, it’s a little off-balanced, and it will carry your swing through.
Always make sure you have a clean cutting area because it might be tough to stop the Fiskars mid-swing.
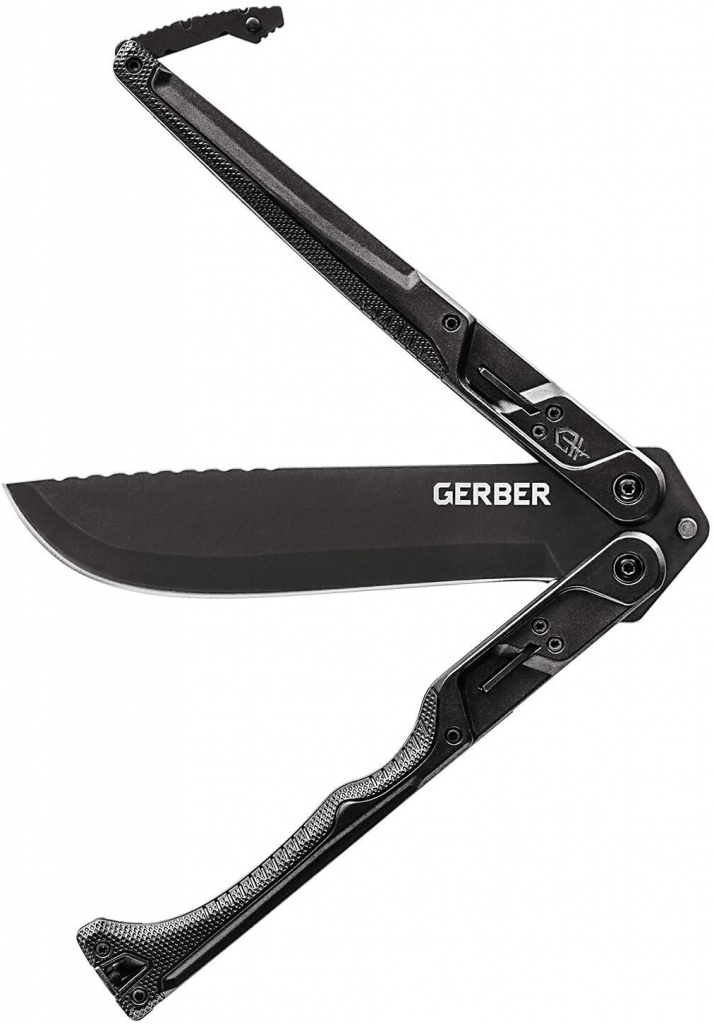
7. Gerber Double Down
My wildcard selection is the Gerber Double Down, and boy, is it a wildcard.
Have you ever seen a machete that’s also a butterfly knife? Well, you have now.
Gerber Double Down
This compact machete allows you to easily trim the size of the machete in half by folding the blade into the handle.
It’s small but made for machete-like tasks. Gerber’s Double Down chops, debarks wood, and will make hanging a tree stand, clearing a path, and trimming away the weeds quite simple.
At the same time, it can fold in half and fit into your back pocket.
Gerber over-engineered the hell out of this thing. They made sure it wouldn’t be fragile for the chopping and cutting.
This massive butterfly knife features a stability guard and overstrike guard.
A four-lock system engages in three different positions to provide the highest amount of safety possible.
It’s not perfect. Not a fan of stainless steel for machete blades, but it is a high carbon stainless steel. So, it’s not that bad.
Second, the $100+ price tag makes it a tough pill to swallow. However, it’s damn sure a cool choice.
Conclusion
Whether you’re heading into the jungle or taming your backyard, machetes are useful tools to have around.
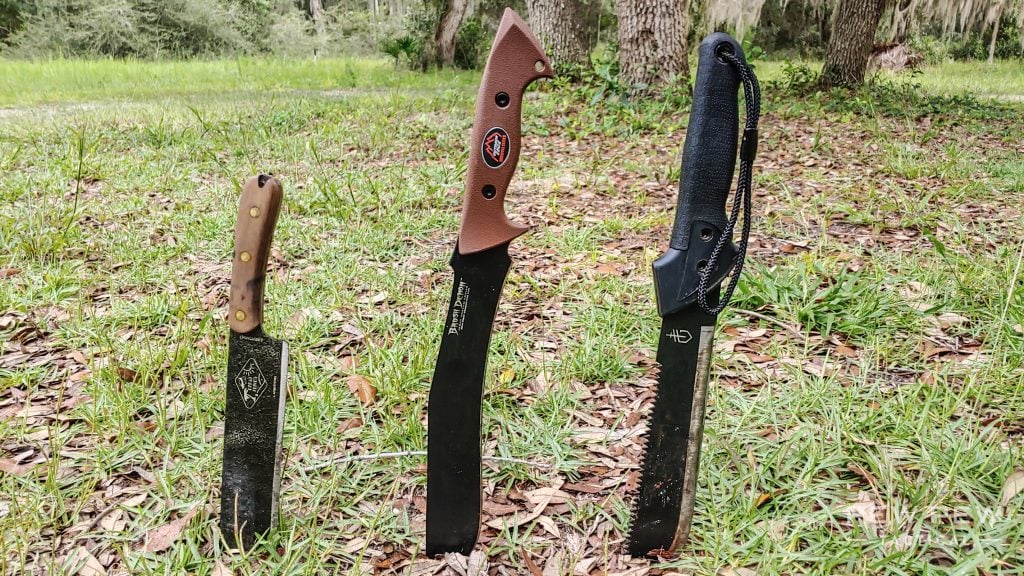
From left to right: Libertariat, Brush Demon, and Gerber Gator Jr.
I’ve tried to narrow the selection down to models I know are worth your attention and time. Hopefully, you’ll find something that works for you!
What do you think about the machetes above? Let us know in the comments below. For more cutting content, check out our Knives Category.
“Deer may not be hunted with the use of dogs, artificial lights, snares, traps, set guns or any firearm using .17 or .22 caliber rimfire cartridges, except that .22 caliber rimfire magnum cartridges are permitted.”
Where are you reading this guide from? Perhaps it’s Wisconsin.
Their law states:
“It is illegal to hunt deer with any center-fire rifle less than .22 caliber, any rimfire rifle, or air gun”
I wouldn’t want to go over all the laws for the different states and countries in the world.
The point is that they are different.
So make sure you know the exact permissions and prohibitions.
This is but a general guide.
Maximum range
Sometimes you need to shoot far.
Sometimes your prey is at close range.
Did you know different airgun types have different maximum ranges?
Here is a generalized breakdown.
Precharged pneumatic airguns – 75 yards – or 69 meters
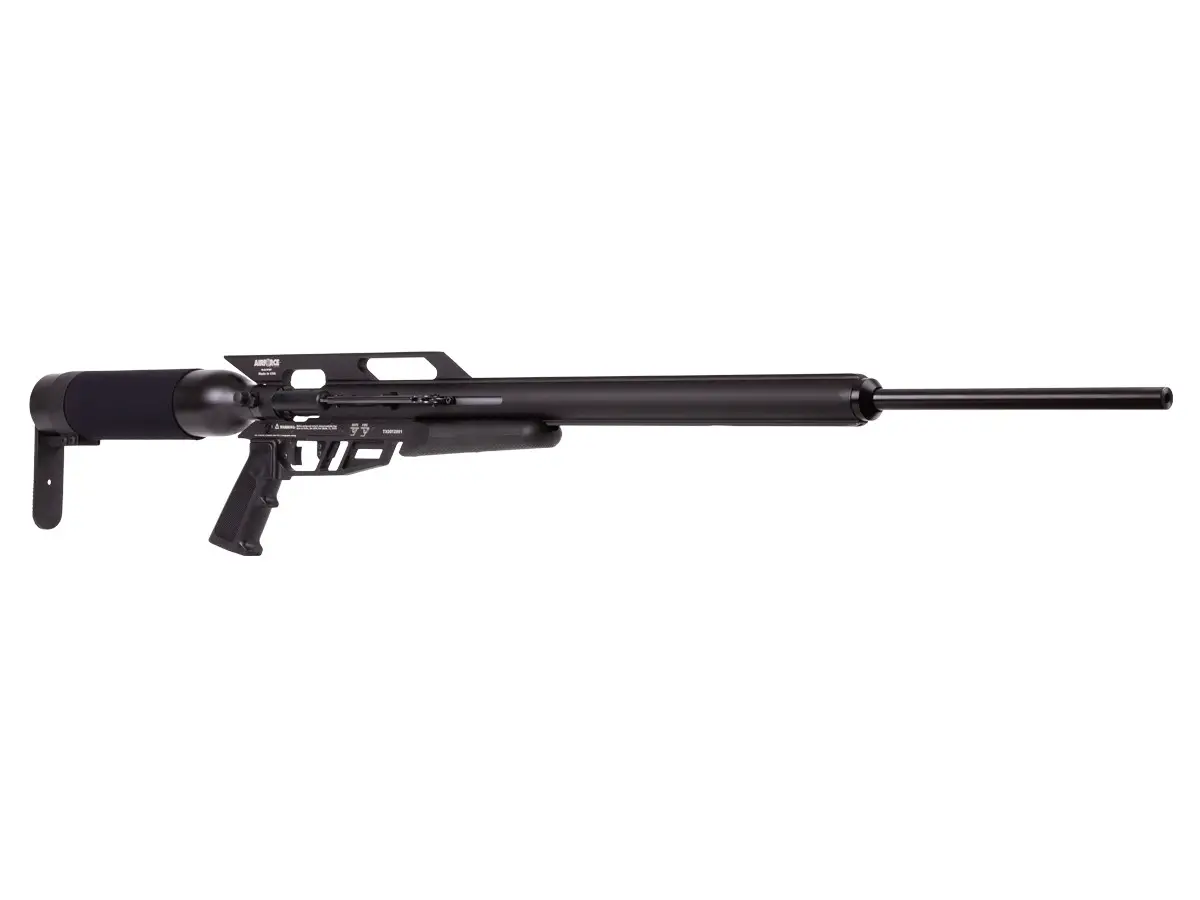
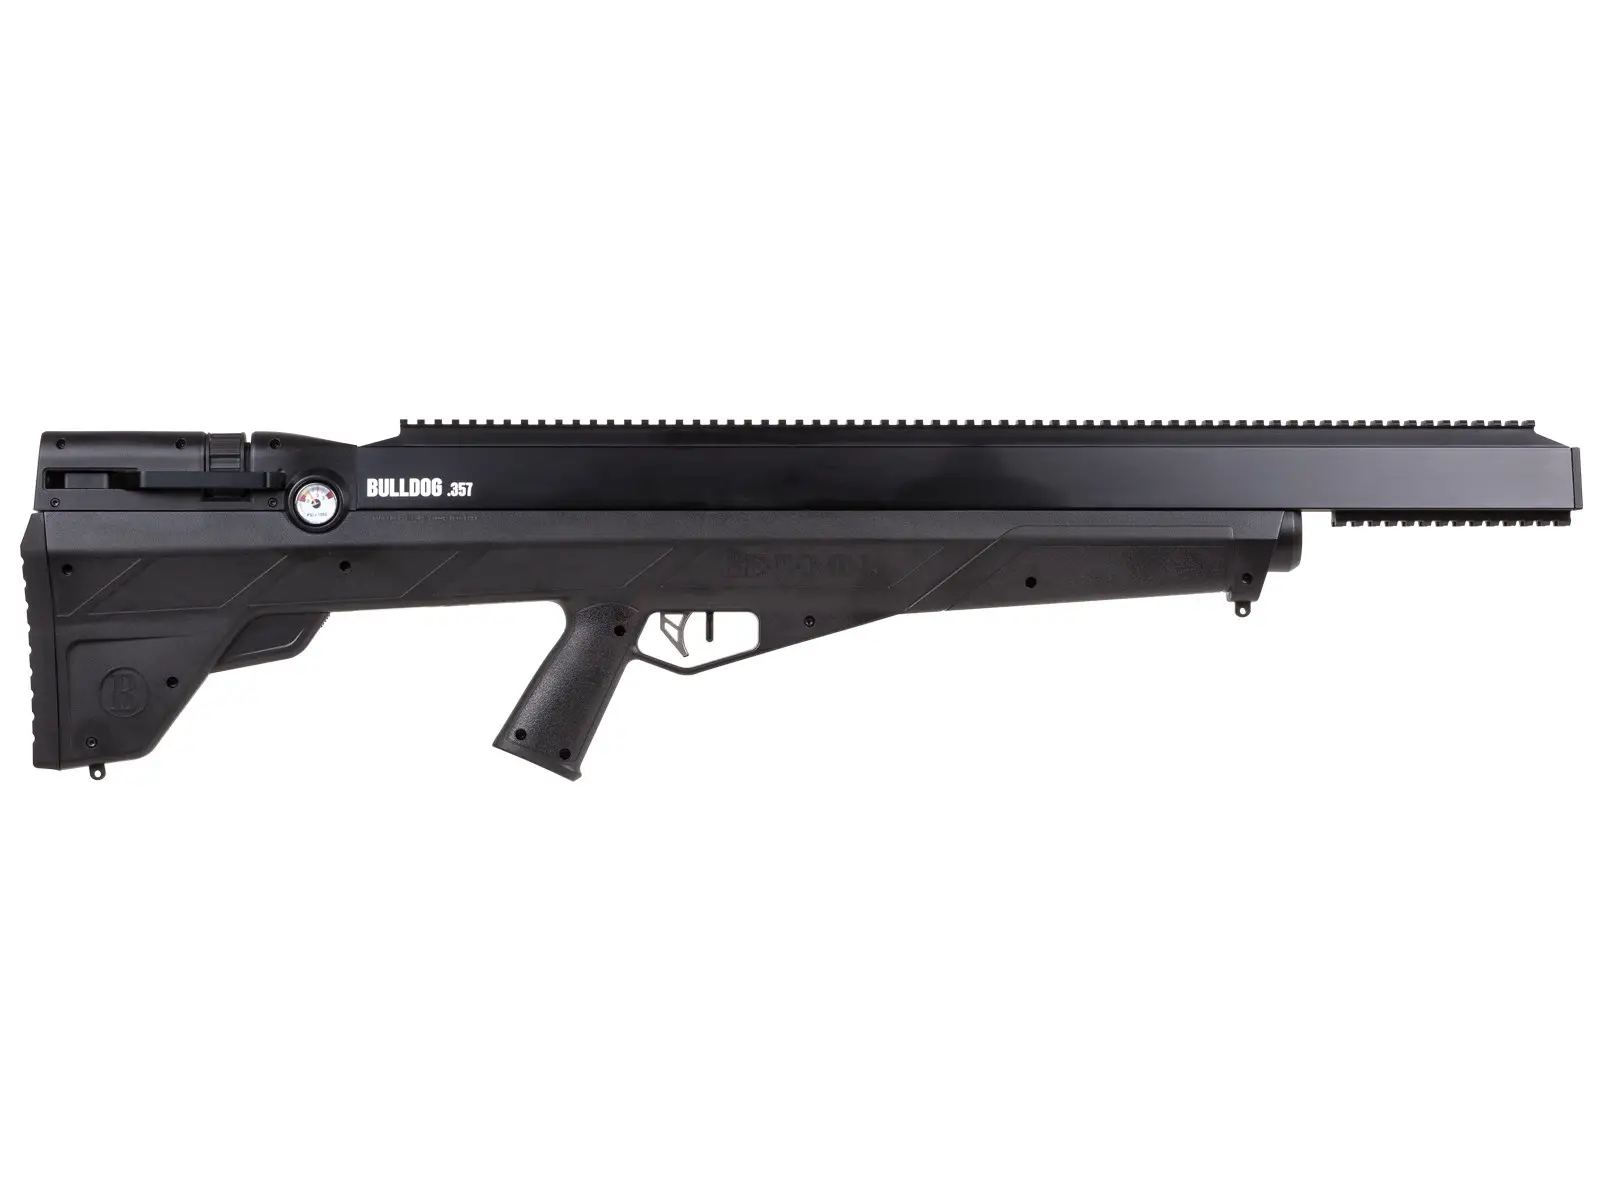
3. Best repeater air rifle for deer: Benjamin Bulldog
Names are sure something to go by.
Bulldog! That’s the name.
And the slogan? Big bite, little bark!
That is the reason thousands of people order it year after year.
Look at the following list of Pyramid Air’s top-selling high-end air rifles for the period 2019 – 2024.
Position
2019
2020
2021
2024
1
Benjamin Marauder
Benjamin Marauder
Benjamin Bulldog
Benjamin Bulldog
2
Benjamin Bulldog
Benjamin Bulldog
Air Arms T200 Sporter
Benjamin Armada
3
Airforce Texan Big Bore
Benjamin Armada
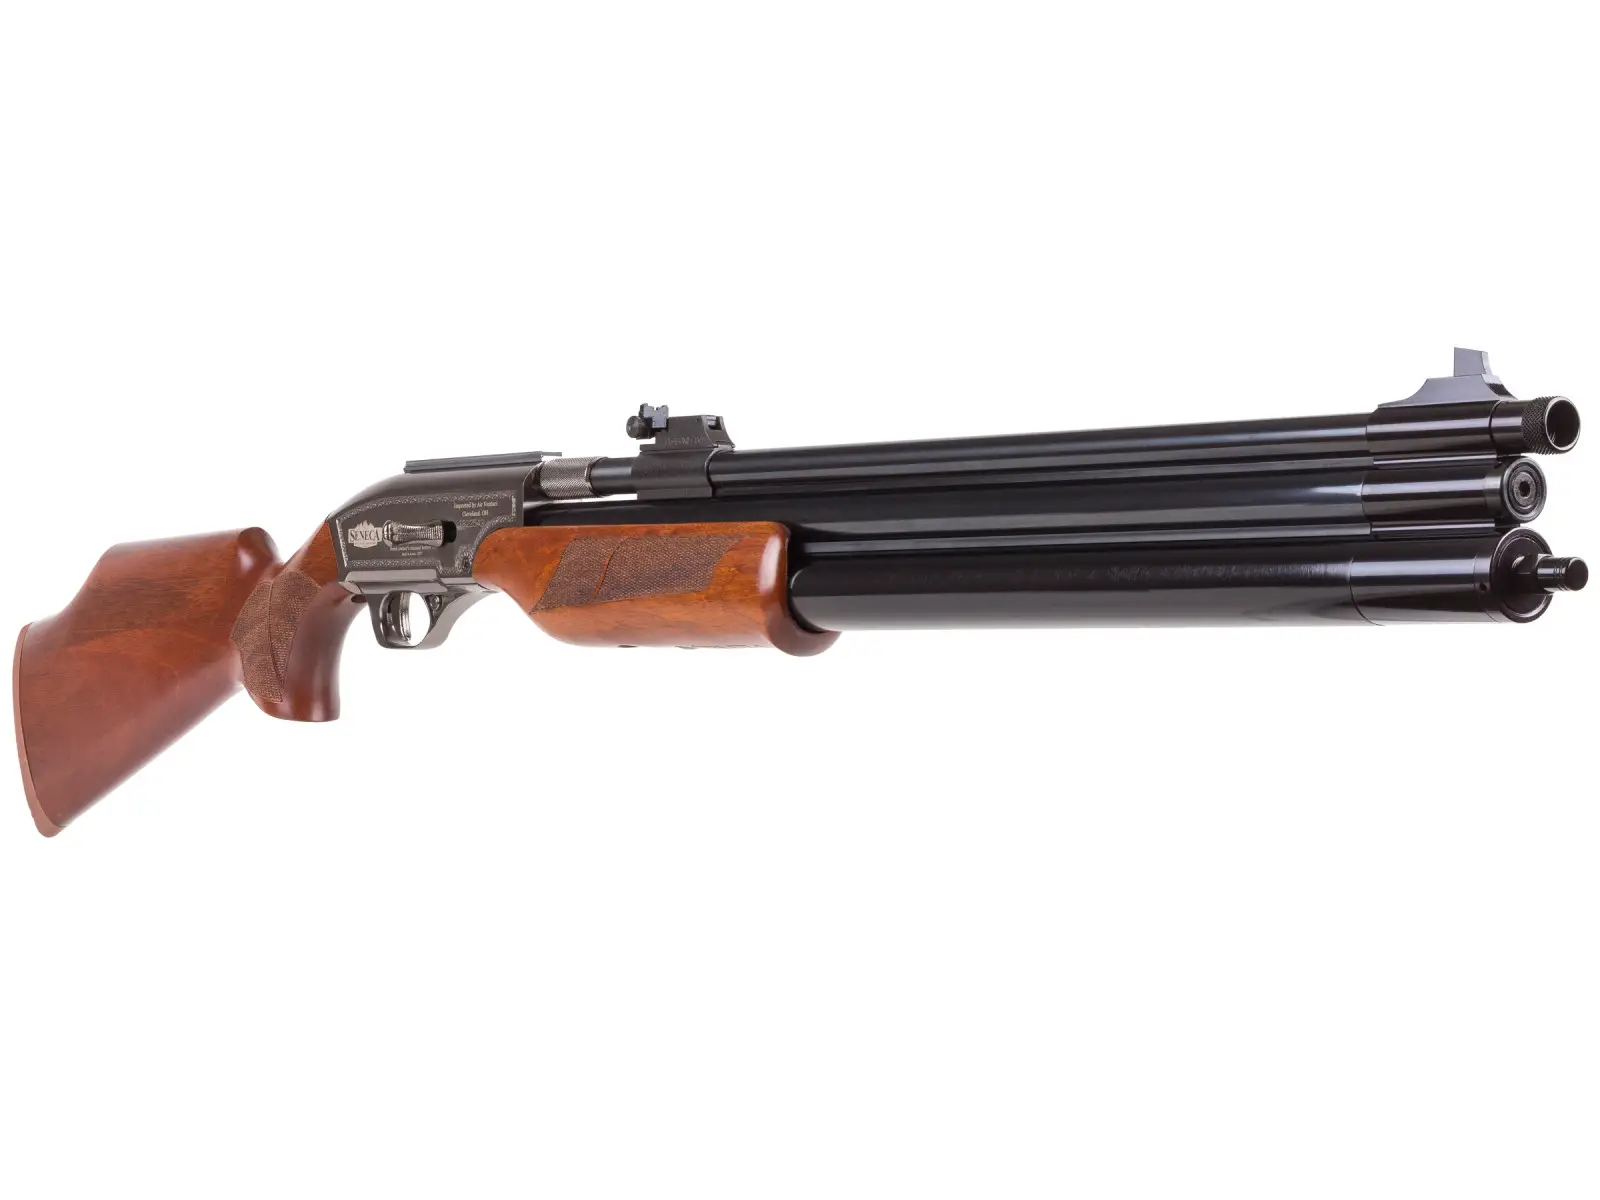
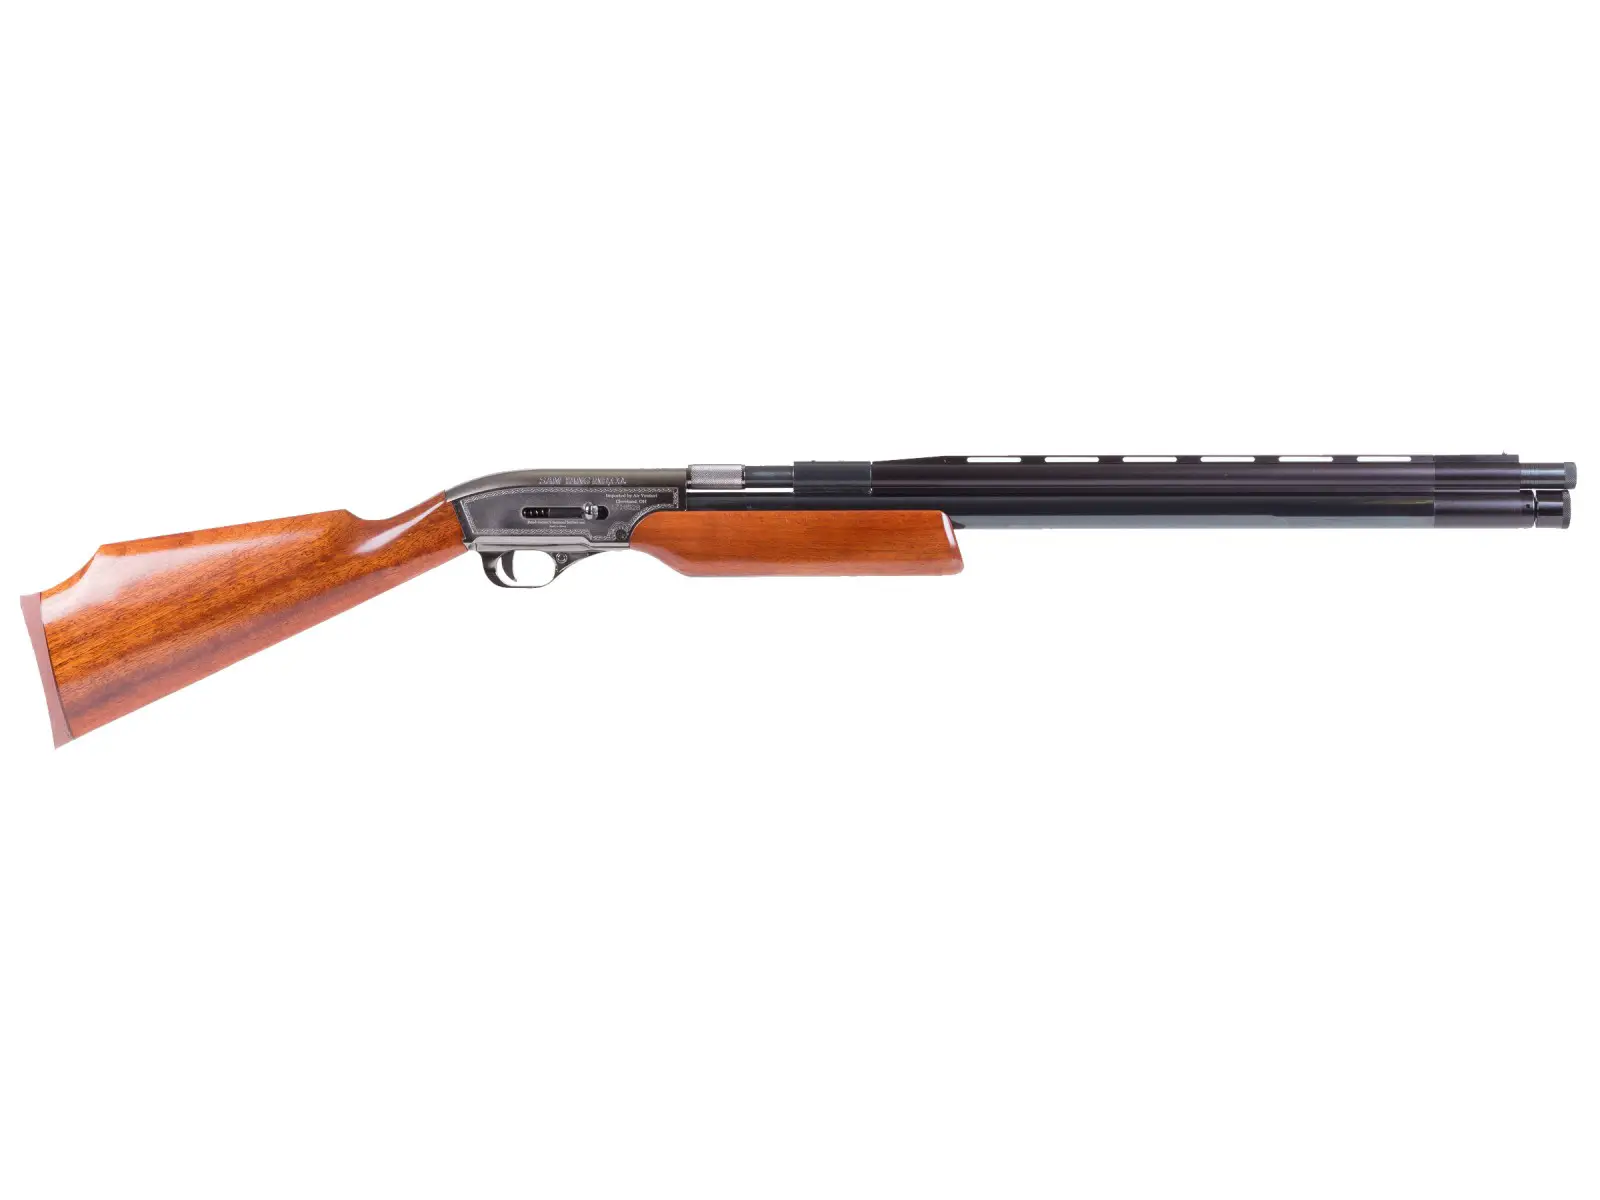
Seneca Dragon Claw
AirForce Texan Big Bore
4
Air Arms T200 Sporter
AirArms TX200
Airforce Texan Big Bore
Air Arms TX200
5
Benjamin Armada
Airforce Texan Big Bore
Benjamin Armada
AirForce Texan SS
6
Sam Yang Dragon Claw
AirForce Condor SS
Airforce Condor SS
Benjamin Marauder Filed & Target
7
Air Venturi Wing Shot
Air Arms T200 Sporter
Air Arms TX200
Seneca Dragon Claw
8
Sumatra 2500
Hatsan Gladius
Seneca Sumatra 2500
AirForce Condor SS
9
Air Arms TX200
Sam Yang Dragon Claw
Seneca Wing Shot II
Seneca Wing Shot II
10
AirForce Condor SS
Air Venturi Wing Shot
Airforce Texan SS
Air Arms T200 Sporter
Starting with the big bite, the .357 caliber gives you the authoritative muzzle energy of 200 FPE.
Your ammo can attain speeds of up to 910 fps.
The air rifle is fairly consistent regarding the speed of the ammo.
See the graph below for deeper insight.
NB:
Testing was done with 81-grain JSB pellet
Starting pressure – 3000 psi
Ending pressure – 1900 psi
Moving on to the little bark, the airgun’s barrel is fully shrouded to reduce the noise levels.
With a rating of 4/5, we cannot claim it is the quiet air rifle on our list, but at least it is quieter than the high-power rifles we already mentioned.
Other features of the Benjamin Bulldog
Ultra-modern bullpup design that trims the overall length and reduces weight
Has numerous Picatinny rails for ease of customization – add as many accessories as you can
Accuracy
Calibers
Pellets
Distances
Groups
.357
H&N Grizzly Hollowpoint 82gr
100 yards
1"
.357
81gr JSB Diablo
50 yards
one hole
.357
Airgun Slugs 142 gr
75 yards
1"
.357
Predator Polymag, .35 Cal, 81.01 Gr
50 yards
1/4"
.357
Neilson Speciality Ammo 110 grain slug
55 yards
1/2"
.357
81gr JSB Diablo
50 yards
one hole
.357
.358 slug of 125 grains
50 yards
0.42"
.357
JSB 81 grain
50 yards
0.5"
Chrony tests
Calibers
Pellets
FPS
FPE
.357
JSB Match Diabolo Exact 81gr
905
147.35
.357
Air Venturi Hollowpoint 95gr
777
127.39
.357
Benjamin Nosler Ballistic Tip 145gr
728
170.68
.357
H&N Grizzly Hollowpoint 82gr
907
149.83
.357
Air Venturi Round Ball 67gr
941
131.77
.357
Benjamin Nosler Ballistic Tip 145gr
731
172.09
.357
Benjamin Nosler Ballistic Tip 145gr
784
198
.357
158 grains pellet
880
271.76
.357
Hollow Point 130 gr
900
233.88
.457
Benjamin Slugs 279 Gr
730
330.22
.457
Seneca 300 gr
703
329.3
.457
Seneca 405 gr
579
301.56
.357
Air Venturi Round Ball 67gr
885
116.55
.357
Air Venturi Hollow point 95gr
794
133.02
.357
H&N Grizzly Hollowpoint 82gr
830
125.47
.457
Hunters Supply 298gr
793
416.22
.457
Slugs 230gr
789
318.01
Recommended uses:
Small/medium/big game hunting: deer, prairie dogs, hogs, coyotes, squirrels, rabbits.
5. Most quiet air rifle for deer: Airforce Texan LSS Moderated Big-bore PCP
AirForce Texan LSS PCP air rifle is a powerful and quiet air rifle that is perfect for deer hunting or target practice.
The CF tank’s 475cc, 250 BAR (approx. 3600 psi) fill pressure and updated TX2 valve help boost the Texan LSS’ maximum muzzle energy from an already whopping 600+ foot-pounds of energy to over 800 FPE (in .50 cal)
And, of course, the slightly smaller, carbon-fiber tank weighs less than its aluminum counterpart, bringing the total weight of the Texan LSS down to a feathery 6.35 lbs.
Features:
.257, .308, .357, .457, and .50 Caliber Lothar Walther Barrel
Velocity: up to 1100 feet per second*
Max Fill Pressure: 3000 psi / 200 bar (Only use compressed air or dry nitrogen)
Safety: automatic on cocking
490cc air tank
Pressure Relief Device
Adjustable Power. See our Manual for more information on how to tune your rifle for the specific ammo used.
Low Effort Side Lever Cocking
Available in Original Black Finish
Chrony tests
Calibers
Pellets
FPS
FPE
.457
Hornady Round Balls 143 Gr
1050
350.16
.257
72 grain bullet
1130
204.2
.457
290 grain
813
426
.457
350 grain
780
473
Recommended uses
Pest control – small/medium/large game hunting: deer, hogs, rabbits, squirrels, coyotes.
When we talk about 40mm, it refers to the objective lens size of your scope.
This lens size can give you a smaller, lighter, and more compact scope tube diameter for your rifle.
I personally like using a 40mm scope because a light transmission at this scope size is already good, especially in brighter contact.
In fact, I can make its performance even better by adding a high-quality glass coating.
You can commonly see a scope with the 40mm objective with the following magnification ranges:
3-9x
9-25x
4.5-14x
4-12x
50mm Scope Overview
I used to think that a larger objective lens meant clearer and sharper target images.
However, even a smaller objective lens with better glass quality and coating can beat a bigger one!
So, having a bigger lens diameter does not necessarily mean an immediate edge.
A 50mm objective lens already lets me see a target BRIGHTLY in a low-light environment.
It also provides good and bright image quality even at a longer distance.
In my experience, a 50mm scope has helped me ACE every shot in all my different shooting activities.
Just like the 40mm, you must complement the advantage of a 50mm scope lens with a high-quality lens coating and glasses.
40mm vs. 50mm: What’s the Difference?
You will not know the difference between a 40mm vs. 50mm lens if you don’t look through the scope’s ocular glass lens.
I used to think bigger is always better regarding objective lenses.
But the comparison between the two revolves around which one can give my naked eye BETTER image quality.
Everyone views their optics differently, and it does NOT depend on the size alone.
The scope glass quality can also help provide better image sharpness and brightness, even if the scope size is smaller.
I’ll compare these scope sizes in different essential categories in the scope world.
Intended Use
The kind of shooting or hunting you will do is important!
For example, if you plan to hunt in the day when light won’t be a problem, a smaller objective lens will suffice.
On the other hand, low-light hunting situations require a larger objective lens to let enough light enter the scope.
WINNER: It depends.
Size
Obviously, 40mm is a smaller objective lens than 50mm.
Thus, it provides you with a lower mount profile for better and more comfortable aiming.
Meanwhile, the 50mm objective lens gathers MORE light and gives additional adjustment clicks for shooters.
However, eye alignment and aiming comfortability might be an ISSUE for some of them.
WINNER: 40mm
Weight Consideration
Since a 40mm objective lens is smaller, it is LIGHTER than a 50mm one.
It only adds a little to your rifle’s total weight.
I preferred moving around with the 40mm scope than the 50mm since I didn’t have to carry too much weight.
A wider objective lens like the 50mm gives EXTRA weight to your rifle scope. Thus, I would not recommend it in this situation.
WINNER: 40mm
Magnification Power
With high-quality glass and coating, a 50mm objective lens diameter can already give you a bright image.
A wide objective lens no longer requires much magnification.
This is especially when you need better sight at a distance in LOW LIGHT. Thus, having a 50mm objective lens is better for a long-range scope.
It is a different story for a 40mm scope lens.
You must mostly use magnification to get a better image quality, especially when aiming at darker times and locations.
WINNER: 50mm
Exit Pupil
A LARGER exit pupil size makes BRIGHTER images.
The exit pupil is the diameter of light that passes through the objective lens to your eyes. It is placed at the back of the eye relief, the closest to the human pupil.
Thus, a 50mm scope has a bigger objective lens, therefore, a bigger exit pupil size than the 40mm one.
You can have brighter images in this manner because MORE light transmission via a larger exit pupil size gets to your naked eye.
WINNER: 50mm
Resolution
Unlike the exit pupil, the resolution does not solely depend on the size of objective lenses.
A bigger objective size is useless if your scope has bad lens coating and glass quality.
The 50mm diameter lens for rifle scopes already provides a brighter image than the 40mm.
But, the latter can still offer a better-aiming image if it is higher in quality than the former.
WINNER: 50mm
Frequently Asked Questions
You may still be curious about this scope size comparison and other relevant information. Check out more details on some common questions below.
Is a 50mm Scope Better Than 40mm?
A 50mm scope for rifles is better than a 40mm one, but not in all contexts.
If both have similar accessories and parts, the 50mm rifle scope lens is surely better.
But, it is NOT ALWAYS the case if the 40mm objective lens has better accompaniments.
Regardless of size, your scope will reflect light and cause lens flare if it has a low coating and glass quality.
Thus, you should gather good parts for your scope and make it a COMPLETE PACKAGE.
It may cost more, but it is worth it!
What Scope Is Best for 50 Yards?
The 40mm diameter lens is better for close-distance shooting, like at 50 yards.
A 50 mm diameter lens is suitable for wider field shooting and has more features. However, it does not necessarily mean it is also good at any distance.
Short-range shooting requires smaller guns, and smaller lenses are more compatible.
The 40mm diameter lens is also light for fast movements, aiming, and shooting at a close distance.
Is a 3-9×40 Scope Good for Hunting?
Yes! I have a lot of scopes with this magnification and diameter, and my hunting is always efficient!
This scope model gives you a sense of versatility for short-range and longer-distance shooting.
It provides accurate short-range shots of small to medium-sized animals.
The same applies to lesser accuracy issues in longer-distance firing due to its high magnification range.
So yes, a 3-9×40 scope is GREAT for your hunting activities!
Final Verdict: Which Is Better to Use?
If you look at these categories, there is not much difference.
But in similar parts like the glass and coating quality, I have to give the win to the 50mm objective lens over the 40mm.
Thus, this gives you more choices in buying rifle scopes.
Do you want to choose a 40mm and add good rifle scope parts? You may want to maximize a 50mm diameter advantage with the best available parts.
Conclusion
You should not focus much on the bigger objective diameter size but on the other accessories in your rifle scope as well!
There are MORE factors to be considered, not just the lens size of rifle scopes.
A 50mm is greater than a 40mm as the former has more advantages.
Yet, gearing the latter with better parts like good lens coating and glass quality can still take the win.
In other words, you should gather the best parts to have the best rifle scope.
I started my big bore airgunning journey back in 2002 with a .308 semi-custom rifle built for me by the father of the modern big bore airgun, Dennis Quackenbush. Then, later that year, he built another rifle in .50 caliber for me to hunt hogs and exotics down in Texas. Over the years, Dennis produced another dozen rifles for me in a range of calibers—including the .457 caliber used on most of my airgun hunts in South Africa. At that time, if you wanted the most powerful airgun for hunting, Quakenbush was the only show in town. And even though this was a niche market, and arguably it still is, there was enough business to keep his order book filled with a long list of potential buyers just waiting to give him their money. The Quackenbush rifles were uncomplicated, solidly built, and extremely shootable hunting air rifles that were truly made for the field.
As the demand for guns grew, along with the waiting time for a Quackenbush rifle, other small-scale manufacturers came to market with rifles of varying quality. This situation persisted for a few years as the market continued to grow.
Then, a couple of important events occurred over a few short years. The American airgun manufacturing giant Crosman and later the smaller, more experienced PCP air rifle manufacturer AirForce Airguns, released true big-bore air rifles. Concurrent with this, other manufacturing companies started to gain traction, some small-scale startups such as Professional Big Bore Airguns (PBBA), and other large-scale manufacturers such as Hatsan Airguns, offered a large and evolving lineup of powerful big bore rifles.
The benchmark for the most powerful air rifles is power output, which makes sense, even though I firmly believe that accuracy trumps this and field handling is close on its heels. But all things considered, once you have achieved a level of accuracy and come up with a design that works for shooters, more power is usually better. So, with this in mind, I will present a few of the most powerful airguns available today. It’s not possible to cover all the calibers and configurations, but I’ll pluck out a few of my favorite hunting rifles.
The Most Powerful Air Rifle: AEA Zeus
Best Budget: Umarex Hammer .50 caliber
Best for Accuracy and Power: FX Impact .30 caliber
Every manufacturer wants to be known as having the most powerful air rifle in the world, and until recently, this was a fluid state between a couple of the companies. The “correct” answer of who made the most powerful rifle was a bit difficult to assess because shooters were modifying their guns to up the power. So, to provide context, I always look at peak power in an out-of-the-box configuration.
The author using his AirForce Texan on a hunt. Jim Chapman
It is worth noting that in the world of airguns, ammunition (slugs, bullets) and calibers are decoupled from the power produced by the gun. As an example, two .457 rifles with 26-inch barrels of different designs using the same projectile, can deliver vastly different power outputs. I have two .50 caliber rifles from different manufacturers, one generates 220 ft-lbs and the other 700 ft-lbs using the same slug. The power output is a function of barrel length and the valve design and setup, the fill pressure, and the airflow through the transfer port. Of course, it is possible to get more power by going to a larger caliber, optimizing the valve, and driving it at higher pressures. Still, caliber alone is not the primary factor.
With that said, let’s look at my list of the most powerful air rifles available today, which all have power in common, but they represent a mixed bag of features and styles.
Want to learn the basics of PCP airguns? Check out PCP Air Rifles 101 to learn more.
Most Powerful Air Rifles: Reviews and Recommendations
The Most Powerful Air Rifle: AEA Zeus
Key Features
Available in .58 and .72 caliber
Barrel Lengths: 16, 24, and 32 inches
Up to 1500 ft-lbs for .72 cal.
Weight: 12 pounds
Sidelever action
Hardwood sporter style stock
Threaded for DONNYFL moderator
Pros
Very powerful
Wide range of configurations (calibers and barrel lengths)
Compact in shorter barrel lengths
Purpose-designed moderator available
Cons
Heavy (very heavy in long barrel versions)
Loud (Unless suppressed)
For years the airgun companies have all claimed to manufacture the most powerful air rifle, and in fairness, this has been open to debate as they were close in performance. However, the AEA Zeus in .72 put that argument to rest, as it is clearly the most powerful. Do you need all that power? In most cases, probably not, but the intrinsic energy produced by this power plant allowed AEA to design short rifle and carbine versions of the .72 and add the .58 while maintaining a high-power output.
The Zeus is a well-made, rugged, shootable, accurate, and very powerful big bore airgun. Jim Chapman
The AEA Zeus is a traditionally styled big-bore air rifle with a hardwood sporter-style stock. The wood and metal work on these rifles is solid to the point of being over engineered, not a bad thing in a gun generating power output up to 1500 ft-lbs. The added weight helps to dampen the recoil generated by a 500-grain slug traveling down the barrel at 1025 fps. I’ve used this gun to take a couple of massive Texan boar, and the terminal performance is outstanding. In my experience, the Zeus is a solid big game gun for the largest quarry.
Read our full AEA Zeus review to learn more.
Best Budget: Umarex Hammer
Key Features
.50 caliber
Weight: 8.5 pounds
Delivers approximately 700 ft-lbs of energy
Up to 5 shots per fill
Incorporates a 2-shot shuttle magazine
Utilizes Umarex Lightspeed valve
Pros
Accurate
Shot-to-shot consistency for three full power shots
Lightweight and ergonomic
Cons
The barrel is longer than I prefer (Carbine version to be released soon)
Loud
I’ve hunted deer, hogs, and javelina with this rifle, and the overall performance has been impressive. This gun is fairly lightweight for a big-bore air rifle and carries well for long slogs through rough terrain. The accuracy is spot on in the 50 to 80-yard range I typically prefer, but it can reach out farther when called on to do so. The Hammer lives up to its name regarding terminal performance, and I’ve seen the proprietary Umarex 510 grain slug cleanly anchor some big hogs.
The Umarex Hammer is a .50 caliber rifle designed to accelerate a greater mass faster using proprietary technology from the company’s Lightspeed valve. The design of this air management system, coupled with a .510 caliber, 550-grain lead slug, is capable of generating over 700 ft-lbs of energy at the muzzle. The cocking action of the Hammer is very light and requires about 2 pounds of effort to operate. This short, effortless action actuates a two-shot shuttle magazine for fast follow-up shots when required.
Best for Accuracy and Power: FX Impact M3
Key Features
Max Velocity: 850 fps
Weight 6.85 pounds
Muzzle Energy (65.5 grain): 128 ft-lbs
Shot Capacity: 21
Max Shots Per Fill: 85
Sideliver
Pros
Very accurate (Used to win RMAC many times)
Customizable
High shot count
Excellent for coyote and small game hunting
Cons
Not meant for big game hunting
My top pick for a crossover rifle that performs well for both small-game and predator hunting is the FX Impact air rifle. This bullpup design has a lot going for it, and the frame is rugged and lightweight, with an adjustable stock that accepts standard AR pistol grips. The air storage is a 480cc removable carbon fiber (other options available) tank that can be charged to 3600 psi, and the design allows extra bottles to be packed and changed in the field.
The FX Impact M3 easily shoots 1/2 inch groups at 50 yards. Scott Einsmann
The sidelever action is one of the quickest, most tactile, and smoothest cycling that I have used, and reliably indexes the magazines every time. What really seals the deal for me though, is that the modular design lets the shooter swap out barrels, magazines, and probes to optimize the gun for different types of hunting. The hunter can use the .22 barrel for a rabbit hunt, then swap to a .25 barrel that has a liner optimized for slugs to do a long-range prairie dog shoot, then swap again for the .30 caliber barrel to hunt predators.
Hatsan PileDriver
Key Features
Available in .457, .50, and .62 caliber
Adjustable synthetic thumbhole stock
Sidelever cocking action
Easy access loading port accepts longer projectiles
Several Picatinny rails for mounting accessories
Pros
Accurate and powerful
Rugged construction, reliable
Generates six full power shots per fill
Cons
Big and heavy
Single shot (though loads rapidly)
I’ve been shooting the Hatsan Piledriver in the .457 and .50 caliber versions for a few years now, and have used it to take several deer, hogs, javelina, and exotics. This year Hatsan added the .62 caliber version to the lineup, generating over 750 ft-lbs with a 650-grain hollow point slug. This gun is a great performer with respect to accuracy, power, and reliability.
The PileDriver .62 is a bullpup configuration, but it is still a big gun. However, the .62 caliber clipped 4 inches off the 33-inch standard barrel bringing the overall length to 42 inches, and reducing the weight to a tad over 9.5 pounds. The synthetic thumbhole stock has an adjustable length of pull and cheekpiece. It uses a 480 cc carbon fiber tank to deliver up to five shots. The single-action gun cycles with a smooth side lever action, and loads quickly through easy access to the loading port. It also has Hatsan’s two-stage Quatro trigger, which is crisp, with a medium pull out of the box, and can be adjusted.
Read Next: The Best PCP Air Rifle Compressors of 2023
Honorable Mentions
AirForce Texan
The AirForce Texan big bore air rifles have become the most popular of the big bores over the last few years, and there are several reasons for this. The bottle for a buttstock design and inline valving are well proven in the field. The guns are adjustable and lend themselves to customization and personalization. They are also very well made and available in several calibers, including .257, .308, .357, .457, and .50. The performance of the Texan, with respect to both accuracy and power, is rock solid. I’ve used mine to take several species of North American big game. The most powerful version of this gun out of the box is the Texan LSS .50-CF, which is a .50 caliber gun generating over 800 ft-lb. The rifle features a 490 cc and 250 BAR tank that delivers three to four shots per fill. That’s moving a 620-grain slug at 620 fps for about 805 ft-lb. I find that the Texan’s excellent trigger helps wring the most accuracy out of the Lothar Walther barrel and the rifle as a whole.
Airguns of Arizona Bushbuck
Airguns of Arizona is a major U.S. retailer that is especially well known as an importer of high-end European guns. But a few years ago, they began manufacturing a big bore rifle called the Bushbuck. To my eye, this is the best looking big bore rifle on the market. It is a bolt action sporter style rifle in .452 that is dressed in a laminate stock with stippling on the forestock and grip, with an adjustable cheekpiece. This rifle is solidly built and weighs in at 10.2 pounds with an overall length of 49.5 inches and a 30-inch barrel. My Bushbuck is the compact version. It is 43.5 inches long with a 22.5-inch barrel. After a point, I am usually willing to trade off some power for a more compact gun. The 285 cc air reservoir fills to 4500 psi using an unobtrusive under-barrel tube that helps maintain the rifle’s sleek lines, while providing two to four shots per fill. The single-shot Bushbuck has two power settings and generates over 600 ft-lb in the high setting. I’ve carried and used this gun on both North American and South African hunts, and it is a capable rifle for any non-dangerous game.
FAQs
Final Thoughts on the Most Powerful Air Rifles
The most powerful air rifles are quite different, but there are similarities connecting them all. I would be happy using any one of them when out after deer or hogs, though my preference would change based on the specific situations and conditions. All of these rifles are accurate, generate more than sufficient power, and have an acceptable shot count for big game hunting. But air usage, number of shots, sound level, anticipated range, and size and weight of the gun are variables each hunter needs to assess based on their own needs and preferences.
Other factors to consider are, how will you keep the gun filled? Will you get a compressor or refill tanks at a local paintball or dive shop? Can, or will, the local shop in your area charge the tank up to over 4500 psi? It’s a lot easier to keep a gun charged at 3600 psi than 4500. Can you reduce the power if hunting in an area where limited range is advantageous, or so as to reduce air usage? Is noise an issue, and do you need to have the lowest possible sound signature? Will most hunting be from a blind or a stand, or will you spend hours covering large tracts of land on foot?
Each shooter needs to weigh the importance of these variables to find what suits them best. I can honestly say that — my own personal preferences and biases aside — any of these rifles could be a perfect big game rifle depending on what you like and what’s important for you and your intended uses.
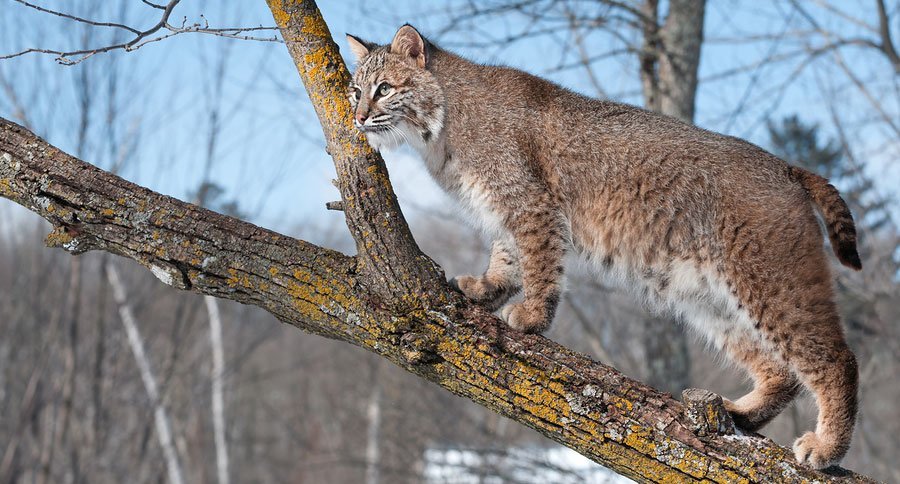
When you entice one to step in the 4-inch circle of earth you prepared, there are not too many other feelings of accomplishment that compare to trapping bobcats.
Plus, with bobcat pelt prices staying consistently high, the full wallet at the end of the process is pretty satisfying too.
I did not include the number one most well-known trapping tip, just because everybody should know it: set on sign.
Here are nine additional tips I’ve picked up over the years, mostly from trapping with and observing some truly talented Wyoming bobcat trappers.
They’re Just Big Cats, So Observe Small Ones
An old timer told me this: “Cats are cats, whether they’re de-clawed house cats or mountain lions. These critters are carnivores. They all hunt and are attracted to the same sense triggers.” He advised me to observe “domesticated” house/barn cats whenever possible. You will likely notice many parallels in bobcat populations that will make it much easier to lure one into your coil spring, foothold traps, or cage trap.
Visual Attraction
Just like a house cat will stalk and pounce at a red laser light or a piece of string that you are wiggling, bobcats can’t hardly resist investigating moving objects they can’t immediately identify. Near each bobcat set, you should place some type of visual attraction.
One of my favorite techniques is to hammer a masonry nail into a rock wall near the set. Wrap a length of baling wire on the nail and protrude it about a foot straight out from the wall. At the end of the wire, bend a loop. Take a second small length of wire and loop the end through the first loop, so that the wire hangs loosely straight down. On the end of the second wire, attach something shiny and reflective. I’ve found silver Christmas garland or aluminum foil works well. Just make sure to check your local trapping regulations to make sure what you are doing is legal first.
The bobcats will see the reflection first, then notice the movement in the wind. As they curiously approach the movement from the bush, they will then pick up the scent of the bait – and hopefully move into the set.
Double Up the Springs
Use #10 traps for bobcat, but install a second set of springs. This will ensure the bobcat will not be able to pull out. Plus, cats paws are extremely sensitive, so, the more pressure on the paw, the less the bobcat will try to pull out.
Use Peat Moss
Because fur trapping is a winter pursuit, the temperature will more than likely be below freezing the majority of the time. Since the traps are buried in the ground, moisture from temperature changes can freeze the traps open.
The best way to avert this situation is to cover the trap with a layer of peat moss prior to sifting natural dirt over the trap. The organic materials within the peat moss emit methane, which when released, is warm. This will keep the trap from freezing up.
Cut Off a Paw
This is good trick for both bobcats as well as coyote. Cut off and preserve one of the front paws. Attach the paw to the end of a broom handle (cut in half) or a short stick. After you make your trap set and you have sifted the dirt over the trap to look completely natural, CAREFULLY and gently make a paw print directly over the trap pan.
Bobcats, especially big toms, are smart, and they instinctively know that if another bobcat has stepped in a certain spot, it must be safe to also step there.
Rocks/Ledges
When scouting a bobcat trapping location, always start with rock ledges. That’s where they live, especially in the Western states of America.
Rock ledges give bobcats a higher perspective to see prey below as well as affords them an extra level of protection from larger predators. First look for rock ledges and outcroppings, then look for sign – prints or scat. Those are all good indicators that you’re amongst good set locations.
Don’t Piss
This tip applies to bobcat hunting too and is a good rule of thumb for any furbearer you may target. Do not answer the call of nature where you hope to ambush one of these big cats. They have a great sense of small and you can ruin an entire area – no matter how catty it is – by urinating within your bobcat trap zone. Pee at the truck before you venture into your trapline, and hold it until you get out.
Don’t Disturb the Landscape
Disturbed landscape is another warning sign to bobcats. If you accidentally turn over a large rock, return it to it’s original position. Cover your tracks as you back away from your sets.
Cats Wander, Dogs Go Straight
In areas where bobcats and coyote share the landscape, a good rule of thumb when identifying animal tracks from a distance is that bobcats and lynx like to move in a serpentine pattern while coyotes tend to move in straight lines. Once you know this, it can make snaring your target species a whole lot easier if legal.
I just wrote 10 tips and realized I didn’t even get to choking trails into sets or bobcat bait. That will be for a future article.
Happy trapping!
Products featured on Wide Open Spaces are independently selected by our editors. However, when you buy something through our links, we may earn a commission.
So you are interested in getting into archery and more specifically crossbow archery but you aren’t sure where to start…we have all been there and are happy to put together this guide for getting in to this exciting and fun sport. As this guide is geared toward beginners, we will discuss everything from selecting the right crossbow for you all the way to how to shoot it and even how to sight in the scope. Please read on and enjoy!
There are literally hundreds of crossbows out there to choose from, so how do you know which is the best one for you? When you are looking at a crossbow, it is important to first ask yourself what you intend to do with it. Are you looking for something purely for target shooting? Are you looking for something to hunt with? If so, what size animals will you be looking to take and at what realistic ranges? Many modern crossbows are capable of taking down a deer out to ranges in excess of 60 yards, but that is also going to require a lot of time and effort on your part to become proficient enough with your crossbow to make shots at that range. More realistic ranges are typically going to be 30 to 40 yards, so keep that in mind when looking at your hunting opportunities. So what are the biggest factors you should look for in a crossbow and how will they affect your shooting?
What is better, a recurve or compound crossbow?
A lot of people wonder about the difference between a recurve crossbow and a compound crossbow and what the advantage and/or disadvantage of each is. Both have a place in the target as well as the hunting world and both have a dedicated cadre of shooters. Here is a breakdown of the pros and cons of each type.
Recurve Crossbows
The recurve crossbow is the most purist of the crossbows and is the type of crossbow that has been around for hundreds of years. It is often selected by archers for its simplicity and reliability. The recurve crossbow essentially has a simple bow and string with no cables or pulleys to adjust or to worry about failing at a critical moment. The trade off for this simplicity is that a recurve crossbow is typically going to be quite a bit wider from axle to axle (ATA), which is the measurement across the widest part of the bow section. The recurve will typically also have a higher draw weight with less overall speed than its compound counterpart.
Compound Crossbows
Compound crossbows are the most popular crossbow type largely due to their lower draw weights with higher arrow speeds. The addition of the cables and pulleys means that a compound crossbow can enjoy a narrower ATA, which makes it more portable and easier to shoot from a confined area such a deer blind. Those cables and pulleys also translate to additional moving parts, and as such, additional potential points of failure. This isn’t to say that modern compound crossbows are overly prone to such failures, merely that the possibility exists, and likely won’t happen at the most opportune moment!
Speed
We are constantly asked about the speed of a crossbow and usually are asked, “What is the fastest crossbow?” There are some truly fast crossbows out there with speed capabilities well in excess of 400 fps. The most important question to ask yourself is why do you need that much speed? If you plan to go hunt a T-Rex in Jurassic Park, we might understand that, but for simple target shooting or for most deer hunting, nothing near that is necessary.
A fact not understood by a lot of shooters is that too much speed can actually be detrimental to your shooting. A fast arrow is great in terms of hitting harder and shooting flatter (a flatter shooting projectile means there is less drop of the projectile over distance so knowing the exact range is not as critical as with a slower projectile). The drawback is that as you increase speed, you decrease the crossbow’s tolerance for any little mistake. A fast arrow is going to react more to a less than perfect draw as well as being less forgiving for any imperfections in the arrow or vanes.
It is also important to know what weight arrows are recommended and what weight total projectile (arrows and points) were used to calculate the claimed speed of a crossbow. Often times, a heavier arrow will slow your speed, but will actually carry more force to the target, especially at longer ranges. Just remember, that you want an arrow that is fast enough to get the job done, but not so fast that the overkill makes your shots more difficult.
Safety
A beginner archer should really be concerned about the safety aspects of a crossbow as there are a lot of things to learn, so integrated safety devices will help keep you from injuring yourself or damaging your new crossbow. The most important safety features are discussed below.
Anti Dry Fire
A “dry fire” for a crossbow is when the crossbow is fired without an arrow in place. This is one of the single worst things you can do to a crossbow as it puts enormous stress of the limbs of the crossbow. The arrow provides resistance to the limbs when fired to allow them to release their energy in a controlled fashion, so firing without an arrow allows for a lot of energy to be released more rapidly than the limbs were designed for. Many modern crossbows feature a mechanism that will not allow the string to be released unless an arrow in place. This is called a “dry fire inhibitor”, or an “anti dry fire” device and is something you should definitely look for when selecting your crossbow.
Auto-Engaging Safety
Just about all crossbows on the market today will feature a mechanical safety that keeps the trigger from releasing the string when set. This functions much like the safety on a rifle and can be of many different designs. An auto-engaging safety is one that is automatically set during the action of drawing the bow string. This is a great feature for the beginner shooter as it is something you will not have to remember to set yourself and will keep the crossbow safe until you are ready to intentionally pull the trigger.
Forward Grip Design
The forward grip is the part of the crossbow located under the rail where your stabilizing hand is going to go. In a typical rifle design, this grip is simply a piece of wood or plastic where you can hold the rifle when shooting, without much concern for the safety of that hand as the bullet is contained inside the barrel. On a crossbow, while the arrow is contained somewhat within the rail, the bow string is not and slides rapidly down the rail when the crossbow is fired. If a finger or thumb from the forward shooting hand is up a bit too high and gets in the way of that string, at best the shot is going to be ruined, but most likely there is also going to be a significant injury to that hand.
To minimize this possibility, you should look for a crossbow that has a forward grip design with ‘wings’ that stick out to the side and run the length of the grip. These wings will help keep your fingers well below the string path and make for one less thing you need to focus on when learning to shoot.
Once your crossbow arrives
Typically, beginner crossbows will come as a combo, often with included arrows and other accessories. Keep in mind that just about every crossbow you order is going to require some level of assembly.
Assembly
Knowing that your crossbow is going to arrive in a big box, but is still going to need to be assembled is an important thing to understand. Don’t worry, assembly isn’t really a big deal at all. Typically, the bow section is going to come fully assembled, and in the case of a compound bow is going to be fully strung as well. The assembly will usually consist of mating the bow section to the barrel/stock assembly, mounting the scope and possibly adding a few accessories, such as a grip or quiver mount. The required tools are usually included and the instructions aren’t hard to follow.
Be sure when mounting your scope that you place it in the proper orientation. First look through it so you know the back and the front to ensure you don’t put it on backwards. Also, as you mount the scope, if it is an illuminated scope, there will be three round dials (one for the illumination settings) and/or round covers (two for the windage and elevation scope adjustments) at the midpoint of the scope. Simply place the middle cap in the up position and mount the scope. If the scope is not illuminated, there will only be two round caps for windage and elevation adjustments. One will be pointed straight up and the other straight to the right side of the crossbow. It is important to ensure your scope is mounted straight up and down and with the adjustments in the proper position or you will not be able to sight in your scope properly.
Arrow selection
If your crossbow didn’t come with arrows, you will need to select a good set of arrows to go with it. Most shooters use aluminum or carbon arrows but the carbon are the most popular. Be sure when selecting your arrows that you know what the recommended shaft length is for your crossbow as getting one that is too short can present a danger for shooting and might not weigh enough for your crossbow to shoot without the risk of dry fire.
Target selection
A crossbow is a much more powerful archery tool than a traditional vertical bow. The arrows are fired at much faster speeds and can often penetrate a standard archery target. Even with a good crossbow target, the arrows can often bury themselves so deeply that an arrow pulling tool might be required to remove them.
We have tested several different targets in our target selection guide to offer you some convenient recommendations: Best Crossbow Targets
Shooting your crossbow
So now you have everything assembled and the proper equipment ready to go so it is finally time to shoot your new crossbow. Before you shoot the crossbow, it is very important that you understand a few of the most important aspects of safely shooting.
For starters, never cock your crossbow until you are ready to shoot and most definitely never load it until it is time to fire. Keep in mind that once you are more experienced, this will not apply to hunting situations where you will want the crossbow cocked and loaded once you are safely situated in your hunting location. Be sure you never point your crossbow at something that you don’t intend to shoot and never EVER touch the trigger until you are lined up with your target and ready to fire. Lastly, always be completely sure of what you are shooting at and also know what is BEYOND your target. A crossbow arrow carries a lot of energy and can easily pass through an animal or you might miss the target…either way, be sure you know what is beyond your target and that conditions are safe to shoot.
How to aim
Just about all modern crossbows come with some sort of scope, or are set up with a rail to mount one. When you look through the scope you will either see a vertical line intersecting a horizontal line in the center of the scope. This is called the crosshairs. In the most simplistic version of shooting, you place the crosshairs where you intend the arrow to hit and squeeze the trigger. This will work assuming the scope is sighted in and the distance for the sighting in is the distance you are shooting (more on that below). There might also be a dot in the center of the scope which will be used in the same way.
Many scopes also have additional horizontal lines below the main crosshairs. These are used to shoot at targets further away, with each horizontal line creating a new crosshair where it intersects the vertical line. The lower the crosshair in the scope, the further away the target it is meant for. You will typically need to sight in the scope at say 30 yards, and then see how far away your specific crossbow/arrow/scope combination impacts at each crosshair to know the yardage it should be used for.
How to draw
Drawing a crossbow requires quite a bit more force than drawing a standard vertical bow. Most crossbows have draw weights in the range of 150 to 180 pounds with some having draw weights in excess of 200 pounds. It is critical that you draw the bow string in a uniform fashion every time such that your shots will be reproducible. The easiest way to accomplish this is through the use of a rope cocking aid. This is a device that is designed to hook to the bow string on either side of the rail and loops across the back of the crossbow.
First, place the crossbow pointed down at the ground and place your foot in the foot stirrup (the piece that sticks out from the end of the crossbow to place your foot in when pointed down). Hook the hooks on the rope cocker on each side of the rail and grab the handles on the end of each side of the rope cocker in the respective hand on that side. Then you simply pull straight up on the handles evenly with both hands until you feel the string engage in the firing mechanism. A swift solid pull straight up along the rail will make for the easiest cocking. Then ensure the safety is on and remove the rope cocker.
How to fire
Once the crossbow is cocked, you will need to place an arrow on the rail. You do so by grasping the arrow near the point (about four inches back from the tip) and slide it down into place on the rail and all the way back until it makes contact with the bow string. It is important when you do this to make sure the one of the vanes (usually the one that is the odd color relative to the other two vanes) is pointed straight down in the slot of the rail such that the arrow rests on the rail and not the vanes. It is also important to ensure that the groove in the nock of the arrow is horizontal such that the bow string seats into the groove (keep in mind that if your arrows that come with the crossbow have flat nocks, there will be no groove in the nock). It is very important that the arrow is loaded with the odd color vane straight down and that the arrow is fully seated back against the string. Once the arrow is in place, you simply aim at your target, click the safety to the “off” position and squeeze the trigger. There will usually be a bit of a slap sound from the string when you fire but very little recoil will be felt.
How to sight in
Once you are comfortable with how to look through your scope and understand how everything works you will want to sight in your crossbow. To do so, you will need to unscrew the caps on the top and right side of the scope. Removing these caps will expose the dials to allow you to adjust your scope to zero it in. You should first fire your crossbow into a target about 20 yards away to ensure your scope is close enough that you will be able to hit your target at 30 yards. If it is way off, simply use the dials to adjust where the aim point is. As you look at the dial on the right side, it will typically have a letter “L” and an arrow. That means if you click the dial in that direction, you will be moving your aim point to the left, and if you go the opposite direction of the arrow, you will be moving your aim point to the right. So if your arrow is several inches to the right of the bullseye, you will want to move the dial in the direction of the arrow to adjust your aim point to the left. The same method is applied with the top dial except it will usually have an “UP” and an arrow which means if you move the dial in the direction of the arrow, you will bring your aim point up and vice versa. Once you get familiar with how the dials move the aim point of the scope, you will be able to zero your scope in with ease.
Below are some of the most frequently asked questions we receive from new shooters:
Are there right and left handed crossbows? No. Crossbows do not eject any type of spent casing like a rifle does so you can shoot it either way. You might have to move mountings for a quiver if it attaches along the side of the crossbow, but other than that there is no right or left.
Can I change the string on my crossbow? Yes, but you will need to have the proper tools. It is easiest to accomplish changing a string with a bow press which essentially allows you to remove any tension from the limbs for easy changing of the string. Quite often this will require an archery pro shop, although we have used a portable bow press that worked quite well.
Here is a link to that review for more information: Night Hawk Bow Press
What is the absolute furthest I can hunt with my crossbow? Modern crossbows are capable of launching an arrow literally hundreds of yards, although without much accuracy. A very accomplished shooter might be able to hunt at ranges out to 80 yards, but that is a VERY accomplished shooter. Most beginner shooters should keep within 30 to 40 yards until they have enough range time to ensure accuracy at greater distances.
Are crossbows legal to hunt with everywhere? More and more states are adopting laws allowing the use of crossbows for hunting during archery season by all hunters, regardless of whether they have a disability. We would recommend you check with your local and state regulations to know the laws pertaining to crossbows in your area.
What’s the difference in a crossbow arrow and a crossbow bolt? You may see quite often the use of the terms crossbow “arrow” and “bolt” used interchangeably. This is actually incorrect. The true crossbow bolt which was used for so many hundreds of years is a front heavy projectile with no stabilizing fins or vanes. The modern projectiles used with crossbows that have vanes or fletching are crossbow arrows, just like a regular arrow only a bit shorter to fit the crossbow requirements.
What kind of hunting points should I use? You can use any type of broadhead that is legal in your area, but most crossbow shooters prefer mechanical broadheads over fixed broadheads. This is primarily due to the extreme speeds of crossbow arrows. Having the fixed broadhead can affect your accuracy while a mechanical broadhead will fly more like a field point.
Can I cock it by hand? The short answer is “yes” if you have the strength to pull it back. Cocking by hand is not recommended, however as the string may not seat perfectly leading to variability in shot placement. A rope cocking aid is always recommended as it makes it easier to cock by reducing the felt draw weight by around 50%, and it also allows you to ensure the string is centered for each shot.
When it comes to dove hunting, one of the most important skills a hunter must master is knowing how far to lead a dove at 40 yards. This distance can be particularly challenging for many hunters, as it requires a great deal of skill and practice to get right. The key to success lies in understanding the behavior of doves and their tendency to fly erratically, as well as the limitations of your shotgun and ammunition.
There are a number of factors that can affect your ability to lead a dove at 40 yards, including the size of your shot, the pattern of your shotgun, and the agility of the bird itself. Hunters must also be aware of any regulations or hunting laws that may apply in their area, as well as the importance of proper clothing, shelter, and camouflage. With the right training and practice, however, even novice hunters can learn to master this challenging distance and become skilled dove hunters.
Lead is the amount of space that a shooter needs to aim in front of a moving target in order to hit it. When shooting at a moving target, such as a dove, hunters need to lead the target to account for the time it takes for the shot to reach the target.
Factors Affecting Lead
The amount of lead required to hit a dove at 40 yards can vary depending on a number of factors. These factors include the speed of the bird, the distance of the shot, the type of shotgun and ammunition used, and the skill level of the shooter.
Image by G.C. from Pixabay
How Far to Lead a Dove at 40 Yards?
When shooting at a dove at 40 yards, the amount of lead required will depend on the speed of the bird and the type of shotgun and ammunition used. A general rule of thumb is to lead the bird by about 3 to 4 feet, or about the length of the bird’s body.
It’s important to note that shooting at a moving target like a dove requires skill and practice. Hunters should take a course on shooting moving targets and practice regularly to improve their aim and accuracy.
In addition, it’s important to follow all hunting laws and regulations, including those related to the use of weapons and clothing. Sporting clays can also be a great way to improve your shooting skills and accuracy, as well as to learn more about the sport of hunting.
When shooting at a dove, it’s important to consider the impact of the shot on the bird and the surrounding wildlife and environment. Using a field gun with a tight pattern of pellets can help to minimize the number of pellets that miss the target and reduce the potential impact on other wildlife and water sources.
Practicing Your Shot
The Importance of Practice
For hunters looking to hit their targets accurately, practice is key. Shooting a dove at 40 yards requires skill and precision, and the only way to achieve this is through consistent practice. By practicing regularly, hunters can develop their aim, improve their technique, and get accustomed to the feel of their gun.
Image by BRRT from Pixabay
Best Practices for Practicing Your Shot
To get the most out of their practice sessions, hunters should follow these best practices:
Start with closer shots: Before attempting to hit a dove at 40 yards, hunters should start with closer shots to build their confidence and accuracy.
Use smaller shot sizes: When practicing, hunters should use smaller shot sizes to simulate the size of a dove. This will help them get a better understanding of the patterns their pellets create.
Practice in different environments: Hunters should practice in different environments to get accustomed to shooting in different conditions. This could include shooting on a rifle course or in a field with agile game birds.
Use a field gun: When practicing for dove hunting, hunters should use a field gun rather than a sport gun. Field guns are better suited for hunting game birds and will help hunters get a feel for shooting in the field.
Focus on technique: Hunters should focus on their technique when practicing, paying attention to their stance, grip, and aim. By improving their technique, hunters can improve their accuracy and precision.
Join a club: Joining a shooting club can provide hunters with access to shooting ranges and other resources for practicing their shot.
By following these best practices, hunters can improve their shooting skills and increase their chances of hitting a dove at 40 yards.
Equipment and Accessories
Shotgun and Barrel Selection
When it comes to shooting doves at 40 yards, the right equipment can make all the difference. A shotgun with a 12-gauge or 20-gauge barrel is ideal for this task. The barrel should be at least 26 inches long to provide a good balance between accuracy and maneuverability. A longer barrel may be more accurate, but it can also be cumbersome to carry around in the field.
Shot Size and Pellet Count
The right shot size and pellet count can also have a significant impact on your success when shooting doves at 40 yards. For this distance, a shot size of 7.5 or 8 is recommended. These sizes provide enough power to take down a dove without causing excessive damage to the bird. As for pellet count, a load of 1 1/8 ounces is a good choice for 12-gauge shotguns, while 7/8 ounces is better suited for 20-gauge shotguns.
Dove Decoys and Camouflage
Using dove decoys and camouflage can help you blend in with your surroundings and increase your chances of success. When selecting decoys, choose ones that are realistic and have natural-looking colors. Place them in a way that mimics the natural behavior of doves. As for camouflage, choose clothing that matches the environment you will be hunting in. This will help you blend in and remain undetected by the doves.
In summary, when shooting doves at 40 yards, it is crucial to have the right equipment and accessories. A 12-gauge or 20-gauge shotgun with a 26-inch barrel, a shot size of 7.5 or 8, and a pellet count of 1 1/8 ounces (for 12-gauge) or 7/8 ounces (for 20-gauge) is recommended. Using dove decoys and camouflage can also increase your chances of success.
Image by Nicky ❤️????????????❤️ from Pixabay
Regulations and Safety
Hunting Regulations for Doves
When it comes to hunting doves, hunters must follow specific regulations to ensure the safety of both the hunters and the game. Regulations vary from state to state, so it is essential to check with the local wildlife agency before heading out.
Some common regulations for dove hunting include the following:
Hunting season: There is a specific hunting season for doves, which varies from state to state. Hunters must follow the designated dates and times for hunting doves.
Bag limits: There are specific bag limits for doves, which vary from state to state. Hunters must not exceed these limits.
Hunting license: Hunters must have a valid hunting license to hunt doves, which can be obtained from the local wildlife agency.
Safety Precautions for Dove Hunting
Dove hunting can be dangerous if safety precautions are not taken seriously. Hunters must follow specific safety guidelines to ensure their safety and the safety of others.
Some common safety precautions for dove hunting include the following:
Shelter: Hunters must seek shelter in a safe area, away from other hunters, to avoid accidents.
Surprise: Hunters must always be aware of their surroundings and avoid surprising other hunters.
Hunting laws: Hunters must follow all hunting laws and regulations to avoid accidents and legal consequences.
Weapons: Hunters must handle their weapons with care and only shoot when they have a clear shot.
Clothing: Hunters must wear appropriate clothing to protect themselves from the elements and avoid accidents.
Food: Hunters must bring enough food and water to sustain them throughout the day.
By following these regulations and safety precautions, hunters can enjoy a safe and successful dove hunting experience.
Foxes and coyotes are widely distributed throughout North America. Interactions between these species are common, but the two mostly ignore each other in the wild.
However, a carcass can easily change the social dynamics and turn these animals from tolerant towards each other to aggressive.
Coyotes are about twice as large in size and three times heavier than foxes. They are also faster, reaching speeds up to 43 miles per hour vs. 30 miles per hour for red foxes. Foxes have a bite force of around 307 PSI, whereas coyotes bite with a strength of 727 PSI. In a one-on-one fight, the fox wouldn’t stand a chance.
The table below shows a quick comparison between coyote vs. fox*:
*Data in the table was sourced from research papers, scientific journals, magazines, and other official sources. For comparison purposes, we considered the physical, behavioral, and strength factors of red foxes, which are the most common fox species in North America. Strength facts and characteristics may vary for gray or arctic foxes.
Strike forces were calculated by multiplying the top speed for each species by the top weight mentioned in the table.
Foxes and coyotes belong to the same family. However, they are rather distant relatives.
While they are both Canidae, red foxes belong to the genus Vulpes (true foxes) and Vulpes vulpes species. They are further divided into 45 subspecies distributed all over the world, with the exception of some territories such as Tasmania.
Coyotes are members of the genus Canis, the same as domestic dogs, wolves, and dingoes. The species – Canis latrans – is divided into at least 19 subspecies which are all distributed across Northern and Central America.
Both red foxes and coyotes are top carnivores in some ecosystems. In shared habitats, coyotes don’t actively hunt or eat foxes but they do have the potential to kill them.
2. Size
Body Length
The most visible difference between red foxes and coyotes – fur color aside – is the size. Foxes are about two times smaller than coyotes, even though larger fox males can grow larger than coyote females.
On average, red foxes reach body lengths between 1.8 and 2.8 feet. Coyotes grow between 2.6 and 3 feet in length. However, some eastern coyote males can be larger, with lengths reaching 4.5 feet in some cases.
If estimating the size could be tricky from afar, the coat color can help tell whether the animal is a fox or coyote.
Red foxes have a reddish brown coat darker on the legs and tail and with white undersides. Coyotes’ predominant color is light gray and red interspersed with black and white. The legs and undersides are whitish.
Both animals have bushy tails, but the coyote tail is mostly dark gray in color whereas a red fox’s tail is a dark reddish brown.
Height
Another crucial difference between coyotes and foxes is their height – coyotes are about eight inches taller than foxes.
On average, they reach a shoulder height of 24 inches. Red foxes, on the other hand, rarely exceed 16 inches in height.
The height difference, together with the length and fur color, can help tell the difference between the two species when spotting them in the wild.
3. Skull Size (Length)
Foxes and coyotes belong to the same family, and their skulls are very similar in shape. The most noticeable difference is the size.
Coyote skulls are about two inches longer than fox skulls. Specifically, coyote skulls are about eight inches long, whereas fox skulls are about six inches long.
The skulls of both animals have an elongated shape with a large braincase and elongated snouts.
The dental formula is also identical. Both coyotes and red foxes have 40 teeth in total, 20 on the upper jaw and 20 on the lower one.
Their dental formula is I.C.P.M (incisors, canines, premolars, and molars) 3.1.4.2/3.1.4.2 for each side of their jaws.
4. Scat Size
Another similarity between foxes and coyotes is the shape and overall appearance of their droppings.
Both species have dark brown scat, more or less cylindrical, and that mainly contains fur, tiny bones, feathers, seeds, and berries.
Foxes and coyotes living in urban areas may have lighter-colored droppings that can contain kitchen scrap traces.
Coyote scat can vary in length from about four to seven inches and is about 0.5 to 1-inch thick. Red fox scat is about two to three inches long and up to 0.5 inches thick.
4. Weight
Weight is an important asset in the animal world. The heavier an animal is, the greater the strike force it can generate.
And even if most animals use their bite to fight off an opponent, being able to make the opponent lose balance by slamming into it is a huge advantage.
With coyotes being about two times the size of red foxes, it doesn’t come as a surprise that they are also heavier.
Typically, coyotes weigh between 20 and 50 pounds. Red foxes are a lot lighter, with weights between 10 and 18 pounds.
5. Paw Size
Another unsurprising fact is the larger paws coyotes have compared to red foxes.
According to the Washington Department of Fish and Wildlife, coyotes have a paw size of about 2” by 2.5”. Red fox paws are about 1.5” by 2” in size.
However, the size is not the only factor that could help you identify canid tracks.
Most canids have oval paws with the second and third toes of their front paws pointing away from each other.
In the case of coyotes, the second and third toe are closer together; they both point forward and the claws are oriented toward each other.
This trait makes it easy to tell coyote tracks apart from red foxes, but also wolves and dogs.
6. Speed
Photo: Blue Barron Photo / Shutterstock
Another point in favor of coyotes is the speed: these canids can reach sprinting speeds up to 43 miles per hour.
Red foxes can run at a max of 30 miles per hour, and only for short distances. Their normal running speed is even slower.
Similar to foxes, coyotes can only run at top speed for short distances. However, they are still faster than foxes even when running at normal speed.
7. Strike Force
While the strike force in mammals is seldom measured, this value is easy to calculate by multiplying the speed by weight.
According to these factors, the strike force can be different each time the animal strikes. However, for comparison purposes, we considered the top speed of each species and the top weight coyotes and foxes can reach.
Based on these values, foxes can strike with a force up to 540 lb.-ft./s which is the equivalent of about 16.7 pounds of force.
However, coyotes can strike with up to 2,150 lb.-ft./s, or 66.8 pounds of force. This makes coyotes four times stronger than red foxes.
8. Jumping Abilities
Coyotes, much like red foxes and other canids, are not considered good climbers. However, they can jump – even if their jumping performance is inferior to that of foxes.
In fact, coyotes can jump about three feet up. Despite their smaller size, red foxes can easily jump over obstacles standing up to six feet tall.
While this is the only point in favor of foxes, it might be just what they need to get to safety if they can jump over a fence or up a tree where coyotes can’t reach them.
Climbing-wise, it should also be said that even though they are not considered good climbers, both red foxes and coyotes can climb trees as long as they can reach branches with a smoother incline and that don’t require the use of claws to grip onto the bark.
9. Bite Force
As explained, red foxes are better jumpers and climbers than coyotes. Their advantages end there, though.
As far as bite force is concerned, coyotes are stronger than foxes. In fact, they can exert a bite force of about 727 PSI. A red fox’s bite is about two times weaker, of only 307 PSI.
Both mammals have bites strong enough to kill prey and tear the flesh off bones. To put things into perspective, humans have a bite force of only 162 PSI.
If it would come to a fight between the two canid species, though, coyotes would have a clear advantage.
Despite this, an interesting fact to observe is that red foxes actually have stronger jaws than coyotes when measured pound-per-pound.
The bite force quotient (BFQ) is a measurement scientists use to estimate the bite force of various animals based on their body mass.
In a study on bite forces of various species of mammals, scientists found that red foxes have a BFQ of 90, whereas that of coyotes is only 88.
10. Behavior
Foxes may have a higher bite force quotient than coyotes, and they might be more agile climbers, however, that might not be enough when it comes to a fight.
If strength is in numbers, coyotes have all the odds in their favor.
In fact, while they have a solitary behavior when foraging, coyotes are actually social animals that live in packs.
Packs typically consist of family units – coyotes are monogamous – but unrelated coyotes could sometimes be accepted in a pack. Despite their social structure, coyotes are not known to defend their territory except for the denning season.
Unlike coyotes, red foxes are solitary animals. Females can sometimes live in groups, but this usually happens if they are all mated to the same male.
In fact, female red foxes are typically monogamous. Most males are monogamous too, but some may also seek other partners.
Apart from these circumstances, groups are mostly formed by females and their dependent or unmated offspring.
11. Diet
Coyotes and red foxes are considered omnivores, even though their primary diet consists of meat, and they can compete for resources.
Red foxes usually go after small prey, such as rodents, rabbits, and even birds and reptiles. They also eat insects and arthropods.
Foxes also eat eggs, fruits, berries, and other plant materials. When living near human settlements, they could also take advantage of kitchen refuse.
Coyotes have similar preferences. They go after small mammals, reptiles, insects, and other invertebrates.
As opportunistic mammals, coyotes take advantage of the proximity to human settlements and food scraps. Sometimes, coyotes may also hunt together and take down large prey.
Both coyotes and foxes also feed on carcasses and carrion, when they come across them.
12. Geographic Range
Red foxes are a common and invasive species present in most regions across the globe. The species is native to Eurasia and North America, but it is now found in the southern hemisphere as well.
For instance, red foxes introduced in Australia became an invasive species that is now found in all Australian territories, except for Tasmania. They are also found in South America in countries including Chile and Argentina.
Coyotes are only found in North and Central America, their geographic range spanning from Canada all the way south to Mexico.
Like red foxes, coyotes are considered an invasive species that is known to have expanded its original range over the years.
13. Habitat
Coyotes generally prefer open areas, such as prairies, grasslands, and deserts. Nonetheless, they are also found in open forest areas, urban parks, and suburban areas.
Red foxes prefer semi-open areas, such as the edge of forests and brushlands. They also inhabit prairies, grasslands, and urban and rural areas.
As one can imagine, it is common for coyotes and red foxes in North and Central America to share the same habitat.
Who Would Win A Fight?
Coyotes are larger and stronger than foxes, and when these two species come together in the wild, the former is considered the apex predator.
Yet, coyotes don’t actively hunt foxes. They typically tolerate them, unless a fox comes too close to a coyote’s food. In this case, coyotes are known to kill foxes.
Considering the size and strength differences, as well as the fact that coyotes sometimes hunt and eat in packs, a red fox has no chance of winning the fight. Its only chance would be to get to safety by jumping over a fence tall enough to deter the coyote.
")
")
")
")
")