“Debate over whether a 22 air rifle can effectively take down a deer has sparked curiosity among hunting enthusiasts. With its lower muzzle velocity compared to traditional firearms, we delve into the possibilities and limitations of this controversial topic to shed light on whether this lightweight weapon can indeed be lethal enough for deer hunting.”
can a 22 air rifle kill a deer
When it comes to hunting deer, using a.22 air rifle may not be the most effective or ethical choice. While it is possible for a.22 air rifle to kill a deer, it is generally not recommended due to its limited power and range. The.22 caliber is more commonly used for smaller game such as rabbits or squirrels, where accuracy and precision are more important than sheer stopping power. Deer are much larger animals and require a larger caliber rifle to ensure a humane and quick kill.
In many states, using a.22 air rifle for deer hunting is illegal due to the lack of sufficient power. Most hunting regulations require hunters to use firearms with enough energy and velocity to quickly and effectively kill the animal without causing unnecessary suffering. A.22 air rifle simply does not meet these requirements. It is important to prioritize the welfare of the animal being hunted and choose an appropriate firearm that can deliver enough force to ensure a clean kill.
Ultimately, while it may be technically possible for a skilled shooter with exceptional accuracy to kill a deer with a.22 air rifle, it is not advisable or ethical. It is always best to use firearms specifically designed for big game hunting that provide adequate power and range. This ensures that your hunting experience is safe, humane, and within legal regulations.
In conclusion, while a 22 air rifle may technically be capable of killing a deer, it is not recommended or ethical to use such a weapon for hunting large game. The limited power and potential for inhumane kills make it unsuitable for deer hunting. It is crucial to prioritize the use of appropriate firearms and techniques to ensure a quick and humane kill while respecting wildlife conservation laws.
“Unveiling the Epitome of Precision: The World’s Most Expensive Air Rifle. Experience unparalleled craftsmanship, cutting-edge technology, and unrivaled performance with this masterpiece of engineering. Elevate your shooting experience to new heights with this luxurious and exclusive weapon, meticulously designed for the discerning marksman. Prepare to be captivated by its exquisite design and extraordinary accuracy – a true testament to the pursuit of perfection in the world of air rifles.”
most expensive air rifle
The world of air rifles is a diverse one, catering to both recreational shooters and professional marksmen. However, for those seeking the pinnacle of air rifle performance and craftsmanship, there are a few models that stand out as the most expensive options available. These high-end air rifles combine cutting-edge technology, precision engineering, and exquisite materials to deliver an unrivaled shooting experience.
One such example is the FX Impact MKII, hailed as one of the most advanced air rifles ever created. With a price tag reaching several thousand dollars, this Swedish-made rifle features a range of innovative features including adjustable power settings, multiple calibers to choose from, and unparalleled accuracy. The FX Impact MKII is highly sought after by serious shooters who demand nothing but the best in terms of performance and versatility.
Another contender for the title of most expensive air rifle is the Daystate Pulsar HP (High Power). Known for its exceptional build quality and attention to detail, this British masterpiece offers incredible power and precision. Equipped with state-of-the-art technology such as electronic firing systems and advanced regulators, the Daystate Pulsar HP delivers consistent shot-to-shot performance that rivals even some firearms. This level of sophistication comes at a premium price point that reflects its top-tier status in the world of air rifles.
In conclusion, the most expensive air rifles are highly sought after for their exceptional craftsmanship and cutting-edge technology. While they may come with a hefty price tag, these rifles offer unparalleled precision and performance, making them a worthy investment for serious shooters and enthusiasts who prioritize quality and accuracy in their shooting experience.
This article was originally published in Issue 1 of our magazine.
Using the right tool for the right job makes all the difference. Sure, you can get away with using a flathead screwdriver on a Phillips screw, but every time you do so, you run the risk of stripping the screw. It’s much better to use the correct driver for the proper fit to avoid damage to the screw and the driver. Similarly, using the right knot can be a huge factor in the success of accomplishing a job, easily and safely.
Unless knots factor into your daily grind like bungee jump operator or first mate of the S.S. Minnow, the majority of people may only use one or two knots on a daily basis — or if you have Velcro on your shoes, maybe even none at all. Whether or not you have ever been taught what sort of knot is used for what, or if you have, it’s probably been a long time since you earned your merit badge in that endeavor. Let’s take a look at a few useful knots that can get you out of a pinch or simply help you get things done quicker.
There are countless knots out there as well as multiple variations for many of them. Each knot was created for a specific application. Realistically, unless it’s part of your everyday life, it’s difficult to remember how many of these knots are tied. We’ve picked out three knots that are strong and versatile that can be used in just about any situation.
The Bowline forms a secure, non-sliding loop. When a load is placed on the Bowline, it will not slip or jam, but when the line is relaxed, the knot can be easily untied. The loop may pass around or through an object such as a railing, pole, tree, or a fence, during the making of the knot. When no longer being used, the knot comes undone relatively easily, even after being used under great load. For this reason, this knot is not recommended for uses such as climbing or rappelling.
Uses
Hoist or lower objects from an elevated position
The loop can be tied around just about anything you need to pull or drag
Use as an anchor point when tying down cargo. When using it in this manner, finish off tying the cargo with the Trucker’s Hitch.
Tying off a boat to prevent drifting
1 2345
Trucker’s Hitch
Commonly used by truckers, the Trucker’s Hitch is used to tie down loads securely and with great tension. The loop formed while tying this knot acts as a pulley that tightens up slack to keep even heavy loads in place. The Trucker’s Hitch is actually a system of several knots used together to great effect.
Uses
Cinch down heavy loads on roof racks, car roofs, and truck beds
Securely tie down tarps
123
Double Fisherman’s
This knot is used to tie two ropes of similar width and strength together. If you don’t have a single rope long enough to get the job done, use this technique to tie two ropes together. What you’re essentially doing with this knot is tying two knots, one on each rope. When pulled toward each other, the two knots come together, tighten, and form a secure method of combining two ropes.
Uses
Joining two ends of shorter ropes to make a longer one
Joining two ends of the same rope to make a secure circle or loop
123456789101112131415
Rope Care
It’s always important to check your ropes for kinks, debris, and frays. Keep your rope away from water if possible, unless it is designed for it. Damaged and weakened rope that is under a lot of tension can break and cause serious injury or death.
Tidbit
The origin of knots has been lost to time, but what we do know is that they have been in use for thousands of years by many ancient civilizations. This human knowhow now lives on the surface of the planet Mars. NASA’s Mars Rover Curiosity features cables that are bundled together with hand-tied knots. The knots keep the cables bundled without wearing them out like cable ties would.
Gamo is a Spanish company that has been manufacturing air rifles since 1961. The company is best known for its high-powered, high-velocity rifles. In recent years, Gamo has been advertising the Magnum as being the fastest pellet gun on the market. So, is it?
The Gamo Magnum boasts an impressive FPS of 1,650 in .177 caliber and 1,300 in .22 caliber. To put that into perspective, most pellet guns have an FPS of around 700-900. So, there’s no doubt that the Gamo Magnum is a powerful air rifle. But is it the fastest? The Gamo Magnum is capable of reaching speeds up to 1650 fps and 1300 fps with PBA Platinum ammo, making it ideal for taking down rabbits, squirrels, raccoons, and crows. The fixed fiber optic front sight and fully adjustable fiber optic rear sight help you keep your target in sight, while the 11mm scope rail with scope stop provides a stable platform for mounting your favorite optics. The rifled steel barrel and SWA (Shock Wave Absorber) recoil pad work together to deliver precise shots with reduced felt recoil, while the all-weather ambidextrous thumbhole stock ensures a comfortable grip in any conditions
Other features of Gamo Magnum
In addition to its high velocity, the Gamo Magnum also features a precision rifled barrel, fiber optic sights, and a shockwave absorber recoil pad. These features make the Gamo Magnum a great choice for both beginners and experienced shooters alike.
Other Product features:
11mm scope rail with scope stop
Rifled steel barrel
SWA (Shock Wave Absorber) recoil pad reduces felt recoil by up to 74%
All-weather ambidextrous thumbhole stock with black rubber inserts on grip, forearm and cheekpiece
Custom Action Trigger (CAT) independently adjustable 1st and 2nd stage, allows you to tailor you trigger
Automatic cocking safety system
Manual safety
Recoil Reducing Rail maximizes scope lifespan with 99.9% recoil compensation
Includes 3-9×40 adjustable objective scope and mount
Optics Features
3-9x magnification
40mm adjustable objective lens
1″ tube
30/30 reticle with fine crosshairs, perfect for target acquisition
40 ft to 12 ft field of view
3.5″ eye relief
21.6 oz
13.5″ long
Fogproof
Shockproof
Wateproof
Includes lens caps
Conclusion
So, is the Gamo Magnum the fastest air rifle on the market? Based on its advertised FPS, it certainly appears to be. However, there are other factors to consider when choosing an air rifle, such as power, accuracy, and user-friendliness. If you’re in the market for a new air rifle, be sure to do your research and choose the one that’s right for you.
While a spring-piston gun has tar and lube on the metal spring, the grease thickens when the temperature goes really low, a gas piston, on the other hand, needs no lube.
Therefore, it won’t have any of the problems experienced by springers.
Moreover, the IGT gun has no spring torque, no spring fatigue even when you leave it cocked for hours and gives you smoother cocking.
Finally, since there is no spring vibration when shooting, the IGT rifle gives you smoother shooting and lasts longer than a spring gun.
If you prefer your gun with open sight, then you must be very happy: Gamo Silent Stalker Whisper’s iron sight is fiber optic sight with the use of optical fiber for the dot.
As a result, you could align the sight faster and hit more accurately, even in low-light conditions like dusk.
The front sight is fixed fiber, while the rear sight is fully adjustable for windage for elevation.
If you’re not a fan of traditional iron sight, Gamo has installed 3-9 x 40 scopes for dead-on accuracy.
40 is the diameter of the front lens, measured in millimeters. 3-9 is the magnification ability of the scope:
It means that the picture you see through the scope is 3 to 9 times bigger than the picture you see without it.
This variable power scope gives you confidence in long-range shooting, although the fiber optic sight is more than enough in my opinion.
Trigger
In the past, Gamo customers have swapped out their triggers with after-market ones.
No need to do that anymore.
The Smooth Action Trigger (SAT), is light years ahead of the previous version.
It’s smooth and predictable.
What will that do for you?
It’ll improve your grouping because a heavy, unpredictable trigger is responsible for delivering large groups.
You’ll be amazed at how good a shot you are when you shoot the Silent Stalker with the brand-new SAT trigger.
Velocity, accuracy and power
Gamo Silent Stalker Bull Whisper generates velocity up to 1300 FPS with .177 pellets and 975 FPS with .22 pellets.
These are outstanding velocities compared to other air rifles on the market and it makes this rifle belong to the magnum class in the air gun world.
Additionally, since the speed of sound is 1100 FPS (varying with altitude and temperature),
You may hear a loud crack if you buy .177 caliber because the lightweight pellets break the sound barrier.
If you buy a .22 one then this is not an issue at all.
Does this IGT rifle meet the advertised velocity? Chrony tests have given us the results as follows:
In .177:
Pellet (.177)
FPS
FPE
Gamo Pro Magnum 7.8 gr
955
15.8
JSB Exact Monster 13.4 gr
630
11.81
Gamo Magnum pellet 7.6 gr
975
16.05
In .22:
Pellet (.22)
FPS
FPE
Gamo PBA Platinum 9.7 grains
939
19
RWS Hobby pellet 11.9 gr
758
15.19
Crosman Pointed Hunting Pellet 14.3 gr
698
15.47
Gamo Raptor PBA gold 9.9 gr
918.8
18.56
Gamo Rocket 14.3 gr
724.7
16.68
Gamo TS 22 Long Distance 22 gr
575.5
16.18
Gamo Diablo Match 15.43 gr
684.8
16.07
Beeman Silver Sting 15.74 gr
678.6
16.1
Crosman Premier Domed 14.3 gr
709.6
15.99
Crosman Premier Pointed 14.3 gr
704.2
15.75
RWS Hobby 11.9 gr
771.5
15.73
Beeman Kodiak Extra Heavy 21.14 gr
575.4
15.55
Predator Polymag 16 gr
631.5
14.17
JSB RS 13.43 gr
714.2
15.21
Crosman Premier Hollow Point 14.3 gr
754.8
18.09
RWS Superdome 14.5 gr
743.2
17.79
JSB 18.1 gr
653.8
17.18
H&N Baracuda green 12.65 gr
843.6
19.99
Gamo TS 22 21.6 gr
593.6
16.9
JSB Exact Jumbo RS 13.43 gr
675
13.59
JSB Exact Jumbo Heavy 18.13 gr
609
14.93
Crosman Hollowpoint 14.3 gr
713.2
16.16
Gamo ProMagnum 15.43 gr
675
15.61
Gamo Pro Hunter 15.43 gr
668
15.29
Gamo Pro Match 15.43 gr
689
16.27
JSB 16 gr
631
14.15
H&N Baracuda 21.14 gr
527
13.04
H&N 14.8 gr
670
14.76
RWS Super H-point 14.2 gr
700
15.45
Crosman Premiere 14.3 gr
685
14.9
RWS Hobby 11.9 gr
727
13.97
JSB Exact Express 14.3 gr
673
14.39
As you can see, the velocities are not close to the advertised numbers but the muzzle energy is still more than enough to deal with pests and take out small game animals.
Suggested for: Target shooting/Plinking/Small game hunting/Pest control
Trigger Pull: 3.74 lbs
Action: Break barrel
Safety: Manual
Powerplant: Gas-piston
Function: Single-shot
Body Type: Rifle
Weight: 7.15 lbs
Customer review
There are lots of customer reviews for this Gamo rifle.
Positive reviews show that people love its IGT technology, smooth trigger, amazing accuracy, awesome power, and relatively quietness (although not as quiet as “whisper”).
Negative reviews show 2 prominent issues with this gun.
The first is the loud noise out of the box:
But the sound level will decrease after the break-in period so be patient if you just shoot a couple of pellets with this rifle.
The second problem is the scope: They said it’s hard to achieve the desired accuracy with the manufacturer’s scope.
The solution is simple: Use the great fiber optic open sight or you can put your own scope on this gun.
Pros and Cons
Pros
Cons
Proven IGT technology
Innovative ND52 noise suppressor
Improved SAT trigger
Remarkable stock
Attractive design
Terrific fiber optic sight
Amazing velocity
Breath-taking power
Eye-opening accuracy
Quiet for sensative neighbors
Bad scope
Price
The price for Gamo Silent Stalker is about 200 dollars.
Considering its advanced technology, superb power and accuracy, and lots of awesome features like fiber optic sights, variable zoom scope, it’s a very reasonable price for this pellet gun.
At this price level, you’ll have a lifetime gun that shoots as good as new for years.
There are a couple of different listings online with different prices but the listing I found with the lowest price is the cheapest price among online e-commercial sites like Amazon, PyramydAir, Walmart, etc.
This air rifle incorporates many of Gamo’s new features into one lightweight package.
It is powerful, accurate and the all-new SAT trigger is a huge improvement that Gamo’s customers have been begging for, for a long time.
The Silent Stalker is best suited for picky shooters who want to own an excellent air rifle with stunning power and for hunters who want a trusted companion to go into the field.
Bushcraft skills are essential for survival, especially if you plan on bugging out to a remote location.
The ability to use resources from the environment can save your behind when SHTF—and even help you thrive after—so it’s important to take the time to learn them.
In this article, we discuss bushcraft 101, from basic bushcraft tools to vital skills like foraging, building shelters, making fires, acquiring food, and more. You’ll also find useful tutorials throughout the article, so if you think you need to sharpen those bushcraft skills, read on:
Bushcraft 101: What Is Bushcraft and How Will It Help You Survive TEOTWAWKI?
Here’s the simple truth: Mother Nature provides all of your needs. All you have to do is figure out where to find these resources and know how to use them.
Bushcraft, used interchangeably with “wilderness skills,” focuses on using resources available in the natural environment for survival. This skill set includes fire making, foraging food, tracking, trapping, hunting game, and shelter-building using basic bushcraft gear.
Learning and mastering bushcraft skills will inevitably help you when SHTF.
Remember, in a large-scale disaster, most modern conveniences will go to the dogs. Without the grid, food supply, clean water, functional sewage, and the internet, society as we know it will plunge into chaos.
People will have no choice but to learn the old ways or perish. As a prepper, you’ll have to learn how to make fire, forage for food, purify water, build a shelter, and make tools with what little you can find.
By arming yourself with a sharp set of bushcraft skills, you’ll learn how to survive in a short-term emergency and even be self-sufficient in long-term scenarios. Once you’ve mastered these skills, you can go on to teach others.
Essential Bushcraft Tools
To do bushcraft, you must have the right bushcraft tools. Here are some of the basics to have in your arsenal:
Knife
A sharp and sturdy knife is indispensable in bushcraft. Without it, you’ll be unable to make fire, set up your shelter, hunt and prepare your food, carve other tools—plus a slew of other small tasks.
A durable full-tang knife with a fixed blade is often used for bushcraft. Full tang means the knife’s steel extends all the way through the handle, making it less prone to breakage and damage.
While folding knives are portable and great for EDC, they’re not exactly the safest or most reliable for tasks like woodworking, so stick with a fixed-blade knife instead. A knife with a drop point and a flat or Scandi grind is great for most bushcraft tasks, too.
How long should bushcraft knives be?
Bushcraft knives are usually around 3 and a half to 6 inches long. This length allows them to do both small, detailed tasks and heavy-duty work. Anything smaller will be hard to handle; anything bigger, on the other hand, will be a machete.
Should you go for a high carbon steel or stainless steel bushcraft knife?
As far as material goes, it’s a contest between high carbon and stainless steel. Your choice of steel will depend on your needs.
Carbon steel blades are durable, easier to sharpen, and tend to throw better sparks when used with a ferro rod. They’re more prone to rust and oxidation, however, so they need higher maintenance compared to their stainless steel cousins.
Stainless steel blades, on the other hand, take longer to sharpen, but they keep their edge longer. They require little maintenance and are virtually rust-proof, making them great for humid environments.
Don’t forget about the knife handle
The knife handle should feel good in your hand, too. Bushcraft knife handles are usually made from hardwood, but this absorbs moisture over time, so you can go for synthetic materials like Micarta or G10 fiberglass.
Knife Sharpener
Since you’re using a knife, it only makes sense to include a sharpening stone among your bushcraft tools. There are many knife sharpeners out there—the most common of which include Japanese water stones, whetstones, or oil stones.
Most sharpening stones have two sides: a coarse side for the initial sharpening and shaping, and a finer surface for the finishing touches. Leather belts also make for good stropping materials to keep your knives sharp even when on the field.
Check out the video above if you need pro tips on how to sharpen your knife while on the field or in your bushcraft camp.
Bushcraft Axe
Next up on our list of must-have bushcraft tools is an axe.
This bad boy is capable of doing tasks your knife can’t or shouldn’t do, like felling and limbing trees, cutting and splitting large pieces of firewood, and building permanent shelter.
Like your knife, axe blades can be made from high carbon steel or stainless steel. A bushcraft axe doesn’t have to be the biggest or longest, either.
Large axes with heavy bits may penetrate wood better, but they also require more energy for you to swing. That’s why most bushcrafters prefer using smaller, lighter axes they can conveniently stow away in a backpack. These are easier to carry around and can be used with only one hand.
Another important factor to consider when choosing this bushcraft gear is sharpness. An ideal axe should be able to keep its edge well even after use and abuse.
Lastly, an ergonomic hardwood handle is key for a good grip and chopping power.
Bushcraft Saw
Not all bushcrafters carry axes. Some enthusiasts prefer using a folding saw for woodworking since it’s significantly lighter and easier to carry around. It also makes for straighter cuts in the wood, which is great for building shelter, especially if you want a sturdy one to outlast the elements.
Saws are also more efficient since these bushcraft tools take less energy to cut through wood and produce more output in the same amount of time. Less effort means you have more time and energy left to do other tasks necessary for survival.
Compass
A compass is a pretty straightforward device. You don’t need a lot of bells and whistles in a compass; you just need to have a reliable one that orients accurately. Moreover, you have to know how to use one to find your way in the wilderness.
Firestriker
The last thing on our list of essential bushcraft tools is a firestriker.
Firestrikers or ferro rods are capable of creating fire through friction. Unlike lighters or matches, fire strikers work even when wet, are effective at any elevation, and don’t need fuel. They’re also easier to use compared to their flint-and-steel counterparts.
To know more about ferro rod fire starters, check out this comprehensive review.
Bushcraft Skills You Need to Learn
Now that you know the basic bushcraft tools, it’s time to dive into the skills you need to possess. Remember, it doesn’t matter if you have the sharpest knife or the most accurate compass out there if you don’t have any idea how to use them properly.
Below you’ll find an extensive checklist of all the bushcraft skills to have under your belt:
Foraging for Food and Medicine
Foraging, by definition, is the act of finding and gathering flora and fauna mainly for food. However, you can also use your foraging skills to find medicinal plants and herbs, natural cordage, firestarters, or materials for shelter.
Foraging for Food
Humans started out as hunter-gatherers. Before the dawn of agriculture and industrialization, the forests were our ancestors’ grocery stores.
Some examples of food you can forage in the wild include:
Fruits
Berries
Nuts
Mushrooms
Tubers
Shoots
Flowers, seeds, and weeds like dandelions and nettles are less obvious choices, but you can also forage and eat them when the going gets tough.
Know Your Local Geography
To be a good forager, you first have to know the lay of the land. What types of plants, fruit-bearing trees, and vegetation grow in your area? Where can you find them?
Take cattails, for example. This wild edible is common in most parts of North America and can be found near ponds and marshes. Cacti, on the other hand, are common in the West and Southwest regions of the States and can be found in dry, arid areas like deserts.
Plant Identification
Plant identification is crucial in foraging. Make a mistake, and you’ll end up with a bad allergy, a busted stomach…or you might not live to tell the tale at all.
Remember, Mother Nature may provide for all your needs, but she also has a lot of plants that can kill you on the spot, too, so it’s important to know how to distinguish friend from foe.
Ask yourself:
What do these edible plants look like? What are their distinct qualities, and how can you tell them apart from dangerous ones?
Some wild edibles, like root crops and bulbs, grow underground, so you also have to know how their leaves and shoots look above the surface.
If you’re a complete beginner, keeping a pocket guide with colored illustrations can help a lot. Make sure this pocket guide covers the area or climate that you’re in and carry it with you when out camping or backpacking. Try to identify the plants you can find along the way and take down notes with your personal observations.
You can also take classes with a forager to help you learn faster. These experts have years of insight and may have tips and learnings from their experiences that you can’t find in guidebooks about bushcraft skills.
Growing Seasons for Foraging
Aside from knowing the plants’ geographic location and appearance, you also have to be familiar with their growing seasons. When do these wild edibles grow most abundantly? Are they available only in certain seasons, or can you find them all year round?
Many edible mushroom species, for example, grow abundantly during the hot and humid summers. They grow at the edge of forests at the start of the season, especially after a nice, warm rain shower. By July to August, you can find tons of mushrooms in oak and beech groves or in areas where evergreen trees grow. They can also be abundant in south-facing hill slopes since these areas receive more warmth.
Foraging for Medicine
Plants aren’t only good for food. Many of them also have medicinal properties. To take advantage of these, you must know which parts of the plant to use and how to use them.
Here are some examples of common medicinal plants and what they can help with:
You can steep willow bark into a tea and use it to treat aches, pains, fever, and swelling.
Fennel tea also helps soothe an upset stomach and fight bloating and nausea.
Yarrow leaves and flowers can be used to aid in blood clotting to slow down bleeding. You can also use it to treat fevers and coughs.
Dandelions, usually passed off as weeds, can be turned into a salve for muscle aches and joint pain.
Plantains have excellent anti-inflammatory properties and make good poultices.
Comfrey poultices or compresses are great for fixing wounds and fractures.
Dos and Don’ts When Foraging
Building Bushcraft Shelters
Exposure to extremely harsh conditions can kill you in a matter of minutes, so knowing how to build temporary and long-term shelters is one of the most important bushcraft skills to know.
The good news? There are tons of ways to make bushcraft shelters from just about anything you can find in the environment.
Making cordage using natural materials
Cordage is one of the most vital components of bushcraft shelters. If you find yourself without rope or 550 paracord, you can use natural cordage to assemble frames or lash poles together for your shelter. You can also use cordage for other purposes, like climbing—and creating snares, traps, fishing lines, or bow drills for fire.
Cedar bark is one of the best sources of natural cordage. You can find these trees all over the country, especially if you’re in the Pacific Northwest region. To make cordage from cedar bark, you want to harvest the inner bark or bast of the tree. That’s the stringy, fibrous layer right under the protective outer bark.
As you can see in the video above, you’ll need to peel the outer bark off in one go and harvest the bast to create cordage from the fibers. You’ll want the bark to dry and age before turning it into ropes, though, since moist bark can shrink over time.
Plants like nettles also make for good cordage. Remove the leaves, flatten the stem, and carefully peel the nettle skin off. Once you’ve done that, twist the fibers until you form cordage. Unlike cedar bark, you don’t have to wait for the nettle stalks to dry out before you can use them. They’re also strong and capable of withstanding tension.
Just wear gloves when harvesting these plants—they’re not called stinging nettle for nothing.
Other natural materials you can use as cordage include some species of tall grass, willow saplings, roots, and jungle vines.
Tying Knots
Knot-tying is another one of the most basic but essential bushcraft skills to learn. If you don’t know how tie decent knots, cordage would be of little use.
There are various knots for different purposes. Here are some of our go-tos:
Square knot – This is a multipurpose knot great for tying or connecting two lengths of rope.
Figure eight – This knot retains the strength of the cordage well. It doesn’t unravel with pressure, so it’s good for climbing, creating footholds, or pulling someone to safety.
Bowline knot – Also retains the strength of the rope or cordage. You can tie this with one hand, making it excellent for rescues or for tying down objects.
Clove hitch – This is a quick-release knot for securing cordage to trees.
Tautline hitch – It’s used to adjust the tension on tarp shelters.
For an in-depth look at more knots you can use for bushcraft and survival and how to tie them, check out this post.
Basic Types of Bushcraft Shelters
Bushcraft shelters come in all shapes and sizes. You can find shelter in nature, as in uninhabited caves, under rock overhangs, or near large fallen trees. You can also construct your own from tree limbs, branches, and foliage. Some types of bushcraft shelters you can make include:
Lean-to shelter – a common free-standing shelter with three walls and an open side. This is one of the easiest bushcraft shelters you can construct.
A-Frame shelter – has a triangular, A-shaped frame with a main ridgepole that runs along the top. Also known as the double lean-to shelter.
Dug out shelter – a shelter made by digging a trench on the ground
Fallen tree shelter – a shelter made from the flat base of a tree root
You can read more about how to build these bushcraft shelters and more in this article.
General Shelter Building Guidelines
Whatever type of shelter you’re looking for or are making, here are some things to consider:
Pick a good location. Your shelter should be able to offer adequate protection from the environment and shield you from harsh rain and wind. It should also be located a safe distance away from your water source (about 200 meters).
Choose a relatively flat location to avoid floods.
Avoid setting up camp under large trees. While they offer shelter from rain, they also have thick branches that can fall on you. Plus, they’re prone to lightning strikes and their leaves will drip long after the rain has stopped—their cons outweigh the pros.
Your shelter should be able to reflect and conserve heat. Stone faces or large boulders make for good heat reflectors. You can also construct a wall from medium-sized sticks and line it with foliage and moss, which are natural insulators.
We’ve previously talked about survival and bushcraft shelters at length in our other articles. Here’s a directory of useful info to help you out:
Waterproofing your shelter
Since your shelter is mostly made of wood, you’d want to take extra measures to make sure that it stays dry.
As we mentioned earlier, choosing the right place is essential in keeping dry. Pick a relatively flat and well-draining location, away from trees with a lot of leaves to prevent dripping. Stay away from ravines or canyons—they may be bone-dry now, but they’re notorious for flash-flooding after mild showers.
When building your shelter, don’t make it too big to conserve heat.
You also have to create roofs at an angle so that rainwater flows at the sides. Cover these steep, angled roof frames with broad leaves, starting from the lowest part and working your way towards the top. This way, your roof can work like shingles and shed rainwater without a hitch. Don’t forget to dig a rainwater runoff around your camp so you won’t wake up in a puddle.
Another way to waterproof your shelter is by simply bringing a tarp. Tarps are cheap, hard-wearing, and multifunctional. You can use different configurations to turn it into a shelter, use it as a ground sheet or to put on as an additional layer to your bushcraft shelter’s roof.
When using tarps to waterproof your shelter, make sure that it’s stretched out tautly and is securely pegged to the ground or to a tree so that it doesn’t collect rainwater. If you can’t afford a tarp, use a thick drop cloth or repurpose an old shower curtain.
Related: Waterproofing your survival gear and supplies
Making DIY cement from wood ash
Basic carpentry and woodworking are undoubtedly crucial bushcraft skills to know when making long-term shelters, but if you want to take it up a notch, you can create makeshift cement from wood ash.
As the name suggests, wood ash cement is made by burning biomass like dried bark and leaves. These materials are more common than the usual ingredients used to create makeshift cement like limestone or shells, but contain the same minerals like potassium, phosphorus, and calcium. When done properly, you can use wood ash cement as mortar to reinforce your shelter, or you can turn it into little blocks for various purposes.
The process is pretty labor-intensive and time-consuming, though, so it’s best to make this only if you’ve got the time and resources. As seen in the tutorial above, you’ll need a kiln or oven, a lot of ash from biomass (hardwood ash works best), and some clay or terracotta to use as aggregate.
Still, it’s a good-to-know skill that might come in handy when you’re building a semi-permanent bushcraft dwelling or bug-out camp.
Primitive Firemaking
Fire provides you with heat, light, and protection. This indispensable resource also allows you to cook food, purify water, and fend off predators. Needless to say, knowing how to make fire is one of the top bushcraft skills you should master.
You only need three ingredients to create fire: oxygen, heat, and fuel. These factors are collectively known as the combustion triangle. If one is missing, you can’t ignite a flame.
Oxygen, of course, comes from the air around us. You can best harness oxygen by allowing proper ventilation and by creating efficient firelays.
You can produce heat primarily through friction. Once you create a spark or an ember and it catches on to your fuel, chances are you’ll be able to create a fire.
Fuel comes in the form of combustible materials and is generally classified as tinder, kindling, and firewood.
Tinder is the smallest and finest of the bunch, usually made from thin wood shavings, feather sticks, and other fibrous materials. Its purpose is to catch sparks or embers to burn kindling like sticks and twigs. Once your tinder and kindling are burning, you can feed it larger chunks of fuelwood to keep it burning and to produce hot coals.
Natural Firestarters: Tinder, Kindling, and Firewood
Shavings or curls from fatwood or from resinous trees like cedar, birch, and pine make for excellent tinder, and you can find them almost anywhere in North America.
Tree bark also makes a great tinder and firestarter. Red cedar bark is especially fibrous and can be lit even when damp. You can fluff up red cedar bark to create a “bird’s nest” to catch sparks or live embers.
Birch bark is rich in resins which help them ignite faster. It’s also resistant to moisture and easy to gather. Simply skin dead fallen birch trees with a knife, and their barks will come off in sheets. You can tear birch bark into strips and bundle them up to start a fire.
Fatwood is another term for pine heartwood drenched in resin. Though not as common nor as easy to harvest as the other firestarters mentioned earlier, fatwood shavings light almost instantly, even in super damp conditions. You can also cut them up in chunks and use them as kindling or firewood.
Other natural fire starters include:
Tinder fungus – This black and spongy species of mushroom is used to hold coals or reignite fires.
Cattails – Dry and fluffy, cattails can be found near water or in marshlands. They don’t burn for very long, so they’re usually considered flash tinder.
Pinecones – Like fatwood, pinecones are resinous and can be used as fuel.
Batoning and splitting firewood
Batoning firewood has been a very polarizing topic among preppers. Should you do it and risk ruining your knife? Or should you never do it at all?
Well, whether you’re in favor of it or not, you have to learn how to baton and split wood when you’re left with no other choice.
Batoning is the process of splitting wood with a knife and another blunt piece of wood called a baton. The idea is to lodge the knife onto a block of wood and strike it with the baton, thus splitting the wood into smaller chunks perfect for a campfire. Batoning can sometimes be easier than using an axe or saw, especially when you want to split small pieces of wood quickly.
The downside is that batoning needs a lot of practice, and it can damage your knife in the process. If you’re not careful, you might even end up hurting yourself.
The trick to successful batoning is to make sure that your knife is sharp and its edge is placed perfectly straight onto the block. Then, strike it with the baton nice and hard to split it right down the center.
Primitive Ways to Make Fire
Since primitive folks didn’t have matches or lighters, they primarily made fire through friction, and they produced friction through drills.
There are many types of drills out there, but they more or less have the same basic components: a spindle or a long stick that one uses to create friction and a fireboard, which is a flat piece of wood that collects the embers made by the spindle.
Here are some examples of primitive fire drills:
Hand Drill – The hand drill can be operated by one person and is perhaps the most easily recognizable fire drills out there. The idea is pretty simple: you roll the spindle really fast between your palms, running your hands down its length very quickly until it produces embers. The embers are collected in a small nick or depression on the fireboard and are then transferred to a pile of tinder. Tinder ignites and boom, you have a fire.
Bow Drill – The concept is pretty similar to a hand drill, but this time, you use a flexible stick and a piece of cordage to create a bow. The bow is used to turn the spindle and creates the friction for you.
Two-Man Friction Drill – This one is essentially a bow drill but instead of going at it alone, one person holds the drill upright while the other operates the bow to create friction.
Pump Fire Drill – This type of fire drill is a bit more complicated than the rest. The bow is powered by a manually operated pump mechanism that creates friction.
Aside from drills, another primitive way to create a friction fire is through a fire plough. Instead of using a spindle and a small depression on a fireboard, you make a groove along the length of the fireboard and slide another piece of wood along it, creating friction horizontally. The stick should be around an inch thick and made from softwood for best results.
You can also use flint and steel. This is how they used to kick it back in ye olde days. On one hand, you’ve got a striker made from carbon steel, and on the other, a hard stone made from flint or chert. Striking these materials against each other creates sparks, which catch on dry tinder.
You can perfect this method through practice, but a more convenient way to create fire through the same principle is by using ferrocerium rod fire starters instead.
Which Firelay Should You Use?
It’s not enough to light a fire—you should also be able to keep it going. An excellent firelay will help your fire stay lit throughout the night with little to no maintenance, so it’s important to pick the right one.
Here are some examples of firelays you can construct:
Tipi firelay – As the name suggests, the tipi firelay sports a triangular shape like a tipi shelter and can be made from sticks and twigs. To build it, all you have to do is start from small kindling and work your way to the bigger ones, leaving an opening on the upwind side to ignite the tinder.
Log cabin or upside down fire – This is a self-feeding firelay that burns from top to bottom. Up top, you have your tinder and kindling. The pieces of fuel get thicker as you go down the firelay, allowing the fire to produce a big, hot, and consistent flame with minimal tending.
Star fire – This one is really simple. Start by building a small pile of tinder and kindling, and around it, place large pieces of firewood. The idea is to gradually push the larger pieces of fuel into the fire to keep it going.
Wanna know the nitty-gritty details of making these firelays? Check out these tutorials. If you want to learn more about firemaking in general, here’s the full roster of useful guides and resources:
Finding and Purifying Water in the Wild
Hydration is key for survival, so knowing how to find and purify water in the wild should be bushcraft 101.
Like the other bushcraft skills mentioned in this article, you can find many sources of water out there by first knowing the lay of the land, and by reading natural indications of water, like the following:
Gurgling or rushing sounds – These indicate the presence of running water. Since water flows downward, you can most likely find it in low-lying areas, canyons, and valleys.
Plants and vegetation – Certain plant species, like lilies and cattails only grow near water, so look out for these. Note the quality of the soil, too—muddy or marshy ones obviously indicate water. Large, thick vines and trees can also be sources of water themselves. Before you drink up, however, make sure that the plant is not poisonous and it doesn’t ooze bitter or cloudy sap.
Presence of animals and insects – Grazing animals and herbivores are more likely to lead you to their watering holes. Watch out for birds, too. Birds will fly low and in a formation when in search of water, and will likely hop from tree to tree after having a drink.
When you can’t find a lake, river, or stream to get water from, you’ll have to get creative by collecting rainwater, creating a solar still, or looking for alternative sources of hydration. Here’s a guide on how to go about those methods.
Bushcraft Water Purification
A bandana or shemagh is excellent for taking out debris and dirt from your drinking water, but if you don’t have one on hand, you’ll have to make your own filter. The video above describes the process of how to make one with a bottle and some natural filters like rocks, leaves, and soil.
The idea is to stack the filters up in layers. The large and loose ones, like rocks and pebbles, go at the top to filter big pieces of debris. The filters gradually become finer to take out minute contaminants until you get clear water.
Once you’ve got a decent amount of water, purify it via boiling. Boiling kills microorganisms and viruses that might cause disease.
Related: Best Ultralight Backpacking Water Filters
Trapping and Hunting Game for Food
Berries, roots, and edible plants will keep you alive well enough, but if you want to fill your belly with something more substantial, you will have to learn how to track, trap, and hunt game for food.
Here’s what you need to know about these bushcraft skills:
Trapping
The biggest advantage of trapping is that it saves you time and energy. Unlike hunting, where you have to actively chase after a single quarry, trapping lets you catch a lot of prey without having to run after them.
You can set up traps in different places to increase your chances of catching a meal. This multitasking feat frees up a large chunk of your time, letting you do other stuff like building a campfire or reinforcing your shelter.
When setting up traps and snares, it’s important to develop a keen skill for tracking animals. Know what kind of animal you’re trapping by watching out for things like:
Pawprints
Fresh or worn tracks
Droppings
Disturbed vegetation
The animal’s usual diet within the vicinity
Once you’ve determined your prey, it’s time to move. Here are tutorials that show how to create some of the most common traps out there:
Deadfall Trap
The deadfall trap is one of the earliest and most effective traps known to man. It’s used to catch small to medium-sized prey like rodents and squirrels.
Spring Snare Trap
Simple yet effective, the spring snare trap uses a length of wire or string to create a noose that tightens around the animal’s leg or neck.
Woven Fish Trap
This trap takes a long time and a lot of skill to make, but the payoff will be worth it. This trap lets you catch medium-sized fish and eels.
Prawn Trap
This is a smaller version of the fish trap for prawns and smaller species of fish.
Things to Remember When Making Traps
Traps take a lot of skill and practice. Here are some useful tips to remember when constructing traps and snares:
Prepare the parts of your trap away from the area to avoid disturbing the vegetation and alerting the animals to your presence. All you have to do when you come to the site is to assemble it.
Stay downwind.
Always wear gloves when handling your traps. Animals have a keen sense of smell and can detect your scent. Rub plants, dirt, or the innards of your previous catch onto your trap to mask your own scent and confuse the animal.
Blending in is key. Make sure that your trap blends well with the environment by camouflaging it with leaves, mud, and vegetation.
Avoid using young twigs and cordage when making your traps. These release a scent that alerts animals of potential predators. If you can’t find old materials, age your trap by exposing it to the sun.
Choose your bait wisely. Don’t use bait that the animal can just easily find elsewhere. Instead, use something that will potentially catch their attention.
For an in-depth look at other primitive ways to catch, cook, and eat food in the wild, check these out:
Other Bushcraft Skills You Have to Know
Shelter, fire, water, and food are the four foundations of outdoor survival. Once you develop your skills in these areas, you’ll be able to survive out in the wild without modern resources.
However, that doesn’t mean you have to stop there. These intermediate bushcraft skills will help you take your survival know-how to the next level:
Making Bushcraft Tools
What separates humans from other primates? Our ability to create and use tools to help make our lives easier. This video shows 7 useful primitive bushcraft tools and contraptions you can use in and around your camp.
Natural navigation
You need to know how to get your bearings when out in the woods. When you don’t have a compass and a map, natural navigation techniques will prevent you from getting lost in the wilderness.
Creating watercraft
At some point, you might have to leave your camp and venture out into bodies of water to get food or to explore. You can create a canoe from reeds, as shown in the video above, or construct a raft from driftwood.
Final Thoughts
You know what they say: the more you know, the less you need. Having a sharp set of bushcraft skills will not only help you survive in the wild; they will also help you live off the land and thrive without modern creature comforts long after SHTF.
How good are your bushcraft skills? Do you think you can survive an extreme bug out situation in the woods? Let us know in the comments!
After spending enough time in the field, aiming at and leading a duck may become second nature. You pull up, know where to shoot, and make a clean shot. This comes with many trial and errors and empty shotgun hulls without much to show for them. In this article, I’ll talk about the science behind how far to lead a duck, and how much margin for error there is.
How far to lead a duck based upon distance
A shooter needs to lead a duck by .24-5.16 feet to make a clean shot. The two distinct variables that determine how far each duck should be led by are: How far away the duck is, and how fast the duck is flying.
How to aim at a duck
Flight speed and lead distance
How far to lead a duck at 20 yards
How far to lead a duck at 30 yards
How far to lead a duck at 40 yards
Is is hard to shoot a duck?
*Note: as you’ll see later in the article, choke tube selection does not determine the distance a duck should be led by, but instead impacts the margin of error that a hunter can miss by.
To correctly aim at a duck, a hunter must shoot far enough in front of it to allow for the time delay between when the pellets leave the barrel of the gun, and when they arrive at the duck. The distance of how far to lead a duck by is determined by how far away from the hunter the duck is, and how fast the duck is flying.
I was interested in the math and science behind how far to lead a duck (I know, you can say it, I can get a little nerdy sometimes), so I started digging into the numbers. I learned a lot in the process and thought it was interesting enough to publish my findings. Scroll to the bottom of this article to see the calculations and equations I used to create these tables and charts.
Charts showing how far to lead a duck by
The tables below show the midpoint for leading a duck depending upon its flight speed. This represents how far you would need to aim ahead of the duck so it ends up in the exact middle of your pellet pattern. You don’t have to shoot spot on this midpoint to make a clean kill shot, meaning there is some margin of error which is discussed later in this article.
A duck that’s getting ready to land (flying 5 mph)
How far to lead a duck that’s flying 5 mph
A duck that’s making an approach (flying 15 mph)
How far to lead a duck that’s flying 15 mph
A duck flying by (flying 25 mph)
How far to lead a duck that’s flying 25 mph
A duck making a fast pass (flying 40 mph)
How far to lead a duck that’s flying 40 mph
Is it hard to shoot a duck?
Shotguns that shoot several pellets at the same time are used to hunt ducks, so there’s a margin of error both ahead of, and behind the midpoint, that would still allow for a clean kill shot. This margin of error is primarily determined by the choke tube used.
In some situations, like when the duck is getting ready to land, it can be easy to shoot a duck. On the other hand, if the bird is further away (30 yards or more), and flying fast (faster than 25 mph), it can be very challenging.
Chart showing inches you could shoot either ahead of or behind a duck and still make a clean kill shot using various choke tubes:
Inches of Margin of error per chock tube
Calculations used in the experiment
There are numerous small variables in every hunting situation. They can’t all be accounted for, so I used the following assumptions for a control baseline in my calculations:
Check out our article about best shot sizes for ducks
#2 Steele shot traveling 1365 fps
12 gauge 30 inch barrel
Shotgun is patterned correctly
Light/no wind
No rain
Average size duck
Equations used in article
Equation used for midpoint: (B/C) * A = X
A= speed (fps) the duck is traveling at: fps converted from mph
B= distance (ft) from duck (ft): Yards converted to ft
C= pellet speed (fps)
D= time (seconds) for pellets to reach target: (B/C)
X = Distance to lead duck by
Margin for error (inches) equation =
(Size of pellet spread that contains 65-70% of pellets at specified distance in ft) / (2)
Considerations that might impact my results:
Using a smaller shot size would mean it would take more than 65% to 70% of the shell’s pellets to bring a duck down
The longer the gun barrel, the tighter the pellet pattern. This can reduce the margin of error while increasing the effective distance
Shotgun shells with slower/faster pellet speeds would increase/decrease how far a duck would need to be let by
Larger ducks usually take more/larger pellets to bring down
Using a 20 gauge would decrease the effective rage
For 35 years, Liberty Safe has been our best-selling brand. Based in Payson, Utah, Liberty’s premier production line is manned by Americans. It’s the only US manufacturer offering a full range of entry-level to high-end gun safes. However, we do offer many other U.S.-built safe brands that provide a Liberty Safe alternative.
Although Liberty is the household name, when it comes to quality U.S.-built safe manufacturers, others such as Browning, Champion, Superior, and Rhino offer alternatives to Liberty that might align with your needs. We compiled a short list to compare with Liberty Safes best sellers for your reference.
Although Liberty is the household name, when it comes to quality U.S.-built safe manufacturers, others — such as Browning, Champion, Superior, and Rhino — offer alternatives to Liberty that might align with your needs.
While we’re well-versed in the selection of gun safes for sale (you might even call us gun safe nerds), we know that comparing multiple brands can be confusing. The following list outlines Liberty’s best sellers and the closest American-made alternative.
DISCOUNTS & REBATES: The following prices listed below do not reflect any current sales and or rebates available. Additionally, we are currently offering 12-month same as cash financing to qualifying individuals.
1. Liberty Centurion Alternative: RHINO RBFX
Rhino is a veteran-owned gun safe manufacturer located in Caldwell, Idaho. It’s named after the fighter jet Don Suggs flew — a McDonnell Douglas F-4 Phantom. (A twin-jet, all-weather aircraft that had top speeds more than twice that of sound!) An innovative manufacturer, Rhino offers both a patented swing-out gun rack and their new patented SafeX™ Security System.
Liberty CenturionPrice Range: $799 – $1,299 Fire Rating: 40 MinutesSteel: 14 Gauge
We hate saying there’s no solution for something. Our team bends over backward to help customers achieve their goals. But when it comes to finding a Liberty safe alternative for the USA series, we can’t. There simply isn’t a comparable American-made gun safe at this price point at this time.
3. Liberty Colonial Alternative: BROWNING HUNTER SERIES
Browning can trace its roots back to 1878, when the Browning Arms Company was founded in Ogden, Utah. It made a name for itself as a sporting gun manufacturer. Over the decades, it has offered a wide assortment of outdoor gear — including gun safes.
4. Liberty Fatboy Jr. Extreme Alternative: BROWNING HUNTER PATRIOTIC 49
In a head-to-head comparison, The Browning Hunter Patriotic 49 weighs 165 pounds more than the Fatboy Jr. Extreme and can hold one additional long gun. It’s also important to note that the Hunter Patriotic 49 is 11.5 inches taller, requiring a larger ceiling.
Liberty Fatboy Jr. ExtremePrice Range: $2,799 – $2,899Fire Rating: 75 MinutesSteel: 12 Gauge
5. Liberty Franklin Alternative: BROWNING 1878 Series
Once again, this U.S.-built Liberty Safe alternative is a bit pricier. It also packs on a few more pounds, weighing roughly 75 pounds more than similarly sized safes within the Franklin series.
6. Liberty Fatboy Alternative: BROWNING HELLS CANYON 49
Head-to-head, this is where we start to see more comparable safes from U.S. manufacturers. They offer similar footprints and storage capacity. One of the primary differences between these two safes is Liberty’s patented flat bar design.
7. Liberty Lincoln Alternative: CHAMPION SUPERIOR MASTER SERIES
The Superior Master series produced by Champion offers top-tier security and uncompromising craftsmanship. It features thick, reinforced, pry-resistant doors — along with an intelligently designed interior to maximize long-gun and valuable storage.
Liberty Lincoln SeriesPrice Range: $4,099 – $6,599Fire Rating: 120 MinutesSteel: 10 Gauge
8. Liberty Presidential Alternative: AMERICAN SECURITY BFX SERIES
Established in 1946, American Security (aka AMSEC) manufactures some of the strongest gun safes and commercial safes in the world. The BFX series is its premier consumer gun safes. The series features a UL certified RSC burglary rating, aligned with an adjustable interior for customizable storage solutions.
What to Know About Alternatives to Liberty Gun Safes
Liberty Safe Sells the Only Entry Level American-Made Long Gun Safe
If you want an American-made gun safe for $1,000 (or less), Liberty is your only option.
American Flags Look Cool. They Don’t Guarantee a Made-in-the-USA Safe.
We love Old Glory. And we think things decorated with her look pretty darn cool. But beware a wolf in sheep’s clothing because it’s not uncommon for a foreign gun safe manufacturer to print an American flag print on their product. The flag doesn’t mean it was actually made in the U.S.
Fishing has been around for a while. For thousands of years, humans have been catching aquatic creatures for food — so fishing rods are a pretty ancient invention. The tool was used throughout China, Egypt, and Greece in 2000 BC, but rods were invented even earlier than that.
Before rods, prehistoric humans probably caught fish with their hands or other traps. Eventually, fishing hooks were carved from wood or bone to catch fish more easily. Then came fishing rods that were much more similar to modern inventions. By the 15th century, deep-sea fishing was underway and seafood was a typical part of the global diet.
Today, fishing is a popular pastime and a common source of food. Learn more about the most expensive fishing rods you can buy with this top 10 list.
Dobyns Champion Extreme HP Spinning Rod
photo source: americanlegacyfishing.com
First we have the Champion Extreme HP Spinning Rod by Dobyns. This high-end system has a lot of nice touches that boost the price. Each rod features “Kigan titanium frame zirconium insert guides” and classic hook keepers to avoid tangles. The rod also offers high-quality cork on the handle.
Dobyns rods are designed by Gary Dobyns himself — a legendary tournament fisher. Buyers enjoy a lifetime warranty and all the benefits of a rod designed by a pro.
Dobyns says he wasn’t satisfied with what the fishing rod market had to offer, so he made his own designs. With decades of experience, Dobyns rods are some of the best out there.
The Legend X Series Casting Rod
photo source: fishermanswarehouse.com
Coming in at number nine is the Legend X Series Casting Rod by St. Croix. This high-end rod offers classic design details combined with advanced technology. St. Croix says the rod is “built upon a super-high modulus graphite blank with FRS in the lower section,” giving users a high-strength and durable rod that’s simultaneously light-weight.
At more than $400, this fishing rod is one of the most expensive on the market.
Did you know?
St. Croix has been around for over 70 years. The business operates in Wisconsin and Mexico, producing a range of fishing rods for freshwater and saltwater fishermen.
50W 2-Speed Reel on a Bent Butt Tournament Edition Rod
photo source: eatmytackle.com
This tournament-level rod and reel combo stands out with high-end design and careful craftsmanship. Stainless steel, saltwater resistance, and smooth finishes make this rod extremely expensive. Sold by Eat My Tackle, the setup costs an eye-popping $734.99 — making it the eighth-most expensive fishing rod you can buy.
Did you know?
So what’s the point of the bent butt design? It comes down to how the rod is used. Bent designs are good for heavy drag and heavy tackle while straight designs are better in most other cases. Bent butt rods are also useful for people who have trouble controlling the rod, like kids or smaller adults.
The T&T Paradigm Fly Rod
photo source: tridentflyfishing.com
Up next is this beauty from Thomas & Thomas (T&T). The classic design may look simple, but expensive touches like authentic American maple details and T&T’s attention to detail boost the rod’s appeal — and price. At more than $900 apiece, these rods are the seventh-most expensive on the market.
T&T rods are handcrafted in the U.S. The company was founded in 1969 by Tom Dorsey and Tom Maxwell. For decades, T&T has been at the pricey end of the fly fishing market.
Did you know?
T&T fishing rods were given to President Regan and First Lady Nancy Regan to be gifted to the Royal Family.
Sage R8 Core Fly Rod
photo source: gorgeflyshop.com
The R8 Core Fly Rod by Sage is a corrosion-resistant design that sells for more than $1,000. The pricey rod offers easy control and connection with the water so users can feel subtle movements without the risk of losing their catch.
Sage says this rod is focused on “maximum versatility and applies new revolutionary material technology.” The durable design features Ziricote wood, anodized aluminum, and real cork. The whole setup makes it easy to gauge the power you need in each cast for precise fishing and careful catching.
Did you know?
Sage says this rod promotes “zen-like awareness” of quiet movements in the water so users never miss a fish.
The G. Loomis Asquith 690-4 All Water Fly Rod
photo source: americanlegacyfishing.com
Next up is the Asquith 690-4 by G. Loomis. The fly rod offers durable materials that avoid ovalization and a saltwater-friendly reel system. Overall, the entire rod system costs a whopping $1,175.
Loomis says its mission is to “heighten angler experience through creating tools that expand tactical opportunity.” The brand offers a range of products, including cheaper options like this rod which sells for less than $300.
Did you know?
Historians say the oldest references to fly fishing date back to the 13th century in England. These early fly fishers used their rods to catch grayling and trout.
2021 XOS GT’n’Doggie 7’6 Expedition
photo source: fishingandboatingdeals.com
Hamachi’s 2021 Expedition rod is designed for travel. The system easily breaks down for easy storage so users can fish all over the world, but the design is strong enough so you never lose a fish. With “a parabolic rod rated at PE 5-10, with a max drag of 22kg@ 45 degrees and 18kg@ 60 degrees,” the Expedition is ready for anything.
All those cool features come at a price though — at more than $1,200, this rod is the fourth-most expensive on the market.
Did you know?
Deep-sea fishing showed up around the 15th century, but fishing was an important part of the human food supply long before that.
Penn’s Creek Full-Flex Split Bamboo Fly Rod
photo source: orvis.com
Heading into the top three we find the Penn’s Creek rod by Orvis. This fishing rod costs an eye-popping $2,998, but the optional personalization feature boosts that price by $45.
This rod is known for its light-weight feel and beautiful design. Orvis used real bamboo for flexibility and durability, making this a great option for avid fishers or collectors.
Did you know?
Orvis was founded in 1856 by Charles F. Orvis. The brand was established in Vermont and provided fly fishing equipment. Now, with over 160 years in the history books, Orvis offers a range of outdoor gear — including expensive fishing rods.
Oyster Bamboo Fly Rods
photo source: oysterbamboo.com
Coming in at number two are Oyster Bamboo Fly Rods. These pricey fishing rods are made by Bill Oyster, a famous fly rod maker who has crafted rods for people like President Jimmy Carter. Each rod costs about $5,760 and buyers have to provide a $1,440 deposit before the creation process begins.
Each Oyster Bamboo Fly Rod is custom-made when a customer puts in their order. As such a skilled craftsman, Bill Oyster has worked with students from across the globe to teach the careful art of making fly rods.
Did you know?
President Jimmy Carter said, “It is obvious to me that this Oyster rod will be my favorite.”
The Hermès Fishing Rod
photo source: vogue.com.au
The Hermès fishing rod is the most expensive fishing rod you can buy.
At more than $13,000, this fishing rod by the luxury brand Hermès is by far the most expensive rod on the market. The crazy-expensive design features pricey materials like sycamore and leather.
Hermès might be mostly known for its fashion, but the company regularly offers pricey non-clothing items. Beyond this fishing rod, Hermès sells lures and a satchel that’s perfect for carrying your bait — if you can afford it, that is.
Did you know?
Hermès was founded in the 1830s. To this day, the brand is family-run and independent. The brand is known for high-end designs and pricey products like this $12,000 jacket for men.
Bullfrogs and green frogs look similar but are easy to tell apart from other frogs in Missouri, due to their relatively large size at maturity. They prefer aquatic edge habitats that offer still, shallow water with aquatic and/or terrestrial vegetation. This provides both cover and food, such as insects and nearly any other small animal that will fit in their mouths. Ponds, lakes and river banks, wetlands, and other vegetated waterways are all great places to find frogs.
Frog Hunting
Methods
Frogs can be hunted in Missouri using many different methods.
With a fishing permit, frogs may be taken by gig, trotline, throw line, limb line, bank line, jug line, snagging, snaring, grabbing, or pole and line.
With a hunting permit, frogs may be taken by crossbow, pellet gun, or .22 or smaller caliber rim-fire rifle or pistol.
With either permit frogs may be taken by hand, hand net, bow, or atlatl.
Green Frog
When to Hunt Frogs
Frogs may be pursued during the day or at night with an artificial light.
During a full moon frogs are typically more skittish because they feel more exposed, and are thus more difficult to approach.
During a new moon it is usually easier to get closer to them.
Because frogs are amphibious and must keep their skin moist, they spend more time in the water and weeds during the day and are generally less visible around the banks than at night. Whether they’re hiding or not, their location is often given away by their assertive croaks.
Getting Started
Frog-Hunting Gear
Rubber knee boots or hip waders
Flashlight
Gig or net
Something to keep your harvested frogs in
Choosing a Location
Public and private landowners typically do not manage for frogs. Instead, frog populations are often the result of management for another species such as waterfowl or fish. Frogs are also common in aquatic edge habitats not subject to management or maintenance of any kind.
Waters with few to no predators will yield the best frog populations, which is why newer ponds or very old ponds are generally plentiful with frogs. Bullfrogs and green frogs can be found along nearly all waterways on MDC conservation areas but especially on wetland areas and along rivers and lakes.
Bullfrogs are ambush-style predators that will eat any live prey they can fit in their mouths, including insects, fish, mice, birds, and snakes! Focus on shallow water areas and mud flats along the margins of ponds, lakes and wetlands where cattails, willows, grasses, and other aquatic vegetation is present.
Tips and Tricks
If you are hunting with a partner, have them blind the frog using a light so that you can stalk the frog from behind. Frogs can feel the vibrations of you approaching on foot, sometimes causing them to flee before you locate them.
Consider using a canoe to stealthily locate and get close enough to grab, net, or gig.
Try Hunting During the Day
Most frogs are caught with the use of a gig or by bare hands at night. For a little different experience, try fishing during the day. Simply use a long fishing pole, like a cane poll or crappie rod, with a short piece of fishing line and a small treble hook tied to the end. Attach a small piece of red cloth to the hook and dangle in front of the frog. Often temptation will get the best of the frog and it will strike at the cloth. The only thing left to do is set the hook.
Unveiling the truth behind dry firing a Gamo air rifle, this intriguing headline delves into the possibility of safely practicing without ammunition. Join us...
")
")
")
")
")


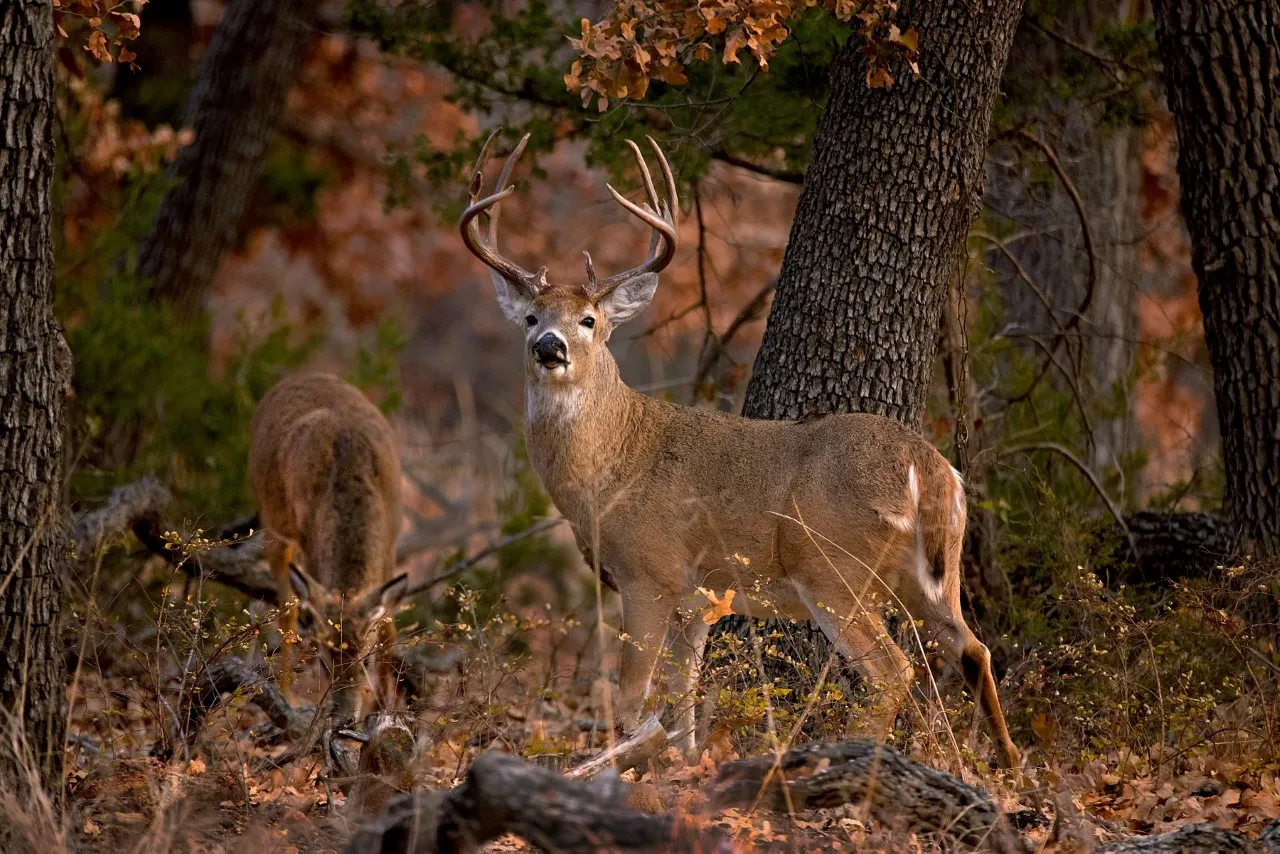


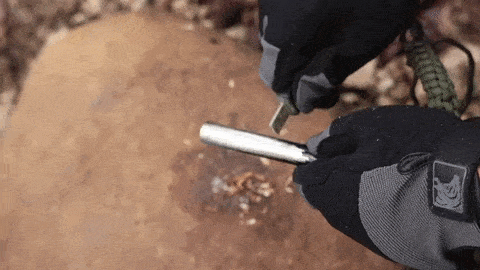


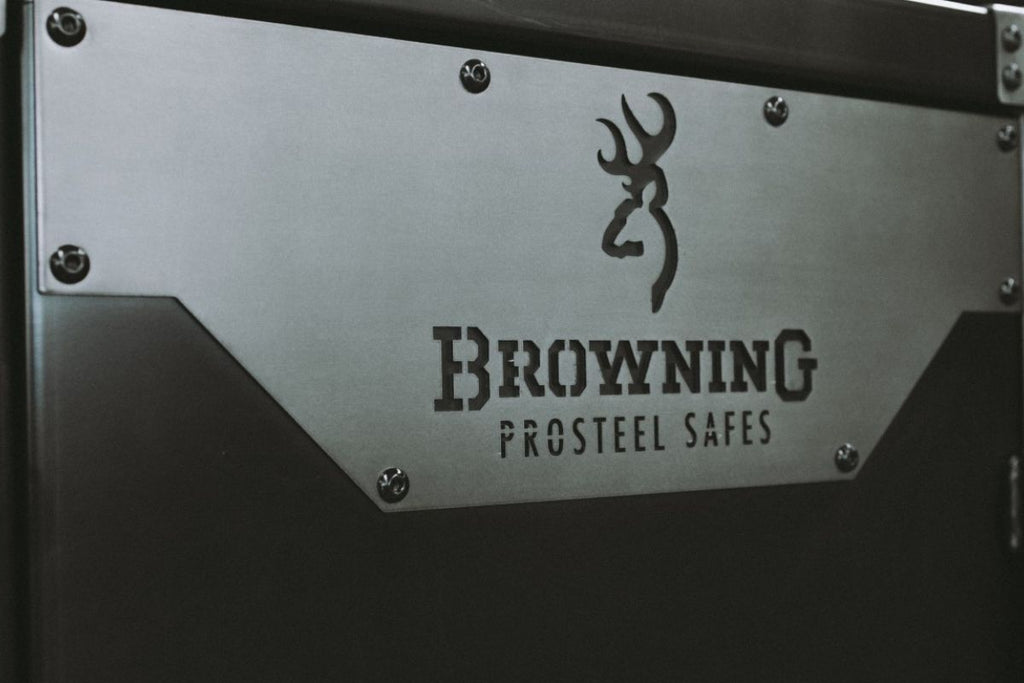
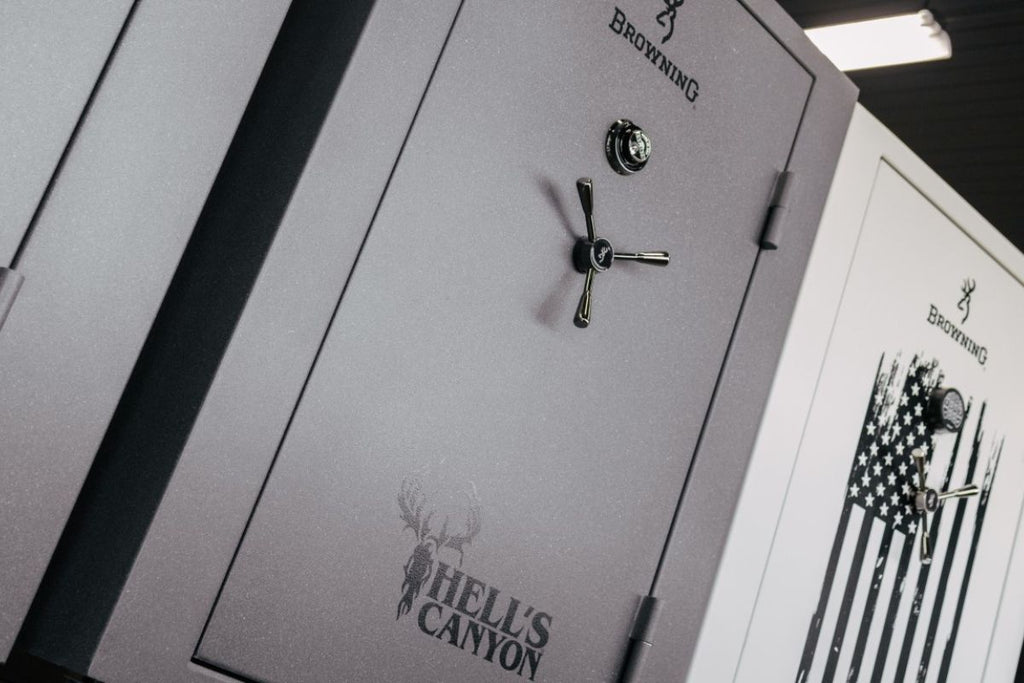

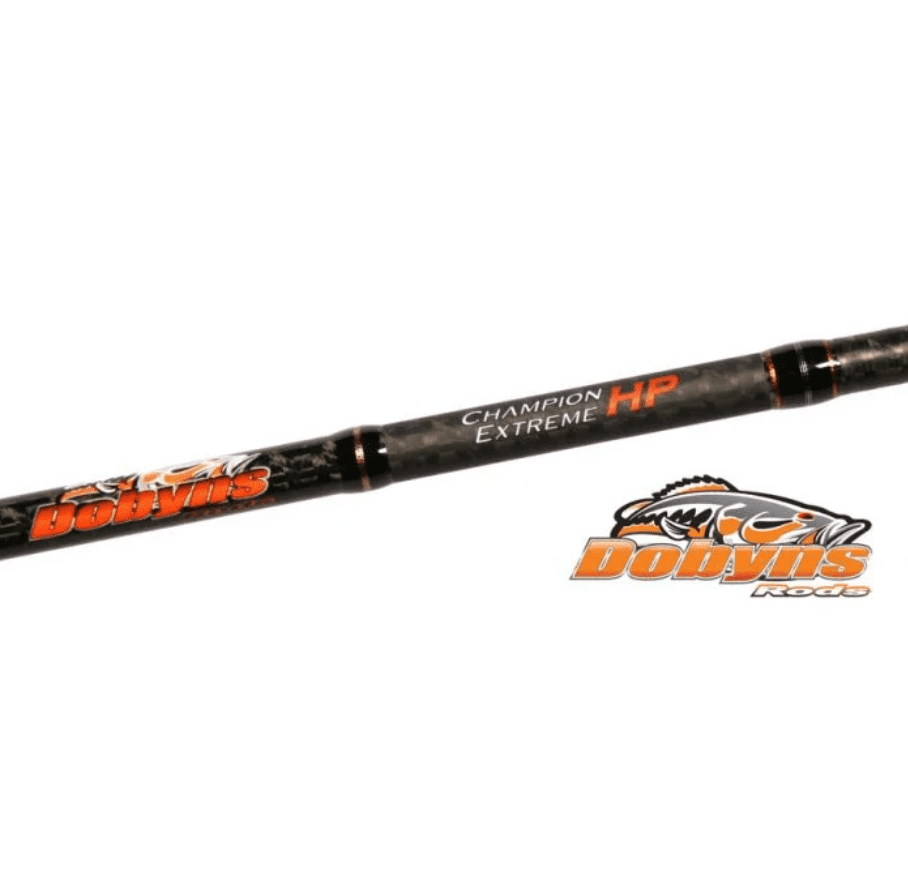 photo source: americanlegacyfishing.com
 photo source: fishermanswarehouse.com
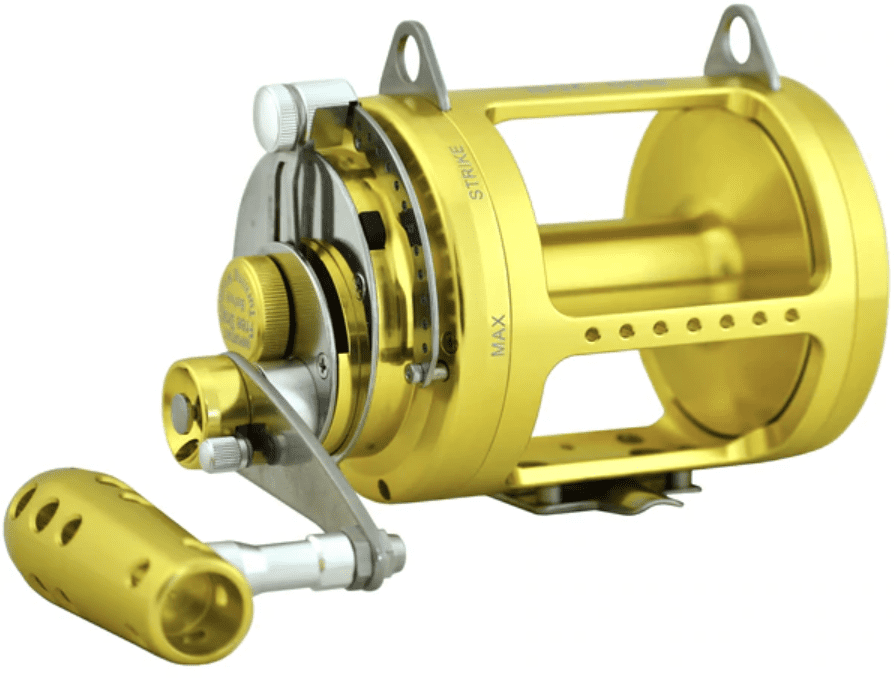 photo source: eatmytackle.com
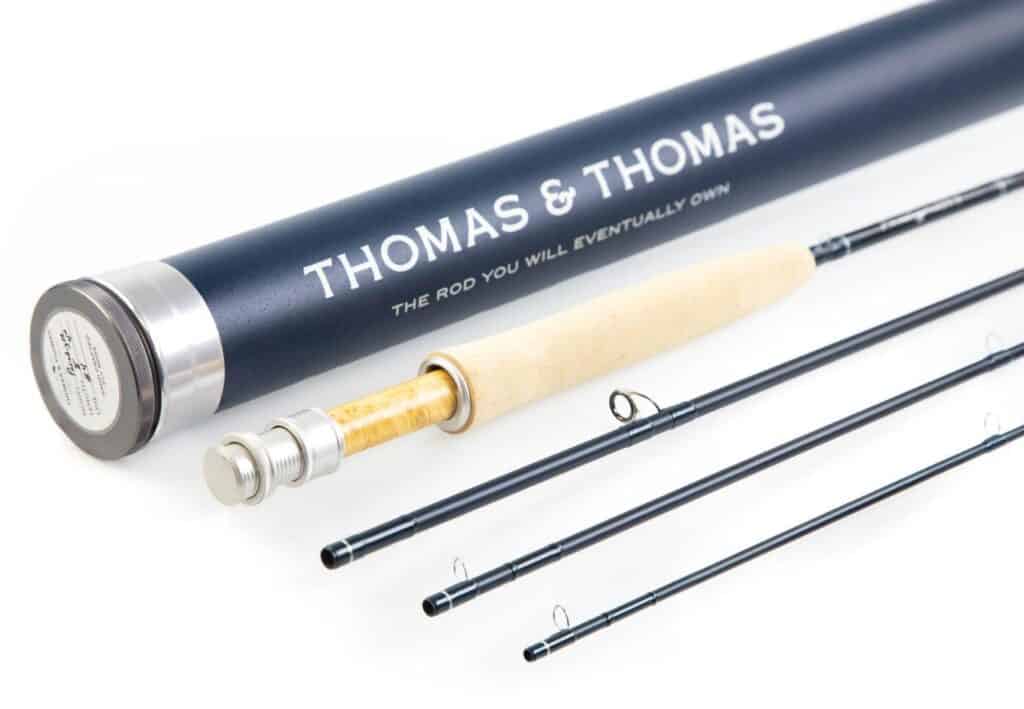 photo source: tridentflyfishing.com
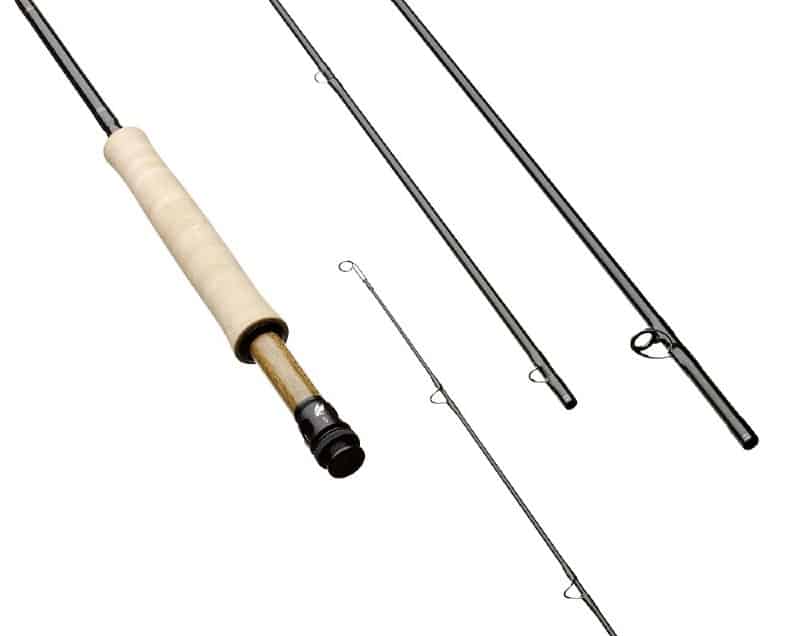 photo source: gorgeflyshop.com
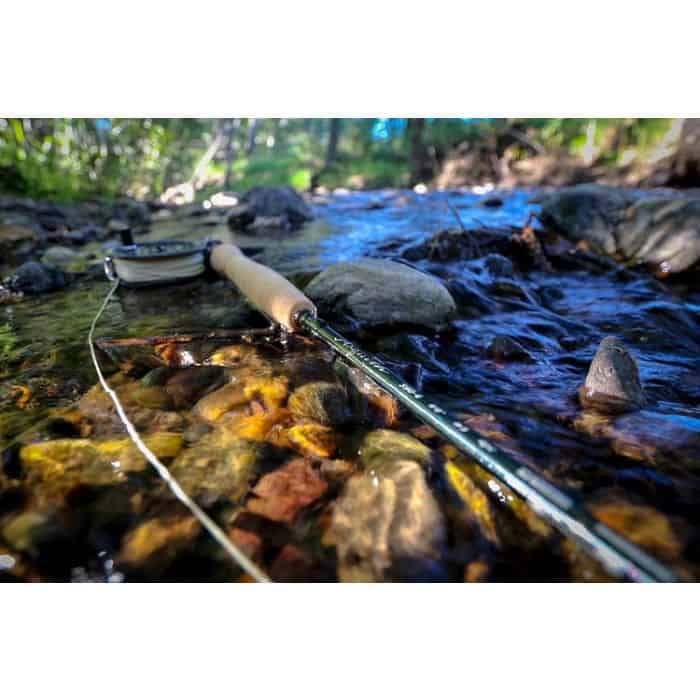 photo source: americanlegacyfishing.com
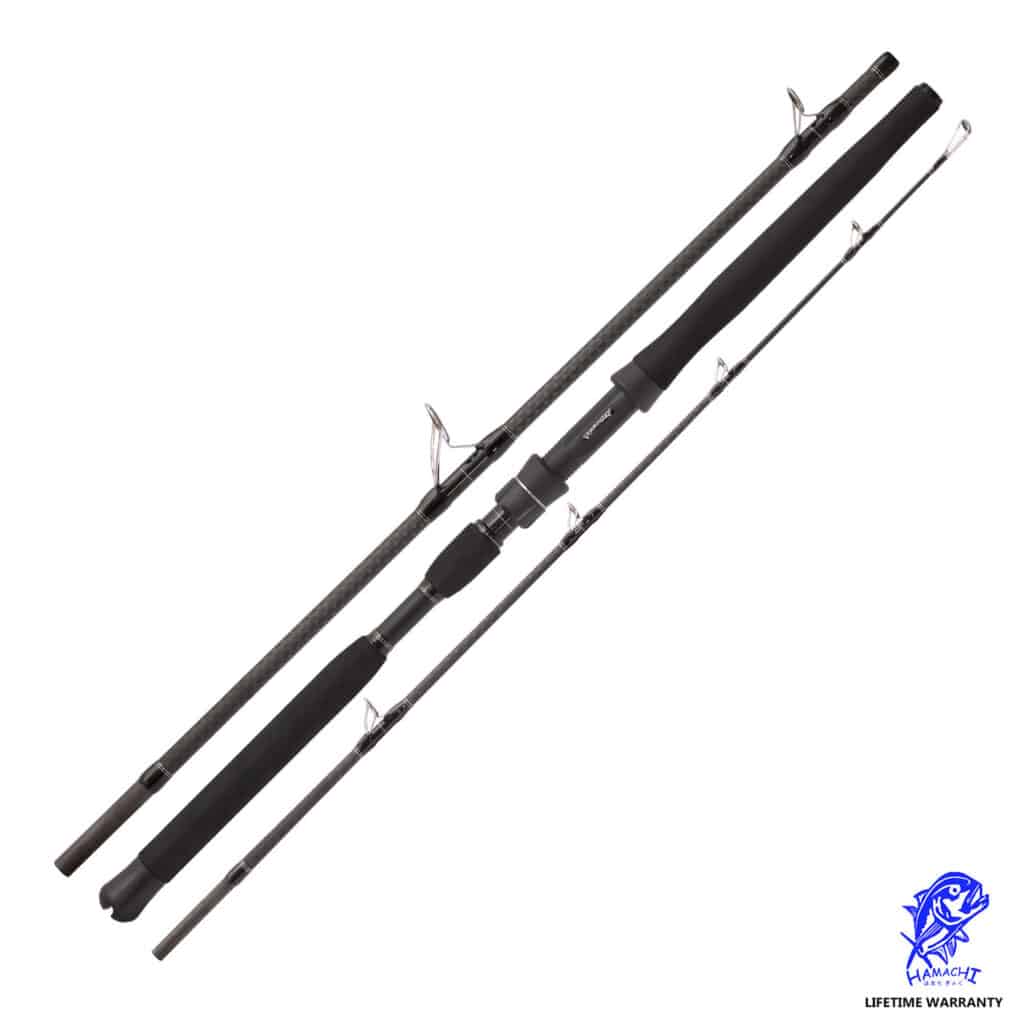 photo source: fishingandboatingdeals.com
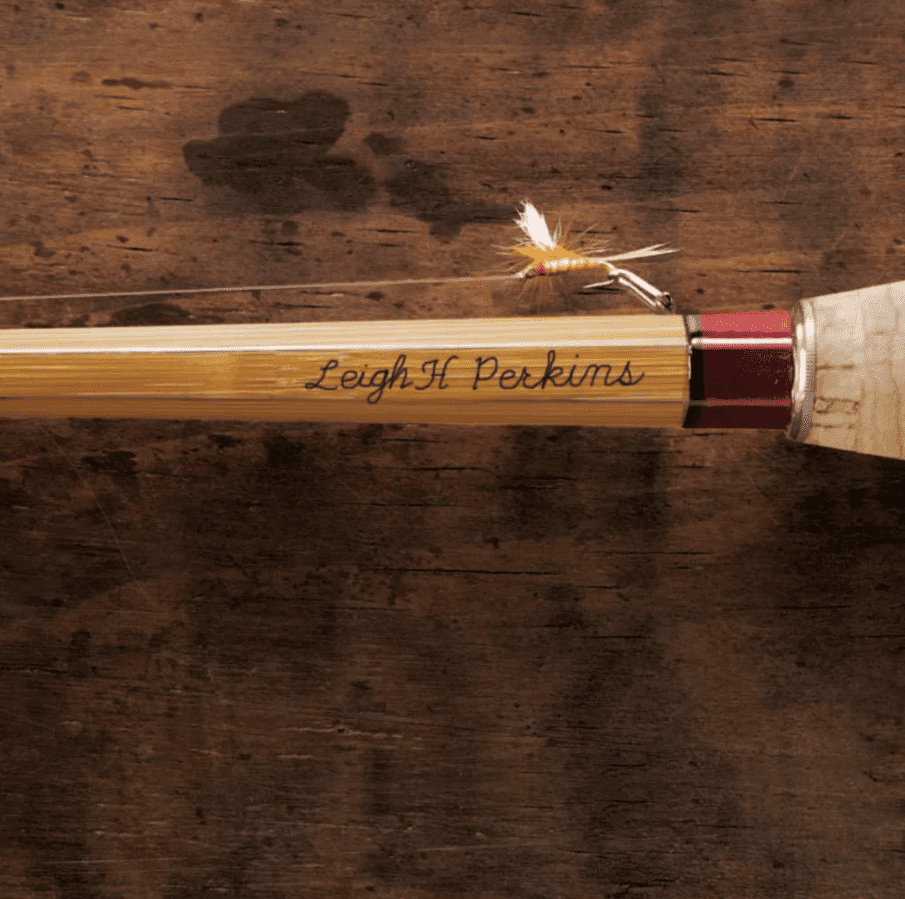 photo source: orvis.com
 photo source: oysterbamboo.com
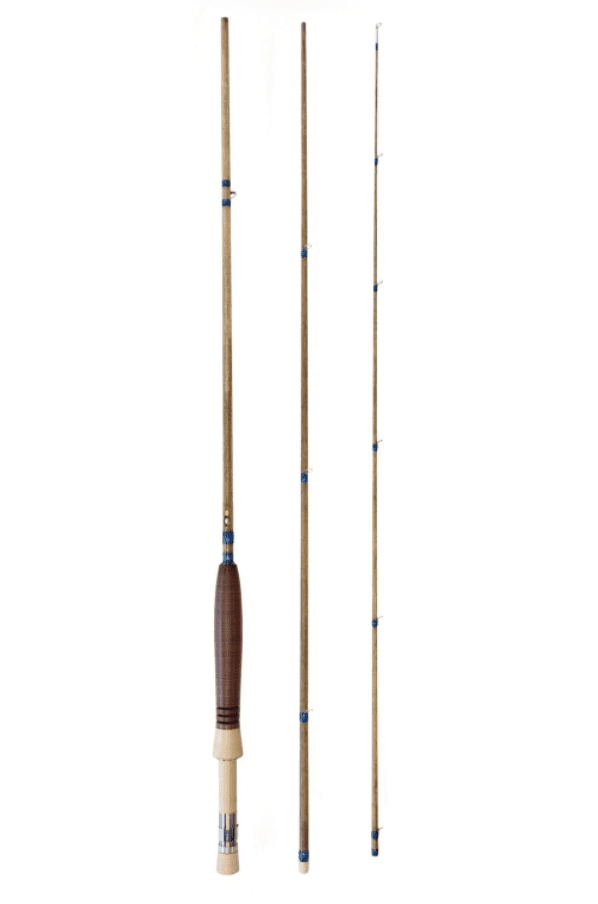 photo source: vogue.com.au


