Despite the hot, muggy, “dog days” of summer, July and August are special months for the avid whitetail hunter. Bucks are formed in bachelor groups and are highly visible as they frequent agricultural fields and other high-quality food sources. This provides opportunities to assess the number, age, and antler quality of bucks in your area. This becomes even more exciting when several quality bucks are sighted on your hunting property. However, this excitement often turns to disappointment and frustration as these bucks magically disappear once the hunting season begins. Did they leave, become nocturnal, or go “underground” as many hunters believe? Thankfully, advancements in technology have enabled wildlife researchers to gain a better understanding of buck movements.
Maryland Study Is Revealing
Equipped with radio-collars that monitor hourly GPS locations, researchers in Maryland recently discovered many new aspects of buck home range and movements. The study took place at Chesapeake Farms, a 3,300-acre wildlife and agricultural research site on the eastern shore of Maryland owned by DuPont Corporation. The research effort was led by James Tomberlin, graduate student from North Carolina State University; Dr. Mark Conner, manager of Chesapeake Farms; and Dr. Richard Lancia, Wildlife and Fisheries Program Coordinator with North Carolina State University.
Chesapeake Farms has been managed under Quality Deer Management (QDM) guidelines since 1994 and boasts a fairly balanced adult sex ratio of 1.5 does per buck, and an older buck age structure with more than half of all bucks harvested being 3 1/2 years of age or older. Approximately 50% of the property is forested, 33% is cropland and the remainder is ponds, marshes, hedgerows, and other areas managed for wildlife and hunting.
From 2003 to 2005, researchers darted 18 bucks that were 2 1/2 years old or older and equipped them with GPS radio collars, which recorded their location and movements 24 hours a day, seven days a week. This information was used to determine buck home range size, core area use and excursions, and unusual movements outside of their home range.
Buck Home Range & Core Area Use
Previous studies have revealed significant variation in buck home range size according to age, habitat type, deer density, buck age structure, and more. Therefore, the following results should be viewed with caution, especially if the habitat or composition of your deer herd is significantly different than those on Chesapeake Farms.
In this study, the average home range size of mature bucks was approximately 700 acres. However, taken alone, this information can be misleading. First, there was considerable variation in home range size among individual bucks. This echoes previous studies that suggest some bucks are “homebodies” while others are “travelers.”
Second, there was considerable seasonable variation, with home range size being largest during the rut and smallest during summer. This is not surprising given a buck’s drive to breed as many does as possible during the rut, and the lack of need to move during the summer, except between bedding and feeding areas. Many bucks also exhibited significant shifts within their home ranges between seasons.
For example, many bucks that spent nearly every moment on or adjacent to an agricultural field during the summer shifted their home ranges a mile or more away during the breeding season. Researchers believed that changes in forage availability was likely responsible for the shift, as agricultural crops at Chesapeake Farms were harvested during early fall and mast crops in nearby hardwood forest areas became available. This could explain why many hunters in agricultural areas don’t see the bucks they watched all summer during the hunting season.
How to Hunt Your Neighbors’ Deer
Finally, and perhaps most important to hunters, the average size of a buck’s core area, or where he spent at least 50% of his time, was only around 100 acres. Like home range size, core area size also varied seasonally and was largest during the rut and smallest during summer. Surprisingly, during the rut, bucks spent 50% or more time in only 16% of their home ranges! Given that their study also confirmed that buck activity was lowest during daylight hours, it is not surprising why many mature bucks seem to disappear during the hunting season.
These findings also stress the need for hunters to identify a buck’s core area—or areas—during the hunting season. This is best accomplished through hunter observations and the use of game cameras. However, just because you took dozens of photos of a particular buck in August doesn’t mean that’s where he will be during November. Remember, within their home ranges, bucks often shift core areas seasonally. Therefore, to harvest a particular buck, you likely will need to shift your hunting areas as well. Bottom line, while the locations of those August photos might be the best place to harvest that buck during early archery season, they may be among the least-likely spots to take him later in the season.
When Bucks Go Wandering
During summer, daily buck movements tended to be short trips from bedding to feeding areas, but this changed dramatically during the breeding season. Beginning during the pre-rut, several bucks covered large portions of their home ranges and then returned to their core areas within eight to 30 hours.
Additionally, 58% of bucks also made excursions outside of their home ranges during the rut, often staying in the new locations six to 24 hours before returning to their home ranges. While unsure, researchers speculated that these bucks likely were in pursuit of an estrous doe. These seemingly random excursions outside of a buck’s normal home range could explain how some bucks that have never been seen or photographed previously, seem to magically appear and either get harvested or vanish—never to be seen again on the property.
Another interesting finding was the change in time of day the excursions occurred. During both the pre-rut and post-rut periods approximately 70% of excursions occurred during nighttime hours; whereas during the peak rut, 70% occurred during daylight hours. This certainly helps explain the increased visibility of bucks by hunters during the rut.
Scouting and Installing Water Sources for Deer
How Will You Change Your Hunting Approach?
So, where do all the big bucks go? From this study, it’s clear there are numerous reasons why a hunter doesn’t cross paths with a particular buck during the hunting season. For example, where a buck spends his summer or early fall may be drastically different from where he will be during the rut. Also, a buck’s core area is smaller than previously believed. If you are not hunting within or very near this core area, you risk hunting locations that are never (or rarely) used by a given buck. Furthermore, except during the rut, a mature buck moves little during daylight hours except for brief periods during early morning and late evening.
To make matters worse, researchers at Chesapeake Farms also confirmed that at least some bucks can pattern hunters. They compared GPS locations of buck movements to those of their permanent hunting stands where all hunting occurred. For example, not once during daylight hours did one 3.5-year-old buck pass within shootable distance of any of these stands during the hunting season. However, at night he used them like mile markers on a highway, and was frequently recorded in their immediate vicinity. Unless this buck made a mistake, he had become essentially “unkillable” —at least by hunters on Chesapeake Farms.
Collectively, the findings of this study confirm what ardent whitetail hunters already knew—harvesting mature whitetails is among the most difficult of hunting challenges. However, armed with this new whitetail science, hopefully you can stack the odds a bit more in your favor this hunting season.
Planning Deer Hunting Vacations: Are Opening or Closing Days Better?
Dehydrating morel mushrooms is a common practice among individuals who harvest a large amount during mushroom season (lucky you!)
The dehydration process is the number one method that allows you to savor the taste of these even during the off-season, as they do not freeze well (though it is possible).
Some say the best location to hunt for morels is in the Midwest, but you can find them all over the US, Europe, and beyond. This area seems to have the best vegetation and temperature to grow these tasty morsels. Look for them sprouting from mid-April to mid-June.
They usually appear after a series of spring showers, prior to the heat of summer setting in. Morels often reappear in the same spot year after year, and many hunters keep their “spots” a well guarded secret.
These fungi (yes – they are fungi) seem to prefer hillsides with plenty of rotting logs, but they may appear in unexpected spots as well. You may not find them where you’d expect – this is one reason why this variety isn’t commercially farmed.
Three basic processes exist for dehydrating morels. The first involves the use of a dehydrator. Here’s what you need to do:
1. First, wash the specimens in cool water to remove any debris.
2. Pat dry with a paper towel. Trim the stems if necessary.
3. Slice them in half, from the tip through the base of the stem.
4. Place in a single layer on each level of the dehydrator. Follow the manufacturer’s instructions for proper drying times, or check out our ultimate guide to food dehydration – it has a bunch of helpful drying times listed at the bottom.
For those individuals without a dehydrator, you can also use your oven to prepare the mushrooms.
1. Wash, dry, and cut the same way as previously outlined.
2. Cover the bottom of a cookie sheet with parchment paper. Lay out sliced mushrooms in a single layer. It is alright to have the sides touching, but they should not overlap.
3. Bake at 250°F for approximately 6 hours. During the baking process, crack open the oven door a slight amount. This allows the moisture to escape during the drying process.
Finally, the oldest known way to dry morels is to string them up and dry them in the sun.
1. Wash and prepare the individual pieces as before.
2. Cut a piece of cotton packaging string (kitchen string) that’s approximately six feet long. Thread a large-eyed needle, and insert through the center of a morel slice. Slide the mushroom along the cotton string until it’s within 12 inches of the opposite end.
3. Repeat the process with the remaining pieces, making sure they do not touch one another.
4. Hang the string in a sunny location. If you hang the string outside, be sure to bring it in at night to prevent dew from setting on it, which could introduce mold. Allow to dry in the sun for a minimum of two days.
The trick to drying morels is to make sure they are completely dry. Here’s how to test the mushrooms periodically during the drying process:
Break a small portion from the main body. It should snap when broken. If it is mushy or spongy, then moisture still exists within the cap.
Place the dehydrated specimens in a glass jar with a lid or in a resealable plastic bag. These will keep for up to six months if prepared correctly. You can further extend this by using vacuum sealing, placing them in the freezer after they’re dried (though this isn’t always recommended, as it can introduce moisture) or adding some oxygen absorbers to the sealed packaging.
Dehydrated morel mushrooms may be reconstituted by soaking them in enough cool, salted water to cover for 30 minutes, or by boiling them for 10 minutes at a low boil.
Be sure to reserve this water for cooking, as it is full of antioxidants. It makes a great addition to soups and sauces. Just let the sediment settle before adding the liquid on top to dishes.
And if you need a bit more info on the prep process, read our article on how to properly clean your mushrooms.
What’s your favorite way to dry the season’s bounty? Let us know in the comments!
Squirrel hunting has long held a special place in my heart. It can often be social, the bag limits are generous, and they taste incredible. However, having a successful squirrel hunt is anything but easy. These are small animals. Their quick movement and seemingly endless places to hide makes them a challenging harvest for even the most skilled hunters. Quite possibly one of the most important pieces of gear for a successful squirrel hunt is your rifle’s optic. While having quality optics is undoubtedly crucial for all hunts, this is exemplified as you try to rest your crosshairs on their erratic movement. I have used both ends of the spectrum for my squirrel hunts, and using the best optics speaks volumes.
The two most popular rifle calibers for squirrel hunting are the .22LR and the .17HMR, so we’ll focus on those two when choosing optics. Here are my top picks for optics to use when squirrel hunting with these calibers. There’s an old saying amongst hunters and shooters alike that your scope should cost more than the rifle. While that’s a pretty over simplified motto to live by, there is some great wisdom in purchasing quality optics, especially when pursuing small game such as squirrels.
Editor’s Note: Products featured on Wide Open Spaces are independently selected by our editors. However, when you buy something through our links, we may earn a commission.
Vortex has made a name for themselves for producing high quality, accurate, clear, and dependable optics, and their popularity has grown tremendously over the past decade. This scope is on the higher end of what you can buy for squirrels at $329. But you get what you pay for, and this scope comes with one of the best magnifications in the business. The 7x zoom on this scope provides clear images, the glass is extremely durable, and it is fog-proof for those frostier mornings in the woods. Combining that with Vortex’s impressive warranty, this one is hard to beat for the serious squirrel hunter.
2. The Best Fixed Magnification Option
Leupold FX-3 6×42, $449.99, Leupold
Pros:
An incredibly clear optic.
Weatherproof
Cons:
Fixed magnification might not work for all hunters.
Leupold is one of our favorite brands. They have been consistently making the clearest and most durable glass for essentially longer than anyone. While their prices aren’t ideal for the budget hunter, you are getting what you pay for in this scenario. The FX-3 is a fixed, non-adjustable scope, however, that shouldn’t be an issue for most squirrel hunting conditions. The simplicity of that design in return gives you over 17 feet FOV (feet of view) at 100 yards. That is impressive by any standard. We also just like the reticles Leupold offers in their scopes. And finally, this scope is backed by Leupold’s incredible optic warranty.
3. The Simplest Design
Vortex Crossfire II 4-12x40mm, $239.99, Vortex
Pros:
Affordable
Lightweight
Cons:
Fixed parallax
Is it that surprising that we have two Vortex scopes mentioned on this list? Probably not. But that’s for good reason. The Crossfire II has become one of the most popular scopes for deer and varmint hunters because of its clear glass, simple design, and durability. And it works great on smaller targets like squirrels too. This scope is super lightweight, weighing in at only 14.3 ounces, and having a length of just under 11 inches. The main complaint on this scope has been towards its fixed 50-yard parallax, however, if you’re solely hunting squirrels, that shouldn’t deter you from purchasing it.
4. The Best Overall Value
Nikon Prostaff 3-9x40mm, $199, Walmart
Pros:
Excellent multi-coated lenses
Price
Cons:
Harder to find
The Nikon Prostaff 3-9x40mm is quite possibly the biggest steal in the optic market currently. Its multi-coated lenses increase light transmission up to 90% which is extremely uncommon for a scope that retails for less than $200. This scope is incredible when the hunting conditions aren’t such as lowlight mornings, and poor weather. It is parallax-free at 20 yards. It also features a rather versatile magnification dial, which could come in handy depending on what type of terrain you’re hunting squirrels in. While this scope was designed with smaller calibers in mind, it performs quite well with heavier cartridges.
READ MORE: HOW TO PREPARE SQUIRREL IN 6 GREAT RECIPES
Rock bass and bluegill share many similarities. For this reason many people ask if they’re the same fish or different. Therefore, let’s answer, is a rock bass the same as a bluegill?
Rock bass and bluegill are different species of fish although they are from the same family. Rock bass is the A. Rupestris and bluegill is the L. macrochirus species. The most identifiable difference is the rock bass bright red or orange eye color compared to the bluegill’s dark eyes.
This article will compare both fish tastes, textures, cooking methods, costs, mercury levels and whether one can substitute for the other in recipes. In addition, I’ll do a side-by-side comparison of their habitats, appearance and compare their nutritional value.
Rock Bass vs Bluegill: Habitats, Size, Weight and Appearance
How can you tell the difference between the two fish?
To tell the difference between a rock bass and bluegill is to check their cheeks, belly colors and dorsal fins. Bluegill have blue color on the sides of their mouth and chin. Rock bass has no blue, just a dark tear drop below their eyes. Bluegill has an orange belly compared to rock bass white/silvery belly. Bluegill has a dark spot on the base of the dorsal fin rock bass doesn’t have.
Other ways to tell the difference:
Bluegill has a rounder body with the mouth more streamlined with the body. Rock bass has an elongated body with the mouth more pointier.
Rock bass has 5-7 anal fin spines, bluegill has 3 anal fin spines.
Rock bass has teeth in the mouth, bluegill has no teeth.
Rock bass has red or orange eyes, bluegill has dark eyes.
Bluegill has a small mouth, rock bass has a large mouth.
Rock bass has dark spots forming laterals lines, bluegill has no lateral lines but vertical bars.
Rock Bass and Bluegill Scientific Classifications, Families, Species
Bluegill are from:
Family: Centrarchidae
Genus: Lepomis
Species: L. macrochirus
Common nicknames: Bream, panfish, brim, sunny, sunnies, perch.
Rock bass are from:
Family: Centrarchidae
Genus: Ambloplites
Species: A. rupestris
Common nicknames: Red eye, rock perch, goggle eye.
Both species are part of the sunfish family. Other fish include smallmouth bass, largemouth bass, pumpkinseed, warmouth and crappies.
Habitats
Bluegill
Native to North America and can be found from Canada, Delaware to northern Mexico.
When fishing they can be found in streams, ponds, lakes and rivers.
They like to hide under fallen logs, piers or in weeds.
Rock Bass
Native to North America and can be found from Canada down to Florida and west to Texas. They are mostly found in the eastern and central United States.
When fishing they can be found in streams, ponds, lakes and rivers.
The species prefer rocky shorelines and vegetation areas. They can be found under docks and near swimming areas.
Watch bluegill in their natural habitat.
Appearance
Colors
Bluegills have an olive green upper body and light yellowish to orange belly. The sides of the head and chin are iridescence blue or purple. The fish have dark vertical bands on the sides. A breeding male will have more orange than yellow on the belly.
Rock bass have an olive green to golden brown upper back and sides fading down to a silvery, white belly. The species have black spots which form broken lateral stripes down the body. The have red eyes and the fish has the ability to change colors to match their surroundings for protection.
Dorsal Fins
Bluegill has one dorsal fin with 6-13 spines and 11-12 rays.
Rock bass has one dorsal fin with about 10-13 spines followed by 11-13 rays.
Anal Fins
Bluegill has three anal spines followed by 10-12 rays.
Rock bass has 5-7 anal spines followed by 10-12 rays.
Mouth
The bluegill mouth is small, and the jaw doesn’t extend to the eye line. They don’t have teeth.
The rock bass mouth is large located below the snout. They also have teeth.
The rock bass has a pointier snout compared to the bluegill which has a more streamlined mouth and head which blends into the body. A big difference between the two fish is their mouth size.
Body Shape
Bluegill are flat and have a rounder shape. The mouth hardly protrudes and is more streamlined.
Rock bass are flat and not round. They are more elongated.
Size and Weight
Bluegill average 6-7″ long and weighs less than 2 pounds.
Rock bass average 6-10″ long and weighs about one pound.
Lifespan
Bluegill average 5-6 years.
Rock bass lives up to 8-10 years.
Diet
Bluegill consume the following:
Worms
Small crustaceans
Insects
Insect larvae
Rock bass consume the following:
Smaller fish
Insects
Worms
Small crustaceans
Minnows
Both fish have a similar diet.
Bass Fishing
When looking at the sunfish family, rock bass fishing won’t win many popularity contests amongst anglers. Despite their gamefish appeal, when fishing they are strangely appealing.
They can get caught with almost any angling method. Live bait works extremely well. Bass fishing within a few feet of the bank is best.
Prior to fishing, always check with your local advisory, safety and management boards.
I recently wrote a comparison article with the species pumpkinseed. Their differences may interest you. Check out my comparison article here.
Panfish: Tastes and Textures
One of the most important things people takes into consideration when fishing or choosing a fish is its taste. When comparing the two fish, rock bass vs bluegill, does one taste like the other?
Rock bass taste similar to bluegill and has a mild to sweet taste. Rock bass and bluegill have a firm, flakey texture.
Rock bass is good eating and tastes pleasing to most people having a mild to sweet taste. The white flesh is slightly firm and flakey.
Depending on the time of year or type of water when fishing, both may taste slight muddy or fishy to some people. The fish can be soaked in milk to help eliminate any unpleasant taste or odor.
To conduct some original research, I polled clients, readers and people in food groups. I asked which one tastes better?
39% said they preferred the taste of bass rock.
34% said they preferred the taste of bluegill.
27% said they had no preference one over the other.
To conduct more research, I set up a taste test at home. Both fish were cooked the same way with the same seasonings. Three out of four people chose the rock bass.
Watch rock bass in their natural habitat.
Substitutions
When preparing recipes for dinner it’s not always possible to locate the type of fish in the store or when fishing. If you only caught one type of fish when fishing, you may ask, can I substitute one for the other?
Rock bass and bluegill can substitute for each other due to their similar tastes and textures. Both fish can be used in many of the same recipes and cooking methods. They both can be cooked by baking, broiling, steaming, grilling, deep frying and pan frying.
Bluegill substitutes:
White crappie
Black crappie
Pumpkinseed
Redbreast sunfish
Redear sunfish
Pollock
Lake herring
Rock bass substitutes:
White crappie
Black crappie
Pumpkinseed
Green sunfish
Lake herring
Tilapia
Pollock
Find out how green sunfish compared in my article, Green Sunfish – What’s The Difference?
Costs
The costs for some fish will vary depending on the type of fishing and where they’re sold. When purchasing any fish, be sure to check the label. Therefore, which fish is more expensive?
Rock bass and bluegill have a similar price. The average cost for either ones fillets are $19.43 per pound.
Rock bass fillets are extremely difficult to find for sale. Sunfish are easier to find online.
To conduct more original research for fish prices, I checked online at Walleye Direct and found the following:
Wild, bluegill fillets
$25.36 per pound
Seafood Markets:
Wild, sunfish fillets (does not specify which kind of sunfish)
$18.00 per pound
Dixon Fisheries:
Bluegill fillets
$14.95 per pound
For stocking ponds, Pond King has the following price per live fish:
Hybrid (green sunfish x bluegill) $0.75 per 3-4″ fish
Bluegill – $0.75 per 3-4″ fish
Crappie is a little easier to find online than some of the other sunfish. See how crappie compared in my article, Crappie – What’s The Difference? Let’s Compare.
Checking the prices of mackerel and other seafood at my local market
Mercury Levels
The EPA and The FDA have issued suggestions and warnings about mercury levels in fish and how often they should be consumed 1. This is especially important for young infants, pregnant women and developing children.
They established three lists:
Best fish
Good choices
Ones to avoid based
Therefore, which of the two fish has more mercury?
Rock bass and bluegill have similar levels of mercury. Both fish are listed on the FDA’s best choice of fish regarding mercury levels.
If you’re pregnant, breast feeding or has a young child, Always check with a physician prior to eating new foods or changing your dietary habits.
These mercury warnings can change over time or affect only a particular area or state. Please check with your local EPA and FDA for the current fish recommendations especially when fishing 2.
Nutrition
Both of them are an excellent source of protein, healthy fats, minerals and B vitamins. Both sunfish contain the following:
Omega-3 fatty acids
Magnesium
Potassium
Folate
Niacin
B6
B12
B5
Thiamin
Riboflavin
Iron
Selenium
Calcium
Zinc
Bluegill provides the following number of nutrients per four raw ounces:
Nutrient Resources 3 4
Both fish provide a similar percentage of the same nutrients. Keep reading the next section below to find out how the nutrients benefit health, especially omega-3s.
Since the sunfish are difficult to locate in stores, I’ll consume either fish available to me for their nutrient content, taste and health benefits.
Find out how redbreast sunfish compared in my article, Redbreast Sunfish – What’s The Difference?
Rock Bass and Bluegill Health Benefits
Omega 3 Fatty Acids
The omega-3 fatty acids are heart healthy and help keep arteries healthy. The omega-3s may help with the following:
Reduce inflammation.
Reduce plaque buildup.
Keeping bad cholesterol low.
Keeping good cholesterol high.
Lowering triglycerides
Help keep the heart rhythms more normal.
DHA and EPA, two of the fatty acids, are associated with lowering blood pressure and improving the health of blood vessels 5.
Studies suggest omega-3s from fish can help reduce joint pain and stiffness in people with rheumatoid arthritis. They may also boost the effectiveness of anti-inflammatory drugs.
Potassium
Potassium provided from either fish is approximately 400 mg. Potassium helps the body get rid of excess sodium which helps reduce fluid build-up. These help keep systolic and diastolic blood pressure lower 6.
The more potassium you consume, the more sodium your body will lose. Consuming too much sodium or not enough potassium throws off the delicate balance the kidneys need to remove the excess water 7.
According to Harvard Health, a number of studies have shown a connection between low potassium levels and increased blood pressure 8.
B Vitamins
The B vitamins provided by both fish include B1 (thiamin), B2 (riboflavin), B3 (niacin), B9 (folate) B6, B12 and B5. B vitamins help support the following:
Digestion.
Brain function.
Energy levels.
Red blood cells.
Cardiovascular disease.
Nerve function.
Selenium
There are 14.2 mcg of selenium per four ounces. Numerous studies 9 show selenium may help to protect the following:
The immune system
Thyroid
Cognitive issues
Heart disease
Phosphorus
Both fish provide approximately 203 mg of phosphorus per four ounces. It has been shown in scientific research to help with the following:
Promote healthy nerve conduction.
Aides the kidneys in waste removal.
Promote teeth and bone strength.
Muscle recovery after exercise.
Muscle contraction.
Help the body store and manage energy.
Magnesium
Both sunfish provide about 34 mg of magnesium per four ounces. It calms and relaxes the whole body including blood vessels. Magnesium has been shown to help improve sleep related problems like insomnia 10.
Magnesium helps keep blood pressure levels balanced and stable. A recent study researched 22 studies and concluded magnesium supplementation decreased diastolic and systolic blood pressure 11.
The magnesium in rock bass and bluegill helps control muscle and nerve function, blood sugar and blood pressure.
In the muscles and heart, magnesium competes with calcium to help the muscles relax after contracting. When the body is low in magnesium, calcium can over stimulate the heart muscle’s cells causing a rapid or irregular heartbeat.
Calcium
Calcium is important for blood pressure and the heart. Harvard Health reports calcium helps maintain blood pressure because it helps to control the relaxing and tightening of blood vessels 12.
Calcium also helps the following:
Build and maintain strong bones.
Muscles need calcium to function properly.
Improve nerve function.
Find out if the nutrients in redear sunfish differed in my comparison article, Redear Sunfish – Are They The Same? We Compare.
As a Certified Health Coach many of my clients ask me about seafood. In addition to educating my Health Coaching clients about bluegill and rock bass, I have researched, purchased and consumed both fish for 20 years prior to, during and after writing this article.
If you have any questions about this article don’t hesitate to email us. You can find an email on our contact page.
Read Next – More Black Crappie, Largemouth Bass and Green Sunfish Articles!
Black Crappie vs White Crappie – What’s The Difference?
Crappie vs Bass – What’s The Difference? Let’s Compare
White Crappie vs White Perch: Are They The Same? We Compare
Article Resources: Foods For Anti-Aging follows strict guidelines to ensure our content is the highest journalistic standard. It’s our mission to provide the reader with accurate, honest and unbiased guidance. Our content relies on medical associations, research institutions, government agencies and study resources. Learn more by reading our editorial policy.
FDA: Advice about Eating Fish[↩]
National Center for Biotechnology Information: Mercury accumulation in largemouth bass (Micropterus salmoides) in a Florida lake[↩]
The Topeka Capital-Journal: Keto, Paleo or Atkins diet? Hunting, fishing can help trim your waistline in 2020[↩]
Nutritiondata: Fish, sunfish, raw[↩]
National Center for Biotechnology: Marine Omega-3 Supplementation and Cardiovascular Disease[↩]
American Heart Association: How Potassium Can Help Control High Blood Pressure[↩]
National Center for Biotechnology Information: The Effect of the Sodium to Potassium Ratio on Hypertension Prevalence: A Propensity Score Matching Approach[↩]
Looking for a scope mount but not sure what kind to get or how to install it?
I’ll help you decide, and give you the instruction necessary to mount your scope.
Weaver vs Picatinny vs Dovetail Mounts
We see these names all the time in the gun world, but what the heck do they mean?
Being a shooting enthusiast for years, I never gave much thought to the matter. I could install most of my rings on any of them interchangeably, and didn’t worry much about it, until I tried to install a spec Picatinny mount on a Weaver rail.
Here’s a basic breakdown without getting too complicated.
Dovetail Mounts
First, the dovetail mount.
This is by far the simplest type of mount, and you may come across it with rimfires more than other weapons.
In short:
Two grooves are milled into the frame or receiver of the weapon, and your scope mounts attach directly to this.
There are no grooves or indents to allow space for the tightening bolt to fit over. Luckily, most of the time the dovetails are cut in such a way that they shouldn’t really interfere, but this is also where they slip up, literally.
Heavy recoil can cause your rings to slide a bit forward along the dovetail, inching their way toward the end of it.
The little grooves cut into modern rails are there to prevent this.
Weaver and Picatinny Mounts
Weaver mounts and Picatinny rails look very similar.
They both have a flat top with slots cut across it and the edges are wider than the top and bottom, giving your mount something to bite into.
The biggest difference here is tolerance.
Weaver bases don’t follow a standardized format, and there are generally fewer slots cut into a rail of the same length. The slots also tend to be narrower than Picatinny slots.
What this means is that the bolt from a Picatinny base may not always fit into a Weaver style base, and Weaver rings won’t fill the slot on a Picatinny rail. You also have less choice in where to mount your optics due to less slots available.
In short, get Picatinny rails. But sometimes you can get away with using them interchangeably.
If you do put Weaver style mounts on a Picatinny rail, make sure they are as far forward in the slot as they will go when you tighten them down, so they don’t creep forward as we discussed with the dovetail mounts.
Specialty Mounts
Some mounts are just odd.
There are a few manufacturers out there who have created their own mounting systems that match special attachments for scopes. While the rings themselves are usually a standard size, the mounting system is anything but.
A classic example is the Leupold Dovetail mount.
These attachments are not based on any kind of rail system, but a fixed pivot that cannot ever slide. If you don’t intend to use any kind of quick release mount, these can be a great touch, and they are usually machined to fit certain rifles.
The downside is that they might not fit all scopes, and you may have to buy rings with a built-in offset, known as cantilever rings. You’ll also want a special wrench to mount these rings.
Speaking of mounting, if you want to remove your AR-15 front sight, read my guide on that.
Other base designs abound, but none are more popular than the almost universal Picatinny rail system. Some guns require a specialty mounting platform because the rifle doesn’t conform to a shape that easily accepts a scope rail, like SKS mounting systems.
Different Types of Attachments
Rings are what typically connects the scope to the mounting base, and there are many ways to do this.
Since nearly every gun has a different mounting setup, and every scope has its own dimensions, there are several varieties that solve different problems that might come up when trying to mount a scope to a rifle.
Dovetail Rings
If your weapon already has integral slots cut in it, then you can sometimes get away without installing a mounting base at all, and just buy rings that fit your dovetail grooves.
Generally, the grooves will be spaced either 9mm or 11mm apart, and it’s important to get the right rings, or a more flexible ring mount that fits both.
While you’ll save some money on rings and the lack of a new mounting base, this is not always the best option. On high power rifles the rings can move under recoil, and that’s a never a good thing. Even if there are locking tabs, these can break under even the modest kick of a .308.
On the other hand, if you are scoping a rimfire or a pellet gun, sometimes a set of dovetail rings is the perfect option. Easy, cheap, and effective.
Picatinny and Weaver Rings
Mostly, these are interchangeable, but there are always exceptions.
One absolute rule on this is not to try and mount Picatinny rings or other attachments onto a Weaver style rail if there are multiple screws in the same plate. The grooves in Picatinny rails are standardized, not so with Weaver bases.
Other than that, you can try, but in this case it’s best to get Weaver rings as they will always fit Picatinny rails.
Picatinny is the new gold standard when it comes to rings, so if you are installing a rail for the first time, go with what everyone is using, and you won’t be disappointed. After the military adopted this style for their M4 rifle rings, the rest of the world soon started using them.
Red Dot Attachments
One thing I love about red dots is that they come with their own mounting system, so you don’t generally need to go shopping for a mounting plate.
However, if you are putting a red dot on a pistol, there may be some other work involved.
Mounting plates can be installed on rails, in the dovetail that holds the rear sight on the pistol, or mated to a custom mount machined directly into the slide.
On a rifle, the standard again is that they attach to picatinny rails, though they do exist for other mounting styles. You can get air-rifle and rimfire red dots that will mount to your rifle’s dovetail.
Ring Height
Attachments give a lot of things to consider. There are different styles, but one of the most important considerations is the height.
The height is measured from the top of the scope base to the center of the ring. One reason this is so important is because scopes typically have a very large objective lens on the front, and you want rings that are tall enough to accommodate it.
The last thing you want is to finish installing the mount and rings, and then not be able to get the scope in because it’s touching the barrel.
As a general rule of thumb, the rings should be at least half as tall as your scope’s objective diameter. This is the last number on the scope description.
For instance a 1-3×40 would have a 40mm and require at a minimum 20mm tall rings. Much of this depends also on the rifle design and the thickness of the scope body.
There is an advantage, of course, to keeping your scope as low to the bore as possible. When you zero the rifle, the drop calculations will be affected with different scope heights. Close to the bore means that there will be less elevation change in the bullet at shorter ranges, or flatter shooting.
Ring Size
Another important consideration is the size of the scope rings.
Generally speaking, there are two that most scope bodies use:
One inch, and 30mm.
Many brands make both, so until you know what the scope tube size is, it’s best to hold off on buying rings.
While the solution is simple, I mention this here because too often it happens that shooters will buy expensive rings, only to find out that they aren’t the right size for the scope they want.
Murphy’s Law in full effect.
Specialty Rings
If you are going to be using a special mounting base, then you need to get rings that match it.
Leupold Dovetails are the most common outlier, but be sure that you are getting rings specifically made for any non-rail systems.
There are also a number of standard style rings that have different mounting designs.
Cantilevered rings are the most common. These include one ring and generally attach to the base with one bolt (sometimes two), but they are offset from their mount point.
If you have a short rail or limited mounting points, cantilevering can give you more options for scope fit and placement, by changing the distance between your rings or shifting the scope position forward or back.
There are also dual-ring attachments that contain two rings on the same base mount. One attachment, and you have everything you need to attach your scope.
The options go on and on, including integrated bubble levels, or even extra bits of rail mounted to the sides or tops of the rings themselves so that you can add other devices to the same mount point right beside your scope. One use of this might be a night vision scope with a separate IR source mounted to the side.
Quick Detach Attachments
And how could I talk about attachments without mentioning quick disconnects. These attachments have a lever at the bottom instead of a screw or bolt to lock them to the rail.
If you want to remove the scope after installing it on a Picatinny rail, you simply flick the levers and pull it off. How cool is that?
This option is so popular that it is quickly becoming a standard all its own.
The 8 Best Scope Rings
If you’re pressed on time, here’s a quick list of the best scope rings:
Aero Precision: Best Scope Mount for AR-15
Vortex Optics Pro Series Riflescope Rings: Best 30mm Scope Rings
Leupold Rifleman: Best for the Money
Talley Lightweight: Best 1 Inch
Warne 1” Matte PA Rings: Best Rings For Heavy Recoil
Warne Quick Detach: Best Quick Release Mount
Burris XTR Rings: Best for Picatinny Rail
Seekins Precision: Best Scope Rings for Long Range Shooting
1. Aero Precision: Best Scope Mount for AR-15
The Aero Precision is the best scope mount you can get for the AR-15.
It’s not only great for high-end optics, but it’s also the lightest mount on the market.
But that’s not all. Here’s why I have the Aero Precision mounted on my AR-15 to this day…
Durability
The Aero Precision mount’s lean design does not define its strength.
In fact, a bulky mount doesn’t always mean a sturdy build.
It’s constructed of extruded aluminum with a hard-coat, black matte finish.
Plus, the edges are rounded and smoothed that compliments its design.
Which makes it a lean, mean mounting machine.
Eye Relief
The eye relief will mostly depend on your specifications when mounting it to your AR-15 scope.
But this mount also works for a variety of different heights and length for your eyes.
In fact, the only issue with the eye relief was with the installation of the mount itself.
When trying to adjust for eye relief, the included mount rings were not securely holding my scope in place.
Which means you should probably switch the rings out for something more reliable.
I highly recommend these 30mm LaRue rings to hold your scope in place while adjusting it for eye relief on this mount.
Installation
Now here’s the tricky part.
When it came to installing the scope mount, there were some issues.
Due to the integral ring’s pinch bolt style, this can cause the scope to rotate as you use a Torx tool to screw it on.
Which means the reticle can become unleveled. So torquing the mount became trial and error.
But one solution is to use a stack of gauge blocks to get a snug grip between the bottom of the scope and the mount.
And then torque the rings to keep the mount in place for a level scope.
If one thing could be improved on this mount, it would definitely be the installation.
But it’s up to everyone’s individual specifications to decide how tricky it is to properly install this mount.
So keep it in mind, but the other great qualities of this mount remain unmatched.
Who’s the Aero Precision for?
The Aero Precision scope mount is a great option if you’re looking for a lightweight and sturdy mount for your scope.
Plus, it’s a high-quality mount that’s also affordable for most budgets.
So whether you’re into hunting or target shooting at the range, the Aero Precision is a versatile mount any AR-15 scope.
2. Vortex Optics Pro Series Riflescope Rings: Best 30mm Scope Rings
I’m a big fan of using rings to mount my scopes, especially on tactical rifles.
They’re time-tested, rugged, and ultra-reliable.
When you first start using them, they take some getting used to.
If you can put your first pair of rings onto your rifle the first time perfectly, I applaud you.
After you get the hang of it though, you’ll never go back to one piece mounts again.
Vortex is one of the best gun accessory makers in the business.
They offer incredible quality, precision, and durability for a comparatively low price.
Plus their warranty is unbeatable.
So when they came out with their Pro Series Rings, I had to give them a shot.
Their extra high 30mm rifle rings are now my hands down favorite type of mount.
In my opinion, they’re basically one of the best AR scope mounts you’ll find.
Keep reading and I’ll tell you why you need to give the Vortex Optics Pro 30mm Rings a shot.
Durability
Vortex is a company known for putting out high quality and insanely durable products.
Their Pro Series rings are no exception to that claim.
Made from T6 aluminum, these things are solid.
They’re thick and attach securely to your rail or rifle with 4 T-25 Torx screws per ring.
Once these rings are on, they stay on.
They’re not going to get bent, or twisted, or knocked out of place no matter what you do to them.
It’s their job to stay put and keep your zero and that is exactly what they do.
In addition, they’re coated with an anodized finish that offers a ton of weather protection.
The best part is that even though each ring is made of a solid chunk of nearly indestructible metal, they’re still super lightweight.
That means you won’t have to worry about compensating for the weight of them like I’ve had to with some one-piece mounts.
I put these on my scout rifle and after over 500 rounds, my zero is still in place.
I’ve marched this setup through the brush, up and down hills, across streams, and climbed trees with it.
They’ve been banged against rocks, scraped through weeds and bushes, and submerged in water.
The rings have never budged so much as a centimeter.
I’m by no means gentle on my equipment and I couldn’t put a dent in them.
To me, that speaks for itself.
Eye Relief
Vortex offers low, medium, high, and extra-high rings to fit any standard 30mm scope.
That means depending on your scope and rifle, you can customize your eye relief for the perfect fit.
My advice is to generally get a bit higher than you think you’re going to need.
It’s a lot easier to lift your eye up a bit than it is to mash your cheek onto your rifle to see through your optic.
Plus, if you pick rings that are too short for your scope, you might have to mount them farther back, compromising your eye relief.
If you haven’t picked out a scope for your scout rifle yet, check out these muzzleloader scopes.
Installation
If you’ve never mounted a scope before, check out this page for mounting basics.
Although rings require a little more precision to mount than one-piece mounts do, they’re still fairly easy.
This is a great video from Vortex Optics showing you how to tighten their rings.
One of the best things about these rings is that they have the torque specifications engraved directly onto the rings.
So even if you take them off and switch them to another rifle, you’ll always know exactly how tight to tighten them.
They’ll easily attach to any Picatinny rail or Weaver mount you have as well.
Thanks to the torque specifications and everything that you need to mount the rings included, it took me less than 20 minutes to get them on and tightened.
They’re extremely user-friendly, and you shouldn’t be intimidated.
If you have any issues make sure to take advantage of Vortex’s great customer service.
Who’s the Vortex Optics Pro Series Riflescope Rings For?
If you’re looking for unbeatable quality and durability, then these are the ring mounts for you.
They’re perfect for long-range rifles, scout rifles, and thanks to their incredible durability they even work on air rifles.
If you’re in the market for a new air rifle scope, check out these scopes.
Plus, because they come in so many different heights, they’re perfect for larger scopes.
These rings are also an excellent choice for rifles with high recoil because they just don’t budge.
To review:
Durable
Lightweight
Anodized finish
Made in the USA
Made from T6 aluminum
Torque setting engraved on rings
Comes in a variety of models to fit your needs
Plus they’re covered by Vortex’s Lifetime VIP warranty.
No matter what happens to your rings, who you give them to, or when it happens, Vortex has you covered.
They’ll replace or repair them free of charge.
It doesn’t matter if it’s been a week or eighty years, when they say lifetime, they mean it.
If you haven’t made the switch to ring mounts for your rifles yet, I urge you to take a look at the Vortex Optics Pro Series yourself.
Trust me, you’ll thank me later.
3. Leupold Rifleman: Best for the Money
Every shooter knows that Leupold is a reputable brand that manufactures products with excellent workmanship.
This household name is well known to design high-quality yet affordable scopes, including a line of mounts called “rifleman rings.” For less than $25, the scope rings have more than 3,000 reviews all over the internet.
The good news: You don’t need to read through thousands, just this one.
Interested? Let’s dive in…
Durability
The Leupold Rifleman rings are sturdy and reliable.
The workmanship is excellent, the fit clean, the pieces arrived without marks or scratches.
Take note:
The rings are not made of steel.
Although they’re precision-machined from aircraft-grade aluminum for strength and lighter weight, it can still create challenges.
Read the directions before mounting. Do not overtighten the scope rings on the optic. If they loosen up, use a thread-locker to prevent the scope from moving when in use.
Design and Fit
The Leupold Rifleman rings are designed for a 1-inch tube scope, and the base will fit any Weaver/Picatinny rail.
Don’t forget:
Proper ring height is needed for clearance of the scope objective from the barrel.
The Rifleman rings come in different heights. I recommend high rings for 50mm objective lenses, medium rings for 40mm, and low rings for 32mm or less.
Once fitted into my AR-15 rifle’s grooves, the mounting screws disappeared, providing the maximum unobstructed viewing area beneath the scope.
Speaking of mounting…
Installation and Eye Relief
Proper installation is crucial.
The box comes with a hex key, set screws, and a straightforward guide.
In fact:
I have a Leupold VX-6HD LPVO mounted on my Benelli semi-auto .300 win mag using the Rifleman Rings.
It took me less than 10 minutes to set up.
The Rifleman Rings also allow any optic to be mounted forward far enough for proper eye relief.
The scope held zero after 250 rounds and never budged.
Final Verdict: Who’s the Leupold Rifleman Rings for?
Are they the best in the market? Most likely not.
But do they work? Absolutely!
You can spend $100 on Leupold’s better rings, but for $20, I’d say the Rifleman Rings are pretty decent.
Here’s why…
Holds zero
Budget-friendly
Quick Installation
Reliable construction
Plus, the rings come with Leupold’s lifetime warranty. You can get them replaced if they arrive at your door with defects.
All in all, Leupold Rifleman Scope Rings are trustworthy and quality scope mounts that won’t disappoint or break your bank.
If you’re on the search for the best AR scope mounts, check out my latest review!
4. Talley Lightweight: Best 1 Inch
Do you hunt dangerous game in unforgiving territory? Do you need a scope mounting system that can take a serious beating and hold zero?
If you want a bombproof mounting system, you should seriously consider the Talley Lightweight mounting system.
Durability
If you’ve been around firearms for a while, you’ll notice that the most tried and true way to mount a scope to a rifle is a two-piece mounting system. A set of rings that wrap around the scope. Then those rings attach to a base that is screwed into the rifle’s receiver.
The base and rings are separate pieces. Sometimes that joint where the base and rings come together can be a weak spot.
The joint can be shaken loose with recoil. Or I can damage that connection when I knock my scope scrambling up a rocky hillside searching for a better shot or cover.
Talley has eliminated that weak spot.
Their rings are machined directly to their base meaning this system screws right into my receiver. There’s no joint between the bottom ring and the attached base because it is all one solid piece of 7000 alloy.
This gives me more rigidity and greater stability than any other mounting system out there. My scope will hold zero only as well as its mountings. If the mountings shake loose with recoil, then I’ll have to resight my rifle.
Not so with a Talley Lightweight.
Because this mounting system is perfectly machined as a single piece, I can beat the ever-living-daylights out of my rifle and scope and those mounts will hold steady.
Even better, the rings are coated with Cerakote and will be resistant to scuffs, scrapes, and rust. This system will not only hold your scope steady-but it will look good doing it.
The Talley Lightweight is easily the best AR scope mounts you can find.
But, if mounting without a rail isn’t your thing, then these other mounting options might be more useful to you.
Eye Relief
While Talley recommends that the rings are best mounted directionally-I found that by turning them around I can better adjust the distance between my eye and my eyepiece to get the best eye relief distance for my optic.
Installation
The Talley Lightweight rings will install a little different than you may be used to. It doesn’t matter if you have a weaver or a picatinny mount on your rifle-you won’t be using it.
If you have a rail you will need to remove it.
These rings mount directly into your receiver. If you don’t have any holes to accept the mounting, you’ll need to have your receiver professionally drilled and tapped.
After I got my gun back from my gunsmith, screwing in the bottom portion of the mounting system-the base, if you will-was simple.
I didn’t want these screws to loosen over time, so I locked them down with Locktite Blue 242. I didn’t need much.
Once I attached the bases, I could set in my scope then the top rings. I used a level set to keep everything lined up
No products found.
and a torque wrench to make sure I didn’t over tighten.
Please note that while the alloy that these rings are made from is fantastically sturdy-you will strip the screws if you tighten them as much as you can. Do not over-tighten the screws! You’ll want to torque them between 17in/lbs to 20 in/lbs.
Who’s the Talley Lightweight for?
The Talley Lightweight rifle scope rings are for anyone who wants an extra-durable mounting setup. Don’t let their light 4 oz weight fool you. These rings are built tough and can withstand any abuse you can give them.
To recap Talley Lightweight’s top features:
Easy to install
Cerakote finish
Single piece system
Weigh in at only 4 oz
If you like these mounts, but still need a scope, check these durable optics out.
5. Warne 1” Matte PA Rings: Best Rings For Heavy Recoil
Warne is a company that I think deserves more attention.
Their products are incredibly durable, strong, and reliable.
They make some of the best permanent riflescope mounts that I’ve ever used.
Plus, their products are made entirely in the USA.
That being said, let me introduce you to the Warne 1” Matte PA rings.
They’re an insanely good value for the price, and you’d be hard-pressed to find scope rings of a higher quality.
Warne rings are rock solid, and once you’ve got them tightened down, they’re not going anywhere.
Neither is your zero.
Keep reading and I’ll tell you all you need to know about the Warne 1” rings.
Durability
It’s not often that I’m able to find a mount or set of rings that can really handle the kick of a heavy recoil rifle.
Standard mounts are fine for those fancy high-tech scopes because you’re usually not using them on anything with a kick.
Put one on a .17HMR and you’re in business.
Put one on a Ruger and there’s a good chance your rings and your scope are dust.
That’s where the Warne 1” rings come in.
These rings are ultra-durable.
They’re made of stainless steel and have been proven to be the strongest rings on the market.
In addition, they’re equipped with a no-slip positive recoil surface.
That means they’re built to withstand even the heaviest recoil.
It works by evenly distributing the force of the recoil across the entire setup.
That way no one part is bearing the brunt of the force, so it’s a lot easier on your equipment.
I’ve used these rings on shotguns, scout scopes, and ARs, and the rings have never budged.
This kind of quality and durability is insane for the low cost.
If you’re looking to go big game hunting, these are the rings you need.
If you just want to make sure nothing budges during your deer hunt, these are the rings you want.
Basically, these are fantastic all-around rings for whatever purpose you need.
Eye Relief
Your eye relief is really going to depend on your scope.
The great thing about using rings rather than one-piece mounts is that you have more control over where you place them.
Since they’re more versatile, you can adjust them for your perfect eye relief.
I’m personally a big fan of long eye relief scopes.
I like the wiggle room they offer and the ability to adjust my eye for the shot.
If that sounds like you, then these rings are perfect.
They work great with these long eye relief scopes.
Installation
I recommend buying the Warne Base to help mount your rings.
It makes it easier to mount than a Weaver or Picatinny rail, and since it’s Warne they were made for each other.
These rings aren’t hard to mount if you follow the included instructions.
Once they’re installed, you can set them and forget them.
Seriously. You’ll never need to adjust these rings ever again.
This is one of the best AR scope mounts you could ask for because of how user friendly it is.
The main difference between these rings and others is that they’re split vertically instead of horizontally.
Once you’ve wrapped your head around that, there’s nothing to the install.
Here’s a youtube video by Warne showing you the install process.
Who’s the Warne 1” Matte PA Rings For?
These rings are perfect for anyone who wants to mount their scope once and never wants to worry about it again.
It’s possible to take it off and move it to another rifle, but you’re better off just buying multiple sets of rings.
If you’re looking for a set of rings that’s gonna hold up to a high recoil rifle and perfectly distribute the weight, then these are for you.
Combined with the Warne base, these are perfect for any type of firearm.
They also work with most scopes, including these 1-8x scopes.
To review:
Inexpensive
High quality
Super durable
Made in the USA
Hold perfect zero
Set it and forget it design
Stainless steel recoil control
Perfect for guns with heavy recoil
They’re also covered by Warne’s lifetime warranty, and by lifetime they mean as long as someone has the product.
No matter how it breaks or when Warne will repair or replace it for free.
That’s a company that stands by their product, so you know they’ve gotta be good.
Check out the Warne 1” Matte PA Rings for yourself.
6. Warne Quick Detach: Best Quick Release Mount
If you’re after a mounting system that will let you run different scopes on the same gun, look no further than the Warne Quick Detach (QD) Ring set.
With a set of Warne QD Rngs on each scope, you can swap out optics in 10 seconds. Just throw the lever and pop your variable distance scope off. Slip your red dot in place and use the lever to lock it down tight. These rings will keep zero when you reattach your optic-no need to sight in your scope again.
Do you want to swap out a variable powered scope for a thermal scope or for a night vision scope? With this affordable set of rings, you can easily put them on all of your optics.
Durability
The Warne QD Rings are heavy-duty, American made rings are crafted out of stainless steel. Their electrostatic powder coating is pretty tough. These rings can take a beating.
I have them on my Weatherby 300 win mag. Despite my gun’s heavy recoil, they hold solid. I don’t have to tighten them.
I don’t treat my firearm or optics lightly. They get knocked, smacked, dragged through the dirt and submerged. I think my Leupold VX-5HD 3-15×44 might give out before these rings do.
Eye Relief
Warne QD Rings are designed to go on a weaver style mount. The adjustability for eye relief is limited to the length of my weaver rail.
These rings aren’t designed to forward mount a scope. Using these, expect to mount your scope within standard eye relief distances. Your eyepiece should be about 3 to 4 inches from your eye-depending on your scope’s specs.
Installation
Installing the Warn QD Ring set to my optics was super easy. They come with an allen key, all I needed was a torque wrench
and a gun vice.
Here’s what you’ll need to do:
Remove the screws from each ring. Notice that they aren’t the same length-you’ll want to make sure you put them back in the right spots.
Put your scope inside the two halves and add the recoil key. Heads up: Ruger and CZ rings will not have a specific recoil key.
Start all 4 screws, but only tighten the bottom ones to 25 in/lbs using your torque wrench.
Attach your rings to the base and make sure the recoil keys are set into the slots and press each ring towards the muzzle to lock the recoil keys in.
Then tighten the throw lever tight with your thumb and forefinger-there’s no need to over do it.
Next you can adjust your eye relief and reticle.
After you have your eye relief and reticle as you’d like tighten the top screws to 25in/lbs with your torque wrench.
Once all of the screws are set, you can pull out your quick release lever and face it-or index it-the direction you’d like.
Once I had my optic on securely and zeroed, I can remove and replace my optic to my heart’s delight without having to sight it in again.
Who’s the Warne QD Ring Set for?
These rings are for anyone who wants to exchange multiple optics on the same rifle. The Warne QD Rings are very easy to remove and reattach. Just throw the lever, remove your scope, slip in the next one and lock it down.
The Warne QD Ring set:
Holds Zero
American made
Easy installation
Durably crafted from stainless steel
If you are looking for a great rimfire scope to use with these rings check out this list.
7. Burris XTR Rings: Best for Picatinny Rail
Burris is known for designing some of the most robust and reliable riflescope rings on the market.
I bought the XTR signature rings because I needed additional vertical adjustment for shooting at extended ranges. I considered buying a 20 MOA Picatinny rail, but they were expensive and difficult to find for custom actions.
Let me tell you this: the Burris XTR Rings solved my problem.
By the end of this review, you’ll know if these XTR signature rings are for you.
Let’s get started!
Durability and Fit
The Burris XTR Rings are lightweight yet rugged.
Although they’re not made of steel, the rings are precision-machined from aircraft-grade aluminum and come in an elegant finish.
The shims are designed to offset your scope’s minor misalignment or build a custom MOA base for long-range applications. You won’t need to buy additional bases to adjust MOA.
By choosing the right combo of inserts, you can easily adjust for unusual ring/mount/barrel alignments.
The inserts can also be aligned to provide additional elevation or windage if necessary.
Plus:
The XTR rings allow perfect alignment of the scope without adding stress on the tube, thanks to its nylon inserts.
The well-constructed rings hold the scopes securely without leaving a mark on them.
Nothing is more disheartening than to have your expensive scope marred up by scope rings.
The XTR Signature Rings come in stated heights of 1.0″ (medium), 1.25″ (high), and 1.5″ (extra high) for 1″ and 30mm diameters, and only 1″ and 1.5″ in 34mm.
Remember, proper ring height is key to a perfect cheek weld for the most comfortable fit and accurate shooting.
Installation and Eye Relief
The installation is very straightforward.
The Burris XTR Rings come in a waterproof storage container with a set of instructions.
It includes all the tools and parts needed to make 0-40 MOA of cant in the scope mount.
Each ring set includes:
One set of the +/- 0 MOA concentric.
One set each of the +/-5 MOA and +/-10 MOA.
Two sets of the +/-20 MOA.
Take note!
These rings don’t come with two sets of 0 inserts, so if you don’t want to change your MOA angle, you need to carefully install the two sets of +/- 20 MOA to achieve 0 MOA.
I also found that the six screws on the ring clamps make it easier to tighten without changing the scope level compared to the four screws set up on the regular signature zee rings.
I used a laser bore sight to get them dialed in. I was just 2 inches off zero at 200 yards.
I mounted a Burris XTR II 8-40×50 FFP scope to a 6.5 Creedmoor with these rings. I shot about 100 rounds through the rifle and found no issues holding zero.
Final Verdict
I’ve been a Burris fan for over five years and have several sets installed on my rifles.
What can I say?
The Burris XTR rings are one of the best AR scope mounts I own.
Here’s why:
Holds zero
Easy to install
Good price point
High-quality construction
Regardless if used for hunting, tactical, or target shooting, the Burris XTR Rings are an excellent choice.
If you’re on the hunt for the best handgun scopes, I’ve got the perfect list for you!
8. Seekins Precision: Best Scope Rings for Long Range Shooting
Seekins Precision scope rings are an ideal mount for long range shooters.
With a solid mount that you can count on, making those precision shots becomes a whole lot easier.
Seekins Precision provides that support and gives you the opportunity to concentrate on your shooting.
Want to hear more? Keep reading…
Durability
These scope rings were built like a tank.
They are made from 7075-T6 aluminum and precision machined for a high quality, sturdy feel.
Seekins Precision are a tad on the bulky side, but they don’t get in the way and they’re incredibly durable. The solid build allows them to handle the recoil from any caliber, including the heavy hitting 45-70, which I use for big game hunting.
Plus, you won’t have to do any lapping, like I usually do with cheaper rings.
They are also specifically made for the picatinny rail, so they’re one of the best AR scope mounts.
Installation
Since these were made for the picatinny rail, installing them on one is a breeze.
If you’re using the Seekins rail, the cross bolt fits right in the channel and there’s no movement at all. I’ve noticed movement there in other rings, which is why I love the Seekins precision so much.
While they do come with a T25 key, I had to use a T25 torx screwdriver to get it on the way I wanted. But once set up, it was perfect.
And my scope slipped right in and fit nice and tight in the rings. I’ve even tried these rings on a SKS rail and they worked perfectly.
Eye Relief
The Seekins Precision scope rings come in multiple heights to give you the clearance you need for your weapon.
Because they secure to a picatinny rail, you can position them to give you the best eye relief.
The firm, solid fit keeps your scope in place, so you never lose your zero.
At this point, I’ve shot over 200 rounds using these and haven’t had to readjust a thing.
Who’s the Seekins Precision Scope Rings for?
Seekins Precision scope rings are perfect for long range shooters that need to know they have a solid mount.
They are:
Easy to install
Strong and sturdy
High quality aluminum
Solid, with no movement
If you’re looking for the best quality scope rings on the market, try the Seekins Precision scope rings. You won’t be sorry.
How to Properly Mount a Rifle Scope
There are a lot of how-to’s out there on this subject, and some are better than others.
I realize that not everyone has a machine shop, and some of these steps are a bit of overkill for a rimfire plinker that won’t be used for competition or even to take game.
With that in mind, I’ll go through each step of the process for a professional scope job, but take it with a grain of salt. Depending on your gun, mounting, and scope, not all of these steps will be necessary.
If you are interested in a professional mounting kit, this video might interest you, and it’s a great how-to resource as well:
How to Attach the Scope Mount
The first step is to get your rail on the weapon. Obviously, if you are using an existing dovetail that is cut into your receiver, you can skip ahead.
Most rifles have some tiny screws in the top of the receiver that can be removed with a small flathead or phillips screwdriver. The threaded holes left behind are what the mount will attach to.
If there are no holes, then you may have to drill and tap the receiver, or some other machining may be necessary. A trip to the gunsmith is usually in order, as those who have a machining skillset and the right tools will know what to do. But here is a little more information:
Usually, the mount is placed on the receiver and the screw hole centers are marked with a punch. Holes are drilled in the receiver, and then a tap is used to thread them to the proper size and pitch.
Once you have the mounting holes located or drilled, it’s a simple matter of placing the mounting rail over the exposed holes, and then attaching it with the included screws, which are typically torx screws. 30 inch pounds is the usual torque recommendation.
To make life easy, ensure that your rail is made for your weapon platform, and you should have very few issues. Manufacturers make rails machined perfectly for just about any rifle out there.
How to Attach the Lower Half of the Scope Rings
I like to make sure everything is going to fit well before I start screwing it all together. I start by separating the rings and only attach the half with the lug on it to my rails. Just snug them up finger-tight for now.
Then I lay the scope across the open platform. If I have the wrong size rings, then it won’t fit right. Consider that check number one. The rings should hug the scope, but it should drop in easily. Check that the spacing between the rings is not interfering with the scope.
While you are at it, you may also want to check the eye relief to ensure that you are happy with the scope location, and also that the primary optic isn’t touching the barrel. There should be a little air gap between the two.
Optional: On Picatinny rails in particular, you can try to adjust the spacing where the front ring rests comfortably against the body of the scope (the bulge in the middle where the elevation and windage knobs are). Having that change in diameter butted up against the front ring will eliminate any possibility of the scope creeping forward later on.
Once you are happy with the placement, snug up the lower rings to the recommended torque from the ring manufacturer.
Lapping the Scope Rings
If you have a lapping rod, this is an additional step that will ensure that the scope is held snugly by the rings with minimal chance of the tube distorting over time.
First, lapping compound is applied to the insides of the rings. Mark both of the rings with a pencil or grease pen on top, so you will know which is the front and the back, and which side faces the muzzle. Once you start, you want to stay with the exact same configuration.
The lapping rod is secured into the rings just like a scope would be, but the rings are only tightened enough to hold it in place. It should still be able to slide freely.
Work the rod forward and back a couple dozen times, and then check the rings by taking everything back apart and examining the wear patterns.
Repeat this process until you’ve removed at least 75% of the surface finish.
How to Swab the Rings
You want to remove any residual oils or foreign matter.
I prefer rubbing alcohol and a rag, but there are several options out there.
Clean the rings thoroughly to remove grit, grime, lapping compound, oils, cosmoline, or anything else that will wipe off. A spray cleaner of some kind with a little straw attached to the head can be used to get inside the screw holes as well.
Clean everything, and then dry everything. To be extra safe, go over the whole setup with a can of compressed air when you are finished to dry out any leftover solvent.
How to Check the Level
Lay the scope onto the bottom rings, then cover with the top rings and start threading in the screws until the scope is held securely, but it can still twist and move if you turn it. Not tight enough to scratch the paint, but not so loose that it will move on its own.
Check that the gaps on either side of the rings are the same as well.
Once all of the screws are finger tight, secure the rifle in a vice and place a level bubble on any flat along the top of the receiver or barrel.
Both the rifle and the turret top should be perfectly level. This ensures that both will match, and that will give you a leveled finish.
Now start tightening the screws. Just a little snug at first, and if there are more than two per ring you will want to criss cross when tightening. A simple star pattern, such as forward-left, rear-right, rear-left, forward-right. Kinda like tightening lug nuts on a car wheel.
Once everything is nice and snug, apply the final tightening with a torque driver using the same pattern.
How to Sight In Your Rifle
With a new scope, it’s good to ensure that the scope is as close as it can be before actually putting a shot down range. There are generally two ways to do this.
At the range, set a short target at twenty or thirty yards and zero there first. When you are hitting the paper close to center, you can reach out to 100 yards and re-zero.
If you know the intermediate point of impact for your rifle caliber, you can set your short target at that range, and it should be pretty dang close when you reach out to a longer range.
A bore sight tool is another option. This is a little laser that chambers just like a bullet, and will put a dot on the target for you to align to.
But be aware:
You will still need to shoot some groups to get everything dialed in, but it should get you on the paper at 100 yards.
Now It’s Your Turn
I hope you enjoyed my best scope ringsguide.
Now I want to turn it over to you:
Which scope ring will you pick for your firearm?
Let me know by leaving a quick comment down below.
Whitetail hunters and land managers have been playing around with the idea of food plots for nearly 40 years now. And admittedly, a lot of folks have become quite proficient at planting food plot crops that rival the best farm crops out there.
Even vegetable gardeners would have to be envious at the results seen by those deer hunters who are merely trying to provide the best food plot for the deer on their land.
This year, I’m back at it in our “Fallow to Fabulous” experiment. Last year’s success included two small food plot that were grown on land that hadn’t been farmed in over 15 years. I started out by killing (or attempting to kill) all of the weeds. Wasn’t real successful at that. But I was successful in getting those two plots to grow brassicas quite nicely. Yeah, I know that’s not a major accomplishment, because growing brassicas is fairly easy, even in sandy soils like we have here in central Wisconsin.
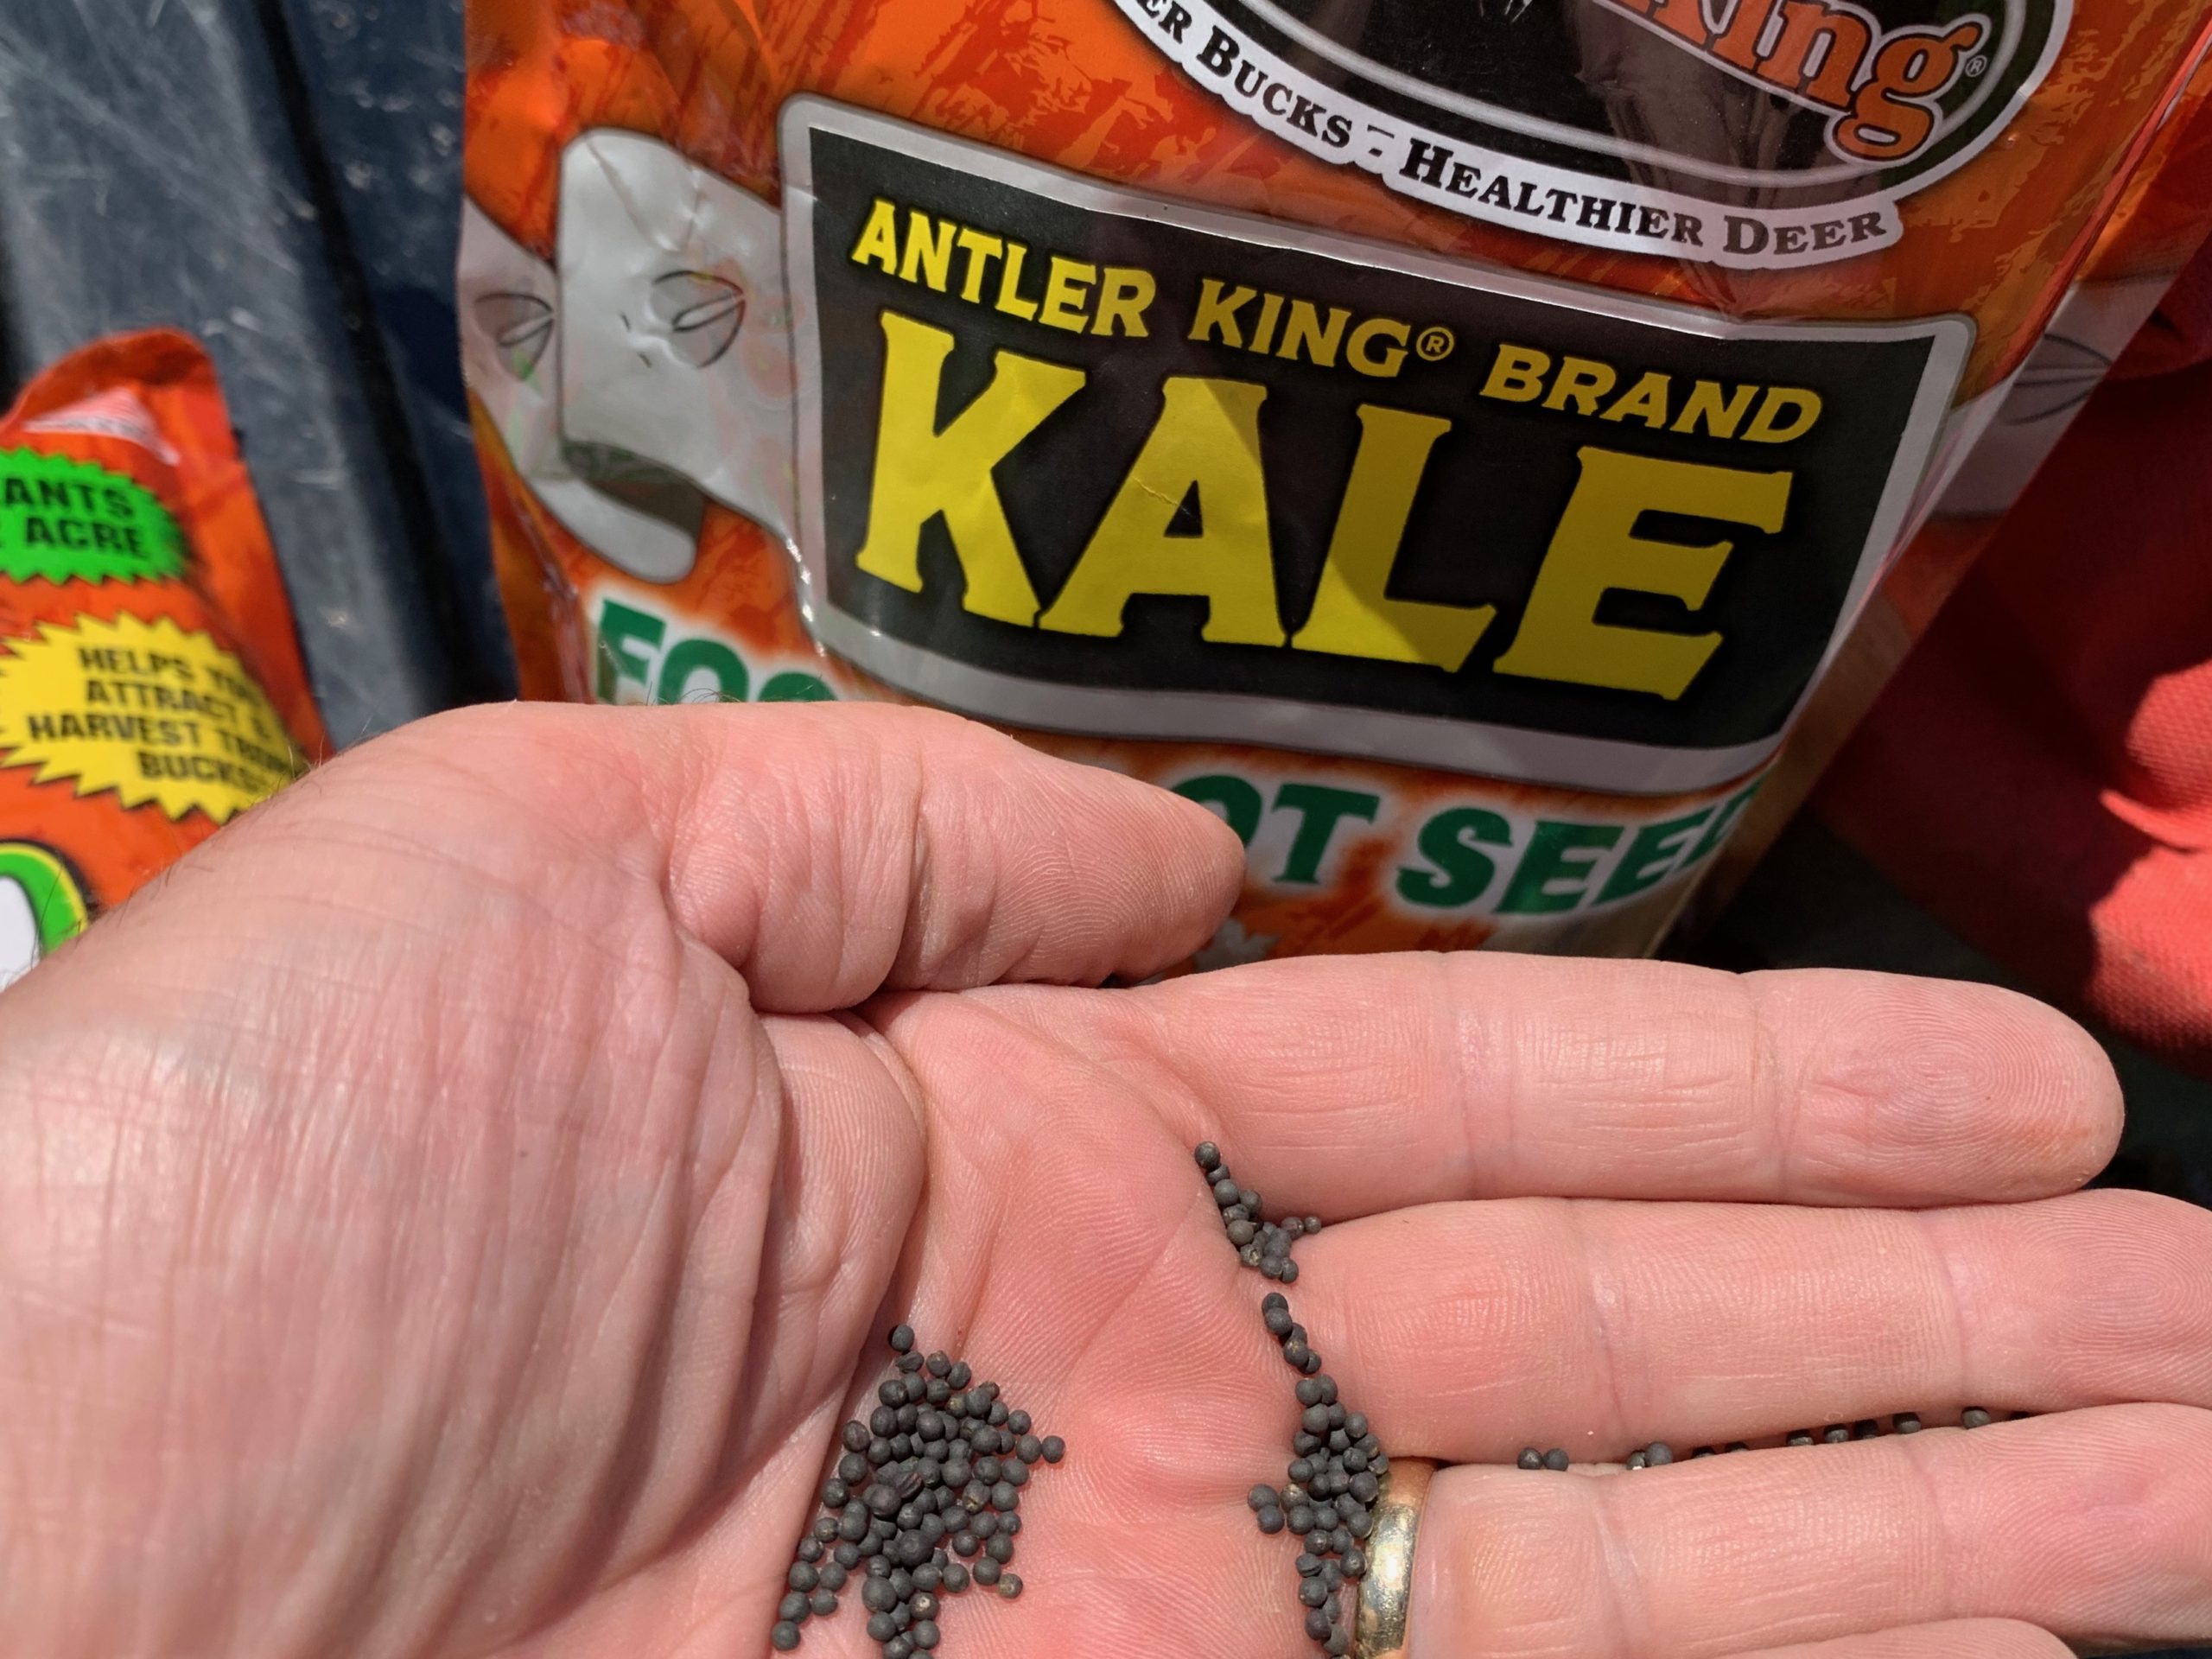
In any event, this year I’m back at it. In fact, this week, I (with all credit to my friends who have equipment) worked the plots and again got some brassica seed planted. I went back with the proven blend of Antler King Honey Hole. Honey Hole is a mixture of five unique varieties of brassicas, which include three varieties of rape, and two varieties of turnips. This blend provides an ideal plot for the fall and winter. After the first frost the plants go from bitter to sweet and the deer love them. In fact, we darn-near filled all of our tags during the early archery season while hunting over these plots. It was simply amazing to see deer flock to these plots after not having any real source of supplemental food for years. I know for a fact that it drew deer to our hunting property from a lot of the neighboring properties.
Mature kale leaves are bitter in warm weather, but the plant breaks down and becomes sweeter in the cold autumn months. Deer prefer it at that stage.
The Next Big Thing in Food Plots?
Both plots are relatively small (less than 1/4 acre each), and I used the same amount of Honey Hole when seeding the plots this week. However, I couldn’t help but be intrigued by a “newer” product that Antler King has been offering: Kale.
Yes, kale. That nasty leafy green they put on your plate when you order a sandwich at the restaurant. Yeah, yeah, I know some folks love kale, especially when it’s cooked with mashed potatoes, but I’ve alway found it kind of gross, to be honest. Bitter tasting (to me, anyway), and even though I know it has a ton of good nutrients in it, I’ve always shied away from including it in my salads.
Well, I’m not a deer, and I’m certainly not waiting around until late fall for it to “sweeten up.” Apparently, that’s exactly what kale does … because it IS another form of brassica!
I simply took 1/2 pound of the seed (way more than enough) and cut it with the Honey Hole seed I was planting. I don’t know of anyone who personally has planted a food plot of just kale, so I didn’t want to roll the dice on being all-in just in case the deer didn’t take to it right away. But after reading all of the information about this specific strain, I’m really intrigued as to how these plots will turn out. And we just received a good dose of rain, so this stuff should germinate before too long.
If planted by itself, kale can produce several tons of forage per acre in a deer food plot. (photo by Daniel Schmidt)
More About Kale Food Plots
Here’s a little more info on the seed itself from Antler King:
•Kale is a member of the brassica family and is extremely cold tolerant, easy to establish and provides a fantastic cool-season food source.
•Kale is packed with protein (20-30%) and vitamins and can produce up to 10 tons of forage per acre.
•Kale will grow best in cooler climates as the plant’s leaves will sweeten as the temps get colder.
•Like other brassicas, a frost will create a molecular change and further sweeten the leaves and increase attraction.
•Kale is best planted from July through October and works as a great fall and winter forage crop in the Southern U.S. and a summer, fall and winter forage crop in the North, Northeast, and Midwest.
•Kale prefers lighter soils; sandy, sandy loam or light clay and will perform best in a pH ranging from 5.5-7.0.
Kale Conclusion
So … I will keep my fingers crossed that these brassica plots flourish and the kale is something that helps improve them even more than last year. I will also report back with photos of the progress; and trail-camera photos and videos of any visitors we might get over the next several weeks.
You may know about a few expensive mushroom varieties like truffles, but there are also some very rare and expensive mushroom varieties you may not have heard of.
This article will teach you about a dozen of the most expensive mushrooms in the world. You’ll learn how much each type costs and why they’re so expensive.
Why Are Some Mushrooms So Much More Expensive Than Others?
The most expensive mushrooms in the world only grow in the wild and are difficult or impossible for farmers to cultivate.
Since they can’t be mass-produced and only grow for a certain period of the year, they’re more scarce.
Varieties of fungi like truffles also grow under the ground, which makes them even harder to find, and therefore more costly (in time and money) to extract.
What Are the Most Expensive Mushrooms?
How many of these costly mushrooms have you heard of?
1. Kalahari Truffles
Cost: $4 per pound (£6.45 per kilogram)
Truffles have a reputation of being some of the most expensive types of fungi.
But though these truffles grown in the Kalahari Desert in Namibia, Africa may run slightly more expensive than your average grocery store button mushroom, they’re actually quite affordable.
Compared to the more popular white or black truffles, they have a more mild flavor and scent.
Their cheaper price is based on the fact that they grow in more sandy ground. They’re easy to find by looking for cracks in the sandy earth, so there’s no need to use truffle dogs or pigs to locate them.
2. Enoki Mushrooms
Cost: $8 per pound (£12.90 per kilogram)
Enoki mushrooms are now widely available in many grocery stores in North America and Europe. However, they don’t look like most other types of mushrooms that you can buy.
They have long, thin white stems with very small caps. They also tend to grow in clumps.
These little mushrooms have a mild flavor and make a nice addition to stir-fries. As long as they’re not overcooked, they tend to retain a lot of crunch.
3. Oyster Mushrooms
Price: $5 to $15 per pound (£8 to £24 per kilogram)
Oyster mushrooms are the second-most-common mushroom in North America and Europe.
They are exceeded in popularity only by the agaricus bisporus mushroom (which includes button mushrooms, cremini and portobello).
Oyster mushrooms are one of the easiest mushrooms to grow at home. Many mushroom farmers now grow them and they can even be grown from kits right on your kitchen counter.
Since they’re so easy to grow, they’re naturally the least expensive mushroom on our list.
These fungi are available in a wide range of colors including grey, white, pink, blue and others.
They’re best used fresh within a few days of harvesting, but they can also be dried.
Learn the easiest way to grow oyster mushrooms at home.
4. Lion’s Mane
Price: $10 per pound (£16 per kilogram)
Lion’s mane is an interesting-looking mushroom with long, white spines. It looks a bit like a tiny mop, clump of hair or a little white hedgehog.
The flavor of lion’s mane is said to be similar to lobster or crab meat. You can eat these mushrooms raw but cooking lion’s mane enhances their flavor and texture.
Historically, lion’s mane was harvested from the wild. Now it’s fairly easy to cultivate in controlled environments.
Aside from being edible, lion’s mane is also used for its medicinal properties.
While lion’s mane sells for about $10 per pound when fresh, it can sell for significantly more when dried and powdered for use as a supplement.
Check out Growing Lion’s Mane Mushrooms: The Ultimate Guide if you’d like to try growing some for yourself.
5. Shiitake Mushrooms
Price: $7 to $15 per pound (£11 to £24 per kilogram), fresh
Shiitakes have been the favorite variety of mushrooms in many Asian countries for a while. They’re now quite popular in the west as well.
These fungi have a firm texture and a meaty flavor, which makes them great as a meat alternative in vegetarian recipes.
Many supermarkets and grocery stores now carry fresh shiitake mushrooms. They can also be found dried in bulk as well.
Shiitake mushrooms can be fairly easily cultivated, either indoor under controlled conditions, or outdoor when grown on logs. So they’re less expensive than most varieties on this list.
Although shiitake is mostly grown as an edible mushroom, it’s considered to have some medicinal benefits as well.
If you’ve got some spare logs laying around, try growing some shiitake using our resource How To Grow Mushrooms On Logs: The Ultimate Guide
6. Morels
Price: $30 to $90 (£21 to £65) per pound when fresh, $250 (£180) per pound or more dried.
Morels are some of the most sought-after varieties of fungus by mushroom hunters.
Once a mushroom hunter locates an area where morels grow, they’ll tend to keep it secret for just their family and friends. Morels will continue to grow back in the same place year after year.
Morels are very difficult to cultivate and they’re only available fresh for a few months each year in the wild. So they tend to command a high price.
They’re one of the most expensive mushrooms in the USA
7. Porcini Mushrooms
Price: $50 to $70 per pound (£80 to 112 per kilogram), dried
The porcini or king bolete mushroom is found in hardwood forests across Europe. They’re most common in Italy, although they can also be found in parts of North America as well.
You can recognize porcini mushrooms by their oversized caps and thick stems.
As with most expensive mushrooms, porcinis are difficult to cultivate.
So they’re harvested from the wild when they’re in season and then dried out to be sold around the world during the rest of the year.
8. Chanterelles
Price: $200 per pound (£320 per kilogram), dried.
Among most mushroom hunters, chanterelles are second only to morels.
These golden-yellow mushrooms are distinct and fairly easy to spot, without many look-alikes. However, they can cause illness and discomfort when eaten raw and need to be cooked.
They tend to pop up on warm humid days after rainfall.
Like most expensive mushroom varieties, they’re very difficult to cultivate and the majority are harvested from the wild.
If you happen to get your hands on some tasty chanterelles, be sure to read 30 Of The Best Mushroom Recipe Ideas to make the most of them.
9. Black Truffles
Price: $800 per pound (£1290 per kilogram) fresh
Black truffles are the most well-known type of truffle. Even though they aren’t as expensive as white truffles, they still come with a hefty price tag.
Like their white counterparts, black truffles are mostly found in the wild using pigs and dogs.
Some American and Australian mushroom producers have attempted to grow black truffles with limited success.
Since these fungi tend to grow at the base of mature oak trees, it’s a time-consuming and expensive endeavor.
That also makes black truffles some of the most expensive mushrooms to grow.
Most black truffles are bought by chefs at high-end restaurants.
There is even a bit of a “black market” for these truffles. There are numerous fake “black truffle oil” products on the market that are actually made from synthetic chemicals, rather than fungi.
10. Matsutake Mushrooms
Price: $1,000 to $2,000 per pound (£1600 to £3200 per kilogram)
Matsutake mushrooms are native to Japan. They look a bit similar to shiitake mushrooms, with shaggy brown caps. However, they have longer stems.
This Japanese mushroom has a distinct spicy smell and taste.
Like with products such as green tea, there are varying degrees of quality when it comes to matsutake mushrooms.
The best-quality mushrooms at the beginning of the harvest season command the highest prices.
Within Japan, you may be able to find them toward the end of the season for as little as $2 per pound, though.
For importing matsutake mushrooms into Europe or North America, the average cost is about $90 (£65) per kilogram.
The matsutake harvest has been drastically reduced over the past 50 years due to a pine-killing pest that affects the trees that matsutake grows around.
11. European White Truffles
Price: Anywhere from $1,000 to $4,000 per pound (£1600 to £6445 per kilogram), depending on the harvest that year.
White truffles are the rarest and most expensive of all the truffle varieties.
Although white truffles are actually quite common across Europe, they’re notoriously hard to find. Truffle hunters will often employ trained truffle dogs or pigs to help locate these expensive fungi.
So far, no farmer has successfully cultivated white truffles. That’s why the price still remains so high.
What Is the Most Expensive Mushroom in the World?
So what’s the most expensive mushroom in the world? The winner is…
The yartsa gunbu mushroom (Cordyceps sinensis).
Price: $50,000 per pound (£80,500 per kilogram), or $2,000 for a single ounce.
If you clicked this link while wondering how to grow the most expensive mushrooms in the world, things are about to get a little weird.
This mushroom is also known as the caterpillar fungus and for good reason. It infects the bodies of a specific species of caterpillars.
The fungus kills its host and then grows out of the caterpillar.
As you can imagine, these little mushroom fungi are hard to locate in the wild.
The caterpillars typically bury themselves a few inches into the ground before they die.
These mushrooms have also never been cultivated in a controlled environment.
Yartsa gunbu or cordyceps mushrooms are believed to be an aphrodisiac. It’s claimed to have other medicinal benefits as well.
Many people also simply eat them as a status symbol because of their rarity and cost.
Want to try growing something a bit more straightforward? See our article The five Easiest Mushrooms to Grow.
What Is the Rarest Mushroom?
The yartsa gunbu also wins the prize for rarest mushroom.
It’s not just that these mushrooms are only found in the wild growing out of caterpillars. They also only grow in a specific area as well.
These exceedingly rare and expensive mushrooms are mostly only found around the Himalayas, at altitudes from 3,000 to 5,000 meters (9,000 to 16,000 feet) above sea level.
Is There Any Cheaper Alternative?
Very few people are willing to pay $50,000 per pound (£80,500 per kilogram) for some mushrooms that grow out of caterpillars.
Luckily, there’s a much cheaper option.
While cordyceps sinensis is extremely rare and needs to be harvested from the wild, it does have a close relative that offers most of the same benefits.
Cordyceps militaris can be easily cultivated on much more conventional growing mediums (rice and soy) without the need to sacrifice insects to get it.
That means you can buy bottles of cordyceps militaris capsules for about $20 (£14.40), when the same amount of cordyceps sinensis would cost over $1,000 (£720).
Final Thoughts
There are some truly rare mushrooms out there, including some that cost thousands of dollars or pounds per serving.
What makes a particular type of mushroom expensive is usually an inability to cultivate it. Wild mushrooms only grow during a certain part of the year and they’re difficult to find.
Growing mushrooms doesn’t need to be expensive though.
If you’d like to try growing oyster mushrooms, our GroCycle Kits allow you togrow your own delicious mushrooms at home in just 14 days. They also make a great gift.
Or to grow them from scractch, check out ourmushroom growing courses.
Whether you just want to grow a small amount of mushrooms at home or start a Low Tech Mushroom Farming business, we offer something for everyone.
Tracy Schmidt | Originally published in GameKeepers: Farming for Wildlife Magazine. To subscribe, click here.
Health foods are all the rage these days, and none comes healthier than the pure-protein provided by white-tailed deer venison. Venison is low in fat, high in nutrients and packed with a whopping 44 grams of protein in one man-sized serving (six ounces). That’s more than half the daily recommended amount of protein for a healthy person.
Although pure, clean venison is the poster food for good health, it does come with some precautions. As with any meat, special care must be taken after your deer is down; during the butchering process; and, of course, in the kitchen. I’ll share my family’s best practices here.
No discussion on venison can occur in these modern times without first addressing the “Boone-and-Crockett class elephant” in the room: chronic wasting disease. CWD became a hot-button topic among Eastern deer hunters 14 years ago when the disease was discovered in free-ranging deer east of the Mississippi for the first time. It had been previously considered a Western deer disease (and elk and moose) confined to states like Wyoming and Colorado (where it was first identified in 1967).
The disease (transmissible spongiform encephalopathy – TSE) centers on abnormal brain proteins in deer which, when infected, always kill the animal. Human concern heightened when some scientists characterized the disease in the same category as Bovine spongiform encephalopathy (BSE) in cattle (Mad Cow disease) and Creutzfeldt-Jakob disease (CJD) in humans.
Although BSE has been linked to increases in CJD, there are no known links between CWD and any increased cases of TSEs in humans. In fact, several scientific studies have concluded that there is most likely a species barrier between CWD in deer and TSEs in humans.
Hanging your deer head-up or head-down is much a decision of personal preference. Some prefer head-down because they believe it allows heat to escape more quickly from the larger cuts.
Should we worry about CWD in our venison? If you hunt in an area with known CWD infection rates, common sense only dictates that you would want to have your deer tested, which is fairly simple and cost effective. More importantly, you should follow some basic handling precautions after your deer is down:
1. Field-Dressing Know-How
There are two important parts of the field dressing process: keeping the deer from becoming contaminated from its own waste and keeping external contaminants from entering the body cavity of the deer while you are working with it. Make sure to use a sharp, clean blade and to wear elbow length gloves when field dressing your deer.
Just behind the breast bone, make an opening through the skin and muscles of the upper abdomen. Insert two fingers of your gloved hand into the body cavity and keep the knife up and slice the skin apart down to and around the anus, making sure not to puncture the stomach and intestines.
Contamination from contact with digestive tract contents not only will taste bad, but it can be contaminated with bacteria which can cause food-borne illness at the point of consumption if the meat is not properly handled or prepared. Remove the genitals of a male deer and discard them. Cut around the anus and tie it off then draw the intestine back through the canal between the rounds, into the body cavity and out and remove through the body cavity. Be mindful about keeping your knife clean while you work. Keep all removed internal organs from introducing contamination to the meat. Try to avoid contact with the brain, spinal cord, spleen and lymph nodes while field dressing your deer. Make sure you remove all the internal organs.
Roll the deer over to drain any excess blood before you drag it, but be careful what you roll it over onto. If you are removing the head, use a separate knife for that than you used for working with meat areas. This will help you avoid cross-contamination. Another thing to avoid is getting dirt and debris from the ground into your deer and a personal dislike of mine, hair.
When you are done working, clean your knives and equipment with a 50/50 solution of chlorine bleach and water. Soak your knife for an hour to make sure it is sterile.
2. Cool Your Deer
Hang your deer and prop open the body cavity with a stick. My husband and I believe that using a head-down position is better because it allows heat to rise from the chest cavity more quickly. Some old-timers have chastised us for doing so, claiming that blood will pool up in the upper thorax. We ignore such criticism because the majority of the prime venison comes from the hind quarters. The few scrap-pounds of venison that could potentially be spoiled in the neck/shoulder area is a risk were willing to take if given the choice, but you know what? We’ve never lost an ounce of meat by hanging our deer from the hind legs.
During the early archery season, we also pack our deer with bags of ice to help cool it down. To hang a deer head down, simply insert a stout stick or meat-hanging gambrel between the hock and the tendons. Make sure to skin the hock before you hang the deer if you are going to do so yourself. It is very easy to accidentally cut the tendon when making the first cuts around the hock. Doing so would cause the deer to fall down.
A shady spot where temperatures stay at or below forty to fifty degrees is best for storing for two to three days. If it is cooler than your refrigerator, your deer may hang for a bit longer. Hanging the deer in a walk-in cooler is ideal, but you may quarter the deer and put it into a chest freezer.
It is a good idea to wear gloves that go up to your elbow when gutting a deer. It will help avoid contamination from clothing and also protect your clothing from fluids in the deer.
Thawing and refreezing fresh meat once will not affect meat quality. If you are taking your meat to a professional processor you are ready to load your deer and go. Just make sure not to tie the deer to your vehicle’s hood since the engine heat will hasten spoilage. Some will pull the carcass in a trailer or in a pick-up bed without covering the meat. This just serves to introduce road-grit to your meat.
3. Choose the Right Processor
When we don’t have time to cut up our own deer we take them to a professional butcher. We are lucky to have a local grocery store that processes deer. We know that the deer are kept in a walk-in cooler and that we will be getting our own deer back to eat. We like that it is processed in a commercial kitchen with its clean equipment and health inspections.
It is important to get your own deer back when you try to be so careful while field dressing. Not everyone is as careful, so if you don’t know that you’re getting your own venison back you are taking some big chances. Make sure to ask about that before you drop off your deer.
We are also very selective of when we take our deer to the processor. We usually drive the deer to the processor during non-peak hours like weekday mornings. This allows us to personally drag the deer into the cooler and talk one-on-one with the butcher. It’s just like anything else: If you get to know the person, they’re more likely to look out for you the next time you show up.
When you don’t have time to do your own butchering, look for a professional setup. You want a butcher who will make sure you get your own venison back.
When you go to a butcher shop, look for cleanliness in the work area. Tables should be stainless and the floor should be clean. Look for working sinks and clean equipment. Talk to the people who work in the butchering area if you are able to have access to them to find out how long they have been processing deer. Don’t be afraid to walk away. After all, this is the food you’ll be serving to your family. If you’re going to pay to have your deer butchered, it only makes sense to find the very best butcher in your local area.
4. Skinning Techniques
During clear, cold weather, you can let your deer hang for several days on the meat pole or from a tree limb. Just be sure to hang it high and keep the chest cavity protected from the elements (and critters). During warmer weather, you’ll want to get the skin off as quickly as possible to assist with the meat-cooling process. Deer can be skinned while hanging head up or head down. There are plenty of quality videos online that show proper techniques. We prefer the head-down (back feet first) method because it allows for the hide to come off cleaner and more quickly.
With a razor-sharp skinning knife, start by cutting circles through the hair and hide just below the dew claws on the back legs. Next, make incisions along the inside of each back leg, running them through the hide along the leg bone all the way to the deer’s anus. Peel back the hide on each legs and pull the hide down (almost like removing a stocking) until both sides are skinned all the way down to the deer’s rump.
From there, work the knife around the tail to free up the hide from the hind quarters. This will now allow you to pull the hide down the deer’s stomach and thoracic cavities in one motion (when the deer is still warm). It’s almost as easy as pulling off a sweatshirt if you’re working on a freshly killed deer. If the deer is cold and stiff, you’ll need to use your knife a bit to help loosen the tallow from the hide.
Keep working your knife and pulling the hide until you get all the way past the front shoulders and past the deer’s neck. Don’t stop short. Pull the hide all the way to the head if you can. A lot of people make the mistake of stopping short once they get past the front shoulders. Don’t do that, because there’s plenty of good grinding venison in the deer’s neck.
5: Butchering Tips
I admittedly was intimidated when I helped my husband butcher a deer for the first time. It’s certainly something I wasn’t exposed to while growing up in Natick, Massachusetts. But after those first few deer, I soon learned to enthusiastically embrace the job because this is where we ensure our final food product. The quality of the meat is totally dependent upon what we do during the butchering process.
Making meat from a carcass is really quite simple. Just break it down into working-sized pieces and then take your time processing it from there. For example, we start by reducing the deer to seven main pieces: two hindquarters, two back-straps, two shoulders and the neck. True, there can be meat in the ribs but this section of the deer is best utilized when you a) are working on a large buck, and b) the deer was in pristine shape when you field-dressed it. Translation: Don’t mess around with the ribs if there’s any chance stomach contents leaked out during the field-dressing process. It’s just not worth the health risks of possible cross-contamination.
The back-straps are easy to remove. Just fillet them off the backbone of the deer as you would fillet a fish. Use the knife to feel your way around the spine. Once you have worked the knife halfway down the back-strap, you can oftentimes pull it the rest of the way. You’ll get two forearm-sized “logs” of meat from the back-strap of an adult deer.
For the hindquarters, you needn’t use anything but a stout, sharp knife. No bone- saws are necessary. Just use your knife to separate the muscle groups. It’s easy if you take your time. You’ll end up with three nice muscle groups plus a few handfuls of shank meat. Use that for stew or stir fry. The bigger chunks can be divided into roasts or sliced (always against the grain) into steaks.
Front shoulder and neck meat is almost always used for venison stew, chili and grinding meat in our home. When given the time, I’ll tie a shoulder roast or two for the freezer. These are ideal for weekend dinners in late winter. (Shoulder roasts need to be slow-cooked on low heat.)
Conclusion
Field-dressing, skinning and butchering a deer for the first time is about as intimidating as changing your car’s oil for the first time. However, once you get over those irrational fears, you’ll wonder why it took you so long to roll up your sleeves, because there’s nothing more satisfying than providing your family with an entire dinner plate of food you’ve grown, hunted and prepared all by yourself. Venison provides that satisfaction…in spades.
Diana Stormrider comes from the queen of air rifles, Diana, a German-based manufacturer of compressed air and small-caliber weapons.
Since 1892, Diana has been a muse for hunters regardless of age, country, or shooting level.
Diana Stormrider is the first of a production line where Diana tried to make something in action like deviating from their performance line.
Though Diana Stormrider is on its experimental stage, the manufacturers have already come up with an updated version.
Performance in terms of accuracy is one thing that Diana did right with Stormrider.
You cannot ask for a better product at this price range.
A Stormrider which is a PCP gun costs you around $200, and this could not get any better.
Stormrider got its name for all right reasons and from performance to look, and everything in between you can easily rely on this multi-shot air rifle.
It is lightweight both in physical and financial terms.
The sleek design, high accuracy, pre-charged pneumatic feature set a new benchmark for low-cost air rifles.
I advise you not to go with the price tag.
You will soon understand what a gem a Stormrider is when it comes to serious shooting.
There exists a cheekpiece on the left side, and it is considerably raised for better positioning of this pellet gun.
This feature, though made for right-handed shooters, could be easily adjusted and helps the left-handed shooters as well, making it ambidextrous.
The grip and forearm are contoured with the checkered patterns, which are pretty much simple lines scribed by machine on the wood but good at the price point,
And you can easily find the perfect hold anywhere along the length of the checkered contour.
This will give you a confident hold of the gun.
The bolt action of Stormrider is pretty easy and light.
There is an integrated pressure gauge in the air gun for you to tack the air pressure inside the tank easily.
The butt comes with a rubber pad which is thin enough to go overlooked but contributes to a better grip.
For durability, I noticed bluing on the metal, and the breech was coated with powder considerably.
Though the wood looks somewhat dull compared to any high-end wood stock air gun, it has no actual defects.
Sight
Diana Stormrider comes with a regular open sight, which we can see on the top of the barrel band.
However, it lacks all the fiber-optic features.
The rear sight can be adjusted according to your need.
You can use a flat blade screwdriver for adjusting the rear sight which offers adjustment for windage and elevation.
An 11 mm dovetail ring is a feature of the Diana Stormrider and both the barrel and breech are grooved with it.
You can easily mount any scope of your choice.
The rear sight is removable and in reality, you actually have to remove it for mounting any scope longer than 10”.
This is because the breach is too small to accommodate both the rear sight and a long scope.
To use the barrel band as a front scope ring, this adjustment is necessary.
However, you can think of it as too much hassle, so we have a remedy for that too.
You have a choice of using the UTG BugBuster scope from Leaper that has a medium height air gun ring that you can attach to your Stormrider.
It fits perfectly in Diana Stormrider without removing the rear scope or irritating the magazine at all.
More importantly, the rear sight in this particular arrangement does not tamper with the sight picture through the scope.
You can go for any high-end scope as well which you can adjust easily by removing the rear sight
But most of such scopes which offer better performance are heavyweight.
The BugBuster is neither too big nor too heavy which is a big advantage considering the handling could be overbalanced due to weight.
The Stormrider was made to be compact and lightweight and any heavy scope just fails its purpose in the first place.
Velocity, accuracy and power
In case you are using large scopes, your chosen location to mount the scope ring should be the front of the breech, and the dovetail ring that we see on the barrel band.
In such cases, you must be worried about removing the iron sights but let me tell you it is no rocket science.
First, you get a small, around 2 mm Allen wrench with which you can open the front sight by just undoing a set screw.
In the case of rear sight removal, you need a flat blade as I mentioned above.
Velocity, speed, and accuracy are the trio that could make all the other points irrelevant when it comes to air guns.
You can adjust everything, compromise a little and forget about some uncomfortable positioning
But where modification can do nothing is in its velocity and accuracy specification.
This is why we will produce some test results made by using Diana Stormrider so you can get a clear picture of what it is capable of doing.
You may have other requirements or different expectations from your air gun so it is better you have the actual picture in mind.
Diana Stormrider Gen 2 follows the basic pattern of all PCP guns that shows a decrease in muzzle velocity with an increase in grain weight
And for the same condition increase in muzzle power.
Here, the test includes seven different pellets from five different manufacturers which are Gamo Raptor, H&N, Crossman, JSB, and RWS.
The velocity ranges from 1068 to 883 fps whereas the energy shows a range of 12-18 ft/lbs.
Before I get to the conclusion, I am going to present the actual test results
So you know on what basis I am deciding the best pellets for Diana Stormrider.
As I mentioned at the beginning, the first-generation Diana Stormrider comes with a single-stage trigger which is also non-adjustable.
The main problem with one stage triggers is unpredictability.
You keep pulling it and most of the time you have no idea when it would go off.
With Stormrider, you don’t have to worry about that.
It’s pretty predictable, and you will know the breaking point which will improve the performance and chance of hitting the target.
The trigger pull is also less so if safety is not on it could result in an accidental discharge.
The accuracy will also be less than that of any two-stage trigger.
In the first generation, the trigger pull weight is 3lbs 1oz with metal blades.
While in generation two, they provided a two-stage trigger that is adjustable.
They have better accuracy and safety as the trigger pull is higher.
You can adjust the position between the two stages as well.
The accuracy improves because after the first pull you can very conveniently make little changes in target and then pull the trigger for the final fire off.
Cocking and loading
The cocking and loading process in Diana Stormrider Gen 2 is also simple though somewhat strenuous.
The cock on opening action makes it harder to pull the bolt handle at the back than push it forward.
Pushing the bolt forward is actually easy and the action is light and simple.
While pulling the bolt back you may find it small and hard to grip, which also adds to the difficulty.
The magazine is loaded in a usual manner where you first rotate the top cover and put the first pellets in the rear of the magazine skirt first.
Then you put the rest of the pellets in nose-first.
Loudness
Diana Stormrider Gen 2 is not fully shrouded so it is not quiet like a Marauder, but it is also not a very loud gun.
There is a short suppressor at the front of the barrel which makes it quieter than other completely un-silenced air guns.
What I mean to say here is that you can shoot at it in your backyard, but it is definitely going to cause some eyes to roll.
While there is a shooting spree with a bunch of air guns, you can easily call it quiet compared to a lot of other louder ones.
The generation one Diana Stormrider sound rate is 3/5 whereas the second generation has a rate of 2/5.
Shooting Ability
Without wasting too many words I am giving the verdict.
Diana Stormrider is undoubtedly pleasant to shoot! It could be because of the lightweight and sleek design even a scope is mounted.
There is ample under the scope so you have easy access to the magazine.
The use of a single-shot tray is also easy and hassle-free.
However, the bolt handle and knob are smaller in size and can be troublesome for people with average hand size.
It is good for plinking, target shooting, small gaming,
Although shooters across the world are overwhelmed with its performance in target shooting.
Air Rifle vs Airsoft: A Comparison of Power and Precision. Discover the key differences between air rifles and airsoft guns, exploring their unique features, uses, and capabilities. Whether you’re an avid shooter or a beginner looking for the perfect firearm alternative, this comprehensive guide will help you make an informed choice for your shooting needs.
Air rifle vs airsoft
When it comes to recreational shooting, two popular options are air rifles and airsoft guns. While they may seem similar at first glance, there are significant differences between the two that make them unique in their own ways.
An air rifle is designed to shoot pellets or BBs using compressed air or gas. It is typically used for target shooting, pest control, or small game hunting. Air rifles come in various calibers and power levels, ranging from low-powered models suitable for backyard plinking to high-powered ones used for competitive shooting. They provide a realistic shooting experience and can be an excellent tool for practicing marksmanship skills.
On the other hand, airsoft guns are replicas of real firearms that shoot plastic BBs using compressed gas or electric power. These guns are primarily used in recreational skirmishes or military simulation games known as “airsoft battles.” Unlike air rifles, airsoft guns have lower velocities and are generally safe for close-quarters combat. They offer players the opportunity to engage in realistic combat scenarios without the risk associated with real firearms.
In conclusion, both air rifles and airsoft guns have their own unique advantages and purposes. Air rifles are primarily used for hunting and target shooting, offering power and accuracy. On the other hand, airsoft guns are designed for recreational skirmishes, providing a safe and enjoyable experience. Ultimately, the choice between the two depends on individual preferences and intended usage.
"Debate over whether a 22 air rifle can effectively take down a deer has sparked curiosity among hunting enthusiasts. With its lower muzzle velocity...
")
")
")
")
")