“Demystifying Texas Air Rifle Laws for Felons: Exploring the Possibility of Ownership”
can a felon own an air rifle in texas?
In the state of Texas, the laws regarding felons owning firearms are quite strict. While it is generally illegal for felons to possess firearms, there is a specific provision that allows them to own and possess certain types of firearms, including air rifles. According to Texas law, a person with a felony conviction can legally own an air rifle as long as their felony offense did not involve the use or threat of violence.
However, it is important to note that even though felons may be allowed to possess air rifles in Texas, they still face certain restrictions. For instance, they are prohibited from carrying the air rifle outside their premises without proper authorization or transporting it in a vehicle without complying with specific regulations. Additionally, federal law still considers felons in possession of any type of firearm as breaking the law and subject to potential penalties.
In Texas, felons are prohibited from owning firearms, including air rifles. While certain states allow felons to possess non-lethal weapons like air rifles, Texas maintains strict regulations that apply equally to all types of firearms. Thus, felons should be aware of the legal restrictions concerning gun ownership in order to avoid any potential violations.
This post was last updated on October 20th, 2021 at 08:23 pm
So, can you eat porcupine meat? Heck yes you can eat porcupine! In hard times and survival situations, perhaps porcupine meat is one of the best available food options, especially if you can’t find any edible plants. If You’ve ever been curious about the quality and flavor of porcupine meat, you don’t have to wonder any longer. I can tell you that it is very delicious and tastes a lot like chicken! I filmed the following catch and cook porcupine video a couple years ago and overall I don’t regret any part of the experience one bit. I slow roasted it over a campfire with a hand made bushcraft rotisserie. Since porcupines are vegetarians it is my understanding that you can safely eat the meat raw without too much worry of parasites. The meat on a porcupine has a light scent of pine, so compared to many other meats, I found it to be quite pleasant and not tough at all.
The quills of a porcupine are very dirty and will almost surely cause you an infection if you are stuck. It is important when skinning these animals that you do it in a place where you won’t be walking around barefoot or have pets walking in the area. Cleaning a porcupine is about what you’d expect. You need to use a little extra caution to take the skin off, but otherwise it’s just like skinning anything else.
Eating porcupine is not very common these days in the US, but once upon a time they were eaten regularly. They are still considered a regular food source in some parts of the world.
How Do I Catch a Porcupine?
The best way to prepare porcupine meat is by roasting, but an open fire isn’t always available. If this is the case, you can use a Dutch oven to boil the meat over a low flame very slowly for a couple of hours or until tender. Be sure that all bones are removed from the meat before broiling.
Porcupine are slow moving animals so if they are on the ground you can get them with a big stick or a club. If they are in the trees they can be humanely hunted with a .22 caliber rifle. There are porcupine in almost all of Canada and throughout the Northern and Western US all the way down to Mexico. Check out the following catch and cook porcupine video for more in depth explanation on how to handle porcupine.
Where to Catch Porcupine
Before you kill a porcupine, be sure that you are in an area where they are plentiful. It would be very sad if you accidentally hunted one of these fine creatures and knew that the meat was bad for your health so you decided not to eat it even though you had gone to a lot of trouble and risk to catch it.
Be sure that the porcupine is healthy by checking the skin around its eyes. If they are clear and free of any discharge, then you can be pretty certain that your prey is good to eat.
When hunting for porcupines, look in clearings or forest edges near heavy vegetation. They can also be found in open woods, along fencerows, at the edge of fields where shrubs are present, and anywhere else where they have plenty of cover to hide in.
Remember that porcupines are slow-moving creatures so once you have caught one or more, it is easy enough to kill them with a stick or other blunt object before skinning them.
The Benefits of Eating Porcupine Meat
First off, it is very high in protein and low in fat. The meat also contains thiamin (vitamin B), which keeps the nervous system healthy; niacin (B-3), which promotes good circulation; iron, which produces the red blood cells that carry oxygen to the cells; and phosphorus, calcium, sodium, and potassium, which are all essential for maintaining good health. Porcupine meat is also an excellent source of zinc which helps to keep the immune system working properly.
Porcupines are found throughout North America and Europe. Their meat can be used as a substitute for beef, pork, or veal in soups, stews, and casseroles. You can even use it in place of rabbit or venison when making kabobs. You may not be used to eating porcupine meat, but once you try it, I think you’ll like it and see how healthy it is for you as well.
So now that we know that yes, you can eat porcupine meat, let’s find out where to get it.
In Conclusion – Can You Eat Porcupine Meat?
Can you eat porcupine meat? Definitely! Porcupine meat is high in protein and low in fat, making it an excellent substitute for beef or pork. You can use porcupine to replace rabbit or venison when cooking kabobs – the list of benefits goes on and on! If you’re looking to try something new with your next dinner party menu, this may be just what you are looking for. What’s more? Porcupine meat has many health benefits including being a good source of iron which helps keep red blood cells healthy! Hopefully this article tells you all you need to know about porcupine meat!
However, while researching this product, I see lots of discrepancies in product descriptions between Amazon.com, manufacturer websites, and other e-commerce sites.
To make it worse, even Amazon itself has inconsistent information in the product specifications.
And they still have not fixed it at the time this review was written.
With a BB repeater gun, you don’t have to open up and reload or cock every time you want to shoot BBs.
Each time you shoot, a new BB is reloaded automatically.
This air rifle is not only a BB gun but also a single-shot pellet gun.
Moreover, having the ability to shoot both BB and pellet, this Crosman 760 gives you an awesome option to switch to pellet in case you get bored with shooting BB.
Besides, you can teach your kids how to operate a BB gun and a pellet gun at the same time without having to buy two types of guns separately.
The Bowtech General was added to the Bowtech 2008 lineup. With an ATA just over 31″, an 8 1/4″ brace height, and a 315 fps IBO, this rig was quiet and was a premier hunting bow. Because of limb problems, Bowtech issued a voluntary recall on all the bows and replaced the limbs, and discontinued making the bow. The General is still one of the best bows ever designed by Bowtech. This bow is slower than todays speed bows, but should be a consideration if the shooter is looking to make a purchase. Since the limbs have been replaced, the only reason not to purchase this rig is because you feel you have to have the newest bow on the market.
Finish
This rig was designed with the Realtree Hardwood Green In-Velvet coating. Archers order this rig in Realtree APG HD, Advantage MAX-4, Mossy Oak Obsession, Mossy Oak Treestand, or Mossy Oak Brush. This finish is still used today and provides a rubber-like feel and enhances the vibration dampening properties of the bow.
Risers/Limb
This rig came with a fully machined forged riser providing strength and stability. The riser also has a short pivoting leg at each end which provides the center point for the pivoting limb. This “leg” provides some movement along the limb to aid in maximum bend for shooting stability. The limbs for this bow are a 12″ center pivoting split-limb system that are machined out of a unidirectional fiberglass. This particular material is known for its strength and durability, making it perfect for bow limbs. There is virtually no limb pockets. The limbs are secured to the riser and use a pivot point where the riser supports the limb at a midway point. This provides additional limb stability and allows the limb to bend more from the midpoint out to the cam. This design helps the bow generate more power while dissipating the shock throughout the rest of the bow. This bow also used Vertical Force Technology, which was introduced in 2002 and basically meant parallel limbs. It was not long before other bow manufacturer realized that Bowtech was onto something revolutionary. The General was only one of the Bowtech rigs that boasted this technology.
Other Components
This bow came with BCY 452X strings, a Short Stop integrated string stop, roller guard cable guard, center pivot limb pockets, and a hush kit. As this rig is no longer in the Bowtech lineup, if the archer is looking to purchase one, it will be used. This means that it will most likely have a host of add-on components.
Eccentric System
This rig used the Center Track Binary Cam System. This cam system generated the speed produced by the General. This cam system not only provided excellent speed for 2008, but also was able to provide that speed without creating any bow torque. The General boasted an IBO of 315 fps. A test bow, straight out of the box, setup for 70# draw weight, 29″ draw length, and shooting a 360 grain arrow chrono’d at 285 fps. Although not right on IBO, but very close. Draw length can be adjusted by changing the draw modules. The modules will allow for adjustments in 1/2″ increments. When changing the draw length of the General, it is necessary to adjust the draw stop as well. Adjusting the stop post will allow for additional draw length adjustments in 1/16″ increments. It is also very important that the shooter not try to adjust the draw stop while at full draw.
Draw Cycle/Shootability
Pretty smooth draw throughout the cycle to a solid back wall. At full draw, there is no bow creep. However, if the shooter must let off the shot, they should use caution. The shooter will have only about two inches of movement toward letdown, and then the bow will pull with a lot of force and accidental release is a real possibility. It is very difficult to hold on to.The draw weight of this rig is based on the peak weight of the limbs, and adjustability of up to 10# from there. The limbs come in weights of 50#, 60#, and 70#. Any adjustment from there is done simply by loosening the limb bolts. The archer must be careful not to loosen the limb bolts too much. This rig was a very shootable, quiet, and accurate bow, but limb problems caused Bowtech to voluntarily recall the bow to repair the issues. Bowtech eventually discontinued this rig. If an archer can find a General on the used market, they should be wary and have the bow checked out prior to purchase to ensure the repairs have been completed. Any authorized Bowtech Dealer can perform this inspection.
Silencing Package
This rig is quiet out of the box. The slightly heavier riser, the In-Velvet finish, the string stop, and the hush kit make this bow very quiet. Even when shooting a light arrow (at or near IBO) there is almost no noise from this bow.
Comparisons
The Bowtech General can be compared to the Bowtech 101st Airborne. Even with the limb problems the General had before the recall, it was still one of the best overall bows ever designed by the guys at Bowtech. The 101st, although a good bow in its own rights, was never a flagship quality rig. The 101st is an overall bigger bow with five more inches ATA. The brace height of the 101st is slightly shorter at 7 3/16″ instead of the 8 1/4″ of the General. The 101st also offers an additional 20 fps than the General, but does not compare when it comes to quietness, smoothness, and accuracy. Since neither of these bows are in the current Bowtech lineup, they both must be purchased used. Because of this, the shooter can definitely find either one of these bows in a price range that they are comfortable paying. The limb issues encountered by the General have been corrected, but the purchaser would be advised to have it checked out to be sure. Although this issue has been corrected, the General still carries the stigma of limb problems that some just can’t get over.
Usage Scenarios
This rig was designed specifically as a hunting rig. It will fit well on a target course or a 3D range, but make no mistake, it is a hunting bow. When originally designed, the designers at Bowtech were looking for a rig that was fast, quiet, and smooth. They found this in the General, and it was their flagship bow in 2008. With an IBO of 315 fps, this rig is fast enough, and is quiet enough to fit any hunting situation.
Value
When this bow first hit the market, it sold for around $849. They can be found used today for as low as $250. Although this rig was involved in a voluntary recall by Bowtech, the limb problems that caused the recall should have been fixed. If you can find a Bowtech General and the limbs have been replaced, this rig is a very good bow to purchase. There still are very few bows that are as quiet as this bow, although there are quite a few that are faster.
Summary
The guys at Bowtech were looking to create a rig for the hunter that was fast, quiet, and smooth. They eventually came up with the General. This bow not only met the call, but did so with no vibration or noise. With an ATA of just over 31″ and a brace height of 8 1/4″, this bow is accurate, fast, and consistent. The Center Track Binary Cam system provides a smooth draw and an IBO of 315. This is about 15 fps slower than the average bow today, but in 2008, it was respectableThis rig is adjustable as well with a draw length range of 26″ – 30″ in 1/2″ increments, and a draw weight range of 40# – 70#. The limbs are the primary determinate for the draw weight with the weight being adjustable to 10# below peak weight of the limbs. This rig was added to the 2008 lineup, but shortly into the year Bowtech voluntarily recalled the bow as it had received 255 work orders for defective limbs. Although they recalled all the bows and replaced the limbs, the damage had been done and they discontinued the bow. The shooter can still find them for sale online. The limb issues should have been corrected, making this a very good bow to have in your arsenal. The shooter would be advised to have the bow inspected by an authorized Bowtech dealer prior to purchasing the bow just to make sure it didn’t slip through the cracks when the recall took place.
I’ve long dreamed of hunting in the mountains, spending days climbing, glassing, and stalking. This kind of trip has always seemed quite accessible to me, except for one aspect: getting the meat out of the woods. It would be impractical to expect to drag a deer back to the truck. Foolish, really, and out of the question with an elk. So that would mean quartering and packing the animal out. This is nothing to the hunter on horseback, or even one who is accustomed to doing it.
But here in Minnesota, it is rarely done. Dragging is the norm, and ATVs are often employed. It is unusual to ever be just too far from the road. With a western hunt or two nearing on the horizon, I have felt I needed practice- a trial run. Sure, I could study the process and know what to do, but I wouldn’t want to figure it out in the dark, on the side of a mountain, with a snowstorm coming. That would be truly foolish.
My Chance
So for the last couple seasons, I’ve been looking for an opportunity to try my hand at quartering a deer and packing it out by backpack. While I spend the opening weekend of deer season hunting with family on private land, I always try to plan other hunts to satisfy the need for meat and my need for adventure. This year’s hunt in the Mississippi riverbottoms of Houston County held much promise for taking a deer far from the road.
While I found myself over three and a half miles from the road at my farthest point, I ended up taking a nice buck about a mile and a quarter out. He was far too heavy to drag on the ground, so there was no choice but to follow through with my plan. Armed with a knife and a game bag from Koola Buck, I set myself to the task.
Halfway There
Now, when this is normally done, a person takes the quarters, loins, tenderloins, and other assorted meat from the skeleton, and leaves behind the spine and hide and as much extraneous mass as possible. The unique problem I faced on my hunt was that part about leaving the spine behind. I was hunting in the CWD Management Zone, where leaving the spine and brain material in the zone was mandatory. Dumpsters were provided so that hunters could leave that CWD-containing waste behind, to protect the rest of the state from contamination.
At home, I researched as much as I could to determine the overall legality of doing a conventional quartering job (leaving spine, hide, etc. in the field). I didn’t come up with much. A Conservation Officer might have been a good resource, but they are very busy that time of year. I hate to pester them needlessly. I figured that since the DNR didn’t want the spines contaminating the rest of the state, they wouldn’t want spines left behind in the field to potentially contaminate the environment. It seemed I might incur adverse legal attention if I didn’t take it with me. It also seemed a ridiculous notion to separate the spine/ribcage from the meat and then carry it out anyway. So I planned to remove and pack the rear quarters, and drag the remainder of the deer. I hate to do only half a job, but my choice was more or less made for me.
I still made two trips out- one with backpack, and one more to do the dragging. The game bag I used was more than roomy enough for those rear quarters, as large as they were. The straps on the outside of the Koola Buck quarter bag (not a standard feature on meat bags) made it easy to secure to my pack. Taking that much weight from the carcass made that buck more draggable, but only barely. The dragging portion took longer than I expected, and with many stops along the way. Though my backpack had been heavy, this impressed on me how much more efficient it would have been to pack the entire animal out– even in two trips. Facing even a moderate dragging job in the future, I might elect to quarter and pack.
Conclusions
Since I wound up doing the rest of the quartering job within the next couple hours (to fulfill the CWD zone requirements), I did the whole job yet that day. What I didn’t do was the actual carrying out of the front quarters, loins, etc. Frankly, that’s not a big gap in my overall experience- it doesn’t take much to imagine dropping them into a bag. I feel now I could not only do the job again, but I could do it faster and better. That’s a load off my mind.
The next step will be to get better at using my pack, so the load can ride optimally. This was the first time I had such a heavy load in it. Again, it’s not something you want to discover in the field.
The method for splitting an animal up into quarters may seem complicated, but it’s not. If you’ve ever processed your own deer, it was probably hanging in the air as you dismantled it. Quartering in the field is essentially the same, only on the ground. If you have no previous experience with any of it, just learn about the different cuts and how to separate them from the rest of the carcass. There are many online tutorials available.
Materials for this task are encouragingly minimal. A worthy backpack is required, so choose your pack for the day carefully. A good, sharp knife is necessary to get through all the skinning, separating of joints, etc. Meat bags round out the list, and the one from Koola Buck I used was great. It is rated for elk-sized needs, and just one could accommodate an entire whitetail (not that mine was light enough). Splitting the load into at least two meat bags is customary, so be sure to obtain an appropriate number of bags for your task.
Koola Buck bags like mine come in blood red, to hide the inevitable staining. After washing at home, mine was just like new again. It also proved to be tough as nails and I expect to be able to use it for years to come. After my experience with Koola Buck, I will be looking to obtain smaller sizes for deer and antelope hunts. I highly recommend these game bags to big game hunters everywhere.
Koola Buck also makes heavy-duty and antimicrobial meat bags. You can find them all at koolabuck.com.
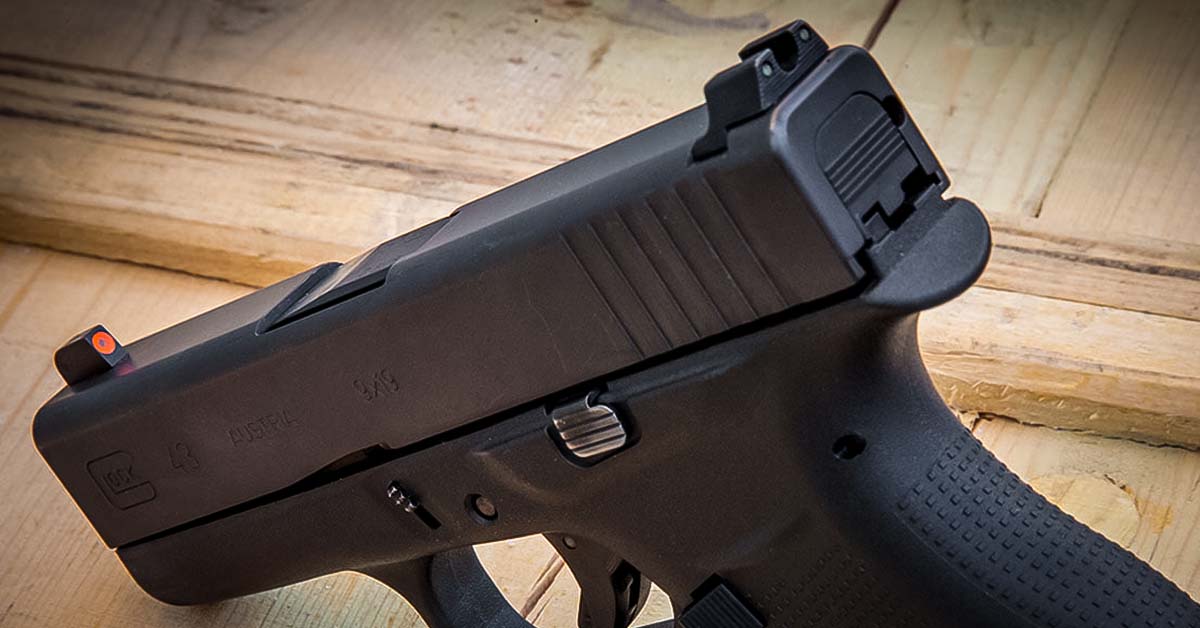
One of the first upgrades you can do to a Glock is adding the best Glock sights. The standard Glock sights are lacking, and many people do not like them.
Adding the best Glock sights will increase your accuracy and be able to shoot quicker, especially if you are used to a three-dot sight setup.
Because of the popularity of Glocks, there are a lot of options, and this post will recommend the best Glock sights you can buy.
This post will review the best Glock sights for every generation and model.
Nothing is better than upgrading and modifying guns and especially Glocks. Now I will say from the factory, out of the box, they are great guns, and you can take it to the range or use it for home defense, and it’s ready to go as is.
However, upgrading your Glock will make it better and more user-friendly to your specific preference.
Swapping out the sights is a quick and easy upgrade. There are a lot of different options to choose from.
If you are getting older and your eyesight isn’t as good as it used to be, getting some bright or high-contrast iron sights will help you aim.
Also, adding a night sight is great for home defense or concealed carry.
Upgrading your sights can be done fairly inexpensively and are worth it.
Increased Accuracy
You can shoot what you can’t see, and having some high-visibility sights will help you shoot more accurately.
The square notch that comes standard on all Glocks as a rear sight is okay. It leaves a lot of room for improvement.
The more traditional three-dot sight setup and is what comes on most pistols and is what most shooters have become accustomed to.
Again, higher visibility iron sights and better contrast from the front to rear sight will increase your accuracy potential. This also depends on the shooter. If you can’t shoot, to begin with, then you need to practice the fundamentals, and no amount of accessories or upgrades will fix bad techniques.
Shooting Faster
You can pick up a sight picture quicker if you have better aftermarket sights on your Glock.
This will allow you to get on target quicker and transition between multiple targets quicker. Again, being able to see the sights and line up the front and rear is easier with raised or high-visibility sights.
With proper training and practice, you should notice a significant difference in your shooting speed with upgraded Glock sights.
How To Replace Your Glock Sights
There are two ways to change out your Glock sights. First, you can take your slide to a gunsmith or certified armorer, and they will do it for you.
This is easy, but they will charge you a fee, and you might have to wait a while, depending on how many work orders they have ahead of you.
The other option is to do it yourself. This is fairly easy as long as you have the proper tools, and I can’t stress that enough.
Being the way I am, impatient, the first time I swapped out pistol sights, I didn’t have the proper tools, and it wasn’t pleasant. I almost destroyed my sights and slide.
I pretty much beat the sights off with a hammer and punch. Almost destroyed both.
So learn from my mistakes and but the proper tools if you are doing it yourself.
You will need a sight pusher tool and a vice installed on a workbench. You may need a small punch set and a screwdriver set.
Be aware that the rear sight groove is thicker on one side, so when removing and installing the rear sight, it will only come off one way and go on that same side.
Click Here to check the current prices of the Trijicon Glock Sight Tool
“Understanding the Legalities: Felon Ownership of Air Rifles in Tennessee”
can a felon own an air rifle in tennessee?
In the state of Tennessee, the ownership and possession of firearms by felons are regulated under both federal and state laws. While federal law prohibits felons from possessing any type of firearm, including air rifles, Tennessee law provides certain exceptions for non-powder guns such as air rifles. However, it is important to note that these exceptions do not apply to all felons.
Under Tennessee law, individuals who have been convicted of a felony offense are generally prohibited from owning or possessing firearms. However, there is an exception for non-powder guns, which includes air rifles. Felons may be allowed to own and possess air rifles in Tennessee as long as they meet certain conditions. These conditions include having completed their sentence, including probation or parole, and not being convicted of certain specific offenses such as domestic violence or drug-related crimes.
It is crucial for felons in Tennessee to fully understand the restrictions and exceptions regarding firearm ownership. While owning an air rifle may be permissible for some felons, it is advisable to consult with a legal professional or seek guidance from local law enforcement to ensure compliance with both federal and state laws regarding firearms.
In Tennessee, felons are prohibited from owning firearms, including air rifles. The state law considers air rifles as firearms, subjecting them to the same restrictions. Therefore, felons are not legally allowed to possess or own air rifles in Tennessee.
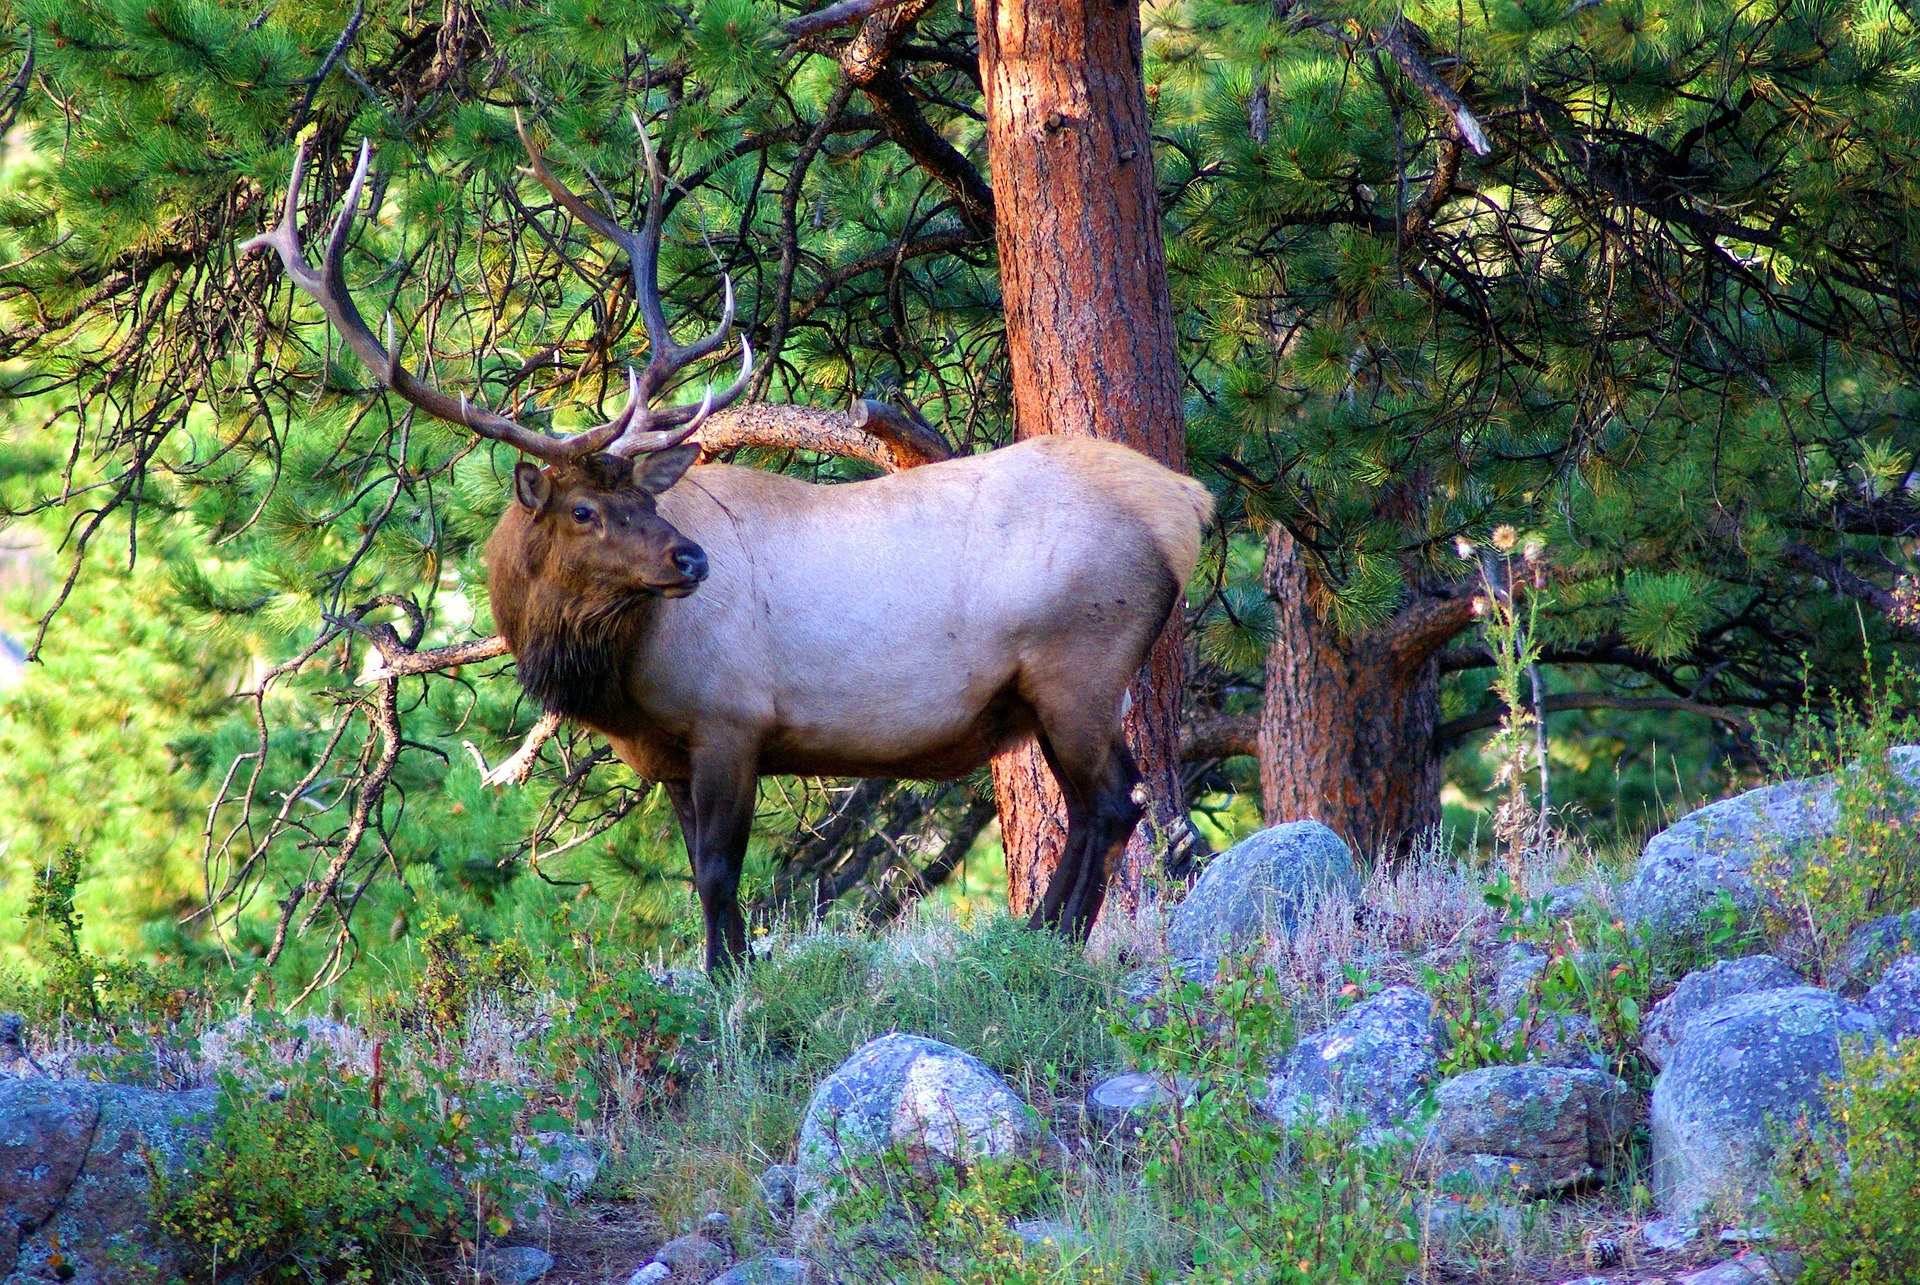
Slowly stalking through stands of conifers and golden aspens, you stop and cup your hand to your ear. There it is again, the sound, unmistakable and piercing. After days of trekking, you’ve finally heard the roar of a bull elk, and you’ve got him pinpointed. That’s when the stalk begins across the ridge. This is what you’ve been waiting for all year.
Understanding the elk sounds of the season will give you a leg up when you head to the woods this fall.
For us, there’s almost nothing better in this world than hearing elk sounds echo throughout the mountains. No other animal in North America sounds quite like it. And the different cadences are extraordinary. For the elk hunter, it’s important to understand exactly what these vocalizations mean. For instance, you want to know if the sounds you’re hearing are from a bull or cow, if they’re alert or calm. This will also help you become a better caller, allowing you to draw the animals in close enough for a shot.
Even non-hunters can recognize a bugle from a bull elk. It’s a multi-tone sound that begins low and transitions into what can only be described as a loud scream. Bulls bugle during the rut when they’re seeking a mate. The vocalization also serves as a warning to other bulls in the area as a sign of dominance. While you can’t judge the size of a bull based on his bugle, it can be used as a beacon to pinpoint his location. Use the Back Country Elk Decoy and a bugle call to draw him into range. When the rut is in full swing, he won’t be able to resist the prospect of fighting off another male to protect his harem.
Glunking
This is a sound made by a bull that you may also hear during the rut. A glunk is a muffled bass sound, in single tones, one after the other in quick succession. The bull uses this vocalization to communicate with groups of cows. So if you hear this, there’s a good chance there are cows nearby as well.
Chuckle
Bulls will produce a chuckle at the end of a bugle. It sounds like a series of short, loud grunts. However, he may chuckle without bugling. This is another vocalization that is meant to express dominance to males and attract females. Many bugle calls can produce a chuckle, and it’s a great way to add variation to your call sequences.
Bark
This call is used by elk to alert the herd of danger. The vocalization is a single, sharp sound.
Typically, if you hear a bark, the whole herd will quickly disappear because they’ve spotted or winded you. Barks are bad and a sound you want to avoid hearing.
Cow in Estrus
Cows will use this vocalization during the rut to signify she is ready to breed. It sounds like a whine, similar to a bugle but not as high-pitched or as long. This is a handy call to keep in your bag, as this can be used to locate a herd or stop a bull when you’re ready to shoot.
Calf
A calf will sound similar to a cow, although the tone will be much lower. Typically, their calls will be single sounds, similar to a squeak. Much like whitetail does, cow elk will respond to the bleating of a lost calf. If you can pique the curiosity of a few cows with a calf call, they’ll come into bow range. If you’re hunting bulls this can also be advantageous as he’ll often follow cows to ensure his harem doesn’t get separated.
Chirp
This call is made by cows and bulls, often when a large herd is together. They’re general noises elk make when near each other, feeding contently. If you hear these sounds, you can expect a herd close by.
The Art of Taxidermy: Exploring the Beauty of Deer Head Wall Mounts
Preserving Nature’s Beauty
Taxidermy, the art of preserving and mounting animal specimens, has been practiced for centuries. One popular form of taxidermy is creating deer head wall mounts, also known as deer mounts or trophies. These mounted deer heads serve as a testament to the skill and craftsmanship of talented taxidermists who are able to capture the beauty and essence of these majestic creatures.
The process of creating a deer head wall mount involves carefully skinning and preserving the animal’s hide, then attaching it to a mannequin or form that mimics the shape and posture of the animal in its natural habitat. The result is a lifelike representation that showcases the intricate details of the deer’s antlers, fur, and facial features.
A Display of Personal Passion
For many hunters and collectors, displaying a deer head on their wall is not just about showcasing their hunting prowess or love for wildlife; it is also an expression of their appreciation for nature’s beauty. A well-executed taxidermy mount can transform a simple room into a captivating space filled with character and charm.
These mounted deer heads often become focal points within homes or cabins, serving as conversation starters and reminders of memorable hunting adventures. Each mount tells a unique story, connecting individuals to their personal experiences in nature and allowing them to relive those moments whenever they glance at their prized possessions.
A Diverse Collection
The world of taxidermy extends beyond just deer head wall mounts. Skilled taxidermists can create stunning displays featuring various animals such as bears, lynxes, or even exotic species from around the globe. These displays can include full shoulder mounts, skull mounts, or racks depending on personal preferences.
Collectors often take pride in amassing a diverse collection of taxidermy mounts, showcasing their passion for wildlife and the artistry involved in preserving these creatures. From the striking presence of a bear mount to the elegance of a lynx perched on a sofa, each piece adds its own unique touch to the overall aesthetic of a space.
In conclusion, deer head wall mounts are not just simple decorations; they are works of art that require skill, dedication, and an appreciation for nature’s beauty. Whether you see them as trophies or artistic expressions, these taxidermy creations serve as reminders of our connection to the natural world and the wonders it holds.
Decoding Wildlife Displays: Understanding the Terminology Behind Deer Head Wall Mounts
The Different Types of Wildlife Displays
When it comes to displaying wildlife in your home, there are various options available. One common practice among hunters and collectors is to mount a deer head on the wall, which is referred to as a “deer mount” or simply a “trophy.” Similarly, if it was a bear head on the wall, it would be called a “bear mount.” These displays are often considered works of art when done properly by talented taxidermists.
Another type of display is known as the European skull mount or just skull mount. This involves mounting only the skull without the taxidermy skin or other parts. It provides a unique and minimalist aesthetic that some people prefer.
The Artistry Behind Wildlife Displays
For those who appreciate wildlife displays, these mounts can be seen as more than just decorations. They are considered pieces of art that showcase the beauty and majesty of nature. A well-done taxidermy display can capture the essence of an animal and create a stunning focal point in any room.
The author of this content personally owns an impressive collection of wildlife mounts, including 10 full shoulder mounts, 9 skull mounts, and numerous racks. With around 100 mounts in their house, they clearly have a deep appreciation for these displays and consider them an integral part of their home decor.
In conclusion, understanding the terminology behind deer head wall mounts allows us to appreciate the artistry and craftsmanship involved in creating these displays. Whether it’s a deer mount, bear mount, or skull mount, these pieces serve as reminders of our connection with nature and add a unique touch to any living space.
In conclusion, a deer head on the wall is commonly referred to as a trophy or a mount. However, it is essential to be mindful of differing opinions and ethical considerations surrounding the display of animal remains for decorative purposes.
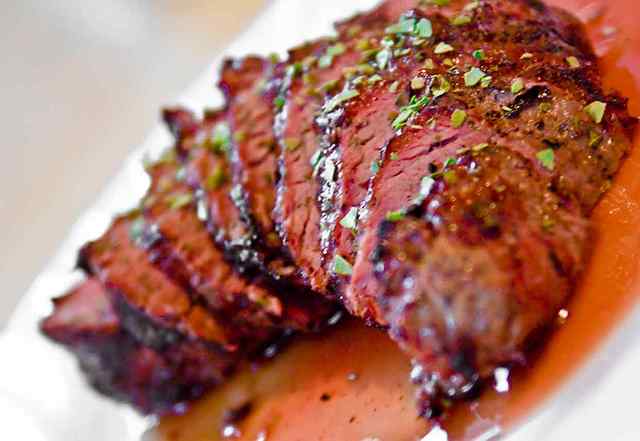
When Native Americans go hunting, they sometimes eat the deer’s heart as a way of honoring the animal. The heart is seen as a symbol of courage, and eating it is seen as a way of taking in the animal’s strength. In some tribes, the heart is also eaten as a way of showing respect for the deer’s spirit.
A typical size heart can produce enough meat for four or five lunches. This method of cooking allows the heart to retain its delicate flavor while also providing it with a nutritious and tasty taste. Rather than overpower the flavor, the mustard and sharp cheddar work to enhance it. It is simple to save a deer’s heart.
Deer Camp is a hunting destination where hunters make a pact to eat their heart out. A freshly killed animal’s heart was traditionally eaten by Native Americans. As a result, Indians regarded the animal as both brave and powerful, as well as a graceful and graceful animal.
Heart tartare is one of the best ways to eat your heart. Heart tartare is the preparation of meat that does not require it to be cooked. Because the heart is so lean, it can be difficult to cook. You get the full flavor of the animal that you hunted by serving it raw.
Several of the vitamins found in deer hearts, as well as the vitamins B2, B6, and B12, are also found in other animals’ hearts. Eating heart regularly can help improve your health, as well as boost your energy, if you are tired and run down, or if you have high blood pressure.
There is no one answer to this question as it depends on the individual hunter. Some hunters may choose to eat the heart of the deer they have killed, while others may not. Some people believe that eating the heart of the animal you have killed is a way of honoring the animal and taking all of its power into yourself, while others may simply find the taste of heart to be unpleasant. Ultimately, it is up to the hunter to decide whether or not they want to eat the heart of the deer they have killed.
There has been a lot of debate about whether or not it is healthy to eat deer hearts. Johnny Yuile posted a photo of himself and his daughter eating the heart of a freshly killed young deer in 2016 as they commemorated their first night of hunting in the field. According to Native Americans, deer hunting is a sacred ritual. The act of eating a heart is associated with our lives as well as those around us. Raw meat should not be consumed by anyone. Raw meat from a deer can infect it with parasites, so eat it when it is still fresh, two days after harvest, to reduce the risk of infection with viruses such as hepatitis E. A younger deer’s heart is preferred by hunters over an older deer’s heart. Others will prepare it on their own, in addition to the other ingredients. A deer heart is roughly the size of a large adult human, and it can produce enough meat to feed four to five people.
Even though harvesting and cooking deer hearts may appear gruesome, they can be extremely satisfying. If you want to be bold, try cooking it up as a steak and serving it with a rich, red wine reduction sauce. Alternatively, serve it as is with a side of roasted potatoes for a simple, elegant meal.
Did Native Americans Eat Buffalo Heart?
There is no one answer to this question as there are many different Native American tribes with their own unique traditions and customs. Some tribes may have eaten buffalo heart as part of a ceremonial or religious ritual, while others may have simply considered it a delicious and nutritious part of the animal that should not be wasted. In general, Native Americans tended to use every part of the buffalo they hunted, so it is likely that at least some tribes did eat buffalo heart.
Buffalo, also known as the American Bison, has played an important role in the survival and culture of Native Americans over time. Every part of Buffalo is used by Native Americans to provide food, clothing, tools, fuel, and utensils. The hides are used in the construction of robes, bedding, and rugs in Native America. Buffalo horns are frequently cleaned and cut into trinkets, spoons, and rattles. Buffalo hair can be cut and spun into cordage, which is then strung, belted, or otherwise used. You can use the tendons from the back and legs as sewing tools by tearing them out and drying them.
Delicacies Of The Plains Indians
The Plains Indians were known to eat boiled bison brains, hearts, shoulder blades, tongues, and stalks of meat from snouts. They used hooves, tails, and pemmican to make the soup, which was made with hump bison (the shoulder). The Plains Indians were known to eat boiled bison brains, hearts, shoulder blades, tongues, and brain and thigh bones from their snouts.
Do People Bite The Heart Of Their First Deer?
No, people do not bite the heart of their first deer. This is not a common practice among hunters.
If they’re eating deer meat and it’s fresh, why is it called meat? Is it possible to drink blood? When I cut it up, I sprinkle it with salt and a little pepper cover and fry it like a backstrap. Simply soak the blood in it and trim it a little as you go. We used to boil all the hearts to make sandwiches and toss them in a pot with mustard when I was younger (early 1970s). It is not a good idea to open the guts of your first time partner. It is very simple to grab it through the rib cage. The deer is my favorite variety.
Hunter’s First Deer: A Tradition Of Good Luck
When hunting their first deer, hunters usually daub some of its blood on themselves. It is customary for the hunter to wear a bow during this time period to commemorate their accomplishment and to bring good fortune for the future. They believed that the god would be pleased with them, and that the animal would provide them with food for the coming year. Cherokees would seek the gods’ forgiveness after killing an animal. As a sacrifice, some of the animal’s meat would also be thrown into the fire.
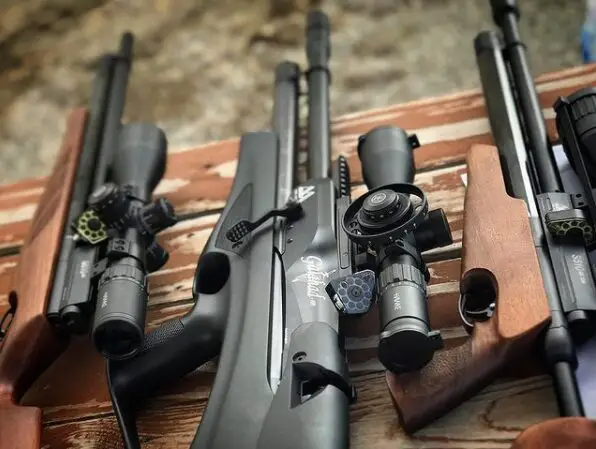
"Air Rifle Scope vs Rifle Scope: Unveiling the Ultimate Precision Optics. Discover the essential differences and benefits of these two optical devices, empowering shooters...
")
")
")
")
")


 My Chance
 Conclusions
 Materials for this task are encouragingly minimal. A worthy backpack is required, so choose your pack for the day carefully. A good, sharp knife is necessary to get through all the skinning, separating of joints, etc. Meat bags round out the list, and the one from Koola Buck I used was great. It is rated for elk-sized needs, and just one could accommodate an entire whitetail (not that mine was light enough). Splitting the load into at least two meat bags is customary, so be sure to obtain an appropriate number of bags for your task.