Out of the roughly 2,500 wild mushroom species in Michigan, approximately 100 of them are edible. Morels, chanterelles, oysters, chicken of the woods, and truffles are the most popular edible species, but Michigan mushroom hunters know that there are more gems to discover.
Morels can be yellow, tan, black, or gray. They are most notably known for their unique cap. The pitted cap is oblong and veiny, almost resembling a crumpled-up honeycomb. If you look hard enough, you can find morel mushrooms in all 83 counties in Michigan.
The best time to harvest morels in Michigan is in May, even though this species fruits from April to June.
They can be found just about anywhere but prefer woodland areas with moist soil, old orchards, and dead or dying trees.
Morels have a meaty texture and an earthy, nutty taste. The darker morels tend to have a smoky flavor, also. Their flavor is something to be showcased.
They are great sauteed in butter but also work well as an ingredient. Think pasta, mushroom soup, sauces, or even morel game burgers.
I recommend the following recipe:
Morel game burger with charred scallion butter
Watch our video to learn all about how to find, forage, and identify morel mushrooms!
2. Chanterelle (Cantharellus species)
The golden chanterelle and the cinnabar red chanterelle are two popular species in Michigan. They are vase-shaped and have deep, false gills on the underside of the cap. Chanterelles are well-known for their fruity apricot scent.
You can find this species in the upper peninsula and the northern section of the lower peninsula. Because chanterelles are mycorrhizal, you will always find them near trees, especially beech, oak, and conifer oak trees.
July is the most bountiful month for harvesting these mushrooms.
These unique mushrooms have a slightly peppery and fruity flavor without the sweetness.Sauteed chanterelles are a great side dish, but you can also use them in risotto, on toast, in pasta, or to add a slight sweetness to meat dishes.
I recommend the following recipe:
Chanterelle toast
Watch our video on when and where to look for chanterelles.
3. Oyster (Pleurotus species)
Although this species is easily cultivated, foraging it yourself is much more exciting. The white-light brown cap of the mushroom is smooth and oyster-shaped. They have decurrent gills and grow in a shelf-like formation on wood, usually overlapping each other.
They grow on many hardwood trees, but most commonly on aspen trees. You can find oyster mushrooms year-round in Michigan, but they are most abundant in June.
Even though they have a strong anise/licorice scent, their flavor is subtle and earthy, with only a hint of anise.
Their texture is meaty yet soft, similar to shitake mushrooms. You can fry, bake or sauté oyster mushrooms, or even use them to make your own version of Korean barbecue.
I recommend the following recipe:
Korean barbecue crispy oyster mushrooms
4. Chicken of the Woods (Laetiporus species)
Chicken of the woods grows in shelves between two and ten inches wide. They range from a sulfur-yellow color to a bright orange color. The exterior is soft and smooth and releases a yellow liquid when pressed.
This species is usually found on Oak trees, but you can also find it on other trees, including the poisonous yew tree (do not eat the mushroom from this tree). It is a saprobic fungus and typically grows at the base of dead wood in the summer and fall.
Chicken of the woods can cause severe gastrointestinal discomfort if eaten raw. Once cooked, it is meaty and juicy. It tends to absorb the other flavors in a dish and could pass for chicken when mixed into a recipe.
You can use this wild mushroom to make sandwiches, fried “chicken,” teriyaki dishes, or boneless buffalo “wings.”
I recommend the following recipe:
Chichen fried chicken of the woods
5. Michigan Truffle (Tuber species)
This truffle is firm with a brick red exterior and small warts covering its surface. The interior is dark colored with off-white veins. It has a sweet but slightly musty odor.
You can usually find this species growing near pine and spruce trees. Most foragers enlist the help of a truffle dog to sniff them out.
The best time to harvest these truffles is between August and November. If the mushroom feels slimy, it is overly mature.
The flavor of the truffle is similar to the smell – sweet and musty. Truffles are mainly used as a garnish and are not usually cooked.
The Michigan truffle is an exquisite addition to many dishes, including pasta, potatoes, and soups.
4 Poisonous Mushrooms to Avoid in Michigan
1. False Morel (Gyromitra species)
False morels are different colors than true morels. They are usually red, purple, or brown.
Instead of having a honeycomb appearance with pits, the false morel has a cerebral appearance. It is wrinkled and has many folds.
Some people eat false morels without an issue. However, the toxins can build up in your body over time and cause severe future damage.
Eating these mushrooms can cause gastrointestinal problems, muscular coordination loss, and death.
2. Eastern Jack O’Lantern (Omphalotus species)
This species is a dangerous look-alike of the chanterelle mushroom. While both can have a bright orange color, rumor says that the jack o’ lantern glows in the dark.
Some of the most notable differences are that jack o’ lanterns grow on wood, usually in clusters, and have orange flesh.
This mushroom species is not known to cause death. However, it does cause nausea, headaches, vomiting, and diarrhea.
Check our video on the 7 most poisonous mushrooms growing in the US (mushroom details and ingestion symptoms included)!
3. Eastern Destroying Angel (Amanita species)
This mushroom is found in deciduous and coniferous forests. It has a smooth white cap, crowded gills not attached to the stalk, and a bulbous base. It usually grows along the edges of woodlands or in hardwood and oak forests.
You can touch this mushroom but not eat it. Initially, it causes vomiting, nausea, and diarrhea. As the toxins spread, it causes cellular necrosis, leading to liver failure and death.
4. Autumn Skullcap (Galerina species)
This small brown poisonous mushroom looks similar to multiple edible mushrooms. It has a smooth cap with brown gills and a rusty-colored spore print. What sets it apart is that it almost only grows on decaying conifer trees.
The autumn skullcap has deadly amatoxins that can cause vomiting, diarrhea, liver damage, hypothermia, and death.
Psilocybin mushrooms, also known as magic mushrooms or shrooms, are mushroom species with psychedelic properties. They cause hallucinations that affect the consumer’s auditory, visual, and emotional senses.
Some groups have used them in religious rituals for over 6,000 years. While some people consider them dangerous drugs, other researchers have discovered their medicinal use. Shrooms are a possible treatment for depression and anxiety.
A petition to decriminalize psychedelic substances has been making its rounds statewide. In the state of Michigan, there are at least twelve species of magic mushrooms.
In 2020, Ann Arbor was the first city to decriminalize these substances, followed by Hazel Park City and Detroit.
While it is still considered illegal, both federally and in the state, arrests and investigations are highly unlikely.
The most common magic mushrooms in Michigan include:
The Oklahoma Department of Wildlife Conservation predicted another banner year as big-game hunting seasons opened this week. But like any good hunting expedition, the season ahead has some challenges.
Archery seasons for deer, elk, antelope, and black bear opened Sunday, and big-game muzzleloader seasons and a youth-only weekend rifle hunt lie ahead this month. The popular 16-day rifle season opens next month, Nov. 18-Dec. 3.
For the first time, deer and elk seasons opened with Chronic Wasting Disease documented inside state lines, a factor of particular interest to northwest Oklahoma hunters. And while the department has consistent methods for tracking game harvest numbers, it no longer has a clear handle on how many hunters put in the effort. The license-numbers challenge puts a glitch in long-term hunter success-rate data and could be a sign of potentially serious revenue issues ahead.
However, according to the state’s top big-game biologist, hunters are reaping the benefits of suitable habitat and plenty of game. The department’s 2022-23 Big Game Report shows a record-smashing total white-tailed deer harvest of 134,158, which firmly eclipsed the previous record of 126,290 in 2020, presumed at the time to be a result of more hunters afield due to COVID pandemic shutdowns that season.
Wildlife Department Big Game Biologist Dallas Barber credited healthy populations, good habitat conditions, and cooperative weather for the new record. Hunters also killed more does, which made up 45 percent of the 2022-23 harvest and fully met the Department’s percentage-harvest goal for the first time.
Lost numbers, lost revenue
A forced inaccuracy makes hunting effort appear sharply reduced in the report. For the first time, the big-game data roundup fell short in its accounting of hunters.
While the Department’s 2021-22 report noted record-setting participation in the archery and rifle seasons but a slight decrease in muzzleloaders, the most recent report comes with a giant asterisk and a considerable drop across the board.
The annual Game Harvest Survey, a scientific survey used by the Wildlife Department to track hunter participation for decades, was thrown askew when Gov. Kevin Stitt refused to renew hunting and fishing compacts with the Cherokee and Choctaw nations in late December 2021.
The tribes issued their own licenses, which removed tribal members from the Wildlife Department’s license survey system.
It also erased the revenue from compact license sales. Fiscal 2021 was the last time the department received tribal-compact license sales. It totaled $689,240.
The combined GHS estimates for archery, muzzleloader, and firearm participation in 2021-22 totaled 457,020 hunters. The estimated numbers afield dropped to 294,796 for last season, an on-paper reduction of more than 35 percent.
“It’s something we’re still figuring out,” Barber said. “We don’t know yet what it will mean for long-term trends. We’ll have to analyze that.”
The numbers could indicate another financial hit in the making. The department receives its share of federal matching funds for wildlife conservation based on a formula that relies heavily on the number of certified Oklahoma hunting license holders compared to other states.
Department spokesman Micah Holmes said all 50 states via for federal funding from excise taxes on firearms, ammunition, and hunting tackle under a somewhat complicated formula. The amount available fluctuates annually. Hence, the ultimate change on that budget line is hard to predict.
“The loss of federal grant funds related to license certifications is unknown due to fluctuating fund availability and changes in other states’ license certifications,” he said.
The Wildlife Department is a non-appropriated agency and receives no state tax money. It relies on hunting and fishing license fees, which state legislators have refused to increase for two decades. Federal matching funds, private and non-profit organization donations, and other smaller fundraising efforts contribute to the department’s bottom line.
CWD precautions widen
Regardless, Barber said another record-setting hunting season could be in the books for 2024.
“I think deer season will be at least close to that number again,” he said. “We’ve been in an upward trend, and habitat, on a statewide basis, looks good. We had rain where we needed it, and there is a lot of good habitat, so hunters have a lot to look forward to.”
Barber said that interest in archery hunting seasons continues to grow, as indicated by annual record-setting harvests in that category.
“It’s a more intimate method, exciting in close quarters, but it’s also a method you can practice in your backyard and put to use in every corner of the state. Plus, it’s a super long season, and as far as the working man goes, they have more weekends available as opposed to the limited-time seasons,” he said.
Chronic Wasting Disease, officially on the books for the first time in Oklahoma, is not expected to curb hunting interest, he said. Before the season opener, the department posted CWD information and tips about carcass disposal on its website.
The prion disease, similar to mad cow disease and scrapie in sheep, is always fatal and difficult to detect. First discovered in captive mule deer in Colorado in 1967, it has since spread to free-ranging deer and elk in 31 states and three Canadian provinces and captive herds in 18 states and the three provinces. Oklahoma previously had captive-herd CWD cases in elk, and it joined the list of states with CWD documented in free-ranging deer in June.
Parts of Cimarron, Texas, Woodward, Major, and Woods counties now have “Selected Surveillance Area,” or SSA, designations. Hunters in those areas must process their deer and dispose of the carcass in the place where they hunt. The Wildlife Department established CWD sample test drop-off points in each SSA, where hunters can deposit deer heads into a freezer for later testing.
Barber said hunters can help curb the spread of CWD statewide by being careful with carcass disposal wherever they might hunt.
“It’s one of those deals where the more diligent you can be, the better off everyone else is going to be,” he said. “Hunters should take a look at proper carcass disposal methods. If you’re outside the SSA, they don’t necessarily apply, but if you have the ability to bury that deer, great. And if you can ensure that your trash will go to a certified landfill, put it there and not on the landscape.”
Ravin released the Ravin R29 back in early 2019. After months of waiting for this crossbow to arrive, I finally received it last week and today I can finally publish my review! It’s a very compact, lightweight, accurate and also very expensive crossbow.
Ravin is one of the leading brands in the crossbow industry together with TenPoint, Excalibur and Barnett. They always produce high-quality, highly accurate and powerful crossbows.
One of my first ever reviews I published was about the Ravin R29X and I was immensely impressed with that crossbow. Later in this review I’ll compare both crossbows as well, click here to skip to the comparison.
Ravin ships the Ravin R29 Predator Fully Assembled & Pre-Tuned. Included with this package are a 100 Yard Illuminated Scope, 6x Ravin .003 Arrows & Field Tips (400 Grain Total), 3-Arrow Quiver & Mounting Bracket, Removable Draw Handle, and an owner’s manual.
Like with any Ravin crossbow we’ve bought and tested so far, the Ravin R29 Predator Crossbow Package comes fully assembled and pre-tuned. Which means you can instantly take it out to the range for some target practice.
Pulling the Ravin R29 out of the box, you’ll instantly notice how compact and lightweight this crossbow is. It feels very comfortable to hold and the ergonomic foregrip is really well made as well. These Ravin foregrips are rubberized and one of the better ones out there.
The Ravin R29 crossbow has a total weight of only 6.75 pounds, length of 29 inches and a width of 10 inches uncocked and 6 inches cocked! Ravin rated the R26 to be the most compact crossbow on the market, but the R29 is only 3 inches longer and 0.25 inches wider. But the R29 shoots 30 feet per second faster at 430 FPS.
All Ravin crossbows come with HeliCoil technology, the Ravin R29 Predator Crossbow is no exception to that. This crossbow also comes with a built-in cocking mechanism and a removable crank.
This crossbow looks a lot like the Ravin R29X, but there’s some small differences. Click here to skip to the comparison section.
Arrows and Speed
The Ravin R29 is rated at 430 feet per second with a 400-grain Ravin arrow. With a power stroke of only 12.5 inches, the Ravin R29 still has a kinetic energy of 164.
Ravin includes 6 Ravin .003 Arrows & Field Tips with this package. These arrows have a total weight of 400 grains, the shaft weighs 300 grains and the field trips 100 grains.
These arrows use special nocks that are required to properly cock and load the Ravin R29. If you do not use Ravin nocks, your warranty will void!
Also included with this package is a 3-arrow quiver. This quiver does the job and it’s very easy to install or remove. The mounting bracket that the quiver attaches to is also used for the detachable draw handle for the cocking mechanism.
Optics
Ravin always makes sure to include a proper scope with their crossbows. Mounted on the Ravin R29 sits a 100-Yard Illuminated Scope. This scope is one of the best scopes that comes with a crossbow.
This 9-dot, red or green illuminated scope comes pre-tuned for 20 to 100 yards and features a variable speed and arrow drop compensation setting.
Of course, this scope is fog-, weather-, shock- and recoil proof for optimal durability.
If you’d like to extend the range of the Ravin R29 out to 200 yards, you can order a Jack Plate Elevation Scope Mount on Amazon!
Cocking
The only way to cock the Ravin R29 is with the Built-In Versa-Draw Cocking Mechanism. This built in cocking mechanism reduces the draw weight to only 12-pounds! Ravin also upgrade the cocking mechanism to be fully silent! No more sounds or clicking when you cock your crossbow. Because of the Trac-Trigger System it’s not possible to rope cock or cock this crossbow by hand.
The Trac-Trigger System slides along the rail to latch onto the center of the bowstring. Attach the removable draw handle to use the versa-draw cocking mechanism to cock the Ravin R29. Once you’ve fully cocked the crossbow, the trigger will automatically engage.
You can mount the removable crank next to quiver.
Trigger and Safety Features
Ravin installed a trigger that works together with the Trac-Trigger system. It breaks at around 3 pounds and has some creep. For a crossbow at this price level, I really hope this will go away once I’ve shot it a couple more times.
After cocking the Ravin R29, the trigger will automatically engage. The Anti-Dry Fire and safety switch will also automatically engage. The anti-dry fire mechanism will only disengage once you’ve loaded a .003 Ravin arrow. It takes about 10 pounds of force to get it loaded correctly, you’ll hear a click once it’s correctly loaded.
Assembly and Sighting-In
Ravin ships the Ravin R29 fully assembled and pre-tuned. Due the shipping of the crossbow, Ravin removed the scope from the stock. If the package gets knocked during shipping, the scope can get damaged or is not sighted in properly anymore.
Mount the scope, quiver bracket and quiver on the stock of the Ravin R29 and you’re ready to take it out to the range or a hunting trip! I made sure to use some levels to make sure the scope and stock are completely level.
Sighting in the scope wasn’t needed, Ravin already pre-tuned the scope correctly!
Range Test
Because of the compact and lightweight design of the Ravin R29, it’s a really comfortable crossbow to hold. This crossbow is great for hunting in tight spaces, hunting blinds or tree stands.
Cocking this crossbow is really easy to do. It’s also finally fully silent. Unfortunately, you’re not able to let go mid-draw unlike TenPoint’s ACUslide. Ravin’s Versa-Draw reduces the effort to cock this crossbow to only 12 pounds of force.
Load the Ravin .003 arrow with the white vane point down. It takes quite a bit of force to actually load the arrow properly, once you’ve loaded it correctly, you’ll hear a click. It’s now ready to shoot!
Note: It’s impossible to put the safety to fire with your trigger-hand. It’s placed a bit weird at the end of the stock.
Sighting in the scope was not needed and I was getting really tight groups at 50-yards. Shooting the Ravin R29 at closer distances will greatly increase the chances of splitting arrows. Its accuracy is just ridiculous.
Ravin is always spot on with their speed ratings, so I expect this crossbow to also hit the advertised speeds of 430 feet per second. I managed to see speeds of 429, 427 and 429 FPS on our chronograph. Ravin really builds high-quality crossbows.
I decided to move the target to 100 yards to see how tight my groupings were. I shot 3 arrows and managed to get a 2-inch group. The arrows were still pretty deep inside the target as well. This means that you should be able to take out animals at 100 yards easily!
You’ll definitely feel the power that the Ravin R29 has to offer. It has some recoil, not enough to hurt to hurt anyone though.
This crossbow comes without any string or limb dampeners or other silencing features pre-installed. Without these features the R29 is already a pretty silent crossbow. But, if you’re already spending this much cash on a crossbow though, you’ll definitely want to get some limb dampers. This will greatly reduce the vibrations that goes through the limbs and reduce the noise even more.
Ravin R29 vs Ravin R29X
The R29X is the newer and faster brother of the R29. Below is a quick specification comparison of both crossbows.
[table “109” not found /]
As you can see there’s not much difference. The R29X shoots arrows at 20 feet per second faster and has a different scope mounted. This tactical scope with elevation mount extends the range of the crossbow out to 200 yards!
You can buy the elevation mount for the R29 as well, but the R29 might lack some power to actually get consistent accurate shots for 200-yard distances.
Recommended Accessories
Arrows & Broadheads
Ravin features a big warning in the owner’s manual; “Use of arrows, nocks, strings or cables other than genuine Ravin components.” You’re only allowed to use Ravin branded arrows and nocks with the R29 crossbow. Ravin also states: “Use of fixed-blade broadheads with a maximum diameter greater than 1 5/8” with the model R29.”
Because of that I can only recommend to use Ravin arrows, there’s an exclusion to broadheads though. You can’t pick any broadhead that has a cutting diameter greater than 1 5/8”. I recommend to use the HME fixed blade broadheads in combination with the Ravin arrows for hunting.
Storage
To protect your crossbow during travel, transportation and storage, it’s best to store it in a case. I highly recommend to get the Ravin soft crossbow case. This crossbow case fits the R29 the best and has plenty of room for your arrows, field points, broadheads and other accessories you might want to bring with you.
Sling
Ravin offers 2 different slings for this crossbow. The first one is a padded shoulder sling and the second is a backpack sling. Both have different uses. I highly recommend to just get the shoulder sling and use the soft crossbow case for transportation.
The right panfish rod and reel is a conduit to the underwater world. Anglers often talk about rod tips, as the connection to lure and biting fish. But truly, the tip is no more important than the line, reel, or other aspects of the tool. Trouble is, the difference between a mismatch and a perfect fit can be subtle, even elusive. You can’t always put your finger on it, but when all the pieces — rod, reel, line, lure — fall into place, you know it.
The Dock Shooter
Some of the biggest sunfish and crappies I’ve caught in recent seasons have been taken by skipping baits below boat docks and other overhanging cover. The rod I use is a 6-foot 6-inch Cabela’s Fish Eagle II (GSII662-2) coupled with a Shimano Sedona 1000FD. The reel’s loaded with 4- or 6-pound braid with an 18-inch fluorocarbon leader.
Its length and soft action match my style of skipping tubes and other softbaits. Other anglers prefer short “shooting” rods coupled with underspin reels, such as the Pflueger Trion Spincast and 6-pound-test mono. The 4-foot 5-inch B’n’M Sharpshooter is a popular option. Anglers grip the back of the lure, loading the rod and pointing the tip toward its target. With a finger on the reel’s trigger, they release lure and trigger simultaneously, shooting the bait well beneath the cover. It’s a method I have yet to master. But watching a shooting specialist, such as Ohio crappie pro Russ Bailey extract slabs from 20 feet back under a pontoon boat, makes a convincing case.
Classic Jig Pitcher
My affection for working diminutive hair jigs and plastics goes back three decades. Even today, it’s hard to outdo a black curlytail grub and 1/32-ounce jig on 2-pound-test mono. In the early years, my favorite rods were a St. Croix Premier (PS66LF) and a Cabela’s Fish Eagle (GS702), models that still sell well.
These 6-foot 6-inch to 7-foot, long-handled, light-power rods enabled me to fling tiny 1/80- to 1/16-ounce jigs for distance. No question that longer — light rather than ultralight — rods cast farther, line and reel being equal. But it’s more than length. The tip section, that is, the final quarter of the blank on the Premier, is soft enough to provide a fast catapult. With a limp 2- or 3-pound-test monofilament coursing through the guides, even a 1/64-ounce jig feels substantial as it hangs from the tip. Done right, a rapid 2-o’clock to 10-o’clock to 2-o’clock pendulum can punch out 30-foot to 50-foot casts, even in moderate headwinds.
It’s tempting to say that softer (slower) tip and butt sections on rods designated ultralight further empower the catapult, resulting in even longer casts. This is true to a point. But excessive softness reduces casting accuracy, jig control, and certainly, sensitivity. Fighting bull bluegills on ultralights is fun, but enticing them to bite is significantly more likely with a precision light-power, moderately fast- to fast-action blank.
Rod tip “action” is described as the speed at which the rod returns to straight after it’s been fully loaded. Moderately soft tips can be fast in action, even though they provide plenty of cushion for catapult casts. There’s a perceivable difference — one’s sloppy, the other precise. A fast yet appropriately soft tip enhances casting distance and provides measured give, yet allows fine control over jigging cadence. The perfect tip allows me to impart petite, precise darts, twitches, and sweeps to a jig without sacrificing the ability to cushion 2-pound mono. Moreover, new feather-light rod guides add another dimension.
Line Advice
Though the labeling on some light-action rods calls for no less than 4-pound line, many of them fish 2- and 3-pound test beautifully. Beyond classic Trilene XL, Maxima’s Ultragreen in 2- and 3-pound test is a workhorse mono that’s been popular for over 40 years. Sunline Siglon F in 2-pound test is another fabulous mono. Ultragreen, however, remains one of the only lines to offer 3-pound test, which remains a versatile choice.
Many anglers have switched from mono to braid, and I can’t fault the choice other than to make a case for stretch. In certain jig scenarios, the stretch of mono has benefits. It prevents premature hook-sets and lip damage that can occur with braid. Stretch prompts fish to hold a bait longer before rejecting it since they don’t feel you pulling back. It provides a shock absorber that keeps fish hooked better as well. In shallow water, mono wins. Deeper than 20 feet, braid rules.
Regarding fluorocarbon, I never spool it on small spinning reels. Its rigidity causes casting problems. It tends to slap the rod blank, and feels heavier on the rod than comparable mono. For abrasion resistance in heavy cover, or as a means of disguise, it’s often beneficial to add a 12- to 18-inch section of 4- to 8-pound-test fluorocarbon at the end of a mono or braid mainline.
Reel Choice
For maximizing casting distance and minimizing line coils, larger spools help. Designations vary somewhat by company, but it’s usually best to select the second smallest spinning reel in a series. Most of my jigging rods are matched with Shimano Stradic CI4 1000s, Pflueger Purist 1325s, or Abu Garcia Cardinal STX10s.
With light mono, smooth reel performance is important, and you mostly get what you pay for. Any rough or “dry” spots in the reel’s rotation can interrupt jig contact, which results in missed bites. Likewise, a smooth drag prevents line breakage.
New Wave Jig Pitcher
New rod options elevate performance on several fronts. One of the sweetest introductions in recent years has been St. Croix’s Panfish Series. I’ve fished several models in this 9-rod series and they all have excellent blank actions. Guide and noted panfish angler Brian Brosdahl is a fan of these rods, choosing the 6-foot 9-inch PFS69ULF and 7-foot PFS70LXF for most of his shallow-water jig casting.
The light power, extra-fast action 7-foot PFS70LXF is a gem. Proprietary St. Croix SCVI graphite provides a fine blend of weight, balance, and sensitivity. Progressive Pac Bay Minima guides cut rod weight significantly and position the rings well away from the blank. This separation reduces line slap, increases casting distance, and seems to enhance sensitivity.
The blank features an appropriately soft casting tip, while the butt section has power for setting hooks and hoisting fish. It couples nicely with a Shimano Stradic CI4 1000F and 3-pound Maxima Ultragreen for casting tiny jigs in shallow water as well as working panfish swimbaits. It fishes instinctively, which is the highest praise I can offer.
The “Bull” Whip
When I first cast the 6-foot 7-inch G. Loomis TSR791 — part of their Trout & Panfish Series — it became another new favorite. Loomis classifies it ultralight power and fast action to handle 2- to 6-pound-test and 1/32- to 3/16-ounce lures. Compared to the St. Croix Panfish option, its blank and tip are slightly faster, and with a bit more beef through the spine.
G. Loomis marketing coordinator John Mazurkiewicz suggested I match it with a Shimano Stradic CI4 1000FML Microline reel, which handles thin polyethylene lines, suchas 3-pound PowerPro Microline, brilliantly. I used that combo to fling 1/16- and 1/8-ounce hair jigs for white bass, trout, perch, and crappies.
Its faster tip was ideal for working jigs slightly more aggressively, and for setting hooks in deeper water, whereas the St. Croix combo worked best in the shallows. I also used that combo to fling crappie-sized cranks. Particularly around cover and in ultra-clear water, I added an 18-inch Sunline Metan Invisible fluoro leader.
Vertical Jigger
Much of the year, we fish vertically for suspended crappies and white bass, as well as bottom-hugging sunfish and perch. Fishing a 1/16- to 1/4-ounce jig, spoon, or a drop-shotrig below the boat are money presentations. For these vertical approaches, a 5-foot rod provides pinpoint control and sensitivity. The tip on my old favorite 5-foot 3-inch Fenwick HMG (GS53L-M) is fast enough to transmit bites in deep water, yet the rest of the blank flexes enough to prevent slack line and lost fish during lengthy fights. Its faster tip can deliver minor quivers and bumps to lures 20 feet below.
Shorter rods keep lures positioned within the sonar’s cone angle. With careful boat control, it’s possible (and often critical) to watch lures and fish reacting to them on the screen.
With low stretch and tiny diameter, 3-pound-test Berkley NanoFil shines for deep vertical approaches. Wide-spool reels such as a Pflueger Purist 1325 minimize line coils and lure spin — critical elements for deepwater jigging.
Spinner Stroller / SlipFloat Dipper
When hunting panfish spread across expanses, slowly trolling with a bow-mount trolling motor is essential. Methods differ north to south, but rod choices don’t. Long 9- to 11-foot rods with extra-soft tips and beefy butt sections excel for towing jigs, cranks, and small spinner rigs adorned with plastics or livebait.
For pulling spinner rigs behind 1/4-ounce bullet sinkers in vegetation, I’ve long used an 11-foot Cabela’s Match Rod, now out of production. Last season, I added an 11-foot St. Croix Panfish Series (PFS110LMF2) rod.
These long, moderately-slow-action rods perform double-duty for slipfloat fishing and for dipping light jigs into tight spots in cover. For trolling, 4- to 10-pound mono or braid works. For slipfloats, it’s 4- to 8-pound mono, depending on cover. In wood, many anglers prefer heavier braid and lightwire hooks to straighten and free snagged rigs with steady pressure.
On recent trips, I’ve been impressed by rods from B’n’M Fishing. Designed by Pickwick Lake, Tennessee, crappie guide Roger Gant, “The Difference” rods (available in 8-, 9-, and 10-foot versions) offer soft, yet sensitive tips on IM6 blanks. Crafted for a crappie tactic known as “side-pulling,” these rods also shine for spider-rigging and for tightlining deep crappies.
When drifting and trolling, multiple long rods go in holders, while anglers monitor their spread until a tip arcs deeply into hooked fish. Small line-holder reels, such as B’n’M’s Buck’s Mini Reel is a popular choice, as are specially designed single-action reels with bait alarms. B’n’M, Bass Pro Shops, and Slater’s offer fine trolling reels.
In the dynamic world of firearm innovation, two names stand out—Faxon Firearms and Q. These industry titans have embarked on a singular mission: to redefine the boundaries of ballistic performance.
Their latest collaboration has given birth to a groundbreaking round that promises to shift paradigms and set new standards. Welcome to the 8.6 Blackout journey—a testament to their quest for ballistic excellence.
Join us as we delve into this captivating blend of expertise, precision, and groundbreaking innovation.
To date here is everything you need to know about the new 8.6 Blackout round, how it compares to 300 Blackout, and the radical new barrel design by Faxon Firearms.
The 8.6 BLK round was imagined and developed by Q.
When imagining 8.6 Blackout, a good starting point is to think of 8.6 BLK as the big brother to 300 Blackout. However, it’s much more than just an upgrade on 300 BLK.
Like the 300 Blackout, the 8.6 Blackout was designed primarily for suppressed shooting, however, they also have supersonic loads in development as well.
8.6 BLK is re-imagining “energy on target” by employing a fast 1:3 twist rate (compare to common 1:7 and 1:8 twists for calibers like 5.56 NATO or 300 BLK).
Other 8.6 BLK Features
Fits AR-10 Sized Rifles
338 Subsonic Load Based around the 300 grain Sierra Match King
Similar to 338 Federal, but the case has been shortened to reliably work with gas guns without modification to mags
Uses Standard 308 Mags
Low-Pressure Cartridge
Utilizes a shortened 6.5 Creedmoor case for use of subsonic and high BC projectiles
Current Ammo Companies in Development: Gorilla, Hornady, Black Hills, and Discreet Ballistics
Designed Around a 12″ barrel
Faxon Firearms has previously shown several 8.6 Blackout loads with a 300-grain bullet and a 210-grain Barnes TTSX bullet. These loads are still in development but should become commercially available in the foreseeable future.
How is Faxon Firearms Involved
Faxon Firearms has been privileged to work with Q on developing the best possible barrels to support this revolutionary new round.
The team at Faxon Firearms is in the development of their own 8.6 BLK barrels for both the AR-10 and Remington model 700 platforms.
Faxon Barrels for the 8.6 Blackout
Faxon Firearms will be offering 1:3 twist 8.6 Blackout barrels for Remington 700 platforms and AR-10 pattern rifles. The barrels for both platforms will be available in 8″, 12″, and 16″ length options.
Remington 700 Platform
8″ Light Palma, Remage style with 1:3 twist
12″ Light Palma, Remage style with 1:3 twist
16″ Light Palma, Remage style with 1:3 twist
AR-10 Platform
8″ Big Gunner with 1:3 twist
12″ Big Gunner with 1:3 twist
16″ Big Gunner with 1:3 twist
Faxon Firearms 8.6 BLK barrel Details
1:3 twist rate
Better stabilization on long and heavy subsonic rounds
Better expansion of the projectiles
Re-allocates the energy from the sound and flash to the rotation of the bullet
.875 gas block journal for AR10
DPMS Gen 1 Pattern
Remage style barrels from Faxon will use a Remage style nut with a standard AR-15 armorers castle nut wrench. The nut is included.
Faxon Firearms and Q is a partnership aimed at the conception and development of high-quality barrels tailored for the game-changing 8.6 Blackout (8.6 BLK) round. This alliance signifies a harmonious fusion of expertise and vision, paving the way for a new benchmark in ballistic performance.
The hallmark of these 8.6 BLK barrels is the pioneering 1:3 twist rate, an impressive feature that harnesses the power of rotational energy, optimizing the force transferred on impact. The result? An unparalleled surge of energy on-target that promises unrivaled precision.
True to Faxon’s commitment to excellence, the creation of each 8.6 BLK barrel is a meticulous journey. Beginning life as raw bar stock at our state-of-the-art facility in Cincinnati, every barrel undergoes a stringent production process. This includes a full stress-relief treatment to ensure structural integrity and rigorous air-gauge testing to maintain the tightest tolerances. Moreover, the Magnetic Particle Inspection (MPI) process adds an extra layer of assurance, detecting any imperfections, while an 11-degree target crown is employed to guarantee the apex of accuracy.
The choice of material speaks volumes about Faxon’s unwavering commitment to quality. Fabricated from the robust 4150 CMV, the barrels promise durability and resilience. Each undergoes a series of exhaustive tests through its production cycle and is eventually finished in a protective Nitride layer. This not only enhances the barrel’s longevity but also ensures it stands up to the demands of even the most avid shooter.
But Faxon’s promise doesn’t stop at quality craftsmanship. Each of our barrels undergoes an individual headspace check, assessed using precision custom-hardened gauges, a testament to our dedication to ensuring that every product that leaves our facility is of the highest standard. And to further solidify our commitment, every Faxon Barrel comes with a Lifetime Guarantee, ensuring peace of mind for our customers, and recognizing the trust they place in our brand.
In partnering with Q and presenting the 8.6 BLK barrels, Faxon Firearms proudly reiterates its pledge to innovation, precision, and unmatched quality. Join us on this exciting trajectory into the future of ballistics.
Why is the 1:3 Twist Rate Important
Faxon Firearms is manufacturing the barrels for these 8.6 Blackout loads. These barrels are not by any means your standard rifle barrel. Designing and manufacturing them can be a challenge, but Faxon Firearms has confidently stepped up to the plate. In order to properly stabilize the long and heavy 300-grain subsonic projectiles, the 8.6 blackout barrels have a 1:3 twist rate!
That means the round is making one full rotation every three inches of barrel length. The bore of these new barrels look more like internal threads for a bolt or screw than rifling. This revolutionary 1:3 twist greatly enhances the energy on target of the large 8.6 blackout round.
Conventionally, energy on target has been largely concerned with linear forces.
The following video highlights the devastating difference of the energy on target with a 1:3 twist rate vs a more standard 1:7 twist.
Top – 1:3 twist @2380fps MV with 140gr projectile
Bottom – 1:7 twist @2380fps MV with 140gr projectile
The fast 1:3 twist rate of the 8.6 BLK is reimagining the energy on target as having a second energy delivering component; the rotational energy of a fast spinning projectile.
8.6 Blackout FAQ
What is 8.6 Blackout good for?
The 8.6 Blackout, often referred to as 8.6 BLK, is a versatile ammunition round designed primarily for short-barreled rifles and suppressed firearms. It’s particularly good for:
Subsonic Shooting: Thanks to its design, the 8.6 BLK excels in subsonic applications, providing quieter shooting experiences when paired with suppressors, making it ideal for discrete hunting or shooting scenarios.
Hunting: With its significant on-target energy, the 8.6 Blackout is effective for hunting medium to large game at moderate ranges.
Compact Firepower: Given its effectiveness even in short-barreled rifles, it’s suitable for personal defense or any situation where compact firepower is advantageous.
Ballistic Consistency: The 8.6 BLK offers a consistent ballistic profile, which aids in accurate shooting.
Compatibility: It can be used with many platforms, including those initially designed for rounds like the .308, with just a barrel change.
In summary, the 8.6 Blackout is good for a range of shooting activities, from hunting to personal defense, especially when suppression or compact size is of importance.
What is the difference between 300 Blackout and 8.6 Blackout?
The 300 Blackout (300 BLK) and the 8.6 Blackout (8.6 BLK) are both innovative ammunition rounds that serve distinct purposes. Here’s a breakdown of their key differences:
Caliber Size:
The 300 Blackout is a .30 caliber round, effectively a 7.62mm projectile.
The 8.6 Blackout, on the other hand, is an 8.6mm projectile, which makes it larger in diameter and typically heavier.
Primary Use:
The 300 BLK was developed primarily for enhanced performance in short-barreled rifles with the added benefit of being optimized for suppressor use, making it a choice round for tactical scenarios.
The 8.6 BLK is tailored for short-barreled rifles and suppressed firearms, designed especially for subsonic shooting and medium-to-large game hunting.
Bullet Weight:
300 BLK rounds typically weigh between 110 to 220 grains, with the heavier bullets often being subsonic.
8.6 BLK rounds are generally heavier due to their larger diameter, contributing to their ability to retain energy at subsonic velocities.
Origin and Development:
The 300 BLK was developed to provide a more effective round for military operations in close-quarters scenarios without needing a change in the rifle platform, just a barrel swap.
The 8.6 BLK is a more recent innovation, building upon the principles of the 300 BLK but catering to a different set of shooting and hunting needs.
Platform Compatibility:
While both rounds can often be used in platforms designed for other cartridges with just a barrel change, the 300 BLK is frequently associated with the AR-15 platform.
The 8.6 BLK, due to its size and characteristics, is more closely associated with platforms like those designed for the .308.
In summary, while both the 300 Blackout and 8.6 Blackout share some similarities in their goals for performance in specific firearms, they differ in caliber, intended use, weight, and platform compatibility.
Conclusion
As we’ve journeyed through the intricacies of the 8.6 Blackout’s development, it becomes evident that this isn’t just a round—it’s a symbol of relentless pursuit for perfection by Faxon Firearms and Q.
As enthusiasts, collectors, or industry professionals, it’s our prerogative to embrace and support such groundbreaking innovations. Let’s not just be passive observers. Be a part of this evolution. Test, adapt, and share your experiences with the 8.6 Blackout.
Together, we can usher in a new era of firearm excellence. Dive in, get involved, and let’s shape the future of ballistics together.
For more information, visit: FaxonFirearms.com/86BLK
Stay Tuned to the RE Factor Tactical Blog and be part of this all VETERAN-run website. Be sure to follow us on Facebook, Instagram, and LinkedIn for exclusive content and deals.
Check out our DAILY DEALS page for industry deals and discounts.
Visit our Amazon Influencer Page for more products we recommend: https://www.amazon.com/shop/refactortactical
The Barrett 82A1 and its sibling, the M107A1, are legendary semi-automatic sniper rifles famous for their .50 BMG caliber. These American-made rifles are noted for their devastating power and impressive, effective range of about 2,000 meters. The 82A1 has accounted for some of the longest confirmed sniper shots in history – including a hit made by Sergeant Brain Kremer in 2004 during the Iraq War at a range of 2,300 meters.
After years of successful service, the M107A1 was developed based on the feedback of US service members. As a result, the M107A1 features a recoil-mitigating design and a dual-chamber muzzle brake to help manage the substantial kick. The 107A1 shares many of the 82A1’s characteristics but is built with a lighter and stronger aluminum chassis and designed for a dedicated suppressor.
In service since the 1980s, the 82A1 and M107A1 have been adopted by numerous NATO countries and continue to be a powerhouse platform for elite military units around the globe.
Barrett Mk22 MRAD:
The Barrett Mk22 Multi-Role Adaptive Design (MRAD) is in a new class of military sniper platforms. Its defining feature is adaptability, allowing for an array of configurations to suit a multitude of operational requirements. This flexibility is primarily why it was chosen as the current contract winner for the US Special Operations Command’s Advanced Sniper Rifle (ASR) and US Army Precision Sniper Rifle (PSR).
One of the key features of the Mk22 MRAD is its user-changeable barrel system. This allows the sniper to quickly and easily switch between calibers and barrels in the field depending on the mission’s needs, including the .338 Norma Magnum, .300 Norma Magnum, and 7.62x51mm NATO rounds.
In terms of performance, the MRAD is known for its superb accuracy, making it a reliable choice in various combat scenarios. For example, its effective range with .338 Norma Magnum rounds is up to 1,500 meters, while with .300 Norma Magnum, it can accurately engage targets up to 1,200 meters.
In summary, the Barrett Mk22 MRAD is not just a sniper rifle; it’s a comprehensive, adaptable system that provides military snipers the flexibility to adjust to rapidly changing battlefield conditions. Its impressive accuracy, versatility, and adaptability make it one of the finest military sniper rifles in operation today.
Mcmillan TAC-50:
The McMillan Tac-50, often referred to as the “Big Mac,” is a powerhouse in the world of sniper rifles. This bolt-action rifle is designed for pin-point precision and is most famous for its record-breaking long-range shot in a combat scenario.
Chambered in the potent .50 BMG caliber, the Tac-50 is not just a sniper rifle; it’s an anti-materiel rifle capable of disabling light vehicles and equipment at long distances. This makes it a versatile tool on the battlefield, able to engage personnel and material targets.
Key elements of the Tac-50’s design encompass its match-grade 29-inch free-floating barrel and the high-quality McMillan action, both of which significantly contribute to its extraordinary accuracy. The rifle also features a recoil-absorbing fiberglass chassis, making the shooting experience more manageable despite the potent round it sends down range.
The Tac-50 has seen service with the Canadian Armed Forces, where it is known as the C15 Long Range Sniper Weapon (LRSW). In this role, it has repeatedly proven its worth, including the longest confirmed sniper kill shot in history — a remarkable 3,540 meters achieved in Iraq in 2017.
The McMillan Tac-50 represents a culmination of precision engineering and practical design. It’s a weapon that offers extreme range, devastating power, and a high degree of accuracy, standing as one of the world’s most effective long-range military sniper rifles.
M24 Sniper Weapon System (SWS)
The M24 Sniper Weapon System (SWS), a mainstay of the US Army, is a testament to the effectiveness of well-executed traditional design principles. Based on the Remington 700 long action, this bolt-action sniper rifle has served US military snipers for decades and continues proving its worth in various conflict zones worldwide.
Initially chambered in 7.62x51mm NATO, the M24 SWS was designed for accuracy, reliability, and ease of use. The choice of this caliber provided a good balance of power, range, and recoil management. However, many M24s have been rechambered to the more powerful .300 Winchester Magnum to increase its effective range, extending its reach beyond 1,200 meters.
While not as fancy as some of the other rifle systems discussed, the M24 is a proven platform and a formidable tool in the hands of a trained marksman. It offers a blend of accuracy, power, and reliability, making it a trusted choice for the US military, earning its place as one of the best military sniper rifles in service.
Knight’s Armament M110 SASS
The Knight’s Armament M110 Semi-Automatic Sniper System (SASS) is a notable piece of military hardware that is a trusted platform with various special forces units due to its combination of accuracy, power, reliability, and rate of fire.
The M110 SASS is a semi-automatic sniper rifle that allows for a higher rate of fire and increased magazine capacity compared to traditional bolt-action systems. This feature is particularly valuable in high-intensity special forces operations where rapid engagement of multiple targets may be necessary.
Chambered in 7.62x51mm NATO, the M110 SASS’s standard kit includes a Leupold 3.5x10x scope, Harris bipod, night vision optic, and dedicated suppressor.
In terms of accuracy, the M110 SASS is capable of impressive precision. With an effective range of around 800 meters, it allows special forces snipers to confidently engage targets at extended ranges.
In summary, the Knight’s Armament M110 SASS, with its semi-automatic firing mechanism, suppressor compatibility, and adaptability to various accessories, has proven to be an invaluable asset for military units. Its blend of accuracy, power, and versatility makes it a preferred choice for those who operate in the most demanding and high-stakes environments.
Final Thoughts:
Each of these sniper systems carries a unique set of capabilities tailored to specific mission requirements and environments. Whether it’s the adaptability of the Barrett Mk22 MRAD, the long-range accuracy of the McMillan Tac-50, or the rapid-fire capabilities of the M110 SASS, these rifles underscore the diverse challenges and demands of modern military operations.
Other notable mentions include:
Mcmillian TAC-300 SAKO TRG M10 Hecker & Koch M110A2 Mk 13 Mod 0/5/7 Accuracy International AS50
Ultimately, the best military sniper rifle depends on the mission, the environment, and the sniper’s skill. What’s undeniable is that these rifles, each impressive in their own right, represent the leading edge of design and performance in the realm of precision marksmanship. They serve as a testament to human ingenuity and play a crucial role in shaping the outcome of conflicts worldwide.
Many of these exceptional rifle platforms are accessible to civilians and available from companies like Hinterland Outfitters and other online dealers. Long-range shooting has become a popular sport in the outdoors industry. It tests precision, patience, and technical knowledge, offering enthusiasts a challenging yet rewarding way to hone their marksmanship skills over extended distances.
Weight Per Stake: 1.82 oz | Material: 100% recycled polycarbonate plastic
If you often set up camp with a canopy tent on the beach or other areas with soft sediment, the Orange Screw Ultimate Ground Anchor is the stake for you. Its screw design, flexible plastic material, and length are the perfect recipe for a lightweight, durable, robust holding power machine in loose sediment where other stake designs struggle. Another bonus is that these screws do not require a hammer or an awkward balancing act to install by foot. Rather they use a plastic tube that threads through the top of the anchor for extra leverage to screw in by hand. Even if the anchor can only be installed 50% into the ground, the natural flexibility of the plastic and effective traction of the screw in the ground still provides an awesome hold.
Where the Orange Screw doesn’t shine is in hard, rocky ground. The main challenge in tough rocky earth is gaining initial traction with the anchor. As rocks shift and get dislodged as the anchor tries to dig in, it loosens up the ground reducing any traction the anchor might have had initially. This limitation to soft sediment already largely disqualifies these stakes from backcountry use, while the bulky size of these screws makes them an unrealistic option for backpacking as well. Overall, the Orange Screw is a durable option for staking applications requiring a strong hold in both horizontal and vertical directions of pull in soft to firm conditions. While you likely won’t see these miles away from the trailhead, there are plenty of uses like backyard canopies, camping, and festivals where these stakes can shine, plus the fact that it is made of recycled materials is an added bonus.
Compare Products
Compare select up to 5 products to compare
Why You Should Trust Us
We extensively researched the various types of tent stakes available on the market today, ranging from tri-beam, shepherd’s hook, nail peg, screws, and v-shape designs, and compiled a list of dozens of the most popular models today. Keeping overall performance and cost in mind, we narrowed our focus further to the top contenders for meeting a wide array of end-user needs. We hammered, pushed, and pulled each stake in and out of an array of different ground densities repeatedly to gauge durability, holding power, overall versatility, and ease of use to suss out the best of the best. With 80 uses applied per stake, we installed and pulled on stakes over 800 times. We carefully weighed and measured each stake to gauge overall packability while considering the inclusion of a stuff sack or not. We kept detailed notes along the way capturing surprise or unexpected performances and logged ideal uses in order to provide you with all of the information you need in choosing your next set of tent stakes.
As an avid outdoor recreationalist and industry professional, Hayley Walker has been adventuring and working in the outdoors since graduating from college in 2011. Whether it is backpacking, canyoneering, climbing, mountain biking, trail running, pack rafting, or all of the above wrapped up into a multi-sport adventure, she has spent countless nights out under the stars pitching tents and shelters. Her several years of experience as a rental gear manager for an outdoor guide and outfitting service has given her a depth of knowledge and experience when it comes to assessing camping equipment. She is no stranger to the ins and outs of tent stakes and their unending ability to bend or break at the most inopportune times. With a keen eye for the details and vast experience testing equipment for quality, Hayley put her knowledge to the test with this tent stakes review sussing out the top performers to help others rest easy on their camping adventures.
Analysis and Test Results
The criteria for comparison considers the important role tent stakes play in securing a protective and reliable shelter while out in the elements. Keep in mind your own staking needs and preferences as you consider the metrics and comparisons made between tent stakes below.
Value
Not all low-priced options are created equally. Some products present a better value than others, and though we don’t score the products we test on their price, we like to make note of products that provide a great price-to-performance ratio. We love the All One Tech Stakes, which come in a set of 12 and are lightweight, packable, and easy to use. This set is great for backpackers looking to shave weight and save money on gear. For campers who are less focused on weight but just need a solid, affordable stake to hold their tent down, check out the Coleman 10-Inch Steel stakes, a 4-pack of heavy-duty steel stakes. If you need a few more than 4, we recommend the Eurmax Galvanized, which are very similar but come in a 10-pack for a few bucks more.
Durability
Durability is one of the most important metrics we used to rank each model. While material and design play an important role in predicting potential overall durability, we wanted to know how well each tent stake could weather being repeatedly used in a variety of ground types including sand, soft soil, firm ground, and hard, rocky conditions in order to arrive at a real durability score. We installed 1 of each stake into all 4 ground types 20 times per ground type for an overall total of 80 installations per stake. Of those 20 installations per ground type, we used a hammer for 10 of them and our hands and feet for the other 10. Stakes were then scored across 3 metrics associated with durability; bend factor, guyline attachment points, and stake tip.
The recycled polycarbonate plastic Orange Screw Ultimate Ground Anchor surprised us with the highest durability score, showing very little wear and tear even after repeated uses. As expected, the steel Coleman 10-inch and Eurmax Galvanized stakes scored the next highest, especially under their ideal circumstances for use, with a hammer in soft to hard ground.
The Vargo Ti Shepherd’s Hook received a high score considering its minuscule weight, displaying promising integrity with its titanium material and natural flexing capabilities. The aluminum models struggled to keep up with the sturdiest models in regards to durability, but with careful use, they can enjoy a long life, too.
Packability
Packability is another key area of performance, especially when considering a backpacking or backcountry setting. Campers can largely ignore this metric, while backpackers are advised to tune in more carefully. We carefully measured and weighed each tent stake using a kitchen scale and measuring tape. Each stake within its set was measured and the average weight was scored relative to the other contenders. We measured one stake from each set to log and score the length and width. The smaller and lighter the stake, the higher the score. We also considered whether or not a set of stakes came with a stuff sack or not.
The most packable stakes were the Vargo Ti Shepherd’s Hook, the MSR Mini Groundhog, and the TOAKS Titanium V-Shaped, all of which were indeed lightweight and quite small in size. The Vargo Ti and the MSR Mini scored well for being the lightest of the bunch, while the TOAKS Titanium scored well for its ability to pack down into a neat, compact size by nesting into itself and for coming with a high-visibility, ultralight stuff sack.
Holding Power
This test metric measures how strong of a hold each stake provides across soft soil, firm ground, and hard rocky conditions. Upon installing each tent stake into the ground during our durability testing, we then attached a guyline to each stake and pulled at a near-horizontal angle to the ground. Across 20 pulls, we judged how easy or difficult it was to pull out of the ground. Scores were tallied either as an easy single-hand pull, a difficult single-hand pull, or a hard two-hand pull. Difficult two-hand pulls were then tallied for each stake across the soft soil, firm ground, and hard rocky ground types to give an average holding power score. We intentionally left out sandy conditions to give a more accurate representation of holding power under the most common circumstances. If a stake held strongly in one ground type but performed poorly in another, its overall holding power score was lower despite excelling under some circumstances.
Our strongest performers included the longer steel nail peg designs like the Coleman 10-inch Steel and the Eurmax Galvanized, which were able to dig down deep, maximizing their surface area and traction. The other top contender, especially in softer to firm ground types, was the Orange Screw Ultimate Ground Anchor with its wide screw design and length reaching and gripping effectively into the ground.
The other above-average performers included the TOAKS Titanium V-Shaped utilizing maximum surface area with its v-shape design and the aluminum tri-beam models like the MSR Mini Groundhog and the All One Tech stakes. Some of the shepherd hooks impressed us with more holding power than expected but still landed lower than the models mentioned above in this metric.
Versatility
Versatility determines overall stake performance and is based on scoring answers to a few basic questions. First, we consider how many guyline attachment points the stake presented. The more available options for attaching guylines increased the overall usability of a single stake. Second, we consider whether or not a stake requires a directional placement in the ground or if it can be placed in multiple directions. A directional placement requirement can be limiting, reducing its overall usability. Third, we consider the stakes’ utility across varying sediment densities, from loose sand to packed and dry dirt. Lastly, we consider whether or not it is still feasible to use a stake after it was bent or damaged through prior testing.
Our top performers for versatility included the All One Tech and MSR Mini Groundhog stakes for their overall solid performance in holding power, non-directional placement capabilities as tri-beam designs, and their ability to be used over and over again with minimal bending or damage. They are also lightweight enough for backpacking trips yet also work fine for camping.
The Coleman 10-Inch Steel and Eurmax Galvanized received higher scores for their ability to hold in sand where most others failed. Only the Orange Screw also performed well on the beach, although this screw is mostly limited to the beach or quite soft or moist sediment. The FANBX F Tent Pegs, while not the most versatile overall, did have a noteworthy performance in their continued usability despite getting bent out of shape early on in testing.
Ease of Use
Ease of Use is how user-friendly or not the tent stakes are. We used four criteria: ease of installation by hand and foot, ease of installation by hammer, the inclusion of a pull cord or equivalent, and the ease of removal from the ground. It should be noted that we did not use a hammer or foot to install the Orange Screw Ultimate Ground Anchor but rather, due to its design that utilizes its own mechanism for installation, based its ease of installation scores off of its intended installation method.
The top performers had pull cords and a tri-beam design in common, two factors contributing to easy removal and easier installation by foot. The winner here was the MSR Mini Groundhog, which was easier to install by foot than most others, hammered in quickly, and was a breeze to remove with the help of its pull cord. The notches are also very useful for keeping guylines in place.
The All One Tech came in as a close second. This model was equally easy to remove. However, its length made it a touch harder to install by foot. The Vargo Ti Shepherd’s Hook was another close contender. The slim profile made it easier to install in and around rocks. It was also easy to remove by hand with its hook design.
Conclusion
We used our professional experience working with rental equipment, our depth of personal experience pitching tents, and our extensive research and hands-on testing to bring you our comprehensive review and recommendations. After relentless usage in all types of environments, from sandy and soft conditions to our backyard lawn to rocky and unforgiving terrain, we documented stake performance through it all to identify the top models and their best uses, all with the hope of shedding light on what tent stakes make the most sense for your tent staking objectives and needs.
Food plots are for many of us the most fun and dramatically rewarding part of being a gamekeeper. But as you delve deeper into habitat and wildlife management, it becomes clear that there are plenty of other improvements that need to be made to the habitat if your goal is to attract and hold mature bucks on your property.
IT’S ABOUT CREATING A LEGACY FOR ALL FUTURE GENERATIONS. SUBSCRIBE TODAY.
Attending to these “extra” things besides food plots becomes especially important for those who, like me, only have a hundred or few hundred acres. If you have thousands of acres of mixed habitat and let young bucks walk, chances are you already have some older bucks present. For those of us with less acreage, packing the maximum amount of things that will attract and hold older bucks in a small area and managing it extra carefully are especially important. Here are 12 projects and management principles that will help make your land attractive to older-age-class deer. There are certainly other steps you can take, but these are good ones to start with. If you don’t give the deer these things, chances are your neighbors will, and that’s where they’ll go.
Before getting started, realize that to get the maximum benefit from these projects, you need to carefully analyze your property using topos, aerial photographs, and your knowledge of the land to lay them out for maximum attractiveness to the deer and maximum enhancement of your hunting success. The latter aspect requires careful consideration of things such as best access to stand sites, prevailing wind direction, sun angle, approach cover, and other factors. But knowing where the different types of cover and food are that you have put in place will help you know how the deer will travel and where they will likely bed as they make use of the habitat enhancements you’ve made. 1. Create a transition corridor for mature bucks. Most land is to open for prime deer habitat and big bucks don’t get old by traveling where they can often be seen. Locate a natural potential travel route from bedding to feeding areas or between doe bedding areas and make it appealing to bucks by adding a variety of shrubs or tall annual grasses and partially felling a few low value trees. This serves two purposes. Besides offering cover, a lot of the species you plant will also offer food as will the hinge-cut trees. That will make the travel corridor even more appealing. Here’s an example. You have a small stream or drainage ditch flowing through an area that could be a big buck travel route between doe bedding areas, feed fields or blocks of timber, but it’s too open. Without brush and trees, only does and young bucks will likely use it during daylight. Put in a swath of shrubs that grow 5-8 feet tall or cover grasses such as Blind Spot along the creek, however, and mature bucks will start using it because they’ll feel secure there. A number of different shrubs will work well for this project. Some good ones to consider are: native American honeysuckle bushes, dogwood shrubs (graystem, silky, or red osier), lespedeza, crab apple, Chickasaw plum, chinquapin, viburnum and indigo bush. They’ll not only create security cover, deer will nibble on most of these plants, adding to the travel corridor’s attraction.
Plant two rows of these bushes on the side of the creek a buck would likely travel, 8-12 feet apart. For variety and winter cover, you can mix in a few pines or cedars.
2. Provide minerals. Maybe you’re fortunate enough to have a natural mineral site on your property. Most of us, though, are less fortunate and need to build one or more mineral licks to satisfy the deer’s need for macro and micro elements that they don’t get enough of from natural foods, crops and food plots.
BioRocks are good. I also like to dig up and mix in Full Potential into the top 8-12 inches of soil in several key sites for every 50 acres of land. Place them in or near cover, where a mature buck is more likely to make use of them. By putting that many sites out, you can monitor which ones are most attractive and keep those activated while eliminating the others. Refresh them as needed, but avoid checking the site too often.
3. Add water. This one is pretty obvious. If a deer doesn’t have a source for water that it feels comfortable using it will move off your land to find it. If you expect him to use it during daylight, it needs to be in or adjacent to cover, with a route leading to it that doesn’t make him expose himself. If the source you have is in the open, you should build a travel corridor to it (see step one) with cover.
Water sources don’t have to be big or elaborate. You can often use rocks and logs to dam a small wet-weather stream. Placing water troughs, kids pools, or pond liner plastic in dug out spots is another relatively easy project. If you want to tackle both mineral and water needs in one step, consider the Banks Outdoors Watering Systems with their H2O Wild Water Mineral Supplement added to the water.
IF YOU LOVE WILDLIFE AND WANT TO IMPROVE HABITAT SUBSCRIBE TODAY!
4. Create or enhance staging areas. Crop fields and food plots are attractive to deer, but if they appear abruptly at the edge of open woods, mature bucks might not move into them until after dark. By adding or enhancing a staging area between the field and woods, older bucks will feel comfortable hanging out in these areas and perhaps even approach the plots in daylight. Cut down some low-value trees along the border to create a thicket of brush. Leaving some of the tops partially attached makes even more valuable cover. Grape vines, greenbrier and honeysuckle will grow up the fallen trees and form thick shelter that big bucks crave as they approach an open feeding area. And those plants are also great foods for deer. Add a few bushes from a nursery to fill in spots that are still too open and you’ll soon have a staging area bucks feel comfortable using well before dark. The edge should be at least 75 feet deep, 100-150 feet is better still. Be careful not to make the area too thick, though. Deer also like to socialize and see each other in these areas. 5. Plant native warm season grasses. This not only keeps more mature bucks on your property, it also benefits species such as quail, pheasants, turkeys and song-birds. Switchgrass is one of the easiest to grow and my favorite warm season grass. If you are considering planting a wet area, it’s definitely the one to choose. It can survive up to 30 days in standing water. Other species should also be considered such as Indian grass and big and little bluestem. I like to mix several of these in my plantings. These grasses will grow from 5-7 feet tall, providing great cover for both mature bucks and does which will draw in those bucks. You can plant these by broadcasting the seed and covering it lightly, but drilling is preferable. Special drills for these seeds are often available from local conservation agencies or farm co-ops. Since this is a strong conservation step for the land, government programs can sometimes be used to help finance seed purchase and planting. It’s not important to have large warm season grass fields. The main thing is to locate the stands in good strategic spots where deer will use them to bed in or go to when there’s pressure in other areas. Putting in several small plantings in long narrow fields is an excellent strategy.
I prefer not to hunt these warm season grass fields. Their best use is to hold deer on your property. On the other hand, hunting near them is a good way to intercept a buck moving out of the stand to chase a hot doe. This tactic yielded a huge eight pointer for me recently with bases just shy of six inches.
6. Add shrubs and vines. Habitats that are mostly open crop fields and mature woods can benefit from releasing and enhancing any shrubs and vines present and planting others. If you have Japanese honeysuckle, fertilizing can double the forage production of this non-native, but still valuable plant for deer. Also nurture any raspberry, blackberry, greenbrier, and plum shrubs on the property. These offer both food and valuable cover.
Trim them back if they are growing too high for deer to reach or pull the vines down. Also daylight them if low-value trees are shading them by cutting back overhanging branches of those trees. Adding lime and a 10-10-10 type fertilizer can also help.
If you lack these shrubs, consider planting rows or clusters of them or other plants such as strawberry bush, American beautyberry, shrub dogwoods, crabapple, and mulberry.
7. Build big buck bedding cover. Mature deer might walk through your land or venture onto it looking for does as the rut swings in. They might visit food plots you’ve created for a bite to eat, but you’ll never have old bucks stay on your land without good bedding cover.
Fortunately, that’s easy to create if you don’t have it. The first step is to select a good location. I like to position it far from human activity, close to the center of the property. A good spot would be on a shelf or bench or just a slight rise if that’s all the elevation that’s available. The heads of hollows are also good.
Bucks like to bed high and move low in the afternoon to feed or chase does. They typically choose the leeward side of a ridge or hill based on prevailing winds. Put your beds in these spots for maximum use.
Using a chain saw, cut some low value trees in the spot you’ve chosen. Don’t knock everything down, but enough to create a jungle-like rough and congested area that bucks will take to. Cut mostly low quality, bent, injured or diseased trees, and just hinge-cut some of them. Before starting, learn the safety rules for logging and always wear the proper protective gear. If you aren’t comfortable doing this work, hire a professional. He might cut the wood for firewood or pulp and take a few saw logs that you specify to make it worth his time coming in for the job. Besides creating a bedding area, this cutting also allows additional light to enter the woods by removing some of the overhead canopy that shades the forest floor. This lets new shrubs and forbs that offer valuable deer food emerge – species such as raspberry, blackberry, honeysuckle, greenbrier and grapes. That makes the jumble of fallen timber even more appealing as a buck hideout. Maple stumps from the cutting will also generate shoots that bucks snack on. Eventually saplings will spring up, adding even more cover.
Since you build this bedding area yourself, you’ll know exactly where it is and how it’s laid out. With trail cameras you’ll be able to quickly learn the routes bucks use as they head to it in the morning and leave in the afternoon—prime stand sites.
BECOMING A GAMEKEEPER IS NOT JUST THE BEST WAY TO PRODUCE GREAT HUNTING… IT’S THE BEST LIFE! SUBSCRIBE TODAY.
8. Create a thermal refuge. To keep deer on your land during inclement weather, you need a thermal refuge. These can be anywhere from a half to several acres, close to the center of your property when possible. A dense grove of pines, spruce, or cedars offers deer thermal cover and shields them from blustery winds, snow and sleet in winter. The conifers are also immensely valuable as psychological security cover, offering great escape areas. When hunting pressure mounts on nearby lands, there’s nothing a buck craves more than thick cover and seclusion. His life depends on it. A grove of dense young evergreens in a secluded spot is just what he’s looking for. Species may vary according to what will do well in your area. I particularly like white pines. Plant as large of an area as you can, anywhere from one-half to several acres. To add extra wind protection and bedding cover, also fell several low-value small to medium trees, cutting some through and hinge-cutting others. Intersperse these through the conifer plantings.
9. Plant oaks. Most properties managed for whitetails have some of these, but you can improve their output by thinning trees around them. If you have enough open land, by all means consider planting more oaks purchased from state forestry departments or sources such as nativnurseries.com. Try to put in some early maturing and some late-maturing nut varieties. Planting these in open areas rather than woods will make them magnets for old bucks with the heavy mast crops they’ll produce there.
10. Give them fruit. They may not be important in the overall nutrition of a picture of a mature buck, but trees of species like pear, apple, mulberry, peach, and persimmon offer treats that will hold and draw deer to your property. They also provide a vital energy boost just before the rigors of winter set in and are packed with phosphorous and vitamins. Plant them in areas receiving at least five hours of sunlight. Slight slopes are good, rather than bottoms. Put in at least six trees in each location so they will cross pollinate. If possible, put tree shelters around them so they don’t get damaged by deer and rabbits.
11. Delineate sanctuaries. No matter how small your property, it’s vital to have some part of it placed off limits to any human activity except entering to retrieve a hit deer. It should have some cover, perhaps including some of your bedding areas and thermal cover sites. The rougher, thicker, and steeper the terrain, the better. If it’s an ideal habitat, five or ten acres may suffice for a sanctuary. In most cases much larger areas are better, up to 25-50 percent of a property sometimes. Besides delineating sanctuaries, also keep pressure light on areas that are hunted. Don’t use a stand when the wind is wrong or where the deer will be spooked by your entrance or exit from the stand. It won’t take much of that before mature bucks either leave your property or become nocturnal. Also keep a lid on non-hunting access and activities. Mature bucks and human activity simply don’t mix.
12. Don’t just “scatter” these improvements throughout a property. Rather, integrate them so they mesh and complement each other, helping, instead of hindering, your hunting success. And don’t forget to ask for help and advice from other gamekeepers nearby with similar properties.
Often state wildlife biologists will visit your land and give recommendations for free. Institute as many of the habitat projects described here as you can and chances are any mature bucks in the area will make your land their home year-round.
Adult white-tailed deer are about three feet tall at the front shoulders. Maryland yearling bucks (males) weigh an average of 105 pounds; yearling does (females) average 90 pounds. During the warm months, deer possess reddish-brown hair. A grayish-brown coat with a thick undercoat replaces the reddish hair during the cold time period. The white-tailed deer’s distinctive white tail and white rump patch is readily visible when they bound away from real or perceived danger. White-tailed deer sprint up to 35 miles per hour and are able to leap over 8 foot tall barriers.
Only white-tailed bucks possess antlers. In extremely rare cases, does may grow antlers. Bucks use their hard antlers to establish dominance over other bucks during breeding season. Antlers are grown and shed each year. Antlers, which are composed of true bone, begin to grow in late March and early April. The growing antlers are covered with skin and blood vessels called velvet.
White-tailed deer can be found in every county in Maryland. White-tailed deer are also common throughout much of the United States, southern Canada and even parts of central America.
Doe (left) by John White and a buck withvelvet antlers (right), by Kerry Wixted
Habitat:
Maryland white-tailed deer habitat includes most of the state except for open water and intensely developed urban areas (e.g. downtown Baltimore). Deer thrive in landscapes with wooded/brush sections and open areas such as cropland, pasture or landscaped yards. Deer use the wooded areas for food and cover, and open areas provide food. Landscapes with an abundance of edge habitat (areas where forested and open habitat meet) support prime deer habitats. Because of this, suburban sprawl creates ideal habitat conditions for white-tailed deer. When forested areas are converted into housing developments, portions are cleared for roads and home sites, while other sections remain forested. When open farmland is transformed into residential areas, new homeowners plant trees, shrubs and perennials. Both of these types of residential conversions provide excellent deer habitat. To learn more about managing deer damage, then click here.
The typical, annual average home range for white-tailed deer is considered about one square mile (640 acres). However, the sex and age of the deer and habitat types will influence varying size home ranges. Yearling males will move many miles while adult females usually have smaller stable, annual home ranges. Deer in good quality habitat will need to travel less than deer in poor quality habitat.
Diet:
Deer feed on nuts and berries, leaves, woody shoots and stems, grasses and cultivated crops. Some of their favorite natural foods include acorns, honeysuckle, poison ivy, green briar, young tree seedlings and mushrooms. Soybeans, corn and ornamental shrubs are several of their favorite foods planted by humans.
Deer have a four-chambered stomach that is required to digest the vegetation. Food first travels to the rumen that contains the bacteria and protozoans, which begin the digestive process. The reticulum circulates food back to the mouth so that the deer can chew the food again. The omasum functions as a pump and directs the partially digested food from the reticulum to the abomasum. This final chamber functions as a true stomach and completes the digestive process. Because of this special digestion process, it is generally not recommended to feed deer during the winter. Click here to view White-tailed Deer Facts.
Reproduction:
Maryland white-tailed deer begin breeding in October and continue to breed through mid December. The shortening of day length (photo period) triggers the breeding season. Most does become pregnant during the first half of November. Because white-tailed deer are polygamous, one dominant buck can breed numerous does. Any receptive doe that does not become pregnant will cycle back into estrous (heat) in about 28 days and will mate again.
Fawns (baby deer) are born during May and June after a gestation period of about 200 days. Yearling does usually give birth to single fawns. Mature does in good physical condition frequently produce twins.
Newborn spotted fawns remain hidden and solitary for about three weeks. The doe visits her young only two to three times per day in order to nurse and groom the offspring. When the fawn is strong enough to run with the doe, it will follow its mother and begin to sample foods eaten by the doe. Fawns can live independently of their mother at about two months old.
Sounds:
Deer typically make three different types of sounds: alarm, maternal, reproductive.
Alarm calls help to warn other deer of real or perceived danger. When a deer is surprised, it will snort by forcing out air rapidly from the nostrils. When fawns or young adults are captured by a predator or trapped, they will make a bleating or groaning sound.
Does also use low grunts to communicate with her young and to maintain contact. Fawns respond with a mew like sound. Fawns will also use bleats to get attention from the maternal doe. Communication between does and young help to maintain a close pair bond.
During the breeding season, bucks make grunt sounds while searching for receptive does and while tending does. Bucks also advertise their presence to prospective does and potential competitive bucks with grunts of varying pitch and volume.
Behavior:
Bucks are often solitary creatures aside from the breeding season and occasionally during the summer when they form bachelor bands. In the breeding season, bucks will actively seek out females to mate with as well as spar with other males to fight for the rights to breed.
Does, on the other hand, can often be seen traveling together particularly in the winter when food tends to be scarce. Often, fawns will remain with their mothers through the winter and into early spring. Typically, young bucks leave their mothers earlier than young does.
Management:
White-tailed deer are primarily managed by hunting in Maryland. Click here to learn more about hunting as an effective tool for white-tailed deer management. Click here to learn more about white-tailed deer management, in general.
For an information sheet on common deer sign, please click here.
Using the right fishing rig is essential for catching trout successfully, and knowing which rig to use for what conditions can make the difference between catching your limit or getting skunked.
There’s a perfect trout rig for almost every situation, and that’s why it’s so important to master rigging for trout, as this will allow you to choose exactly the right fishing rig for your purposes.
In this article I’ll cover the 9 best trout rigs, and will discuss what each of them is ideally suited for.
In order to rig for trout, you need to choose one of three basic types of rigs:
Rigs that present your bait suspended underneath a bobber or float
Rigs that present your bait close to the bottom with a weight
Rigs that enable you to cast and actively retrieve an artificial lure
While these three types of fishing rigs cover almost all trout fishing applications, they come in a variety of different shapes and forms, each of which is best suited for slightly different trout fishing setups.
So if you’re a beginner, chances are that you’re confused about all the different options of rigging for trout.
However, the great thing is that you can get started with just two or three of the most versatile trout fishing rigs, and then add more specialized rigs once you know what kind or rig works best for your pond, lake or stream.
Now let’s look at each of the most important trout rigs in more detail, to help you choose the best rig for your purposes.
And in case you’re also looking for the best bait to use with your trout fishing rigs, check out our article on what is the best bait for trout?
Trout fishing rigs with bobbers
Bobber rigs are among the most effective trout fishing set ups, and work especially well when fishing in shallow ponds and streams, as well as in shallow bays of bigger lakes, or basically in any situation where trout are active close to the water surface.
Now let’s look at the two main types of bobber rigging for trout.
Trout rig with fixed bobber
This is one of the simplest trout rigs, and consists of a fixed bobber attached to the line, as well as a hook and sinker to weigh down the baited hook in the water.
The depth at which the bait is presented depends on the distance between the hook and the bobber.
How to tie it: Attach the bobber to the line, and then tie the end of the line to the hook. The most common type of bobber used for this fishing rig is a round red and white bobber, but you may want to choose a pencil shaped bobber instead, which offers less resistance when a trout takes the bait.
If you’re not sure how to rig a fishing line for trout, take a look at our article on what fishing line should you use for trout?
When to use it: This is a great fishing rig to use in shallow ponds and streams, as well as any situations where trout are feeding close to the surface. It’s very easy to set up and a lot of fun to fish with, which makes it an excellent choice for beginners who want to try trout fishing in a stocked pond.
But keep in mind that the maximum depth you can fish this rig corresponds to the length of your rod, since you can’t cast the fishing rig effectively if you set the bobber higher than that.
How to use it: The best way to use this fishing rig is to cast it out with a baited hook and wait for a trout to bite, which is indicated by the bobber being pulled down underwater.
When you see this, set the hook immediately, so the trout doesn’t have a chance to spit out the hook when it feels resistance on the line. This is the best setup for trout fishing in streams and rivers, where you can use it to drift your bait into the best locations that hold trout.
Slip bobber rig
This is another commonly used trout rig, and should be part of every trout angler’s arsenal of fishing tools.
Using a slip bobber rig (aka sliding float rig) makes the fishing rig more compact and easier to cast with than a fixed bobber rig.
How to tie it: Tie a bobber stop on to your main line, and then thread the line through your bobber and tie the line to the hook. The best hook size depends on your bait, but generally lies somewhere between size 8 and 14.
If you’re unsure about choosing the right hook size for different trout line setups, take a look at our article on the best size hook for trout.
Attach a split shot or two to the line between the bobber and the hook. This stops the bobber from sliding down onto the hook and it also weighs down your bait, helping to present it at the right depth to the trout .
Keep in mind that some baits (like powerbait) float in the water, and you may need to add extra split shots to make the baited hook sink down to the desired depth.
When to use it: The slip bobber rig is the best choice when trout are feeding in midwater, and if you can’t reach them with either a fixed bobber rig or with a bottom fishing rig.
The great thing is that you can fish practically any depth with this fishing rig, as you just need to move the bobber stop up the line to whatever depth you want to set the bobber.
How to use it: Estimate the depth of the water you’ll be fishing in, and set the bobber stop to that depth. Then bait your hook and cast out your fishing rig to the desired spot and wait for a fish to grab the bait.
Bottom fishing rigs
Bottom fishing rigs are often the best choice when trout are found in deeper water, as they tend to feed close to the bottom most of the time. There are several options available to you in this rig category, so now let’s look at the most important ones.
Slip sinker rig
This is the simplest bottom fishing rig around, and is the one most often taught to novice trout anglers. This rig has been in use for more than a century, and continues to perform well in many situations where trout hold close to the bottom.
How to tie it: Thread a 1/8 or 1/4 oz sliding sinker (either a bullet or egg sinker) onto your main line, and then tie the line to a barrel swivel. Attach a leader to the other end of the swivel, and tie your hook to the leader. Choose the type and size of hook depending on the type of bait you want to use.
When to use it: This rig is most commonly used in lakes where trout hold in water deeper than 5 or 10 feet. It’s a great rig to use from shore, since you can cast it relatively far, and cover a lot of water with it.
It’s important to use this fishing rig with floating bait, since you don’t want your baited hook lying on the bottom where trout won’t notice it. You can use it with either powerbait (which is designed to float), or worms injected with air to make them float.
How to use it: This is the most common bait rig used for trout fishing setups, and is usually fished passively. Most anglers cast it out to a promising fishing spot and then wait for a bite. If you do this, make sure to check your rig regularly to see if the bait is still on the hook, and also test different fishing spots.
Carolina rig
This rig is very similar to the slip sinker rig, but unlike the slip sinker setup it is often fished actively with artificial lures instead of passively with bait, which is why we list the two options separately.
How to tie it: Start by threading your main line through a 1/8 to 1/4 oz sliding sinker. Next, thread the line through a plastic bead, and then tie it to a swivel or snap swivel. The bead stops the weight from banging into the swivel during retrieval, which protects the knot on the swivel from being damaged while fishing, and this is more important if you want to fish it actively.
When to use it: You can use this option anywhere where trout are feeding close to the bottom. It’s a great option to use when fishing in lakes, reservoirs and ponds, but you can also use it in rivers.
How to use it: While you can also use this fishing rig with a baited hook and fish it passively until a trout comes by and bites, the strength of the Carolina trout fishing rig lies in fishing it actively with a floating lure.
You can use a floating jig head with plastic lures such as trout magnets or power worms. After casting out, let your rig sink to the bottom, and then slowly retrieve it with a jigging movement.
Split shot rig
This is basically a finesse version of the Carolina rig, and instead of a sliding sinker it uses one or more split shots attached to the line. Since trout can be finicky at times (especially when fishing in heavily fished waters), it’s always great to have some finesse techniques up your sleeve.
How to tie it: Tie your main line to a swivel or snap swivel, and then add one or two split shots to the line right above the swivel. Next, tie a 1 to 2 foot long fluorocarbon leader to the swivel, and then tie your hook to the other end of the leader.
Next, thread a soft plastic lure onto the hook, and your trout fishing line setup is good to go.
In most cases you’ll want to use a floating lure on this rig, which will result in presenting your lure right in the strike zone every time the split shots sink to the bottom.
When to use it: This rig is a great option if you notice that the trout are finicky. This is most often the case in heavily fished waters, and especially in clear water it can be advantageous to use a finesse rig that’s harder for the fish to spot. It’s also a great trout fishing set up for small creeks.
How to use it: Cast the rig out and let it sink to the bottom. Then slowly retrieve it with jigging movements of your rod tip. The main disadvantage of the split shot rig is that it can’t be cast as far as the Carolina rig, since it comes with less weight on the line. Because of this, it’s better to use it when fishing in smaller lakes, rivers and streams.
Drop shot rig
This is another great trout fishing rig setup for bottom fishing, and one of it’s key advantages is that it allows you to place your lure in the strike zone and keep it there for a long time. Similar to the two previous rigs, it’s most often used with soft plastic lures.
How to tie it: Start by tying your main line to a 4 or 5 foot fluorocarbon leader with a double uni knot, and then tie the end of your trout leader to a 1/8 to 1/4 drop shot weight.
Next, take a bait hook and place it facing upwards, and form a loop with the leader line about 1 foot above the drop shot weight.
Pass the loop through the eye of the hook from below, and then tie an overhand knot with the loop. Finally, pass the hook through the loop, wet the line, pull tight, and you’re ready to start fishing.
When to use it: While the drop shot rig was originally developed for vertical fishing in deep water from a boat, most bass anglers can tell you that this rig works equally well for fishing from shore, and can even be fished in very shallow water. It’s a great trout fishing setup for beginners fishing in lakes and rivers.
How to use it: Cast the rig out and slowly retrieve it by hopping the weight along the bottom, while jigging the lure up and down. If you figure out where the strike zone is, you can keep the drop shot fishing rig there, and simply wiggle the lure in place without moving the weight. That way you can keep your lure right in front of the fish for a long time, without having to retrieve it and cast again.
Lure rigs
While all of the fishing rigs discussed above can be used as trout fishing setups with either natural bait or artificial lures, some options for rigging for trout are only intended to be used with lures. Let’s take a look at the most important rigs of this type that you should know.
Spinner rig
The spinner rig is the most commonly used lure fishing rigs for trout. It is most often used with spinners (such as a rooster tail or panther martin), but it can also be used when fishing with any other artificial lure designed for casting and retrieving.
How to tie it: Tie your main line to a swivel or snap swivel, and add one or two split shot weights just above the swivel. Next, tie a 2 to 4 foot fluorocarbon leader to the other eye of the swivel, and then tie your lure to the other end of the leader.
Depending on the size and weight of your lure, adjust the number of split shots to achieve the right depth during retrieval. The swivel prevents line twist of your main line, but if you’re using a lure that doesn’t generate twist, you can also tie the main line directly to the leader.
When to use it: This is one of the most versatile trout set ups, and can be used in almost any setting, from small streams to deep lakes. In most cases you should try to fish this rig in the middle of the water column, but can also go deeper than that if the trout are holding close to the bottom.
How to use it: Simply cast out the fishing rig and start retrieving. Depending on how deep you want to fish it, you can adjust your retrieve speed, and you can also experiment with letting the rig sink to the bottom before you start reeling it in. However, if you’re trout fishing over weed beds, make sure to keep your lure above the weeds.
If you’re interested in fishing with trout spinners, check out our complete guide to trout fishing with spinners.
Trout fishing rig setup with bobber and jig
This is a great rainbow trout rig to use if you’re fishing over weeds, as you can fish it slowly without getting the jig snagged in the weeds.
How to tie it: Depending on the depth of the water, you can use either a fixed bobber or a slip bobber.
So start by setting up one of the two bobber rigs (as described above), and instead of tying a bait hook to the end of the line, tie a 1/16 or 1/8 oz jig head to the line. Next, you can bait the jig head with any of a wide variety of plastic lures, and you’re ready to start fishing.
When to use it: This is a great trout fishing setup for beginners when fishing over weed beds, and when want to keep your lure just above the weeds. You can achieve this by setting exactly the right depth with your bobber.
This trout rig setup is also great for drift fishing in streams and rivers, and again you should adjust the setting of your bobber to present the lure just above the bottom.
How to use it: If you’re trout fishing in a lake, cast out the fishing rig and let the jig sink as far as it can (at which point the bobber stands up straight). Then lift your rod tip to retrieve the fishing rig about 4 to 5 feet, and then pause to let the jig sink down again.
What this trout fishing setup achieves is that your jig will be slowly pulled up and then allowed to sink again. In the case of a plastic worm, this results in the worm wiggling through the water, which is highly attractive to most trout.
See also: How to rig when trolling for trout
Ned rig
The ned rig is most familiar to bass anglers, but few people know that it also works really well for catching trout. The key feature of the ned rig that makes it so effective when fishing for trout is that it is usually fished with a floating plastic tail, which is ideal for catching trout.
How to tie it: This is the simplest fishing rig to tie in this collection. If you’re using fluorocarbon as your main line, you can tie that directly to the mushroom jig head of the ned rig and you’re ready to start fishing. If you’re using braided line as your main line, it’s best to use a 2 to 4 foot fluorocarbon leader, since that’s much less visible in the water.
When to use it: You can use this rig whenever trout are feeding close to the bottom, and it works equally well in lakes, rivers, and streams. The only situation when you shouldn’t use this rig is if you’re fishing in a lake with a lot of vegetation on the bottom, which is likely to get your ned rig snagged.
How to use it: Cast it out and let it sink to the bottom, then retrieve it for 3 or 4 feet with a jigging motion, and let it settle on the the bottom again. Repeat this until you get a bite.
What are the best trout rigs?
The 3 best trout rigs are:
Slip bobber rig
Slip sinker rig
Spinner rig
Between them, these three setups cover all the three main types of rigging for trout, and if you can set each of them up and fish them effectively, you’re off to a great start.
The slip sinker rig is perfect for presenting a bait close to the bottom, which is the best depth to target trout in most situations.
The slip bobber rig, on the other hand, can be used to present a bait suspended underneath a bobber, which is great when fishing for trout that are active higher in the water column.
And the spinner rig is a great basic setup for active trout fishing with lures, which is an ideal way to cover a lot of water in search of hungry trout.
If you’re currently looking for a new trout rod, check out our article on what is the best rod for trout fishing?
What are the best trout bait rigs?
The 3 best trout bait rigs are:
Slip sinker rig
Slip bobber rig
Fixed bobber rig
Each of these fishing rigs is well suited for baiting your hook with natural baits like worms, maggots, minnows, corn, salmon eggs, or scented baits like powerbait.
In addition, all of them can be used for fishing passively, by casting out your fishing rig and then waiting for a trout to pass by and take the bait.
Trout worm rigs
The best rigging for trout to use with worms is either the slip sinker rig, or the slip bobber rig. The former rig is the ideal choice if you know that trout are feeding close to the bottom, and the latter rig is better if trout are feeding higher in the water column.
When using a slip sinker with a worm as bait, it’s important to make sure that your baited hook floats in the water, as trout will not eat it if it’s lying directly on the bottom. Traditionally, this has been done by injecting air into the worm with a worm syringe (which you can get in most tackle shops).
More recently, many anglers are fishing with floating jig heads baited with worms to make their bait presentation float in the water, and another great trick is to put a small marshmallow on the tip of your hook, which also makes it buoyant.
Finally, no matter which trout worm rig you use, it’s usually best not to use a whole nightcrawler on your hook, as this is too big to fit into the mouth of a trout. Instead, cut off a 1 or 2 inch piece of the worm, and thread it onto the hook.
The best hook type to use for this rig is a baitkeeper hook, which prevents the worm from sliding down the shank of the hook.
Minnow rigs
The best trout rig to use with minnows is either the slip bobber rig, or the fixed bobber rig. Your hook size should be between size 8 and 12 (depending on the size of the minnow). The best way to hook a minnow for trout is through the upper lip.
Small fish form a large part of the diet of many trout species, which is why they can be such a good bait.
Bobber rigs are great for fishing with live minnows, since you can easily spot a trout bite when the bobber goes down, and this allows you to delay your hook set long enough to give the trout a little extra time to get the minnow fully inside its mouth.
Which one of the two bobber fishing rigs you choose depends on the depth of the water you want to fish in, and on the depth at which trout are active.
When fishing with live minnows as trout bait, it’s important to weigh them down with split shots, so they stay at the right depth.
Salmon egg rig
The best trout rig setup to use with salmon eggs is one of the following:
Slip bobber rig
Fixed bobber rig
Drop shot rig
Your hook size should be between size 8 and 14, and if you use a larger hook, you can thread several salmon eggs onto your trout hook. No matter which fishing rig you choose, you need to cast very gently in order to avoid ripping the eggs off the hook during the casting process.
If you’re trout fishing in a lake or pond, the best choice is a bobber rig, as that allows you to present the salmon eggs suspended in the water. But if you’re trout fishing in a stream or river, you can use a bobber rig to drift the salmon eggs with the current.
Alternatively, you can also use a split shot rig to drift the salmon eggs right on top of the bottom of the stream. The latter approach is better for getting it right in front of the trout, but it’s harder to detect bites with this style of fishing.
Egg rigs also work very well for steelhead fishing, and it that’s something you’re into, check out our article on how do you rig for steelhead bank fishing?
Final remarks
This concludes our article on rigging for trout, and hopefully we’ve helped you find exactly the right rig for your fishing technique.
Different trout rigs are ideally suited for different trout fishing tactics – bait fishing, lure fishing, trout fishing from shore, trout fishing from a boat, as well as fishing in diverse bodies of water, ranging from small streams to big lakes.
Now that you understand the basics of what each of these fishing rigs is designed for, this should help you to choose the best trout setups to help you to catch more fish in your local trout fishery.
"Unlock the Perfect Shot: Discover the Best Scope for Break Barrel Air Rifles. Enhance your shooting experience with precision and accuracy, as we delve...
")
")
")
")
")


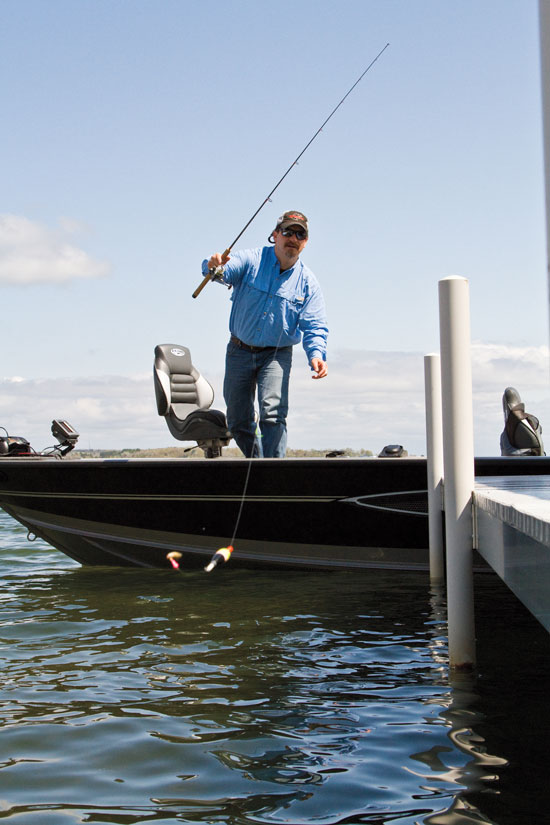
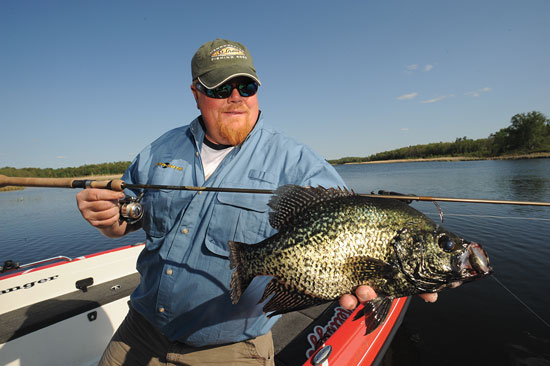 Some of the biggest sunfish and crappies I’ve caught in recent seasons have been taken by skipping baits below boat docks and other overhanging cover. The rod I use is a 6-foot 6-inch Cabela’s Fish Eagle II (GSII662-2) coupled with a Shimano Sedona 1000FD. The reel’s loaded with 4- or 6-pound braid with an 18-inch fluorocarbon leader.


 A number of different shrubs will work well for this project. Some good ones to consider are: native American honeysuckle bushes, dogwood shrubs (graystem, silky, or red osier), lespedeza, crab apple, Chickasaw plum, chinquapin, viburnum and indigo bush. They’ll not only create security cover, deer will nibble on most of these plants, adding to the travel corridor’s attraction.
 7. Build big buck bedding cover. Mature deer might walk through your land or venture onto it looking for does as the rut swings in. They might visit food plots you’ve created for a bite to eat, but you’ll never have old bucks stay on your land without good bedding cover.