Catfish are one the most popular game fish on the North American continent and varieties of catfish can be caught world-wide. Catfish have always seemed something rather elusive to me growing up.
I know how to locate them and how to catch them. I’ve seen countless folks around me do it all the time. But I always seemed to have bad luck myself. Maybe I’ve been using the wrong bait.
How about worms? Surely they will catch plenty of catfish, right? I mean they work incredibly on bullheads. So I did some research for this article.
Can you catch catfish with worms? You can catch catfish using worms. Worms provide fish-attracting scent and enough natural action to draw in fish day or night. The effectiveness of worms makes them one of the most popular catfish baits.
While you may luck into a stringer full of catfish by haphazardly tossing worm-baited hooks into the abyss, there are specific ways to ensure bites and action using worms. Read on to learn how to maximize your catfish success.
I know this is a bit random, but if you ever wanted to go on a guided or chartered fishing trip in freshwater or saltwater, you should check out Fishing Booker. They are the leading database of certified and professional fishing guides at the guaranteed lowest prices.
They have countless listings for such dream destinations as the Florida Keys, Corpus Christi, Great Lakes, San Diego, Central America, Montana, and many more. Click here to visit Fishing Booker and book your trip of a lifetime at very affordable prices.
Worms are actually the perfect catfish bait for a variety of reasons. They are readily available everywhere and in every garden or bait shop.
They are free or very inexpensive depending on your means of acquiring them. They also offer great longevity and hardiness.
But we don’t care about all that. What we really care about is how to catfish like them. Catfish devour worms given the opportunity.
Sure there are plenty of bait options (cut bait, live bluegills, chicken liver, etc) that work really well under certain circumstances, but worms will catch catfish under universal circumstances.
Worms will catch catfish often times when other baits won’t.
Worms vs. Nightcrawlers for Catfish
When fishing for catfish, worms (red worms & earthworms) and nightcrawlers have their own advantages and disadvantages. I personally think worms are superior to nightcrawlers for catfish and I explain why.
First, worms are more lively and “flail” about on the worm more vigorously than nightcrawlers. Worms are more “twitchy” and reactive than their bigger, more docile cousins.
While you can usually get by only putting one single nightcrawler on the hook instead of multiple red worms, the resulting action just won’t be the same.
Perhaps even more critical a factor is the scent released by both forms of worm. Red worms are more aggressive feeders of decaying matter than nightcrawlers. This permeates into their body and out of their pores.
You may not be able to smell a difference in your hands, but catfish can detect a couple red worms more vividly from a few feet away easier than a single big nightcrawler.
If I had to choose, I’m going red worms.
Half-Worm vs. Full-Worm vs. Multiple Worms
There is a lot of nuance to this answer. This could vary from fishermen to fishermen. I’m going to go with multiple worms for catfish and I’ll explain why in a second.
Using half a worm is ideal for smaller-mouthed fish like bluegills and even small bullheads. This is because with fish like that, you want the piece of worm they grab to allow contain the point of the hook.
Their mouths are so small, you could just pull the worm off the hook and never come close to the hook itself.
If you we are talking about using a full worm, I’m assuming we are referring to a big nightcrawler. Like I mentioned earlier, I don’t love nightcrawlers as catfish bait.
I think their sluggishness and lack of scent makes them inferior as catfish bait to red worms. You can still catch catfish with them but my choice is clear.
I think you’ll have much better success with cats if you hook multiple red worms on your line than a single nightcrawler. I also believe using 1/2 a nightcrawler or worm simply is not enough meat to draw in a hungry cat.
You have to remember catfish hunt by touch and smell. The more of both those senses you can address with your bait, the easier fishing will be.
How About Plastic Worms for Catfish?
So we have clearly demonstrated that worms and nightcrawlers work very well for catfish. Let’s go a step further. Can you use plastic worms to catch catfish?
The answer is yes. It is possible to catch catfish using plastic worms. Catfish are naturally curious predators and rely heavily on their sense of touch and smell to locate food.
Bass fishermen occasionally hook into catfish when jigging soft plastic worms. This is especially true when using “Carolina-style” worm rigs.
“…I catch a catfish or two every once in a while. I know immediately once they take the bait, the pull is too steady to be a bass.” – unnamed South Carolina bass angler.
However, I would advise strongly against targeting catfish will these soft plastic baits. You’ll be wasting your time targeting catfish this way. Catfish are very smell-driven and plastic worms give on an unnatural but delicate odor.
Catfish are used to eating fishy and dying things. There’s a reason why many of the top catfish baits and attractants small awful. Catfish may eat a plastic worm on occasion but there are so many other baits that will be better for the average catfish angler. Just put a real worm on the line.
Day-Time vs. Nighttime
Nighttime. If you had to pick between day time and nighttime to throw worms at catfish, the easy answer is night. This because catfish are the most active during the summer at night.
They aggressively ascend and descend in the water column in search of prey: living and dead. At night, there’s a decent chance your bait won’t even reach the bottom before a hungry cat scoops it up.
Don’t get me wrong though, you can still catch a lot of catfish during the day, especially in the late afternoon. But if your wife is making you pick the time you’ll be out of the house, go with night.
For a complete gear and tackle recommendation for catfish, check out my recommended catfish gear list which will help you catch more and larger catfish than anyone else.
9 Tips: More Catfish Caught Using Worms
1. Multiple Rods/Multiple Distances
When fishing for catfish, especially from shore, cast your worms out to different distances. This will ensure each of your baits will settle on the floor at different depths.
Catfish are roaming characters but they will likely be grouped in similar depths depending on temperature, food sources, and other factors. Because of this, use your first few casts as “fish finders” to locate the distance from shore they are at.
2. Poke More Holes in Worms
Worms are jam-packed with nutrients and corresponding scents. A worm with just a single hole in it will release a fraction of the scent a worm with multiple “hookings” will. Yes, hookings is a real word because I just created it.
3. Fish Bottoms Only
There are times when catfish will feed higher in the water column like at night, but for 90% of your catfish outings, put your baits flat on the bottom of the river or lake.
I really like recommended bobber striker indicators but for catfish, I won’t. You want your worm on the bottom, not hovering off the bottom.
4. Break Out Flashlights
Nighttime is the right time for catfish. Ok, they can be caught at all times of the day but nighttime cats are especially voracious feeders.
Catfish are extremely reliant upon senses other than sight so they are perfectly at home hunting in darkness. Grab your flashlights, lanterns, and a jar of nightcrawlers and start casting.
5. Add Some Scent to Worms
Worms already come well-infused with natural attractive scent. Believe it or not though, it can be improved upon.
Some avid catfishermen will dip their worms in blood or even sauerkraut. Seems a little odd but it apparently works well for them.
6. Create a Burley
Most Americans likely don’t know what a burley is. From what I gather, it is a very popular and effective way of chumming in saltwater fish in New Zealand and Australia especially.
Create your own burley by tossing ground pieces of old fish or red meat. Cornmeal can work well too but will draw in bluegills that will steal your worms.
7. Avoid Vegetation
Catfish don’t discriminate when it comes to hunting grounds. They can hunt quite actively near vegetation. I’m recommending you avoid weeds for now because bluegills love weeds.
Bluegills are the single biggest (and smallest size-wise) threat to your bait. Bluegills will strip the worms off your hook before catfish can find it.
Fish muddy bottoms away from weeds and you can bet the only thing eating your worms will be large cats.
8. Use Long-Shanked or Circle Hooks
Catfish have a tendency to swallow worms completely. This can result in a gut-hooked fish which is difficult to release.
Instead, select a long-shanked hook which is harder to swallow and easier to remove. Better yet, spring a little extra money and buy some nice circle hooks.
Circle hooks are designed to hook in the corners of fish’s mouths nearly every time.
9. Rods with Backbone
This goes without saying when fishing live bait. Make sure your rod has the backbone to handle a 10+ pound catfish. If you hook into a 30-pound blue or flathead catfish, you’ll be wishing you had the rod to handle it.
There are a lot of great fishing rod & reel combos on the market for catfish. I personally recommend this 7’0″ rod and reel combo available on Amazon for most catfish angling you can do. It offers great casting ability, a ton of backbone power, and a more reliable rod for better catfish action.
Related Questions
Are worms a naturally occurring food source for catfish?
I don’t think so. Short of worms being washed into the water by heavy rain or a kid tossing a handful of worms in the water, I can’t imagine a scenario where a worm (a creature that drowns in water), is just crawling along the bottom of a lake.
Will bullheads also bite worms?
Yes, bullheads readily consume worms presented to them. You may be lucky enough to catch catfish and bullheads in the same section of water using this bait.
10 rabbits eat the same amount of pasture as one ewe?
Rabbits can render agricultural land useless as a result of extensive soil erosion that comes through burrowing.
Feral rabbits cost Australian crop producers $ 113 million annually destroyed produce and control costs.
Rabbits, with their rodent-like teeth, look for tiny seedlings of the most nutritious plants and eat them before they can grow .
Do rabbits indirectly contribute to the decline of native species?
Hunt the rabbits
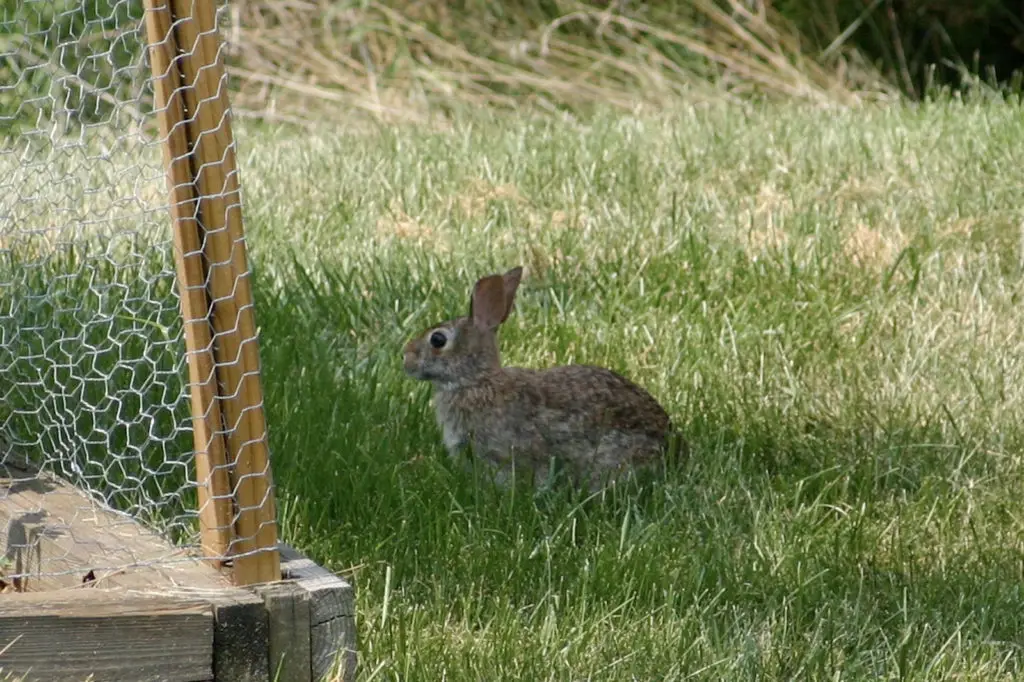
Whichever country you are reading this from, you must have come face to face with the menace of rabbits.
Methods suggested for controlling rabbit populations include poisoning, fencing, tree wrapping, cleaning up, using repellents, keeping dogs, trapping, and shooting.
Here is a brief account of the methods.
Poisoning
The most commonly used poisons for eradicating rabbits include Pindone and 1080.
You will first need to give the rabbits some carrots or other bait before giving them the poison.
Pros
Cons
Cost effective
Foxes subsequently killed by eating poisoned rabbits
1080 is biodegradable and does not leave any toxic residue in soil
May endanger people’s health as well as domestic animals and wildlife if poorly used
Requires controlled substance license to use
Dry weather required
Fumigants
This is used where rabbit burrows are deep and elaborate.
Rabbits inside the burrows inhale the toxic fumes and die.
Pros
Cons
Easy method as it does not require any technical skills
Useful if rabbits live underground in inaccessible spots
Labor-intensive
Can only be used on a small scale
Cannot be used where rabbits live above the ground
Rabbit proof fencing
These can be used around farms to keep rabbits from accessing.
Pros
Cons
Eco-friendly
Stops re-invasion
Possibility of rabbits digging burrows deep below the fence
Rabbit population continues to grow as none is killed
Requires frequent checking
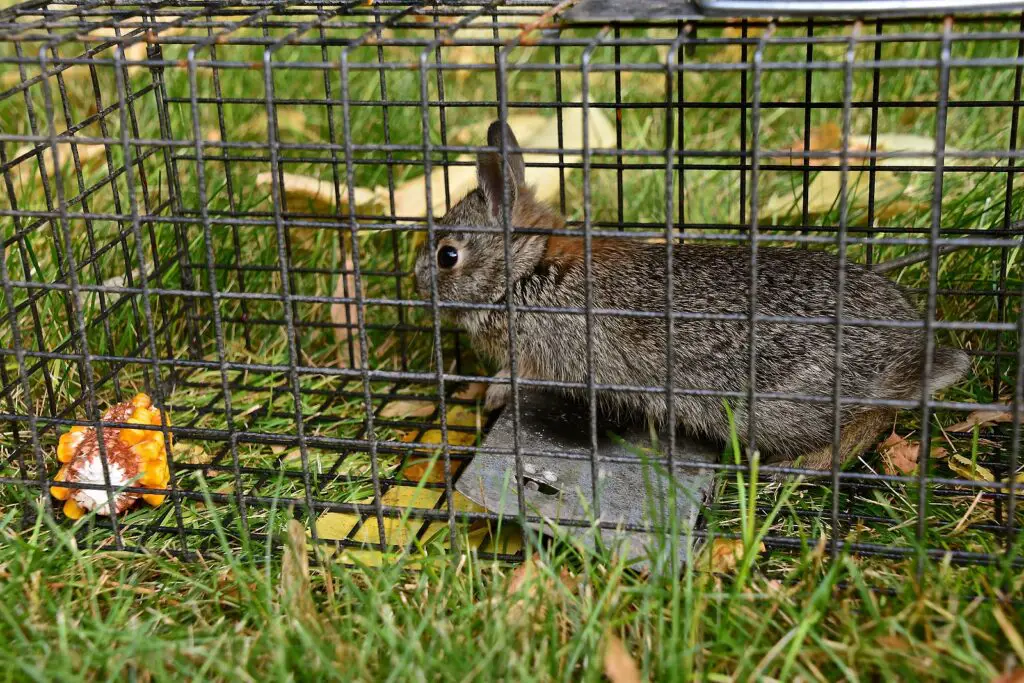
Trapping
Rabbit traps are set at strategic locations in the bushes.
A rabbit is caught in a live trap, lured in by a the corn cob.
Pros
Cons
Effective when combined with other methods
Very labour intensive
Need a permit for many types of traps
Only useful if the rabbit population is low
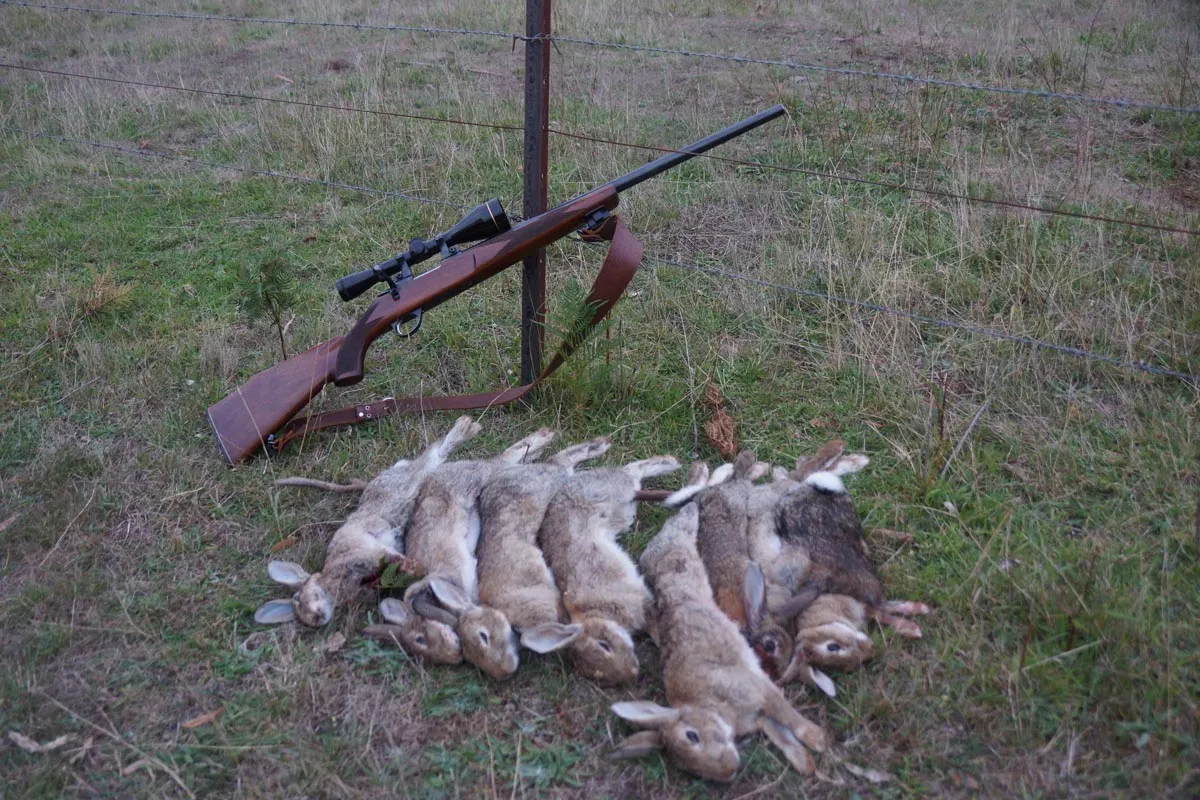
Shooting
This is an easy and effective way to eradicate rabbits.
The method has grown in popularity owing to the fun derived while controlling pests.
As much as rabbits are animals, they don’t deserve the suffering they undergo through poisoning, fumigation, and trapping.
With shooting, you literally take their lives in the spur of a moment, in the twinkling of an eye, without passing them through extended periods of suffering.
For this reason, thousands have taken to shooting as their most preferred rabbit control method.
Specifically, consider using air rifles for shooting the rabbits.
I doubt you will need the power of a firearm.
Air rifles are quite numerous in brand, design, and performance.
To save you the pain of going through the hundreds of rabbit air rifles available, I have compiled a detailed review of the top 10 you need to consider.
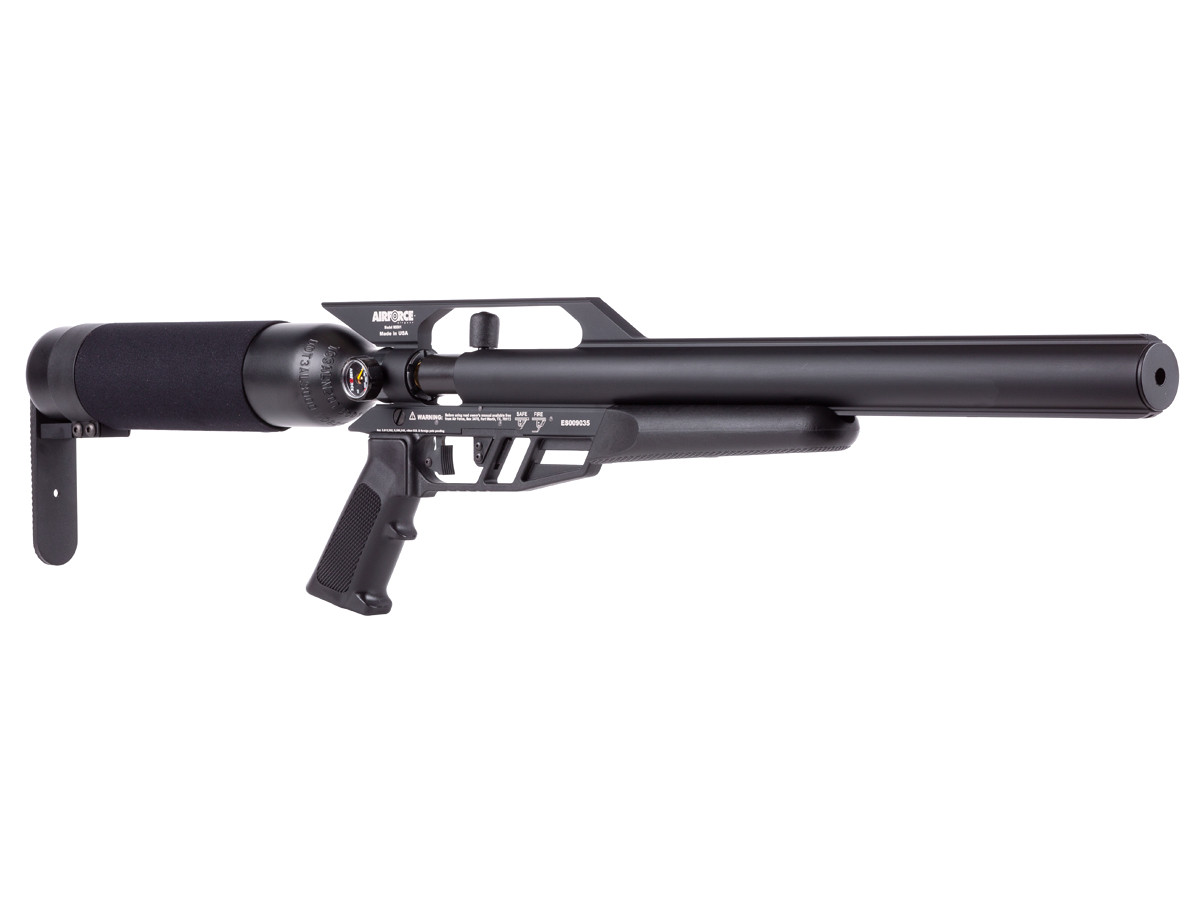
Here is a quick list of the best air rifles for rabbits.
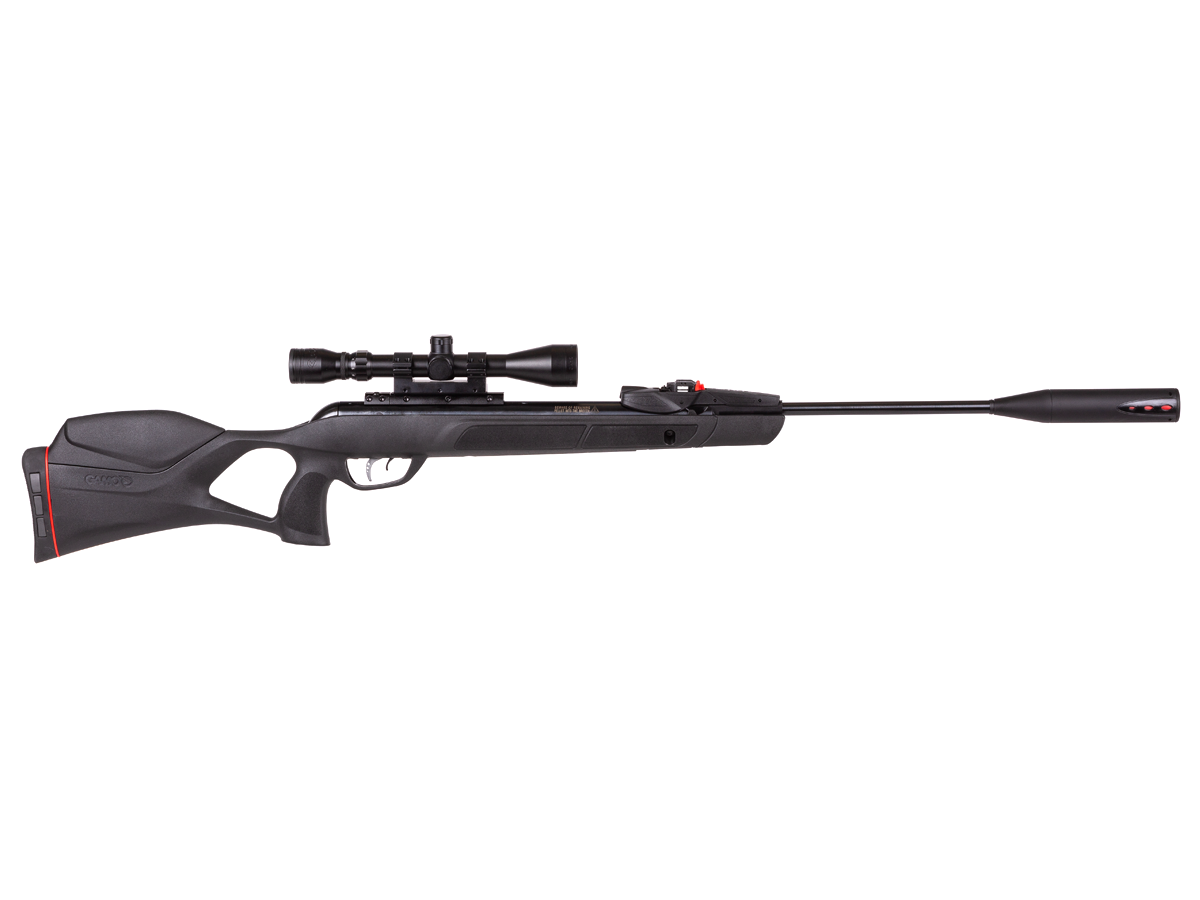
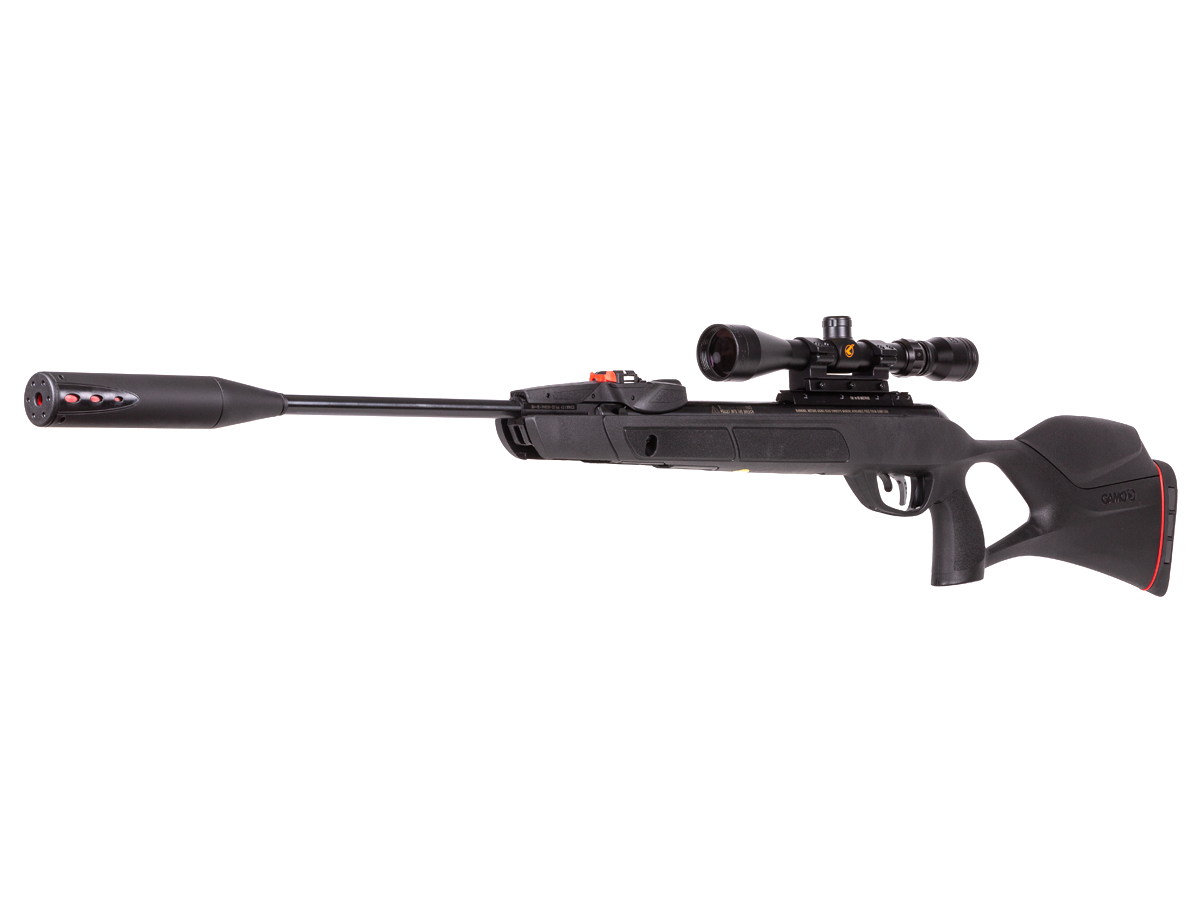
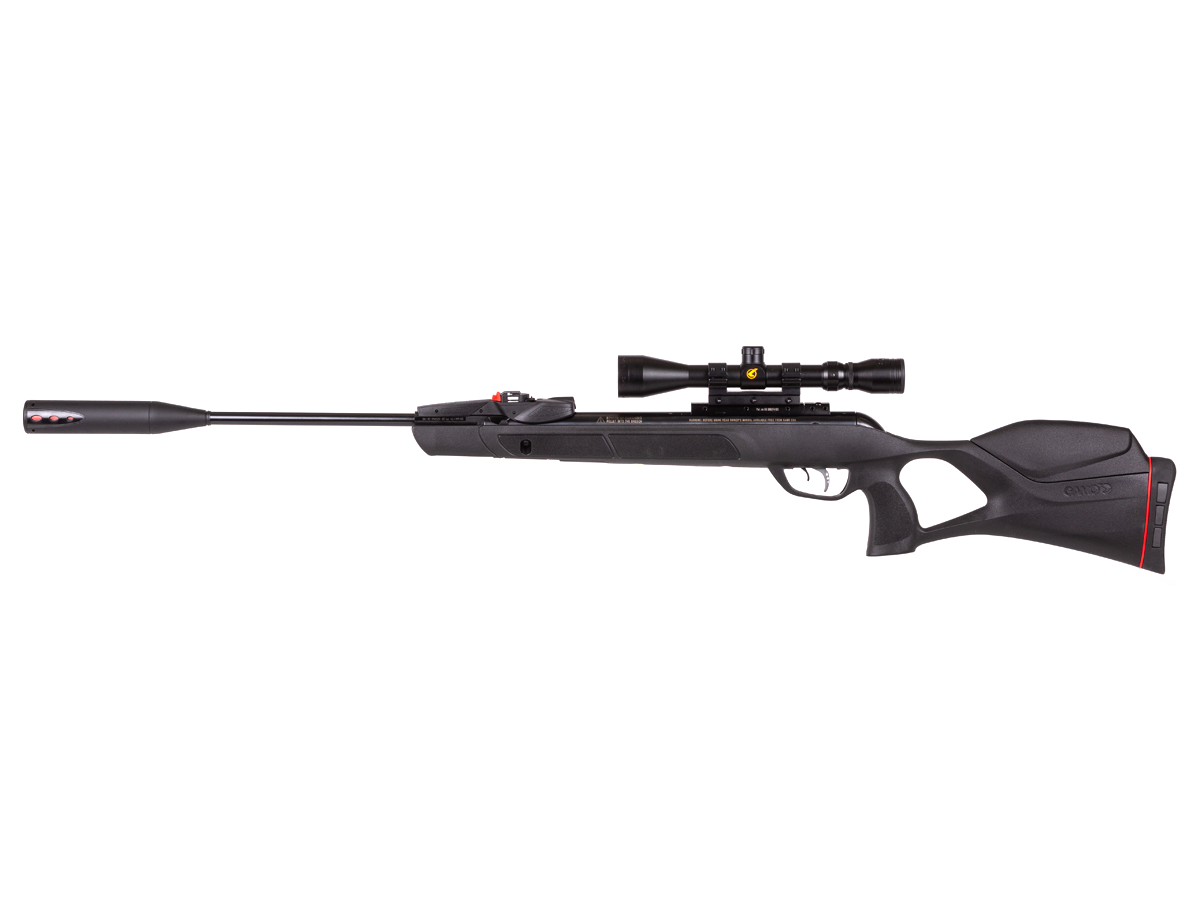
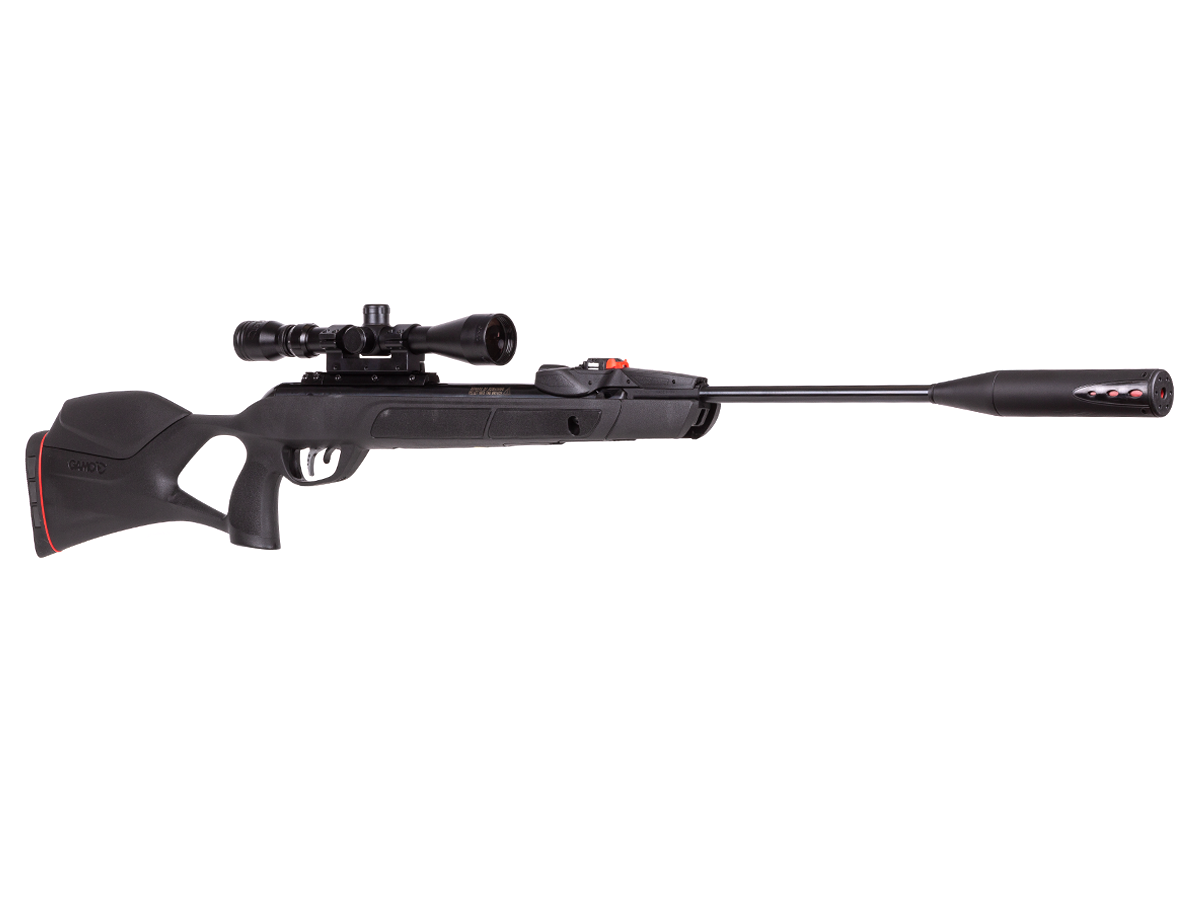
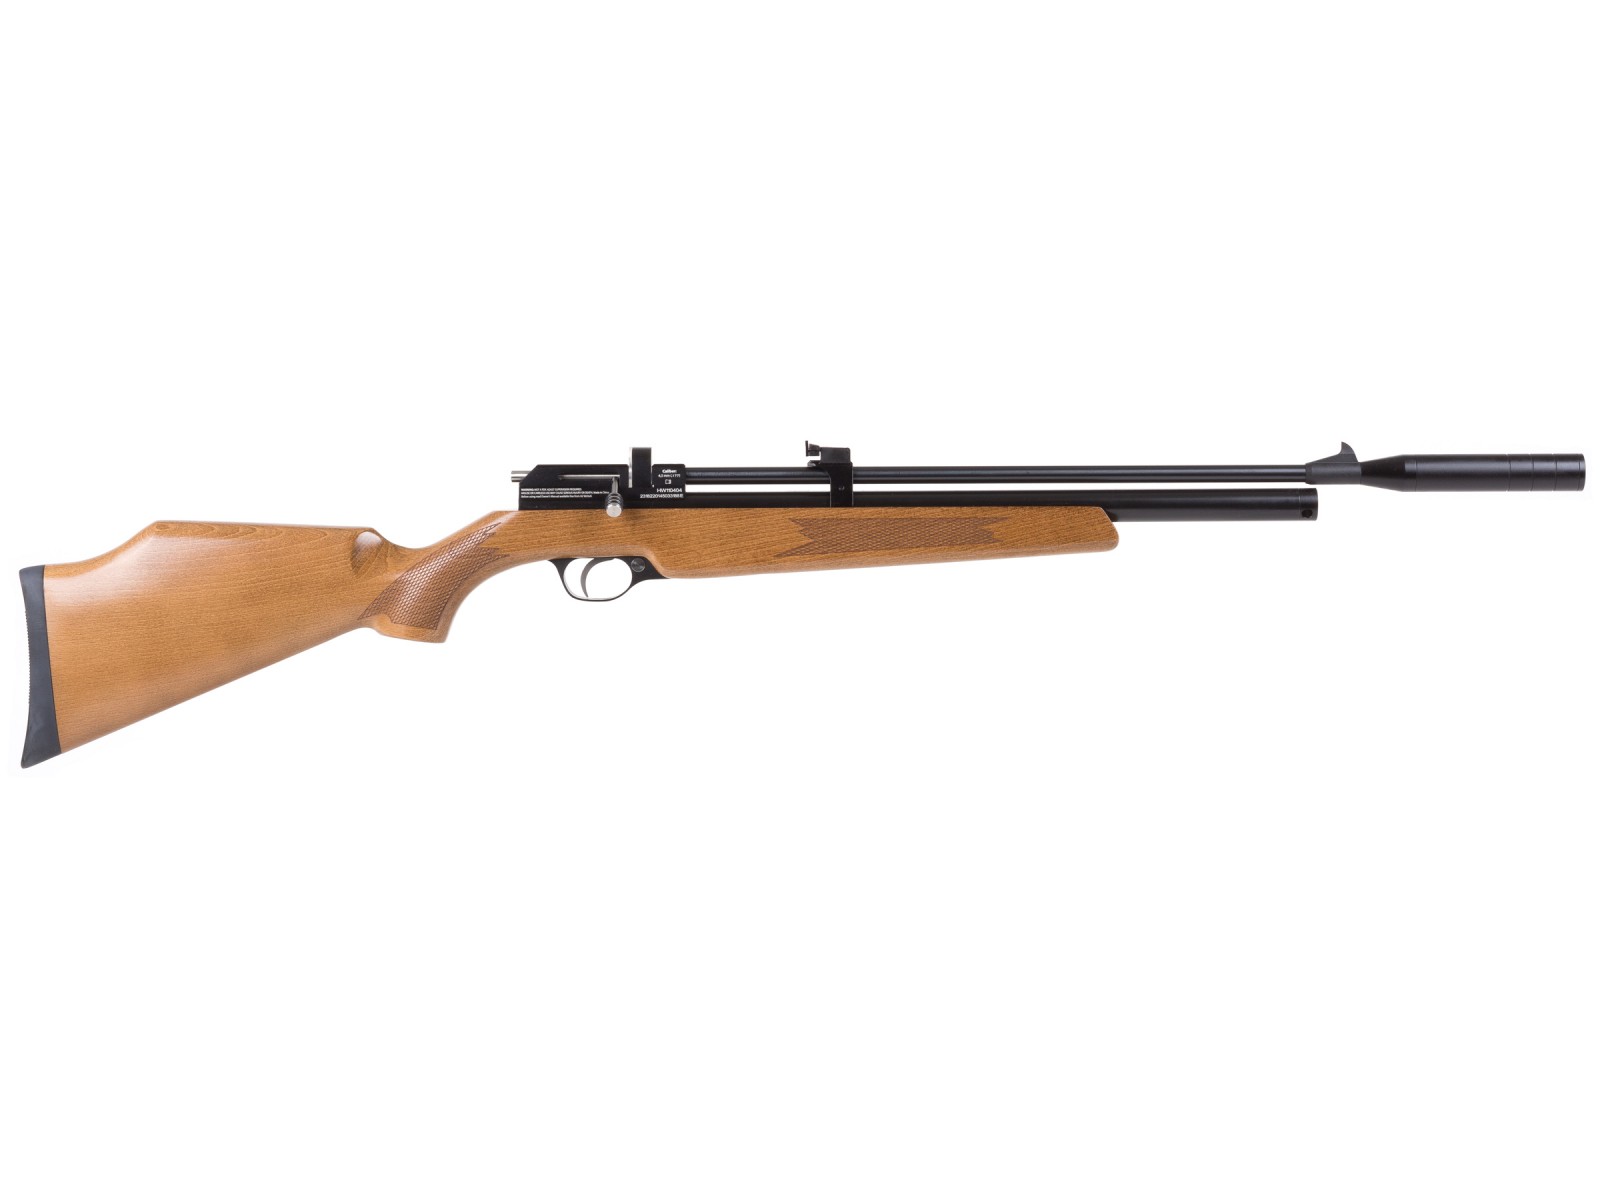
The Gamo Swarm Magnum 10X GEN3i Multi-Shot Air Rifle is an ideal choice for shooters looking for an affordable break barrel airgun to take care of squirrels.
With velocities of up to 1650 FPS (with alloy) in .177 caliber, this rifle offers superior accuracy and power. Furthermore, the 10X GEN 3i Quick-Shot inertia-fed magazine makes reloading a breeze – allowing users to make 10 shots without needing to fumble with pellets.
Thanks to its IGT Mach 1 inert gas piston powerplant, you get smoother cocking than with traditional spring piston air rifles, while an adjustable two-stage Custom Action trigger offers independent adjustments of the first and second stages for travel.
Features
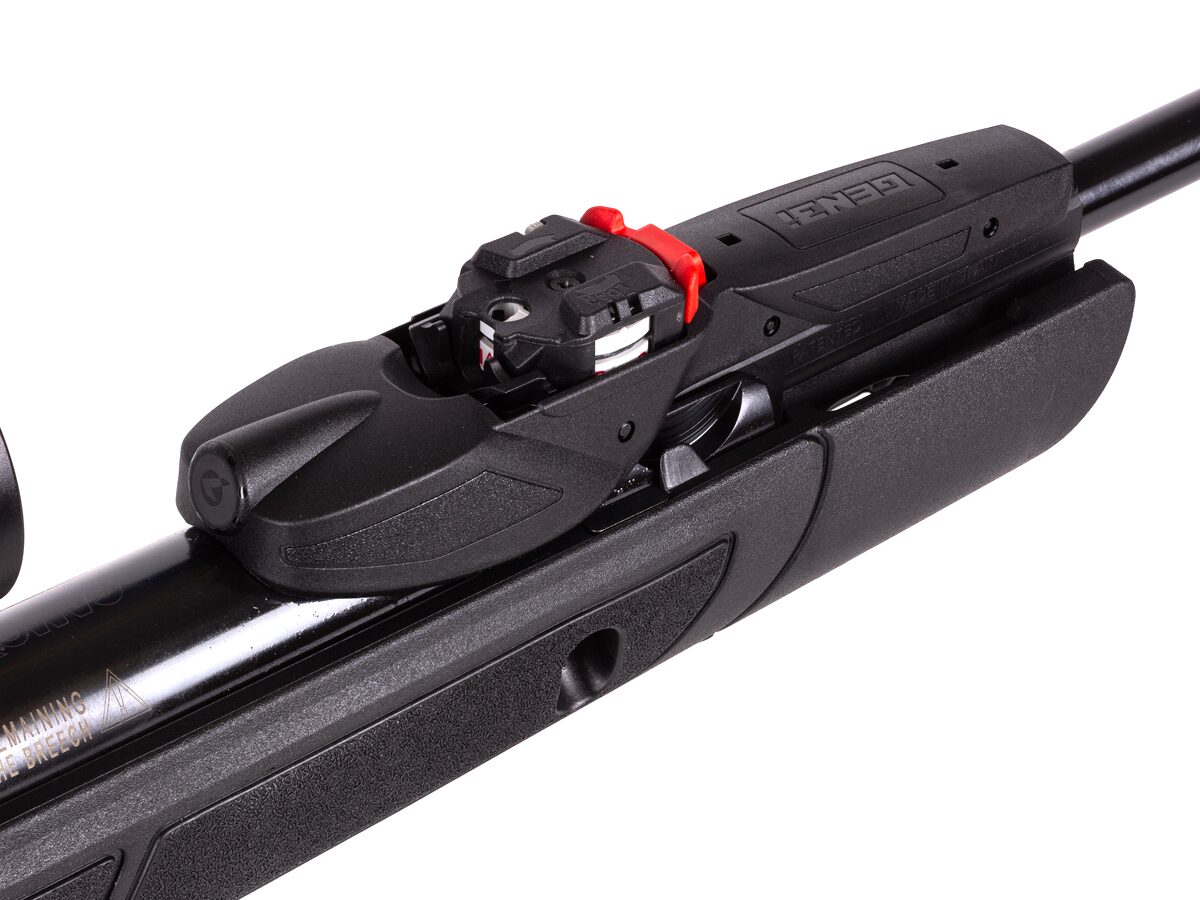
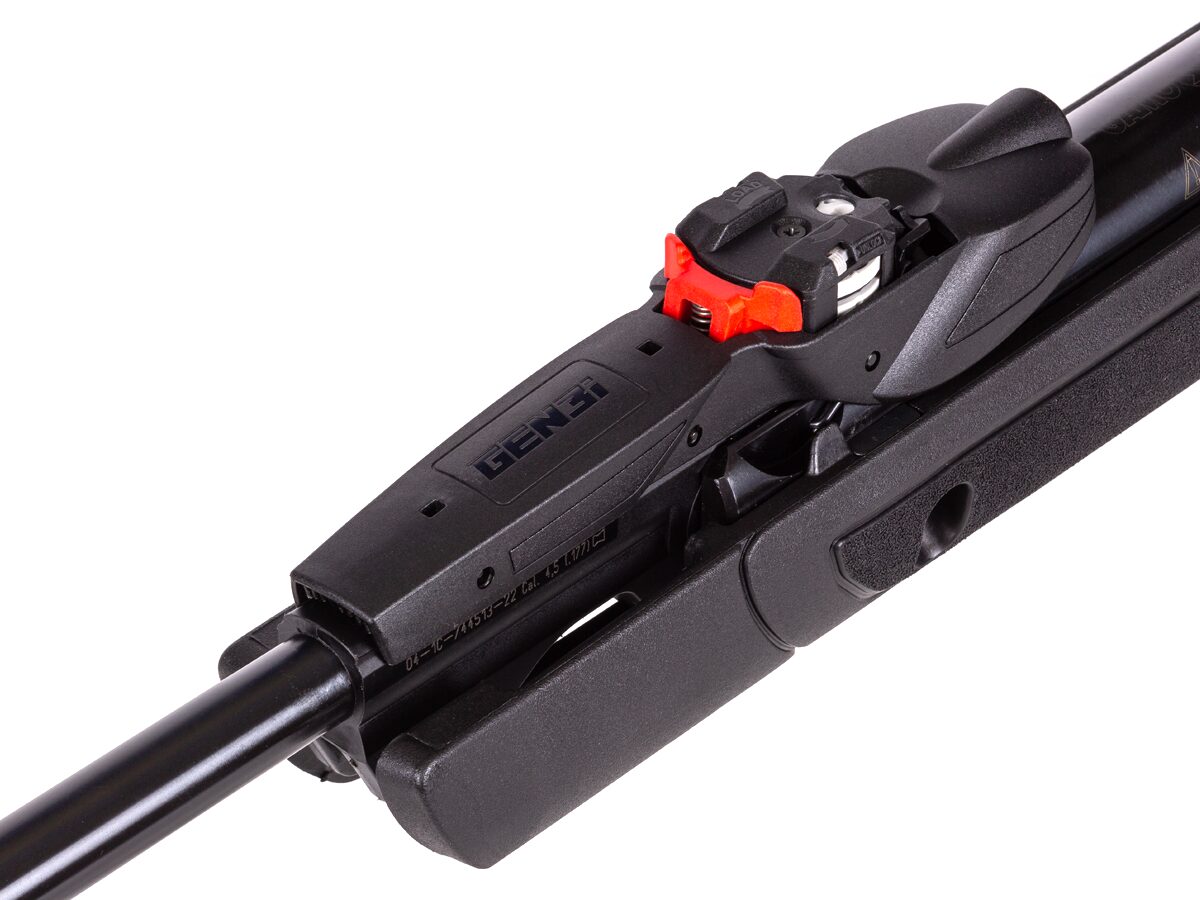
10X GEN3i Quick-Shot inertia-fed magazine
Break barrel
Max. velocity (.177): 1650 FPS with alloy
Max velocity (.22) 1300 fps with alloy, 975 fps with lead
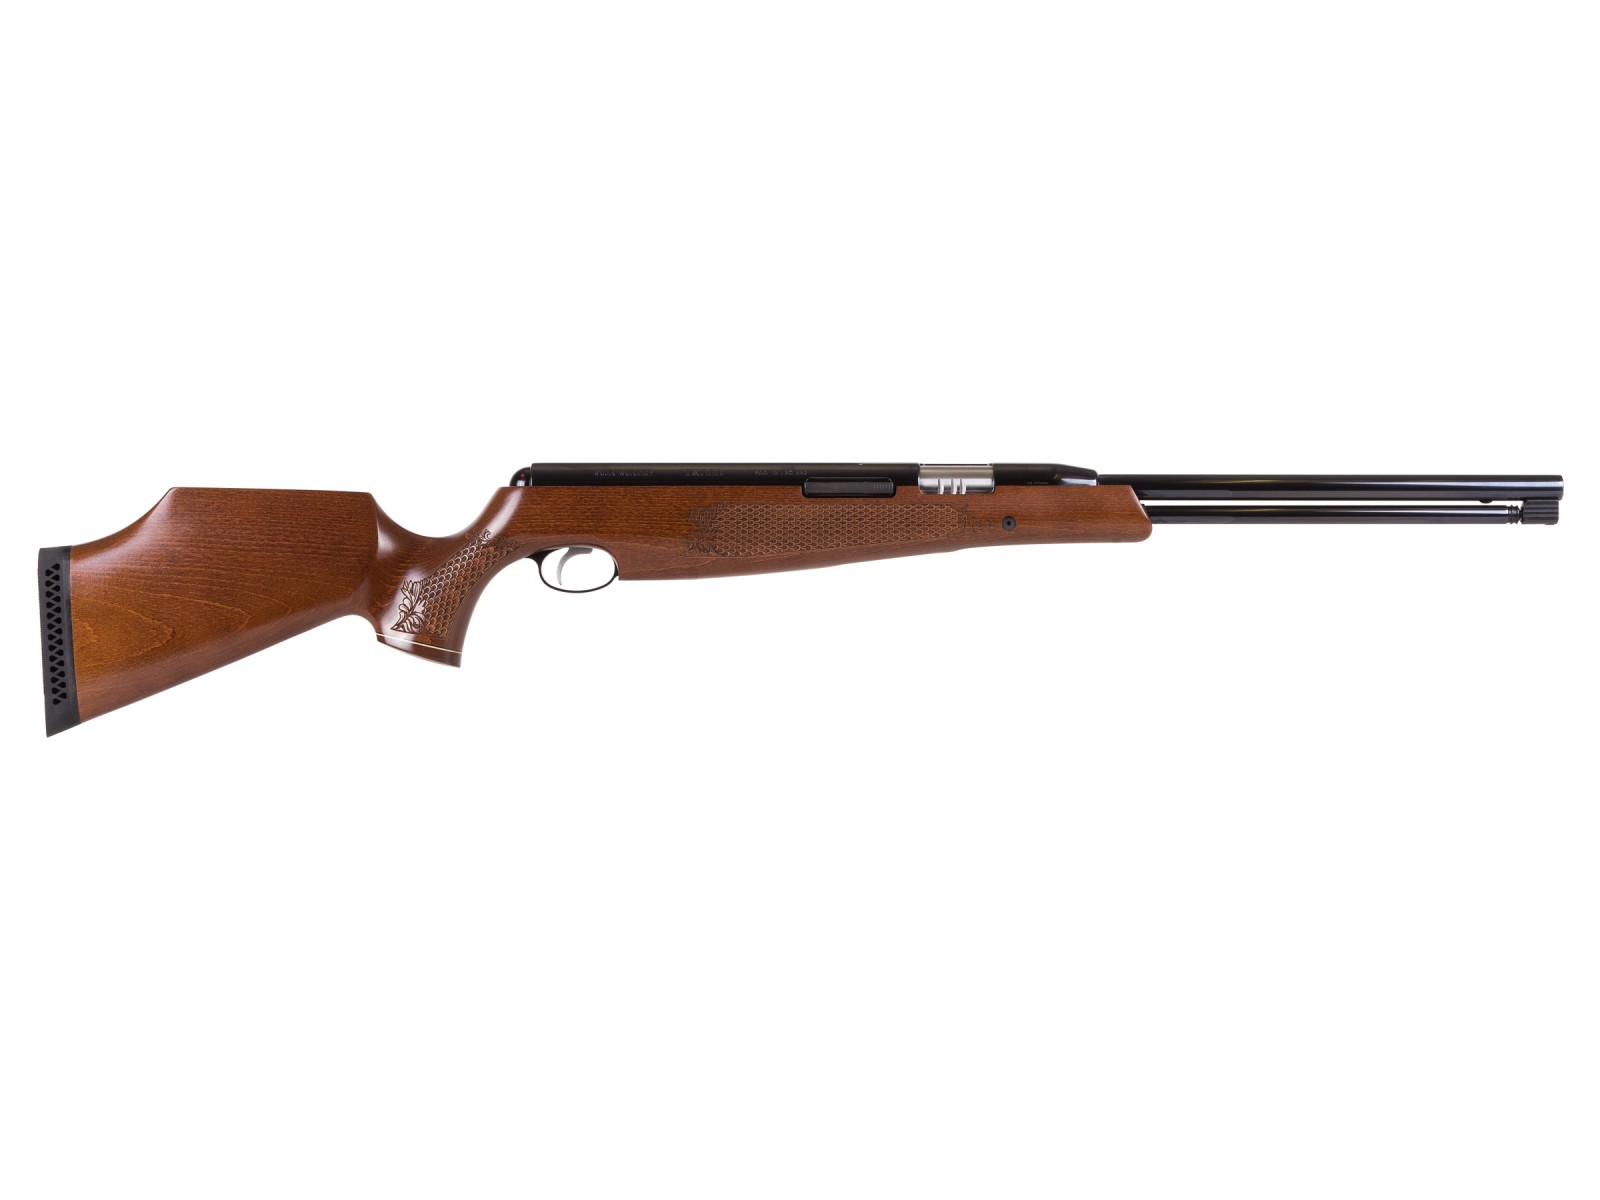
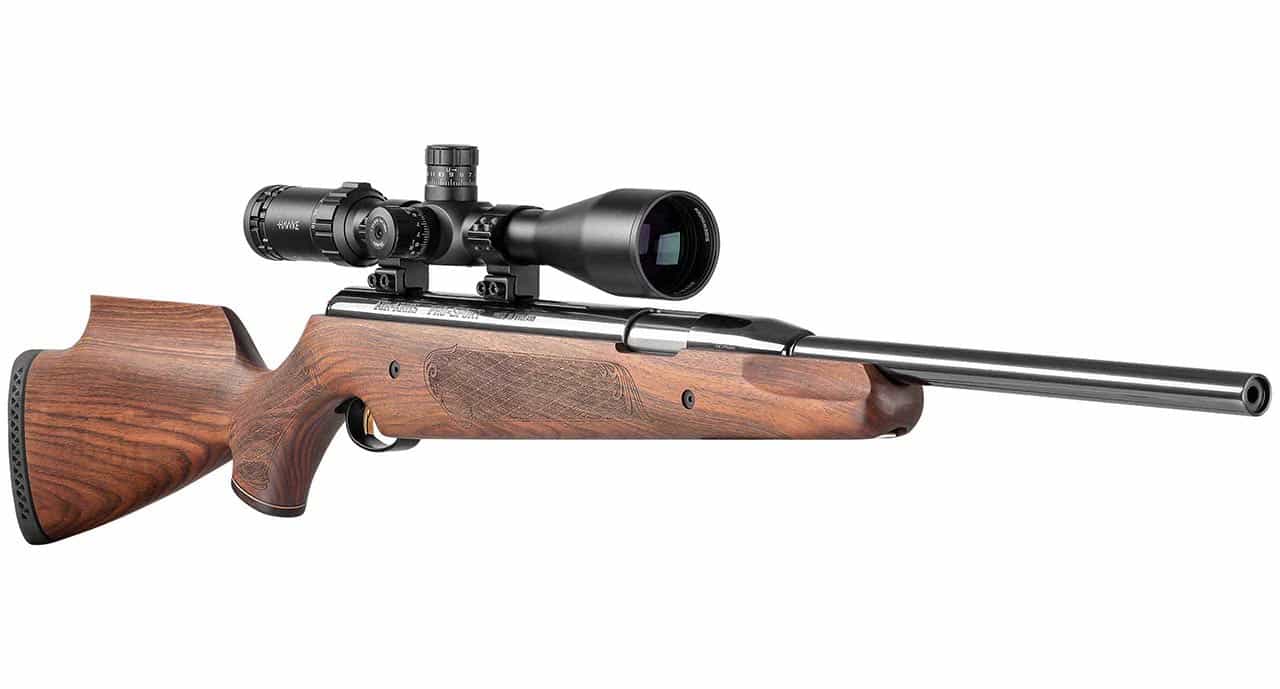
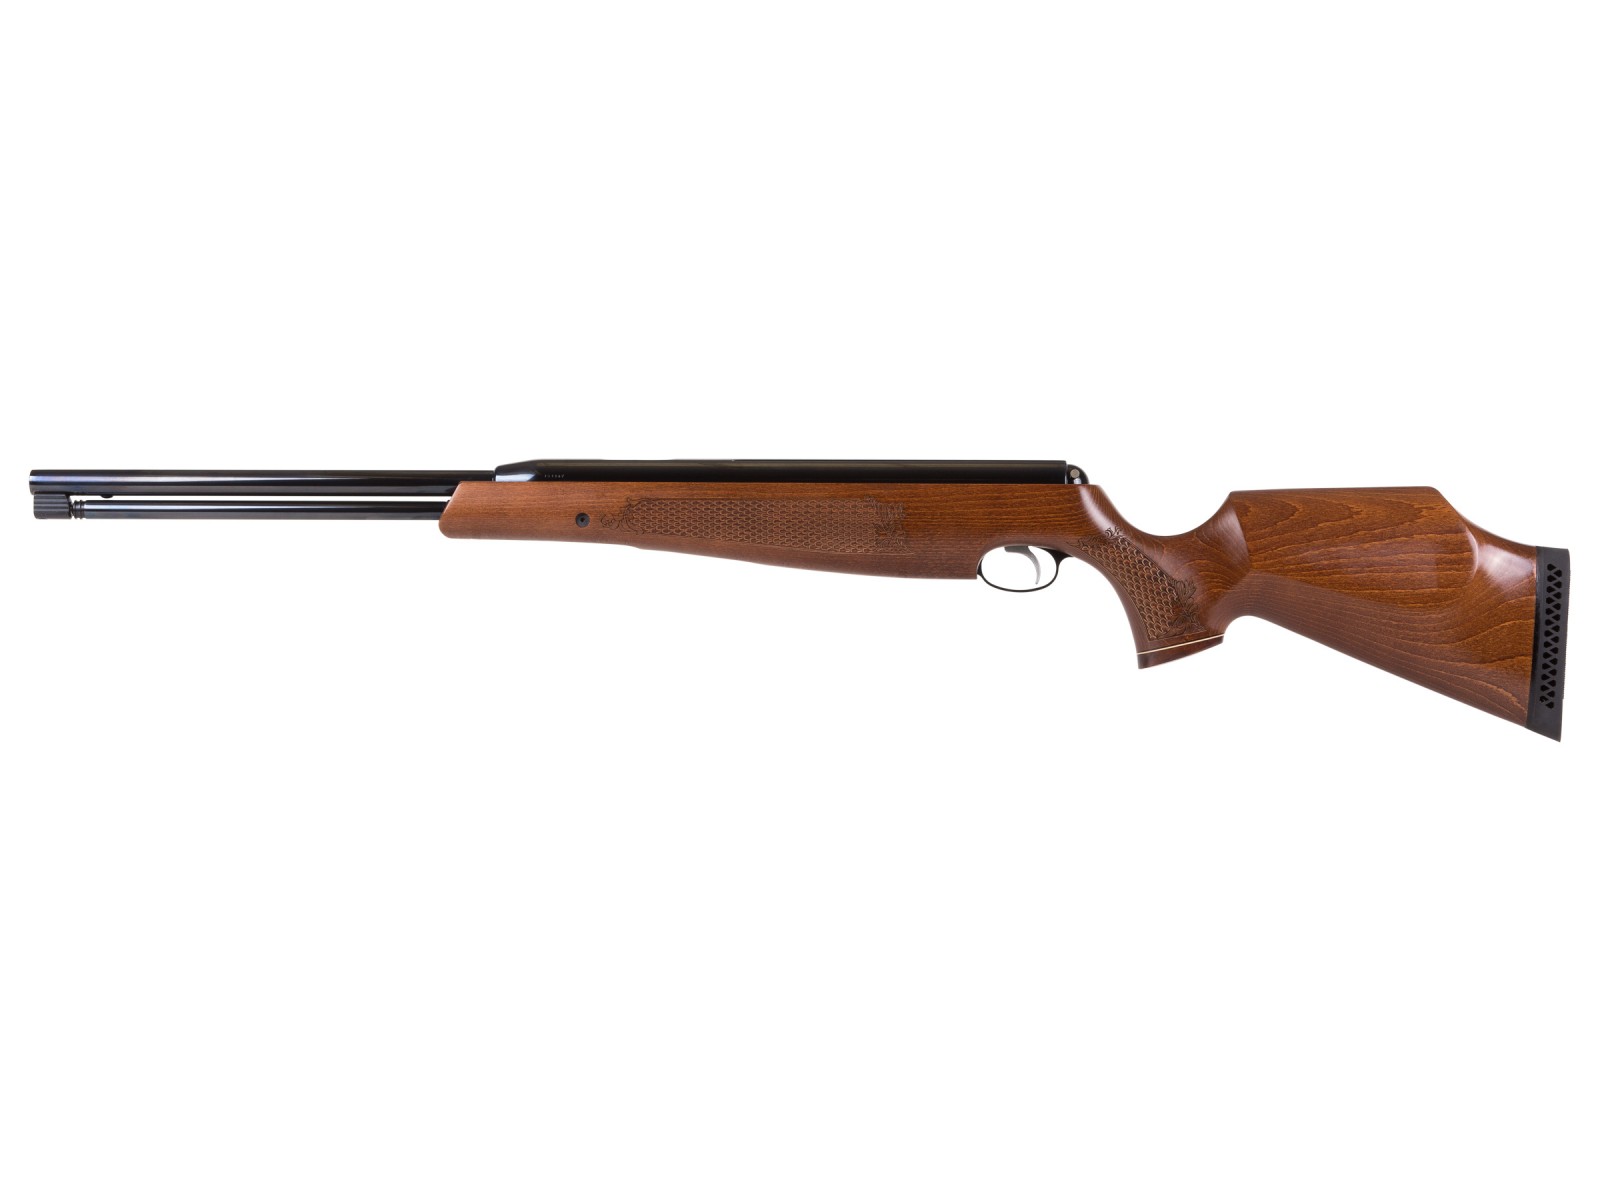
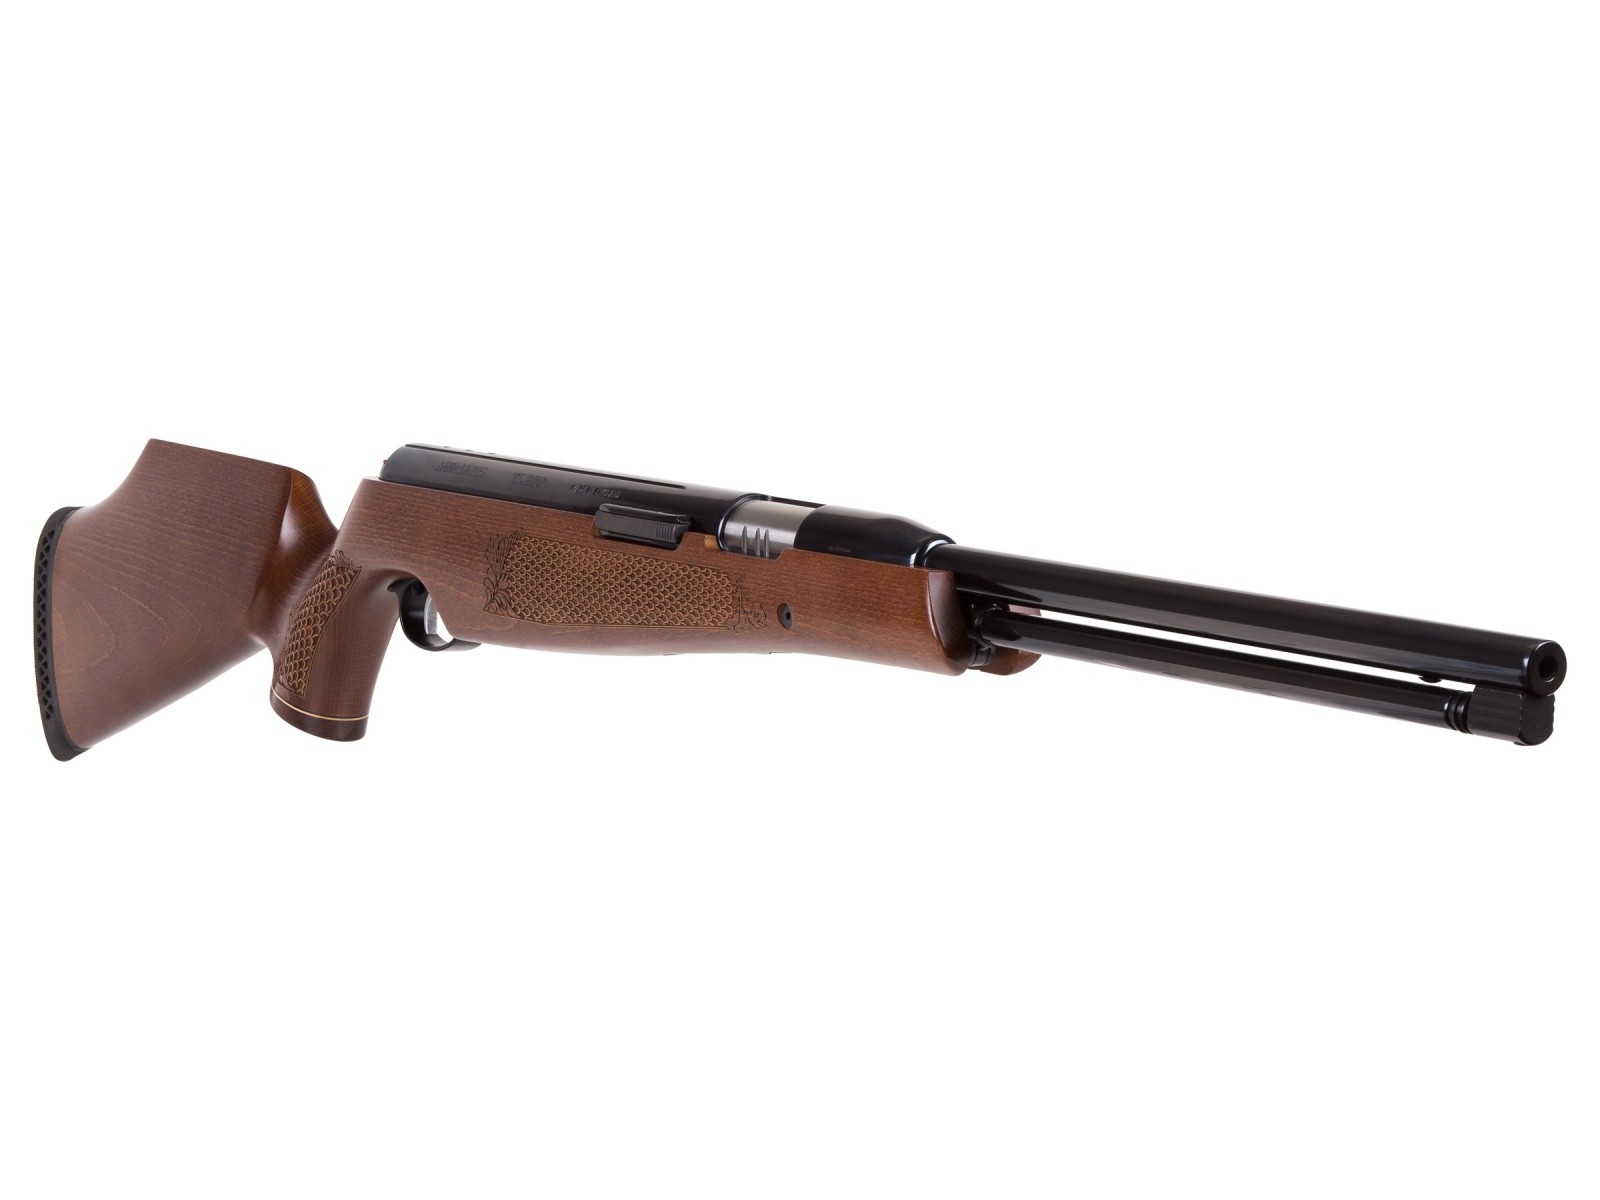
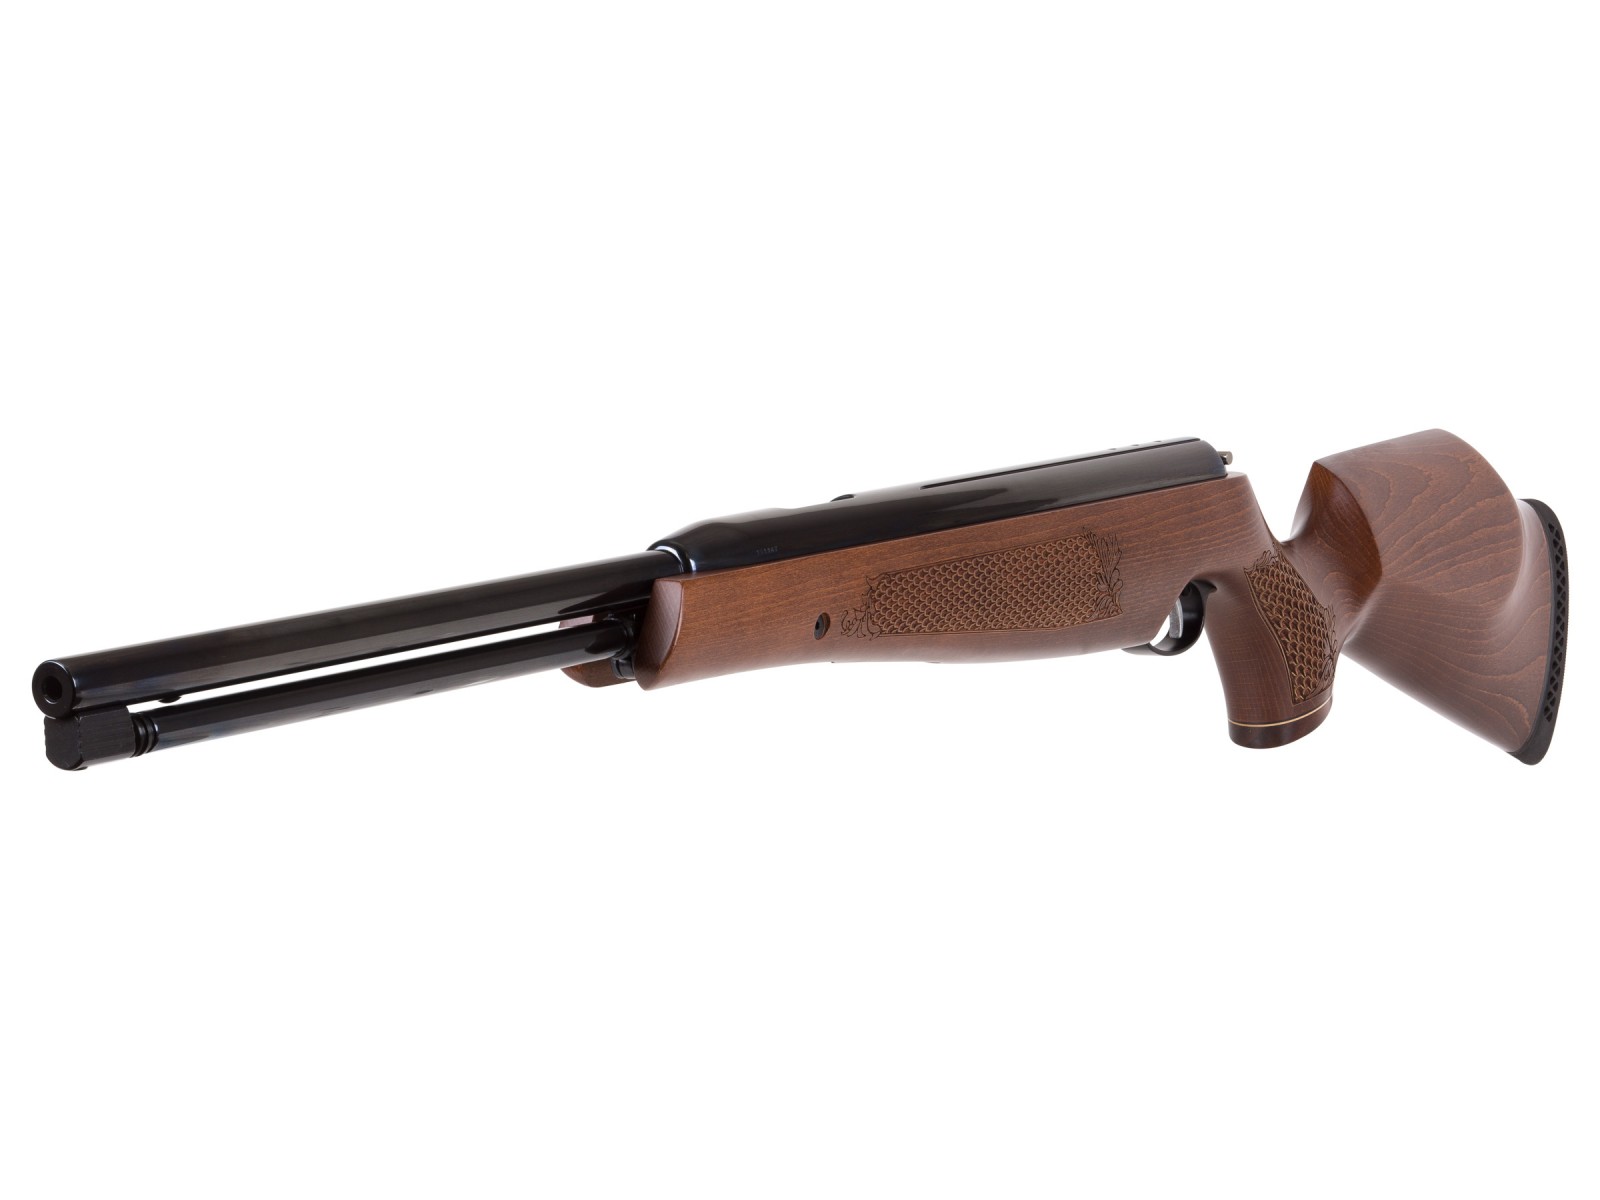
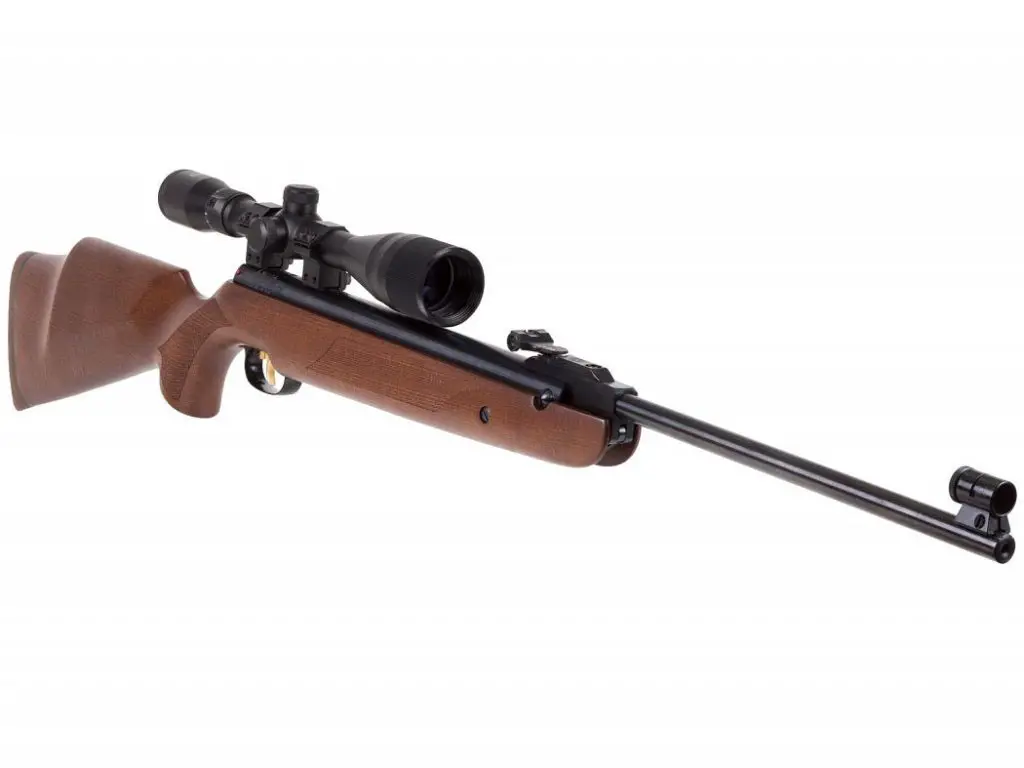
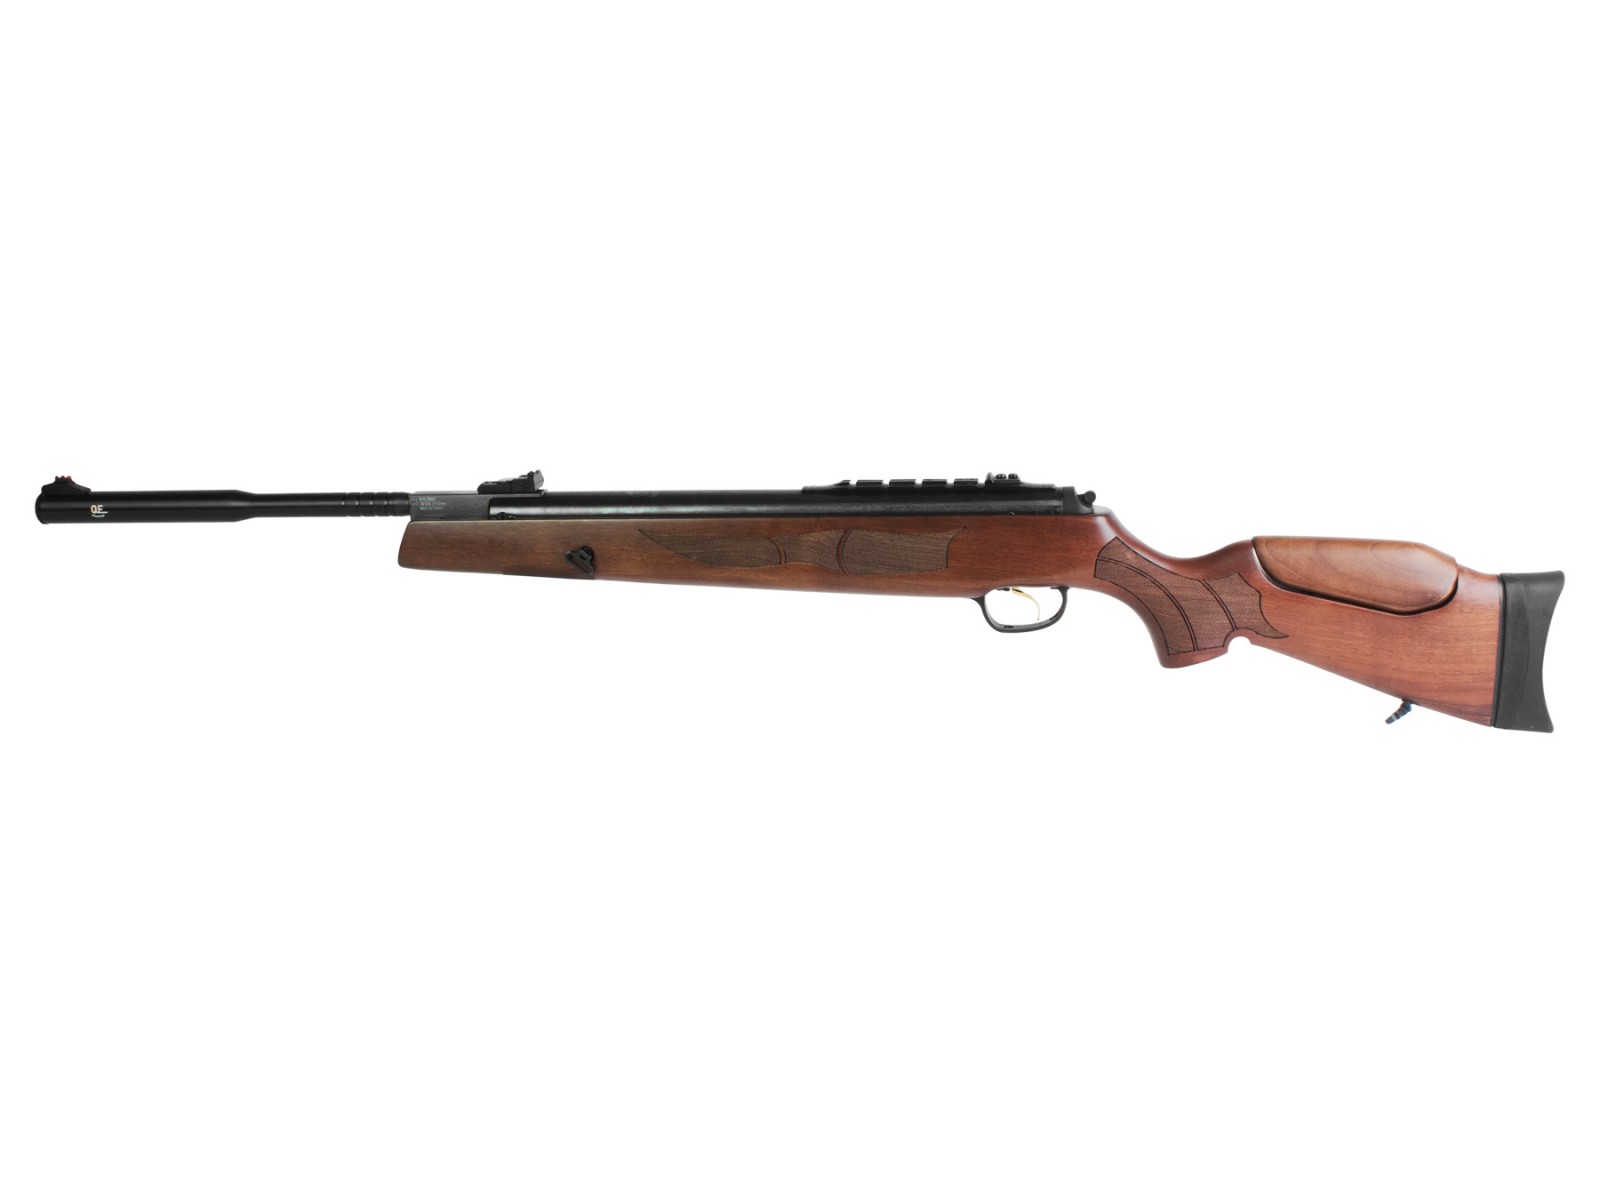
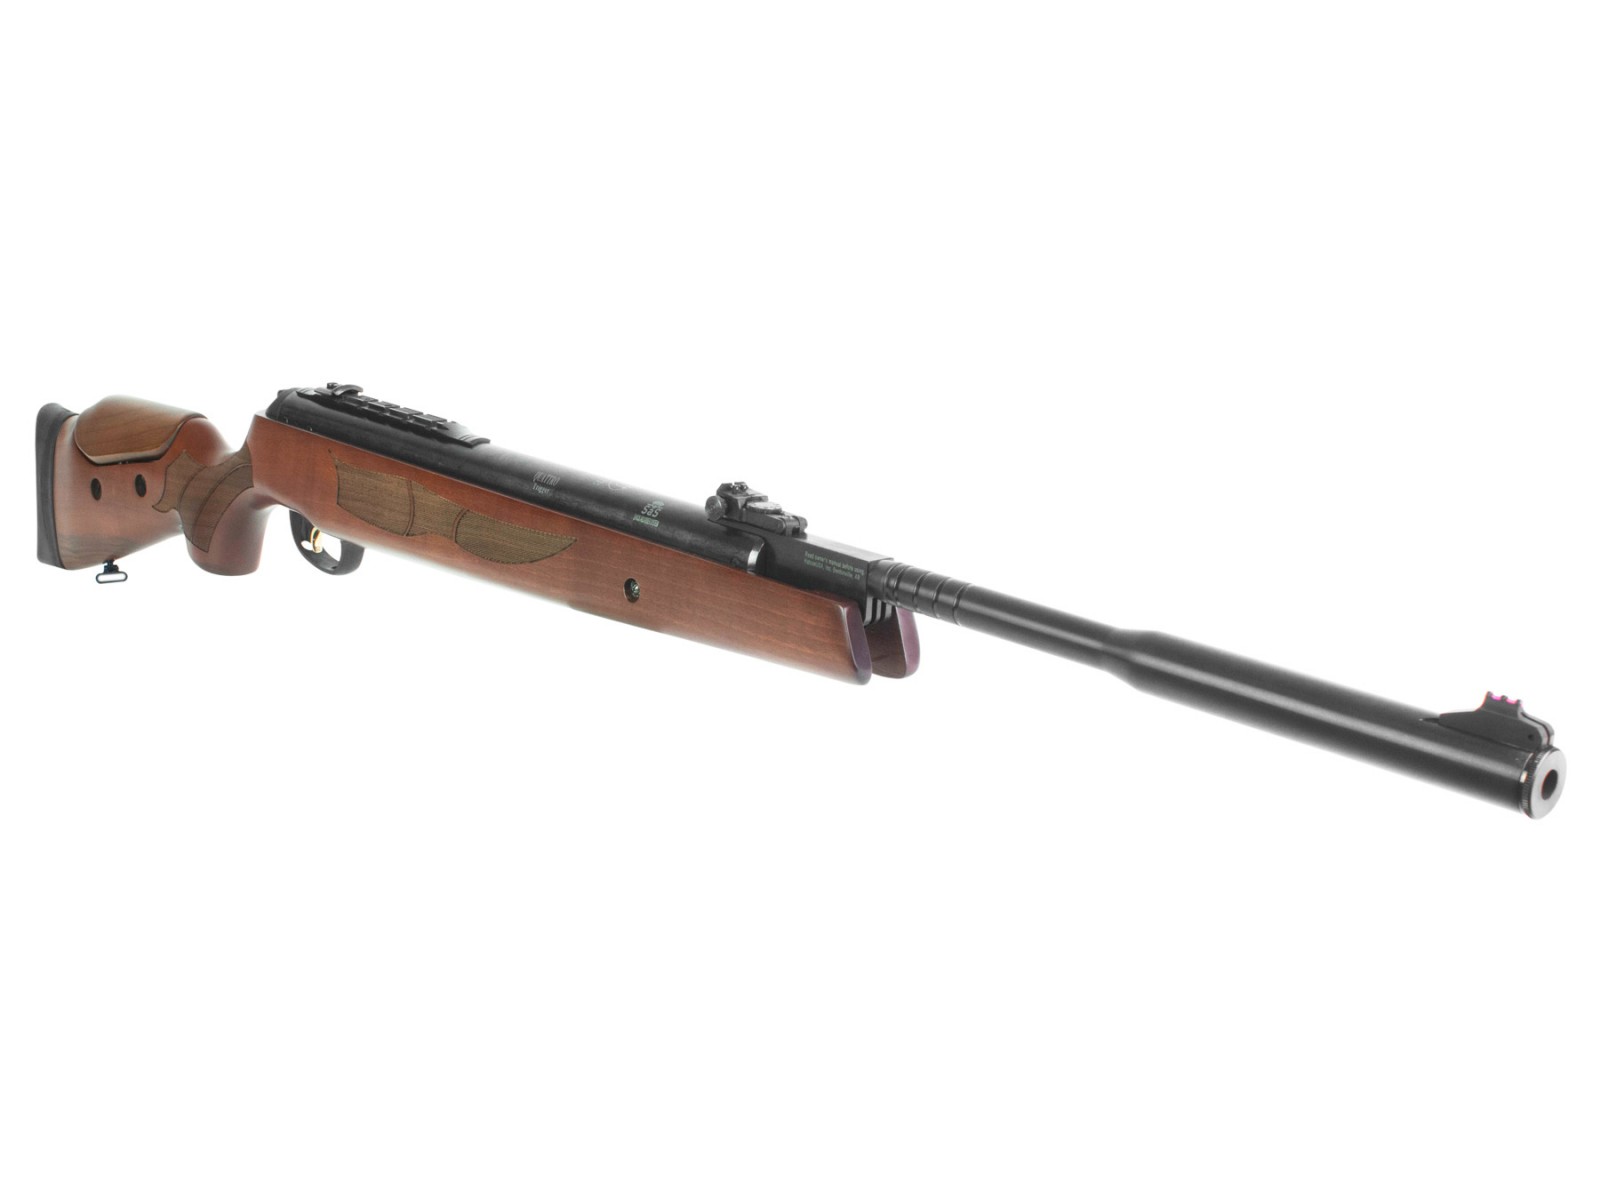
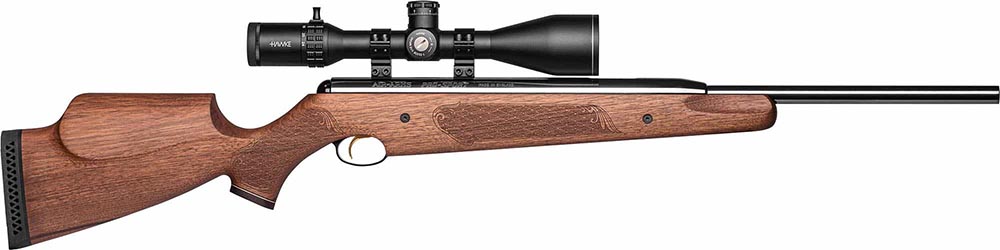
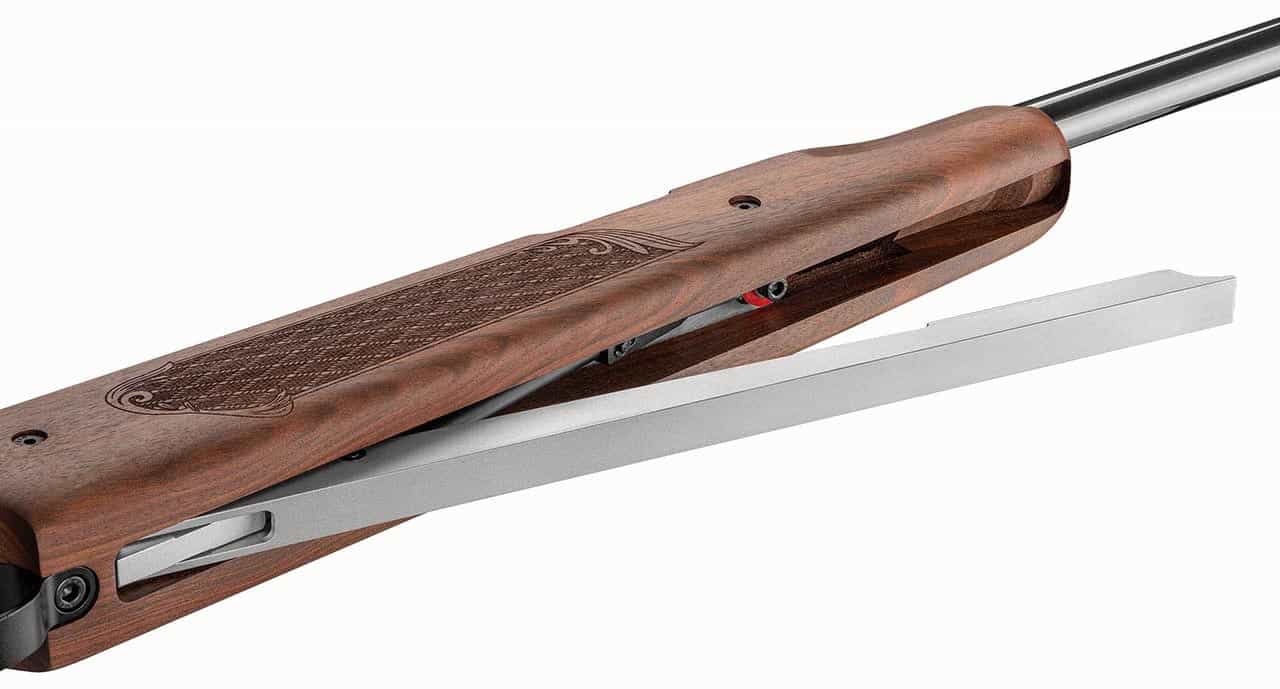
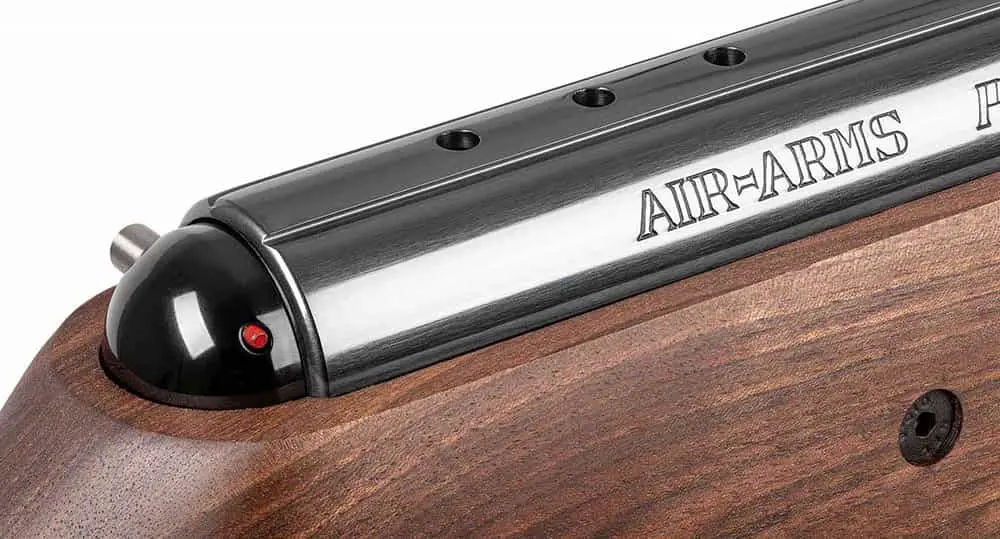
Air Arms Pro-Sport – most accurate air rifle for rabbit hunting
Not to mix me up, I reckon that this is specially designed for field target shooters.
But it doesn’t really matter if you kill the boredom between shooting competitions to harvest a few rabbits for dinner.
You will especially love its excellent accuracy and ease of shooting. Regarding power, the .177 gives you about 13 FPE when tested with the 8.44-grain JSB Exact Diabolo pellet.
At 9 lbs weight, it seems rather heavy, given that there are air rifles as light as 5 lbs.
Coupled with this is the very beautiful hardwood beech stock.
Accuracy
Calibers
Pellets
Distances
Groups
.22
H&N Terminator 16.36 gr
40 yards
one hole
.22
Air Arms Falcon 13.43 gr
35 yards
dime size
.22
H&N Field Target Trophy 14.66 gr
35 yards
dime size
.177
JSB Match Diabolo Exact 8.4 Gr
25 yards
0.25"
.177
JSB Diabolo Heavy
40 yards
one hole
.22
JSB Diabolo Heavy 18.13 gr
35 yards
1/2"
.22
Crosman Premier Hollow Point 14,3 gr
30 yards
one hole
.22
Air Arms Diabolo Hunter 16 gr
23 yards
0.75"
.22
JSB Hades Diabolo 15.89 gr
30 yards
dime size
.22
JSB Hades Diabolo 15.89 gr
25 yards
0.33"
.22
JSB Exact Jumbo 13.43 gr
25 yards
0.32"
.22
Predator GTO Lead Free Pellets 11.75 gr
25 yards
0.21"
.22
JSB Hades Diabolo 15.89 gr
50 yards
1.29"
.22
JSB Jumbo Heavy 18.13 Gr
35 yards
3/8"
.22
H&N Baracuda Match 21.3 gr
35 yards
3/8"
Chrony tests
Calibers
Pellets
FPS
FPE
.22
H&N Field Target Trophy 14.66 gr
720
16.88
.22
Crosman Premier Hollow Point 14.3 Gr
728
16.83
.177
JSB Match Diabolo Exact 8.4 Gr
755.9
10.66
.177
JSB Diabolo Heavy 10.34 gr
770
13.62
.22
JSB Diabolo Heavy 18.13 gr
635
16.24
.22
H&N Field Target Trophy 14.66 gr
717
16.74
.22
Crosman Premier Hollow Point 14,3 gr
704
15.74
.22
Crosman Premier Hollow Point 14,3 gr
710
16.01
.22
JSB Hades Diabolo 15.89 gr
620
13.57
.22
JSB Exact Jumbo 13.43 gr
675
13.59
.22
Predator GTO Lead Free Pellets 11.75 gr
805
16.91
.22
JSB Hades Diabolo 15.89 gr
665
15.61
.22
JSB Jumbo Heavy 18.13 Gr
583
13.69
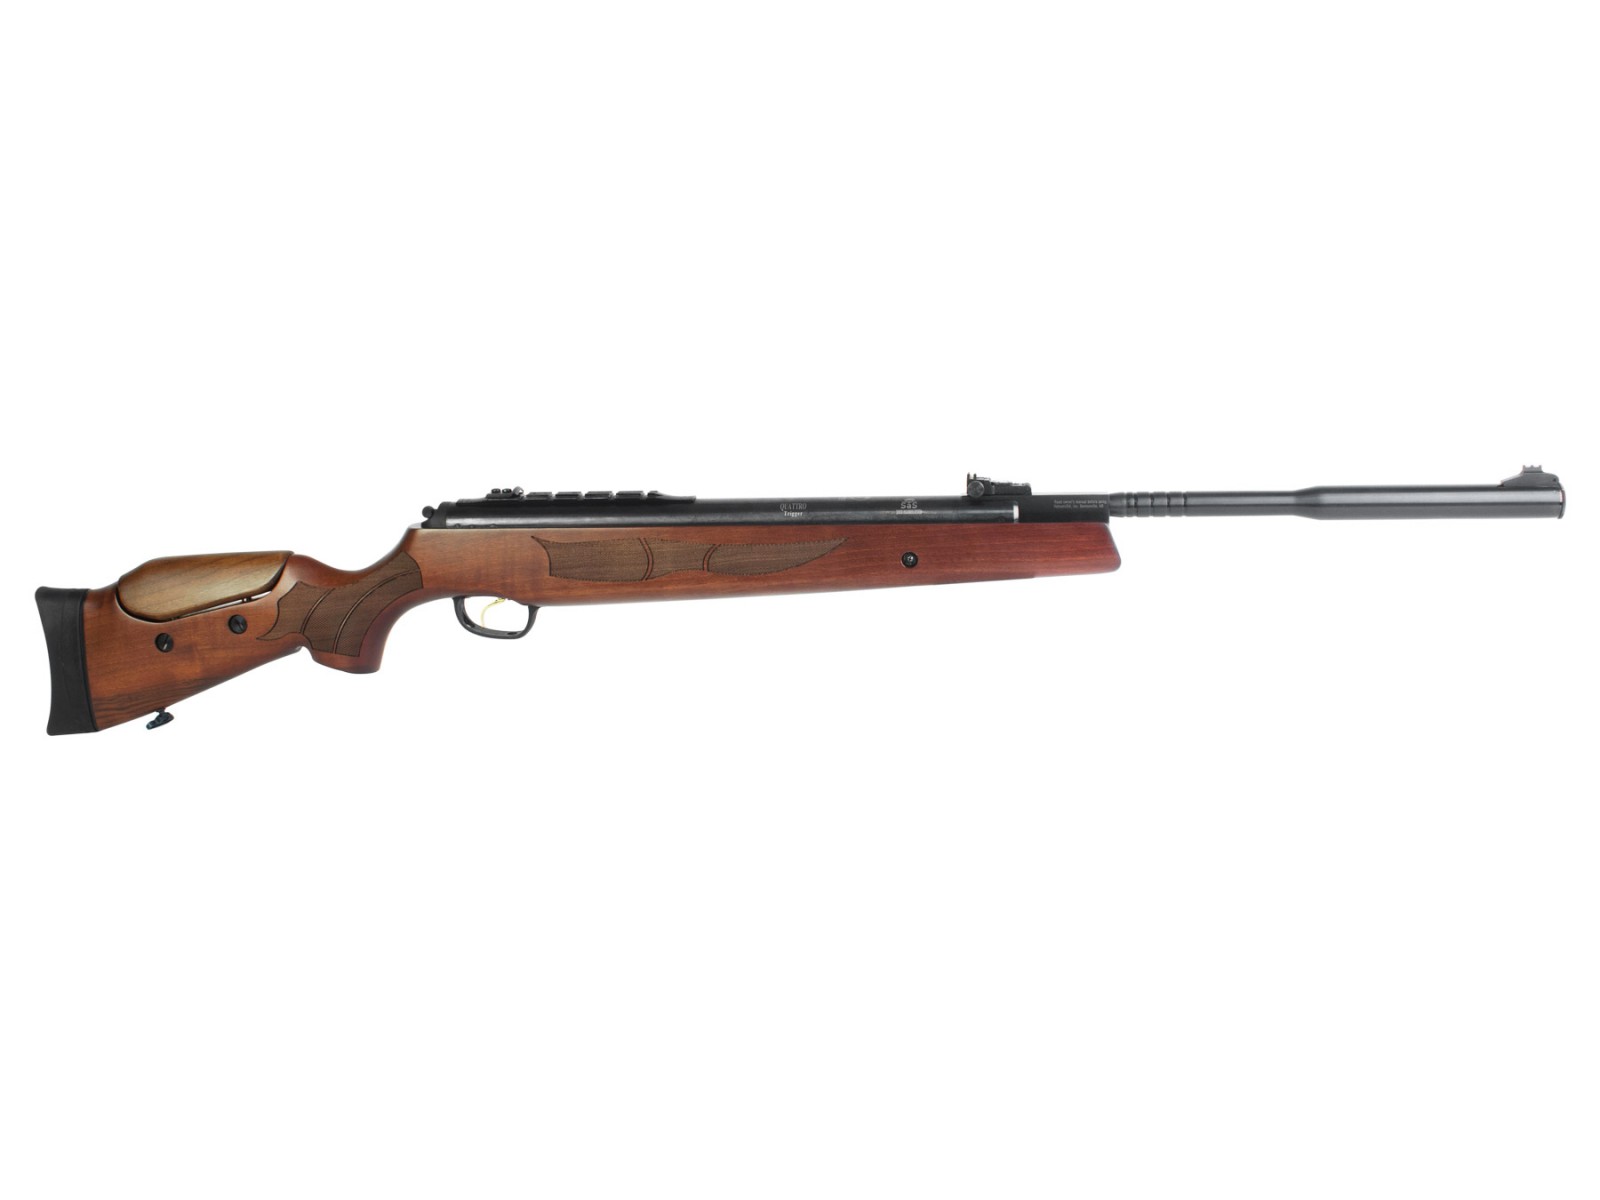
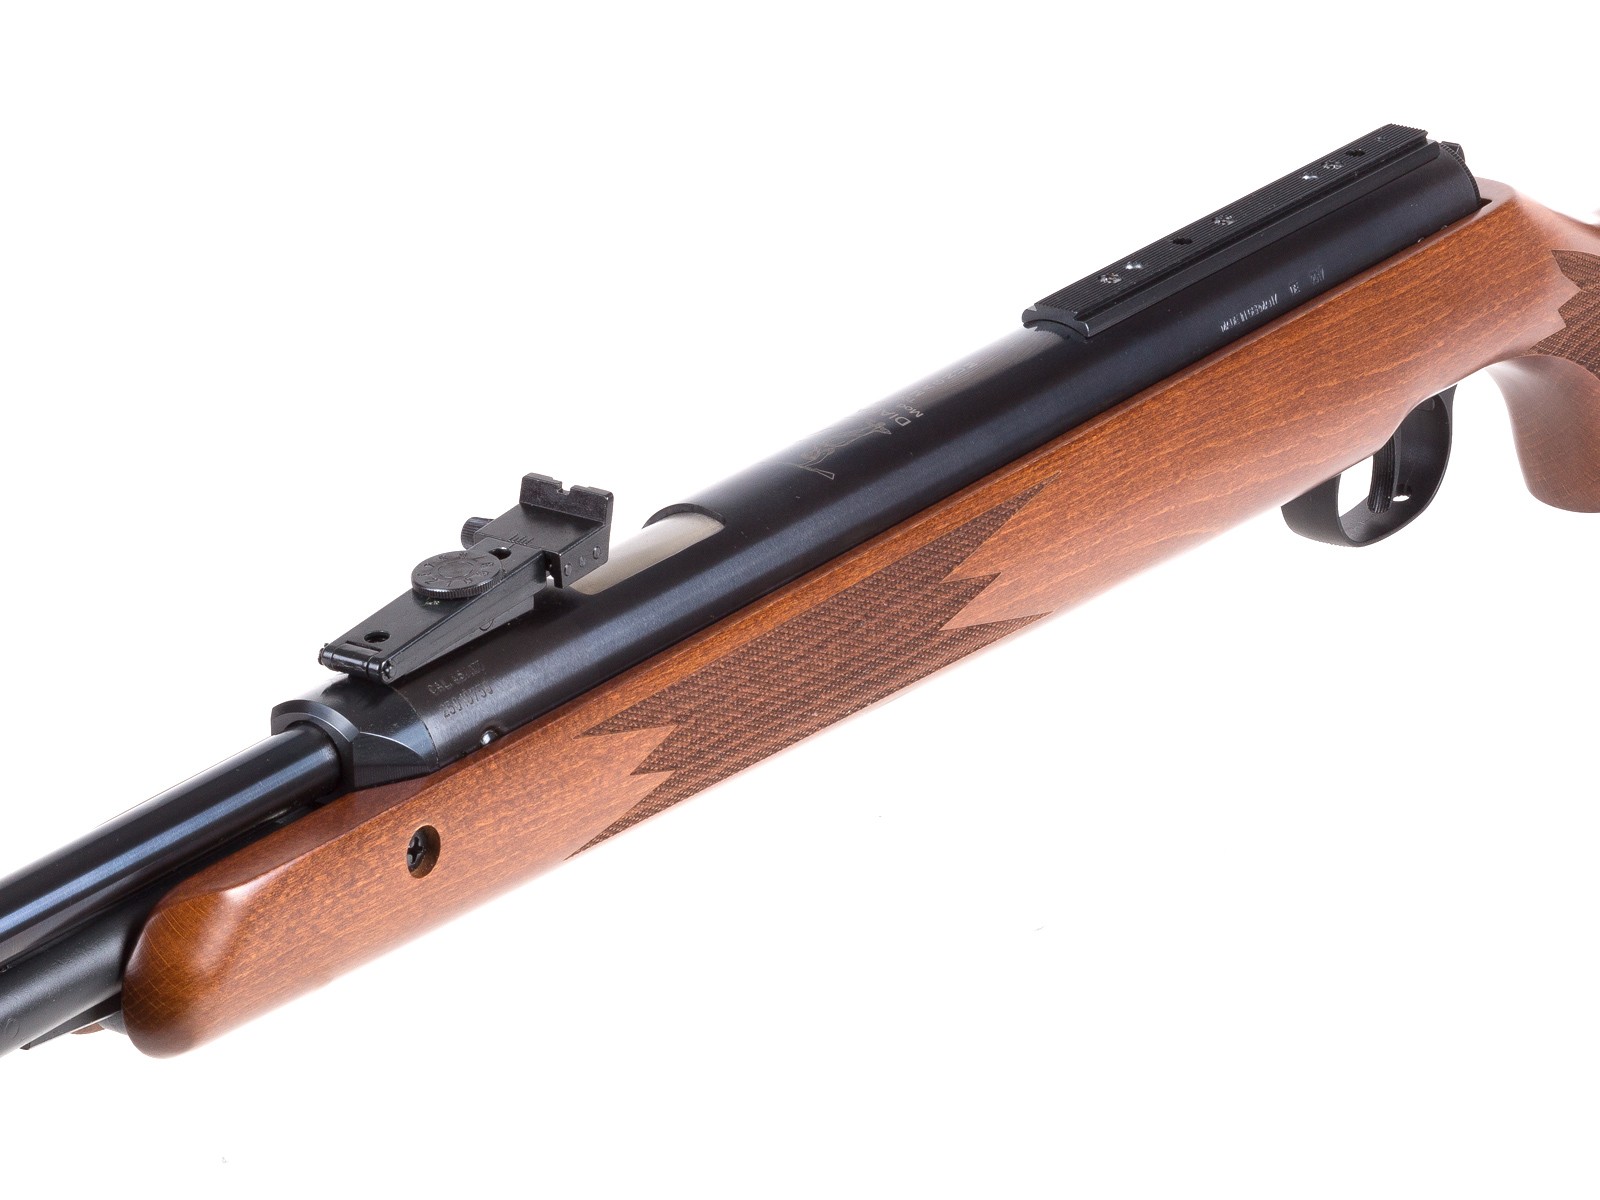
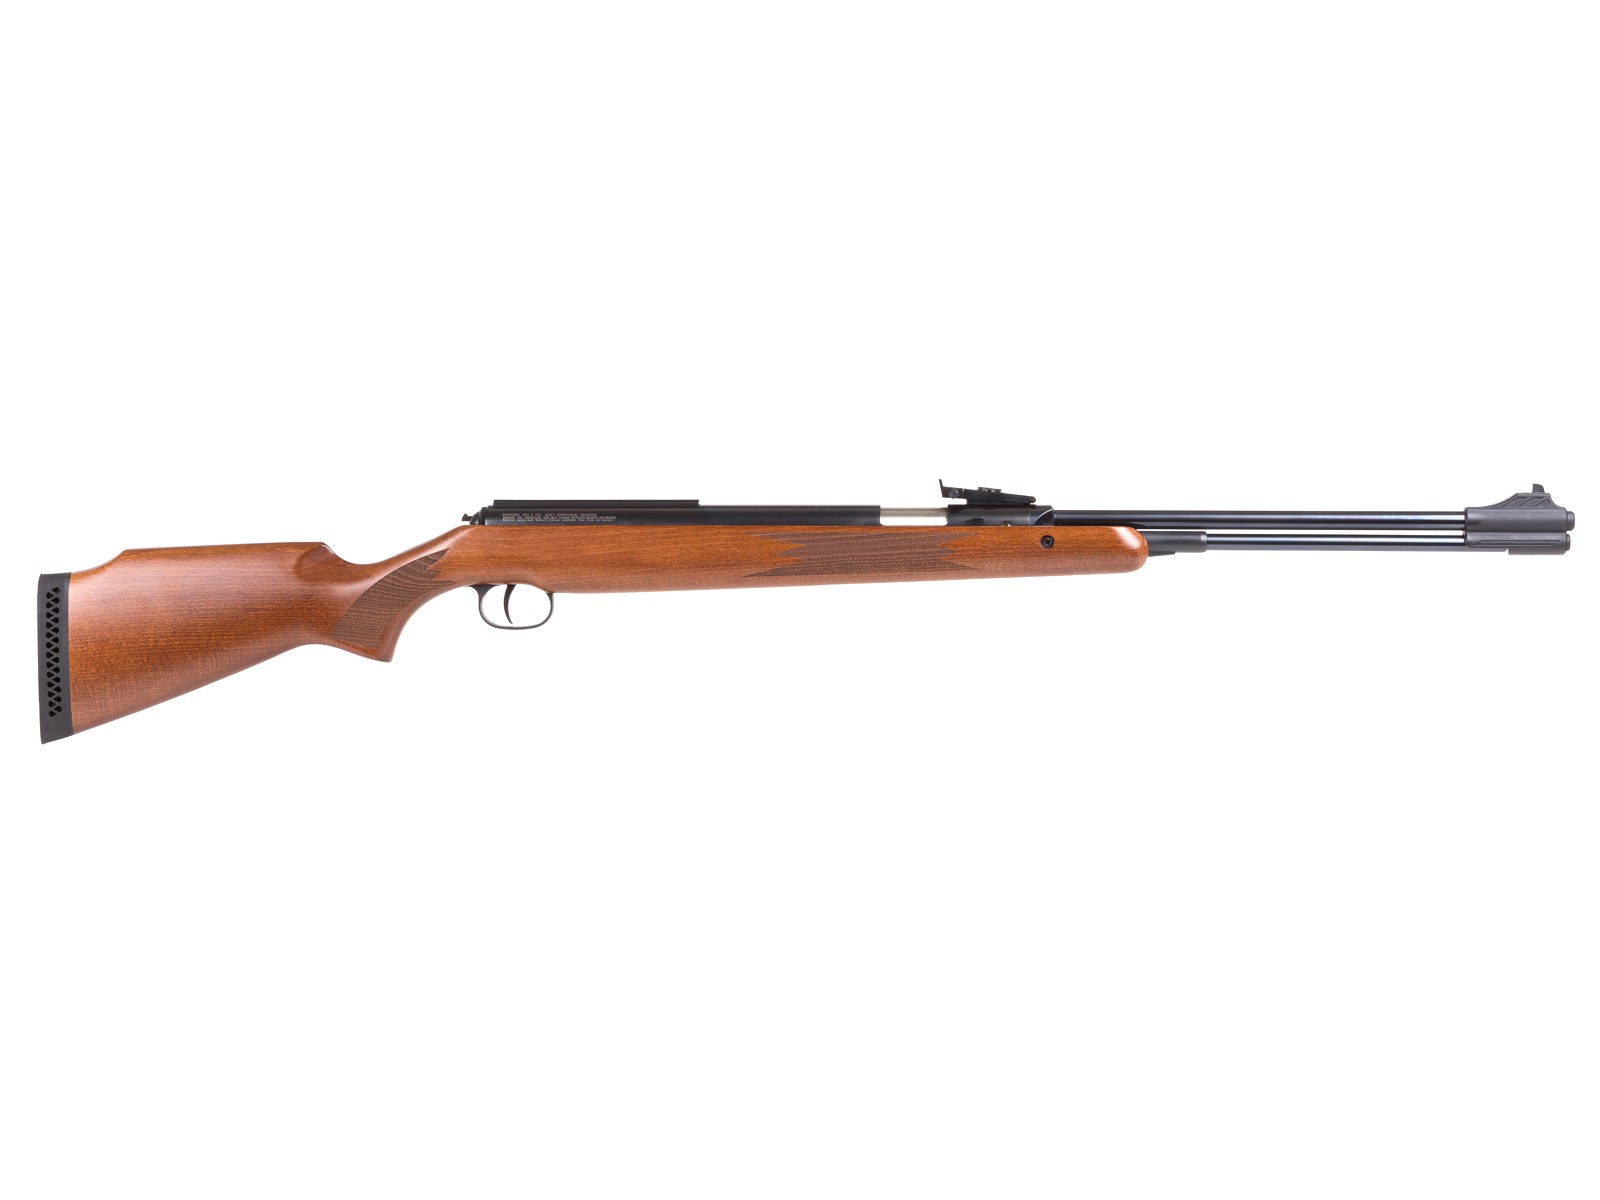
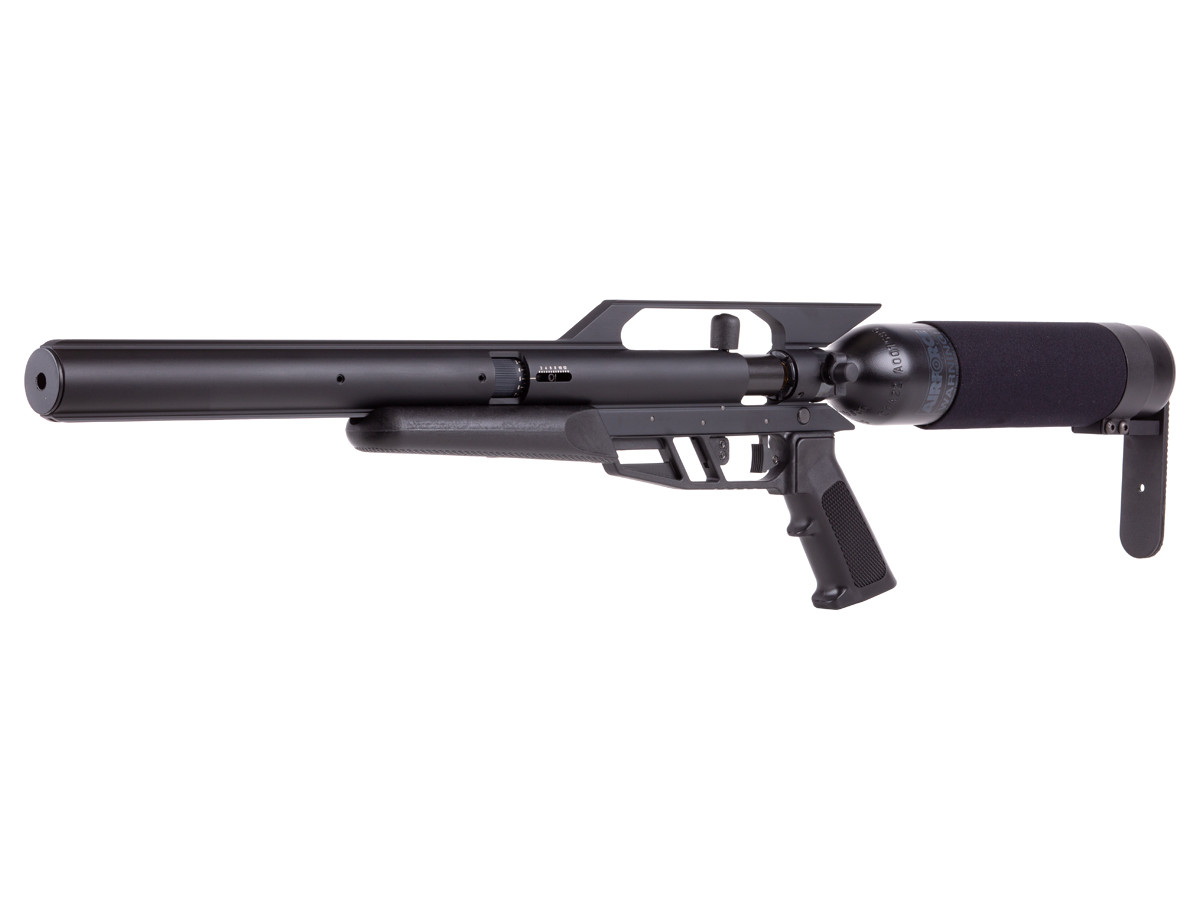
Features
Max Velocity: 950 fps
Overall Length: 40.5″
Buttplate Ventilated rubber
Function: Single-shot
Weight: 9.03 lbs
Trigger Pull: 3.0 lbs
Scopeable: 11mm dovetail
Safety Automatic
Suggested for Small game hunting/target practice
Caliber: .177 – .22
Loudness: 3-Medium
Barrel Length: 9.5″
Shot Capacity: 1
Cocking Effort: 39.6 lbs
Barrel Rifled
Front Sight: none
Rear Sight: none
Trigger: Two-stage adjustable
Action: Underlever
Powerplant: Spring-piston
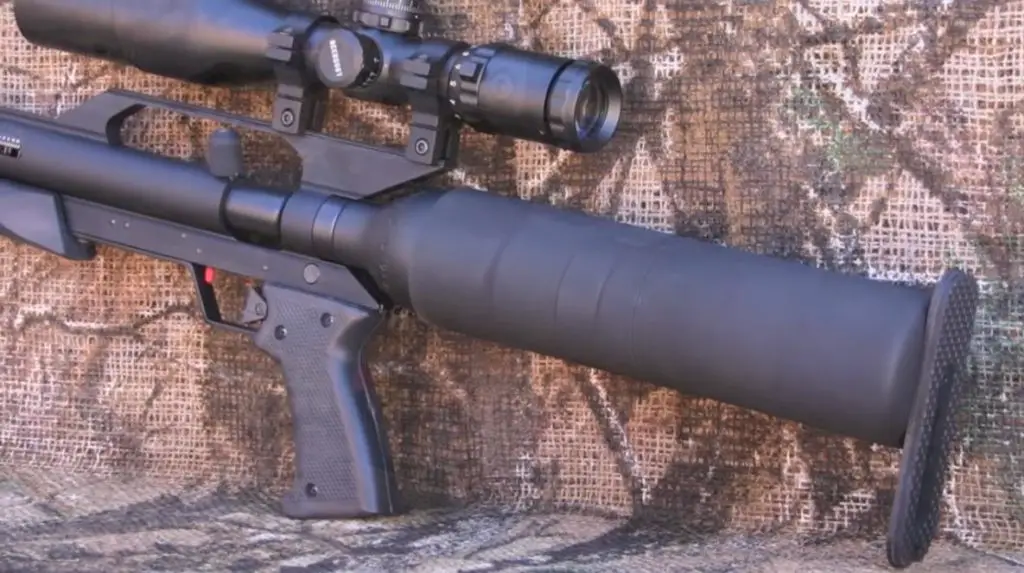
Pros and Cons
Pros
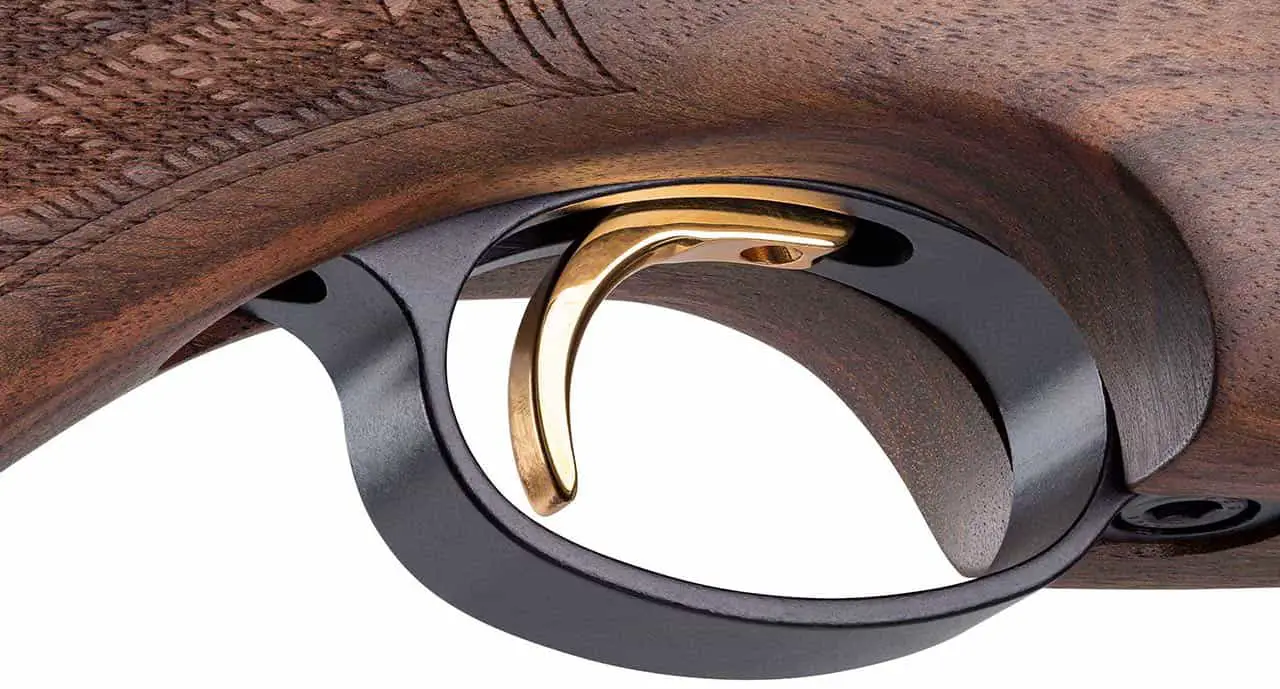
Cons
Quality craftsmanship, stunning walnut stock, and deep bluing
Well-tuned from the factory
Quiet and well-balanced
Great 2-Stage Trigger
Accurate up to 40+ yards
Packs enough punch for most of your pest and small games hunting needs
Many hunters go for the large farms, some even developed with the most modern equipment
Focus on smaller farms and neglected public hunting lands.
Search for overgrown hedges, land lying fallow, and brushy ditches.
Rabbits like hiding in the abandoned property
If you spot any old barn, dilapidated machinery, or destroyed sheds, hang around longer than you had planned.
Rabbits love basking after cold spells
If such are the current conditions, target the sunny slopes.
Rabbits feed more after dawn and toward dusk
Plan your hunting sessions well to coincide with these times.
Many hunters go for the large farms, some even developed with the most modern equipment
Focus on smaller farms and neglected public hunting lands.
Search for overgrown hedges, land lying fallow, and brushy ditches.
Rabbits like hiding in abandoned property – If you spot any old barn, dilapidated machinery, or destroyed sheds, hang around longer than you had planned.
Rabbits love basking after cold spells
If such are the current conditions, target the sunny slopes.
Rabbits feed more after dawn and toward dusk
Plan your hunting sessions well to coincide with these times.
That said, what should you consider when choosing air rifles for hunting rabbits?
How to choose a rabbit hunting rifle
Perhaps the most important criterion for your choice should be the punching power of the air rifle.
Before we proceed, consider the following recommendations by hunting experts.
Game
Minimum acceptable caliber
Minimum energy (FPE)
Small birds
.177+
5
Medium birds
.177+
7
Large Birds
.22+
11
Squirrel-sized prey
.22+
9
Rabbit-sized prey
.22+
9
Raccoon-sized prey
.25+
25
Possum-sized prey
.25+
25
Fox-sized prey
.30+
35
Coyote-sized prey
.30+
50
Javelina-sized prey
.357+
90
Small deer
.357+
100
Medium deer
.40+
150
Large deer
.45+
200
Hog
.45+
200
It seems you need muzzle energy of only 9 FPE to humanely kill a rabbit.
Quite a lot of mid-range air rifles can achieve this killing force.
Caliber
In conjunction with the punching power is the air rifle caliber.
You certainly don’t need a big-bore air rifle for rabbit hunting.
Leave the .50 air rifles for the cape buffalo and hogs.
FPS alone is not enough to determine the killing power of ammo.
The killing power is tied around the muzzle energy.
Therefore, when talking about the FPS, we must accompany it with the weight of the ammo, so that we have an idea of the resultant muzzle energy.
You can have a pellet with terrific speed but negligible weight.
That may fail to kill even a rat.
But if the weight is sufficient, a pellet with the same velocity will kill even a rabbit.
Can 600 fps kill a rabbit?
In line with the discussion above, the answer to this is both Yes and No.
Can you legally shoot rabbits?
According to the UK government, rabbits are categorized as pests.
In this regard, the question can read: Is it legal to control pests that destroy your crops? Certainly, yes.
Rabbits are not a protected species in many jurisdictions.
But when the shooting element sets in, laws vary widely from country to country.
The Pest Act 1954 states that all land occupiers have a continuing obligation to kill or take any wild rabbits living on the land, by methods such as gassing, snaring, trapping, fencing, ferreting, and shooting.
However, as to who can or cannot shoot, gun ownership legislation is applied.
Then there is the shooting of rabbits as a form of pest and the shooting of rabbits as a recreational activity.
Not all countries and states see eye-to-eye – and therefore the laws vary.
Make sure to check your local laws so you are not caught on the wrong side of the law.
Conclusion
Taking all things into account, hunting rabbits by shooting is both legal and enjoyable.
Whether you are on the recreational side or the pest control one, never shoot the rabbits and simply leave them to rot.
Wild rabbits are edible. Very delicious and nutritious indeed.
All you need is to get the facts and equipment and gear ready for the hunting season.
We already covered the facts at the beginning of this piece. Perhaps I can list the equipment and gear you may need:
Waterproof boots
Hat
Hunter orange vest
Gloves
Socks
Vinyl-faced canvas field pants
Sturdy hunting coat
A firearm or air rifle
Ammo for the weapon
Air rifle case
Airgun cleaning kit
Hunting license
Knife
Flashlight
Map and Compass
Fully charged smartphone
Game bag
All in all, take it easy, and stay within the dictates of the law.
Kill only what you can eat.
Even if your rabbit air rifle has 200 shots per fill, exercise self-control.
You are not out there to terminate the rabbit population.
I sign off with a light touch.
Two men were out hunting when one of them saw a rabbit.
“Quick,” said the first, “shoot it.”
“I can’t,” said the second. “My gun isn’t loaded.”
“Well,” said the first, ”You know that and I know that, but the rabbit doesn’t.”
Trotline fishing for catfish is a tradition in the South. A weekend camping trip on the river or creek would not be complete without the excitement of slipping out on the water after dark to “run” a trotline and finding a catch of several catfish. Catfish that by the end of the weekend will find their way into some hot grease.
Trotline fishing is relatively simple in theory. A trotline is basically a length of line stretched with the use of a boat, across a section of water and fastened secure at both ends. On this line every three or four feet a hook is dangled from a drop line, essentially making it impossible for a catfish to swim by the line without being tempted by one of the baited hooks. Once “set out” the trotline is left unattended until a few hours later when the trotline is checked, fish removed, and rebaited. Trotline fishing for catfish is most effective after dark because many species of fish which would rob the trotline hook’s of their bait during day light hours often hide at night while the catfish is a very efficient at feeding in the dark. Darkest also, adds an element of anticipation to this type of fishing which is hard to explain. Trotline fishing is a form of fishing which must be tried to appreciate.
Ready made trotlines fishing kits such as the Magic Bait Trot Line are available, complete with all the essentials. These are good if you want to try trotline fishing for the first time or have doubts about how to build a trotline. These kits provide a good understanding on how to rig up and set out a trotline plus they are reasonably priced. However, a trotline is relatively simple to build and somewhat fun. Although all trotlines are fundamentally the same, there are some differences in styles. These differences in styles often relates to how the drop lines, which hold the hooks, are attached to the main stretch line. The drop lines, which are often smaller in diameter, must be attached so it can not slip or slide up and down the main stretch line. Many trotline styles accomplish this by fastening the drop lines to the main line between synthetic clamps or hand tied simple knots. This can become a little tedious and time consuming but is effective.
The style Fishing-Tips-Bait-Tackle.Com prefers was introduced to us by Jimmy, a Hardin County resident in Southeast Texas. Jimmy, who enjoys setting his trotlines around the area where Village Creek joins the Neches River, shares our philosophy that a good fishing tackle tip should inspire angler to “do it themselves” while saving both time and money. His method of making a trotline does just that by using only one size nylon braided line, sturdy snap swivels and quality hooks. Utilizing line at least two hundred pound test, he makes forearm long loops along the length of the line using a simple knot. All loops are spaced a full arm’s length wingspan apart with the first and last loop being about 10 feet from the ends.
These loops are the drop lines, simply attach a snap swivel using a half hitch knot then add a hook to each swivel to complete the trotline. The snap swivels are essential because catfish are notorious for twisting off a hook. Hook size may vary depending on the targeted fish generally between a 2/0 and 6/0. Also any drop line can be left hookless and used as a weight point to fish the trotline deeper.
Jimmy showed us one more little trick with the trotline. Instead of using a bulky racking box or wrapping the trotline around a coffee can he simply rolls the trotline up as if it was a ball of yarn. This makes the trotline easy to handle and store. Plus if you like, the hooks can be removed before making the ball.
Although a trotline can be “set” in any place, some spots may prove more productive than others. For example, a bend in a creek or river where the water is relatively deep, near an area where a slough or small tributary feeds a larger body of water, or if the trotline does not interfere with navigation spanning it across a waterway.
Choose two anchor points along the water to stretch the trotline, anchor the first end to a tree limb, tree root, cypress knee, or anything that will hold the line secure. Tie the line low to or just under the water surface, that makes the trotline less noticeable to any by-passes. Move the boat to the next anchor point, allow the trotline to lay loosely on the water and tie off the other end. Now that the trotline has been “set out”, it can be weighed and baited.
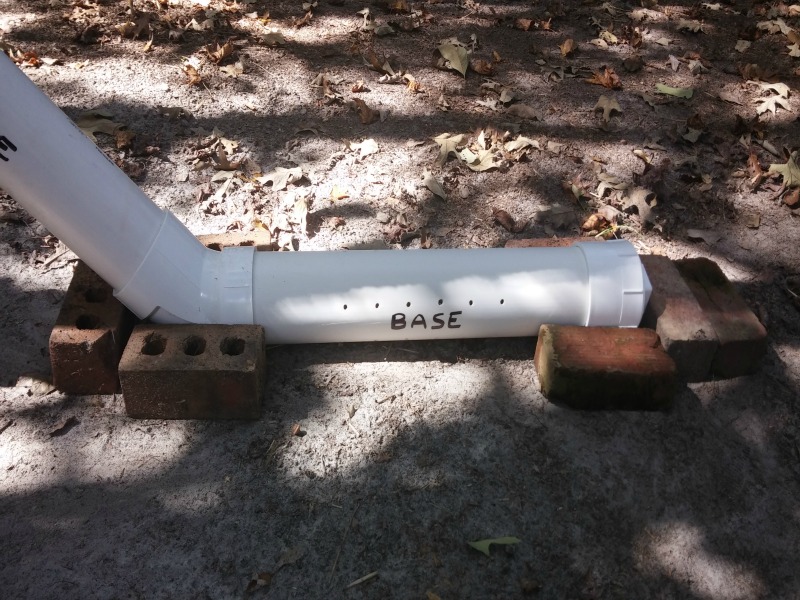
The trotline can be weighted with a large lead sinker, a brick, an old window counter weight or anything else found around the house that is heavy enough yet small enough to manage.
Almost any thing can be used as bait for trotline fishing. Live bait work particularly well; blacktail shiner, crawfish, small bream or even earth worms. Cut bait, a portion of blue crab, chicken livers, or man made stink bait can also be effective. For the best results bait the trotline just before dark and if possible use a variety of bait. Allow the trotline to fish two or three hours before checking for a catch, likewise replace any lost bait. The trotline can be checked several times through out the night or left until morning.
A few safety tips on fishing trotlines are in order. When “setting out” the line, check for critters. Before tying the line off, keep an eye out for a stray snake or a pesky wasp nest.
Although a trotline can be managed by one person we recommend that anglers don’t “go it alone”, especially after dark. Keep a Knife handy, a situation may arise in which a drop line (or even the main trotline) may need to be cut immediately. If an angler is unfortunate enough to have a hook snag a hand this need becomes quite apparent. Also, nothing can be more disappointing than losing a good size catfish before it can be gotten into the boat so take a dip net.
An alternative to the trotline is the limbline. Using the same gear used to make a trotline, the limbline is tied up as if it could be fished from the end of a pole with a single hook, snap swivel, and sinker. Hang the limbline from a flexible limb that extends over a preferred fishing hole. Several limblines can sometimes be as effective as a trotline, however due to the distance between limblines generally more travel is required.
Most states have regulations on trotline fishing so be sure to familiarize yourself with the state rules. These rule may require the line not to be over a particular length or may limit the number of hooks on a line. Some states may prohibit setting a trotline across navigable waterways. Also, some state may limit the time period a trotline can be “set”, or may require name tags. Still, trotline fishing is highly recommended and can be very productive.
Fishing Tackle Tips ~ Fishing Season ~ Fishing Boat Tips Live Bait ~ Artificial Lures ~ Fishing Dictionary
Are you trying to determine which is the best Shimano spinning reel for your specific fishing needs? There are many options to pick from, so choosing the right reel can be challenging. In this article, we asked our fishing community to recommend their favorites so you can decide for yourself.
As you have probably figured out by now, the Shimano brand offers spinning reels that share several noteworthy features. Your choice of the fishing reel should be based on your preferences, style of fishing, the type of fish you’re targeting, and a reputable brand.
Size and Weight
The size of the Shimano spinning reels you get should depend on the size of the fish you want to catch. For instance, if you are targeting smaller fish, a 500 to 1000-size reel should suffice. If your reel is too big for your line size, you will have more lines than you know what to do with, and it’ll be heavy to carry all day.
If you are going with a heavier line, you’d need a bit larger reel. It’d be worth checking out the Shimano Ci4 or FG.
The former is lightweight and made of carbon material that flexes just enough to tackle medium size fish. However, the Stradic FJ is more rigid, which makes it more robust against stronger or bigger fish.
Drag System
Every experienced angler knows that a spinning reel with weak drag is basically a useless reel, especially if you are trying to catch strong fish.
The importance of a quality drag system is in its smoothness and stopping power. Depending on the size of the fish you’re targeting, you’ll want the appropriate drag pressure.
However, when you have a drag system that isn’t smooth, you risk breaking off your fish due to the spikes in tension on the line.
Gear Ratio
Slower ones would be 5s:1 and 6s:1 for heavy loads, and faster gear ratios, i.e., 7:1 or above, are for moving lures quickly through the water.
These determine the speed at which fishing reels pick up the line. So if a reel has a gear ratio of 6.3:1, that means that the spool goes around 6.3 times for every turn the reel handle makes.
What makes gears extra special in these reels is that no cutting work is applied to them. Instead, the whole surface is designed using 3D technology and created via cold forging.
Propulsion Line Management System and Aero Wrap II
Shimano spinning reels feature a Propulsion Management System, one of the best features of which is the Propulsion spool lip design.
It provides a more extended casting range than the standard variety and prevents wind knots and backlashes from forming.
Reels that have the Aero Wrap II feature as well can benefit from optimal oscillation, uniform line lay, and winding shape, which prevents energy loss during casting. In simpler words, with a Shimano reel that has these two features, you can increase how far you cast without exerting yourself.
Line Capacity
The line capacity you want in your Shimano reel will depend on a few factors including.
Size of the spool
The line you use on the spool
For example, if you are using a mono line for a Shimano Baitrunner reel, you can get a line that is 265 yds long with a 12 lb test or a 170 yds long line that can withstand a 15lb test.
Similarly, if you prefer braid and are using, say, a Shimano AERO Technium reel, you can get a 60-yds long line that can withstand a 40lb test or a 460-yds line that can withstand a 50lb test.
Quality Materials and Construction
The Hagane design concept in Shimano reels ensures that they can withstand consistent use and extreme abuse in the toughest of conditions.
The strength and durability of the Hagane gearing, efficient power transmission of the X-Ship technology, and the rigid body of the reel maintain this concept in every reel.
All of these benefits come together to eliminate body flexing, which in turn translates into more cranking power.
Shimano Warranty
Shimano reels come with a two-year warranty beginning the moment they are purchased.
It should be noted, however, that this warranty does not cover reels that have incurred damage because of wear and tear or neglect.
Damage that has been inflicted by the end-user is not covered by the warranty, nor is repair, modifications, or improper reassembly. The removal of serial numbers is an absolute no-go and nullifies the warranty no matter the issue.
Shimano USA Headquarters: 1 Holland, Irvine, CA 92618
Shimano phone number: (949) 951-5003
1. Shimano Stella SW
Best Saltwater Spinning Reel
Available in 8 size ranges (from 5,000 to a whopping 30,000), the Shimano Stella SW comes in three gearing ratios. Its power aluminum body, along with an X-rigid rotor handle and body, works together to reduce power loss. Like other Shimano reels, it also features X-ship technology.
This includes two bearings that are situated at either end of the pinion gear and remain in place under heavy load. The Stella makes for high-quality tuna and sailfish reels, which are robust and pull like mad.
We love the aesthetics of this Shimano spinning reel as well as how smooth it casts. However, be prepared to shell out some significant cash for this beauty. The only thing that will put you a bit aback is the price, which is steep. Ultimately, it’s a Stella…you get what you pay for.
2. Shimano Stella FJ
Best Freshwater Spinning Reel
The Shimano Stella FJ spinning reel boasts a smooth drivetrain as well as X-protect. This allows it to resist water damage. The propulsion line management system offers long casting ability and prevents knots from forming in the reel.
The spool support of the main shaft has been strengthened in this model, ensuring smooth drag delivery under heavy loads.
This reel has MicroModule II gearing and silent drive, which provide the smoothest and quietest operation we’ve ever experienced. Again, the only setback might be the price.
3. Shimano Ultegra XSD
Best Long Cast Spinning Reel
Though not usually in the running for the best reel, you would be hard-pressed to find a reel better than the Shimano Ultegra XSD for its price.
Its instant drag system allows you to switch between fight drag and free spool easily. The Super Stopper II feature also prevents back play and free movement on the handle for smooth line management.
The Ultegra XSD spinning fishing reel’s propulsion line management system features the AR-C spool and a patented angled spool lip, which reduces line friction. The technology reduces drag and increases casting distance.
We love how smoothly this reel casts, but we wish the brand had paid more attention to the aesthetics. The fishing reel looks a bit plasticky at first glance.
4. Shimano Exsence
If you need one of the best spinning reels that can withstand harsh saltwater conditions, check out the Shimano Exsence. It features an internal labyrinth structure that repels corrosive saltwater even if you are soaked by the heavy spray.
Plus, the X-Ship technology, as well as the Hagane gear and body, ensure smooth winding and increased durability. Also, the G Free Body technology shifts the center of gravity of the reel closer to the rod and, thus, the angler’s hand position. This reduces fatigue and increases casting distance.
The Shimano spinning fishing reel embodies all of the best features the brand has to offer but in a more rugged and affordable package. There are no cons to this reel that we could see, making this one of the best Shimano spinning reels you can get for saltwater fishing.
5. Shimano Stradic Ci4
The Shimano Stradic Ci4 boasts a CoreProtect waterproof drag system and is exceptionally lightweight, both of which make it ideal for saltwater fishing.
With striking good looks and a smooth operation that is right up there with more expensive models, it is little wonder why the Stradic spinning reel is popular with anglers.
The EVA grip on the Stradic is a lighter alternative to plastic and does not get as slippery when it gets wet, either. Plus, the cold-forge aluminum spool provides extra strength and durability compared to graphite or diecast aluminum spools.
The Shimano Stradic Ci4 is so lightweight that it floats, which you will thank the brand for if it is dragged into the water by an overly feisty fish.
However, the size and position of the anti-reverse lever in this Stradic is a problem. It is located right up against the rotor under the reel and is tiny that you may have difficulty using it.
6. Shimano Stradic Ci4+ RA
Shimano Rear Drag Spinning Reel
The Shimano Stradic Ci4+ spinning reel is an advanced version of the Ci4 fishing reel, the only difference being that it is two and a half times stiffer in comparison. This reduces flexibility in the body and rotor even if the rod is under extreme pressure.
Plus, the Stradic Ci4+ has a 6:1 line retrieve gear ratio and Aero Wrap II oscillation for excellent line lay. The power roller also reduces line twists, which will come in handy if you use mono or braid. The Stradic Ci4+ also boasts five Shielded A-RB bearings for a powerful yet, silky-smooth performance.
The Ci4+ Stradic fishing reel’s rapid-fire drag and the fact that it is an incredibly lightweight reel, make it a must-buy. However, like the Stradic Ci4, it also has a tiny anti-reverse switch, which can be challenging to access, especially when you are trying to reel in a big catch.
However, it is one of the best Shimano spinning reels you can get if you are looking for a light yet robust fishing reel.
7. Shimano NASCI
Inshore Spinning Reel
The Shimano NASCI is one of the best Shimano spinning reels for freshwater as well as saltwater fishing. It boasts the Hagane gear technology for a smooth retrieve experience even under heavy loads. The NASCI is available in 5.0:1 and 6.2:1 gear ratio.
The fishing reel also features thick bail wire that prevents it from wrapping, which is only suitable for propulsion line management.
We love how the NASCI feels in our hands, especially if it is paired with the right rod. The spinning reel can give you hours of easy fishing with little fatigue. However, the spool is not braid-ready, and the reel is not fully sealed either, which can pose a problem.
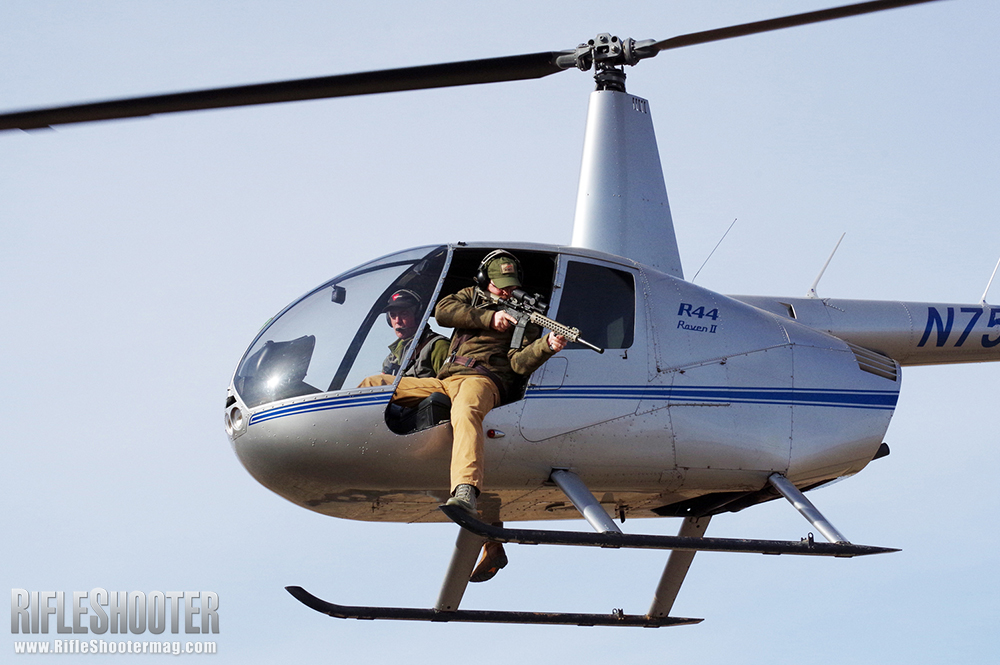
A bucket-list dream came to life when I spent two days hunting hogs with helicopter pilot Kyle Lange, and learned some intense lessons along the way. Lange estimates he fires an average of 30,000 rounds at havoc-wreaking feral hogs and coyotes annually.
As a gun guy, I’d wheeze with enthusiasm over the opportunity to shoot at simple inanimate targets out of a helicopter. Heck, the opportunity to even go up in a chopper fills me with delight. Adding a target-rich environment of invasive species just adds to the challenge and the fun.
Much of Texas and the Deep South are overrun by wild hogs, and they damage millions of dollars of agricultural and native ecosystems every year. Prior to spring planting, farmers and state wildlife control make a push to reduce feral hog populations, which directly improves crop success.
Texas Parks & Wildlife estimate current feral hog populations in the Lone Star State at 1.5 million and growing exponentially every season. Young sows begin breeding around the age of six months, and their gestational period of 115 days yields up to three litters per year.
A big sounder (group of pigs) can root up acres of freshly planted crops in a single night. As a result, farmers and ranchers occasionally band together in an effort to radically reduce the population. Although it’s expensive, the most effective way – the only truly effective way – to reduce or even eliminate invasive hogs is by shooting them from a helicopter.
Hardware
Hunting feral hogs from a chopper introduces some surprising hardware considerations. For example, guns need a special shell deflector to prevent empty shell cases from flying up into the rotors and causing expensive damages – not to mention a rather abrupt landing.
Chopper rotor blades are incredibly sensitive. At one point, Lange noticed a rhythmic vibration in the chopper, which was caused by bird poop deposited on one of the blades overnight. Lange keeps specialized deflectors for AR-type rifles on hand, but sometimes shooters have to make their own – out of outlandish items such as the old motor oil bottle we fashioned onto fellow writer and Editor David Faubion’s AK.
Also, most guns will malfunction at least once during two days of hot and heavy shooting. It’s important to keep a compact cleaning kit, CLP and a small parts kit on hand.
There’s no doubt helicopter hog hunting emphasizes the value of high-capacity magazines. Lange has discovered that most AR magazines will feed up to 22 rounds or so of bulk steel-cased ammo reliably. Pack more in and you’ll have issues with some mags. He attributes it to the lesser lubricity and malleability of steel cases compared to brass.
Airborne Rifles
For decades, a good shotgun was the choice of aerial animal-control gunners. Scatterguns are still effective as ever, but they require pilots to get close – which is hard on the helicopter and tricky for the pilot. Plus, getting right down on animals with the rotor blades pounding them like a bass drum tends to scatter them in all directions, resulting in the need to climb, relocate, and pursue individual animals into thick brush. Additionally, hours of hammering heavy buckshot through a shotgun will pound even the toughest shooters into mush.
A better choice is the AR-15 rifle. Its reach allows pilots to hover a bit higher, which is easier on the machine. Animals also tend to stick together when the chopper stays higher, enabling shooters a chance to drop several hogs in quick succession. You burn through a lot of ammo – sometimes dumping a full magazine in one pass over a sounder of pigs.
The only concern I had initially was with the advisability of shooting big hogs with bulk FMJ .223 ammo. Which leads to the most surprising element of the experience: you may have to shoot a hog multiple times, but that FMJ ammo gets the job done. More often than not, hogs rolled with the first well-placed hit, and I’m pleased to say that we didn’t have a single wounded pig escape.
Ideally, heli-hog hunters should feed their rifles with something like Nosler’s 60-grain Partition or a Barnes TSX bullet – which would expand and impart much more energy – but such ammunition is far too expensive for crews shooting tens of thousands of rounds per year.
Another fantastic option would be to shoot an AR-15 chambered in .300 Blackout, which is potentially the perfect cartridge for the activity. But again, ammo cost is prohibitive. Lange did have one shooter use a .300 Blackout; he had a shell-catcher installed on his rifle and salvaged every piece of brass – often detrimental for making quick reloads.
Lange has also tried for years to make an AK-47 work. According to him, its 7.63x39mm cartridge hits pigs hard – but he hasn’t been able to get an AK to shoot with adequate precision or maintain integrity with an optic, which he considers vital for effective helicopter hog and coyote hunting.
Faubion used a Krebs Custom KV-13 on the hunt. It sported a forward optic rail, a decent trigger, and better-than-adequate accuracy. Mounted with a Trijicon RMR, it made for a fantastic close-range combat sight but was a bit coarse for use on running animals at 30 to 50 yards. Using a more precise optic like the Trijicon SRS (Sealed Reflex Sight) would have made Faubion’s setup much more helicopter-‘n-hog friendly.
Optimal Optics
A quality, non-magnified or low-magnification optic is vital to fast-paced shooting. It also needs to have very clear glass and have a fine aiming point.
Lange prefers Trijicon optics, and he’s particularly fond of the SRS. Its generous ocular lens and pinpoint red dots enables fast target acquisition and situational awareness. The SRS uses commonly available AA-batteries and is durable enough to withstand abuse and still maintain zero.
I opted to use a Trijicon VCOG in case I wanted a bit of magnification. It’s super durable, and offers true 1X (no magnification) at the low end of its 1-6x range. It worked great. After two days in the chopper, Lange was eyeing my VCOG with something I can only describe as lust.
Suppressors
Lange and other pilots prefer shooters use suppressors while shooting from the aircraft; both to minimize hearing loss and to avoid noise pollution for neighboring farmers. Even with hearing protection, the effect of hundreds of un-suppressed shots adds up quickly.
Reduced recoil is also an added benefit, making it easier to get back on target quickly. Just don’t touch that steaming hot can after a barrage of shots. Yes, I speak from experience.
Keys to Success
When shooting at wild game from a helicopter, every dimension is constantly changing. The chopper moves forward, sideways, up, down and usually a combination of directions. Animals run helter-skelter for parts unknown, and the shot distance, angle and required lead-time is always dramatically changing.
There’s simply no way to practice shooting from a moving platform, while leaning out of an aircraft and aiming at a target running in the opposite direction. You’ve got to learn on the fly (forgive the pun). Round counts tend to add up in a hurry.
Keys to success are staying loose, watching bullet impacts and adapting quickly. Be aware of the differing leads – when paralleling a running hog at roughly equal speeds, no lead is needed. If that animal is outstripping you, hold in front of it; if you’re overtaking, hold behind it. Holding behind a running animal seems counterintuitive, and it’s tough to do initially.
While not the most difficult type of shooting I’ve done – I reserve that distinction for very long shots on small targets in high wind with a precision rifle – shooting at zigzagging critters is undoubtedly the most intense shooting I’ve ever experienced.
Safety
It’s important to note that shooting from an aircraft is extremely safe. Sure, you’re hanging out of a door-less helicopter banging away at moving targets, but consider the fact that those bullets are going directly into the dirt – the potential for a ricochet is almost nonexistent. Plus, having a literal birds-eye view allows you to see any people or livestock in the area.
While most shooters don’t use a climbing-type harness, the seatbelts in choppers are secure. The craft we flew in had a five-point belt system in the front seats and a two-point system in the rear. Both were sufficient to make me feel safe while maneuvering in flight. However, if you’re skittish, bring a simple strap-type treestand harness and a carabiner for added peace of mind.
I also felt safe with Lange’s piloting experience; he’s your archetypical chopper-jockey. He often flies with his father, Aubrey, who served two tours as a medevac helicopter pilot in Vietnam. Together, they’ve net-gunned and relocated deer and exotic species for 20 years. Kyle also does aerial deer surveys and has extensive wildlife management experience. Plus, like many guys that spend their life driving a bubble in the sky through crazy maneuvers, he’s a humorist – never a dull moment.
Additional safety rules apply: While in the helicopter, “up” is no longer a safe direction for your muzzle. In fact, pilots are firm about keeping muzzles pointed down – at the ground and away from rotor blades. A negligent bullet headed through the rotor blades has drastic potential.
When flying, you’ll most likely have your gun in “hot” condition, meaning there’s a cartridge in the chamber. Attempting to remove the magazine and clear the chamber after every flurry of action is potentially more dangerous than simply putting the firearm on ‘safe’ and keeping the muzzle pointed safely out the door and down.
Doing It
Hunting from a helicopter can cost up to $800 per hour or more. If you’re like me, you don’t have that kind of unoccupied cash lying around. If you do have it, make reservations today and get up in the air. I was lucky enough to participate in my capacity as an outdoor journalist.
If you want to try something different than anything you’ve ever experienced, get up in the sky to do your part for invasive species control. It’s a trip you’ll never forget.
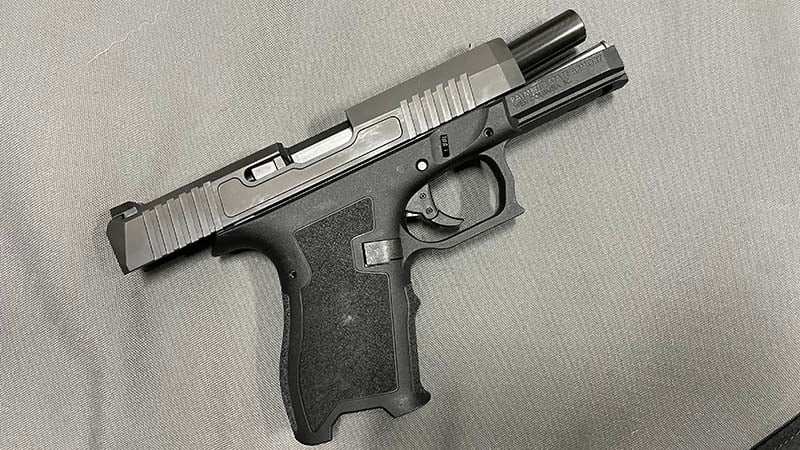
The Palmetto State Armory Dagger, also known as the PSA Dagger, was created to compete in the compact pistol market against the Glock 19. This is clearly a Glock 19 Gen 3 clone.
What makes the PSA Dagger so different is the fact that it comes in at a $299 price point. This price point makes it extremely attractive, considering Glock’s can be $500 plus dollars.
The Dagger really shines in terms of MSRP, but does it hold up to Glock’s reputation of quality and performance?
Well, that’s why I’m going to do a complete review of the PSA Dagger. I think it’s important to preface this by saying, I purchased this PSA dagger and while we do work with PSA sometimes, I purchased this outright, at the MSRP.
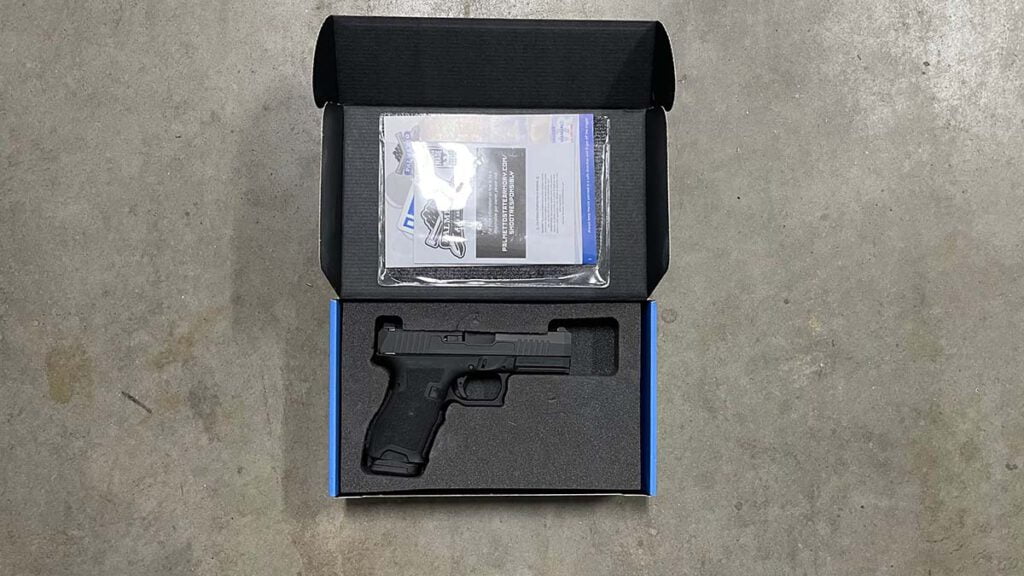
First of all, the PSA Dagger comes in a cardboard box with the foam cut out for the gun.
Upon opening it, you could take the gun out, take the chamber flag out, and the lid holds all of your manuals and other information. You can pull the bottom out and that’s where you’ll find your magazine, and other materials from Palmetto, including your Gun Lock.
PSA did a good job with the box, the opening, the presentation, is all very good. That’s very well done. It doesn’t come in a plastic case, but if you’re like me, you don’t much care about the plastic cases because you’re not going to use them anyway.
I typically have to stack them somewhere in case I ever decide to sell a gun, which I don’t do anymore.
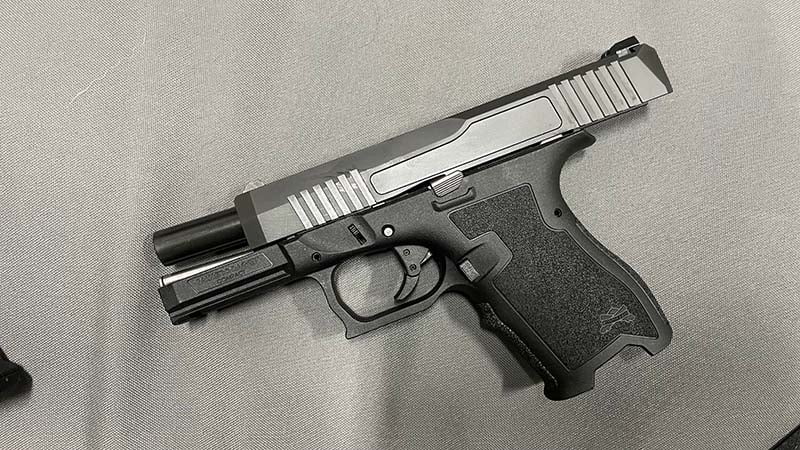
My first impression when I held the PSA Dagger was, is this a Glock, or is this a Sig?
It’s very interesting because it definitely has the Glock frame, but I think what threw me was the texture of the grip.
So, when I held it, I was like, Oh man, this feels like a SIG. But the more and more I held it, the more and more I was like, Okay, this gives you a Glock feel with a SIG texture.
It’s a very interesting feel to the gun, and I really like it. So, I was actually really impressed with a $300 gun in the overall initial feel.
Now, the overall aesthetics and look are pretty much like Glock. There is a little bit of difference in the slide cut.
I think you get a little bit different finish than you would on a Glock or others. It does come with a Magpul magazine. So, no proprietary mags, and you can run standard Glock mags in it as well.
PSA Dagger Features
The features of the PSA Dagger include pretty much everything on the Glock 19 Gen 3.
You have the standard takedown method, you have your magazine release, which is done almost just like a Gen 3 with PSA’s slight touch to it.
There is a hump in the middle of the grip like the Gen 3’s are known for. The slide does have a unique design, but it doesn’t have any of Palmetto State Armory’s markings on it. It is just a clear, clean-cut, slide. I do like that.
Now, Palmetto State Armory does have all their information on the grip. The serial number for the gun is located in the same spot it would be on a Glock, and the sights are just standard, three white dot sights with no night sights.
In addition to no Palmetto State Armory markings on the slide, it does have front and rear cut serrations.
Overall, the gun feels good, the slide reminds me somewhat of the blocky design of the SIG P320, but at the same time, still looks like a Glock.
It just doesn’t have the rounded corners on the slide, it definitely has the edges more of a SIG.
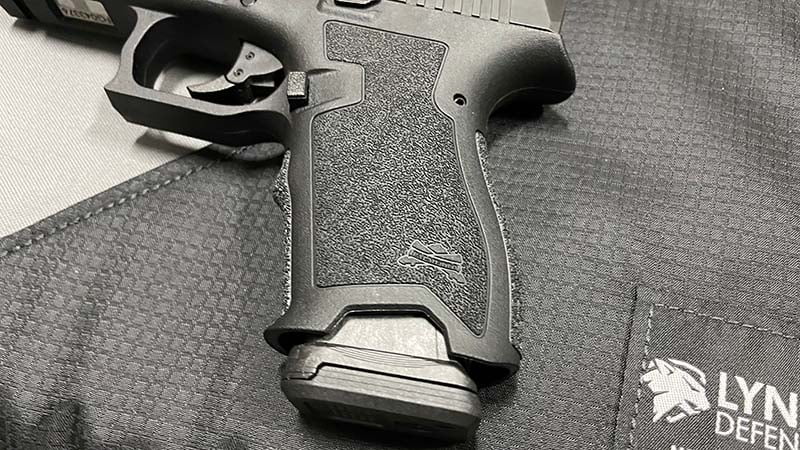
Grip and Ergonomics
Like I mentioned in my initial impression of the gun, the grip really struck me.
It definitely has the same texture, that the SIG P320’s have. It has the ergonomics, however, of a Glock Gen 3.
I really like what Palmetto did with the grip texture. It does have the little Palmetto State Armory logo in the bottom right-hand corner of the grip, on the left side and on the right side, it would be in the bottom left-hand corner.
It’s definitely visually appealing and it’s also very nice and porous and allows you to get a good grip on the gun.
Establishing your master grip is very easy, and overall, I think they did a great job on the grip.
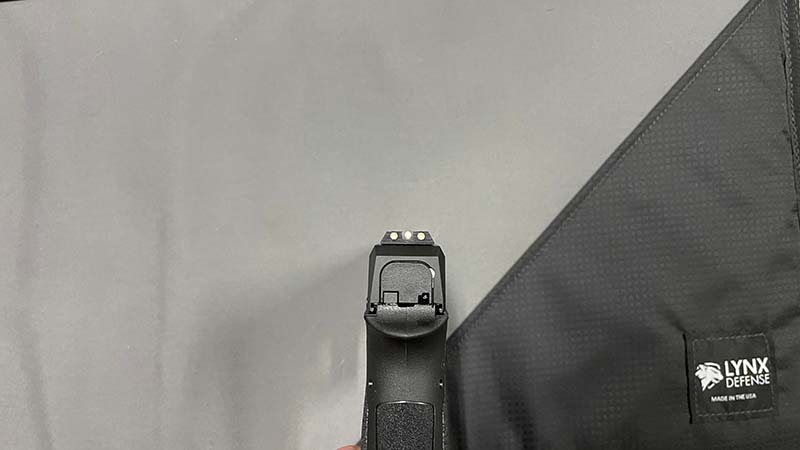
Sights
The sights on the PSA dagger are a little disappointing, but at $300, I’m not sure what exactly I was expecting.
I guess I’ve just become so used to sights on guns coming with night sights. So when I realized the PSA Dagger didn’t have night sights, I was a little surprised.
But again, I thought to myself, “This is a $300 gun. What did you expect?”
The good news is you can change these out to any Glock sights, they haven’t changed their design in years. So, these are definitely changeable.
The one thing I would say I would have done, had it been in stock, is buy the red dot cut slide.
It’s only $80 more, and I definitely would’ve gone that route if that was an option at the time I ordered this gun.
The stock sights aren’t, particularly my favorite type of sights. I prefer no rear dots on the rear sight and just a singular dot on the front sight.
I’ve had no problems with these though. I took it out and shot it, and we’ll get to the actual shooting of it. But as far as sights go, they’re accurate, they were on, had no problems hitting targets.
So the sights, once again, good, cool, would’ve loved to see them as night sights. But again, I think the price point would likely have to have increased.
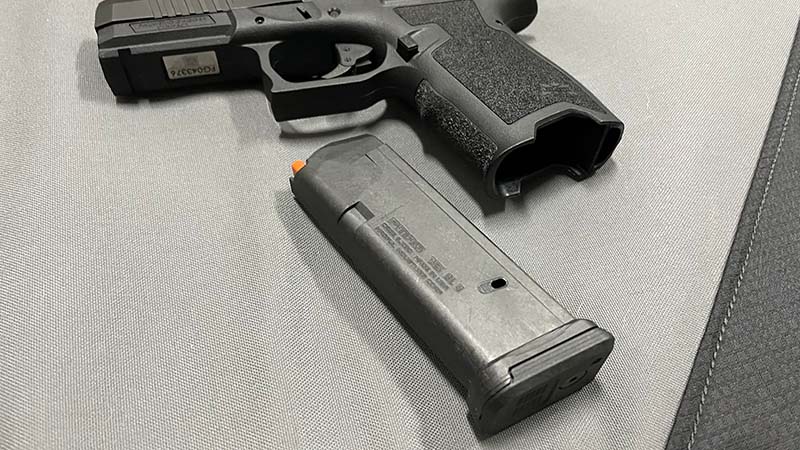
Magazine
The magazine of this gun is nothing to write home about, it’s just a Magpul Glock 19 magazine. There’s nothing wrong with it.
There’s only one of them, but again, you’re buying a $300 gun. This is in the realm of Taurus and a lot of other guns, but you’re almost getting a Glock quality product for $300.
Now, if you have a Glock 19, and have carried a Glock 19 since they released the Gen 3 version, you have a ton of Glock mags that are already compatible.
I personally have an undisclosed amount of Glock mags, nice try ATF, which will work in the PSA Dagger.
So, I’m okay magazine-wise. I don’t have any issues with the Magpul magazines and so far, this has functioned perfectly fine.
Optics Ready Model
Like I mentioned, under the sight section, this is one thing that I think everybody should know about.
I think you should definitely consider getting the optics-ready version. The pistol world is likely going all red dot. I don’t blame them, it’s fantastic.
If you haven’t done it, try it, you might not like it at first, I didn’t. But give it a shot because it’s actually a really, really, nice way to shoot a pistol.
Once you get used to it, your accuracy is going to increase tenfold and I don’t think you’re ever going to turn back from not owning an optic mountable pistol.
With that being said, get the PSA cut slide from the factory, for 80 more dollars. You’re not going to be able to save any money getting it milled somewhere else.
Even some of the cheapest slide millers I know, charge a minimum of a hundred dollars to cut a slide. So, don’t try to save some money here. PSA’s already done that for you. Go ahead and get the RMR cut slide.
Controls
So, let’s talk about the meat and potatoes of any gun, and that’s the controls. The controls of this pistol are, once again, that of a Glock Gen 3.
You have your magazine release, you have your takedown in the middle of the slide, to where you can field strip the gun and take it apart.
You also have your slide release and also magazine release, and that’s pretty much the basics of the gun. You also have your trigger. So let’s dive in, starting with the magazine release.
Magazine release
The magazine release in this gun does stand up relatively high. It’s fairly easy to depress and does have the same texture as the Glock Generation 3’s.
The grip frame does have a spot cut for it, to where your thumb can fall in. Nothing special, it works.
It drops the mag clear, about what you’d expect from this gun, given the fact that the frame is based on the Glock.
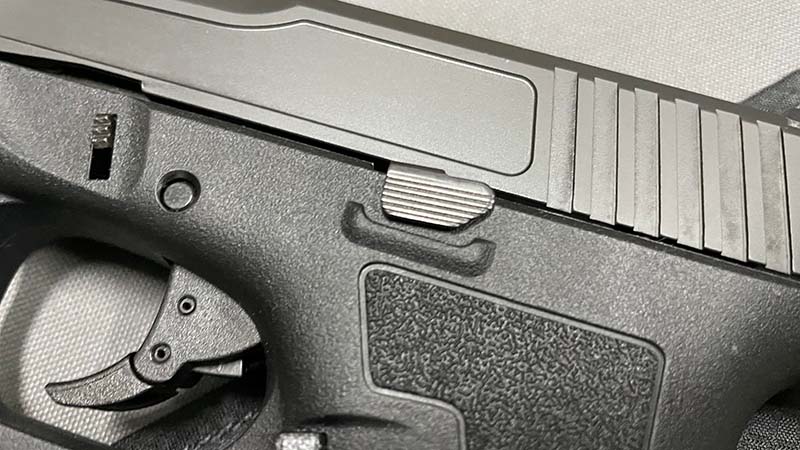
Slide Stop
So the slide stop/slide release is pretty much the same thing as a Glock Gen 3.
They’re not, however, like the Glock Gen 5. So, this is only on the left-hand side of the gun.
I prefer the ambidextrous style slide stop slide release as it makes it easier to pull the slide release down.
This does not have that, it is the standard flat slide switch.
There’s nothing to really catch your finger. It’s about as stock as you can get, but it does work.
There are no issues with it, you can lock the mag back easily. You can drop it free, easy.
It does function extremely well, but just know that it’s a stock part on a $300 gun. It’s not going to wow you.
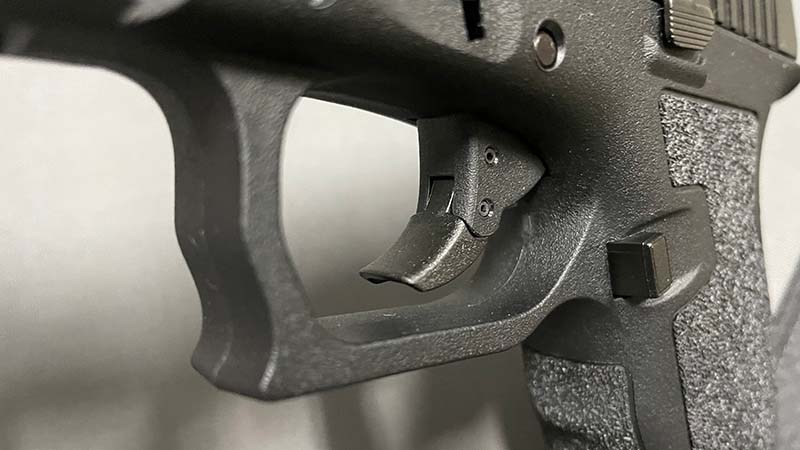
Trigger
The PSA Dagger trigger is probably the only part of this gun that disappointed me to an extreme level.
Everything else is pretty much on par with what I expect out of a $300 gun. Granted, the trigger is terrible.
Probably the worst trigger I’ve ever felt. They use a Smith and Wesson M&P trigger design, where it bends in the middle, versus something like the Glock trigger that has the safe action in the middle.
I don’t know the rationale behind this, but what I can tell you is it feels like sandpaper when pulling the trigger. It’s pretty bad.
I don’t want to harp on this too much, as the gun overall, is an extremely nice gun. It’s even fun to shoot, but the trigger is so lackluster that it’s crazy. This was beyond an afterthought, in my opinion.
I’m not here to hate on PSA. I own a number of their products and most of them are fantastic, especially for the price point. But even for a $300 gun, this just feels like sandpaper.
The take-up travel is good, and the break is clean. It’s not very crisp, but it is clean and not spongy.
The reset is short and it’s just back to the wall.
So my beef is really with the smoothness of the take-up which is almost like sand was dumped into the fire control group of this gun, and that saddens me.
But at the same time, it’s a $300 gun and still shoots great and what I found while shooting the gun is while the trigger is gritty it doesn’t have an impact on accuracy, and shooting the gun overall is actually really fun.
PSA Dagger Ammo
If you are in the market for some ammo for your PSA dagger the options are endless.
Accessories
The nice part about the accessories for the PSA dagger, the fact that pretty much any Glock Gen 3 accessories will work.
PSA Dagger Slides
Looking for a baller pistol on a budget? Turn to the PSA Dagger because the number of available slide options from Palmetto are incredible.
SW5 RMR Slide
I’ve always like the TIN barrels and bolts on guns so forgive me for being a sucker if these aren’t your thing. But for just $329 you can get the SW5 RMR Slide which features a milled slide with an RMR cut and a threaded barrel.
That is a crazy good deal considering Glock threaded barrels typically start at $119 and go up.
SW1 RMR Slide With Copper Threaded Barrel
With a number of different slide cut options you can really get the look you are going for with your pistol the SW1 RMR Slide With Copper Threaded Barrel is definitively a looker.
One of the great things about Palmetto is they don’t just offer you different colors but also didn’t cut styles and even better features like threaded barrels and optics ready cuts.
PSA Dagger Holsters
Now, the only exception to that is holsters. They’ll fit in some Glock 19 holsters, but not well.
It’s very tight and it’s extremely hard to get out. I think that has a lot to do with the slide, but I believe the retention point on the frame is the same.
The slide is thicker and has a slightly different profile so it doesn’t slide into the holster as easily as a stock Glock 19.
So if you want a Kydex holster for your PSA Dagger you might want to grab one that’s available on their website. But keep in mind it’s slim pickings right now, but hopefully, the selection will grow.
PSA Dagger Flashlight
I grabbed an Inforce Wild 2 flashlight for the PSA Dagger and while it’s a polymer flashlight I don’t even have a holster that will fit my Dagger yet so it’s more or less a light that wouldn’t see a lot of action outside of the range.
Personally, the light is fantastic but it still has it limitations namely it’s a polymer flashlight.
But output wise it’s fantastic!
The dagger is nice because the rail will allow nearly any pistol flashlight to be mounted to the gun.
Aesthetics
The overall look and feel of this gun are fantastic. Starting with the bottom of the grip frame features a nice little cut-out that allows you to grab and rip your magazine if it was ever stuck for any reason.
The DLC slide with carry cuts looks fantastic and gives a unique picture from behind the gun with the blocky design of the slide. This side is great and I like what PSA did with it.
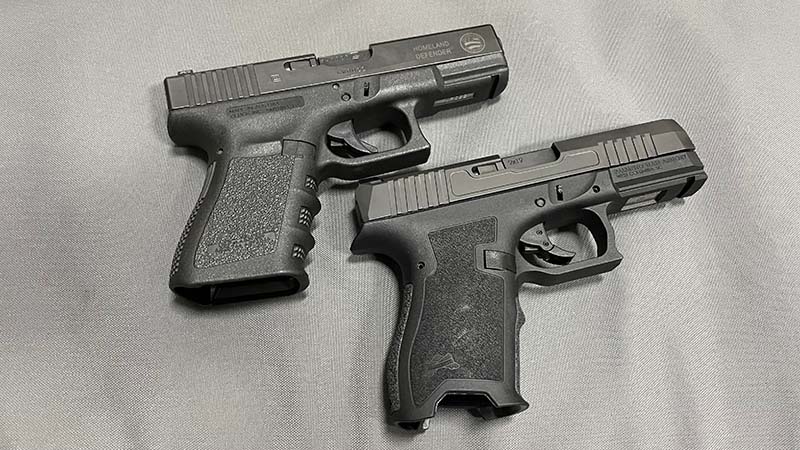
PSA Dagger vs Glock 19 Gen 3
The PSA Dagger is a revamp of the Glock 19 Gen 3 and the most notable differences are the aesthetics.
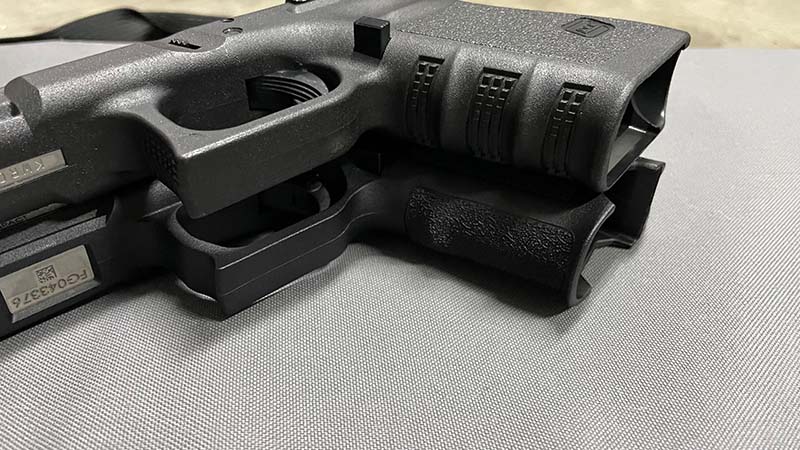
The internals do feature some slight differences namely the slide rails.
Glock 19 Gen 3 pictured left vs PSA Dagger pictured right
The PSA Dagger also has a different grip and grip texture as you can see below.
Glock 19 Pictured Top vs PSA Dagger Pictured Bottom
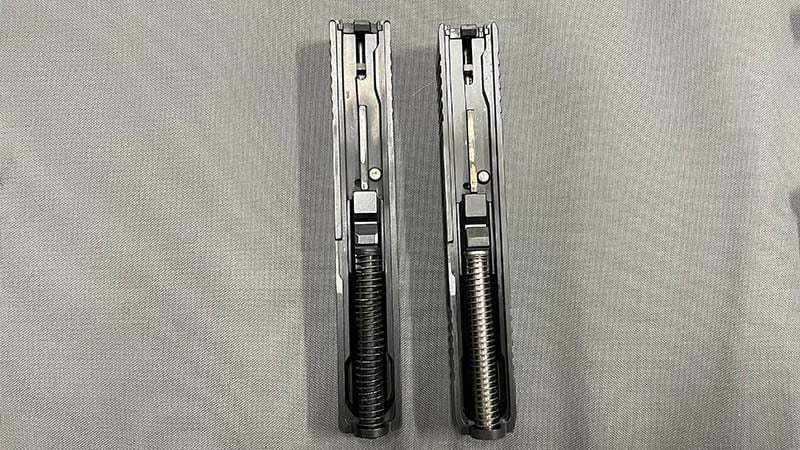
The slides are nearly identical with the spring guide rod being the biggest difference.
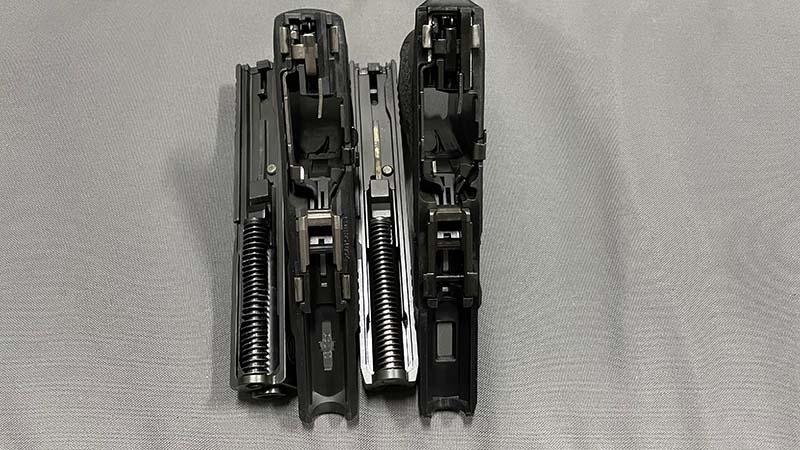
Lastly here’s a side-by-side picture of the complete internals.
As you can tell there are some clear differences and clear similarities between these two pistols and I think each has its place in the market.
PSA Dagger Durability
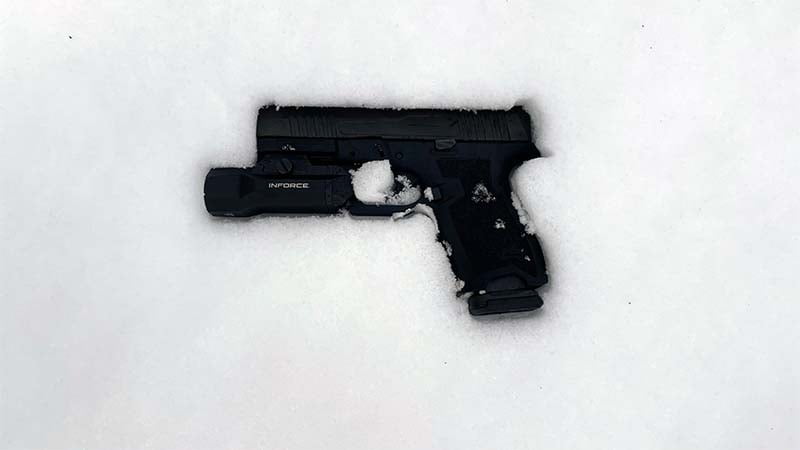
North Carolina finally produced some snow for the first time in several years so I figured I might as well make use of such a fine day!
So I put the dagger through a quick and short test for function. By no means do I think these were comprehensive or even a true torture test but it’s more than most people would likely ever put their gun through.
I put the Dagger through several various things and it never skipped a beat. The misses were all me being it cold and almost never shooting with gloves on, I accept all of the misses as my fault.
I also dropped it from roughly waist height and shot it one-handed so I could video the results. I racked the slide on my boot and other than my misses it functioned fine.
Overall, I’m happy how the Dagger did in the mild snow test I performed on it.
Shooting the PSA Dagger
Now, shooting the PSA Dagger is actually a little different. It does feel like a SIG texture in your hand, but this thing absolutely shoots like a Glock 19, all day long.
Shooting this side by side with a Glock 19, you’re really not going to notice much difference and for better or for worse, that’s a plus in my opinion.
Will you like to shoot the PSA Dagger? It depends on if you like a Glock 19. It does well on the range, it shoots good, and it puts rounds on target.
I had no flaws, no malfunctions, and nothing bad to say about shooting this gun. I didn’t have any pins walk out on me.
I didn’t have any problems with this gun so far, whatsoever. In fact, it’d be hard for me not to recommend this gun.
Other than to warn people, you’re not going to have a nice trigger.
While triggers are changeable, by the time you throw a new trigger in this gun, you’re getting dangerously close to Glock prices.
If you don’t like the Glock trigger either, and you’re going to replace that trigger anyway, this gun is a value.
Overall shooting this gun is very smooth, very crisp, and clean and I really enjoyed it. The slide and the sight picture are fantastic.
Final Thoughts
My final thoughts on the PSA Dagger are this, I don’t think that this is a Glock replacement.
The Dagger is more of a reason not to buy a Polymer 80 Build. Now, if you’re worried about a serial number, that’s one thing.
But as far as cost savings, or building a cheap Glock, there’s no reason to build a Polymer 80 build, when the PSA Dagger is available at this price point.
Now, if you’re looking for night sights from the factory, or the nice clean trigger, or something of that nature, you might default to a Glock.
The Palmetto State Armory Dagger definitely gives a solid run for the money, and for $300, it is a bargain. I think it fits exactly in the niche it’s trying to fill and will be a great carry gun for a lot of people.
The Dagger, PSA Jakl, and PSA AK are hands down my favorite guns from Palmetto.
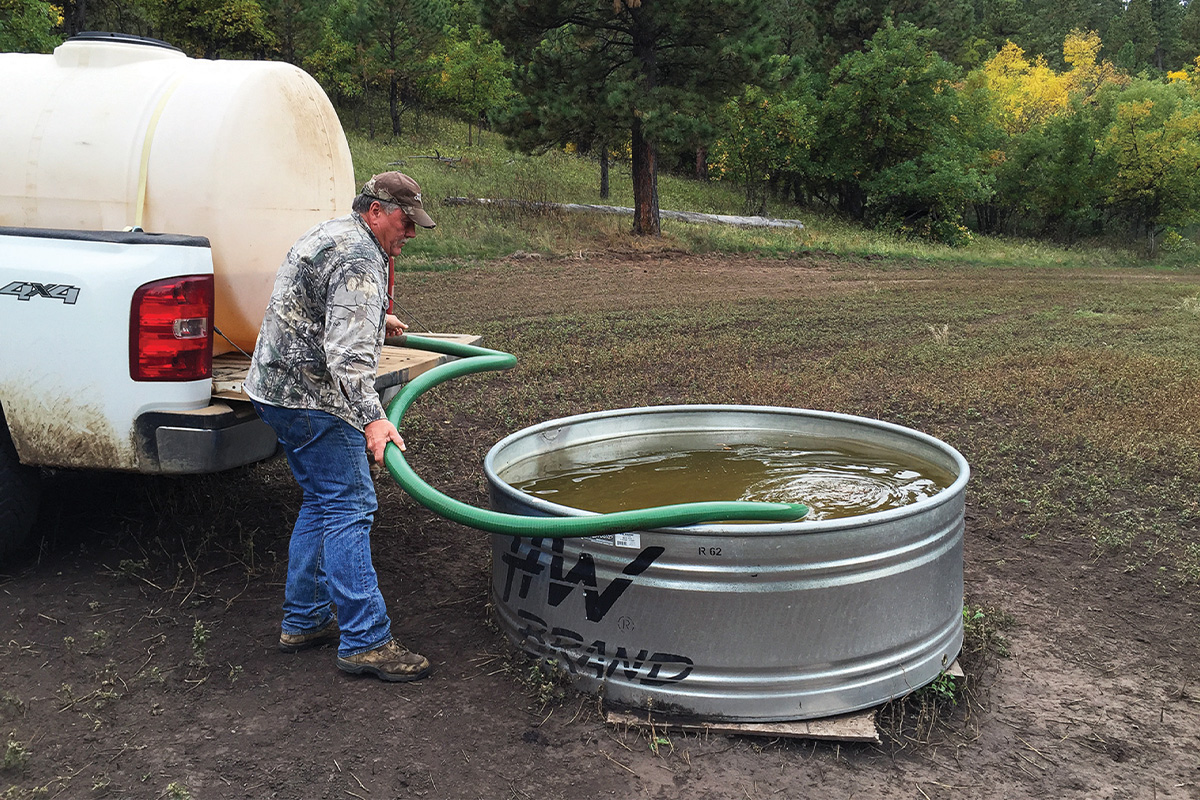
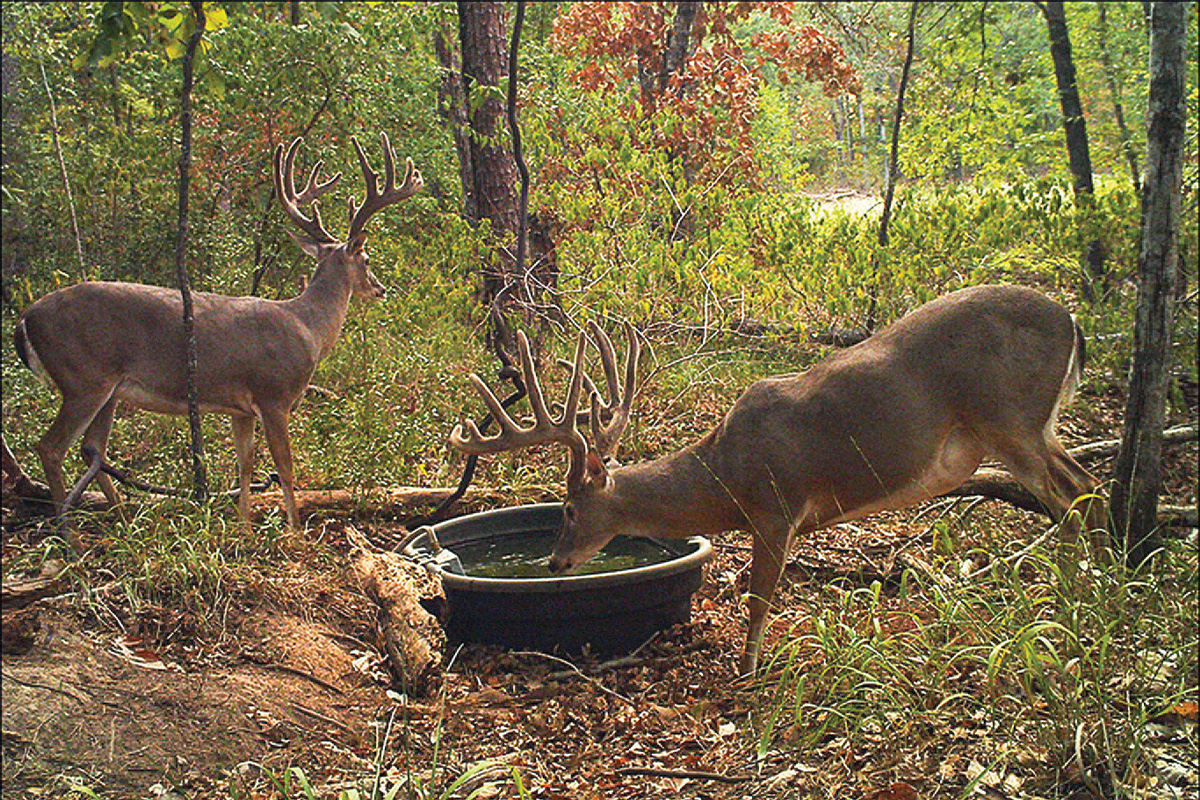
Mike Schmid of Solitude Ranch & Outfitters refills a tank drawn down by thirsty deer.
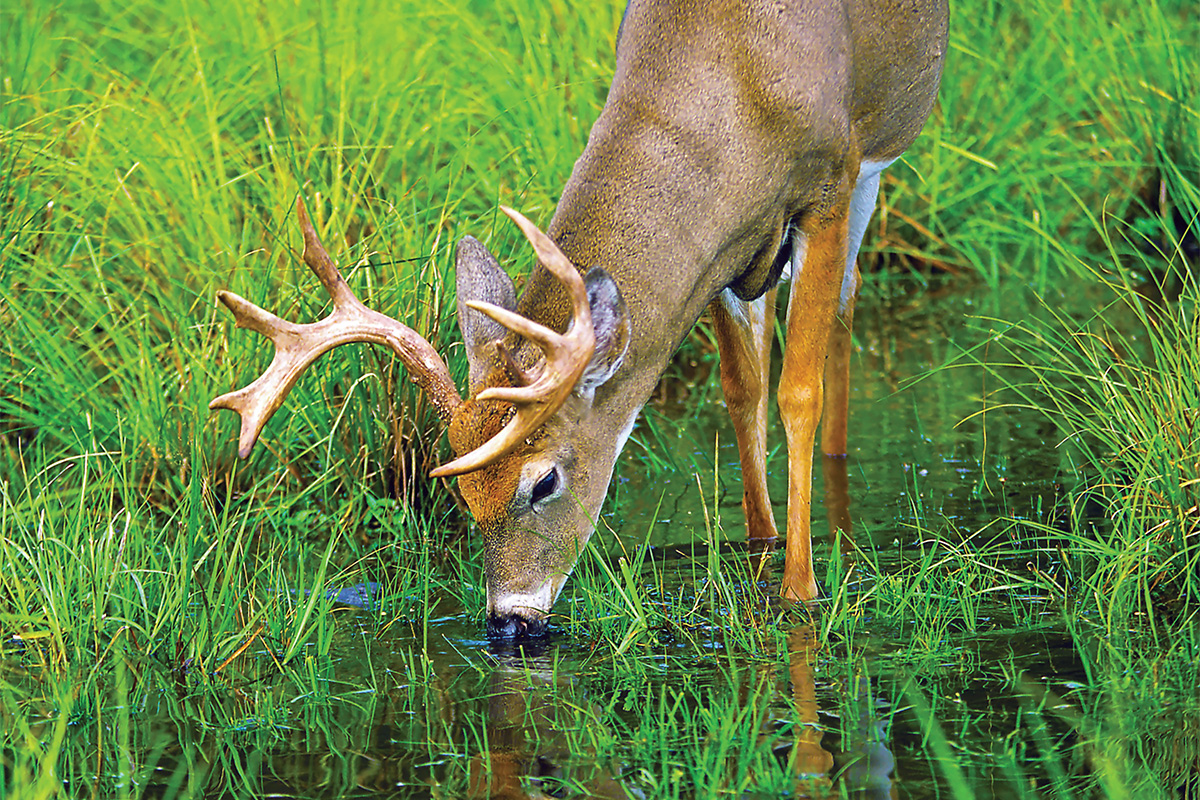
In searching for life elsewhere in the universe, the primary criterion scientists use to identify candidate planets is the existence of water. Mammals generally are composed of 70-75 percent water, and all known plants and animals contain some amount of it. In fact, most species must ingest free water every day. White-tailed deer are no exception. But if you were to ask a group of hunters or landowners to name the most important factors in deer herd health, water probably wouldn’t end up in the top three.
In eastern North America, water seldom is considered to be limiting, as there usually appear to be creeks, rivers, ponds and lakes within easy reach. Yet it has been our experience that every deer-management program should consider water availability in terms of both timing and location. Here at the Institute for Whitetailed Deer Management & Research in East Texas, over the past 30 years we’ve studied all aspects of water needs for whitetails, particularly the when, where and how of supplying it.
THE NEED FOR WATER
A whitetail needs from one-half to one gallon of water per day throughout the year. This is principally to support rumen activity, body temperature regulation and electrolyte balance.
Mature bucks will hit secluded waterholes in daylight. If your land lacks water in the right places, add some. Photo by John Ford
There’s long been a misconception that the greatest water requirement occurs during the hotter months. You might be surprised to learn there’s an equal — and in some cases greater — water demand during winter. The increased metabolism required to maintain body temperature places a huge demand on internal water resources. Having often hunted the far North Woods in subzero temperatures, I can attest to my own need for additional water under such conditions. When all surface water is frozen, deer stay hydrated through water content in browse.
The bottom line is that any sound management program should include a significant effort to ensure deer have water readily available every day of the year. The primary questions, then, focus on how and where to provide that water.
While bucks are well known to be quite vagrant during the rut, whitetails have relatively small home ranges during most of the year. In many cases, the majority of their year is spent inside a square mile. Going even farther, the actual area a whitetail would “prefer” to roam is only about 100 acres during much of the year. We learned this during our early radio-telemetry studies here in East Texas, in which we monitored what happened to average home range size as we gradually improved habitat to the perfect distribution of key elements.
Unfortunately, much whitetail range falls far short of this potential. In developing management plans for landowners, the first thing we do is overlay a 100-acre grid on a property map (even if it’s smaller than 100 acres), then determine what key habitat elements are present or absent in each grid. For smaller properties, we examine what the neighboring lands within the 100-acre grid provide. One of those key elements is year-round water sources.
However, water sources often can’t be counted on throughout the entire year. Even perennial streams dry up during times of drought. That is when supplemental water can be critical. Ponds and lakes often freeze over during much of the winter, effectively creating a “desert” environment for your deer. So, being able to anticipate when and where water will be lacking is a very important part of management.
In the authors’ study, distance from human disturbance was the No. 1 factor affecting deer use of water sources. Photo courtesy of the Institute for White-tailed Deer Management & Research
We often search historical climatic records to get a better idea of the reliability of water sources in a specific area. Local residents and resource management professionals also can be good sources of information in making such assessments. In general, however, we always add in a worst-case scenario to every management plan, just to be safe. Remember, while whitetails don’t want to migrate during hard times, they can and will do so if things turn bad enough. Adding a reliable water source, even when it appears there’s no need for one, is a wise management strategy.
Whitetails can be very “picky” about the water they drink, but not necessarily in the way you’d think. They tend to avoid running water, presumably due to the noise flowing water makes. Also, the places from which deer prefer to drink often contain water you wouldn’t even consider drinking! Mud puddles filled with green algae scum often are highly preferred by deer.
Our research has shown deer tend to use other criteria for choosing watering locations. In 2011, we conducted a study near Alice, Texas, to determine which factors influenced the choice of watering areas by whitetails. We took measurements of the physical characteristics, water quality, surrounding vegetation and proximity to human activity (roads, hunting blinds and residences) for each of 27 artificial watering stations on an 810-acre ranch.
You’ll often find natural water sources, like ponds and creeks, to be central traffic hubs for whitetail and other wildlife. If fresh sign is visible, it can be worthwhile to hunt these locations as you would a destination food source. Photo by Gordon Whittington
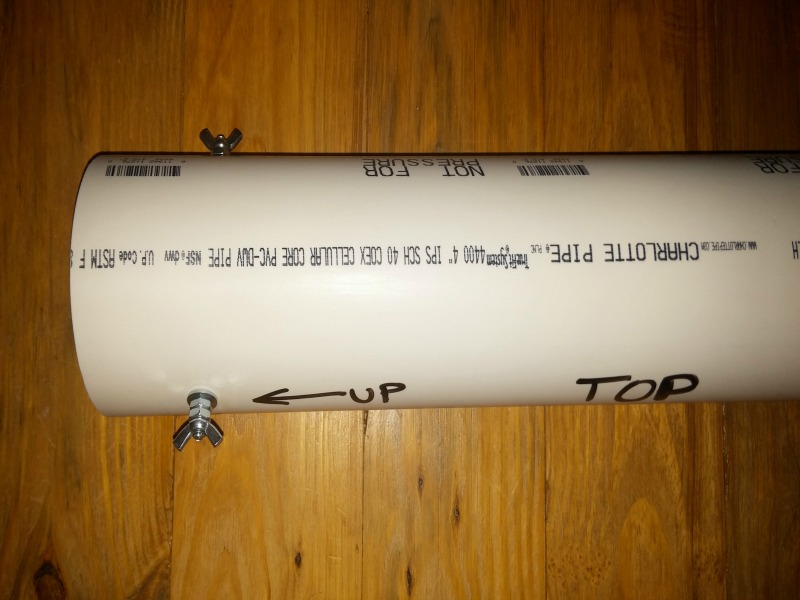
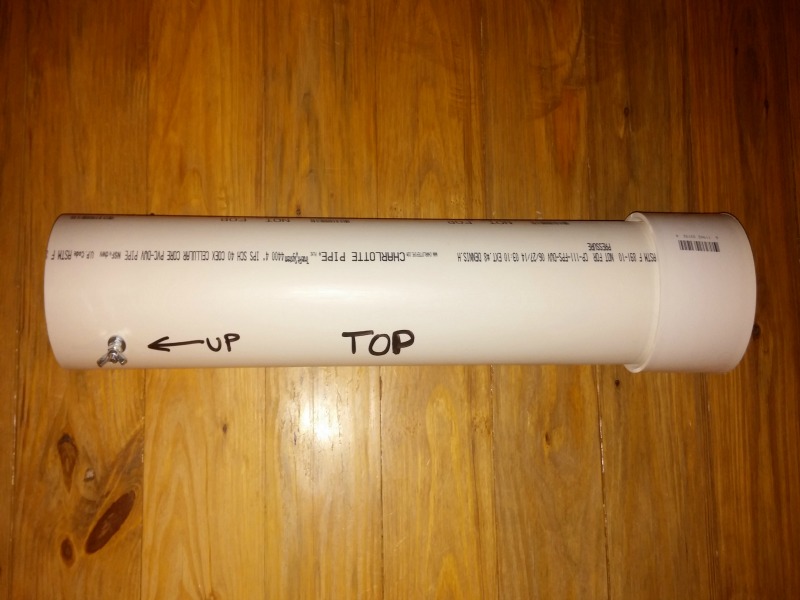
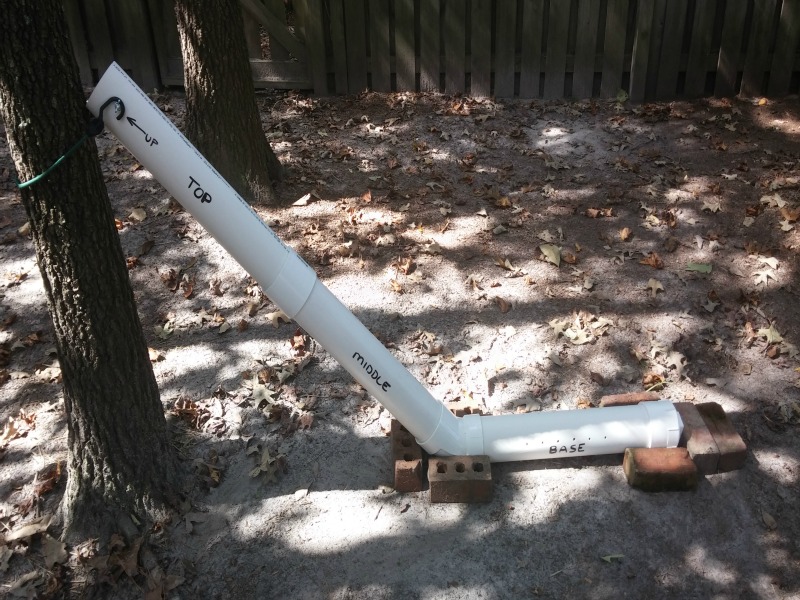
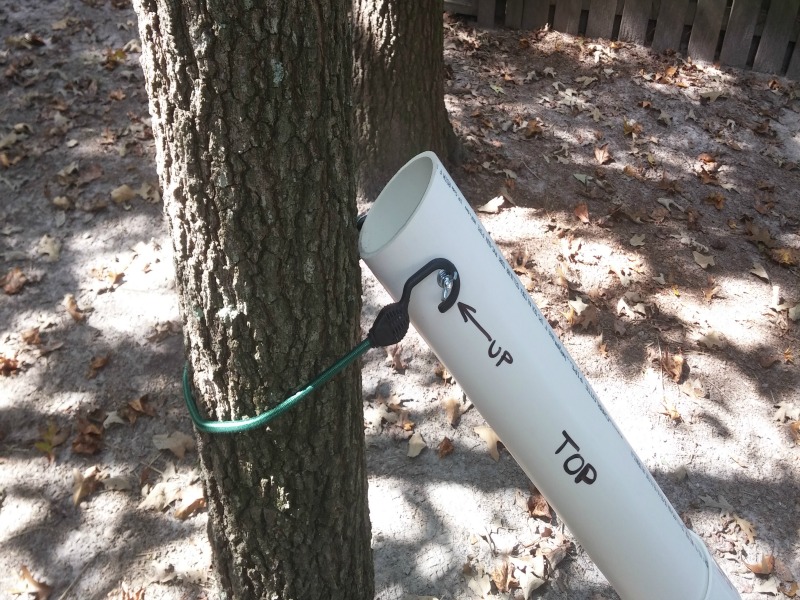
Most of the watering stations were constructed by excavating depressions and supplying each with a “dripping” faucet connected to a network of PVC pipes from a well. We used infrared trail cameras to monitor each location’s use by deer and other wildlife. Then we compared use to a host of variables, looking to determine which had the greatest impact. Fourteen habitat variables, 28 water quality variables, five water characteristic variables, and seven spatial variables (distances to roads, habitations, feeders, hunting blinds and other water sources) were measured for each location.
During this year-long study, we recorded an impressive array of animals using our watering sites. Among them were whitetails, turkeys, bobcats, coyotes, small mammals, birds and reptiles. It was obvious that supplying supplemental water benefitted far more than deer. In late spring, we recorded 671 visits to water stations by 177 bucks and 494 does. In late summer, we recorded an additional 353 buck, 734 doe and 143 fawn visitations. The most important variable influencing deer visits was the distance to the nearest high-use road. This accounted for an estimated 62.9 percent of variation, with water stations nearest to the main ranch road receiving the lower number of visits. Not surprisingly, water stations near human activity were used less than those left undisturbed.
Water stations near hunting blinds also received less use, even outside of the hunting season. Stations surrounded by a diversity of screening vegetation with a large amount of bare shoreline were preferred. Our study also showed preference for water near food sources. Meanwhile, water quality appeared to have little impact on use. If you want to develop some artificial watering stations, we suggest you consider places that are away from roads and human habitations, are near food sources and have adequate screening cover to provide security to your deer. The next question is, what’s the best way to supply water to deer?
Water can be supplied in many ways, including ponds, lakes, water troughs and dugouts with a water supply. We’ve experimented enough to see that each has its positives and negatives. In the case of ponds and lakes, there’s the obvious negative of cost. Here in East Texas the cost of constructing a half-acre pond is about $5,000, including layout, excavation and dirt work. The cost of a true lake can run into the hundreds of thousands of dollars.
The benefit of a pond or lake is that it can provide other recreational benefits, forest protection and potential income. A pond with a surface acre of water should be valued at $30,000 in added benefits, particularly from fisheries. Yet not every parcel of land has potential sites for impoundments. And even when there are suitable sites, soils might be limiting (low water-holding capacity). Another negative to consider is such deer diseases as epizootic hemorrhagic disease and bluetongue. In times of low rainfall, the water level drops significantly, exposing muddy shoreline. These viral diseases are vectored by biting midges (gnats), whose maggots live and mature in rich organic mud. The midges emerge as adults in the late evening, when deer come to water. They have a blood meal by biting the exposed stomach skin of a deer, infecting it with the virus in the process. Sick deer also tend to come to the water to cool off from high fever; setting up a perfect storm for spreading diseases.
For many years, Dr. Kroll managed the Four Canyon Ranch near Camp Wood, Texas. This scenic area lying on the southwestern edge of the Edwards Plateau is comprised of rough limestone outcrops and canyons. In spite of its scenic grandeur, the ranch is conspicuously lacking in surface water. Wells are expensive to drill and often fail to produce, making supplying water to deer an expensive proposition. Over dinner, owner Ken Bailey and Dr. Kroll hatched a scheme to economically supply water evenly over the ranch. Instead of drilling wells, why not place water tanks connected to water troughs in strategic locations?
Of course, there had to be a water supply. The answer to that question came in the form of a surplus water truck costing $2,000. It was easily filled from a nearby river, with water then being carried to the tanks. This began over 25 years ago, and as far as we know, that truck is still in service. Since that time, we’ve had phenomenal success deploying water stations — each composed of a tank, water line, shallow trough and float valve — across North America.
In Texas, it was this system that saved many deer herds during the so-called “millennial” drought of 2011, even as other landowners lost large numbers of deer. Subsequent research revealed a surprising added benefit. You might think that deer use the artificial sites only when water is limiting; however, we discovered they continue to use them even when water is plentiful. We recently discovered the reason for this. Deer, especially does, tend to avoid social conflicts between rival “clans.” Well-spaced water and food sources tend to reduce these conflicts, which have the added benefit of increased fawn survival and antler quality.
Lastly, artificial water sources can actually reduce disease in the deer herd. Many professional biologists say we should avoid anything that attracts deer to a specific site, because bunching theoretically could spread certain diseases. However, our research has shown that providing artificial water is biologically sound.
For starters, supplemental water sources can help to spread deer out over the landscape. Also, easy access to water reduces stress. And perhaps most importantly, such water sources reduce production of disease-transmitting organisms, such as the midges that cause the spread of epizootic hemorrhagic disease (EHD) in deer. There’s little or no mud around artificial troughs, eliminating habitat for disease vectors such as gnats and flies.
Today, we install artificial watering stations at the rate of one per 100 acres anywhere there’s no reliable natural water source. The cost of each unit is under $600. That’s less than you’ll spend on food plots, feed and attractants in the average hunting season. Average water consumption per deer is about one half-gallon per day over the year. We install a 300- or 400-gallon tank at each site, so one filling will supply approximately 600-800 deer-days of use. The average number of deer using a watering station has been no more than 12. At that rate, each station needs refilling about every six weeks.
Especially in areas that contain little standing water, deer will take in most of their water from food sources. This is pertinent both in the winter, when many water sources freeze over, as well as in the spring and summer months when highly-succulent forbs and herbaceous materials are key food sources. Photo by Gordon Whittington
We suggest you either acquire a black storage tank or paint yours dark green to prevent algae growth. Also, locate the tank in a shady area to avoid overheating the stored water. Although a tank must be accessible to the vehicle used to deliver the water, we try to locate watering stations away from areas of frequent human disturbance. We also like to put them adjacent to food sources such as food plots, feeders and natural food locations (browse and mast). We don’t hunt these areas, as we want to provide safe havens for doe clans and buck groups.
As we’ve yet to discover a negative in providing artificial water, we decided it was time to convey this information to the public. This might all seem like a great deal of trouble, but managing whitetails has become a sport in and of itself. The whitetail lifestyle now is a 365-day affair, and it brings far more joy than just killing a buck.
We reviewed and tested over 25 compasses and found that the Sunnto MC-2 is the best survival compass.
A compass needs to do a lot more than just point North to be considered a good compass for survival. With so many options out there called “survival compasses”, it is hard to know what to choose.
Our buying guide explains what to look for in a survival compass and how the Sunnto MC-2 is the perfect choice – not only as the best survival compass but also the best for any other outdoor activity when getting lost is a possibility.
I have over 40 years of experience using compasses and purchased my first Silva baseplate compass when I was 10 years old in Boy Scouts. My family has a combined 40 years of military experience using compasses, with one of them being a navigator. My grandfather was a pipeline surveyor, and I have his 1940s model compass.
So, we have used a few compasses over the years.
I based this review on our experience and also the experience of other experts that teach wilderness navigation classes. Our goal is to present the best survival compass available that can help you get to safety (or away from harm) in an emergency.
If you need a compass to get from A to B while hiking, bushcraft camping, or just in case you face a survival situation, keep reading.
Quick Comparison of our Favorite Survival Compasses
Best Survival Compass
Suunto MC-2 – The Best Survival Compass
Type: Orienteering Mirror Sighting Compass
Size: 2.5” x 4” x .7”
Weight: 2.6 ounces
Declination Adjustment: Yes
Glow in the Dark Indicators: Luminescent Marks
The Suunto MC-2 Compass is our top pick for the best compass for survival.
This compass has all of the features I need to navigate a survival situation. It is a sighting compass that I have used to keep me traveling in a straight line over long distances. I can simply sight an object in the distance at the correct bearing and hike to that object. After reaching that object, repeat the process.
The mirror is great to have in case I need to signal for help or for personal first aid.
I like the fact that this compass is also a baseplate compass for use with topographical maps. I have the USGS version of this compass, and my maps are USGS scale maps. This allows me to measure distances easily on a map without having to do any math. Even if you don’t have USGS maps, the inch ruler is universal for other maps.
The built-in declination adjustment is excellent as well. I can simply read the adjustment on the map and then turn the adjustment screw on the back of the compass. I like that a small adjustment tool is included and attached to the lanyard, so I never have to look for a screwdriver.
The baseplate also has a magnifying lens, which I have used to see small details on my maps and to start fires.
A clinometer and a slope ruler are also built into this compass. While I personally don’t usually need these features, I have them.
I also like that the bezel has all 8 directions printed on it (N, NE, E, SE, S, SW, W, NW), as well as degrees. This makes it easy to use since you don’t have to remember the bearing for E or W in a stressful situation.
When ordering one, there may be some confusion about which configuration to get. I personally recommend the Northern Hemisphere version with USGS UTM scales (which is linked above.)
This compass has everything that I need in a compass. Many other survivalists and outdoorsmen also agree. It is affordable, so there is no reason not to recommend it.
Recommended for:
The Sunnto MC-2 Compass is the best compass for any outdoor activity. It is especially suited as the best compass for survival situations. If you only plan to buy one compass, get this one.
Suunto MCB Mini Compass – Best Backup Survival Compass
Type: Mini Mirror Sighting Compass
Size: 2.2” x 2.68” x 0.7”
Weight: 1.27 ounces
Declination Adjustment: No
Glow in the Dark Indicators: No
The Suunto MCB Mini Compass is a compact mirror sighting compass that is a great backup compass to keep in your pack, vehicle, or boat. Sunnto calls it their “Safety Compass”, so it was designed to be a backup to your primary compass.
This compass is similar to what I call an orienteering compass, except it does not have a clear baseplate.
It does not have declination adjustment or a magnification lens either, so mapping capabilities with this compass are somewhat limited.
It has a straight edge on the sides with mm and 1/20 scales, so you can use it with a map if necessary.
The lanyard has a built-in whistle, which, combined with the mirror that can be used for signaling, makes this a great multiuse survival tool.
The Lid folds down to make an excellent compact package that will fit almost anywhere. While not the best primary compass, it does make a great backup. If you ever find yourself in a situation where you may not believe your primary compass, a backup will help you verify your doubts. Peace of mind is cheap.
Recommended for:
The Suunto MCB Mini Compass is for someone looking for a backup survival compass for their pack, vehicle, or boat. If you do not venture out very far, it makes a good backup for a GPS unit as well.
Cammenga US Military Compass – Most Durable Survival Compass
Type: Lensatic Compass
Size: 2.25″ x 3″ x 1.1″ (closed)
Weight: 16 ounces
Declination Adjustment: No
Glow in the Dark Indicators: Tritium
The Cammenga US Military Compass is the same as the government issue M-1950 compass for the military.
The biggest benefit of this compass is it is very durable and battle-tested. If you are concerned about damaging your compass, this is the most durable compass available.
Our team has seen this compass dropped over a cliff and ran over during military operations. Afterward, it still functioned fine. Simply put, we have seen it survive tough times.
I feel that using this compass is not as straightforward as a mirror compass. However, using this compass is second nature if you are military-trained.
It does not have a mirror, so this is a disadvantage from a survival perspective. While it does have a magnifying lens for sighting, it is not strong enough to start a fire.
The tritium inserts are great and will stay illuminated for years. This makes this compass the best on our list for navigating at night.
This compass can be used with maps. However, using it is a little different from traditional baseplate map compasses. Again, anyone that is military-trained will not have an issue. It does not have a declination adjustment, so you will have to consider it in your bearing calculations.
Recommended for:
The Cammenga US Military Compass is for anyone who has had military training and is comfortable using this compass. It is also very durable, so if you are hard on your equipment, this is one to consider. For people that are not military trained or understand compasses very well, this is not the best choice for a survival compass.
Silva Ranger 2.0 Compass
Type: Orienteering Mirror Sighting Compass
Size: Approx 4” x 2.5” x 1”
Weight: 4.8 Ounces
Declination Adjustment: Yes
Glow in the Dark Indicators: Luminescent Marks
The Silva Ranger 2.0 Compass is a mirror-sighting compass with all the features I look for.
It has a sighting mirror to sight objects in the distance for traveling in a straight line. It has a clear baseplate for use with maps and a magnifying lens to start fires if needed.
I like the fact that it has multiple map scales printed on it. In my experience, you come across different maps with various scales, so a compass with multiple scales is great.
The lanyard also has map scales marked on it. Since the lanyard is flexible, you can lay it on a map and bend it around curves for more accurate distance measurement. This is great if you want to know the distance you will travel on a curvy hiking trail.
There are a few things that I do not like about this compass. The bezel only has degrees and no directions like the Suunto MC-2. During a stressful situation, it could be hard to remember the bearing for East, for example.
I also don’t care for the shape of the baseplate. It is curved on the ends and not straight, which makes it more challenging to line up on a map.
The lid of this compass seems just too large to me. It is noticeably larger than the Suunto. Also, the compass does not have a tool for adjusting the declination.
I have owned Silva compasses for over 40 years, so I am a fan. Unfortunately, they moved manufacturing to China in 2005, which is another negative for me.
Recommended for:
The Silva Ranger 2.0 Compass is for anyone looking for a survival compass, and our top pick is unavailable. If you are an avid hiker, the lanyard is convenient when mapping out a hike.
Brunton TruArc 15 Compass
Type: Orienteering Mirror Sighting Compass
Size: 4” x 2.5” x 0.6”
Weight: 3.2 ounces
Declination Adjustment: Yes
Glow in the Dark Indicators: No
The Brunton TruArc 15 Compass is made in the USA and checks all of our boxes in what is needed in a compass for survival.
It has a sighting mirror, magnifying lens, and a baseplate with USGS scales. I like the three scales on the baseplate. It has a 1:24,000 scale for miles, meters, and feet. This makes it easy to measure any distance you want on a map. The only downside is you must have a USGS map to use it without doing any math.
This compass has a global needle as a standard. This makes it nice if you want to travel near the equator or to the southern hemisphere with this compass. It also has a built-in clinometer and toolless declinometer adjustment. While the toolless design sounds good, many people have issues adjusting it.
There are a few negatives with this compass. The bezel is set up in reverse from most other compasses and has a magnifying window over the bearing markings. If you practice and exclusively use this compass, it may not be a problem. But, with most other compasses being the opposite, it is very confusing to learn from someone with a different compass.
Sighting with the compass is also not intuitive. It is easier to see the bearing marks at the top of the bezel through the mirror. When you read the bearing this way, it is 180 degrees off and does not align with the “shed” markings on the baseplate. This just makes it confusing to me.
Recommended for:
The Brunton TruArc 15 Compass is for someone looking for a made-in-the-USA compass. It fits all of our criteria for a survival compass but is not as easy to use as others.
Sunnto MB-6 Compass
Type: Mirror Sighting Compass
Size: 2.6” x 1.85” x 0.9”
Weight: 1.94 ounces
Declination Adjustment: Yes
Glow in the Dark Indicators: Luminescent marks
The Sunnto MB-6 Compass is a unique compass that folds into a metal matchbox-style box. This makes it very durable and compact.
This compass has a mirror that folds down underneath it when you open it. It has gun sight-type sights on the top that you can use to sight targets in the distance. It is a little different than most mirror compasses but works similarly.
The main advantage of this compass is how compact it is. If folds up into a nice box that will fit into your pocket.
The main disadvantage is this compass is it can’t be used with maps. You will need a separate baseplate compass if you need to do any map work. However, it does have declination adjustment, so this will help when translating bearings from your mapping compass.
While I can’t consider this compass the best for most people, it should be considered for someone who doesn’t like the standard orienteering compass and doesn’t plan to use maps.
Recommended for:
The Sunnto MB-6 Compass is for someone who wants a rugged, compact, and durable survival compass and does not plan to use a map. This is a great backup compass for a hiker or a boater.
Silva Mini Compass
Type: Mirror Sighting Compass
Size: 1.6” x 1.86” x 0.8”
Weight: 1.6 ounces
Declination Adjustment: No
Glow in the Dark Indicators: Luminescent marks
The Silva Mini Compass is a small mirror sighting compass that is very compact. It is the smallest compass on our list. It is also the cheapest.
This compass should only be considered a backup compass. It is compact and lightweight, so it is a great choice for a backpacker or hiker when weight is a concern.
It does have a mirror, which is unusual for such a small compass. It is also affordable, so keeping a backup won’t blow your budget.
It is made from thinner plastic, so it is not the most durable compass.
You could use this compass with a map if you had to, but since it is so small it is not easy. It does have an inch scale on one side.
This compass made it to my list because it has a mirror and is very small. You can stick this in a small survival kit; it will be good enough to help you travel in a straight line when you have no other option.
Recommended for:
The Silva Mini Compass is for someone looking for a small, compact mirror compass for their survival kit. This should not be considered your main compass for survival situations but rather an emergency backup.
Best Compass for Survival – Buying Guide
To select the best survival compass, it is essential to understand a few basics about compasses. Don’t just buy any cheap compass advertised for “survival.”
There are a few different types of compasses. Some are good in a survival situation, and some are not. Below we will discuss the differences, and then we will put it all together so you can decide which is the best for you.
Price
While, usually, you can find an excellent lower-priced option for most survival gear, this is not the case for a compass. As they say, “You get what you pay for.”
Stay away from anything that is under $25. These are cheap inferior copies. Most cheap compasses are inaccurate and are more difficult to use.
If you just want something to play with, cheap is fine, but a survival compass should not be something you just play with. Since your life depends on it, it needs to work correctly.
Brand
A reputable company should make your survival compass. I found many cheap knockoffs with strange brand names that are made in China. While they look like the more expensive compasses, they are different.
Cheap compasses are made from inferior materials that are simply not reliable. The needles can be inconsistent between readings, causing you to travel in the wrong direction. While a small error is negligible, it really adds up over a long distance.
Stay with these reputable brands:
Suunto has been making compasses in Finland for over 80 years. Their specialty is compasses, and they are continually updating their processes to make their products more accurate and durable. They include a lifetime warranty and make some of the best compasses available.
Cammenga is a US-based company that has been making the military’s standard issue M-1950 lensatic compass since 1992. They must meet all the military standards in their processes so their products are top-notch.
Silva began in Sweden and made their first compass in 1928. They made compasses in Sweden until 2005, when they moved production to China. Since then, they have been bought and sold a few times. Since 2018 they have re-established themselves as a Swedish company. However, their manufacturing facilities are still in China. Their quality has improved in the past few years.
Brunton is a US-based company that was founded in 1895. They began by making a pocket transit that was used by surveyors that included a compass and clinometer. It was often just called a “Brunton.” In 1996, they were acquired by Silva but were sold in 2006 and again in 2009 to another Swedish company. Manufacturing is still done today at its Riverton, Wyoming facility.
Different Types of Compasses
There are a few different types of compasses, each with a specific purpose. This is where it gets confusing when buying a compass.
First, we will review each type of compass.
Button
A button compass is what the name suggests. It is a small compass, not much bigger than a button. They are usually around 1” in diameter and are circular with no other baseplate or cover.
A button compass gives you an overall direction with no absolute accuracy. If you want to move North, it will give you a general Northerly direction.
These compasses cannot be used with a map, and they cannot be used to sight a bearing accurately.
While one of these is better than nothing, there are ways to determine the overall direction of the environment. The location of the sun, the moon, and moss on trees and rocks can tell you which way North is more reliably than a cheap button compass. Don’t waste your money.
Baseplate
A baseplate compass is a circular compass mounted to a thin rectangular base plate. The baseplate is usually a clear plastic.
Baseplate compasses are designed to be used with maps to determine bearings and distances. They will have a ruler or scale printed on the side to measure distance on a map. They will also have a rotating bezel that is used to measure a heading between points on a map.
While these compasses will show you a bearing, they do not have any type of sighting mechanism. These can be used to navigate somewhat when there are prominent landmarks to follow. However, if there are no prominent landmarks or you do not know where you are, they will not be accurate enough to travel in a straight line.
Lensatic
A Lensatic compass is a circular compass inside a case with a lid and a sighting device. An excellent example of a Lensatic compass is the standard military M-1950 compass.
These are used to sight objects or landmarks in the distance so that an accurate bearing can be determined or followed. These compasses are the best for traveling in a specific direction and allow you to move in a straight line.
While they are not specifically made to use with maps, some have a flat base that can be used with a map when opened.
Transit Compass
While not as popular today with GPS and modern electronics, a transit compass is used by surveyors and map makers. These compasses are usually 3 inches or so in diameter, have a metal case and lid, and are very accurate and expensive.
While you can’t find many of these sold new today, they are often sold as antiques. I have one from the 1930s that was my grandfather’s. He used it to survey while installing pipelines.
Orienteering or Mirror Sighting Compass
The term orienteering compass is often used a lot for baseplate compasses. This is likely a marketing tactic since it sounds “cooler.”
An orienteering compass or mirror sighting compass looks similar to a baseplate compass. However, it has a top-hinged cover that has a mirror. It also has a gun sight-type feature that allows you to sight objects in the distance.
An orienteering compass can be used the same as a baseplate compass for determining direction and distance on a map. It can also be used like a Lensatic compass to sight objects in the distance accurately.
This type of compass is usually the best overall since it combines the baseplate and Lensatic compass.
Parts of a Compass
Understanding the parts of a compass is critical before purchasing one. Below, we will step through each feature while referencing this diagram.
Needles
The needle is the heart of the compass. Compass needles will have two sides, one painted red or another color and the other painted black. The painted side of the needle points to “magnetic North.”
Some compasses have two types of needles available. The most common in the US is called ” Northern Hemisphere” or just “NH.” The other type is “Global.” If there is no indication, they are usually NH needles.
Since the Earth is curved, the magnetic field is different depending on where you are on the planet. If you are in the northern hemisphere, a compass needle is attracted to the poles at a different angle than in the southern hemisphere.
Since the needle floats around its center inside a capsule on the compass, you have to hold the compass level so it is free to rotate.
So, a compass with a needle tuned for the Northern Hemisphere will need to be held at an angle to rotate in the Southern Hemisphere freely. This makes it challenging to use on a flat surface.
In the US, both NH needles and Global needles will work. Global needles have more room for the needle to tilt inside the compass.
While some say that Global needles are better since you can walk and still use the compass, I am not sure who is trying to hike in the woods without watching where they go. This is the same as texting and driving. You cannot accurately use a compass, not trip over your feet, and track landmarks simultaneously.
Global needle compasses are more expensive than NH compasses, so again, this is just a marketing ploy to get you to spend more money on something you don’t need.
Unless you plan to travel to the Southern Hemisphere (that’s a long hike), an NH compass will work fine for you.
Rotating Bezel
A rotating bezel is needed to measure and follow bearings. Make sure your compass bezel has markings in degrees from 0 to 360. Some military compasses are marked in Mils, which is not helpful unless you were trained in the military.
Also, make sure your compass bezel is at least marked with “N” to indicate North. While North is basically 0 degrees, having this on the bezel is better so you don’t get confused in a stressful situation. The best compasses have N, S, E, and W marked for clarity.
Declination Adjustment
Declination is a complicated subject that could be its own article.
There are basically three directions for North depending on your reference point. There is true North, magnetic North, and grid North. Maps are a flat representation of a curved surface.
The declination adjustment is printed on the map to make up for the differences between the North direction on a map and the magnetic North that your compass reads. This adjustment will be different depending on where you are on the earth.
A compass with declination adjustment makes it easy to adjust for this difference and measure bearings accurately on the map. If your compass does not have a declination adjustment, you can still use it, but you must add or subtract the declination from every measurement you take.
Having built-in declination adjustment on your compass is the best and makes calculating bearings easier.
Orienting Lines
The best baseplate and orienteering compasses will have orienting lines printed on the baseplate so you can line them up accurately on the map. Aligning the grid lines on a map is an essential first step to measuring bearings.
They will also have what is often called a “shed” or “doghouse” printed behind the needle. This area visually indicates where the compass arrow should be when you are taking or measuring a bearing.
It is often said to “put red in the shed” or “put the dog in the doghouse” as a way to remember how to align the compass needle.
Needle Chamber
Most newer compasses (except the Military compasses) have a liquid-filled needle chamber. The liquid in the chamber helps to dampen the amount of movement the needle makes. It makes it smoother and quicker to get an accurate reading.
Cheaper compasses will not have a liquid-filled chamber, and the needle will constantly move around as you hold it. This makes it hard to get an accurate bearing since the needle constantly moves.
Over time, bubbles can form in the chamber (like in my 40-year-old Silva). This does not affect the compass’s accuracy but makes it harder to use since you must wait for the needle to stabilize. If the bubble is over 25% of the chamber, it is time to get a new compass. My Silva has been officially retired.
Clinometer
Some compasses will have a built-in Clinometer. This is used to measure the slopes of hills. Surveyors and map makers used this tool to do their work historically. Today with modern GPS devices, they are no longer used much.
There is no need for a Clinometer on your survival compass, either.
Scales
The scale printed on your baseplate or orienteering compass can be confusing. This is used for measuring the distance on a map.
Most compasses come with at least inches or centimeters printed on the baseplate. At a minimum, this, along with the scale printed on the map, can always be used to measure distance on a map. You could use a piece of string if you had to.
Most topographical maps today come with a standard scale. USGS maps are always 1:24,000 scale. Some compasses, like our top pick, come with a variety of scale options available.
If you know the type of map you have, try to match your compass with your map. For example, if you have a USGS map, get a USGS compass. This will just make it easier to take distance measurements. Otherwise, just use the typical inch or centimeter ruler that comes on all baseplate compasses.
Glow in the Dark Marks
A compass with luminescent or Tritium markings glows in the dark, making using your compass at night much easier. Tritium is the best and will usually last for at least ten years. Luminescent paint has to be “charged” by sunlight or a flashlight and will glow for a few hours afterward. Some glow better than others.
Either way, some glow-in-the-dark markings are nice but not essential.
Sighting Lens or Mirror
A Lensatic compass will have a sighting lens, while an Orienteering compass will have a mirror.
When using a Lensatic compass, you hold it close to your face. As you focus on an object in the distance through the sighting window, you can look down without moving and see the needle and the markings on the bezel through the lens. Since everyone’s eyesight is different, the position of the lens may have to be adjusted. You may also need to remove your glasses depending on your eyesight.
When using an orienteering compass, you hold it extended away from your face, much like a handgun. As you focus on a distant object through the sighting window, you can adjust the mirror to see the needle and bezel.
Essentially, the mirror and lens are accomplishing the same thing in different ways. In my experience, the mirror works best and is easier to use.
What makes a good Compass for Survival?
To find the best compass for survival, you must first determine what the compass will be used for.
The main items to focus on are:
Assist with traveling in a straight line over a long distance.
Be able to find a position and navigate with a map.
Have multiple other uses like signaling and fire starting.
Lateral Drift
First and foremost, a survival compass must assist you with traveling in a straight line for a long distance. Everyone experiences what is called “lateral drift” while they are walking without a clear target in the distance.
When you are in the woods, and all the trees look the same, you tend to walk toward your dominant side without realizing it. This is why you hear of lost people walking in one big circle.
To walk in a straight line, we need a compass that allows us to sight targets in the distance to walk towards. This can only be accomplished with a Lensatic or orienteering compass.
Map Navigation
A survival compass should be able to be used with a map. Finding your way to safety or around hazardous locations is one of the main objectives in a survival situation.
Even while bushcraft camping, navigation is an essential bushcraft skill that could be used to find a body of water to fish or a location to hunt. It would then help you find your way back to camp.
To navigate with a map, a baseplate or orienteering compass is needed. Some Lensatic compasses can also be used with a map.
Multi-Use
For any piece of survival gear, it should have multiple uses to be considered. We are limited in how much gear we can carry in a survival kit, bug-out bag, or get-home bag, so each item must be valuable.
An Orienteering compass has a mirror. Mirrors can be a signaling device to others in the air or on the ground. They can also be used for hygiene or to see areas on your body that you can’t usually see for first aid.
A baseplate compass and an orienteering compass also have a magnifying lens. A magnifying lens can be used to start a fire with the sun. This massive advantage over the other compasses should not be ignored. It is very easy to practice starting a fire with a magnifying lens before you need it. While you should have a fire starting kit, this is a resource that never runs out except on a cloudy day.
Best Survival Compass
Considering these factors, the best compass for survival is an orienteering compass like our top pick, the Suunto MC2. It has all the criteria needed in a survival compass.
Most people that are using a compass are doing it because they are traveling in a remote area. An argument could be made that all compasses are survival compasses. Before buying a cheap compass to take hiking or camping, this should be considered. If you get lost, was saving a few dollars worth it?
A good survival compass is essential for any survival kit or as a backup to a GPS unit or survival watch. Learning how to use a compass to navigate is similarly just as important. There are many books, classes, and courses available on navigation. I recommend purchasing a map and practicing with your compass before venturing out on a long hike.
The best way to avoid a survival situation is to never get in one to start with.
Video Guide to the Best Survival Compass
Dave Canterbury discusses the best compass for bushcraft and survival.
What is the Best Compass for You?
I see many recommending cheap baseplate compasses as the best compass for survival. After understanding the criteria above, would you consider one? It is not practical to try and constantly watch a compass while walking through the woods, trying to get to safety. This will only get you more lost or, even worse, injured.
The best compass for survival is the Sunnto MC2, without question. Its features, quality, and ease of use are ahead of competitors. In my experience, it is also the best compass for hiking, bushcraft, camping, hunting, and any other outdoor activity. There is no reason to own a different compass.
Now that you have the best compass, look at our other survival guides and gear reviews. As you build out your survival kit, we have you covered no matter the outdoor activity.
Murky population and hunting status often leads sportsmen and women to ask the question, “Can you hunt bison in America?”
Hunting bison in America may seem like an improbable endeavor. Overhunting and flat-out annihilation nearly wiped out the bison of North America in the late 19th Century.
Through conservation efforts and reintroductions, the abysmal number of wild bison left in 1900 (300 animals according to the U.S. Fish and Wildlife Service) was boosted to about 360,000 bison by the beginning of the 21st Century.
Over 140 years later, the vast bison herds of the Great Plains are gone. Their former range has been sliced and diced by a million housing developments, strip malls, farms, and cattle ranches, bisected by countless fences and highways.
However, the current bison population, brought back from near extinction, is a true North American conservation success story.
As such, you may be wondering if you can still hunt this North American icon. The answer is yes, absolutely you can. And you don’t have to settle for just hunting domesticated herds on private ranches either.
While you can no longer hunt bison in America the way it was once done, six states do allow special-permit public-land hunts for American bison.
Where You Can Hunt Bison in America
Alaska
The Plains bison were introduced to Alaska in 1928. Starting with 23 animals, the non-native population has grown to 900 free-range bison that roam the state. According to Alaska Fish and Game, hunting opportunities have been available since the 1950s and these days it’s an extremely popular hunt. For example, in Delta Junction, 100 permits are available for a draw of about 15,000 hunters.
Wood bison are native to Alaska and were re-introduced in 2015 after being extirpated in the 1800s. Hunting opportunities are expected to be available for this subspecies once the population has a harvestable surplus.
Arizona
Bison hunts take place in just two areas of the entire state; Raymond Wildlife Area and House Rock Wildlife Area. Plains Bison are native to Arizona and were reintroduced in 1906, in large part because of former bison hunter and rancher Charles Jones.
Charles “Buffalo” Jones ran 87 American bison nearly 200 miles from Utah to Kaibab Plateau, which President Theodore Roosevelt had set aside for protection. Jones caught most of these wild bison as calves in the 1880s from the last remaining wild bison herds in Texas and New Mexico. He then sold his remaining bison to the state of Arizona in 1927. Bison hunting came into play in Arizona in 1972.
Montana
Buffalo hunting returned to Montana in the mid-1980s. Due to criticisms of hunt methods, including game wardens assisting hunters with locating bison, buffalo hunts were banned in 1991 and then reopened once again in 2005. Now, officials are banned from contacting hunters when bison stray from the safety of Yellowstone National Park. Other new regulations include requiring hunters to attend classes on bison hunting.
Montana Fish and Wildlife data show that in 2015, there were 10,424 applicants for an available 72 either-sex permits. It could take a while to draw for this big game hunt.
South Dakota
Bison hunting in South Dakota is restricted to Custer State Park. Much like Arizona, these bison are the descendants of American bison calves that were rescued in 1881 and sold to a cattle rancher in 1899. That cattle rancher, Scotty Phillips, took over the herd and grew it to a head of a thousand. These bison were used to restock the population at Custer State Park, as well as other herds in the U.S.
Two short hunts (non-trophy and trophy) are available at Custer State Park. These hunts focus on bison that are 10 years old or older and serve as a management tool. The park provides a guide and hunters can only hunt three consecutive days at a time.
Wyoming
Wyoming brought back hunts for bison, or American buffalo, during the winter of 1988. According to Wyoming Game and Fish Department, bison hunts are allowed in “areas of Bridger-Teton National Forest, the National Elk Refuge, small parcels of state-owned land, and potentially some private lands with landowner permission.”
In order to hunt the National Elk Refuge, there is a separate application process for hunters that successfully draw a bison license.
Utah
In 1941, Dr. William Goetzman introduced 18 plains bison in southeastern Utah. Working with the Utah Divison of Wildlife Resources, U.S. Division of Grazing, and local stockmen to transplant American bison from Yellowstone National Park, the numbers soon increased.
Bison then began populating the Henry Mountains. Incredibly, the Henry Mountain herd is one of two that can claim genetic purity (not containing domestic cattle DNA) and being disease-free.
Not only that, but the herd is one of six free-ranging herds on public land in the United States.
Utah offers once-in-a-lifetime hunts for American bison in the Henry’s, as well as the ultra-coveted Bookcliffs. For a lucky permit winner, either one of these rugged and beautiful locations is an incredible hunt. There are opportunities for bison hunts on Antelope Island as well.
How to Hunt Bison in America
There are many states such as Colorado, Pennsylvania, Texas, and New Mexico where you can book bison hunts on private ranches. Steve Rinella of MeatEater notes the apparent “lack of challenge” in these hunts, but that it “might certainly give a hunter an idea of what it was like when our ancestors tangled with these massive beasts.”
Many of these ranches and outfitters offer a 100% guarantee of success.
If you want to ratchet up the difficulty, apply to one of the states mentioned previously for their public land, fair chase American bison hunts. It may take you years to draw, and there is also the reality that you may never draw for these competitive tags.
Spot and stalk is the usual hunting method, and most weapon choices are allowed including archery, rifle, and muzzleloader. Some areas like Custer State Park in South Dakota only allow rifle hunting on bison hunts and specify legal calibers.
A Nod to Early Conservationists
We can be thankful for early conservationists that took the form of ranchers, hunters, wildlife professionals, and presidents. Their individual actions to preserve North American bison, was the impetus that brought American bison numbers back from near extinction.
Without the foresight of people like Theodore Roosevelt, James “Scotty” Phillip, Walking Coyote, Dr. William Goetzman, Charles “Buffalo” Jones, and others we wouldn’t have bison or the bison hunting opportunities we now have.
NEXT: 4 STATES YOU’D BE SURPRISED HAVE GOOD DEER HUNTING
Ground squirrels can damage many food-bearing and ornamental plants. They will enter gardens and devour vegetables in the seedling stage, gnaw on plastic sprinkler heads and irrigation lines, eat the eggs of ground-nesting birds and can be quite destructive. This humane DIY squirrel trap can help you eliminate those pesky little varmints!
– Three pieces of PVC plastic drain pipe, 4 inch diameter, 2 feet long each (total of 6 feet)- One PVC 45 degree elbow, 4 inch diameter- One PVC clean out plug, 4 inch diameter- One PVC adapter fitting, 4 inch diameter (threaded on one end for the clean out plug above)- One PVC coupling fitting, 4 inch diameter- One PVC pipe cap, 4 inch diameter- Two machine screws, zinc or stainless steel, 1/4 inch diameter, 1 inch long- Four nuts to match the screws above- Two washers to match the screws above- Two wing nuts to match the screws above- One adjustable 2 foot bungee cord- One can of spray cooking oil- One small jar of peanut butter
Tools:- Power drill with 1/4 inch bit
Step 2: Drill holes in pipe.
Using the power drill, drill multiple 1/4 inch diameter holes in one of the 2 foot long pieces of PVC pipe. Do not drill holes in the last 6 inches of each end of the pipe. This pipe will be the BASE of the trap.
Select a different 2 foot long piece of PVC pipe. Drill two 1/4 inch diameter holes approximately 2 inches from one end of the pipe.
The holes should be directly across from each other on opposite sides of the pipe. This pipe will be the TOP of the trap and the end with the two holes will point up, when assembling the final trap.
Step 3: Assemble the trap base
Attach the PVC adapter fitting to one end of the BASE pipe and carefully screw the clean out plug into the threaded section of the adapter fitting.
Attach the PVC 45 degree elbow to the other end of the BASE pipe. (Do not use PVC adhesive or glue to attach any of the PVC pipes or fittings.)
Step 4: Assemble the top of the squirrel trap
On the end of the TOP pipe with the two holes, reach inside the pipe and push one machine screw through each of the holes.
The head of each screw should be inside the pipe with the threaded part outside of the pipe. On the outside of the pipe, place a washer on each of the screws, screw two nuts on each screw, and screw one wing nut on each screw.
Attach the PVC coupling fitting to the end of the TOP pipe without the holes. (Do not use PVC adhesive or glue to attach the fitting.)
Step 5: Assemble and bait the trap
The remaining pipe is the MIDDLE of the trap. Insert one end of the MIDDLE pipe into the open end of the PVC coupling fitting on the TOP pipe.
Insert the other end of the MIDDLE pipe into the open end of the PVC 45 degree elbow on the BASE pipe. (Do not use PVC adhesive or glue to attach the fitting.)
The fully assembled trap will look like a big hockey stick.
Spray a light coating of cooking oil on the inside of the TOP and MIDDLE pipes. This will keep the squirrels from escaping when trapped.
Using your fingers or a long spoon, smear peanut butter on the inside of the TOP pipe about 8-10 inches from the open end of the pipe. The peanut butter is the bait. You can also place peanuts or something similar in the BASE pipe, if you wish.
Step 6: Select a location and place the trap.
Look for a sturdy tree in an area with squirrels. Be sure you can easily see and get to the base of the tree trunk. Place the trap next to the tree with the BASE on the ground and the TOP touching the tree trunk.
Secure the TOP to the tree trunk with the bungee cord.
You can also place bricks or rocks around the BASE to help keep it in from moving.
Step 7: Catch some squirrels.
Wait for a squirrel to sniff out the bait and slide down into the BASE.
Once you have one trapped, it’s up to you as to what to do with the squirrel.
If you choose to relocate the squirrel, place the pipe cap on the open end of the trap before moving the squirrel to its new home.
NOTE: You may wish to vary the length or diameter of the plastic pipe depending on the size of your squirrels or available materials. I chose to use schedule 40, foam core DWV (drain, waste, and vent) pipe because it will stand up to periodic bumps and drops without much problem. Materials for the 4 inch diameter trap cost about $50.
About the author:
James Hammond is a disabled veteran and has done landscaping and home renovation projects for over 25 years.
"Master the art of precision shooting with dry firing air rifles. Enhance your aiming skills, trigger control, and muscle memory without using ammunition. Discover...
"Air Rifle Scope vs Rifle Scope: Unveiling the Ultimate Precision Optics. Discover the essential differences and benefits of these two optical devices, empowering shooters...
")
")
")
")
")