The Thompson Center Encore Pro Rifle is a single-shot, break-action firearm. It’s also a switch-barrel rifle, meaning the barrel is interchangeable. Any Encore barrel will fit, which lets you customize the gun to fit any need. Whether you’re looking for a gun suitable for hunting, target shooting or self-defense, the Encore Pro is great for all types of shooters. Here’s why.
Accuracy
The precision rifling of the TC Encore Pro gives you accuracy you can count on. The 28” barrel gives you the best velocities you can expect from a given rifle cartridge. Like most rifles, the accuracy definitely varies based on what kind of ammo you use. I’ve noticed that I get the best, most consistent accuracy when I use powder instead of pellets. When I used between 185-200 grains, my 3 five-shot groups averaged 1.72 inches, and when I used 140 grains, it was around 1.2 inches. With most loads, you can expect excellent accuracy. The more often you clean the gun—and riflescope—the better shot groups you get. The trigger makes it a little harder to get even smaller groups, because it has a longer lock time. But, this tends to come with the territory with a hammer-fired gun.
Reliability
Thompson Center rifles are known to be great quality, and TC is a reputable company. The Encore is one of the best break-actions on the market, with no misfires to report, and extreme durability and robustness. However, there’s one downside: loading the gun with a dirty barrel. I had a couple bullets get stuck and had to clean the gun in order to get them out. For the most part, however, it’s a reliable gun you can count on no matter what you’re using it for. You can maintain optimum control in any conditions, wet or dry, with the overmolded pistol grip. It’s definitely a stand-out in comparison to similar models.
Handling
This is a well-built, well machined gun. The fit, the feel, and the balance are all fantastic, and the pistol grip stock fits perfectly in your hand. It’s one of the most comfortable grips I’ve ever experienced! One of the coolest features of the Encore Pro is the interchangeable barrels. It’s pretty simple to change them out:
Just remove two screws from the forearm, pull out the hinge pin, switch the barrels, replace the pin and screws, and… done! It’s quick and easy to transform it from a muzzleloader, to a slug gun, to a centerfire rifle.
It also comes standard with an ambidextrous Swing Hammer. A couple of downsides:
Cleaning the rifle is a bit challenging because in order to remove the breech, you need to first remove the fixed extractor. This involves removing two screws on the forearm, one on the extractor, and then reassembling the rifle after cleaning it. However, this is easier with an E-Z tip primer extractor. When you have one of these, it’s easier to clean, and you’re more willing to clean it often, which improves accuracy. There’s also no safety on the gun. But you can still move safely, even with a round in the chamber, by keeping the hammer forward.
Trigger
The Encore’s trigger is pretty good. It’s firm but crisp, which helps to offset the heavier pull—around 5 to 6 lbs. There’s a little inconsistency with the trigger pull, but other than that, it’s pretty impressive! No take-up, no sand, no creep, and no grit to speak of. The travel before the hammer snaps is minimal.
Magazine & Reloading
The TC Encore Pro is a break-action, single-shot rifle, and one of the best break-action muzzleloaders on the market. It features a Quick Load Accurizer with reduced rifling at the tip, which allows for easy loading. To open the action, you just pull back on the trigger guard lever and load your shell! One downside is that it comes with an extractor rather than an ejector, so you have to manually remove the cartridges or cases.
Length & Weight
The standard barrel of the Encore is advertised at 28,” but since the barrel is interchangeable, this all depends on what you choose. Overall, it measures around 42.” It’s relatively lightweight, and depending on the accessories you use, weighs anywhere from 7.5 to 8.25 lbs.
Recoil Management
Recoil management is definitely something TC got right with the Encore. It comes with a FlexTech recoil reducing stock, which boasts four layers of Limbsaver navcom material. The stock also comes with pliable inserts in the butt and comb, which makes the gun shoot softer. The buttpad is soft enough to absorb most of the recoil from firing. This firearm is great because it can handle tough-recoiling loads without making the shooter absorb all the recoil.
Price
The MSRP for the Encore Pro is around $790. For an extremely customizable, smooth shooting rifle, it’s not a bad price! It’s tried and true, and the customizability it offers at this price point is steller. It’s within most people’s budget, and perfect for families that need one gun for any situation, or for the “one-gun-man.”
My Verdict?
The TC Encore Pro is a great hunting rifle, and is perfect for anyone looking for an inexpensive gun for hunting, target shooting, and self-defense all rolled into one. Here are some of the best features:
Interchangeable barrels
Squishy buttpad to absorb even the most intense recoil
Weather Shield coating makes it extremely resistant to corrosion
Ability to shoot different calibers based on the game and terrain
So if you’re looking for the best in versatile hunting guns, look no further than the Thompson Center Encore Pro.
Richard Douglas is a firearms expert and educator. His work has appeared in large publications like The Armory Life, Daily Caller, American Shooting Journal, and more. In his free time, he reviews optics on his Scopes Field blog.
Very few firearms have been a top choice for military, police, and civilian shooters alike for over half a century like the Beretta M9 series.
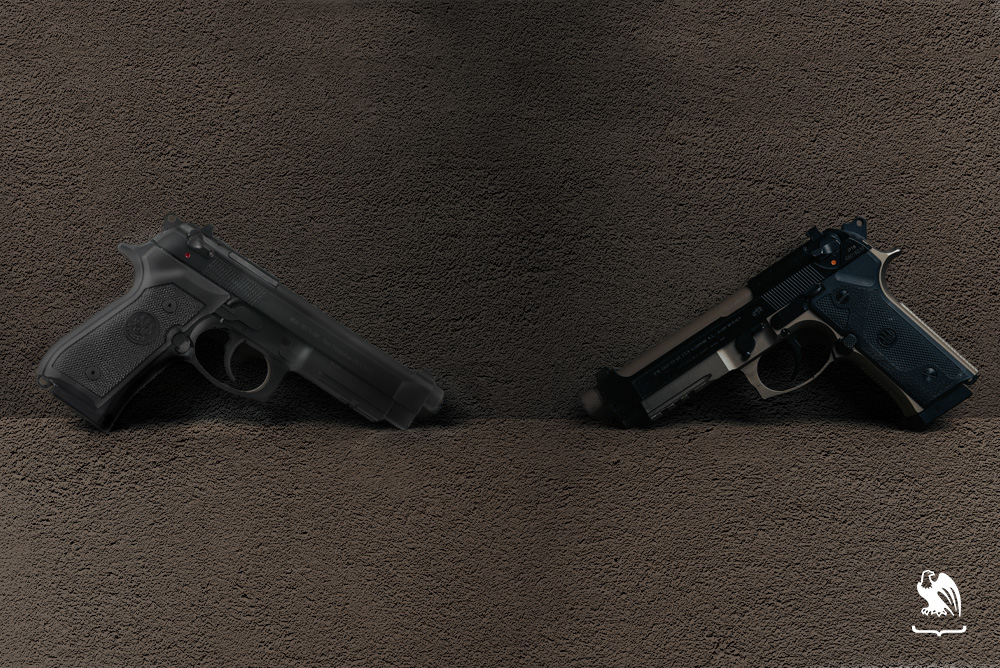
Two of the updates of the M9 design, the M9A1, and the M9A3, are still some of the more compelling full-size handguns on the market today. But, what are the differences between these two guns, and which is the best option for you?
While both of these pistols are truly world-class designs and come from the same general blueprint, there might well be some differences between the two that make one better than the other for your purposes.
The Beretta M9A1 vs M9A3 are very similar in terms of specs and overall design. The M9A3 has a higher capacity and is a bit more customizable, with a threaded barrel, longer rail, and removable front sight. The M9A1, on the other hand, has a three-dot sight and a slightly shorter barrel.
In this article, we’ll compare each of these gun models head to head, getting into specifics of size, ergonomics, optics, controls, and more.
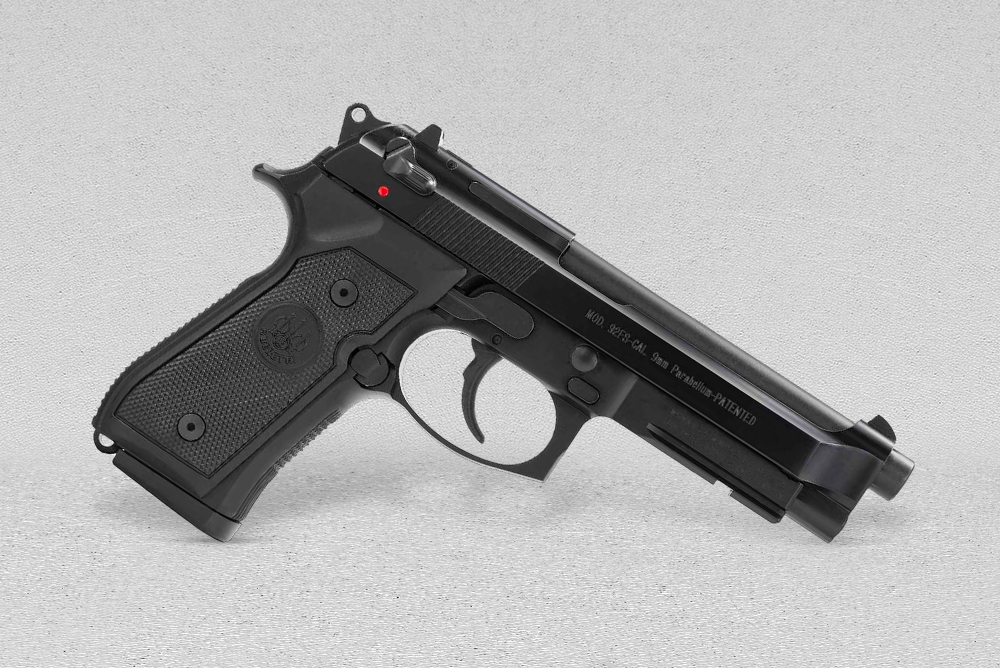
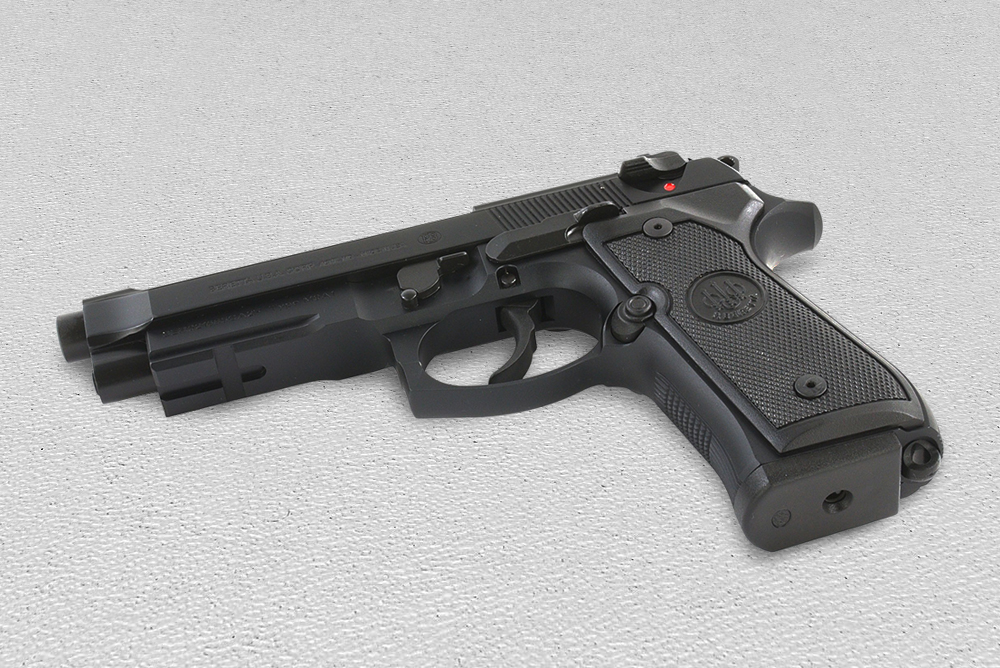
For a lot of folks fighting in the Global war on terror, their first encounter with a pistol was a Beretta M9A1. According to Beretta’s website, the M9A1 was designed specifically to meet Marine Corps requirements that were cognizant of not only Desert Storm in 1990-91 but the then-ongoing conflicts in Iraq and Afghanistan.
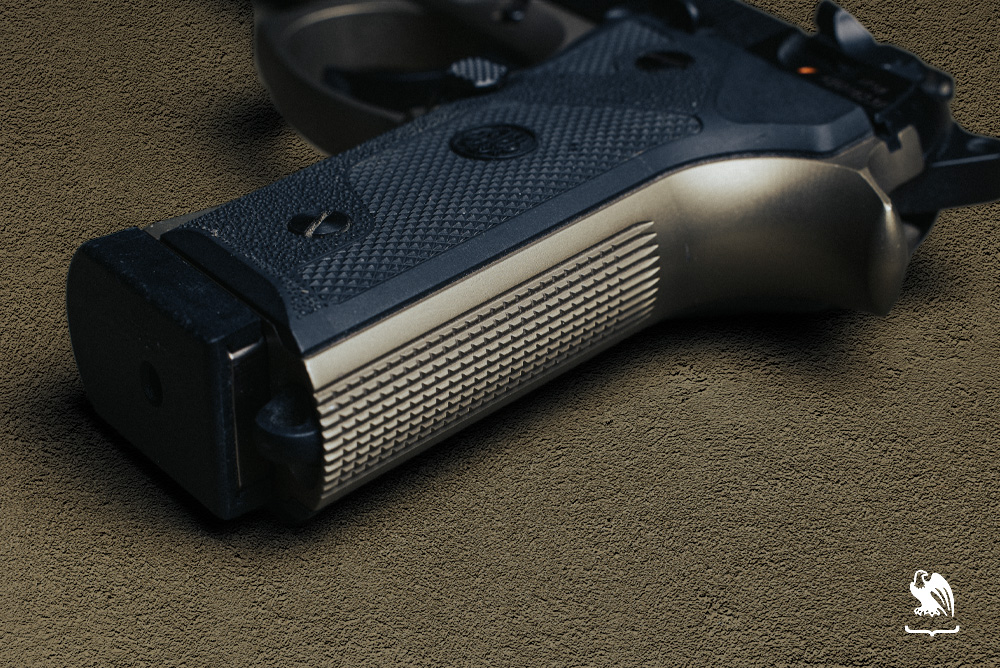
The main thing that folks transitioning from the M9 to the A1 variant would be likely to notice is the inclusion of a Picatinny rail on the underside of the pistol’s frame. This allows users to attach lights and lasers, greatly enhancing the operational capabilities of the weapon. From there, the changes are more subtle.
The front and back straps, as well as the grips, of the A1 model are more aggressive than its older counterpart to make it easier to grip while sweating or wearing gloves. Additionally, the M9A1 came with magazines with a specially designed coating to resist the sand that is so common in Iraq.
Basically, you can think of the M9A1 as a slightly refreshed and face-lifted model of the M9, with both some cosmetic and performance improvements to make it a more effective weapon for troops in the field.
If you’re looking for a Kydex or hybrid Beretta M9A1 holster, check out our selection of IWB and OWB holsters here.
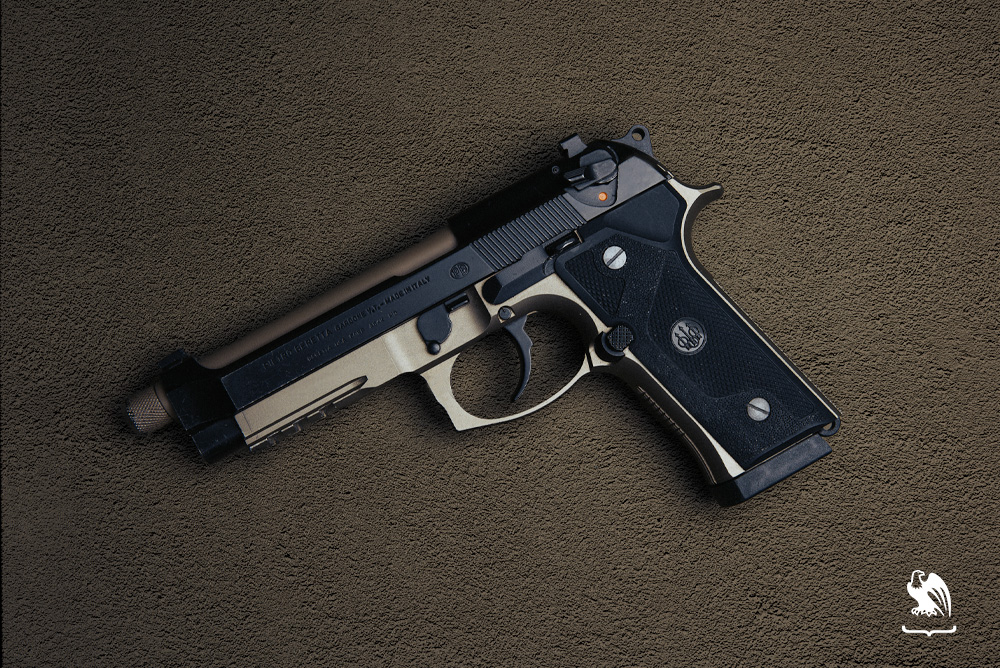
Beretta M9A3
If the A1 model was a refreshed version of the M9, the A3 variant is something like what folks in the car community might call a restomod: a redesign and retrofitting that keeps the original design philosophy in mind, but that stretches performance to its limits.
The A1 model was adopted into military service in 2006. With about another decade of learning in the field, arguably the best research and development on the planet, Beretta came out with the A3 in 2015.
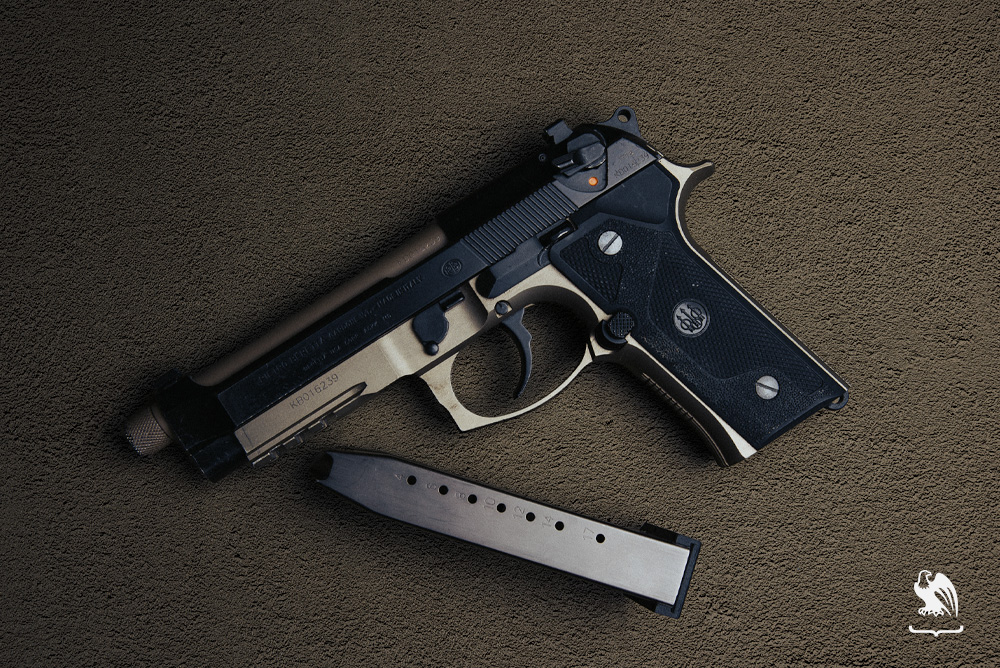
The M9A3 adds even more Picatinny rail to give users more options for installing lights and lasers, in addition to larger, 17-round magazines. The grip was also thinned out, with the option to add a more traditional, thicker grip. Finally, the magazine geometry was changed to make it easier to reload by feel.
In effect, the M9A3’s list of changes represents a fine-tuning of the M9A1 into one of the most compelling military pistols that are in current or recent use.
If you’re looking for a Kydex or hybrid M9A3 holster, check out our selection of IWB and OWB holsters here.
Beretta M9A1 vs M9A3: Specs
Beretta M9A1 vs M9A3: Size & Capacity
With most of these comparisons, we’re going to be splitting hairs, since both the A1 and A3 are iterations of the M9 design. There are, however, some meaningful differences when it comes to size and capacity.
As you can see in the chart above, the two pistols are very similar in size, with an inch here and an ounce there being added and subtracted in the various dimensions of the two designs.
Importantly, the M9A3’s standard magazine capacity is 17 rounds, two more than the older design. Those two rounds in effectively the same sized pistol lead us to lean a little bit in the direction of the M9A3 in this category.
Beretta M9A1 vs M9A3: Ergonomics
Frame
The major difference in the frames between these two firearms is that the M9A3 has a slightly more vertical hand position than the M9A1. For folks picking up both of them for the first time on the same day, the A3 might feel a little more natural to point and shoot. If, on the other hand, people spent many range days with the A1, then the older model will likely feel more like home.
The difference in frame geometry is also somewhat offset given that the A3 can be used with a thicker grip that is the same size as that of the A1 as well as its standard, very slightly thinner grip profile.
Slide & Barrel
Here is where things get a little bit different: while the slide on the two guns is extremely similar, the two major upgrades on the A3 model give it the edge here.
First, the A3’s slide can be switched between models with or without a decocker. While this is a niche feature, it’s one that some folks will deeply appreciate, considering you can have a new slide shipped to your door.
Second, the A3’s barrel comes threaded from the factory, making the A3 a better choice for people who might be thinking about suppressing their M9s.
Generally, the A1 and A3 shoot very similarly in terms of their slide and barrel, but the ability to more easily suppress the A3 with the included threaded barrel might sway some folks. Oh, also, the M9A3 comes in Flat Dark Earth in case you want your M9 in a color other than black.
Beretta M9A1 vs M9A3: Sights & Optics
This might be the category in which these firearms differ most from each other, and where a lot of users might make their choice between them a little clearer.
The M9A1 comes with white three-dot sights that are relatively easy to use in the daytime, and reasonably well at night.
The rear sights are adjustable on the A1 model, meaning you can drift them left to right to zero the pistol, or replace them entirely with a mode of your choice from the aftermarket. But, and this is important, the front sights are integral and are not coming off without a grinder.So, if you like a white dot front sight, good. If not, then you might like the A3.
The A3 model was designed so both the rear and front sights are removable. This opens users up to a lot more options, including raised sights for use with suppressors, making the threaded barrel that much more useful.
You can attach a light or laser on the bottom of the frame of both the A1 and the A3. The A3 does have a longer Picatinny rail in addition to being able to swap out the front sight, which the A1 cannot do.
Beretta M9A1 vs M9A3: Controls
Safety
In their stock configurations, both the M9A1 and M9A3 have a combination decocker and safety, which makes it possible for these guns to be carried with the hammer down on a live chamber safely.
Here the edge goes to the M9A3 since it is possible to buy a slide that only has a decocker. Many folks consider the additional manual safety to be redundant and unnecessary. There are ways to do the same thing to an A1, but it’s a lot more involved than simply popping on a new slide like you can with the A3.
Trigger
The trigger on these two firearms is identical for the purposes of most shooters: it’s a double/single-action trigger that takes some getting used to.
With DA/SA triggers, the first pull is a heavy one that cocks the hammer and then fires a round, while subsequent shots are lighter and shorter. This means that the shooter will have to get used to two different trigger pulls to shoot either of these handguns well.
Which is Right For Me?
Because the A1 and A3 models of the M9 are so similar to each other, the choice here will be a mostly personal one depending on your preference.
If you’d like to get the most modern version of the M9, with the ability to easily use a suppressor and upgraded sights along with larger lights and lasers, then the M9A3 is for you.
The Beretta M9A3’s accuracy might be a little bit better than its older predecessor with some upgraded sights, better grips, and more optics options on the bottom of the frame. And if the accuracy doesn’t help, then you get two more rounds to hit the target.
With that said, one thing to seriously consider is the possibility of getting an awesome deal. Since the M9A1 is no longer in production, you can often buy them for less, and they make great concealed-carry guns. The Beretta M9A1 specs are certainly nothing to scoff at, and it’s an excellent defensive tool.
Summary
The variations between the Beretta M9A1 vs M9A3 are very small. The two pistols are very similar in size, with the main differences being in their sights and slides.
Overall, both of these make an excellent choice of full-size handgun, and either one would serve you well: if you want the most modern version go for the A3 model, but an A1 at a deep discount in the local gun store would be an almost ideal gun for people who plan to shoot a lot and want good quality for the money.
If you’re looking for a new IWB, OWB, or pocket carry holster, visit our Holsters by Gun Model page for Kydex holsters that are custom-made for your weapon of choice.
Interested in items beyond holsters? Check out our Resources Page for links to recommended products like lights, lasers, first aid, maintenance, and more, and browse our selection of belts, apparel, and accessories at our website, vedderholsters.com.
To stay up-to-date on all the latest Vedder Holsters content and offerings, check out our blog and follow us on Facebook, Instagram, and Twitter. And be sure to visit our sister company, GeoGrit, for all of your American-made minimalist wallet needs.
If you own a taxidermy mount, it is always a good thing to keep it clean. Keeping it clean prevents unwanted guests from touching your taxidermy. Suppose there are any concerns about insects damaging your taxidermy. In that case, it is important to occasionally inspect your mount-especially around the mouth, antlers, and around the ears- for signs of any pests.
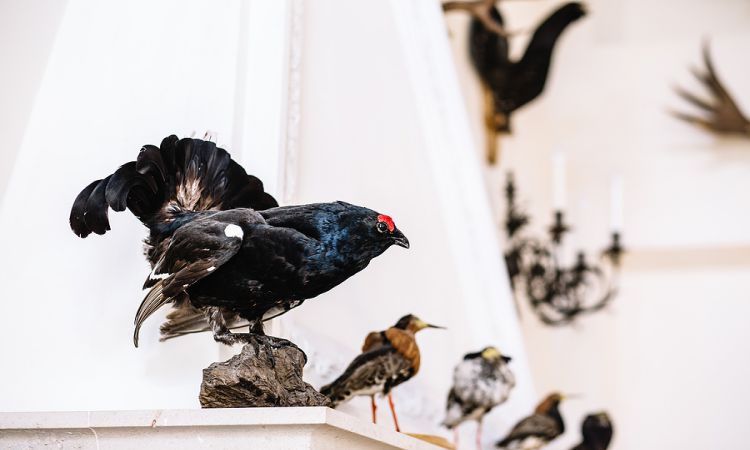
Cleaning your mounts often ensures that they look fresh and lifelike. Depending on the type of mount you have, the cleaning process will vary from one to the other. Here are a few tips on how to clean and care for Taxidermy Bird Mounts.
Cleaning your bird mount is crucial as it ensures that dirt or dust does not build up. The frequency of dusting your bird depends on the place you live, among other factors. People who live in dustier areas will need to do the cleaning more often.
When removing excess dust, a feather duster works well. You can also dust your bird mounts by gently brushing them using a cotton ball in the direction of the feathers. In addition to that, you can also use a hairdryer at arms-length to de-dust your bird regularly.
Please make sure the hairdryer is in its most relaxed and lowest setting and use it in the same direction as the feathers to avoid damages. Do all this instead of using solvents. The birds’ feathers usually have some natural oil that several solvents can strip, leaving them more brittle.
All the skin surface of birds such as legs, the skin around the eye, beaks, and featherless skin areas for some birds like the vultures’ neck and the head is some species have preparators painted on them. Cleaning these places with solvents may not work well with preparators. As a result, using solvents should only be a last resort.
In cases where you must remove dust on bird taxidermy mounts held by grease emanating from poorly prepared skins, you will have to use some solvents cautiously. Make sure you are using gentle solvents and take your time.
Start by using simple distilled water and barely-damp swabs and see if that solves the problem. If the dust is stubborn enough, move up and use non-denatured 70% ethanol. It is doubtful you will find any dusty taxidermy specimen that requires anything more potent than the non-denatured 70% ethanol.
Do not immerse the specimen in any solvent or leave it wet. Do not wet the skin of your bird mount unless it is a featherless area. If you also wet the featherless skin areas, be sure to dry them thoroughly. Birds have fragile skin, and moisture can quickly wick through it, making it swell and split.
Use lacquer thinner
If your Taxidermy Bird Mounts have residual dust on the feather, experts recommend we avoid using water. Water tends to matte and messes up with the feathers. Instead, lightly dampen a rag with lacquer thinner and wipe the mount off. The feathers absorb lacquer thinner as it evaporates, quickly bringing out the shiny bit of the bird’s feathers. When brushing your bird, be sure to wipe it gently and in the same direction as the feathers. However, it would be best if you stayed away from all painted areas.
Keep it out of the sun
Your Taxidermy Bird Mounts need to be displayed prominently but be sure where you put them. Avoid placing your mounts in direct sunlight. Direct sunlight will breach the feathers of your bird, making them fade.
To ensure that you maintain the original richness and vibrant colors of your birds’ feathers, keep them out of direct sunlight. Place your mount near a window, and they will soon succumb to damage because of too much presence of ultraviolet (UV) light.
For white-coated birds, the UV light will change them to yellow. For bird mounts with darker colors, they will become bleached. If the only place to showcase your birds is near a sunny window, make sure you install quality UV blocking window films.
Be wary of smoke
From wood-burning stoves and burning logs in fireplaces to smoking cigarettes and cigars indoors, it is essential to know that smoke can ruin your Taxidermy Bird Mounts. Therefore, avoid displaying your mounts over smoke-producing fixtures or hanging your prized taxidermy trophies in your cigar room.
In addition, prolonged exposure of your artworks to smoke will discolor them. To clean smoke damage from your taxidermy, you need to follow a few steps:
In a bucket of warm water, mix three droplets of dish soap.
Agitate the solution to make a sudsy solution
Get a clean sponge and saturate it in the sudsy soap solution
Squeeze out all the excess solution from the sponge so that it is damp but not soaking wet
Wipe the stuck smoke gently and in the direction of the feathers
Use OdorXit to eliminate odor in Taxidermy Bird Mounts
Do you have a bird mount that is smelling like rancid fat or meat? Smelling mounts can often be worrying, and at the same time, can put you in a dilemma on the next step to take. Birds have feathers, and their bones are very thin and fragile.
How can you remove the fat and muscle without destroying the feathers and skin of your taxidermy bird?
Most taxidermy trophy owners ask themselves this question. The answer is, you can inject small amounts of 20 to 1 OdorXit solution into the fingers and wing joints. OdorXit eliminates the odor quickly. To take care of the exterior odor, spray 30 to 1 OdorXit solution onto the feathers and skin.
Your taxidermy mount always deserves the best treatment and care. That is why you need to work with professional and compassionate bird taxidermist who understand and care about your pet. If your mounts crack or become brittle, they can restore them. If your fur/feathers are not in good shape, or you have a cracked tongue or nose, the taxidermist can re-clay them. They always ensure that your bird is in perfect condition every time you mount it. With tips and experience possessed by taxidermists, they will make sure your artwork lasts forever.
In the world of air gun shooting, there is much debate surrounding the best way to hold a springer. Many shooters will tell you that there is only one way to do it, but the truth is that there are many different ways to hold a springer that can lead to successful shooting. One method that has been gaining popularity in recent years is the artillery hold. So, what is an artillery hold? Let’s take a closer look.
History of Artillery Hold
The term “artillery hold” was first coined by American airgun writer Tom Gaylord. Gaylord observed that many artillery pieces remain accurate even after recoil, and he began to experiment with different grip techniques to see if he could replicate this success with a Beeman C1 air rifle. After some trial and error, Gaylord found that loosening his grip on the rifle resulted in tighter groups. He dubbed this technique the “artillery hold” and it has since been adopted by many shooters looking for an edge on the competition.
Basically, the artillery hold is just a loose hold. Instead of gripping the forestock, simply lay it in your open palm at the point where the rifle is balanced. Grip the buttstock as lightly as possible and lay your thumb along the top of the stock instead of around it. The buttstock should rest against your cheek and shoulder as gently as possible.
Benefits of Artillery Hold
So, what are the benefits of using an artillery hold? First and foremost, it helps to reduce muzzle rise after each shot. This allows for faster target acquisition and increased accuracy, as you are not having to fight the natural tendency of the rifle to want to move up after each shot. Additionally, an artillery hold can help to keep your shots consistent, as any variability in grip will be negated by the fact that your hand is not tightly gripping the stock.
If you are looking to improve your shooting skills, then we highly recommend giving the artillery hold a try. It may take some practice to get used to, but you’ll be impressed with the results.
Fact checked by Steven Lines, lifelong Hunter, and Outdoorsman.
The bugle call of an elk is a distinctive sound. There are multiple ways that a hunter can use this noise to their benefit. You can use it to track the movement of the elk. Or you can mimic their calls to attract them to the area. But will the elk bugle all year?
Elk will be most active during the rut. This occurs during the fall, usually between the end of September to the middle of October. But they will continue to bugle during the year. The bugle is their primary way of calling out potential challengers and controlling their herd.
Understanding the elk bugle is crucial for hunters. Keep reading to learn more about elk bugle calls and how you can put this information to use when hunting.
Elk will bugle throughout the year in North America. But the amount that they bugle will vary throughout the year.
They will be most active during the rut. This occurs during the fall months. They use this call to help them attract a mate. Because of this, it’s not uncommon for bulls to bugle most of the day. As we’ll discuss later, they will be more responsive to calls made during this time.
The breeding season will depend on where you live. Usually, though, you should start to hear bugling at the beginning of September. This will continue until mid to late October. But you might still be able to hear bugling towards the end of November.
You will be able to hear bugling throughout the rest of the year. But it will be occurring less frequently. Because of this, you will need to listen more carefully to identify the elk. Later, we’ll go more in-depth about the type of bugles you should be listening for.
What Time of the Day are Elk Most Active?
During the rut season, the best time to listen for elk bugling will be during the night. The twilight period will bring an increase in bugling activity. They will bugle most frequently during the rut. Sometimes, they can call out so much that they become hoarse.
The way the elk behaves will depend on the time of the day. During the sunrise and sunset, they will tend to be more active. This makes morning and evening hunts most productive.
During the day, they will tend to bed down. Often, they will move into thicker woods, making them more difficult to locate and hunt. It’s best to look for food and water resources.
Why do Elk Bugle
There are a few reasons why elk will bugle. Often, it will be their way of attracting a mate to the area. They might also use it to establish dominance and keep other men out of the area. Sometimes, it can be a way to alert fellow elk to danger in the area.
There are two main reasons why an elk will bugle. These are:
When an elk is bugling during the rut, it is often a way for the bull to attract a cow to them, so they can mate. Because of this, they want to make sure that their call is louder and more attractive than other bulls.
They can use their bugle as a way to establish their dominance. They want to make sure that other males stay out of their way. Because of this, they might use their bugle as a sign of aggression, acting as the precursor to a fight.
Other Ways Elk Attract a Mate
The bugle is just one way that an elk will attempt to get a mate. Some of the other ways they can get a mate’s attention are:
Rubbing. During the rut, elk will rub themselves against trees and other objects. This is their way of showing their dominance. It also allows them to get old velvet out of their skin.
Wallowing in mud and urine. This is designed to increase their scent making them more attractive.
Hanging vegetation off their antlers. Sometimes, you will find that elk are hanging vegetation from their antlers. This is used to show their dominance.
Other Types of Elk Calls
Like humans, elk use their bugles to help them communicate their emotions. Some of the reasons why they might want to make a bugle call include:
Warning of danger. The elk have a finely tuned sense of smell and have good hearing. If they sense a potential threat in the area, they will make noises to alert other group members. This lets them flee to safety.
Calling for help. Sometimes, a young elk will make a call. This is often calling out to their mother or seeking some other type of help.
Anger. Sometimes, the bulls will make a call to let other elk know how powerful they are. This can bring other bulls into the area, keen to defend their territory.
General communication. When traveling an elk herd, elk have been known to make quieter calls to each other. This ensures that they are all moving together.
As an elk hunter, it’s essential to know the difference between each of these calls. If you know why the elk are making the bugling call, you’ll know the best way to respond to them. This will help you encourage them to get close enough to take a shot. We’ll talk about how you can do this a little later.
What Does an Elk Bugle Sound Like?
Many people are familiar with the most common elk bugle call. This will start as a low-pitched growl. But, as it goes on, it will transform into a high-pitched scream. This sound will carry long distances, so you might hear it echoing through mountainous terrain. You can listen to the bugle noise here.
Other Types of Elk Bugles
While this is the most famous type of bugle, elk will change their bugle depending on their situation. Some other kinds of bugles include:
Locator calls. This is done throughout the year by the herd’s dominant bull. It’s their way of finding out if any other males in the area could challenge their dominance. If they don’t get any responses, they will continue on their way. Sometimes, they will stay in the same place when sending out these bulges. You can use this to your advantage, allowing you to pinpoint his location.
Challenge bugle. Sometimes, there will be rival bulls in the area. They send out this bugle when they think their dominance will be challenged. At the end of these bugles, they will add a few chuckles.
Other Types of Elk Calls
While elk are known for their bugle, it isn’t the only sound they will make. Some of their other calls include:
Mew. This is similar to the meowing that a kitten will make. It’s how the calves will communicate with their mothers.
Chuckles added to the end of a bugle. This is a way for the bull to demonstrate its dominance and power. The more chuckles, the more powerful it is.
Drum sounds. Sometimes, you’ll hear deep noises, like the banging of a drum. Because they are so deep, this sound will travel over a long distance. This is another way for the bull to prove its dominance, challenging any surrounding males. It’s most common during the elk rut.
Bark. This is the sound no hunter wants to hear. Like a dog’s bark, the elk will use this noise to signal danger in the area. This is the herd’s cue to get out of the site.
Chirping. This is a high-pitched noise. It’s often used within the herd to ensure the group stays together.
Clashing. If you are elk hunting, you might hear the sound of elk clashing antlers. This is their primary way of establishing dominance, showing that they are the most muscular male in the area.
Using Bugle Calls to Track Elk Movements
Now that we know more about what a bugle is and why elk will make this noise, we can use it to our advantage when hunting. The first thing we can do is use the bugles to locate where the herd is. They will even bugle when they are bedded down.
But using a call to locate the elk can be a difficult task. It can echo off mountains and rocks, making it hard to pinpoint the cause of the signal. The good news is that you don’t need to rely on it during the rut season.
First, you’ll want to look at the trees. See if you can spot any signs that they have been rubbing on them. It’s also a good idea to look for things like droppings or tracks. This tells you how recently the elk were in the area.
Like all hunts (mule deer, red deer, moose), you’ll need to consider how the elk will react to stimuli. If there are a lot of humans around, the elk will often want to avoid that area. You should also look at a map. Look for signs of water, food, and other wildlife. The elk will want to move towards these areas.
This article goes into more depth about how you can locate both bull elk and cow elk during your hunt.
Using a Bugle to Attract Elk
Another way to use the bugle to your advantage is by replicating the call. This will bring the elk to you. Let’s look at how you can do this.
Making a Realistic Bugle Noise
The first thing that you need to do is learn how to make a realistic bugling noise. You will need to build or buy an elk bugle to do this. This is a tube that will allow you to replicate the call of the elk. This video shows you how to develop your bugle. Alternatively, you can find them in hunting stores.
How to Call for Elk
Once you have your bugle, it’s time to go hunting. Once you have located the elk, you’ll need to decide what type of bugle you want to employ. This will depend on the type of call the elk is providing.
Sometimes, you will get a more tentative call. In this case, you might need to wait until you are closer to start getting aggressive. This will help you force the elk into the open, where you can get a shot at them.
On the other hand, you might be able to get aggressive from the start. This will force the elk towards you so that you can get a good shot. Here are a few other tips that you can use:
Be in control. You want to make sure that the elk respond to your calls rather than you reacting to them. If you can do this, they will want to come to you.
Elk have two emotions. There are two things that the elk will respond to. They will respond to love. This is especially important during the rut, as they bugle to attract a mate. The other emotion is anger. This is what happens when you are going into their territory and start challenging their dominance.
Understand the emotions. Many people can get caught up in trying to replicate the call perfectly. But this is often less important than reading the emotions of the elk that you are communicating with. The elk will come if you can make the right call at the right time.
Keep practicing. Like all skills, your elk calling will improve the more you practice it. If you want more tips on what you should focus on, check out this video with champion caller Corey Jacobsen.
Why Do Some Elk Run From a Bugle Call?
Most of the time, the elk will go towards a bugle. They want to face their challenger and prove their dominance. But this won’t always be the case.
Sometimes, they will gather up their herd and leave the area. Among hunters, this is called bugling and running. There are a few reasons why this might be happening.
Sometimes, it might be a young elk. They might be too inexperienced and concerned about the prospect of going up against a bigger animal. Because he doesn’t want to lose his harem, he might want to move his cows out of the area before losing the challenge.
On the other hand, bigger bulls can also bugle and run. They might have a lot of cows who are coming into estrous. At this time, he will often be more focused on breeding than proving his dominance.
Third, the hunter might have made a mistake. If a hunter has already spooked the bull, he will be warier. If he can sense danger in the area, he is unlikely to go towards the sound. He’ll just want to gather his herd and move away from the threat.
The good news is that bugling and running are rare occurrences. In most cases, if you make a good call, the elk will come to you.
Final Thoughts
Bugling for elk is one of the essential tools that a hunter will have at their disposal. If you can understand why they are bugling, you’ll be able to respond appropriately. When done right, the elk should come to you, giving you plenty of opportunities to shoot them.
Though this will be most effective during the rut, elk will bugle all year. As a result, a good caller will always be able to attract elk into the area.
Steven Lines is a hunter and outdoorsman from Safford, Arizona, USA. Since he was a child, he has been hunting and fishing and has over 20 years of outdoor experience. Steven works as a hunting guide in Arizona during his spare time and runs a Youtube channel dedicated to sharing his outdoor adventures with others.
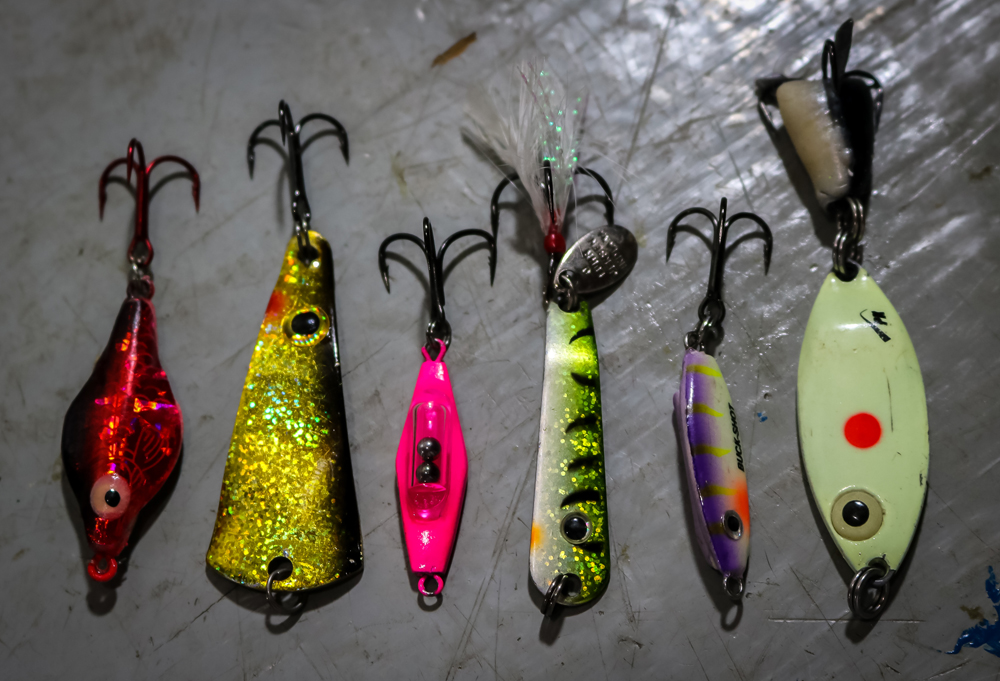
No doubt there’s a pile of jigging spoons out there…’cuz they straight-up catch fish! You’ve probably already got your faves, so did any of ’em make this list of 6 tried-and-true options that have been putting walleyes topside for years?!
I’m confident this lineup of jigging spoons could pluck walleyes through the ice on any lake, anywhere. Heeeere we go — straight off my ice rods and into this write-up — in no particular order:
Darts and flies outside the hole to cover a ton of real estate, yet fishes heavy enough for the feel/control you skilled spooners are lookin’ for. Super-loud brass rattles make a different kind of “ting” on its alloy innards. Tie on a “techni-glo red” in dirty water and you won’t look back:
2. VMC Tingler Spoon
Fave size: 3/16-oz
Rattle-bearing jigging spoons have taken over the tackle trays of most walleye-nuts, but don’t forget about those silent options when times get tough. It’s all about the flash and flutter, and the VMC Tingler Spoon’s got ’em going on. Works especially well in clear zeeb-infested water, during a cold-front or on heavily-pressured fish.
I’m a sucker for the bigger 3/16-oz size, but don’t be afraid to drop down to 1/8-oz when the fish are super fussy. #SilentButDeadly
3. Clam Rattlin’ Blade Spoon
Fave size: 1/4-oz
Stainless steel BBs + Pyrex-glass housing = a unique clacking sound that calls ‘em in from waaaay out. Slices through the water and has just enough flutter to seal the deal on picky-eaters:
4. VMC Tumbler Spoon
Fave size: 1/8-oz
Great 1-2 punch in a single bait: can be fished “soft” when there’s slow-moving fish on the graph…or sped up and pounded. Unique “knuckle” bend gives it that tasty tumbling action on the drop, and the small metallic attractor blade adds flash and sound. There’s a reason it’s guide Brad Hawthorne’s all-time favorite spoon….
5. Northland Buck-Shot Spoon
Fave size: 1/8-oz
Really don’t think this OG needs an introduction…it’s literally been ringing the dinner bell since before the Internet was a thing! Noisy brass rattle gift wrapped in holographic or UV finishes, can’t go wrong. There’s something special about that “purple tiger” color — flat-out catches ‘em in clear or stained water. #Dibs
6. PK Spoon
Fave size: 3/8-oz
Every walleye fishermen should own a 3/8-oz PK Spoon — especially in the “red dot glow” color — it’s that good when fished aggressively. I work it just like you would a rattlebait through the ice: Start out high (say 2-3’ off bottom) and run a series of big rips before letting it flutter back down…then rock it in place for 5-ish seconds if it takes that long to get whacked….
For you visual learners….
You don’t (always) need livebait to catch hardwater walleyes…. Ever try using “fake” minnow heads on your jigging spoons? How about adding a feathered- or glow-resin treble hook??
That and waaaay more in this video breaking down my complete jigging-spoon setup. It’s 15-min long, so here’s a “Table of Contents” lol:
0:27 – Top 6 jigging spoons to catch walleyes anywhere 5:05 – 3 🔥 alternatives to live minnow heads 9:06 – Rest of the setup (line, leader, snap, swivel, etc) 11:25 – Longer ice rods are better…. 12:18 – My absolute favorite budget-friendly ice reel 13:10 – Braid gives you better spoon control
Or can check the full vid right here:
When you realize how much $$$ you’ve spent on fishing tackle:
Learn the key distinctions between backstrap and tenderloin in deer meat. Discover the nuances in taste, texture, and cooking methods that set these cuts apart. Gain a deeper understanding of these two popular options for maximizing your culinary experience with venison.
Understanding the Distinction: Backstrap vs. Tenderloin in Deer Meat
Understanding the Distinction: Backstrap vs. Tenderloin in Deer Meat
When it comes to deer meat, there is often confusion between the backstrap and tenderloin cuts. While they are both desirable and delicious, they are not the same thing. The backstrap refers to the large muscles that run parallel along both sides of a deer’s spine and rest on top of the ribcage. On the other hand, the tenderloins are smaller cuts located inside the abdominal cavity underneath the backstrap and spine.
To understand this distinction, think of backstrap as the ribeye in beef and the tenderloins as filet mignon. Both cuts are highly prized for their tenderness, but they differ in size and location within the deer’s body.
To access the tenderloins, you will need to field-dress the deer and remove them from inside the body cavity. They are usually hidden by a layer of fat and lie between the ribs and pelvis. The backstraps, on the other hand, can be easily removed with a sharp fillet knife by making horizontal and vertical cuts along either side of the spine.
The backstraps belong to a group of muscles called Longissimus, which include three sections: Longissimus capitis, Longissimus cervicis, and Longissimus dorsi. The Longissimus dorsi is what we commonly refer to as “backstrap” and is known for its tenderness and flavor. It extends from the shoulder blades all the way down to the lowest vertebrae.
Unlike other muscles in a deer’s body that bear weight constantly, such as shoulders or hindquarters, backstraps are not used for weight-bearing activities. This lack of constant use contributes to their tenderness compared to other cuts.
In terms of cooking and nutrition, backstrap is highly versatile due to its lean nature. It is low in calories and fat, making it a healthy choice. A 3.5-ounce portion of venison backstrap contains only 150 calories and 2.4 grams of fat, compared to beef loin with 205 calories and about 10 grams of fat. Venison is also rich in protein, packing nearly 30 grams per serving.
With its tenderness, lean profile, and versatility in the kitchen, backstrap is a favorite among hunters for good reason. It offers quality nourishment while allowing for various cooking methods and flavors.
In conclusion, understanding the distinction between backstrap and tenderloin in deer meat is essential for both experienced and new hunters. While they are often used interchangeably, they refer to different cuts with distinct characteristics. Backstrap refers to the large muscles along the spine, while tenderloins are smaller cuts located inside the abdominal cavity. Both cuts are highly desirable for their tenderness and flavor, but it’s important to know where they are located on a deer and how to properly remove them for cooking.
Exploring the Variances: Backstrap and Tenderloin in Deer Meat
When it comes to deer meat, two cuts that are often confused are the backstrap and tenderloin. While they are both desirable cuts, they are not the same thing. The backstrap refers to the large muscles that run parallel along both sides of a deer’s spine and rest on top of the ribcage. On the other hand, the tenderloins are smaller cuts located inside the abdominal cavity underneath the backstrap and spine.
To put it in perspective, think of the backstrap as the ribeye in beef and the tenderloins as filet mignon. Both cuts are known for their tenderness, but their names are often used interchangeably.
The tenderloins can be accessed from inside the body cavity after field-dressing the deer. They are usually hidden by a layer of fat and lie underneath the spine between the ribs and pelvis.
The backstrap belongs to a group of muscles called Longissimus, which includes three sections: Longissimus capitis, Longissimus cervicis, and Longissimus dorsi. The Longissimus dorsi is what we commonly refer to as “backstrap” – a thick, tubular, lean muscle that extends from the shoulder blades to the lowest vertebrae.
Unlike other muscles used for weight-bearing like shoulders or hindquarters, backstraps do not constantly bear weight. This lack of constant use makes them more tender compared to other cuts.
To remove the backstrap from a deer carcass, start with a horizontal cut at the junction of the spine and pelvis. Then make a vertical cut down the spine, carefully removing meat from the bone until you reach the base of the neck. Slice along the ribs to delicately trim meat from the ribcage.
Backstrap is highly desired among hunters and cooks due to its tenderness, leanness, and versatility. It is a healthy and nutrient-dense meat, packed with protein and various minerals. A 3.5-ounce portion of venison backstrap contains only 150 calories and 2.4 grams of fat, compared to beef loin’s 205 calories and approximately 10 grams of fat.
With its unique flavor profile and easy cooking methods, backstrap lends itself well to experimentation with different recipes. It is an excellent way to introduce others to the joys of hunting culture and the deliciousness of venison.
The word “venison” derives from the Latin word “venari,” meaning to hunt or pursue. Originally used to describe meat from any game animal killed by hunting, it has evolved over time to specifically refer to members of the deer family.
If you’re interested in expanding your knowledge about deer hunting or getting involved with organizations like the NDA (National Deer Association), there are various opportunities available such as joining local branches, attending banquets or field days, or even helping form new branches.
In conclusion, understanding the variances between backstrap and tenderloin in deer meat is essential for both experienced hunters and newcomers alike. These cuts offer different flavors, textures, and cooking possibilities, making them prized delicacies among hunters and food enthusiasts alike.
Demystifying the Cuts: Backstrap vs. Tenderloin in Venison
When it comes to venison, two cuts that often get confused are the backstrap and the tenderloin. While they may be used interchangeably in conversation, they are not the same thing.
The backstrap refers to the large muscles that run parallel along both sides of a deer’s spine and rest on top of the ribcage. It is a long “strap” of muscle that extends from the shoulder blades all the way down to the lowest vertebrae. In terms of comparison, it is similar to a ribeye in beef.
On the other hand, the tenderloins are smaller cuts located inside the abdominal cavity underneath the backstrap and spine. They lie between the ribs and pelvis and are usually hidden by a layer of fat. Think of them as filet mignon in beef.
To access the tenderloins, you would need to field-dress the deer and remove them from inside the body cavity. They are considered more desirable cuts due to their tenderness.
In terms of taste and texture, both backstrap and tenderloin are prized for their tenderness and lean quality. They are often considered America’s best cuts of meat due to their versatility in cooking methods.
When it comes to nutritional value, venison is a healthier option compared to beef. A 3.5-ounce portion of venison backstrap has fewer calories and less fat than an equivalent portion of beef loin. Venison is also packed with protein and various nutrients such as niacin, iron, potassium, zinc, and B-vitamins.
Removing backstrap from a deer carcass is relatively simple once you have skinned it. The backstrap can be easily separated from the spine by making horizontal and vertical cuts along its length. Carefully trim away any meat from the ribcage to ensure you don’t leave any behind.
In conclusion, while backstrap and tenderloin are both desirable cuts of venison, they are not the same thing. Backstrap refers to the large muscles running along the deer’s spine, while tenderloin is a smaller cut located inside the abdominal cavity. Both cuts offer tenderness and lean quality, making them popular choices among hunters and meat enthusiasts alike.
Decoding the Terminology: Backstrap and Tenderloin in Deer Meat
Decoding the Terminology: Backstrap and Tenderloin in Deer Meat
The backstrap and tenderloin are two highly sought-after cuts of meat in deer hunting. While they are often used interchangeably, it is important to understand that they are not the same thing. The backstrap refers to the large muscles that run parallel along both sides of a deer’s spine and rest on top of the ribcage. It is a long “strap” of muscle that extends from the shoulder blades all the way down to the lowest vertebrae. On the other hand, the tenderloins are smaller cuts located inside the abdominal cavity underneath the backstrap and spine.
To put it into perspective, think of backstrap as the ribeye in beef, while tenderloins can be compared to filet mignon. Both cuts are highly desirable due to their tenderness, but their names are often confused. The tenderloins are usually hidden by a layer of fat and can be accessed from inside the body cavity after field-dressing the deer.
When it comes to removing the backstrap from a deer carcass, it is a fairly simple process. Starting with a horizontal cut at the junction of the spine and pelvis, make a vertical cut down the spine while carefully removing the meat from the bone until you reach the base of the neck. Then, slice along the ribs to delicately trim away any remaining meat from the ribcage.
The reason why backstraps are so tender is because these muscles do not constantly bear weight like shoulders or hindquarters do. The more a muscle is used, such as in weight-bearing activities, the tougher it becomes as muscle fibers break down and rebuild. In comparison, backstraps experience less strain and therefore remain tender.
The backstrap is highly prized among hunters for its tenderness, lean nature, and versatility in cooking. It is considered one of America’s best cuts of meat. Venison, in general, is a healthy and nutrient-dense protein source. A 3.5-ounce portion of venison backstrap contains only 150 calories and 2.4 grams of fat, compared to 205 calories and about 10 grams of fat in the same portion of beef loin. Additionally, venison is packed with essential nutrients and minerals.
In conclusion, understanding the difference between backstrap and tenderloin is important for any deer hunter or enthusiast. While they are both desirable cuts, they have distinct characteristics and locations within the deer’s body. The backstrap is a long muscle running along the spine, while the tenderloins are smaller cuts located underneath the backstrap and spine inside the abdominal cavity. Both cuts offer delicious flavor and tenderness when properly prepared.
Unveiling the Differences: Backstrap vs. Tenderloin in Venison Cuts
The article discusses the differences between backstrap and tenderloin in venison cuts. Backstrap refers to the large muscles that run parallel along both sides of a deer’s spine and rest on top of the ribcage. It is often confused with tenderloin, which is smaller and located inside the abdominal cavity underneath the backstrap and spine.
Backstrap is comparable to ribeye in beef, while tenderloin is similar to filet mignon. The two cuts are desirable due to their tenderness, but their names are often confused. Tenderloins are usually hidden by a layer of fat and can be accessed from inside the body cavity after field-dressing the deer.
The backstrap belongs to a group of muscles called the Longissimus, which includes three sections: Longissimus capitis, Longissimus cervicis, and Longissimus dorsi. The Longissimus dorsi is the longest and largest muscle, extending from the shoulder blades to the lowest vertebrae. This is what is typically referred to as “backstrap.”
Backstraps are tender because they do not constantly bear weight like shoulders or haunches do. The more a muscle is used, the tougher it becomes. Backstraps are easily removed from a deer by making horizontal and vertical cuts along the spine.
Venison backstrap is highly desirable due to its tenderness, leanness, and versatility in cooking. It is considered one of the healthiest and most nutrient-dense meats available, being low in calories and fat while high in protein and various nutrients.
Overall, understanding the differences between backstrap and tenderloin can help hunters properly identify and utilize these prized cuts of venison in their cooking preparations.
Differentiating Prime Cuts: Backstrap vs. Tenderloin in Deer Meat
When it comes to venison, the backstrap and tenderloin are two prime cuts that are highly sought after by hunters. However, there is often confusion about these cuts and their differences.
Firstly, it’s important to understand that backstrap and tenderloin are not the same thing. Backstrap refers to the large muscles that run parallel along both sides of a deer’s spine and rest on top of the ribcage. On the other hand, tenderloins are smaller cuts located inside the abdominal cavity underneath the backstrap and spine.
To put it in perspective, think of backstrap as the ribeye in beef, known for its tenderness and flavor. The tenderloins, on the other hand, can be compared to filet mignon, another highly prized cut due to its tenderness.
The process of removing these cuts from a deer is also different. Backstraps can be easily accessed by making a horizontal cut at the junction of the spine and pelvis, followed by a vertical cut down the spine. Carefully trimming along the ribs allows for the removal of backstraps without leaving any meat behind.
Tenderloins, on the other hand, are located inside the body cavity and can be accessed after field-dressing the deer. They are usually hidden by a layer of fat and require careful removal from inside.
The reason why backstraps and tenderloins are considered desirable cuts is due to their tenderness. Unlike muscles that bear weight constantly like shoulders or haunches, these cuts are not used as extensively by deer and therefore remain more tender.
In terms of nutritional value, venison backstrap is an excellent choice. It is lean with only 2.4 grams of fat per 3.5-ounce portion according to USDA data. It is also a great source of protein, packing nearly 30 grams per serving. Additionally, venison is loaded with nutrients and minerals such as niacin, iron, potassium, zinc, and B-vitamins.
With its tenderness, flavor, and nutritional value, backstrap is a versatile cut that can be cooked in various ways. Whether it’s grilling, pan-searing, or slow-cooking, there are plenty of recipes to explore and enjoy this staple of the hunting culture.
In conclusion, while backstrap and tenderloin are often used interchangeably in hunting camps, they are not the same thing. Backstrap refers to the large muscles along the spine while tenderloins are smaller cuts inside the abdominal cavity. Understanding these differences allows hunters to fully appreciate and utilize these prime cuts in their culinary endeavors.
In summary, the main difference between backstrap and tenderloin in deer meat is their location on the animal. While both cuts are highly prized for their tenderness and flavor, the backstrap is longer and runs along the spine, offering slightly more meat, whereas the tenderloin is smaller and located inside the rib cage. Ultimately, personal preference will determine which cut to choose for a delicious venison dish.
Have you been dreaming of a Canada Moose hunting adventure? We offer some incredible Moose hunts in Alberta.
Why should I book a Moose hunting trip with you? We hunt in west-central Alberta where the farmland meets vast tracts of undeveloped Crown Land. This area has prime moose habitat and is home to an incredible Canada Moose population and has some excellent Moose hunting opportunities that few other places in North America can rival.
Since we only book a limited number of big game hunters each year, we’re able to keep the hunting pressure on the Moose very low. Combine those factors with the outstanding Moose habitat, and it’s easy to see why we offer some of the best Moose hunting in North America.
We hunt in an area with very good road access, so we can take hunters of varying physical fitness on this hunt. Typically, we use trucks and ATVs to cover a lot of ground and glass willow flats and cut blocks in the morning and evening. There are also numerous good vantage points for us to glass the willow groves in river bottoms where moose like to hang out.
All of our moose hunts take place about 3 hours from Edmonton in Alberta. Your guide will pick you up at the airport in Edmonton on the first day of the hunt and drive you up to camp.
We have have a lifetime success rate of over 90% on our archery and rifle Moose hunts. Our hunters typically take bulls in the 35-55″ range. Every single one of our hunters has gotten a shot at a mature bull moose over the past three years.
Finally, we also have guaranteed moose tags. So, there is no need to enter in a limited entry draw to go Moose hunting with us.
Due to all of these factors, we offer an outstanding Moose hunting experience that is truly in a league of its own. Are you looking looking for a great chance at taking a really nice Canada moose? Then book one of our incredible Moose hunting packages.
What is the cost of a Moose hunting trip in Canada with you? The prices for our 2024 and 2024 Alberta Moose hunts are listed below. Contact us for specific dates available in 2024 and 2024.
All prices are in US dollars. Our Canada Moose hunting packages include all food, lodging, transportation within the hunting area, field preparation of trophies, non-resident hunting licenses, tags, and taxes. The packages do not include tips, commercial air fare, taxidermy, meat processing, and shipment of trophies home.
Alberta Rifle Moose/Deer Combo$11,380We’re fully booked for 2024 & 2025
This is a rifle moose hunt that takes place during the late season and includes the opportunity to hunt whitetail deer at no extra charge. These late season hunts are a very underrated opportunity to hunt both moose and deer.
These hunts take place about 3 hours north of Edmonton. Hunting pressure is very low in that area and the moose habitat is outstanding. As a result, that area has high moose densities and offers a good opportunity at a 35-55″ bull.
The deer habitat is also outstanding and that part of Alberta is known for excellent whitetail deer hunting. Most of the bucks taken on these hunts score 140-150″, but hunters do occasionally take bucks in the 160-175″ range. The dates for this hunt also overlap with the whitetail rut.
Additionally, that area has very good road access, so we can take hunters of varying physical fitness on this hunt. Typically, we use trucks and ATVs to cover a lot of ground and glass willow flats and cut blocks in the morning and evening. There are also numerous good vantage points for us to glass the willow groves in river bottoms where moose like to hang out.
We only take a maximum of 2 hunters at a time and guide each hunter 1×1, so are high quality moose hunts. You’ll stay in a comfortable bunk house with electricity and hot water showers. Camp also has good cell phone service.
BOOK THIS HUNT!
Alberta Archery Moose$11,200We’re fully booked for 2024 & 2025
This is an archery moose hunt that takes place during the peak of the moose rut. This is an excellent time to hunt as the bulls are extremely vocal and respond very well to calls. If you’re looking for an exciting moose hunt where you get in close to a monster bull for a shot, then this is the hunt for you!
BOOK THIS HUNT!
What other animals may be combined with a Moose hunt? You can hunt wolf and coyotes after you get your moose at no extra charge. Depending on availability, our rifle Moose hunts in November can sometimes be combined with Whitetail Deer as well for an additional $1,750 (no extra charge for the moose/whitetail combo hunt). Our rifle moose hunts overlap with the whitetail rut in this area.
WHY SHOULD I BOOK A CANADA MOOSE HUNT WITH YOU?
We have hunting rights in a part of Alberta that contains some of the best Moose habitat in the country. This area is home to an incredible population of Canada Moose and has some excellent hunting opportunities that few other hunting outfitters in Russia or North America (to include Siberia, Alaska, Ontario, and the Yukon) can rival.
We book a limited number of hunts each year, abide by strict quotas, and carefully manage our hunting areas. This ensures that our hunters have high success rates and consistently harvest mature bull Moose on fair chase hunts.
These hunts take place in an area with good road access, so unlike a moose hunt in British Columbia or Alaska, there’s no need for a float plane charter or long boat ride on a hunt with us.
Since we have guaranteed Moose tags, there’s no need to spend years accumulating bonus points or deciphering a complicated lottery system in states like Colorado, Idaho, or Utah.
We can accommodate rifle Moose hunters on spot and stalk hunts.
Our Hunting Guides are friendly, knowledgeable, and have many years worth of experience guiding trophy Moose hunts.
There are limited numbers of wolves in the area and we can also take you on a coyote or wolf hunt for free if you have time remaining in your hunt after your harvest your moose.
We take pride in providing hunts with outstanding personal service before, during, and after your hunt. You will not have problems getting in touch us when and we’ll be available to you through the entire process to provide assistance with anything you need related to the hunt.
What is the average shot distance when Moose hunting in Canada? Since they are often encountered in thick cover, shots taken when Moose hunting are usually at short to moderate range: 50-250 yards. However, they are sometimes encountered in situations requiring longer range shots, so hunters should be prepared to take shots out to 300 yards on a rifle Moose hunting trip with us.
What are the accommodations like on your Moose hunting trips? You’ll stay in a comfortable bunk house with electricity, hot water showers, and an outdoor bar/cookhouse. Camp also has good cell phone service.
Breakfast is normally eaten in camp and typically consists of oatmeal, bacon, pancakes. Hunters usually take a sack lunch of sandwiches and a few snacks into the field and return to camp for a hearty and tasty dinner in the evening.
When do you do your Moose hunting? The rifle moose hunting season takes place during the month of November and this is when we outfit our fully guided moose hunts.
Contact us for more information or to book your Moose hunting trip.
What is the best rifle caliber for Moose hunting? Since they are so large (they’re the largest members of the deer family), Moose must be hunted with an cartridge of appropriate power. With this in mind, we do not recommend using anything less than the .30-06 Springfield, using 180gr controlled expansion bullets, for Canadian Moose hunting. The .300 and .338 Winchester Magnum are also good choices. Some hunters successfully hunt Moose with even larger cartridges, such as the .375 H&H and .416 Remington, though neither is really necessary.
That being said, we would rather you bring a smaller cartridge that you are familiar with and can shoot accurately rather one that you are afraid of. As always, accuracy and good shot placement are the two most important things when hunting Moose.
What is the best recommended Moose shot placement? Though Moose are very large, they will not travel very far if hit properly by a powerful enough bullet. When the animal is standing broadside, simply aim at the center of the shoulder, approximately one third of the way up the body.
Remember to adjust your aiming point accordingly if the Moose is quartering towards or away from you (aim slightly forward if it is quartering towards you and slightly to the rear if it is quartering away). Prior to taking any shot, ensure that the animal is stationary and is not standing in water. Recovering a dead Moose from a body of cold water is doable, but is an experience best avoided if at all possible.
Western Canada Moose Scientific Name: Alces alces andersoni
How do you distinguish males from females when Moose hunting? Male (bulls) and female (cows) Moose are very easy to tell apart when Moose hunting. Only bulls (top) have antlers.If you’re interested in going Moose hunting in Canada, please contact us for more information. We’ll get back to you as soon as possible, usually within 24 hours.
Welcome! Please view, share, and enjoy the copyrighted, complete solution to the Fenn quest. Visual independent proof (“VIP”) exists in three different forms, while the site determined by the poem is here.
The readiest proof is found here or in the image shown on this page, which is the quest solution. The image combines an overlay of the illustration by Polt found in the epilogue of The Thrill of the Chase: A Memoir by Fenn, published in January 2010, onto an outdoor photo of the site I took in August 2018. That match proves that Fenn, who commissioned the illustration, was at the site of the photo while creating the quest.
In that book, where “EPILOGUE” heads the last chapter title page, the letters “LOG” are centered above the illustration. The Greek root of “epilogue” is “ἐπί” or “epi” meaning “above.” In often referencing “under a log” or “turning over a log” while searching, Fenn refers to this image, not to the natural remains of a tree. The key image under, or labeled by, the letters “LOG,” when overlaid onto the correct photo and faded, proves the correct site, again underneath.
More independent proof is found here in the clear connections between the site and the Colorado state seal. The three VIPs often interconnect. For example, the fasces in the state seal matches the “ax in the wood” portion of the overlay image, while the Fenn directive to “turn over a log” matches the key 1794 Battle of Fallen Timbers, fought near Toledo.
Details are found in the full solution.
Only the correct site and its surroundings were visited in the context of the quest. Identifying the area was straightforward. The difficulty lay first in narrowing down the site, which took about one year, then in perceiving that the quest is not a scavenger hunt for treasure but rather a test of grit: of character, disentitlement, productivity, and resilience in adversity, culminating in independent proof. Creating at least one form of independent proof took over two years, and creating others took almost three.
The rugged site, dominated by willows, is of limited extent, about 1 acre (0.4 ha), yet multiple, thorough searches yielded nothing. Anyone is welcome to explore and search the site. Outdoor safety precautions in all particulars must be taken as the site is at 9,000 feet (2,743 m) of altitude and is accessed only by wading a river.
The solution is publicly revealed. To be clear, the quest is solved, the answer to the puzzle is independently proved, and treasure is absent at the site.
Three forms of VIP would not be needed if treasure, proof enough, were present. The status of treasure is unknown. In my opinion, a real treasure exists, and Fenn securely retains it to award as he sees fit — which is also common sense: the poem ends, “I give you title to the gold.” Many “treasure searchers” might misunderstand the quest, setting the wrong success standard and guaranteeing failure by insisting on finding and retrieving a literal treasure, when the “treasure in the woods” is figurative or metaphorical. A metaphorical test of grit solved by creativity and reference to history, literature, and images is consistent with the personal profile of a combat pilot turned artist and best-selling author. Literally abandoning treasure in the woods, a foolish act inconsistent with a brilliant man, also would deprive Fenn of control over the quest.
Many thanks to Fenn, Polt, family, friends, and public safety authorities. Fenn is a man of service, creativity, and intellect, whom I respect and admire. I am humbled to have solved his amazing quest and would be privileged to meet him in person. We have never mutually corresponded. My name and contact are found atop this page and at the bottom of the cover page of the solution document.
“If I cannot move heaven, I will raise hell.” – Virgil, The Aeneid of Virgil, Book Seven, Line 312
I’ve written a bunch about the act of nymph fishing, but I haven’t talked much about nymph flies themselves. Using a nymph while fly fishing is probably the most effective method of catching trout. It doesn’t have the glamor of dry fly fishing, but nymphing can change a skunk into a productive outing.
What is a Nymph Fly?
A nymph fly is a fly fishing lure that simulates a sub-surface bug with a hook in it during the larval stage. Mayflies, damsels fly, stone flies and caddis flies start life as eggs on the stream bottom. The eggs hatch into a nymph or larva and become a prized meal for trout.
Pheasant Tail Nymphs in size 10 through 16. These flies should be in every fly box. Proven effective, and easy to tie if you’re a fly tier. Get a couple with beads and you’ve got most situations covered.
Hares Ear Nymph in size 12 through 18. I like using a hare’s ear as a dropper in size 16 off a buoyant dry fly. The light color of the hare’s ear simulates so many bugs. If you want to fish this nymph a little deeper find flies with brass beads.
Green Caddis size 10 to 16. When the trout are keyed into green caddis you’ve got to fish them deep and on the bottom. I’m always amazed at how vibrant green these nymphs are.
Tips for Selecting an Effective Nymph for Fly Fishing
A common quote in fly fishing circles goes like this. So what are they biting on? Those little brown flies about 3/8 inch long with a hook inside.
This hits home the important factors in selecting a nymph fly. If you pickup a river rock or submerged log and get your nose down close and look. If the water you’re fishing has trout, odds are you’ll see lots of little brown bugs crawling around.
Here’s the tip: Size up those creepy crawlies you see under rocks and woody debris and select a fly that’s close in color and size.
Green Caddis are really common on my home water. I’ve learned through years of experimenting that the best nymph for me to start out with are those green beauties.
caddis fly nymph bug and fly
How to Fly Fish with a Nymph
The simplest way to start nymph fishing is to use an indicator. Basically rig up a longer leader 9 to 12 feet is best. An indicator is a float that can be positioned along the leader. I start by placing the leader 3 times the water depth when fishing in a moderate current. Tie on a fly like the hares ear or green caddis and hang on!
Read more about nymphing with an indicator in this article. What is a strike indicator in fly fishing
Another method is called “high stick” nymphing. This method uses a fast sinking nymph fly and fish relatively close (10 to 15 feet away) Instead of letting the fly drift in the current, while high sticking the angler actually leads the nymph through the fishy water.
I’ve written a great article that goes into all the details of high sticking. How to High Stick Nymph Fly Fish
If you see occasional trout rising, setup a dry fly with a dropper nymph. This combination can be super effective, and you can get a double hook-up. I like the floating lead fly to be something like a Elk Hair Caddis or a Yellow Humpy. The hollow hairs used to tie these flies help them float. If you can remember treat these flies with floatant before getting to the water. If you give the floatant plenty of time to dry they’ll float longer.
I wrote an article all about rigging up a Dry/Dropper in this article: How to Setup a Dry Fly with a Dropper for Fly Fishing
Recommended Fly-Fishing Gear for Fly Fishing Nymphs
If asked I would say the number one item I would recommend is a nice fly rod. Behind that a decent selection of flies followed by fluorocarbon leaders and tippet.
I really believe in investing in getting the right gear to fly fish. You might plan a trip for weeks and you’re excited about the chance to catch a trophy. When nymph fishing fluorocarbon leaders and tippet is an inexpensive way to improve your odds to netting that trophy.
Nearly invisible and stronger than nylon in the same diameter fluorocarbon lines have less stretch making them more sensitive. Pick-up a couple fluoro leaders and tippets – highly recommended.
Fly Selection – in one way you could say an item that costs between $1-$3 is cheap. Having 2-5 fly boxes filled with 100s’ of flies is an investment. To fish nymphs effectively you will lose flies. Trout like to hide in wood and around rocks so snagging and breaking-off will happen.
Fly rods above 9 ½ feet in length excel when nymph fishing. Water current speeds vary across the top of the water and through the depth. The more fly line that can be held off the water will minimize the amount of drag/pull inflicted on the fly.
Longer fly rods also enable the fly fisher to “reach-out” into little pockets of trout holding water. Example: those back eddies behind a boulder
Tips from Fly Fishing Guides When Using Nymph Flies
Many times, when you’re not catching anything the first thing you do is switch out the fly you’re using. DON’T SWITCH – if you’ve picked a fly that remotely resembles the natural bugs – FIRST add a little bit of weight. Nymphs and fish are on the bottom, your fly needs to be close to the bottom as well.
Bouncing a nymph on the bottom will dull a hook fast. Regularly check the hook for sharpness and carry a hook file to re-sharpen.
Add a little bit of tippet length to get down deeper. Nymph fishing is way harder that dry fly fishing on the surface. Usually you can’t see the fly, in turn you don’t know what’s happening. Adding tippet length until you start ticking on the bottom will improve your hook-ups.
Set the hook often. Learn to strip set whenever you even think the fly has paused, ticked or changed direction. Fish learn to spit-out anything that isn’t food – SUPER fast.
The strip set is a method of tightening the fly line and hooking a fish without completely pulling the fly out of the water.
How to strip-set: The key is to keep your rod tip stationary. I hold the rod with my right hand and have the fly line in my left.
To set the stage, your nymph is drifting nicely with an occasional tick on the bottom. Then you see a pronounced pause in the line – with your rod tip stationary QUICKLY jerk/pull the fly line back 2 feet or so with left hand.
Another benefit of the strip set is that often after striking you can continue drifting the fly through the holding water without re-casting.
More Articles about CATCHING Fish on a Fly Rod
Learn the ins and outs of catching Brook Trout in this article: How to Fly Fish for Brook Trout
A perfect summer evening for me is fly fishing for Bluegills. I detail the steps in this article: How to Fly Fish for Bluegills: A Complete Guide
Read about my favorite fly rod – especially for nymph fishing in this article. The Best Fly Rod, Reel and Fly Line for Nymph Fly Fishing
Exploring the Pros and Cons: Pump Air Rifle vs Break Barrel - Unveiling the key differences and advantages between two popular air rifle mechanisms....
"Debate over whether a 22 air rifle can effectively take down a deer has sparked curiosity among hunting enthusiasts. With its lower muzzle velocity...
"Master the art of precision shooting with dry firing air rifles. Enhance your aiming skills, trigger control, and muscle memory without using ammunition. Discover...
")
")
")
")
")


 If you own a taxidermy mount, it is always a good thing to keep it clean. Keeping it clean prevents unwanted guests from touching your taxidermy. Suppose there are any concerns about insects damaging your taxidermy. In that case, it is important to occasionally inspect your mount-especially around the mouth, antlers, and around the ears- for signs of any pests.