")
")
")
")
")


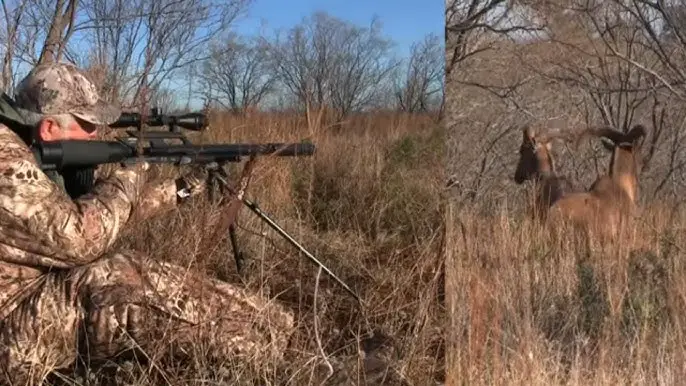
Deer hunting is perhaps one of the most American hunting activities, and with the increasing popularity of suppressors, it’s only natural that people will ask if they can hunt deer with suppressors. The answer is by and large a resounding yes! 40 of 50 US states allow hunting deer (and other game) with suppressors, meaning that most anyone who wants to can with a suppressor.
Table of Contents
Can You Hunt Deer with a Suppressor?
You can totally hunt deer with a suppressor, and there are a lot of good reasons to! We’ll show you the states that allow hunting with suppressors in a minute, but the good news is that it is quite likely that you can hunt with a suppressor in your state.
If you have a hunting rifle with a suppressor or want to put a suppressor on your hunting rifle, you’ll find a lot of benefits, and precious few, if any, drawbacks. Well, other than the bother of getting an NFA registered device, but that’s not such a big deal in the grand scheme of things.
Anyway, since most places are states that allow hunting with a suppressor, let’s look at the advantages that come with suppressed hunting.
Buy a Rifle Suppressor
Benefits of Hunting Suppressed
From the very beginning in 1909, suppressors have been actively marketed to hunters and for good reason – they make hunting safer and quieter, eliminate the need for bulky hearing protection, and improve accuracy when shooting.
Here are just a few of the reasons why suppressed hunting is better hunting:
- Make the outdoors quiet again. The thundering roar of a gunshot spooks game, trains animals to expect hunters and disturbs private landowners and other people sharing the same hunting space. Suppressors, when paired with the right ammo, reduce the sound of a gunshot to hearing safe levels, and “dull the edge” of the sound of a gunshot.
- Hunting deer with a suppressor is safer. While in recent years electronic ear muffs that allow you to hear ambient noise while blocking the sound of gunfire have hit the market, the simple fact is most hunters still choose between no ear protection or wearing something that makes it hard to hear what is going on around them.
- Using a suppressor on your hunting rifle allows you to hear everything that is going on around you, and not damage your hearing when taking a shot.
- Accuracy is proven to be improved when shooting with a suppressor. This benefit has also been touted since the early 20th century. This is because the physics of a silencer reduce felt recoil and muzzle climb. With both of these factors greatly reduced, shooters find their rifles easier to shoot.
So it isn’t that silencers make the gun more accurate per se, but they make it easier for YOU to shoot your gun more accurately.
There are a lot of other little things that make hunting deer with a suppressor nice, too. Your shots are less likely to spook other game in case you miss, you are fully aware of your surroundings, you have less gear to carry on your person, you never have to worry about quickly getting hearing protection in before taking a shot, and of course, reducing noise pollution is simply the responsible, polite thing to do.
Do Suppressors Impact Accuracy?
We already touched on this a bit, but we can look a little deeper into how suppressors impact accuracy.
It is a law of physics that for every action, there is an equal and opposite reaction. Gun owners understand this as recoil. Recoil is moderated through various means, like through heavy guns or dense stocks that help absorb and distribute some of the energetic forces from firing a round. Felt recoil can also be reduced with various shock absorbing materials like rubber buffer pads or even various spring loaded or similar shock absorbers built into the stock.
Semi automatic rifles have some natural recoil reduction built into their operation, as the recoil springs that cycle the action absorb huge amounts of energy that would normally be felt by your shoulder.
Muzzle brakes (while rarely seen on manually operated hunting rifles) are another proven way to reduce felt recoil, as they redirect muzzle gas in such a way as to weaken the recoil impulse.
All these common mechanical ways to reduce or redistribute recoil energy add up to easier shooting. And we all know an easier shooting gun can be more accurately shot. Consider the difference between shooting a .22 rimfire and a punishing .300 Winchester Magnum. While skilled shooters can do well with either gun, I think we can all agree the .22 is a lot easier to shoot accurately.
Suppressors take the recoil reducing ability of a muzzle brake and turn that power up to 11. Because suppressors contain muzzle gas for so long in order to reduce sound, they also double as an insanely effective muzzle brake. Which means less felt recoil, and, you guessed it… the ability to shoot your rifle easier.
Buy a BANISH 30 > >
States that Allow Suppressors for Hunting
There are presently 42 states that allow ownership of suppressors, and 40 of them permit hunting with suppressors. As you can see, that includes some of the best deer hunting country in the nation. Sadly, some highly populated states like California and New York don’t allow hunting with suppressors, but most Americans are in luck!
If your state isn’t on this list, consider connecting with local gun rights advocacy groups and pressing your elected officials to embrace firearms and hunting safety by allowing the use of suppressors when hunting.
Getting Your Hunting Rifle Barrel Threaded
Many common hunting rifles do not have barrels threaded for a suppressor. There are many reasons for this, most of which boil down to cost. Suppressors are an optional accessory that often cost more than the gun they are being mounted on. This means there is little reason to thread every barrel that comes out of a factory.
And for whatever reason, hunters rarely embrace muzzle devices like flash hiders or muzzle brakes on their guns, so most hunting rifles show up without threaded barrels. The exception to this is many semiautomatic sporting rifles which usually have threaded muzzles for common muzzle brakes or flash hiders. These can be quickly fitted with suppressors. But odds are good your favorite manually operated or older semiautomatic rifle isn’t suppressor-ready.
When you consider the best-suppressed hunting rifle is often the one you own and are comfortable with, barrel threading becomes very important. You could trust your rifle to a gunsmith using hand tools or inexpensive machine tools and hope that they’ll do the job right, or you could have your barrel threaded on a state of the art CNC machine that cuts more perfect threads than are possible by any other means.
That’s why we founded Threading Central and offer an easy mail-in barrel threading program! Our state of the art machines will do a more perfect job than even most factories are capable of, and the best part is that it’s incredibly easy and affordable!
Get Your Barrel Threaded
The Best Suppressors for Hunting
The best-suppressed hunting rifle needs the best suppressor for hunting. Of course, we should consider what kind of rifle we are putting a suppressor on. As a general rule, any well-made rifle is suitable to be used as a suppressor host. The “best” suppressed hunting rifle really does become academic, because there is no one single best hunting rifle. So we’ll assume you have a good rifle and want to put one of the best suppressors for hunting on it.
We are a tad bit biased towards our famous BANISH Suppressor line, and for good reason. The all-titanium, user-serviceable and multi-caliber BANISH suppressor is truly the one that fits any gun. We designed the entire line to work with the most popular hunting and sporting rifle and handgun cartridges while offering true hearing safe performance across a range of dozens of different cartridges. No other suppressor line offers the same kind of value, performance, and functionality as the BANISH suppressor.
However, we know that people like consumer choice, and as the nation’s largest silencer dealer, we are happy to sell you whatever silencer you want.
We are also especially fond of the Advanced Armaments 762-SD. Created specifically to address the problems with suppressing .308 Winchester and 7.62 NATO ammo, it also works extremely well with .300 Blackout. And of course, there are umpteen million deer rifles in those wildly popular calibers. And at under $700, it is a real bargain.
If price is your absolute bottom line and you have a .30 caliber or smaller hunting rifle, it is hard to beat the Coastal Gun .30 Caliber LRT which will get you into the suppressed hunting rifle game for well under $600, and will work on many different .30 caliber and smaller rifles.
Get Equipped Before You Hunt
Are you ready to own a hunting rifle suppressor? That’s exactly what Silencer Central is here for.
We’ve long recognized there are distinct markets for suppressors including tactical/military/law enforcement, and the hunter. So, if you to hunt deer with a suppressor, we know a thing or three about the needs of hunters and sport shooters just like you, because you are our entire reason for existence. Our dedicated expert staff can help you select the perfect suppressor for your hunting rifle that meets your unique combination of budget, performance and end-use.
In addition, Silencer Central has offices in all 42 silencer legal states, so we know what it takes for your state. Plus, we are the only silencer dealer who can perform the entire transaction from purchase to submitting ATF paperwork, to delivering your suppressor entirely by mail!
That’s right, for the first time since the 1934, mail order silencers are again possible, and only through Silencer Central. Learn more about the process here, and see how much easier it can make things for you. We also offer a FREE NFA gun trust to all our customers that not only makes registering your suppressor easy but serves as a trust for all your NFA devices.
No matter if you are an experienced silencer owner or are just getting your first hunting rifle suppressor, we are here for you. Drop us a line or send us an email and let’s get you started with selecting the best suppressor for deer hunting (or anything else you can use a suppressor for) right now.
Get Started


))/4566485.json)


))/15970002.json)
))/16708149.json)
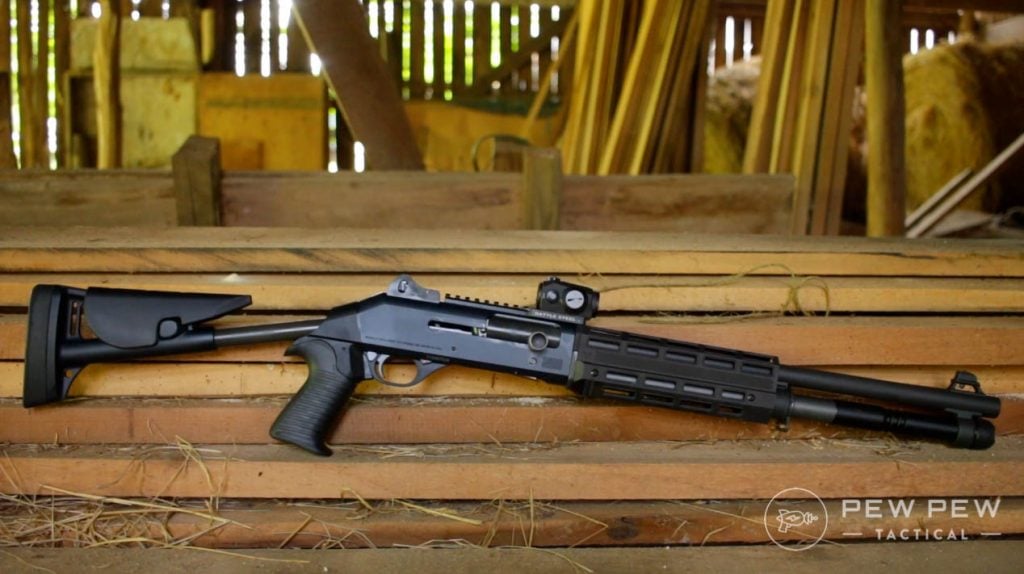

![Benelli M4 Review: Best Combat Shotgun? [Video+Tested]](https://www.pewpewtactical.com/wp-content/uploads/2021/07/21.-Benelli-M4-1024x574.jpg)


 If you’re looking to enhance a natural area that is already providing native food sources for wild ducks, diversity is key. It’s time to be inclusive of all types of waterfowl. When a variety of waterfowl is using your waterways, you have a variety of waterfowl in the freezer. In some cases, it can extend your season.


