“Unleash Your Shooting Potential with the 22 Cal Air Rifle 1300 FPS – Experience Unparalleled Accuracy and Power in a Compact Package!”
22 cal air rifle 1300 fps
A 22 cal air rifle with a velocity of 1300 feet per second (fps) offers an excellent combination of power and precision. With its high muzzle velocity, this air rifle is capable of delivering impressive accuracy and impact on target. Whether you are hunting small game or participating in shooting competitions, the 22 cal air rifle with 1300 fps provides the necessary force to ensure a successful shot.
The.22 caliber pellets used in this air rifle are larger in size compared to other calibers, offering increased stability during flight and improved impact on the target. The high velocity of 1300 fps ensures a flat trajectory, allowing for better long-range shots and reduced bullet drop. This makes the 22 cal air rifle ideal for varmint control, pest elimination, and small game hunting.
In addition to its power, the 22 cal air rifle with a velocity of 1300 fps also offers versatility. It can be used for various shooting purposes such as target practice, plinking, and even vermin control around farms or gardens. The ability to achieve such high speeds with a.22 caliber pellet makes this air rifle a favorite among enthusiasts who value both accuracy and power.
In conclusion, the 22 cal air rifle with a velocity of 1300 fps offers power and accuracy for various shooting applications. Its high muzzle velocity ensures a strong impact, making it suitable for hunting or target practice. With its lightweight and compact design, this air rifle provides ease of use and maneuverability. Whether you are an experienced shooter or a beginner, this air rifle is a reliable choice for achieving precision and control.
Muskrats are interesting animals that have the ability to live on land and in water, (although they prefer water) and also build dams underwater leading to the surface. These intricate burrows can be highly destructive to residential properties, so I can understand why you want them gone.
If you want to trap a muskrat that is becoming a nuisance in your area, here’s what you do:
Choose the proper trap: you have three choices
Leg trap
Body grip
Live trap
Decide where to place the trap:
Along their muskrat run (their underwater path to dry land), or
Near their burrow entrance
Bait the trap
Use a root vegetables like potato, or crunchy fruit like an apple
Position the bait in the center of the trap to avoid the animal reaching in and grabbing it.
Set the trap
The trap door should be open, and facing the burrow entrance or muskrat run
Make sure no debris is blocking the door from closing, and nothing is jamming the trigger.
Check the trap: peek in about every couple of hours to see if you successfully captured the animal.
Yay, you’ve caught the muskrat!
Calmly approach the cage or trap
Place a sheet on the cage to keep the animal calm
(If it’s legal) transport the animal between five and ten miles away from your home, or call Animal Control for proper pick-up and relocation.
Muskrats tend to stay to themselves and avoid human contact. But how can we avoid them if they are causing property damage, or creating a disturbance to our local ecosystem? This may be the case for you, and there are some key features about muskrats that you should know before attempting to trap one.
Occasionally during the winter, they will eat crayfish, snails, mussels, frogs, insects, and slow-moving fish; but muskrats are predominantly omnivores, and love to feast on plants and vegetation. Because of the strength and sharpness of their teeth, Muskrats favorite foods tend to be starchy foods or simple plants like:
Apples
Carrots
Water Lilies
Sledges
Cattails
Clover
Switchgrass
Wild rice
Arrow head
Parsnip
The musk of another muskrat is also another option as bait. It’s not the best choice because it will attract the same problem that you’re trying to get rid of, but it’s still an option.
Even certain scents like oil of Anise is a great attractant for muskrats. The goal when baiting is to use the correct bait to lure the muskrat completely into the cage. So whatever you see or notice the muskrat eating, use that as your primary bait. If you’re not sure, this list of goods should do the trick.
Want more tips for best bait practices? No problem!
Create a small trail of bait that will lead to the inside of the cage.
Place a heavy object on top of the cage to keep it from being knocked over by the elements, or another animal.
Be sure that the bait is positioned well, and will not lodge between the door, or jam the trigger.
What Is The Best Way To Catch A Muskrat?
The best way to catch a muskrat is by trapping them with either a live or lethal cage. Muskrats are semi-aquatic animals, and spend the majority of their time in water, traveling back and forth between rivers and the land.
Use these tactics to successfully capture your pesky muskrat
Pick Your Trap
You have three different choices: a leg trap, body trap, or live cage.
Leg trap: a circular device that closes shut on the animals’ foot when it passes over it.
Body trap: a large flat trap that crushes the muskrat as soon as it’s in the center of the trap.
Live trap: a self-closing cage with either one or two doors for easy access
* Both a leg and body traps are lethal *
Determine the Trap’s Placement
Here are two prime choices
Set it along the travel path of the muskrat, on a bank or the perimeter of a waterway.
Place it a couple of feet away from their burrow entrance (a hole with mud in front of it, or surrounding it.) This option is easier to set up.
Bait Your Trap
Use crunchy or starchy vegetables and fruit. A few examples include:
Apples
Parsnip
Fully Set Your Trap
First, place your trap at the beginning or end of the slide set, or trail, of the muskrat
The cage should be parallel with the width of the trail
Open the cage door
Bait the trap with the muskrat’s favorite food. Use string to hold the bait on the cage (if the cage is submerged in water.)
To trap a muskrat underwater, fully submerge the trap two-to-three inches under the water, near the entrance of their slide, to stealthily disguise the cage. Use a piece of string and a weight to hold the cage beneath the water
Check periodically on the cage and animal. Muskrats can become anxious if trapped for too long, thus, making them more aggressive towards you when you approach them.
Congratulations, your muskrat is successfully caught!
Now place a sheet or blanket over the cage to keep the animal calm.
Once the muskrat is captured, you have two options for relocation:
Transport the muskrat to a woodland area with lots of food, moisture, and a body of water (check with your local laws to see if this action is legal.)
If it is illegal to transport the animal yourself, simply contact Animal Control, and they will be there to permanently rid you of your muskrat issue.
As previously mentioned, muskrats spend a lot of time in the water, so there may be a chance that you’ll end up with an aquatic trap. There are many entrapments that are available specifically for water-based muskrat sets.
How Do You Scare Away A Muskrat?
You tried baiting it…that didn’t work. Maybe you baited it well, and the mangy muskrat keeps taking the bait. When all else fails, scaring it away can work just as well as a trap or bait. But what are some muskrat repellents that actually work?
Alter Water Levels
If there isn’t enough water, muskrats cannot build their dams nor create proper burrows and den. Presuming you have control over the water level in your pond, draw the water level down to at least two feet below the normal standard.
If the pond is near your home, but you have no control over the water level, the next scare tactic is for you
Fencing
Create a fence around the areas that you want protected. Muskrats are swimmers, not climbers, so a fence is a great solution for keeping them out of ponds and waterways. Here are some tips:
The fence must surround the entire perimeter of the body of water in order to keep the muskrat completely out.
Since the fence will most likely go into the water, use post material that won’t erode quickly, like a metal T-post.
The best material to use for fencing out a muskrat is 1-inch hardwire mesh. Chicken wire is too thin, and the muskrat will most likely chew through it.
Place the posts at least three feet beneath the water to avoid burrowing, and at least one foot above the surface.
Although indiscreet, and sort of intrusive, creating a fence to protect your property is a safe and humane way of deterring a muskrat.
Electronic Repellents
Electronic repellents are best used after all of the muskrats have been collected and transported elsewhere. So once you’ve captured the nuisance, try setting up a repellent device to deter other muskrats from making the same mistake as the one you just trapped.
Consensus shows that the best electronic device to consider is a motion-activated sprinkler that quickly shoots out burst of water, which will ironically scare the muskrat out of your yard or garden.
The general instructions for setting up an motion-activated sensor:
Place each device about 30-35 feet away from each other
Position the sprinklers around the shoreline to deter the muskrats from entering the water
Point the motion sensor outward so it can detect upcoming invaders
Reduce Attracts
Such a simple solution, isn’t it? Getting rid of what makes the muskrats appear is one of the most significant, and cost-efficient ways to keep muskrats away. Muskrats love aquatic vegetation, which is another reason as to why they spend so much time submerged beneath the surface.
When reducing attracts, place emphasis on these treats:
Pond weeds
Arrowheads
Willow
Water lilies
Ferns
Cattails
Sedges
Rushes
By decreasing these attracts, they will have less of a reason to show up in your yard or pond; thus, creating less of a muskrat problem for you.
Predators
Although a tricky option, providing the muskrat with a predator will definitely scare it away from your property. Luckily, they have plenty of predators to choose from. Here’s a few:
Snapping turtle (best option because it’s an aquatic animal)
Weasels
Otters
Fox
Coyote
These are the most prominent muskrat predators that can get the job done.
Flipside to the coin: using a predator to successfully deter the muskrat away could cause another problem…the predator then becomes a pest, and you now have to get them out too!
Although an option, I don’t recommend it as an efficient solution.
Do Muskrats Bite?
Yes, biting is their number one form of defense. When an animal or human is too close to the muskrat, or makes it feel pressured and threatened, they are known to become physically assertive in order to defend their lives.
Fun Fact! Despite their smaller stature, they are well equipped and strategic enough to fight a dog, and win! There have been several cases of muskrat bites reported to Animal Control over the years.
You want to take real caution when attempting to handle a muskrat because muskrats are known to carry disease. They eat and drink directly from the earth; and the earth is filled with animal feces, urine, and animal hairs, which is how they obtain most of these diseases.
And yes, Rabies, is one of the diseases that muskrats carry.
These bacteria are usually spread via biological fluid like blood or saliva. Which is why it is imperative to take precautions when caging a muskrat. Be sure to wear heavy-duty gloves, and cover the trap with blanket once the animal is caught. It will keep them calm enough to not try and strike you.
Are Muskrats Aggressive?
Yes, muskrats are aggressive. As stated earlier, muskrats do what they must to refrain from contact with any predators, including humans. So when they are approached by one, they are known to become feisty, and will use their body as a weapon of defense.
Although one of their primary tools for fighting is escape, if that doesn’t work, muskrats will use their sharp claws that they use for burrowing, to dig and scratch at you. Their nails are pointy and slender, about an inch long, which is perfect to create a clean cut that will draw blood, if successful.
Most attacks are due to a predator trying to invade their burrows. They are very territorial animals.
Muskrats also become aggressive during their time of gestation. Because the mother is pregnant, she becomes irritable due to hormonal fluctuation. They are monogamous creatures, and the male will become very assertive if you try to harm its mate and babies.
Are Muskrats Afraid Of Humans?
Well, there are two sides to this coin. No, muskrats are not afraid of humans; however, we can scare them.
Heads: they are not afraid of humans. Muskrats spend their days eating, and building dams and burrows. At no point in time does a human cross their minds because we are not a daily part of their routine. So since we’re not their mind, they are not concerned about our well-being.
Tails: humans certainly do scare muskrats. The animals are natural-born eco-architects, and have no intentional means to cause harm. Although unintentional, their organic habit of eating vegetation, developing underground canals, and building dams causes a disruption in our human environment.
Because of the significant damage that they can cause to our crops, water lines, and property foundation, we humans tend to prey on these animals by killing them, or causing disturbance to their livelihood.
Did you know that there is a muskrat trapping season in Connecticut?
Imagine if there were a trapping season for humans? That would scare us, big time. Muskrats can become very defensive when it comes to humans, which is why it’s important to keep calm while approaching the caged muskrat. Limiting physical harm is the goal during capture and transfer.
Do Muskrats Attack Humans?
Yes, muskrats will attack a human, if they are provoked. Muskrats care about all of the work that they put into their burrows, canals, and dams, and will defend it at all cost. The most prominent reason for a muskrat attacking you is home invasion.
Excess heat can also be a determining factor of whether or not a muskrat will attack you. On very hot days, a muskrats’ body temperature can raise almost a little higher than a human, which is another reason as to why they love the water so much. But just like we get irritable, so will they.
With that being said, trapping your muskrat will definitely become a problem for them, and they will most likely attack you with a swipe of their claws, or a bite with their strong incisors. To protect yourself while trapping, wear heavy-duty gloves, and maybe even pants and a long-sleeve shirt to combat against scratches and bites, and prevent possible infection.
Do Muskrats Chew Wood?
Muskrats mostly chew on food that they will actually ingest, like aquatic vegetation, fruits, and vegetables, but not necessarily wood. People have the misconception that muskrats chew on wood because they swim and build lodges and dams, and are probably mistaking the muskerat for a beaver.
They have been known to have sticks in their mouth, or simply sit around a group of wood. That’s their building material for their new home (hopefully not in your backyard.) They stack the pieces of wood together to build an elevated mound to protect their hole, and to defend themselves against predators.
Can Muskrats Run Fast?
No, muskrats are not fast runners; however, they can run, and are quite agile.
This is good news! Now you know you won’t have to expend too much effort to catch it! Muskrats have very little feet with long nails attached to them. This feature is great for defense, and gripping the ground for cutting corners, but slows down the animal at the same time.
Another reason for their lack of running is due to their excessive swimming. Muskrats spend most of the day in marshes and other typical bodies of water. They are amazing swimmers, and their legs suffer from that because they don’t get used very often on land.
In addition, when a muskrat does have to run – from something trying to trap capture it – it simply scurries into the water and submerges itself as deep as it can go. Therefore, running on land is possible, but not the strongest feature for any muskrat
How Long Can Muskrats Stay Underwater?
Land may be a secondary environment for these animals, but they thrive in the water. Muskrats are capable of staying submerged underwater for about 20 minutes! Contrary to popular belief, they do not have gills, and cannot breathe underwater, they simply hold their breath!
They are capable of staying underwater for so long for several reasons.
First, they have flaps over their nose, mouth, and ears to protect the orifices from filling up with water. Next, their body is designed to handle a build-up of carbon dioxide, the particle that we breathe out when we exhale. They also have a membrane in front of their eyes that closes, and protects them when they go into the water.
They get a lot of practice swimming around, considering that they start swimming a couple of weeks after birth. Swimming helps them to develop their webbed feet that they use to push themselves through their wet home, and makes their tail stronger by using it as a rudder. Because of their strength, they can swim beneath the surface at speeds reaching approximately three miles an hour.
Fun fact! Did you know that muskrats can swim backwards?!
Are Muskrats Blind?
At birth, yes they are. Newborn muskrats are born blind, and stay blind until about two week after birth. Muskrats have the typical vision of any animal; however, their vision during the day is probably not as good at night.
Muskrats are nocturnal animals, meaning that they are most active between the hours of dawn and dusk. Because they are so used to roaming and eating during the dark hours, their eyes adjust to it without a problem.
The problem occurs during the day time. Although they may occasionally go out during daylight – for a meal or to escape a predator – they refrain from it as much as possible. The eyes are set for very little light, and the sun tends to conflict with their vision.
This fact makes them easy targets for predators like you and me to capture them when they least expect it! This conflict will cause them to run back to darkened areas such as underwater, or their burrow. With that being said, the best time to check your trap for your captured muskrat is within the hour of dawn and dusk, or simply at night.
Here are some of our favorite products
Thank you for reading this post. We hope you found it helpful.
Wildlife Control: We recommend Do Your Own Pest Control. They offer Rodents & Wildlife Control Supplies, Pest Control Supplies, Traps, Fumigants, Repellents, Glue Boards, Acid Sprayers, Lawn & Garden care Supplies, etc. FREE Shipping.
Pest Control Cleaning Products: We recommend Non Pesticide Roach Spray. Including Bed Bug Treatment Spray, Roach, Flea, Tick, Lice, Beetle and Mite Killer With Residual Protection. also Household Cleaners.
You Might Also Like:
How to Get Rid of Muskrats? (Helpful Guide and Quick Facts)
How to Trap a Bobcat in House? (Helpful Guide and Facts)
How to Trap A Gopher? Best Bait and Gopher Trapping Tips
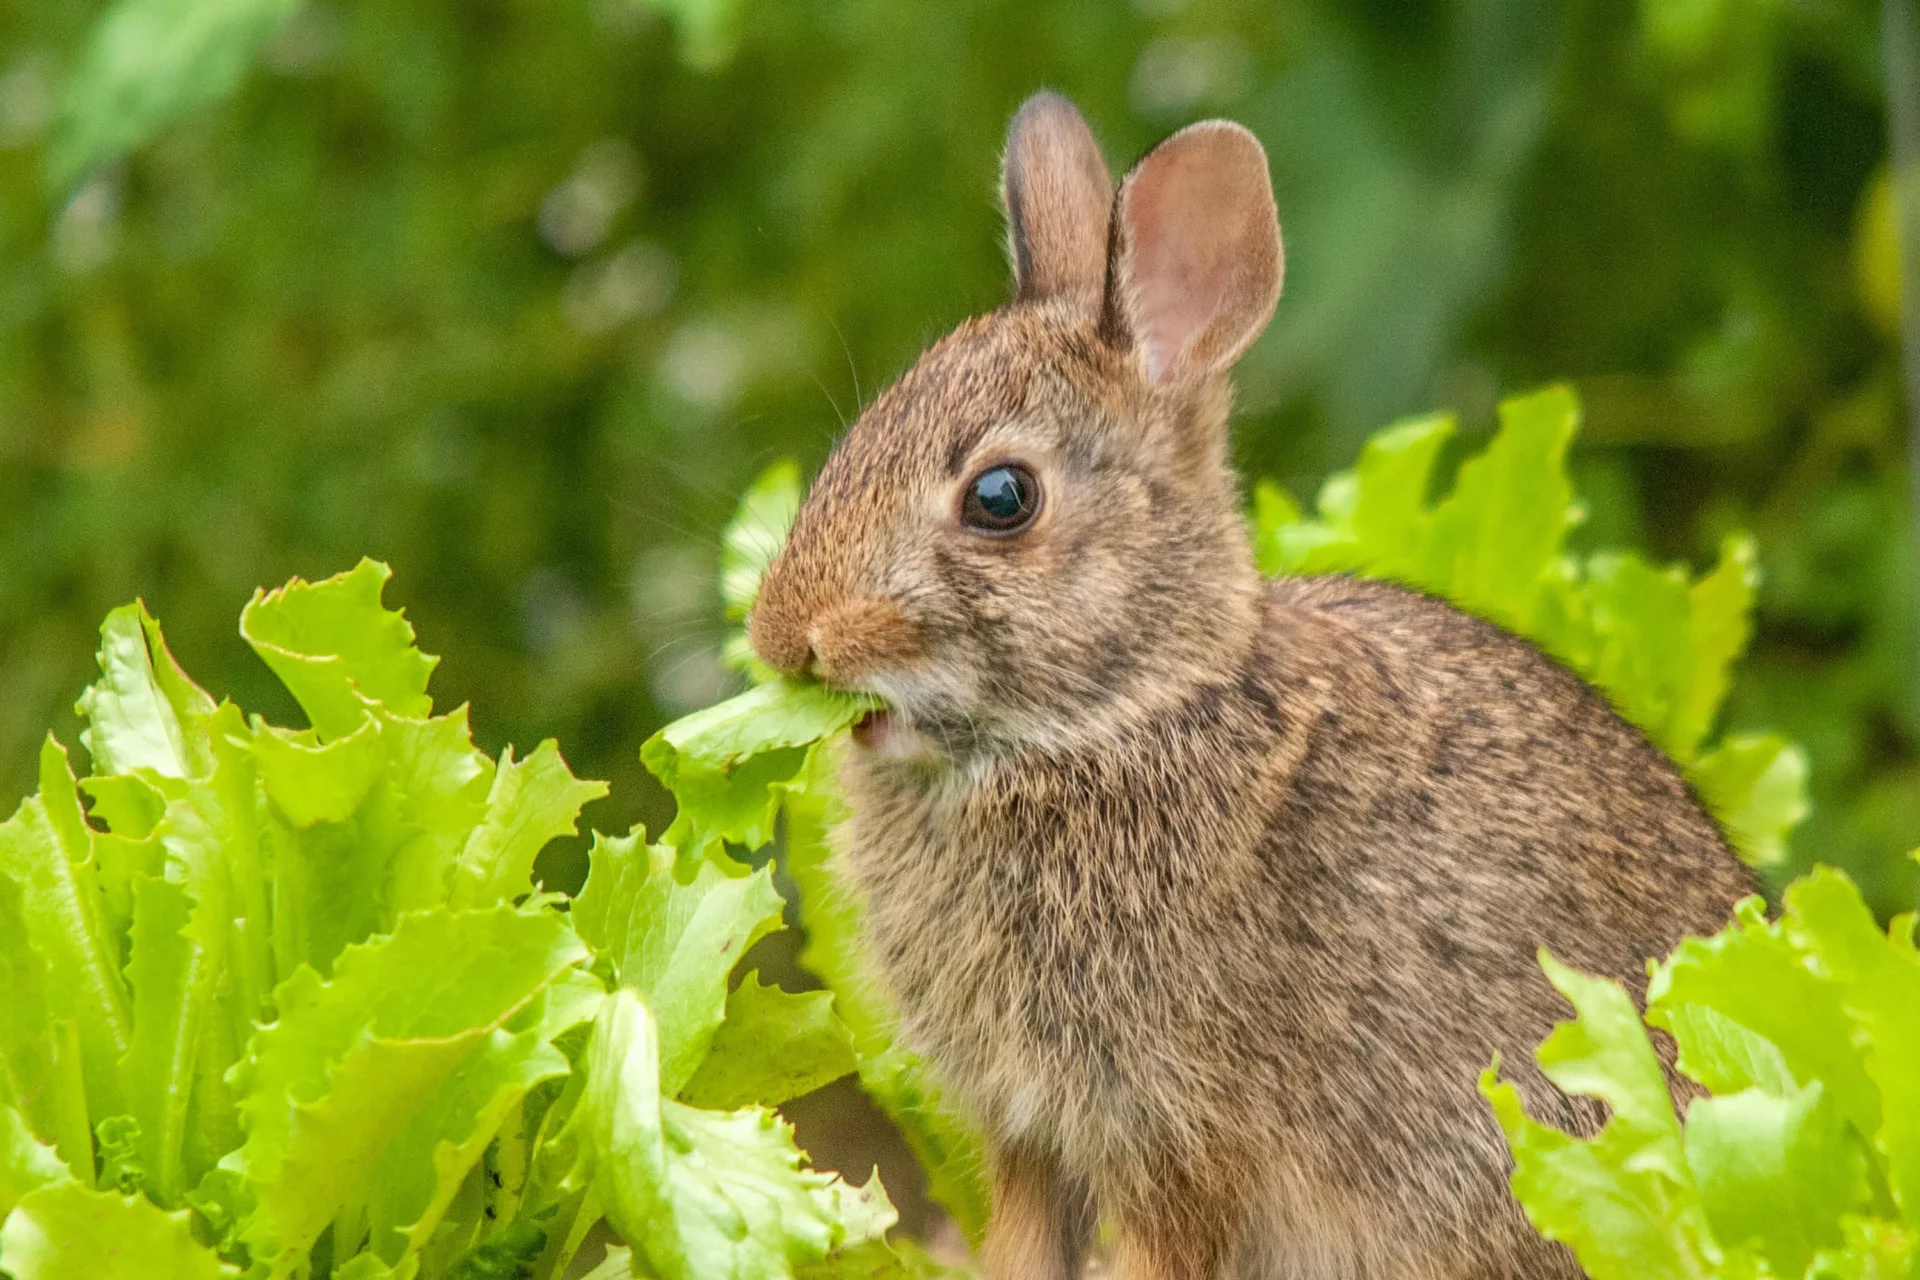
How to Trap A Rabbit? Best Bait and Rabbit Trapping Tips
How to Trap A Beaver? Best Bait and Beaver Trapping Tips
The longstanding practice of conducting warrantless searches on private property by officers with the Tennessee Wildlife Resources Agency is unconstitutional, a three judge panel hearing a case in Benton County Circuit Court ruled Tuesday.
The ruling invalidates Tennessee law that TWRA has relied on to conduct warrantless searches and surveillance on private land in order to fulfill its mission of enforcing the state’s hunting, fishing and wildlife laws.
It’s an authority that is not explicitly extended to any other state or local law enforcement. The law, the judges wrote, gives rise to an “intolerable risk of abusive searches” and violates the Tennessee Constitution’s property protections. It is “unconstitutional, unlawful and unenforceable,” their ruling said.
An attorney representing Hunter Hollingsworth and Terry Rainwaters, two Benton County men who filed suit against the TWRA over warrantless searches on their lands, called the ruling a “momentous thing.”
“This is a decision that’s going to have a really huge impact on private landowners in Tennessee,” said Joshua Windham, an attorney for the Institute for Justice, a libertarian leaning law firm.
Windham said the ruling may have implications beyond Tennessee. The Tennessee Constitution’s property protection language, cited by the judges, is echoed in the constitutions of 16 other states, potentially leading to legal challenges of similar wildlife agency enforcement practices elsewhere. TWRA’s practice of patrolling private property without an owner’s consent or a warrant is not uncommon.
A spokesperson for TWRA on Wednesday did not immediately respond to questions about the ruling, or whether state officials plan to appeal.
State wildlife officers patrol private lands across the state year-round without giving owners notice, obtaining consent or appearing before a judge to make a case for a warrant, court records said.
TWRA officers sometimes investigate turkey-, dove- and deer-hunting offenses by crouching in bushes and secretly taping hunters — hiding within the line of fire in some instances cited in the lawsuit. The agency keeps no records of when or how often officers enter private property. TWRA officers do not need a supervisors’ permission before entering private land. There are no agency rule limiting how long officers may spend searching private property.
TWRA attorneys have argued that state wildlife officers must have the flexibility to enter private lands to do their jobs. The agency’s mission is to protect wildlife and enforce hunting, fishing and boating laws. The vast majority of hunting in Tennessee takes place on private property and wildlife aren’t confined to public lands, they noted.
TWRA also cited a well-established U.S. Supreme Court precedent, known as the “open fields doctrine,” which says that property owners have no “reasonable expectation of privacy” on private property deemed to be an open field — property outside the immediate vicinity of an owner’s home or yard, such as a field of crops well beyond a farmer’s homestead.
But the three judge panel in Benton County concluded that the Tennessee Constitution gives property owners more protection. Article I, Section 7 of the Tennessee Constitution provides a “broader guarantee of security for an individual’s real property than its federal counterpart,” they wrote.
Tennessee’s Constitution protects all “property, real or person, actually possessed or occupied,” the court noted. Under Tennessee Supreme Court precedent, land possessed or occupied extends beyond a homestead. Only “wild or waste lands” that are not used, farmed, fenced or otherwise utilized are excluded from those protections, the state Supreme Court has found.
The judges also concluded that the statute giving TWRA the right to enter private land amounted to a “general warrant,” giving officials wide latitude to conduct searches. “General warrants are dangerous to liberty and ought not to be granted,” the court ruled.
Hollingsworth, a Benton County railroad worker, said Wednesday he felt vindicated after years of challenging multiple TWRA officers forays onto his property, where they secretly hid behind bushes to videotape Hollingsworth, his girlfriend and friends while they hunted and socialized. They patrolled his land and surveilled his movements.
Hunter Hollingsworth on his property in Benton County. Photo: John Partipilo.
“I think it’ll be a lot more relaxing to be on my property and you won’t have to be paranoid that they’re looking at you all the time,” Hollingsworth said. “I think it’s fantastic that other people will get to enjoy their property without worrying if they’re being watched.”
Rainwaters similarly expressed “great relief to have the court recognize that searching my property without permission and without a warrant was unconstitutional.”
“It’s even better to hear that the court doesn’t believe anyone else in Tennessee should have their rights violated in the same way,” he said. “I’m going to sleep a little better tonight knowing that state officials have to respect my property rights.”
The case was heard under a new state law requiring a panel of three judges, one from each division of the state, to hear challenges to state law. Judge Donald Parish, Chancellor Jerri Bryant and Judge Russel Parkes presided over the case.
Parish, who concurred with the majority of the decision, filed a dissenting opinion in which he argued the court should have gone further.
The Institute for Justice had requested an injunction barring TWRA from entering private property — which was rejected by the panel because they had already concluded Tennessee’s law was invalid.
But Parish noted that TWRA lawyers argued that their authority to conduct warrantless searches also rests in the Tennessee Constitution’s recognition of a personal right to hunt or fish, subject to reasonable regulation.
Parish also cited a TWRA officer’s conversation with Hollingsworth in the court’s record. Hollingsworth told an officer who showed up on his property that he wasn’t invited.
“When you bought your hunting license, you invited me,” the officer told Hollingsworth.
Absent an injunction, Parish wrote, “I believe an ‘intolerable risk’ of improper searches by the TWRA persists.”
Let’s all agree from the start, boilies are the ultimate carp bait. Fished correctly nothing catches more carp around the UK and Europe than boilies and related hook baits.
But with so many available how can you know which are the best boilies on the market?
Here’s my guide to my bait and how to best fish it, it’s broken down as follows (Scroll through to what you are looking for)
As a day session angler, I’m really keen on smaller boilies and have used loads of different ones. Smaller boilies are a killer bait for winter carping. I always carry some 12mm boilies and hook baits on day sessions – they can be good for getting a bite if it’s a quiet day. My choice for the best small boilies is – Nash – Scopex Squid. These are awesome smelling bait that and the 12mms are nice and soft. They come with a full range of matching liquids and hook baits too.
A bag will last me a few sessions in winter and I generally fish them in a solid bag or small bed of broken boilies. When fishing the bottom baits I’ll occasionally use them in a method or pellet feeder as a hook bait (See my guide to the best feeder pellets here). I always get great results at the lakes I fish with these boilies and they are my go-to small bait. You can mix it up and fish a 12mm snowman which can give you an edge on some waters.
Best full-size boilies
I’m saying full size for anything 14mm+ as I class anything under that as a small boilie. This section is basically what I think is the absolute ultimate must buy boilie.
And the winner is…
CC Moore Live system
It’s fair to say CC Moores Live System boilies are my favourite boilie and these have accounted for some big carp around the world. They are a unique bait with an incredible smell and excellent consistency.
These are part of an incredible range of baits from CC Moore in this flavour with the stick mix being one of my favourite products to use. Here’s the full range –
Shelf life boilies in various sizes (15mm – 18mm – 24mm)
Matching Popups
Balanced wafters
Bag mix
Base mix for rolling your own
Freezer bait paste
Hardened hook baits
Airball popups
Pellets
Pre glugged hook baits
Dumbell boilies
The bag mix is fantastic for your PVA bags and it creates a good area of attraction around your bait to create a cloud of attraction. There are not many others on the market that combine these flavours and the difference gives you a good edge on harder waters rather than fishing the same baits everyone else is using.
If you want the best bait to catch more carp then I’d say you cannot go wrong with these – in summer, winter, autumn or spring!
Best popups
I could have done a whole separate page on pop-ups with the amount of weird and wonderful baits there is on the market. I’ve tried fishing with the odd fluro mixed colour ones but just find they don’t work, well they didn’t for me anyway. Ones like this are not making the list!
I’m sure someone out there loves these baits but it’s not me.
My favourite pop-ups are – CC Moore diary supreme pop-ups, washed-out pink colour. What I love about these are the colour and strength. The elite range can stay in the water for up to 24 hours and work really well with the matching glug. The 12mm is a great bait for the cooler months and is my preferred hook bait all winter. I’ll then switch to the larger sizes in the summer months.
These can be fished effectively on their own or over a bed of bait and work best with an added glug or bait spray booster. The 12mm version make great baits for a snowman rigs over a size 18mm/ 20mm boilie. These are excellent as a hook bait in a solid bag. As soon as you open a pot of these you’ll see why I rate them so highly. They are good sweet-smelling bait that is visually attractive.
Best Cheap boilies
Important – when I say cheap I mean ways to find good value quality boilies, I do not mean the £3 a kilo crap off eBay!
1 – Starmer baits – Starmer baits have a good range of quality boilies but with a bit of searching you can find 5KG bags of their offcuts and overruns at a great price – Check for stock here. With offcuts, you’ll never really know what you’re getting until they arrive and from experience, you’ll get some odd shapes and the occasional sausage in there. These are great boilies for feeding and mixing up how you fish. I’ve had some decent sessions on these.
2 – Premier baits – Randoms – Premier baits are one of my favourite frozen boilies manufacturers and for the best value freezer boilies you will not beat these at £17.50 per 5KG* (*Price correct at time of writing this blog, shipping is extra). These are again overruns from their mainline and are excellent boilies. Find them here.
Again you don’t know what you’re fishing with and will have a mix of boilies on the lake bed but at this price for the quality, you cannot go wrong. If available you’ll find them in the left-hand menu of the premier baits website.
Best freezer boilies
For big carp fishing and long sessions you simply cannot beat freezer baits. The quality of the baits are instantly noticeable and with a little prep and an air-dry bag (I use this one) then you’ll soon see the benefit of these baits.
1 – Premier Baits – Matrix Plus
What a bait the matrix is, I’ve caught loads of fish using these baits and were allowed I’ve some mates who take them to France every time they go. The Matrix plus is an advanced version of the original Matrix which is even more potent and took 2 years of testing before launch to make sure it was perfect.
The smallest amount you can buy is 5kg which comes in at a very reasonable £40 (Correct at time of writing and subject to change). Sizes go from 14mm up to 24mm and if you order 20kg or more then you’ll be able to split sizes. At a maximum, you can order 50KG for £290 which works out at just £5.80 a kilo – which is a great value.
After three years of ownership and countless pellets down range, I can tell you that purchasing the Beeman R9 was one of the best decisions I’ve made in my airgunning journey. Let me share what it’s really like to own and shoot this German masterpiece.
I still remember the day I unboxed my R9. While everyone was raving about tactical-looking PCPs, I found myself drawn to this classically styled beauty. The deep bluing on the barrel caught my eye first – it’s the kind of finish you just don’t see much anymore. When I ran my hands over the beech stock, I could feel the quality of one of the best spring air rifles for the money. Sure, some might say the finish is almost too smooth (I actually added a bit of grip tape to the forestock for those humid summer days), but that’s just nitpicking.
Living with the R9
Here’s what you don’t read in the specs: this rifle becomes part of your routine. Every morning, I take a few shots in my backyard range before work. The 35-pound cocking effort that seemed a bit challenging at first has become second nature – I barely notice it now. The action has actually gotten smoother over time, like a well-worn pair of leather shoes.
The Rekord trigger? It’s become my benchmark for what a good trigger should feel like. When I shoot other airguns now, I find myself comparing their triggers to my R9’s, and few measure up. I haven’t even felt the need to adjust it from the factory setting of 2 pounds 12 ounces – it’s just right.
Real-World Performance
Let me tell you about accuracy. My favorite pellets are the H&N Field Target Trophies (8.64 grain), and with these, my R9 consistently puts pellet on pellet at 25 yards. I’ve taken it to several local field target matches, and while I’m not winning any championships, my rifle certainly isn’t holding me back. The looks of surprise when this “old-school” springer keeps up with expensive PCPs are priceless.
The power level (around 14 ft-lbs) might not sound impressive in today’s magnum-powered world, but it’s perfect for what I need. I’ve successfully handled the occasional garden pest, and for target shooting, it’s ideal. Plus, the moderate power means I’m not fighting harsh recoil or dealing with scope-destroying behavior.
Comprehensive Beeman R9 Performance Data
Velocity and Energy Performance by Caliber and Pellet Type
.177 Caliber
Pellet Type
Weight (Grain)
Velocity (FPS)
Muzzle Energy (Ft/Lbs)
Gamo Raptor Platinum (alloy)
4.7
1,099.35
12.61
H&N Field Target Trophy Green
5.56
1,052.39
13.67
RWS Hobby
7.0
906.29
12.76
Crosman Premier HP
7.9
889.19
13.86
JSB Exact Diabalo
8.44
859.59
13.84
H&N Field Target Trophy
8.64
857.15
14.09
H&N Baracuda Match
10.65
744.13
13.09
.22 Caliber
Pellet Type
Weight (Grain)
Velocity (FPS)
Notes
JSB Exact
18.1
561-585
Common hunting load
H&N Field Target
11.42
772
.20 Caliber
Pellet Type
Weight (Grain)
Velocity (FPS)
Notes
Benjamin Diabolo
14.3
820
JSB
13.73
740-742
Very consistent
Detailed Accuracy Performance by Distance
Distance
Group Size
Pellet Type
Notes
10 yards
0.16″-0.39″
H&N Baracuda Match
10-shot groups
10 yards
0.125″
Various
5-shot groups
20 yards
0.17″-0.50″
H&N Baracuda Match
10-shot groups
25 yards
0.25″
Various
5-shot groups
25 yards
0.4″
H&N Baracuda Match 10.65gr
5-shot average
25 yards
0.5″
Various
Consistent across users
30 yards
0.49″-0.87″
H&N Baracuda Match
10-shot groups
30 yards
0.75″
Various
Quarter-size groups
50 yards
<1″
Predator GTOs
10-shot groups
50 yards
0.715″
Various
6-shot group
Notes:
Most consistent accuracy achieved with medium to heavy weight pellets
Hold sensitivity reported as minimal compared to other spring-piston rifles
Performance varies slightly with temperature and altitude
Factory tuning can affect individual rifle performance
Best results after proper scope mounting and break-in period
The Scope Situation
I’ll be honest – I swapped out the bundled Bushnell scope pretty quickly. Not because it was bad (it’s actually quite clear), but I needed mil-dots for field target shooting. I mounted a Hawke Airmax, and the combination is fantastic. If you’re buying an R9, I’d suggest getting the scope-free version and choosing your own optic based on your needs.
Daily Use and Maintenance
One thing I love about the R9 is its simplicity. There’s no need for filling tanks, no regulators to adjust, no complicated maintenance routines. A few drops of quality oil every few thousand shots, keep the barrel clean, and that’s about it. In three years, I haven’t had a single mechanical issue.
The rifle has developed its own character marks – a few small scratches on the stock tell stories of woodland hunting trips, and the bluing on the barrel has worn slightly where I grip it for cocking. Each mark makes it more mine.
Hunting and Field Use
While I mainly use my R9 for target shooting, I’ve taken it hunting occasionally. It’s dropped several rabbits cleanly at ranges up to 30 yards. The moderate power means you need to be more conscious of range and shot placement, but that’s made me a better shooter overall.
What really impresses me is how the rifle performs in different weather conditions. Whether it’s a humid summer evening or a cold winter morning, the point of impact barely shifts. This consistency is something you really appreciate over time.
The Little Things
There are small details you discover only after extended use. The way the barrel locks up with that satisfying click. How the automatic safety, which I initially found annoying, becomes a natural part of the shooting routine. The solid “thunk” when it fires, without the twang some springers develop over time.
Even loading becomes a zen-like experience. The breech design makes it easy to seat pellets perfectly every time – no thumb-destroying pellet loading here. It’s these little things that make shooting the R9 so enjoyable.
Value Over Time
Yes, I paid $570 for the Elite Combo version, and at the time, it felt like a lot of money. Looking back, it was a bargain. When I consider the thousands of enjoyable hours I’ve spent with this rifle, the cost per hour of entertainment is minuscule. Plus, unlike many modern airguns, I’m confident this one will last long enough to pass down to my kids.
What I Would Change
If I could change anything? Honestly, not much. The manual could be better – I had to learn about the decocking procedure from an online forum. And maybe the stock could use a bit more texture. But these are minor quibbles about what is otherwise an exceptional air rifle.
Final Thoughts
The R9 isn’t just an air rifle I own; it’s become a trusted companion. While others chase the latest innovations or highest power levels, I’ve found satisfaction in mastering this classic design. It’s taught me the importance of good technique, the value of consistency, and the joy of simple, well-executed engineering.
To anyone considering an R9, I’d say this: if you appreciate quality over flash, if you enjoy the process of becoming a better shooter rather than letting technology do the work, and if you value long-term reliability over short-term excitement, this rifle will not disappoint. Three years in, I’m still discovering new things to appreciate about it.
Every time I pick up my R9, I’m reminded why it’s earned its reputation as a modern classic. It’s not just an air rifle – it’s a lifetime investment in shooting enjoyment.
Choosing the best fixed blade broadhead for traditional archery can be challenging considering the sheer number of options available these days. You want one that is razor-sharp, tunes well with your arrow of choice, and holds up to the demands of practice sessions and hunting situations.
To save you a lot of time and stress, we did the research for you. We scoured the internet, got personal recommendations from various hunting Facebook groups, and tested some ourselves to bring you what we feel are the 10 best broadheads for traditional archery on the market today.
Which of these will work best for you depends on numerous factors, and what you prefer in a broadhead. Of course, cost almost always impacts the decision-making process, so we were sure to touch on that aspect as well.
When I polled other bowhunters in one of my traditional archery Facebook groups, one brand that kept popping up was Zwickey. Zwickey has been producing quality fixed blade broadheads for traditional archery since 1938!
The Delta is a big, two-blade, cut-on-contact model constructed of high-carbon steel. The broadhead is 2 9/16 inches long with a 1 3/8-inch cutting diameter and weighs in at 170 grains. While Zwickey offers a glue-on model (featured below), this particular broadhead includes an adapter that allows it to screw into a standard arrow insert.
To prove its toughness, Zwickey claims a Montana hunter took eight bears with the same Delta 2 broadhead.
Best Single Bevel Broadhead
Iron Will Single Bevel SB-150
Iron Will broadheads are known for their high quality and strength which comes at a premium cost. These are the most expensive broadheads on our list, and one of only two single bevel broadheads that made the cut (pun intended) as well.
The single bevel broadhead is designed to maintain the arrow’s rotational spin through impact, resulting in a bone splitting effect and more tissue damage throughout the animal.
Iron Will broadheads feature super beefy .062-inch thick A2 tool-steel blades that are cryogenically treated and triple tempered to 60 HRC hardness. That will allow the Iron Will’s blades to withstand the demands of big game hunting for years, and allow frequent resharpening as needed to maintain a razor-sharp edge.
Best Heavy Broadhead
Steel Force Traditional Series Single Bevel Broadhead
This is the second of two single-bevel broadheads on our list. The long, lean design of the Steel Force provides maximum penetration and superb flight. Of course the single-bevel design will provide maximum damage and break bone if necessary.
The Steel Force is built like a tank out of 0.08-inch thick, knife-grade stainless steel. The broadhead is three inches long and one inch wide with an 11/32-inch ferrule, and is available in right or left bevel in 225 or 300 grains.
Best Glue-On Broadhead for Traditional Archery
Zwickey Eskimo Glue-On Broadhead
This is our second set of Zwickey broadheads on the list, but instead of being a screw-in model for a traditional insert, the Eskimo is made to glue onto a wood arrow or special insert. As we mentioned earlier, Zwickey has been making quality broadheads for decades and is a favorite among traditional bowhunters, and the Eskimo is probably the most popular broadhead they manufacture.
The Eskimo is a two-blade option with a 1 1/8-inch cutting diameter, and a weight of 125 grains. It feature an 11/32-inch taper hole. The cut-on-contact broadhead is made from special high-carbon steel so you can get the edges hair-shaving sharp. The triple-thick tip with special heat-treating resists curling and blows through bone for maximum damage. If you need a glue-on broadhead, you can’t go wrong with the Zwickey Eskimo!
Best 3 Blade Broadhead for Traditional Archery
EBBQ Woodsman Glue-On Broadhead
If you’re looking for a great three-blade option in a glue-on broadhead, then the EBBQ Woodsman may be the perfect option. The Woodsman is machined from a solid piece of tool-grade steel and features a pyramid tip for increased strength.
The broadhead has a one-inch cutting diameter and is coated in advanced pure Teflon for maximum durability. The Woodsman is made in the USA and backed by a lifetime guarantee. Unlike the other options listed here, EBBQ offers the Woodsman in a six pack.
Four Other Great Options
Simmons Land Shark
Another name that kept popping up among diehard traditional bowhunters was Simmons broadheads. The Montana-based company offers a variety of broadheads for traditional archery ranging in weight from 100 to 225 grains to cover every bowhunting scenario from whitetails to cape buffalo.
You won’t go wrong with any of Simmons’ numerous broadhead options, but for this article, we went with the 160-grain Land Shark. The Land Shark features tough .050-inch thick high-carbon steel blades with a respectable 1 5/8-inch cutting diameter. The concave blade design gives them unsurpassed penetration on both big and small game.
Every Simmons broadhead is made by hand here in the U.S. and inspected for perfect alignment before they leave the factory.
Magnus Stinger 4 Blade Arrow Broadhead
My broadhead of choice for my compound and recurve bows over the last two deer seasons has been the 150-grain Magnus Stinger 4-blade head. Like most of the broadheads on our list, the Stinger is a large, cut-on-contact broadhead that can be purchased with or without small bleeder blades.
Made from knife-grade stainless steel, the Stinger is razor-sharp right out of the package. The patented diamond tip provides bone-splitting performance on the largest of game animals, and the aircraft aluminum ferrule is spin tested to within .002 of an inch, providing perfect flight right out of the package.
One of my favorite aspects about Magnus broadheads is their lifetime replacement guarantee. If at any time you break, bend or have any concern with a Magnus broadhead, they will replace it.
Wasp Archery SharpShooter Broadhead
Wasp was one of the first companies to come out with replaceable blade broadheads, and they’ve been providing great broadheads ever since. They’ve recently started offering a traditional broadhead, the SharpShooter, that looks similar in design to the Magnus Stinger.
The 100% steel, cut-on-contact SharpShooter broadhead weighs in at 150 grains and features a razor-sharp .040-inch thick main blade with a 1-inch cutting diameter, and .027-inch thick bleeder blades.
While I love my Magnus Stingers, the Wasp SharpShooters are cheaper and seem to be more readily available through Amazon. At the time I’m writing these, they also feature a 4.6 out of 5 rating on Amazon with over 170 reviews. That’s really good for a broadhead.
Dead Ringer The Butcher Broadhead
Dead Ringer The Butcher broadheads also have a very similar look to the Magnus Stinger with a large main cut-on-contact head and smaller bleeder blades. The Dead Ringer heads feature a 0.925-inch cutting diameter and is only offered in 100-grain weight.
One thing that stands out to me on The Butcher broadhead is its long, tapered tip (as opposed to Magnus’s diamond tip). That lower blade angle makes The Butcher a great choice for anyone shooting a lower-poundage setup to help provide maximum penetration. On the flip side, the long, tapered tip will likely bend if it comes in contact with any hard bone, rocks or trees.
Dead Ringer’s website is lacking in information, so I can’t report on what the broadheads are made from or the thickness of the blades. I will mention that Dead Ringer’s reviews on Amazon are pretty favorable with a 4.4 out of 5 rating at the time I write this with over 220 reviews.
SIK F4 Fixed-Blade Broadhead
You probably haven’t heard of SIK broadheads. I hadn’t before I started researching for this article, but these appear to be great broadheads for traditional archery. These 100-grain, cut-on-contact, fixed-blade broadheads feature four blades for creating a maximum wound channel.
The laser-welded stainless steel broadhead features a .04-inch cut-on-contact main blade with .03-inch bleeder blades to deliver a 1.35″ cutting diameter. The 27° razor-honed edge angle on the full blade enables the F4 to cut forward or backward. All this wrapped into a compact design with field-point accuracy.
Summary
Choosing the best broadhead for traditional archery can be a pain, but you can’t go wrong with any of the ten broadheads featured in this article. Take into consideration what arrows you’ll be using, the overall weight you’re targeting with your arrow setup, and whether you’ll need a screw-in or glue-on broadhead. From there, you can try a few of the options listed here to help you find the perfect broadhead for your longbow or recurve bow this season.
If you have a favorite broadhead for your traditional archery setup not covered here, we’d love to hear about it! Feel free to drop us a note in the comments section below letting us know what you shoot.
March is here, and some turkey seasons have already opened. With that, it is time to look into the best states for hunting turkeys this season. Though recent years have seen a decline in overall turkey populations across the U.S., states are adjusting their regulations to help level these fluctuating numbers to ensure that the wild turkey—and these hunting opportunities—will be around for generations to come.
If your home state made the list, then you’re in luck, grab a tag and get in the field. If you are living in a state where turkey hunting isn’t very accessible, maybe it’s time to fill up the gas tank and hit the road. These states made the list after considering current populations estimates, season length, bag limits and opportunity for the traveling hunter. Here are the seven best states to hunt turkeys this spring.
Coming in at number one is California. Though it might be known as one of the most extreme states for attacking our hunting heritage, California can be a great state to chase turkeys. The population there is a true conservation success story. Just ten years ago the population was down around 250,000. But now, with an estimated population nearing 400,000 birds, California is a gold mine. Season runs from March 25th until the end of April and each hunter is allotted a bag limit of three gobblers per season. With three of the four subspecies needed to complete the Grand Slam and decent public-land access, the Golden State could easily be considered the top sleeper state for turkeys.
Season Dates: General Season – Mar 25 – Apr 30; Archery Only – May 1 – 14
Tag Cost: $75.60/resident; $210.34/non-resident
California Department of Fish and Wildlife
Mississippi
If you don’t want to head all the way to the West Coast, try the great state of Mississippi. This allows you to kick off your season down South with the earliest opener of the year on this list. With a turkey population of just over a quarter million birds, the ‘Sip season starts on March 15th and runs through the beginning of May. With ample amounts of public land throughout the entire state, there’s no shortage of hunting opportunity. Although, the Mississippi Delta is a region worth homing in on when planning your trip. Mississippi has a generous bag limit of three gobblers with beards six inches or longer and hunters took more than 22,000 birds last season. It’s easy to see why Mississippi ranks so high and it’s a great option to chase a swamp bird this spring.
Season Dates: Mar 15 – May 1
Tag Cost: $27.29/resident; $212.50/ 7-day non-resident
Mississippi Department of Wildlife, Fisheries, & Parks
Photo courtesy of Haynes Shelton
Alabama
Alabama is one of the states that has seen a slight decline in overall turkey numbers in recent years, but still boasts a population of 365,000 birds. With the highest bag limit of any state on this list, you can take one gobbler per day, not to exceed four total for the spring and fall seasons. Zone 1 opens on March 25th but doesn’t allow decoy use until April 4th; Zone 2 opens April 1st with decoys legal to use on April 11th. Alabama has an abundance of public land for hunters to try their luck on, but just as with most southern states, hunting pressure could be high. But it’d be hard pressed to not have Bama in the top three.
Season Dates: Zone 1 & 3: Mar 25 – May 8; Zone 2: Apr 1 – May 8
Tag Cost: $30.25/resident; $216.20/ 10-day non-resident
Alabama Department of Conservation and Natural Resources
Photo courtesy of Dale Evans
Tennessee
Coming in at the fourth spot is Tennessee. With a liberal bag limit and lengthy season, I’d definitely volunteer to go there this season. Tennessee has a healthy population of more than 250,000 birds, a good amount of public land from the hills to the hollers and a season spanning six weeks. If you haven’t stood on a ridge in the dawning of a new day and heard the echoes of gobbles ringing out in multiple directions, you’re flat missing out. Make sure to put Tennessee on your list and try your wits against one of these eastern toms.
Season Dates: Apr 15 – May 28
Tag Cost: $66/resident; $214/ 7-day non-resident
Tennessee Wildlife Resources Agency
Texas
The old adage of everything is bigger in Texas rings true in regard to turkey hunting this state. With the largest population in the U.S.— over half a million birds—there’s no doubt Texas could be the best place to take a true Rio Grande. Though there are limited public-land opportunities, Texas has numerous management areas that allow access for hunters. This state has multiple season dates to consider depending on where you’ll be hunting as well as varying bag limits, so be sure to read the regulations thoroughly before planning your trip. But with the incredible population and low pressure, it’s easy to see why this state ranks number five as a turkey hunter’s paradise.
Season Dates: Eastern: Apr. 22 – May 14; Rio Grande North Zone: Apr. 1 – May 14; Rio Grande South Zone: Mar. 18 – Apr. 30
Tag Cost: $25/resident; $133/non-resident
Texas Parks and Wildlife Department
Photo courtesy of Shutterstock/Iv-olga
Maine
Maine might surprise you as the number six spot on our list due to its small size, but it has a relatively high number of turkeys. This little state in the northeastern part of our country can offer great turkey hunting. It’s also one of the only states that gives you the opportunity to hunt birds all the way into June. There is plenty of publicly accessible land, and it’s one of those states where a door knock, and a handshake, might just get you access to prime ground. With a bag limit of two bearded birds per season, and season dates that allow you to stretch every second out of spring, Maine must be on your list. Don’t overlook the northeast corner of the U.S. for turkey opportunities.
Season Dates: May 1 – June 3
Tag Cost: $46/resident; $115/non-resident
Maine Department of Inland Fisheries and Wildlife
South Dakota
One of the most coveted birds of the Grand Slam is the Merriam’s, and so many turkey hunters dream of notching a tag on one of these birds. That’s why South Dakota must be on this list. With over 2.3 million acres of public land and three quarters of that located around the Black Hills region, those of you looking to fill a tag on a Merriam’s just might be in luck. Though overall numbers have seen a slight downward trend, there is still a dense population along river corridors and a well-established population covering most of this state. Add in a season that runs almost two months, buckle up because it can get a bit western chasing these overly vocal birds.
Season Dates: Single-season Prairie units – Apr 8 – May 31; Black Hills – Apr 22 – May 31
Tag Cost: $25/resident; $100/non-resident
South Dakota Game, Fish and Parks
Photo courtesy of Dale Evans
Maybe you’re like me and love traveling to different states to test your skills against different birds, or maybe you’re chasing that elusive U.S. Super Slam of a bird in each of the 49 states that have an established season. Regardless of your motivation, these seven states are the best places to spend your time chasing gobbles this year. Get out there and enjoy it this spring, we only get so many.
Levi Morgan won his first professional archery tournament in 2007, when he also went on to win the Archery Shooters Association Shooter of the Year and World Champion titles that year. Since then, he has won the Shooter of the Year title 11 years in a row. Levi is the host of Bow Life, airing on Sportsman Channel.
The following topics are from the column, “Changing the Game” in Petersen’s Bowhunting.
by Levi Morgan
In the following article, I will address:
How to Overcome Target Panic: The Aiming Drill
Achieving Perfect Bow Balance
How to Grip a Bow
Shooting a Bow: Pushing and Pulling
Anchoring a Bow: Three Steps to Success
Write It Down
Serving a Bow String
How to Stand When Shooting a Bow
Paper Tuning a Bow
Preparing Your Mind for Success: Mastering the Mental Game of Archery
If you’ve shot a bow long enough, you’ve probably heard about – or experienced for yourself – the demon we call “target panic.” The main form of target panic is best described as the inability to hold your pin on the target and squeeze the release slowly enough to cause surprise when it fires. Essentially, you punch the release prematurely. While there are many forms of target panic and just as many ways to cure it, there are a few things you can do to prevent or beat this horrible condition. Surprisingly, the one solution I’m most fond of doesn’t even require you to fire an arrow.
The main form of target panic derives from what I call “anxious aiming.” This occurs when the pin settles in where you want it to and you feel like you have to fire that release immediately. The problem with firing a release on command (the way 90 percent of people trigger their release) is that from the time your mind tells you to fire that shot to the act of your finger actually doing it is enough time to move off the spot. Generally, this is the main cause of inconsistent groups. You may say you don’t have target panic, but if you can’t aim in the middle and slowly fire that shot, then I’ve got some bad news: you have target panic. Luckily there is a cure for this.
You are probably wondering how I can suggest solving this problem without even shooting an arrow, but the fact is, the problem lies between your ears, not in the act of shooting. What you need to do is commit two weeks to the cure; every day or every chance you get, go out in the yard with an arrow nocked, just like you would normally practice. You will simply draw the bow and address the target, aiming with your finger on the trigger – but don’t pull that release; you want to focus only on aiming. Keep that pin where you want to the arrow to hit until your aiming starts to break down. Then let down and reset, never firing the arrow. Treat this just as you would any practice session, except never actually shoot your bow.
This will do two things that benefit you greatly as an archer. First, it will teach your mind that it is OK for that pin to settle on the bulls-eye without firing that arrow. Second, it will increase the length of time during which you can effectively aim before your shot breaks down. Over time, you will be able to add shooting back into your routine, but if you ever feel those anxious or rushed feelings, take a few days and just commit to this simple drill.
Target panic is a horrible thing, and if you don’t know how to cure it, it can really mess with your confidence, taking the fun out of shooting your bow. Even if you aren’t struggling with target panic, this aiming drill can and will make you a better archer, regardless of whether you are a novice or a top-level competitor.
Achieving Perfect Bow Balance
Maybe you are new to archery and trying to learn everything you can. Maybe, however, you have been a successful archer for years and are simply reading this because you are addicted and can’t get enough. Either way, we all want to be better shots, and if you say you don’t, I’d say you’re not a passionate archer/hunter.
There are many things that make up a great archer, but no one thing is more important than having a perfectly balanced bow. The overall goal of finding perfect balance is to be able to draw the bow with your eyes closed, settle in and open your eyes to a perfectly level bubble. This takes away human influence or torque that is necessary to level your bow otherwise. Proper balance will better your aim in all areas. Better aiming then leads to improvements in every aspect of your shot and can even cure most forms of target panic.
To achieve perfect balance, you will need a front stabilizer bar (I’d recommend at least 10 inches), a V-bar bracket that will allow you to adjust side to side and up and down, and a rear stabilizer bar that’s at least 8 inches. In addition, you will want a few weights to play around with.
First, you will need to put the stabilizers on and level the bow from side to side. I would recommend trying 4-5 ounces of weight on the front bar and 10-15 ounces on the back bar. You can fine-tune the weights from here, but this is a good ratio to start with.
Next, draw the bow with your eyes closed, anchor with a relaxed grip and open your eyes. If the bubble on your sight is not level, then adjust the rear stabilizer accordingly until you can repeat this process and your bow is perfectly level from side to side.
Leveling your bow front to back is a little different because you will adjust by adding or removing weights rather than adjusting the bars from side to side. To level your bow front to back, come to full draw aiming at a horizontal line. If your pin wants to dip or bounce below the line then add weight to the back bar or take the weight off the front. If your pin bounces above the line, do the opposite. After this step is complete, your bow should be very close to balanced. While you probably won’t be aiming perfectly still, your aiming pattern should be centered on that horizontal line, not bobbing up or down.
Obviously, we all want to be the best archer we can be. Balancing your bow properly will help you tremendously. Some people say balancing your bow makes it too heavy, but I’d rather carry a few more ounces and hit where I aim.
How to Grip a Bow
The grip is the only part of your bow you actually touch during the shot process, meaning the way you handle it is critical. Despite that, I believe grip remains one of the most overlooked aspects of good shooting form.
Over the years, I’ve seen many variations of how people grip their bows, and guess what? None of them are necessarily wrong. Just like any other aspect of archery, the proper grip is simply one that can be repeated consistently shot after shot. However, there are several things that can make that task much easier. One is to keep the entire grip on the thumb side of your lifeline. Then you want to point your thumb at about 2 o’clock (10 o’clock for left-handed shooters), making sure it isn’t riding up against the shelf of the riser. Lastly, you want to have a loose hand, not squeezing the grip and not with your fingers stuck straight out; just let your hand relax.
There are two main muscles in your hand, one on each side of your lifeline. If your grip crosses over onto both, then it’s a lot easier for you to torque the bow just by tensing your hand slightly. It’s very important to keep the bow on the thumb side of that lifeline only, making it almost impossible to torque with the muscles in your palm.
The best way to do this is to make a thumbs up sign, turn your thumb to 2 o’clock (or 10 o’clock for lefties), open your hand and place it on the grip. This will help prevent your thumb from pressing too hard against the shelf, which can create sideways torque and cause inconsistencies in your balance while aiming.
Now, your bow isn’t going anywhere. So, stop holding onto it for dear life at full draw. Just relax your bow hand. Now, squeeze the grip again and see what it does to the bow and level. That’s called torque, and it’s bad. You want a completely relaxed hand. Just allow your fingers to lie softly on the back of the grip. Don’t stick your fingers way out trying to avoid torque, because when you do that you can’t help but tense up those muscles, which defeats the entire purpose. It’s OK if your fingers are touching the riser, as long as they aren’t influencing it.
Again, there is no right or wrong way to grip the bow if you can do it the same every time, and the method I just described will help you achieve consistency. Keep the grip on one side of the lifeline in your hand, keep your thumb from pressing too hard up into the shelf and relax your entire hand. A consistent grip is absolutely crucial to accurate shooting.
Shooting a Bow: Pushing and Pulling
We all realize that to shoot a bow, some form of pushing and pulling has to take place – but probably not as much as you’ve been told. My entire life, I was preached to on how I needed to push my bow arm at the target and pull on my release arm firing the shot using my back muscles. I quickly realized that doing that the same way each time was next to impossible. Archery, as I’ve always said, is a game of repetition, and trying to rip the bow in half just wasn’t something I could repeat. One day I’d do great, the next I’d be pulling harder and hit to the right or pushing shots out to the left. The inconsistency was really frustrating.
Now, many of my struggles were from the equipment I was using combined with this push/pull method. But mainly, it was
because this entire method is flawed, in my opinion. Back when this “back tension” method was introduced, bows had hardly any let-off and spongy back walls. Pushing and pulling really hard probably was the most consistent way to shoot that setup. These days, however, bows are built with solid back walls and high let-off, and when you start pushing and pulling on something that doesn’t give, it just doesn’t work. Think about it; you’re shooting a bow with a solid wall, and when you pull, something has to give. In this case, that would be your bow arm. And when you push and the bow can’t give, then the movement is transferred to your release arm. I truly believe this is the reason so many people struggle with this technique. It’s not that they’re doing it wrong. It’s that the entire process is no longer necessary.
I understand that to keep the bow at full draw, some form of “back tension,” or pushing and pulling, has to take place. I also believe that’s about all you need, just enough to keep the bow at full draw. You have to look at your cam system, holding weight, bow weight and type of draw stop to come up with a consistent push/pull method that suits you. However, if you’re shooting a bow made in the last decade, more pushing and pulling probably isn’t the answer to making you a better shot.
If you are struggling with aiming or consistent groups and you have been taught to push and pull on the bow, let’s try a different approach. Try to relax a little more in your shot. Pull just hard enough to keep the string against the stop and let the bow do the rest. After a while, you should find a really comfortable, less stressful way to fire the shot. This will be way more repeatable for you, and you will be engaging fewer muscles than before. Yes, the fewer muscles during the shot the better. When you’re nervous, that’s what causes tension and shaking, and that’s what gets us tired. So, the fewer muscles used the better. The days of ripping the bow apart are over. It’s time to relax and let these bows shoot themselves.
Anchoring a Bow: Three Steps to Success
If you know archery, you know how important a consistent anchor is. Most people just think of anchor as a being only one thing. But the truth is, having a repeatable anchor position involves three major components. Everyone’s anchor involves – or at least should involve – the following: release-to-hand contact, hand-to-face contact, and string-to-face contact. If you have these three components down, you will have a solid anchor position.
Release-to-hand contact is very crucial in all parts of your shot, but none more so than your anchor. If you are shooting a handheld release, that importance doubles. You can literally change your draw length and entire form just by positioning the release differently in your hand from one shot to the next. It is critically important to find a comfortable spot in your hand where the release just seems to fit. It’s not a bad idea to even mark that on your hand with a marker or tape while you practice. Make a conscious effort each shot to place that release in your hand exactly the same. Soon, that will be the only place you can comfortably place the release, and any slight change will be noticed immediately. At this point, the marking and/or tape is no longer needed.
A consistent hand-to-face contact point can be a little trickier. I’ve seen guys and girls mash their hands into their faces, and I’ve seen them completely avoid any contact with their face at all (both are disasters). You want to find a comfortable pressure point somewhere along your jawbone. I like to slide my jawbone between my first knuckle and middle knuckle. I don’t mash my hand to my face. I just very lightly touch my hand to that spot on my jaw so I can execute my release properly. I’ve found that the more pressure I put on my face, the harder it is to execute the shot. On the other hand, no contact or a floating anchor even worse, in my opinion. How can you ever know when you are anchored if you can’t feel any contact with your hand?
The final piece of the anchor is the contact between your face and the string. While you need this contact, you absolutely can’t press on the string with your face, as this will cause nightmares with shooting consistency. The absolute best and most repeatable string-to-face contact point I’ve found is to very lightly touch the string to the tip of your nose. If you use your cheek or the side of your nose, it’s hard to put the string in the exact same spot every time. The tip of your nose is always in the same place.
Just like every other aspect of archery, there is no right or wrong anchor – if you can repeat it from shot to shot. Having the correct draw length is very crucial in comfortably anchoring with the method I’ve just described. Assuming your equipment fits you perfectly, this three-part anchor method is, in my opinion, the best way to go about fine-tuning your archery game. Always remember your release-to-hand, hand-to-face, and string-to-face contact points. Stay consistent with all three and your anchor position will never fail.
Write It Down
Everyone has had that one setup that was money – that one bow they always shot better than any other. The problem is once you replace the strings, cables or limbs, it’s never the same. You can go to the same model, poundage and draw length, but it still doesn’t feel right. If only you had taken notes on everything. There are some key things you always should write down once you have that dream setup you are in love with. First, write down all the measurements on the bow. Then take notes on how your arrows are built. Lastly, take notes on other things in your shot more along the lines of feel and execution.
When we have the best set up of our lives, we need to realize that bows change with use, and before it’s too late, we need to write down everything about the setup. Some of these things are draw length measured from the throat of the grip, d-loop length, peep height from the loop, nock height from axles, draw weight, holding weight, axle to axle, brace height and let-off. Then, move on to things like stabilizer lengths and weights, sight choice, fiber size, lens magnification, peep aperture size, rest location from burger hole and, if you shoot a blade rest, what size launcher. Nothing is too small or unimportant to write down about this setup.
Next up are your arrows. Nothing is more critical to a forgiving and accurate setup than your arrows. You need to log all of this info as well. How long are your arrows carbon to carbon? What model arrow are you shooting, including spine? Vane selection and the helical or offset on those vanes are very important. Write down what nock, what grain point and then overall arrow weight. Arrows come in so many sizes and spines these days that if you can’t remember what arrow you had, all the other info isn’t nearly as important.
Lastly, you need to log every part of how you are executing your shot. Are you relaxed at full draw or are you pulling hard on the wall? What is your bow arm positioning? Straight arm or slightly bent? Same goes for release arm and even how you hold your release. Write down how you are anchoring in and what release you’re shooting. Bow grip is another crucial piece, but it’s very hard to write down specific details about
Clay has been a Top Ten finisher in the WORLD CHAMPIONSHIP COYOTE CALLING CONTEST® (WCCCC) the last two years running. He has hunted coyotes all over the US. In this podcast, Clay talks in detail about coyote calling techniques in different areas of the US, how to call them, how to set up, and the advantages of using FoxPro electronic calls vs. mouth calls.
This how to call coyotes video by Clay Owens will give you the basics and have you well on your way to successfully hunting coyotes. Clay Owens is coyote calling Champion and FoxPro field staffer.
Learn how you can go on a predator hunt with Clay for some one-on-one hunting experience. (coming soon)
Why do we hunt predators?
To control their numbers to protect livestock and game.
For their fur.
Because it is fun.
Stand Strategies:
Hunt where the coyotes are. Scout just as you would for deer hunting. Landowners are usually willing to help. Your success will decrease drastically if you are just doing cold sets.
It is very important to have a good vantage point where you can see 360 degrees if possible.
Set up with the wind in your face, or at the very least a crosswind. Make sure you can see downwind however. Coyotes have exceptional senses. They have great eyesight and hearing, but their nose is something you’re never going to beat. 90% of coyotes will try to work the wind and get in behind you.
In some cases, calling with a buddy is critical.
Three things drive coyotes to come in to a call:
Food: Rabbit distress, fawn distress and mouse squeaks are the go-to calls you need in your arsenal. Hear Clay demonstrate in the video.
Fighting: Howling is more difficult. If you’re a rookie, Clay suggests you get yourself an electronic call. Listen to Clay do a location howl on the video. Clay also demonstrates the Female Challenge Howl and a pup distress call with a diaphragm call. Clay also shows us how to use the CS24 FoxPro Electronic call.
Sex
How to call coyotes depending on the season:
Fall: In the fall, pups are receptive to distress calls. The pups are still young, undispersed and hungry.
Winter: In the winter, Clay still starts with distress sounds.
Spring: Spring is when coyotes start to pair up for breeding season. This is when howling becomes more critical. You are appealing to a single male looking for some love, or trying to pick a fight. Sometimes Clay also uses a Pair Howl. Distress calls still work well in the Spring as well.
Clay leaves the coyotes alone in the summer to raise their pups.
Other coyote hunting tips:
Start your calling sequence softly, stepping up the volume gradually.
If you call a coyote to within 100 yards, SHOOT!
Often, they come as a pair or even a pack. After the shot, be quick to get on the pup in distress call to get them to stop.
Clay thinks that there is a big difference in hunting mountain coyotes and plains coyotes. Mountain coyotes are more difficult, in his opinion. He thinks it’s because mountain coyotes have more predators such as mountain lions, wolves, and even golden eagles to contend with, so they are more cautious.
Western vs. Eastern coyotes. Eastern coyotes are a bit bigger, because they have more food available, but Clay doesn’t think that there is much difference in hunting them.
Coyotes come to fight, breed or find food. Learn how to appeal to those needs, and you’ll a successful predator hunter.
Three things you need to master in order to be a successful predator hunter:
1) Good woodsmanship;
2) Learn the behaviour of coyotes and how to handle them as they’re approaching;
3) Practice your shooting.
Clay scouts 75% of the time, and only spends 25% of his time actually hunting. Scouting is super important, as it doesn’t do any good to hunt where there aren’t any dogs. While he is scouting, Clay is in “stealth mode”, and usually in the dark. He likes to run up and down backroads looking for tracks and scat piles. He also likes to stop every once in awhile and howl, patterning an area where they live, and also learning the pack dynamics i.e., is there a dominant male in the area, or a bunch of pups in a big group?…hunting each will be different. While he’s scouting, he is quiet, and tries not to be seen or winded as you looks for sign and vantage points that will make good calling setups. He also takes notes of what direction the wind needs to be blowing from in order to hunt that setup and waits until the conditions are right before hunting it.
If you find a dead cow, or a road kill deer, you know they won’t be more than a mile away from that free meal, so that’s a bonus. When he finds that situation, he calls there “pretty soon”. Coyotes will travel a long way to feed on a dead cow, so take advantage of the opportunity. You may get the chance to hunt coyotes that don’t even live in the area while they’re getting a free meal.
Clay almost exclusively uses FoxPro electronic predator calls. With their calls, you can replicate almost any type of call you need to.
Pack dynamics will dictate your hunting strategy.
If you’re dealing with a family group, he uses more vocalizations as opposed to distress sounds (excluding pup distress). Males will circle to get the wind, and females will charge right in.
Breeding season is late winter, through early spring (January, through early March). They will start pairing up in January, so you’ll start using more vocalizations. Family howling sequences; female single howls; male challenge howls; and female challenge howls. He will often just howl one single time, and then wait ten minutes for them to come.
Calling to an entire pack can sometimes be pretty easy, when you hear them howling. Clay will often just make a “desperate” distress sound for about five seconds, and then wait. If they’re within a few hundred yards, they could be in range in under a minute. If they don’t come, you might try it a few more times.
Clay’s go-to sounds are howling (all variations); rabbit distress; deer fawn distress; any kind of bird distress sound; rodent distress; and one of his favorites is an antelope fawn distress sound.
Don’t start out too loudly. Start with a 30 to 60 second sequence of a super low rabbit or rodent distress calls. Then wait two minutes before starting the next sequence.
Then he will go into two, one minute sequences of mid-volume rabbit distress a minute each, with a two minute break between each sequence.
If nothing has shown up, he might throw in some howling.
The entire setup will last 15 to 25 minutes. Mountain coyotes however, are more cautious, and sometimes take 30 to 40 minutes to come in.
Discover why thousands of people have trusted us with their adventures.
10 rabbits eat the same amount of pasture as one ewe?
Rabbits can render agricultural land useless as a result of extensive soil erosion that comes through burrowing.
Feral rabbits cost Australian crop producers $ 113 million annually destroyed produce and control costs.
Rabbits, with their rodent-like teeth, look for tiny seedlings of the most nutritious plants and eat them before they can grow .
Do rabbits indirectly contribute to the decline of native species?
Hunt the rabbits
Whichever country you are reading this from, you must have come face to face with the menace of rabbits.
Methods suggested for controlling rabbit populations include poisoning, fencing, tree wrapping, cleaning up, using repellents, keeping dogs, trapping, and shooting.
Here is a brief account of the methods.
Poisoning
The most commonly used poisons for eradicating rabbits include Pindone and 1080.
You will first need to give the rabbits some carrots or other bait before giving them the poison.
Pros
Cons
Cost effective
Foxes subsequently killed by eating poisoned rabbits
1080 is biodegradable and does not leave any toxic residue in soil
May endanger people’s health as well as domestic animals and wildlife if poorly used
Requires controlled substance license to use
Dry weather required
Fumigants
This is used where rabbit burrows are deep and elaborate.
Rabbits inside the burrows inhale the toxic fumes and die.
Pros
Cons
Easy method as it does not require any technical skills
Useful if rabbits live underground in inaccessible spots
Labor-intensive
Can only be used on a small scale
Cannot be used where rabbits live above the ground
Rabbit proof fencing
These can be used around farms to keep rabbits from accessing.
Pros
Cons
Eco-friendly
Stops re-invasion
Possibility of rabbits digging burrows deep below the fence
Rabbit population continues to grow as none is killed
Requires frequent checking
Trapping
Rabbit traps are set at strategic locations in the bushes.
A rabbit is caught in a live trap, lured in by a the corn cob.
Pros
Cons
Effective when combined with other methods
Very labour intensive
Need a permit for many types of traps
Only useful if the rabbit population is low
Shooting
This is an easy and effective way to eradicate rabbits.
The method has grown in popularity owing to the fun derived while controlling pests.
As much as rabbits are animals, they don’t deserve the suffering they undergo through poisoning, fumigation, and trapping.
With shooting, you literally take their lives in the spur of a moment, in the twinkling of an eye, without passing them through extended periods of suffering.
For this reason, thousands have taken to shooting as their most preferred rabbit control method.
Specifically, consider using air rifles for shooting the rabbits.
I doubt you will need the power of a firearm.
Air rifles are quite numerous in brand, design, and performance.
To save you the pain of going through the hundreds of rabbit air rifles available, I have compiled a detailed review of the top 10 you need to consider.
Here is a quick list of the best air rifles for rabbits.
The Gamo Swarm Magnum 10X GEN3i Multi-Shot Air Rifle is an ideal choice for shooters looking for an affordable break barrel airgun to take care of squirrels.
With velocities of up to 1650 FPS (with alloy) in .177 caliber, this rifle offers superior accuracy and power. Furthermore, the 10X GEN 3i Quick-Shot inertia-fed magazine makes reloading a breeze – allowing users to make 10 shots without needing to fumble with pellets.
Thanks to its IGT Mach 1 inert gas piston powerplant, you get smoother cocking than with traditional spring piston air rifles, while an adjustable two-stage Custom Action trigger offers independent adjustments of the first and second stages for travel.
Features
10X GEN3i Quick-Shot inertia-fed magazine
Break barrel
Max. velocity (.177): 1650 FPS with alloy
Max velocity (.22) 1300 fps with alloy, 975 fps with lead
Air Arms Pro-Sport – most accurate air rifle for rabbit hunting
Not to mix me up, I reckon that this is specially designed for field target shooters.
But it doesn’t really matter if you kill the boredom between shooting competitions to harvest a few rabbits for dinner.
You will especially love its excellent accuracy and ease of shooting. Regarding power, the .177 gives you about 13 FPE when tested with the 8.44-grain JSB Exact Diabolo pellet.
At 9 lbs weight, it seems rather heavy, given that there are air rifles as light as 5 lbs.
Coupled with this is the very beautiful hardwood beech stock.
Accuracy
Calibers
Pellets
Distances
Groups
.22
H&N Terminator 16.36 gr
40 yards
one hole
.22
Air Arms Falcon 13.43 gr
35 yards
dime size
.22
H&N Field Target Trophy 14.66 gr
35 yards
dime size
.177
JSB Match Diabolo Exact 8.4 Gr
25 yards
0.25"
.177
JSB Diabolo Heavy
40 yards
one hole
.22
JSB Diabolo Heavy 18.13 gr
35 yards
1/2"
.22
Crosman Premier Hollow Point 14,3 gr
30 yards
one hole
.22
Air Arms Diabolo Hunter 16 gr
23 yards
0.75"
.22
JSB Hades Diabolo 15.89 gr
30 yards
dime size
.22
JSB Hades Diabolo 15.89 gr
25 yards
0.33"
.22
JSB Exact Jumbo 13.43 gr
25 yards
0.32"
.22
Predator GTO Lead Free Pellets 11.75 gr
25 yards
0.21"
.22
JSB Hades Diabolo 15.89 gr
50 yards
1.29"
.22
JSB Jumbo Heavy 18.13 Gr
35 yards
3/8"
.22
H&N Baracuda Match 21.3 gr
35 yards
3/8"
Chrony tests
Calibers
Pellets
FPS
FPE
.22
H&N Field Target Trophy 14.66 gr
720
16.88
.22
Crosman Premier Hollow Point 14.3 Gr
728
16.83
.177
JSB Match Diabolo Exact 8.4 Gr
755.9
10.66
.177
JSB Diabolo Heavy 10.34 gr
770
13.62
.22
JSB Diabolo Heavy 18.13 gr
635
16.24
.22
H&N Field Target Trophy 14.66 gr
717
16.74
.22
Crosman Premier Hollow Point 14,3 gr
704
15.74
.22
Crosman Premier Hollow Point 14,3 gr
710
16.01
.22
JSB Hades Diabolo 15.89 gr
620
13.57
.22
JSB Exact Jumbo 13.43 gr
675
13.59
.22
Predator GTO Lead Free Pellets 11.75 gr
805
16.91
.22
JSB Hades Diabolo 15.89 gr
665
15.61
.22
JSB Jumbo Heavy 18.13 Gr
583
13.69
Features
Max Velocity: 950 fps
Overall Length: 40.5″
Buttplate Ventilated rubber
Function: Single-shot
Weight: 9.03 lbs
Trigger Pull: 3.0 lbs
Scopeable: 11mm dovetail
Safety Automatic
Suggested for Small game hunting/target practice
Caliber: .177 – .22
Loudness: 3-Medium
Barrel Length: 9.5″
Shot Capacity: 1
Cocking Effort: 39.6 lbs
Barrel Rifled
Front Sight: none
Rear Sight: none
Trigger: Two-stage adjustable
Action: Underlever
Powerplant: Spring-piston
Pros and Cons
Pros
Cons
Quality craftsmanship, stunning walnut stock, and deep bluing
Well-tuned from the factory
Quiet and well-balanced
Great 2-Stage Trigger
Accurate up to 40+ yards
Packs enough punch for most of your pest and small games hunting needs
Many hunters go for the large farms, some even developed with the most modern equipment
Focus on smaller farms and neglected public hunting lands.
Search for overgrown hedges, land lying fallow, and brushy ditches.
Rabbits like hiding in the abandoned property
If you spot any old barn, dilapidated machinery, or destroyed sheds, hang around longer than you had planned.
Rabbits love basking after cold spells
If such are the current conditions, target the sunny slopes.
Rabbits feed more after dawn and toward dusk
Plan your hunting sessions well to coincide with these times.
Many hunters go for the large farms, some even developed with the most modern equipment
Focus on smaller farms and neglected public hunting lands.
Search for overgrown hedges, land lying fallow, and brushy ditches.
Rabbits like hiding in abandoned property – If you spot any old barn, dilapidated machinery, or destroyed sheds, hang around longer than you had planned.
Rabbits love basking after cold spells
If such are the current conditions, target the sunny slopes.
Rabbits feed more after dawn and toward dusk
Plan your hunting sessions well to coincide with these times.
That said, what should you consider when choosing air rifles for hunting rabbits?
How to choose a rabbit hunting rifle
Perhaps the most important criterion for your choice should be the punching power of the air rifle.
Before we proceed, consider the following recommendations by hunting experts.
Game
Minimum acceptable caliber
Minimum energy (FPE)
Small birds
.177+
5
Medium birds
.177+
7
Large Birds
.22+
11
Squirrel-sized prey
.22+
9
Rabbit-sized prey
.22+
9
Raccoon-sized prey
.25+
25
Possum-sized prey
.25+
25
Fox-sized prey
.30+
35
Coyote-sized prey
.30+
50
Javelina-sized prey
.357+
90
Small deer
.357+
100
Medium deer
.40+
150
Large deer
.45+
200
Hog
.45+
200
It seems you need muzzle energy of only 9 FPE to humanely kill a rabbit.
Quite a lot of mid-range air rifles can achieve this killing force.
Caliber
In conjunction with the punching power is the air rifle caliber.
You certainly don’t need a big-bore air rifle for rabbit hunting.
Leave the .50 air rifles for the cape buffalo and hogs.
FPS alone is not enough to determine the killing power of ammo.
The killing power is tied around the muzzle energy.
Therefore, when talking about the FPS, we must accompany it with the weight of the ammo, so that we have an idea of the resultant muzzle energy.
You can have a pellet with terrific speed but negligible weight.
That may fail to kill even a rat.
But if the weight is sufficient, a pellet with the same velocity will kill even a rabbit.
Can 600 fps kill a rabbit?
In line with the discussion above, the answer to this is both Yes and No.
Can you legally shoot rabbits?
According to the UK government, rabbits are categorized as pests.
In this regard, the question can read: Is it legal to control pests that destroy your crops? Certainly, yes.
Rabbits are not a protected species in many jurisdictions.
But when the shooting element sets in, laws vary widely from country to country.
The Pest Act 1954 states that all land occupiers have a continuing obligation to kill or take any wild rabbits living on the land, by methods such as gassing, snaring, trapping, fencing, ferreting, and shooting.
However, as to who can or cannot shoot, gun ownership legislation is applied.
Then there is the shooting of rabbits as a form of pest and the shooting of rabbits as a recreational activity.
Not all countries and states see eye-to-eye – and therefore the laws vary.
Make sure to check your local laws so you are not caught on the wrong side of the law.
Conclusion
Taking all things into account, hunting rabbits by shooting is both legal and enjoyable.
Whether you are on the recreational side or the pest control one, never shoot the rabbits and simply leave them to rot.
Wild rabbits are edible. Very delicious and nutritious indeed.
All you need is to get the facts and equipment and gear ready for the hunting season.
We already covered the facts at the beginning of this piece. Perhaps I can list the equipment and gear you may need:
Waterproof boots
Hat
Hunter orange vest
Gloves
Socks
Vinyl-faced canvas field pants
Sturdy hunting coat
A firearm or air rifle
Ammo for the weapon
Air rifle case
Airgun cleaning kit
Hunting license
Knife
Flashlight
Map and Compass
Fully charged smartphone
Game bag
All in all, take it easy, and stay within the dictates of the law.
Kill only what you can eat.
Even if your rabbit air rifle has 200 shots per fill, exercise self-control.
You are not out there to terminate the rabbit population.
I sign off with a light touch.
Two men were out hunting when one of them saw a rabbit.
“Quick,” said the first, “shoot it.”
“I can’t,” said the second. “My gun isn’t loaded.”
“Well,” said the first, ”You know that and I know that, but the rabbit doesn’t.”
"Unlock the Perfect Shot: Discover the Best Scope for Break Barrel Air Rifles. Enhance your shooting experience with precision and accuracy, as we delve...
Wyatt Earp has said:
Fast is fine, but accuracy is everything
And I just thought how many airgunners are obsessed with muzzle velocity and muzzle energy,...
"Debate over whether a 22 air rifle can effectively take down a deer has sparked curiosity among hunting enthusiasts. With its lower muzzle velocity...
"Unleash the Power: Mastering Break Barrel Air Rifles for Maximum Performance. Discover expert tips and techniques to enhance the power and precision of your...
")
")
")
")
")