")
")
")
")
")


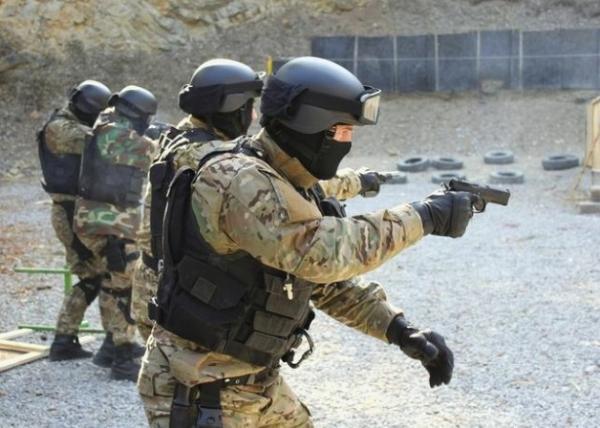
What’s the most diverse group of guns in use by the world’s military forces?
It’s not rifles, or machine guns, or submachine guns, or even shotguns. Most successful long-gun fall into just a few different designs.
When you see oddball service rifles, you often see them plagued by issues of all kinds I.E. the INSAS, the FAMAS, the SA-80, and even the G36 have all had their problems.
The most diverse group of military weapons are handguns, aka sidearms. Even within certain countries, pistols can be diversely issued depending on the unit and mission.
Sometimes pistols are such a second thought they are a mishmash of different guns.
For example, see Israel at the near end of this list. Another challenge is how countries outside of Western Europe equip their military forces. In the Western World, there is a big move towards standardization that’s not present with other countries.
Several countries also don’t put out a press release when they purchase or adopt a new handgun, making it difficult to verify the information.
To be entirely fair, sidearms are just a step above bayonets on the necessity of military equipment priorities. Most countries issue them in small numbers to officers and specialists.
I put my best foot forward to come up with a comprehensive list of the sidearms from around the world. It was a little harder than I initially thought, but the research was still fascinating and fun.
With all this in mind, I’ve tried my hardest to verify the issuance of every firearm on this list. I set my parameters to general issue sidearms.
Some Special ops teams may use something different than the standard forces, and trying to catalog these weapons along with general sidearms would take several articles.

For example, the United States military alone issues the Beretta M9, the M17/18, the MEU/SOC 1911, the SIG P226, the M11A1, the P229R, the Glock 34, Glock 17, Glock 19, Glock 22, and many more we’ve likely never seen. It’s much more reasonable to focus on the general issue sidearms of these military forces.
Since several military forces have adopted the same gun, we’ll group those together to simplify things.
Table of Contents
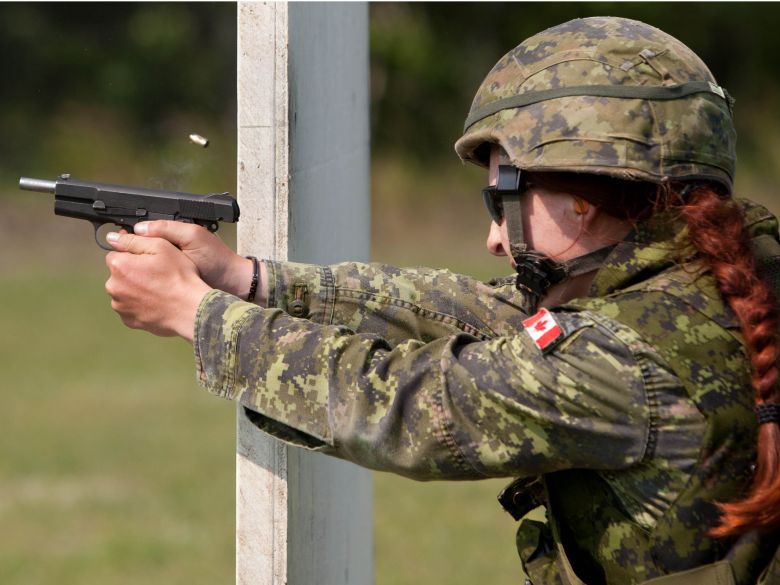
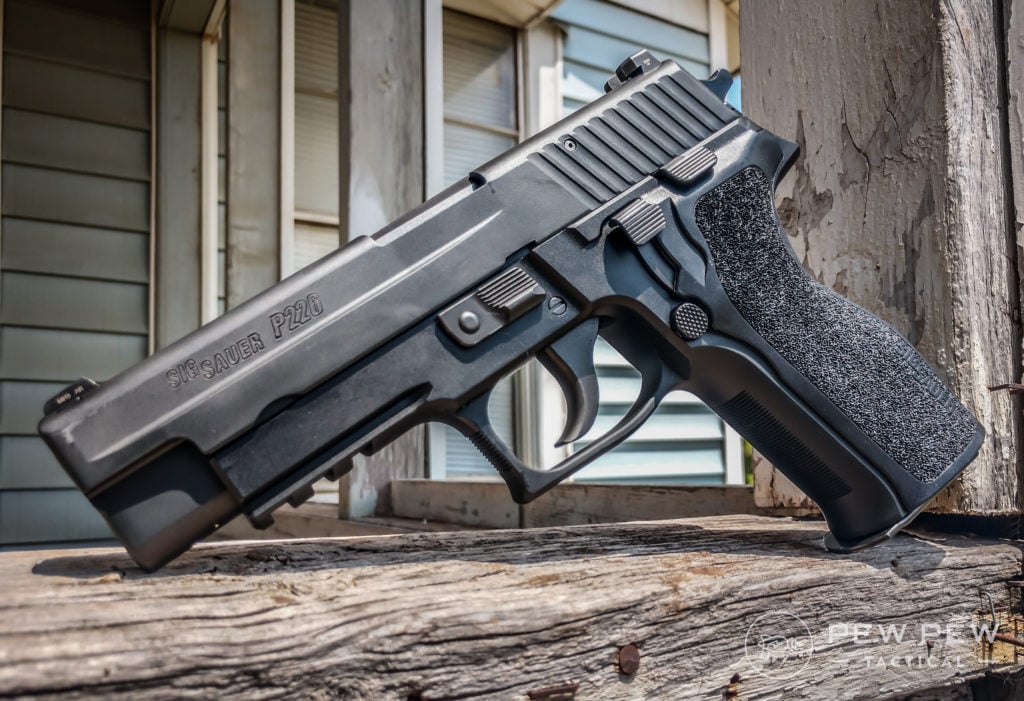
- 1. United States – SIG P320 Designated the M17/18
- 2. Commonwealth Club – The Browning Hi-Power
- 3. 20+ Nations – The Glock 17, 19, and 34.
- 4. Germany, Ireland, Greece, and Spain – The HK U.S.P.
- 5. The French – M.A.C. Mle 50 and PAMAS G1
- 6. South Korea – The Daewoo K5
- 7. China – Type 92
- 8. Russia – Makarov, and MP-443
- 9. Belgium – FN Five-Seven
- 10. Czech Republic – C.Z. 75 Phantom
- 11. South Africa – Vektor Z88 and SP1
- 12. Italy – Beretta 92FS
- 13. Brazil – Taurus PT-92
- 14. Israel… A Little Bit of Everything
- Conclusion
1. United States – SIG P320 Designated the M17/18
I was lucky enough to be at SHOT Show when it was announced that the SIG P320 would be adopted for military service with the U.S. Army. Needless to say, the folks at the SIG booth were quite excited.

The P320, designated the M17 and M18, was adopted in 9mm in full size (M17) and compact (M18) variants. The M17/18 series are quite advanced for military sidearms and feature red dot optics compatibility. Although red dots have not been issued as far as I know.
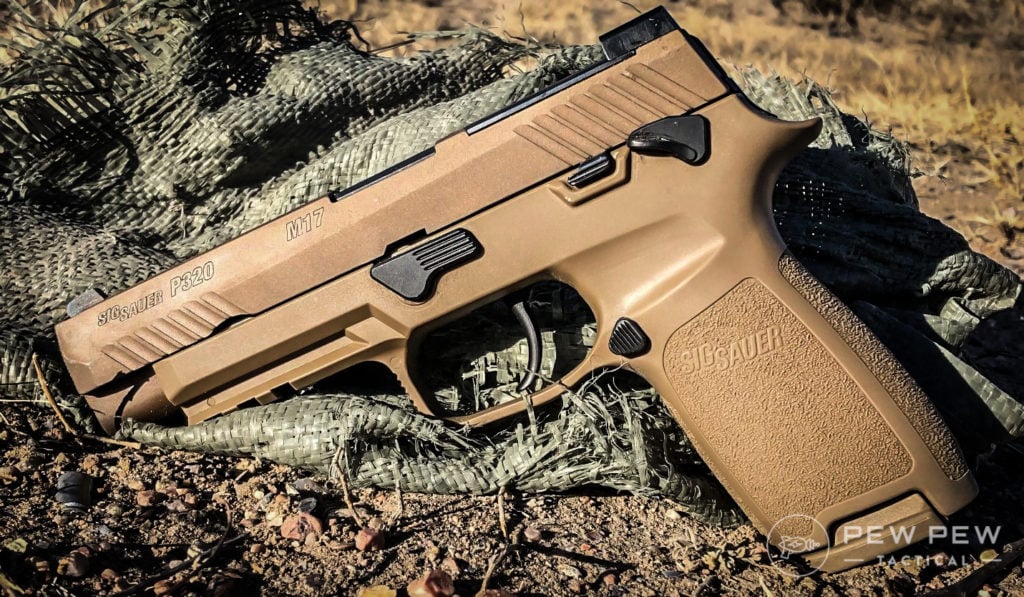
Like the P320 the ability exists to move the serialized fire control group to different grip modules. The military is quite strict with serial numbers and if the military allows the issued troop to choose a grip module they could get a gun that fits them. One size fits all is rarely a good idea.
Of course, the U.S. Military is nanny like and included a manual safety. In reality, more training would be more beneficial than a manual safety, but who am I to judge big army.
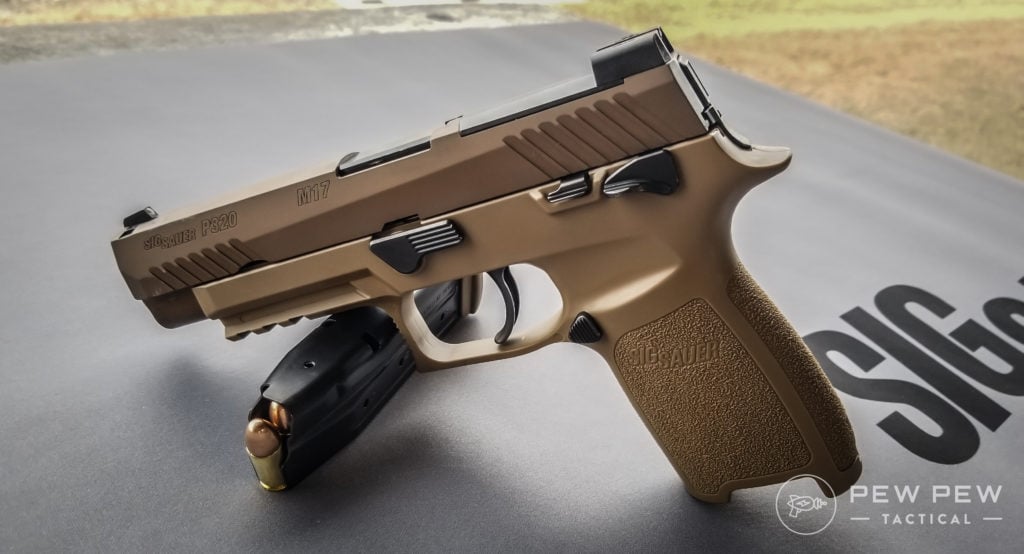
The M17 has since been adopted by the Air Force, the Navy, and the Marines. The M17 is currently being issued to combat arms units first in the U.S. Army. The Army plans to replace every M9 within ten years with an M17/18.
2. Commonwealth Club – The Browning Hi-Power
Canada, Australia, Bahrain, India, Thailand
The Browning Hi-Power is the European 1911.
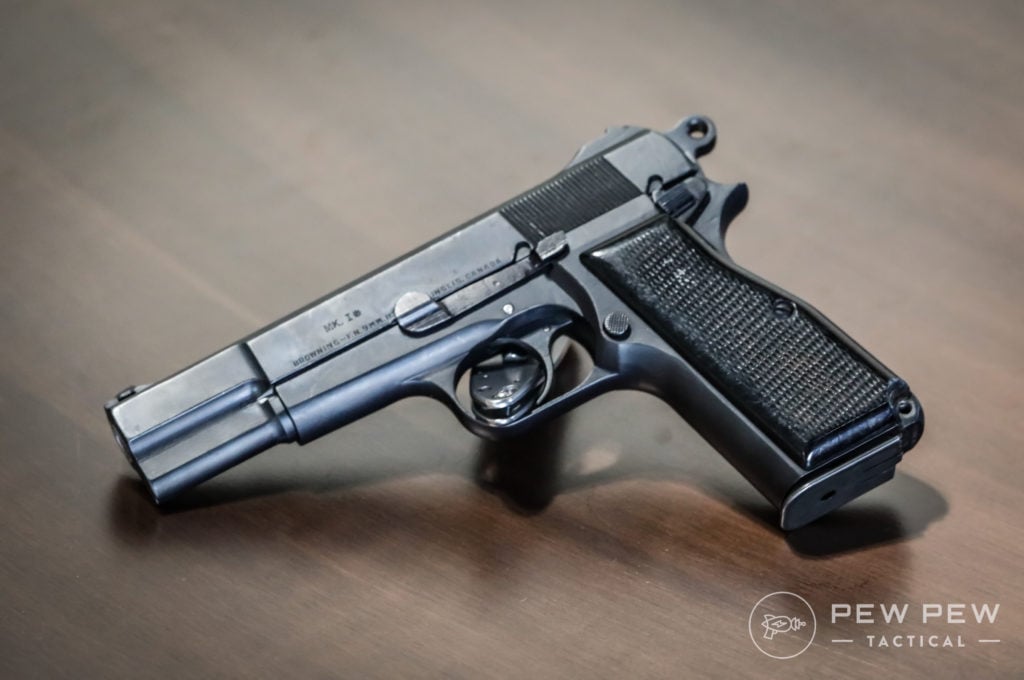
What I mean by that is its popularity and longevity in military service. The Hi-Power has been used by just about everybody and in only the last few years have more modern designs replaced it.
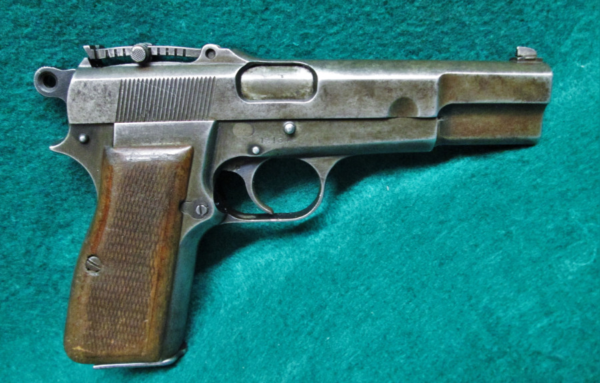
The Hi-Power was one of the first high capacity 9mms that entered regular service. It’s a single action only weapon with a manual safety and a 13 round magazine. The Hi-Power is a beautiful gun that is robust and reliable.
It’s close to 100 years old and is still seeing war.
It’s one of the few guns to see action on both sides of WW2 in service with numerous Allied Forces, including the British, and in the hands of Germans. The Hi-Power is an excellent firearm and was a final fitting design for John Browning.
Its legacy of service across the world is nearly unmatched. Much like the sun never sets on the British empire, the sun doesn’t set on the Hi-Power. While it’s been produced mostly in Europe, the gun is also widely built in South American factories as well.

It’s been heavily used in Europe, the Middle East, Asia, and South America. From imported goods to domestic production copies, the Hi-Power is a legend in small arms design.
It’s currently the issued sidearm of Commonwealth countries like Canada and Australia, and as far out as India and Thailand.
3. 20+ Nations – The Glock 17, 19, and 34.
The United Kingdom, Sweden, Austria, Finland, Malaysia, Mexico (Navy), Montenegro, The Netherlands, New Zealand, Norway, Poland, Portugal, Romania, Switzerland, Yemen, Venezuela, Uruguay, India, and many more.
It would seemingly be easier to make a list of countries the Glock 9mm series doesn’t serve in. The weapon seems to be everywhere in the world.
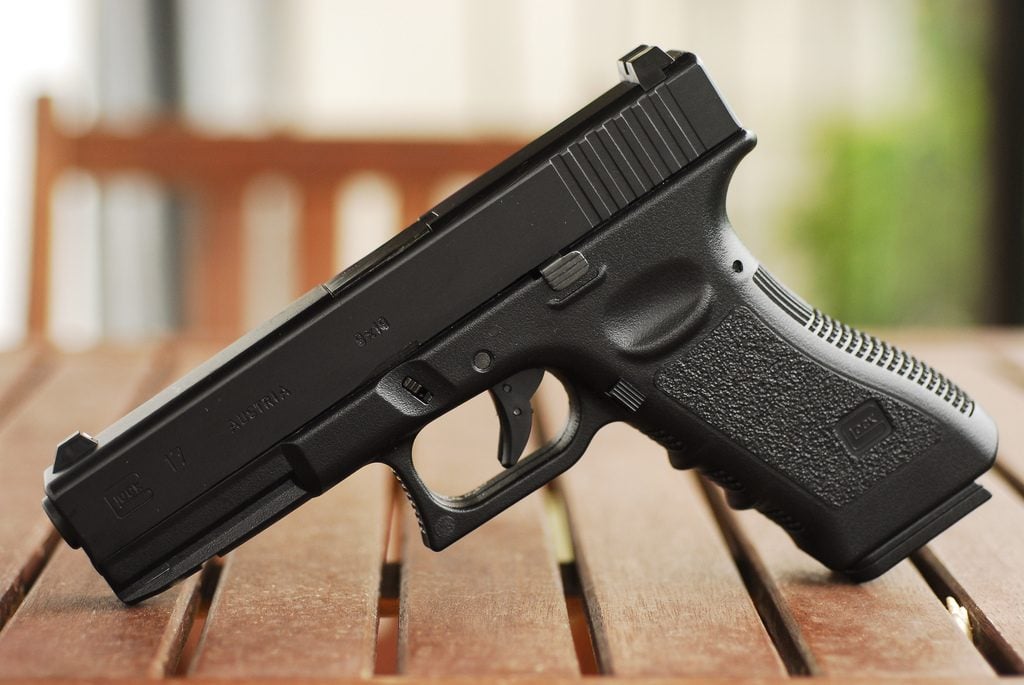
Why not? The 9mm Glocks are the flagship of their handguns, and the only difference between the 17, 19, and 34 is barrel and grip length.
Glock 9mm pistols are legendary for their rugged and reliable design. These superbly simple guns work, and keep working. On top of that, Glock has logistics nailed with supplies and spare parts out the yin yang.
Generation wise it appears that Gen 3 and Gen 4 models are the most popular variants in the military market. The Glock series also seems to be the most popular choice in countries where Spec Ops have more leeway in choosing a handgun.
The Glock series of firearms are popular the world over for a good reason. They are accurate, easy to use, highly reliable, lightweight, and cheap. The price Glock sells their guns to Police Forces is criminally low, and I imagine the price for military forces is even smaller.
Penny pinchers often give a big say when it comes to new guns, and price always matters. Glock makes their weapons affordable while being high quality. As far as military sidearms go the Glock 17 will likely remain the most popular choice for some time to come.
If you want to get your own Glock, you should take a look at some of these articles:
- Best Glock (All Sizes & Calibers)
- Best 9mm Glock
- Best Glock Upgrades
4. Germany, Ireland, Greece, and Spain – The HK U.S.P.
I love the HK U.S.P. It’s one of my favorite DA/SA guns, and that’s saying a lot. The U.S.P., or universal self-loading pistol, is Heckler and Koch’s premier handgun design.
It’s a fascinating gun and while 9mm is the chosen NATO cartridge the USP was one of the first guns built around the 40 S&W. The gun was also chambered in 357 SIG, and later 45 A.C.P.
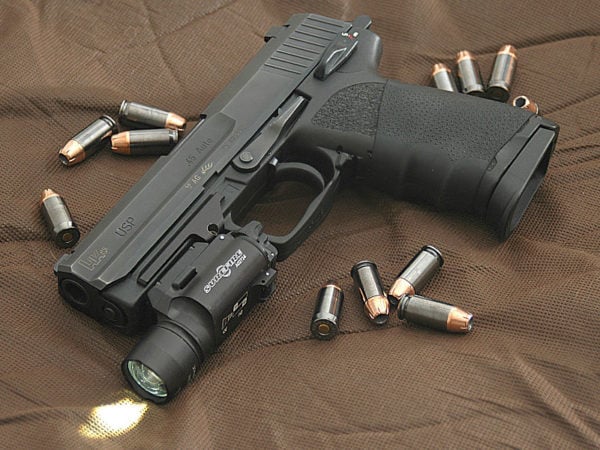
The U.S.P. stood apart from other polymer-frame guns of the time due to its mechanical recoil reduction system. This system is implemented with a heavy captive coil spring around the guide rod that reduced the force of the slide slinging rearward.
This buffers recoil by up to 30% according to H.K. The U.S.P. came to be because of the Offensive Handgun Weapon System, where it was tested alongside prototypes of the Mk 23 Mod 0. From the very beginning the gun was always meant to be a service pistol.
As a service weapon, it has been adopted by at least four countries as the general issue sidearm. In several more countries, it serves as a pistol for Special Operations units. Plus the U.S.P. C. is Jack Bauer’s gun of choice.
5. The French – M.A.C. Mle 50 and PAMAS G1
I’m not picking on the French, but any look into their current small arms will find them lacking. Their military is often ignored and their weapons are often quite old. There are two current service pistols in use, and neither is a new design.
First we have the ancient, but domestically designed M.A.C. Mle 50 and then the PAMAS G1. The PAMAS G1 is a licensed clone of the Beretta 92F and is built in France.
The 30-year-old G1 was supposed to replace the MAC Mle 50, but it seems the process has been moving along very slowly. They are looking to now replace both pistols as of March 2019.
The M.A.C. Mle 50 is a product of its time, and as a gun designed in 1950, that means it’s a single stack 9mm with nine rounds and a single-action design. It uses the Browning system like a Hi-Power and has an integral barrel feed ramp.
The M.A.C. 50 is a stout little gun that’s known for its durability, clearly, since it’s been around for nearly 70 years now.
The PAMAS G1 is a clone of the Beretta 92F made in France. There are a few differences between the PAMAS G1 and Beretta 92F. The G1 has a decocking lever only, and apparently, the French steel is more brittle.
Since it’s a 92F, it lacks the enlarged hammer axis pin that prevents the slide from accidentally leaving the gun and hitting the operator in the face. However, there is some speculation this was initially caused by +P+ ammo.
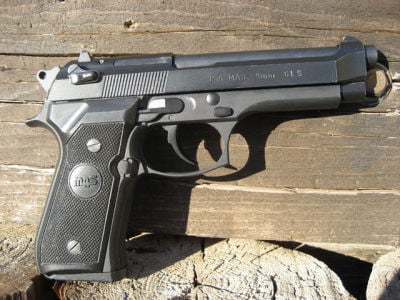
The French will likely adopt a Glock pistol, but until then, the M.A.C. and PAMAS are chugging along. The PAMAS is certainly a step up from the MAC, but both are likely well past their service life.
6. South Korea – The Daewoo K5
South Korea has a robust and well established domestic arms production history. Rather than just relying on the U.S., the Daewoo brand has produced most of South Korea’s military firearms.
The Daewoo K5 is an innovative and exciting firearm design that has served the Koreans since 1989.
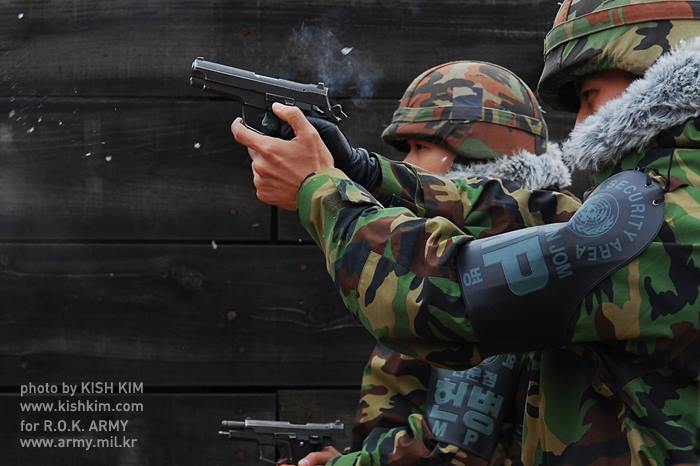
The Daewoo K5 is a DA/SA pistol with a hammer, made on metal frame and is chambered in 9mm. The Daewoo K5 holds 15 rounds of 9mm, and in 1989 was quite high tech. It’s slightly dated now, but still an excellent combat pistol.
The K5 features an unusual trigger mechanism, sometimes called Triple action or Double action +. It’s quite similar to the P99, except with an actual hammer-fired handgun. The K5’s hammer can be decoked, while still maintaining mainspring compression.
The end result is a trigger pull with the length of a double-action trigger, but the weight of a single-action design. In the states, the Lionheart imported pistol had the same innovative feature. The K5 is a fascinating gun, and in 1989 showed a lot of innovative thought from Daewoo and South Korea.
Daewoo is an interesting company. They make everything from TVs to Cars, and handguns and assault rifles. If you need a slow, fuel-efficient car and a machine gun, call Daewoo.
7. China – Type 92
The Type 92, aka the QSZ-92, is China’s primary service sidearm. This recoil-operated, locked-breech pistol has a rotating barrel locking system like the Beretta PX4 series. This rotating barrel setup is supposed to improve reliability and decrease recoil.
This is an interesting little gun, and it was ahead of its time.
The Type 92 was designed in 1994 and featured a detachable steel frame that holds the fire control group. This sits in the plastic grip and acts very much like a SIG P320’s FCU. The frame can be removed and moved into different sized frames and grip designs.
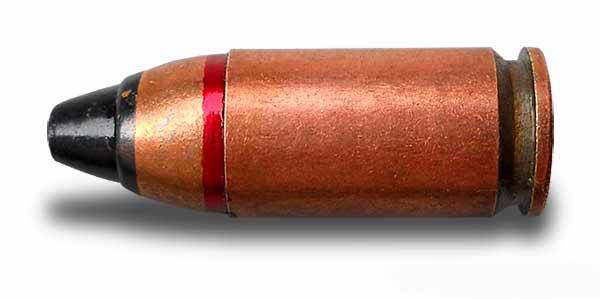
Whether or not this was ever done remains to be seen. The gun is also chambered in the very odd 5.8x21mm round. This was China’s variant of the 5.7 and was designed to defeat soft armor.

It holds 20 rounds of the 5.8×21 round in a double-stack magazine and has a combination safety/decocker. It’s a DA/SA design and is issued lightly among Chinese forces.
9mm variants also exist for export… for reasons.
I’m betting the 5.8 round handles a lot like the 5.7, and it’s a shame we can’t find out for ourselves.
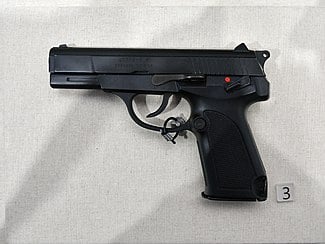
8. Russia – Makarov, and MP-443
Russian is a weird country for small arms.
Admittedly they are much more focused on their rifles than their handguns. That’s why the Makarov pistol is still around and kicking in use by their military forces. This Great Value brand Walther PP has been serving since 1951.
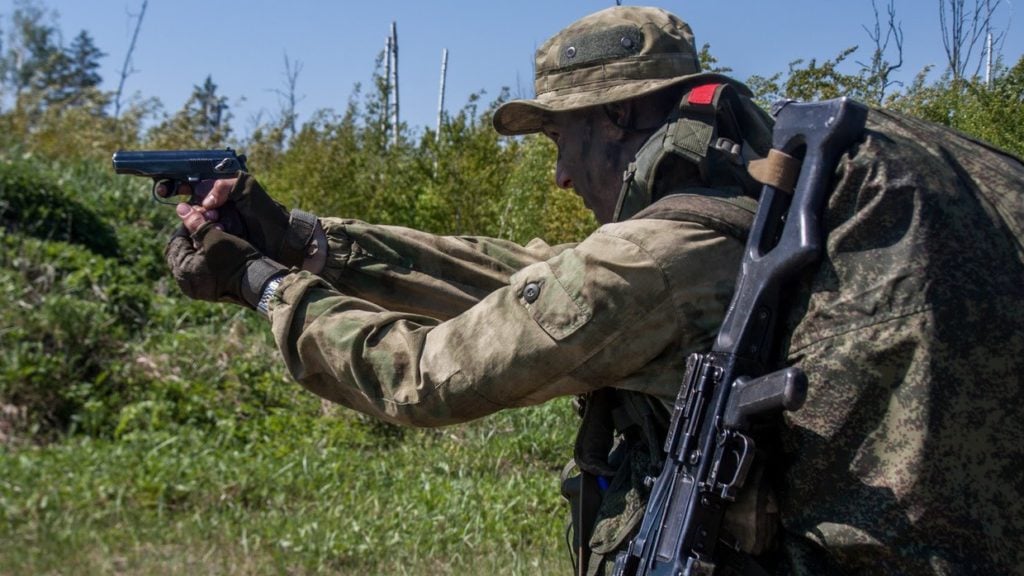
It’s a blowback-operated design that’s very compact for a service pistol. When your handgun is more or less used for executing traitors and subjugating people, I guess size doesn’t matter. The Makarov had a capacity of 8 rounds of what is essentially a +P .380 ACP round.
The most impressive thing about the Makarov is the fact it’s made of only 27 parts. This was perfect for the Soviet Union at the time. It is cheap and easy to produce, and had very few failure points.
The Makarov pistol has been around for so long because the former Soviet Union produced millions of them, and they are robust little pistols.
The MP 443 Grach, aka the PYa, is a more modern Russian service pistol that aims to replace the Makarov. The MP 443 is a modern 9mm Parabellum pistol with a 17 or 18 round magazine capacity. The MP 443 is slowly making its way into the hands of Russian forces, and the gun has been in mass production for eight years now.
The MP 443 is pretty standard as far as pistols go. It’s a DA/SA design that does allow the user to swap the slide stop lever and manual safety to the right and left sides of the gun. The MP 443 uses a Colt-Browning design and doesn’t do anything revolutionary.
So it’s a lot unlike bored Russians in that sense.
It is an all-steel gun, and while this adds to the gun’s weight, it is quite robust and durable. It needs to be to use the Russian armor piercing 9mm 7N21 armor-piercing round. This s a +P+ style round apparently and is a hard hitter
The MP 443 is another gun we will likely never see, but I doubt it does anything an old SW 3rd gen doesn’t do.
9. Belgium – FN Five-Seven
The Belgium FN Five-Seven pistol is an interesting firearm. It fires the 5.7x28mm round and was developed to share ammunition with the FN P90 PDW. The round it fires is similar to a rifle round in design and shape.
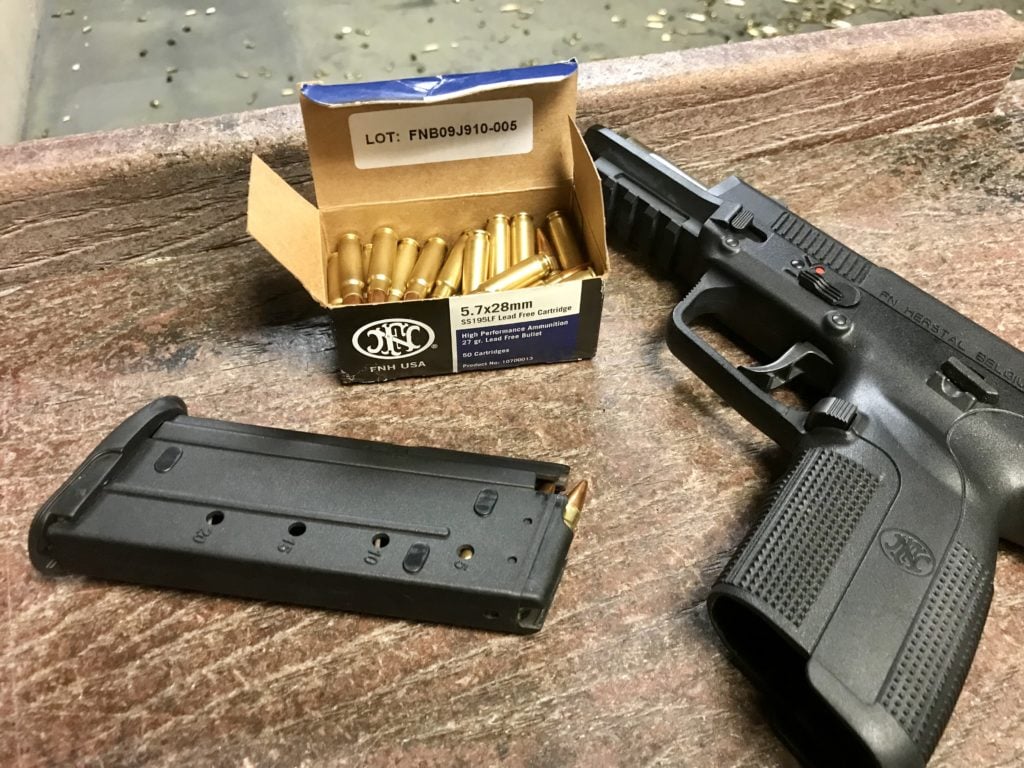
While the ammunition is long, it’s thin, and this allows the Five-Seven to hold 20 rounds in a flush-fitting magazine. The Five-Seven offers soft armor penetration and very low recoil on top of a flat shooting cartridge that can reach out to 100 yards.
This is a very easy shooting gun, and I can see why a military would adopt it. Plus it’s lightweight, reliable, and is unlike most handguns when it comes to armor and barrier penetration. The gun and the ammo is quite pricey though.
The gun is Belgium designed and is currently replacing the Browning Hi-Power with the Belgium Army. The Five-Seven also serves the Air Force, Special Forces Group, and Federal Police forces. The Five-Seven is an unconventional choice but is an effective weapon.
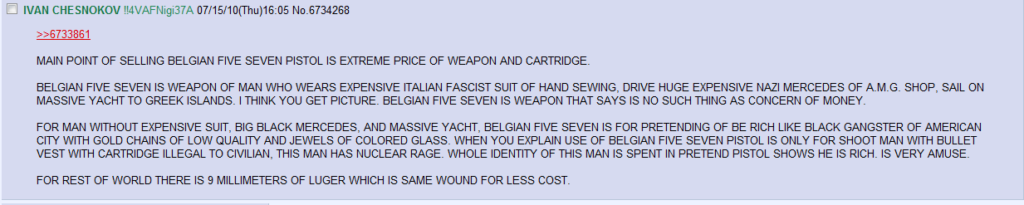
And of course, it is the firearm of Ivan Chesnokov fame.
10. Czech Republic – C.Z. 75 Phantom
The Czech Republic has a long history of private firearms ownership and is one of the few European countries to have a strong firearm’s civil rights. C.Z. is also one of my favorite personal gun makers.

The C.Z. 75 has been used extensively by their military for quite some time, and still serves in reserve units.
The C.Z. 75 Phantom is now the primary service pistol. This gun is similar in design to the classic C.Z. 75 but features a polymer frame, Picatinny rail, and a decocker only design. It also uses a larger 19 round magazine, but can also work with classic C.Z. 75 mags.
The C.Z. 75 Phantom is a robust and accurate weapon. The ergonomics are simply incredible, and C.Z. isn’t afraid to sell the gun in the States, so yay for us. The Phantom is a service pistol with the handling of a competition gun.
It has an excellent trigger, a low bore axis, and is well proven. The Phantom is an excellent gun, and it was a great choice by the Army of the Czech Republic.
11. South Africa – Vektor Z88 and SP1
South Africa has an exciting history of arms design and has both cloned and created their weapons. Their service handguns are a mixture of both. The Z88 was a domestically produced clone of the Beretta 92.
They couldn’t license it or receive handgun imports due to the arms embargo on South Africa at the time. Beretta also couldn’t sue because South African’s couldn’t come to court to defend themselves.
The Z88 was a direct clone of the Beretta 92 and, as such, is a DA/SA gun with a decoking safety and a 15 round magazine. The Z88 was a very well done clone and helped modernize the South African military. It still serves today in a limited role.
After the sanctions were lifted, Beretta was in a place where they could file lawsuits, so South Africa wisely changed the design and came up with the Vektor SP1. This gun utilized the same basic Beretta design with some changes. The safety was moved to the frame, the barrel was no longer exposed, and a 40 S&W variant was created.
The SP1 is a metal frame pistol, and it still utilizes Beretta magazines. It currently serves the South African National Defence Force and the Police Service. It admittedly looks very cool and while limited numbers were imported to the States I’ve never seen one in person.
The SP1 is reportedly a well made combat handgun, and since the weapon is based on a Beretta 92 it’s got a solid platform to start on. South Africa apparently likes the weapon enough that they’ve yet to start shopping for a new sidearm, even without an arms embargo.
12. Italy – Beretta 92FS
Beretta, the world’s oldest still-operating arms company, is an Italian firm. Are we at all surprised that the Italians are using one of Beretta’s most legendary handguns?
The 92FS has served several countries as a military and police sidearm, including our own, for more than 30 years.
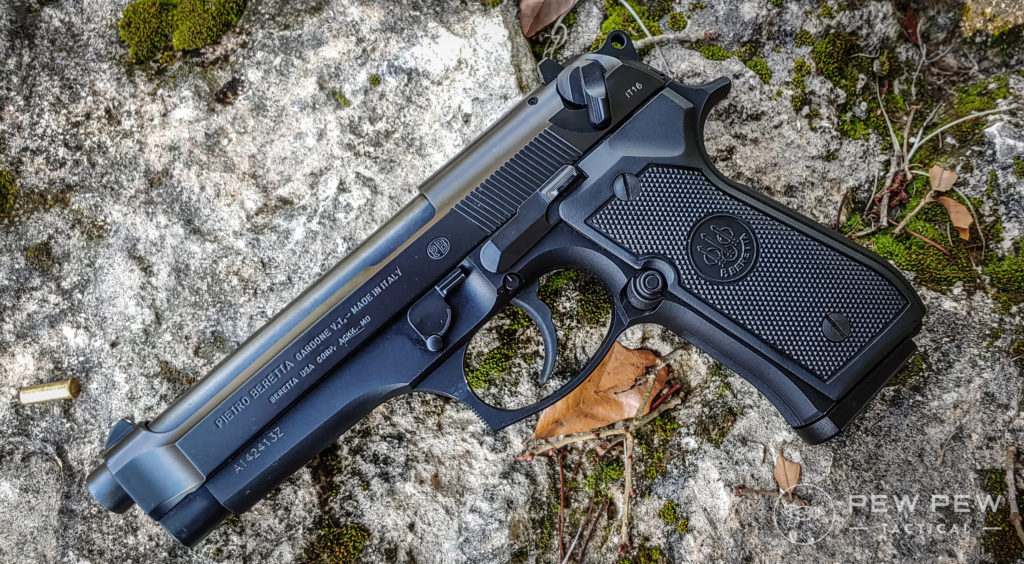
The Italian military uses the Beretta 92FS. This DA/SA design features one of the best stock factory triggers on the market. The 92FS has a combination safety and decocker and excellent ergonomics outside of the safety.
The 92FS in it’s M9 form was the gun I used and it’s an excellent weapon. The 92FS is robust, reliable, and well-proven. The direct feed system and open slide design greatly increase the gun’s reliability.
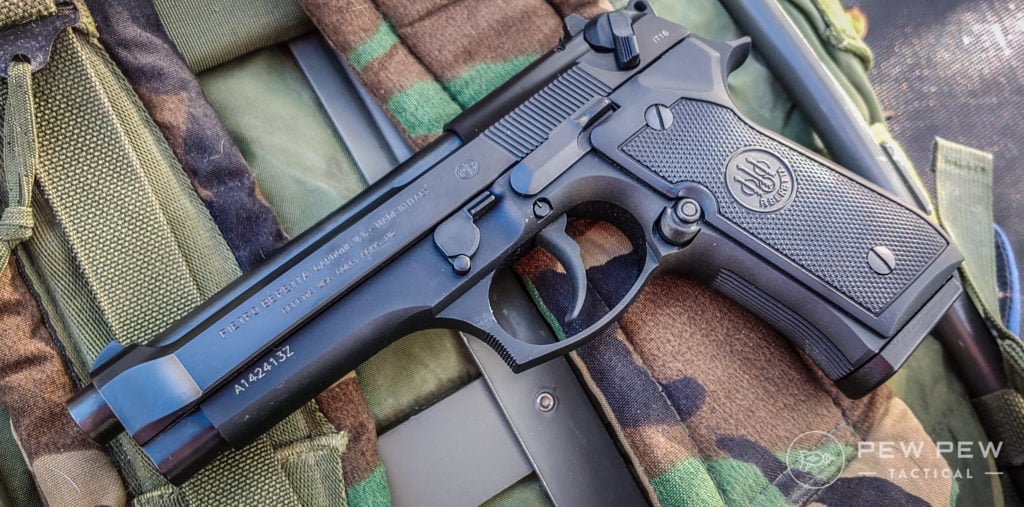
Beretta’s and the U.S. Army’s numerous testing has shown that the weapon is extremely reliable and can take a ton of abuse before it cracks.
The all-metal frame pistol has very low recoil and handles like a dream. It’s perfect for both new recruits and expert shots. The 92FS is Italy’s standard service pistol, and there doesn’t seem to be a rush to swap it out.
13. Brazil – Taurus PT-92
The PT-92 is the Brazillian copy of the Beretta 92, made by Brazillian firm Taurus. It’s not an identical copy of the Beretta. Taurus makes these guns on original Beretta machinery left behind after Beretta’s military contract expired in Brazil.

The Taurus PT-92’s most significant and most noticeable change from the Italian Stallion was the use of a frame-mounted combination safety and decocker. Other than that, the PT-92 handles almost identically to the Beretta 92.
This includes the DA/A design, the direct feed design, and the double-stack magazine. The PT-92 has been serving the Brazillian military for decades now without much issue. The teething problems the Taurus guns sometimes have are seemingly not present in the P.T. 92’s design.
14. Israel… A Little Bit of Everything
Tracking down one service pistol for the Israeli army isn’t easy. It seems like they keep a bit of everything around.
The domestically produced Jericho pistol is in the inventory, as well as the SIG P226 and 228, the Hi-Power, the Glock 17 and 19 models, and more.
Researching this article has shown me that service pistols in the Israeli Army are highly uncommon. The Special Forces and Intelligence agencies all seem to have their particular pistol.
I mean, does the Uzi pistol count as a pistol?
The one common thread between Israeli pistols is that they are all quality options. They are well made, proven guns with a long history of service and success.
Conclusion
Service pistols are such a diverse subject to cover, guns that include both past and present designs. The current field of Service pistols around the world is massive, and I was left exhausted after researching and writing this article.
Service pistols are a fascinating subject to research, and I’m surprised to see such exciting diversity. I can’t possibly have conquered them all, so I ask you fine folks in the comments, which ones have I missed? Want more…check out Police Sidearms: From Past to Present.
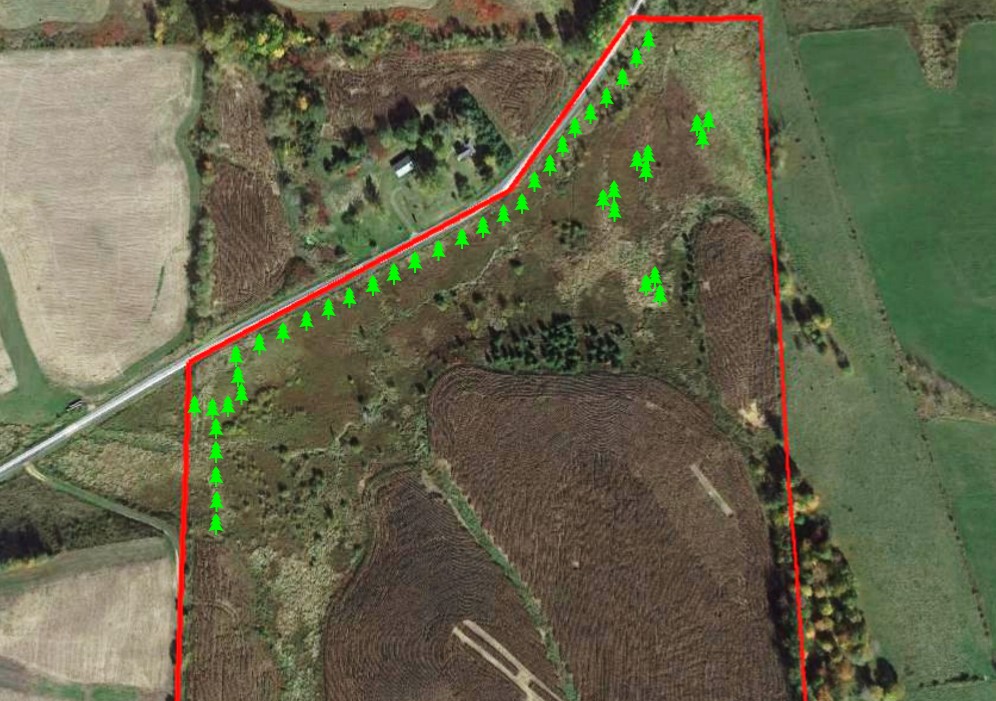
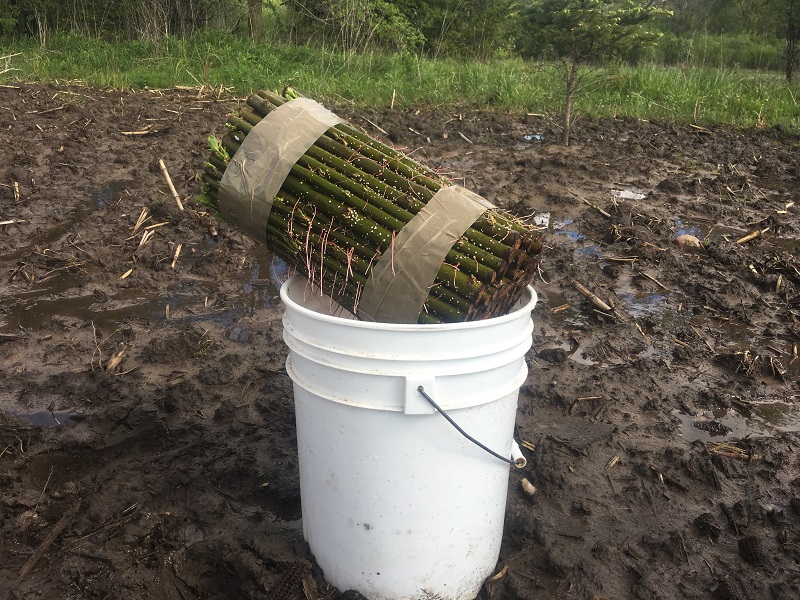
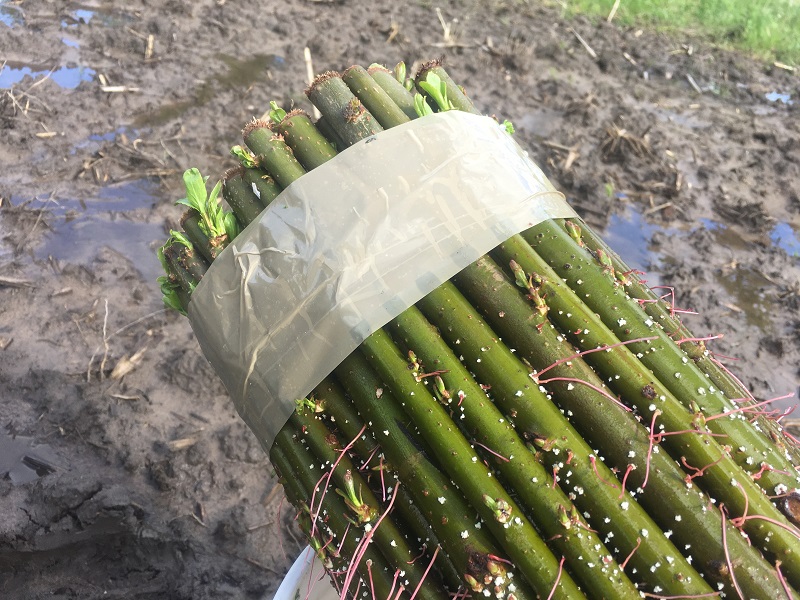
 June 9th update. Growth after 2 weeks.
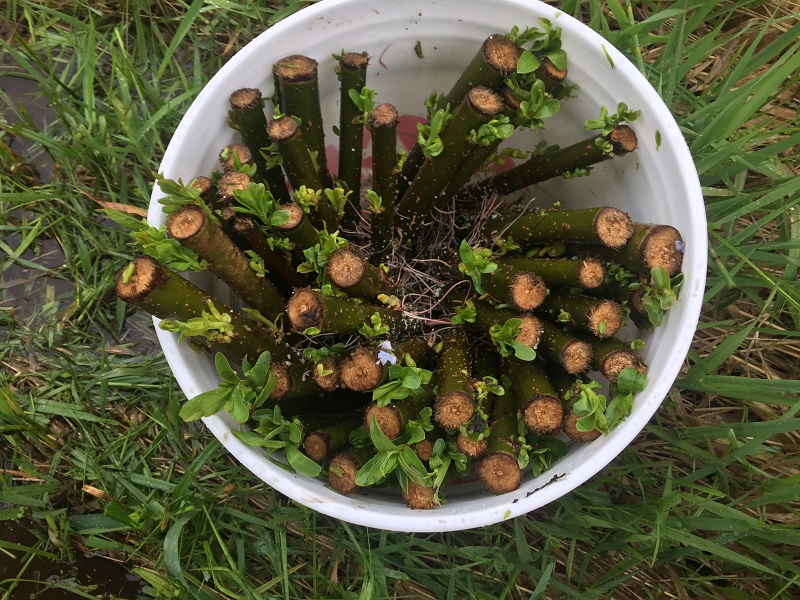
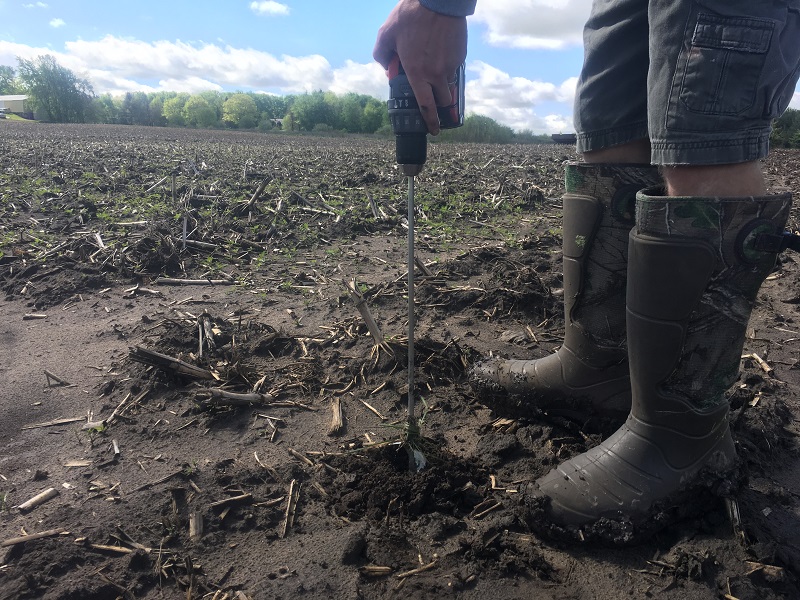 July 20th update. Multiple stems about 3 feet tall.March 21, 2018 update: They survived the first WI winter and starting to bud. Most of them have multiple stems and stand about 4 feet tall. We planted the hybrid willows on the outer edge of the screen to create a fast and more immediate screen, while the spruce trees grow up and create an evergreen screen for the future. Tallest tree is about 6 feet tall.