Several methods are available to estimate the weight of a fish. Some use length as well as girth measurements. Weight also can be estimated using only length measurements based on relationship between length and weight. Length-weight equations can be developed for specific waters, regions (e.g., states), or for a particular species.
Formulas containing length as well as girth are often most accurate for estimating weight, because the fatness or plumpness of the fish is accounted for. If only length is available, the most accurate weights often are estimated from length-weight relationships for specific waters or regions. For instance, in some waters fish might be relatively “skinny,” and the weight estimate might be overinflated if based on a formula created from data on a water body where fish are “fat” or even “normal.” That’s why adding girth to the formula can help with accuracy. Formula’s containing girth, however, also may not be as accurate as we’d like, because of inherent differences in the shape of fish and finding the right adjustment factor (or “shape” factor) to use in the formula. And it’s important to measure girth carefully, and at the fish’s fattest point, as girth estimates affect weight estimates powerfully.
One easy way to estimate fish weight is through the use of standard length-weight formulas. Species-specific formulas, called standard-weight equations, have been developed for dozens of fish species by fishery biologists to describe the standard growth form of a species as a whole. These relationships often are used to assess body condition (the relative weight or plumpness of a fish), which provides an index of a fish’s well-being, such as whether there are forage shortages or surpluses, and can sometimes reflect fish growth rate.
These standard length-weight formulas are often developed using thousands of fish from hundreds of populations across the range of a species, so they describe the “general” growth form of that species. For instance, the equation for black crappie was developed using over 20,000 fish across a range of sizes from 175 populations across the geographic range of black crappie.
*An important thing to keep in mind is that these standard length-weight formulas describe fish in “above-average” condition. In fact, the weights in the tables represent the 75th-percentile in the samples for that particular length, and are not average weights. In other words, if you lined up 100 random bass of the same length in order of weight, and those bass were a good representation of the range of weights for that length, the weight provided in the table would be for the 75th heaviest fish. While it might have made more sense to use the median weight for these formulas, fishery biologists decided to go with the 75th percentile so that the standard weight at a given length was an above-average or “ideal” target to shoot for in terms of body condition. So, if your fish appears plump and healthy, the weights from the table should be relatively close. If your fish is skinny to average, it will weigh less, and if very plump and remarkably “fat” it will weigh more. Just make an adjustment. No formula is 100-percent accurate, but if you have only length and not girth, this should help get you in the ballpark. Your state fishery agency may have standard weight tables based on regional data posted on their website. These formulas use total length of the fish, measured from the tip of the snout to the tip of the tail fin when compressed.
The military widely employs walkie-talkies, as seen in numerous action movies. It depicts an essential item or tool for all troops. In real life, walkie-talkies are extremely useful for communication during the war. In the old days, the military made two-way radios for soldiers in infantry squads to keep them in touch with their leaders. They made the radios from backpack radios that soldiers in the units carried. Likewise, people who use walkie-talkies, also called handheld transceivers (HT), can take them around.
Although walkie-talkies lack the range and flexibility of cell phones, they are handier to use during particular tasks. It is because it’s simple to use. For example, a radio set in within the range of the other will always be available. In this article, let’s look at the top tactical walkie-talkies available. But, first, find some of their leading characteristics to see how they rank in our military groups.
#5 Arcshell Rechargeable Long Range Two-Way Radios
How to Choose the best Walkie Talkie
Maintaining contact with others is critical, especially if you’re researching survival options or relocating. The best military-grade walkie-talkie makes communication with your team simple. In addition, because walkie-talkies are generally helpful, they can bring them with them at any time. As a result, before purchasing a walkie-talkie, it is critical to understand the essential features. As a result, consider the following factors when selecting a radio for your team.
Frequency
Understanding the distinctions between VHF and UHF two-way radio will help you decide which is best for you and the team. The FCC regulates the operating frequencies of all wireless communication devices, including two-way radios and cell phones. As a result, knowing what radio frequency your team requires is critical.
In addition, keep in mind that VHF waves are longer. As a result, a VHF-enabled two-way radio can cover greater distances while using less power. The popular UHF-enabled two-way radio, on the other hand, can penetrate obstructions in indoor environments due to its shorter wavelength.
Durability
Another factor to consider is the product’s durability. Of course, a durable walkie-talkie is essential, even for indoor use. However, if one intends to use a walkie-talkie primarily outside, ruggedized devices, unlike regular walkie-talkies, can usually withstand environmental variables such as extreme temperatures and the elements.
Battery life
The battery is crucial for this kind of device. Many two-way radios incorporate helpful AA or AAA batteries and accept disposable alkaline batteries or rechargeable nickel-metal hydride (NiMH) batteries. At the same time, some batteries are rechargeable in packs. Unfortunately, the bigger the radio’s power output, the faster it will drain your batteries.
Emergency Alert Feature
Emergencies are the scariest moments you will face, and knowing you have no one by your side is even more frightening. As a result, having a robust tactical radio can put your mind at ease. A long-distance walkie-talkie system with sound alarms, such as a weather band and emergency lighting, would benefit. Every emergency necessitates the use of a dependable communication device. If you have the best emergency two-way radio in your bag, it will save you many worries and prepare you for any severe crisis.
Channels
Channels are one of the most important factors to consider when deciding on the best long-distance walkie-talkie. A military walkie-talkie, for example, may have single or multiple channels. Switching channels allows you to avoid static and other interruptions, so having a multi-channel product is usually the best option. On the other hand, dealing with only one channel is frequently inefficient. So, it is always better to check this important feature before buying.
Price
The price of walkie-talkies can vary significantly, so it’s usually a good idea to shop around. However, it is always better to research through an online market or check out reviews from reliable resources before visiting some retail shops. Shopping at three or four different stores before committing to a purchase is usually the best way to find the perfect goods. Additionally, comparing and contrasting the features and costs of many goods will always result in the best military walkie-talkie at the lowest price.
Why should I use a Tactical Walkie Talkie?
Using a tactical walkie-talkie is robust and more reliable. One can depend on its features suitable for heavy day work. It must have the ability to use for an extended time without worries. Walkie-talkies can also save a life in an emergency crisis. Even if you are using it personally at home, it will benefit you and your family.
Further, communication equipment has undergone numerous developments which provide significant outcomes. For example, people used to communicate with pagers and professional walkie-talkies before the days of tweeting and texting.
Long-range Walkie-Talkies have become a necessity for industries due to changing consumer needs and households. In addition, the use of smartphones and cell phones grew because of the inconvenient licensing radio norms that used to come with walkie-talkies. However, today you can use many decent and solid walkie-talkies without a license.
Lastly, you will be able to communicate with multiple groups of individuals simultaneously as a result of this. Similarly, if you utilize a walkie-talkie in a challenging working environment, you should consider purchasing a waterproof walkie-talkie.
Conclusion – The 5 best Tactical Walkie-Talkies
When determining which walkie-talkie to buy, this is one of the most critical factors. For example, suppose you require a walkie-talkie for military people. In that case, you’ll most likely need a more robust and professional cellphone with longer battery life and range and a more significant number of channels. Because determining the number of users, nature, and location are also important. Many radios can provide great aesthetics but not enough to provide excellent service, especially during emergencies.
The five tactical walkie-talkies discussed in this article are dependable in many situations. Depending on the team size and industry, you may pick one of these best tactical radios. It may be better to choose the Arcshell Rechargeable Long Range Two-Way Radios, aside from it comes with six per pack. They are well-made, light, and have an excellent range while maintaining crystal-clear broadcast and receive. They must be really durable to use and for longevity.
We asked a firearms expert with over thirty years of experience to pick the top five semiautomatic pistols. Yes, here we go again with another Top 5 gun list. Having previously done one on the Top 5 9mm Pistols, 5 Best Sig Sauer Guns, 5 Best CCW Guns, and plenty more.
Now it’s time to get to one of the most popular gun debates out there. We’re going to talk about what I consider to be the five best Semiautomatic Pistols regardless of size, brand, or specific caliber.
M1911/M1911-A1 .45 ACP
Okay, y’all know this one had to make the list. Besides belonging on this Top 5 List, it’s also one of the three most enduring inventions of the legendary gunmaker John Moses Browning. After passing a 6,000 round torture test, it became the first semiautomatic pistol to be adopted by the U.S. Armed Forces as well as the most powerful sidearm to ever become standard issue to a nation’s military.
It served faithfully in that role for nearly 75 years, and even though the M1911 was officially replaced in that role by the next gun on the list, it remains wildly popular with gun enthusiasts to this day, more than 100 years since its invention. And it’s one of my sentimental favorites as well; my very first firearms purchase was a Springfield Armory M1911-A1, and I’m quite fond of both my Springfield Mil-Spec and my genuine WWI-vintage Colt.
Beretta 92FS/M9 9mm
As previously indicated, this was the gun that had the daunting task that of succeeding the M1911 as the official sidearm of the U.S. military, and in 1984 the Beretta 92F/M9 did precisely that, in turn fulfilling the role for 33 years — saw combat in Panama, Iraq, and Afghanistan along the way — before giving way to the SIG M17. This pistol gained further credibility after being adopted by LAPD and the L.A. Sheriff’s Department as well as numerous other domestic law enforcement agencies. In retrospect, that’s not surprising in light of the fact that Beretta is the world’s oldest industrial firm of any kind, dating back to 1526, so you gotta figure they know what they’re doing.
What’s more, two renowned firearms industry experts who are both known as hardcore M1911 aficionados, Ken Hackathorn and gunsmith Bill Wilson, have gone on record lavishing praise on the Beretta, with the former deeming it “the most reliable handgun I ever used” and the latter stating that “I shoot it just as well as the 1911.”
From a personal standpoint, as I’ve written several times before, the Beretta 92 was the very first pistol I fell in love with – strictly platonically speaking of course – back at the tender age of 14.
Browning Hi-Power P-35 9mm
Another one of John Browning’s top three most enduring inventions (the third being the M2 “Ma Deuce” .50 caliber machine gun). Though alas, Mr. Browning passed away in 1926 before this particular project was perfected, so the proverbial torch was passed on to Belgian gun designer Monsieur Dieudonné Saive, who saw the pistol through to completion in 1935, hence the P-35 designation. With its 13 + 1 standard ammo capacity, the BHP was the first of the “Wondernines,” i.e. high-capacity double-stack 9mm autoloaders; indeed, the “Hi-Power” designation refers to the ammunition capacity and not the ballistic power of the caliber in which the pistol was chambered.
The “Grande Puissance” spent several decades as the most widely used military, police, and counterterrorist pistol in the world, with its list of users including the elite British Special Air Service (SAS) and the FBI Hostage Rescue Team (HRT). That’s credentials!
I purchased my own 1967 vintage BHP as a birthday present to myself back in 2007. With roughly 4,000 rounds through it, it’s been a fine shooter.
Glock 17 9mm
Here we go again. The most reliable and durable handgun ever made: a service life in excess of 250,000 rounds; going 10,000 jam-free rounds without a cleaning; Tenifer finish that’s more rust-resistant than stainless steel; continuing to function after being dropped out of a helicopter at an altitude of 400 feet; working after being frozen in a solid block of ice, etc. The pistol that, upon its debut in 1982, established the credibility of polymer-framed and striker-fired pistols and paved the way for their eventual dominance of the U.S. private citizen and law enforcement market.
My own Glock 17 has given me superb performance over the course of 19 years and 20,000 rounds. ‘Nuff said.
Ruger Standard .22 LR
Hey, I had to include at least one rimfire pistol on the list for the sake of “equal time,” right?
The Ruger Standard is to .22 Long Rifle (LR) rimfire semiauto pistols what the M1911 and Browning Hi-Power 9mm are to centerfire semiautomatic combat handguns, i.e. the gold standard against which all competing makes & models must be judged. Back in 1949, this pistol launched the careers of the late great Bill Ruger (1916-2002) and Alex Sturm (1923-1951) and their eponymous Sturm, Ruger & Co, which is now one of the giants of the American firearms industry.
Like the 1911 and BHP, M1911 and the BHP, the Ruger .22 autopistol has proven itself highly adaptable through the decades, spawning many variants and lending itself to a myriad of customizations.
And this gun hasn’t served as a mere plinker and paper-puncher either: suppressed (“silenced”) editions of the pistol were actually used by U.S. Army Special Forces AKA “Green Berets” for stealthy kills against Viet Cong and North Vietnamese Army (NVA) sentries during the Vietnam War.
Shockingly, this is the only pistol on the list which I don’t own! That said, I recently did a live-fire range review of the current and most refined variant, the Ruger Mk IV, and found it to be a very pleasant experience.
Hit Or Miss?
Okay, agree or disagree? For any fans of SIG Sauer pistols, Smith & Wesson auto pistols, the CZ-75 (that one just barely missed the cut, to be honest), Heckler & Koch (HK), Walther, etc. go ahead and unleash your rage at us in the Comments section.
Bonus: Glock Gun Photo Essay
MORE: The F-35 Now Comes in Beast Mode
MORE: Why the U.S. Navy Tried to Sink Their Own Aircraft Carrier
Expert Author Biography: Christian D. Orr has 33 years of shooting experience, starting at the tender age of 14. His marksmanship accomplishments include: the Air Force Small Arms Ribbon w/one device (for M16A2 rifle and M9 pistol); Pistol Expert Ratings from U.S. Customs & Border Protection (CBP), Immigration & Customs Enforcement (ICE), and the Federal Law Enforcement Training Center (FLETC) Criminal Investigator Training Program (CITP); multiple medals and trophies via the Glock Sport Shooting Foundation (GSSF) and the Nevada Police & Fires Games (NPAF). Chris has been an NRA Certified Basic Pistol Instructor since 2011. In his spare time, he enjoys (besides shooting, obviously) dining out, cigars, Irish and British pubs, travel, USC Trojans college football, and Washington DC professional sports.
Humminbird’s MEGA Live Imaging TargetLock has created a buzz at ICAST 2022 in Orlando. (Photo courtesy of Humminbird)
Note: Check back for updates from ICAST 2022, scheduled July 20-22 in Orlando.
The annual ICAST Show in Orlando is a coming-out party for the best new fishing accessories each year, from gaffs and coolers to sunglasses and apparel.
Some are truly new, some may be a “new” update of a previous model. Whatever the case for the products introduced each year, anglers and industry folks love seeing them. You’ll see these cool new products on store shelves and websites now or in the coming months.
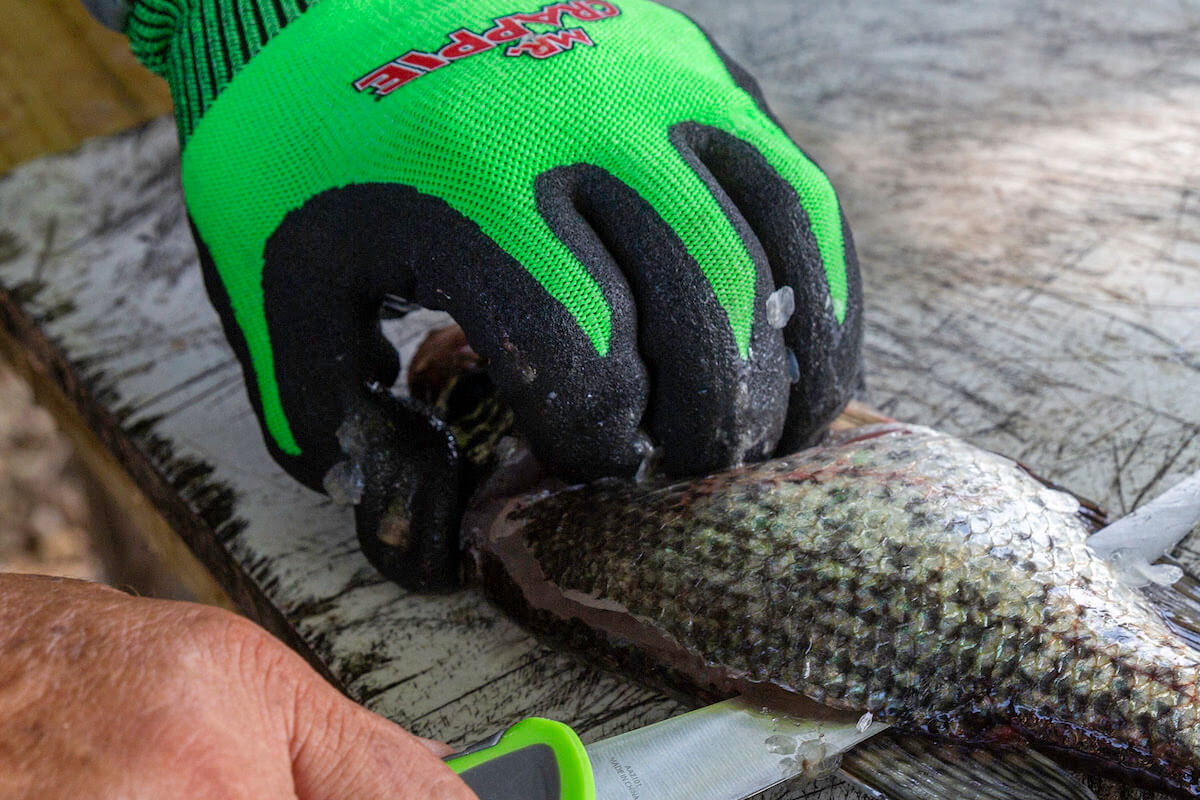
Cleaning fish is a chore, whether it’s a mess of catfish and crappie or offshore saltwater bigs such as cobia and snapper. Good gloves help the task. The new Mr. Crappie Slab Slanger Cut-Resistant gloves from Smith’s and Wally Marshall have been designed to handle any fish and processing work. The non-slip gloves are manufactured from food-grade high-performance polyethylene, which is four times stronger than leather and provides Cut Level 5 protection. The gloves are machine and hand-washable, shrink-resistant and breathable. Info: smithsproducts.com
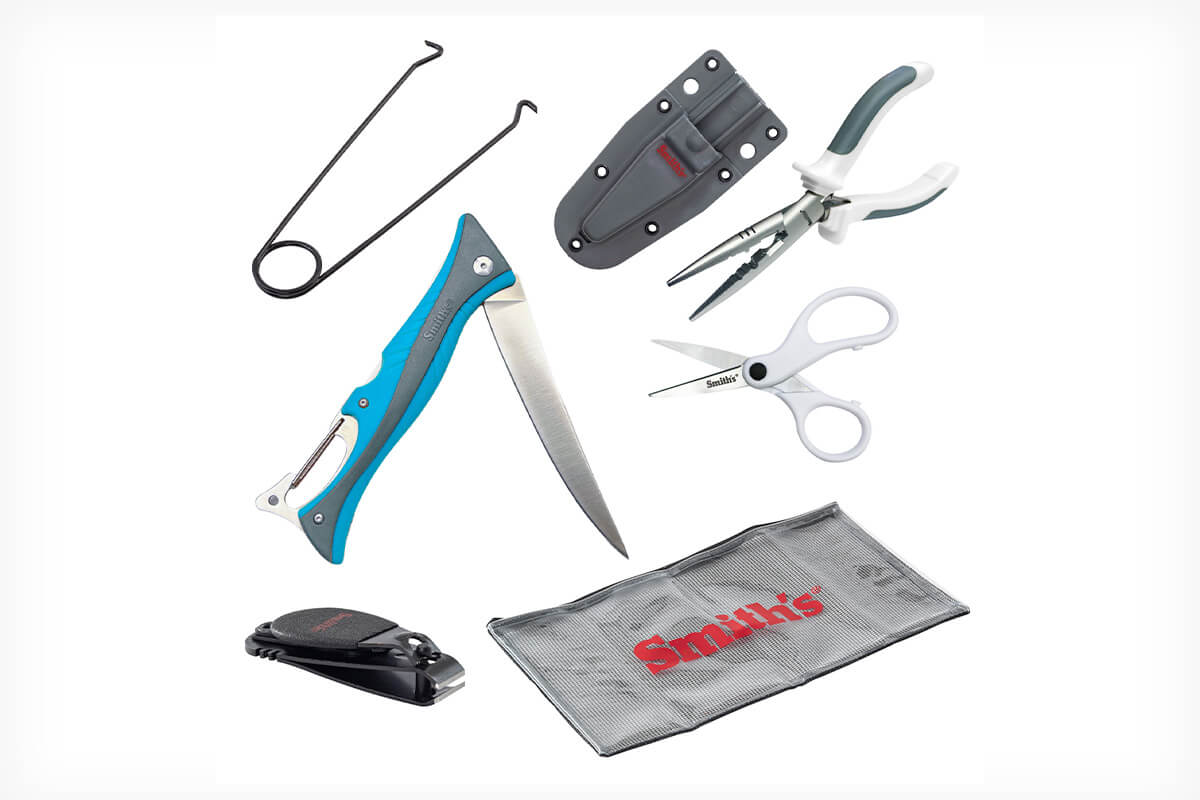
Smith’s Regal River Ice Fishing Tool Kit
Smith’s Regal River Ice Fishing Tool Kit
Ice fishing anglers need tough tools such as the seven essentials in the Smith’s Regal River Ice Fishing Tool Kit. When you’re going after pike and walleye on hardwater, you can’t afford to have mistakes. The new Smith’s tool kit includes a 9-inch jaw spreader, 6.5-inch stainless steel pliers and line scissor combo (with sheath and belt hook), line clipper, 4-inch folding flex fillet knife and a marine grade mesh tool bag. Info: smithsproducts.com
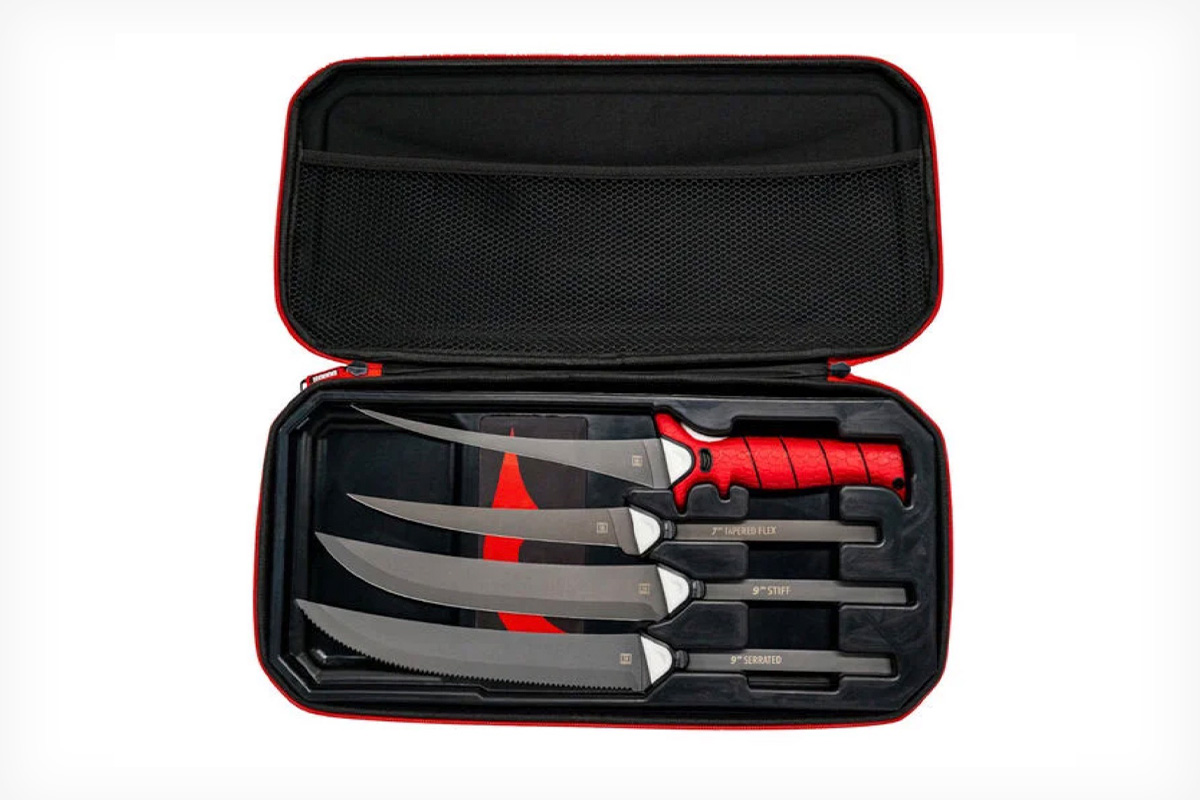
Bubba Multi-Flex Interchangeable Set
Bubba Multi-Flex Interchangeable Set
Bubba’s new Multi-Flex Interchangeable knife set features 9-inch serrated and stiff full-tang blades for whatever fish you need to process. The “squeeze and slide” mechanism allows for switching blades easily and also allows for better cleanup. The Flex-Change locking system keeps the blade safe and secure, and a non-slip grip handle offers a consistent feel. With versions for freshwater and saltwater, the set comes in a premium hard-sided carry case with a watertight seal, quick access handle and blade storage, and a flexible organizer for added storage. Info: bubba.com
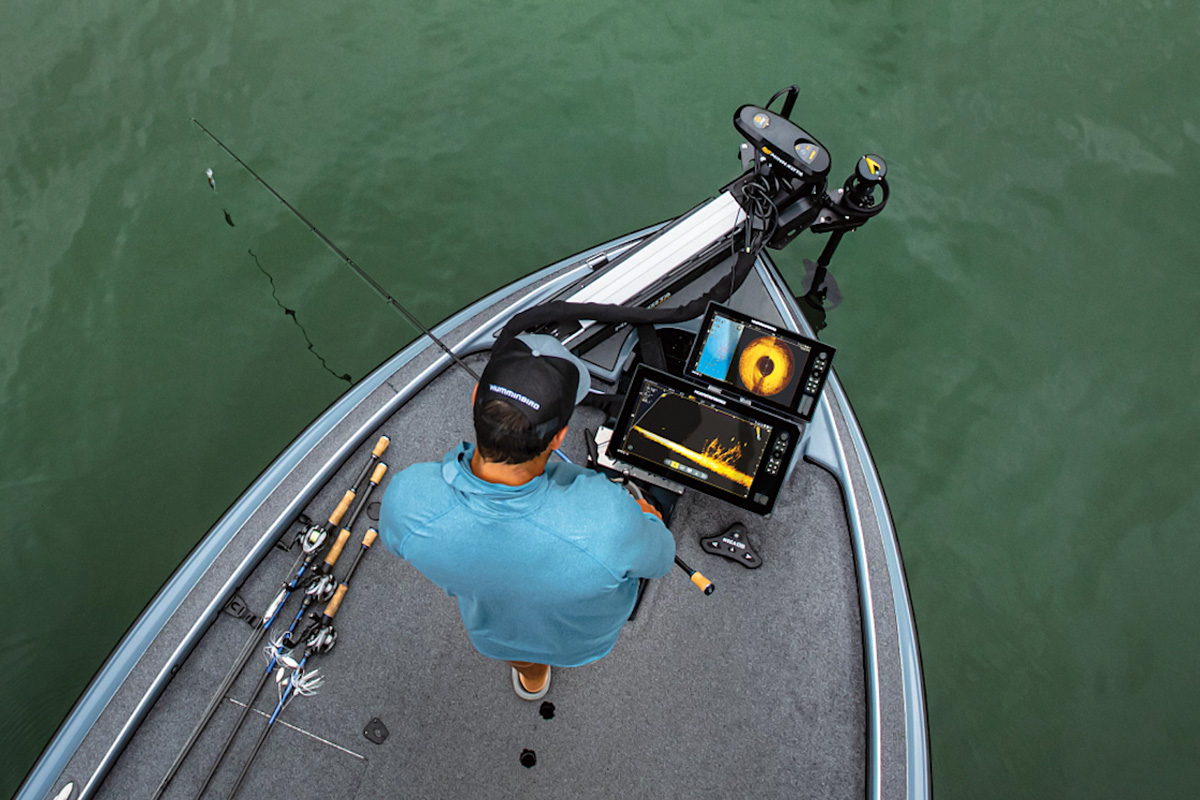
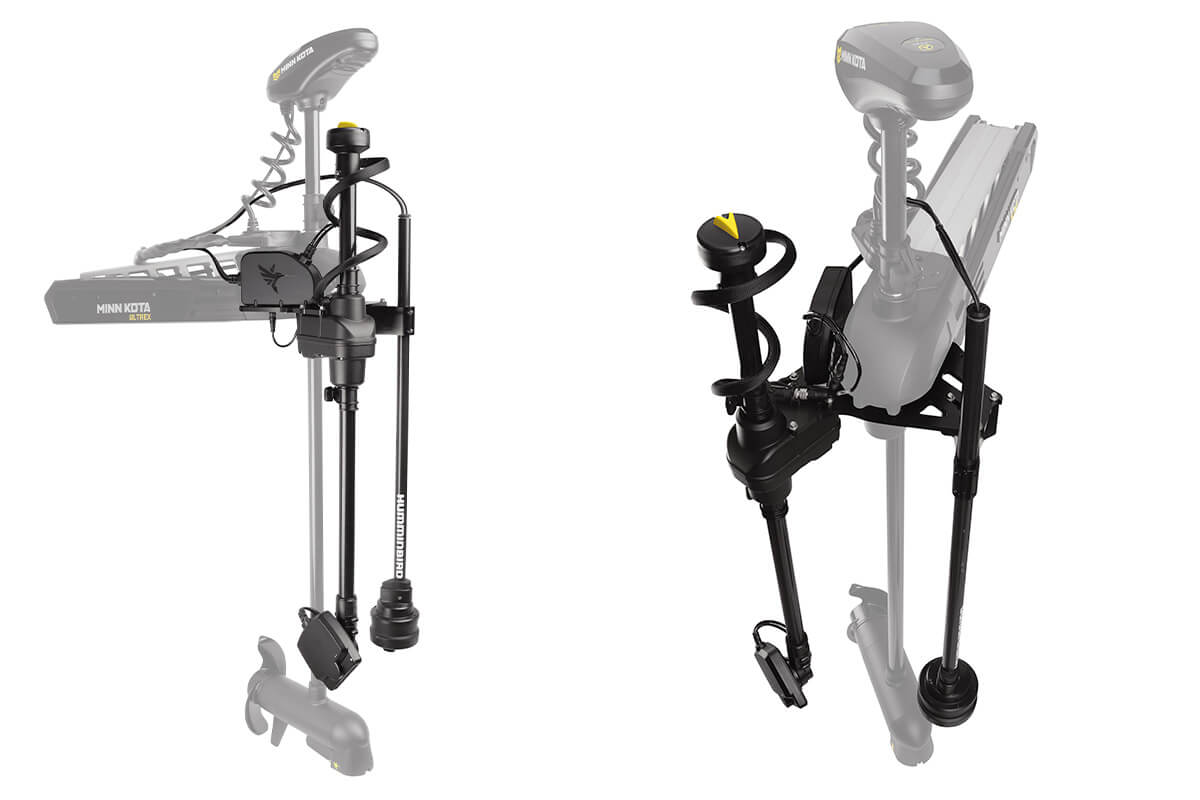
Humminbird Mega Live Imaging TargetLock
Humminbird Mega Live Imaging TargetLock
No doubt, anglers have wondered if it would be possible to combine Live Imaging with TargetLock, giving them the ability fish more easily. capability? Humminbird has done that with the new Mega Live Imaging TargetLock. This new live sonar accessory provides anglers with the ability to control a Mega Live transducer independently of their Ultrex trolling motor’s steering. This gives anglers the power of Spot-Lock and boat control with their Ultrex motor, while introducing live sonar innovations exclusive to Mega Live TargetLock and Minn Kota Ultrex users. With the push of a button, the TargetLock feature locks the Mega Live onto structure and keeps it in clear view by automatically adjusting the Mega Live transducer as the boat moves position and changes direction. Whether the boat is moving, drifting, or Spot Lock is engaged, TargetLock does all the work to stay focused on structure and fish. Info: humminbird.com
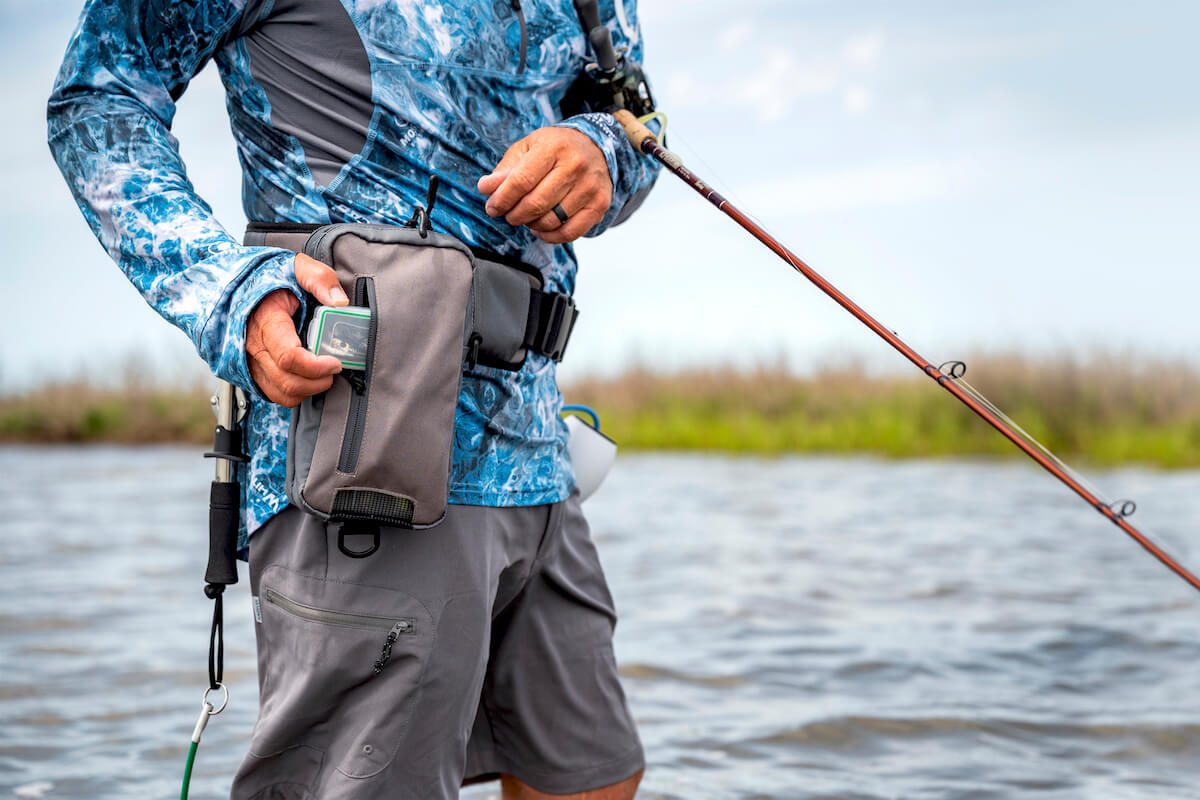
Frogg Toggs Coastal Wading Packs
Frogg Toggs Coastal Wading Packs
Frogg Toggs is introducing a series of coastal wading tackle packs that will work for inshore anglers as well as those wading freshwater streams for bass and panfish. The Coastal Wading Tackle Pack series is designed with high quality, functionality and portability in mind. Items in the series include the Tidal Sling with Waterproof Utility Box, Pursuit Wade Belt, Hightide Chest Pouch, Catchall Chest Pack, and Flats Sling Pack. Info: froggtoggs.com
Plano Edge Frog Box
Plano Edge Frog Box
Storing frogs always has been tricky for anglers. The baits get smooshed, rubber legs twisted, other additions such as blades maybe tangled. The new Plano Edge Frog Box eliminates that problem thanks to a cool design that vertically stores 50 baits by the line tie. Each bait has a hook; no more snags or tangles. The box also includes a WaterWick divider with a reusable moisture-wicking packet, a Dri-Loc O-ring seal and Rustrictor technology. An EZ Label system allows for quick identification of contents, and the DuraView crystal-clear polycarbonate lid shows what is inside. Info: planomolding.com
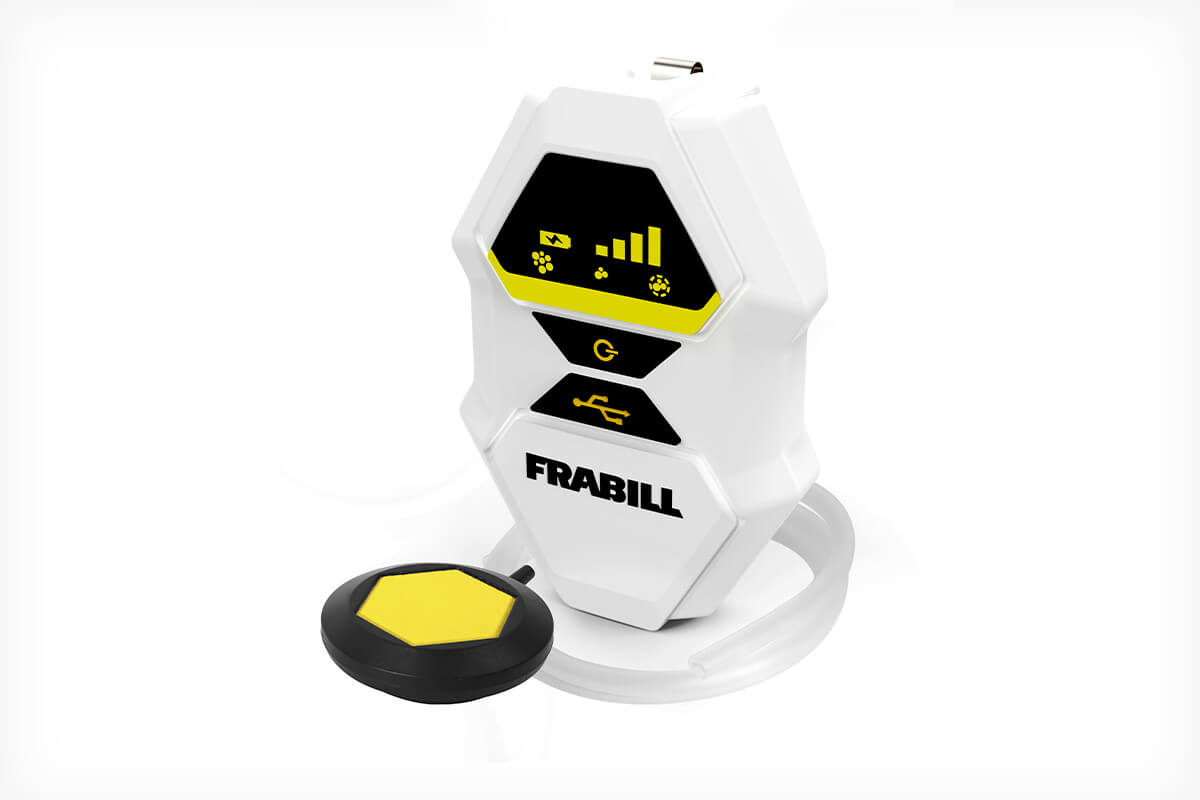
Frabill ReCharge Deluxe Aerator
Frabill ReCharge Deluxe Aerator
The Frabill ReCharge Deluxe Aerator is a mobile livewell aeration system with an induction motor that provides long use to keep bait lively. Outfitted with a rechargeable lithium battery, the ReCharge Deluxe Aerator can be conveniently recharged with the included 10V adaptor or through a USB cable. A water-resistant gasket designed with an anti-back flow check valve keeps water out and bait alive longer. The universal hang-on clip with stability posts allows anglers to bring it on fly-in trips, shore fishing, or on any boat. Now a bucket or nearly any waterproof container can become a viable minnow bucket. Info: frabill.com
Magma Crossover Series
Magma Crossover Series
Cook pizza, hibachi or whatever you’re craving on your next adventure with Magma’s new Crossover Series. This portable cooking system quickly transforms from stove into a grill, pizza oven and griddle via interchangeable tops. The Magma is made with high-end stainless steel for ultimate durability. The Magma versatile cooker is perfect for RVing, tailgating, car camping and overlanding. It also is available in marine versions with corrosion-free stainless steel. Info: magmaproducts.com
Bajio Roca Sunglasses
Bajio Roca Sunglasses
For the last few months I’ve been wearing the new Bajio Roca sunglasses in a variety of situations: on the lake fishing, at the golf course, around town. They’re lightweight, thanks to the bio-based nylon construction. Frames are comfortable but tight; I’ve experienced no nose-slipping even in sweaty conditions. One thing I love about them is the oversized frame that protects my eyes while preventing peripheral light and glare intrusion. Polarized lenses are crisp and clear; I’ve easily spotted bass and bluegill on beds in shady conditions or bright light shallow and deep. Smallmouth bass were easy to spot on beds on the Niagara River. The lenses also have Bajio’s blue light-blocking tech to minimize eye fatigue and strain. Bajio hit the scene with a splash in 2020 and continues to grow its mission-based company each year. The new Roca, which is named for the Roca Flat near Campeche, Mexico, is a great addition to the lineup. Info: bajiosunglasses.com
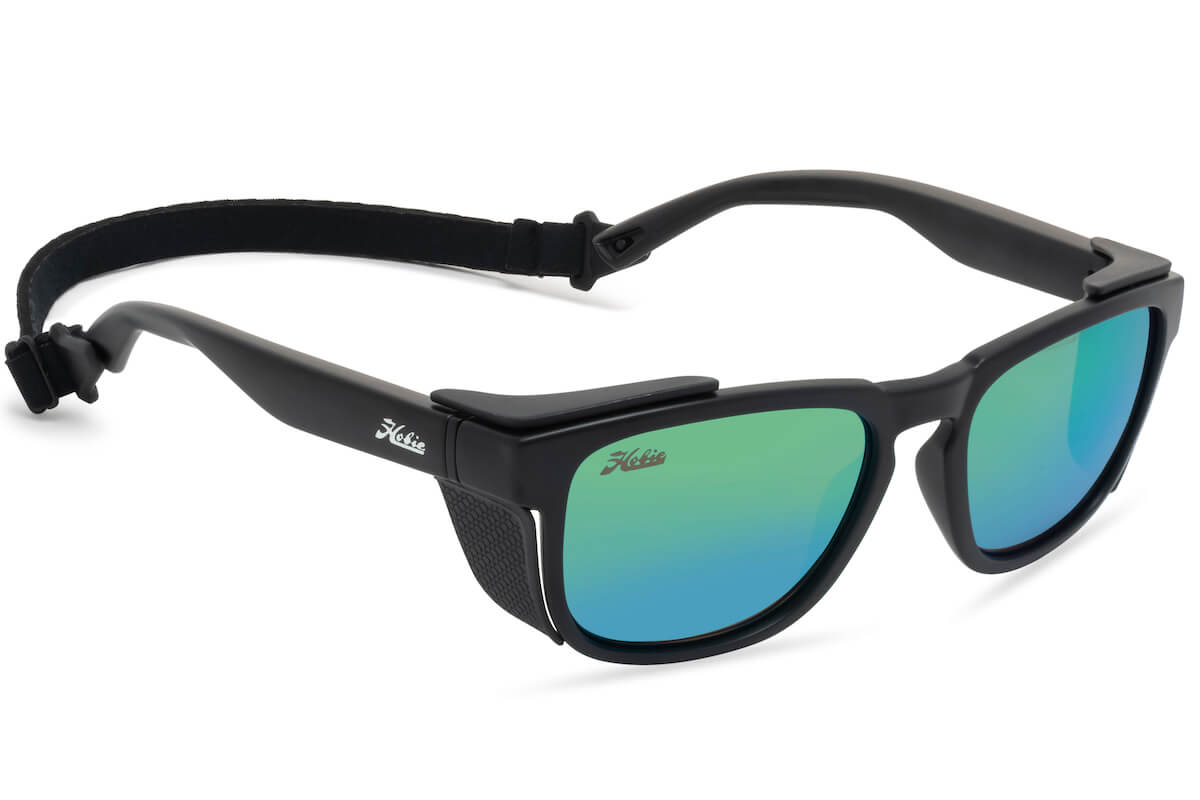
Hobie Monarch Float Sunglasses
Hobie Monarch Float Sunglasses
Hobie’s new Monarch Float sunglasses have two interesting features: they’re lightweight, which is a good thing for anyone wearing them, and they float. That’s also a good thing for anglers who sometimes, well, slip up and let their glasses fly off a deck, gunwale or their head. Hey, things happen. Quality lenses in four shades allow you to peer through water to find cover and fish; removable side shields and an adjustable neoprene retainer offer more comfort while blocking peripheral light and glare. Info: hobieeyewear.com
Ocean Waves Greenhorn Illuminator
Ocean Waves Greenhorn Illuminator Sunglasses
Ocean Waves Luminator lenses excel when fishing in low light or murky water. The glasses have two layers of Japanese Crown Glass, mirror-between-the-glass technology that prevents the mirror from getting scratched, polarization that blocks 100% of UV-A and UV-B radiation, and a resilient anti-reflective coating that absorbs glare and bounce-back of UV light. Luminator lenses give anglers additional advantages by brightening the entire visual field – perfect when fishing early or late in the day, under a cloudy sky or shady trees – while eliminating halos and unnatural light refraction. The Greenhorn frame combines a classic look with excellent eye coverage and a comfortable, secure fit. Available in either black or tortoise for men and women. Info: oceanwaves.com
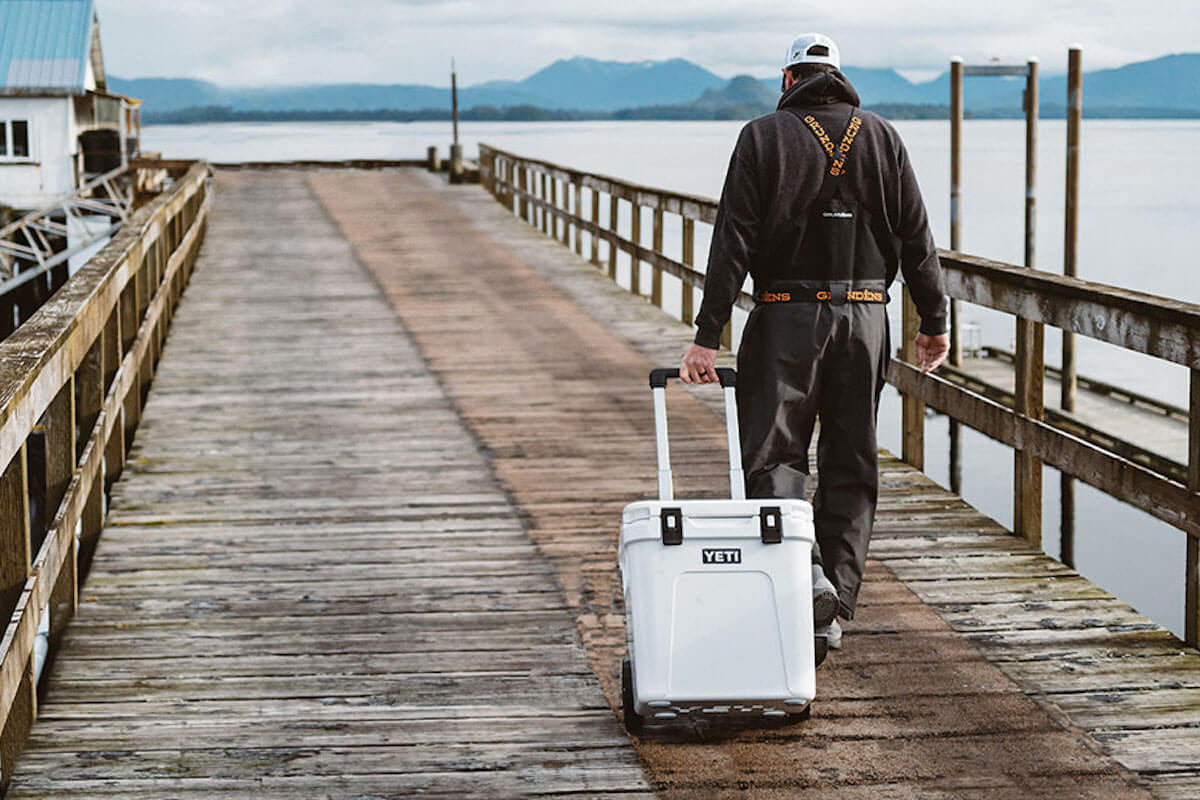
Yeti Roadie 48, 60 Wheeled Coolers
Yeti Roadie Wheeled Coolers
Two new coolers from Yeti — the Roadie 48 Wheeled Cooler and Roadie 60 Wheeled Cooler — are maneuverable and durable. They’re built for your favorite trips: fishing, tailgating, hunting or wherever you need a solid cooler to keep things cold. Wheels and handles are built to last, and the coolers are designed to keep ice frozen and items cold for days. Info: yeti.com
Smith’s 60-Inch Insulated Cooler Bag
Smith’s 60-Inch Insulated Cooler Bag
Bait? Check. Fish after the day is over? Check. Sodas and brews for on the water, at the dock or around the campfire? Check. Smith’s new 60-inch Insulated Cooler Bag is designed for long-lasting hard use. I got to see this bag in action back in May at Kentucky Lake and it’s a champ. The bag has a non-corrosive zipper with pulls. It’s made from marine-grade tarpaulin inside and out, with a half-inch of dense, closed-cell insulation between. An adjustable, padded shoulder strap makes loading and carrying a breeze. Four heavy-duty grab handles – including two center padded handles and two large end handles – allow for a four-person carry when the bag is fully loaded. One uber-cool feature is the integrated drain port. Another is the sit-flat bottom that keeps the bag upright, even when loaded. It has a capacity of 205 quarts. Info: smithsproducts.com
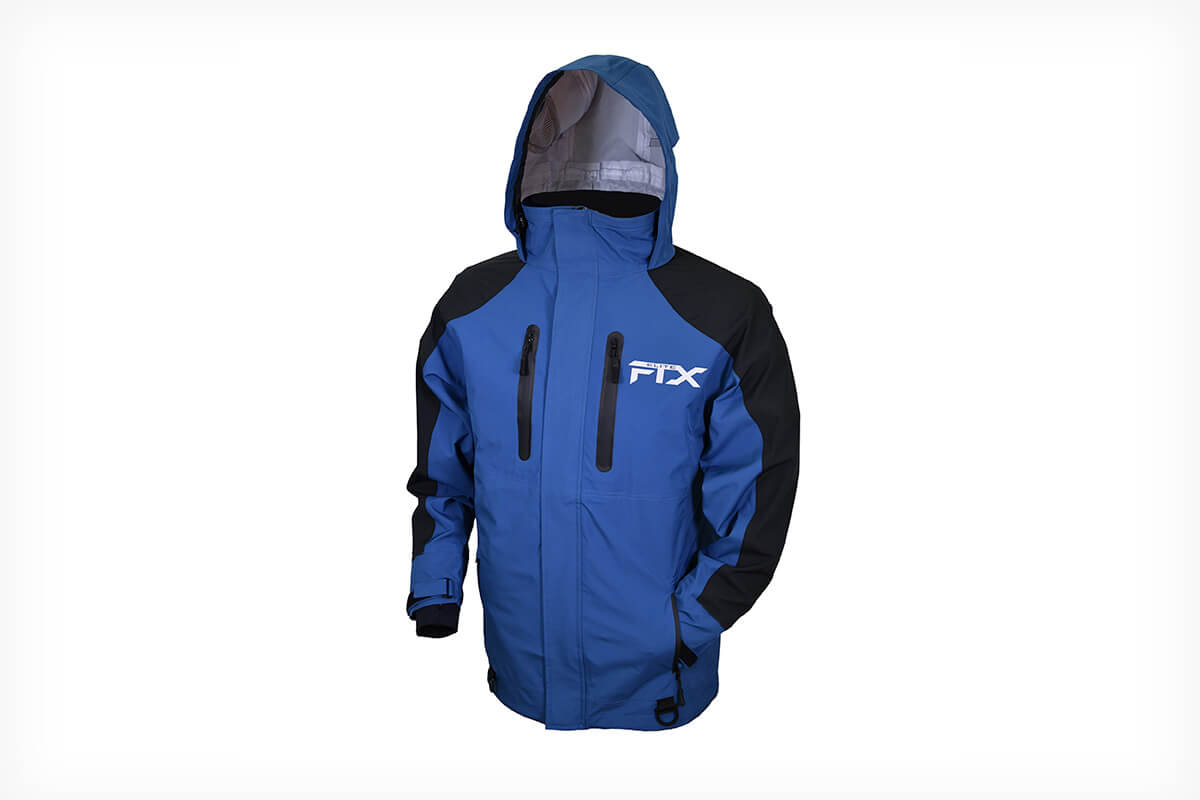
Frogg Toggs FTX Elite Lite
Frogg Toggs FTX Elite Lite
Frogg Toggs is following its successful launch last year of its FTX Armor line with the new FTX Elite jacket and bibs, and the FTX Lite jacket and pants. The FTX Elite jacket and bibs feature the highest water hold-out in the Frogg Toggs line, along with an innovative wrist gasket and closure system, fully sealed and reinforced seams, two-way zipper with storm flap, vented hood and more. It’s available in sizes SM-3X. The FTX Lite jacket and pant combo is light, packable, portable and comfortable. It has similar features of the Elite line, but is more affordable. Info: froggtoggs.com
AFTCO Cocoboardies
AFTCO Cocoboardies
Recycling is vogue. Coconut fibers seem to be the rage this year and Aftco is on board with its new Cocoboardie boardshorts. They’re made with Cocotex fabric, a polyester that “is infused with activated charcoal from repurposed coconuts.” The shorts repel water, resist odor and dry quickly, thanks to the lightweight and moisture-wicking 4-way stretch material. They also have a reinforced pliers pocket for keeping tools or other items easily at hand. Info: aftco.com
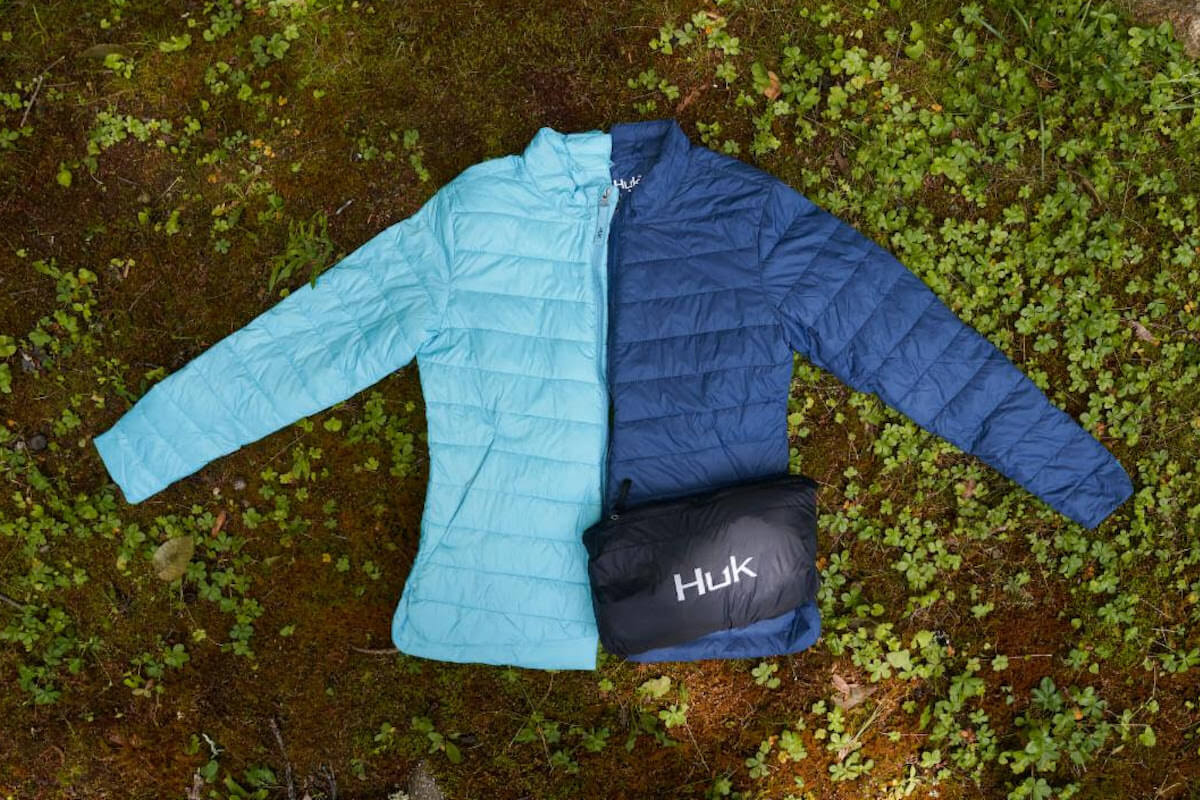
Huk Waypoint Jacket
Huk Waypoint Jacket
The new Huk Waypoint jacket is perfect for cool mornings aboard the boat or brisk evenings around the beach fire, when more than a hoodie is needed. The Waypoint Eco-Smart collection is made from recycled bottles; the Waypoint is at least 60 percent recycled consumer content. The Waypoint jacket adds warmth without weight thanks to its Primaloft ECO black 80-gram insulation. It is packable into its own pocket for storage and convenience. The Waypoint jacket’s shell is water-resistant and features a stretch binding at the cuffs and the hem to provide the right fit and block out cold air. It comes in sizes SM-3XL in five colors. Info: hukgear.com
Huk Women’s Rogue Wave Boots
Huk Women’s Rogue Wave Boots
Huk’s new Rogue Wave boots for women are designed for wet weather, slimy decks, sand, rocks and more. The slip-on boots are constructed of durable neoprene rubber. For positive traction in wet conditions, Huk developed the Grip-X Slice outsole traction pattern that grabs in all directions. Additionally, micro channel openings allow water to escape. The boots have heel and toe reinforced grab loops, breathable mesh liners, a rounded toe and a non-marking outer sole. They’re available in sizes 5-11 (full sizes only) in two colors. Info: hukgear.com
Whether you’re looking for faster target acquisition on your pistol or more range on your turkey gun, red dot sights can increase your efficacy and range.
While red dots vary in size, they seem to largely inhabit three categories: micro, small to mid-size, and large, closed emitters. Each category serves a function, depending on a shooter’s needs, but quality can also determine this as well (a lot of early, cheap red dots were unnecessarily bulky).
The Vortex Venom delicately walks the line between micro and mid-size red dots. While it’s not a micro dot by recent standards (such as the Vortex Defender or Holosun’s line of microdots), the Vortex Venom is an unobtrusive optic for your turkey gun, but it also won’t feel like a brick if you decide to mount it on your pistol.
In short: The Vortex Venom is an affordable and streamlined red dot with a large sight window that makes it ideal for a variety of shooting situations.
This turkey season, I mounted the Vortex Venom on one of my Remington 870s. It comes with a Weaver/Picatinny mount and mounting screws. Sighting in the Venom required a learning curve. I spent several shells before noticing that the red dot wasn’t moving when I adjusted the elevation.
With the shotgun in a rest, I observed the red dot and made a full rotation and back before it finally moved, and I had it dialed in a few shells later. I’ve had zero issues out of it since, but it’s worth noting.
Dot Brightness and Clarity
Vortex offers the Venom in 6 MOA and 3 MOA configurations. With shots inside 40 yards, I’m running the 6 MOA on my turkey gun. Within that distance, you won’t have to worry about it covering up a turkey head, and the dot is plenty bright for low light conditions or extremely sunny days.
The Venom includes two brightness modes, Auto and Manual. Dot brightness in Auto mode adjusts to the ambient lighting conditions and power down after 14 hours of inactivity. You can engage Auto mode by holding the up arrow until the dot flashes three times, while Manual mode engages after the dot flashes twice.
The dot exhibits a small bloom and a significant starburst effect on higher settings, but I didn’t notice any parallax within 100 yards. On lower settings, the Venom produces a bright, crisp dot.
Durability
(Photo/Adam Moore)
I haven’t had any issues with the Venom holding its zero. After running through various target loads and a box of Winchester Longbeard XRs, and burying the Venom in mud to brace a fall, the dot hasn’t moved. Considering that my gun takes a beating throughout turkey season, I’ve been pleased with the lack of adjustments I’ve had to make since the initial sight in.
Where the Vortex Venom Shines
The streamlined design makes the Vortex Venom ideal when you need to shave weight or space. Recessed windage and elevation adjustments mean you don’t have to worry about large dials getting bumped or snagged on brush. The large sight window, which has a blue tint, makes target acquisition (like picking out a turkey head through the timber) a breeze.
For less than $250, this red dot is hard to beat, especially since it’s covered by Vortex’s VIP warranty.
Where the Vortex Venom Can Improve
You can’t feel any clicks when you make adjustments to the windage and elevation, so a clear, tactile response would be nice.
The adjustment mishap I had while sighting in the red dot was a bit unsettling, but I haven’t had any issues with it since. It’s possible an obstruction, like an epoxy, was blocking the housing and eventually broke free once I cranked down on the turret. For what it’s worth, I’ve been running this setup since it happened, and I’ve even checked the zero a couple of times just to be safe.
Vortex Venom Red Dot: Final Thoughts
(Photo/Adam Moore)
The Vortex Venom inhabits that class of red dots that offers intuitive and rugged features at a budget price. Whether you’re chasing turkeys or adding an optic to your bear gun, you should consider the Venom as an affordable and capable option.
As soon as the sun goes down, you’re faced with an unfortunate reality.
For safety’s sake — or simply to remain on the right side of the law, depending on what you’re use case is — you have to stop shooting.
At least, you did, until night vision optics became a practical reality for recreational consumer-level shooters. These systems are cheaper, better, and easier to use than ever before, and they can make a ton of sense under the right circumstances.
The night vision marketplace can be confusing, but with our guide, you’ll be able to wade through the jargon and figure out what purchases make sense for you. Keep in mind, this isn’t meant to be an exhaustive survey of the night vision optic marketplace.
That would take many thousands of words and is probably beyond the need of most shooters. Instead, we’ll look at a few practical setups you might want to run, either for hunting or tactical applications.
This is a question every shooter has to answer for him or herself.
Are you interested in night vision optics for a theoretical tactical advantage? Are you just a shooting enthusiast who wants to experiment with different situations and use cases?
Maybe you’re a hunter who can legally take certain types of game at night. In some places, deprivation permits allow hog hunting after dark — which is an excellent time to catch wild pigs out in the open … see our guide to pig hunting here.
Or perhaps you have a rat infestation and an air gun waiting for some target opportunities in a safe setting — (you have read our 5 Best Air Guns, right?).
Whatever the case, your intended application should determine what kind of night vision optic setup you purchase, and what you’re likely going to need to spend for effective results.
There are too many possible applications to cover optics for every scenario, so we’ll look at different types of night vision technology and specific optics, along with their range of suitable applications, to help you figure out what you’ll need in the field.
What is NVD?
What are people talking about when they discuss night vision optics? There’s a long history that it’s helpful to understand as you go about making a purchasing decision.
Night vision devices, or NVDs, were developed and deployed for military applications as early as World War II. The Germans put a portable unit in the field called the ZG 1229 Vampir, an active infrared device that was mounted on Sturmgewehr 44 rifles and powered by a backpack battery.
Of course, this type of technology was set to completely change warfare, as night fighting is normally a highly risky proposition without adequate intel and illumination. The U.S. developed “zero generation” active infrared devices in parallel with the Germans, and Sniperscope infrared devices also appeared on WWII battlefields on the Allied side.
Development continued through the Korean War and Vietnam, where first generation passive devices, which rely on ambient light instead of an infrared light source, were put into use for the first time. These offered around 1,000 times light amplification levels and had an effective range out to about 100 yards.
Second generation devices used an image intensifier tube with a microchannel plate, which greatly improved night vision performance to about 10,000 times ambient light levels, or out to about 200 yards.
The third generation saw even more technological improvements, resulting in higher image resolution and greater light magnification, anywhere from 30,000 to 50,000 times greater than ambient levels, offering an effective range of about 300 yards and beyond.
There’s a fourth generation of NVDs out there, sort of, though the U.S. Army went back on this classification after issues arose with the technology. But we don’t need to talk too much about this, except in terms of marketing, as the term does pop up around some devices. Suffice it to say, they aren’t necessarily superior.
I could go into the technical aspects of the technology, but for the average shooter, the result is the same: night vision optics were getting better, and were able to perform in much lower light, such as during a moonless night.
White phosphor technology, which produces a white-and-black, high-contrast image based on amplifying ambient light, is also becoming very popular.
However, for many hunters especially, infrared-sensitive optics are the best bet for hunting at night – where their use is legal, of course. Non-scope-mounted monocular units are also popular for finding game at night.
Why Thermal?
Generally, thermal imaging offers far superior capabilities in terms of detecting animals when compared to light amplification devices. Though the resolution isn’t generally as good, IR units are more than adequate for most applications, and when viewing game through an IR unit, they really stand out versus a light amplifying system.
Additionally, thermal imaging technology can be used in complete darkness, and can also be used during daylight for sighting in, whereas light amplification devices aren’t usable during the day and can be damaged if light sources are too bright.
Gen 2 and Gen 3 night vision devices are excellent, however, and can absolutely surpass thermal imaging devices in some applications, especially in terms of target identification and resolution. This is why you need to be very clear about your goals and intended use cases.
Because light amplification devices are highly versatile and offer greater resolution, they excel for navigational applications and in some tactical situations where higher resolution is paramount.
Keep in mind, however, that gen 2 and gen 3 devices will likely be extremely expensive. Most entry-level equipment is going to be gen 1. So we really can’t compare apples-to-apples in terms of image clarity unless we ignore price.
I know I keep saying this, but it’s really important: It really all comes down to your intended application. Instead of dwelling on all of the technical differences, let’s focus on what the average shooter needs to know.
Best Night Vision Scopes
Let’s start by examining a couple of mainstream night vision and infrared units and what you can get out of them to better understand the market.
You’ll likely not be running a goggle-based night vision system for hunting — though some hog hunters trying to clear overwhelmed farmland will run goggles with IR lasers for quick shots, to eradicate pest populations — and you probably won’t need multiple accessories you’d otherwise find useful for tactical applications.
There are a ton of options available in the marketplace, so let’s look at two to get a better idea of what you might want.
1. Firefield NVRS 3×42 Night Vision Riflescope
This gen-1 night vision scope is more of a budget option, but it gets the job done. It’s a little bulky, and it features 3 times magnification, but for less than $300 in most cases, this scope is a good bet for those looking to enter the world of night vision-assisted shooting.
The unit features a titanium body and is thus lightweight, and the unit also includes an IR illuminator built in (as an aside, be sure to check local laws when making purchasing decisions, because, in some states, infrared illumination isn’t allowed for taking game. In some cases, however, passive units that don’t feature IR illumination are allowed).
The Firefield has red crosshairs with adjustable brightness settings and features 20 hours of battery life when the IR is active, reaching 50 hours if IR mode is off. Otherwise, this is a simple unit that is reasonably easy to use but is very careful not to use this scope in daylight. The front lens cover has a pinhole sight you can use to zero your rifle in daylight, but it isn’t especially easy to use.
2. ATN Thor 4 384 2-8x Thermal Scope
While anything in the Thor line-up from ATN is going to be quality, the 2-8x magnification is a common sweet spot for hunting. However, you can get ATN thermal scopes ranging from 1.15x all the way to 40x.
Hunting at night has never been easier than with modern thermal scopes. The ability to clearly see and target game in near zero light is a powerful tool, but it doesn’t come cheap.
ATN has packed in a lot of goodies though, from computer-assisted one-shot-zero to a self-correcting BDC, plus being able to record in 60-fps!
You’ll also have lots of options in terms of sensor model and lenses.
3. ATN X-Sight II HD 3-14x
While the Firefield is a great way to get your toe wet in night vision, sometimes it really helps to get the next rung up from the budget option. In this case that means the ATN X-Sight II HD – and the extra cash really makes a difference.
Sporting a ballistic calculator, recoil activated video, night and day vision, E-barometer, gyroscope, and E-compass – this is the scope that coyotes should fear.
And it comes in at a very reasonable price point.
Best Tactical Night Vision
Tactical setups for night shooting run the gamut, and covering every possible setup for every use case is outside the scope of this article (pun intended).
That said, most shooters will either run a full night vision scope on their rifle, or use some sort of head-mounted goggle NVD system, along with a specialized setup on their rails, with a red dot sight, iron sights, an IR laser, and some combination of illumination options, either for redundancy’s sake, or just out of personal preference.
There are far too many potential options and combinations of equipment, but be aware that as you get deeper into setting up a gun for shooting at night, more advanced IR laser systems and sights can become expensive.
4. Sightmark Ghost Hunter 2×24 Night Vision Monocular
The Ghost is a gen 1 monocular night vision optic with a built-in IR illuminator. It features 2x magnification, automatic shut-off when ambient light is too intense, and polymer construction to keep it lightweight.
This is a small unit, and you can use it as a hand-held, mount it directly on a rifle (with a separate mounting bracket), or integrate it into a goggle system (sold separately, obviously). All are reasonable options, depending on your setup, but from a tactical perspective, I’d guess most would opt for a goggle mount. The Ghost Hunter absolutely would serve on a rifle, though.
At around $240, this isn’t the cheapest monocular night vision setup you can get, but it’s definitely within the ballpark for those seeking entry-level equipment, and it’s versatile to boot. You can spend much more on a gen 2 or 3 unit, but for shooting within closer ranges, the Ghost should suffice.
5. Primary Arms Advanced Micro Dot
This night vision-compatible red dot setup allows for versatility with an IR or night vision scope mounted inline. While this sort of system really isn’t optimal as the primary aiming system for a goggle-mounted night vision setup.
Because of the issues, you’ll have to try to navigate around and focus your optics at distance, all while trying to line up your red dot. In a tactical scenario, this is far from ideal.
That’s why most goggle-mounted night vision setups rely on IR lasers as their primary aiming system, with red dots and iron sights as backups. With that said, the Primary Arms’ red dot system absolutely can serve for various configurations.
It allows for precise zeroing and features over 50,000 hours of battery life on the medium intensity setting. Great for set-ups that you want to leave turned on even when they are stored away in your safe!
This red dot can provide accurate sighting in line with a night vision or IR scope, or act as a redundancy aiming system in conjunction with an IR laser aiming system. It’s built to be rugged, features a long battery life, and has most of the features for a variety of night shooting and tactical applications.
6. Steiner Offset Tactical Aiming Lasers-IR
Most goggle-mounted night vision systems are going to rely on IR lasers to reliably hit targets in the dark. It’s just not practical to try to line up red dots or iron sights down the length of a barrel with goggles strapped to your head.
Again, there are tons of IR laser units available, but the civilian market is generally restricted, both in the U.S. and abroad (so be sure you can legally acquire what you’re looking to purchase), and the units tend to be on the expensive side.
On the cheaper side of high-quality, low-power, civilian-legal IR lasers designed for use with rifles. This unit offers a low profile, light weight construction, and easy functionality for use with a night vision shooting system.
Note that a lot of users report preferring to run this laser with a remote switch to temporarily activate it when ready to shoot. Additionally, some prefer to run it alongside an IR illuminator to help reduce the blooming effect the laser gives off when it hits a target.
This blooming is unavoidable, as the laser light reflects back toward your optic when it hits something, but an IR illumination can help reduce the effect.
Daytime Optic Compatibility
Use caution when paring red dot systems with night vision scopes. Make sure you’re red dot system is compatible with night vision applications because if the red dot is too bright, it’s possible for it to damage your night vision optic.
Lower power settings are available for many red dot systems, but be sure to check with the manufacturer and know how to use your equipment before you make a costly mistake.
Night Vision Enthusiasm
There are a ton of reasons to be excited about night vision shooting setups. For anyone who hunts, the opportunity to track game at night, such as predators and pest species, is a game changer — where it’s legal to use these systems, of course.
For tactical enthusiasts or those interested in self-defense, the ability to safely engage targets at night is revolutionary. It takes some knowledge and understanding, but if you have the funds and the drive to learn, a night vision setup is within your reach!
Hunt with night vision or thermals? Run tactical ops with them? Let us know in the comments! And if you’re looking for some NVGs, take a look at our best Night Vision Googles article!
The link between where you are likely to find a buck’s shed antlers and where you are likely to shoot that buck in the fall is way overrated.
In winter when a buck’s antlers are dropping, his life revolves around finding the best quality food to replenish his body after the peak rut period. Bucks will be worn down from fighting, chasing and breeding does, and the weather. Bucks also will seek the best cover for security and protection. These are the keys to finding where he spends his time.
If you are going to find a buck’s shed antlers, these two main areas are where you should concentrate your efforts.
Winter is a rough time for whitetail bucks. They are run down from the rigors of the rut and they need energy to fight off the cold. Foods high in carbohydrates provide quick energy and can easily be stored as fat. The buck’s stomach tells him what he needs to eat and he seeks it out. Corn and soybeans are buck magnets in the winter for this very reason. Find the right foods and you’ll find where the deer are concentrated.
Windblown Hilltops
When the snow gets deep, food can be hard to find, but the tops of hills provide areas where the snow is blown off and the food is easier to access. This is where the deer will feed. My first set of matching Boone & Crockett sheds were found 200 yards apart; one on top of a windblown hill in soybean stubble and the other in thick cover at the edge of the field.
Related: When do deer shed their antlers?
Thermal Bedding Cover
I divide the bedding areas into two categories, the first is thermal cover and it’s usually the snarliest, nasty thicket within a quarter mile of the food source. This is where the deer bed when the weather is windy, the snow is blowing or it’s overcast. Thermal bedding cover is often in creek bottoms where the deer can get out of the elements.
Solar Bedding Cover
Solar cover is the type of bedding area the deer will use on sunny days. The southern slopes of hills with open canopy of trees provide them with a place they can see in front of them and smell what’s behind them. They will lie in the openings where the sun’s warming rays can hit them.
As the sun moves across the sky they will get up and move out of the shade. The more they move, the more they are likely to drop an antler. South slopes experience earlier snowmelt, allowing the shed hunter a chance to go picking when snow is still covering other areas.
Trail Troubles
The fifth spot seems obvious at first; the deer bed and the deer feed, so look to the trails where these areas connect. But there are high-percentage spots even on the trails. Some of my most consistent shed producers are where the deer leap over a ditch, and where they jump the fences surrounding crop fields. This can be just what it takes to jar a loose antler completely off. Areas with heavy overhanging cover can be hotspots for bone collecting too.
Pay attention to where the deer are spending most of their time in the winter, and spend your time looking in these places. You’ll find more antlers per mile by doing so.
Outdoor enthusiasts often encourage people to “forget the forecast.” It’s a clever way of saying to enjoy the outdoors regardless of the weather. With so many variables at play, waiting for the right conditions would keep many people inside. But does the same logic apply when it comes to bowhunting? That depends. Weather should always be top of mind for bowhunters. It affects animal movement, personal safety and meat spoilage times.
Deciding whether to hunt or not in certain weather is mostly personal preference. However, certain conditions require greater preparation, and at times, a decision to stay inside can be for the best. This preparation is important enough to note that the National Bowhunter Education Foundation has an entire section dedicated to preparing for weather conditions in its bowhunter education curriculum.
Bowhunting in the rain can dramatically change your day in both good and bad ways. Here’s a look at the pros and cons of bowhunting in rainy conditions.
Pros:
Quiet Conditions
My 2021 elk season started out frustrating. Hot, dry conditions made it sound as if I were smashing a bag full of chips with every step on the forest floor. The crunchy ground made it impossible to do anything but sit patiently and hope an elk walked by. But then it rained. Wet weather changed everything. The rain drenched the grass, leaves and pine needles, making it possible to sneak silently through the forest. The morning after the wet weather moved in, I snuck up on two bulls fighting in the trees, an encounter that would have been impossible the previous day.
Concealed Movement
Rain helps conceal movement because it creates movement. As raindrops fall, they move branches and leaves, which can be just enough to mask your movements, including drawing your bow.
Scent Killer
The smell of fresh rain is so powerful that you’ll find it replicated in scented candles and home air fresheners. But rain isn’t just an odor; it’s an odor-killer. Rain helps mask human scent. It can wash away scent trails and make it more difficult for deer to detect human presence.
Changing Wildlife Movement
Bowhunters targeting ungulates like elk and deer typically expect the majority of animal movement to occur during the early morning hours and just before dark. That’s when animals are most active feeding and moving. However, weather patterns can change traditional movement. Light rain doesn’t typically cause animals to run for cover. Heavy rains will usually make wildlife hunker down. However, after a downpour, many animals will be up and moving, looking for food. And I’ve had some incredible rainy days in the field when the animals seemed to be moving all day long.
Less Human Pressure
Remember the advice, “forget the forecast”? Well, not everybody listens. Rainy days keep a lot of hunters home. If you’re not afraid of getting a little wet, you might find yourself alone in the field.
Cons:
Added Gear Requirements
Hunting in wet weather requires the right gear. You’ll need a waterproof jacket, pants and boots. Good rain gear can get expensive, and many materials are pretty noisy. But sitting or hiking in wet weather isn’t very fun either. Getting wet isn’t only uncomfortable; it can be dangerous. Hypothermia can happen in cold conditions, like downpours. And even if the situation isn’t dangerous, shivering can give away your position or make it impossible to hold your bow steady.
Dangerous Lightning
There’s a big difference between bowhunting in a rainstorm versus a thunderstorm. Lightning is dangerous, and you don’t want to risk getting caught in the field in it, especially in a treestand. When the forecast is calling for lightning, you should probably stay home. If you find yourself caught in an unexpected thunderstorm, leave the field as soon as possible if you can. Get out of the treestand immediately. Get away from any other metal. Avoid tall objects and fence lines.
Washed-Out Blood Trails
Rain hides human scent, but it also washes away blood trails. Often blood trails play a crucial role in the recovery of downed game. If you plan to hunt in the rain, it might be a good idea to have a blood-tracking dogon standby in case you take a shot — if using one is legal in your state.
Conclusion
Whether you bowhunt in the rain is up to you, but there are always some important considerations. Check the forecast every day and look into the specifics. A drizzle is different from a downpour, and you’ll want to stay home if lightning is expected. Bring the right layers. Pack extra clothing in the truck for a quick change at the end of the day in case you get wet. Make sure you have flagging tape in your pack. Rain will wash away a blood trail fast, but flagging tape will stay.
Bowhunting in the rain can provide a lot of opportunities. If you can handle a little wet weather, you might be rewarded with a day you won’t forget.
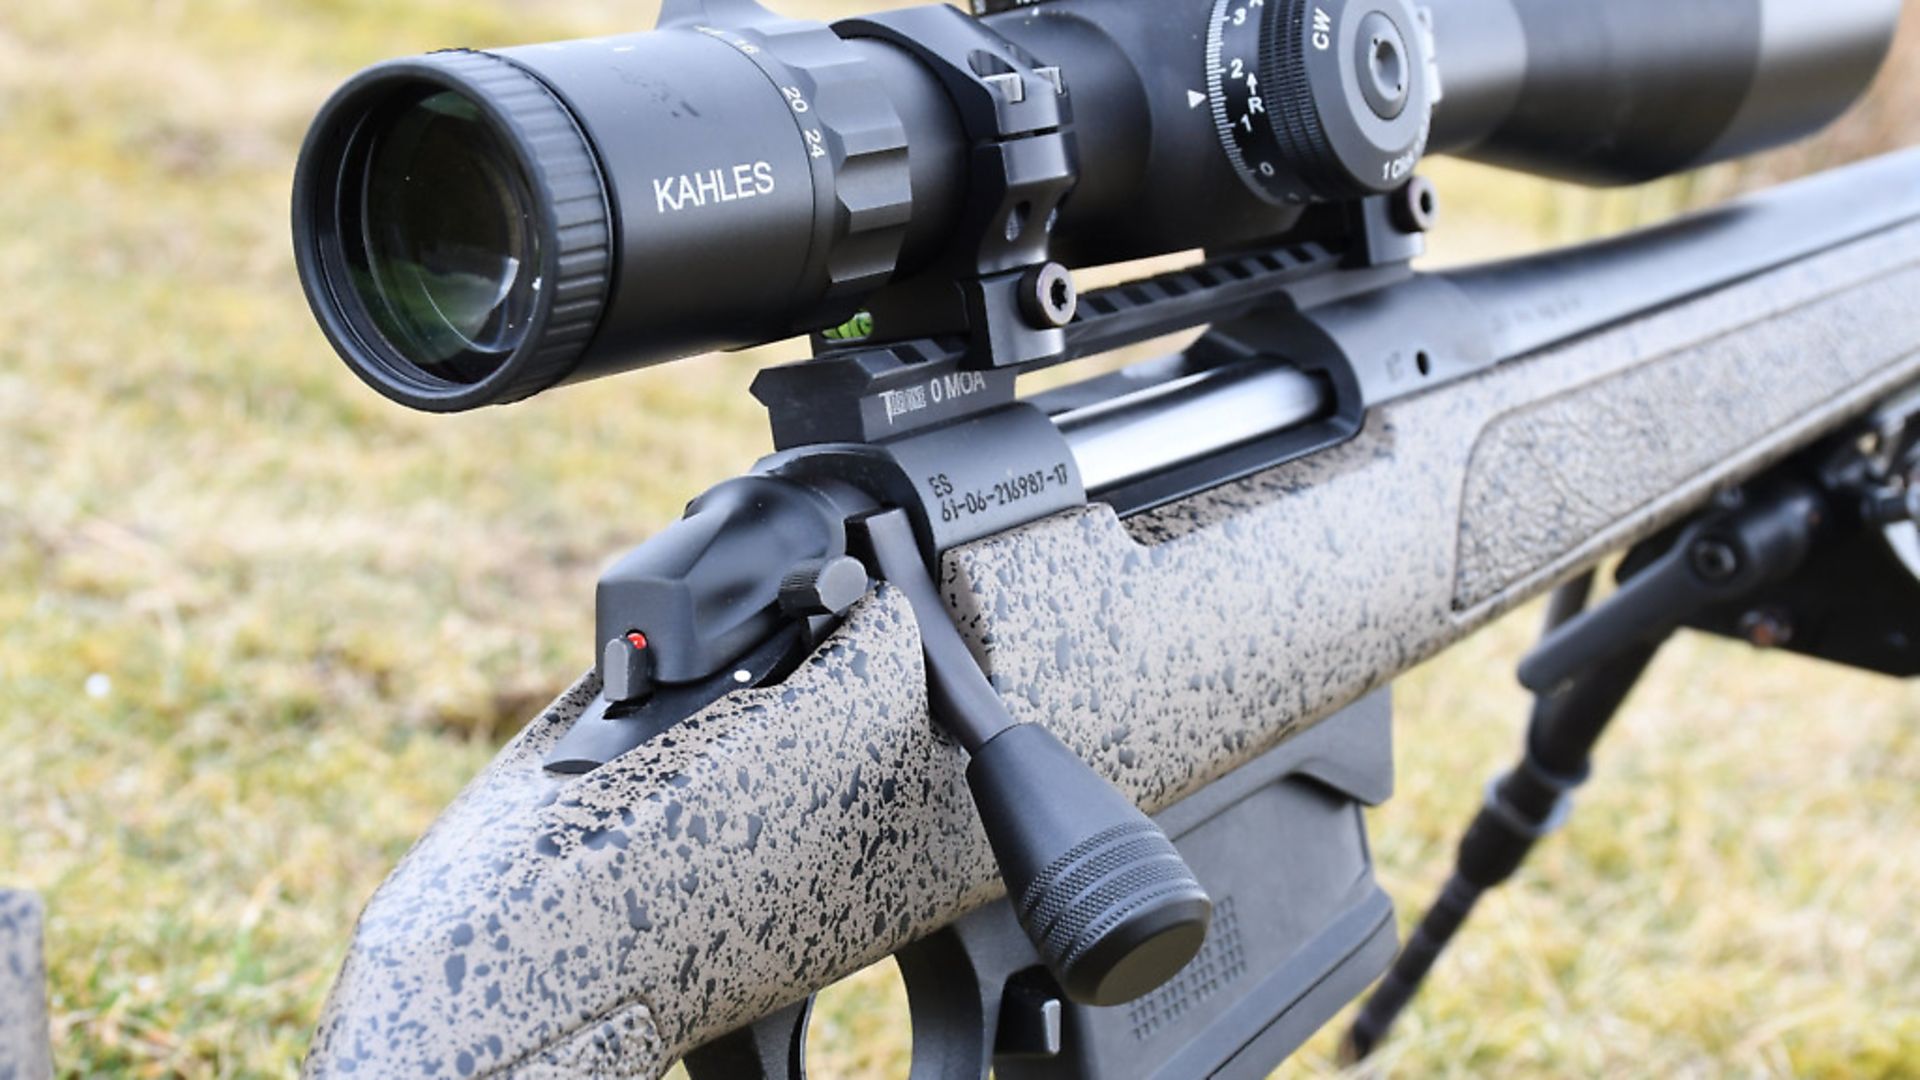
Chris Parkin puts the Bergara B14 to the test and discovers an accomplished, all-round rifle that is reasonably priced too!
credit: Archant
PROS: Excellent trigger and overall build with intelligent stock design; The barrel showed good thermal stability with a hot cartridge burning 80gr of powder; Not light, but not too heavy for an occasional stalking trip with a biathlon sling; Stable recoil manners with or without the moderator; Very good value for money
CONS: No Left Hander
VERDICT: I really liked the 6.5 Creedmoor short action HMR, and this big boomer shows how inherently sound the overall design is when submitted to more recoil. I can’t wait to see the short 22-250 which will be a cracking varminter
credit: Archant
TECH SPECS
Overall length – 1200mm/47.25”
Weight – 4.6kg/10.2lbs
Magazine capacity – 5+1
Trigger – Single stage, 950gr break
Barrel length – 660mm/26”, 1 in 10” twist, button Rifled
Stock material – Injection moulded polymer with integral aluminium bedding block and skeleton
Length of Pull – 335mm/13.2”- 365mm/14.4”
credit: Archant
RRP
Bergara BMP 6.5 Creedmoor – £1127
Kahles K624i – £2550.00
Hausken WD60, Tier One Picatinny rail and 34mm Rings, RWS, Norma and GECO Ammunition
Contact – RUAG, 01579 362319, www.ruag.co.uk
ALSO USED
Hornady 165 GMX and BTSP Interlock ammunition
Hornady Edgar Brothers 01625 613177 www.edgarbrothers.com
credit: Archant
IN DEPTH TEST AND REVIEW
After shooting B14 sporting rifles and the BMP chassis rifle in 6.5 Creedmoor, I was fortunate to be loaned an HMR in the same calibre for a longer trial and video review. The HMR format impressed me as much as I suspected it would when I first saw it at the British Shooting Show in 2017.
I heard a lot of chatter about a long-action version chambered in .300 Win Mag which was set to appear in the US to massive fanfare – the Creedmoor was already showing sales beyond Bergara’s manufacturing capacity.
The .300 WM appeared at BSS 2018 and I was quick to get one ordered. It shows the same build and differences as the regular short-action rifle does to a Remington 700, with a single-stack magazine holding five rounds being the only difference other than bolt travel.
credit: Archant
A 26” No.5 profile barrel (19mm at the muzzle) is an ideal companion for a longer-range rifle hoping to achieve the most velocity from a cartridge burning around 80gr of powder and driving .30-cal bullets from 110 to 230gr, a 180-grainer likely to be projected at a speed approaching 3,000 feet per second (914m/s).
The stock is an injection-moulded polymer vertical grip design showing similar ergonomics to a Macmillan A5. It has an adjustable cheekpiece with forceful thumbscrew to lock it in place and marking lines on the front post to indicate position.
You can shoot thumb up or wrapped around the vertical pistol grip carrying moulded stippling. Three 10mm spacers are fitted to adjust length of pull between the maximum 365mm (14.4”), down to 335mm (13.2”) which will suit most shooters. Reach to the single-stage trigger is perfectly specified, allowing your index finger pad to sit relaxed with a trigger pull directed toward the centre of the recoil pad in your shoulder for minimal aiming disturbance. Any aftermarket Remington compatible unit will fit but you are unlikely to need it: mine had a fraction of discernible creep that soon bedded in to virtually nothing with a reliably predictable break of 950g.
The twin-lug bolt opens 90° to cycle the action with an oversized, conical bolt-handle to speed up processing, adding leverage with less disturbance to the rifle’s aim. There are no ‘three rings of steel’ so famously advertised by Remington, but the action shows a single Sako-style extractor claw rather than the internal circlip of its forefather.
credit: Archant
Primary extraction of the large 62,000 Psi (CIP) belted magnum is plentiful, although the sprung plunger in the bolt-face is quite delicate in its ejection, the cases not thrown more than 30cm laterally from the gun (a factor I also found on the Creedmoor even with its smaller, lighter case).
The action and floorplate are seated within the stock with a recoil lug sandwiched at the front between the receiver and threaded barrel. I like the Bergara update of enclosing this lug within the action’s face to ensure it will return exactly to position if you ever have a barrel change. I especially like the aluminium skeleton moulded within the polymer stock, extending from the grip to the tip of the fore-end from the machined bedding block the action sits in. Twin-action screws fasten everything in place and I was pleased to see no stress applied to the action when they were tightened to 65”/lb.
Each round is push-fed from the magazine up the feed ramp into the chamber and, like all long-action rounds, feed and reliability is that little bit more assured than shorter cases with a correspondingly shorter overall length to jump the ‘moat’ formed by the bolt’s locking abutments.
RUAG kindly supplied me with a full armoury of Tier-One scope rings and Picatinny rail (screwed to the action with four bolts) as well as a Kahles 624i FFP optic well suited to some long-range steel plate shooting.
credit: Archant
I also had two Hausken sound moderators, the larger of which, a Hunter WD 60 still weighing only 414g for its 224mm length, does a fantastic job of reducing both noise and recoil. I have shot .300 WM for nearly 10 years and am well aware of its character – this moderator really impressed me!
Ammunition came from RWS, Norma (180gr Oryx), GECO (180gr SP) and Hornady (165 GMX) with a selection of polymer tipped and spitzer bullets in the 165-180gr region. These were all designed for hunting and tested for accuracy on paper to assure me of the gun’s likely capability, because were I to be seriously shooting long range, I would use a 200gr+ bullet with a B.C. above 0.6 to make the most of the .300’s capability. Unless you use 300gr bullets in a .338 Lapua, the plain old .300 can cope well out beyond 1,000m and be pushed as far as a mile, although that is stretching things significantly.
My own .300 WM driving a 208gr Hornady A-Max closely mirrors the ballistics in terms of windage and drops of my .260 Rem shooting a 139gr load to about 1,200m, yet the recoil is the major difference with the .300. I shot with the WD60 in place for most of the test as it tamed the stout cartridge well and wasn’t as disturbing as a braked muzzle.
credit: Archant
I spent a lot of time at 300m which will interest those wanting to use such a rifle for long-range culling. None of the ammo was cloverleafing on paper at 100m, yet none threw flyers either. I did get the gun quite hot with some 15 and 20 round strings (in very cold wind chill conditions) to show the thermal consistency of Bergara’s steel.
If I were handloading, I’m confident this would have been improved upon and could have been tailored to my needs, but the 26” tube showed good velocity with little point of impact shift between any of the ammunition types at 100m.
180gr GECO developed 959m/s (3,147 fps/3,959 ft/lb), the largest energy output with the similar 180gr Oryx lagging a little with 882m/s (2,894 fps/3,348 ft/lb). Hornady 165gr GMX developed 957m/s (3,141 fps/3,615 ft/lb) with the best consistency out to 400m for elevation and wind resistance on steel targets but none were a disappointment.
credit: Archant
After a good clean, a second experiment on paper actually showed some RWS Doppelkern to have the most consistent accuracy, with two sequential cloverleaf groups of five rounds, whereas all the rest stuck into the ¾” bracket and stayed that way.
I wouldn’t normally have set off to the range to shoot over 100 rounds of .300, but this gun was a soft shooter. The heavier bullets were detectable with a shade more recoil, but even so, the superb moderator and versatile length of pull adjustment in the stock allowed repetitive hold, aim and recoil control, and the trigger was a blessing.
To be honest, I would like to have kept the 6.5 Creedmoor HMR as it just oozed reloading potential and the .300 did too. Neither are expensive rifles for what they are capable of if paper and steel are your game.
On the other hand, all the ammo tested was reliable for any realistic hunting and the gun, although bulkier than a sporting rifle, was a good compromise for occasional use on game from static positions. It did shoot accurately from quad sticks with the rear butt hook wedging into position, but the steady push of recoil did lose your sight picture from a standing shot on sticks.
Fore-end stiffness was assured and the free float never wavered. If you are of bigger build, this gun might suit you perfectly for stalking as the generous length of pull without undue weight does nicely for long stalks on the hill with a biathlon sling, but it is never going to be a fast, pointable woodland rifle.
At a base weight of 4.6kg, you can add another 2.5kg for a suitable scope, mounts, bipod and moderator. With the base rifle at 47.25” long before you add a moderator (totalling 1,360mm), think carefully!
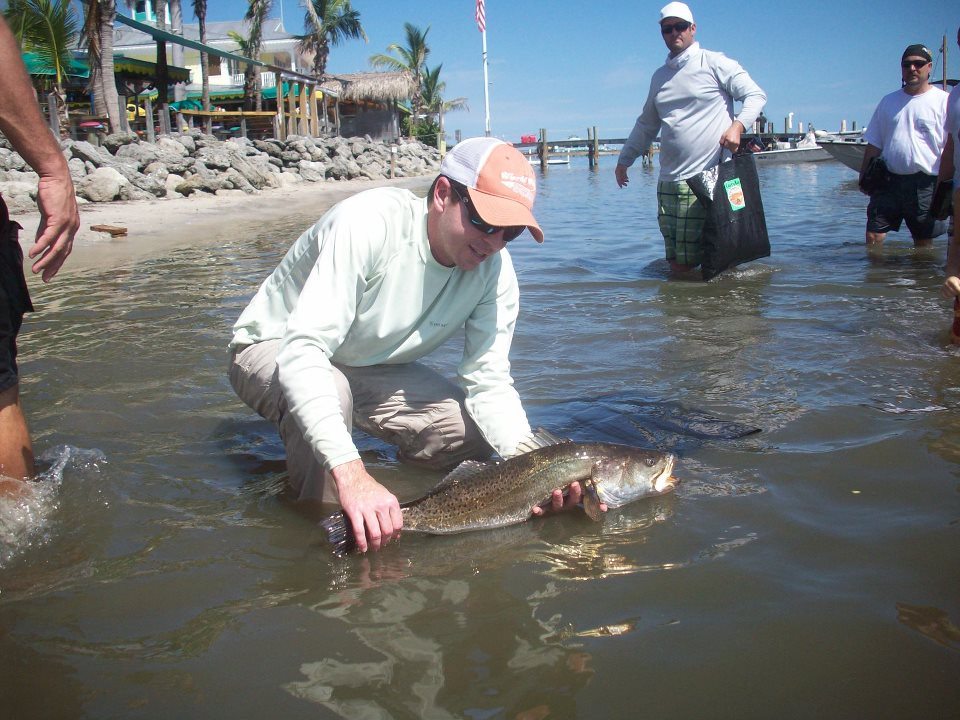
I remember how excited I was the first time I finally figured out how to catch seatrout.
My only regret was that I really wish someone had taught me the three shortcuts that I am about to share with you.
Why?
Because I can vividly recall how frustrated I was getting when I was hardly catching anything on our vacation trips to the coast when I was used to consistently catching bass on the lakes in my hometown… it was painfully frustrating!
To me, fishing was not just a basic hobby to fill in free time… it was an absolute passion.
It is what I spent all of my lawn mowing money on. And I would do all I could do to get out on the water as much as humanly possible.
Me @ 9 years old showing off some bass shortly after being allowed to take the john boat out by myself:)
This passion allowed me to become a very accomplished bass angler at a young age, but I had a very difficult time making the proper adjustments to find success along the coast of Florida.
So here are three essential shortcuts that anyone can use for catching seatrout in Florida (and beyond):
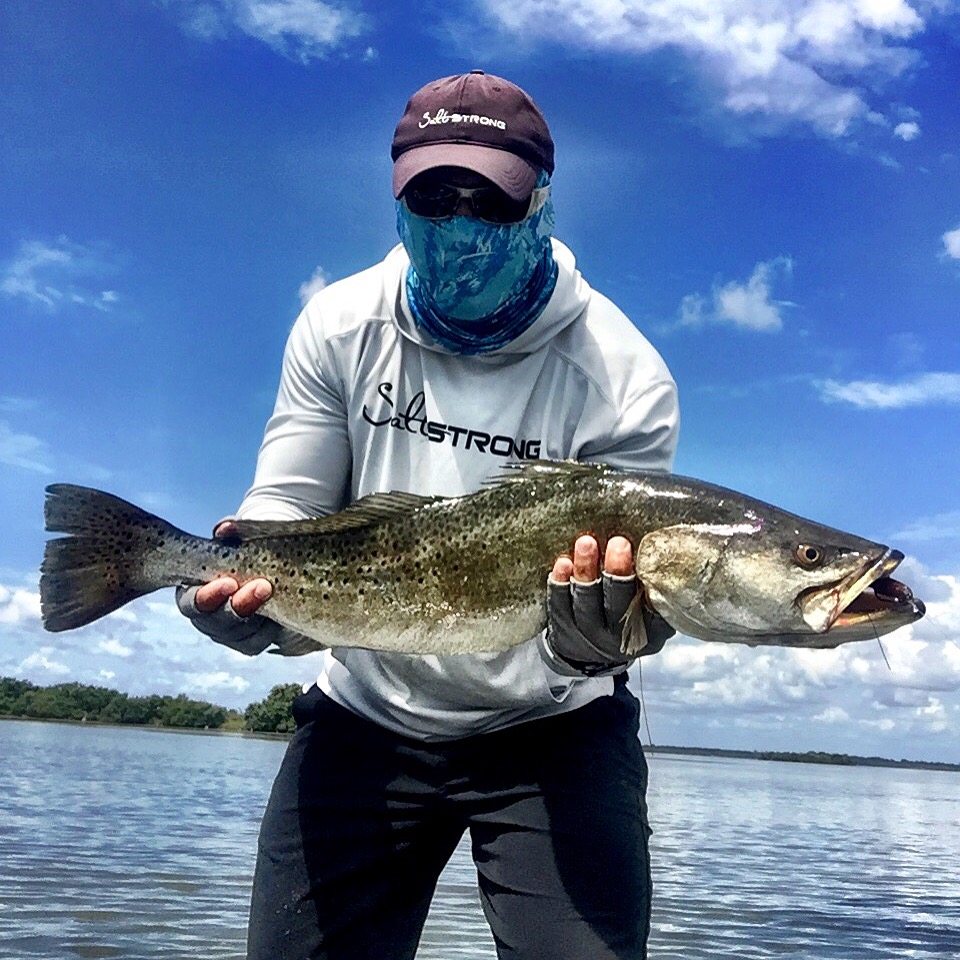
1. Learn How To Assess An Area For Feeding Seatrout
2nd place trout released from weigh-in from one of my first tournaments… caught on soft plastic bullfrog:)
Learning how to assess an area for feeding seatrout is by far the most important shortcut of all.
It is the core factor causing most anglers to come home empty handed… or nothing more than a measly catfish (which many believe are even worse than catching nothing at all).
To be able to consistently catch seatrout, it is absolutely essential to be able to quickly assess an area for it potential to be a good feeding ground.
Without this knowledge, you’ll waste tons of time fishing in spots that have very little chance of success.
Fortunately, finding good seatrout feeding areas isn’t complicated and doesn’t require a sixth sense…
In fact, it’s actually quite easy once you simply focus on these 3 things:
Structure
Bait
Current
Yes, these three simple variables will significantly help you find good areas to catch seatrout… even in regions that you’ve never even been to before which will make vacation trips to a new area even more enjoyable.
Here’s a breakdown of what to consider within each of the variables:
Structure
In saltwater fishing, there are a lot of different forms of structure that often hold predator fish like seatrout, redfish, snook, etc… here’s a brief list:
Seagrass*
Oyster Bars
Points
Trees/Roots/Stumps
Rocks
Docks
*For the quickest shortcut for finding seatrout, I recommend focusing on underwater seagrass because seatrout often stay around seagrass beds where they feed and reproduce.
So focusing on seagrass will be key in consistently catching trout, and these areas can be easy to spot from free online maps with the trained eye…
Note: Secret tips for reading this online map image example for seatrout feeding areas is explained below the putting it all together section.
Bait
If we could read a seatrout’s mind, my guess is that only two things will be there:
Where can I get my next meal?
How can I not be a meal to something else?
Knowing that food is one of their primary concerns, it is extremely important to pay attention to what type of bait is in the area you’re fishing.
If you’re not seeing any type of bait making ripples on the surface or flashing under the water, and you’re also not feeling any slight nibbles on your lure from small pinfish, snapper, etc., then it’s time to move to another spot where more food is present.
When you are seeing bait, make sure to take note of its size and shape so that you can select a lure that resembles the bait that’s in the area.
But when in doubt, a 3 to 4-inch soft plastic jig is a safe bet.
And when using soft plastics, always remember that rigging it is incredibly essential… here’s a video showing how to rig one of my favorite trout jigs:
Current
Seatrout are ambush predators that prefer to stay still and pounce on an unsuspecting prey for an easy meal.
And current significantly helps them get more food with less effort because it allows them to hide in the seagrass while waiting on shrimp or small baitfish to come close to their hiding spot.
So I recommend focusing on areas that are close to passes/inlets that get a good amount of clean running water throughout tidal fluctuations whenever possible.
Putting It All Together: Structure + Bait + Current
Since seatrout are focused on where they’ll find their next meal while being protected from becoming the next meal to something bigger, focusing on areas that have healthy seagrass, bait, and some current is incredibly important.
Having two of those variables is great, but having all 3 should be the core goal.
Wondering how to find areas with good seagrass?
Although nothing beats seeing areas firsthand, there simply isn’t enough time in the day to check out all areas from the water.
And of course not all seagrass areas are created equal… here’s an easy tip that’ll help narrow down your search.
I highly recommend using online maps like Google or Bing so that you can narrow down your search to areas that have grass that’s visible from satellite images.
How To Use Online Maps To Find Seagrass
For seatrout, I have the best results fishing areas with healthy grass with potholes scattered around… from online maps, this ideal bottom looks like a camo pattern (see below):
Screenshot of Google Maps view of a nice grass flat.
As you can see, these online satellite maps can show a very good look at the bottom structure and respective contour. And this helpful insight allows you to put together a good plan before you even get out on the water.
For example, you can clearly see the dark regions (which is seagrass)… and the light areas that are mixed in the dark grass areas are potholes that seatrout often use as ambush points.
Further, you can even use the clarity of the bottom to get a pretty good gauge at the depth of the water.
With this knowledge, you now know what specific areas to target during a certain tide.
For example, low tide would make the deeper spots more appealing while a high tide typically has the fish shifting up into shallower areas to feed.
How to Determine Water Depth From Satellite Images
To determine the water depth, you simply can use the clarity of the lines between sand and grass to be able to judge its depth.
For example, the edges of sand to grass in the areas where the “Shallow Camo” text is displayed is much more crisp than the surrounding areas which means that it’s shallower. This spot is so shallow and clear that you can even see prop scars in the grass (the white lines are from Googans running over the flat while their prop is cutting up the grass).
Important Note: Always be very mindful of your motor when going over grassflats because it takes seagrass a very long time to recover from prop damage… slow down to no wake and trim the motor way up so that it’s out of the grass. I even have passengers get up to the front of my boat so that it raises the prop even higher (surprisingly effective for small boats).
2. Use The Right Gear
Tony Acevedo with a nice trout while fishing from his kayak using soft plastics
Many people cringe when thinking about having to go to a store to pick out fishing equipment knowing that the budget seems to get overblown every time.
But for seatrout, the tackle used to catch them does not have to be top of the line. In fact, I find that most people spend way more than necessary when targeting seatrout and redfish on the flats and inshore waterways.
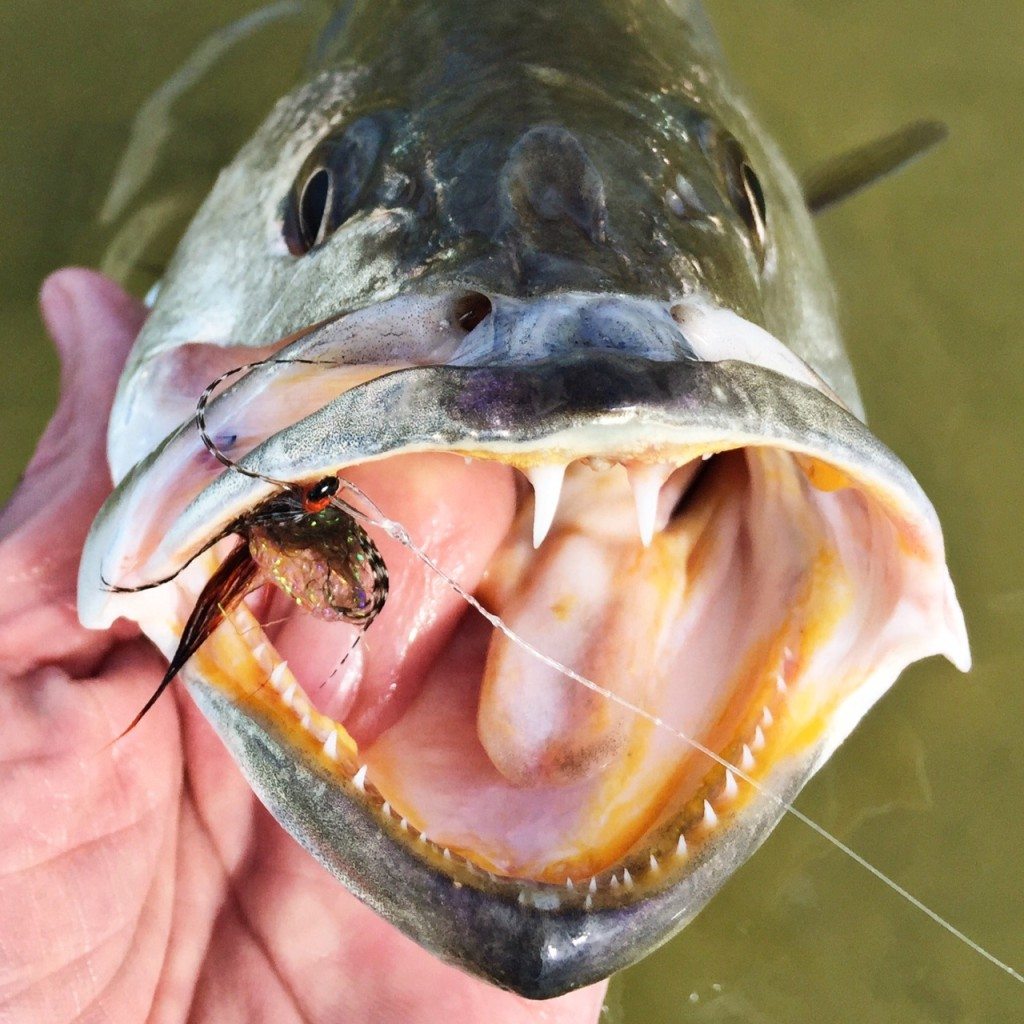
Since seatrout aren’t the strongest fighters, and their teeth (although sharp) are not good at breaking leaders so heavy tackle is not needed.
In fact, I found that I catch way more fish when I’m using my 10 lb braid with 20 lb leader than I ever did when I used to use 20 lb main line to 30+ lb leader… and not just more, I’m catching much bigger fish too.
So here’s what I recommend for seatrout:
Rod – 7′ to 7’6″ Medium to Medium Heavy
Reel – small spinning reel (2000 to 2500 series for most brands)
Line – 8 lb to 10 lb braid
Leader – 20 lb fluorocarbon
Lure – soft plastic bait rigged on a jig head
And here are some specifics for each:
Best Fishing Rod For Seatrout
Although most people seem to focus on the quality of their fishing reels with little attention paid to the rod, I completely disagree with that order of importance.
For example, I’d much rather go fishing with a $10 kids reel attached to a good rod, than use a $400 reel paired with a $10 kids rod.
This is because the rod does a vast majority of the work:
Casts bait
Feels strikes
Sets the hook
Works lure (assuming artificial lure is being used)
Provides necessary bending cushion when fighting fish
Essentially, the fishing rod an extension of your hands and it is in charge of the most important tasks.
So I highly recommend budgeting the most money for a good rod for inshore fishing.
For fishing artificials, I like Medium to Medium-Heavy rods. And if using live bait, it’ll to go with Medium rods (many people seem to like Medium Light rods for live baiting, but I have not yet found a ML rod that I like).
Best Fishing Reel For Seatrout
In contrast to the rod tasks specified above, a reel essentially does only two things:
Retrieves line
Provides drag when fighting a big fish
And although these two tasks are important, the difference in smoothness between a basic reel and a top of the line $400 reel isn’t worth the upgrade for most weekend warrior anglers.
And the drag is of course very important, but that doesn’t even come into play unless the rod handles its tasks effectively.
Plus, seatrout typically do not fight hard at first so they’re easy to pull away from structure when using light line.
And the proper drag setting for a reel is just 20% to 30% of the line strength, so the drag needed when using 10 lb line is just 2 to 3 lbs, which even the most basic reels can provide.
So I now stick with smaller reels (2000 to 2500 series) because they are lighter (more comfortable on a full day of casting) with the added benefit of being more affordable. And although small, they still hold plenty of line and even the inexpensive ones provide plenty of drag.
Best Fishing Line For Seatrout
After I finally was talked into trying out braid after years and years of mono use, I firmly believe that braided line is the way to go for targeting seatrout, redfish, snook, and most other inshore species.
This is because its very thin and non-stretch characteristics combine to allow for much more distance in casting and much better feel of strikes… and these two benefits can be a game-changer for inshore anglers.
But if you’re new to braid or you’re about to make the jump, make sure to know how to spool it properly as well as which knots to tie because adjustments are needed for braid because of its slick surface.
Note: Here are two articles that you should read if you’re not yet comfortable with braid:
Best Fishing Knot For Braided Line
How To Spool A Spinning Reel While Saving Time & Money
Although braid is much thinner than mono, some anglers chose their braid based on the similar diameter to mono theory… thinking that using a 30 lb braid for seatrout is ok because its diameter is equal to a 10 lb mono… but that sort of thinking will hinder your catch results.
Instead of comparing line diameters to other alternatives in mono, simply put your focus on getting the smallest diameter line possible while still having enough power to land your target species.
And my best answer to that for inshore fishing has been 10 lb braid… not only for seatrout of all sizes, but I’ve landed 40+ inch snook, redfish, and tarpon on it too so it’s plenty strong (knot contests with 10 lb PowerPro using the FG Knot have surpassed 20 lbs of strength).
Note: If you’re worried that lightweight rods and small reels won’t be able to handle a big trout or redfish that hits, then watch the video below where a ~50 lb tarpon in landed on a 2500 series spinning reel with 10 lb braid:
Best Leader Line For Seatrout
There seems to be a lot of debate between traditional monofilament line users and those who use the newer Fluorocarbon. In case you haven’t heard of fluoro, it’s a type of monofilament line that has roughly the same density as water, and it’s known to be less visible to fish since it decreases the refraction of light.
The debate against fluoro seems to focus on reflection being the core reason why fish can see line or not (vs. refraction) making the refraction benefit of fluoro a non-issue.
However, there seems to be greater consensus that fluorocarbon is better at withstanding abrasions, so many use it for their leader material knowing that their target species have some sharp teeth.
Whichever type of mono you choose (traditional of fluoro), I recommend using 20 lb leader when targeting seatrout because that’s plenty to land even the gators while being small enough to not spook them on days that they’re leader shy.
Best Lures For Seatrout
Seatrout are a favorite species of many inshore anglers because of their propensity to aggressively attack a very large variety of lures.
My personal favorite in terms of fun is to use topwater lures to get them to come up and attack the lure at the surface of the water.
Many great options are available at almost any tackle shop such as spooks, skitterwalks, etc.
But my go-to lure when wanting the maximize the quantity of seatrout that I’ll catch is undoubtedly a soft plastic bait rigged on a light jig head. These jigs can get strikes all day long. And they can be successfully worked to target any specific depth that they seem to be holding in.
As for jig head size, I almost always stick with 1/8th oz and focus in on areas that are in 2 ft to 5 ft of water.
For the soft plastics used, I’ve found plenty of success with from Berkely, Zman, Zoom, DOA, etc. (there are an absolute ton of options).
3. Learn How To Use The Right Gear
Trout catch in my first boat… a Carolina Skiff J-16 (before I knew that holding trout this way was harmful to them)
The great thing about inshore fishing is that it’s not about having the best boat, kayak, rod, reel, line, lure, fishing clothes, etc… it’s all about knowing how to use what you’ve got.
It’s 100% about knowing how to find areas with good fish and then knowing how to successfully use your tackle to generate strikes.
And many of the best fishing areas are accessible by foot or even the cheapest of all kayaks that can be used to simply paddle across a channel to wade fish a good flat.
Best of all, I’ve found that it’s much better to become an expert at just one lure than to be decent at using a whole tackle shop full, so you can catch a ton of fish with just using one lure and one rod/reel combo.
And if you decide to make the soft plastic bait rigged on a jig head to be your go-to lure, then here’s a video showing some helpful tips on maximizing your results by getting strikes from seatrout that aren’t actively feeding.
Note: If you’re serious about consistently catching seatrout along with other inshore species, then I highly recommend taking advantage of our 30-day risk-free trial of our Inshore Slammer course… click here to learn about this popular online fishing course.
Conclusion
Spotted seatrout on ice
Learning how to catch seatrout can seem like a daunting task. But as you’ll find after focusing on the essentials, it’s truly not as hard as most people think.
And when you combine the art of knowing how to find areas that are prone to have feeding trout along with the art of generating strikes, you’ll find that they days of getting skunked will be a distant memory.
These basic tips should allow you to go out and find the most common sized trout on the grass flats making for many fun memories with friends and family.
If you’re interested in learning the secrets to catching gator trout along with redfish and snook, then I highly recommend giving our online fishing course called the Inshore Slammer Online Fishing Course a shot because we have a 100% Thrilled guarantee behind it…
Meaning that you get a full refund if you’re somehow not 100% thrilled that you took the course.
Click here to learn more about the Inshore Slammer
And if you haven’t seen the 4-part Trout Tutorial video series with Capt. C.A. Richardson, I urge you to click here so you can get all four videos emailed to you for free.
[Important Note]: Of all the inshore fish, spotted seatrout are one of the most fragile of all so it is essential that we take the best possible care of all trout that are going to be released. Click here to see The Complete Guide To Catch, Photo, & Release Fishing.
P.S. – If you have any friends who could use some pointers on consistently catching seatrout, please share this article with them so they can have more fun out on the water.
"Unleash the Power: Mastering Break Barrel Air Rifles for Maximum Performance. Discover expert tips and techniques to enhance the power and precision of your...
Wyatt Earp has said:
Fast is fine, but accuracy is everything
And I just thought how many airgunners are obsessed with muzzle velocity and muzzle energy,...
")
")
")
")
")


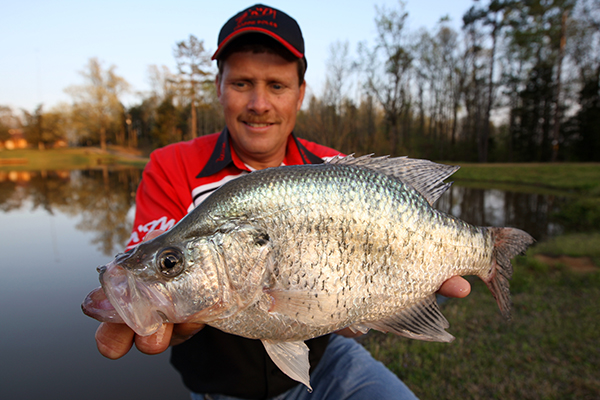
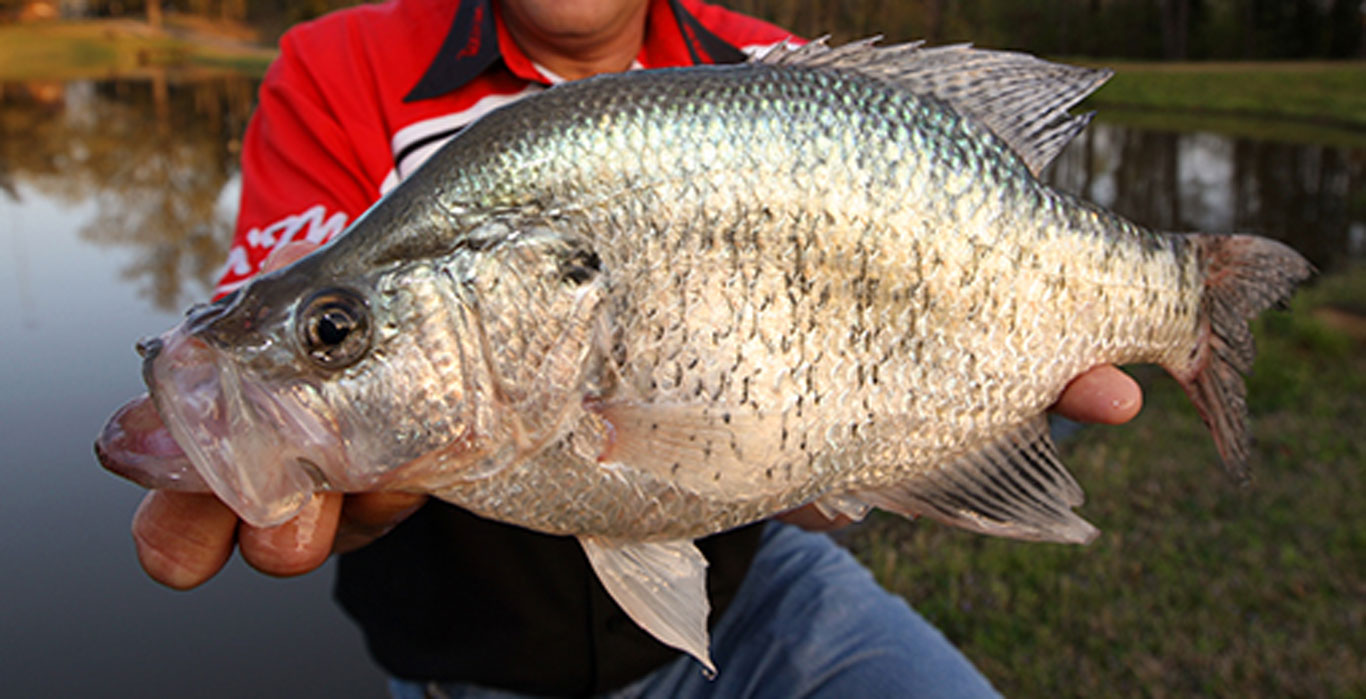
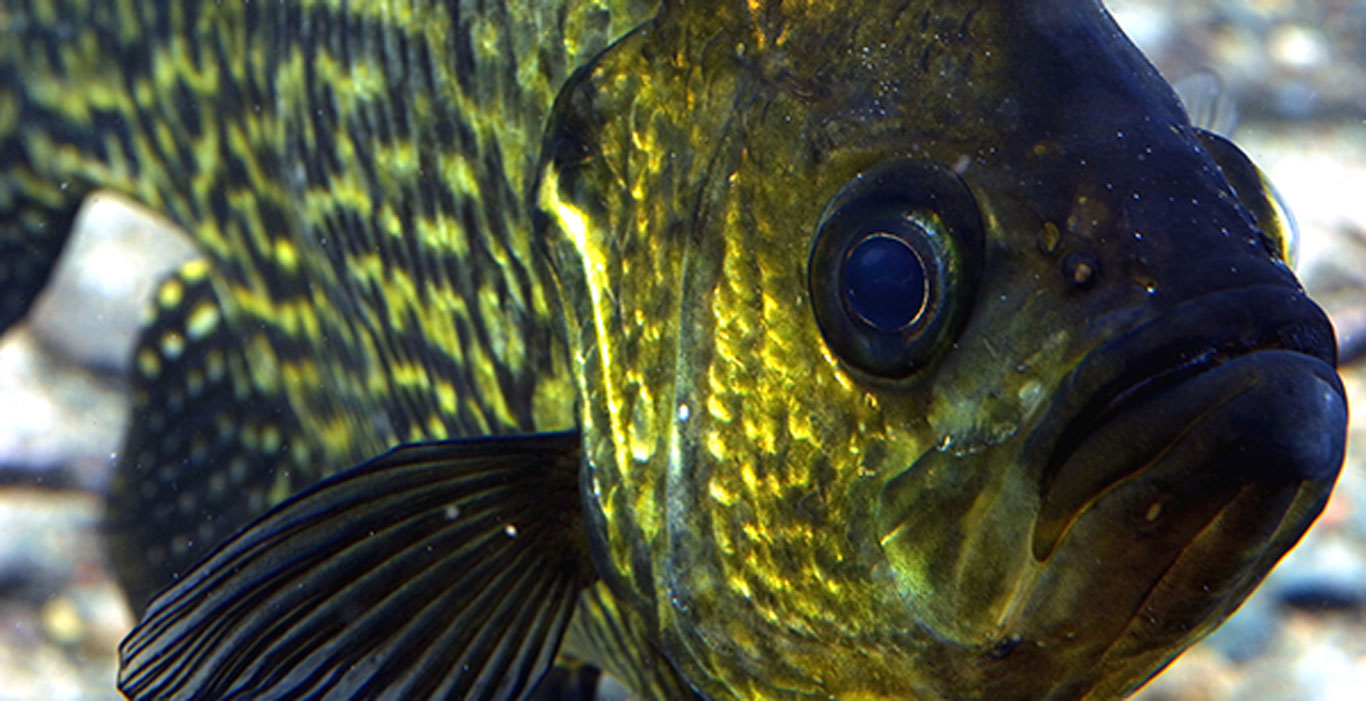
 Although walkie-talkies lack the range and flexibility of cell phones, they are handier to use during particular tasks. It is because it’s simple to use. For example, a radio set in within the range of the other will always be available. In this article, let’s look at the top tactical walkie-talkies available. But, first, find some of their leading characteristics to see how they rank in our military groups.
 Understanding the distinctions between VHF and UHF two-way radio will help you decide which is best for you and the team. The FCC regulates the operating frequencies of all wireless communication devices, including two-way radios and cell phones. As a result, knowing what radio frequency your team requires is critical.
 Another factor to consider is the product’s durability. Of course, a durable walkie-talkie is essential, even for indoor use. However, if one intends to use a walkie-talkie primarily outside, ruggedized devices, unlike regular walkie-talkies, can usually withstand environmental variables such as extreme temperatures and the elements.
 The battery is crucial for this kind of device. Many two-way radios incorporate helpful AA or AAA batteries and accept disposable alkaline batteries or rechargeable nickel-metal hydride (NiMH) batteries. At the same time, some batteries are rechargeable in packs. Unfortunately, the bigger the radio’s power output, the faster it will drain your batteries.
 Emergencies are the scariest moments you will face, and knowing you have no one by your side is even more frightening. As a result, having a robust tactical radio can put your mind at ease. A long-distance walkie-talkie system with sound alarms, such as a weather band and emergency lighting, would benefit. Every emergency necessitates the use of a dependable communication device. If you have the best emergency two-way radio in your bag, it will save you many worries and prepare you for any severe crisis.
 Channels are one of the most important factors to consider when deciding on the best long-distance walkie-talkie. A military walkie-talkie, for example, may have single or multiple channels. Switching channels allows you to avoid static and other interruptions, so having a multi-channel product is usually the best option. On the other hand, dealing with only one channel is frequently inefficient. So, it is always better to check this important feature before buying.
 The price of walkie-talkies can vary significantly, so it’s usually a good idea to shop around. However, it is always better to research through an online market or check out reviews from reliable resources before visiting some retail shops. Shopping at three or four different stores before committing to a purchase is usually the best way to find the perfect goods. Additionally, comparing and contrasting the features and costs of many goods will always result in the best military walkie-talkie at the lowest price.