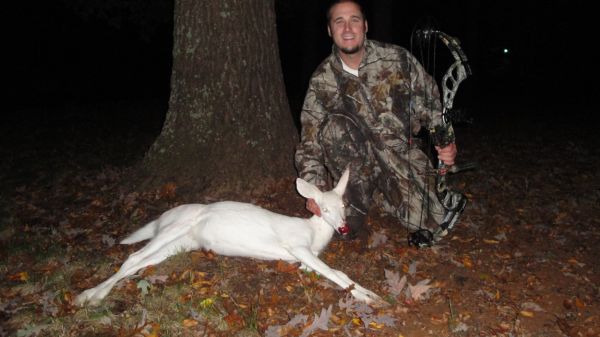
This albino deer was killed by a North Carolina hunter who had a full-body mount created by his taxidermist. A trophy by many hunters’ standards, would you shoot a white deer?
Completely legal in both Carolinas, but would you do it?
Would you shoot a white deer? If you’ve been hunting long enough, you have probably heard of someone shooting a piebald deer, and maybe even an albino, but would you pull the trigger with such an animal standing in front of you?
Albino deer are rare. Piebald deer are unusual, but not exactly rare. According to the North Carolina Wildlife Resource Commission, the traits of an albino deer (pink eyes, pink nose, white hides and hooves, and a lack of pigmentation) occur in one of every 30,000 deer. The traits of a piebald deer, which include white patches of fur on the hide which is otherwise brown, can show up in one of every 1000 deer, although those white spots can sometimes be so small as to be almost unnoticeable in many of them.
The difference between rare and unusual notwithstanding, seeing a white deer (or partially white deer) while hunting does not happen often, and in most hunters’ lifetimes, they will never see a white deer. But would they shoot one if they had the chance?
Scientifically speaking, it seems to make sense to shoot white deer at every opportunity. They are white because they have genetic deficiencies that prevent them from having normal colorations. Presumably, these deficiencies make white deer more susceptible to any number of diseases that normal deer have the ability to fight off, thanks to their genetic makeup. White deer are also more prone to predators, including man, with their inability to readily hide or blend in to their natural surroundings. It seems to make sense to stop those genes from being passed on.
Certainly, a segment of the population will say a white deer is so rare, that no one should consider shooting such an animal. Is a white deer, however, any more rare than a 12-point buck with a 25-inch spread and 16-inch brow tines? And would the rareness – does the rareness – of such a buck make it any less of a trophy for the average hunter, and would the average hunter have any qualms about shooting such a buck? Isn’t that rareness exactly what trophy hunters hope for while afield?
A recent article on SouthCarolinaSportsman.com featured a hunter who killed a small, 7-point piebald buck. The hunter is a trophy hunter, and passes up many bucks that a lot of hunters would be proud to shoot. But this deer was special to him, a trophy of another kind, and he feels lucky to have had the chance to harvest it. And while many fellow outdoorsmen offered congratulations to him through our Facebook page, a number of folks made comments vulgar enough that we had to delete them, all because they saw his actions as degrading to hunters or because they claimed he lacked morals.
White deer, whether albino or piebald, are not protected in North or South Carolina. No restrictions exist on shooting them that don’t exist for regular deer; they are fair game during deer hunting season. So with no laws against shooting these uncommon deer, what would you do if you spot one while hunting? Would you shoot it, or let it walk?
If you need to be able to defend yourself at night, then you’re looking for an awesome Glock night sights review. In this article we will cover a wide variety of sighting systems. We’ll talk about the best iron sights, and some great red dot sights for low light self defense. As you’ll see, most shooters aren’t really focusing on the right details when trying to find the best night sights for their particular needs. Keep reading for more.
When doing my research for this article, it was readily apparent that most of the Glock night sights reviews were written by robots, or people who hadn’t shot more than a box of ammo in the last 7 years. It’s also patently obvious that most most reviewers don’t do much shooting at night.
As many of you know I’m, a competition shooter, as well as a police officer. I do a lot of shooting, in all hours of the day and night. While this doesn’t make me the worlds greatest expert on night sights, I can tell you that there are several issues that come up when you actually need a good sight system. Here’s a quick overview of the article.
Iron sights with tritium inserts are the best Glock sights for simplicity and durability
Using a weapons mounted light can negate the need for night sights
Red dot sights are good options for low light defense, provided it’s set correctly
Stay away from exposed fiber optics sights for self defense use
Rear sights with a ledge allow for one handed weapons manipulation
Many of these sights come in different colors, follow the links for all options
Before we get to the details in this Glock night sights review, we need to discuss if you even need night sights. We will also talk about some facts and fallacies of low light shooting, which may help steer you towards one sighting system over another. Remember, there is no best system for everyone.
Do You Need Night Sights for Your Glock?
If you ask this question to most self defense minded, or tactical shooters, they will tell you that you need night sights to shoot at night. Unfortunately, they would be wrong, or at least no right enough. To illustrate this point I’m going to give you a little scenario.
You’re in your home, and you hear the proverbial bump in the night. You grab your Glock to go clear your house by yourself (not a good idea). You have a Glock 19 with standard tritium night sights, and no pistol light. You eventually confront the intruder, who is stealing your $3000 Taylor Swift tickets they saw on your kitchen counter.
You challenge them at gunpoint, and your sight picture is a dark blob, with three green dots in front of your face. You see nothing else! You can’t tell if they’re armed, or a drunk neighbor in the wrong house, or any other useful information. But hey, you can see your sights are in rough alignment!
You would be better off with a pistol light, and the standard Glock sights in this scenario. If you light up the person with your light, you will see a clear outline of your sights. You will also take away the intruders night vision, and disorient them. Most importantly, you can see if they’re armed.
Choosing Your Self Defense Pistol Setup
Don’t take this to mean I’m anti night sights for your self defense pistol. I’m simply pointing out that the ability to see three dots won’t solve this difficult and dangerous problem. I would argue that it does very little if you can’t ID the person in your house. It’s an all too common tale for someone to shoot a family member at night because they thought they were an intruder.
Night sights certainly have their uses, and they really shine in mixed lighting conditions, where there are areas of light and dark. These would be areas like parking garages, street lights, or lights around your house that provide some dim illumination.
After reading this article you should have a good idea of what Glock night sight set up you want. After that it’s up to you to train with your setup. Don’t be the guy to buy all the high speed gear and have no idea how to use it. I see this all the time at matches, and it makes me cry inside. The best part about having awesome gear, is learning to use it well!
I’ll get off of my soapbox now, and we’ll get to the equipment part of this article. I encourage you to follow the links, some of which are affiliate links, for the products that seem most useful to you. They will tell you more detailed info, and you can read other useful things like customer reviews. Rest assured, I won’t link to any terrible products. Don’t forget to join the email list below for more awesome articles.
Join the Email List
If you like fitness, shooting, and quality gear reviews, then click here to join the Tier Three Team. It’s totally free, and over seven thousand members get the latest articles sent directly to their inbox.
5 Best Glock Night Sights
By now you should have some idea that I’m not only going to include standard iron sights, in this Glock night sights review. I will include several iron sights options, and red dot options for low light shooting. I will also include the very best night sight option, a pistol mounted light!
1. Surefire X300U-B Pistol Light
The Surefire X300U is my favorite weapons mounted light. I have one on my duty gun, and I have another on my home defense pistol. It’s a very bright 1000 lumen flashlight that is compatible with nearly any pistol on the market. It also works well when mounted on a long gun, giving it nearly unlimited uses.
I tend to pair it with Surefire’s DG grip pressure switch, wich makes one handed activation easy. That pressure switch isn’t a must have, as I ran this light for many years using my support hand thumb to activate the light. The light uses a dual action switch that gives you momentary on, when pushed forward into the light body, and constant on when rotated down.
Of note, if you do opt for the pressure switch, the light still retains the standard rocker switch as well. This allows you to use it as a back up, and have constant on functionality. This is crucial if you actually find a bad guy, and need to keep him illuminated for 5-10 minutes, waiting on the police to arrive.
As of this writing, the light retails for a little over $300. The switch is a little over $100. While that isn’t chump change, it is a great option because you can move it to any firearm you care to use, quite easily. Next we’ll move on to my favorite iron sight system.
Trijicon Glock HD Night Sight (GL1010)
The Trijicon Glock HD night sights are used by police and military forces all around the world, for good reason. They’re durable, simple, and reasonably priced. This model features tritium inserts, which is a phosphorescent green chemical that will glow for 10 years or so, with no need for additional maintenance. The Trijicon HD night sights also include an orange front sight circle, around the front dot tritium insert. This helps to capture your eye in all lighting conditions.
This system will require gunsmith installation, unless you have a sight tool like this one (Amazon Affiliate Link). You can see in the video below that, putting new sights on your Glock isn’t all that hard, but you do need the right tools. One of the best features about this product, is the ledge type rear sight. This allows you to rack the slide off of objects with one hand. This isn’t likely to happen, but it’s a nice bonus feature.
As of this writing, the Trijicon GL 1010 retails for around $120. With the sight pusher linked above, you’ll be spending around $180 in total. Next we’ll move on to another great set of iron sights.
Meprolight Adjustable Tritium Sights
The Meprolight adjustable night sights are a great option for those that want a more accurate sighting system, with a snag-free design. These sights feature tritium vials for reliable low light performance, with an adjustable rear sight. This allows you to fine tune your sights for your shooting style, and ammunition choice. This is one of the biggest differences between these sights, and stock, white dot factory sights from Glock.
I know some shooters really enjoy having adjustable iron sights. I’ve shot both standard and adjustable sights. To be perfectly honest, I almost never adjust them. I would also point out that the rear sight has a very small ledge that would make one handed manipulations harder. That wouldn’t be a deal breaker for me, but it’s something to consider.
These sights have good reviews on Brownells, and they’re currently priced around $145, which is a great price for all the options these sights include. In the next section of this Glock night sights review, I’ll cover two great red dot options for those that need to shoot at night.
Holosun SCS Multi Reticle Red Dot Sight
The Holosun SCS is one of the best choices for low light shooting, and general everyday use. It also has some distinct advantages over other red dot sighting systems. The biggest advantage is that it features an extremely low deck height. This allows you to use it without installing suppressor height back up sights.
This means you can maintain whatever iron sights you have installed, which can save a lot of money. Suppressor height front post, and rear dot sights, can be expensive.
If you have a newer Glock with the MOS optic plate, you can install the SCS directly to the slide, without using an optics mounting plate. While many mounting plates are very durable, you can run into issues where the plate screws shear, leaving you with your red dot sight tumbling through the air.
Realistically, this is something most Glock owners will never experience. I’ve put around 6,000 rounds through my CZ Shadow 2 Optics Ready competition gun, and I’ve had no issues with this.
This dot has a solar charging system with a rugged titanium housing. If you’ve read the Sage Dynamics White paper, you’ll note that this specific sight is still going strong after more than 6,000 rounds, while being dropped directly onto the optic every 500 rounds.
As of this writing, the SCS for Glock pistols retails for about $370, which is a great price for a very durable optic. This is the best choice for the vast majority of Glock models. Next, we’ll talk about another great red dot optic.
Trijicon RMR Type 2 Red Dot Sight
The Trijicon RMR Type 2 is by far the most rugged red dot pistol sight. It’s been around for several years, and Aaron at Sage Dynamics has one variant of this sight that is still going strong after 30,000 rounds, and dozens of drops onto concrete. At this point, I would say its as durable as iron sights.
It features a tremendous battery life, with up to 2 years of normal use. Moreover, it has a sensor that automatically adjusts the dot brightness, for different lighting conditions. This is great for those that have a pistol mounted light.
Because Trijicon has released an updated version of this optic, which is much more expensive, you can find this 6.5 MOA variant for $470 at the time of this writing. This is the cheapest I’ve ever seen this optic.
If you plan on putting your sights through some abuse, then this is your best choice. Next I’ll cover some good advice for setting up your pistol for ease of use.
Setting Up Your Sights and Lights
In this section I want to review a few practical recommendations to help you choose the right sights. First, and foremost, do not use a red dot sight if you don’t plan on practicing with your gun. You have to get enough live fire, and most importantly, dry fire reps, to develop a natural point of aim.
I shoot Carry Optics in USPSA competitions, and I regularly notice lower ranked competitors have a lot of trouble finding their dot. This demonstrates a lack of practice. I rarely if ever see a B class shooter, or above, have any issues here. If you’re willing to practice, then dots are great. If not, go with iron sights.
Secondly, if you do run a red dot sight, then you need to pick the correct brightness setting when your light is illuminated. For self defense, you need to err on the side of brighter rather than dimmer. This is especially true if you have a pistol light. Bright light will wash your reticle out, if you set the dot to dimly. If this seems like too much hassle for you , then go with iron sights.
Lastly, I strongly recommend that you go with the pistol light, and then worry about changing your factory Glock sights later on, if needed. The light will be much more useful in a self defense scenario, and it works well with stock sights, as well as night sights. Now, let’s finish this Glock night sights review up.
Final Thoughts
There are a lot of considerations when discussing this Glock night sights review. The most important thing you can do is practice with whatever setup you choose. Time and again, I see shooters buy a gun, or a piece of equipment that promises to give them some new capability.
They purchase these products like a talisman, thinking that if they own them, they can do the thing it says they can. This isn’t true. You must learn to use it proficiently before it does that. I recommend finding a good instructor, and getting into competition shooting. You will get more bang from your buck in one match than years of flat range training.
You can also find links to great training ammo, and self defense ammo here. Don’t forget to join the email list below. Now get out there and get training!
Join the Email List
If you like fitness, shooting, and quality gear reviews, then click here to join the Tier Three Team. It’s totally free, and over seven thousand members get the latest articles sent directly to their inbox.
Any links to Brownells, Palmetto State Armory, Primary Arms, or other manufacturers are affiliate links. That means that we receive a small referral fee if you purchase from them after clicking on their link. It costs you nothing, and helps keep the lights on here. Read this for more info. Thank you for the support.
Picture yourself getting the jump on a big prairie dog town. You crest a hill, lay your trusty .22 across a fencepost, and peer through your scope. It’s pretty far. You might need to aim a little bit high. If only you paid more attention to the MOA vs MRAD debate.
Experience might tell you that your bullet hits a certain distance low at 150 yards and a little more at 200 yards, but “a little low” doesn’t give you much to work with, especially when you don’t even know the distance to your target. Even if you knew exactly how many inches low it was at the distance you’re trying to shoot, could you really picture that in your scope with any degree of accuracy?
What you need is a way to make precise, calculated adjustments to compensate for proven ballistic performance. That’s where minutes of angle (MOA) and milliradian (MRAD) come in. These concepts are absolutely essential to shooting well — even if all you’re doing is zeroing your pistol’s red dot — and figuring them out might be easier than you think.
Both MOA (minutes of angle) and MRAD (milliradian) are methods of measuring angular units. Bullets aren’t laser beams, so we all understand that we have to aim high to engage targets that are far away from us. Rather than calculating bullet drop to inches, creating a mental estimation of what that looks like, and aiming at a point in space above our desired point of impact, we use these angular units to get on target.
Both methods are more than capable of facilitating precision shooting. They’re not interchangeable, though, so your rifle scope, reticle spotting scope, ballistic tables, and any software you use will need to be on the same page. Eventually, you’ll learn to think in MOA or MRAD and be able to make better adjustments on the fly.
MOA: What You Need To Know
The majority of all sighting systems (scopes, red dots, holographic sights, and iron sights) sold in the U.S. use MOA because this unit works well with imperial units — specifically inches and yards.
What is MOA?
There are 360 degrees in a circle and 60 minutes in a degree. One minute (MOA) equals 1/21,600 of a circle.
At 100 yards, one MOA equals 1.047 inches. Since it’s angular, the same one-MOA angle expands to 2.094 inches at 200 yards, 3.141 inches at 300 yards, and so on. Moving your point of aim one MOA shifts your point of impact 1.047 inches at 100 yards.
That’s not very precise, so most optics use quarter-MOA adjustments. If your scope turret is labeled “one click = 1/4 MOA,” you’ll be able to refine your point of impact in 0.26-inch increments at 100 yards.
By using 1/4-MOA adjustments, we divide a circle into 86,400 slices, and each click of your turret moves your point of aim 0.004 degrees.
What About “Shooter’s MOA?”
Many people use what’s called “Shooter’s MOA,” which rounds MOA to the nearest quarter-inch. That’s why you’ll hear people say that one MOA equals one inch at 100 yards. They’ll equate one click of a 1/4-MOA turret to 0.25 inches at 100 yards rather than 0.26 inches at 100 yards.
It’s not exactly correct, but it’s close enough in some cases. At longer distances, this shortcut will catch up with you.
At 1,000 yards, .308 Win might drop 393 inches. Using MOA, your come-up in that situation (393 inches / 10.47 inches per MOA at that range) would be 37.5 MOA, and your point of aim would be 393 inches above your point of impact, matching bullet drop exactly.
If you were using Shooter’s MOA, your come-up would be 39.3 MOA (393 inches / 10 inches per shooter’s MOA at that range). Because scope turrets use actual MOA rather than Shooter’s MOA, your input of 39.25 MOA (the closest setting to 39.3) would result in a point of aim 411 inches above the center of your target and cause your bullet to impact 18.5 inches high. Unless you have a massive target, that’s a miss.
Range in Yards1/4 MOA1/4 Shooter’s MOA
MRAD: What You Need To Know
Outside of the U.S., shooters generally prefer to use MRAD over MOA. Interestingly enough, American military snipers also use the metric-based MRAD system; most precision shooters do, too.
What is MRAD?
Instead of using degrees, we can divide a circle into 6.283 radians. Inside each radian are 1,000 milliradians (mils, for short) for a total of 6,283 mils in a circle. Random, right? Damn Europeans.
There’s a method to this madness because one mil equates to 10 centimeters at 100 meters.
In the same way that we don’t make adjustments in whole MOA, we don’t make them in whole mils, either. Scopes turn in 1/10-mil increments, so one click on your turret translates to one centimeter at 100 meters.
A scope’s 1/10-mil adjustments divide a circle into 62,832 pieces, and each click moves your point of aim to 0.006 degrees.
When you range targets in yards, using MRAD can feel clumsy.
Range in Yards1/10 MRAD
But when you range targets in meters, using the 1/10 MRAD adjustments on your scope turrets is straightforward.
Range in Meters1/10 MRAD
MRAD vs MOA: Which Should You Use?
Knowing that both systems are effective doesn’t make your scope-purchasing decision any easier. There has to be a reason some shooters prefer one over the other.
Why You Should Use MRAD
Using the 100-yard example, a typical MOA scope will let you make adjustments in finer increments. Remember that, at 100 yards, 1/4 MOA equals 0.26 inches while 110 mil equals 0.36 inches. But if MOA is more precise, why do snipers and competitive shooters almost universally prefer MRAD?
In the real world, there is a practical limit to the degree of precision we’re capable of extracting from a shooting system (our rifle, scope, and ammunition).
“On the milliradian optic, I’m doing 1/10 of a mil click in whatever direction, that’s going to equal roughly 2.5 inches at 700 yards,” Eliasson said in the Vortex Edge podcast. “If I do that same click on a 1/4-minute adjustment minute of angle optic that’s about two inches — a little under, I think it is. So it’s like two, 2.5 at 700; can you shoot that good?”
Both MOA and MRAD deliver the precision you need, and MRAD scopes can save time by making adjustments in slightly larger leaps, as Eliasson discovered during his time as a Marine Corps scout sniper.
“We got the 1/4-minute adjustment optic on our gun, and I felt like I was just adjusting for days,” he said. “It was just click, click, click, click, click, click to get where I needed to go. I thought that was kind of hindering us to a degree.”
The base-10 nature of MRAD can also make life simpler when you’re shooting under pressure.
“If somebody says, ‘Come up 0.7’ that’s seven clicks,” James Hamilton, host of the Vortex Edge podcast, said. “And if they’re like, ‘1.7’ that’s 17 clicks. But if somebody says, ‘Come up 2-3/4 MOA’ I’m like, ‘Okay one click is 1/4 MOA, so that’s four clicks per one MOA, so that means four times two is eight, plus 3/4 is three, eight plus three is — you know?”
Simply put, MRAD scopes get us inside the margin of human error with less time spent converting quarters to clicks, counting tiny hash marks, and fiddling around with our scope turrets. Since most competitive shooters use MRAD, that route will also make it easier to learn from others if you have ambitions of getting started in long range shooting.
Why You Should Use MOA
Most shooters who prefer MOA optics probably appreciate the unit’s relative correlation to inches and yards rather than adapting to the metric system.
“As Americans, if you were born and raised here, we tend to think in inches, and it’s really hard to associate what 10 centimeters looks like,” Eliasson said. “Our brain kind of wants to think about it in 10 inches, not 10 centimeters.”
The combined market for MOA hunting scopes and low-power variable optics with a BDC (a bullet drop compensator reticle like the one in the Trijicon ACOG) is probably larger than it is for MRAD scopes. Red dot optics and holographic sights almost universally use MOA. That alone might be enough to sway you, especially if you don’t need a fancy mil-dot reticle.
“Some of our optics that I’m thinking of are very, very well-suited for hunting and they’re just not even available in MRAD,” Hamilton said. “In my head, I’m thinking getting the right optic is more important than getting some super-duper special unit of measurement.”
The reality is that the advantages of MRAD scopes don’t matter at the distances most people shoot. Plenty of hunters and recreational shooters do just fine by zeroing at 50 yards, having a usable point of aim out to about 200 yards, and falling back on Shooter’s MOA in a pinch.
Use Your MOA Or MRAD Reticle to Estimate Range
You can use both MOA and MRAD to perform useful calculations in the field if you have a technical reticle. Knowing how to use these formulas will help you get the most out of your scope.
Make the resulting adjustments by dialing your turrets or using a holdover based on the subtensions in your reticle.
Range Estimation
Yards to target = (size of target in inches x 95.5) / size of target in MOA
Yards to target = (size of target in inches x 27.77) / size of target in mils
To use these formulas, you’ll need to know the size of your target in inches. Between that known size, the size of the target in MOA or MRAD as measured with your reticle, and the appropriate constant (95.5 for MOA or 27.77 for MRAD), you can determine the distance to your target in yards.
Size Estimation
Size of target in inches = (yards to target x size of target in MOA) / 95.5
Size of target in inches = (yards to target x size of target in MRAD) / 27.77
The size estimation formula is based on the range estimation formula; it just solves for a different variable. This is particularly useful for hunters who want to gauge a game animal’s size from a distance.
Constants vary by cartridge. For .308 Win, use a constant of 12. For 6.5 Creedmoor, use a constant of 17.
MOA adjustment = (range / 100) -1
The above formula is for a full-value 10 mph wind. Changes based on a wind direction are made after calculating your hold in MOA.
Wind Estimation with an MRAD Reticle
The above pattern is fairly universal, but you may need to tweak an adjustment here or there. Your specific rifle and ammunition will have a certain wind speed at which you can use this formula.
If you shoot a “6 mph gun” in a full-value 6 mph right-to-left wind, you would hold 0.5 mils right at 500 yards. If the same wind were a half value, your hold would be 0.25 mils. If the wind were full value but 3 mph, your hold would be 0.25 mils.
READ NEXT – Precision Rifle Series Shooting: 6 Keys for Beginner Success
If you’re pressed on time, here’s a quick list of the best coyote hunting lights:
Orion M30C: Best Coyote Hunting Light
Ulako Zoomable Green Light: Best for the Budget
Wicked Lights W403IC RED: Best Red Coyote Light
Predator Tactics Coyote Reaper: Best for Predator Hunting
1. Orion M30C: Best Coyote Hunting Light
The Orion M30C is one of the best lights for coyote hunting on the market today.
Orion is one brand that has never disappointed me, so I was very excited to try this light!
How did it measure up to their other products?
Let’s find out.
Build
The Orion M30C is available in either red or green light. It offers 100% pure light, with no filtering at all.
It’s constructed with aviation-grade aluminum and is scratch and impact-resistant. It’s very durable, waterproof, and heat/cold resistant.
The M30C is made with 3 Cree XP-E2 LED lights, with three different brightness levels including 700 lumens, 400 lumens, and 75 lumens.
This is the brightest hunting light I’ve ever used. I’ve had many good experiences using Orion’s hunting gear, and this light was no different. It’s bright, clear in any environment, and easily portable.
To set the brightness, you turn the bezel at the top of the light. It’s a bit awkward to reach up and turn at first, but it’s easy to get used to and remembers your last brightness setting, even after you turn it off and back on again.
If you purchase the whole light kit, it comes with an AC and car power adapter, two high-quality batteries, and all the mounting gear you could need.
The brightness level you use determines how long you can expect the battery to last. At 75 lumens (the lowest brightness setting), it’ll last 22 hours. At 400 lumens, expect 4.5 hours of use. And at the highest setting of 700 lumens, it’ll last 1.8 hours.
The batteries are rechargeable up to 500 times, and since it comes with a car charger, it’s easy to charge no matter where you are. Plus, you don’t have to worry about overcharging, because it’ll automatically stop once the battery is full.
Use
Orion claims you can see up to 377 yards with this light, but I’ve seen the reflection of eyes from 500+ yards away!
I’d say it takes until you’re around 200 yards away before you can get a good shot, which is still incredibly far.
Coyotes never notice this light. Even from 5 yards away, on the brightest setting, they don’t suspect a thing.
The M30C comes with a tactical mount and all the attachments you need to mount it on virtually any gun’s scope, rail, or barrel.
One of the only downsides of this light is that the beam is not adjustable. It’s not a huge problem, just something that takes a little getting used to.
On some guns, the head may be a bit too large for the barrel connection piece. Again, not a huge issue, it might just rub against the barrel.
Size
This light is relatively small and compact.
The head is 2.5” in diameter, and the tail is 1”. Overall, it’s 6” long.
It’s also pretty lightweight, weighing only 7.6 oz. This is ideal, as it won’t add a lot of weight to your gun.
Price
You can choose to purchase the entire kit, including two batteries; the chargers; and the mounts, or you can purchase just the light.
The kit is available for around $170, while the light itself goes for about $120. In my opinion, it’s worth the extra $50 for the whole kit!
This is a light that’s absolutely worth the money you’ll spend. It’s guaranteed to be one of the best varmint hunting lights you’ll ever use.
Is the Orion M30C Worth it?
If you’re a seasoned coyote hunter, you know that lights are an indispensable part of any hunting trip.
Like turkey hunters need turkey calls, coyote hunters need coyote lights.
Coyotes are nocturnal animals, so you need the right equipment to be able to see through the pitch-black of night.
If you’re a newbie coyote hunter looking for the perfect accessories, the Orion M30C is the best, brightest light I’ve ever owned. It makes coyote hunting completely effortless.
2. Ulako Zoomable Green Light: Best for the Budget
If you’re looking for an affordable hunting light, look no further than the Ulako Zoomable Green Light.
Every nighttime hunter needs a light, and green lights are great because you can see your game, but your game can’t see you.
Many top hunting lights retail for $100+, but the Ulako will run you less than $30!
Does the company sacrifice quality in their pursuit of an affordable green light?
Let’s find out.
Build
The Ulako Green Light is made with a convex lens, powered by an included rechargeable battery. In a pinch, it’ll also run on 3 AAA batteries.
It’s made of very durable aluminum alloy, and it’s both waterproof and shockproof. I’ve had mine for over a year, hunted in just about every environmental condition you can imagine (sometimes multiple times per week!), and never had a single issue with it.
The Ulako also features dual switches. The tactical on/off switch is located on the tail cap, and the toggle pressure, momentary on-switch is located near the pressure pad. The dual switches give the user versatility and offer easy operation.
Overall, it’s a very simple yet rugged green light. The bright green light gives you long-distance visibility without alerting game to your presence.
Use
Ulako claims this light can extend to a maximum distance of 300 meters. In my experience, this seems to be true. However, you get the best visibility up to about 150 meters.
It projects a crisp, bright, and steady beam at long and short distances. Visibility is great, even in fog and rain. You can easily get a clean shot at any nocturnal pests, big or small, and they won’t be spooked by the green light.
One great thing about this light is that the zoom is adjustable. With the zoom fully extended, you get a small, concentrated, square-shaped beam. When you slide the focus inward, it changes to a less concentrated, medium to large, round beam.
The zoom is smooth, precise, and easy to adjust.
The battery is specifically designed for high-powered hunting flashlights, and you can expect a run time of 4+ hours on a full charge. The charging indicator light changes from red to green once the battery is fully charged, so there’s no need to worry about over or undercharging.
The Ulako fits tubes sized 25-30mm and mounts/unmounts easily.
Size
At just 14.4 oz, this is a relatively lightweight light that’ll fit nicely on any gun without weighing it down.
It’s 5.3” long (6’3” when fully extended) and 1.4” wide.
Price
The entire Zoomable Green Light kit is available for just $25.95.
This kit includes the light, quick release mount, Picatinny mount, pressure switch, rechargeable battery, and charger.
The rechargeable battery is especially useful, especially if you regularly hunt at night. It’ll save you countless pennies on replacement battery after replacement battery.
You may be wary of this light because its price is almost too good to be true! However, you can be assured that Ulako provides great quality at an even better price.
Is the Ulako Zoomable Green Light Worth it?
The Ulako Zoomable Green Light is the best option for the money by far.
Ulako offers a very dependable light that lets you get the best shot in the worst conditions.
It’s great for newbie nighttime hunters, as it functions simply and is very easy to operate.
If you’re a hunter on a budget searching for predator hunting lights reviews online, you might be discouraged by the high price of a lot of the top options. However, this is a fantastic light that won’t break the bank.
I would recommend it to any nighttime hunter who needs a good, affordable green light.
3. Wicked Lights W403IC RED: Best Red Coyote Light
The Wicked Lights W403IC RED is one of the best red coyote hunting lights available.
It’s purpose-built, durably engineered, and incredibly bright.
How does the W403IC measure up to competitors?
Let’s find out!
Build
The W403IC is precision-made with T6 aircraft-grade aluminum, with type III hard anodization. The entire assembly is produced by a certified LED manufacturer, ensuring consistent color and quality.
It comes with the Intensity Control Rheostat tail cap, which doubles as a push on/off switch. This allows you to set the light intensity level before you even turn the light on, and gives you infinite control of the brightness in order to spook fewer animals.
The zoom focus uses Wicked Lights’ Scan & Kill technology. While many other lights have a series of grooves, forcing the user to turn the knob numerous times to change the focus from flood to zoom, the W403IC has a single, deep groove for quick adjustments.
It features a built-in halo shield, eliminating any possibility of light spills, and has a taller lens than other similar lights for greater magnification.
The fully adjustable mounting hardware and Picatinny scope mount fits 1” and 30mm tubes. The light is o-ring sealed for water resistance, and it’s operable in temperatures ranging from -30 – 120 degrees Fahrenheit.
Use
Wicked Lights claims you can get 400 yards of visibility with this light. From what I’ve seen, this seems to be accurate! I’ve even seen eyes reflecting from 500+ yards away. You can expect to get a good shot from about 300 yards.
This light is very bright, durable, and operates as advertised. My battery lasts an average of 2.5 hours on a full charge, but this depends on the level of intensity you choose to use.
The Intensity Control tail cap is one of the best features of this light. You can set it low at first, then gradually brighten it as you need. This helps condition the animal to the light, as they won’t notice a low light that gradually gets brighter as much as a sudden bright light!
You adjust the zoom focus with a bezel, which allows you to easily and quickly switch from spot to flood with one simple twist.
Another great feature is the two-piece, adjustable mount design. You can quickly attach the light to your gun and zero in on your target.
Size
At the scope mount, the body diameter is 1”. Overall, the light is 7.28” long when not extended, and 7.72” when fully extended.
With the battery installed, it’s a relatively lightweight 15.6 oz.
Price
The entire W403IC kit MSRPs for $189.95.
This includes the light, 2-position battery charger with AC/DC adapters, 2 Lithium-ion batteries, the adjustable windage and elevation mount kit, and a plastic case.
For added peace of mind, this price includes a three-year limited warranty on the light itself and a one-year limited warranty on the accessories.
Is the Wicked Lights W403IC Worth it?
The Wicked Lights W403IC RED light is one of the brightest, best hunting lights on the market. It’s a must-have for anyone who regularly goes hunting at night.
Specifically designed to target coyotes; hogs; foxes; and even smaller game, including raccoons, this light will not let you down.
4. Predator Tactics Coyote Reaper: Best for Predator Hunting
The Predator Tactics Coyote Reaper XXL is the best predator hunting light of its kind.
The beam throw is unmatched and the adjustable focus gives you a clear picture, no matter how zoomed in you are!
How does it compare to similar lights?
Let’s find out!
Build
The Coyote Reaper is made with aluminum alloy and comes in a sleek, matte black finish. It’s waterproof and functional in temperatures down to -20 degrees Fahrenheit, so you can use it in a variety of environmental conditions.
It runs on a single rechargeable battery, but Predator Tactics also sells a battery extension tube that holds two batteries for a longer runtime. The battery extension tube does add a little weight, so keep that in mind if you’re considering adding one.
For added concealment, the Coyote Reaper includes a rubber halo shield.
One downside of this light is that the included universal mount is a bit difficult to adjust. I’d recommend considering a Predator Tactics windage elevation adjustable rail mount, which is easy to install and lets you aim much more easily.
Overall, the Coyote Reaper is a solid choice. Predator Tactics designs and manufactures high-quality hunting gear, and this light is no exception.
Use
Predator Tactics claims that the Coyote Reaper gives up to 700 yards of beam throw. Speaking from personal experience, this light seems to work precisely as advertised.
I haven’t tried using it from exactly 700 yards yet, but from 500+ yards, you can easily see and identify different animals in pitch-black conditions. The picture is very clear, regardless of the zoom settings.
The Coyote Reaper comes with an adjustable focus, good for varying range. The light quality is great, and it’s bright enough to zoom in without any pixelation or graininess.
Controlling the focus is a bit difficult to understand at first, so it’s best to become familiar with the controls before using it for any serious hunting.
The intensity control dial on the tail cap doubles as a remote on/off switch and can be easily and silently controlled without ever moving your hands from a shooting position.
However, it’s also easy to bump the switch and turn the light on accidentally – and you won’t notice, since it’s in IR, until you go to turn it on and see you have a dead battery!
To prevent this, I always make sure to just loosen the tail cap one extra turn.
The average battery runtime can vary greatly based on the brightness you use. In fact, I’ve hunted two nights in a row on one battery charge before!
Overall, I’d say the average total runtime is around 4 hours.
Size
The Coyote Reaper is 8.5” long.
It’s relatively lightweight, weighing around 17 oz, so you don’t have to worry about it weighing you down while you’re running through the woods!
Price
The entire XXL Rifle kit sells for $189.95. It includes green and red LED lights, a universal scope mount to attach it to a rifle scope or Picatinny rail, a rechargeable Lithium-ion battery, a charger, and a plastic carry case.
It’s not a cheap light, but it’s a pretty great value for one of the best predator hunting lights.
Even better, this price includes a lifetime light shell warranty; two-year LED bulb module and tail cap circuitry warranty; one-year remote switch, mount, and charger warranty; and a 30-day battery warranty!
Is the Coyote Reaper Worth it?
The Predator Tactics Coyote Reaper XXL is one of the best performing lights of its kind.
It’s ideal for nighttime predator, hog, and coyote hunting, helping you see better for more positive target acquisition.
I would 100% recommend this light to any nighttime hunter.
Now It’s Your Turn
I hope you enjoyed my best light for coyote hunting guide.
So as a recap:
If you’re looking for the best coyote hunting light, get the Orion M30C.
If you’re on a budget, I’d recommend getting the Ulako Zoomable Green Light. It’s affordable and dependable.
The Wicked Lights W403IC RED is the best red coyote light. It is durable and incredibly bright.
Lastly, if you’re looking for the best for predator hunting, then the Predator Tactics Coyote Reaper is what you are looking for.
The most advanced sniper rifles in the world are always been a great addition to any special operations forces team. They also have been my weapon of choice. In modern warfare, they are unavoidable subject in every infantry or special operations forces mission. Usually, snipers are our eyes and our advantage at the moment when the battle begins. From short-range to long-range sniper rifles, the outcome is the same.
In the world of firearms, these sniper rifles mean something and they are considered as the top sniper rifles in the world at this moment.
The M110 SASS (Semi-Automatic Sniper System) is an American semi-automatic sniper rifle/designated marksman rifle. The sniper rifle is developed by Knight’s Armament Company in a 7.62x51mm NATO round.
The M110 SASS (Semi-Automatic Sniper System) (Photo: XY)
It has been introduced to the U.S. SOF community in April 2008, when U.S. Army soldiers from Task Force Fury in Afghanistan used them in a combat zone. The troops rated the weapon very highly, noting the quality of the weapon and its semi-automatic capabilities compared to the bolt-action M24. It is considered as one of the most advanced sniper rifles in the world.
Designed: 2007 Cartridge: 7.62×51mm NATO Action: Gas-operated, rotating bolt Rate of fire: Semi-automatic Muzzle velocity: 783 m/s (2,570 ft/s) with 175 gr. M118LR Effective firing range: 800 meters (875 yds) Feed system: 10 or 20-round detachable box magazine
M40
The M40 rifle is a standard-issue sniper rifle in the USMC (United States Marine Corps). It is a bolt-action sniper rifle introduced into service in 1966. So far, it has had four variants—the M40, M40A1, M40A3, and M40A5. The changeover to the A1 model was completed in the 1970s, the A3 in the 2000s, and the A5 in 2009.
The most advanced sniper rifles in the world: M40 is a standard-issue sniper rifle in the United States Marine Corps (Photo: XY)
Each M40 is built from a Remington 700 bolt-action rifle and is modified by USMC armorers at Marine Corps Base Quantico, using components from a number of suppliers. New M40A5s are being built, and A1s are upgraded to A3s and A5s as they rotate into the armory for service and repair.
Designed: 1966 Cartridge: 7.62×51mm NATO Action: Bolt action Rate of fire: 6 RPM Muzzle velocity: 777 m/s (2,550 ft/s) (w/175 gr. M118LR) Effective firing range: 800 meters Feed system: 5-round integral box magazine (M40, M40A1, M40A3) 10-round removable box magazine (M40A5) Sights: Scout Sniper Day Scope (SSDS)—Schmidt and Bender PM II 3-12×50
AS50
The AS50 sniper rifle was primarily designed for the British Armed Forces and the United States Navy SEALs. It was employed due to its high rate of fire (five rounds in 1.6 seconds).
The AS50 sniper rifle is primarily designed for the British Armed Forces and the United States Navy SEALs (Photo: XY)
The AS50 was manufactured by British firearms producer Accuracy International and chambered in a .50 BMG caliber.This sniper rifle enables operators to engage targets at very long range with high accuracy using explosive or incendiary ammunition. The AS50 employs a gas-operated semi-automatic action and muzzle brake, allowing for lower recoil than the AW50 bolt-action rifle and faster target acquisition.
Designed: 2007 Cartridge: .50 BMG Action: The gas operation, direct impingement Rate of fire: semi-automatic, estimated at 5 rounds/1.6 seconds Effective firing range: 1,800 m Feed system: 5 or 10-round detachable box magazine
McMillan Tac-50
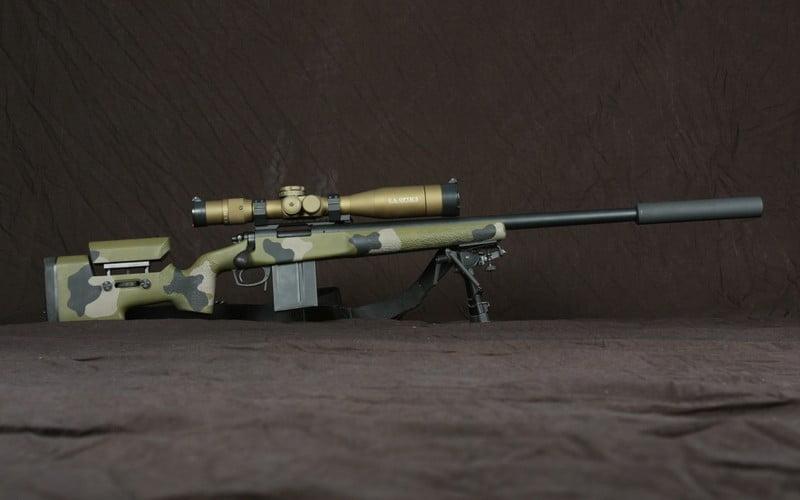
The McMillan Tac-50 sniper rifle was produced as a military and law enforcement weapon, which, designated as the C15. The rifle is also a standard Long Range Sniper Weapon (LRSW) of the Canadian Forces since 2000. Rifles of the Tac-50 family are capable of outstanding accuracy and guaranteed to provide 0.5 MOA groups with match grade ammunition.
The most advanced sniper rifles in the world: The McMillan Tac-50 is a standard issue of the Canadian Forces since 2000 (Photo: McMillan)
The Tac-50 sniper rifle is produced in Phoenix, Arizona in the United States by McMillan Firearms Manufacturing. This long-range anti-material/anti-personnel weapon is based on previous designs from the same company, which first appeared during the late 1980s. McMillan makes several versions of .50 caliber rifles, based on the same proprietary action, for the military, law enforcement, and civilian use.
Designed: 1980s Cartridge: .50 BMG (12.7 x 99 mm) Action: manually operated rotary bolt action Muzzle velocity: 805 m/s (2,641 ft/s) Effective firing range: 1,800 m (1,970 yd) Feed system: 5 round detachable box magazine Sights: Customizable; 5-25x telescopic sight standard in Canadian Forces
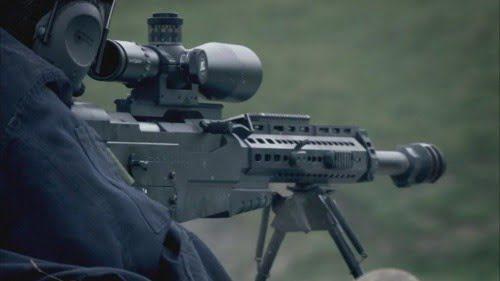
Accuracy International AWM (Arctic Warfare Magnum)
The Accuracy International AWM (Arctic Warfare Magnum) is one of the most recognized sniper rifles among the special forces community. The rifle is a bolt-action styled manufactured by Accuracy International and designed for magnum rifle cartridge chamberings. The Accuracy International AWM is also unofficially known as the AWSM (Arctic Warfare Super Magnum), which typically denotes AWM rifles chambered in .338 Lapua Magnum.
The most advanced sniper rifles in the world: The Accuracy International AWM (Photo: XY)
On 25 September 2012 Accuracy International announced on their company website that the AWM .338 Lapua Magnum rifle is being phased out and replaced by the Accuracy International AX338 rifle.
Designed: 1996 Cartridge: .300 Winchester Magnum .338 Lapua Magnum Action: Bolt-action Effective firing range: 1,100 m (1,203 yd) (.300 Winchester Magnum) 1,500 m (1,640 yd) (.338 Lapua Magnum) Feed system: 5-round detachable box magazine Sights: detachable aperture type iron sights day or night optics
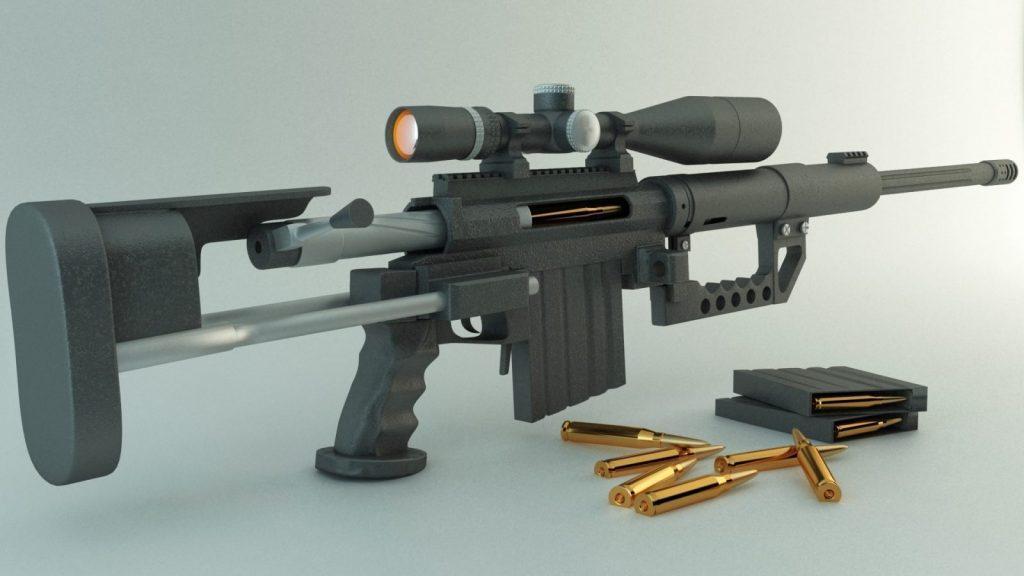
CheyTac Intervention
The CheyTac Intervention is considered as a star among sniper rifles. An American-made bolt-action sniper rifle manufactured by CheyTac LLC is one of the most favorited on the market. It is fed by a 7-round detachable single-stack magazine. It is chambered for .408 Chey Tac or .375 Chey Tac ammunition. The manufacturer states that the system is capable of delivering sub-MOA accuracy at ranges of up to 2,500 yards (2,300 m), one of the longest ranges of all modern-day sniper rifles.
The CheyTac Intervention is considered as the best sniper rifle in the world (Photo: XY)
It is based on the EDM Arms Windrunner and it can be found in various variants: M-200, M-200 Carbine, M-200 CIV (Civilian), M-200 RK, M-310 SS (Single Shot), and M-310 R (Repeater).
Designed: 2001 Cartridge: .408 Chey Tac or .375 Chey Tac Action: Bolt action Effective firing range: 2000+ m – M-200 2000+ m – M-200 Carbine 1500+ m – M-200 CIV (Civilian) 1800+ m – M-310 SS (Single Shot) 1800+ m – M-310 R (Repeater) Feed system: 7-round detachable box magazine Sights: Day or night optics
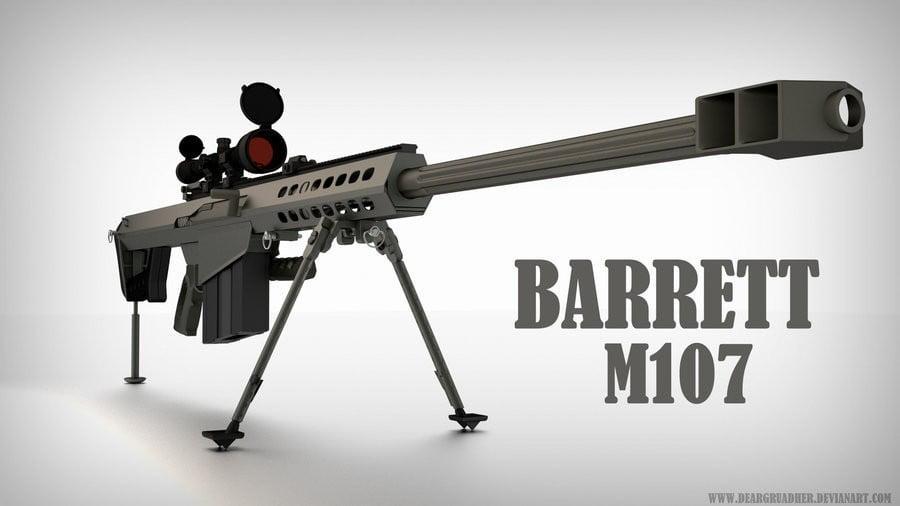
Barrett M107
The Barrett M107 is a .50 caliber, shoulder-fired, semi-automatic sniper rifle. Like its predecessors (Barrett M82), the rifle is said to have manageable recoil for a weapon of its size owing to the barrel assembly that itself absorbs a force, moving inward toward the receiver against large springs with every shot.
Various changes were made to the original M82A1 to create the M107, with new features such as a lengthened accessory rail, rear grip, and monopod socket.
The Barrett M107, like previous members of the M82 line, is also referred to as the Barrett “Light Fifty”. The designation has in many instances supplanted earlier ones, with the M107 being voted one of 2005’s top 10 military inventions by the U.S. Army and it is one of the most advanced sniper rifles today.
Designed: 1980 Cartridge: .50 BMG (12.7×99mm) Action: Bolt action Effective firing range: 1,829 m (6,001 ft) Feed system: 11-round detachable box magazine Sights: Day or night optics
Rubber boots are essential for those rainy days when you don’t want your feet to get wet. But if they start to leak or crack, it can be frustrating. That’s why we’ve put together this guide on how to fix them fast.
You don’t have to go through the hassle of buying a new pair of rubber boots just because they start to leak or crack. With our easy tips, you can have them fixed up in no time. So don’t wait – Repair Your Rubber Boots In No Time!
Don’t let a little crack or leak in your rubber boots turn into a big problem. Here are five ways to repair them quickly and easily in our compilation.
Read on here for more information on repairing cracks and leaks in rubber boots!
Yes, it is possible to repair rubber boots. However, the extent of the repair will depend on the type of damage and the available materials. For minor damages, such as small holes or cracks, a patch can be used to fix the problem. More extensive damage, such as large holes or tears, may require the use of a patch and a sealant. If the damage is too severe, the boot may need to be replaced.
5 Ways to Repair Cracks and Leaks in Rubber Boots
If your rubber boots have cracks or leaks, there are several ways you can repair them. You can buy a rubber boot patch kit, use vulcanizing cement, use a sealant, use a hot glue gun, or use boot covers. Let’s see how these tips can be used to repair rubber boots that leak and crack.
1. Rubber boot patch kit
Repair Rubber Boots with a rubber patch
A rubber boot patch kit comes with a piece of rubber and instructions on how to apply it to the boot.
The process included in applying the patch may vary, but the kit will come with everything you need to complete the repair.
You can follow these steps:
Clean the area around the hole or leak with a damp cloth.
Cut the patch to size, if necessary.
Apply the adhesive to the back of the patch.
Peel off the backing and apply the patch to the boot.
Press down on the patch to adhere it to the boot.
Wear the boots after the adhesive has dried completely.
With a few minutes and effort, rubber boots can be repaired easily!
2. Use vulcanizing cement
Rubber boots are repaired with vulcanizing cement when they leak or crack. It works by bonding the two pieces of rubber together, which creates a strong seal that prevents further leaking.
Vulcanizing cement is available at most hardware stores and can be applied easily with a brush or roller. This type of repair is often used on rubber boots that are exposed to harsh weather conditions or frequent wear and tear. It results in a strong and durable repair that will last for many years.
3. Use sealant works
A sealant is a material that is used to fill in gaps or cracks, sealing them off from the rest of the surface. When applied to rubber boots, it creates a barrier that prevents water and other liquids from seeping through the cracks and leaks. This can be an effective way to repair and extend the life of your rubber boots.
The application process includes the following steps:
Start by cleaning the surface of the boot where the sealant will be applied. Use a damp cloth to remove any dirt, debris, or other foreign objects that could prevent the sealant from bonding properly.
Apply the sealant to the cracks and leaks, using a putty knife or other similar tool.
Smooth out the sealant so that it is level with the rest of the boot surface. Boots should be worn after the sealant has completely dried.
Sealants are typically made from silicone, latex, or other synthetic materials. They can be purchased at most hardware or home improvement stores.
When selecting a sealant, be sure to choose one that is specifically designed for use on rubber. Follow the instructions on the packaging to ensure proper application and drying time.
4. Use a hot glue gun
Rubber boots can be repaired with a hot glue gun if they have cracks or leaks. It works by heating the glue so that it can be easily applied to the affected area.
The hot glue will then cool down and harden, creating a seal that will prevent further water from leaking through.
To use a hot glue gun, first, make sure that the area to be repaired is clean and dry. Then apply a layer of glue around the perimeter of the hole or crack.
Be sure to smooth out any air bubbles so that the seal is as watertight as possible. Allow the glue to dry for several hours before wearing the boots again.
Hot glue guns are a quick and easy way to repair small cracks and leaks in rubber boots. However, they are not intended for use on larger holes or tears. If the damage to your boots is too severe, you will need to replace them entirely.
Mote read: Glue for rubber boots
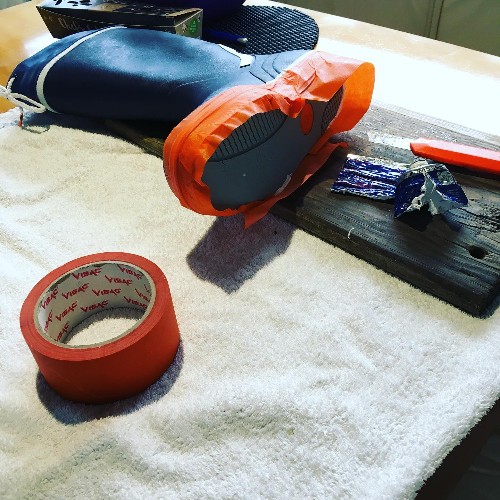
5. Use boot covers
The Use of a boot cover works to repair the Cracks and leaks in rubber boots by providing a temporary seal that will allow the user to continue using the product while it is being repaired.
This method is often used when there is a small crack or leak that needs to be fixed, and it can be done quickly and easily without having to replace the entire boot.
Almost any hardware store or home improvement store sells boot covers, and they are typically made from a flexible material that can be easily applied to the affected area.
Once the cover is in place, it will need to be held down with a piece of tape or a similar product so that it does not come off while the boot is being repaired.
Once the repair is complete, the boot cover can be removed and the boot will be as good as new. In some cases, the use of a boot cover can also help to prevent further damage to the boot, which can save the user money in the long run.
Best way to patch rubber boots
There are many ways to patch a hole in rubber boots, but the best way depends on the size and location of the hole.
For small holes, use a strong adhesive like epoxy or super glue. For bigger holes, patch the hole from the inside with a piece of rubber or PVC pipe. If the hole is near the edge of the boot, you may also need to reinforce the edge with a strip of rubber or PVC.
Once you’ve patched the hole, be sure to test the repair by walking in a puddle or spraying the boots with water. If the repair seems secure, your boots should be good as new!
Conclusion
In conclusion, rubber boots are a great way to keep your feet dry and protected from the elements. However, they can sometimes leak or peel, and they may also crack if they’re not properly cared for. If you have a pair of rubber boots that are in need of repair, be sure to follow the steps outlined in this article so that you can get them back in working order. And when shopping for rubber boots, be sure to keep the above information in mind so that you can choose a pair that will last you for many years to come.
Thanks for reading!
FAQs
How to fix peeling rubber boots?
If your rubber boots are peeling, there are a few things you can do to try and fix the problem. First, make sure that the boots are clean and dry. If they are dirty or wet, they will be more likely to peel. Next, try using a mild soap or detergent to clean the boots. If this does not work, you can try using a rubber boot conditioner. Finally, if none of these things work, you may need to replace your boots.
How to find a leak in rubber boots?
There are a few ways that you can tell if your rubber boots leak. One way is to simply fill the boots with water and then check for any drips or leaks. Another way is to put the boots on and then step into a puddle or pool of water. If you see any water coming in through the boot, then you know that you leak. Finally, you can also check the inside of the boots for any water or moisture. If you see any signs of water, then you most likely leak into your boots.
How do keep rubber boots from cracking?
There are a few things you can do to help extend the life of your rubber boots and prevent them from cracking.
One is to make sure that you store them in a cool, dry place when they’re not being worn. If they’re exposed to too much heat or sunlight, the rubber will break down more quickly.
Another is to avoid wearing them in rough conditions whenever possible. If you know you’re going to be walking through mud or puddles, try to put on a different pair of shoes first and save the rubber boots for when you need them.
And finally, you can treat the surface of the boots with a silicone-based protectant. This will help create a barrier against water and dirt, and it will also make the boots easier to clean. Simply apply the protectant with a cloth or brush and then buff it dry.
Trout Fishing With Rapala Minnows by Bryce Stupples
Rapala Countdown CD5 (5cm in length).
My first introduction to the mighty Rapala was through a family friend who has featured in a number of my stories – Chalky (aka Bruce White). He uses nothing but Rapalas and seems to catch more than his fair share of large trout.
Rapalas always seemed a bit ”poncey” and the price was always a bit out of my league, ”imagine if you lost one at $20.00 each,” I often thought!
One of the trout I have caught recently on a Rapala.
Over the years I heard more and more references to Rapalas being used to catch large fish, though more often than not these monsters were caught while trolling, and as I don’t get many opportunities to fish this way, they still held little appeal.
One day a colleague at work was pouring over a fishing gear catalogue. As we talked he pointed out how cheaply you could import these items, especially Rapalas, given that our dollar was a lot stronger at the time. Getting over that immediate cost factor had just been achieved and I found myself putting in an order for a variety of types and colours.
After about six weeks the package arrived and I was now armed with a number of 7 cm Rapalas. My selection included floating, sinking and articulated. The colours were rainbow, perch (black and gold) and silver.
My initial excursions saw me catch no more fish than normal. In fact, I would often revert back to the tried and tested Toby or Tassie Devil in order to catch a fish. However, I persisted and explored different ways of using these lures. I soon discovered their worth, and now use them as my number one weapon against trout. Hopefully the following experiences, observations and tips will provide other anglers with some new ideas when next fishing these fantastic “fish catching” lures.
1. Rapala Knot Always use the special Rapala Knot. This knot forms a loop that assists the lure’s distinctive action by allowing it some slack to shimmer like a stricken baitfish when retrieved. An alternative is to use a snap-swivel which does affect the action slightly but in my experience makes changing patterns and types a lot quicker and easier as I tend to change over lures a lot depending on the water conditions.
2. Wear Shorts! When fishing with Rapalas I always wear shorts and boots. The reason being that although I set myself up relatively cheaply they are still pricey to replace. I have stripped down and gone for a few swims to rescue ‘a snagged Rapala. In saying this, however, even though these have twin trebles they don’t seem to get snagged as often as other lure types. My theory is that the plastic lip combined with the nose-down shimmering action glides the lure over most stones and through the weed – submerged trees are a different story!
3. Lure Size Lure size doesn’t seem to matter too much. I have regularly witnessed small trout being taken on very big Rapalas. I prefer to use a size seven as it doesn’t look too big and it provides me with enough weight to be able to cast effectively. Anything smaller and unless you have a tailwind you will be wasting your time trying to cast with it.
4. Casting These lures are difficult to cast. But life is made a good deal easier if you fish with light gear such as a small graphite rod and reel spooled with line no heavier than an 8lb test. Some recommend you use split shot about 30cm up the trace to help with casting and sinking the lure. With practice, I found this unnecessary as it changed the action of the lure and increased the number of snags I was getting.
Hurunui River Monster Trout on Scarborough Reel, 6lb line and Rapala Lure.
In this diagram, you can see the various Rapala lure types and their swimming action when retrieved.
5. Colours & Models Rapalas come in a wide variety of colours and styles. Everyone I know who fishes with Rapalas seems to catch fish with each individual having a different preference for a colour and style. For what it is worth the rainbow pattern is universal but I prefer the “black and gold” or ”perch” patterns for fishing southern waters.
For trolling I prefer the articulated models, but for rivers and lakeshore casting I use either a floating or Countdown, once again depending on the type of water I am fishing in. The Countdown is designed to sink at approximately one foot per second then hold a fixed depth while being retrieved.
The floating Rapala will float until retrieved, or it encounters resistance from the current. Recently I purchased some of the new Blue Fox range. These are cross between a Rapala and a Veltec (made by the same people at Rapala) and although I have yet to catch a fish on one, they impressed me with their action and castability.
6. Casting Upstream One of my preferred methods to fish a Rapala is to cast a Countdown upstream in a smaller river or stream in a similar fashion to the way one would cast a dry fly up current. With this method, I try to cast in such a way that the fish turns away from me to take the lure. In other words, make the fish turn towards the opposite bank to which you are standing on.
In the waters of the Oreti River where I predominately fish with Rapalas the fish spook very easily and if they see you will rarely take.
When fishing blind I start at the bottom of a hole or run, and looking directly upstream, cast at 10 o’clock to the far bank or far side of the main current. My next cast goes to 11 o’clock midstream, or mid current, then finally on cast directly upstream to fish the near side.
I then take a couple of steps upstream before repeating the process until I have covered all likely water. It is by this method – with a bit of practice – that I have had the most success and caught all of my big trout over recent years.
The important thing to remember is to wind fast enough with the current to maintain the swimming action of the lure.
The other point to bear in mind is that fish more often than not have taken the lure coming downstream, and therefore even with big fish, the takes are very subtle. So be ready or otherwise you will miss the strike!
7. Floating Downstream Using a floating Rapala and floating it downstream to retrieve up through the middle of a pool or over-hanging grass or willows is another tactic I often employ. This involved my starting at the head of the pool, or above the rapid feed the hole – often standing mid current – and allowing the current to take outline as the Rapala floats on the surface taking the natural course of the river.
When the Rapala is at the bottom of the pool or past the fishy zone you engage the reel and start slowly retrieving. This method fishes the lure right up to the side of the area where fish will be feeding and gives the fish plenty of opportunity to get a good look at the lure. This method allows you to fish a lot of water that you would not be able to access without spooking the fish or tangling with obstructions such as overhanging trees. Indeed how many times have you seen trout cruising underneath willows or lying hard up against the bank where the grass overhangs and wished you could cast to them? Give it a go.
Rapala Fat Rap Shallow Running Bibbed Minnow designed for fishing in shallow water.
8. Across and Down Across and down is the traditional way for spin fishermen to attack the water. I rarely fish with Rapalas in this way, but where a river is wide or is carrying a large volume of water there is often no other way to cover the water. In such water, the likelihood of spooking fish is less so it is, therefore, the tactic to employ.
9. Lake Margins Fishing lake margins and over weed beds gives you the opportunity to utilize the different characteristics of the different Rapala lures. The Countdown is good as it allows you to fish the bottom, or fish through the water at different depths by utilizing the predetermined sinking rate.
One word of caution is to remember that as the water gets shallower the lure will start to hit the bottom so be wary of those submerged snags!
The floating Rapalas are useful to cast over weed beds as they will only go under the water a metre or so. If you feel them catching on the weed stop winding and they will float back to the surface. A jerky retrieve is often useful in these situations as this will keep your lure ”fishing” at all times.
10. Trolling The few times I have trolled with Rapalas I have used the articulated models for no other reason than they look fantastic in the water. Their appearance perfectly replicates the swimming action of a small fish very well.
Friends of mine swear by the rattling models fished on a downrigger but they all report that the Rapala is one of the best lures to use when trolling for trout.
In general the wider and longer the plastic bib on the front of the Rapala the deeper it dives when trolling. This makes it possible, generally speaking, to choose a lure to dive down to the depth that fish are appearing at on your sounder.
Keep in mind that Rapala lures trolled a good distance behind a boat will usually dive and swim at over twice the water depth attainable from the same lure by casting and retrieving. Also when trolling on lakes most fish are caught trolling in: the shallower water near the lake’s margins, close to river mouths, along drop-offs, and cover, rather than out in the middle in the deepest water.
Rapala Shad Rap Deep Runner is an excellent lake trolling trout lure.
In general, a Rapala lure with a wider and longer bib (like the Shad Rap top) is designed to run deeper. The Rapala Countdown (below) tends to rise toward the surface when you stop winding.
11. Releasing Fish A characteristic of Rapalas is that fish take them very well. With the treble hooks, they tend to stay hooked. This often poses problems for me when I look to release a big trout and it is bleeding or the middle treble has hooked the trout in the eye. Therefore when you have caught enough for the table, remove one of the treble hooks or change them over to singles to give yourself the best possible chance of returning fish safely.
So from early scepticism about the Rapala lure, I am now a confirmed believer in their ability to catch fish. Be prepared to experiment with them and the results may surprise you. Of the last ten trout, I have caught on a Rapala I can honestly say that they have averages 6 pounds.
Rapalas do of course have their uses in sea fishing. I have also seen anglers catch salmon on them in the Rakaia and Rangitata Rivers.
Once you get the feel for fishing with Rapalas you will want more than one.
A brace of big brown trout taken from Southland’s Oreti River with the aid of a yellow and black Rapala Countdown CD7.
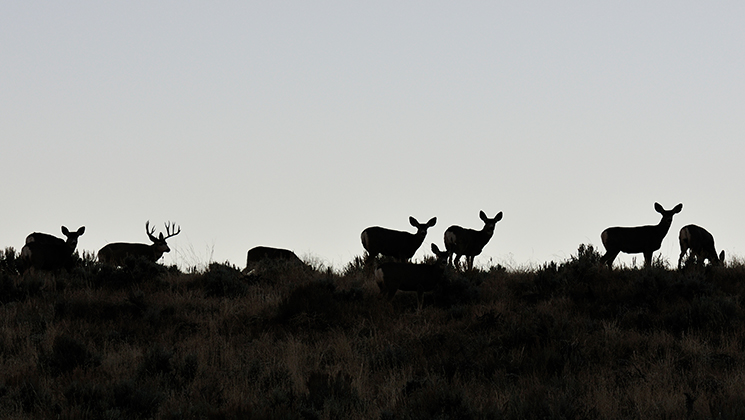
In my opinion, a big mule deer buck is one of the hardest animals on earth to kill with a bow. They don’t have regular patterns like a whitetail; their eyes, ears and nose are superb. They usually hang with a group of other bachelor bucks, and together they employ a strategic method of bedding with somebody facing in every direction. They almost never drink in the daylight, rendering them all but impossible to ambush over water. And they don’t like to be disturbed: bump them once, and they’ll move to a different location or go nocturnal.
Muley bucks do have a couple weaknesses though: food and romance. And in some specific locations they like to bed in big, wide-open territory. That can put them in a stalk-able position. Let’s look at those three chinks in a buck’s armor and see if we can put an arrow through one of them.
Spot-and-StalkProbably the most respected method of hunting in the West, spotting and stalking can be exciting, adrenaline-ridden and effective. The above-timberline habitat of Colorado or Nevada and the broken high-plains badlands of Wyoming or the Dakota’s can be ideal for spotting and stalking big muley bucks with stick and string.
But spot-and-stalk methods can also be frustrating, physically extreme and futile. For instance, the mule deer where I live never bed in open stalk-able areas. They climb atop mesas and bed in thick pinyon/juniper forests. It’s impossible to spot them, and just as hard to stalk them.
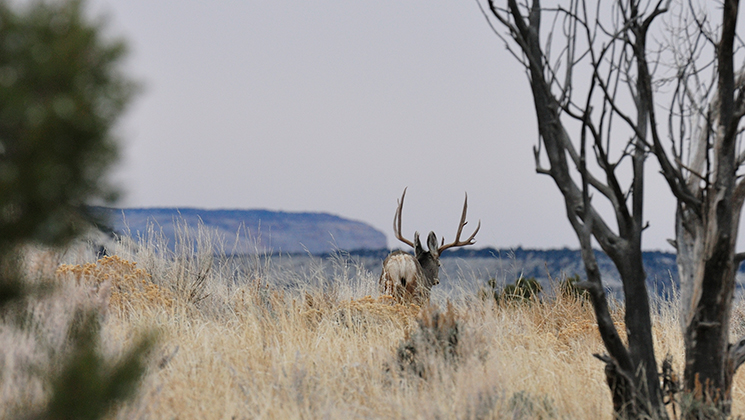
To kill a big spot-and-stalk buck, you’ll first need to spot him, then put him to bed, and then stalk close enough for a shot. Let’s look at the process in detail.
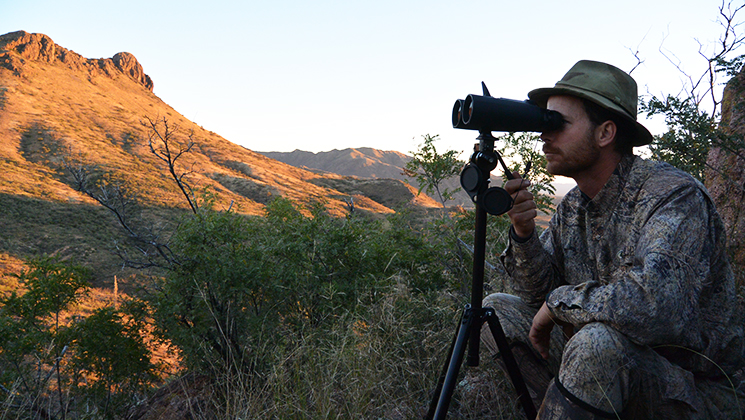
1. Spot Climb a high vantage point and let your binoculars do the walking. You’ll be glassing up to a couple miles distant, so use premium optics. Once you spot bucks, study them through a spotting scope to determine if there’s a shooter buck amongst the group. Try to get to know the bucks while you watch them: How many are there? What are their habits? What is their pecking order? There’s always one schizophrenic buck in the gang; figure out who he is and avoid him. Most of all, figure out how the big boys move in relation to the group: Do they like to bed above, below, in the middle or to the side? The answers to these questions will dictate whether a buck is killable or not.
2. Put Your Buck to Bed. Early-season bucks usually feed for a few minutes up to several hours before heading to their morning beds. Spot them now, but don’t make a move. Watch as they work their way to a bedding area and lie down. You need to stay put a little longer though; most of the time a buck will bed—often, but not always, in the sun—for about 45 minutes to an hour, and then he’ll get up and move to a different bed in the shade. That’s when you make your move. Watch him for 15 minutes or so to be sure he’s settled in, and then go. You’ll have roughly three to five hours before he gets up to relieve himself and eat a midday snack.
3. Stalk in Close. While you’re waiting for the buck to settle in for the day, you need to strategize your approach. Figure out what the wind is doing at the buck’s location. Plan an approach route, and locate landmarks to keep you on track. Everything looks different when you’re on location than it does from a distance, so study it well, and then make your move. Ditch your shoes and pack while you close the last 100 yards, sneaking in on just your socks.
If you’ve planned and executed successfully, you’ll either be able to arrow the buck in his bed or set up downwind of the buck. Get comfortable and stay ready—ideally you should be able to see at least his antler tips. It may be several hours until he gets up. When you see him swivel his head a couple times, get ready. His antlers will swoop down and forward as he begins to get up—that’s when you draw your bow. You’ll have a few seconds to squeeze off the shot before he busts you and heads for the next county.
Hunt the RutWhen a big muley buck has romance on his mind he disregards all else, becoming very vulnerable. It’s the reason that there are almost no public land rifle hunts during the rut, and precious few archery hunts. Big bucks forget all their hard-earned survival tactics, charge around during all hours of the day and will look right at you and then go back to chasing tail. Peak rut in most locals happens in late November and early December, and a little research can turn up hunting seasons in various states. It’s a great time to hunt big muley bucks with a bow. Here’s what to do:
1. Shadow Doe Families. Mule deer bucks travel from doe family to doe family, looking for a group that’s coming into estrous. When he finds one, he’ll stay with them until they’re serviced (usually several days), then he’ll hit the road in search of another party. Your best tactic right now is to find does—lots of them—then stand by for a big boy to show up. Sneak in and set up downwind of the group and wait until he offers a shot.
2. Set Up on Travel Routes. As mentioned above, big bucks move a lot during the rut. I once watched a big rutty buck cover over a mile in less than fifteen minutes, checking three families of does along the way. Find a ridge-top saddle, pinch-point or natural funnel and set up downwind of it, much like you’d set up to hunt whitetail. If you’ve got doe groups on both sides of your position, you’re golden. Wait all day, especially if the weather is cool and/or overcast.
3. Rattle. Muleys don’t rattle up as readily as whitetails do, but if the timing is right, they’ll come in. Try getting within 150 yards downwind of a big buck and his does, and make like a couple rival bucks battling it out. You can also rattle to traveling bucks, giving the impression of two bucks fighting over hot does—you just might get lucky.
AmbushSuccessfully bushwhacking a big muley buck is all but impossible under ordinary circumstances. They’re just too nomadic. I’ve sat on a ridge top and watched the same bachelor bucks enter a 90-acre alfalfa field ten different ways in ten different days. That said, in my home turf, spot-and-stalk methods are next to impossible, and the rut happens months after the bowhunt is over, so the big bucks I’ve killed with a bow have all been ambushed. Here’s how to make it happen.
1. Bottlenecks. Though rare in good muley habitats, bottlenecks do exist. Case-in-point: one meadow I sometimes watch is bordered by a creek and has a sandstone point jutting alongside. The deer’s favorite bedding area is opposite that creek and point. The only way for them to get there is across the creek, past a huge ponderosa pine, and around the point. Sit there long enough and you’ll kill a buck. Another good place might be in a narrow ridge-top saddle between feeding and bedding areas. Just remember, mule deer go where the wind blows them, so the situation and terrain must be significant to create an effective ambush.
2. Attractants. Sometimes the only way to get within archery range of a mule deer buck is to hunt over something he wants pretty badly, such as a good acorn patch, a mineral lick or an apple tree near an old homestead. Those spots are few and hard to find, but if you locate one, you might see an old warrior compromise his safety for a nibble of his favorite treat. That’ll give you a chance to turn him into your favorite venison treat.
3. Decoy. I’ve seen it work one time; the biggest buck any of my clients ever killed came to a decoy. He fed in a large meadow each night, leaving well before dawn each day. My brother was guiding, and just couldn’t get the hunter and the buck within the same zip code. Then one day he had a flash of brilliance and set our 3-D buck target in the meadow near the client’s blind. That old savvy buck saw the decoy from clear across the meadow and came to investigate. He ended up gross scoring 196 and some change. I’m not saying a decoy will work every time, or even often. But it worked on the biggest bow-killed buck I’ve seen on the ground.
Still-HuntingStill-hunting deserves an honorable mention in this article, especially if you’re simply hunting any buck. Slipping your way very slowly through good deer habitat can provide a fun way to spend your midday, teach you a lot about your hunting area and even offer a shot opportunity. Just be sure to keep the wind in your face and move slowly as cold molasses, picking cover apart with your binocular. “One step, two looks” is a good mantra. Spot a buck, and your adventure morphs into a spot-and-stalk event.
Why would you want to get rid of snapping turtles?
Snapping turtles, as cute as they may look, are actually pretty dangerous! They can enter your garden pond or water feature easily from any neighboring stretches of water. If you live near a river or lake, for example, they could easily make their way to your nice, quiet pond.
The reason they are so dangerous is because of the type of animal they are. They are carnivorous animals which means that they will not think twice about snapping up your ornamental fish.
They have also been known to eat baby ducks, geese, and other waterbirds. So, needless to say, it is best to get rid of them! However, this can be easier said than done, especially since they also carry a huge risk towards humans too.
The bite of a snapping turtle is extremely painful and can cause really serious damage. They are also known to carry the infection known as salmonella, putting you at risk of infection from their bite.
With this in mind, the way you approach these creatures needs to be well planned and executed carefully. Follow our tips to find out how to get rid of snapping turtles.
Check the Regulations in the Local Area
Before you do anything, it is very important that you check the rules and regulations for the area in which you reside. The reason for this is because many local authorities have certain ways of dealing with animals that are a danger.
The authorities will help you in the best ways to trap them, as well as letting you know where you can release them back into the wild. Some locations, for example, may be off-limits due to the carnivorous nature of these animals.
As well as this, some animals may be protected by certain authorities. Your local authority will be able to advise you on how to deal with the snapping turtles, and may even come out to deal with them for you!
Choose Your Humane Trap
Notice the word ‘humane’! This is very important! We have already stated this but we think it is important to remind you again that whilst they are undesirable characters in your pond, they are just animals trying to do the best they can to survive.
The traps that you get to get rid of these turtles should be live traps, meaning that they can be caught with no harm done to them. Usually, you can choose from either floating or non floating traps.
Either is fine but just ensure the non floating trap is positioned on solid ground so the snapping turtle has access to oxygen or else they will drown. Choosing either of these traps will make it far easier to transport them to safety and will minimize the risk of you getting hurt, too.
Choose Your Bait for the Trap
Choosing the right type of bait for your snapping turtle trap is essential. You will need to lure them into the trap, and so you need to choose something that will be attractive to them. Remember, snapping turtles are carnivores!
So, for this reason, you should seek out bait that will appeal to them such as meat or fish. They prefer meat with very strong scents! This allows them to track the bait better. This also means that even if the bait gets wet, the scent will remain strong and will be able to be easily identified by your snapping turtles.
With this in mind, we recommend that you should choose strong-smelling fish, beef, liver, and other animal organs such as kidney. These all have strong scents that not even water could lessen.
Set Up Your Snapping Turtle Trap
Now that you have chosen your trap and bait for the trap, you can set it all up together. It is super important that any bait you use is placed deep enough inside the trap to allow the snapping turtle to get fully inside it. Place the trap in a shallow area, as this is where the turtle is most likely to hunt for food.
If your trap is non floating then you will need to place it so that part of it is out of the water. As such, it will need to be on a bank or partly on the shore.
If you do not do this then the turtle will be trapped without oxygen and will drown.
This should be avoided at all costs since the snapping turtle does not need to be killed in order to get rid of it. It is very important that you deal with your snapping turtle infestation humanely.
Relocate Your Snapping Turtle
When you have finally got your snapping turtles inside the trap, now is the time to relocate them.
As annoying as they are, and as detrimental as they can be to your pond, they are just innocent animals. They are acting on their natural instincts and deserve to be able to live a good life.
You should take them to a safe water source, approved by the local authorities to relocate them. Alternatively, you could ask for advice from the local authorities or even ask them to do this part for you.
You should take extreme care when handling a snapping turtle since their bite is dangerous, and can cause lots of pain and damage. They also have very sharp claws which can easily tear through your skin. Always wear gloves to protect yourself around them.
Hungry deer can wreak havoc on any garden. They can stomp, chew, poop, and destroy all those precious herbs you worked so hard to prepare. If you live near a forest or large stretches of land, you either have to invest in quality fencing or plant herbs that deer will avoid. It seems like deer will eat just about anything, but there are some plants that they don’t mess with.
Generally, deer avoid most herbs that have a strong flavor, aromatic foliage, silvery-gray color, and/or spiky or poorly textured leaves. This includes rosemary, lavender, thyme, sage, oregano, and tarragon. The essential oils of herbs throw off the olfactory system of the deer and send them looking for other food sources.
However, contrary to popular belief, not all herbs are deer resistant. Deer will sometimes munch on basil and parsley if they don’t have any other green leaves available. Let’s take a deeper look at some of the top herbs that deer will avoid!
Lavender has a powerful aroma and is naturally deer-resistant.
Thanks to its powerful aroma, lavender is a naturally deer-resistant plant. Even when it isn’t flowering, the foliage of lavender has a pungent smell that deer do not like.
Deer don’t usually eat lavender due to a terpene called linalool that makes the lavender taste too strong for their liking. This essential oil is also found in many of the Mediterranean herbs below, including oregano and thyme.
Plant lavender along the margins of your vegetable garden as a companion plant. The camphorous smell of the leaves and the floral aroma of the blooms can help deter deer (and other pests) from eating your crops while simultaneously attracting beneficial insects.
Rosemary
This hardy shrub will keep deer away.
Another drought-tolerant Mediterranean favorite, rosemary is repulsive to deer. The potent aroma of rosemary can help mask the smell of other plants they may be seeking, like your freshly-sown lettuce or fruiting tomatoes. Deer also dislike rubbing against the rosemary plant because of the essential oils that can rub off on their fur.
Like lavender, you can plant rosemary around the perimeter of your garden as a “deer shield.” It also works great when placed near the entry gates to your property or anywhere you suspect deer are regularly passing through.
Sage
Garden sage is a natural deer repellent.
Sage plants are among the most popular deer-resistant ornamentals because they offer a diversity of floral colors along the margin of a woodland. This popular herb is actually part of the Salvia genus, which includes hundreds of varieties.
From white sage to Russian sage to blue sage, all of these shrubs produce beautiful booms and aromatic leaves that repel deer. As a bonus, the leaves have a wooly or fuzzy leaf texture that hungry deer do not want in their mouths.
Oregano
The essential oils in the oregano plant will help keep deer away.
Oregano contains two strong essential oils called carvacrol and thymol. When the fragrance of this herb hits a deer’s nose, it often sends them off in the other direction. Like rosemary, deer really hate rubbing up against oregano or stepping on it.
Thanks to its insect-repellent properties, oregano also makes an excellent vegetable companion plant. It doesn’t mind partial shade and can be interspersed in a drought-tolerant garden alongside the Mediterranean herbs described above.
Thyme
This low-maintenance herb can thrive in just about any type of soil.
Thyme is an extremely low-maintenance herb that thrives in poor soils without much fertility or water. As an herbaceous perennial deer barrier, thyme’s fragrant leaves are not appetizing to deer. When blooming, the strong smell of the flowers can also repel deer.
Use creeping thyme as a ground cover around your garden beds and it may prevent deer from walking in.
Lemon Balm
Lemon Balm has many uses in the garden and will help keep deer away.
Known for its delicious tea-making capacity, lemon balm is not quite so tasty to deer. The animals have an aversion to the fragrant leaves and flowers of this herb.
Lemon balm is a perfect low-growing border plant to keep deer out of your garden. However, it can be slightly invasive in some regions, so plant wisely.
Mint
Mint is another herb with a pungent smell.
You will notice that all of the above herbs belong to the mint family (Lamiaceae). Mint and its relatives are the backbone of a deer-resistant herb garden.
Peppermint, spearmint, pennyroyal, ginger mint, and any other variety of mint can easily be added to the blend to add olfactory shock value to your local deer noses.
Grow mint in great abundance around the borders of your garden, but avoid planting it in your garden beds. Mint is a natural spreader that can out-compete your vegetables. However, it makes great ground cover in moist, partially shaded soils along a forest or grassland border.
Chives
Chives have a strong smell and can help keep deer out of your garden.
The evergreen, herbal, and floral fragrances of mint-family herbs aren’t the only smells that deter deer. Chives are a perennial onion-family (Amaryllidaceae or “alliums”) herb that turns away deer as well as aphids and Japanese beetles.
Because of the strong taste and onion-y smell of chives, you can reliably plant them out in the open. They make a delicious garnish for meals and a low-maintenance, cold-tolerant ornamental.
Be sure to plant perennial chives, not annual green onions. Both are deer-resistant, but the perennial chives will grow as a clump that comes back year after year.
Dill
Dill has a strong aroma and taste, which help to repel deer.
Any gardener who loves pickles needs to have a self-seeding dill patch. This resilient herb is smelly and strong tasting, which makes it yet another deer-deterrent.
Sometimes known as dill weed, both blue-green foliage and yellow umbel flowers of dill have a distinctive fragrance. The plant can naturally spread into small patches and remains biennial in zones 2-8.
You can grow dill in your annual garden beds or alongside perennial herbs. While you repel deer, you also get yummy pickle flavoring!
Horseradish
Horseradish has a spicy smell, which will keep deer way.
Deer avoid horseradish at all costs. The spicy aroma of this perennial Brassica keeps most pests away. The large bushes look like weedy dock plants but smell strongly of mustards. Deer avoid the foliage as well as the spicy roots.
Tarragon
Tarragon has a distinctive smell that deer will stay away from.
Whether it’s Mexican or French tarragon, this herb has a distinctive anise smell that deer strongly dislike. They tend to avoid eating or stepping on the plant.
These 18-36” bushes can be grown as perennials in zones 4 and warmer. The licorice flavor is surprisingly delicious as a garnish on chicken, fish, or vegetables. Thankfully, deer don’t find it nearly as appetizing as we do.
If you have pets, keep in mind that tarragon oils can be toxic to dogs, cats, and horses. Most animals avoid the plant anyways.
An air rifle's effective shooting range depends on various factors, including the type of rifle, the caliber, and the power source. Generally speaking, most...
")
")
")
")
")