Home Blog Page 89

5 Spring Turkey Vocalizations & When to Use Them

0
5 Spring Turkey Vocalizations & When to Use Them

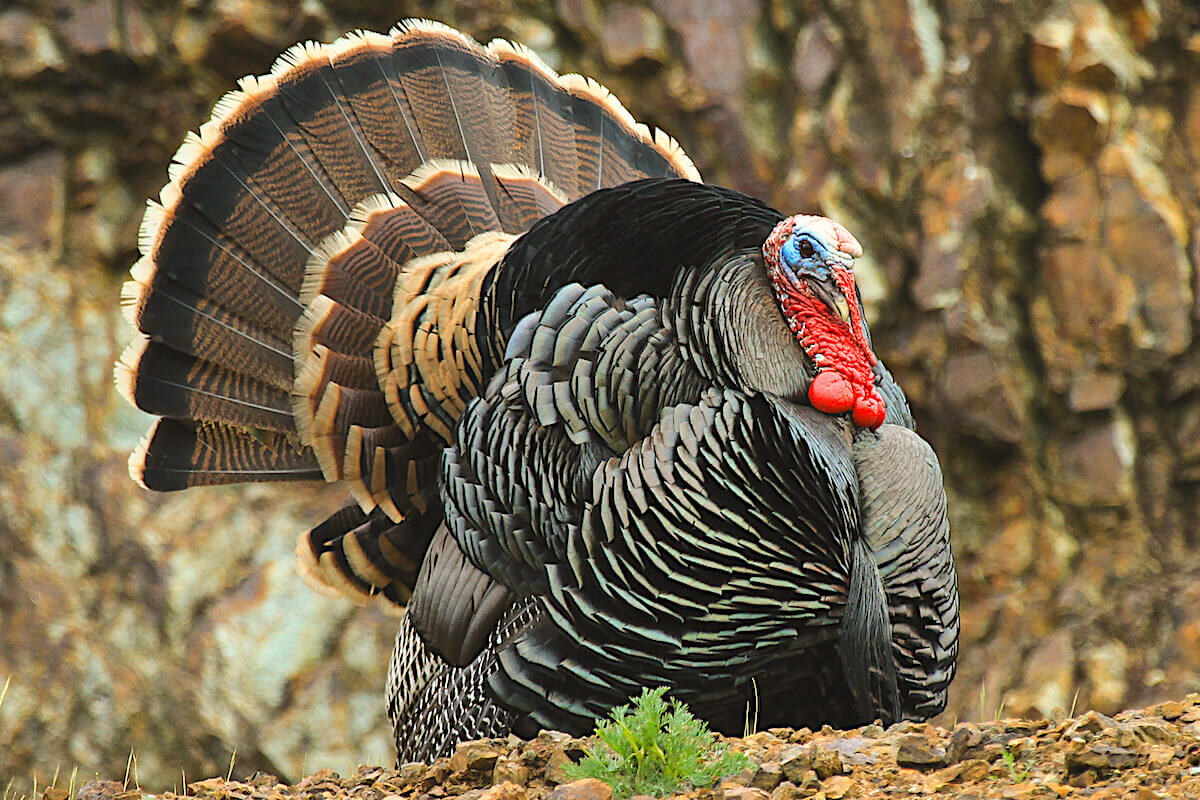
If a gobbler is traveling with a hen, hit them with some cutts. These sounds provoke aggressive responses from hens. If she comes in, the tom should follow. (Shutterstock image)

  • This article on turkey hunting is featured in the Midwest edition of March’s Game & Fish Magazine. Learn how to subscribe

When I started turkey hunting as a clueless 14-year-old, the loudest voices in the expert turkey space all said the same thing:

Yelp three times and shut up. Those were the dark ages of turkey hunting.

Since then, we’ve learned just how conversational turkeys can be—and how deep their vocabulary really is. To be a consistently successful turkey hunter, you need to understand this proclivity for conversation and know how to interact with turkeys accordingly.

1. YELPS

If you can’t yelp, you can’t call turkeys. This call functions to serve several purposes. The ladies use it to keep track of one another (gobblers too, just less frequently). Hens also use it to rope in a randy gobbler, and a good series of yelps often leads to other calls as intensity ramps up.

The key to understanding yelps is grasping cadence and structure. A yelp is a two-note call that drops off sharply at the end. Most beginners default to a one-note yelp, and it doesn’t work.

They also string their yelps together too quickly, which sounds unnatural. Whether you use a diaphragm call, slate or box, think “slow and purposeful” with your two-part yelps.

2. PURRS

Most of the purring you’ll hear from wild turkeys will come from hens as they preen themselves and slowly, contentedly pick their way past your blind. When birds fight, especially gobblers, they’ll engage in a souped-up purr that often transitions into other calls, but what most hunters should think about is the softer version. This is an all-clear, confidence-boosting call.

Whether you channel your inner Cajun and roll your Rs with a mouth call or drag a striker softly across a slate, this call is for close birds that need a little coaxing to cross the red line. It’s a great way to convince a hung-up gobbler that he should cover the last 50 or so yards.

3. CLUCKS

The cluck, a one-note sound that might remind you of that of a chicken, falls close to the purr on the vocalization spectrum. Content turkeys cluck, just like they purr. The two sounds are often made back-to-back, and if you learn how to do this, you can further sell the ruse that all is good with your faux flock.

The easiest way to do this is to end a purr on a slate call with a quick, soft pop of the striker. The key here is subtlety, just like it is if you make clucks with a mouth call. Content birds don’t scream their lungs out, so you want to keep your library voice going here. Again, if you’ve got birds that are hung up or respond negatively to more aggressive calling, clucking might be the ticket.

4. CUTTS

Cutting is the “come at me, bro” of the turkey vocabulary—though, technically, it’s more of a “come at me, sis.” This sound, which really ramps birds up, can be made like a cluck on a slate call but with some serious force and rapid-fire succession. It often triggers a dominant response from hens, which usually pulls in the boyfriends and can turn a dead setup into an action-packed gobble fest.

The cutt is also easy to make with a mouth call, but probably best created with a box call. Ensure you’re chalked up and confident, and tilt the paddle at as much an angle as you can. Then, bring it home with authority several times in a row.

Cutting, like all calling, is situationally specific. If you’ve got a hen that’s chatty, you’re off to a good start. You can also use the cutt around midday when nothing is going on, but you’ll want to start with softer yelps and purrs first. I often use two separate calls—a slate and a mouth call, for instance—to create calling sessions that sound like hens getting after one another. These sessions always lead to aggressive cutting, and they’ve brought in many longbeards over the years, especially on heavily pressured public ground.

5. GOBBLES

We all know what a gobble is, but most of us don’t actually know when to use it as a call. The best answer is “not very often.” Gobbling is something to consider if you know for certain that no one can potentially sneak up and shoot you with a load of No. 4s. It’s also a last resort for a hung-up gobbler that you can see but who just doesn’t believe your normal turkey talk. Occasionally, the competition aspect of throwing a gobble into the mix does the trick and you can coax a longbeard in closer.

There are gobble-shaker calls out there, but you can also hold a box call upside down and quickly shake it back and forth for a passable gobble. If you’re confident with a mouth call, you can shake your head like a lunatic and create a loud, realistic-sounding gobble that will have spit flying and your snoozing hunting partner checking his underwear. While a gobble might not be a great call for very many situations when you want to draw a longbeard into range, it’s an excellent locator call. In fact, in my experience, it’s the best one out there.

Turkey Calling
Read the situation and create the right sounds to communicate with birds. Starting subtly and building to aggressive calling often works best. (Photo by Tony. J. Peterson)

Locator Lowdown

Play a productive game of Marco Polo with toms.

As discussed, if you can gobble, you can get turkeys to gobble, which is the whole point of a locator call. Also, as mentioned, it’s not always smart to go around sounding exactly like the thing everyone in the woods is trying to kill. Fortunately, you’ve got other options.

Crow calls, owl hooters and even peacock calls are all available to spring longbeard chasers who just need to hear a few real birds to devise a plan. If you’re trying to roost a bird, an owl hooter is tough to beat (although a gobble is as good or better). If you’re running and gunning all day long and just want a midday bird to sound off, try a simple crow call. The best for this is a series of five caws, with the first three drawn out and the last two made very quickly (listen to real crows and this will make sense).

Spring Turkey Vocalizations
Clockwise from top left: Primos Veronica, HS Tongue Series, Zink Wicked Series Box, Flextone Potluck Glass.

CLUTCH CALLS

Seven of the best turkey calls to carry this spring

Owning—and knowing how to use—a variety of calls improves your odds in the spring. While plenty of options exist, running diaphragm calls like the Primos Veronica ($6.99; primos.com) is an excellent way to expand your vocabulary. This three-reed, spur-cut mouth call is designed so that users can produce everything from the high-pitched kee-kee to a low-and-slow raspy yelp. Another great option for mouth calls is the Hunter Specialties Tongue Series ($29.99; gsmoutdoors.com). A four-pack contains options for producing every sound a turkey can make thanks to the unique cuts of the latex.

Naturally, you’ll want more than diaphragm calls, and no turkey hunter worth his or her salt would be caught dead in the woods without a box call and a pot call. In the former category, it’s hard to find a better option than Zink’s Wicked Series Box ($119.99; zinkcalls.com). This premium call is hand-built, hand-tuned and is double-sided to allow for different tones. Pot call fanatics should check out Flextone’s Pot Luck Glass ($12.99; flextonegamecalls.com). This compact and weatherproof call is designed to keep working even when the rain comes, all while producing crisp, loud-as-you-need-them sounds.

Best Coyote Traps – Foothold, Snares, and Live Traps

0

When I started trapping I went down to the local farm store, Cal Ranch to and Sportsmans Warehouse to see what traps were available to buy. There was not much of a selection and it was just a little corner of the store.

I didn’t have a clue what was a good trap or a better trap and why I should get one over the other. In this article, I will be presenting several coyote traps. Hopefully, you can find the best coyote trap for your needs.

The best and most popular coyote trap is the MB 550. It is big enough to hold coyotes and is one of the strongest leghold traps on the market. It comes ready to use out of the box.

Coyote Foot in Trap
Coyote Leghold Trap

Coyote Leghold or Foot Traps

MB 550 Coyote Trap

The MB 550 is at the top of my list for trapping coyotes. This trap was specifically designed to be the best trap on the market and other brands of traps have tried to copy its success making similar traps.

There are a few reasons why I think the MB550 is the best trap on the market.

  • It is a cast jaw trap that keeps coyotes from bending the trap as easily.
  • It comes ready to use out of the box. Just need to boil the trap to remove some scent.
  • As I read through forums and trapping groups it appears to be the most recommended trap.
  • It is a multi-animal trap and will hold coyotes, fox, and raccoons.
  • See more information on the MB 550 trap (coming soon).

Where To Buy MB 550 Traps

MB 450 Coyote Trap

The reason the MB 450 is lower and in the second spot on the list is that it is a size one and a half trap. It is smaller than the MB 550 but don’t underestimate its power.

In most cases, the MB 450 would work for trapping coyotes and if I got a bunch of them I would not have an issue using them on coyotes, but they were not designed for coyotes.

So if I was trying to target smaller animals such as fox or raccoons and had a high possibility of catching coyotes I would consider the MB 450.

  • It is a cast jaw trap that keeps coyotes from bending the trap as easily.
  • It comes ready to use out of the box. Just need to boil the trap to remove some scent.
  • We did a survey on the MB 450 and found that it was voted the best fox trap that workes well for coyotes. See the survey results here.
  • It is a multi-animal trap and will hold coyotes, fox, and raccoons.
  • See more information on the MB 450 trap.

Where To Buy MB 450 Traps

See All MB 450 Trap Prices on eBay

Duke 550-OS

The Duke 550-OS or offset jaw trap is the Duke version of the MB 550 trap. Duke came out with their 550 trap soon after Minnesota Brand traps came out with them.

These appear to be the budget cast jaw trap and probably will perform similarly to the other cast jaw traps listed above. Here are several reasons why they would be a good trap.

  • Duke traps are usually cost less than the Minnesota Brand traps. Similar trap less money.
  • It is a cast jaw trap that keeps coyotes from bending the trap as easily.
  • This Trap is on my list to compare to the MB 550. I have heard several trappers recommend them and the price might seal this one as your choice.
  • It is a multi-animal trap and will hold coyotes, fox, and bobcats.

Where To Buy Duke 550 Traps

Duke No. 2 Coil Spring Trap

The Duke No. 2 coil spring trap is an excellent starter trap. I started out using these and still use them when trapping. I found them at the local farm store and bought a bunch of them.

I went out to try my luck with them and they worked. It took a while but I finally caught a coyote and several raccoons in them. If you take care of them they are a good trap.

Some trappers will not use them simply because they are not cast jaw traps and they might bend a little occasionally when you catch a coyote. I haven’t had a huge problem with them and would recommend them for a new trapper.

  • The Duke No. 2 traps are cheaper than the cast jaw traps. You may be able to get double the traps for the same price.
  • They may be slightly less durable than the cast jaw traps but they will last if you take care of them.
  • It is a multi-animal trap and will hold coyotes, fox, and raccoons.

Where To Buy Duke No. 2 Traps

PriceWhere to buy

Coyote Sets To Make With A Foothold Trap

There are several sets or ways you can bury a foothold trap and get a coyote to step on it. When you position and bait a trap for a coyote to get caught in you are making a set.

Knowing different ways to make sets is very helpful. Sets like a dirt hole set or a flat set are good options when trapping coyotes.

I wrote an article about a bunch of different coyote sets so that you have some options for different weather and locations. You can find that list of coyote sets and how to make them here.

Coyote Snare Trap

When snaring coyotes the brand of snares is not as important. Most people who are selling snares for coyotes are making very similar products.

Most snares are one-time use traps and will be bent out of shape by a coyote when they are caught. The cable is usually the only thing that breaks on a snare and the parts can be put on a new snare and used over and over.

The nice thing about snares though is they are faster to set up and are much cheaper than any of the other types of traps we will discuss. They are usually between one or two dollars if you buy them prebuilt.

If you make your own snares it can be way cheaper than that because you can buy the parts in bulk and build your own for less than a dollar.

  • One type of snare is a cable restraint just catch the animal around the neck and hold it there until the trapper comes.
  • Another type of snare is a nonrelaxing snare. This snare gets tighter and tighter as the animal pulls on the snare and dispatches the animal if caught.
  • Snares are placed along coyote trails and will catch them as they move down the trail. Where these trails cross fence lines is often one of the best places to place a snare.
  • It is a multi-animal trap and will hold coyotes, fox, and raccoons.

Where To Buy Coyote Snares and Cable Restraints

PriceWhere to buyOne Dozen Coyote SnaresTwo Dozen Coyote Snares and SupportsOne Dozen Cable Restraints

See All Coyote Snares On eBay

Coyote Live Trap or Cage Trap

The hardest trap to use is a cage trap or live trap. Coyotes don’t like going in them because they can see the cage. I have never tried to catch a coyote in a live trap so I think it would be a fun expierement.

I think you would be more likey to catch a fox, bobcat, skunk, or raccoon in a live trap than a coyote. This is a hard thing to do.

I checked on Youtube and tried to see how many people have actually caught a coyote in a live trap. I found two, one the coyote escaped and the other was a good catch. There are tons of other videos though of coyotes being caught in the other traps listed above.

The nice thing about a cage trap though is it is easier to transport and release the coyote. They can go in a truck or car very easily and can be released in a new location.

Coyote Live Trap Size

The recommended size of a live trap for a coyote is at minimum two feet tall, twelve inches wide, and three feet long. A coyote does not like being boxed in so bigger is better.

How To Trap A Coyote In A Live Trap

  • This is a very big trap. Coyotes can be big animals and don’t usually like small places.
  • You can pick a trap with a sliding door or a swinging door. Both will work very well.
  • Covering the trap with sticks and brush will make the coyote feel more comfortable entering the trap. You may also cover the bottom before the trigger plate with dirt to help the coyote feel more comfortable.
  • It is a multi-animal trap and will hold coyotes, fox, bobcats, and raccoons.

Where To Buy Coyote Live Traps

PriceWhere to buy

See Extra Large Live Traps On eBay

Quick Coyote Trapping Tips

  • Check your trapping laws before you start trapping.
  • Use gloves to hide your scent. Coyotes don’t like human scent on the trap.
  • Bait, lure, and urine are all good to use at the trapping location.
  • Check out my article on more coyote trapping tips and coyote trapping mistakes.

Crosman 760 Pumpmaster Pink Review

0

Crosman 760 Pumpmaster Pink Stock Review

Think shooting is only for boys and men?

Think again.

This Crosman 760 Pink will change your whole perception of the air gun world.

Because girls love to shoot, too.

And apparently, girls want pink guns?

Well, who are we here to make assumptions?

Anyway, it’s pink.

And it looks great. 

This pink, variable pump rifle could make a great gift for your girlfriend.

And what makes you happier than when your little sweetheart begins to share your favorite sport from childhood?

Crosman 760 Pink – Gun Type

This is a multi-pump pneumatic air rifle.

For more on the 5 types of air rifles you need to know before buying, see this post.

The barrel is a smooth bore with a caliber of .177 (4.5 millimeters).

For more on how to choose the right air gun caliber for your game, see this post.

This Crosman 760 Pumpmaster pink is a BB repeater.

With a BB repeater gun, you don’t have to open the loading port and reload or cock every time you want to shoot BB.

Each time you shoot, a BB is reloaded automatically.

This air rifle is not only a BB gun but also a single-shot pellet gun.

A single-shot gun teaches you how to make your first shot count because you have to reload before you shoot the second shot.

Being the double function BB/pellet air rifle.

This Crosman 760 Pumpmaster pink gives you an awesome option to shoot with whatever ammo you got in your hands.

Besides, you can teach your kids how to operate a BB gun and a pellet gun at the same time without having to buy 2 types of guns separately.

Stock

The stock is made of synthetic with a dominant pink color.

(For more on the in-depth comparison between synthetic and wood stock, see this post).

While synthetic stocks function perfectly in any kind of weather and aren’t affected by moisture or temperate,

The pink color might make it a great choice for girls.

The checkering on the grip and the indentation on the pump handle makes it much easier to get on grip and stay on target.

The stock has a plastic butt-pad to help reduce recoil.

Besides, the stock is ambidextrous so left-handed shooters can use it with ease like right-handed shooters.

Ammo

The 760 Pumpmaster pink uses both .177 pellets and .177 BBs as its ammunition.

(For more on the differences between .177 & .22 and which jobs they do best, see this post.)

Velocity, Accuracy and Power

The 760 Pumpmaster Pink produces up to 615 FPS with lead pellet, 700 FPS with alloy pellet, and up to 645 FPS with steel BB.

This is medium velocity compared to other pellet guns and high velocity compared to other BB guns.

For the Crosman 760 Pumpmaster pink, the common shooting group is 1” at 20 yards so this is a very accurate gun up to 20 yards.

You can use it for plinking indoors, practice target shooting in your backyard

And teach your little daughter how to handle an air rifle safely and properly.

Sight

The iron sight is a standard open sight:

The front sight is a fixed blade and ramp, and the rear sight is adjustable for elevation (allowing you to adjust the sight up and down).

But you can get even more accuracy with the 4×15 scope.

For more on how many types of air gun sights are out there and which one is suitable for you, see this post.

click for the lowest price

Specifications

  • Caliber: 0.177”
  • Velocity: 615 FPS with lead, 700 FPS with alloy, 645 FPS with BB.
  • Loudness: 3- Medium
  • Barrel Length: 16.75”
  • Overall Length: 33.5”
  • Shot Capacity: 18
  • Cocking Effort: 3-10 pumps
  • Barrel: smoothbore
  • Front Sight: Blade and Ramp
  • Rear Sight: Adjustable for elevation
  • Scopeable: 11mm dovetail
  • Buttplate: Plastic
  • Suggested for / Target shooting/plinking
  • Trigger pull: 4.0 lbs
  • Action: bolt-action
  • Safety: Manual
  • Powerplant: Multi Pump-pneumatic
  • Function: Repeater
  • Fixed/ adjustable power: Multiple setting
  • Weight: 2.75 lbs.

Customer Reviews

This pink BB gun receives lots of positive reviews:

People love its prominent color, its lightweight, and its small size because their sweethearts can handle it with ease.

And there are little to no negative reviews of this gun with very minor issues.

That proves the Crosman 760 pink rifle’s quality makes its buyers happy.

Pros and Cons

ProsCons
  • Fantastic pink color
  • Small size and lightweight
  • Decent Scope
  • Great synthetic stock
  • Awesome double function
  • Made in the USA
  • Pumping action takes some time to master
  • Pumping action can be tedious at some points.

Price

The price for this variable pump gun is only about 50 dollars.

It’s a cheap price for a gun that has an impressive girly design with solid quality.

You will be very happy with this gun, for sure.

There are a couple of different listings online with different prices but the listing I found with the lowest price is the cheapest price among online e-commercial sites like Amazon, PyramydAir, Walmart, etc.

click for the lowest price

Conclusion

Crosman Pumpmaster 760 Pink is the great gun for the money.

It’s cheap, beautiful, lightweight, fun to shoot, easy to handle, and has decent velocity and power.

It’s the go-to gun to introduce girls to shooting sports.

In addition, it is a great gift for your wife and for your daughter if she’s ready to start learning.

Now you, your spouse, and your little sweetheart can share the precious family moment that lasts forever.

The 10 Best Places to Hunt Deer in America

0

Whitetail deer hunting is a foundational American pastime and a thriving passion among today’s hunters. Good deer hunting can be found across nearly the entire country, so hunters have plenty of places to choose from. But which are the best states for deer hunting?

With so many states that offer legitimate deer hunting opportunities, we’re forced to wonder what criteria makes a state “good” or “bad” destinations during whitetail season. There are certainly many factors to take into consideration, such as total harvest numbers, hunter success rates, measurable hunting pressure, the average age of harvested bucks, and even prevailing weather conditions. Many hunters have strong feelings on the matter, citing personal experiences as the strongest evidence to support an area having a strong, healthy whitetail deer population.

There is plenty of accessible data—from sources such as the National Deer Association, Boone & Crockett Club, and state wildlife agencies—that points to a handful of states having an edge, as well as the timeless word of mouth method of communication that has sustained hunting traditions since its origins. In the end, it’s up to you to decide—but we’re here to help. Here is our list for the 10 best states for deer hunting in the U.S., all of which deserve serious consideration by anyone looking to travel for future whitetail pursuits.

10. Georgia

While its placement on this list may come as a surprise to many, the quality of whitetail hunting in Georgia has increased greatly over the years. You’re certainly less likely to tag a Booner here than in other states on this list, but the overall harvest numbers are simply eye-popping, as Georgia ranked No. 1 in antlerless harvests in 2011 and has stayed consistent, still ranking third in 2020 with 74 per 100 hunters. Meanwhile, it also boasts a high buck density, plenty of public hunting land (over 3 percent of the state), and high hunter satisfaction rates, with over 90 percent of hunters rating their season as satisfactory, good, or excellent. Incorporate a 55-percent hunter success rate and you have a state that is a must-have on a list such as this.

9. South Carolina

South Carolina slides into the back end of this list for many of the same reasons as Georgia, but there are a few exceptions. The Palmetto State Boasted a hunter success rate of nearly 70 percent in 2020, as well as 9.3 deer harvested per square mile—one of the highest rates in the country. However, it also moved up to second place with 65 antlered deer harvested per 100 hunters. While your chances of bagging a monster might not be quite as high as they would be in some of the other states on this list, having a good chance to shoot any buck always makes for a good time!

8. Texas

Everything is bigger in Texas, and that includes whitetail hunting. Hunters in the Lone Star State kill more bucks than in any other by a huge margin—449,933 in 2020 alone—and 71 percent of those were at least 3 1/2 years old, which means the mature bucks are most definitely there. Only further reinforcing its case for elite whitetail hunting, Texas also ranks first in total antlerless harvest numbers, with 402,515 in 2020, ranked 10th from 2005 to 2010 for most Boone & Crockett entries with 132. Combine these factors with the almost 1.6 million acres of public hunting land available, and it seems as if Texas hunters have a good thing going.

When the time comes to book a Texas hunt, try Ox Ranch, home to some of the best whitetail deer hunting you can find not only in the state, but in the entire country.

7. Mississippi

If any state is a poster child for effective QDM practices, Mississippi takes the cake. Ranking first in the nation for percentage of bucks older than 3.5 years in the harvest at 74 percent, fourth in lowest number of yearling bucks harvested at 9 percent, and first in number of bucks harvested per 100 hunters at 74 percent, the Magnolia State and its hunters are seemingly doing everything right. You might not think of Mississippi, or anywhere in the Deep South as a destination for a successful whitetail deer hunt, but you simply can’t get the same odds of harvesting a quality buck anywhere else in the country.

6. Iowa

For many Midwestern whitetail hunters, the idea of Iowa not finding a place within the top three rankings of any deer hunting list is just ludicrous. However, while it does have a legitimate reputation for being a trophy whitetail hotspot, as only two states had more B&C entries between 2005 and 2010, there are quite a few statistics that knock the state down a few spots.

Unfortunately, though, Iowa presents a little bit of a boom-or-bust hunting opportunity. While it ranks third nationally in 1,330 B&C entries, owning three of the top 20 counties for the most records produced, it doesn’t rank in the top five for any of the NDA’s antlered deer harvest, antlerless deer harvest, or age structure for either. Its lighter harvest numbers could be a product of a number of factors, including painful out-of-state license fees (for a license that restricts nonresidents to certain parts of the state, and the fact only 0.7 percent of the state’s land is open to public hunting (only Hawaii has less). However, with designated Deer Management Zones, you’re pretty much guaranteed to fill a tag, even without the roughly 100,000 bucks harvested each season.

5. Kansas

Kansas is a state that has grown accustomed to being near the top of any “best whitetail destinations” list, and for good reason. Ranking eighth in total Boone & Crockett entries with 867, the Sunflower State offer the third best chances of any state to kill such a buck.

However, hunters run into the same obstacles in Kansas that exist in Iowa. Sure, monster bucks are there, but getting them is no easy feat. Only 420,000 acres—about 0.8 percent of its total area—are open to public hunting (Michigan, for example, has over 7.3 million acres of public hunting land). Also, while the state’s lottery system for deer tags seems to offer a better chance at being drawn than Iowa, the cost of a guided or private land hunt can be out of this world!

While Kansas may be a top destination if your goal is to kill a record-book whitetail, prepare to fork over some serious coin.

4. Illinois

Illinois is a state that isn’t in the top 10 in any of our categories—except trophy production. Ranking second in total B&C entries with 1,445, Illinois is a powerhouse among deer hunting states. Featuring the 10th, 11th, and 12th hottest counties for trophy entries—Pike, Fulton, and Adams— it offers an array of legitimate opportunities to harvest a big-time buck.

While some states on our list scored highly in one or two categories, Illinois did fairly well in several. The anterless harvest is large (well over 87,337 in 2020), the pressure is high but no more so than many other states. And, there’s a lot of public land to hunt, which bodes well for traveling hunters.

3. Missouri

Missouri stands as an up-and-coming star in the outdoor world. Several online and television hunting shows have sprung up from Missouri in the last several years, putting this great state on the radar for many of us. It has the chops to back its newfound popularity, too. The trophy potential is huge, there’s an amazing amount of public land available, the pressure is reasonable, nonresident permits are affordable, and with 29 percent of the buck harvest being 3 1/2 years old or older, the state’s deer heard appears to have a healthy age structure. If you’re planning on hunting the Midwest this year, don’t overlook Missouri.

2. Wisconsin

When you have a state that ranks first in B&C entries by a margin as wide as 377 with a total of 1,882, you have to put it near the top of the list. Wisconsin also ranked fourth in the 2020 antlered buck harvest with a 158,236, behind only Texas, Michigan, and Pennsylvania. It ranked fourth in its antlerless harvest, too, with 181,665, and fifth in antlerless deer harvested per square mile with 3.4. Additionally, Wisconsin has 572,000 acres of public hunting land, a diverse range of habitats, and an affordable nonresident permit

1. Kentucky

For years, Kentucky has been one of the best-kept secrets of the hunting world, but many of the Commonwealth’s hunters fear the secret is out.

The Bluegrass state seems to have it all: long seasons with friendly regulations, reasonable pressure, a large, healthy, and well-balanced herd (in some portions of the state hunters can harvest as many does as they are wiling to buy tags for), and lots of public land with trophy potential. In fact, the deer pictured above scored 246 3/8 inches, and was killed on public hunting land. Kentucky ranks second only to Indiana in likelihood of harvesting a Booner (0.082 percent), and all of these factors combined are enough to earn Kentucky the number one spot on our list of top 10 places to hunt whitetail in the U.S.

READ MORE: Axis Deer: How to Hunt the Invasive Big Game

Best Crossbow Under $500 In 2024 With Reviews 

0

What To Look For When Choosing A Crossbow Under $500

You might think that when looking for a budget crossbow under $500 that you have to sacrifice certain features or preferences. That isn’t the case, though. You can still be picky. Here are some specific things to look at.

Brand Name

RELATED: Best Crossbow

It’s not always necessary to get a brand name, but in the case of crossbows, certain brands do give you the confidence that they’ll be well crafted. When looking for a budget crossbow, specifically, several name brands help assure you that the low price doesn’t necessarily mean lower quality. These include:

  • Barnett
  • PSE Archery
  • TenPoint (who also make Wicked Ridge models)
  • Bowtech/Excalibur
  • Bear Archery
  • Centerpoint
  • Killer Instinct

RELATED: Best Hunting Gear

Compound, Recurve or Reverse Draw

Among the three main types of crossbows, compound models are by far the most common. They provide power and speed without being too bulky. Plus, they minimize draw weight without sacrificing power.

As opposed to compound crossbows, recurve models are much simpler. As a result, they rarely break down, require minimal maintenance and are easier to use. This makes them good for beginners. Their main downside is size, specifically ATA width. They also usually have a bit less power, but this can also be good for beginners.

Reverse-draw crossbows are a newer type of crossbow with a more innovative design that involves, well, drawing the crossbow the opposite way. The advantage is that you get a longer power stroke, which means the bowstring accelerates the bolt for more time, giving you more speed and power with a narrower ATA. They also tend to shoot more quietly.

Unfortunately, reverse-draw models are a bit more complicated to use and are usually more expensive. They’re a better choice for experienced archers looking for something new.

Speed

Crossbow bolt speed, measured in feet per second, or FPS, usually ranges between 300 and 500 FPS and is one of the most important features to look at. While just about any crossbow is fast enough to hunt medium-sized game like deer, you may want a more powerful model for big game like elk, moose or bear.

RELATED: Best Place To Shoot A Deer With A Crossbow

Additionally, while faster bolt speeds give you more range and improve accuracy, they can be hard to handle for beginners, and the effective range of the crossbow does not really change that much. We usually recommend you stay under 400 FPS for your first crossbow, but over 400 is fine if you have some experience.

Draw Weight

Draw weight is less of an issue for crossbows compared to vertical bows because pretty much any crossbow is going to be impossible for someone to cock without some kind of device. However, a lower draw weight may be easier to cock just using a foot stirrup rather than a cocking rope or crank. This is important for archers who don’t have a lot of upper body strength.

Cocking Method

Unless you’re a record-holding powerlifter, you’ll almost certainly need some kind of cocking device to cock your crossbow. The simplest way is with a foot stirrup. By putting your foot through the stirrup, you get leverage that allows you to pull up the bowstring.

However, other methods can make things a lot easier. For example, a cocking rope better distributes the draw weight so it takes less effort to pull up the bowstring.

The easiest way, though, is with a crank. By rotating the crank, you slowly draw back the bowstring with little effort at all. Some crossbow models come with a crank that’s integrated into the frame, a great feature to look for.

A crank also works to decock a crossbow, which makes them that much more valuable.

Safety

Crossbows are dangerous weapons, so safety should always be a priority, doubly so if you’re shopping for a youth or beginner crossbow shooter. Standard safety features include trigger safeties and anti-dry-fire mechanisms that keep the crossbow from releasing the bowstring if there isn’t a bolt loaded. Dry firing can damage a crossbow and even cause it to splinter and injure the shooter.

More advanced safety features include finger wings, trigger guards and even rail sensors. These do their best to prevent your fingers from crossing the plane of the crossbow bowstring which moves so fast that it could potentially cut off your finger.

Accessories

It’s always nice when a crossbow comes with accessories so you don’t have to buy them separately. Essential accessories you should look for so you can start hunting right off the bat include:

  • Crossbow bolts
  • Scope
  • Some kind of cocking method (stirrup, cocking rope or crank)

Of course, some crossbows also come with other accessories that can increase your chances of hunting success. These add a lot of value to the package and include:

  • Quiver
  • Carrying case
  • Sling
  • Limb dampeners
  • String silencers
  • Rail lube

We also want to mention crossbow broadheads. You need hunting broadheads to go hunting, but these are rarely included in hunting packages, even if they come with bolts. If the package does, that’s a great feature.

Warranty

With proper maintenance and care, your crossbow should last for years, but it’s always worth checking the warranty a given crossbow comes with. For one thing, a long warranty lets you buy with the reassurance that you can return or repair it if there is some kind of defect. More importantly, long warranties signal that the manufacturer is confident in their product and has crafted it with care.

Final Thoughts

Even if you’re on a budget, you can still get a crossbow with the features and accessories you need. Our best overall crossbow under $500 is the Wicked Ridge Rampage 360, but the staff here at DeerHuntingGuide.net really love the PSE Archery Fang HD as well.

Make sure you’ve considered all the reviews and how each crossbow might fit your personal hunting needs and situation.

Now it’s time to go buy your favorite crossbow on the list, take it out in your yard and get it sighted in, just in time for the hunting season!

Tips for Turkey Food Plots

0

Take the time to prepare your turkey food plots

At this time of year, the questions usually start pouring in on how to attract turkeys for the upcoming spring season.

Most people don’t like to hear that many food sources turkeys love to eat should have been planted the previous summer for seed production and cover. Restoring native habitat for game birds like turkey and quail is also a growing section of wildlife management.

In my opinion, loss of habitat may be the number one factor in a list of many reasons for why quail numbers declined steadily over the last several decades. On the other hand, wild turkeys have enjoyed remarkable success in recent years. Now turkey populations are abundant across most of the United States.

Whether you want to attract turkeys and keep them on your property or wish to provide food and cover for a couple coveys of quail, there are several easy to plant turkey food plots that can be very beneficial. Millets, sorghum, and sunflowers are all easy to plant warm-season annuals. They can be planted as stand-alone crops or as a blend with other crops.

Plant Now, Feed Later

Many people want to plant something that provides food for wildlife within a couple weeks. That can work for deer, but it really doesn’t work that way for birds. For game birds, people really need to try to create food, cover and brood habitat essential for their survival. Giving the birds all they need through the changing seasons will keep them at home and discourage them from wandering to neighboring properties.

Millet, sorghum, sunflowers and other seed-producing warm-season annuals need 70 to 100 days of growth to mature and produce seed. As the plants mature and dry up in late summer and into the fall, they naturally begin dropping seeds. The maturity rate for plants depends upon what varieties are used. Of course, weather also plays a factor.

These warm-season annuals are relatively easy to grow and can be planted by broadcasting onto a prepared seedbed or by using a no-till drill or planter. I prefer a no-till drill for bird plots for a couple of reasons. The rows make it easy for smaller game birds like quail to navigate through an area. In addition, drills disturb the soil considerably less than using a disc or tiller. As a result, the planter usually has fewer problems with weeds.

If using traditional planting methods, I suggest spraying the area to be planted a week to 10 days before planting the seeds. Use a non-selective herbicide such as Round-Up to kill all existing vegetation in the plot. Ground to be planted can then be disced or tilled and then cultipacked or rolled to create a firm seedbed.

Seed can then be broadcast and lightly dragged in or rolled back over with a cultipacker. A pH range of 6.0 to 7.0 is usually needed for optimum growth and seed production. Since millets, sorghums, and sunflowers are fairly tolerant of acidic soils, people can plant them for birds in areas with less than ideal soil conditions. For fertilizer, I recommend using 13-13-13 at around 300 pounds per acre or an equivalent. These non-legume warm-season annuals are nitrogen lovers and it would benefit growth and seed production to implement a secondary nitrogen application four to six weeks after germination.

Go Native

A more long-term way to provide the lifecycle needs and improve habitat for birds is by using native warm-season grasses and plants. Varieties such as big bluestem, Indian grass, Maximillian sunflower, switchgrass, New England aster, Virginia wild rye and partridge pea are great choices. These native grasses and plants not only provide great nesting cover and feeding areas but also are very attractive to insects that are crucial to young birds. The bunch grasses provide open areas on the ground that makes it easy for young birds to traverse.

“Another big upside to planting game bird habitat, almost all other forms of wildlife benefit from it. I have found that whitetail deer love to use such areas for fawning.”

It doesn’t take an area with a large acreage to plant something effective for birds. Strips along the sides of roads, perimeters of large food plots, clearings in the woods and places like that all make suitable locations to plant something for birds.

Another big upside to planting game bird habitat, almost all other forms of wildlife benefit from it. I have found that whitetail deer love to use such areas for fawning. Many small critters, such as rabbits, really like to use these plots as well.

If you want to take your wildlife management to the next level, consider planting some areas specifically for birds to improve the overall diversity on the property. Even though you may only have an occasional covey of quail currently, there is no better way to help them multiply that by creating the food, cover and nesting areas they need.

Turkeys are somewhat creatures of habit. If a person provides them with year-round food and cover, they will not leave that area.

How To Field Dress, Preserve and Tan a Squirrel

0

Processing Squirrel Meat

Squirrel hunting can produce a substantial amount of extra meat for your dinner table, but once you have a squirrel in hand…how do you process it? Processing squirrel meat is a pretty simple process that requires just a little time and a sharp knife. As with anything that has been around as long as the processing wild game, there are several ways one can complete the task. For simplicity purposes we will examine just one, the one I use and find to be the simplest.

Before we begin processing the squirrel I’m going to assume a few things.

  1. The squirrel has previously been skinned (field dressed) and all organs have been removed.
  2. The feet on all legs, head and tail have been removed. If these are not completed, please do so before moving on.

If you were using a shotgun to get the squirrels, search the outer parts of the meat for pellets. There is nothing worse than chipping a tooth over dinner. Also, if the meat is bruised due to pellet or bullet penetration you may want to consider soaking the squirrel for a few hours (or overnight) in a solution of salt water. This usually “draws out” the bruising in the meat considerably well.

How to Process Squirrel Meat

Let’s begin:

Front Legs:

Cut from underneath the front leg (armpit area) in an upward motion severing the leg from the body. The socket where the front legs meet the shoulder isn’t very strong and should slice through rather easily. Repeat for other front leg.

Rear Legs:

Cut along the spine (tailbone) until you are able to “bend” the entire leg downward, breaking the socket loose, to remove the leg. Repeat for the other rear leg.

Another thing to do with the rear legs is to remove the small pocket of fatty tissue that is hidden below the surface of the meat, behind the knee. Slide the knife into the meat just enough to puncture it and dig the fatty tissue out. It isn’t a requirement to remove this but most people do so. Leaving it will not adversely affect the taste of the meat.

Torso:

Remove the “flappy skin” that covered the organ casing (belly meat) if you like. Some people choose to trip this meat from the rib cage down to the hip area while others keep it for the small amount of extra meat value. The choice is yours. I usually trim it if I’m going to fry the squirrel but if I use it for a stew or pull the meat from the bone, I’ll leave it attached.

Cut upward just below the bottom rib until you make contact with the backbone. Repeat for the opposite side. Grip the rib cage in one hand and the remaining bottom section in the other and twist. This will break the rib cage free for discarding (there is hardly any usable meat there). This will leave the area from just below the rib cage to the tailbone. Along the back is the loin area and can be cooked along with the legs.

Final

Lastly, remove the lower section of the tailbone (from the back section mentioned above) where no meat is present and discard the tailbone. You will now have all four legs and the back meat section to use for cooking, grilling or stews.

Note: Some people choose to soak the meat overnight in salt water or buttermilk. Some claim that this takes the “gamey” flavor out of the meat. I’ve tried this and do not notice a difference in taste. Plus, if you have an aversion to the flavor of squirrel…I have to ask…what are you doing reading this anyway?

Watch the video tutorial below:

How to preserve a squirrel hide

Preserving a squirrel hide acquired during squirrel hunting can be a fun activity for any young hunter. It can enable them to save their first squirrel or to learn about hiding preservation. Of course you have many other reasons to want to preserve a squirrel hide but before we begin, I must note that “preserving” a hide is different than “tanning” a hide. While Tanning leaves the hide soft and pliable, preserving it usually yields a much stiffer product. This stiffer product may not be as desirable, but with the only required chemical being table salt…many people prefer this method.

If you have a leftover hide from field dressing a previous squirrel, that will work fine but personally I like to get a better looking pelt by skinning it so that I have a much more complete and less damaged hide. Keep this in mind before skinning your squirrel, they way you clean it will determine how intact the hide will be.

Here’s what you’ll need:

  • Sharp knife
  • Large flat working surface or a sheet of plywood
  • Denatured alcohol
  • Non-iodized salt

Instructions:

  1. Begin by slicing along the underside of the squirrel, from the chin to the anus. You only need to get under the skin so do not stick the knife in far or you risk opening the body cavity. The goal is to remove the skin, not disembowel the squirrel.
  2. Once you have exposed much of the underside meat from the skin, work the skin free slowly and gently. It’s recommended to go ahead and remove the feet so that the legs can be pulled free of the skin. Leaving the feet attached risks allowing rot to take over and ruin your hide.
  3. Split the underside of the tail slowly as you work out the tail. It’s difficult to get it 100{6eed75c7f8c195edd1162272d31c56c9d78bf8d95bfa341f234a4c2acf0cac3e} removed so if you are unable, stop at a reasonable spot and snap it off.
  4. If you decide you want to keep the head on your hide you’re taking on the more difficult part of the skinning process. But with a little patient, you can do it. I choose to remove the head from the body (but not severed from the hide) and save this part for last, slowly work back the skin with your knife. Next, use a staple gun, tacks, small nails, etc to hold the hide open. I recommend taking it to a piece of plywood. Try to keep it on the very edge of the hide.
  5. Add a generous amount of non-iodized salt to the hide, others have stated that regular table salt (with iodine in it works fine but I have not tested it). Be sure to get around the edges and make sure there are not any folds in the skin where the salt cannot reach. Work the salt into the head and tail.As you salt, remember this: Any unsalted spot is not protected and will rot!In a day or two the salt will become saturated or crusty with the moisture it has drawn out of the flesh. Scrape away the old salt and reapply a second generous layer. Allow the second layer of salt to remain for about ten to fourteen days.
  6. To finish off the process, remove the salt and scrape away anything still remaining on the skin. Apply a small layer of Neatsfoot oil or other leather conditioner to give your pet some pliability. Allow it to absorb for a few hours then add another layer.

How to preserve a squirrel tail

Every hunter (squirrel hunters included) enjoys showing off their hunting prowess. Deer hunters often have a head or antlers mounted, fishermen sometimes have a nice size fish preserved and mounted on their wall. Squirrel hunters usually don’t have their squirrels taxidermied but often enough, we like to keep the tails so in this article we will see a simple way to preserve a squirrel tail.

When keeping tails as a record of your successful hunts there really isn’t too much involved in the preservation process. With some non-iodized salt, you can start collecting your squirrel tails as well.

Instructions:

  1. Start with a pair of pliers and remove the bone. You can also try slicing down the tail to remove the bone but the pliers often remove it completely, reducing the chance of it rotting.
  2. Once the bone has been removed, pour a generous amount of salt on the fleshy part of the tail (the inside). This is best done as soon as the bone is removed as some of the inside skin is exposed.
  3. Turn it right-side-in again and pour some additional salt into it. Let this sit (on a flat surface) for at least 24 hours.
  4. After 24 hours, wipe or scrape away the old salt and reapply another generous layer. Place it on a flat surface to dry for another couple days and the tail should stay preserved for many years.

How to Tan a Squirrel Hide

Squirrel hunting can provide many squirrel hides that can be turned into durable leather or made into nice decorative pieces in just a few simple steps. We will examine how to tan a squirrel hide in a simple and effective manner.

Squirrel pelts were traditionally used as a durable leather that had many uses, such as being sewn into patterns to make coats and other articles of clothing to keep our ancestors warm. Even though you can run down to the local Walmart store and buy a coat eliminating the NEED to tan a hide, the process of tanning a hide can still be an interesting and entertaining activity, even if it’s just done for fun.

Here’s What You’ll Need:

  • 5-gallon bucket
  • Salt
  • Dull knife
  • Alum (tanning chemical, short for Aluminum) can be purchased many places, including Amazon.com. Do a quick Google search for a place that carries it near you.
  • Hide from a squirrel
  • Neat’s Foot Oil (purchased at any leather shop)

Instructions:

  1. Prepare the pelt by scraping away as much visible meat and fleshy tissue as possible from the hairless underside of the hide. A dull knife is recommended, as it will scrape the hide without slicing through.
  2. In a 5 gallon bucket, prepare a solution of salt water: 5 cups of salt to 1 gallon. Submerge the hide in the salt solution for a minimum of 24 hours. Remove and scrape away any remaining flesh and membrane that has come loose during the soaking process.
  3. To prepare your tanning solution, begin with 2 lbs. of salt mixed into 4 gallons of water. You can reuse the same bucket as before. Stir it to dissolve the salt completely. In a separate container, mix 2 lbs. of alum in just enough water to dissolve and mix thoroughly. Add this to the salt mixture.
  4. Place the scraped pelt into the tanning solution. Allow it to sit for 24 hours and stir it a minimum of two times during the tanning process.
  5. Remove from the solution and rinse the entire pelt under clear running water. Hang the pelt outside with the fur side up, over a clothesline or railing out of direct sunlight. Let it hang for several days.
  6. Rub the hide, back and forth, over a straight edge to soften the leather. A patio railings will work well for this process.
  7. Work Neat’s Foot or other leather lubricants into the underside (leather) with your fingers to insure the tanned hide becomes both soft and pliable. Use a dog brush or other comb to work out any mats or tangles on the fur side of the hide.

Now you have your very own squirrel pelt. A set of them placed over the arms of your couch looks great!

Things to note:

  1. The chemicals, salt and alum, are non-toxic to humans but should NOT be digested. Wear gloves and wash hands frequently. As always, you should read the product label before using any chemical.
  2. This method can be used to tan almost any type of animal hide. Increase times and amounts of tanning solution for larger hides.
  3. Squirrel hides can be frozen in the freezer until ready to tan if you choose to tan several at the same time.
  4. Alum can usually be purchased at any pharmacy or drug store.
  5. The tanned hide is NOT WATERPROOF. Exposing it to water can cause hair to fall out or the hide to stiffen. However this method is still good for preserving hides.

How to Tie Your Own Walleye Spinners

0

When it comes to creating spinner rigs suitable for walleye fishing, the factory-tied versions on the market leave me cold much of the time. For better than 30 years I’ve taken pride in tying my own walleye spinners using premium hooks, lines, clevices and blades.

The time spent making my own fishing rigs is enjoyable, but even better it’s a satisfying feeling reeling in a fish I caught on one of my own creations. My son Jake and I often tie spinners together while we’re watching a ball game. My wife Mari even jumps into the act to make sure we color-coordinate things as she sees fit!

A spinner rig can be drifted, cast or trolled. This presentation starts heating up in the spring when the water gets in the upper 40-degree range and remains good all summer long.

Getting started tying your own spinner rigs starts by identifying the proper components. Most tackle shops and mail order houses sell spinner components including blades, beads, leader material, clevices and hooks. An investment of about $50 will set an angler up for producing as many quality spinner rigs. That’s a considerable saving over purchasing the factory-tied versions which start at about $2 each and range up to $5 or more!

Leader Material

Walleye spinner rigs can be tied on a variety of leader materials. An ordinary monofilament line is an acceptable and affordable option. Select a hard-surfaced line that has excellent abrasion resistance. Both Maxima Ultra Green and Chameleon are examples of monofilaments that are tough enough to make great spinner rigs.

Fluorocarbon is also popular as leader material for spinner fishing because this line type is nearly invisible in the water. Fluorocarbon also has great abrasion resistance qualities and it holds knots well.

A few anglers use fused lines to tie spinner harnesses. The biggest problem with fused lines is they are soft and tangle easily. Should one of these rigs get tangled, there is little chance of salvaging the rig.

Depending on the size of fish targeted leader material suitable for walleye fishing ranges from 10- to 15-pound test. Both fluorocarbon and monofilament can be purchased in leader wheels, saving money and making sure the line used for tying spinner rigs is fresh and in good shape.

Beadsmail-order

Tackle shops sell beads designed for tying rigs, but I prefer to buy my beads at a craft shop. Craft shops have a wider variety of beads and bead types and many more colour options than routinely stocked at a tackle shop. Also, beads at a craft shop cost about one-quarter of the price of the same ones sold at tackle stores!

Clevices

A clevice is the device that holds the blade on the leader allowing the blade to rotate. Some clevices are made from stamped metal, others folded metal and still, others are formed from plastic. Metal clevices allow the blade to spin with the least amount of resistance and are superior for slow trolling and drifting applications.

Plastic clevices are often configured to allow the blade to be removed without having to cut and re-tie the leader. This handy feature allows anglers to experiment with blade size, shape and color quickly. The leader in this category is a company called Quick Change Clevices and they are widely distributed at tackle shops everywhere.

Plastic clevices come in two sizes, one for smaller blades and a second model for larger blades. Matching up the right size clevice to the proper blade is important to get good performance from these products.

Hooks

For walleye harnesses, I favor a short shank-style hook known as a “beak” hook. Similar in shape to an “egg” hook, but with a little longer shank, a No. 4 beak hook is a good all-around choice. When targeting bigger walleye a larger No. 2 beak hook is the best option.

Ordinary bronze hooks are the standard for walleye spinner rigs, but red anodized hooks are gaining in popularity. Many anglers feel that red hooks help to attract fish.

Blades

The most popular blade type for walleye spinner fishing is hands down the Colorado blade. Colorado blades spin at slow speeds and give off a lot of flash and vibration. Sizes 2 and 3 are ideal for structure fishing applications and when fishing inland lakes. Larger No. 4 and 5 blades work better for targeting larger walleye or when fishing impoundments and the Great Lakes that produce bigger average-sized fish.

A good second option is Indiana-style blades that are a little more oblong in shape. It takes a little more speed to get an Indiana blade spinning, but these blades work well in most walleye fishing situations for drifting and slow trolling.

These days blades suitable for walleye spinner rigs come in every color and finish imaginable. When buying blades purchase them in groups of 4 to 6 blades per color. That way if a particular color starts producing you’ll have other blades of the same color to share.

The Knot

The best knot for tying walleye spinner rigs is known as the egg loop and anglers can quickly learn to tie this knot at a web page called www.animatedknots.com. The benefit of the egg loop knot is the hook can be placed precisely on the leader allowing the angler to space two or three hooks at exactly the desired distance from one another. Other snell knots allow the hook to slide when the knot is tightened, making it tough to create uniform rigs.

Summing It Up

Tying spinner rigs is a lot of fun and these rigs are deadly when fishing walleye on bottom bouncer sinkers, slip sinker rigs, three-way swivel rigs or when trolling in open water using divers like the popular Off Shore Tackle Tadpole Diver.

Once tied I like to store my spinner rigs in small plastic bags or wrap them up on a short chunk of foam made for insulating water pipes. One length of foam can be cut into about a dozen short leader wheels ideal for storing walleye spinner rigs.

If tying your own spinner rigs isn’t an option, some of the best factory-tied rigs are produced by Yakima Bait, Northland Tackle, Lindy Little Joe and Bait Rigs Tackle

Requisitos para la Licencia de Caza en California – Guía Completa

0

Soy Ricardo, un blogger latino en Estados Unidos y con este post quiero informarte sobre los requisitos para obtener la licencia de caza en California. Me gustaría contarte cuáles son los parámetros necesarios para adquirir esta autorización en la la costa oeste de Estados Unidos. Ven y conóceme más en mi blog «EstadosUnidosAhora» y descubre todo lo que debes saber de este tema. ¡Espero que disfrutes!

Paso a Paso sobre requisitos para licencia de caza en california

  1. Completar un curso de educación de caza certificado por el Departamento de Pesca y Vida Silvestres de California.
  2. Solicitar una licencia de caza con su identificación.
  3. Probar que tiene la edad legal para obtener una licencia de caza.
  4. Pagar la tarifa anual para la licencia de caza.
  5. Comprender los reglamentos y estatutos de caza propios de California.
  6. Estudiar sobre la vida silvestre y los hábitos de caza.
  7. Presentar un informe médico que indique si se encuentra apto físicamente para la caza.
  8. Revocar cualquier otra licencia relacionada con la caza de otros estados.
  9. Obtener un examen para el uso seguro de un arma de fuego.
  10. Portar siempre la licencia de caza mientras se encuentre cazando.

Requisitos Necesarios Sobre requisitos para licencia de caza en california

  • Ser mayor de 21 años.
  • Presentar una prueba de ciudadanía.
  • Contar con el pago de los impuestos pertinentes.
  • Contar con el certificado de Hunter Education, si se requiere.
  • Presentar el comprobante de inscripción en el Área Registrada de Caza.
  • Proporcionar una fotografía reciente para la tarjeta de caza.
  • Demostrar que tiene la capacidad para usar un arma de fuego.
  • Tener seguro de Responsabilidad Civil por daños al medio ambiente.

leyes de caceria, preguntas y respuestas parte 2

¿Quién puede portar un arma de fuego en México?

¿Qué se necesita para cazar en Estados Unidos?

Para cazar en Estados Unidos se requiere contar con un permiso de caza emitido por el Departamento de Pesca y Vida Silvestre de cada estado, además de tener las herramientas necesarias para el correcto desarrollo de la actividad. El cazador debe contar con un seguro que le cubra cualquier daño ocasionado a terceros durante la práctica de la caza.

Además del permiso y seguro, es requisito obligatorio contar con cierta documentación como licencia de conducir, pasaporte, carné universitario o tarjeta de identificación con foto. La edad mínima para cazar está entre los 14 y 16 años, dependiendo del estado en que se realice la actividad.

Otro aspecto relevante es el armamento adecuado para la caza, que en la mayoría de los casos es un arma de fuego y/o un arco y flechas. Se debe prestar atención al reglamento estatal para saber qué tipo de armas están permitidas para cada caza. Finalmente, se deben llevar todos los elementos de vestimenta necesarios para preservar la salud y la seguridad.

¿Qué documentos se necesitan para cazar?

Para cazar en Estados Unidos, se necesita tener una licencia de caza. La cantidad de documentos necesarios para obtener la licencia varía dependiendo del estado. En algunos casos, los cazadores deben presentar pruebas de un curso certificado de caza y supervivencia o de un examen de seguridad de armas de fuego. Además, en algunos estados se exige que los cazadores presenten una copia de una identificación oficial como pasaporte o licencia de conducir. Por último, la mayoría de los estados requieren que los cazadores paguen una tarifa para obtener una licencia para cazar. La tarifa varía dependiendo del lugar y del tipo de caza, pero en general es relativamente baja. Una vez que los cazadores han cumplido con todos los requisitos y pagado la tarifa, reciben un permiso de caza válido por un periodo determinado. Es importante destacar que en muchos estados los cazadores pueden pedir por teléfono o a través de Internet la licencia, pero en otros estados los cazadores deben aplicar en persona.

¿Qué hay que hacer para obtener la licencia de caza?

Para sacarse la licencia de caza en Estados Unidos es necesario cumplir una serie de requisitos. En primer lugar, antes de comprar una licencia de caza es importante averiguar las regulaciones de la caza en el estado en el que se desea cazar; cada lugar tiene diferentes reglas para cazar y las variaciones de un estado a otro.

Luego, uno debe obtener su número de identificación de cazador, el cual generalmente se consigue gratuitamente en una agencia de vida silvestre del estado correspondiente. Además, se debe tomar un curso en seguridad con armas de fuego antes de obtener la licencia, el cual puede ser tomado a través de cursos en línea o por un instructor certificado. Finalmente, se necesita comprar la licencia de caza correspondiente para el estado o región en la que se desea cazar, la cual se puede adquirir en los establecimientos designados o en línea.

Es importante tener en cuenta que muchos estados requieren una licencia de caza para las personas mayores de 16 años, aunque algunos permiten que los niños de 12 a 15 años salgan de cacería si se les asigna un supervisor autorizado. Dependiendo del estado, también hay restricciones en cuanto a qué animales son legalmente cazables o dónde se puede cazar. Por lo tanto, es importante revisar las regulaciones de caza antes de salir a cazar.

¿Qué se necesita para obtener la licencia de conducir en California?

Para obtener la licencia de conducir en California, es necesario cumplir ciertos requisitos impuestos por el estado. Primero es necesario tener al menos 16 años de edad y demostrar que se está inscrito en un programa de educación vial en el estado de California, que ofrece un curso de prueba escrita. Luego se debe presentar una prueba escrita y completar una clase teórica, así como un examen de manejo práctico. Una vez que se hayan cumplido con estos requisitos, el solicitante tendrá que proporcionar su información de identificación personal, como una prueba de la identidad, para poder iniciar el proceso de solicitud de licencia de conducir en California.

Además, el candidato deberá proporcionar una prueba de residencia vigente en el estado para realizar el trámite de licencia. El Departamento del Vehículo de Motor (DMV) de California exige que los solicitantes cuenten con un seguro de automóvil válido para obtener una licencia de conducir. El seguro debe ser emitido por una compañía de seguros autorizada por el estado, y debe ser válido durante el período previo a la certificación de la licencia. Finalmente, el solicitante deberá pagar los impuestos correspondientes a la licencia de conducir antes de que se le otorgue.

Preguntas Relacionadas

¿Qué requisitos legales tengo que cumplir para obtener una licencia de caza en California?

Para obtener una licencia de caza en California, es necesario cumplir con una serie de requisitos legales. Primero, debe estar al día con el impuesto sobre las ventas del estado de California y la tasa de registro de armas de fuego. Estas tasas son exigidas por el Departamento de Pesca y Vida Silvestre (DFW) de California. Segundo, debe haber completado un curso obligatorio de seguridad en el uso de armas de fuego. Tercero, debe tener una prueba de aptitud oculta para demostrar que sabe manejar un arma de fuego con seguridad. Cuarto, debe presentar una copia de su identificación con foto emitida por el estado de California u otro estado reconocido. Quinto, los solicitantes de licencias de armas de caza deben proporcionar una certificación médica, ya sea del estado de California o de otro estado reconocido, que indique que está capacitado para usar armas de fuego con seguridad. Sexto, el solicitante debe pagar la tarifa correspondiente a la licencia de caza antes de que el DFW expida la licencia. Finalmente, séptimo, debe proporcionar una prueba de edad para demostrar que es mayor de edad.

¿Puede alguien con un registro criminal solicitar una licencia de caza en California?

No, alguien con un registro criminal no puede solicitar una licencia de caza en California. De acuerdo a la legislación estatal, cualquier persona que tenga una condena por un delito relacionado con el manejo, posesión o uso de armas de fuego o de cualquier artículo de caza o pesca, está inhabilitada para obtener un permiso de caza. Sin embargo, el condenado podría recibir autorización para la caza despues de cumplir con la sentencia legal y de ser verificado por la División de Vida Silvestre. Si la Division determina que el demandante es «adecuado para tener acceso al arma de fuego», el condenado podría obtener un indulto gubernamental para su licencia de caza.

¿Existen restricciones de edad para obtener una licencia de caza en California?

En California, hay una restricción de edad para obtener una licencia de caza. Una persona debe tener al menos 16 años para ser elegible para solicitarla. Autorización y asesoramiento adicional puede ser necesario para los menores de 18 años para obtener la autorización parental antes de que puedan obtener una licencia. Los mayores de 65 años están exentos de la licencia de caza en California.

Rare And Exotic Trout

0
Rare And Exotic Trout

Apache Trout — The Apache trout (Oncorhynchus apache) is native to the White Mountain region of east-central Arizona. This trout was on the endangered species list, but through the efforts of the White Mountain Apache Tribe, the U.S. Fish and Wildlife Service, and the Arizona Game and Fish Department, it has rebounded enough to be listed as threatened, and soon may be off the list. This would make the Apache trout one of the only fish to be removed from the endangered species list. Hybridization with introduced rainbow trout along with competition from non-native brown trout is thought to be the main cause for the Apache’s decline.

Apaches are thick bodied fish with a yellowish-gold color, large black spots, white-edged fins, and an oversized dorsal fin. A black horizontal bar graces their eyes. They’re spring spawners like their close relative, the Gila trout. The world record is shared by two 5-pound 15-ounce fish from Hurricane Lake on the White Mountain Indian Reservation.

Dry flies, nymphs, streamers, small spoons, and spinners all work well. The largest fish are caught from lakes like Hurricane and Christmas Tree on the White Mountain Indian Reservation. To fish there, a special permit is required along with a reservation, as access is limited to a set number of anglers per lake, per day. The Arizona Game and Fish Department raises Apaches in their hatchery system for stocking some state waters.

Bull Trout — Bull trout (Salvelinus confluentus) are actually a char, not a true trout. Endangered in most of its native range, I’ve found record listings for six northwestern states. The world record is a 32-pounder caught from Lake Pend Oreille in Idaho in 1949. Fishing for bull trout in Idaho and most of Montana is illegal, due to the fish’s endangered status.

Bulls resemble Dolly Varden, a species they were originally confused with. They also resemble lake trout, but lack the deeply forked tail. Small bulls are similar to brook trout but lack the ­vermiculations (wavelike markings) on their backs. Their body is greenish-gray or silvery with creamy or white spots. During the fall spawn, these spots develop a pinkish tint and the belly becomes reddish, similar to spawning brook trout.

Bull trout are an aggressive piscivore. At one time, a bounty was offered for Dolly Varden, as well as the then unknown bull trout, to protect salmon smolts from their predation. Habitat destruction and hybridization with the introduced brook trout have severely reduced bull trout populations.

Sunapee Trout — The Sunapee trout (Salvelinus alpinus) is generally considered a race of landlocked Arctic char. It originally occurred in a few lakes in New Hampshire, Vermont, and Maine. The world record, from Sunapee Lake, New Hampshire, weighed 11 pounds 8 ounces. Some Sunapees were transplanted into two Idaho lakes (Alice and Sawtooth), where they continue to survive. Few true Sunapees remain, as lake trout and brook trout readily hybridize with them.

The two Idaho lakes are believed to still contain true Sunapees. They resemble brook trout although are less colorful and have a more forked tail. Body color is greenish-silver with reddish pink spots. They’re a slim-bodied char, and during the fall spawn, their colors intensify, particularly in males.

Sunapees inhabit deep water during warmwater periods. Lake trout tactics work well if you keep in mind the Sunapee’s smaller size and downsize your lures or bait. In the east, many anglers favor smelt for bait.

Like other char, Sunapee trout spawn in fall in the shallows. In Idaho, most are caught in late fall when they’re shallow. But only a narrow window of opportunity exists, due to unstable weather. In early spring, the fish are shallow, but access to mountain lakes often is difficult. In the east, ice fishing can be effective, but as with other rare and exotic trout, catch and release is highly encouraged.

Gila Trout — Gila trout (Oncorhynchus gilae) are a highly endangered trout found only in a small area in New Mexico and possibly the border of Arizona. They’re protected throughout their range so angling for them is prohibited. Habitat ­degradation and introduced trout, particularly rainbows that readily hybridize with the Gila, are the main causes of their decline. Most pure-strain Gilas are relegated to tiny intermittent headwater streams, so average size is less than 12 inches. No world record is listed, and even New ­Mexico doesn’t list a state record.

The Gila is heavily marked with small black spots, an olive back, and coppery or golden sides. The Gila is a chunky fish and a spring spawner like rainbows and cutthroats. A recovery effort is underway; perhaps someday we’ll be able to fish for Gila trout. It’s an excellent candidate for dry-fly fishing as it readily rises to the surface to feed.

Ohrid Trout — Unless you’ve fished in the former country of Yugoslavia, or select waters in Wyoming, Minnesota, or Tennessee, chances are you’ve not heard of, let alone seen an Ohrid trout, Salmo letnica. The Ohrid trout is also known as the Yugoslavian brown or Yugo for short. Ohrids were imported from the Lake Ohrid region of Yugoslavia by the US Fish and Wildlife Service in 1965, because of their tendency to spawn in lakes.

Ohrids look like a greatly exaggerated brown trout. They have oversized fins, huge black and reddish-orange spots, a uniform tan body, and black shading along the belly. Spawning males are brilliantly colored during the spawning season in late January and through February.

In Wyoming, many Yugos are caught by ice anglers fishing fluorescent orange jigging Rapalas in the redds of spawning trout. Apparently, Ohrids bite aggressively when spawning, evidenced by their expelling milt or eggs as they’re pulled from the hole. Due to their slow growth and late maturity, Ohrid stocking has been discontinued, so those you catch are naturally spawned fish, appropriate for release.

The best chance to catch an Ohrid trout in the US probably is at Pathfinder Reservoir in Wyoming. Alcova Reservoir, also in Wyoming, and Watauga Lake in Tennessee, also hold a few of these rare trout. The world record Ohrid, 14 pounds 4 ounces, is a tie between the North Platte River in Wyoming and Watauga Lake in Tennessee. Both were caught in 1986.

Tiger Trout — Tiger trout are not a species, but a hybrid cross between a male brook trout (Salvelinus fontinalis) and a female brown trout (Salmo trutta). They occur naturally, but are more commonly hatchery produced. Due to genetic differences between brookies (a char) and browns (a trout), egg and fry survival is low, ten percent considered excellent. That fact coupled with the sterility of the offspring makes tiger trout rare.

Ten states list a state record, with the world record coming from Lake Michigan, a 20-pound 13-ouncer. Several other states could contain tiger trout, as anywhere brookies and browns are found together, tigers are possible. Wyoming doesn’t list a state record, but I’ve seen several mounted tigers from Wyoming waters.

Tigers are unusual looking with no spots, but their sides are covered with vermiculations. Their coloration usually is brown and yellow. Male tigers, although sterile, develop spawning coloration in fall. Their bellies turn orange, much as a male brook trout’s belly reddens. The tiger’s fins look like a brookie’s, though not as intensely ­colored.

Tigers aggressively hit large dry flies. Large lures are popular, but I’ve had better luck using small jigs sweetened with bait. Streamers also are worth a try, as both parental species feed on baitfish. Hybrid vigor is responsible for the tiger’s aggressive hits and strong fight. Utah stocks several bodies of water with these exciting hybrids.

This is by no means a complete list of the rare and exotic trout of North America. Several cutthroat subspecies, strains of rainbows, the blueback char, the Canadian aurora trout, and others could be included. Most have recovery programs in place, although few programs have achieved the success of the Apache trout. Hopefully, the Apache success story will someday be repeated for the Gila, Sunapee, bull, and other rare and endangered trout. Catch and release along with angler support of recovery programs may provide future anglers with the opportunity to catch these rare and exotic trout.

* Danny Kurttila is a freelance writer from Riverton, Wyoming.

Best Air Rifle Deals

Popular Posts

Air Rifle Scope vs. Rifle Scope – Which One Fits Your Shooting Needs?

0
"Air Rifle Scope vs Rifle Scope: Unveiling the Ultimate Precision Optics. Discover the essential differences and benefits of these two optical devices, empowering shooters...

Best Distance for Sighting In an Air Rifle

0
Shooting with an air rifle always seems like a thrilling experience, but if you are a newbie then you have lots to learn. One...

Can a 22 air rifle kill a deer?

0
"Debate over whether a 22 air rifle can effectively take down a deer has sparked curiosity among hunting enthusiasts. With its lower muzzle velocity...