Home Blog Page 208

What’s the Best Treestand Height?

0

I’ve hunted from stands 30 feet in the air.

I’ve hunted from stands 8 feet off the ground.

Both were precisely the right height for where they were positioned. How’s that possible?

Hanging a treestand at the “right height” is not an exact science. It’s something that changes depending on many variables, including the height of available trees in the area and density of surrounding foliage.

That 30-foot-high stand was in a stand of tulip poplars the resident deer were cutting through each evening to head to an adjacent crop field. All the trees were mature poplars, which means the woods looked like a collection of telephone poles, with very little ground foliage.

To get out of the deer’s line of sight, I had to go high. Otherwise, I would have stuck out like a sore thumb at, say, 15 or even 20 feet. My goal was to be able to allow does to pass within 10 yards of my tree as I waited for the bucks to show at the end of the evening migration.

Had I been lower and a wary old doe busted me, my hunt basically would have been over right there. There were no low branches to hide among, so my only option for cover was to go up. And it worked. I arrowed a nice 8-pointer after several sits in my sky-high perch.

Conversely, the 8-foot-high stand was situated in a skinny little tree that stood only about 25 feet tall in the middle of a swamp. It was the only tree within shooting distance of the main deer trail that offered any sizable trunk for holding a hang-on stand. But 8 feet off the ground was as high as I could go before the tree really started tapering down and the branches started growing really close together.

The 8-foot boost, however, gave me just the right amount of lift to see over the surrounding cattails. I knew a deer was coming long before it got within bow range, which allowed me plenty of time to get ready for a shot or to freeze, depending on if the approaching deer was a shooter or not.

And quite honestly, while the deer coming through my poplar woods always seemed to be scanning for danger, the dense ground vegetation of the swamp seemed to make those deer feel very comfortable. They never looked up at my tree, and as long as my wind was right, I never once got busted in that stand.

I never had the right deer come by my swamp setup, unfortunately, so I never shot a deer from it. But I sure passed a lot of deer that I easily could have shot.

The moral of the story is, you hang your stand to suit the conditions surrounding it. Do what it takes, as the saying goes.

Having said that, if you take special circumstances out of the equation, and suppose that I am hunting a basic, normal woodlot, I like my stands to be 20-25 feet high – favoring 25 feet over 20. Why? That just seems to be the height where it’s easiest to avoid detection by deer on the ground.

I hang those stands as high as I do to not shoot deer. If my plan was to shoot the first deer that walked up, then stand height would be irrelevant. But I believe you have to think about not shooting deer. You have to consider that the deer you want to shoot might be the fifth, 10th, 15th, etc. deer to walk by your stand. And that means you have to avoid detection by the first four, nine, 14, etc. deer.

From experience hunting eastern hardwoods like we have in my home state of Pennsylvania, I’ve found it’s very hard to escape a deer’s eyes and nose when I’m under 20 feet. Even when I freeze like a statue while hugging the tree to minimize my silhouette, I’ve had deer peg me at 15 feet or so. Add another 10 feet, though, and I can get away with almost anything.

Be aware, the higher you hang a treestand, the more you need to think about shot angles. A 10-yard shot while you’re 12 feet in the air is nearly perfectly broadside. A 10-yard shot from 25 feet up is nearly straight down. You have to think about where to place your arrow to hit as much of the vital area as possible.

Ideally, you want to put a hole in both lungs. Well, from 25 feet up shooting at a broadside deer 10 yards out, you’re probably going to have to aim a little below the spine on the side of the deer closest to you. That should allow you to hit the close lung and then catch the far lung as the arrow slices diagonally through the chest cavity, exiting the bottom of the deer’s body on the opposite side.

Still, some people don’t like heights. Or they don’t like taking steep shot angles. So maybe you want to hang a stand at 12 or 15 feet. That’s okay, so long as you have cover. Put your stand in the middle of some branches to break your silhouette. One of my favorite tricks is to find several trees growing close together and hang my stand in the middle of them to help with concealment.

So in conclusion, the best height to hang your treestand for hunting whitetails is whatever suits the environment you’re hunting in, and whatever you feel comfortable with. It’s really that simple.

PCP vs CO2 Guns: Which One is Better?

0

The most talked-about debate between hunters and gun enthusiasts is what the best power source of a gun is. 

The five main sources of power behind the pellet that we find in guns are spring power, gas piston (nitro piston included), variable pumps, compressed CO2 gas, and pre-charged pneumatic (PCP). 

These power sources are the heart of all air guns and pistons and may vary, but all of them ultimately do the same thing – firing bullets. 

There are advantages and disadvantages to everything, but in this article, I am mainly going to discuss which power source for air guns is better – pre-charged pneumatics (PCP) or CO2. 

Both PCP and CO2 air guns require tubes of compressed air to work, though PCP guns are considered more powerful. On the other hand, CO1 guns are easier to use and require less time and energy to maintain. Let us further discuss these qualities and compare PCP vs CO2 air rifles. 

PCP Guns and their Working Procedure

PCPs are guns with a lot of range and are available in many calibers. The recoil is minimum and the internal part of PCP guns has three major categories – regulated mechanical, unregulated mechanical, and electronic. 

  1. The air cylinder is pre-charged and stored in the gun so that when you cock the rifle, the cylinder is pulled back through the spring. 
  2. The cylinder is released when you pull the trigger and it hits the valve, causing muzzle velocity to accelerate. 
  3. The released air glows through the transfer port to go to the barrel. The valve closes due to the air pressure getting the same force as before. 
  4. Using a PCP gun with a regulator makes sure the air pressure remains the same. 

CO2 Guns and their Working Procedure

CO2 guns have been around for a very long time and come in all shapes and sizes. They are great for a shooting experience and are very similar to traditional rimfire firearms. Similar to PCP guns, there is minimum recoil and the accuracy is at par with spring pistons.

They are not powered by pressurized air but through pressurized carbon dioxide. When the pressurized carbon dioxide is inserted into the cylinder bottle, some of the gas turns into liquid. Therefore, the cylinder has both liquid and gas.

  1. Upon pulling the trigger, the cylinder valve opens. 
  2. Some of the gas transfers into the barrel with great force which causes the barrel to shoot the pellet out of the gun . 
  3. The liquid gas remains the same until the time for it to turn into gas for the next shot. 

Differences between PCP vs CO2

The main difference between the two types of guns is in their mechanisms. Pre-charged pneumatic guns work by manually compressing the air when the folding of the barrel is going on. 

The shots are fired from the pressure of the compressed air and their intensity depends on the system. Meanwhile, the power of the CO2 gun will always be the same, due to the compression of the gas inside the cylinder.  The more the cylinder is filled, the greater the shot will be. 

PCP guns can reach a power of up to 8/10 joules but a CO2 gun can only go up to a 4 J. In terms of FPE, most PCP guns offer more than 11 FPE. Some .25 caliber PCP guns can also reach up to 50 FPE, making them suitable for large/medium game hunting.

(For more on the best air rifle for hunting medium games, see this post)

On the other hand, CO2 guns can only offer FPE up to 16 in most cases. Therefore, they’re not as powerful as PCPs.

Another way PCP is more advantageous over CO2 guns is that the change in air pressure does not affect their performance.

However, CO2 guns also have their benefits over using PCP guns. In CO2 guns, pressure regulators are not required. The power of CO2 guns is usually in the range of what a human can take, and hence are safe from unnecessary hassle. 

When comparing a PCP air tank vs CO2, the pressure of the vapor does not depend on the tank size but rather on the temperature of the liquid. Large pressurized gas is converted from a small volume of liquid and hence is a very simple system for the storage of energy.

Since both depend on the needs of the individual, let us dive deeper into the comparison of these two guns. 

PCP vs CO2 Rifle Power Comparison

The difference in the powers of PCP vs CO2 air guns is that the latter can go to about 650 feet per second, while PCP has 750 feet per second and can go up to 1000 too. This is because PCP guns get higher pressure in the chamber. 

It also has a longer barrel and though they both have the same trigger and breech, there is higher pressure in the PCP gas chamber.  PCP rifles are of better construction and when there are regulators involved, the performance shoots up as well. 

The CO2 guns have a metal spring inside which can deteriorate over time with use. Hence, that is also one of the downsides.  

Accuracy

On average,  CO2 guns are around 800 PSI, while PCP rifles work on around 2900 PSI, which means they have three times more pressure.  This huge increase in pressure causes the compressed air to give the pellet an instantaneous push, unlike a CO2 gun which is comparatively slower. Hence, PCP guns have more consistency and accuracy.

The accuracy is the same for both of them when it is at a short distance. It also depends on the number of bullets you carry. Two capsules in a CO2 gun or a cartridge can also help shoot accurately. 

(For more on the best CO2 air rifle on the market, see this post)

Noise Level

CO2 guns make noise depending on the power level of the gun. A .22 short caliber gun can make a loud, popping, ripping sound. With a sound suppressing system in the CO2 gun, the noise can be reduced as it does not have a spring inside like a spring piston. They are, however, much quieter than a normal gun.

PCP guns, on the other hand, are noiseless. There is a small ‘ping’ sound made when air is passed through the tube suddenly, but the noise is not the same as other guns which make a banging noise. 

Upkeep Cost

When it comes to an overall cost for purchase and maintenance, in the PCP vs CO2 pellet gun debate, CO2 guns definitely take the win. 

It is noteworthy that the starting prices of high-quality CO2 guns are less expensive than the prices of low-range PCPs.  An expensive CO2 gun can cost about $150 while a good quality PCP will cost you around $500 – and this amount is without the extra charges you pay for the equipment and maintenance of these guns. 

Extra materials like a hand pump or an air compressor are also needed to recharge your PCP gun. These may cost around $6 per piece or more and may be a small amount to pay for the extra accuracy, but over the long period, it can prove to be expensive. 

In contrast, CO2 guns not only start at a lesser amount, but you can also get a handful of CO2 cartridges for just about $5. For a beginner who is just trying the sport and is not sure if they would continue, the CO2 guns are budget-friendly as well as efficient. 

Which One is Better For Pest Control?

CO2 guns are great for simple shooting. With their low cost a decent range, they are a great pick for normal uses. Though high-end CO2 guns may vary from low-quality CO2 guns, the difference is not binary and also depends upon the model.

It would be wrong to recommend a CO2 for hunting, as its purpose is mostly that of shooting small things once in a while, hence, the gun is the better pick out of the two for pest control.

PCP guns definitely cover up most of the functions and mechanics one would need as a hunter, so they can do the work of any other gun and be used for pest control as well, but that is a waste of gas – especially since PCPs are expensive. Therefore, you can leave these small tasks for your CO2 gun. 

=> For more on the best air rifles for pest control, see this post

Which One is Better for Hunting Games?

The sport of hunting is where the PCP will come into play and be the best at it. It is obvious that its great build is perfect for shooting, but if the target does not require continuous shooting, then it is alright to not use a PCP as well.

While CO2 guns can have a range of about 40 yards, with all its repeatable consistency, the range of PCP guns can go from and past 75 and 100 yards. This does not only cover a medium to large range, but your PCP bullet can also go at a speed of 750 per second or more. Shooting from large distances also makes hunting a fun activity for some . 

PCPs are also way more powerful when compared to CO2 guns. Their FPE can reach up to 50 whereas most CO2 guns fall short here. 

(For more on the best PCP air rifles on the market, see this post)

Conclusion

Which one you choose is really your decision at the end of the day, however, to sum it up, a Co2 gun will be perfect if:

  • It is a small situation like pest or vermin control. 
  • The situation is just a practice of casual target shooting
  • You are looking for something low maintenance. 

PCP guns are the way to go if:

  • There is no limitation on budget and you can afford the best regardless of its price. 
  • You are going to use the gun for a lot of hunting and competitive target shooting. 
  • You want to keep the gun in good condition for an extended period of time.
  • You want to opt for large or medium game hunting. 

Best Warzone Sniper Rifle class loadouts: Attachments, Setup, Perks

0

There are so many choices when it comes to Sniper Rifles in the original Warzone, but some are simply better than others. We came up with a list of the best meta sniper rifle loadouts in Warzone Caldera.

Warzone still remains one of the greatest battle royales when it comes to weapon diversity, each weapon has its own character. Sadly, the nerfs in Season 3 made it so only a handful of the battle royale’s sniper rifles can still one-shot opponents.

To help you find the best sniper in Warzone, we’ve covered all the top-tier loadouts and attachments that maximize their efficiency. Whether you’re looking to increase your lethality or just wish to claim more long-range kills, then you can’t go wrong with these picks.

Remember, if you’re ready to dive into Warzone 2 and want to know which top-tier weapons to use, be sure to check out our list of the best Sniper Rifles to use in Warzone 2.

Contents

  • What is the best sniper in Warzone?
  • Best snipers in Warzone
  • Best Warzone sniper support weapons

What is the best sniper in Warzone?

operator using zrg 20mm sniper rifle in cod warzone

The best Sniper Rifle in Warzone is the Gorenko Anti-Tank Rifle. Currently, this sniper has the highest KD ratio and win rate out of all the rifles in the game and it’s easy to see why.

The Gorenko offers unmatched damage at long-range and while the 3 Line Rifle is a close contender, the Gorenko comes out on top thanks to its raw firepower.

12. Best Type 99 loadout

Attachments

  • Muzzle: Mercury Silencer
  • Barrel: Shiraishi 712mm Sniper
  • Optic: 1913 Variable 4-8x
  • Stock: Sakura CVR Custom
  • Underbarrel: M1930 Strife Angled
  • Magazine: 5.6mm 8 Round Mags
  • Ammunition: FMJ Rounds
  • Rear Grip: Leather Grip
  • Perk 1: Discard
  • Perk 2: Deep Breath

While the Type 99 may not be the most popular Sniper Rifle in Warzone, it’s still a pretty fun gun to use. Closer to the Kar98 and Swiss than some of the other options, the Type 99 is a relatively versatile sniper with good range and speed.

If you’re bored of the better options, check this Type 99 class out. But, if you find it underwhelming (which you probably will), then swap to something deadlier — like the other snipers on this list.

11. Best M82 loadout

Attachments

  • Muzzle: Infantry Stabilizer
  • Barrel: 22.6″ Combat Recon
  • Stock: Tactical Stock
  • Magazine: STANAG 9 Rnd
  • Rear Grip: Airborne Elastic Wrap

The M82 is a perfectly viable option in Warzone and we believe its power is nothing to scoff at. It may lack mobility compared to the higher-ranked Sniper Rifles on this list, but that isn’t to say the M82 isn’t worth taking out onto the battlefield.

Give it a go, and make sure to consult our detailed setup for the M82.

10. Best AX-50 loadout

Attachments

  • Muzzle: Monolithic Suppressor
  • Barrel: 32.0″ Factory Barrel
  • Laser: Tac Laser
  • Stock: Singuard Arms Assassin
  • Rear Grip: Stippled Grip Tape

A tried and tested fan-favorite over the years, the AX-50 is a solid choice but falls short compared to the other meta options in Season 5 Reloaded. While it can’t down people across the map quite as easily as the HDR and Gorenko, it’s a much more versatile option given its mobility, aim-down-sight (ADS), and firing rate advantages.

This AX-50 class maintains enough bullet velocity and accuracy to prove lethal from range, while still enjoying some mobility. You can be fairly comfortable pulling it out for a quick down during a gunfight before pushing with an AR or SMG.

Making this gun even more mobile to use is the Tac Laser, Singuard Arms Assassin Stock, and Stippled Grip Tape. The gun is quite versatile as Swagg was even able to turn it into the Intervention from Modern Warfare 2.

Make sure to check out our full breakdown of the best AX-50 loadout in Warzone right here.

9. Best Tundra loadout

Attachments

  • Barrel: 29.1″ Combat Recon
  • Laser: Ember Sighting Point
  • Optic: Ultrazoom Custom
  • Underbarrel: Patrol Grip
  • Magazine: Vandal Speed Loader

Despite receiving a set of hefty buffs back in the Season 5 patch, the LW3 Tundra is still sitting outside of the meta top 5. However, it’s still a powerful choice in the right players’ hands, and with the increase in damage range, it’s in a better state than ever before.

Our Tundra loadout above has great kill potential and even though it isn’t the most popular Sniper Rifle currently in Warzone, it definitely packs a punch.

8. Best Swiss K31 loadout

Attachments

  • Muzzle: GRU Suppressor
  • Barrel: 24.9” Combat Recon
  • Laser: SWAT 5mw Laser Sight
  • Underbarrel: Bruiser Grip
  • Rear Grip: Serpent Grip

A victim of Raven’s Season 3 nerfs, the Swiss is no longer a guaranteed one-shot down to the head anymore, stunting some of its use.

Although no longer dominant as it once was, the Swiss is still fast, has a clean default scope and reticle, and it downs enemies quite efficiently. Like the Kar98k, the Swiss is all about fast ADS, quick shots, and precision.

For a full, detailed breakdown of the best Swiss K31 loadout in Warzone, check out our dedicated class guide.

7. Best Pelington 703 loadout

Attachments

  • Muzzle: Stabilizer .308
  • Barrel: 25″ Extended
  • Stock: Duster Stock
  • Magazine: Vandal Speed Loader
  • Rear Grip: Field Tape

The Pelington 703 is a good Sniper Rifle for aggressive Warzone players who prefer to take quick shots. While the weapon definitely won’t do as much damage as the Gorenko or 3-Line Rifle, it does provide you with more mobility and a reduced ADS speed.

Also, with Raven buffing the Pellington’s damage in Season 5 Reloaded, it’s brilliant when paired up with a meta SMG or AR.

It’s worth noting that to knock an opponent with the Pelington, you’ll need to land headshots. So, if you’ve got a sharp aim and prefer a less stationary playstyle, consider picking up the Pelington and trying this loadout.

6. Best HDR loadout

Attachments

  • Muzzle: Monolithic Suppressor
  • Barrel: 26.9” HDR Pro
  • Laser: Tac Laser
  • Optic: Variable Zoom Scope
  • Stock: FTAC Champion

Following on from the Warzone Sniper weapon nerfs in Season 3, the HDR once again became a viable option thanks to its overwhelming firepower.

If you’ve ever been downed from hundreds of yards away out of nowhere, then it was probably the HDR. While this gun is heavy and slow-moving, both are entirely negligible, especially given its incredible kill potential.

This is the best HDR loadout for those who want to claim a bounty of long-range kills. It’s not about moving around, downing an enemy, and rushing in with a numbers advantage. It’s about sitting back, taking out enemies from afar, and trying to claim cross-map headshots.

Make sure to check out our full breakdown of the best HDR loadout in Warzone right here.

5. Best Kar98k loadout (Modern Warfare)

Attachments

  • Muzzle: Monolithic Suppressor
  • Barrel: Singuard Custom 27.6″
  • Optic: Sniper Scope
  • Laser: Tac Laser
  • Perk: FTAC Sport Comb

For what seemed like an eternity, this gun was deemed to be the best sniper in Warzone by many pros and content creators alike. It took a long, long time, but the Kar98k is no longer the king of Warzone.

The fastest ADS and mobility of the gun means it’s still a great gun to use, although its one-shot ability has been greatly tamed.

The only question mark about this Kar98 loadout is the Sleight of Hand usage, which is great for reload speed and gun swapping but can be sacrificed if you’re struggling to hit shots. If that’s the case, you can consider the Precision or the FTAC Sport Comb instead.

Make sure to check out our full breakdown of the best Kar98k loadout in Warzone right here.

4. Best Kar98k loadout (Vanguard)

Attachments

  • Muzzle: Scout Silencer
  • Barrel: VDD RE02K
  • Stock: Short Stock
  • Underbarrel: SMLE Pistol Grip
  • Magazine: 8MM Klauser 5 Round Fast Mag
  • Ammunition: FMJ Rounds
  • Rear Grip: Leather Grip
  • Perk: Fleet
  • Perk 2: Fully Loaded

With absolutely insane ADS speeds and a one-shot kill of up to 100 meters, the Vanguard Kar98k is ideal for aggressive Warzone players.

While you will need to be a sharpshooter with a solid aim to make this gun shine, it’s deadly in the hands of players who can quick scope their opponents from a distance.

Although the gun won’t be eliminating enemies in a single shot from massively long distances, it makes up for this shortcoming with its absurd ADS speeds and mobility.

3. Best ZRG 20mm loadout

Attachments

  • Muzzle: Wrapped Suppressor
  • Barrel: 43.9″ Combat Recon
  • Laser: SWAT 5mw Laser Sight
  • Stock: 5 Rnd
  • Rear Grip: Serpent Grip

Taking the third spot is none other than the ZRG 20mm Sniper Rifle from Black Ops Cold War.

Again, significant shifts in the game’s meta have allowed some underrated guns to flourish. None more so than the ZRG 20mm, which did enjoy some success when it first came out, but it has quickly become a fan favorite.

While it can’t quite contend with the 3-Line Rifle and Gorenko, its fantastic speed and great bullet velocity do make it much easier to use. Even Call of Duty streamer IceManIsaac has singled out one of the best Warzone sniper loadouts to try for the unstoppable ZRG 20mm Sniper Rifle.

Check out our own top ZRG 20mm loadout too.

2. Best 3-Line Rifle loadout

Attachments

  • Muzzle: Mercury Silencer
  • Barrel: Kovalevskaya 820mm R1MN
  • Optic: 1913 Variable 4-8x
  • Stock: ZAC Custom MZ
  • Underbarrel: Mark VI Skeletal
  • Magazine: .30-06 20 Round Mags
  • Ammunition: Lengthened
  • Rear Grip: Leather Grip
  • Perk 1: Silent Focus
  • Perk 2: On-Hand

The 3 Line-Rifle was ignored for a long time by a lot of Warzone players but a hefty set of buffs in Season 5 finally brought the gun into the fold.

Since then the rifle has been a dominant pick on Caldera that deals lethal amounts of damage. Which is why this is one of the best Warzone sniper loadouts out there.

Not only that, it’s currently the most popular rifle in the game and players are seeing a lot of success with the weapon, so don’t hesitate to make the most of this powerful sniper.

To make sure it’s the best it can be, we have a complete guide to the best 3-Line Rifle loadout here.

1. Gorenko Anti-Tank Rifle

Attachments

  • Muzzle: Mercury Silencer
  • Barrel: 420mm Empress
  • Optic: 1913 Variable 4-8x
  • Stock: Reinforced Stock
  • Underbarrel: GF-59 Flashlight
  • Magazine: 13mm AM 10 Round Mags
  • Ammunition: FMJ Rounds
  • Rear Grip: Leather Grip
  • Perk: Focus
  • Perk 2: On-Hand

The Gorenko burst into the meta in Season 5, establishing itself as one of the best Warzone sniper rifle and loadout after the one-shot nerfs to the Kar98k and Swiss. Now, the gun reigns as the top sniper in Warzone thanks to its lethality at long-range which makes it perfect for picking off opponents.

While it did get hit with a bullet velocity nerf in Season 5 Reloaded, this wasn’t enough to knock it off the top spot. It remains a devastating sniper option in the right players’ hands and offers a huge amount of damage at long range.

Best Warzone sniper support weapons

Once you’ve decided on the best Warzone sniper loadout for your individual playstyle, it’s then important you pick a solid secondary or support weapon.

Seeing as Sniper Rifles are ideal at long range, your best bet will be to find a weapon that is good at close and medium-range engagements, leaning toward whichever suits you best. We’ve listed three separate weapon loadouts that are perfect when paired with any of the sniper loadouts above.

1. Best Armguerra Warzone loadout

  • Muzzle: Recoil Booster
  • Barrel: Botti 315mm CII
  • Optic: Slate Reflector
  • Stock: Imerito SA Folding
  • Underbarrel: Mark VI Skeletal
  • Magazine: 9mm 60 Round Mags
  • Ammo Type: Lengthened
  • Rear Grip: Polymer Grip
  • Perk: Hardscope
  • Perk2: On-Hand

2. Best XM4 loadout

  • Muzzle: Agency Suppressor
  • Barrel: 13.5″ Task Force
  • Optic: Axial Arms 3x
  • Ammunition: STANAG 60 Round
  • Underbarrel: Field Agent Grip

3. Best MP40 loadout

  • Muzzle: Recoil Booster
  • Barrel: Krausnick 317mm 04B
  • Optic: Slate Reflector
  • Stock: Krausnick 33M Folding
  • Underbarrel: m1941 Hand Stop
  • Magazine: 7.62 Gorenko 45 Round Mags
  • Ammo Type: Hollow Point
  • Rear Grip: Polymer Grip
  • Proficiency: Steady
  • Kit: Quick

While many support weapons complement a sniper loadout in Warzone, if you’re struggling to find that perfect fit, these three should prove to be successful in the BR.

Looking for more of the best Warzone loadouts and tips? Check out our list of guides below:

Best Warzone settings to increase FPS on PC | Most popular Warzone weapons | Best Warzone loadouts | Call of Duty Warzone Mobile: Everything we know | What is Sabotage Contract in Warzone? | How to level up Vanguard weapons fast for Warzone

If you click on a product link on this page we may earn a small affiliate commission.

The Turkey Snood

0

Threat from another turkey brother?

Take care, beware and stare at my snood if you dare!

Turkeys are unique: I cannot think of any other creature on this planet with a dangling piece of flesh that: changes colors, shrinks or lengthens depending upon stimuli of anger or excitement.

https://en.wikipedia.org/wiki/Snood_(anatomy)

From Wikipedia:

“the snood is an erectile, fleshy protuberance on the forehead of turkeys. Most of the time when the turkey is in a relaxed state, the snood is pale and 2-3 cm long. However, when the male begins strutting (the courtship display), the snood engorges with blood, becomes redder and elongates several centimeters, hanging well below the beak”

“The snood functions in both intersexual and intrasexual selection. Captive female wild turkeys prefer to mate with long-snooded males, and during dyadic interactions, male turkeys defer to males with relatively longer snoods. These results were demonstrated using both live males and controlled artificial models of males”

Actually, I have my doubts about that entire second Wikipedia paragraph. I suppose some test some where had those results however….

Common sense and my observation shows the male turkeys defer to- and female turkeys swoon to- the current reigning flock Alpha male. (Alpha male status is always tenuous)

Fighting skills: 99.92% determines whom the hens swoon for. My observation is that Snood length plays an infinitesimal small part in the reproductive process.

Yet, there is a natural selection process at work.

Evidently at least some of the hens prefer a long snood. – a selection that allows the Snood to grow and contract as needed, despite the beatings the snoods take during battle.

A dangling snood is a liability.

Turkey hens also have snoods-smaller versions of the male snood.

Hen snood injury from fighting

And….. A dangling snood, be it a tom or hen is still a liability.

This hen lost her fight for female alpha status and the hen that bested her had clamped down on her snood making it black and blue. Full snood recovery.

Could the snood be a remnant of the age of Dinosaurs?

Latest Study Anseriformes and Galliformes (above) originated in the late Cretaceous

Snood in battle……a thing hanging the way…

Flying snoods!

“Talkin to me?”

Photo of a snood at night. No outside stimulus to make the snood grow.

(Snoods have to rest)

Snood at Florida dawn

And now for a Quick story. I have mentioned the dangling snood is a liability.

I came home one day to find my Eastern wild Tom, with his snood swollen to the size of a banana and his bumpy head twice the normal size. What the heck?

Upon close examination, I discovered fang marks in the “banana” where a pigmy rattlesnake (Sistrurus millarius) had bitten the snood. The Tom was sick for about two weeks, made a full recovery, however his snood was always crooked after that. He lived for another five years. (no photos of that two weeks)

Florida snakes

Odd bit of information: The Ocellated turkey has a blue snood, instead of the normal red.

As the annual December turkey battles heat up, this Royal Palm Tom has his own snood in his mouth, crunching down causing excruciating pain to his rival.

Or something like that..

Video clip of “Turkey Rebellion against Thanksgiving” and snoods in the way!

Return Home from Turkey Snood page

10 Biggest Smallmouth Bass World Records of All Time

0
10 Biggest Smallmouth Bass World Records of All Time

Although oftentimes overshadowed by their larger-mouthed relatives, the smallmouth bass is easily one of the most popular freshwater game fish in North America. Their expansive range, accessibility, and willingness to take a variety of baits, lures, and flies make them a great target for sportsmen of all levels.

And while they don’t grow as big as largemouths, pound-for-pound, smallmouth bass are every bit as strong and aggressive.

Couple these facts with their beautifully mottled complexion, and it’s no wonder why anglers have pursued smallmouth bass for centuries.

So without further ado, here’s 10 of the biggest smallmouth bass ever recorded:

All-Tackle: David Hayes – 11 pounds, 15 ounces

Dale Hollow Reservoir, Tennessee

SMB_Hayes

David Hayes’ celebrated 5.41 kg (11 pounds, 15 ounces) All-Tackle world record smallmouth bass has seen its share of controversy over the years.

Hayes caught his record fish on July 9, 1955 while trolling a lure in Dale Hollow Reservoir, Tennessee, without a doubt the most famed body of water for producing massive smallmouth bass.

In fact, the three heaviest smallmouth ever recorded have come from Dale Hallow!

Hayes’ catch held the All-Tackle title for 41 years, despite swirling rumors throughout the angling community denouncing his catch. These rumors, coupled with an affidavit stating that the dock owner added lead weight to the catch (unbeknownst to Hayes), resulted in the temporary ousting of Hayes’ record.

During this time, John Gorman’s held the All-Tackle title with his 10 pound, 14 ounce smallmouth he caught on April 24, 1969 while fishing the same location (Dale Hollow Reservoir, Tennessee).

However, nine years later, it was proven through multiple polygraph tests that the sworn affidavit that denounced the legitimacy of Hayes’ smallmouth, had been falsified.

Thus, returning the All-Tackle title to Hayes and retiring Gorman’s trophy, which still holds the title of the second heaviest smallmouth ever submitted to the IGFA, even though it is not a current record. Despite the controversy surrounding Hayes’ smallmouth, it has withstood the test of time – and quite a few polygraphs, too.

8-Pound Line: Paul E. Beal – 10 pounds, 8 ounces

Dale Hollow Reservoir, Tennessee

SMB_Beal

More than 30 years after Hayes’ historical catch, Dale Hollow produced once again on April 14, 1986 in the form of a 10 pound, 8 ounce smallmouth caught by local angler Paul E. Beal. The story goes that Beal was sharing a houseboat with some friends and family, and on that fateful morning he was left behind to do the dishes while his buddies snuck off to go fishing.

Angry that he was left cleaning up after everyone, Beal decided to “cool-down” by going fishing with his dad. Not long after the plastic grub he was casting hit the water, Beal came tight on the trophy smallmouth.

After a 15 minute fight on an 8-pound test and no leader, Beal boated the fish which bottomed-out his 10-pound scale. Knowing he had something special, Beal immediately headed for the docks for an official weighing.

The catch was documented well and soon after made headlines as the third heaviest smallmouth ever, and the new men’s 8-pound line class world record. But that doesn’t mean the catch wasn’t controversial. Dale Hollow is bisected by the Tennessee/Kentucky border.

According to Beal, the fish was caught in Tennessee, but weighed in Kentucky. This has created a feud between the two states, who both want to claim ownership for this monumental catch, and understandably so.

12-Pound Line: Terry Dodson – 9 pounds, 6 ounces

Lake Jocassee, South Carolina

SMB_Dodson

In 2001, angler Terry Dodson made angling headlines for the world record smallmouth he pulled from Lake Jocassee, which is located in far northwest section of South Carolina and very close to the North Carolina border. On the morning of May 3, 2001, Dodson was fishing with a friend on his boat, when the diving plug he was casting suddenly got crushed.

After a relatively quick 5 minute fight, Dodson’s friend was able to net the fish. The fish was officially weighed-in at 9 pounds, 6 ounces and has held the men’s 12-pound line class record ever since.

6-Pound Line: Dr. E. Scott Yarbo – 8 pounds, 9 ounces

Counce, Tennessee

SMB_Yarbro

Dr. E. Scott Yarbro braved the snow flurries and strong winds on the morning of March 11, 1998, and ventured out to Pickwick Lake, located in Counce, Tennessee. Later that morning, while casting a 4-inch Harville Shad on a 3/8-ounce jig head, Yarbro hooked into a fish that put his 6-pound tackle to the test.

Nearly 10 minutes after coming tight, Yarbro had the “biggest smallmouth he’d ever seen” on his boat. Realizing they had something special, Yarbro and his friend immediately called it a day and headed straight to a local store for an official weigh-in, where it tipped the scales at an impressive 8 pounds, 9 ounces.

Soon after, Yarbro’s fish was granted the men’s 6-pound line class record, which it still holds today.

16-Pound Line: Terrell D. Nail – 8 Pounds, 6 ounces

Pickwick Lake, Alabama

SMB_Nail

The men’s 16-pound line class record has belonged to Terrell D. Nail since he pulled an 8 pound, 6 ounce smallmouth from Alabama’s Pickwick Lake on January 4, 1988. But unlike the other anglers in this list, Nail was fishing with a live shad – rather than a jig – when he hooked his world record. The fish put up a tough fight for 8-10 minutes before it could be subdued and landed.

An interesting fact about Nail’s record fish is that it was originally submitted for a 12-pound line class record because that was what he was using at the time. Had the line tested accurately, his catch would have never been listed as world record because the 12-pound line class record was a couple ounces heavier at the time.

However, because the 12-pound Berkley Trilene XT line he was using tested out at 16.8 pounds, his catch was placed in the 16-pound category and became the new world record.

Ultra-Light Tackle: Herbert Ratner – 7 pounds, 0 ounces

Pickwick Lake, Tennessee

SMB_Kantner

When it comes to catching trophy smallmouth on ultra-light tackle, that title belongs to multiple record holder Herbert Ratner.

On the morning of June 2, 1997 while fishing a live minnow on the Tennessee side of Pickwick Lake, Ratner skillfully played a 7-pound smallmouth on straight 2-pound tackle (no leader) for nearly 20 minutes, before he could subdue the fish.

As if that wasn’t impressive enough, Ratner was also able to properly document the fish on the shoreline and then release it alive. And not only does Ratner own this impressive record, he also holds the 2-pound fly tippet record for smallmouth bass with a 5 pound, 8 ounce fish he caught in 2000.

20-Pound Fly Tippet: John Herrick – 6 pounds, 12 ounces

Basswood Lake, Minnesota

SMB_Herrick

While John Herrick’s 6 pound, 12 ounce smallmouth bass is certainly not the largest specimen ever caught by an angler, it is the largest smallmouth bass record ever caught on fly tackle that has been submitted to the IGFA.

Herrick was fishing Minnesota’s Basswood Lake on August 30, 1997 when he caught his record smallmouth.

The fish ate a white rabbit strip fly and tested Herrick’s tackle and whits for nearly 20 minutes before he could finally boat the fish.The catch soon became the men’s 20-pound tippet class record after it was officially weighed and submitted to the IGFA.

16-Pound Fly Tippet: Pamela Kinsey McClelland – 6 pounds, 4 ounces

Pine Lake, Michigan

SMB_McClelland

Before the IGFA decided to split the freshwater line class and fly tippet world records into men’s and women’s categories (to make the program consistent with the saltwater counterpart), angler Pamela Kinsey McClelland was the only woman to hold a smallmouth bass record.

McClelland caught a 6 pound, 4 ounce smallmouth on August 12, 1995 while fly fishing on Pine Lake, Michigan with her friend, her husband, and her dog.

McClelland, who was visiting Michigan from her home in Washington D.C., needed 10 minutes to land the trophy smallmouth after it ate the red and white streamer fly she was casting. The catch has held the distinction of the heaviest smallmouth caught on 16-pound fly tippet for nearly 20 years.

Male-Smallfry: Michael Fillette – 5 pounds, 12 ounces

Lake Erie, New York

SMB_Fillette

One of the reasons why smallmouth bass are such a popular game fish is because anyone can catch them. Unlike a musky or a marlin that can overpower young or inexperienced anglers, smallmouth are sized appropriately to accommodate all anglers, while still requiring finesse and skill.

Angler Michael Fillette was only eight years old when he caught a fish that most smallmouth junkies would die for – a 5 pound, 12 ounce fish that he pulled from Lake Erie in New York on May 18, 2009.

The young Fillette needed only 8 minutes to subdue the fish after it inhaled the live shiner he was fishing. Not only does Fillette hold the Male-Smallfry record, he is also the youngest angler to hold a record on smallmouth bass.

8-Pound Fly Tippet: Ichiro Nagai – 5 pounds, 9 ounces

Lake Inawashiro, Japan

Although smallmouth bass gained their popularity in North America, their reach is not limited to the US and Canada alone. After being introduced in locations around the world, several international locations are producing world-class sized smallmouth.

On June 8, 2013, Japanese angler Ichiro Nagai, M.D. became the first angler to catch a world record smallmouth bass outside of North America.

Nagai caught his 5 pound, 9 ounce smally while fly fishing Japan’s Lake Inawashiro. Nagai needed only a few minutes to subdue the catch, which soon after became the heaviest smallmouth ever caught on 8-pound fly tippet.

Why You Should Try a Glass Turkey Call

0

Are you an old dog that can’t learn new tricks? Some seasoned turkey hunters get hooked on specific turkey calls and will often neglect the vast majority of other great options that come out. While it’s tough to argue with their experience, trying new calls can be a huge advantage. This is especially true with someone who has decades of hunting and calling turkeys under their belt. So why not try something new and maybe find your new best turkey call? While a glass turkey call isn’t by any means new to the market, some people seem hesitant to use it. In the video below, Michael walks you through a few reasons why you should really consider adding a glass turkey call to your turkey vest this spring.

Glass vs. Slate Debate

If you already use pot calls, there’s a good chance you have a slate call or two. And while slate turkey calls do produce deep and realistic tones that work great on turkeys (have we mentioned the Lights Out slate call?), they have some disadvantages in certain situations. For example, they usually lose their effectiveness when they get wet. A surprise rain event, high humidity, or dropping it in the dewy morning grass can all spell disaster for your turkey hunt if that’s the only turkey call you have with you.

Glass turkey calls, on the other hand, don’t lose their ability to make turkey sounds when they get wet. If they get soaked by the rain, you probably won’t be thrilled to keep hunting, but the striker will keep making realistic sounds as if nothing happened.

Michael comments “Typically glass calls run better when it comes to moisture in the spring, when you get a thunderstorm that pops up obviously being soaking wet causes a problem but glass calls typically run better in moisture..where a slate call has a deeper, richer tone, but water can completely clam the call up”.

Another benefit of a glass turkey call is that it can easily produce a hen’s raspy notes while also having a high pitch. So when you first start dragging the striker across the surface, it starts out very high pitched and shifts to lower raspy tones. This is a big advantage for cutting through the woods and reaching out to distant toms. The Sweet April glass call is a great choice for this. The tuned mahogany cup has glass over glass, and comes with a durable hardwood striker.

Best Uses for a Glass Turkey Call

As you can see, both kinds of turkey calls work great in different scenarios. And there are other types too (e.g., crystal, aluminum, ceramic, etc.) that work well – we’re not here to slam any of them. But with the benefits of glass calls discussed above, there are a few scenarios where a glass turkey call has the upper hand.

First, if you hunt in areas where high humidity is a constant companion during turkey season (i.e., the South) or you expect occasional spring showers, a glass turkey call is probably a better choice to take with you. Turkeys can be a little more predictable in the rain, so if you can stick it out and keep hunting, a glass call will help you much more than a slate call.

Second, we mentioned that glass calls have the advantage of being high-pitched. You don’t always want a super loud call, as it might spook toms or make them hang up and wait for a hen to come to them. But this high pitch can cut through the woods better than lower tones without being at a high volume. For this reason, a glass call can reach out and strike a turkey from afar very well. As an interested tom closes the distance, you can switch to a mouth call for the close range action, which eliminates the extra movement. But for that first contact at distant turkeys, a glass call is tough to beat.

“If I had one friction call in my turkey bag it would be a glass call…it has a higher pitch, and a higher tone typically than a slate call…its sharp, precise, cuts through the wind, so it makes for a great call to strike a turkey..some of those sweeter, more subtle calls are not as good at striking a turkey” Michael explains.

As we said, we’re not here to knock other turkey calls – they all have their place. But if you’re not already using a glass turkey call, you could be missing out! Michael is demonstrating the sweet april call in this video, take a look by clicking the link below!

Coyote Hunting with a .177 Air Rifle: Expert Tips and Techniques

0

“Unleash your precision and power in coyote hunting with the .177 air rifle. Experience unmatched accuracy and stealth as you navigate the wilderness, armed with this lightweight yet lethal weapon. Discover the thrill of conquering nature’s ultimate predator with the perfect balance of control and impact. Are you ready to take on the challenge?”

coyote hunting with.177 air rifle

coyote hunting with.177 air rifle

When it comes to coyote hunting, using a.177 air rifle can be a viable option for hunters. While larger calibers are commonly preferred for this game, the.177 air rifle offers certain advantages that make it worth considering. The high velocity and accuracy of these rifles can provide a lethal shot when aimed correctly, making them suitable for taking down coyotes efficiently and effectively.

One of the main benefits of using a.177 air rifle for coyote hunting is its lightweight nature. These rifles are much lighter than their larger caliber counterparts, allowing hunters to maneuver easily through various terrains. This makes it particularly advantageous when stalking or tracking prey in challenging environments. Additionally, the compact size of these rifles makes them easier to handle and carry for extended periods without causing excessive fatigue.

(1500 characters)

In conclusion, coyote hunting with a.177 air rifle can be an effective and ethical method for controlling the population. The high velocity and accuracy of these rifles make them suitable for taking down coyotes at reasonable distances. However, it is crucial to prioritize safety, adhere to local laws, and ensure humane shot placement to minimize suffering.

How to Eat Acorns

0

Yes, you can eat acorns, and all acorns are edible — it’s just that most need special processing. Here’s how to go about it.

Blue oak acorns in a bowl
Photo by Hank Shaw

If you haven’t read my other acorn posts, Acorns and the Forager’s Dilemma is an introduction to the use of acorns; the Forager’s Dilemma is, in a word, starch. Starch (carbohydrates) is the toughest thing to gather, and is a primary reason why humans settled down 10,000 years ago to grow grain.

Next I wrote about how various world cultures have traditionally used acorns, cultures ranging from Korea to Japan to the Native Americans, Europeans and North Africans.

Let me say loud and clear that you can eat acorns and all acorns are edible, at least all species of acorns are. We’ll get into details in a bit.

Basically there are three ways to eat acorns: Eating them as nuts (they are a lot like chestnuts), making acorn flour, or cooking in acorn oil. I have not yet tried to make acorn oil, but that link leads you to my friend Sam Thayer’s website; he sells it.

Collecting Edible Acorns

First you need to get yourself a supply of acorns. Go find some oak trees; they’re the ones with all the acorns that have fallen down around them. I know this sounds condescending and stupid, but oaks come in so many varieties that in autumn this really is the easiest way. It is a bit of a crapshoot, as it is tougher to determine a variety of oak by its acorn than by its the leaf — you can do it, but it is a little harder.

You can gather acorns anytime from September until early spring. I find gathering as the acorns fall is best. Suellen Ocean, who wrote a very useful book Acorns and Eat ’em,
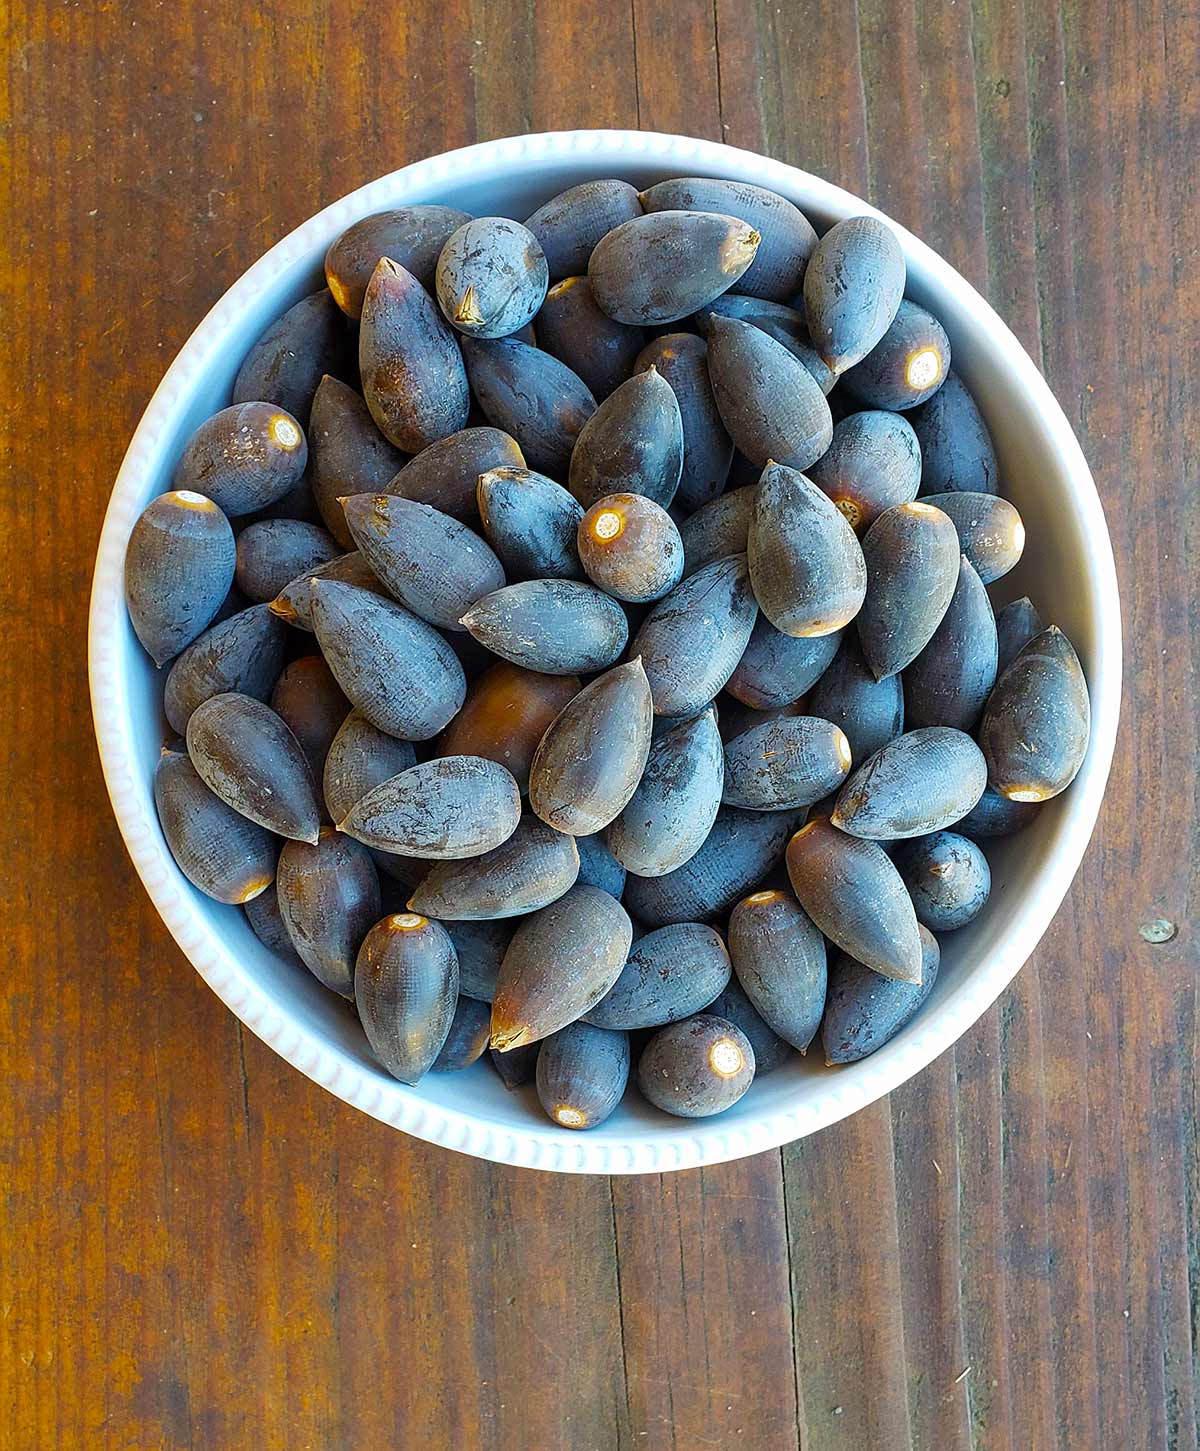
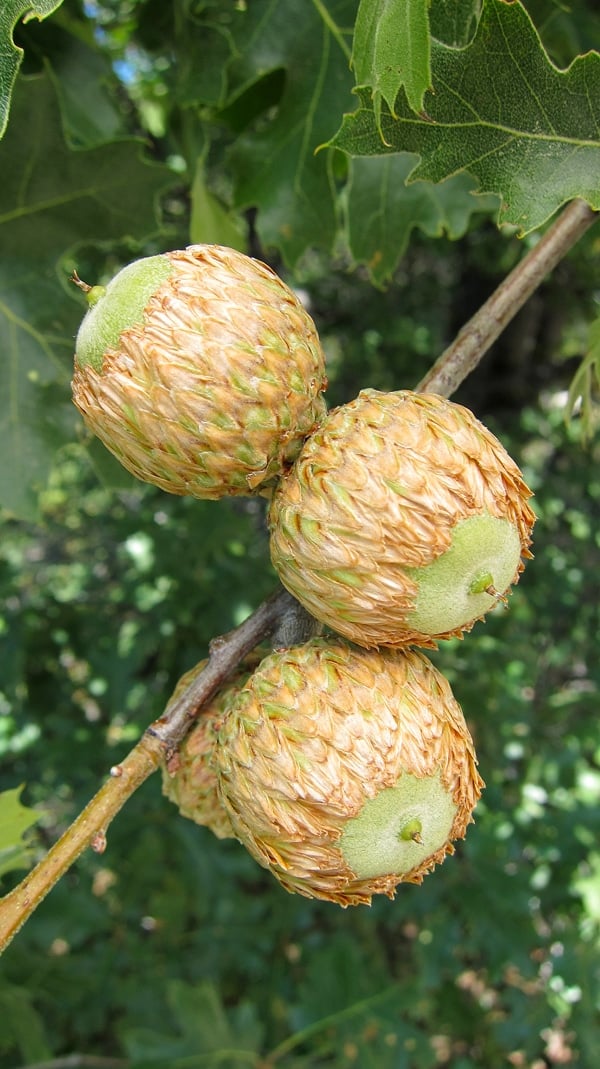
says she likes to collect Tanoak acorns in February and March, after many have begun sprouting.

She says acorns with sprouts between 1 to 2 inches long are still good to eat, but discard any acorn meats that have turned green. Ocean says recently sprouted acorns a) have begun to turn their starch into sugar, and b) are foolproof: “If it is sprouted, it’s a good acorn and I haven’t wasted time gathering wormy ones.”

A word on worms. When I first gathered acorns, little did I know that I had gathered scores already infected with the larva of the oak weevil. Nasty little maggoty things, you can tell they are inside your acorn if there is a little hole in the shell. Look for it, discard that acorn and move on. But know that oak weevil larvae bored those holes from the inside out. Like Alien.

It’s helpful to know what kind of oak you are dealing with because acorns from different oaks have different levels of tannins in them; more on that in a bit. If you don’t know your trees, start looking for little green acorns in May. Pick a leaf and compare it to oak leaves online or in a guidebook. Gather acorns and compare them to online images and guidebooks; different oaks bear acorns with different shapes.

With that in mind, remember that not all oaks are created equal, and the fundamental fact to know if you are going to eat acorns is that you are dealing with a wild food, and as such must contend with tremendous variability, both in species and even among individuals of the same species.

Some oaks bear acorns so low in bitter tannins that they can be eaten raw. Legend says that California Indians fought over these trees, which makes some sense because one mature Valley Oak can drop 2,000 pounds of acorns in a really good year. A ton of sweet acorns may well be worth fighting over.

That said, even “sweet” acorns should be leached to remove what tannins exist in them because several studies show that unleached acorns can make you constipated and can harm your teeth. Of all the species I know of, only the imported European cork oak and the Emory oak of the Sonoran Desert come close to being “sweet.”

Tannins aren’t the only thing that makes different species of acorn different. UC Riverside Professor David Bainbridge wrote in a 1986 academic paper that depending on species, acorns can range in fat content from 1.1 percent to 31.3 percent, protein from 2.3 percent to 8.6 percent, and carbohydrates from 32.7 percent to 89.7 percent. That is a huge range!

What does it mean? It means that in the kitchen you treat acorns from different species very, very differently. A fatty acorn will make a meal, like ground almonds. A carb-rich acorn — like Valley Oak acorns — makes a drier flour, more like chestnut or chickpea flour (acorns lack gluten and so will not rise.)

California black oak acorns on tree
Photo by Hank Shaw

Differences in Various Oaks

Here’s a general breakdown:

‘Sweetest’ Acorns, meaning lowest in tannin: East Coast white oak, the Emory oak of the Southwest, the pin oak of the South, the valley and blue oaks of California, the burr oak of the Midwest, as well as the cork oak and the well-named bellota oak of Europe. To my California readers, know that there are an awful lot of cork oaks and burr oaks planted in towns and cities here, so keep your eyes peeled.

Largest Acorns: Valley oaks are really big, as are East Coast White oaks. Burr oaks are large, too, as is the California Black oak.

Fattiest Acorns: The Eastern red oak acorns I’ve used have a very high oil content, and I’ve read that the Algonquin used red oak acorns for oil. In the West, the champions are both live oaks, the Coastal and the interior live oak, as well as the tanoak and black oak, which is Quercus kellogii.

Shelling Acorns

I found that shelling the acorns is the most onerous part of dealing with them. They have an elastic shell that resists normal nut crackers. I found whacking them with a hammer to be the best way to open up an acorn. Some people use a knife, and I do this with green acorns, but not fully ripe ones.

Best way to whack ’em is to put the flat end (the side that used to have the cap) on a firm surface and rap the pointy end with a hammer, or, with long, tapered acorns like cork oak or Valley oaks, just whack the side.

Acorns are far easier to shell after they’ve dried. If you choose to dry them, do this in wide, shallow pans so they don’t get moldy. Once dried, I’ve worked with two-year-old acorns and they were fine. They will need an overnight soak before grinding, however.

Red oak acorns have a “test,” a skin that doesn’t want to come off, just like a chestnut. Easiest way to deal with this is to freeze your fresh acorns for a week or two before cracking. This will slip the skin off the nut. The skin is bitter, but it’s not that big a deal if you are making flour.

Shell your acorns into water. The meats oxidize, and you will get a lighter-colored flour if you do this. It’s aesthetic, but it matters to me.

Tannins

All acorns should be leached with water to remove bitter tannins, which will a) make your mouth feel and taste like felt, b) make you a bit nauseous, and possibly c) constipate you for days.

Getting those tannins out is the big barrier to cooking with acorns. But it ain’t no biggie. With my valley oak acorns, after shelling I drop the acorn meats directly into my stockpot that was two-thirds full of water. When I fill the pot about a third of the way up with shelled acorns, if I am in a hurry, I bring the pot of water to a boil. The water turns dark. As soon as it boils, pour the water off into the sink and repeat the process.

It requires about five changes of water to get valley oak acorns to taste like chestnuts. I did this all while watching football, and did not miss a snap. Other oaks will require more or fewer changes of water. Choose the “sweetest” acorns on my list above for the least amount of work.

There is a better method, but it takes days. Grind the raw acorns into flour, then mix a ratio of 1 cup of acorn meal to 3 cups water, or more water if you have large containers. Pour this all into a glass jar with a lid and put it in the fridge. Every day you shake the jar, wait 12 hours or more, then pour off the water — and the tannins.

How long? Anywhere from a week to two weeks, depending on how bitter your acorns are. This is a good way to leach acorns without using fuel for boiling water, and you do not denature a particular starch in the acorns that acts a little like the gluten in flour, i.e., it helps the flour stick to itself. I go into the full process of cold leaching acorns here.

If you plan on baking with the acorn flour, use the cold-water leaching method.

Photo by Hank Shaw

Once your acorns are free of tannins, you need to figure out what to do with them. Regardless, you need to dry them first or they will rot. Acorn grits can be patted dry on a tea towel. If it is hot out, lay the acorns out on cookie sheets and dry in the shade. You could also put them in an oven set on “warm.” You can also put the acorns in a dehydrator set on low heat, which is what I do.

You can also freeze your fresh acorn meal. Store dried flour in jars in the fridge. Why the fridge? What fat there is in acorns will go rancid pretty quick if you left the flour at room temperature.

What you can now do to eat acorns is pretty limitless.

My first success was an acorn flour flatbread in the style of an Italian piadina. I also make an acorn flour honey cake, which is really very tasty — almost like gingerbread cake. The flour also makes an excellent pasta dough when mixed with regular flour.

Other Ways To Eat Acorns

I will also substitute about 1/5 of the flour in my homemade flour tortillas with acorn flour, and I also make mean acorn gnocchi.

Use your imagination!

Kawasaki Prairie 650 Specs and Review

0

Disclosure: We may get commissions for purchases made through links in this post.

Among the strongest and most reliable ATVs ever produced is the Kawasaki Prairie 650. This mean machine, launched in 2002, dominated the off-roading scene and introduced many firsts to the public – defining the sport-utility sub-segment in the process. It was one of the most successful off-road vehicles of its time, earning the “Design and Engineering Award” in Popular Mechanics and being highly regarded by ATV magazines and publications.

The Kawasaki Prairie 650 goes down in ATV history as the world’s first mass-produced quad to sport a V-Twin power mill. Apart from its monstrous 633-cm3 engine, this award-winning 4×4 boasts a variable limited-slip front differential, impressive powerband, and industry-leading features.

One of Team Green’s breakthrough machines, the Kawasaki Prairie 650, started a whole new era of high-standard behemoths – its massive torque making it a force to be reckoned with (literally!). No wonder it has inspired the creation of other iconic Kawasaki quads. Read on and learn more about the capabilities and evolution of this off-road legend.

Quad Bikes in the Desert

The King of Firsts

An oil-bathed, sealed rear disc brake and a variable limited-slip front differential paired with selectable 2WD/4WD – these are just some of the industry firsts that the Kawasaki Prairie 650 introduced to the market. These features may be puny for some (in today’s standards). But two decades ago, only a handful of well-engineered ORVs had these luxuries – and the lime-green wheeler was one of them.

Initially conceptualized as a utility quad, the Prairie soon morphed into a sport-utility four-wheeler to cater to the increasing number of riders gravitating toward dual-purpose, big-bore machines.

Launched as a 650-class ATV, the Kawasaki Prairie 650 soon upgraded to a 697-cm3 power mill in 2004. The Prairie left the Brute Force lineup to carry on the slightly smaller engine displacement for a little while – as the said series eventually released the Kawasaki Brute Force 750 4x4i five years after.

Whether it be the 650- or 700-class trim, both big-bore machines had dual carbs and shared almost similar vehicle dimensions. Undoubtedly, this uncanny resemblance between the two is why most consumers confuse one with the other.

Performance

This high-performance wheeler is unquestionably bulletproof. However, tight wooded trails and rough terrain are not the most suitable for this big-bore machine. The topography adversely affects the performance of its suspension system. In these environments, the Prairie falls behind its counterparts in soaking up bumps and ripples. Owners can always equip their 4x4s with Rear Shocks.

But since the front suspension is non-adjustable, it would be challenging for the quad’s suspension system to be fully optimized.

Conversely, the four-wheeler can soar through straight-line acceleration on grass tracks and straightaways. Steep engine-draining trails and mountains also become playgrounds for this beast – thanks to its differential lock, twin-carburetor setup, and unrelenting power.

In truth, the Kawasaki Prairie 650 can slice through these settings’ most technical portions with ease – but in the hands of a highly-skilled driver.

Kawasaki Prairie 650 Specs & Features

Engine

Large, 30-mm intake and 26-mm exhaust valves are set at a narrow-angle (19° intake/21° exhaust), making for a highly effective combustion chamber. A high-quality foam air filter and dual Keihin CVKR-D32 downdraft carburetors lend to the vehicle’s fuel efficiency and smooth throttle responsiveness. (TIP: When cleaning the fuel tank, never use gasoline or low flash-point solvents to avoid potential dangers of fire or explosion.)

Drivetrain

A dual-range automatic KAPS (Kawasaki Automatic Powerdrive System) CVT transmission, inclusive of the Kawasaki Engine Brake Control system and a reverse, handle the shifting. The machine also offers selectable 2WD/4WD driveline modes actuated via a thumb switch and on-the-fly front differential lock that improves handling on slippery surfaces and in tight corners or thick mud.

Ignition

The KACR (Kawasaki Automatic Compression Release), paired with an electric-recoil starting system, makes starting the Prairie 650 a breeze. A cigarette-style DC outlet at the handlebar base and a trailer-type connector at the rear provide quick, accessible power for electronic accessories.

At some point, you would need to swap out stock batteries. If so, a Kepworth KP14-BS 12V LiFePO4 Battery (view on Amazon) would be a good replacement – it is leak-proof and has a low self-discharge rate.

Tires & Brakes

Dual front hydraulic disc brakes fitted with dual-piston calipers and enclosed oil-bathed multi-disc rear disc brakes provide stopping power. This brake system mates to a Kawasaki-exclusive Engine Brake Control system that electronically observes ground speed and uses engine compression to slow the quad down.

Suspension

Minimal differences can be observed between the Prairie 360 and this machine’s suspension components since the former is an exact carbon-copy of the latter. The caster angle and rear suspension wheel travel were improved a bit, while the rest remained unchanged.

Dimensions

While the Prairie 650 weighs the same as its smaller-displacement sibling, this 4×4 has a larger trailer weight and carrier capacity. The curb weight is 294.06 Kg/648.3 lbs – merely 5.0 lbs more than the Brute Force 650.

Exterior

Unlike Team Green’s 300-class four-wheelers, the Prairie 650 did not fall short on instrumentation. A multi-function meter comes standard across all trims and year models. Adjustable footpegs atop full footboards make long trail rides enjoyable. The saddle comfortably sits taller riders. Plus, the machine’s tubular space frame allows owners to personalize their wheelers with aftermarket Kawasaki Prairie 650 parts and accessories.

K-EBC™ (Kawasaki Engine Brake Control)

The K-EBC™ system enhances the quad’s brake systems with the engine’s additional braking force. Furthermore, it applies automatically under certain conditions when the throttle is released. This feature is ideal for use when descending steep declines, becoming an added safety measure that keeps the speed of the Prairie safe regardless of the type of terrain, rider skill level, or operating conditions.

However, note that the K-EBC™ is best as a supplemental braking system at low speeds (between 3-20 km/h) and does not work in reverse.

Kawasaki Prairie 650 Pricing

The table below shows the list price of all Kawasaki Prairie 650- and 700-cc models and trims released from 2002 to 2006 (Source: Nada Guides):

Surprisingly, auction listings are slightly higher than retail pricing and range from $775 to $4,510. Resale units are mostly 2002-2003 models – vehicle conditions vary depending on the year, trim, and upkeep done by the previous owner. Typically, pre-loved Prairies have 8,000 miles, 430 to < 1,900 hours, and with no title.

Rare finds, on the other hand, are freshly overhauled and come with a recovery winch like Mile Marker 77-53120W Premium Sealed Electric Winch (view on Amazon) or aftermarket wheels/tires. If you want to be guaranteed a Prairie in near-mint condition, be prepared to spend at least $2,800 for a secondhand unit.

Known Issues of the Prairie 650

The Kawasaki Prairie 650 4×4’s service manual contains troubleshooting steps that would solve most of its common problems. But for more persistent challenges, you need to visit forums and other Kawie community sites to get specifics on how to resolve them. Here are some of the machine’s more prevalent issues and their corresponding fixes:

Cold-starting Hiccups

If the Kawasaki Prairie 650 quads had one major setback, that would be a specific functionality of its monstrous V-Twin engine. This powerplant retards the vehicle’s ignition until it reaches a certain RPM, leading to a difficult engine startup – particularly on a cold February morning.

If you are a long-time Prairie owner, you would know that the choke is used more frequently during cold weather. Otherwise, you may want to check if the under-seat valve is turned on or if there is any obstruction in the petcock valve, causing possible fuel starvation.

Faulty K-EBC™ and 2WD/4WD Actuators

The engine brake system and driveline actuators of the Prairie 650 are quite an upset for Kawie riders, as they are not known for their durability. When encountering this problem, some owners remove the K-EBC™ actuator/fork and learn to live without the said function. Others choose to remove the 2WD/4WD actuator, modifying it to have a choke cable setup to run manually.

However, addressing the issue entails more than just pinning the blame on the actuator/controller alone. Defective electrical components could also cause the problem, such as:

  • Shorted/Open speed sensor
  • Forward/Reverse gear detecting a shorted/open sensor
  • Controller (10 Amp) fuse blown
  • Disconnected battery

Leaking Oil Seals

Engine and front/rear differential oil seals on the Kawasaki Prairie 650 tend to leak. Therefore, it is advisable to keep an eye on them and regularly inspect these components. Oil seal lips that are misshapen, discolored, or hardened indicate rubber deterioration and warrant immediate replacement. The same goes for oil seals that are visibly damaged or dried out.

Veteran owners do not recommend jumping while in 4WD, as this also aggravates the leaking problem. It would also be wise to check other things like degraded valve gaskets, damaged driveshaft/axles, and oxidation on the shaft and other metal surfaces. Quads that have sat for a while are also more likely to have this problem than those frequently used and properly maintained.

Weak Choke Springs

First-year Prairie 650 carburetors had flimsy choke springs that caused gasoline to fill the engine when not in use. Similarly, post-2002 models had sticky choke plungers that resulted in poor idling. The permanent fix for this issue was to replace the stock choke springs with a later-model-year variant.

Turning off the petcock valve when the quad is not in use also helps, especially before trailering or storage (and for extended periods). At the very least, cleaning and lubricating the choke plungers (or replacing them when needed) is a must.

Other Problems

  • MacPherson Strut springs are too soft for fast-paced riding.
  • Airbox snorkel and CDI are too restrictive.
  • Swingarm bearings and rear secondary clutch wear out prematurely.
  • The fuse box connections are prone to corrosion.
  • The stock radiator fan breaker (a.k.a. buss connector) tends to malfunction.
  • Mounting bolts on the rocker arm shaft tend to loosen, potentially causing catastrophic damage to the motor’s top-end.

Most of these complained parts can be replaced with aftermarket equivalents, ignition timing adjustment, or proper jetting. Others are resolved or prevented through religious upkeep of the machine and avoiding over-the-top activities.

Do not worry – sport racing, serious mudding, and ripping through the dunes are not prohibited. But please, do these in moderation. And remember to clean your four-wheeler thoroughly after every ride.

About Kawasaki

Kawasaki Heavy Industries, Ltd. is a prominent institution in the ATV landscape and maker of industry-leading vehicles like the Kawasaki Prairie 650. The Japanese firm was founded in 1878 and traces its humble beginnings to being a part supplier for shipping businesses.

Since then, this world-renowned manufacturer has ventured into other transport industries and grown into massive production of transit, aerospace and energy systems, hydraulic machinery, motorcycles, off-road vehicles, side x sides, and personal watercraft.

Conclusion – Kawasaki Prairie 650 Review

One thing often overlooked about high-performance quads like the Kawasaki Prairie 650 is that they require a certain level of maintenance and care. What all riders must realize is top-caliber 4x4s are usually the most finicky. Therefore, flimsy parts or factory-assembly flaws are not always responsible for wear and tear. Driving conditions and not rider behavior have more of an adverse impact on the longevity of our vehicle.

All in all, this highly-acclaimed trail beast is a dream to ride. Its smooth but monstrous power delivery, low-range torque, well-designed chassis, and other best-engineered mechanisms only prove why present-day off-road icons took inspiration from this big-bore machine. If you want a four-wheeler that can conquer slow-crawling sections as well as high-altitude areas, then look no further than the hardworking and timeless Kawasaki Prairie 650.

Fishing In The Rain: Is it GOOD or BAD to Fish in the Rain?

0

You decided to go fishing, prepared everything like you usually do, but the weather changed. It is raining and you are wondering what to do?

Fishing in the rain can be done, and rainy weather can actually help you in some cases. What many people consider bad weather, is actually good for angles!

Environmental factors have a huge impact on fish. Rain affects river flows, it carries different insects and worms into the river from the riverbanks. That attracts fish which can feed on it. The same goes for lakes too …

Clouds, unlike sun, provide darker conditions during the day, and it can also be your advantage. So, this is your opportunity to profit the best you can from that situation.

Except that, while fishing in the rain, you will also need to think about your needs and how to protect yourself from cold, rain and possible dangers.

Here we will see how rain affects on different fishes, what gear to use, find out some rain tips and learn how to prepare yourself.

Is it Good or BAD to Fishing in the Rain? [Why?]

Depending on the season, rain can be very useful for fishing. Before I mention some tips for fishing, here are some basics.

In early spring, when the water is high and temperatures low, most of the time rain will not be your advantage.

But in warm months of the year, when water levels are lower, moderate rainfall will be the best situation for fishing adventure. The same applies to times after strong and heavy rainfalls (storms).

Very important thing to mention is to avoid fishing during heavy thunderstorms and lightning because that can be very dangerous for you.

As already mentioned, rain carries small worms and insects into the water, but also causes commotion among small living creatures in the water. This occurrence causes increase in fish activity.

Rain can also affect the water temperature, and/or blur it and darken it. In those conditions large fish can move around more than usual.

In rainy days it is good to use bigger spinners because they are more visible in the absence of sunlight and such fishing conditions. We will mention different approaches for different fish species later on.

In lakes with clear water rain will cause darker conditions and make fish more active which is good for productive fishing. Unlike rivers, lakes are prone to lack of oxygen in warm and dry months of the year. Rain will cool the water, restore some oxygen and create lower visibility for fishes, so they can’t see you and your fishing equipment.

Rain can make the water very muddy and “dense”. As rain carries living creatures into water, it can also carry large amounts of mud. Those conditions are not desirable for fishing. In that situation you should find the clearest possible spot, away from obvious mudflows from riverbanks. This problem is much bigger if you are not using a boat.

You can predict this problem if it has been raining for days prior to your fishing trip. That way you can consider possible locations before and not to use your precious fishing time for location searching.

Even the light rain can affect your fishing sucess. Together with steady light wind, it creates favorable conditions as it oxygenates the water.

Fishing In The Rain - Fly

Is Fishing Better Before or After Rain?

When talking about rainstorms, fishing is better before.

Before the storm and heavy rains, the barometric pressure lowers which is good for fish activity. Feeding frenzy can occur among fish and that’s the best time for you to present your bait and catch a fish, or more than one. Fish bites will come one after another!

During the storm the fish activity will slow down but that is not a problem because it is not advisable to fish in that conditions. In the end of the storm there is a very short time window in which pressure increases and fish are active. When the storm is over, fish will act the same as usual, or even be more inactive.

During summer and early fall you can benefit greatly from fishing before the storm. Also, at that time of the year very hard but not long-lasting thunderstorms are more frequent. If you want to try, and use the weather for your advantage, bass is one of the fishes that will react the most on weather changes.

If your weather predicting skills are not that good, there are numerous internet websites and weather mobile apps which are highly accurate and easy to use so that anyone can figure out the weather forecast. Or if you prefer, you can buy a simple barometer and have it with you while fishing.

Fishing In The Rain - Storm and Lightning

Rain Will Help You Catch More Fish like Trout, Carp and Bass

Trout, carp and bass are among fish which are the most sensible on weather conditions.

Trout reacts the most to lower light, carp to oxygen level and bass to water movement, everything caused by rainy conditions. No matter which one you prefer to catch, rain will be your best friend while fishing for them.

Trout Fishing in the Rain

Absence of sunlight will make trouts more active.

In darker conditions they lurk on their prey because they are less visible to it.

Fly-fishing for trouts in the rain will work the best …

Usually, the best time to catch trouts is low light condition like early morning or evening. Clouds and rain produce similar conditions during the whole day. Rain washes insects to the water and attracts trouts, so this is the best time to present your bait. Although this time is the best for dry flies, it is also good to try fishing deeper. Small water invertebrates are also stirred up at this time, and they are important food for trouts. Sinking flies are very useful here.

Rain brings cold weather (or at least a few degrees cooler) which is great in warmer parts of the year. You all know that trout prefer coller water.

Carp Fishing in the Rain

Fishing in the rain for carp can be beneficial but also it depends on of the season.

In warmer months quick rain showers affect carps activity. They are more active before the shower. While temperature of the water is lower, like in spring, rain will cool it even more so carp will be less active. Apparently, carps are more sensitive to wind than other fish (bass for example), so if the conditions are windy try to find a sheltered spot. Carp is also very sensitive to low oxygen levels so that is the main reason it reacts to rain.

Bass Fishing in the Rain

Although fishing in the rain is good, it affects the moving patterns of fish, so in the beginning it can be hard to locate it. If you find baitfish in those conditions, there is a high chance bass is close.

Wind is also important because water motion carries small fish, so its better to go on a downwind side of the water. You can also look for natural hiding places for small fish in harsh weather. Bass will be active and look for them.

When fishing for bass in normal conditions it is important to keep your distance from the fish. While fishing in rain you re not that visible to the bass so you can be closer. That way your casting will be more precise and your lure will not make a big splash while hitting the water surface.

Try topwater baits as bass is now more active than usual. They are aggressively biting in rainy conditions so if you are using spinners they can move faster, if you are using worms, don’t keep them in one place for too long as the bass is swimming around, not lurking from its hiding place.

What is the Must Have Gear for Fishing While Raining? [Every Angler Need!]

Fishing while raining requires an investment in good rain gear.

Imagine yourself being wet and cold and not being able to use most of your fishing day.

You will need a suit and footwear which will keep you dry and warm, even in the storms.

Cheap coats or “emergency” rain suits will not do the job. You will have to visit a specialized store and pick a jacket, pants and boots or boot covers.

It is easy to stay dry while standing in place, but while moving, walking and working with your equipment you need clothes which can handle it.

Fishing Rain Suits for Fishing

There are numerous brands that you can choose from but make sure you invest in quality products.

Prices can vary but make sure it is comfortable, you can normally move in it and that it has easy accessible pockets.

The more waterproof and heavy it is the less breathable it will be, so you decide what option is the best for you.

Light ones are usually more comfortable but less durable. If you don’t care about the prices there are high-end options that combine durability, comfort and are breathable.

If you are a beginner the best option would be multi functional rain suit you can use for other outdoor activities too. Make sure that zippers, buttons and sleeve edges are tight and fit properly.

No matter which items you decide to buy, at least the basic waterproof gear is a must to protect yourself from wet weather!

Fishing In The Rain - Suits

How Rain Affects Water Temperature and Your Fishing?

Rain can also have a significant impact on water temperature and your fishing experience.

When it’s raining, temperature of the water tends to decrease as the precipitation cools down the surface. This drop in temperature can affect fish behavior, making them less active and harder to catch.

However, fishing in the rain can be advantageous in some cases. The raindrops create a masking effect, making it harder for fish to detect your presence. This can give you an advantage when it comes to stealthy fishing.

Additionally, if you’re fishing in an area with warmer water, the rain can bring down the temperature to a more favorable range for fish activity. While fishing during sunny weather is typically considered optimal, don’t shy away from casting your line when it’s raining as it can present unique opportunities.

Adjusting your times to fish and embracing the rain can lead to successful fishing trips.

Conclusion

Fishing in the rain can be more productive than fishing during nice and sunny days.

Most of the fish species react to rain. If you use proper gear and know your locations, most certainly you will end up having one of your best fishing days. AND don’t forget your safety and avoid lightning and thunders.

Fishing in the rain is very similar to dry conditions from the technical aspect but much more productive because of how rain affects the fish behavior. So during summer and fall don’t think twice when the forecast is “bad” because fishing is one of the rare activities which are better in rain.

Best Air Rifle Deals

Popular Posts

How Do Break Barrel Air Rifles Work?

0
A break barrel air rifle is a type of airgun where the barrel breaks open at a hinge point just above the breech. This...

PCP vs Spring Piston: Which one is better?

0
When reading about guns in the search for the first one that would be perfect for you, an age-old debate comes into question. Should...

How to make a break barrel air rifle more powerful

0
"Unleash the Power: Mastering Break Barrel Air Rifles for Maximum Performance. Discover expert tips and techniques to enhance the power and precision of your...