What are some of the characteristics of a good big game skinning knife? I have used these knives extensively and they work really well.
by Leon Pantenburg
Disclaimer: Nobody had any input in this post, and I was not paid to write it. This post features photos of some bloody blades, that got that way by being used in legal, lawful big game hunting. Don’t read or view any further if this offends you.
Even if you don’t hunt, and have no plans to start, a prepper/survivalist needs a set of butchering tools. When the shinola hits the fan, you may need to butcher and process a large animal such as a cow, pig, horse, bison, goat etc. With the correct tools and some basic knife skills, this is not a big deal. Without the right knives, that task may become odious and near-impossible drudgery.
Our ancestors skinned mammoths and other very large animals with small, sharp rocks. In an emergency, you could probably skin a large animal with a tiny Swiss Army Knife Classic or a pocket knife. For that matter, a standard box cutter would probably work OK. My Cold Steel SRK survival knife helped skin several deer and elk, and it worked fine. But who wants to just get by?
Among your butchering tools should be a skinning knife. Skinning a large animal merely requires separating the hide from the meat by cutting the membrane that connects them. Generally, the faster you can remove the hide, the quicker the meat cools and the better it will taste.
Every successful hunter has an opinion and here’s what I look for in a skinning knife:
Thin blade: The knife is not going to be used for bushcraft, and woodworking is not in the plan. A thin blade is more effective for virtually everything.
Pronounced belly: The belly of a blade is that part from the tip to where the edge straightens out. The belly does most of the work, and a skinning knife will have a large belly with a curve.
Comfortable handle: A skinner will be used a lot, for extended periods of time. The handle that fits your hand allows you to work comfortably. (Here is how to measure your hand to fit a handle.)
Quality steel: This goes without saying. A knife that must frequently be re-sharpened will take more time to use. Also, it will dull quicker, making it an unsafe tool. Best steel
Point: A piercing or drop point will work OK for skinning, but the best is an upswept or trailing point. These help extend the belly of the blade.
Size: This is a personal choice. I usually take two different-sized skinners in my daypack, because I can. I want a five-to-six inch blade on the larger knife, and a smaller knife with a two-to-three inch blade. These will be used in different parts of carcass.
No replaceable blades: Your best chance for getting in a survival situation is when you’re big game hunting. The replaceable blade knives are not sturdy enough to be survival knives – and are you going to pack out the dull blades? I hope so. Invest in a quality knife with good steel, and you won’t need to be resharpening or switching blades while processing a carcass.
Here are three types of knives I carry for big game hunting in the backcountry.
Obviously, I can’t test every skinner, and there isn’t even enough room to review all the skinning knives I have used over the years. The following skinners have proven themselves at many camp skinning racks. They are listed in a random, disorganized fashion, with no ranking of quality or usefulness.
Grandpa’s butcher knife: My grandfather, Leo Wirth, was a farmer and part-time butcher. One of my earliest childhood memories was watching Leo skin a pig at a butchering. During the Great Depression in the 1930s Leo would travel to other farms and butcher and process cattle, hogs, goats or whatever. He had a full compliment of butchering tools, hand made by his brother, John Wirth, who was a blacksmith in Boone, Iowa. John used the steel from a Model T Ford to craft the implements to Leo’s specifications.
Today, Leo’s knives are distributed among his descendants, and most of the blades are still in use. (Leo’s butchering steel is in my kitchen, and it gets used all the time. The steel ends up at the skinning rack during deer season.) My mom used Leo’s butcher knife for everything, and she maintained the edge with the steel and by honing it on the rim of a crock. At some 90+ years-old, the old butcher knife still has a lot of years of service left.
Russell Green River: A standard of the western fur trade was a do-all utility knife manufactured by J. Russell & Co. and sometimes referred to as a “Green River”. The knives were not called Green Rivers until some time after the heyday of the fur trade.
The J. Russell & Co factory was started in 1832-34 to make butcher and kitchen knives. During the era of the fur trade, close to 60,000 Russell knives per year were shipped to the West. Among the most popular patterns were the scalper, butcher and skinner. These are available today, and are a great low-cost, no-frills working tool. Fur Trade knives
Bark River Mountain Man: This basic utility knife is a recreation of the old Fur Trade standby. It combines modern steels and materials and a proven design. Mine gets a lot of use. The latest incarnation of this features the latest super steel, Magna-Cut, and an attractive handle made of the material of your choice. Bark River Mountain Man
Bark River Skinner: “Finally!” was my reaction when I saw Bark River had produced a designated skinning knife. Somebody finally produced an upscale, classic design knife for butchering and meat preparation. Bark River Skinner review
Bark River Fingerling: This design is familiar to anyone who has ever used an Old Timer™ Sharp Finger. The shape of the blade is excellent for processing the carcass, but is just as capable as an EDC knife. Read the Fingerling review.
Casstrom Safari: This small knife works very well as a small game knife. It is also valuable as a detail skinner for caping. While it could be used to skin an entire large game carcass, it wouldn’t be my first choice. On the other hand, the Safari is so small and lightweight, it makes a great backup blade in your daypack. Casstrom Safari Review
L.T. Wright Large Northern Hunter
The Northern Hunter is not really classified as a skinner, I guess, but it sure works well. The belly on the blade works efficiently to separate the hide and the handle design makes using the knife easy. Large Northern Hunter review
L.T. Wright Large Pouter
Not a skinner per se, the Large Pouter works well as an over-all hunting knife. The belly on the blade is about right for a skinner, and the knife can do it all on a carcass. Large Pouter review
Bark River JX6
The Grohmann Knives of Nova Scotia, Canada, had definite influence on this JX6 knife design. That design, according to my research, apparently goes back to the original Nessmuk knives. I used the knife on a couple of whitetails and it worked well. I would like a longer handle, but I have to periodically complain about something so people know I’m not writing ad copy!
This is another smaller skinner that is lightweight and handy. It fits well in a hunting daypack.
Honorable mention: These knives are not skinners per se, but they work well as hunting knives that can also be efficient skinners.
Lon Humphrey Minuteman: I loaned this knife to my brother, Michael Pantenburg, with the instructions to “Wring it out.”
He did that a couple of years ago on a Mississippi deer hunt. My cousin, Marion Fitzgerald, shot a whitetail buck. Mike helped him track the blood trail, and they recovered the animal, naturally, in a deep, weedy ravine. Marion went back to get me and the sled.
When we got back to the downed animal about 15 minutes later Mike had it gutted and ready to haul. We went back to the skinning shed, and Mike continued using the Minuteman to take the hide off. He raved about the Minuteman, and gave it a six-star rating out of a possible five stars.
Good friends, especially hunting friends, need good knives, in case you ever have to borrow one. Mike got the Minuteman for his birthday.
Jesse Hemphill Gator Breaker Bowie knife
Skinning an alligator is like skinning a motorcycle tire. When my neighbor brought home an eight-foot long alligator, I jumped at the chance to wring out some knives. The Hemphill Bowie knife proved to be the best knife for the job. My small knife on this project proved to be my Ambush Tundra.
Ambush Tundra: For several years the Tundra was no go-to hunting/skinning/everything knife, and it was used extensively on deer and elk. I have absolutely no complaints about its performance and could happily use a Tundra for the rest of my hunting days. Tundra review
But. Cutlery nerds are never quite satisfied.
Bark River UP Bravo: I thought the Tundra could be improved for me with that same leaf-style blade and the Bark River Bravo handle. I lobbied for that combination for a couple years, and apparently my suggestions, whining, complaining and begging were a small part of creating the UP Bravo and the UP series.
I’ve got to stop somewhere, so I’ll let it go with this. My personal skinning knife choices are not necessarily going to be yours. What works for me may not be the best choices for you. If you are currently using a favorite skinning knife and are happy with how it performs, there is no reason to go shopping for another knife.
But knife people are always looking for an excuse to acquire another cutlery tool – so here you go!
Please click here to check out and subscribe to the SurvivalCommonSense.com YouTube channel.
When most hunters think about going out of state for a hunt, their minds turn to getting drawn for elk or mule deer out west. The truth is there are a lot of great out-of-state hunts in the east for whitetail that can offer chances at good deer, without worrying about draws, with some really affordable tags.
If this year has you wanting to get away, but you missed the window to get drawn, here are some over-the-counter options that might not be as far away or expensive, but still get you out of the house and in some new areas, with a chance at a trophy.
Wisconsin leads the list for a couple reasons. First, the quality of deer in Wisconsin is incredible. No doubt you’ve heard the tales of Buffalo County, but there are great hunting opportunities to be had throughout the state.
Second, it’s affordable. Non-resident hunters can get in the field legally for around $160, which is super affordable. Never hunted Wisconsin before? You can give it a try even cheaper. Wisconsin has a program for first-time license buyers in the state that basically knocks 50% off your tag. It doesn’t get much better than that does it?
Bonus for non-resident hunters in Wisconsin; lots of public ground. About 18% of Wisconsin ground is public, so you can put boots on the ground and start hunting pretty much right away. A lot of that public ground is further north where the hunting can be a little harder than in the more agriculture-laden southern part of the state, but there are still deer to be had.
You will want to be mindful of CWD zones and any regulations that go along with those, but if you are looking for public-land hunting in a state where a true monster buck can be had, Wisconsin is it, and that’s why it tops the list. For more details and to stay legal in the Badger state visit https://dnr.wisconsin.gov/.
OHIO
Ohio isn’t a secret when it comes to big deer. What might be a secret is just how affordable it is for hunters who come from out of state to hunt there.
Non-resident hunters need to purchase a hunting license for $125, and then your buck tag will run you $24. So, for just under $150, you are up and running the state of Ohio. The Ohio tag and license structure is also one of, if not the, most logical licensing systems in the country as far as I’m concerned. You purchased your buck or doe tag and it’s good for any season. Go to the Buckeye state for archery, but don’t seal the deal? You can return with your tag still in hand for their firearms season and still be legal. It’s straightforward, it’s legal, and frankly MOST states could take a page from the Ohio regulation book in this regard.
If there’s a downside, it’s the lack of public hunting ground. Just 4.2% of Ohio is public, so there isn’t no public ground, but you won’t have the options of some other states. That said, a little scouting, a little hard work, and maybe a few phone calls can get you on some ground that may well hold the deer of a lifetime.
The Ohio DNR website is currently being redesigned, but keep checking for details.
INDIANA
While it isn’t mentioned with the same reverence as other states on this list, or in deer hunting in general, don’t sleep on the Hoosier state. Those paying attention have seen the quality of deer Indiana has been turning out with increasing numbers for the last decade, and while the herd management has lagged behind some other states, and still has some substantial holes, big deer abound here.
The biggest problem in Indiana has been their unwillingness to streamline and simplify that licensing process that in many ways is still a holdover from before Indiana went to the one-buck rule more than two decades ago. Simplest thing to do? Just buy the deer license bundle. It covers all weapons seasons, and allows you to take a buck and two does, or three does, for just $295 as a non-resident. Buy the bundle and don’t take a deer during archery? Come back for the general firearms or muzzleloaders seasons with a tag that’s still good. Archery opens October 1, and both the general firearms and muzzleloader season are two full weeks spanning three weekends. Plenty of time to get in the woods.
Indiana was a slug gun state for a long time, then went to pistol cartridge rifles, and in the last few years has opened up to a host of other rifle options, but there are still limitations, so be sure to double check the regulations to make sure you’re legal, especially if you end up on public grounds. Tags and weapons have additional restrictions on public land that could cause you issues if you aren’t paying attention. Certain doe tags aren’t valid on public land, and the same goes for rifle calibers.
Much like Ohio, less than 5% of the state is public ground, so you may have to work to find spots to hunt, but they are there, and the chances of a big deer being there are pretty good.
Find out about deer hunting in Indiana by visiting https://www.in.gov/dnr/fishwild/2344.htm.
Wherever you choose to hunt this fall, even if you don’t go out of state, stay safe and good luck!
The short answer: it’s your preference. If you use the metric system (meters/centimeters) then go for MRAD. But if you measure in the empirical system (yards/inches) then MOA may be easier.
If you want a more thorough answer along with an explanation of MOA vs MRAD, then keep on reading!
Suppose you’re headed out on a hunting trip with your buddies.
You did your research, you read the best rifle scope guide, and you’re ready to go. But then your buddy starts talking in meters and your MOA turrets are adjusting in yards.
His numbers don’t match your turrets, your turrets don’t match your reticle, and now your target has bounded off to another state.
The problem: he was using MRAD while you were using MOA.
MOA and MRAD are basically two different systems of measurement.
When sighting rifle scopes, the reticle and turrets are used together to reach the most accurate shot possible. The turrets change the position of your reticle while your reticle provides an aiming point.
Your turret clicks and the hashes on your reticle can use one of two different systems of scope alignment: MOA or MRAD.
You can have the best long range scope on the market, but if you don’t sight it in using either system, it’s useless.
If you’re looking for help choosing between rifle scopes, here’s the only guide you’ll need to read.
What’s an MOA Scope?
M.O.A. stands for Minutes of Angle; a system based on degrees and minutes. This type of angle measurement is used to calculate the distance to a target and MOA turrets correction for the bullet trajectory.
Basically the math breaks down to this: there are 360 degrees in a circle, and 60 minutes in a degree for a total of 21,600 degrees.
You can find your MOA measurement by multiplying the distance in yards by 1.047, then dividing by 100. You can thank the Ancient Egyptians and Mesopotamians later.
At 200 yards, one MOA equals 2.094 inches. Out to 1,000 yards, 1 MOA equals 10.47 inches, and so on.
For those of us who aren’t Einstein, the easiest way I’ve found is to use a quick-reference conversion chart. That way you don’t miss your prize buck while scribbling away on math problems.
MOA scopes aren’t a perfect system though.
Often calculations are made with 1 MOA at 100 yards (91.4 meters), but you need to count on 100 yards with 1.05 MOA. Up to 100 yards there will be no problem with 1 to 100 comparison, but when shooting over longer distances you’ll be 5% off base and this could mean missing a shot.
This isn’t a problem if you’re only shooting at medium ranges. Read my 4×32 scope guide for more details.
I use an MOA reticle scope on my AR-15 A2 after I removed the front sights for added cool guy points. I’ll show you how to remove the AR-15 A2 sights here.
What’s an MRAD Rifle Scope?
MRAD stands for milliradians (or MIL for short), and was originally developed for artillery in the late 1800s. It’s still the preferred method for military and police force operations to this day, where you’ll commonly here it referred to as a MIL-dot reticle.
Based on a radial line, a unit of angular measurement that is equal to roughly 57.3 degrees, a milliradian is one thousandth of a radian.
This system does not come out to make a perfect circle like the MOA system. Instead, milliradians divide the circumference of a circle into 6.28 equal sections measuring 57.3 degrees each in an MRAD scope.
Thus, every circle has a circle circumference that is 6.28 radians long. Then each radian is going to be divided into 1,000 parts more, which is called Milliradians.
When calculating MRAD in a MIL-based scope, you will be calling it MIL, which is 3.6 inches at 100 yards (91.4m using the metric system) equal to 1 MIL.
I tried an MRAD scope on my M1A that happens to have the best M1A scope mount ever.
MOA vs MRAD: Which is better?
The short answer: neither. The argument is as old as time, but it’s really just the shooter’s preference of rifle scope.
The fight between MOA vs MRAD boils down to a difference in how we format degrees of angular measure. It’s fancy math terminology that basically asks if you use yards or meters.
Technically, the 1/4 MOA clicks are slightly more accurate than the 1/10 MIL, but the MIL values are somewhat easier to communicate.
Reference cards with MIL are easier to read because they are indicated by 2 numbers only, while the cards with MOA are indicated with four numbers. We could go back and forth all day, but you get the idea.
If you like other comparisons, check out my Nightforce SHV vs. Vortex PST guide.
Which do you need?
Choosing between the MOA or MRAD system will take some self reflection, so buckle up.
If you normally think in meters or centimeters, then it is easier to calculate distance with a MOA. If you normally think in yards or inches, then MRAD should be your go-to.
And if you’re not going to calculate distances, it doesn’t matter between the MRAD vs MOA. Do your thing, both types are equally effective for medium- and long-range shooting.
Another thing to take into account is that you also have to consider your hunting partners, teammates, friends, and so on. You’ll want to have a common language so you can communicate together without having to do conversions between the two systems.
Or you could be an absolute rebel and have a scope for each system, swapping it out in the field with the best quick detach scope mounts. Live your life to the fullest.
Most importantly, choose the same system for your turrets and scope reticles. I have a guide on first focal planes vs. second focal planes to help you choose the right reticle as well.
Regardless of all the math, the decision between MOA and MRAD isn’t that important. Clicks with an MOA turret are slightly more precise than clicks with a MIL turret, but at the end of the day it’s a style choice between rifle scopes.
Fly fishing in the winter can be challenging but, also, highly rewarding. Most people do not venture outside their homes so winter fly fishing keeps the crowds away, and often times you’ll have the water all to yourself.
Generally speaking, trout are a smidge sluggish in the winter as they become less active in, literally, wader freezing temperatures. In certain small streams, we don’t recommend that you fly fish in the winter because it only adds further stress to fish that have not recovered from the summer and spawning season. However, if you know that the stream holds a high abundance of food sources then go for it!
Streams fed by springs and reserviors usually means a constant and stable water temperature that provides a healthy environment for large insect populations.
How to use weight in the winter to catch more fish.
If you were to fly fish during the winter, here are our top 15 winter trout flies followed by our best tips and advice:
Midge Flies
When growing up, trout are always reminded by their cannibalistic parents to “eat your midges because they will make you big and strong.” Midges are, basically, the most important source of food for trout. In fact, midges are the bulk of a trout’s diet November thru February. Midges are a major food source year-round for trout.
They hatch in freezing temperatures and hatch by the thousands. Basically cockroaches. When aquatic insects are less inactive in the winter, opportunistic trout key in on drifting midge larvae. Because midges mature and develop year-round, trout depend on them for easy pick’ins.
Here are just a few of our favorite midge flies we recommend fly fishing for trout in the winter.
Griffith’s Gnat
Typically, you’ll find swarms of these guys over slack water. Be sure to use a light tippet and target the slow-moving water following a pool.
Tungsten Rainbow Warrior Midge
One of the most successful searching fly patterns for trout, the Tungsten Rainbow Warrior Midge fly pattern combines a tungsten bead with a bit of flash to produce spectacular results.
Zebra Midge
Zebra Midge flies have been around for decades and for good reason — they catch fish. We love incorporating the Zebra Midge within our nymphing rigs as the first nymph followed by a heavier tungsten beaded fly. Midge larva can be found in nearly every level of the water column at all times so we make sure to keep a good variety of this pattern in our boxes. Across the board, it is a reliable trout fly in streams, rivers, and stillwater.
JuJu Baetis Flashback
Technically, this is considered a mayfly nymph pattern but it easily doubles as a perfect midge imitation. This lightweight midge larva pattern is another wet fly we recommend for our nymphing rigs. While you can fish this fly near the bottom with great success, it is best fished near the surface in slack water. On some days, you may be able to visibility see trout feeding close to the surface and sipping adult midges on the top. A great tactic would be to drop the JuJu Bee off the back of a dry fly pattern and cast to trout feeding both off the top and just below the surface.
Use A Two-Fly Nymph Rig
The Two-Fly Nymph Rig is an important technique that not only helps present subsurface flies better but also improves your chances. Well, sure, with an extra fly in the water you have a higher probability of catching a trout, but let’s not make this into a numbers game. Trout don’t know numbers. It comes down to the presentation of each individual fly. Trout will only move a few inches to eat an insect so you have to make sure that your fly is presented within those few inches.
With the Two-Fly Nymph Rig, both flies work together to get down into those narrow feeding lanes. The heavier larva/nymph pattern pulling the lighter emerger/pupa down.
Eggs Flies
October thru December, brown and brook trout spawn. During this time, opportunistic trout will lie downstream of the reproductive activity for drifting egg clusters. CAUTION: Please do not target trout on a redd. Redd is the spawning bed and is characterized by turned over gravel (usually bright). Please leave these trout alone so we can expect future generations as they are making more trout.
Great Searching Patterns:
Beaded Egg Fly
This fly is extremely effective during the spawning season in heavily stocked streams. Fish this fly downstream of the spawning area to awaiting trout. Although, during an abundant midge or baetis hatch, these will often be ignored.
Beadhead Veiled Cabalerro
The two-toned body with a thin outer “shell” will blend together perfectly in the water to make a realistic offering that trout will find irresistible.
Baetis(Blue Winged Olive)
Baetis (BWO) nymphs are one of the most common nymphs across the United States. During the winter months, you may find BWO’s hatching during a few days of warmer temperatures.
BWO Foam Para Emerger
Foam emergers are great for selective trout, which is great for the winter because most of the activity is found in slower, slack water. These look great with the tapered segmented body and have an amazing profile from nearly every angle. Foam para emergers also sit low in the surface-film, just like the naturals. We love using these blue-winged olive flies in the winter in particularly small sizes and often adding more than one dry fly — a multi-dry fly rig.
Dirty Hipster
This barbless euro nymph is scattered across our entire site and recommended everywhere, and that is for good reason. It catches fish. In this particular case, the olive variation in small sizes is a fantastic blue-winged olive nymph pattern. You can use this however you like but, for us, we like to fish this under a small indicator with smaller midge nymphs tied in above it.
Beaded Soft Hackled Hare’s Ear
This is a variation of the classic Hare’s Ear nymph pattern you commonly know. Tied as a soft hackle, the Partridge Hare’s Ear fly pulsates and moves just like how emerging nymphs wiggle and squirm on their way up to the surface. On the other hand, you can also add a non-beaded version of the Hare’s Ear Soft Hackle into the top of your nymphing rigs or off the back of a dry fly.
WD40 Emerger
WD40 flies are fantastic un-weighted patterns that we fish anywhere in our nymphing rig. You can add it to the top, off a dry fly, or trailing off a heavier nymph, but as long as you have it in the water it works wonders.
Aquatic Worms
Aquatic worms are totally natural and are a select part of a trout’s diet. They are found in sediment on the stream bed and are constant year-round. We prefer the Squirmy Wormy over the San Juan Worm because its flexible body provides more motion. They may not be as durable, but when winter fly fishing gets tough, you call in the big guns. When scouting for trout we use flashy patterns like this to see if fish respond. Once trout become more selective, we switch to more natural-looking patterns like the Pheasant Tail.
Improved Squirmy Wormy
Squirmy Wormy flies are great — they wiggle and squirm like no other worm fly and catch fish like crazy — but the durability of the material they are made from is their downfall. They will degrade even when taking good care of them or even leaving them in mild heat. Trust me, we’ve recycled hundreds of dozens of these patterns before they ever hit the shelves. After speaking with a few fly designers on material options, we’ve made squirmy wormy flies that last longer by using micro chenille on the body rather than the soft plastic worm material.
Firebead Sparkle Worm
A heavy worm pattern we like to use in deep water for big browns and rainbows. The added flash and sparkle creates a wonderful contrast that sparks interest. Sometimes all it takes is a bright fly.
Scuds & Sow Bugs
Trout can be found eating scuds and sow bugs year-round. In streams with plentiful underwater vegetation these shrimp’y thingies usually take up most of the food pyramid (sorry carbohydrates). During winter months, trout heavily depend on scuds to make it through the winter. We tend to find that the most natural colors perform better in the winter: olives, browns, blacks, grays.
Beaded Scud
There are so many scud patterns out there to choose from but this simple design is incredibly effective. It features a streak of flash on the back and copper ribbing for added durability. The presentation of this scud pattern is enough to fool hardy winter trout holding deep. Just get this fly down rolling near the bottom.
Streamers & Baitfish
Trout are known not to chase during the winter. They try to exert as little energy as possible and still get what they need. That being said, you should refrain from stripping and, instead, dead-drift or swing your fly. Think like a baitfish, be the baitfish. Give slight twitches to the line so that it adds a little movement to your streamer. Most trout will not pass up streamers either due to hunger or territorial instincts if presented correctly. Tip: Cast above the pool and allow your line to swing down and across so it looks like your fly is trying to evade being lunch. Following the swing, let your line straighten out and troll your fly for a bit; this pause in motion will give impulsive trout a chance to take the fly.
Beaded Woolly Bugger
Out of all the streamers available on the market, it is hard to beat the classic Bead-head Woolly Bugger. Typically, we like to fish a darker woolly bugger in black or olive in a smaller size by striping and swinging it through deep pools we know trout hold.
Euro Tungsten Jig Bugger
This super buggy jig pattern not only has the pulsating movement from the marabou tail but also the wiggling tags of rubber legs. Masterfully designed, the combinations that make up the Tungsten Jig Bugger makes this one of our favorite winter patterns and flies for our euro nymphing rigs. You can swing, strip, or dead-drift it anywhere.
Winter Fly Fishing & Strategies
Target a specific fish out of a pod rather than fishing blind.
Focus your fishing to actively feeding trout found along the edges, seams, and runs of slower deep pools.
The majority of trout will be concentrated in just a few pools. Find those pools.
Focus on fishing from around 10:00 am to about 3:00 pm. This is when trout become most active during the day.
Best fishing occurs when water temperatures are around 40 degrees Fahrenheit.
Test flies and don’t be afraid to switch patterns frequently.
Dead-drift streamers as baitfish are more inactive.
Nymphs Are More Productive
First things first, winter is not the time of year to adopt the “DryFly or Die” mantra. Now, there is no doubt that dry flies are arguably the most fun way to catch fish, there isn’t an angler out there who doesn’t get an adrenaline rush after watching a trout rise to the surface and aggressive slurp your fly. However, there is a time and a place for all types of fly fishing, from dries to streamers and nymphs. Winter is guaranteed to be most productive when using nymphing techniques.
Nymphing can be extremely effective and relatively easy. By positioning yourself directly across from the fish-if you aren’t able to sight fish, place yourself where the fish are most likely to be feeding, you are setting your flies up to move through the water directly in front of hungry trout. All it takes is roll cast upstream and a proper drift for trout to notice your flies.
Fish Multiple Flies
Trout are significantly less active in the winter which is why it’s a good idea to offer the trout as many delicious food options as possible, this can be achieved by rigging up three flies below a tiny indicator.
Think of this as a juicy buffet line, start your nymph rig with 5x or 6x sized tippet because water in the winter can be low and clear and you don’t want to spook away the chance at a fish. Next, add a very small strike indicator, and micro weight, sometimes two. Add the first fly which should be an attractor pattern such as a San Juan worm. Then below the first fly, add a midge and then a second midge below that. Be sure to keep the heaviest weight midge on the very end, to avoid bird nesting your line.
The other benefit to nymphing 3 flies on a single line of tippet is the ability to try multiple colors and patterns all at once. Then you can dial in the pattern that is producing fish more quickly.
Preventing Frozen Guides
Before your rod even touches the water, spray it down with some PAM cooking spray. Chances are you have some in your pantry and if not you can pick some up for under five dollars at the nearest supermarket. This is a tried and true tactic, that will prevent guides from freezing quickly.
The one thing I never leave home without has major benefits on the water as well, chapstick! Rub a little chapstick on your guides to discourage ice build-up. I prefer either original Burt’s Bee’s or Carmex or any natural based lip balm will do the trick! Loon outdoors makes a non-toxic paste, its safe for the environment as well as your fly line. Just under ten dollars, you can pick up this ice off paste at your local fly shop.
These methods will only work for a short period of time. Your guides will eventually freeze over and more application of pastes and oils will be necessary.
The only true long-lasting method to prevent guides from icing over is to use very thin mono-rigs, such as euro nymphing leaders. Less water is collected on the retrieve with mono-rigs compared to thick fly lines so less water ever reaches the guides to freeze over. You won’t be able to do much dry fly fishing using mono-rigs, however, you’ll rarely ever need to during the cold winter. Give mono-rigs a shot and you’ll notice what we did, less ice and more fish. If you’re curious about using mono-rigs, read this article here about whether Euro Nymphing Leaders are worth it.
What To Wear
That’s the conundrum for so many anglers during the cold winter months. Sure, the fish are out there and probably willing to eat, but is it really worth it during that snowstorm that brings several inches of snow and freezing temperatures? The answer to that becomes much easier when you’re armed with the right gear and clothing to combat the harsh conditions of winter!
Hands
Of all the things that threaten to end the day early, cold hands and fingers is at the top of the list. The inability to comfortably tie on a new rig and the stinging of frozen fingertips grinds a day of fishing to a halt. During these winter months, I like to bring two pairs of gloves with me. The first pair is fingerless wool, which allows me to stay pretty warm and still maintain a level of function. For those extra cold days, the second pair is a wool mitten that flips down into gloves. When I’m casting, my off hand is in mitten mode for maximum warmth, but it’s still really easy to switch into the gloves for retying or unhooking a fish!
Feet
Keeping feet warm in winter is the toughest thing to achieve. Numb toes that feel more like blocks of ice than extremities is a miserable feeling, and it’s really hard to combat. When it comes to dressing for warmth, wear two pairs of socks. Typically my bottom layer is just a regular run-of-the-mill athletic sock followed by thick wool socks. Having two layers helps a ton, and walking around out on the stream keeps blood circulating, which is about the best you can do when water temperatures are hovering just above freezing.
Layers
Dressing in layers, and having more layers available in the car, is key to a day out in winter. Weather can change in an instant, and even a few degree drop can be debilitating to the cold weather angler. Companies like Simms make some fantastic layering options that are lightweight and warm. A classic winter layering system for me is a long sleeve tee, fleece quarter zip, hoodie, and then a jacket to cut the wind and, if necessary, repel precipitation. Another jacket, usually a puffy warmer option, extra hoodie, and fleece layer are stashed in the truck just in case it’s colder than anticipated or even worse, a fall in happens.
Matthew Delorme
How to use weight to catch more fish.
Every fly fisherman, at some point in time, needs a tactical intervention. In my case, it happened to be a depth issue. I needed to properly understand the connection between the weight of my flies, the depth, and flow of the water I was fishing.
The most beneficial advice I have ever received when it comes to technical nymphing was to use more weight! This will help you identify the speed and depth of the current better. Not every hole or riffle should be fished with the same amount of weight or depth. Make sure you are properly evaluating and surveying the stretch you have chosen to fish and adjust accordingly.
A deep plunge pool requires more weight and depth for the flies to get down deeper, but that same approach might not work on a riffle. Less weight and less depth would much more likely cater to that type of water.
So, what does this do? As an avid angler, the most essential and helpful dynamic to technical trout fishing relies on the ability to gauge depth and flow. Take a minute to survey and prospect once you get to the water, don’t just rush into a spot. Look at the water and visualize where the bugs may be, where the fish may be, and where your flies need to be to directly replicate the mannerisms of the natural ecosystem.
Adding supplemental weight to your nymphing rigs is the difference between catching fish and not. Here’s why. The whole idea about split shots and using heavier beads is not only to get your nymphs down faster but to put your flies within the water column that fish most readily feed at—along the bottom.
Knowing when to add and remove weight is the most important thing you have to know when nymphing. Knowing how to use the weight is another.
Believe it or not, there are times when you’ll need to add weight to your nymphing rigs if you ever want a chance of hooking up.
Water is high and fast
Deep pools
Flies are too light
Not getting deep enough
Current is too strong
2 Split Shots are sometimes better than one
One of the best methods of using split shots is to put 2 splits and never just one.
Just having one sinker pulls your nymphing rig down between rocks and boulders like an anchor. Use two sinkers instead. Attaching two allows them to work together and pull each other out of crevices that you would otherwise get stuck in. Water flow catches the sinkers at different angles and pushes them downstream with the current in a rolling motion.
Streamers and split shots
You can so add split shots above streamers to add a jigging – up and down action when retrieved. Placing two split shots above the fly a few inches apart will allow the streamer to roll along the bottom like how a dead minnow or baitfish would.
Add more weight if your flies are going by too fast.
Most flies are pretty light and don’t carry much weight to them. Of course, you can prepare ahead of time by keeping a steady supply of tungsten beaded nymphs and weighted flies. But, odds are that you don’t.
No matter what time of year it is, trout are always feeding along the bottom. It is the perfect place. There is plenty of food and little to no current on the bottom, which allows fish to use very little energy and still continue to scoop up insects floating by. In case you’re wondering, slower currents along the bottom are the result of the friction between the water and the streambed.
Someday you’ll be caught on the stream with a few handfuls of light nymphs and deep, fast water to work. Trout are always feeding along the bottom so this is a perfect time to use tungsten putty or split shots.
Take some weight off if you keep snagging up.
That is the simplest way to put it. If you keep snagging up, subtract some weight.
Now, if you are snagging up every dozen casts or so leave, the weight on. It’s not the best idea to take some weight off unless you’re getting stuck 2 casts out of 3. You can do this in one of two ways.
Remove or replace a split shot with a smaller one
Replace the flies that are the most weight
Do both
Play around with adding weight and remember to always be adjusting. Conditions change from place to place so it’s totally normal to mess around with things to make it right.
Our Favorite Thermal Monoculars of 2024 for Hunting Coyotes, Hogs & More
You probably thought seeing in the dark was a superpower when you were a kid. Now that you’re all grown up and have a little coin in your pocket, you can actually buy that ability with one of 2024’s best thermal monoculars.
If you’ve got pesky coyotes, hogs, and boars that insist on showing up where they’re not welcome, you can peel back the darkness and find out exactly where they are with the push of a button.
But it’s not just about nighttime. Infrared imaging scanners can expose camouflaged deer and elk who’ve bedded down during the day or blended into the woods too well to see. If something gives off heat, a thermal monocular can help you see it — night or day.
We’ve picked out various products from some of the best names in thermal imaging, like FLIR, Pulsar, ATN, and AGN. These trusted brands have products that satisfy all portions of the price scale, including budget options, under $1000 picks, and $4000 state-of-the-art monsters.
Deciding which thermal monocular you need depends on many essential variables — like how you plan to use it, the range you need it to detect, and your budget. The best thermal imaging device for one hunter could be a poor choice for another.
But enough of all this talk about superpowers and price scales. Our reviews of 2024’s best imaging monoculars for hunters and homeowners will heat up your imagination and maybe even help take down a coyote or two.
When it comes to entry-level thermal monoculars, each unit comes with a 160×120 thermal sensor. That’s nowhere near the pixel density of 640×480 sensors available on the higher end, but that doesn’t make these units worthless by any means.
A decent thermal monocular can help you detect prey animals at short distances that would otherwise be undetectable. Or, if you’re following a blood trail that’s gone cold, they’ll peer through the darkness and illuminate what you might otherwise miss.
To be blunt, we prefer mid-range imaging devices of 384×288 pixels or better, but if you want to dip your feet into the thermal monocular game, you can still reap some benefits from the following budget-friendly devices.
Best Inexpensive Solution AGM Global Vision Asp-Micro TM160
As you might’ve guessed from the name, the AGM Asp-Micro TM160 is a small handheld thermal imager that fits easily inside your pocket.
Equipped with a 160×120 thermal detector, you’re not getting the most impressive thermal imaging monocular on the market, not by a longshot. But, if you need to spot heat signatures quickly, the TM160 could make the difference between detecting hogs and coyotes or letting them run wild and ravage your property.
Some additional features you’ll get with the Asp-Micro TM160 include:
10-hour battery life
8 GB internal storage
Video and photo camera
Up to 4x digital zoom
In short, this cheap option for sale delivers solid performance without breaking the bank.
Pocket-Sized Heat Imager FLIR Systems Scout TK Mini
Thermal Sensor: 160×120 Display: 640×480 LCD Detection Range: 91 meters Weight: .4 lb NETD: Unlisted Best for: Home security Not for: Identifying creatures
The next affordable infrared spotter on our list comes from a well-known name in the thermal monocular space: FLIR Systems.
Even more compact and lightweight than the TM160, the Scout TK Mini weighs only .4 pounds. That makes it a portable companion for home security and animal detection, as well.
Like the TM160, you won’t be able to identify animals at far distances with this device, but it can give you the edge you need.
Just be careful: you’ll have to get close to identify animals with a sub-$1,000 monocular like the FLIR Scout TK Mini.
Additional features include:
Still image and video recording
5-hour battery life
IP67 dust and waterproof rating
Eight color palettes
If you’re looking for the most lightweight budget thermal monocular, consider the Micro TK Mini. And if weight isn’t your biggest concern, the next infrared imager is a significant upgrade thanks to its zoom capabilities.
Good Quality without Breaking the Bank ATN OTS-XLT 2.5-10x
The ATN OTS-XLT 2.5-10x uses the same size microbolometer sensor as our first two recommendations but offers a bit higher detection and identification range with a 2.5x base magnification and up to 10x zoom.
This additional zoom will come in handy if you want to center your thermogram and give yourself more confidence when identifying, though you shouldn’t expect to identify hogs or coyotes at long range.
I’d like to clarify my use of the word “identification” here. If you’re an experienced hog and coyote hunter, the ATN OTS-XLT can help you identify those creatures day or night. But telling the difference between a dog and a coyote with a smaller sensor isn’t for novices, so keep that in mind.
That said, if you’re new to thermal imaging or want a monocular that offers more detail, upgrading to a larger thermal detector resolution will do wonders for your identification game.
Features of this scanner include:
Four color palettes
10-hour battery life
Base magnification of 2.5x
Zoom up to 10x
Camera for video and pictures
If you’re confident in your identification capabilities, you might get the job done with this entry-level ATN thermal unit.
Rugged Thermal Smartphone AGM G2 Guardian
Base Magnification: 5.6x Thermal Sensor: 256 x 192 Refresh Rate: 25 Hz Pixel Pitch: 12 micron Display: 6.58’’ FHD+ 120Hz Detection Range: 500 meters Weight: .9 lb Best for: Anyone who wants or needs the convenience of a thermal monocular on their cell phone Not for: Extreme distances, fast-moving objects
New for 2024, and the first product of its kind, the AGM G2 Guardian is a rugged cell phone and long-range thermal monocular in one.
We were fortunate enough to receive one of these bad boys to test drive, and to say that we’re impressed with the functionality of this gadget would be an understatement.
After some first-hand experience, we can definitively say that this device from AGM is a valuable tool for a variety of users; whether you’re a hunter, outdoorsmen, first responder, or construction worker (think HVAC, electrical, or plumbing).
The G2 Guardian boasts a 25 Hz refresh rate. While that’s paltry compared to others on this list, it’s important to note that for the price, it’s one of the best values for any entry-level thermal device. Its MSRP rings in at an approachable $899.
The G2 Guardian is feature-rich; here are some of our favorite attributes:
It’s unlocked and can be used with any carrier
Built-in 109 dB speaker
108 MP camera
Beefy 7,000 milliamp battery
Impact resistant and waterproof
You get more than just a long-range thermal monocular with the Guardian G2 from AGM, you get a trailblazing and one-of-a-kind gadget that’ll stand up to anything you can throw its way.
VIEW ON AGM MOBILE
Mid-Range Infrared Scanners
Now that we’ve considered some solid budget options, let’s move into the best mid-range thermal monoculars for hunting. The truth is, many thermal imaging experts consider this price range the actual entry level.
If you’re willing to drop a little more coin on one of these devices, you’ll be rewarded with a much better thermal sensor that offers 500% more microbolometer pixels. That means a sharper image, more heat detection, and a greater chance of identifying your prey.
Strap in because this is where the products start to get very interesting.
The Now-We’re-Talkin’ Choice AGM Global Vision Taipan TM15-384
Base Magnification: 1.5x Thermal Sensor: 384×288 Refresh Rate: 50 Hz Pixel Pitch: 12 micron Display: 1280×960 LCOS Detection Range: 708 meters Weight: .6 lb NETD: <35mK Best for: Mid-range detection, short-range ID Not for: Long ranges
For hunters who want a device that can identify prey up to 200 meters in the dark, fog, or haze, this is the best thermal imaging for hunting monocular of 2024 for the money.
For starters, this unit is a breeze to use. There’s no focus ring to adjust; it fits your pocket easily and delivers a wide field of view. In short, beginners can turn on this compact handheld device, start scanning, and expect high performance with minimal adjustments.
Efficiency like this is possible because AGM engineered the monocular well and gave it a solid foundation. With a 384×288-pixel microbolometer, 12-micron pixel pitch, a generous 1280×960 LCOS display, and 1.5x magnification, users of all stripes can detect even small rodents at relatively long distances.
If you’re looking for camouflaged deer or elk at dusk or dawn, it should be no surprise when you find great success with this AGM unit.
Some other useful features you’ll find include:
7.5 hour run time
Hot-spot mark
Distance measurement
Up to 8x zoom
App integration
Camera for video and picture
IP67 dust and waterproofing
For hunters who don’t need long detection ranges or those who hunt in tight spaces, the Taipan TM15-384 is the unit for you.
Great Value Long-Range Detection AGM Global Vision Taipan TM25-384
Base Magnification: 2.5x Thermal Sensor: 384×288 Refresh Rate: 50 Hz Pixel Pitch: 12 micron Display: 1280×960 LCOS Detection Range: 1,180 meters Weight: .7 lb NETD: <35mK Best for: Mid to long-range detection Not for: Short ranges
The previous AGM thermal monocular provides such great value that we had to include the upgraded 2.5x magnification model. If you value the ability to detect heat signatures up to 1,180 meters, you’ll love the Taipan TM25-384.
It uses the same infrared-detecting sensor as the TM15 but offers a longer focal length and higher magnification level. The benefit of 2.5x magnification is the ability to see animals as if they’re 2.5 times closer than what you’d typically see.
So, if you’re a long-range hunter who puts in extensive miles tracking and monitoring the behavior of big game like elk, this tool can allow you to see in the dark, gaze through the fog, and get the leg up on your prey.
Just know that you’ll have to scan the area a bit more thoroughly to cover the same ground as the TM15, as it has a smaller field of view (FOV). This is normal with higher magnification devices; they make it more challenging to spot up close-and-personal prey.
With those facts understood, we believe this is 2024’s best long-range thermal monocular for the money. We can’t recommend it enough for day and night hunting. Just keep in mind that you can’t replace the battery yourself.
Reference the TM15-384’s listing above for this specific unit’s additional features. And, if you don’t require this much magnification, a unit like the AGM Global Vision TM19 will hit the sweet spot perfectly.
Base Magnification: 3.3x Thermal Sensor: 400×300 Refresh Rate: 50 Hz Pixel Pitch: 17 micron Display: 1280×960 LCOS Detection Range: 708 meters NETD: 50 mK Weight: 1.2 lb Best for: Long-range detect, short to mid-range ID Not for: Very long ranges
While AGM thermal monoculars provide some of the best value in the space, Burris isn’t too far behind. Based on their included bevy of features, we think they offer greater value to hunters than the AGM solutions.
The main difference between the AGM TM15-25 line and the Burris BTH is the size of the thermal sensors. Burris put a slightly bigger unit on this device, which clocks in at 400×300. This handheld can collect more infrared energy than its AGM counterparts, and perhaps that’s part of why it weighs nearly twice as much.
Another reason for the added weight is this unit’s rangefinder, which can help you determine the exact distance between you and that raccoon, coyote, deer, or whatever else.
If ranging capabilities weren’t enough, hunters can set up the BTH and use it as a remote camera in the blind. Doing so will allow them to see what’s happening from a distance. The app integration on this beast truly sets it apart from the first two mid-range devices in this section.
High-tech equipment can mean the difference between filling your tag and spooking the game you’re after. We think the former is a better option, so check out the following features if you want to know what else this puppy can do.
Picture-in-picture mode
Five unique color palettes
Hot tracking
Remote control via smartphone
Multiple reticles, unlike AGM products
IP66 rated for dust and waterproofing
For a feature-packed thermal device at a great price, check out the Burris BTH50.
High-End Thermal Monoculars
This section is for you hunters and homeowners who want a device with a 384-pixel sensor that offers all the bells and whistles.
And, if you want to start dipping your toes into the 640-pixel waters, we’ve got an excellent choice immediately at the end of this section.
Rangefinding-Capable High End Buy Pulsar 2-8x Axion 2 LRF XQ35
Base Magnification: 2x Thermal Sensor: 384x 288 Refresh Rate: 50 Hz Pixel Pitch: 17 micron Display: 640×400 AMOLED Detection Range: 1,400 meters NETD: <40 mK Weight: .7 lb Best for: Long-range infrared detection, short to mid-range ID Not for: Extreme distances
Pulsar is a well-known and respected name in the thermal imaging arena. Their excellent customer service sure helps, but their spread of world-class heat-tracking products is why they’re one of the best, if not the best, in the business.
Housed in a magnesium-armored body and easy to slide into a pocket, the handheld Axion 2 LRF (laser range finder) can help you spot and range prey animals over 1,100 meters away. And, unlike all the other previous devices on this list, it utilizes a sharp, high-contrast AMOLED display.
The benefit of an AMOLED display is that it works in lower temperatures than an LCOS display. So, if you’re hunting or scanning in a frozen Minnesota winter, an AMOLED display could be the ticket.
It’s worth noting that this device comes in a non-rangefinding version as well.
You can save a good chunk of change by going without the LRF, and if you do, you’re still getting one of the best thermal imagers for hunting at any price point, let alone in the sub-$2,000 range. We love the rangefinder version, however, since it serves double duty in our packs.
Check out the Axion 2 XQ38 LRF if you want a unit with less base magnification. With both models, you’ll get:
Eight color palettes
Picture-in-picture mode
11-hour battery life and user-swappable batteries
2.4/5GHz WiFi wavebands
European-made Lynred sensor
16 GB internal storage (and 16 GB free cloud)
Fast start-up (fully booted in 5 seconds)
IPX6 waterproof rating
The feature-rich Pulsar Axion line isn’t cheap, but it’s well worth the money for all types of hunting — including hog, coyote, deer, elk, and more.
Base Magnification: 4.5x Thermal Sensor: 384x 288 Refresh Rate: 50 Hz Pixel Pitch: 17 micron Display: 1024×768 AMOLED Detection Range: 1,800 meters NETD: <40 mK Weight: 1.10 lb Best for: Long-range detection, short to mid-range ID Not for: Very long range ID
Compared to the Axion 2 I just mentioned, the Helion 2 XQ50 has a few significant advantages. The first leg up that springs to mind is this unit’s detection range. Because this imager starts with a 4.5x magnification, you’ll get an impressive 1,800 meters of range compared to the 1,400 meters of the Axion 2.
Of course, a device’s detection range isn’t all that matters. For example, you might prefer less magnification if you hunt in more confined quarters. If that’s the case, a unit like the Helion 2 XQ38 might be the best choice for you.
The Helion XQ series utilized excellent displays. Thanks to a standard 1024×768 AMOLED screen, these top-end devices provide razor-sharp optical detail for hunters in less-than-perfect conditions — day or night, in the summer, or during cold winters.
Pulsar built these units to last. They’re constructed of magnesium, which serves multiple purposes, including increased structural strength, heat dissipation, and high-quality image maintenance.
You can also expect:
Up to 8x digital zoom
Built-in photo and video camera
WiFi integration with Android and iOS
10-hour battery life and multiple battery options
Stadiametric rangefinding and reticle (non-laser)
16 GB onboard storage
If you want a 384-pixel sensor with the most bells and whistles available in a thermal monocular, the Helion 2 series is your best bet.
Our First 640-Pixel Unit AGM Global Vision Asp TM35-640
Base Magnification: 1.4x Thermal Sensor: 640×512 Refresh Rate: 50 Hz Pixel Pitch: 17 micron Display: 1024×768 OLED Detection Range: 1,600+ meters Weight: 1.1 lb Best for: Identification at mid-range Not for: Users who want quick-swap batteries
Once again, AGM shows up to the thermal imaging party with one of 2024’s very best models you can buy for your hard-earned money — the Asp TM35-640.
Equipped with the largest sensor featured in this article so far, it’ll deliver high-end thermal imaging capability, which means more crips and detailed images. Simply put, 640×512 sensors capture nearly 300% more thermal energy than their 384×288 counterparts.
With more detail, you’ll be able to identify animals at longer distances, which could mean a world of difference if you’re trying to differentiate between a buck or a doe, for example.
But that’s not the only advantage. The Asp TM35-640 comes with an OLED display, which provides more contrast than its AMOLED counterparts. Blacks are blacker with OLEDs, so you’ll be able to differentiate thermal signatures easier and more precisely.
There is one downside, though. Unlike the Pulsar units above, the battery is not user-replaceable.
Other than that minor gripe, we love this device, which also comes with:
5-hours of battery life
16 GB built-in memory
Photo and video camera
Four color palettes
Hot spot tracking
Up to 4x digital zoom
The TM35-640 is our top pick in the high-end range due to its technological advantages (640 sensor, OLED) over the two Pulsars above.
VIEW ON AMAZON
Higher-than-High End Units
For the discerning hunter and homeowners who spare no expense, we’re happy to showcase the best of the best thermal monoculars of 2024.
While we’re aware that several thermal monoculars exceed this price point (~$4,000), we think these units are the best because they’re made for you — hunters. Here you’ll find cutting-edge sensors, bells, whistles, advanced capabilities, and incredible performance.
Best All-Around High End Pulsar Helion XP50 PRO
Base Magnification: 2.5x Thermal Sensor: 640×480 Refresh Rate: 50 Hz Pixel Pitch: 17 micron Display: 1024×756 AMOLED Detection Range: 1,800 meters Weight: 1.1 lb NETD: <25 mK Best for: Detailed observation in harsh conditions Not for: One issue here is price, but if you can afford it, get it
Suppose you want the best possible compact thermal imaging monocular for hunting in the world. In that case, regardless of price, you’d be hard-pressed to top the genius-level capabilities that Pulsar stuffed into their Helion XP50 Pro.
It all starts with the thermal sensor Pulsar used in their flagship handheld. With a <25 mK NETD rating, this unit has no problem discerning even the smallest differences in heat. Those tiny differences, delivered to its HD-quality screen, give you a vivid and complete view of the field.
No matter the weather you’re battling, even extreme cold coupled with rain and fog, you’ll cut through it all to spot what you’re after — creatures that would be hidden entirely otherwise. And even if it takes you a while to spot what you’re after, this device uses hot-swappable batteries to keep you going as long as you want.
With 1,800 meters of detection range, you’ll be able to scan extreme distances. This impressive range, coupled with the high-end visual abilities packed into the unit, will allow you to identify precisely what the thermogram is displaying long before inferior units.
Additional game-breaking features of the Helion XP50 PRO include:
Picture-in-picture
Stadiametric rangefinding
IPX7 waterproof rating
Easy-to-update software
8+ hours of battery life
8x zoom
If you’re ready to step up to the highest level, check out Pulsar’s Helion XP50 Pro. But if you don’t battle temperature swings often, our next option might be even better for you.
VIEW ON OPTICS PLANET
Biggest Thermal Sensor Leica Calonox
Base Magnification: 2.5x Thermal Sensor: 640×512 Refresh Rate: 50 Hz Pixel Pitch: 12 micron Display: 1280×960 LCOS Detection Range: 3,000 meters Weight: 1.5 lb NETD: Not listed Best for: Long-range detection and ID Not for: Extreme temperature variance locations, but it’ll do just fine if you find yourself in one
In our opinion, the thermal device with the best image isn’t from Pulsar; it’s the Leica Calonox. To help decide between the two units, ask yourself one question:
Do you prefer to notice greater temperature changes, or do you seek out more detailed images?
Versus the Pulsar Helion XP50, Leica uses a 640×512 microbolometer while the Pulsar uses a 640×480 counterpart. For that reason, the Leica can collect more thermal energy via its sensor.
Then, because the Leica uses a more advanced 12-micron pixel pitch, the images are crisper and easier to see since there’s less distance between the center of each pixel and its neighbor.
The result is arguably the sharpest image on the market when it comes to compact handhelds explicitly made for hunters. But because the Leica uses an LCOS display, it won’t fare as well as the Helion in downright cold temperatures.
Your choice ultimately comes down to the environment you’ll do most of your thermal imaging. At 3,000 meters, the Calonox has nearly double the detection range of the Helion XP50 Pro. Do you need that much range, or would you rather have better performance in harsh conditions?
Here are some additional features to help guide your decision making:
Leica Image Optimization (LIO) for extreme sharpness
Up to 5 hours of run time
IPX4 Rating
10x magnification
Four color palettes
Excellent app integration and remote control
Can be used while charging
It’s pretty apparent that the Leica Calonox is an exciting challenger to the Pulsar Helion XP50 Pro.
Longest Range on the List ATN OTS 4T 640 4-40x Smart HD
Base Magnification: 4x Thermal Sensor: 640×480 Refresh Rate: 60 Hz Pixel Pitch: Not listed Display: 1280×720 LCOS Detection Range: 3,300 meters Weight: 2.0 lb NETD: <25 mK Best for: Long-range scanning, marathon hunting sessions Not for: Swampy environments — not rated for submerging in water
Not to be outdone, ATN presents its challenger to the thermal imaging throne. If you need extreme range, the ATN OTS 4T 640 4-40x tops all others on this list.
With 3,300 meters of detection, the ATN delivers excellent image quality via its 640×480 sensor. One exciting way that ATN stands apart from its competition is that it utilizes a superior 60 Hz refresh rate, enabling hunters to scan the field quicker and miss fewer details.
Capabilities like these are beneficial when considering this model’s base magnification. Starting at 4x, you’ll be able to eyeball the field without fear of being spotted. And, if you need different magnification levels, ATN offers several other powers in this series.
If you don’t need the extreme magnification and zoom this particular unit provides, chances are there’s something more your speed on this list.
Each device in this series includes:
Spin-to-zoom wheel
16+ hours of battery life
Dual-core processing
Video recording
HD video streaming
Ballistic calculator
If you’re seeking excellent battery life and ultra-long-range detection, you can’t do better than the OTS 640 series from ATN.
And if you don’t need long-range capabilities and desire less magnification, going with the ATN OTS 4T 640 1.5-15x will save you some dough over our previous top-end recommendations.
Technical Considerations of Thermal Monoculars
Thermal monoculars are complicated gadgets; let us help simplify them for you
Thermal monoculars are complex devices that give you the ability to see heat. Since animals are warmer than their surroundings, these devices pick up their infrared energy and turn it into visible light that a hunter can see.
With the suitable unit for the hunting and imaging you do, you’ll be able to inspect the darkness or defeat natural camouflage to spot hogs, coyotes, deer, elk, and other game that typically go undetected.
But, that ability isn’t possible without advanced electronics and materials. Let’s dive into the most critical aspects of thermal monoculars and what they mean for your buying decision.
Lens Material and Size
Unlike binoculars or spotting scopes that use glass for their objective lens, the lens at the end of the cylinder, many infrared scanners use the germanium. That’s because infrared light doesn’t pass through glass.
Germanium, on the other hand, is invisible to infrared light, enabling it to pass through and relay infrared information to the electronics. That info is then processed and delivered to your eyepiece.
The larger the objective lens, the more infrared light the sensor can capture. If you know you’ll be hunting a lot at night or in adverse conditions, a larger lens will help you see more infrared energy.
Sensor and Resolution
Also called the microbolometer, this component reacts to infrared wavelengths or heat given off by your prey. It’s composed of pixels that send electrical impulses to the electronics for processing, creating an image your eyes can see.
The more pixels your senor has, the better image quality you’ll receive. At the lower end of the price spectrum, you’ll commonly see 160×120 microbolometers, which equates to 19,200 total pixels overall.
If you were to move up into the next level of thermal monocular class we discuss, the 384×288 units, you get 110,592 pixels, or over a 500% increase. With more pixels, you’ll see more detailed images, meaning you’ll be able to spot and identify animals with far more certainty.
For that reason, we strongly recommend going with a 384-pixel unit or better. Check out the AGM Global Vision Thermal Monocular Taipan TM15-384 for the best 384-pixel unit you can buy for the money.
Pixel Pitch
Now that you’ve got an idea of what microbolometers do and how they work, it’s vital to discuss pixel pitch. This number measures the distance, in microns or µm, between pixels directly next to one another. You’ll typically see 17 µm or 12 µm measurements.
A lower number denotes a higher-quality sensor. That’s because there’s less space between the pixels themselves. With less distance between the pixels, the sensor can create more detail to give you a sharper image.
Noise Equivalent Temperature Difference (NETD)
NETD is the sensor’s ability to discern even the most minute differences in temperature. Like the pixel pitch measurement, this is another measurement that’s better if its value is lower.
Anything below the 60 milli-Kelvin (mK) is considered an above-average sensor. The higher quality instruments, such as the Pulsar Helion XP50 PRO, feature sensors capable of discerning minute differences in temperature, which helps give hunters the clearest, most precise image available.
In the case of the Helion XP50 Pro, its NETD value is <25 mK, making it one of the best values you’ll find on the market today.
Display Resolution and Type
After the microbolometer takes infrared information and passes it to its electronics for processing, that info will arrive on the display to show you what you’re looking at.
There are a few critical bits of information to know regarding displays. The first is resolution.
High-end devices use HD resolutions like 1280×960. On lower-end devices, you’ll typically see lower resolutions, including 720×540. Just like the microbolometer, more pixels lead to more detail. You can make out more of the animal or scene you’re investigating with more visible pixels.
The next information to keep an eye on is the display type.
On low-end devices, you’ll typically see LCOS displays. These are solid since they use very little energy and are relatively cheap, but they won’t work in temperatures below 14° F. You’ll want an AMOLED or OLED display if you regularly hunt or use your monocular in colder temps.
AMOLED displays work down to -25° Fahrenheit. They also provide greater contrast than what you’d get in an LCOS display, which can help you make out minute differences in a scene.
OLED displays work in similar temperatures as AMOLED displays, but they have an advantage considering contrast ratios. Because an OLED pixel powers itself, you’ll get deeper blacks on your display.
When using palettes like white-hot or black-hot, higher contrast levels can mean you’ll see more detail on your display. However, AMOLED displays have higher color saturation, meaning you’ll get more color when using palettes like fusion.
Ultimately, the image should look fantastic if you’re buying a high-end device, whether it uses an AMOLED or OLED display.
Magnification
Typically, thermal monoculars have some sort of base magnification. Shorter-range devices start at 1.4x or 1.5x, meaning objects appear 1.4x or 1.5x closer to your eye than you’d see naturally. Some have no magnification at all.
You can expect base magnifications of 2.5x to 4x and higher for long-range thermal monoculars.
If you hunt animals at great distances, say you’re in an enormous flat expanse somewhere in the plains of eastern Wyoming, detecting animals at long range can make the difference between missing a potential trophy buck or filling your tag.
Field of View
If you’re not aware, field of view is the width of the area you can see on your thermal imaging monocular display.
It relates to magnification in a pretty specific way. If you’re looking through a lens with higher magnification, you’ll have a smaller FOV. If you need to scan wide-open spaces, a larger FOV may be for you.
But, if you value the ability to see far, a monocular with a higher base magnification might make the most sense. It just depends on what and where you’re hunting.
Zoom
With zoom, you’re taking that base magnification and enlarging it. In the case of thermal monoculars, you’ll be doing so with a digital zoom feature. The electronics in your device are simply digitizing a larger version of what you’d see with no zoom applied to the image.
Zoom can help you determine whether or not the thermal image you’re seeing is prey worth further investigating or if you’re just looking at the neighbor’s dog.
Detection Range
When you combine the lens, microbolometer, display, and magnification, the hope is to create a marriage of components that will help you detect coyotes, hogs, deer, elk, or whatever else.
Different thermal monoculars have different detection ranges, which are measured in meters. Monoculars with large microbolometers and higher zoom numbers give you more extensive detection ranges.
Detection essentially just lets you know a creature is out there. Depending on how close you are to it and what color palette you’re using, it could show up as a splotch of light or a highly detailed image.
How easy it is to identify animals at a given range depends on the quality of your monocular.
Let’s talk about that next.
Identification Range
Identification range of the Leica Calonox: on point
All animals, humans included, give off heat, so deciphering what you’re looking at can be tricky. High-quality thermal monoculars allow you to identify the creature on your display at further distances than lower-quality devices.
Just like detection range, identification range is measured in meters. Naturally, all products always have a smaller identification range than they do detection range. That said, you can get away with a shorter identification range if you’re well accustomed to animal behavior and movement.
But, if you want to be sure about what you’re viewing, you’ll need to find a thermal monocular with a more extended identification range, for example:
If you’re a coyote hunter, knowing whether you’re looking at a coyote or a dog can make the difference between having some serious explaining to do or eliminating a harmful nuisance from your property.
A device like the Leica Calonox makes for an excellent identification tool.
Refresh Rate (Hertz)
Your refresh rate relates to both your microbolometer and display. This value, or the amount of Hertz, states the number of times per second your microbolometer or display will refresh.
Typically, you’ll see values of 50 Hz, meaning the image can refresh itself 50 times per second. If you scan large areas, you’ll want a higher value to keep up with how quickly you move the device.
Palettes
Thermal monoculars have a variety of ways to display the thermal information they pick up, and they’re called color pallets. Using different colors allows hunters to better decipher the scenery around them. We’ll discuss the four most widely used here.
Black Hot: Warmer objects appear black. This palate is used extensively by hunters and law enforcement because it doesn’t deviate much from how humans typically view the world.
White Hot: Warmer objects look white. This palate is one of the most commonly used for surveillance in urban environments.
Red Hot: Warmer objects look red. This palate is probably what you think of when you hear the words “thermal imaging.”
Rainbow: Warmer objects appear lighter and cool objects appear darker. This palate is excellent for observing objects and environments where heat differentials are minor.
Durability and Waterproofing
Because the items listed here are made mainly for hunting, they require a certain level of durability.
Spending lots of time in the great outdoors will beat the heck out of stuff, so finding durable equipment that can last several seasons will inevitably save you some dough.
One of the ways you can tell if something is durable is to identify what it’s made of. The Pulsar 2-8x Axion 2 LRF XQ35 is an excellent example of a product made of solid materials; in this case, Pulsar constructed it of incredibly durable magnesium.
Another way to determine how a product will fare against the elements is via its IP (ingress protection) rating. An IP rating tells you how well an enclosure can keep dust, water, and other stuff out. For example, in the case of an IP67, the first number (6) is the solids protection. Six and up indicates that the product is dust-proof.
The second number, 7, tells the consumer how water-tight a product is. In this case, seven means the product can withstand being submerged in water for up to 30 minutes.
In short, IP ratings give hunters a quick way of telling how much interior protection a product will have out in the wild.
Click here for a full breakdown of the IP rating system.
Battery Life and Type
If you plan on hunting for extended periods, you’ll want a device with long battery life. Better yet, find a device that enables you to swap batteries and extend your day in the field.
One great example of a device with long battery life is the ATN OTS 4T 640 4-40x Thermal Smart HD. Batteries can weigh a lot, so be sure to find your sweet spot between battery life and weight when choosing your next thermal imager.
WiFi Connectivity
Some devices are equipped with WiFi capabilities, which connect the thermal imager to a cell phone to transfer data between the two. Most devices use the older 2.4 GHz spectrum, but newer ones use 5 GHz for faster data transfer speeds.
Size and Weight
At the risk of sounding like Captain Obvious, the size and weight of your thermal monocular could mean the difference between making it a joy to carry or a bulky hindrance.
Get your hands on a device that offers you the portability you require. One example of a lightweight unit with exceptional capabilities is the AGM TM19-384.
Safety
Thermal monoculars make up just one portion of the thermal imaging market. Manufacturers sell thermal binoculars and thermal scopes as well. Compared to thermal scopes, I think monoculars are safer.
When using a rifle scope, you have to point your weapon at what you want to scan. Doing so can present some safety concerns if you’re hunting with a large group or in a well-trafficked area. Plus, looking through the scope all the time can be a literal pain in the neck.
I think the safest way to use thermal technology is via a monocular, though a solid thermal rifle scope is a nice piece of kit too.
Warranty
A product’s warranty is something to consider when dropping over a grand on a thermal monocular. Make sure you feel comfortable with the company you’re dealing with and the warranty they offer. Read the fine print.
Most of the monoculars on this list come from companies that offer three-year limited warranties for their products. As always, ensure you’re getting a solid warranty from a trusted company when you decide to purchase this significant.
Thermal Technology vs. Night Vision
Thermal technology vs. night vision: which is best for you?
Many of you might wonder whether night vision or thermal monoculars are best for hunting, and there’s some confusion surrounding the debate.
The differences between the two come down to what each device can “see” and how it sees it.
Night vision devices rely on a light source — the moon immediately comes to mind. You can also use an infrared illumination device to provide your scope or monocular with a light source.
On the other hand, thermal imaging doesn’t require any light whatsoever. These devices pick up heat signatures and can work flawlessly in the pitch dark of a moonless night. You can also use a thermal imaging unit in the daytime to help you detect and identify bedded or naturally camouflaged animals.
Both thermal and night vision devices have their advantages and drawbacks, so using them in conjunction is good. For example, a thermal monocular and a night vision scope combo tacked onto your rifle could be a winning combo for quick scanning to detect prey and accurate shot placement.
Which of 2024’s Best Thermal Monoculars Will See the Heat?
Time to step up your game and see what all the fuss is about
As you can see, 2024’s best thermal monoculars come in all shapes and sizes. The high-tech products we recommend are lightweight, handheld, and extremely helpful for spotting and identifying coyotes, hogs, and other pesky creatures.
Not only can one of these infrared scanners help you see in the dark, but they can help you spot creatures when conditions are foggy, rainy, and frigid. The coyotes, hogs, and raccoons out there will stand no chance if you’ve got a quality thermal monocular in your kit.
Heck, you also get an advantage in the daytime if you’re looking to find bedded and naturally camouflaged wild game like deer and elk.
So hopefully, no matter which device you pick, whether it’s a Pulsar, ATN, or AGM Global Vision, it’ll give you the ability to see what your eyes alone can’t.
Whether you’re looking for a budget option, a solid setup under $1,000, the best mid-range choice for the money, or an ultra-high-end hoss, we hope our thermal imaging for hunting reviews and write-ups give you all the advantages you seek.
Thanks for checking out 2024’s best thermal monoculars, and be sure to check back soon for more hot gear reviews.
Jack London’s To Build a Fire is one of the best short stories ever written. It illustrates man’s battle with nature as well as how smart dogs are. It also shows the frustration of making fire when you need it the most. In the story, death won because the man failed in starting a fire. That doesn’t have to be the outcome. Here are a few tips on building a fire when things are wet and miserable and you need it most.
Make sure you protect your materials from wind and rain as you work. Create a base to start the fire by clearing the ground. You want the fire in a dry place, so remove all wet leaves and debris and pick a spot with good drainage. A flat rock works well as a work table to get the fire started. Make sure to locate the fire near some kind of shelter for you.
I usually have a space blanket or a small tarp in my pack as well as some paracord because it’s easy to form a roof with to keep rain off the fire. You may need to move or remove it once the fire is going to prevent the sparks from burning a hole, but for now, keep it low enough to protect your work area.
Lacking that, find some natural protection or make it. Build a lean-to frame against a big rock, log or tree with fallen limbs and cover it with spruce bows. That works well in the Northeast where we have lots of spruce. In other areas, improvise; there’s almost always something you can use to keep the rain off you and the fire.
StarterYou’ll need a starter. Often called tinder, it’s something that will light easily and burn hot long enough to ignite small fuel sources. It’s a good idea to bring something with you. I’ve read hundreds of these type of articles where the writer talked about soaking cotton balls in Vaseline or collecting lint from the dryer vent. I’ve tried them all, and to be honest, I didn’t have much luck. There are much better options.
Fire-lighting sticks that are ground wood mixed with wax are hard to beat. I burn wood to heat my house and have to restart the fire often. I used to mess with newspapers and kindling that I split from dry wood. That’s a tedious process of gradually building the fire. Now, I pile up my big chunks of hard wood, insert a fire-starting stick at a junction located low in the pile, light it and walk away. The point is, starters are great and inexpensive.
Another option is solid fuel tablets. They’re easy to find, inexpensive and burn very hot. If you add a folding stove—often sold with these tablets and a metal cup—you have a way to make tea, coffee or food while you work. These cubes and the fire-starting sticks are a bit fragile, so I vacuum seal them with my FoodSaver. At the very least, wrap them in aluminum foil and put them in a zip-lock bag.
I always carry a couple of tea light candles in my backpack. They are short, squat candles in a small aluminum cup. They burn for a long time and are easy to light and slip in under the tinder. They can also provide light to work by.
There are a lot of commercial fire starters on the market, often in individual single-use packaging. Most I’ve tried work pretty well, but a word of caution: Test them at home a few times to be sure. Some burn out pretty fast, and if things are wet, you need something that will burn long enough to dry the edges of your tinder.
If you don’t have any of these materials, don’t panic. There are plenty of fire-starters out there in the woods, they’re just a bit harder to find. Birch bark is an old standby. If you peel deep enough on a standing tree, you should find a dry layer. You may have to use your knife to cut away the dry bark.
Sometimes if you look deep under thick evergreen trees, the branches lowest and closest to the trunk will be dry, as they’re protected from the upper branches. Carefully harvest any small dry twigs to form into a nest to start the fire.
Find some dead branches that are seasoned and start shaving them with your knife. While the outside will be wet, when you whittle away that layer, you should find dry wood at some point. Shave off thin slices of this dry wood until you have a large pile of shavings. You can also form them into a fuzz stick by cutting a shaving so it curls away from the stick, but leaving it attached, then move the knife slightly and make another. If you make a lot of these, you end up with a big fuzzy stick to start the fire.
In locations where you have trees with high pitch content, some types of pines for example, you may find chunks of pitch on the trees. Those work well to start the fire. Shavings from this will light easily and burn hot.
FuelYou need some small dry pieces of fuel to start, and then progressively larger pieces to build and maintain the fire. Once again, look under the protected branches of an evergreen tree. Check on the downwind side of rocks, trees or big formations like cliffs. Often there will be a small zone close to the wind barrier that has some dry material. Collect small twigs, dry grass or anything else that will burn.
Find some smaller sticks—up to an inch or so in diameter—that are dead and seasoned. Break them into manageable sections, about 3 or 4 inches long. Use your knife to split the wood lengthwise. You may need to use a larger piece of wood to drive the blade through with a method called batoning.
A word here to the small knife advocates. I know it’s all so very cool to brag about using a pen knife to process a moose, but this right here is why you should carry a grown-up knife in the woods. Little knives and replaceable-blade knives are fine for gutting rabbits, but you need a large, tough knife to save your life in a situation like this. You don’t need a Rambo-inspired survival knife or bushcraft knife, although it wouldn’t hurt. But you do need a full-size hunting knife with at least a 3-inch blade. A hatchet works even better here, but most hunters don’t carry them as part of their everyday gear.
The inside of the split wood should be dry. Split it fine, with lots of edges to catch fire. You may even want to split off any wood that is water soaked. Work up in branch size as far as you can with your knife and split some bigger pieces. You should have multiple piles of split wood in different sizes. The idea is to start the fire with the small stuff and gradually work up in size until you have a large enough fire to dry the bigger pieces as you add them.
Collect enough wood to make a large, hot fire before beginning. Once the fire is burning well and you have some hot coals, then you can leave it and gather more wood. Gather what you think is enough, then double it. The last thing you want is to run out of wood. Place the wood close to your fire so that it will be drying as it waits its turn in the fire. If you pile the wood high and opposite your position, it can act as a wind barrier and will reflect some of the heat back to you.
Be Prepared with Multiple StartersI never go into the woods without at least two ways to make a fire. I am a big fan of magnesium fire starters, and always have one in my pocket when hunting. I recall one day high in the mountains of Montana where our elk hunting was interrupted by a blizzard. The guide used all his matches and failed to get the fire started. I dug a magnesium starter out of my pack, and soon enough our jackets were steaming and our fingers were warm again. The trick is to make a small pile of shavings using your knife and then hit the metal Ferro rod to create a spark which ignites the shavings. Magnesium burns very hot and will start the tinder easily.
Ferrocerium (Ferro) rods are very popular right now and easy to find. They produce a shower of hot sparks, and when used correctly, that shower is almost continuous and will ignite dry tender easily. One of the best I’ve tried is the Lightning Strike Fire Starter. It comes with several disks that store in the handle, light easily and burn for four minutes. The machined body is designed to guide the striker and to send the sparks directly to the tinder.
Waterproof matches and butane lighters are good as well. With the lighter, you can hold the flame for a long time. Try to find one with a large flame or an adjustable flame.
Tend the fire carefully, as most people (myself included) try to rush things and start piling on too much wood too soon, which can put the fire out. Work slowly, be patient, feed the fire gently and watch it grow.
If you’re really smart, you’ll have a package of noodles or instant soup in your pack and something to heat it in. A metal cup works pretty well. Set it on a rock beside the fire until the water is hot. It’s raining, finding water is easy enough. Finish with a little instant coffee; it does wonders for your outlook on life.
The payara fish, also known as the Dracula Fish, is one fish with teeth on our list of eight.
On many occasions, I’ve gotten distracted while fighting a fish, and when I finally had my quarry close enough to land, I quickly reached down and grabbed it by the lip to bring it in the boat. If it’s a largemouth I’m landing, or a big crappie or striper, that’s not a problem. When fishing in some waters, however, the creature that gets grabbed may grab back. And if it’s one of the toothy terrors listed here, it could leave you with wounds that need stitching, or worse.
I, therefore, warn you to think twice before lipping the next fish you bring alongside your boat. In the Western Hemisphere, rivers, lakes and saltwater environs are home to many fish that have maws studded with rows of needle-sharp teeth. If you make a mistake and grab one of these bad boys by the lower jaw, you may find yourself heading to an emergency room.
They don’t call it “Dracula fish” for nothing. This South American favorite has the countenance of a vampire, with two fangs as long as your little fingers erupting from its lower jaw—plus dozens of other sharp teeth. With needle-sharp tips and knifelike edges, these dentures are perfect for impaling the payara’s favorite dinner: live piranhas. And you know any fish that eats piranhas must be one tough customer.
While fishing for payara on the Rio Paragua in Venezuela, we often reeled in piranha baits so full of holes they looked like hamburger meat—the result of payara attacks. The fish’s long lower fangs fit nicely into sheaths in the upper jaw, but the payara’s strike is as swift as a cobra. It can open wide and impale you before you know it happened. The result is guaranteed to be extremely bloody and painful.
2. Alligator Gar
South Texas Bowfishing guide Scott Meshell’s wife Jaclynn arrowed this monster alligator gar on June 20, 2020. The big fish measured 7 feet, 3 inches, in length. (Photo courtesy of Scott Meshell)
The alligator gar is a toothy, armored-covered leviathan of Southern lakes and rivers. Its size impresses—sometimes more than 8 feet and 300 pounds. Looking into one’s tooth-studded maw is like staring death in the eye.
John Fox guided for Arkansas gator gars in the 1950s. He tells the story of one client so horrified by the hellish stare of a gar that jumped near the boat, he deep-sixed Fox’s rod and reel, with the gar still hooked, and demanded to be taken immediately to shore.
“A guy fishing with us one day let one jump in the boat,” Fox said. “It tore the side of the boat out and broke the man’s leg!” Nineteenth-century news accounts describe many instances of persons being killed or injured by these fish, including people snatched off houseboats.
If you mess with this bad boy, be sure your life insurance is paid up.
3. Bowfin
Richard Hart caught and released this world-record-length (82 centimeters / 32.28 inches) bowfin while fly fishing July 29, 2018, on Lake Champlain. (Photo courtesy of IGFA)
At first glance, the bowfin looks pretty harmless. Its teeth, which are immovable outgrowths of its jawbones, aren’t readily apparent. But if you examine a bowfin’s mouth up close—if you’re stupid enough—you’ll get the definite impression that, given a chance, it would chew your arm off, and if it were the size of an alligator, people wouldn’t be safe in the water. Nicknames include mudfish, dogfish and grinnel, but more vulgar monikers often are used by frazzled fishermen with broken lines, mauled lures and shattered poles.
Writer Jim Spencer gave a vivid account of one bowfin encounter. “It was possibly the most violent strike I’ll ever see in my life, regardless of the species,” he said. “No white marlin ever slashed a trolled skipjack any harder than when that grinnel hit my fast-moving spinner. The water around the lure erupted like a miniature volcano … I set the hook purely out of fright.”
Don’t land one with a lip-lock. If you do, there’s a good probability you’ll come away minus some digits.
4. Esox
Northern Pike (Photo courtesy of Northland Fishing Tackle)
Members of the genus Esox—the pike, pickerels and muskellunge—are deadly predators that will kill and eat darn near anything, including squirrels, ducks, young muskrats and sizeable fish. Their long canine teeth, which ring the wide lower jaw, and the short, sharp teeth on the tongue and roof of the mouth, spell instant death to unwary prey. That same dentition can lay open a person’s foot or hand dangled in the water, as has often happened in places where big muskies and pike thrive.
Suffice it to say that putting any body part too near the jaws of one of these marauders can spell trouble if the fish decides to latch on. Extreme caution is advised.
5. Lingcod
A fresh-caught lingcod (Ophiodon elongatus) is shown with its toothy mouth open and a hook in its mouth. (Shutterstock image)
Many saltwater fish are armed with mouths full of sharp teeth, too. Consider the lingcod, whose toothy maw resembles that of a sci-fi monster destined to eat the entire crew of a spaceship. This fish is covered with brownish-red blotches that make it look like it has some kind of skin disorder. Maybe that’s what makes it so ornery. A 40-pounder I hooked off Seward, Alaska slammed me into the gunwale so hard I had bruises for weeks. Pity the person who hooks a really big one, which could top 80 pounds.
You’ll find lingcod year-round in West Coast waters from southern California to the Gulf of Alaska. They’re aggressive and easy to catch on jigs and cutbaits fished around rock piles and reefs. If you’re tough enough to handle one, and it doesn’t snap your line, steer clear of the huge, gaping mouth studded with big teeth. The species’ scientific name, Ophiodon elongatus, means “long snake tooth,” an appropriate appellation.
6. Bluefish
Bluefish pack a dangerous set of teeth. (Game & Fish Image)
Bluefish are abundant and popular sportfish in many areas, particularly along the Northeast coast. Lots of folks like catching them, but novices may not realize these sleek, powerful marine fish pack a dangerous set of dentures. I’ve seen them bite right through a hook, and saw a fellow angler lose part of a toe to one that dropped thrashing in the bottom of our boat.
Schools of bluefish often “blitz,” pushing baitfish near shore as they feed on them. Swimmers, surfers and others in the water sometimes suffer serious bites if they’re unfortunate enough to get caught in the feeding frenzy. If you handle one carelessly while fishing, there’s a definite risk it could remove some big chunks of flesh from any body part that gets near those chomping jaws.
7. Black Piranha
The scary-looking black piranha. (Shutterstock image)
“They are the most ferocious fish in the world,” Theodore Roosevelt wrote of piranhas. “They will rend and devour alive any wounded man or beast.” Mean doesn’t begin to describe them.
Most of the 17 species in South American waters are beautiful fishes, but not so the black piranha. The biggest of its clan, weighing as much as 13 pounds, this purplish flesh-eater looks like the embodiment of pure evil, with blood-red eyes and a jutting jaw lined with razor-edged teeth. A fearsome 5-pound specimen in Brazil exploded on a big prop bait I cast, sending a spray of water high into the air. When I lifted the fish over the gunwale, it bit cleanly through the 3/0 treble hook impaled in its jaw. They’ve been known to take off fingers and toes with equal ease.
8. Wolf Fish
Brazil’s giant trahira, or wolf fish. (Shutterstock image)
Brazil’s giant trahira, or wolf fish, looks like something that should be chasing Sigourney Weaver around a spaceship. This little-known fish weighs up to 50 pounds and has chompers that look like they could bite through nails. Think “nuclear walleye” and you’ll have a good picture.
When hooked, this evil-looking primitive does a tarpon-on-steroids impersonation, jumping repeatedly. You’ll need heavy tackle to drag it out of the snag-filled jungle backwaters it typically inhabits, but chances are, even that won’t survive a brutal battle with one of these raging bulls.
Don’t hold a trahira near any body part you want to keep. They’ve been known to rip chunks of flesh from nitwits wading barefoot in shorts.
Discover the contrasting realms of stalking and stand hunting for deer in this captivating exploration. Uncover the nuances that set these hunting techniques apart, as we delve into their unique approaches, benefits, and challenges. Gain a comprehensive understanding of the key differences between stalking and stand hunting, and enhance your knowledge of these thrilling pursuits in the wild.
1. Understanding the Distinctions: Stalking vs Stand Hunting for Deer
When it comes to hunting deer, there is a heated debate between two methods: stalking and stand hunting. Stalking, also known as spot-and-stalk hunting, involves staying mobile and trying to spot deer either at a distance using binoculars or up close as you walk through areas of deer activity. On the other hand, stand hunting involves setting up in one location and waiting for deer to come to you, typically using a tree stand or elevated blind.
Stalking has several advantages. One of the main benefits is the ability to quickly move to another area if one spot is not productive. A spot-and-stalk hunter can scout out multiple potential locations where deer may appear throughout the day and move between them as needed. This increases the chances of encountering feeding, bedding, and traveling bucks.
Stalking also allows for tracking down a moving deer. If a hunter spots a nice buck just out of range while stand hunting, they would have to let it go. However, a stalking hunter can potentially flank the deer and approach it from another direction.
Another advantage of stalking is that it requires less setup time and gear compared to stand hunting. Stand hunters need to set up their stands before the hunt or carry them along on the day of the hunt, which can be cumbersome and potentially scare away deer. In contrast, spot-and-stalk hunters only need their hunting gear and a weapon.
Additionally, stalking provides an opportunity to see more of nature and beautiful vistas while moving through different areas. It can be an adrenaline rush for hunters who prefer being on the same level as their game and find it more exciting and fulfilling.
However, there are some downsides to stalking as well. It is more physically demanding since hunters are on their feet for most of the day. Spot-and-stalk hunters need to be in good physical shape to handle long hours of walking or hiking.
Stalking also exposes hunters more to weather conditions compared to stand hunting. If caught in an open area during a storm, stalkers may be out in the weather without the protection of a shelter or trees. Stand hunters, even without a shelter, have the branches and leaves above them for some cover.
Another disadvantage is that noise and movement can spook deer during stalking. It requires patience and careful movement to avoid scaring away deer as you approach them. Generally, stalking is not as productive as stand hunting, which is considered more successful overall when it comes to harvesting deer.
Now let’s turn our attention to stand hunting. One of the advantages of stand hunting is that it provides a place to sit or stand and observe, potentially out of the weather. Hunters can quietly wait for deer to come within range without having to move around.
Stand hunting also offers a more stable shooting platform compared to shooting offhand while stalking. Even if all you have is a tree to lean against or a harness to stabilize yourself, it still provides better stability than shooting on the move.
Additionally, being elevated in a stand gives hunters a better view of the hunting area compared to ground/still hunting. This elevation allows for a broader overview and may help spot deer that could be missed from a ground position.
Stand hunters also have the advantage of being able to trim brush and branches around their stands to clear shooting lanes. By setting up their stands early, they can take the time to prepare their shooting areas for better accuracy.
Furthermore, pre-ranging different landmarks from the stand location can help make more accurate shots at deer. This is especially useful for bow hunters who need precise distance measurements.
In terms of safety, having a known location in case of trouble is another benefit of stand hunting. By GPS marking their stands and letting others know where they are located, hunters can be found easily if something goes wrong during their hunt.
Moreover, stand hunting potentially offers a better chance of bagging a mature buck. These older bucks are often more cautious and easily spooked, making it difficult for stalkers to get close. Stand hunting provides a better opportunity to observe their movements and plan a shot.
However, stand hunting has its disadvantages as well. Setting up temporary or portable tree stands can be heavy and difficult. It requires carrying and assembling complex equipment, which can be a hassle.
There is also the possibility of someone else occupying your stand if you hunt in an area with multiple hunters. This can be frustrating and limit your access to productive hunting spots.
Stand hunting may not always provide the best view depending on the terrain, brush, leaves, and trees that could block sightlines. In some cases, sitting on a stool at the base of a tree with a clear view through the underbrush may be more effective.
Lastly, stand hunting can be potentially dangerous if proper safety precautions are not taken. Falling out of tree stands is a common cause of hunting injuries and fatalities. Hunters must wear safety harnesses and learn how to use them correctly to prevent accidents.
In conclusion, both stalking and stand hunting have their advantages and disadvantages when it comes to deer hunting. Stalking allows for mobility, tracking moving deer, and experiencing nature up close but requires physical endurance and can be less productive overall. Stand hunting provides stability, better views of the area, easier shot preparation, potential safety benefits, and higher chances of bagging mature bucks but requires setup time, restricts movement during the hunt, and may limit visibility in certain situations. Ultimately, the choice between these two methods depends on personal preferences, physical capabilities, terrain conditions, and desired outcomes for each individual hunter.
2. Exploring the Contrasts: Spot and Stalk vs Still Hunting for Deer
When it comes to deer hunting, there is a hot debate between spot-and-stalk hunting and still hunting from a stand. Each method has its own advantages and disadvantages, and understanding these contrasts can help hunters make an informed decision.
Spot-and-stalk hunting, also known as stalking, involves staying mobile and actively searching for deer throughout the day. Hunters scout out potential locations where deer are likely to appear and move between these spots in search of their target. This method allows for flexibility, as hunters can quickly change locations if one area is unproductive.
One advantage of spot-and-stalk hunting is the ability to track down a moving deer. Unlike stand hunters who have to let a deer go if it moves out of range, stalkers can flank the deer and approach from another direction. This mobility gives them an advantage in pursuing their target.
Another benefit of spot-and-stalk hunting is the opportunity to see more of the hunting area. By staying on their feet and moving through different locations, hunters can enjoy beautiful vistas and experience nature firsthand. This type of hunting can be an adrenaline rush as well, as it requires finding and tracking down the deer rather than waiting for it to come to you.
However, spot-and-stalk hunting also has its disadvantages. It is more physically demanding compared to still hunting from a stand. Stalking requires being on your feet all day, which can be tiring if you are not in good shape.
Additionally, spot-and-stalk hunters are more exposed to weather conditions compared to those in stands or blinds. If caught in an open area during a storm, they may have less protection compared to stand hunters who have shelters or tree cover above them.
Stalking also requires patience and careful movement to avoid spooking deer. Noise and movement can easily scare off the prey, making it challenging to approach them unnoticed. In terms of success rate, spot-and-stalk hunting is generally considered less productive compared to stand hunting.
On the other hand, still hunting or stand hunting involves setting up in one location and waiting for the deer to come to you. This method is favored in heavily wooded areas where visibility is limited. Stand hunters use tree stands or elevated blinds to gain an advantage in spotting deer from above.
One advantage of still hunting is the stability it provides as a shooting platform. Hunters in stands have a better chance of taking accurate shots compared to stalkers who often shoot offhand after moving. Still hunting also requires less physical exertion once the stand is set up, allowing hunters to relax and enjoy their day.
Being elevated in a stand also offers a better view of the hunting area, potentially spotting deer that ground hunters might miss. Stand hunters can trim brush and branches around their shooting lanes for clearer shots and pre-range different landmarks for more accurate shooting.
However, still hunting has its drawbacks as well. Setting up a stand can be heavy and difficult, requiring complicated setup processes. There is also the risk of someone else occupying your chosen spot before you arrive.
Safety is another concern with tree stands, as falling accidents are common among hunters using this method. It is essential to wear a safety harness and learn how to use it correctly to prevent injuries.
In terms of visibility, still hunting may not provide the best view depending on local terrain and vegetation cover. Some areas may require ground-level observation rather than being elevated in a stand.
Ultimately, the choice between spot-and-stalk hunting and still hunting depends on personal preference and the specific conditions of the hunting area. Both methods have their advantages and disadvantages, so hunters should consider factors such as terrain, weather conditions, physical fitness level, and desired level of excitement when making their decision.
3. Decoding the Variations: Stalking or Stand Hunting – Which is Better for Deer?
Stalking and stand hunting are two popular methods of deer hunting, each with its own advantages and disadvantages. Stalking, also known as spot-and-stalk hunting, involves staying mobile and actively searching for deer throughout the day. This method requires scouting and knowledge of potential deer activity areas. Stalkers can move to different locations if one area is unproductive. They have the opportunity to track down a moving deer and potentially flank it from another direction. Stalking allows hunters to see more of nature and enjoy beautiful vistas. It can be an adrenaline rush as hunters find and track down the deer themselves.
On the other hand, stand hunting involves setting up in one location and waiting for the deer to come to you. This method is often favored in heavily wooded areas where visibility is limited. Stand hunters have a stable shooting platform, which can improve accuracy. They can clear shooting lanes by trimming brush and branches, providing better opportunities for a clean shot. Stand hunters also have a known location in case of trouble, making it easier for others to find them if needed.
There are pros and cons to both stalking and stand hunting. Stalking is more physically demanding as hunters are on their feet all day and exposed to weather conditions. It can be challenging to avoid spooking deer with noise or movement during stalking. However, stalking allows for quick movement between different areas and potentially tracking down a moving deer.
Stand hunting provides a more relaxed experience as hunters wait patiently for the deer to approach their location. It offers a better view of the hunting area from an elevated position, allowing hunters to see more than those on the ground. However, setting up stands can be heavy and difficult, requiring extra effort before the hunt begins.
In terms of success rates, stand hunting is generally considered more successful overall, especially when targeting mature bucks in certain regions. However, individual experiences may vary.
To increase chances of success in either method, hunters should keep quiet and minimize noise that could alert deer. Paying attention to wind direction and scent control is crucial to avoid detection. Scouting the area before the hunt allows hunters to identify potential deer movement patterns and focus on key areas. Being aware of the background behind you can help prevent deer from spotting your movement. Moving slowly, staying low, and hiking regularly in the off-season can also improve hunting outcomes.
In conclusion, both stalking and stand hunting have their advantages and disadvantages. The choice between the two methods ultimately depends on personal preference, hunting conditions, and specific goals.
4. Comparing Strategies: Spot and Stalk Hunting vs Stand Hunting for Deer
When it comes to deer hunting, the debate between spot and stalk hunting versus stand hunting is a hot topic among hunters. Both strategies have their advantages and disadvantages, and it ultimately depends on personal preference and the specific hunting situation.
Spot and stalk hunting, also known as stalking, involves staying mobile and actively searching for deer throughout the day. Hunters scout out potential locations where deer are likely to appear, such as creek crossings or bedding areas, and move from one spot to another in search of their prey. This method allows for flexibility and the ability to quickly change locations if one area is not productive.
One advantage of spot and stalk hunting is the potential to track down a moving deer. Unlike stand hunting where you have to wait for the deer to come to you, a spot and stalk hunter can flank the deer by quietly approaching from another direction. This method requires stealth and patience but can result in a successful shot at a moving target.
Another advantage of spot and stalk hunting is that it requires less setup time and gear compared to stand hunting. A spot hunter only needs knowledge of the area, essential gear, and a weapon. This makes it more accessible for hunters who prefer a minimalist approach or do not have access to tree stands or elevated blinds.
Spotting and stalking also offers hunters the opportunity to see more of nature and enjoy beautiful vistas while on the move. It can be an adrenaline rush as you try to find and track down your prey rather than waiting for it to come within range.
However, spot and stalk hunting does have its drawbacks. It is more physically demanding as hunters are on their feet for most of the day. If you are not in good physical shape, this method can quickly wear you out.
Being exposed to weather conditions is another disadvantage of spot and stalk hunting. Unlike stand hunters who may have the protection of a tree or blind, spot and stalk hunters are more exposed to the elements. This can be challenging if bad weather rolls in during your hunt.
Noise and movement can also spook deer when spot and stalk hunting. Stalking requires patience and careful movement to avoid alerting deer to your presence. Dry leaves on the ground or impatience can make it difficult to approach deer without startling them.
In terms of success rates, stand hunting is generally considered more productive than spot and stalk hunting. Stand hunting involves setting up in one location, such as a tree stand or elevated blind, and waiting for deer to come within range. This method is particularly favored in heavily wooded areas where visibility is limited.
One advantage of stand hunting is that it provides a stable shooting platform. Whether using a tree stand or leaning against a tree, hunters have better stability compared to stalking hunters who often have to shoot offhand. Stand hunting also allows for better views of the surrounding area, especially if elevated in a tree stand.
Stand hunters can also trim brush and branches around their stands to clear shooting lanes and pre-range different landmarks for more accurate shots. Additionally, being above the deer’s line of sight increases the chances of remaining undetected.
However, there are some disadvantages to stand hunting as well. Setting up stands can be heavy and difficult, especially with portable stands that require assembly. There is also the possibility of someone else occupying your chosen stand location if you arrive later.
Safety is another consideration with stand hunting as falls from tree stands can result in injuries or even death. It is important to wear safety harnesses correctly and take precautions when using elevated stands.
In conclusion, both spot and stalk hunting and stand hunting have their pros and cons. Spotting and stalking offers flexibility, mobility, and an adrenaline rush but requires physical endurance and careful movement. Stand hunting provides stability, better views, and potentially higher success rates but requires setup time and can be less exciting for some hunters. Ultimately, the choice between these strategies depends on personal preference, hunting conditions, and individual skill level.
5. Evaluating Approaches: The Differences Between Stalking and Stand Hunting for Deer
When it comes to hunting deer, there are two main approaches that hunters debate over – stalking and stand hunting. Each approach has its own advantages and disadvantages, and it ultimately depends on the preferences and goals of the hunter.
Stalking or Spot-and-Stalk Hunting:
– Stalking, also known as spot-and-stalk hunting, involves staying mobile and actively searching for deer throughout the day.
– Hunters scout out potential locations where deer may appear at certain times of the day, such as creek crossings or bedding areas.
– The advantage of spot-and-stalk hunting is that if one area is not productive, hunters can quickly move to another location.
– This approach allows hunters to potentially track down a moving deer by flanking it from another direction.
– Spot-and-stalk hunting requires less setup time and gear compared to stand hunting.
– It offers the opportunity to see more of nature and beautiful vistas while being on the move.
– Many hunters find spot-and-stalk hunting to be an adrenaline rush as they have to find and track down the deer themselves.
However, there are some potential disadvantages to spot-and-stalk hunting:
– It can be physically demanding, as hunters need to be on their feet for most of the day.
– Hunters are more exposed to weather conditions compared to stand hunters who have a sheltered position.
– Noise and movement during stalking can easily spook deer, making it challenging to get close enough for a shot.
– In terms of success rate, spot-and-stalk hunting is generally considered less productive than stand hunting.
Stand Hunting:
– Stand hunting involves setting up in one location, either in a permanent or temporary tree stand or elevated blind, and waiting for deer to come within range.
– More white-tailed deer are taken using stand hunting than any other method, especially in heavily wooded areas where visibility is limited.
– Stand hunting provides a stable shooting platform and allows hunters to relax and enjoy their day in the stand.
– Being elevated in a stand can provide a better view of the hunting area and potentially spot deer that ground hunters might miss.
– Hunters can trim brush and clear shooting lanes from their stand location for better shooting opportunities.
– Stand hunting also offers the advantage of pre-ranging landmarks for more accurate shots.
However, there are some potential disadvantages to stand hunting:
– Setting up tree stands can be heavy, complicated, and time-consuming.
– Other hunters may occupy your chosen stand location, leading to disappointment and potential conflicts.
– Falling out of tree stands poses a significant risk, making safety harnesses essential.
– The view from a stand may not always provide the best visibility due to terrain or vegetation.
In conclusion, both stalking and stand hunting have their pros and cons. Stalking offers mobility, excitement, and the opportunity to track down moving deer. Stand hunting provides stability, comfort, and potentially higher success rates. Ultimately, the choice between these two approaches depends on personal preference, physical condition, hunting environment, and individual goals as a hunter.
6. Unveiling the Techniques: A Closer Look at Stalking and Stand Hunting Methods for Deer
Stalking and stand hunting are two popular methods used in deer hunting, each with its own set of techniques and strategies. Let’s take a closer look at these methods:
Stalking Hunting Techniques:
– Stalking, also known as spot-and-stalk hunting, involves staying mobile and actively searching for deer throughout the day.
– Prior scouting is crucial for a successful stalk hunt. Identifying potential areas where deer may appear at specific times can increase your chances of encountering them.
– Stalkers often use binoculars to spot deer from longer distances or move slowly through prime areas of deer activity to get closer for an ethical shot.
– The spot-and-stalk approach is commonly used in open areas or mountainous terrain where a significant hike may be required to locate mule deer or black-tailed deer.
Advantages of Stalking Hunting:
– Flexibility: If one area is unproductive, stalk hunters can quickly move to another location.
– Tracking Opportunities: Stalk hunters have the advantage of potentially flanking a moving deer by approaching from a different direction.
– Minimal Setup Time and Gear: Unlike stand hunting, stalk hunters only need knowledge of the area, essential gear, and their weapon of choice.
– Enhanced Nature Experience: Stalk hunters get to enjoy beautiful vistas and experience nature more intimately than those who stay in one place.
– Adrenaline Rush: Spot-and-stalk hunting can be thrilling as it requires finding and tracking down the deer rather than waiting for it to come to you.
Potential Disadvantages of Stalking Hunting:
– Physical Demands: Stalking hunting can be physically demanding as it involves being on your feet for extended periods.
– Exposure to Weather: Stalk hunters are more exposed to the elements, especially in open areas, compared to those in stands or blinds.
– Noise and Movement: Stalking requires patience and careful movement to avoid spooking deer, making it challenging for some hunters.
– Lower Success Rate: While stalking is considered a pure and exciting form of hunting, it may not be as productive as stand hunting in terms of bagging a deer.
Stand Hunting Techniques:
– Stand hunting involves setting up in one location, either on a tree stand or ground blind, and waiting for deer to come within range.
– Many white-tailed deer are harvested using stand hunting methods, which are favored in heavily wooded areas with limited visibility.
– Stand hunters often choose locations based on factors like creek crossings, bedding areas, food sources, game trails, or antler scrape marks.
Advantages of Stand Hunting:
– Stability: Stand hunters have a stable shooting platform, whether using a tree stand or leaning against a tree with a harness for support.
– Less Physically Demanding: Once the stand is set up, stand hunters can relax and enjoy their day without constantly being on their feet.
– Better View: Elevated stands provide an improved overview of the hunting area compared to ground/still hunting.
– Clear Shooting Lanes: Stand hunters can trim brush and branches to create clear shooting lanes towards expected deer activity areas.
– Accurate Shots: By pre-ranging landmarks from the stand location, bow hunters can make more precise shots at deer.
Potential Disadvantages of Stand Hunting:
– Heavy Setup: Some portable tree stands can be heavy and complicated to set up properly.
– Occupied Stands: In popular hunting areas, your chosen stand location may already be occupied by another hunter.
– Safety Concerns: Falling out of tree stands poses potential dangers. It is essential to wear a safety harness and use it correctly.
– Limited Visibility: Depending on the terrain and vegetation, stand hunting may not provide the best view of deer activity.
– Inconsiderate to Other Hunters: Setting up stands in productive hunting lanes can lead to conflicts with other hunters.
In conclusion, both stalking and stand hunting methods have their advantages and disadvantages. Stalking offers flexibility, tracking opportunities, and an adrenaline rush but requires physical endurance and careful movement. Stand hunting provides stability, better views, and clear shooting lanes but may involve heavy setup and limited visibility. Understanding these techniques can help hunters make informed decisions based on their preferences, terrain, and target species.
In conclusion, stalking and stand hunting are two distinct methods used for deer hunting. Stalking involves actively pursuing the animal on foot, while stand hunting entails waiting in a fixed location. While both techniques have their advantages and considerations, it ultimately comes down to personal preference and the specific hunting situation. Understanding these differences is crucial for hunters to choose the most suitable approach based on their skills, terrain, and desired experience.
Sighting in or “zeroing” a rifle is the art of aligning iron or telescopic sights with the barrel, thus allowing the shooter to place bullets predictably at a given distance. In this article, we will focus on telescopic sights or “scopes” because they offer significant advantages over open sights, especially at longer distances.
Scopes have evolved with greater clarity and magnification to match the increasing power and precision of rifles and ammunition. Two systems for aligning scopes have developed independently. Each has a distinctly different origin and approach. The Minute of Angle (MOA) method is an ancient base-60 scheme conceived for astronomy. The Milliradian method is a base-10 scheme developed for artillery in the late nineteenth century. Nonetheless, both are equally effective, using segments of arc to express a certain amount of change in trajectory at a set distance.
One minute of angle, also known as an arcminute, is equal to a deviation of approximately 1 inch at 100 yards, 2.00 inches at 200 yards and 3.00 inches at 300 yards. One increment of adjustment on many MOA scopes moves the reticle alignment 0.25 (1/4″) of an arcminute or 0.25 inches at 100 yards, 0.50 inch at 200 yards and 0.75 of an inch at 300 yards. These measurements apply to both windage and elevation and are accomplished by rotating a turret adjuster on the scope. Some scopes move reticle alignment in .0125 (1/8″) increments, but many shooters consider this too narrow to be useful, especially at great distances.
Let us consider some examples. If you had a bullet drop of 1.50 inches at 200 yards and wanted to zero your rifle at this distance, you would need to adjust the elevation turret of your scope up by 3 increments or .75 of an arcminute because a minute of arc equals 2 inches at 200 yards. Using these convenient figures, we can generate the following results in Table 1 showing approximate arcminute deviations and the value of one increment at various ranges.
Arcminute DeviationsIncremental Scope Adjustments of 0.25 100 yards = 1.0 inch100 yards = 0.25 inch 200 yards = 2.0 inch200 yards = 0.50 inch 300 yards = 3.0 inch300 yards = 0.75 inch 400 yards = 4.0 inch400 yards = 1.00 inch 500 yards = 5.0 inch500 yards = 1.25 inch 600 yards = 6.0 inch600 yards = 1.50 inch 700 yards = 7.0 inch700 yards = 1.75 inch 800 yards = 8.0 inch800 yards = 2.00 inch 900 yards = 9.0 inch900 yards = 2.25 inch 1000 yards = 10.0 inch1000 yards = 2.50 inch
In order to compensate for a windage error of 2.50 inches to the right at 500 yards, you would need to adjust the windage turret toward the left by 2 increments or 0.50 arcminutes because a minute of arc equals 5.00 inches at 500 yards.
In Depth
The MOA system was handed down from the Sumerians in the 3rd millennium BC. The modern practice of dividing a circle into 360 degrees began with the Sumerians. The Babylonians further refined this measurement by dividing each degree into 60 minutes of arc. Since an arcminute is 1/60th of a degree, there are 21,600 (60 * 360) arcminutes in a full circle. Being a standalone system that is somewhat arbitrary, MOA feels akin to Imperial units, even though it is not part of that system and postdates it by more than two millennia.
True MOA
Shooting purists acknowledge a difference between commonly understood MOA and “true” MOA, which adheres strictly to the underlying mathematics. This meticulous attitude is necessary when acquiring targets that are several hundred yards away because the minor variations of rounded numbers are magnified by distance. In June of 2017, a Canadian Special Forces sniper downed an Islamic State militant from just over 2 miles away. The bullet took 10 seconds to reach its target. Shooting at this distance and accounting for wind, angle of trajectory, light aberration, and even the Earth’s curvature leaves no margin for error. More practically speaking, striking a mule deer from 400 yards, down a powerline slash in Western Montana requires you to be “on your game.”
Calculating the exact deviation of one MOA is a problem of geometry. The circumference of our circle is determined by the radius or distance from the shooter to target. At 100 yards, using the formula of 2 Ï r, we find that 2 * 3.14 * 100 = 628 yards. As there are 36 inches to a yard, the circumference in inches is 22,608. Now, all that remains is to divide by the number of MOA’s in a circle (21,600) and the quotient is 1.047. This is the actual deviation of one MOA at 100 yards.
Using this precise figure, we can generate the following table of MOA deviations, yielding greater accuracy. Note that the variance from rounded numbers is nearly half an inch at 1000 yards.
TRUE Arcminute DeviationsTRUE Incremental Scope Adjustments of 0.25″ 100 yards = 1.047 inch100 yards = 0.2617 inch 200 yards = 2.094 inch200 yards = 0.5235 inch 300 yards = 3.141 inch300 yards = 0.7852 inch 400 yards = 4.188 inch400 yards = 1.0470 inch 500 yards = 5.236 inch500 yards = 1.3088 inch 600 yards = 6.282 inch600 yards = 1.5705 inch 700 yards = 7.329inch700 yards = 1.8323 inch 800 yards = 8.376 inch800 yards = 2.0940 inch 900 yards = 9.423 inch900 yards = 2.3558 inch 1000 yards = 10.47 inch1000 yards = 2.6175 inch
Let us consider a few real-world examples using these more acute numbers. The bullet drop of a Norma 150 grain, 7mm Magnum bullet is 21 inches at 400 yards. Compensating for this drop would require an adjustment of 20 increments of one-quarter MOA for a total of 5 MOA because one minute of arc equals 4.188 inches at that distance.
Suppose you are shooting a 180 Grain Remington Express in 30.06, from a rifle zeroed at 200 yards. The range of your target is 400 yards, producing a bullet drop of 23 inches. You are shooting to the north and there is a 10 mph wind from the east. In order to compensate for the drop, you would need to adjust the elevation turret up by 22 increments. Wind drift would be about 12 inches, based on the known ballistic coefficient for that bullet, requiring a windage turret adjustment of 11 increments to the right for a total change of nearly 3 MOA.
MRAD — Milliradian
Brief
A radian or “rad” is the standard unit of angular measure used in many areas of mathematics. A Radian is slightly under 57.3 degrees. A milliradian or “mil” is one thousandth of a radian. There are approximately 6283 mils in a full circle.
Just as arcminutes have a predetermined value at various ranges, so do milliradians. These are typically expressed in meters (metric system) rather than yards, for reasons we will examine shortly. Milliradian scopes usually adjust in one-tenth (.10) increments because one full mil makes a sizable difference, even at 100 meters.
The deflection of .10 mils is understood to be 1 cm at 100 meters, 2 cm at 200 meters and 3 cm at 300 meters. The fact that the milliradian system works out to whole numbers makes calculating trajectory and adjusting for windage and elevation very straightforward. If, for example, you have to account for a bullet drop of 33 cm at 300 meters, you would need to adjust the elevation turret up by 11 increments. Compensating for wind drift of 3 cm to the right at 100 meters would require an adjustment of 3 increments to the left.
In Depth
The milliradian system is an International System of Units (SI) derived method of angular measurement. All SI units are based on science. A radian is mathematically defined as an arc-length equal to the radius of its circle. Therefore, the milliradian or “mil” is equal to 1/1000th of the radius. It was first proposed by Swiss engineer, Charles-Marc Dapples, in the mid-nineteenth century and came into prominent use for French artillery during World War I.
The established deflection of .10 mils is .9999 centimeters (cm) at 100 meters, or for all practical purposes, 1 cm. A difference of one ten-thousandth (.0001) of a centimeter is simply too small to be worthy of distinction. Even at 1000 meters, the margin of error would be a mere 1000th of a centimeter (99.99 vs 100 cm). Therefore, at 200 meters a tenth of a mil is considered 2 cm and at 300 meters it is 3 cm. We can extrapolate from these numbers to produce the table below.
Mil DeviationsIncremental Scope Adjustments of 0.10 Mils 100 meters = 10 cm100 meters = 1.0 cm 200 meters = 20 cm200 meters = 2.0 cm 300 meters = 30 cm300 meters = 3.0 cm 400 meters = 40 cm400 meters = 4.0 cm 500 meters = 50 cm500 meters = 5.0 cm 600 meters = 60 cm600 meters = 6.0 cm 700 meters = 70 cm700 meters = 7.0 cm 800 meters = 80 cm800 meters = 8.0 cm 900 meters = 90 cm900 meters = 9.0 cm 1000 meters = 100 cm1000 meters = 10.0 cm
Table 1. Mil and 0.10 mil deviations at ranges from 100 to 1000 meters.
Now for some real-world examples. Suppose you are firing a 140 grain 7.62 mm bullet, from a weapon zeroed at 100 meters, at a target that is 300 meters down range. The bullet drop would be 42 centimeters. You would need to adjust the elevation turret up by 14 increments, since each tenth of a mil would equal 3 cm at that distance. Next you are sighting with a Hornady 140 grain 6.5 mm Creedmoor at 500 meters and it is hitting 5 cm to the right. You would need to adjust your windage turret 1 increment to the left, since each tenth of a mil equals 5 cm at 500 meters.
MOA vs. MRAD
Each system has advantages. Here are a few considerations:
MOA Advantages
1/4 MOA adjustments (2.1675″@1000 yards) are nearly twice as refined as 1/10 mil adjustments (3.93701″@1000 yards).
MOA is more familiar if you live in a country that uses Imperial measurements.
Most ballistic tables are in feet and yards.
MRAD Advantages
Base 10 metric values calculate more easily.
More high-end equipment is MRAD & more pros use it.
The US Military and many other forces around the globe have standardized on MRAD, influencing production & use.
Beyond this, both systems are equally effective. The question is not which is superior but which is better for you. Generally, if you are more comfortable with the Imperial system of measurements (inches, feet, yards), than the MOA system will feel more familiar. If you favor the Metric system (centimeters, meters), then MRAD may quickly seem like an old friend. Whichever system you choose, you will probably require at least a passing understanding of the other because they overlap in some important ways.
Many scopes mix the two systems, having a mil dot reticle but turret adjustments in one-quarter minutes of arc.
Although math is simpler in the base-10 metric system, most ballistic charts are in imperial measurements, requiring conversion from feet and yards to centimeters and meters.
Subtension
Subtension refers to the length of arc at a set distance, described by two radii that are separated by a certain angle. Subtension is a relative term and subject to the system of measurement used. In the context of MOA, for example, it would be evaluated in arcminutes, yards and inches.
So, imagine that you are looking at an object at a distance of 100 yards and the width of your view is two minutes of arc. The subtension would be 2.094 inches. We would say that the angle of two MOA is subtended by an arc distance of 2.094 inches at 100 yards. Not surprisingly, an arc of one milliradian at 300 meters is subtended by a circumferential distance of 30 centimeters. While these terms may seem initially confusing, speaking correctly about such concepts is the beginning of thinking correctly about them and ultimately leads to the power of using them properly.
Subtension becomes valuable when using a scope reticle to calculate the size or distance of an object, as well as the accuracy of shot placement. Next we will examine the application of subtension for this purpose in greater detail.
Triangulation
The process of determining a distance or location by using the knowledge of two other points is known as triangulation. It applies equally to MOA and MRAD and the principles are the same. We will use the latter for illustration because the math is more transparent.
Mil scopes are those with turrets that adjust in increments of mils and also have crosshairs that are segmented into mils (the space between one dot center and another). Milliradian measurements can be used to zero your scope at a given range, assess your shot groupings, determine the size of a target or calculate the range.
You can determine the accuracy of your shots from a known distance by using the reticle as a ruler. If your rangefinder reads 1000 meters and your bullet lands 1 mil-space to the right, then you are off by about 100 cm or 1 meter (subtension). The size of groupings can be found by the same method. If your shots appear to be separated by no more than a mil at 1000 meters, then they are all within 1 meter of each other. Similarly, a target image that appears to be 1 mil high at a range of 1000 meters is actually about 1 meter tall. You can also calculate the range in meters if the target size is known. Just divide the size of your target in millimeters by the number of mils it spans on the reticle. Let us say that you are firing upon a paper sheet that is 1 meter square (1000 mm) and it spans 1 mil on the reticle. Dividing 1000 by 1 yields a quotient of 1000. The range is 1000 meters.
Magnification
Magnification is an important consideration when triangulating. If the reticle is installed on the first focal plane of the scope, it will alter by magnification exactly as the view and remain constant with respect to target image. Such a reticle may be used at every level of amplification. However, if the reticle is installed on the second focal plane, it will remain fixed in size as the view changes, varying the ratio between mils and image. In this case, triangulation may only be performed at one designated magnification; usually at the highest point or halfway.
Calculations and Conversions
Here are some formulae that make manipulating both Imperial and Metric measurements more accessible:
Formulae for Milliradian Based Reticles
Distance to Target (Yards): D=H/IÃ1000Where D is target distance (yards), H is target height (yards), I is image size (mils), and the quotient is multiplied by a factor of 1000.
Distance to Target (Yards): D=H/IÃ27.77Where D is target distance (yards), H is target height (inches), I is image size (mils), and the quotient is multiplied by a factor of 27.77.
Distance to Target (Meters): D=H/IÃ25.40Where D is target distance (meters), H is target height (inches), I is image size (mils), and the quotient is multiplied by a factor of 25.40.
Distance to Target (Meters): D=H/IÃ1000Where D is target distance (meters), H is target height (meters), I is image size (mils), and the quotient is multiplied by a factor of 1000.
Distance to Target (Meters): D=H/IÃ10Where D is target distance (meters), H is target height (centimeters), I is image size (mils), and the quotient is multiplied by a factor of 10.
Formulae for Arcminute Based Reticles
Distance to Target (Yards): D=H/IÃ95.5Where D is target distance (yards), H is target height (inches), I is image size (MOA), and the quotient is multiplied by a factor of 95.5.
Distance to Target (Meters): D=H/IÃ87.30Where D is target distance (meters), H is target height (inches), I is image size (MOA), and the quotient is multiplied by a factor of 87.30.
Distance to Target (Meters): D=H/IÃ3438Where D is target distance (meters), H is target height (meters), I is image size (MOA), and the quotient is multiplied by a factor of 3438.
Distance to Target (Meters): D=H/IÃ34.38Where D is target distance (meters), H is target height (centimeters), I is image size (MOA), and the quotient is multiplied by a factor of 34.38.
Application
So far, our examination of this subject has been mostly theoretical and the calculations approximate. In the field, there are many considerations. You need to watch a few hundred bullets of your favorite caliber go down range from your preferred setup before you can make calls that result in consistent hits at distances well over 100 yards. Still, shooting accurately begins with assumptions based on theory. Then it must be refined by hard core experience. There is no shortcut to shooting accurately in such highly variable situations as big-game hunting or battle. You just have to live there for a bit. Keeping that in mind, here is some useful advice.
Scope and Mount
Standardize on ONE System
Choose a scope that has reticle segments and turret increments in the same system and mount similar scopes on ALL of your weapons. Use either an MOA reticle and 0.25″ MOA adjustments or a mil-dot reticle and 0.1 MRAD adjustments. Splitting between the two will add an additional layer of complexity to your calculations when zeroing, ranging, etc.
Mount and Align Your Scope
Mount your scope as low as possible, using established procedures. This process has many variables and is beyond the breadth of this article. If you are unsure, have a gunsmith mount it for you.
Set Eye Relief
Check and adjust the eye relief. If the focal distance of the scope is not adjusted correctly, it will strike your forehead when the weapon recoils and cut a neat ring into your skin.
Align the Reticle
Make sure that the cross hairs are exactly in line with the vertical and horizontal planes. If they are not, all of your adjustments will be off. This condition is referred to as reticle cant.
Sighting In
Get Set & Level
Get yourself and the weapon set and solidly supported in a comfortable position, on a level plane. All testing and adjustments depend upon your steadiness and precision in handling the weapon.
Zero Point
Decide on a point at which you want the rifle to be dead-on. This should be chosen based on the bullet trajectory and your anticipated shooting range. Bullets travel in an arc, at first rising slightly with energy and then falling as they succumb to gravity. Consequently, your Point-of-Aim (POA) and Point-of-Impact (POI) intersect at two points: early and later in flight. Typically, you want to adjust the zero point so that where you are aiming and where the bullet will strike are close over a significant distance. Thus, you have a spectrum of ranges at which you will be accurate within a few inches.
In some cases your shooting distances may far exceed the overlap between POA and POI. In that case, you should make the weapon accurate at the target range you are most likely to encounter.
Test, Test & Test
Test repeatedly in three-shot groups, adjusting the weapon according to your results. Use the same factory ammunition or carefully constructed reloads every time, at the test bench and when engaged in the field.
Try to limit the variables with each testing session. Go at the same time of day, in the same weather, using your usual mode of dress, etc. Later during practice, you will deliberately alter these variables to improve your coping skills.
Ranging and Sizing
Making determinations of target size and range requires a keen eye for detail because images may appear quite small at a distance. Conversely, your target may be larger than the segmented portion of the reticule. Thus, arriving at accurate reading requires you to make an educated assessment. Here are a few pointers:
Multiply & Divide
Suppose your target is less than one graduation or is one plus a fraction. Compare the fraction with the next whole segment on the crosshair. Is it a forth, half, three-quarters?
What if your target is larger than the graduated portion of the crosshairs? Most scopes only span about 10 graduations along each axis (5 on either side of center for both vertical or horizontal). Position the scope so that one side of the target is at the edge of the dots or lines. How much of the target image is off the graduated portion? Imagine the dots or lines continuing. How many would there be? Another tactic is to divide your subject in half or into quarters and measure a section. Then multiply your reading accordingly to obtain the correct product number that represents the whole.
Increase Your Average
It may be difficult to assess the size or proximity of a target if it is standing on a hill, positioned at an angle, or shifting posture. In this case, it may be useful to take multiple measurements and average the results to obtain a more accurate product. Suppose you are targeting a pronghorn buck that is grazing on a hill. This animal is known to be about 36-40″ high at the shoulder. Use your reticle to measure the height from the shoulder to the front hooves. Now, readjust and evaluate the distance from the top of the hind quarters to the rear hooves. Add the two numbers and divide the sum by two. If your final value is 6 MOA, the buck is approximately 600 yards distant.
You can use the same technique when the subject has assumed two different stances while you are watching.
Scale
What if your target is standing near a known value, such as a fence line. Livestock fences average about 50 inches in height. Compare your subject to this and calculate accordingly.
Non-Graduated Reticles
Some reticles have only plain crosshairs but that need not defeat your purpose. Perhaps you are evaluating a black bear at 200 meters. While keeping the rifle very steady, put the crosshair at the shoulder of your target. Now use the elevation turret to slowly adjust the crosshairs halfway down to the paws while counting the clicks. You may need to estimate if it is standing in ground cover. Suppose it was 25 increments of 1/10th mil. Your subject is approximately 80 cm or 36 inches tall.
Holds and Windage Adjustments
Calculations do not always turn out clean and even. Sometimes the firing solution falls between adjustments. Suppose, for example that you need a vertical adjustment of 7.5 cm at 300 meters. Since each tenth of a milliradian is equal to 3 cm at that distance, there is no whole number of adjustments or “clicks” that would equal the necessary deviation. In order to compensate, you must perform a hold or hold-over. Making holds can be difficult, since you must estimate how much to aim above your target at a given distance to account for the adjustment. In the previous example, adjusting the vertical turret two increments up would elevate the POA 6 cm. Your hold must produce an elevation of 1.5 cm to complete the solution. Looking through a scope at 300 meters, this might be barely the thickness of the crosshair!
Holds are not always made because the solution lay between clicks. Suppose you are sitting on a powerline slash and an eight-point, white-tail buck crosses your field of vision at 150 yards. He will be back in the woods in a matter of seconds. There is no time to adjust your scope before you take the shot. If your rifle is zeroed at one-hundred yards, you will need to compensate by estimating how much to aim over your target for a strike.
Likewise, windage adjustments must sometimes be made on-the-fly. This is also referred to as Kentucky windage, no doubt a reference to the famed Kentucky frontier rifle and the skill of the men who used it. If you are compensating for a wind drift of 7.5 inches to the left at 300 yards, two clicks would bring you approximately six and a quarter inches of change. You would need to adjust your POA slightly to account for the remaining inch and a quarter.
Kentucky windage is used not only to account for motion of the air but also in leading a fast moving subject such as a bird in flight. Even though your target is moving much slower than a bullet, it will not be in the same place when the bullet arrives. You must aim ahead of your target enough to compensate for its forward motion while the bullet travels down range. Leading a moving object is a complex topic and performing it well is an art acquired over time. While it is beyond the breadth of this article, there are many fine writings available to instruct you.
One very useful tool for developing skill at windage adjustments is the Beaufort scale. It uses a series of common observations to estimate wind speed. One way to make your judgment of wind speed acute is to train with an anemometer. Digital anemometers accurately measure wind speed and are very affordable. Once you have used such a device to calibrate your perception of the wind, you can make precise calls on-the-fly with nothing but your five senses.
The Beaufort Scale
1mph-3 mphSmoke moves in direction of wind, slight movement of grass. 4 mph-7 mphWind felt lightly on the face *Very Accurate* 8 mph-12 mphLeaves turn, twigs and treetops will be in motion. 13 mph-18 mphLoose paper, dust, and paper will blow around, small tree branches will move. 19 mph-25 mphLarge tree branches move, entire trees will sway if small. 25 mph-30 mphLarge branches will be in constant motion and walking against the wind becomes difficult.
Between the Lines
Fine shooting is both a science and an art, which is why skilled shooters are so highly respected. There is much that falls between the measurements and calibrations. Equipment factors such as scope mount, action type, barrel length, rifling twist rate, bullet configuration, fouling and even barrel flux resulting from high temperature-among others-all affect placement. Your strength, visual acuity, breathing, shooting position, steadiness and mood determine your mastery over the weapon. Add situational variables including wind, altitude (which changes air density), luminosity, visibility, angle of inclination, distance and so on, and you have an infinitely fluid equation that results in a different answer every time. How well you control and interpret these elements will make the difference between a hit and a miss.
One way to improve your skill is to practice with known target sizes, at given distances, under varying conditions. Deliberately set up so that the target image is too small or too large, the wind and light are different, you are shooting up or down hill, etc. How does a 125 cm target look at 400 meters? What about a 9 inch target at 100 yards? How does your perception change in low light at dawn or dusk? What happens when you are shooting up toward your target?
This sort of practice will gradually calibrate your eye and your mind until it becomes an extension of the scope. You will, in effect, become one with your weapon. In fact, the truth is that YOU are the weapon. The rifle is merely a tool.
Use the information you have obtained here to improve your performance. Happy shooting!
This article is the outcome of much research and the first-hand practice of many shooters. However, individual experiences vary. If you have results that differ from ours or conflict with our findings, we would love to hear your perspective.
Planting population for different markets and cultivars
Sunflower is a drought tolerant crop produced mainly for two markets: confectionery or oilseed. The quality standards of the seeds produced, specially seed size and oil content, are different for oilseed and confectionery markets. The desired seed size for confectionery production is larger with relatively lower oil content, whereas the qualities desirable for oilseed are smaller seeds with high oil content. Despite different quality parameters, a majority of production practices for these two types are similar. The primary difference comes in the threshold for insect pest damage, where confectionery has a lower threshold compared to oilseed. Many studies at various locations across the US have shown that seeding rate is the major factor which determines the size and oil content of the seed, where high seeding rate tend to produce small seeds with greater oil content, and vice-versa. Because the size of confectionery sunflower seeds is critical for its market values, the crop produced for confectionery seeds is planted at relatively lower population than oilseed production. In addition to different markets, sunflower cultivars can be classified as either standard or dwarf. Standard cultivars are typically taller, with heights reaching up to 6 feet. Dwarf cultivars are typically much shorter, approximately 3 feet, and often will have a less likelihood for lodging. These standard and dwarf cultivars can also influence seeding rates and practices, with the dwarf cultivars typically being planted at higher seeding rates and narrower rows.
According to High Plains Sunflower Production Guide, final sunflower population should be 18,000 to 22,000 plants per acre for oilseed production and 12,000 (dryland) to 18,000 (irrigated) plants per acre for confectionery seed production. A study evaluating 5 different seeding rates of sunflower (RRC 8025 hybrid, confectionery seed) in the Oklahoma panhandle showed improved yield as planting population increased from 9,000 plants per acre to 25,000 plants per acre (Figure 1). However, the amount of yield increase with increasing plant populations diminished at the highest populations. For example, the gain in yield was 32% when population increased from 9,000 to 15,000 seeds per acre, 17% when population increased from 15,000 to 20,000 seeds per acre, and only 3.5% when population increased from 20,000 to 25,000 seeds per acre. However, these yields were not statistically different among different populations.
Seed spacing and depth uniformity
Besides population, the uniformity of plants influences the overall quality and survivability of the crop. Sunflowers require soil temperature of 50oF or above to germinate uniformly. According to Khalifa et al., (2000), ideal temperature for maximum sunflower seed germination rages from 59-77oF. The germination and germination rates decline above 95oF. Data generated by Robinson et al. (1982) showed that uniform and single spaced seed (1 plant per 80cm) will typically result in seed with higher oil content and lower moisture at harvest, compared to unevenly spaced plants. However, it is not only quality that is influenced, uneven spacing can result in up to 31% yield reductions. Plant spacing non-uniformities include large skips or crowded spacing which reduces yield contribution from individual plants. Several factors can contribute to uneven or non-uniform stands, including poor seeding conditions, high planter speed, disease, insect injury or poor quality seed (Kandel et al., 2013).
Differences in planters, planter adjustments and planting practices can play an important role in germination and uniform stands as well. For example, a no-till vacuum planter provided the best uniformity as it was able to obtain best spacing and uniform depth on a no-till sandy clay loam at 18% soil moisture content (Celik et al., 2007). Work from Celik et al. (2007) in sandy clay loam also showed that increase in planter speed only reduced germination time. The data from Oklahoma panhandle show average germination rate ranging from 70-80% for sunflower with different planter settings. This experiment showed that row cleaner had the major impact on emergence, where including a row cleaner improved germination by 11% followed by speed, which improved emergence by 4% when speed reduced from 7 mph to 5 mph. For detailed report on planter impact on germination readers are advised to refer to Celik et al. (2007).
Right planting depth is crucial for uniform germination of crops. In general, recommended planting depth for sunflower production is between 1-2 inches; and planting deeper than 3 inches is highly discouraged. In the Oklahoma panhandle, a trial evaluating planting depth found that planting at 1 inch resulted in higher yields than those of 2 inches, although this was not statistically significant (Figure 2). This could be due to less seed energy being spent to establish the crop at 1 inch. Because more seed energy is spent between germination and emergence with deeper planting depths, less energy is available for early crop establishment.
The results from those studies provided evidence of the impact of planting depth and population on sunflower yields. It should be noted that the results presented in this fact sheet from Oklahoma Panhandle were from a dwarf variety. Another variety planted for yield potential at the same field the same year was RRC 2414 (but not included for depth and population studies), which yielded 1688 (±232) lbs/acre. This variety was planted at 1” depth and was about 6 feet in height. Data from R.F. Meyers’ work in Colorado showed that sunflower yields tend to decline as planting date moves from May to June. The Oklahoma panhandle study was planted in second week of June. Therefore, the lower yields in these experiments could be due to late planting as well as lower germination rate than the above-mentioned studies. It should also be noted that the planter performance may vary with different soil types and planting conditions.
Figure 1. Sunflower yields for different planting populations.
Figure 2. Sunflower yield for 1 and 2 inch planting depth. Error bars represent standard deviation.
Figure 3. Sunflower emergence (%) under different planter settings at Oklahoma Panhandle Research and Extension Center in Goodwell, OK (adopted from: Godsey et al.).
Summary
In summary, we recommend the planting depth of sunflower seeds to be 1 inch. The confectionery seeds production should be planted at 15000 to 20,000 seeds per acre and up to 22000 for oilseed production. The planter speed tends to influence seed germination where 5 mph results in better germination than 7 mph. Therefore, seed depth and spacing should be checked while planting to make sure the depth and population are precise for a given speed.
References
Celik, A., I. Ozturk, T.R. Way. 2007. Effects of various planters on emergence and seed distribution uniformity of sunflower. Applied Engineering in Agriculture (23):57-61. Available at: ResearchGate: Effects of Various Planters on Emergence and Seed Distribution Uniformity of Sunflower
Godsey, C. Planting Decisions for Oklahoma Sunflower Production. Available at: https://www.sunflowernsa.com/uploads/17/godsey_plantingdecisionsoklahoma.pdfHigh Plains Sunflower Production Handbook. Colorado State University, Kansas State University, University of Nebraska, University of Wyoming. Available at: https://bookstore.ksre.ksu.edu/pubs/mf2384.pdfKandel, H. 2013. National Sunflower Crop Survey. North Dakota State University Extension Service. Available at: National Sunflower Association 2013 National Sunflower Crop SurveyKhalifa, F.M., A.A. Schneiter, E.I. ELtayeb. 2000. Temperature – Germination responses of sunflower (Helianthus annus L.) genotypes. HELIA 23: 97-104 Available at: file:///C:/Users/Sumit/Downloads/10.1515_helia.2000.23.33.97.pdf
Lopez, M.P., A.J. Hall. 2019. Sunflower oil yield responses to plant population and row spacing: vegetative and reproductive plasticity. Field Crops Research 230:17-30.National Sunflower Association. High Plains Sunflower Production Handbook. Available at: https://www.sunflowernsa.com/uploads/3/planting-sunflower.pdfSmith, J.A., M.F. Kocher. Evaluate planter meter and seed tube systems for seed spacing performance of confection sunflower seed to improve plant spacing in the field. https://www.sunflowernsa.com/uploads/research/330/Smith_PlanterMeter_08.pdf
Robinson, R.G., H.J. Ford, W.E. Lueschen, D.L. Rabas, D.D. Warnes, and J.V. Wiersma. 1982. Response of sunflower to unfromity of plant spacing. Agronomy Journal 74(2): 363-365.Warrick, B.E., Sunflower Production Guide. Texas A&M University. Available at: https://sanangelo.tamu.edu/extension/agronomy/agronomy-publications/sunflower-production-guide/
Exploring the Pros and Cons: Pump Air Rifle vs Break Barrel - Unveiling the key differences and advantages between two popular air rifle mechanisms....
")
")
")
")
")


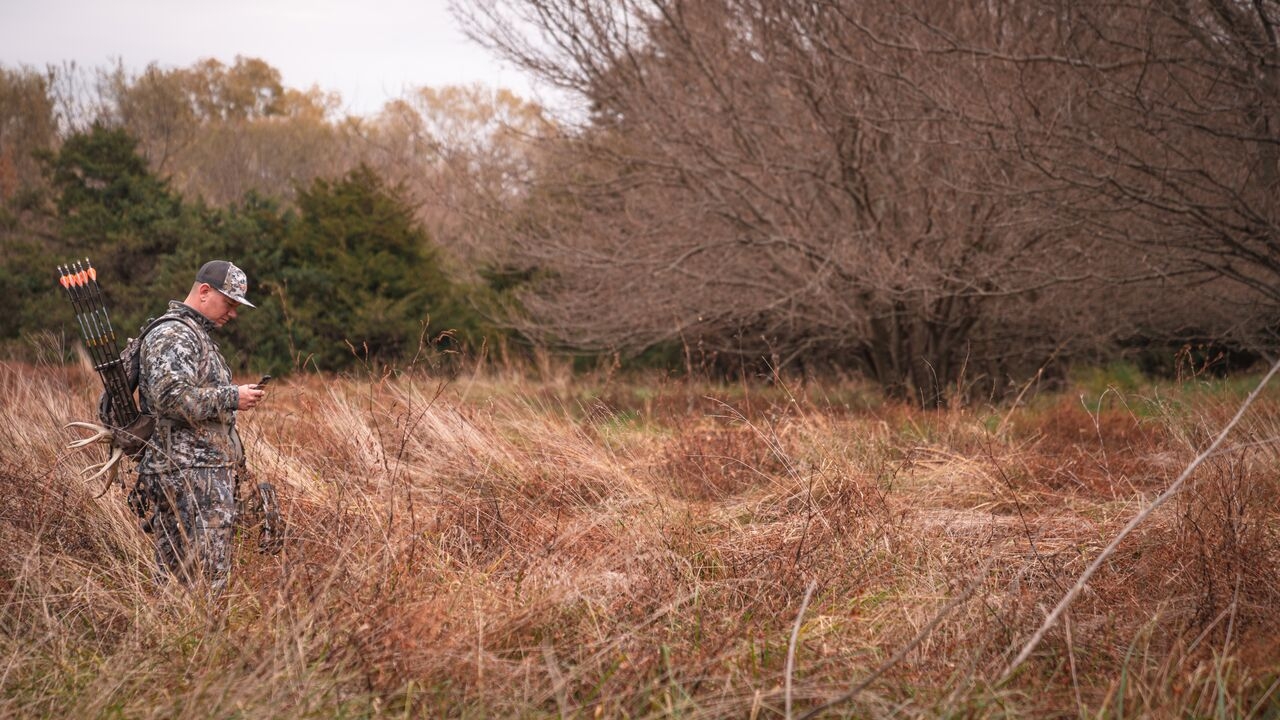


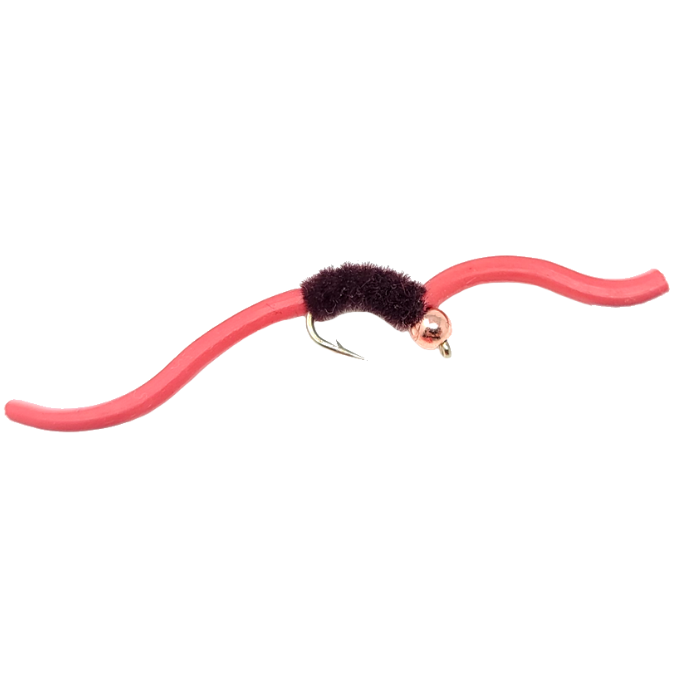


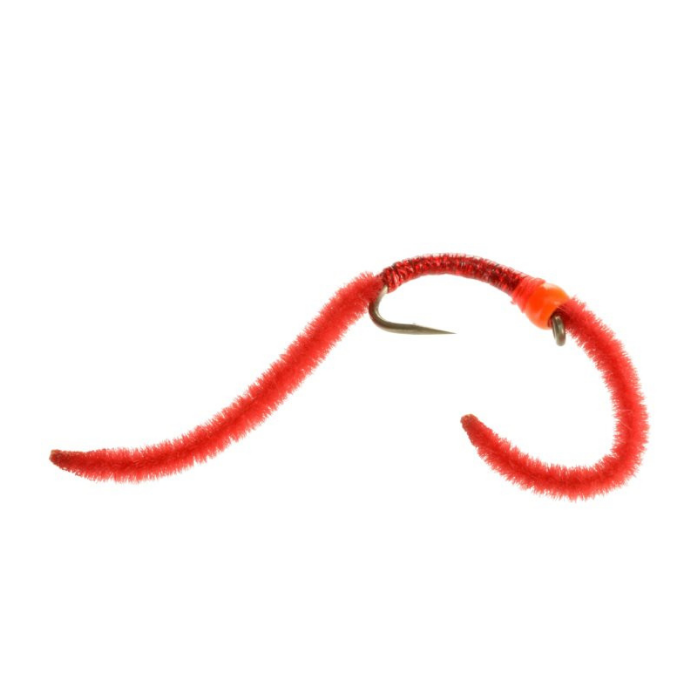


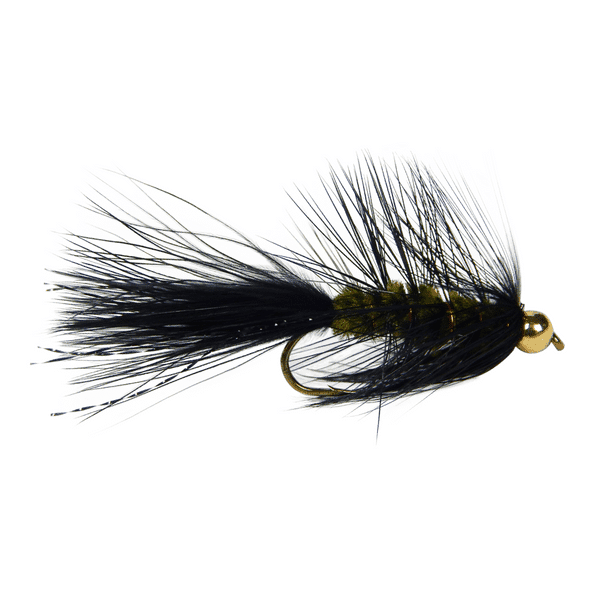


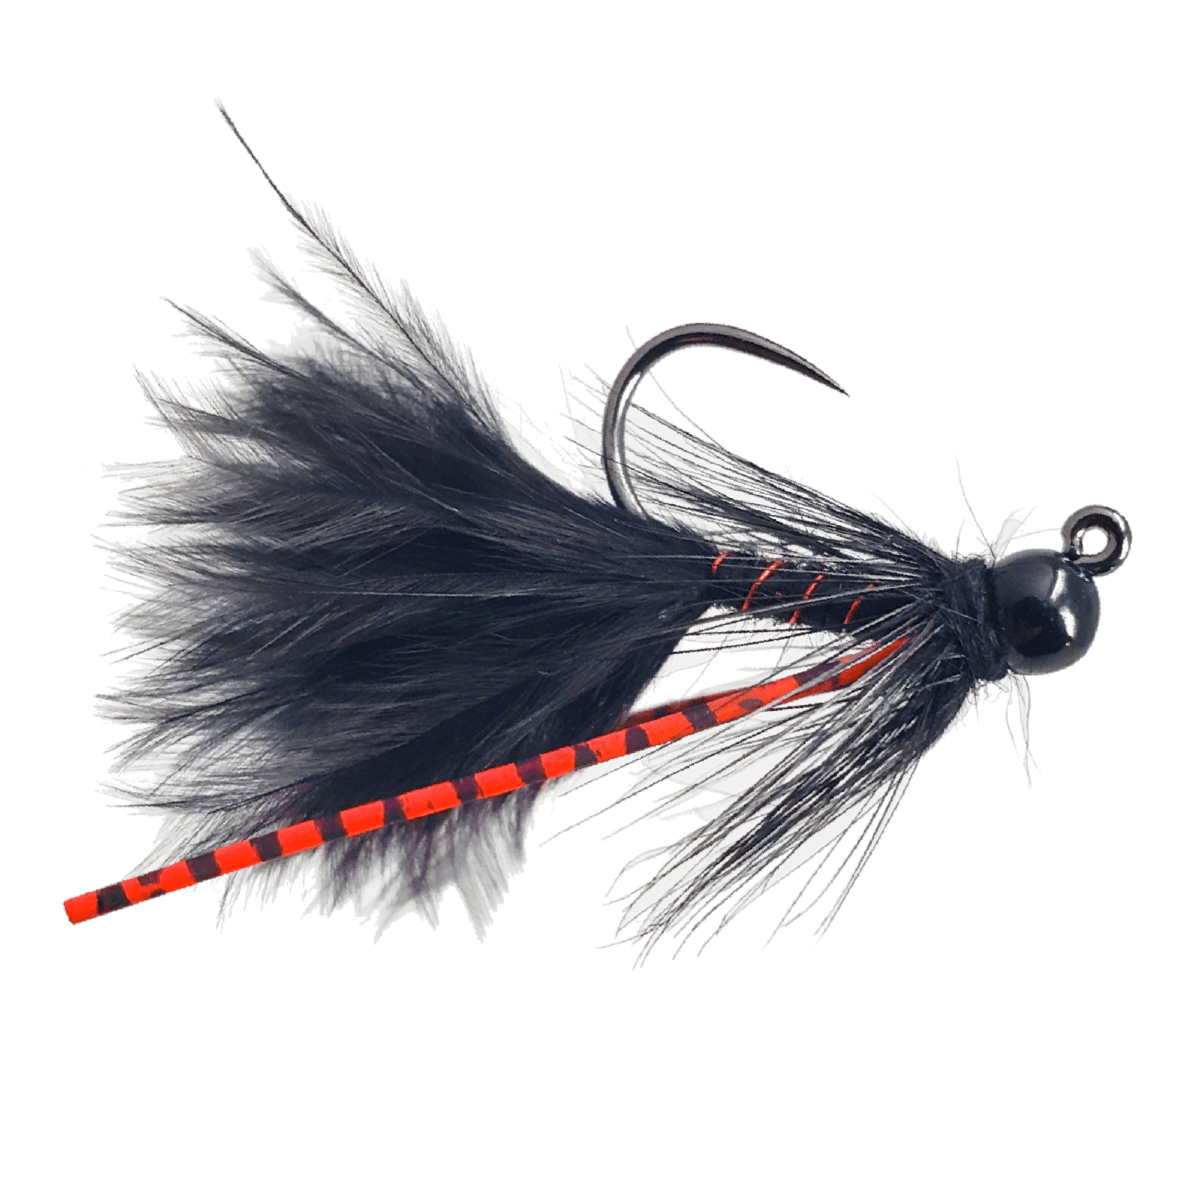


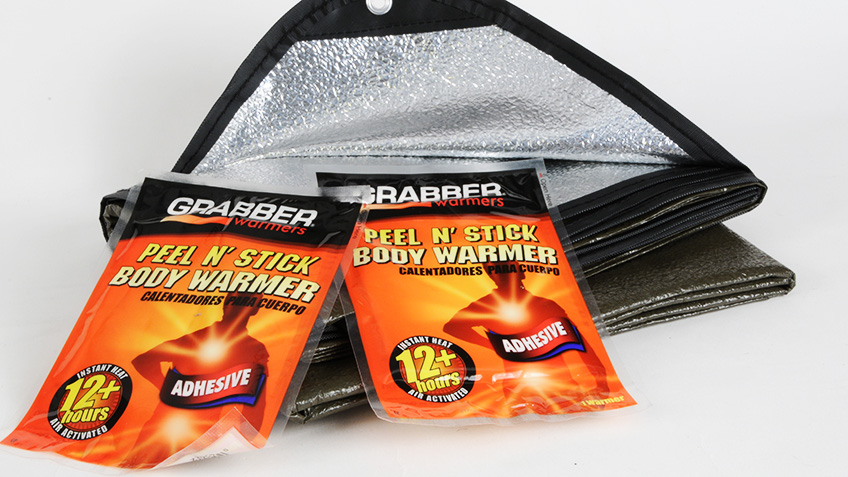

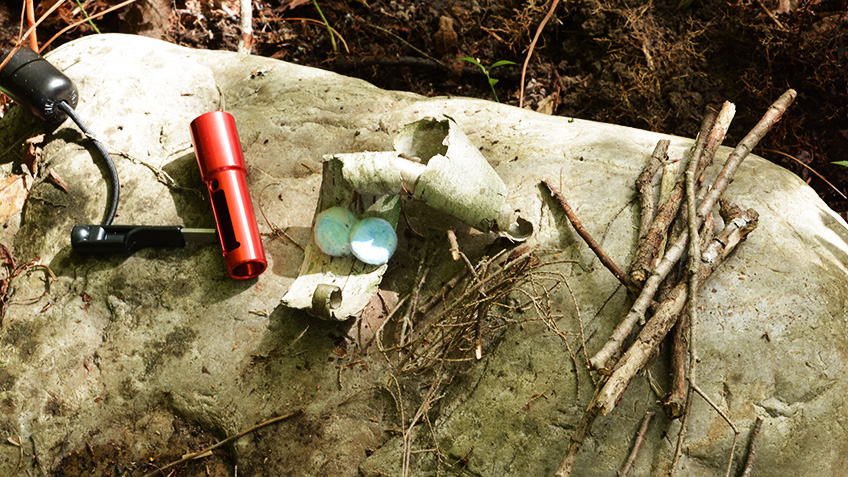
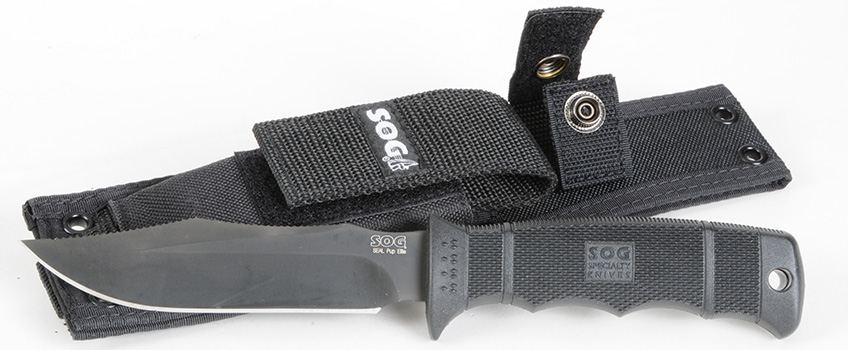
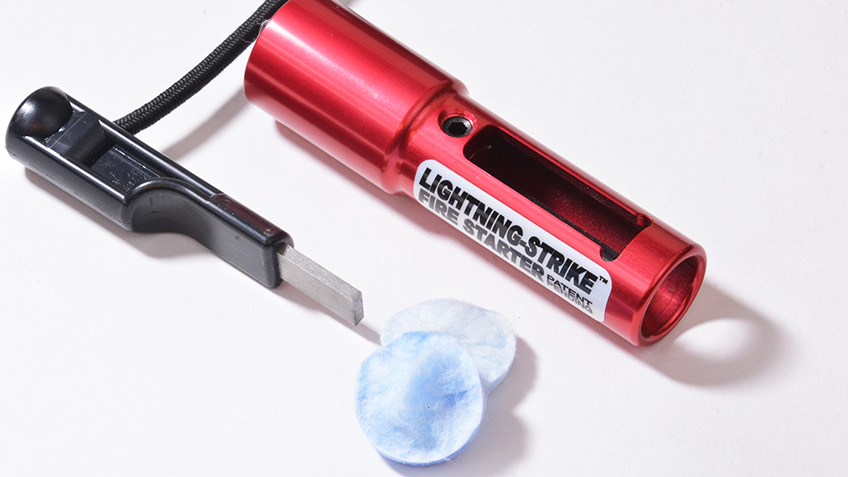

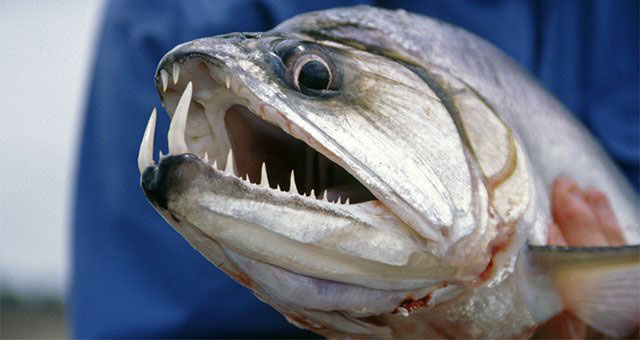


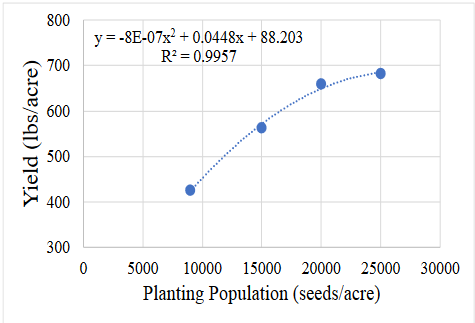 Figure 1. Sunflower yields for different planting populations.