If you’ve been shooting semi-automatic pistols for more than a minute, you’ve inevitably locked the slide to an open chamber position. You have shot to a condition where you have expended all remaining rounds in your magazine and have observed your slide locked to the rearward position. Whether you manually moved the slide into the locked position for an intended purpose, or it was done for you by the cycling of the semi-auto pistol slide, what is the real story behind expediently disengaging a pistol slide stop?
Before jumping right into the technical details, it’s a good idea to first address nomenclature. A slide stop, also referred to as a ‘slide lock’ and in certain cases (some would claim erroneously) a ‘slide release,’ is a functional spring-loaded lever found on most semi-automatic pistols that engages by moving it into a fitted notch located in the slide on the same side as the slide lock.
It is designed to firmly position (lock) a reciprocating pistol slide to the rear of the frame which can be accomplished manually by the shooter physically moving it into place by hand, or by the cycling of the semi-auto pistol slide after the last round of a magazine is fired – colloquially referred to as “shooting to slide lock.”
Technically speaking, upon expending the last and final round of any remaining ammunition in your magazine, the follower (moving magazine part located between your cartridges and magazine spring), depressing the slide stop spring (attached to the frame), presses up against the slide stop and causes it to engage in the slide stop notch cut into the slide which in turn causes the slide to be pinned in the rearward position of the pistol frame presenting an empty chamber.
When the shooter happens to notice slide lock either visually or by feel, it can be considered a positive indicator that there is no more ammo remaining in your handgun prompting the shooter to reload and get the gun back up and running.
Manually speaking the slide stop can be used to either clear a complex operational malfunction, for firearm maintenance or to lock the chamber in the open position allowing for visual and/ /or digital inspection to ensure that the pistol is in fact empty.
In the context of shooting to slide lock, it’s important to get your gun back into action as quickly as possible. The logical conclusion to observing that you have shot to slide lock is to seat another magazine into the magazine well and disengage the slide lock as to place the gun back into full battery.
Inserting and properly seating the magazine is fairly straightforward with few variations, however, disengaging the slide stop is a completely different matter and can be accomplished using varied methods worth discussing in detail.
If you find yourself in mid-motion of firing your gun, and it is the case that you run out of bullets, indicated by shooting to slide lock, then it logically follows that you need to replace the now-empty magazine with a fresh magazine filled, preferably to maximum capacity, with cartridges thereby replenishing your ammunition supply.
The final step to recovering from shooting to slide lock is to disengage the slide lock placing the gun back into battery which can be accomplished expediently and consistently with a handful of varied techniques.
The Claw
Although not the fastest method available to place the slide back into battery, it is favored predominantly by the traditional defensive shooting community. Reason being that applying all four fingers you can work the slide even if you get one of them and/ or your thumb injured in a gunfight. It’s consistent with keeping 6 and 12 alignment in the workbox area therefore not needing to turn the pistol along its bore line axis at any time, conducive to clearing most common operational malfunctions and provides the shooter with yet another option to do a press check to ensure that there is in fact a round in battery if that is part of their standard operational procedure.
The Slingshot
The next most common is the sling shot method which is about the same response time as the claw. Although not really faster or slower it does require that the pistol be turned on its bore line axis that the support hand palm faces the strong hand to initiate the “pinch” or slingshot-like grasp (hence its namesake) utilizing the forefinger and the thumb.
The Slide Lock
Utilizing the slide lock itself to place the firearm back in battery offers the quickest response time. However, as no slick move comes without a price tag, one of the downsides is that if you are using your strongside thumb, based on the size of your hand you may need to reposition the gun in your hand moving the muzzle out of alignment which negates any time you may have saved.
Another potential hazard is of your hands may be cold, oily, sweaty, bloody, etc., which may cause slippage off the slide lock, an inconsistency that could cost valuable time. To bypass this potential hazard several gun parts manufacturers offer third-party oversized slide stops specifically designed with greater contact surface area for a more positive thumb placement. The downside to the oversized single-side or ambi third party slide locks is that if you have a large hand or big, long thumbs, this oversized landing pad can be inadvertently depressed during normal operation and cause a failure to lock back with an empty magazine.
Last but certainly not least is to utilize your support side thumb. Certain agencies and departments that also issue semi-auto AR platform carbines to their employees, train their shooters to hit the bolt catch (locking the bolt carrier assembly to the rear) sending the bolt forward and a round in battery using their support hand thumb. Those same officers are offered the option to employ the same support-side thumb technique to their pistols, therefore maintaining uniform operational consistency between issued shooting platforms.
Given these options and others not listed in the limited space here such as fighting through an injury (employing strong-hand-only and support-hand-only reloads on a belt, holster, boot heel, knees etc.,) the bottom line in disengaging the slide lock is to find that perfect balance between speed and consistency in exchange for an acceptable price tag.
What’s the best low light hunting scope you should take afield?
I think most hunters can likely agree that choosing the best low light hunting scope can be pretty tough, especially for those who are new to hunting or just don’t know a lot about optics in general.
It’s easy to get overwhelmed when searching for hunting scopes on the internet or when browsing the optics section of a sporting goods store. Even if you get past that initial overwhelming shock of seeing the sheer variety of optics choices billed as “low light hunting scopes,” cutting through the marketing jargon optics companies use to sell their products is a massive task itself.
I know how you feel and I’ve experienced much of that same frustration myself.
Though I’ve never owned a truly bad scope, I freely admit that I’ve purchased a few models that I wasn’t happy with and would not recommend to others. Nobody likes wasting money on a product that doesn’t live up to expectations and finding out you bought a sub-par rifle scope after having high expectations about how it would perform will definitley leave a bad taste in your mouth.
The good news is that we’re living in something of a golden age for hunting optics and the best scopes today are much better than was the case even 10 years ago. Indeed, there is a plethora of quality hunting scopes on the market today that provide exceptional performance at the range and afield.
In this post, I share my picks for the best low light hunting scopes. None of them are perfect, but the right scope can provide a vital edge when you need it most.
This is especially true during low-light conditions when many species of big game are most active. A scope with good low light performance can mean the difference between going home empty handed and punching your tag on the buck or bull of your dreams in a situation like that.
Before we get started, here’s a disclaimer: some of the links below are affiliate links. This means I will earn a small commission if you make a purchase.
This commission comes at no extra cost to you. This helps support the blog and allows me to continue to create free content that’s useful to hunters like yourself. Thanks for your support.
Now that we’ve got that out of the way, let’s get started.
Feel free to scroll straight through the article, or click one of the links below to jump straight to the best low light rifle scope in the specific category you’re looking for.
Best Value Low Light Hunting Scope
Best Low Light Hunting Scope Under $200
Best Low Light Hunting Scope Under $1,000
Best Low Light Hunting Scope Under $2,000
Best Low Light Hunting Scope Under $3,000
Best Overall Low Light Hunting Scope
Best Leupold Low Light Hunting Scope
Best Vortex Low Light Hunting Scope
Best Long Range Low Light Hunting Scope
Best Value Low Light Hunting Scope
Leupold VX-5HD 3-15x44mm
I’ll cut straight to the chase: I think the Leupold VX-5HD is the best value low light hunting scope currently available on the market. Not only that, but this is my favorite hunting scope in general. Period.
Why? Well, the VX-5HD has fantastic glass with special anti-reflective coatings to provide outstanding light transmission. Plus, this particular model of the VX-5HD I’m recommending here also uses an illuminated FireDot Duplex reticle. Basically, it’s a standard duplex crosshair with an illuminated red dot in the center that you can turn on and off.
It works just like a typical scope during the day, but you can turn on that illuminated reticle to aid in aiming during low light conditions. I’ve been in several situations where I had game come out during legal shooting light, but it was dark enough that I had trouble seeing the animals with my naked eye.
Fortunately, the light gathering capabilities of the VX-5HD are so fantastic that I could see much better while looking through the scope.
For example, I successfully and cleanly took a big blue wildebeest with my VX-5 on a recent hunt in Africa at dusk when it was dark enough that I could not see the black crosshairs on his dark body. However, I just turned on the illuminated reticle, put the dot where I wanted to hit, squeezed the trigger, and he dropped at the shot.
There’s no way I could have ethically or practically taken that shot with a scope without that fantastic light transmission and without the illuminated reticle.
It’s also really easy to adjust the brightness of that FireDot reticle as well to turn it up for use during the day if desired, or turn it way down to minimize glare inside the scope for use in low light conditions.
The Leupold VX-5HD also comes with Leupold’s CDS-ZL system and a side focus parallax adjustment dial. Additionally, it has a wide zoom range from 3x all the way up to 15x on the high end that make it well suited for basically any hunting situation you can think of from whitetail in thick timber to open country pronghorn hunts.
This scope is also really well built, tracks beautifully, and holds a zero exceptionally well.
To be fair, the Leupold VX-6HD line has a few additional features that some hunters really like, but I own and have hunted with both. In my opinion, the VX-5HD provides the best balance of size, weight, price, and the features that are most important to me.
And yes, a couple of other scopes on this list provide even better low light performance, but all are considerably more expensive than the Leupold VX-5HD.
All in all, this is a fantastic low light hunting scope that provides high end performance at a surprisingly reasonable price. If that big buck or bull of your dreams steps out of the woods right at last light, you want a scope like the VX-5HD on your hunting rifle so you can make that shot when it counts.
Key Features
Weight: 19.7 ounces
Magnification Range: 3-15x
Objective Lens Diameter: 44mm
Exit Pupil (low magnification): 14.67mm
Exit Pupil (high magnification): 2.93mm
Tube Diameter: 30mm
Field of View: 38.3-7.7 feet at 100 yards
Turret Click Values: .25 MOA
Reticle Focal Plane: Second
Parallax/Focus: Side adjusting parallax/focus knob
Illuminated reticle is perfect for low light situations
Great balance of useful features without too many unnecessary “extras”
Cons
On the heavy side
Lacks throw level on magnification ring
Higher price point
BUY A LEUPOLD VX-5HD SCOPE ON AMAZON HERE
BUY A LEUPOLD VX-5HD SCOPE AT EURO OPTIC HERE
BUY A LEUPOLD VX-5HD SCOPE AT OPTICS PLANET HERE
Best Low Light Scope For Hunting Under $200
Vortex Crossfire II
The Vortex Crossfire II is a great entry level rifle scope and is exactly what you need if you want a no frills low light scope under $200 and don’t want to do a lot of shopping.
Let’s be realistic here: the Vortex Optics Crossfire II does not provide light transmission or image quality on par with some of the more expensive optics on this list. However, it’s still a capable low light hunting scope for those who don’t need a high performance optic and is a big step up over other lower price point scopes like the Bushnell Banner Dusk & Dawn.
This is because it has multi-coated lenses that facilitate light transmission and clarity under a variety of circumstances. It’s also available with a V-Brite Illuminated reticle as an additional option for those who want a more clearly defined aiming point at dawn or dusk.
Make no mistake: it’s more than adequate for many hunting situations, especially for hunters on a tight budget. I’d recommend moving up to something a little nicer if your budget allows though.
Key Features
Weight: 14.3 ounces
Magnification Range: 3-9x
Objective Lens Diameter: 40mm
Exit Pupil (low magnification): 13.33mm
Exit Pupil (high magnification): 4.44mm
Tube Diameter: 1-inch main tube
Field of View: 34.1-12.6 feet at 100 yards
Turret Click Values: .25 MOA
Reticle Focal Plane: Second
Parallax/Focus: Fixed at 100 yards
Knob Style: Capped
Illuminated Reticle: Yes (optional)
Pros
Light and compact
Very reasonable price
Perfect for a budget conscious deer hunter
Good glass
Cons
Lower image quality than the higher end scopes
Restrictive eye box
No parallax adjustment dial
BUY A VORTEX CROSSFIRE II SCOPE ON AMAZON HERE
BUY A VORTEX CROSSFIRE II SCOPE ON EURO OPTIC HERE
BUY A VORTEX CROSSFIRE II SCOPE AT OPTICS PLANET HERE
Best Low Light Hunting Scope Under $1,000
Zeiss Conquest V4 3-12x44mm
European companies like Zeiss, Schmitt & Bender, and Swarovski (more on the others in a minute) are all known for producing outstanding quality optics in general. You tend to get what you pay for with that stuff though and European optics are also generally very expensive.
Fortunately, the Zeiss Conquest V4 is a great way to get a high quality European rifle scope with excellent light transmission capabilities for less than $1,000. This scope does not have a lot of “bells and whistles”, but it’s still an excellent German scope with great low light performance. Indeed Zeiss advertises that it uses six-layer multi-coated lenses to offer exceptional 90% light transmission and a clear sight picture.
This is not billed as an extremely lightweight hunting scope or one that’s ideally suited for long range hunting situations (look at something like the Zeiss Victory V, Victory HT, Conquest V6, or V8 if you want something along those lines). However, the Conquest V4 is an outstanding choice for a hunter who wants a good low light scope without paying for a bunch of extra features.
Key Features
Weight: 22.5 ounces
Magnification Range: 3-12x
Objective Lens Diameter: 44mm
Exit Pupil (low magnification): 14.66mm
Exit Pupil (high magnification): 3.66mm
Tube Diameter: 30mm
Field of View: 19-4.8 feet at 100 meters
Turret Click Values: .25 MOA
Reticle Focal Plane: Second
Parallax/Focus: Fixed at 50 yards
Knob Style: Capped
Illuminated Reticle: No
Pros
Excellent light transmission at a reasonable price
Very good quality glass
Perfect for a hunter who wants a good scope without a bunch of “extras”
Very durable
Cons
Physically on the large and heavy side
Smaller field of view
No parallax adjustment dial
No illuminated reticle
BUY A ZEISS CONQUEST SCOPE FROM AMAZON HERE
BUY A ZEISS CONQUEST SCOPE FROM EURO OPTIC HERE
BUY A ZEISS CONQUEST SCOPE FROM OPTICS PLANET HERE
Best Low Light Hunting Scope Under $2,000
Schmidt & Bender 3-12×50 Klassik
The Schmidt & Bender 3-12x50mm Klassik rifle scope is yet another great low light hunting scope from a European manufacturer. Closely related to the 3-12x50mm PM II USMC model the United States Marine Corps used on their sniper rifles for years, the Schmidt & Bender Klassik delivers a great balance of incredibly clearly glass, exceptional light transmission, and outstanding durability.
Don’t let the price of relative lack of marketing for this scope in the Untied States fool you: this is definitely one of the best low light hunting scopes available and has light gathering and transmission capabilities that perform right up there with some higher end (and much more expensive) models also on this list. Plus, it also has an illuminated reticle to further facilitate precision shooting under challenging lighting conditions.
To be perfectly honest, this scope is so good under low light conditions that it could even potentially get you into trouble by allowing you to take a shot outside legal shooting hours if you’re not careful!
All things considered, the Schmidt & Bender 3-12x50mm Klassik rifle scope is the perfect low light hunting scope for someone who wants the best possible light transmission and incredible durability without any extra or unnecessary features and without spending over $2,000.
Key Features
Weight: 21.8 ounces
Magnification Range: 3-12x
Objective Lens Diameter: 50mm
Exit Pupil (low magnification): 14.4mm
Exit Pupil (high magnification): 4.2mm
Tube Diameter: 30mm
Field of View: 11.1-36.4 feet at 100 meters
Turret Click Values: .25 MOA
Reticle Focal Plane: First
Parallax/Focus: Fixed
Knob Style: Capped Windage & Elevation
Illuminated Reticle: Yes
Pros
Extremely durable
Outstanding glass
Illuminated reticle
Great for a hunter who wants an outstanding good scope without a bunch of “extras”
Cons
On the heavier side
Higher price point
BUY A SCHMIDT AND BENDER KLASSIK SCOPE FROM EURO OPTIC HERE
BUY A SCHMIDT AND BENDER KLASSIK SCOPE FROM OPTICS PLANET HERE
Best Low Light Hunting Scope Under $3,000
Swaroviski Z6i 2-12x50mm
We can’t talk about low light hunting scopes without mentioning Swarovski. Specifically, I think the Swarovski Z 6i 2-12x50mm scope is the best low light hunting scope under $3,000.
Swarovski optics are known for having some of the absolute best quality glass in the business. Well, the Z6i is one of their higher end scopes and uses incredible glass that provides outstanding transmission while at the same time minimizing glare and reflection.
The Swarovski Z6i also has an illuminated reticle that also facilitates aiming under dim lighting conditions. Users also have the option of adding a custom elevation turret for use at longer range. The wide zoom range combined with the with the large 50 mm objective lens also makes this a very flexible scope with a large exit pupil across a wide magnification range.
Plus, this scope is surprisingly lightweight considering its overall quality and the extra features it comes with.
All things considered, it’s tough to argue with a combination of crystal-clear images, incredible light transmission, moderate weight, and those additional features that make the Swaro Z6i such an excellent hunting scope both for use during the middle of the day as well as at dawn and dusk when things are so challenging.
In fact, someone could definitely make the argument that the Swarovski Z6i is the top overall pick on this list of the best low light rifle scopes.
If price is no option in your search for the absolute best possible low light hunting scope, then the Tangent Theta TT315 is what you need. A word of warning though: there’s a good chance you’ll never want anything else after you try out a Tangent Theta TT315.
This scope is specifically designed for professional marksman and incorporated all the features most useful in that role. Since those marksmen must look through their scope for long periods of time and depend on that scope to see minute target details, the TT315M has unsurpassed image quality and light transmission capabilities that allow the shooter to see the tiniest details of their target without eye fatigue and under periods of low light.
There are two downsides of this scope though: it’s very heavy and it’s very expensive.
To be perfectly honest, the vast majority of hunters do not need the low light performance of the Tangent Theta TT315 and there are plenty of other great low light scopes that aren’t quite as heavy or expensive. However, this is definitely the best low light rifle scope for those who do want/need that performance and who don’t mind shelling out a bunch of cash for this scope or lugging it around.
Key Features
Weight: 36.15 ounces
Magnification Range: 3-15x
Objective Lens Diameter: 50mm
Exit Pupil (low magnification): 11.5mm
Exit Pupil (high magnification): 3.5mm
Tube Diameter: 34mm
Field of View: 12.8-2.8 meters at 100 meters
Turret Click Values: .1 Mil
Parallax/Focus: Side adjusting parallax/focus knob
Knob Style: Non-translating knobs with elevation zero-stop & mechanical windage direction indicator
The Leupold VX-6HD product line is Leupold’s top end hunting scope lineup and the 3-18x50mm version of the VX-6HD is definitely the best Leupold low light hunting scope. I also think this line contains some of their best rifle scopes overall as well.
This is because it uses outstanding glass with superior coatings that facilitates excellent light transmission. Plus, this particular scope also has an illuminated FireDot Duplex reticle. Just like the VX-5HD I mentioned earlier, the FireDot Duplex reticle is a standard duplex crosshair with an illuminated red dot in the center that you can turn on and off.
The VX-6HD is basically an upgraded VX-5HD with a wider zoom range (6x instead of 5x), a little bit better quality glass, and a couple of other extra features many hunters like having like a reversible throw lever, an electronic reticle level, and flip up alumina lens covers.
While I think the VX-5HD is the best value low light hunting scope, those extra features and capability of the VX-6HD make it a better choice for other hunters who want a little bit better scope with slightly better low light performance, a couple of extra features, and who don’t mind spending a little bit more.
All things considered, the Leupold VX-6HD is an outstanding low light hunting scope. This scope provides a substantial improvement in low light performance over the VX-Freedom and VX-3HD scope lines as well as a modest improvement over the VX-5HD both overall and in the role of a low-light scope.
The VX-6HD definitely won’t let you down if you need to make a shot under low light conditions.
Key Features
Weight: 22.9 ounces
Magnification Range: 3-18x
Objective Lens Diameter: 50mm
Exit Pupil (low magnification): 16.67mm
Exit Pupil (high magnification): 2.77mm
Tube Diameter: 30mm
Field of View: 38.3-6.4 feet at 100 yards
Turret Click Values: .25 MOA
Reticle Focal Plane: Second
Parallax/Focus: Side adjusting parallax/focus knob
Illuminated reticle is perfect for low light situations
Just about every feature you could want on a hunting scope
Cons
On the large and heavy side
Higher price point
BUY A LEUPOLD VX-6HD SCOPE ON AMAZON HERE
BUY A LEUPOLD VX-6HD SCOPE ON EURO OPTIC HERE
BUY A LEUPOLD VX-6HD SCOPE AT OPTICS PLANET HERE
Best Vortex Low Light Hunting Scope
Vortex Razor HD LHT 3-15×50
Look no further than the Vortex Razor HD LHT if you want the best Vortex low light hunting scope. This scope uses high quality glass, has a reticle with a center illuminated dot, a side parallax knob, and an exposed elevation turret with Vortex’s RevStop Zero System (their version of a a zero stop).
There’s a reason why Vortex Optics markets the Razor HD LHT as “one scope to rule them all” and this scope has much improved low light performance over their lower tier Crossfire, Diamondback, and Viper lines. Not only his the Razor HD LHT a better low light hunting scope, but it’s also just a better performing rifle scope overall.
Indeed, it’s well suited for use in dark-timber on whitetails as well as for open country antelope or elk hunts where precision long range shots may be necessary.
The Razor HD LHT also comes with a coupon you can redeem with Kentron Industries to receive a custom elevation turret matched to your favorite hunting load to assist with making long shots on game and at the range.
Finally, the illuminated reticle is especially nice for use in low light conditions where there’s still legal shooting light, but it may be too dark to see the reticle. Just turn on the illuminated center dot, place that red dot where you want to hit, and squeeze the trigger. The reticle also works just fine during the daytime when illumination is turned off.
If you want the absolute best Vortex low light hunting scope, then the Vortex Razor HD LHT is just what the doctor ordered.
Key Features
Weight: 19.1 ounces
Magnification Range: 3-15x
Objective Lens Diameter: 42mm
Exit Pupil (low magnification): 14mm
Exit Pupil (high magnification): 2.8mm
Tube Diameter: 30mm
Field of View: 35.3-7.0 feet at 100 yards
Turret Click Values: .25 MOA
Reticle Focal Plane: Second
Parallax/Focus: Side adjusting parallax/focus knob
Knob Style: Exposed elevation turret (MOA)
Illuminated Reticle: Yes
Pros
Can order a custom elevation dial
Excellent glass quality
Illuminated center dot
Well suited for a variety of deer hunting situations
Cons
Busy reticle
On heavy side
BUY A VORTEX RAZOR SCOPE ON AMAZON HERE
BUY A VORTEX RAZOR SCOPE ON EURO OPTIC HERE
BUY A VORTEX RAZOR SCOPE AT OPTICS PLANET HERE
Best Long Range Low Light Hunting Scope
Nightforce ATACR 5-25×56
With a gigantic 56mm objective lens and fully multi-coated ED glass, the Nightforce ATACR is another excellent addition to this list of low-light scopes. This scope also has a large 34mm main tube and a zoom range from 5x all the way up to 25x on the high end that facilitates use at longer ranges.
It also provides over 35 mils of elevation adjustment. This scope is also available in first focal plane and second focal plane configurations. For those reasons, I think the ATACR is the best long range low light hunting scope.
So, this is the best rifle scope for you if you’re looking for something with excellent low light performance that you can also use to reach out to extreme ranges with.
Key Features
Weight: 39.1 ounces
Magnification Range: 5-25x
Objective Lens Diameter: 56mm
Exit Pupil (low magnification): 10.5mm
Exit Pupil (high magnification): 2.2mm
Tube Diameter: 34mm
Field of View: 18-4.9 feet at 100 yards
Turret Click Values: .25 MOA or .1 MRAD
Parallax/Focus: Side adjusting parallax/focus knob
“Unveiling the Truth: Can You Safely Keep a PCP Air Rifle Charged? Discover the Essential Guidelines and Precautions to Ensure Longevity and Optimal Performance of Your PCP Air Rifle. Stay Informed and Make Informed Decisions for a Safe and Reliable Shooting Experience.”
can you leave a pcp air rifle charged?
Many shooters are often unsure about whether it is safe to leave a PCP (Pre-Charged Pneumatic) air rifle charged for extended periods. The answer to this question largely depends on the specific model and manufacturer’s recommendations. However, in general, it is not advisable to leave a PCP air rifle charged for long durations.
Leaving a PCP air rifle pressurized can lead to several potential issues. One of the main concerns is the possibility of pressure loss over time. Even when not in use, small leaks can occur due to various factors, such as seal deterioration or valve malfunctions. This can result in reduced performance or complete discharge of the air reservoir, rendering the rifle unusable until recharged.
Additionally, leaving a PCP air rifle charged continuously may put unnecessary strain on its components and reduce overall longevity. It is recommended to follow the manufacturer’s guidelines regarding storage and depressurization procedures. Properly venting the air reservoir after shooting sessions and storing the rifle in a cool, dry place can help maintain optimal performance and prolong its lifespan.
In conclusion, it is not recommended to leave a PCP air rifle charged for an extended period of time due to safety concerns. It is important to follow proper storage procedures and discharge the air rifle when not in use to prevent accidents or damage.
When it comes to geese and duck hunting, the gun gets a lot of attention. Many people believe that having a successful season depends on whether or not you have the right gun. But surprisingly what affects the success of your shot is the choke. As a result, it is critical to choose the best choke for duck hunting. Use these guidelines to help you choose an appropriate choke for your firearm.
A shotgun choke is a narrowing or constriction that is present in the barrel that is usually a few inches from the muzzle. Every shotgun barrel has a choke or constriction that is either manufactured into the barrel, screwed in, or detachable.
When a shell is fired, it goes down the barrel, and the choke’s duty is to compress or constrict it before it leaves. This compression plays an important role in the patterning of the shot.
There are three types of choke tubes:
Full Choke
Modified Choke
Improved Cylinder Choke
Full Chokes
The constriction of a full choke is very tight. This choke is useful for rodents, turkeys, and other wildlife shot at 50-yard and longer distances since the shot holds together further.
Modified Chokes
The constriction in the modified choke is moderate. The bullets stay together for longer, resulting in a fuller shot string that is more helpful at longer distances. This choke is frequently utilized for duck hunting and geese hunting. Improved modified chokes are a significantly tighter version of the modified choke.
Improved Cylinder Chokes
A minor constriction exists in the improved cylinder choke. This choke helps gunshots spread rapidly. It is usually used for shooting at close ranges. It is a great option for small birds, rabbits, and other highland animals.
Whether you’re a waterfowler or a duck hunter, your goal is twofold: first, you must determine how far away the bird is when you’re firing and then choose the choke tube that produces the best pattern at that range. The only way of knowing what your choke will do while outdoors is to test it with your firearm and ammunition.
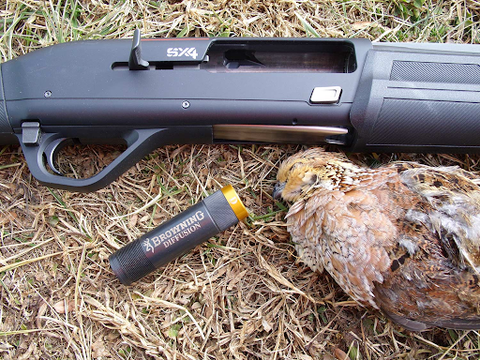
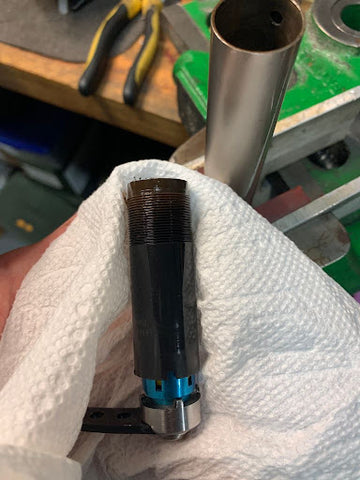
Notches on Choke Tubes
Credit: The Yorkshire Gent
Most choke tubes have notches on them. These are not accidental. The number of notches reflects how much constraint the choke provides; the more notches, the more constraint, and the more constraint the choke provides, the greater the distance of your shot pattern. However, not all chokes are made equal, and various ammunition will react differently, so it’s always a good idea to pattern your shotgun before going out hunting with it.
List of Best Chokes for Duck and Goose Hunting
Here are the best chokes for duck and goose hunting:
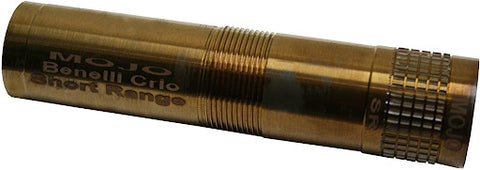
1) Fatal Shot Choke Tube by MOJO Outdoors
The MOJO Outdoors Fatal Shot Choke Tube is suitable for a wide range of shotguns and was developed after years of data and testing of shot patterns. It even runs different ammunition and cartridge varieties. This makes it the ideal choke tube for target sports and duck hunting. The choke is available in three lengths and has a screwless setup, allowing you to change it out as required in the field.
2) CARLSON’S 12 Gauge Choke Tube
The Carlson’s 12 Gauge Choke Tube is made for goose hunting at long-range distances and gives results similar to a full choke. The internal rings present slow the bullet down, allowing the shot to divide as it leaves the muzzle. If you’re looking for a complete package, this is the choke tube to have.
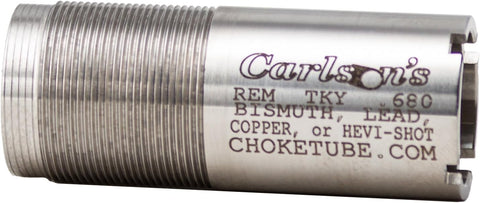
3) CARLSON’S Choke Tubes 12 Gauge for Remington
Another one from Carlson’s, this choke tube is typically recognized as one of the best and most precise designs available for turkeys. Turkeys and other birds don’t always fly in regular patterns, and they don’t always remain close, so this waterfowl choke tube comes in handy when you’re out in the woods. This can survive even the harshest weather during hunting season, thanks to its stainless steel metal body.
4) Primos TSS Turkey Choke Tube
The Primos TSS Choke Tube is a great choke for turkey hunting. The unique design offers a lengthier, more progressive taper, resulting in thick shot patterns that constrict more consistently. As a result, you get more shots. The choke is compatible with all Benneli, Remington, and Invector shotguns.
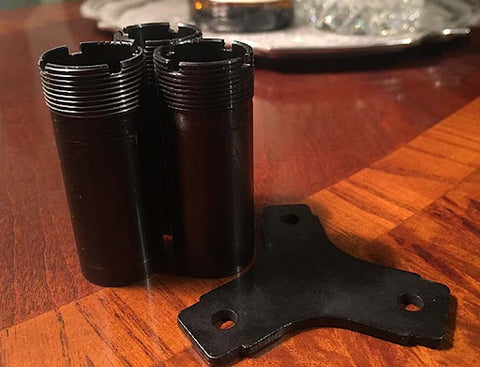
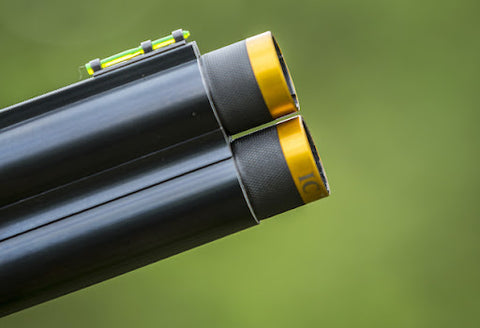
How do You Clean a Choke Tube?
Credit: Rifleshooter
A rusted-in tube is costly to remove, and it’s frequently impossible to do so without damaging the choke and maybe the chamber. Take out the choke tube at the end of each season and whenever the gun gets wet, dry it, scrub the threading on the barrel and tube, apply a dab of grease to the threads, and reinstall the choke tube in the gun. A fresh or rethreaded cylinder costs a lot more than a little grease and sweat.
What Kind of Shots Should You Shoot With Your Choke Tube?
Credit: Richard Faulks
This is entirely reliant on the choke tube’s capacity. Some choke tubes can be used with almost any shot. Other choke tubes will only allow to shoot with a lead or steel shot. Before patterning your shotgun with a certain type of shot, read the instructions on your choke tube carefully.
Summary
Because the most acceptable contact range for ducks or geese is 40 yards or less, the ideal choke for duck or goose hunting is an improved cylinder choke. If you’re going to shoot ducks or geese from a greater distance, a modified choke is the way to go.
Do you want to improve your shooting skills during hunting season? Practicing on shooting targets is the greatest way to do it. Introducing EasyShot: your best bet to improving your shot. Check us out today.
Turkey hunting needs reliable magnification and durability. Red dot sights are known for fast target acquisition, though, and turkey hunters have to move quick.
Red dot sights have unlimited eye relief, so you can use your peripheral vision. They’re a lighter red dot scope for turkey hunting across hard terrain. Basically, turkey hunters should use a red dot.
What qualities should you look for?
Not all red dots are built equally. Some are manufactured with better parts while others are designed for a specific purpose. With that in mind, here are some important factors to consider.
Lens Clarity
When you’re turkey hunting, quickness matters. A big part of being able to sight on your target is the reticle. Some red dots have larger dot reticles that can make it hard to see everything.
Since turkey hunting is outdoors, it also helps to have a green dot option. Red dots are great for certain environments, but green is better for outdoor use. It’s just a little more expensive.
The price is worth it, though. Green dot reticles are better to stand out against tree surroundings.
Design
You never know how long you’ll be turkey hunting, so it’s good to have lighter gear. A red dot sight doesn’t weigh as much as rifle scopes, and they’re usually more mobile.
It’s also important to have durable construction. You might even want a red dot sight that’s small enough to co-witness, so remember your turkey hunting goals.
Battery
Most red dot sights for turkey hunting use batteries that you’ll have to replace when they run out. It’s better to use one that has a common battery. Of course, you also want your battery to last.
Battery life can depend on a number of factors beyond hours of use. The brightness setting you need for turkey hunting, for example, can drain the battery faster.
Versatility
If you’re like me, you have a few guns in your collection. It’s always better if the red dot sight, like something from Vortex, can fit on several, or all, of them. This can save you money and give an accuracy edge to your shooting across the board.
The Best Red Dot Scope for Turkey Hunting
If you’re pressed on time, here’s a quick list of the best red dot scopes for turkey hunting:
Trijicon MRO: Best Overall
Aimpoint PRO: Best for Long Range
Holosun 510c: Best for the Money
Vortex Venom: Best for Budget
1. Trijicon MRO: Best Overall Red Dot Scope
One of the best manufacturers out there is Trijicon, and their MRO has quickly become my favorite red dot. It has an impressive number of features, but you’ll definitely pay for them.
Glass Clarity & Reticle Patterns
Trijicon built the MRO with efficiency in mind. It has a multi-coated lens, so I haven’t had issues with smudges or clarity.
I love how easy it is to use, too. The MRO has 8 ambidextrous settings for brightness, with 4 of them meant for night turkey hunting. The 2 MOA reticle has an intense dot that I can see in countless conditions.
Eye Relief & Eye Box
Unlimited eye relief is a great feature of red dot sights for turkey hunting. However, the Trijicon MRO stands out with one of the best fields of vision I’ve seen, literally.
Durability and Weight
The high-grade aluminum tube is matte black. It only weighs a little over 5 ounces, so it’s easy on my arms for longer turkey hunting. The 2.6-inch length also lets me mount a rifle scope to co-witness.
Once I mounted it, the MRO didn’t shift at all from recoil. Even my shotgun sights didn’t move my zero, so it’s a serious piece of machinery. Trijicon’s optic is waterproof and extremely durable.
Elevation & Windage Knobs
The adjustment knobs on my MRO give me a lot of control over the settings. Each click is ½ MOA with a total range of 70 MOA for elevation and windage.
I don’t have any trouble getting to the knobs, either. The elevation is on top of the red dot sight and windage is controlled on the side.
Parallax & Magnification
The MRO is parallax-free, so the red dot doesn’t move with the sight. I haven’t had any issues with precision or maintaining my target. As with most red dots, the magnification is 1x.
Mounting & Rings
If you need a red dot sight that can mount most of the weapons in your collection, Trijicon has you covered. I’ve been able to put it on every weapon I own, so it works for shotgun sights.
On top of that, the MRO comes with a quick-release mount. If there was a situation where I could co-witness, which hasn’t happened yet, I could swap out scopes easily.
Battery
A highlight of the MRO is the battery. I’ve never had to replace it and it’s supposed to last for 5 continuous years. I also haven’t noticed any issues with the higher brightness levels.
Is the Trijicon MRO worth it?
It’s a little more expensive, but the Trijicon MRO is one of the best red dots I’ve ever used for anything. That means it’s perfect for any turkey hunting needs.
Why? It’s got:
2 MOA red dot
Multi-coated lens
Fantastic brightness settings
5-year battery use
Quality components
For the price you’re paying, Trijicon doesn’t have my favorite warranty. It only lasts 3 years, you need proof of purchase, and it’s non-transferrable. Still, with the durability, I don’t foresee needing to repair or replace my red dot sight anytime soon.
If you want efficiency without the Trijicon price, though, you might like the Burris FastFire III. It’s a little older, but it’s got some great features, like a 3 MOA reticle for improved accuracy.
2. Aimpoint PRO: Best Long Range Red Dot Scope (rewrite)
Another trusted name in sights for turkey hunting is Aimpoint. They offer the ACO and the upgraded Aimpoint PRO, and I always recommend the latter if you can afford it. There’s a reason law enforcement and the military use the PRO.
Glass Clarity & Reticle Patterns
Similar to the Trijicon, the Aimpoint PRO has a 2 MOA reticle and multi-coated lenses. The lens reduces glare, so I’ve never had a problem shooting during the daytime.
Thanks to the red dot picture quality, turkey hunting at 150 yards or farther. With some sights for turkey hunting, night vision makes the image grainy. The PRO retains a clear picture.
Eye Relief & Eye Box
You have the traditional unlimited eye relief with a PRO. I can see everything in my field of view clearly, so I can watch for movement outside of my red dot sight.
Durability and Weight
Aimpoint is one of the best manufacturers in optics. They use quality parts for their red dot scope for turkey hunting, so I’ve never had any issues with durability. The PRO’s tube is made of aircraft-grade aluminum.
The matte-black finish has water wicking and it’s waterproof, so you don’t have to worry about rain. Humidity isn’t even a problem, because the tube is sealed to be fog-proof.
The PRO is shock-proof and scratch-proof. I’ve used mine for a while and it’s survived all of my turkey hunting trips without a scratch. I was surprised at how tough it is, since it’s only 11.6 ounces.
Elevation & Windage Knobs
The elevation and windage knobs on the Aimpoint PRO are covered with aluminum caps. They’re safe, and easy to adjust with the included tool. With ½ MOA clicks, I was able to zero my PRO at 100 yards with ease.
Parallax & Magnification
The Aimpoint PRO is parallax-free with a 1x magnification, which is pretty standard for a red dot sight.
Mounting & Rings
The PRO mounts on a low-profile Picatinny rail. Since I’ve mounted it, I haven’t had to worry about it moving from recoil on any of my firearms.
Plus, the low profile helps with my field of view. The PRO works if you need shotgun sights for turkey hunting.
Battery
The Aimpoint PRO red dot uses a 2L76 battery, which is a little less common. Still, it can run continuously for 30,000 hours, so you won’t be replacing it for at least 3 years.
The highest brightness settings might affect that, but I haven’t had any issues with battery life in the last year. My PRO has 10 brightness options. 6 of them are for daytime shooting.
The back 4 are specifically built for night vision compatibility. That means I don’t have to worry if I’m still turkey hunting when the sun goes down, and the battery hasn’t failed me yet.
Is the Aimpoint PRO worth it?
I’d argue that the Aimpoint ACO and the PRO are both worth it, but the PRO is definitely superior. The ACO has similar features, but they don’t stack up to the PRO for long range.
Here’s why:
Waterproof, fog-proof, shockproof
10 settings for brightness
30,000 hour battery life
Night vision
Aimpoint has a pretty good warranty, depending on your purpose. If you’re using your PRO for competitive or professional shooting, it’s only good for 2 years.
Personal use at the range and turkey hunting, though, comes with a 10-year warranty for defects, repairs, and replacement.
3. Holosun 510c: Best for the Money Red Dot Scope
One of the newer names that impressed me is Holosun. They offer a number of optics for different needs, and the 510c reflex sight is a perfect red dot sight for turkey hunting.
Glass Clarity & Reticle Patterns
The multi-coated lens of my 510c is clear, and the LED reticle helps make the image pop. It comes with a red or green dot reticle, which is perfect for anyone with astigmatism or eye struggles.
One feature that separates the Holosun is that it can switch reticles. While I love the 2 MOA red dot, it can swap to a 65 MOA circle. It can even combine the two for a dot inside a circle.
Eye Relief & Eye Box
Unlimited eye relief and a wide field of view are pretty standard with the 510c. I didn’t notice anything wrong or better.
Durability and Weight
The Holosun 510c weighs just over 8 ounces. The high-grade aluminum tube is also 3.3 inches long, so it easily fits on a rail to co-witness. I love that the sight has a titanium hood, too.
Holosun uses great products for components, so I haven’t put a dent in my 510c. It’s been on many turkey hunting trips without any issues, especially since it’s water- and dust-proof.
Elevation & Windage Knobs
The 510c comes with a T10 L key, which is used to adjust the elevation and windage knobs. It’s easy enough to do on the fly, and the ½ MOA clicks make it easy to zero your red dot sight.
Both elevation and windage adjustments max out at 50 MOA.
Parallax & Magnification
My Holosun 510c is parallax-free past 50 yards with a 1x magnification. However, the anti-reflective coating on my lenses helps with farther shots.
Mounting & Rings
One thing that I’d use as a con is that it doesn’t come with a mount. However, it can be mounted to be a low-profile, absolute co-witness red dot sight. It’s easy to mount with the tool, too. This is great for shotgun sights for turkey hunting.
Battery
Thankfully, the Holosun 510c uses a CR2032 battery, which is very easy to find a replacement for. With 50,000 hours of battery life, though, you won’t need to.
Not only can the battery last for a long time, but Holosun extended that efficiency with two amazing features: Shake Awake and Solar Failsafe.
The former means your 510c will turn on when it senses motion. The latter means that your Holosun red dot sight can use solar power to conserve battery if you’re in the sun.
As for brightness levels, you have 12 settings to choose from. 10 of them are for daylight, and I like to keep mine around 7 or 8, depending. 11 and 12 are perfect for night vision, too, so I’ve gotten a lot of use out of the 510c.
Is the Holosun 510c worth it?
Definitely. Holosun may be newer, but they’ve certainly done their homework. The 510c delivers a premium red dot sight at a premium price.
Why? It’s got…
3 reticle options
Extended battery plus solar options
12 brightness settings
Holosun has a 10-year warranty on their red dot sights. That amount of time is great, because the durability and battery of this sight mean I won’t need to consider a warranty for a lot of years.
4. Vortex Venom: Best Budget Red Dot Scope
If you’re operating on a budget, Vortex is one of the best manufacturers you can look at. The Vortex Venom isn’t necessarily the cheapest, but it’s the best quality for your dollar.
Glass Clarity & Reticle Patterns
For starters, the Venom sticks out because it has a reticle that can switch between 3 MOA and 6 MOA. Different red dot sizes can be better for short- or long-range shots.
Whether you use 6 MOA for long-range shots or not, you still want a clear sight picture. The lenses on the Venom are fully multi-coated for the perfect image.
Eye Relief & Eye Box
As usual, you’re getting unlimited eye relief and you can see everything inside and out of your Vortex Venom.
Durability and Weight
Something that I love about the Venom is how light it is. While none of the red dot sights on this list are heavy, 1.1 ounces takes the cake.
Aluminum is a lightweight material, which is why the Vortex’s tube is made with that. The tube itself is sealed with an o-ring to prevent fog or humidity from affecting the image.
You’ll get a waterproof, fog-proof, scratch-resistant red dot scope thanks to the ArmorTek coat to your Venom. For a red dot sight under $300, Vortex makes a great argument as the best.
Elevation & Windage Knobs
The adjustments on your elevation and windage knobs aren’t quite as precise as some of the more-expensive sights. Still, 1 MOA isn’t bad and they’re not hard to get to.
The max range of elevation and windage is 130 MOA and 100 MOA, respectively. It was easy to zero and I’ve barely had to readjust since.
Parallax & Magnification
Even though it has a 1x magnification with the typical parallax-free nature of red dots, I can easily hit things at 150 yards consistently.
Mounting & Rings
The Venom is also one of the most versatile red dot sights. You can put it on a Weaver or Picatinny rail and it’s adjustable for the height of your cheek weld.
Vortex made an affordable red dot sight for turkey hunters. If you need shotgun sights when you’re turkey hunting, this could be the red dot for you.
Battery
One restriction of the Venom is the 150 hours of battery life, but that’s at the brightest setting. Your CR1632 battery can handle all 10 levels of brightness for a long time.
While the 150 hours for peak brightness may seem low, you’ll get a continuous 30,000 at the lowest. It’s about your purpose and when you plan to go turkey hunting.
Is the Vortex Venom worth it?
One of the best names in optics is Vortex and the Venom has a lot of great features for the cost. It’s the only reflex sight on this list and worth adding to your collection.
Why? It’s got…
3 or 6 MOA reticles
Variable battery life
10 brightness options
Lightweight composition
Another great quality for the cost is the Vortex warranty. It’s transferable with a lifetime warranty to get repairs no-questions-asked. I’ve loved their customer service so far and they work fast.
Still, if you’d rather go even lower, you can get the Vortex StrikeFire II for $50 less. It’s also a great red dot scope for turkey hunting on a budget. The StrikeFire II has similar features for a little less.
Final Verdict
The best red dot scope for turkey hunting comes down to preference and purpose, but my top recommendation would be the Trijicon MRO. It’s more expensive, but you’re paying for quality and versatility.
You also get both colors of reticle and a long-lasting battery for any situation. If you need a red dot scope for a unique reason, though, you can’t go wrong with the other three.
Now It’s Your Turn
I hope you enjoyed my best red dot scope for turkey hunting guide.
Now I want to turn it over to you:
Which red dot sight will you pick for turkey hunting? Or perhaps you already have one and would like to share your thoughts.
Either way, let me know by leaving a quick comment down below.
While there is plenty of available data, charts, and information on aging deer, we hope the info below, as well as our whitetail deer aging chart, can help you learn how to age a deer on the hoof before your next hunt. And if you successfully harvested a deer, we provide three additional aging techniques to determine deer ages.
Reasons to Learn the Age Class of Deer (Before You Shoot)
Aging whitetail deer isn’t necessary for general deer hunting goals. It won’t make you more successful at putting meat in the freezer during or after hunting season. But for those who choose to target older, more mature bucks, estimating age is a skill you must master.
Those who aren’t confident with their ability to age deer in the field on the fly should start by aging deer within trail camera photos. Then, if they see the deer while hunting, they’ll already know if they plan to shoot or not.
Of course, there are plenty of reasons to age a deer and ensure it’s an older member of the herd before shooting it:
If you want to shoot a mature deer, you must ensure it is one before sending a bullet or broadhead downrange.
If managing land for older bucks, identifying a deer as a young buck, and subsequently passing on it to allow it to reach a more mature age class, is necessary.
Passing on younger bucks means more and bigger bucks to see and shoot in the future.
Allowing bucks to age gives them time to express and spread their antler genetics.
Not shooting younger bucks — and taking the correct number of does — helps balance the buck-to-doe deer population ratio.
Allowing bucks to get older creates a balanced, natural age structure for the deer population
Having a balanced age structure improves the overall deer herd.
Improving the buck age structure increases the overarching area’s hunting (and land) value.
On a side note, if you’re tracking numerous bucks and following them over a number of years, it’s hard to beat DeerLab’s Profiles. It’s an excellent tool that can help you with your deer management. The service allows you to track individual bucks or even groups of bucks, keeping logs of their activity and movement, as well as seeing a buck’s historical growth over time. One lesser-known feature is Albums. This is helpful if you want to share your trail cam photos (without all the stats DeerLab gives you), say just of your hitlist bucks or photos of mature bucks, with others, so they can help you with your deer management.
Aging Deer on the Hoof: Characteristics of Age Classes
While it’s not likely to age doe on the hoof, keying in on whitetail bucks body characteristics can help you make an age estimation. Each buck exhibits unique antler, body, and personality traits. However, certain body features tend to consistently change with age and exhibit features tethered to particular age groups. Because of this, it makes aging deer possible. Aging deer on the hoof won’t tell you the exact age, but it will within a year or so of its actual age, and this can help deer management.
Whitetail Deer Age Chart using body characteristics
Some deer body parts to look at when trying to age class a whitetail deer on the hoof include the antlers, back, belly, head, legs, neck, and tarsal glands. Each of these changes over time, and how they look can provide clues as to what age a deer is or isn’t.
Age Estimate: 1 ½-Year-Old Buck
This ½-year-old whitetail buck on hoof
Also referred to as yearling bucks, a 1 ½-year-old resembles a small doe with antlers. Antler size has only reached approximately 20-30% of overall potential and is likely a spike, four-pointer, six-pointer, or very small eight-pointer. Regardless, the spread for younger deer will remain inside the ears.
The head appears long and slender. Body weight distribution is more toward the rear end. The back line appears to slope downward from back to front. The belly and back of the buck do not sag. The deer’s neck has no swelling. Legs seem to be very long compared to their torso. Tarsal glands are lightly stained.
Age Estimate: 2 ½-Year-Old Buck
2 ½-year-old buck on hoof
Once a buck reaches 2 ½-year-old status, it’s synonymous with large does with antlers. It often grows antlers with a spread just inside, at, or just outside the ears, and it’s likely sporting about 50-60% of its lifetime antler potential. Often, it grows between six and 10 points, with a typical average number of eight points.
The head is still long and slender. Body weight distribution shows a heavier rump than front end. This age bracket has a backline that still slopes from the rump to the shoulders but has no sagging of the back or belly. The buck’s neck is generally slightly more muscular than the year before, but no severe swelling occurs. The legs still look too long for the body. Tarsal glands are somewhat stained.
Age Estimate: 3 ½-Year-Old Buck
3 ½-year-old buck on hoof
Now we’re beginning to see some size. This is the age bracket when a buck starts being classified as “big.” It almost always has an antler spread outside the ears and expresses decent mass and good tine length. This buck sports approximately 70-80% of antler potential.
As for the body, the head still appears elongated, but it’s getting thicker from top to bottom, too. It now has a straight line across the back from rump to shoulders (no downward angle or sagging). It has a tight belly line. Weight seems to be distributed evenly from front to back. The neck begins to swell considerably, especially compared to 2 ½-year-old bucks. Legs finally look proportionate to the body. Tarsal glands are moderately stained.
Age Estimate: 4 ½-Year-Old Buck
4 ½-year-old buck on hoof
While a 4 ½-year-old deer is close to being fully mature, it still has much potential to express. In fact, on average, it only grows approximately 80-90% of its antler potential. That said, it exhibits impressive antler size, and begins showing exceptional antler mass, tine length, and more.
The head is now blockier than it once was. Its weight distribution is mostly even from front to back. This age bracket still has a straight line across the back and belly. The neck has significant swelling. The legs still look mainly proportionate to the body. Tarsal glands are heavily stained.
Age Estimate: 5 ½-Year-Old Buck
5 ½-year-old buck on hoof
No hunter can argue that a 5 ½-year-old deer isn’t mature. This animal expresses most of its antler potential, sporting about 90-95% of it, and its body is huge. Antlers generally display incredible mass, beam length, tine length, etc.
Its head appears shorter and thicker than ever before. Weight distribution seems to shift more toward the front of the body. The backline is still straight from rump to shoulders but might show slight swaying. The belly might do the same. The neck shows heavy swelling, and the legs appear too short for the body. Tarsal glands are very heavily stained.
Age Estimate: 6 ½-Plus-Year-Old Buck
6 ½-year-old buck on hoof
Now a bona fide mature deer, a 6 ½-plus-year-old buck’s body is taking on a new shape. It now carries approximately 100% of its antler potential but could grow its largest rack at age 7 ½ or 8 ½. This deer is distinctly different from younger bucks. The difference can be quite staggering.
Its head appears very short and very thick. Weight distribution makes it seem as if the buck’s front is much heavier than the rear end. The back and belly exhibit significant sagging. The neck is extremely swollen. The legs appear much too short for the body. And tarsal glands are extremely stained.
Aging a Harvested Deer
Hunters aren’t limited and restricted to aging deer on the hoof. Although there is no catch and release in hunting, hunters can certainly ground check their bucks, too, which is the act of determining the size, age, and gender of a deer or other game species once it is dead. There are two good ways to do this and a third option that works for supportive reassurance.
Skull Plate Thickness
Speaking of supportive efforts, those who skullcap their bucks will notice older deer exhibit significant increases in skull plate thickness. Generally speaking, the older a deer gets, the thicker its bones and skull plate becomes. The skull plate for young deer is more fragile, while older deer have thicker skulls. In theory, the skull plate aging method works, but when aging deer this way, it’s difficult to measure and it’s definitely not an exact science. If you want to be more accurate, tooth replacement and wear, as well as cementum annuli are the best routes to go.
Tooth Replacement and Wear Method
In contrast, tooth replacement and wear is an excellent and more common method for aging bucks after the harvest compared to on the hoof. This method was developed by C. W. Severinghaus in 1949 (1) and is sometimes referred to as the Severinghaus technique. The bottom jaw changes as deer age. The first step in determining the age of a deer with the tooth replacement and wear technique is counting teeth. Here’s a breakdown centered around tooth characteristics, as well as a video going through deer teeth wear from the Pennsylvania Game Commission.
Fawn Teeth
Fawns have five (or fewer) jaw teeth, and the third premolar has only three cusps. For a fawn 3 to 4 months old, either the first molar is just starting to show, or isn’t showing yet. A fawn that’s 4 to 6 months old has its first molar erupted but its second is not seen. For fawns that are 7 to 9 months old, the second molar is now starting to show or fully erupted, but the third molar can’t be seen.
1½-Year-Old Deer Teeth
Deer or yearlings that are 1 ½-years-old likely have six jaw teeth along the bottom jaw, the third molar is starting to show, and the third premolar tooth has significant wear, having three cusps.
2½-Year-Old Deer Teeth
Once it reaches 2 ½, the third tooth has only two cusps, and the crests are sharp and pointed. There is minimal wear showing on molars.
3½-Year-Old Deer Teeth
At 3 ½, the slight wearing of the permanent teeth is visible, and slight concavity is present. The cusps of the first molar show substantial wear and the third molar is fairly level.
4½-Year-Old Deer Teeth
Most 4 ½-year-old bucks exhibit noticeable tooth wear and often slope heavily downward toward the jawbone. The cusps on the first two molars will have significant wear.
5½-Year-Old Deer Teeth
The same holds true for 5 ½-year-old deer, as the teeth become significantly blunted and worn. All three molars will show significant wear.
6½-Year-Old Deer Teeth
Once deer reach 6 ½ and older, the teeth are worn down smooth, or flattened, and little enamel shows. Eventually, the teeth will wear down very close to the jawbone.
Cementum Annuli Aging
Lastly, the best and most accurate method for aging deer is called cementum annuli (CA). In short, cementum is the connective tissue that forms on the root surface of most teeth.
4 year old white-tailed deer harvested in Missouri, courtesy of Matson’s Laboratory
During the life of a whitetail, as well as other mammals, cementum forms layers or rings, similar to growth rings that you would see in tree trunks. These rings are visible microscopically and form a pattern that wildlife aging experts can use to determine deer ages.
Pope and Young world record typical archery elk harvested by Steve Felix in Montana
To have a professional age your deer, you would need to remove teeth from the lower jaw and send them off to be examined in a laboratory setting. Once there, the lab studies the teeth and tooth wear to age them. It costs approximately $50 per deer, and two of the most used labs include Matson’s Laboratory and Wildlife Analytical Laboratories.
Appendix
Cementum – A protective hard tissue that surrounds the root of each tooth.Anulli – Layers that are formed over the root of a tooth that are used in the process to age individual deer.Cusps – A point or ridge of a tooth, when viewed from the side.Crest – The top of the cusps or ridges of a tooth.Dentin – That part of the tooth that is beneath enamel and cementumEnamel – The white part of a tooth.Molar – The three permanent teeth in the rear of the deer’s jaw.On the Hoof – Alive, not yet harvested.Premolar – The three teeth in front of the jaw that are replaced by permanent teeth.Skullcap – The top part of the skull.Tarsal Gland – Found on bucks and does, the tarsal gland is a pad of stiff hairs located on the inside of each deer’s rear leg. The gland secretes an oily material that coats the hair, making it darker.
References Cited
Severinghaus CW. Tooth development and wear as criteria of age in white-tailed deer. Journal of Wildlife Management. 1949;13(2):195-216.
Chaturbate is a website that allows users to broadcast themselves and earn money through tips and subscriptions from viewers.
To make money on Chaturbate, you will need to create a performer account and complete the verification process. Once your account is verified, you can start broadcasting yourself and earning money from tips and subscriptions from viewers.
To increase your earnings on Chaturbate, there are several things you can do.
First, you can promote your Chaturbate profile on social media and other platforms to attract more viewers to your broadcasts.
You can also offer special features or services, such as private shows or custom content, which viewers can pay extra for. Additionally, you can participate in Chaturbate’s affiliate program, which allows you to earn a commission for referring other performers to the platform.
It is important to note that making money on Chaturbate, or any other platform, requires hard work and dedication.
Success on Chaturbate, like on any other platform, is not guaranteed and will depend on a variety of factors, such as the quality of your content, your ability to engage with viewers, and your dedication to promoting your profile.
Chaturbate is a website which combines 2 things: Chatting and masturbation, as the name suggests. Currently is the world’s largest adult cam-site with a healthy advantage over its rivals.
The website was launched in February 2011 and has increasingly become a very popular site with members and broadcasters alike.
It is the most followed cam site online with 489,000 followers on Twitter. Currently, it keeps growing on all levels so it still is an excellent choice for anyone willing to watch or broadcast.
Now I’ll explain what are Chaturbate’s best features from a broadcaster point of view and also from a viewers point of view.
Chaturbate is a platform that features hundreds of chat rooms from around the world. You’ll see a live amateur webcam stream in each chat room.
For instance, by clicking here, you can view the current most popular stream on Chaturbate right now. You’ll find a model trying her best to make money in front of thousands of horny viewers.
Chaturbate makes it easy for both, allowing to tip your favorite broadcasters in exchange for a performance. But not everyone has time to see all shows to the end.
Good cams shows can last for hours. If you are in a hurry, you may not want to waste hours waiting for a free show to go down. In that case, I suggest you try one-to-one private shows instead.
How to use Chaturbate?
When you enter a chat room, you’ll find that on the screen video takes centre stage with a sidebar for users to talk with each other directly and exchange messages with the ‘broadcasters.’
Chat rooms are divided into five major categories:
Female Cams
Male cams
Transgender cams
Couples
Featured
All these categories are self-explanatory so I won’t say more about that. The featured category shows homepage cams because those get the most traffic. That’s where you’d want to be in.
With tags, each broadcaster can also classify what’s her/his show is about, making it much easier to find what you are looking for.
There are common tags such as bbw, teens and anal, as well as more unique ones for those exquisite viewers.
You can also filter cams by geographic region, but remember that most broadcasters won’t disclose their real location for privacy reasons.
I am a spectator. How does Chaturbate work?
Registering is fully free and will allow you to view most cams but there are premium shows that may require an extra payment.
Private shows can be paid using tokens, the usual currency on all cam sites.
Broadcasters will encourage viewers to pay tokens in order to see something included in the broadcasters’ tip menu.
Tokens may also be used to purchase pictures and videos from a broadcaster, even when she/he is offline. Many broadcasters also include their personal Amazon wishlists so true fans can know what to buy to their favorite models.
What is Chaturbate Pro?
Chaturbate recently launched a new type of subscription called Chaturbate Pro. For $19.95 a month you get:
Clean Ad-Free Interface
Custom chat font & colour options
Private messaging
Anonymous tipping
Animate room images
200 free tokens ( worth $20.99 )
Is it worth it? Chaturbate Pro is basically like buying a basic 200 token pack, but with some more perks.
If you are an active Chaturbate user that spends around 200-400 tokens per month on the site, I recommend you to try this new subscription, because you get more bang for your buck with it than just buying tokens only.
What’s the real value of Chaturbate’s tokens?
Click here to view in detail how much Chaturbate tokens are worth.
As a model, what should I look out for?
Here’s one of the things you might not know about this site. Chaturbate uses a colour coding scheme.
Site participants are categorized depending on how many tokens they have and how frequently they spend them, as well as more information about their site activities. That means that members names on the right-hand side will appear colour coded.
This is extremely useful for broadcasters as it provides information to recognise which members are likely to tip.
Also, broadcasters are much more likely to respond to a suggestion to perform from someone who frequently gives tips than to accept suggestions from someone without tokens. Categories are as follows:
ColourDescriptionRedThis is the chat room moderator. Usually is a person chosen by the broadcaster to help her keeping beggars and idiots out of the room.OrangeMeans that person is broadcasting in their own room.GreyIt means that this member has no tokensGreenMeans that this member is a fan of that roomDark BlueA member who has spent at least 50 tokens in the las 2 weeks.Light BlueA member who has spent between one and fifty tokens in the last 2 weeks.Light PurpleA member who has spent at least 250 tokens in the last 2 weeks.Dark PurpleA member who has spent at least 1000 tokens within the last two weeks.
So now you know it. As a viewer, you need to have some tokens in your account to be taken seriously.
No broadcaster will fulfil your desires with an empty pocket. They know whether you have tokens in your account or not so don’t be stingy and buy some!
Want to broadcast? Check out these guides
Having success on Chaturbate is something definitely possible but that requires work. Check out how much money you can make on Chaturbate or the latest tips to improve your shows.
Why Chaturbate is so popular
I think Chaturbate is enormously popular because of the relationship that it creates between broadcasters and followers. It was the first cam site that exploited this area and years after it’s easy to see they were right.
As a broadcaster, you can not only get tokens from your fans but gifts too. You just have to create an engaged enough audience willing to buy your whims.
Conclusion. Is Chaturbate worth it?
Absolutely. Chaturbate’s popularity right now is in all-time high and nothing indicates that’s gonna change short term. From my experience broadcasting, it can be a nice experience and it can make you lots of money.
If you combine that with other appearances on sites like OnlyFans you may very well in place to improve your financial position drastically, but to do so, you must first know what viewers want and work hard until you get the hang of it.
It took me a few weeks before making significant money so my final advice is to keep at it, never give up and ask for help if you need to. Here on this site, we are open to help any of you who needs help broadcasting. Send us a message through the contact form or leave a message in the comments section.
If you’re planning to keep freshly caught fish on ice, make sure to bleed the fish first before putting them on ice, which is essential to avoid discoloration of the meat.
You don’t want the blood to coagulate inside the fish, and the only way to avoid that is by bleeding them right after catching.
Once fish have been bled correctly, you can keep them ungutted on ice for 24-48 hours without negative effects on taste.
And after you take them home at the end of the day, you can continue to keep the ungutted fish in the refrigerator for another 24-36 hours.
After that you really need to clean them if you want to avoid deterioration of quality.
How long can you keep ungutted fish without ice?
If you’re fishing in the warm season and don’t have ice with you, you can keep your fish for about half a day before it starts to go bad.
However, you’ll need to bleed and clean the fish right after catching. After that keep them dry and in a shady place, and they will be fine until you go home later that day.
If you want to preserve fish longer than half a day in the summer without ice, then the only option is to salt them.
For this you need to rub a lot of salt inside the body cavity after cleaning, as well as all over the outside.
Remember that once you’re ready to eat the fish, you need to soak them in water to remove as much of the salt as possible.
What’s the best way to keep fish fresh after catching?
Ideally, you’ll want to bleed and gut fresh fish immediately after catching them, and then keep them on ice until you cook them on the same day, or the next day.
Raw fish should only be kept in the fridge for a maximum of 2 or 3 days before eating it. On the other hand, if you freeze fresh fish, this preserves their quality for up to 3-8 months.
However, most anglers don’t have time to gut freshly caught fish, since they want to continue catching more fish.
In that case there are several ways to keep fish fresh while fishing. The best of these is to keep the fish alive, but this is only feasible with small fish that can be kept in a keeper net, or in a bucket of water.
If you can’t keep freshly caught fish alive, the next best option is to store them on ice, or in an ice slurry, which keeps them at a temperature of around 32-40 degrees Fahrenheit (similar to the temperature of a fridge).
This can be done quite easily by taking a cooler box with ice along on your fishing trip, though you need to keep in mind that the ice will melt by the end of the day.
If you’re ice fishing, you’re in luck, since the easiest way to keep the fish fresh is simply by leaving them on top of the ice you’re fishing on.
And if you’re planning to mount your fish, check out our guide on how to preserve fish for taxidermy.
How to bleed fish correctly
As mentioned above, it’s essential to bleed fish before putting them on ice, to ensure they stay fresh as long as possible.
The best way to do this is by cutting deeply behind the gills in a downward motion from top to bottom, as this severs all the main blood vessels that serve the gills.
You should immediately see blood come out, and then just wait 1-2 minutes until it’s done, and then quickly rinse the fish.
Can you freeze ungutted fish?
If you take ungutted fish home, you may be wondering if you can freeze the whole fish and clean them later.
The answer is yes – you can freeze fish without gutting them, and you can keep them like that for several months in the freezer without problems.
However, keep in mind that freezing whole fish is not the best solution, and it’s always better to clean fish before freezing them.
The slow freezing process in a home freezer can lead to rupturing of the stomach, which tends to have a negative effect on the taste of the meat.
Also, when you thaw the fish later on, the internal organs will start to decompose very quickly, which can also have a negative effect on taste. In order to avoid this, try to remove the gut when the fish is still partially frozen.
You should also keep in mind that you can’t refreeze fish that has been thawed, since the thawing process accelerates decomposition.
So if you catch a big fish, it’s better to clean it right away and then freeze it in small portions that you can take out of the freezer individually.
How long before ungutted fish goes bad?
If you bleed ungutted fish and then store them on ice or in the refrigerator, they can be kept for 24-48 hours without quality problems. However, it’s essential to keep fish cool for this.
If you don’t keep them cool, you only have 6-12 hours before ungutted fish goes bad. The reason for this is that bacteria and digestive enzymes inside the gut start to affect the rest of the fish.
How long does fresh caught fish last in the fridge?
Gutted fish can last up to 2 to 3 days in the fridge, while ungutted fish lasts for 1 to 2 days in the refrigerator.
Keep in mind that fish protein is highly perishable, and that a fridge only partially slows down decomposition by bacteria. This happens faster in ungutted fish because their intestines contain bacteria that accelerate decomposition.
Finally, even though you can safely eat fish that has been in the fridge for 2 or 3 days, its flavor and texture start to degrade well before it reaches this deadline, which means it will taste worse the longer you wait.
Because of this, I personally only store fresh fish for a maximum of 24 to 36 hours in the refrigerator before eating it.
How long can you freeze fish before it goes bad?
You can freeze fish for 3 to 8 months before it goes bad, and as a general rule of thumb it will be fine if kept in the freezer for 6 months or less.
And when I say “going bad” I mean deterioration of taste and texture, though it’s safe to eat frozen fish even after 1 to 2 years in the freezer.
Also note that fish with a high fat content (such as trout, mackerel and salmon) degrade faster than lean fish, and you should only keep them in the freezer for a maximum of 3 months to ensure optimal taste.
Final remarks
So in conclusion, it’s always best to bleed and fish right after catching them, and then to gut them as fast as possible.
And following that, you should try to eat or freeze the fish as fast as possible to maintain the quality.
So if you happen to be a “catch and release” angler, you’re probably glad right now because you don’t have to worry about this issue.
Is Thetford’s Offering One of the Best Portable Camping Toilets?
If you’re looking for a family-sized portable camping toilet, the Thetford 365 may be the right one for you. Discover what it has to offer and what you need from a portable toilet.
An innovator in the portable camping toilet space, Thetford’s history dates back to 1960. It was in that year that the company produced its first portable toilet for campers. Since then, it’s honed its models constantly and become a leading name in the industry.
The Thetford Porta Potti 365 Toilet is among the more popular models that it has to offer. In this review, we’re going to take a look at whether the toilet lives up to its billing, as well as tackling a few concerns. We’re also going to tell you what you need to look for when shopping for a portable toilet.
The Good
Offers 57 flushes before you need to empty it.
Very lightweight, which makes it easy to carry.
Made using high-quality and durable plastics.
Comes with a three-year warranty.
Comes with several features to help you empty it easily.
The Bad
May not ship with the chemicals needed (depending on the retailer).
Its size can make it difficult to transport with other camping gear.
The Bottom Line
The Thetford Porta Potti 365 Toilet is huge, which means you can usually get through a trip without having to empty it. The toilet’s light weight makes it easy to move around and it feels almost like a full-sized toilet.
This may be one of the best portable camping toilets available today.
The Full Review
To test this toilet, we took it out in the wild with us for a three-day camping trip.
We focused on a few key issues that we want to cover here. These include the following:
Ease of Use
Stability
Materials
The Smell
Portability
Capacity
Other Features
Let’s see how it fares.
Toilet Ease of Use
This is an area where the Thetford Porta Potti 365 really shines.
On a practical level, its size makes it one of the closest portable simulations of a regular toilet that you will find. Taller people won’t find themselves squatting uncomfortably while using it. That said, smaller children may need a little support.
However, it’s the emptying of the toilet that really makes this model stand out.
It comes with a visual indicator for the bottom tank. This tells you when the toilet’s starting to fill up. As a result, you don’t have to crack it open to take a look for yourself. You get to avoid an unpleasant experience as well as ensuring you don’t release any strange odors into your campsite.
Once it reaches capacity, you still don’t have to open the waste tank. Instead, you can take advantage of the emptying spout that Thetford builds into all of its toilets. This releases all of the waste that’s built up inside the bottom tank. Plus, it prevents any nasty splash back. It’s as simple as pressing the vent button after directing the emptying spout into the correct position.
Thetford has also focused on ease of use in their tank construction. The toilet consists of two tanks, which you can clip together using a clasp located at the back. The bottom tank holds the waste while the top tank contains the bowl.
Thetford has also placed the flusher on the back of the tank, which ensures that it doesn’t get in your way during use. You also get a choice of a piston or bellow flusher. Keep in mind that bellow flushers take a little more effort to push down. This may make them less suitable for children or the elderly.
All in all, the Thetford Porta Potti 365 simulates the toilet you have at home well. It’s easy to put together and you don’t even have to open it to empty it. Just keep in mind that its size and your flusher choice may make it slightly more difficult to use for children and the elderly.
Porta Potti Stability
Nobody wants a portable chemical toilet that can’t stay upright when in use.
Thankfully, the Thetford 365 excels in this area. Its cube shape means it’s rarely going to buckle when in use. Unless you’re actively trying to tip it over, you’ll find it stays in place well. This is surprising given the lightweight plastics used in its construction.
Of course, you’ll need flat ground to place it on. However, that’s pretty standard for all portable camping toilets. It’s also worth noting that it doesn’t come with any attachments that secure it to the ground. That’s normally not a problem, but it does mean you won’t want to leave it in the open if it gets too windy.
Having said that, there are a couple of accessories available that fix the toilet to the floor and keep it held down. However, you may have to buy these separately.
Materials
The Thetford Porta Potti 365 Toilet stands out because it contains practically no metal parts.
Instead, both of the tanks and most of the components use a high-quality plastic. You may think this raises questions about its durability, but we found that the plastics don’t present any problems. The toilet doesn’t buckle under the weight of whoever sits on it. Plus, the use of plastic means it won’t get damaged if left out in the elements,
That’s not to say that it’s indestructible. A heavy impact onto rocks or a similarly hard surface could cause damage. But that shouldn’t be a problem as long as you take care when handling it.
The Smell
No matter how well a portable chemical toilet works, if it has an overpowering smell you’re not going to want to use it.
Thankfully, this is another area where the Thetford 365 excels. Using a pink deodorising chemical in the top tank does a great job of masking any smells that it might emit. The plastic materials also prevent smells from escaping when the toilet’s not in use.
Toilet Portability
You would expect such a large toilet to present some portability problems. And that could be the case if you’re traveling in a compact vehicle. It requires a fair amount of room given that it measures 41.4 x 37.9 x 41.9cm. However, you can mitigate this problem if you disconnect the tanks before storing.
Carrying the toilet is a completely different story. Without any chemicals inside, the toilet weighs just 3.7kg. That means that any able-bodied adult should find it easy to carry.
There’s also a handle that extends out of the waste tank. This means you can carry it separately from the top tank if you’ve pre-filled it with chemicals before traveling.
The handle also gives you some separation from the waste tank while carrying. Anyone who’s gotten splashed with toilet chemicals before will appreciate this feature.
Tank Capacity
This is one of the best portable camping toilets when it comes to capacity.
The Thetford 365’s waste tank can hold 21 litres before it needs emptying. That amounts to about 57 flushes, which is more than enough to cover most short camping trips.
Other Features
Newer Thetford 365 models come with an integrated lock cover over the clasp that joins the two tanks together. This prevents you from accidentally unclasping the toilet when carrying it or when it’s in use.
This portable chemical toilet also comes with a three-year warranty. This speaks volumes about Thetford’s confidence in its durability.
Finally, it’s possible to purchase spare parts for this toilet. This offers some peace of mind for those who worry about their toilet breaking down while they’re camping. Plus, it means you may not have to shell out for a new toilet if something goes wrong.
5 Points On How to Choose the Right Portable Toilet:
Of course, the Thetford 365 is just one of many portable camping toilets that you can choose from. You’ll likely want to compare several models, which means you need to know how to choose the right portable toilet.
This buyer’s guide covers some of the key features of portable camping toilets. It also offers information about what you’ll need to keep your toilet in good working condition.
Keep it in mind when making your choice so you can avoid disappointment.
1. The Flusher
You’ll usually get a choice between automatic and manual flushers when choosing a portable toilet.
Automatic flushers tend to work electronically and usually just require the press of a button. This makes them easy to use, but it does open the toilet up to issues. If something happens with the electronics, you may end up being unable to flush.
Manual flushers require a little more effort. However, many would argue that they’re more reliable than automatic flushers.
You typically get a choice between a piston and bellow flushers when choosing a manual toilet.
Bellows require you to push down with some force to flush. This isn’t a problem for most, but may present issues for young children or the elderly. These flushers also have a habit of breaking as a result of people using more force than they need to flush.
Piston flushers require you to pull a piston up, rather than push down on the toilet. This makes them easier to use.
2. Tank Indicators
A tank indicator lets you see how close the toilet is to filling up. Some may provide a measurement, whereas others flash a colour, usually red, to tell you the tank needs emptying.
It’s important to note that not all portable chemical toilets come with these indicators. If that’s the case, you’ll have to open the waste tank to manually inspect it. This isn’t the most pleasant experience so it’s usually best to choose a toilet that has a tank indicator.
3. Spare Parts
Ideally, your portable toilet won’t require much maintenance. It should be sturdy enough to deal with repeated use.
However, it will eventually start to wear down. In particular, the parts that see repeated use, such as the flusher, will undergo wear and tear.
Being able to buy replacement parts can be a huge money saver in these instances. You can replace the component rather than buying a new toilet.
Unfortunately, not all portable camping toilets have spare parts available. If this is the case, make sure you choose a model that offers a long guarantee.
4. The Chemicals
There are two types of chemicals that you’ll need for your toilet – pink and blue/green.
The pink chemicals go into the water that’s used to flush the toilet. They help to keep the bowl clean as they get rid of deposits when you flush. Usually, these chemicals come perfumed, which masks any unpleasant odours the toilet might produce. They also help to keep the toilet’s seals lubricated, which ensures they don’t break down through constant use.
You need blue/green cassette toilet chemicals for the waste tank. They break down whatever waste ends up in the tank, which prevents the build-up of noxious gases. This also helps to control the smell issue.
It’s also important to check these chemicals for formaldehyde. This is a toxic chemical that can cause damage to the environment. You will need to take care when emptying the toilet to ensure you don’t cause any damage. Thankfully, there are chemicals available that don’t contain formaldehyde.
You may need to buy your chemicals separately before you start using your toilet.
5. Toilet Paper
You’ll want to avoid using thick or luxury toilet paper with your chemical toilet. The padding in these papers makes them difficult to break down.
Most camping stores offer specially designed porta potti toilet paper instead. While this is thinner and less comfortable than luxury paper, it ensures that your toilet doesn’t get clogged.
The Final Word
The Thetford Porta Potti 365 Toilet may be the gold standard against which we measure all other portable camping toilets. Its large size makes it comfortable to use, plus its light weight makes it easy to transport.
However, it’s the various features related to waste disposal that make it stand out. You never have to deal with any waste manually thanks to the vent button and emptying spout.
It also has very few negatives. Just make sure you choose a piston flusher if young children or the elderly will use the toilet.
All what’s left is to buy the toilet for your next camping trip. Check Thetford and their products at Tentworld and don’t hesitate to contact us if you have any questions.
This post reviews the bipods the best precision rifle shooters are using. This data is based on a survey of the top 50 shooters in the 2014 Precision Rifle Series (PRS). The PRS tracks how top competitors place in major rifle matches across the country. These are the major leagues of sniper-style competitions, with targets typically in the 300-1000 yard range. For more info on the Precision Rifle Series and who these guys are, or to view the data for other pieces of gear scroll to the bottom of this article.
Although we’ve been surveying the top shooters in the PRS for a couple years, this is the first year we asked them what bipod they use. Here’s what they said:
Harris Bipod
Over 75% of the shooters were using a Harris Bipod, with the overwhelming majority of those being the Harris S-BRM 6-9” Notched Bipod (HBRMS). The official product name according to Harris is HBRMS. While that may seem cryptic, the diargram below breaks down what the letters mean and lets you see the features on the Harris S-BRM bipod compared to the standard Harris HBR model.
The Harris HBRMS is their shortest bipod with legs that extend 6 to 9 inches, and Harris refers to it as their “benchrest” model. PRS matches are clearly not shot from a bench, but many shots are taken from prone positions and the height range of this bipod is ideal for most prone scenarios.
The M in the model name indicates the bipod has notched legs. The notches provide a few preset height reference points to make it easier to adjust both legs to the same height. Virtually all of the top 50 shooters were using a bipod with these notched legs.
The S in the model name indicates the bipod can swivel, which allows you to tilt the rifle from side to side. This makes it easy to get the rifle perfectly level on uneven terrain without fiddling with the leg heights. Even a small amount of rifle cant can result in a miss at long-range, and this feature can help a shooter effectively manage that.
While most guys were running the 6-9 inch HBRMS model, there were a couple guys running the medium height Harris HBLMS model, which Harris advertises to have legs that extend 9 to 13 inches. In my measurements, it looks like the Harris HBLMS measures closer to 8 to 12 inches.
There was also one shooter in the top 50, Matt Gervais, who ran a custom Harris bipod he modified to extend from 7 to 12 inches. I have to admit, I was intrigued by the idea because it sounds like the ideal range. So I followed up with Matt and he graciously provided more detail with permission to share with fellow shooters. He found that when he used the 6-9” bipod, he never used the lowest setting, and when he used the 9-13” bipod, he never used the highest setting. Sounds familiar! As an auto mechanic by trade and tinkerer by heart, Matt’s curiosity drove him to sit down one day and take apart both bipods to compare them. After a little time, machining, and troubleshooting … viola! The ideal 7-12” Harris bipod was born. It was primarily derived from a modified 9-13” model, but there were a few donor parts taken from a Harris 6-9” bipod. Here’s a comparison of the custom Harris 7-12” bipod with a standard Harris 6-9” bipod. Note: Springs were removed from the 6-9″ bipod, and used on the 7-12″.
Virtually all of the shooters had added an after-market swivel lock to their Harris bipod (only applicable to the S series). These allow you to quickly adjust the amount of tension it takes to tilt the bipod side-to-side. The stock Harris swivel models have a fixed amount of tension that isn’t adjustable in the field, but these aftermarket levers and knobs allow you to reach up and torque down the swivel with one hand from behind the rifle. There are a few products out there that do this, such as the KMW Pod-Loc Kit, Alpha-Bravo Bipod Lock, and recently Harris introduced their own Harris lever. (Why not offer a model with the lever preinstalled?!) These handles are easy to install (watch video), and make it easier to operate the bipod swivel and ensure your rifle is cant-free before sending a round down range.
LaRue also makes an improved version of the Harris bipod. They integrated their popular, low-profile, quick-detach, picatinny mount. LaRue explains: “We have replaced the Harris OEM stud attachment base with a custom chassis … ruling-out the risk of the stud screw and grabber becoming loose. By doing so, we were able to lower the profile by roughly .25″. A large knob on the rear provides easy leverage when adjusting swivel tension.”
Note: The LaRue bipod in the photo has spikes installed. That is not part of the LaRue improved package. Those are JEC JPEGs Harris Bipod Spikes made by JEC Customs that I installed myself later. They help ensure you’re dug in and able to consistently load your bipod on any surface (sand, mud, stone, concrete, gravel, dining room table, car hood, etc.).
Atlas Bipod
The second most popular bipod was the Accu-Shot Atlas Bipod. 11 of shooters who placed in the top 50 were running an Atlas bipod.
While most are familiar with a standard bipod like the Harris, the Atlas bipod is very different. The popular standard height PSR Atlas Bipod includes a lot of unique features that aren’t available on other bipods. Here’s a few of the notable features:
Bipod can be loaded with legs straight down (90°) or 45° forward. This provides a height adjustment from 4.75-9”, which is huge compared to similar bipods.
Provides 15° of pan and 15° of tilt
Legs can be stowed forwards or backwards
Can be mounted directly to a picatinny rail
Notched legs (similar to Harris)
Since the Atlas bipod only introduced in 2010, you might not expect it to have the accessories that the community has developed around the well-established Harris bipod … like the LaRue quick detach mount, or the variety of aftermarket feet and spikes. But, B&T Industries, makers of the Atlas, seems to have thought this through as well, and they offer a wide selection. It includes adapters to connect the Atlas bipod to just about any rifle, and accessories to adapt it to any terrain or scenario. Here’s just a few of the accessories offered for the Atlas:
The quick-change feet and leg extensions can be “easily installed with the press of a stainless steel plunger,” according to the manufacturer. Having personally installed spikes on a Harris bipod … I can say almost anything would be easier. Having the ability to easily extend the legs by 3 inches seems to allow you to use one bipod for many scenarios, especially with the huge range of height adjustability the Atlas bipod already offers.
One of the attractive features of the Atlas bipod is the option for multiple leg positions (45 and 90 degrees), but could be a downside to that flexibility. The added adjustability can potentially make the bipod slower to deploy and get in position. At least during competitions, seconds count, and it’d be near impossible to top the quick and simple Harris deployment.
There are certainly other bipods out there, like the Versa-Pod bipod, the Long-Range Accuracy bipod, and the new Accu-Tac bipod … but none of those were represented among these top precision riflemen. It was a short list, with just two brands … but some of the most solid gear you can find.
Meet The Pros
You know NASCAR? Yes, I’m talking about the racing-cars-in-a-circle NASCAR. Before NASCAR, there were just a bunch of unaffiliated, regional car races. NASCAR brought structure by unifying those races, and created the idea of a season … and an overall champion. NASCAR identified the top races across the country (that were similar in nature), then combined results and ranked competitors. The Precision Rifle Series (PRS) is like NASCAR, but for rifle matches.
The PRS is a championship style point series race based on the best precision rifle matches nationwide. PRS matches are recognized as the major league of sniper-style rifle matches. At the end of each year, the scores from around 15 different national matches are evaluated and the top shooters are invited to compete head to head in the PRS Season Championship Match. We surveyed the shooters who qualified for the finale, asking all kinds of questions about the equipment they ran that season. This is a great set of data, because 50+ shooters is a significant sample size, and this particular group are also considered experts among experts. It includes guys like George Gardner (President/Senior Rifle Builder of GA Precision), Francis Kuehl, Wade Stuteville, the GAP Team, the Surgeon Rifles Team, shooters from the US Army Marksmenship Unit, and many other world-class shooters. Thanks to Rich Emmons for allowing me to share this info. To find out more about the PRS, check out What Is The Precision Rifle Series?
Other “What The Pros Use” Articles
This post was one of a series of posts that look at the equipment the top PRS shooters use. Check out these other posts:
"Unleash the Power: Mastering Break Barrel Air Rifles for Maximum Performance. Discover expert tips and techniques to enhance the power and precision of your...
")
")
")
")
")


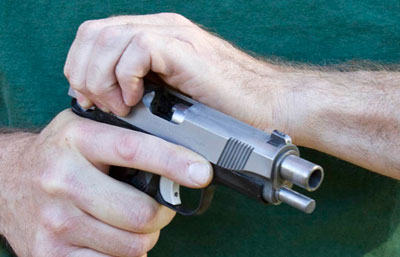 Although not the fastest method available to place the slide back into battery, it is favored predominantly by the traditional defensive shooting community. Reason being that applying all four fingers you can work the slide even if you get one of them and/ or your thumb injured in a gunfight. It’s consistent with keeping 6 and 12 alignment in the workbox area therefore not needing to turn the pistol along its bore line axis at any time, conducive to clearing most common operational malfunctions and provides the shooter with yet another option to do a press check to ensure that there is in fact a round in battery if that is part of their standard operational procedure.
 The next most common is the sling shot method which is about the same response time as the claw. Although not really faster or slower it does require that the pistol be turned on its bore line axis that the support hand palm faces the strong hand to initiate the “pinch” or slingshot-like grasp (hence its namesake) utilizing the forefinger and the thumb.
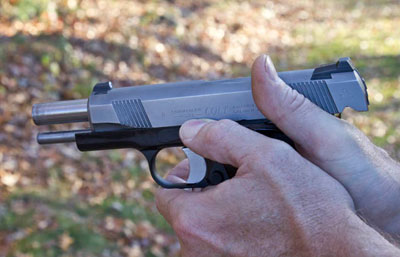 Another potential hazard is of your hands may be cold, oily, sweaty, bloody, etc., which may cause slippage off the slide lock, an inconsistency that could cost valuable time. To bypass this potential hazard several gun parts manufacturers offer third-party oversized slide stops specifically designed with greater contact surface area for a more positive thumb placement. The downside to the oversized single-side or ambi third party slide locks is that if you have a large hand or big, long thumbs, this oversized landing pad can be inadvertently depressed during normal operation and cause a failure to lock back with an empty magazine.