Home Blog Page 175

The Truth About The Dangers Of Crossbows: Your Questions Answered

0

In this article, we explore the misconceptions around crossbows and highlight the very real dangers they pose.

This follows the recent inquest into the death of Shane Gilmer who was “unlawfully killed” by a crossbow.

Together with Shane’s partner, Laura Sugden, we are supporting a campaign to call for stricter laws governing the purchase/acquisition/possession of crossbows. You can view the Parliamentary Petition here.

Our Inquest expert, Gemma Vine discuss some of the common questions being asked about crossbows and the campaign to impose stricter laws:

Q: Why should the Government spend money changing the law when incidents with a crossbow are so rare?

Gemma says: At the conclusion of Shane’s Inquest Ison Harrison carried out research into incidents in which someone had either been injured or killed as a result of a crossbow. Our research was brief and reliant upon media sources obtained via internet searches and therefore we anticipate that we have only just skimmed the surface of the problem.

Worryingly in the last 5 years alone, there have been 21 incidents reported in the media of someone being injured or killed by a crossbow and a further 19 incidents where someone was threatened or caught brandishing a crossbow in public. Only this weekend (1.30am on 9 May 2021) an incident occurred in Barnsley where a young man was arrested by armed police for brandishing a crossbow in public. It is our belief that there has been a demonstrable increase in incidents involving crossbows over recent years and therefore is no longer a rare event.

Q: Isn’t there an argument that the Government should then ban the sale of knives as they cause even more deaths and serious injury than a crossbow?

Gemma says: Unlike knives crossbows can be fired at a distance and still cause devastating damage to the person who has been shot. Crossbows are silent, lethal weapons, which have a similar effective range to a shotgun but offer the accuracy of a rifle. A crossbow bolt when fired can be so powerful that in Shane’s case it travelled through his arm, fracturing the bone, then into the side of his torso, fracturing a rib, slicing through 2 internal organs before embedding into his spine. The force was so powerful that once in his spine the pathologist said he had great difficulty in removing the bolt.

Furthermore, unlike knives which can have a day to day purpose like kitchen knives etc, we can see no routine reason why someone would need to own a crossbow. It is illegal to hunt with a crossbow and there are very few sporting competitions in the UK which allow the use of a crossbow. As a result there should be very few people in the UK who would legitimately need to possess a crossbow, and therefore it can be as easily regulated as those who possess a firearm.

Q: Why should crossbows be regulated the same way as a firearm – are they not different?

They are different in terms of construction, so they don’t fit within the definition of a firearm (as they don’t have a barrel) and the existing legislation would have to be adapted significantly to bring crossbows into line with firearms.

However, it is clear that in terms of lethality there is very little difference between the type of crossbow used to kill Shane and injure Laura and a shotgun or rifle.

It would be relatively straightforward to mirror the existing licensing regime for shotguns and firearms to apply to crossbows. The template for a proper licensing regime is there, within the 1968 Firearms Act and the Home Office Guide on Firearms. The 1968 Act regulates the sale, possession, transfer and use of firearms and ensures that only persons of sound mind, temperate habits, with adequate security and a good reason to use a firearm can obtain, transfer or possess them. Only those persons who are registered as firearms dealers can sell firearms and ammunition (to those who have a shotgun / firearms certificate).

Essentially, the police have the power to revoke certificates and seize weapons if they feel that there is a danger to public safety or the peace, or if they believe the certificate holder to be of unsound mind. Any aggrieved person who has their certificate revoked can appeal to a Crown Court for the firearms and certificates can be returned.

Not all firearms are regulated and less powerful crossbows could potentially escape regulation on the basis of not being ‘lethal’ in much the same way as air rifles. A simple method would be to regulate the sale and possession of crossbows with a draw weight of more than 1.4 kg (as per the Crossbow Act 1987) and to adopt a licensing regime only for more powerful (lethal) weapons.

Q: The government have said that there are already controls in place relating to the sale/purchase and possession of crossbows why do we need a change in the law?

At present the only legislation that is currently in place to specifically address the sale, purchase and ownership of a crossbow is the Crossbow Act 1987. This Act prohibits the sale, purchase and ownership of a crossbow to anyone under the age of 18. There is also legislation in place prohibiting the use of a crossbow to hunt and carrying a crossbow in public. This is however the extent of the legislation in place to prevent the injury or death of a person by using a crossbow.

At present there is nothing in theory to prevent a person suffering from severe mental health issues, with convictions for domestic violence, in the process of an acrimonious divorce and subject to a protection from harassment order from ordering a powerful crossbow online or by walking into a shop selling them. That may be an extreme example, but the dangers are blindingly obvious.

The Home Office makes reference to them having legislation in place to prosecute someone who uses a crossbow to carry out an assault on someone, however this legislation is reactive and not preventative. It is too little too late for the family of someone who has been killed by a crossbow or by the person who has received serious and devastating injuries as a result of one being used on them.

Q: What do you want to achieve by a change in law?

Gemma says: We do not want to ban the sale or purchase of a crossbow, nor do we want to prevent someone from owning one if they want it for a legitimate reason. What we want is for the sale and use of crossbows being regulated in line with the current regulation of firearms.

This would mean that anyone who would want to buy and own a crossbow would have to apply for a license and be assessed by their local police force. This would ensure that the police are aware of who possesses, uses and can access a crossbow in the UK and where they are kept in the property. It also means that if there were any concerns at all about someone’s mental health or behaviour the weapons could be seized for investigations to be carried out or their license revoked.

The indication given by the firearms officer at Shane’s Inquest was that this weapon was a danger to the police, requiring an armed response to an incident where it is known that one was being used. Furthermore, because crossbows are not currently regulated there was no way for the police to know how many crossbows Shane’s killer possessed, or where they were being kept in the property. This meant that they did not know whether when he left on foot he had more in his possession, which increased the risk to the ambulance service and the unarmed police in attending to Shane’s injuries when he was bleeding out in the property.

Q: Where can we find more information about crossbows and specifically Shane Gilmer’s case?

We have written a number of articles about the Shane Gilmer case here:

  • Prevention of Future Deaths Report Released Following Shane Gilmer Inquest (May 2021)
  • UK Campaign To Change The Law Governing Crossbows (April 2021)
  • Jury Return Conclusion At The Inquest Into The Death Of Shane Adrian Gilmer (April 2021)
  • Ison Harrison Help Family Look For Answers In Tragic Death of Shane Gilmer (April 2021)

Share this…

5 Most Important Dog Training Commands for Hunting

0

A version of this article was originally published by Ryan Eder on UplandGundog.com in October of 2014.

The best part of the year for the avid bird hunter is when hunting season is just around the corner. If you’re a waterfowl hunter, chances are you have some kind of early season in September for teal or goose. If you’re an upland hunter, you’re just one or two months from chasing roosters in the field. Either way, as bird dog owners we’ve hopefully been training and conditioning our dogs throughout the off-season to keep them in shape and sharp on their skills. I’m not just talking about obvious hunting related skills like finding birds, marking and retrieving. I’m also referring to basic obedience and every day commands that are also extremely important in hunting situations.

Useful Commands for All Hunting Breeds

Depending on the type of hunting you do, and the type of dogs you hunt with, there can be differences in commands and styles. To account for these differences, I’ll do my best to keep this general and applicable to all types and breeds of hunting dogs. With that said, let’s take a look at some of the most important commands you’ll be using in the field with your dog along with a brief explanation of their importance and how to apply them.

Sit Command

More times than not, I’m hunting with a retriever. I tend to be in a duck or goose blind most of the time, so I’m starting off with the “Sit” command. In the blind, one of the hardest things to train a dog to do is sit and be patient. No one likes a dog in the blind that’s constantly moving around, or a dog that’s not steady while birds are being called and hunters are shooting. A dog that sits well in the blind is more enjoyable to hunt with. That dog is also safer since a dog that breaks prematurely can be in the line of shooting. For you upland hunters, sit is still an important command whether you hunt with a pointer or flusher. For a flusher, you may want your dog to sit on a bird flush. For a pointer, even though you don’t want your dog to sit while hunting, having control of your dog in common areas while hunting at clubs or preserves is still pretty important. In my training program, “Sit” is also synonymous with “Stay”. By this I mean once I tell my dog to sit I expect them to remain sitting until released or asked to do something else. This level of control with your dog is critical both in and out of the field.

Whoa, Stop or Stay Command

To you pointer owners, this command is no stranger. Getting your dog steady on point is a large part of hunting with a pointing breed. The concept of “Stop”, “Stay” or “don’t move” can apply to a number of situations in the field. If you’re hunting with multiple dogs, it’s important for them to honor another point or another dog retrieving a bird. While “Whoa” is not typically a command for this, the concept of “Whoa” is similar. It means “stay where you are, do not move”. This is an extension of the “Sit” command with a flusher or waterfowl dog; “stay where you are” being the message to the dog. There are times where I need my dog to stop and stay, such as when I see him heading for a road or barbed wire fence. Sometimes handlers choose to stop and sit their dog on a whistle, either way, the concept of “Whoa”, “Stop” or “Stay” is incredibly important when handling your dog in hunting situations.

Fetch Command

This is simply a matter of opinion, but my preference in a hunting dog is one that retrieves birds that we shoot in the field. Some people incorporate force fetch in their training program, other people teach “Fetch”, “Hold” and retrieving concepts other ways. Either way, and for obvious reasons, “fetch” or “fetch it up” is something many of us say to our dogs in the field. A dog that doesn’t retrieve well in my opinion can make or break a hunt.

Come or Here Command

Being able to call your dog to you in any situation is important. In fact, this is probably the most important command you’ll teach your dog. It’s the basis of retrieving back to the handler and the ability to call a dog back into range if they’re hunting too far out. Most importantly, this command is a matter of control and safety for your dog in the field. “Come” and “Here” tend to be the most popular commands for this, but many handlers will use a whistle recall as well. This may seem to be a redundant message, but the first time that you have a dog unable to come when called you’ll realize just how important it is.

Kennel Command

Every year I witness someone who wishes they would have tried to teach the kennel command better with their dog. In the home, it is nice to say “Kennel” and have your dog load into their crate without having to lure, push or pull the dog to get them into their crate. The same luxury exists in the field when you want to load the dog into the truck, crate, dog box or trailer after training or hunting. It can be very frustrating to have issues getting your dog loaded into their kennel after a day in the field. If you’re at a gun club or hunt test, or even just a field with hunting friends, it can be embarrassing having a dog that won’t follow this basic command. Make sure to work with your dog on this, and make sure they understand to load quickly, safely and on demand.

Practice at Home for Success in the Field

The basic commands covered in this article are just that. They’re the basics and the minimum standard you should accept from your hunting dog. Most of you probably have them covered and use them every day with your dog. Still, I do recommend practicing them and making sure the dog is sharp so that when hunting season rolls around you don’t encounter any unnecessary issues. Good luck to everyone this fall and happy training!

Ryan EderAbout Ryan Eder

Ryan is the President of the Upland Gundog Association and a longtime trainer of hunting Retrievers. You can learn more about Ryan and his training methods at the UGA website, www.uplandgundog.com.

clean air rifle

0

Introducing the Clean Air Rifle: Revolutionizing Air Filtration and Purification. Say goodbye to pollutants and hello to clean, fresh air with our innovative rifle. Designed with cutting-edge technology, it efficiently filters out harmful particles and purifies the surrounding atmosphere. The Clean Air Rifle ensures a healthier environment for you and your loved ones, making it an essential tool in combating air pollution. Experience the power of clean air today!

clean air rifle

clean air rifle

A clean air rifle is essential for maintaining optimal performance and accuracy. Regular cleaning and maintenance of your air rifle can help extend its lifespan and ensure it operates at its best. By keeping the barrel, action, and other components clean, you can prevent debris buildup and potential damage that may affect the rifle’s functionality.

Proper cleaning of an air rifle involves disassembling the parts, removing any dirt or residue, lubricating moving components, and reassembling them correctly. This process helps remove any accumulated lead or dust particles that can affect the barrel’s accuracy. Additionally, regular cleaning prevents rust or corrosion from developing on metal surfaces, ensuring smooth operation.

Not only does a clean air rifle improve accuracy and longevity, but it also contributes to a healthier shooting experience. A dirty barrel or action can release harmful particles into the air when fired, which may be inhaled by the shooter. Cleaning your air rifle regularly not only protects its internal mechanisms but also promotes cleaner air quality during shooting sessions.

In conclusion, the clean air rifle offers a practical and eco-friendly alternative for shooting enthusiasts. With its innovative technology and zero emissions, it not only ensures a cleaner environment but also provides a quieter and more enjoyable shooting experience. Embracing this sustainable solution can significantly contribute to reducing air pollution and preserving nature for future generations.

MDC to introduce new early antlerless deer season in ’23

0

The Missouri Department of Conservation (MDC) recently set turkey and deer hunting dates for the 2024-2024 seasons along with regulation changes for the 2024-2024 deer-hunting season.

The regulation changes include a new firearms early antlerless portion, a new firearms CWD portion and changes to firearms antlerless permit numbers in most counties. The hunting dates and regulation changes were approved by the Missouri Conservation Commission at its Dec. 2 open meeting in Jefferson City.

“The changes to deer hunting regulations for the 2024-2024 deer season were motivated by increasing deer numbers throughout much of Missouri and in response to changes in the distribution of chronic wasting disease (CWD) in the state,” said MDC Cervid Program Supervisor Jason Isabelle. “With a growing deer population in most Missouri counties, we’re increasing opportunities for hunters to harvest deer both within and outside of the CWD Management Zone next year.”

“With deer populations being at desired levels in most counties but continuing to increase, additional antlerless harvest is needed to stabilize deer numbers,” said Isabelle. “The creation of an early antlerless portion of firearms deer season and increasing the availability of antlerless permits in most counties will provide hunters with more opportunities to harvest antlerless deer and help meet our deer-management goals.”

According to MDC, firearms antlerless seasons that occur prior to the primary firearms season are not uncommon and several Midwestern states have established similar season portions.

“The early antlerless portion will help to increase antlerless deer harvest prior to the November portion of firearms season when the focus of many hunters is on harvesting a buck,” said Isabelle. “The timing of the early antlerless portion was designed to occur when weather conditions are generally comfortable and during a time that will minimize conflict with archery hunters, who spend the most time hunting during late October and early November as the rut approaches.”

CHANGES TO FIREARMS ANTLERLESS PERMIT NUMBERS

MDC has also increased the number of firearms antlerless permits hunters can fill in most counties, including allowing hunters to fill a firearms antlerless permit in Butler, Carter, Scott, and Wayne counties. MDC has also increased the number of firearms antlerless permits from two to four in 82 counties.

“Prior to 2014, firearms antlerless permit numbers were unlimited in 74 counties,” said Isabelle. “However, following the severe hemorrhagic disease outbreak that occurred throughout much of the state in 2012, we became much more conservative with firearms antlerless permit numbers to allow the deer population to rebound.”

He noted the deer population has steadily increased during the last decade, necessitating the liberalization of antlerless harvest opportunities to slow population growth and keep the deer population at desired levels.

Get regulation details and a list and map of allowed antlerless permit numbers by county from the MDC website at mdc.mo.gov/hunting-trapping/species/deer/regulation-changes-2024-24-deer-season

Detailed information on the new firearms early antlerless portion, the new firearms CWD portion, and changes to firearms antlerless permit numbers by county will also be included in the MDC 2024 Fall Deer & Turkey Regulations and Information booklet, available starting in July where permits are sold and online at mdc.mo.gov.

How To Choose The Best Fish Finder for Kayak Fishing

0

Advances in fishing electronics have been moving forward by leaps and bounds in the past few decades. Keeping up with technological innovations is a challenge, even for a techno-junkie such as myself. Sonar, imaging, and GPS have given anglers unparalleled access to what is going on below the surface of the water. However, a decade spent selling fish finders in the retail business taught me a few things. One, many anglers struggle with understanding the different features of modern fishing electronics. Secondly, many anglers are paying for features they simply don’t need or use. If you are buying your first fish finder or looking to upgrade here is a quick course on the features you might look for.

How It Works: Sonar

The majority of anglers rely on sonar. Whether you spend the majority of your time trolling open water or hovering over structure you will find sonar useful. Sonar is useful for identifying your depth, locating fish quickly, identifying the depth of fish, and can provide information on the types of bottom substrate beneath your watercraft. Sonar works by generating a signal that travels outward from your transducer in a cone shape. The signal reflects off surfaces and travels back to the transducer. Your fish finder then translates those reflections into a visual representation. Harder surfaces, such as rock, will reflect more signals than soft surfaces, such as vegetation. The hardness of a surface reflection is often represented by a color gradient that you determine on your fish finder’s settings. Using the color and shape of the return an angler can interpret what the benthic or bottom structure of the lake or river they are fishing looks like. Sonar signals bounce strongly off of air which is why fish with large air bladders show up extremely well on fish finders.

Most modern fish finders broadcast in alternating low and high frequencies. Lower frequencies produce a narrower cone that better penetrates deeper water whereas higher frequencies produce a wider cone that is better at resolving fish and structure in shallow water. Many fish finders will automatically use the best frequency depending on your depth or will cycle back and forth to generate the best signal. However, anglers can select particular frequencies that best suit their fishery and may even opt to buy transducers specific to the types of fishing they do. However, sonar does have several weaknesses. First, due to the narrowness of the signal cone, it is very poor at detecting fish shallow and under your watercraft. Secondly, because it is compressing a three-dimensional cone into a single dimension it is very difficult to separate fish from structure or multiple fish or bait fish from each other. Lastly, learning to interpret sonar output takes time and can be especially challenging for color-blind individuals.

Anglers aren’t bound to just one or two technologies anymore, with modern fish finders displaying a wealth of information on a single screen.

How It Works: Down and Side Imaging

For those anglers that fish structure, whether that be brush piles, weed beds, or rocky reefs, you will find imaging useful. Imaging fills the gaps in sonar’s weaknesses. Unlike sonar, imaging is generated by your transducer generating a razor-thin high-frequency signal. These imaging frequencies can be directed downward, for down imaging, or out to the side, for side imaging. This data is then used to generate detailed and lifelike images of the structure below or off to the side of your watercraft. Unlike sonar images which can be very nebulous and confusing, especially around layered structure, imaging results are much easier to interpret. A tree looks like a tree and rocks look like rocks and so on. Additionally, fish can be separated from structure much more easily.

Imaging uses a high frequency and thus has limitations in deep water applications. In general, I find it most useful down or out to 100’. If you spend a lot of time targeting structure directly under your boat then you will find down imaging especially useful. Side imaging is useful in quickly locating structure off to the side of your watercraft and measured distances on your fish finder unit will allow you to cast at those targets. I’ve also found side imaging to be helpful in locating schools of suspended fish off to the sides of the kayak when trolling in open water.

There are plenty of mounting options for kayaks, though most elect to use one of the accessory tracks.

How It Works: GPS-Enabled Fish Finders

GPS-enabled fish finders provide a wealth of information to any angler. Coupled with bathymetric depth maps GPS allows you to identify and navigate to potential fish-holding areas. Waypoints and tracks of your movements can be saved for future reference as well. Additionally, many fish finders like the Humminbird Helix have advanced features such as Autochart Live that allow anglers to build custom detailed maps of their local body of water. For anglers that troll GPS units provide real-time troll speeds. Finally, GPS can assist in safe navigation to and from your favorite fishing spots.

Advanced Fish Finder Features to Look For

In just the past few years, even more advanced fish-finding features have emerged. These include Humminbird’s 360 imaging which gives you complete imaging all around the watercraft. Additionally, live sonar and live imaging are now available on many fish finders. Live sonar/imaging gives you real-time direction target separation and you can watch fish chase your lure or bait and in some instances you can identify fish species by shape. These advanced features require specialized transducers and cost more but when used correctly can help put more fish in the boat.

Cast Iron Cleaning With Electrolysis – The Cast Iron Collector: Information for The Vintage Cookware Enthusiast

0

Cast Iron Cleaning With Electrolysis

Among the variety of restoration tools available to the dedicated vintage cast iron cookware collector, perhaps the most useful of all is cleaning by electrolysis. While a bit more work and expense than other methods to set up, a properly designed and implemented electrolysis tank can remove both rust and build-up in relatively short order.

The term electrolysis comes from two Greek words, and essentially means “to break down using electricity”. Some may remember high school science class experiments in which electrolysis was demonstrated to break down water into its molecular components of hydrogen and oxygen. But an electrolytic cell can also affect the electrodes to which the voltage source is attached, either by adding material, removing material, or both. The process, under conditions of high voltage and temperature, is the basis for electroplating such as that of decorative chrome on automobile parts.

For our purposes, electrolysis cleaning works somewhat like chrome plating in reverse. By connecting the positive and negative wires the opposite of the plating process, you get crud and rust removal.

The most common set up for an electrolysis iron cleaning tank involves a plastic storage container or the like, sturdy enough to be capable of holding eight or more gallons of water, and a car battery charger. You’ll need a piece of metal, either iron or steel, that will serve as a “sacrificial anode” to which the electrical current will flow from the piece being cleaned.

You’ll also need turn the water in the tank into what’s called an electrolyte, making it more conductive so the current will flow more readily through it. For this, we use Arm & Hammer Super Washing Soda™ (not baking soda), available in the laundry additives section (medium size yellow box), at the rate of 1-2 tablespoons per gallon of water. Washing soda is primarily sodium carbonate, whereas baking soda is sodium bicarbonate. Some people use a swimming pool water conditioner called pH+, which consists of sodium carbonate. Some advanced hobbyists use sodium hydroxide aka lye to achieve a double-acting electrolyte/cleaning solution, but for most, the simpler and less-hazardous washing soda will do.

Gallons of WaterWashing Soda 55-10 T.1/3 – 2/3 C. 1010-20 T.2/3 – 1-1/3 C. 1515-30 T.1 – 2 C. 2020-40 T.1-1/3 – 2-2/3 C. 2525-50 T.1-2/3 – 3-1/3 C.

To properly connect the voltage source, you just have to remember the blacK (negative) wire goes on the sKillet. Also, the battery charger you use must be a manual one, or have a manual charge mode. An automatic charger will see the electrolysis tank as a charged battery and shut itself down.

If you already own a fully automatic charger and don’t wish to purchase a manual one, there is a workaround, although it necessitates the use of a 12V car battery. Hooking up an automatic charger to the battery as if to charge it, you can then use jumper cables from the battery to your electrolysis setup. Current stored in the battery will flow to the pan and sacrificial metal, and the charger will happily supply current to the depleted battery. Heightened care is required using this setup as you must be diligent in properly maintaining the positive-to-positive and negative-to-negative connections between charger and battery. You must also ensure that the positive and negative leads from the battery do not directly touch. Additionally, the terminals and clamps can become hot.

I use a 2amp/10amp switchable manual Cast Iron Cleaning With Electrolysis - The Cast Iron Collector: Information for The Vintage Cookware Enthusiast 
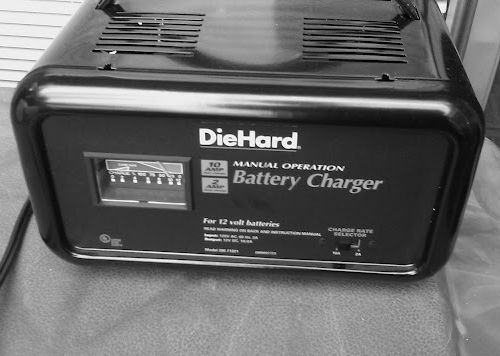
Die Hard™ Charger from Sears. I understand Sam’s Club has some inexpensive manual chargers as well.

Manual car battery chargers have become increasingly harder to find. Another relatively affordable alternative is a variable DC power supply. Normally used for electronic equipment testing and repair, they offer advantages such as adjustable voltage and current. Set the unit to deliver and maintain a desired constant current (amperage) to achieve the best results.

I place a length of 2×2 wood across the top of my container, and suspend the pans in the water from it with coat hanger wire, attaching the black connector to the unsubmerged tip of the handle of the pan. The other, red connector goes to a piece of air conditioner cabinet steel sheet metal I get from an HVAC guy who often has panels of new, unpainted metal left over from his installations.

Other options for cheap anodes include rebar or used lawn mower blades. Larger steel cans like those for fruit juices with top and bottom removed, cut down the side and flattened are another inexpensive alternative. Anodes with more surface area tend to be the most efficient.

For best results, make sure the connectors make good electrical contact with both the piece being cleaned and the sacrificial metal. Use your wire brush or stainless steel scrubber to remove some of the rust and/or crud at the spot on your piece to which you will be attaching the charger connector.

In the long term, to keep your clamps away from corrosive moisture or being affected by the electrolytic process, you may opt to not connect your charger clamps directly to the piece, instead attaching them to the metal bracket or wire the piece is hung from. Adequate current should still be able to flow if all attachment points are relatively clean, bare metal. Poor connections cause increased electrical resistance and excessive heat. Clean metal-to-metal connections will assure the most efficient cleaning and the least damage to charger leads over time. Charger clamps becoming noticeably hot during use is an indication of poor contact.

Also, don’t be tempted to add more washing soda than recommended; it can cause excessive current and overheating problems which may make the charger shut down or melt cable wire insulation. You’ll know you have good current flowing when you see a mist of fine bubbles forming around the piece and your charger’s amp meter reads towards the upper end of its scale.

The process of electrolysis converts red rust (ferric oxide) to ferrous oxide, sometimes called black rust. The process also both coats and rots the “sacrificial” piece of metal over time, so it will need to be scraped down occasionally, or flipped so that a clean side faces the piece being cleaned. Eventually, it will need to be replaced.

A byproduct of the electrolytic process is the formation of potentially flammable hydrogen gas. It is prudent, therefore, to insure the area around the setup is well-ventilated, or, better, to consider doing it outdoors.

Electrolysis is largely a line-of-sight process, meaning the side of the piece closest to the sacrificial metal will become cleaner first. If you put something between the piece and the metal, a “shadow” of crud will be left on the piece where the object blocked the flow of current from the piece. Some people’s set-ups have metal on both sides, or surrounding the piece for faster action. I just turn the piece around from time to time. Visually, built-up crud loosens, and peels or flakes off like old paint. In some places, it sticks tighter, and takes longer to come off. The red rust will turn into a fine, soft black residue that easily wipes or scrubs off. The process is finished when the metal is bare and gray. Some darker staining may remain in spots that were particularly cruddy, but that’s OK, it can be dealt with.

Tip: If the rust is only on the inside, large format pieces like cauldrons and washing kettles can become their own electrolysis tank. Fill with water and dissolve an appropriate amount of washing soda for the volume. Use a 2×4, a piece of PVC pipe or other non-conductive material as a crossbar and hang a piece of sacrificial metal from it. Attach the negative cable of a manual battery charger to the side of the pot and the positive to the sacrificial anode.

How long does the electrolysis take? Before I started using lye, cleaning an average piece using electrolysis alone might have taken a couple of sessions, maybe 8 hours each. Softening things up with the lye first reduces that to about one afternoon session of a few hours. Hanging the piece to be cleaned as close as possible but without touching the sacrificial metal also tends to speed up the process.

Two identically rusted Lodge #7s, before and after electrolysis:

Other Thoughts

As you read about the usage of electrolysis for cast iron cleaning, you will often encounter a few caveats about the choice of materials for the sacrificial anode.

Many frequent electrolysis users, unhappy with the constant need for anode replacement, have turned to stainless steel, some even going so far as to create a 360° setup by using a stainless steel barrel as both container and anode. The advantage to stainless steel is that it does not corrode as readily as do other types of steel or iron. It is not unusual, however, to see comments that using stainless steel in an electrolysis setup creates a hazardous byproduct called hexavalent chromium. “Hex chrome”, as it is referred to in the electroplating industry, is indeed a problem for those working in that industry, where, at the temperatures and voltages employed, it can be produced, vaporized, and released into the atmosphere. At the far lower voltages and temperatures commonly used for cast iron cleaning, however, hex chrome is not a concern.

Similar warnings are seen against using galvanized metals, and the possibility that zinc may be released into the electrolyte, where it may come into contact with the piece being cleaned. Again, the voltages used should not be sufficient to cause concern.

To avoid the foregoing types of concerns altogether, the use of graphite as an anode appears to fit the bill quite nicely. Graphite is a form of carbon that happens to be electrically conductive, but at the same time is far less reactive to the electrolytic process than the majority of metals. As such, the only thing that it can possibly introduce back into the electrolyte or to the piece being cleaned is plain carbon. Graphite also has the advantage of not becoming coated with iron oxide as do typical metal anodes. It therefore needs no regular cleaning to maintain its performance. Storing the anode dry between cleaning sessions is recommended.

Although not as inexpensive as plain sheet metal or scrap iron, graphite can be had, considering its expected duty life, quite reasonably. Bars, rods, or plates of compressed extruded graphite are available from a variety of sources. Look online for liquidation sales of lots of remaindered graphite forms, avoiding those which mention other materials like copper in their composition.

It is important to note that, over time, any anode material used for electrolysis cleaning will deteriorate and will eventually need to be replaced.

Some users have found a hybrid electrolysis/lye method works well. Using the same concentration of sodium hydroxide as that used for a lye bath as the electrolyte can provide some advantages, including a “dual action” cleaning and increased metal anode life. The same cautions for using lye alone apply (if not more so).

Proper disposal of used electrolyte should include avoidance of soil contamination near vegetable gardens. And, as with any cleaning process, proper protocols should include thoroughly washing and rinsing the cleaned piece before beginning any seasoning regimen.

Finally, electrolysis should only be used to clean bare cast iron ware. Aluminum pieces will dissolve. Enameled cast iron pieces may also have their coatings compromised. Chrome or nickel-plated iron pieces may or may not be adversely affected, depending upon whether or not areas of plating have already begun to release or flake off.

Deer Friendly – Feeding Deer

0

Feeding Deer

See the Latest News and Research Below. Also see food plots

Supplemental feeding of wild deer can improve survival and increase the population, but careless feeding can kill deer, transmit disease, or create management problems. Do not use corn or other fermentable carbohydrates as a primary emergency deer food. Deer are routinely killed this way by people trying to help. Examples below. Deer are browsers and have adapted to eating a wide variety of food sources, but their efficient stomachs require time to adapt to a new food source. A hungry deer that has not eaten corn recently can die within a day if it comes across a large pile of corn that it devours [bloat and acidosis].

There are over 10,000 deer farms in the U.S. where deer are fed products formulated for deer such as Purina Antler Advantage, with a protein content of about 16 to 20 percent, which are suitable as an emergency feed. Other similar pelletized products that can be used are available for rabbits, goats, or horses with main ingredients of alfalfa hay, soybean meal, distillers dried grains, rice bran, and corn (less than 25 percent) with protein of at least 12 percent. Goat (chow) feed is widely available. Oats are a preferred supplement. The state of Maine has previously used a mix of oats and barley, but has recently increased the use of alfalfa hay. Some deer may take time to adapt to these unfamiliar foods.

Deer enjoy a wide variety of fruits and vegetables such as apples, grapes, small plums, cherries, pears, pumpkin, carrots, snap peas, tomatoes, squash, almonds, watermelon, figs, turnips, honey locust, watermelon, persimmons, and sunflower seeds. As with people, individual tastes vary. Acorns and other mast are an important food source.

Good trees include pears, apples, crab apples, persimmons, olive, aspen, white oaks and red oaks, ash, aspen, maple, popular, willow, white cedar, yellow birch, red mulberry, and chestnut. Also consider soybeans, dogwood, pokeweed, aster, ragweed, goldenrod, sumac, and honeysuckle.

Feeding deer may increase the transmission of chronic wasting disease and other diseases. Check the map to see if you are in a chronic wasting disease area. Reducing food pile density can reduce transmission probability. The Mississippi DWFP recommends using an above ground covered feeder. An example. Leaving food on the ground significantly increases risk of toxins and other harmful agents. Poop should be removed. Food should be distributed, otherwise dominate deer may prevent younger and smaller deer from eating. Feeding deer is illegal in some jurisdictions. Planting food plots is an effective, safe, and legal way to support local deer populations.

News

Black bears are frequently killed across the country when they live closely to humans, but the practice is often unnecessary and can be avoided

0
  • On June 13, Oregon state officials killed a young black bear that they say had become “too habituated” with humans, according to the Statesman Journal.
  • While many were outraged by the incident, killing black bears is actually quite common in the US. Many states allow annual hunts of the species, while “nuisance bears” are commonly killed in parks and residential areas.
  • According to the Humane Society of the United States, humans can prevent interactions between people and bears (and therefore hunts) by minimizing the animals’ access to man-made food.
  • Seasonal hunts of the species can also be dangerous, as they often ignore the actual problems occurring between black bears and humans.
  • Visit INSIDER’s homepage for more stories.

When Oregon state officials killed a black bear that had become “too habituated” with humans on June 13, people across the nation expressed outrage. Many questioned why the animal wasn’t relocated, while others found irony in the fact that the animal was only deemed dangerous because humans made it so.

Still, the animal is not the first — and won’t be last — black bear to be killed in the US. According to Western Wildlife Outreach, 50,000 black bears are legally hunted in North America each year, while another unknown amount is illegally poached.

The practice is not met without controversy, of course, but it’s still widespread. Many people believe bear hunts are necessary to control populations and protect humans, though others feel the practice is inhumane and cruel.

In reality, however, the common killing of black bears does little but spread inaccurate messages about how humans can coexist with the species.

Black bears are the most commonly found bear in North America

Amongst brown bears and grizzlies, black bears are the most commonly found throughout North America, according to National Geographic. Defenders of Wildlife, a conservation organization, estimates the North American population of the species to be approximately 600,000. Half of that number is said to reside in the US.

The animals can live for up to 20 years old in the wild, according to National Geographic, and typically roam alone across vast territories. Male black bears are said to be especially solitary, while females become more protective when mothering cubs during their first two years of life.

Black bears aren’t typically aggressive.

It’s also a common misconception that black bears are naturally aggressive. According to the North American Bear Center, most black bears typically approach humans out of curiosity — not dominance — and can be scared away with a simple yell or clap.

Black bears also have no interest in eating humans, as they prefer roots, insects, and small mammals, according to National Geographic.

A black bear was recently killed in Oregon after it had become accustomed to humans who fed it

On June 13, Oregon state officials killed a young black bear that they said had become “too habituated” with humans, according to the Statesman Journal. The bear is said to have been between the ages of 2 and 3 years old, and was frequently fed by humans who would pose for selfies with the animal as it ate.

Days before its death, the animal was spotted on multiple occasions in close proximity to humans, according to the Statesman Journal. It was even seen “eating trail mix, sunflower seeds, and cracked corn” alongside other food that was intentionally left by humans.

Local police shared a photo of the bear on Twitter and asked residents to be vigilant and stay away from the area.

“Deputies are working to get this bear cub near Hagg Lake to go back into the woods… please stay away from the area near Boat Ramp A,” the tweet from Washington County Sheriff’s Office said.

Read more: A bear that was given food by tourists so it would pose for selfies was killed because it had become too used to humans, officials say

On June 14, Oregon state officials confirmed via Twitter that they had killed the bear. Rick Swart, a member of the Oregon Department of Fish and Wildlife, told the Statesman Journal that the decision was influenced by past cases in which he said habituated bears were relocated and placed into situations that were more dangerous than where they came from.

People on social media were quick to criticize the decision and questioned why the animal wasn’t brought to a sanctuary.

Killing black bears is actually a common practice throughout the US

According to Western Wildlife Outreach, 50,000 black bears are legally hunted in North America each year. The species is also illegally poached by people who wish to take “their gall bladders, paws, claws, and genitalia for use in traditional Asian medicines,” according to Western Wildlife Outreach, though an exact number is unclear.

As for why the animals are hunted legally, three major factors often play a part. Officials in residential areas and parks, for example, will often kill individual “nuisance bears” that frequently interact with humans, as seen recently in Oregon.

In many other states, however, annual bear hunts are held to control the species’ population numbers, which are growing in most areas, according to the National Wildlife Federation.

Wide Open Spaces, a website about the outdoors, says these growing populations have led to increased problems between bears and humans, leading many people to see the bears as “large raccoons” that are more of an “annoyance” than “top predator.”

A member of New Jersey’s Division of Fish and Wildlife examines a hunted bear.

Some states also use annual bear hunts to help maintain the populations of other animals, according to Wide Open Spaces.

“Believe it or not, a hungry bear that is fresh out of hibernation will follow deer and elk hearts in hopes of scouting out an easy feast,” Wide Open Spaces reported in 2016. “In areas that foster large bear populations, this can put a real damper on other wildlife populations that need those areas to thrive.”

Not everyone agrees that annual bear hunts are effective

Doris Lin, the director of legal affairs for the Animal Protection League of New Jersey, told NJ 101.5 in 2016 that bear populations are rarely cause for concern.

“The bear population is not a problem,” Lin previously told NJ 101.5. “People don’t care how many bears there are. What they care about is bears getting into their garbage cans, into their bird feeders, and cooking grills.”

People protest the annual New Jersey bear hunt in 2017.

“That can only be controlled with non-lethal methods because no matter how many bears there are, they’re going to be attracted to those barbecue grills and garbage cans,” she continued.

Lin also argued that hunters are “just going to keep hunting and hunting because that’s the goal — it’s sport hunting, it’s a trophy hunt.”

Humans can easily prevent most interactions with ‘nuisance bears’

According to the Humane Society of the United States, “nuisance bears” are typically young males or mothers with cubs, and are created by humans who allow the animals to find man-made food “without getting frightened away.” Bears “become less fearful” of people “each time this happens,” which can often lead to conflicts between the two species.

Issues between bears and humans also become more likely during hyperphagia, which is described by the Humane Society of the United States as “a feeding frenzy in late summer and fall” during which bears “bulk up for hibernation” and consume up to 20,000 calories a day. But humans don’t have to fear these conflicts.

Many states in the US host seasonal bear hunts to control population numbers.

The Humane Society of the United States says that keeping black bears away from man-made food will prevent them from becoming accustomed to people. Specifically, making trash cans inaccessible, “enclosing” compost piles, and storing recyclables indoors can stop bears from making house visits.

The organization also suggests removing bird feeders during the summer months, and keeping barbecue grills free from food residue, as even the smallest traces of food can attract black bears.

Annual bear hunts can ignore the actual problems occurring between bears and humans

Black Bear populations are generally rising throughout the US, but that’s not why people are seeing more of them. According to Western Wildlife Outreach, the construction of “housing developments and roads” often push black bears out of their natural habitats, and therefore away from their natural food.

As a result, many of the animals “will frequent municipal garbage dumps and household garbage cans” in search of something to eat. Not only does this lead to bears being labeled as nuisances, but it can also cause an increase in interactions between bears and humans.

Locked garbage cans can keep bears away from food scraps.

A 2015 report from National Geographic says 49,000 incidents occurred between humans and bears in Florida between 1990 and 2014. Many of these conflicts included “encounters at close range, property damage, and perceived safety hazards,” while 200 of the bears were killed after colliding with vehicles.

But because the state has little room to relocate the animals, most “nuisance bears” were killed after encountering humans. In 2015, Florida also hosted a bear hunt during which 295 black bears were killed in just two days, according to National Geographic’s report from the same year. But, according to the Humane Society of the United States, these hunts do little to solve the actual problem at hand: bears interacting with humans.

“Hunters, trappers and wildlife control agents often remove the wrong bears — they kill the individuals not involved in nuisance behaviors,” the Humane Society of the United States says on its website. “Bear-resistant trash cans, hazing programs and other humane methods work better to solve problems.”

Kitty Block, the president and CEO of the Humane Society of the United States, told INSIDER that humans need to become ‘bear aware’

While annual bear hunts are controversial, Kitty Block, the president and CEO of the Humane Society of the United States, feels that killing individual “nuisance bears” is also ineffective.

“States like Oregon too frequently kill bears unnecessarily who come into human-dominated areas looking for food to survive,” Block told INSIDER. “Frequently, the bears are mothers with dependent cubs. When good responses are not in place, states often wrongly try to manage bear-human conflicts by raising bear-hunting quotas, hitting bears doubly hard.”

Rather than killing “nuisance bears,” Block suggests that “non-lethal tactics” should be used.

“Bear biologists strongly suggest that state wildlife agencies employ an escalating suite of non-lethal tactics that include aversive conditioning and relocation in response to bears exhibiting problem behaviors,” Block said. “Those non-lethal deterrents might include the use of Karelian bear dogs, rubber bullets, chemical irritants, noise making pyrotechnics, or just banging pots.”

“In the instance of this young Oregon bear, he or she could have been placed in a rehabilitation facility or even relocated away from this area where people had been feeding him or her,” she continued. “There was no warrant for the state’s action in killing the animal without first exhausting non-lethal options.”

In a previous tweet, representatives for the Washington Country Sheriff’s Office said it wouldn’t have been possible to relocate the bear.

“This was a tough decision the wildlife experts at the Oregon Dept. of Fish & Wildlife had to make for the safety of everyone,” the Washington County Sheriff’s Office said on Twitter. “Relocation wasn’t an option in this case. Humans shouldn’t feed wild bears. It’s a very sad situation.”

Ultimately, Block believes that humans need to become “bear aware” before attempting to coexist with the species.

“People who live or seek recreation in bear country need to take steps to become ‘bear aware’ in order to prevent conflicts from occurring,” Block said. “Simple steps to prevent human-bear conflicts can include not feeding birds while bears are awake, cleaning up barbecue grills with ammonia, keeping a clean campsite or picnic space, and storing garbage containers appropriately at home and in the wild.”

  • Read more:
  • Tourists in Japan are flocking to ‘otter cafés,’ but there’s evidence that the animals are illegally taken from the wild and kept in small cages
  • Tourists from all over the world go to see Morocco’s ‘goat trees,’ but there’s evidence that the animals are being tied against their will
  • A man in Tennessee found a family of bears climbing through the windows of his car and hanging out inside
  • A hungry bear got stuck on the back of a garbage truck after it climbed in looking for a snack

Fallow Deer Sirloin

0

The shelf life of our products is generally based on the specified best before date (“Bäst före” in Swedish). As with all foodstuffs, the best before date is to be understood as meaning that we guarantee the perfect condition of the goods up to this date if stored appropriately. It does not state that the goods are automatically spoiled after this date.

In principle, the shelf life of meat depends on the temperatures and fluctuations in temperature the meat is exposed to. The higher the storage temperature and the more temperature fluctuations, the shorter the meat will stay in perfect condition. Frozen meat may have a best before date of up to a year printed on the packaging. That date assumes that the meat is kept at -18° C during that whole time. This is of course impossible for us to guarantee when we ship the meat over longer distances using a courier. The meat will most likely arrive to your home at a temperature a few degrees below freezing.

Therefore, after you received your meat, we recommend that you store it in a fridge at maximum 4° C and consume it within five days unless you choose to refreeze it.

In general, if your meat was frozen, we recommend not to re-freeze it. However, basically nothing speaks against refreezing, especially if the food has to be heated up before consumption. The nutrient and vitamin content may suffer slightly, but refreezing is more hygienic than storing it in the refrigerator at temperatures above 0° C.

Our own tests also show that you can assume that the great taste of the meat will not be affected by refreezing. Wild game meat is of such high quality that the theoretical reduction in quality is practically unnoticed.

If you want to cook the meat after its been frozen, it is best to remove it from the freezer 1-2 days in advance and place it in the refrigerator.

In the unlikely event that you have forgotten to take your meat out of the freezer, you can defrost it more quickly in water. Check whether the packaging is still properly vacuumed. If this is the case, you can place the meat, packaging and all, in a container of cold water. This way, a the meat thaws faster. If the packaging is no longer vacuumed, then you can NOT use this method.

How to Sight in a Bow (Fixed & 1-Pin) & What Distance To Set Your Pins At

0

Have you just purchased your first bow sight and you need to sight it in?

What are the right sight marks for you?

What is the best way to sight-in your bow?

The only way to find out is to get out there and start somewhere, and we’ll show you where that is.

We’ll discuss common distances used to set your pins as well as our favorite way to sight in your bow.

What Distances to Sight in Pins on Your Bow?

What is the best distance to sight in your bow? You’ll find various answers here and there according to the preferences of the person providing the advice. We’ll lead you straight as the best distances for you will depend on a few things:

  • Draw weight/bow speed
  • Type of bow hunting
  • Personal preference for maximum shooting distances

All these factors will be addressed as we discuss the most commonly used sight marks for many bow shooters.

Top Pin Setting

The most common top pin setting for both timber and the open fields is 20 yards.

These days, most compound bows are fast enough to see very little difference in arrow trajectory between 10-20 yards. When this is the case, the first pin is usually set at 20 yards that also serves as a pin for 10-25 yard distances. You may be a few inches high when using the 20-yard pin for a 10-yard shot, and you may be a few inches low for a 25-yard shot.

To enable accurate and precise shots using your 20-yard pin this way, you’ll have to know how your bow, arrows, and sight setup will perform. Get to shooting off some arrows!

Do you have a 5-inch difference or more? Do you need to start with a 10-yard pin instead? If you’re shooting from a tree stand, you just might. You must also know the positions and kill-zone sizes of your game if you’re a hunter.

Low poundage bows that includes 40lb draw weights will require a top pin that should be set for 10 or 15 yards. It’s about shot placement that includes getting close enough to your target with it in a position to take an ethical shot.

Factors to think about:

  • How fast is your bow?
  • Where and what are you shooting?
  • Become proficient with setup to predict how it performs between 10-25 yards.
  • See instructions for your bow sight if there is a recommended top pin distance.

5-Yard Distance Increments

You may see some shooters with sight marks in 5-yard increments. An example includes: 15, 20, 25, 30, 35, and 40 and other similar variations. Again, personal preference is the rule here.

Consistent 5-yard increments are usually seen on sights that have 5 to 7 or more pins, and there are both pros and cons to this pin setup.

Advantages include less gap shooting, pin for every reasonable distance, and smaller yardage increments for confident shooting.

However, the disadvantages can outweigh the benefits. When increments are small, and you have a generally fast bow, the pins will be stacked very close together. It’s likely you will choose the wrong pin to shoot with.

Pins too close together can also block out a significant amount of the target. The more pins you have, the more it clutters your field of view.

10-Yard Distance Increments

Even 10-yard distances are the most common and versatile setup for hunters for many types of prey in the field. It may start with a 20-yard pin and continue from there, or it may start with a 15 or 25-yard pin and follow suit.

10-yard increments allow enough space between the pins to adequately see the target and to appropriately shoot the gaps when necessary. However, difficulty in achieving accuracy and precision at ranges further than 50 yards increases especially when you gap shoot. When you extend your pins out to longer distances, arrow drop, user error, and form issues are magnified.

Holding over or holding under isn’t so easy to do when you’re cold, hungry, tired, or you’re pumping with adrenaline due to the 10-point buck that just came into view 30 or so odd yards away. It may now be helpful to split the distance in 5-yard increments for the bottom pins such as 20, 30, 40, 45, and 50 or 20, 30, 35, 40, and 45. Find the variation that works for your bow setup and your shooting style.

Think about:

  • How many pins should be in your 10-yard increment setup?
  • What maximum distance are you comfortable and skilled enough at to make an ethical shot?

The more pins you have, the further you can shoot out in practice whether you realistically take shots out this far in the field. Practicing at 60 and 70 yards can make your 20-40 yard groupings tighter and easier to make. However, it does clutter your sight picture and it may encourage you to take shots you shouldn’t in the field.

Where is the Middle Ground?

The middle ground is more about having the right number of pins for your setup. There’s no need to clutter your sight picture with more pins than you realistically use in the field.

A general rule of thumb is 3 pins for many hunting applications, and 5 pins for Western or long shot hunting. Of course, there are hunters that do very well with a single pin bow sight to eliminate the process of gap shooting altogether. Where do you sit in the single vs multi-pin debate?

If you’re one of those hunters who push your bottom pins down as far as they can go to get them out of the way, but you keep them for the “just in case” moment, a fixed pin with a floater bow sight would serve you better.

Many times, the bow sight manufacturer will recommend in the setup and sighting-in instructions what distance the first pin should be set with and the distance increments for the following pins.

While 10-yard increments are certainly the standard and is a versatile setup, the goal is to find what setup works best for you. You won’t know it until you get out there and start practicing.

How to Sight-In a Bow

General Preparation Instructions for Sighting In

  • Mount your sight to your bow.
  • Be prepared to spread out sighting-in process over a course of several days due to fatigue that can compromise everything from correct form to accuracy.
  • Have necessary gear and equipment ready i.e. targets, arrows, appropriate laser rangefinder, etc.
  • Safety first: ensure you have the appropriate backstops and area clearance to shoot.
  • Start close to the target: 10 yards to get on paper and to reduce adjustment issues later.
  • Adjust in small increments at a time.
  • Have Allen wrenches or required tools to make adjustments to sight.
  • We like the “one axis at a time” method of sighting in. This process may incorporate use of leveled tape in the shape of a sideways “T”, as a cross, or any target that helps to focus the eye to aim in straight lines.

How to Sight In With a Fixed Pin Bow Sight

  1. Stand approximately 10 yards away from your T target. Starting with the windage axis (left/right), you will want to aim for the vertical part of the target. Let off 3-5 arrows in a line.
  1. Examine the arrows position in relation to the vertical line of the T. Being this close to the target, you want to make sure you’re as dead-on the center of the line as possible. Margins of error will be magnified when you step back to fine-tune your adjustments at longer distances.
  1. To make adjustments, follow the arrow. If your arrows are left of the T, make an adjustment to move the entire sight housing If your arrows are right of the T, make an adjustment to move right.
  1. Repeat this process until your arrows are dead-on center on the vertical line.
  1. Stand approximately 10 yards away from your T target. If necessary, move the top pin high up towards the top of the housing to leave enough adjustment room for the remaining pins on sights with 5-7 pins. Let off 3-5 arrows in a line using your top pin as an aiming point for the horizontal part of the target to begin adjustments for the elevation axis (up/down).
  1. Examine the arrows position in relation to the horizontal line of the T. You don’t have to be so precise with this at 10 yards. If the arrows are further than 6 inches of the line, follow the arrow to make adjustments by moving the entire sight housing. If your arrows are above the line, make an adjustment to move the sight up. If your arrows are below the line, make an adjustment to move the sight down.
  1. Repeat this process until your arrows are within 6 inches of the horizontal line.
  1. Step back to the distance you want to set your first pin for which is likely 20 yards. The top pin is the only pin you can set by moving the entire sight housing at this point in the process. Let off 3-5 arrows aiming with your top pin to hit dead-on the center of the horizontal line as possible. Now is the time to be precise with your adjustments by moving the entire sight housing up or down.
  1. Once you’re hitting dead-on with your 20-yard pin, it’s time to sight-in the remaining pins which will all be adjusted individually. Typically, the next pins will be set for 30, 40, and 50 yards, if applicable. Stand at the distance you want to set your next pin for, let off 3-5 arrows using the appropriate pin to aim with and shoot for the horizontal line of the target.
  1. Examine the arrows in relation to the horizontal line of the T. Be precise in making individual adjustments for the appropriate pin. Again, follow the arrow. When you’re successfully hitting the center of the line, it’s time to move to the next pin until all remaining pins are set for their distance.
  1. Go back to 30 yards and let off 3-5 arrows for the vertical line to fine-tune your windage (left/right) axis with any adjustments if needed. You might notice you may be slightly off at 30 yards since variations in accuracy are magnified at longer distances.
  1. Fine-tune any adjustments by double checking you’re consistently hitting the lines at your set pin distances. If you need to make any fine-tuning adjustments to your 20-yard pin at this point, do it by adjusting the individual pin, not by moving the entire sight housing.

How to Sight In a Bow Sight With 1 Pin

Each manufacturer and model of single-pin sights will have slightly different sighting-in instructions and sight tapes provided. It’s important to follow the setup recommended by the manufacturer to achieve maximum potential and accuracy from your sight.

A well-accepted method is the 20/60 setup which we’ll explain below.

  1. Stand approximately 10 yards away from your T target. Starting with the windage axis (left/right), you will want to aim for the vertical part of the target. Let off 3-5 arrows in a line.
  1. Examine the arrows position in relation to the vertical line of the T. Being this close to the target, you want to make sure you’re as dead-on the center of the line as possible since margins of error will be magnified when you step back to fine-tune your adjustments at longer distances.
  1. To make adjustments, follow the arrow. If your arrows are left of the T, make an adjustment to move the entire sight housing If your arrows are right of the T, make an adjustment to move right.
  1. Repeat this process until your arrows are dead-on center on the vertical line.
  1. If you’re using calibration tape provided by the manufacturer, go ahead and stick it on your wheel or bar now. Turn the wheel or knob all the way to the top until it stops. Stand 20 yards away from your T target. Let off 3-5 arrows in a line using your pin as an aiming point for the horizontal part of the target to begin adjustments.
  1. Follow the arrow. If you’re low, turn the wheel/knob down in small increments at a time. Repeat this process until your arrows are dead-on center on the horizontal line.
  1. If using calibration tape, note the reference number the indicator is lined up with as this is your 20-yard mark. If not, use a pencil or marker to mark where your 20-yard mark is.
  1. Step back in 10 yards at a time to sight-in for 30, 40, and 50 yards. Dial down the wheel/knob each time you move back.
  1. Finally, get sighted-in at 60 yards and make the adjustments necessary by following the arrow. Take note of the reference number the indicator is lined up with or mark this spot as this is your 60-yard mark. Additionally, fine-tune your windage (left/right) axis now to ensure consistent shots.
  1. Match the correct sight tape for your markings or number references provided by the manufacturer and apply it to the wheel or bar. Use the sight-tape to double-check you’re hitting consistently at the matched distances.

Put it to the Test!

Once you’re done sighting-in, it’s time to pull out the 3D and 10-ring targets and put your skills to the test. You may be surprised to find your groups are tighter than ever. But, is this the only way to sight in a bow?

Everyone may use a slightly different sighting-in method, the same way they may use different distances to sight in their pins. Some may adjust for both left/right at the same time as they’re adjusting for up/down shots. It happens to be the mainstream way of adjusting especially when using traditional 10-ring targets.

Use the system you’re most familiar with. Get to know what distances or sight-in method you like best by getting out there and nocking some rounds. Sight in and shoot sharp!

Further Reading

  • How to Measure Scope Ring Height (With Pics & Calculations)
  • How to Adjust a Rifle Scope: 6 Scope Adjustments Explained!
  • How to Level a Scope on a Rifle [Step-by-Step With Pics]
  • What is a Rifle Scope Ruler (Mildot Master) & How to Use It?
  • What is a Prism Scope? Prism VS Reflex VS LPVO!
Best Air Rifle Deals

Popular Posts

What can you kill with a 177 air rifle?

0
"Unleash Your Precision: Discover the Power of a .177 Air Rifle to Take Down Targets with Accuracy. Explore the Versatility and Potential of this...

What Is An Air Rifle?

0
If you have stumbled upon this article, chances are that you probably have a pest problem at your house. This is a very common...

Air Rifle Scope vs. Rifle Scope – Which One Fits Your Shooting Needs?

0
"Air Rifle Scope vs Rifle Scope: Unveiling the Ultimate Precision Optics. Discover the essential differences and benefits of these two optical devices, empowering shooters...