You may be surprised to learn that the chiltepin is actually a pepper native to the United States. In fact, it’s the only one, making it known to many above the border as “the mother of all peppers”. The chiltepin pepper has a rich history in Native American culture. And its tiny size along with its intense (but short-lived) extra-hot spiciness (50,000 to 100,000 Scoville heat units) and smoky, earthy flavor have made it a unique favorite among today’s hot pepper lovers.
Table of Contents
What are chiltepin peppers?
Chiltepin fast facts
How hot are chiltepin peppers?
Where do chiltepin chilies grow?
What do they look like?
What do chiltepin taste like?
Cooking with chiltepin
Where can you buy chiltepin peppers?
Must-read related posts
Chiltepin fast facts
Scoville heat units (SHU)Median heat (SHU)Jalapeño reference pointCapsicum speciesOriginUseSizeFlavor
How hot are chiltepin peppers?
For such a small size, they pack a pretty big punch. Be careful if you ever get the chance to pop a few of these peppers in your mouth. Chiltepin ranges from 50,000 to 100,000 Scoville heat units (or SHU), with the chance for a bit hotter if a crop had an ideally wet growing season. This makes it equal with Thai peppers in terms of overall heat and roughly six to forty times spicier than your standard jalapeño. Compared to that cayenne pepper in your cupboard (30,000 to 50,000 SHU), the chiltepin begins in heat wear the hottest cayenne stops.
Let’s also compare the chiltepin to another chili that’s often referenced alongside it: the pequin. Pequin chilies are quite a bit milder: 40,000 to 60,000 SHU. Their floor is near equal, but chiltepin can be, at their hottest, nearly double the heat of pequin peppers.
But the heat of a chiltepin is quite different than most other peppers. They zing you with hotness before calming down quickly. Compare that to a ghost pepper where the heat starts seemingly mild and boils over in intensity over time. It’s definitely a different eating experience.
Where do chiltepin chilies grow?
As mentioned, this is the one wild chili native to the United States. It’s found natively in the southwestern U.S. and northern Mexico. For a long time, chiltepin plants pretty much only grew wildly, a treasure of the land. Native Americans adored this chili, and they still do. It’s a food staple and a medicine (due to the capsaicin in the plant).
Rituals were built around the wild harvesting of the chiltepin pepper – it’s something that brought communities and families together. It’s this sort of indigenous North American history and folklore that’s bringing the chiltepin back to the forefront among chilies in America.
Today, chiltepins still grow wildly. The regions of wild growth in the United States are few – totaling 15 locations. But many are all protected national park sites like Coronado National Forest. There are domesticated crops as well, but you’ll find that many packages of dried chiltepins are picked from wild harvests in these regions.
What do they look like?
These are tiny chilies. In fact, chiltepin are sometimes called bird’s eye peppers because of their tininess (not to be confused with the Thai peppers which are also sometimes called bird’s eye chilies.) The chili goes by many other names, too,, including bird pepper, chile tepin, chiltepe, and simply tepin.
Chiltepin are often only a quarter-inch across, so multiple chilies can fit on a United States quarter, and they have a round shape. They follow the common color maturation pattern of most chilies, from green to a beautiful red hue. Overall, they look quite unassuming for the amount of spiciness they hold.
What do chiltepin taste like?
There’s a smoky, earthy flavor surrounding the pepperiness of the chiltepin. And that’s only heightened when they are picked sun-dried from the vine. It’s a common way that these chilies are eaten since they are found natively in the Southwest of the United States.
Cooking with chiltepin
As mentioned, using this chili sun-dried is a favorite for many people. Some simply enjoy this wild North American chili, sun-dried, straight off the vine. Just pop a pepper in your mouth for an intense experience.
And even though these peppers are small, people still cook with them. Chiltepins, in both their dried and fresh forms, are often mixed in with sauces and salsas. They are also ground into powders for spices. They even make their way into spicy desserts. A favorite for many is pickled chiltepins. When pickled, the chili is mixed with other spices to create one of the most unique condiments imaginable.
And, of course, chiltepin are a favorite for Tex-Mex and authentic Mexican foods of all types. It’s an excellent chili for burritos, enchiladas, quesadillas, and more.
More cooking tips:
When cutting into chiltepin, handle with care. The heat level of these chilies is low enough that you can typically handle them whole without concern for chili burn. But cutting into any chiltepin, like with any chili, releases the capsaicin (the compound that creates the spiciness.) Wear gloves when cutting them to keep the potential for pretty significant chili burn at bay.
Use sparingly, then add as you like. The small size of chiltepin can really fool you into overusing them. That’s especially true if you’re swapping chiltepin into a recipe that called for larger chilies. Don’t think that you need to match size for size (like five chiltepin for one jalapeño.) You’ll be in for a surprising amount of spiciness.
Chiltepin are also an excellent chili for read meats and barbecue. It’s that earthy, smoky flavor. It maps very well to the bolder tastes you get from grilled steaks and heavily marinated meats and bolder barbecue sides.
Where can you buy chiltepin peppers?
You won’t often find these peppers in a grocery store outside of the southwestern United States, that’s for sure. And even specialty stores may not carry them. But you’ll definitely find them online,along with chiltepin seeds, whole chilies, and other products.
With its rich North American history and surprising taste, the chiltepin is no longer a forgotten pepper. If you’re a chilihead, exploring what this pepper has to offer is an interesting way to experience both one of the earliest known peppers as well as the rich Native American history of the United States. It may be tiny, but its significance is grand.
Must-read related posts
The Hot Pepper List: The chiltepin is only one of over 150 chilies we profile here at PepperScale. Our list lets you filter chilies by spiciness, flavor, origin, use, and more.
Small Peppers Guide – Tiny Delivers Big: This chili is among the smallest on the Scoville scale. Which others share that distinction? Take a look.
Our Hot Sauce Rankings: We rank over 100 hot sauces, covering overall flavor, heat balance, usability, and collectibility. Explore the rankings and even sort by the chilies used.
Sometimes, you simply can’t fit all of your EDC kit into your pockets. Sure, you’ve probably got enough room for your knife, keys, flashlight, phone, and wallet, but once you start adding on a laptop, first aid kit, and rain jacket, having an EDC backpack can really help you maximize your effectiveness while out and about.
But what sets an EDC backpack apart from just your everyday run of the mill Jansport? What features should you key in on when looking for an EDC backpack?
Not to worry! We’re going to do a deep dive that’ll answer both of those questions and more! Here is not only a comprehensive buying guide for EDC backpacks, but a list of the 7 best EDC backpacks on the market in 2024.
Simply put, an everyday carry backpack is an extension for your EDC loadout so that you can carry more gear efficiently. They’re incredibly durable to stand up to the grind of being used day in and day out.
The biggest key word about EDC backpacks is that they help you be more efficient. That means that EDC backpacks are also not cumbersome. A good EDC pack isn’t the same thing as a large 60L pack that you’d through your camping gear into for a couple nights in the wilderness. It’s small enough that it won’t inhibit your mobility as you wear it through-out your day while it securely carries the rest of your EDC load out.
Now that we’ve properly defined what an EDC backpack is, let’s talk a bit about the features you want to be on the lookout for when you decide to start shopping for an EDC backpack. As we mentioned earlier, not all backpacks are created equal!
An EDC backpack must be able to stand up to the rigor of being used day in and day out. Keep an eye out for the material that the pack’s exterior as well as interior is made from. The toughest packs used nylon that is rated between 840D and 1680D ripstop nylon. Keep in mind that the higher the nylon rating, the bulkier and heavier the pack will be.
– Size –
Your EDC pack should be small enough that it’s easy to carry in a multitude of areas, but big enough to fit all of your EDC kit. Sizes are usually measured in liters. A good size for an EDC pack should be somewhere between 14 liters and 26 liters. Any smaller than 14 liters will limit the effectiveness of your pack and anything bigger than 26 liters will make it cumbersome to carry the pack everywhere you need to go.
– Storage –
Interior organization is an important factor to consider. While you can randomly stuff your EDC kit into the main body of the pack, it’ll make finding your gear a nightmare as you’ll likely need to unpack everything to find the piece of gear you need. Individual zippered pockets help to maximize your storage inside of the pack to make finding your gear a breeze, so be on the lookout for interior zippered pockets.
– Warranty –
As we’ve said time and time again, warranty is one of the best ways to tell how confident a company is in their product. While most companies offer some sort of limited warranty, they usually can’t hold a candle next to lifetime warranties. Companies that offer unlimited lifetime warranties typically design some of the most dependable and durable backpacks on the market, so be sure to double check the warranty of offered with the pack you’re interested in purchasing before buying.
1) Vanquest – ADDAX 18 Backpack
The Vanquest ADDAX 18 stands apart from most EDC backpacks in one surprising area: its high-vis interior. Blaze orange nylon fabric lines the inside of the backpack to make finding your gear in practically any light a non-factor.
The interior of the pack is divided up into 15 different pockets and slots, making it easier than ever to immaculately organize each piece of your EDC kit. With 18 liters of storage space inside of its water repellant exterior, you can rest assured that your gear is well protected.
One area to keep in mind when considering the Vanquest ADDAX 18 is that it has a limited lifetime warranty. While it does come with a 100-day money back guarantee, Vanquest limits warranty claims to defects with the manufacturing only. Everyday wear and tear isn’t covered by the warranty, so if you end up needing to get your pack repaired, you will likely incur some fees to have Vanquest repair it for you.
2) GoRuck – GR1
For a bigger pack with a beefier warranty, definitely checkout the GoRuck GR1. Coming in two sizes, 21 liters and 26 liters, the GR1 is capable of holding all of your essentials inside of its tough interior. The reinforced padding in the shoulder straps makes carrying practically any load feel like nothing at all, so load it down as much as you like! The extra padding in the shoulder straps is also assisted by a removeable hard plastic frame so that the pack remains rigid to improve stability as you carry it.
The warranty that protects the GR1 is incredibly generous. Covered by the GoRuck Scars Lifetime Warranty, you can send it back to GoRuck for repair for practically any reason. And if GoRuck can’t fix it, they’ll replace your pack free of charge.
The one area that the GR1 lacks in is its interior storage organization. While there are 3 different slots to store your gear in, there aren’t interior pockets to niche down your organization.
3) AER – City Pack
If you’re in need of a smaller pack, don’t sleep on the AER City Pack. The 14 liter interior is lined with interior zippered pockets to make organization incredibly easy. And while the shoulder straps aren’t as beefy as the GR1, the contoured back panel of the pack curves to the shape of your back for comfortable all-day carry.
Something that makes the City Pack unique is that it is designed with a specific “smart tracker” pocket. This allows you to insert a small tracker like AirTags, Tile Trackers, or even the Chipolo Tracker. Having a GPS tracker on board will ensure that your backpack is within arm’s reach, no matter what.
But like the Vanquest ADDAX 18, the City pack is only covered with a limited lifetime warranty. While it does cover manufacturing defects, normal wear and tear isn’t covered and can only be used with proof of purchase (aka, you have to hang onto your original receipt).
4) Vertx- Gamut 2.0 Backpack
For those who intend to carry a firearm with them in their EDC kit, the Vertx Gamut 2.0 is the ideal pack for you. Not only does the pack have a concealed area to holster a handgun and an extra magazine, but the top of the pack also comes with a quick draw retention loop that allows you to quickly access your EDC firearm at a moment’s notice. When not used for carrying a EDC firearm, the back panel can easily be used to carry a 16” laptop comfortably.
The 180° front pocket is a great design feature as it makes loading the front slot of the pack a breeze. And when you open it up to access your gear, you’ll find plenty of organizational slots to quickly find the exact piece of gear you need.
One area that the Gamut 2.0 lacks in is its exterior water bottle pocket size. It’s fairly small and only able to accommodate a 16 oz. water bottle. So if you’re looking to carry a larger water bottle like a Nalgene or a Hydroflask, you’ll likely need to store your bottle inside the pack.
5) Peak Design- Everyday Pack
If you’re into digital media creation or just want to ensure that each piece of your EDC kit has a slot to rest in, look no further than the Peak Design Everyday Pack. The Everyday Pack is a highly organized machine as the top flap of the pack opens up to reveal several small dividers that meticulously organize the 20 liters of interior storage space.
Carrying the Everyday pack is incredibly comfortable. With vented quick dry mesh lining the back panel and shoulder straps that pivot to match the contour of your back, you can carry the Everyday pack every day and all day without issue.
Another unique feature of the Everyday Pack is that it comes with stowable exterior straps on the exterior of the main body of the pack so you can cinch down a myriad of other items that won’t fit inside of the pack. Whether it’s a rain jacket, blanket, or anything else that’s too big to fit inside the interior of the pack, the Everyday Pack has a way to help you carry your gear where you need it to go.
6) Mystery Ranch- Rip Ruck 15
Mystery Ranch is a well-known brand in the hunting community. They’ve consistently built packs that are capable of packing in all of your hunting gear for a backcountry excursion and capable of packing out your camp plus practically all the meat you can carry from a successful hunt. The bottom line here is that Mystery Ranch knows how to make long lasting packs that are comfortable enough to carry the heaviest of loads.
Their experience in designing packs that make heavy loads feel like nothing at all makes them immensely qualified to offer the Rip Ruck 15 as their go to EDC backpack. With a top open compartment to access the main body of the pack, they’ve made it easier than ever to access each piece of gear inside of your EDC kit. The lid also comes outfitted with a couple of rows of MOLLE to make it easy to add additional storage options to the pack so you can customize it to your liking.
7) Alpaka- Elements Backpack
One of the most secure packs on our list is the Alpaka Elements Backpack. The anti-theft lockable zippers allow you to pass a small lock through the eyes of the zippers to ensure that all of your gear stays safe from anyone who’d want to rifle through your pack while you aren’t watching. The interior of the pack is loaded with organizational pockets to help you find a place for each piece of your EDC kit.
The most unique feature of the Elements Backpack is the row of nylon loops that allow you to place Alpaka’s quick detach clips for any small and frequently used pieces of gear that you carry. Simply attach the QD ring to the exterior of the piece of gear you want to be able to pull from your pack and clip it to the QD clip. Feed the gear into the QD clip and your gear is held in place securely until you need to grab it!
Alrighty, we’ve gone over a lot, so let’s recap. EDC backpacks are made from some of the most durable materials on the market to stand up to the wear and tear of everyday use. They’re perfectly suited to carry your essentials that help you get through each day, but not too big that carrying it would be cumbersome. Their storage organization is second to none, making finding each and every piece of your EDC kit a non-factor, even in low light scenarios. And they’re backed by a warranty that will repair or replace your pack at no cost to you!
All of these factors lend towards these packs costing a pretty penny. So if you’re looking to upgrade other parts of your EDC kit, be sure to be on the lookout for special discounts and bundles to help you stretch your dollar further. In fact, if you sign up for the Axwell Army Newsletter by clicking here, you’ll be sent a special discount on your first Axwell Wallet purchase!
SOMEWHERE there may be wise, funny, charitable iguanas, and some of you may keep them as pets. But squinting up into a mangrove tree in southern Puerto Rico, trying to resolve a red-eyed, hissing wild iguana in the confusion of slender green leaves, it’s hard to imagine these lizards as anything but back-alley larcenists. Lunch-money bullies. Grifters.
Maybe it’s the air rifle in my hand that places me in such stark opposition to these iguanas, but I admit it: It’s deeply satisfying to shoot these invasive opportunists that are quickly taking over the island. There is also a sensory reward. Thwap spits the gun. Thwunk announces the meeting of hollowpoint pellet and leather. If it’s a good shot, the sound of a 10-pound lizard free-falling through the limbs and smacking on the ground. Crash! Thud!
Tossing lizards up a steep bank; a head-shot lizard.
I’m here, not far inland from the port city of Ponce, to help reduce the infestation of non-native iguanas that are causing many millions of dollars in damage to fruit orchards, crop fields, and even highways and other infrastructure. Because Puerto Rican firearms laws are either restrictive (minority opinion) or confusing (majority opinion), my group has opted to hunt the reptiles with air rifles—new .35-caliber Carnivores from the Turkish company Hatsan. For the first day, we do pretty well. Between five shooters, we drop maybe 40 iguanas from the treetops.
The Romans are part of a loose confederation of Puerto Rican damage-control volunteers who get invitations from large landowners to kill as many iguanas as they can. Some of these reptile-ridders are self-styled rogues who call themselves “Los Iguaneros” and have made desperado-themed videos that you can see on YouTube. The Romans are a little more restrained with their self-promotion. But they are deadeye killers, all the same. In my first day hunting with the family, we dispatch nearly 100 lizards.
Puerto Rico’s iguana problem started, in all likelihood, with a few pets released into the wild. Those outcasts met and bred, and soon their progeny, feral and ravenous, started moving around the island, following the coastline at first, but about 10 years ago, they started moving inland. Initially, iguanas were considered a novelty. But in just a few years, populations went from scattered to dense, and from nuisance to environmental catastrophe. There is no part of the island where you won’t find the invaders gauchly lounging in trees, but they are particularly troublesome in the countryside, where they eat or damage as much as a quarter of the crops. And in a United States territory that’s teetering on the brink of economic collapse, any reduction of its export business is taken seriously. The favorite foods of iguanas are banana, papaya, and melon.
An iguana basks in the sun on a San Juan rooftop. Josh / Adobe Stock
Because of their habit of burrowing deep underground to make nests—each female lays around 70 eggs twice a year—iguanas have also been blamed for highway collapses and sidewalks that crack and slump. Even the main international airport in San Juan has been affected by the lizards. Iguanas love to bask on hot surfaces, and it’s not uncommon for the airport’s runways to close on summer afternoons so they can be cleared of lizards, which can flatten tires and even be sucked into the turbines of jet engines.
Experts estimate Puerto Rico’s iguana population to be between 10 million and 14 million, but because the reptiles have no natural predators here and because of all the food they can find and eat, the population is expected to double every year or two. And that’s where the Romans come in.
Air Strikes
Alex Echevarria Roman is 23 years old and formally polite. But he has eyes like a falcon and has probably collected more pounds of wild meat with an air rifle than anyone I’ll ever know. For the last 10 years, he has roamed Puerto Rico with his family, trying to kill every iguana they see. As we talked, we walked through a stand of trees on the edge of a large mango plantation, and every few minutes, Roman would stop, point up, direct my aim (“Shoot for the spot just behind the eye”), and wait for me to drop an iguana before continuing.
“We distribute our phone numbers around the countryside and tell people, mostly big-scale farmers, to call us when iguanas get out of control,” he tells me as I settle my crosshairs on an avocado-green 5-footer. “At first, we’d get a few calls a month, but now, we can’t keep up. We come to a farm like this one [outside Ponce], but it’s not possible to control them. We can kill 100 iguanas in a spot, and return a day or two later and kill 100 more.”
Hatsan’s Blaine Manifold fills the airgun reservoir from a scuba tank; reloading the 82-grain pellets.
I hit the lizard a little too far back. This is a bad thing, because unless you hit a cold-blooded iguana just behind the eye, it won’t die instantly. Instead, it may scurry around the trunk and out of sight, or it may hang up in a crotch. Or, like this one, it may drop out of the tree, ready to fight. To see a wounded iguana on the ground is to see a Japanese Godzilla flick come to life. The lizards hiss, they flare their frills, and they often charge their persecutors, trying to whip them with their saw-sharp tail. They remind me of the sneaky, venomous dilophosauridae from Jurassic Park, and I don’t mind telling you they freak me out a little bit.
“We mainly use air rifles,” Roman continues after I dispatch the wounded lizard and regain my composure. “Partially because they’re much cheaper to shoot [than firearms], but also because in Puerto Rico you can only use firearms during fall hunting season for pigeon. But it’s legal year-round to hunt iguanas with air rifles. My favorite time is February, during the breeding season. Then, the machos can get very aggressive.”
Roman prefers .22-caliber air rifles for their flat trajectory and accuracy. I’m shooting a hard-hitting .35-caliber pellet out of my Hatsan PCP (pre-charged pneumatic), and after about 20 shots, I have to swap out air reservoirs that we filled earlier in the day from a big scuba tank in the back of Alex’s pickup. The Hatsan shoots 82-grain pellets that look almost exactly like bullets from a .380 semi-auto. Even imperfect shots hit so hard they generally knock the lizard out of the trees. Thwap. Thwunk. Crash. Thud.
“To see a wounded iguana on the ground is to see a Japanese Godzilla flick come to life. The lizards hiss, they flare their frills, and they often charge their persecutors, trying to whip them with their saw-sharp tail.”
After a couple of hours of Roman’s guidance, I get pretty good at seeing and hitting the cryptically colored iguanas. I feel as though we’re hunting unwholesome squirrels as we move quietly through the trees, like we’re hunting unwholesome squirrels. And just like with squirrels, the shots get harder as we go. These reptiles are keenly aware that humans mean danger. Once we kill a few, the rest either climb high into the foliage or morph into the bark—like the chameleons they are related to, they can change colors to match their surroundings, so often the only way to spot one is to spy their long striped tails—or they drop out of the trees into a shallow creek and swim away. The biggest iguana I kill is nearly 6 feet long and about 10 pounds; the average measures 4 feet from scaly nose to whippy tail.
The largest iguana Alex has killed was a female that weighed 18 pounds and stretched over 7 feet.
Chicken of the Trees
By the end of the day, we have collected dozens of iguanas, and have tried to keep them out of the searing Puerto Rican heat until we can clean them. They will be tonight’s dinner. Their scaly thighs elicit competing responses. These are repulsive reptiles that sometimes carry salmonella. But you work up an appetite gunning dinosaurs all day.
So we clean a few dozen of the meatiest specimens and take them back to the farmhouse that we use as a gathering place. There’s an outdoor grill with red-hot coals. While someone prepares arroz con gandules (rice with peas), the iguana tails and thighs sizzle and pop.
The author with an average-size iguana.
The taste is, predictably, like chicken. But even more accurately, it’s like a tough, dry scallop. The texture lends itself to being slow-cooked in a sauce, like a cacciatore. Between mouthfuls, I ask my hosts if iguana is commonly eaten here. When they laugh uncomfortably, Alex explains that while iguana is considered a delicacy in other parts of Latin America, where the reptiles are indigenous, Puerto Ricans never acquired a taste for them. Like me, they tend to be repulsed by the lizards.
That’s part of the problem with controlling iguana numbers here. There’s no market for their meat, and so little incentive to hunt them.
It occurs to me that as much as I want to vilify the iguanas, they are doing what every other organism does—they’re making a living however they can. And it’s a good living, with nothing to stop their steady expansion except the physical limitations of the island. And a few thousand more airgun-equipped hunters.
As we leave the farm, I see the only naturally killed iguana of my week on Puerto Rico. Its decomposing body is stuck in a hurricane fence around a demolition site, too fat to fit through the links.
Read more OL+ stories. This feature originally ran in the May 2016 issue of Outdoor Life.
Building a DIY deer stand is an excellent way for avid hunters to enhance their hunting experience. Learn how to build homemade deer stands with these 25 free DIY deer blind plans to build a safe and comfortable hunting spot easily. These free deer blind plans designed for everyone, from beginners to seasoned builders.
These DIY deer blind plans include step-by-step instructions, detailed guidelines, and PDF downloads, making the process as easy as possible. Incorporate homemade deer stands into your next hunting adventure or nature observation to improve your experience.
Our collection of DIY deer blind plans features a wide range of styles and designs, such as elevated hunting blinds, mobile deer blinds, homemade tree stand blinds, and box blinds. These plans cater to various preferences and uses, such as bow hunting, rifle shooting, or wildlife photography. Choose between using scrap wood, pallets, or new materials to make the perfect deer blind, depending on your budget and preferences.
So, gather your tools and materials, and embark on your DIY deer blind project today! With our 25 free DIY deer blind plans, you’ll have plenty of options to choose from and make a custom and practical hunting blind that will enhance your outdoor experiences. Don’t wait any longer – start building your very own DIY deer blind today!
Revamp your hunting experience with a custom-built, elevated DIY deer blind designed for optimal visibility and protection against weather elements. This innovative project requires basic tools and materials, easily sourced from any home improvement store. Remarkably budget-friendly, you can erect this stand on a weekend with a spending limit of approximately $500.
This deer blind, fashioned from common lumber, blends functionality with portability. It conveniently fits into the bed of a standard full-size pickup, specifically designed with the dimensions of an F-150 in mind.
Despite its compact design, it comfortably accommodates two people and is sturdy enough to withstand harsh weather conditions, proving its worth during below-freezing pre-dawn hunts. Elevate your deer hunting experience and embrace the rugged appeal of this hunting blind today! outdoorlife
2. How to Make Deer Blind From Pallets
Transform your hunting experiences with a budget-friendly DIY box blind! Rising prices of building materials don’t need to hinder your plans. This practical guide demonstrates how simple materials like pallets, 4x4s or 2x4s, exterior grade screws, and a tarp can be repurposed into a sturdy, modular hunting blind.
Designed to be accessible, the structure requires basic tools like a drill, sawzall, and tape measure. This encourages family participation, offering a fun outlet for your kids to sketch out the plan.
From gathering materials to setting up the structure, this guide provides a step-by-step process, ensuring that anyone with some initiative can set up their box blind. It’s a rewarding project that enhances your hunting experience and brings family bonding time. Get started today and make lasting memories with your loved ones. themeateater
3. How to Build a Mobile Deer Blind
Unleash your inner craftsman with a DIY mobile deer blind on a running gear project! This intriguing endeavor starts with affordable farm running gear and involves the construction of a 4×4 frame, 2×6 floor, and 3/4″ plywood floor. It offers a blend of green-treated and standard materials, with unique features like angled corner walls, bow windows, and sliding horizontal windows for an optimal viewing experience.
Unique elements include a cost-effective door with a combo handle for security and noise-damping acoustic foam panels. You can personalize your mobile deer blind with creativity, akin to the joy of painting happy little trees on its exterior.
The result? A functional, transportable deer blind offering an exceptional view from inside, further enhanced with magnetic window screens and a blackout curtain. Get ready to build this fantastic piece, engaging adults and kids in a fun-filled, hands-on activity. Perfect for all DIY enthusiasts out there! bowhunting
4. Homemade Tree Stand Blind
If you love hunting, you’ll love these DIY deer blind plans that will help you build your own deer blind that is comfortable and effective. Envelop yourself in nature with this comprehensive guide to constructing a DIY deer stand blind. Made to provide an elevated and sheltered view for deer watching, this 6′ x 6′ structure is an immersive outdoor project that ensures a cost-effective and rewarding experience. Materials include treated timber, decking boards, plywood panels, corrugated red asphalt roof panels, metal brackets, PVC pipes, and assorted hardware.
Not to forget, several cans of camouflage spray paint blend your blind with the surroundings seamlessly. The building process is a meticulous blend of planning, assembling, and finishing, focusing on stability and longevity. From crafting the platform and frame to installing a sturdy ladder and comfortable seating, each step is outlined clearly, ensuring a smooth construction journey.
Enjoy the tranquility of nature in your deer stand blind, a unique and purposeful addition to your outdoor space. So go ahead, gather your tools, and embark on this nature-oriented project to witness the harmony and allure of the wild from the comfort of your deer stand blind. instructables
5. Building Your Own Platform Deer Stand
Enjoy the captivating view of your rural surroundings with your DIY deer stand, built to withstand the elements and provide a unique vantage point for observing wildlife. With the help of a cordless hammer drill and impact driver combo kit, this project uses sturdy dimensional lumber to construct a safe and secure platform. Explore your property’s wildlife, from colorful birds to majestic deer, all from your homemade perch.
Building a deer stand starts with a solid foundation of 2×6 pressure-treated lumber, precisely structured for balance and strength. The framework is further fortified with Timberlake screws, made effortless by the robust tools from the Milwaukee M18 FUEL line.
The project proves to be an exciting endeavor, not just as a means of observing wildlife but also as a functional structure for seasonal hunting. Before embarking on this project, comply with local zoning laws and building codes for safety. So gear up, engage with the outdoors, and make an enduring symbol of your love for nature with your deer stand. homefixated
6. Inexpensive DIY Hunting Blind
Learn the art of building effective DIY hunting blinds. These blinds hide hunters from their prey, allowing for a more successful hunting season. This project covers three unique designs – the box stand, the hay bale blind, and the natural blind. With each design explained in detail, you’ll understand the cost, materials required, and step-by-step instructions for construction.
The box stand is an elaborate structure that can comfortably accommodate two people. It requires treated lumber, plywood, and corrugated tin sheets for a $100-$300 budget. The hay bale blind is simpler, leveraging existing hay bales in a field to camouflage the hunter, requiring a minimal budget of about $100.
Lastly, the natural blind is a cost-free structure built using surrounding vegetation. Building hunting blinds brings utility and helps make a stronger bond with nature. This cost-effective guide helps you maintain the age-old hunting tradition while ensuring safety and comfort. whitetailproperties
7. Making Your Own 5×5 Deer Blind
Breathe new life into your hunting experience with a DIY 5×5 deer blind project. This unique project utilizes sturdy 2x4s for framing and painted OSB for walls, topped with lightweight steel roofing, making a durable yet affordable deer blind. Its total construction cost rings up at just around $300. This project is easy in difficulty level, inviting everyone to try. The result? A durable, functional, and cost-efficient deer blind that’s perfect for your next hunting adventure. Embark on this project and showcase your skills while benefiting from the functionality of a custom-made deer blind. howtospecialist
8. How to Make a Deer Stand at Home
Prepare for deer season with this comprehensive guide to building your elevated DIY deer stand! This hands-on project provides an exceptional view 17 feet up and includes optional elements for comfort and concealment, such as a blind and roof.
You’ll work with common materials like 16-footer 2x4s and a nail gun to assemble the ladder and frame, ensuring your stand is secure and practical. With careful measurements, cutting, and assembly, you’ll attach the ladder to the frame, strengthen the structure, and add the roof and side panels.
Additionally, the stand offers two design options: a simpler single deer stand or a slightly more complex double deer stand, catering to your specific hunting needs. Harness your craftsmanship to make this innovative deer stand and elevate your hunting experience! diytyler
9. Free Wooden Deer Stand Plan
A deer blind is a must-have for any hunter. Learn how to make your own with these DIY deer blind plans that are easy and inexpensive. Immerse yourself in the thrill of the hunt with the ultimate homemade box deer hunting stand! Expertly built with an emphasis on stability, portability, and affordability, this DIY hunting stand offers optimal concealment and protection from the elements as you pursue your game. Constructed primarily from 2×4 pieces, this stand includes a 4’x4′ platform approximately 6 feet off the ground, complete with a roof for added shelter.
Customize your stand with as many shooting windows as required at your preferred height. The beauty of this project is its transportability – the components fit snugly into the back of a pickup truck, enabling fast assembly on-site with just a single ratchet wrench.
If you’ve multiple hunting locations on your property, this cost-effective solution, estimated at around $150, offers the ideal alternative to expensive commercial options. Now it’s time to gather your tools, source your materials, and build your perfect hunting vantage point! freedeerstandplans
10. How to Make a Deer Stand
Transform your hunting experience with this practical and moveable DIY deer stand. This detailed guide will lead you through making a sturdy, weather-resistant deer stand using basic materials such as cedar, pine, or redwood lumber and plywood. The design includes a floor, sides, a front face, a back face, and a roof, ensuring a comfortable and secure perch for your hunting expeditions.
Follow the step-by-step instructions to accurately measure, cut, and assemble each component. Remember the importance of drilling pilot holes for a tighter lock and right-angled corners for a professional result.
The structure can be easily disassembled and relocated according to your hunting needs. The highlight of this deer stand is its portability, enabling you to adjust to changing wildlife patterns. Enhance your outdoor experience with our free deer stand plans today. myoutdoorplans
11. 8 X 8 Hexagonal Bow Deer Blind Building Plans
Make a spacious hunting hideaway with this simple DIY blind construction guide! The aim is to make a blind that comfortably fits a family and can be assembled in a garage and transported for assembly. You’ll need 2x4s, 4x4s, 1/2″ plywood, gate hinges, blind windows, paint, and blind platform brackets.
Begin by assembling an 8’x8′ base using the platform brackets. Build individual panels for the front and sides, attach them to the platform, and secure them to each other. Build an “L” shaped frame for the rear wall and ceiling joists. Cut out the door, attach the roof, add shingles, and paint. This versatile blind will add a practical and enjoyable feature to hunting trips. reckonill
12. How to Make Your Own 4×6 Elevated Deer Blind
Revamp your outdoor experience with a DIY 4×6 elevated deer blind! This fun family project is practical and rewarding, perfect for enthusiastic nature lovers. Using common tools, such as a hammer, saw, and drill, you’ll work together to construct a sturdy structure elevated for an optimized view.
The process incorporates materials like Plexiglass for windows, enhancing visibility while maintaining the shelter. This unique design also features window dividers on each 6′ side, catering to your personalized viewing needs.
Building this deer blind offers a fun, engaging activity that brings families closer while honing woodworking skills. Plus, the end product provides an ideal spot for wildlife observation, capturing those elusive deer moments like never before. So, get your tools ready and embrace the adventure of building today! myoutdoorplans
13. Build a Ladder Stand for Deer Hunting
Delve into the craft of building a DIY ladder stand for deer hunting. Constructing your own provides cost savings, customization, and a unique perspective for a successful hunt. This guide takes you through six key steps, from choosing the perfect tree to testing the final setup. Materials needed include 2×4 inch treated lumber or cedar beams, plywood for the seat, and an array of tools.
It emphasizes that a ladder stand is not just an impressive feat but a vital tool for hunting, offering a bird’s eye view of the area and excellent camouflage. But remember, safety is paramount; always use a safety harness and routinely inspect your tree for stability. This guide gets you closer to a fulfilling hunting experience. deerproject
14. Small Deer Stand Design
Make your hunting experience even more memorable with the perfect DIY small deer stand design! This woodworking task can be completed in three days at approximately $250. All the necessary supplies can easily be procured, marking it an easy-level task.
The resulting deer stand is an impressive testament to your craftsmanship, showcasing your skills to the world. Not only does it offer a practical application for nature enthusiasts, but it also provides a satisfying creative outlet.
The project plan, available on the provided link, makes the process manageable and enjoyable. Build your deer stand today and immerse in the thrill of DIY woodworking! howtospecialist
15. Build Your Own Deer Stand
A deer blind can improve your hunting experience and success. Find out how to make your own with these DIY deer blind plans that are detailed and practical. Embark on a self-sustainable journey with a DIY elevated deer stand that will bring a fun and practical addition to your homesteading adventure. This tutorial demonstrates how to build a 4×8 elevated deer stand or hunting blind, proving functional and engaging. Anyone can enhance their woodland spaces with minimal equipment and a do-it-yourself spirit.
As they utilize their 18-acre land, they inspire others to embrace simple and sustainable lifestyles, turning dreams into reality. Every step in their process, from suburban life to rural homesteading, brims with useful insights and wholesome experiences.
This tutorial doesn’t just guide you in making a deer stand; it fosters a deeper connection with nature and stirs the innate human desire for simplicity and sustainability. Build your deer stand today and start your adventure!
16. DIY Gaint Deer Hunting Blind With Scrap Wood
Venture into the world of DIY wildlife ventures with a comprehensive guide on building a deer hunting blind using scrap wood. This project is an ideal opportunity for outdoors enthusiasts, promoting resourcefulness, creativity, and eco-friendly practices.
You’ll require basic tools and equipment, such as a hammer, saw, screws, and scrap wood. Preparation involves sourcing your materials and selecting an optimal location for your hunting blind. Following step-by-step instructions, you’ll build a sturdy and practical hunting blind, enhancing your hunting experience.
This innovative project utilizes waste materials and fosters a deeper connection with nature. The scrap wood serves as the main ingredient in this exciting project. Relevant to those interested in hunting, DIY projects, and sustainable practices, this giant homemade deer hunting blind promises an engaging, informative, and rewarding experience.
17. Homemade 7×7 Deer Stand
Gear up for a hands-on experience with this detailed guide on crafting your 7×7 deer stand! This unique project adds to your hunting skills and provides a practical and comfortable shooting box blind designed for effective deer hunting.
With this DIY guide, you’ll gain insights into building a sturdy 7×7 blind on top of a deer stand platform, all accomplished within an impressive 3-day timeline.
Learn how to enhance your outdoor adventures and foster your passion for hunting through this well-explained DIY deer stand walkthrough. It’s time to boost your hunting efficiency and enjoy an elevated perspective of your hunting terrain!
18. DIY 2×4 Deer Stand With Box Blind
Building your own deer blind can be a rewarding and fun project. Follow these DIY deer blind plans that will guide you step by step. Craft your hunting hideout with this DIY 2×4 deer stand and box blind – the perfect way to get close to wildlife! Perched 17′ high, this DIY stand offers a wide viewpoint and conceals you comfortably as you wait for whitetails.
Its construction materials include Ondura Premium Panels, which provide added concealment, with various tools like Counter Sink Bit, Better Vue Screen, and Kreg Forman, to mention a few.
The process is straightforward, and the end product serves the purpose effectively. Furthermore, the stand incorporates an optional blind and roof to enhance your hunting experience. Build your deer stand now and get ready for a productive deer season.
19. Cheap DIY Deer Stand in 10 Easy Steps
Boost your hunting experience with an economical yet effective DIY deer stand built by your hands! Understand the essence of constructing a sturdy, scent-free deer stand through a simple and concise 10-step process. The guide is designed to be customizable, fitting your precise requirements without the need to overspend on brands.
You can craft your hunting tower by incorporating resources like durable wood, common tools, and insightful tips. Appreciate the thrill of deer hunting from a vantage point crafted by you, adding an extra layer of satisfaction to your outdoor adventures.
The process will save you money and arm you with a skill useful for many hunting seasons. Build your affordable deer stand today and experience hunting like never before!
20. Simple DIY Deer Blind on a Budget
The perfect solution for the outdoorsman on a budget, build your DIY deer blind and get ready to make memories! With careful planning and a budget of around $500, you can build a robust 6×6 blind with a 7′ roof, elevated 6 feet off the ground, boasting a unique trap door entry.
It’s the perfect solution for those facing high wood costs but wanting to experience the benefits of a quality deer blind. This project results in a sturdy structure that fits the financial plan and meets the creator’s vision and satisfaction.
Look forward to detailed plans, available for free download soon that will guide you through the build process, offering clear instructions for an even more optimized design in the coming season. Make sure to follow the progress and start preparing for your own elevated box blind project.
21. DIY Custom Deer Blind
Take your hunting experience to another level with an insane custom DIY deer blind build, complete with a 32″ TV and 10,000 BTU Heater! This unique project brings comfort and convenience to your hunting activities, providing you with the ultimate hunting hub in the wilderness.
The materials needed include a ProCom MG10TBF 10,000 BTU Heater, a 32″ TV, an assortment of screws, an air fan, a flush mount, and more. With the right preparation, you’ll build a deer blind that provides an optimal vantage point and keeps you comfortable during long waits.
This project blends the thrill of hunting with the luxuries of home, making it a unique approach to outdoor pursuits. The step-by-step guide to building this great deer blind is straightforward and rewarding, giving you an elevated hunting experience. Transform your hunting activities today with this ultimate project!
22. Build Your Own Shooting House
Unleash your creativity in building a low-cost box blind for deer hunting with an insightful DIY guide that provides an efficient solution in preparing for the hunting season. This simple yet highly effective structure is built from readily available materials, making it a budget-friendly option.
The build requires a few tools and a dash of handiwork but promises excellent results in the form of a sturdy, practical shooting house.
Despite its uncomplicated design, it offers comfort and convenience for hunting enthusiasts, underlining its effectiveness as a significant asset for a successful deer season. Make the most of your hunting experience by building this user-friendly, cost-effective box blind today.
23. Building a 6×8 Octagonal Elevated Box Deer Blind
Gear up to take your hunting game to a new level with a 6×8 octagonal elevated DIY box blind. Designed to accommodate two adults, this spacious blind offers strategic visibility and comfort. With sheet goods optimization in mind, its dimensions have been tweaked to 5’10” x 7’10”, facilitating material utilization and cost-effectiveness.
It uniquely features a trap door entry for a discreet approach. Though you might not see significant savings from this optimization in a single build, multiple constructions will benefit. Embrace the thrill of the hunt in this well-designed and crafted blind. Start building today to enhance your outdoor adventures!
24. Portable DIY Hunting Blind
Explore the intriguing process of constructing a portable deer blind on a truck bed trailer, as depicted in a comprehensive DIY tutorial. This simple yet effective blind design aims to exchange ideas, spark creativity, and generate discussions among individuals eager to build their mobile blinds.
The guide also outlines potential custom additions, such as camouflage mesh curtains, gun racks, heater mounts, shelves, and hooks, that can be integrated into the design to enhance its functionality.
This cost-effective project offers an exciting DIY challenge and a practical application for outdoor enthusiasts. Embrace the joy of building your portable deer blind and make your hunting experiences more convenient and enjoyable.
25. Easy DIY Deer Blind Under $500
Intensify your hunting adventures with a functional DIY deer blind built for under $500! This shooting house is both cost-efficient and easy to construct, raising the bar of your hunting experience. With accessible supplies such as lumber, screws, and roofing materials, you’ll build a sturdy, reliable structure.
Preparations are simple: measure, cut, and organize your materials beforehand. You’ll follow a systematic construction guide that ensures your deer blind stands strong and true. Imagine peering out from your elevated perch, blending seamlessly into the environment, waiting for the perfect shot.
This deer blind is remarkable for its practicality, enhancing your hunting skills while providing a comfortable shelter. Build your deer blind today and elevate your hunting game to unseen heights. It’s informative, helpful, and engaging – a worthwhile project!
Conclusion:
In conclusion, these 25 free DIY deer blind plans offer various options for constructing deer blinds and stands to suit various preferences and budgets. Ranging from pallet-based designs to elevated options and even mobile blinds, these DIY deer blind plans cater to hunters at different skill levels. Utilizing homemade DIY deer stand plans coupled with creativity and resourcefulness, anyone can build a cost-effective and functional deer blind. So, gear up, pick a plan, and start making your very own customized deer hunting experience.
“Understanding the Rights of Felons: Possession of Air Rifles in Florida” Discover the regulations surrounding felons owning air rifles in Florida. Explore the legal framework, restrictions, and implications for individuals with criminal records seeking to own these firearms. Gain clarity on this important topic to make informed decisions within the state’s jurisdiction.
Can a felon own an air rifle in florida?
In the state of Florida, the ownership and possession of firearms by felons are strictly regulated. However, when it comes to air rifles, the laws are slightly different. In general, felons in Florida are not allowed to possess firearms, including handguns and long guns, such as shotguns and rifles. However, air rifles fall into a separate category as they do not use gunpowder or explosive force to propel projectiles.
Florida law does not specifically prohibit felons from owning or possessing air rifles. Since these weapons operate by using compressed air or gas to shoot projectiles, they are considered less lethal than traditional firearms. As a result, felons are generally allowed to own and use air rifles for recreational purposes such as hunting small game or target shooting.
While felons may legally own air rifles in Florida, it is crucial to note that certain restrictions still apply. For instance, individuals with felony convictions related to violent crimes or domestic violence may face additional limitations on their ability to possess any type of weapon, including air rifles. It is always advisable for felons to consult with local law enforcement authorities or legal professionals to fully understand their rights and any potential limitations regarding the ownership and use of air rifles.
In conclusion, felons in Florida are prohibited from owning an air rifle due to the state’s laws regarding firearm possession. Despite being non-lethal, air rifles are categorized as firearms under Florida law, making them off-limits for individuals with felony convictions. It is crucial for felons to understand and abide by these regulations to avoid any legal consequences.
Wow, this is a turkey to be proud of… A new world record! Congratulations Todd Pringnitz. I was just surfing the web and found his site and story about his new world record turkey. Here it is:
For many turkey hunters, the thought of a world record animal must occupy their brains much like the elusive giant whitetail bucks that I have been dreaming about my whole life. In all the thoughts that have entered my brain, shooting a world record turkey was the farthest thing from my mind when my good buddy Dan Johnson and I headed to our Bale Blind on the afternoon of April 13th.
I’ve turkey hunted the last few years without any-luck. My only previous experience having any sort of encounter with a tom turkey would be in my back yard back in my home state of Michigan. I somehow found a way to miss a tom turkey at about 8 feet. Needless to say, I didn’t exactly have a huge goal going into this turkey season. In-fact, I would have been pumped to kill any tom turkey with my bow! If it happened on video that would just have been an added bonus. I mean we’re whitetail video producers right?
Thankfully, the persistence of my good friend Dallas Ft. Worth to film my first few hunts of the season would end up being one of the best things to ever happen in my life. Our hunt started earlier in the year when while shed hunting I happened to find my long-lost decoy laying under a bunch of brush out in my CRP field. I remembered the location, and figured I’d grab it the first day I headed into the field turkey hunting. Thankfully I grabbed it a few days before I started hunting because there was an ant nest inside of it, and they were biters! I hosed it out, but didn’t have the stake to hold it in the ground. After digging through my old arrow pile, I found an arrow that would work just fine.
Throughout our first afternoon in the field, Dallas and I filmed a giant tom working the opposite side of the corn field as us. We called at the tom several times, but despite his gobbling and strutting action, he just wouldn’t come closer. I still considered this pretty darned cool because he was definitely a mature tom turkey, and we got some footage of him.
The following afternoon would find Dallas and myself back into the same Bale Blind in-hopes of seeing the giant tom from the day before. When putting out the decoy, we actually busted a hen from the field, so we didn’t even know if we would be seeing much. Within a few minutes, Dallas was performing his “box call magic”, and the wait was on.
About 45 minutes later, we saw a tom turkey enter the field. It was clear that he was a pig of a turkey, but he was leading a hen. He would work up to about 30 yards in-front of her, and then strut back. I honestly didn’t think he was going to come close because he was entertaining the hen. He worked back and forth within about 60 yards, and started circling parallel to us in the blind. With a hen decoy in-front of the blind, we called a little here and there to try to get his attention enough so that he would see the decoy.
With an occasional view of his strutting fan through the standing corn, he started coming closer to the opening in-front of our blind. I was very aware of the distances and shooting arrangement because we had been deer hunting from the same set-up this past late deer season here in Iowa. I knew if he was in the opening, he was within 40 yards, which was a bad place for him to be. He started working closer and seemed like he was committed to coming into the decoy.
This is a picture of the giant turkey entering the field. My first thoughts were “he’s a shooter”…
As he entered the opening, the old tom was clearly a giant turkey. Even though this tom was interested in the hen decoy, he seemed very cautious. He stayed out at a 35-40 yard parameter around the decoy and our bale blind, never coming closer to investigate the mangy looking hen with arrow fletching strangely sticking through the top of her back.
This shows my not-so-fancy decoy set-up in-front of our blind with the big tom circling at 35 yards…
In the back of my mind throughout these moments was the “Shipwreck” encounter that we had in the same corn field only a few months earlier. “Shipwreck” was the 190 class giant I had at 35 yards from a ground blind and I just couldn’t get a shot into him. With the same exact type of “cautious investigation” as the “Shipwreck” encounter, I wasn’t about to make the same mistake again. With the tom starting to walk back to the hen he was tending, I committed to the 35 yard walking shot and came to full-draw. A quick check with Dallas behind the camera, my anchor was locked, and an arrow was soon in-flight “tom-ward bound”.
This is when the tom started heading back toward the other hen in the field. It was now or never!
Of all the arrows I’ve ever release, boy am I glad this one was true. I hit the tom pretty-much dead-center of his body with a loud “thwack”. Dallas started screaming “you smoked him – you smoked him” and I couldn’t believe I had just shot my first tom turkey. After talking a short bit in the blind, we wanted to go track the bird and make certain he was done. After walking across the field, we saw the turkey and he was still alive. After making a quick stalk, I was able to center another arrow through the bird as he started his “death flap”.
This is Dallas and I in the bale blind just after the shot…
Still not knowing we had just shot the world record, Dallas and I were most concerned with putting the beautiful bird out of his misery. It wasn’t until I peeled back the feathers on his chest when all the beards separated and one after another was visible. My trembling hands sifted through the beards trying to keep track of them as they counted of. 1, 2, 3, 4, 5, and finally 6 beards were exposed and I couldn’t believe my eyes. I’d seen and heard of multiple bearded turkeys, but 6 wasn’t something I’d ever heard of. I proclaimed to Dallas; “I just shot a 200 class Boone and Crocket Turkey Dude”…. Yeah, I still had no idea.
Here is a picture I took of the beards in my hand after just realizing the turkey was a multi-bearded freak bird!
After taking our trophy pictures and making some phone calls, things started to take a turn to the ridiculous. I was SO excited to have killed this tom, I swear I don’t think I would have been any-more excited knowing what I had really just shot. Anyone who has seen our deer hunting videos before already knows what I’m talking about. I can shoot a doe and nearly start crying. Ok, maybe not that bad – but it’s pretty embarrassing I can tell you! This is no exception, but it is what it is. I’m not going to apologize for being myself. Ok, I apologize for those who don’t “get me” because sometimes I hate watching my own stuff!
Sitting in a Huntmore chair that I was fortunate enough to engineer for Huntmore owner Scott Hoffman; well, this is the best testing we can do. Pretty cool I get to combine my skills of product design with my passion for hunting. I’m a very fortunate guy to have Scott many years ago on a hunt in Effingham, Illinois!
Chris Brackett (Arrow Afflictions) was the first guy who let me know exactly what I had shot in his way “You idiot, you just shot a state record or something”. After sending him a cell picture of the beard he replied, “You just shot the new world record, you XXXXX”… I think you get the idea.
This is the Blind Ambitions Bale Blind that we used for this set-up. It worked perfectly!
After doing some “we don’t know how to properly measure turkeys – measuring”, we came to the conclusion that this indeed could be the new world record turkey. By this point all Dallas and I could do is laugh. I mean seriously; I’ve spent the last 22 years of my life basically “living for whitetails”. Every waking second of every single day I spend dreaming of bucks, planning, and working for the upcoming season. As soon as one is complete, we’re already working on the next aspect of our year-around pursuit.
Here’s another picture of the Iowa freaks beard.
The only comparison I can make is to the 12 year old that goes out for the first time bowhunting and shoots a 200 class whitetail. I indeed was just that of the turkey world, and I knew things would never be the same. With that being said, I’ve hunted hard enough over the past many years to realize there is always an element of “luck” in any hunt. I always considered all of my luck to be “made”. In this particular case however, it was not only luck, it was dumb luck! What do you do, every serious turkey hunter is probably going to hate me, but I guess there’s nothing I can do about that now.
The turkey was officially scored by Hazel Creek Taxidermy; and has been entered as the new archery World Record for the Eastern turkey in the NWTF record books. The entire experience has been eye-opening to say the least. I’d just like to thank the NWTF and Hazel Creek Taxidermy for their help with this unknown world of turkey hunting that I have just been thrust into. They have all been just awesome! Most of all, I want to thank my good friend, team member, and cameraman Dan Johnson (Dallas Ft. Worth). Without you brother, we wouldn’t have this experience documented to share with the entire world! The turkey and sport deserves it, and without you this would never have been possible. So, thank you so-so much dude! To think that a 9-fingered guy would film the new world record turkey kill – well, I don’t think you’re missing right index finger would have ever imagined. Definitely not right now anyway.
I would never have imagined in a million years that I would ever be “that guy”. Now that it’s done, I just can’t wait to share the story with everyone. I can only imagine how many “shaking heads” there will be when watching me completely not realize what I have just shot. To those guys, believe me, I feel your pain! With that being said, I’m not going to complain about being “that guy”…
My World Record Archery Eastern Tom Turkey had over 49” of combined beard length. He weighed 25.9 pounds, and had 1-1/4” spurs. He scored 149.6875 which beat the previous record of 139.2400. It could be broken tomorrow, but for the moment it’s pretty cool! Good luck to all the turkey hunters out there! Looks like I’ve got a new spring activity to get serious about. Unfortunately, it’s all down-hill from here!
Most importantly, you must have the legal right to go squirrel hunting. Before you head off to the woods, get a small game license (you need licenses for almost all types of game) for the place you are going to hunt.
The terms for attaining a license vary by state or province. So, review the regulations for hunting squirrels in your specific area.
You might only be able to go hunting during specific times of the year when it is squirrel season. This season takes place in most regions during the fall and winter months. The dates vary by each place. There are also rules on where you can hunt.
You may be allowed to hunt on a certain state or provincial park grounds. Some places require you ask for direct permission from the property owner before you start hunting.
Check the bag limits, too. There may be a limit to how many squirrels you can hunt in one day, as well as during an entire season.
2. Choose the Right Time
Look for squirrels during the early morning or late afternoon hours because squirrels are most active at these times. Morning is when squirrels go out to look for food.
It is easy and necessary for them to find food early in the day when they are at their hungriest. Avoid hunting squirrels in inclement weather, as like deer, they move around and can be harder to track.
Late afternoon to early evening is when squirrels bring food back to their habitats. This is when most squirrels are busy foraging, so you should be able to spot them moving around.
3. Look in the Right Places
Plan your hunts in areas where you are the most likely to find squirrels. Check areas where there are lots of trees. These include trees that produce nuts and other items squirrels commonly consume. An oak tree is one of the most popular places to see squirrels.
Any tree that produces the types of nuts or fruit that squirrels enjoy is the place to locate squirrels. Be aware of the type of trees in the area, so you can determine if they are places squirrels may be searching for food.
4. Find the Best Weapon for Squirrel Hunting
Shop around to get the right squirrel hunting weapon before leaving on a hunting trip. Do some target practice using a small game weapon that works best for squirrels.
In the end, choosing the right squirrel hunting weapon boils down to personal choice. Here are the best weapons for squirrel hunting in my opinion:
The Shotgun
Use a shotgun to cover a larger amount of space during your hunt. The spread of a shotgun shell can cover much of a squirrel’s body at once, thus ensuring a better chance of a kill without damaging too much meat.
Be sure to aim the shotgun carefully so it targets the precise area you want to shoot.
Look for a six-shot because it is large enough to target a squirrel without ruining the flesh. Also, choose a barrel 26 inches in length or greater so the shell will move precisely.
Remember, a shotgun will make a loud sound with each round. The noise will most likely scare the other squirrels away. Focus on being precise and cautious when shooting at squirrels or any other small game, for that matter.
When you take aim, remember that the spread on the shotgun shell will move outward a few centimeters after you shoot.
The .22 Caliber Rifle
The second option for a weapon to use is a .22 caliber rifle (my favorite). This rifle uses a smaller ammunition that targets the squirrel and other smaller game with precision.
The ammo will not damage much of the squirrel meat, either. A .22 caliber rifle produces a longer range than a shotgun. The rifle also lets you go after just one part of the squirrel’s body.
Aim to be accurate and hold your firearm steady. Fortunately, most .22 caliber rifles come with an automatic reloading feature. This feature lets you add multiple rounds into the rifle before you start shooting and release one of the rounds every time you fire the trigger.
Be sure to regularly clean the muzzle and barrel to get a more accurate shot.
This rifle works best when you attach a scope to it. A scope gives you a clearer view of your target. It is also important to take wind, elevation, and distance into account when using a scope.
Bow and Arrow
Another option for hunting squirrels is with a bow and arrow. But take note that most squirrels are small and less than a foot in length.
Because they are so small, it could be difficult to hunt squirrels with a large bow and arrow. In other words, leave your deer hunting bows at home.
You should sharpen any arrow you use so it can pierce the squirrel’s body with ease. Even so, any arrow you aim incorrectly could cut through too much of the squirrel’s body, leaving little meat or fur to use.
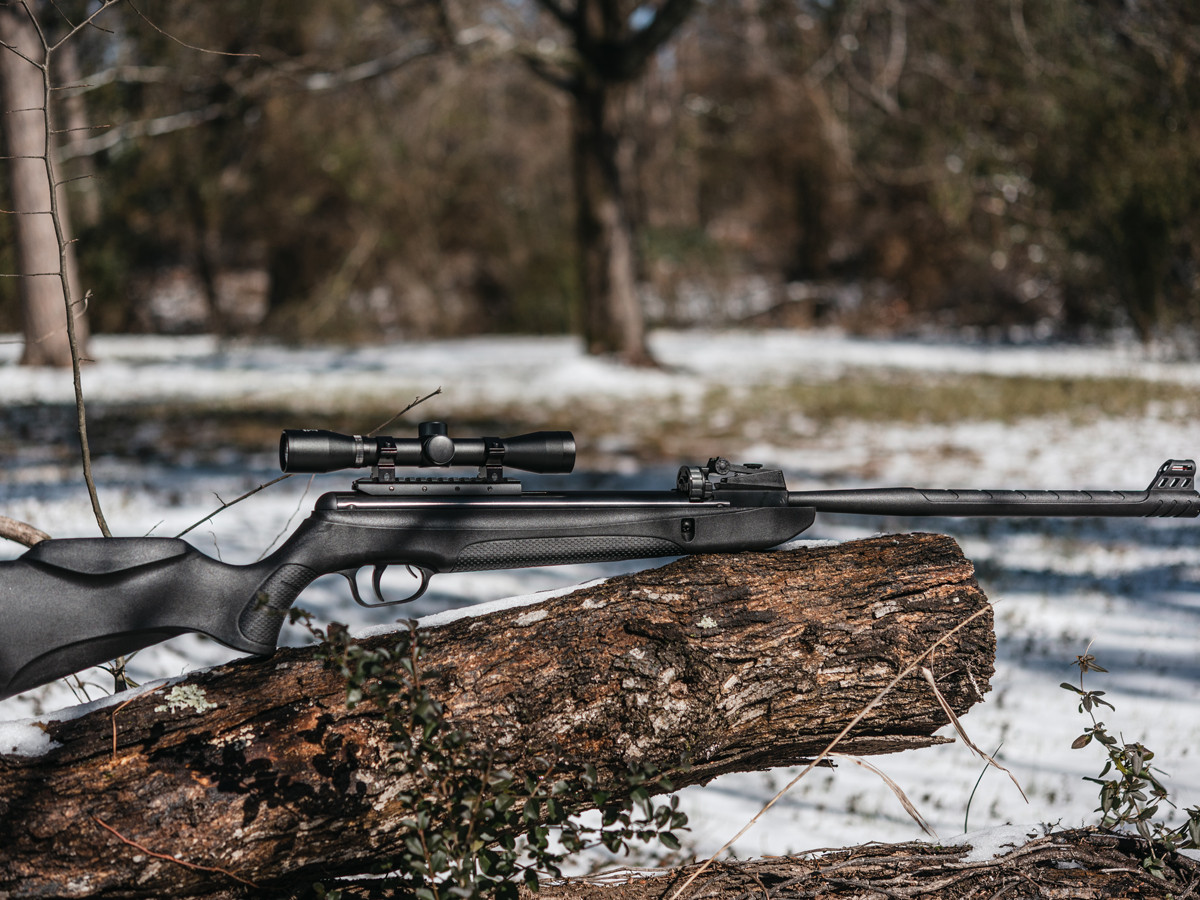
The Air Rifle
While this might not look daunting, an air gun can be deadly to squirrels, and it is the cheaper option of the bunch. Air rifles are best suited for small game like fowl, rabbits and squirrels.
The only major downside is that it requires a lot of practice for a humane kill, as the area that you must hit is very small for an instant kill.
If you want the animal to die instantly and avoid needless pain or tons of frustration, aim for a head shot, which is also difficult to pull off on such small targets. Plus, larger squirrels can absorb multiple hits and evade if you miss the head.
We’d love for a clear winner to emerge, but often, the reality is our subjective personal preferences are really the only sticks we have with which to measure competing options.
In many ways, this is the case with scope reticles and turrets measured in minutes-of-angle versus milliradians.
In fact, the last grudge match I mentioned above — between metric and imperial units — is apropos here, because MOA versus mil or mrad boils down to just that: a difference in how we format degrees of angular measure.
I know this can be confusing, but we’re going to break everything down and try to demystify the topic for those of us who just want to know what we should choose.
We’ll look at the differences between MOA and mil measurements, figure out what’s relevant to you as a shooter, and see if we can find any strong or even weak reasons to prefer one over the other.
Minute-of-angle is just an angular measurement. It’s based off the number of degrees in a circle — 360 — and the number of minutes in a degree — 60. This is an arbitrary arrangement going all the way back to the Egyptians and Mesopotamians that is used simply to provide a standard of measurement.
They divided a circle into 360 degrees, basically because they used a base-60 numerical system (we use a base-10 system). So we do too. Because history.
OK, some of you might be saying … What does that even mean though? Think of it this way. Let’s say you’re looking at a target that’s 100 yards away. Now, imagine there’s nothing around or under you, and a circle appears around you, where you are at the center of the circle, and the outside edge of the circle passes through the direct center of the target.
If you divide that imaginary circle into 360 degrees or 360 pie slices, and you walk out and measure the distance between those degrees or slices, that distance would be 62.83 inches. This means that at 100 yards, 1 degree of angle measures 62.83 inches. Does that make sense?
Good. Now, if we were to further divide that degree by minutes, we’d get the number 1.047 inches, because there are 60 minutes in a degree.
By the way, isn’t it interesting that our measure of one minute-of-angle is very close to 1 inch at 100 yards? That’s partially why, when we’re sighting in a rifle using an MOA-based scope, we often shoot at targets with 1-inch grids on them. At 100 yards, if all of our shots hit within a single square, we can be sure we’re shooting a sub-MOA grouping.
Though this is purely coincidental, for our purposes as shooters, it’s extremely convenient, because this relationship between distance and minute-of-angle holds mostly true as we move out by 100-yard intervals. At 200 yards, one MOA equal 2.094 inches. Out to 1,000 yards, 1 MOA equals 10.47 inches.
You can find your MOA measurement by multiplying the distance in yards by 1.047, then dividing by 100. And at each increase of 100 yards, you’ll find that you’ve added roughly 1 inch to your MOA measurement. You’re basically just adjusting your measurement to “shooter’s MOA,” which is just your MOA rounded down to the nearest inch measurement.
What’s a Milliradian?
So, like MOA, a mil or mrad is just an angular measurement. The difference is, while there are 21,600 minutes in a circle, there are 6.2832 radians in a circle, and each radian has 1,000 milliradians in it, so there are 6,283.2 milliradians per circle.
Incidentally, a milliradian is a measurement derived from the International Standard of Measurements, which is the same system that gave us the metric system. So if you hate the metric system, you might want to stick with MOA.
Jokes aside, the only practical difference between MOA and mil is that the unit of measure is different. There’s nothing magical or mysterious going on here. We’re just talking about the same difference between inches and centimeters.
At 100 yards, a mil subtends — or measures, for our purposes — 3.6 inches. Just like 1 MOA measures roughly 1 inch at 100 yards. At 200 yards, 1 mil is 7.2 inches. At 1,000 yards, 1 mil is 36 inches.
To find your mil, just multiple your distance in yards by 3.6, and divide again by 100. That’s it. It’s that simple.
But Wait … Is It That Simple?
Let’s get into what the differences amount to. You probably immediately noticed that 21,600 minutes is a lot more than 6,283.2 milliradians. But you also know that scope adjustments are almost never done in one-MOA increments.
Instead, MOA scopes are generally adjusted on the ratio of one-quarter MOA per click (some shorter range or CQB scopes are in 1/2 MOA, check your user manual to be sure). That means for any MOA scope, 1 click will equal 0.25 inches at 100 yards (assuming your scope is in 1/4 MOA clicks).
Milliradians are also divided on most mil scopes by tenths. That means that each click on a mil scope is 0.36 inches at 100 yards.
In both cases, these finer adjustment intervals give us more precise control of where our reticle is pointing. Also, MOA-based scopes are a little more precise — 0.25 inches versus 0.36 inches at 100 yards.
That said, the difference isn’t substantial. At 1,000 yards, for instance, one-quarter MOA subtends to roughly 2.6 inches. At that same distance, one-tenth of a mil subtends to 3.6 inches.
There are confounding factors, of course. It’s possible to have a mil-dot reticle and a turret that adjusts using MOA. Also, to further complicate the issue, we need to consider whether the scope you’re using places the reticle on the first or second focal plane.
But how to actually make an adjustment at range, or what the difference between a first- and second-focal plane reticle is, are topics for another article.
Practical issues aside, there are so many factors to long-range shooting that this relatively miniscule difference in precision isn’t going to make or break your ability to hit your target. So, we’re left with personal preference to make our decision.
Let’s go over why we might choose one style over the other for our shooting pleasure.
Your Application Matters
Neither system is inherently superior to the other. In almost all situations, both systems of measurement will serve adequately for your shooting needs.
If you grew up hunting using MOA, and you’re familiar with that system, my suggestion is to stick with it if that’s your intended application. This is especially true for me, because I don’t advocate taking shots at game beyond 400 yards, in almost all circumstances. But that ethical question is for you to decide.
For the average shooter, I do think the practical relationship between 1 MOA at 100 yards and 10 MOA at 1,000 yards is somewhat easier to understand and use effectively.
If, however, you’re getting into long-range shooting as a sport, you’ll have a few more issues to consider, and you’ll very likely want to go with a mil-based scope. It’s safe to say that in tactical situations — and, by extension, sport-based long-range shooting applications — mil scopes have superseded MOA scopes.
Basically, because the mil system is popular with the military and law enforcement, the civilian market has adopted it as well. But this isn’t purely an aesthetic decision, in my opinion.
There are several reasons mil systems are popular, but it essentially boils down to two facts. Using mil turret adjustments is much simpler when ranging with mil-dot reticles because you don’t have to make an MOA-to-mil conversion, and you will have to make fewer clicks with a mil-based turret to make a correction (because MOA turrets are more precise, and thus require more adjustment clicks for a correction).
If you’re used to making that MOA-to-mil conversion, however, you might not think making the adjustment is difficult at all. Ultimately, you can train and become proficient with either system.
Now, all of this takes practice. When you’re shooting at long-range, you’ll inevitably be doing various mathematical calculations. When it comes to the difference between hitting a target or not, the simplest method is probably best.
This is a big part of the reason why the mil system has essentially taken over tactical and long-range shooting applications. At greater distances, many shooters basically just find it easier to use.
If that isn’t enough for you to choose mil for sport long-range shooting, consider this: it’s the system most other long-range sport shooters are migrating to, if they haven’t already. It makes sense to be on the same page for the sake of simplicity, in my opinion.
And I prefer to use an MOA scope, so I’m not just a mil fanboy.
Try Something New
Take my opinion with a grain of salt, and tinker around with each system if you can. Give both a try, or if you’re new to one of them, focus on that for a while. Make your own investigation, and figure out what works best for you.
Neither system is cooler than the other. Don’t just pick one or the other because of what the military uses, or because your grandfather refuses to try something new. We’re literally just talking about a standard of measurement, after all, and you can learn to become an excellent shooter with either one.
Do you use MOA or MIL? Have you switched from one system to the other? Tell us all about it in the comments! Looking for a badass scope? Take a look at the 9 Best Long Range Scopes!
Today, you can find 5 different types of air rifles available in the industry.
They are: spring pistons, gas pistons, PCP air rifles, variable pump guns, and CO2-powered air rifles.
All of these rifles have separate ways of functioning, various benefits, and limitations.
In this guide today, we will mainly cover the two most popular air rifles and compare gas vs spring piston. So, without any further ado, let’s get into it!
A spring piston is one of the most popular and simplest rifle types. In fact, many rifle beginners opt for spring pistons due to their simplicity and ease.
To understand more about spring pistons, let’s see how they work:
Inside the gun chamber, you will find two main components – coiled spring and piston.
The coiled spring undergoes compression when you cock the gun.
The spring compression causes the air behind the piston to get pressurized.
Now, as you pull the trigger, the spring gets decompressed. This causes the piston to move forward.
As the piston moves forward, the trapped air is released at high pressure.
The pressurized air then causes the pellet to come out of the muzzle at full speed.
Hence, in this way, the spring in the piston facilitates the movement of the pellet outside of the air rifle.
If you’re looking for a more sophisticated and advanced version of a spring piston, then you can opt for a gas piston.
A gas piston has a very similar mechanism to a spring piston. Yet, there is one difference that instead of a coiled spring, there is a gas-filled cylinder present in the chamber. It works in the below-mentioned ways:
When you cock the gun, the already pressurized air in the gas cylinder gets more compressed.
The air inside is compressed at very high tension and pressure.
So, when you finally release the trigger, the pressurized air forces the pellet out of the gun. Hence, this leads to a more swift mechanism compared to spring piston.
Now, how does this minor change affect the performance between the gas piston and spring piston? For this, you need to understand their differences.
Gas Pistons Vs Spring Air Rifles: Basic Differences
The most basic difference between a gas piston and a spring-piston rifle is that a gas piston consists of a gas-filled cylinder whereas a spring-piston rifle consists of a spring. Simple? Simple.
So, in the case of a spring rifle, the air is compressed with the help of a coiled spring. In the case of a gas piston, it is a gas-filled cylinder.
Due to this major difference, you may find other differences in the accuracy, velocity, and other factors of both guns.
Accuracy:
The accuracy definitely affects the performance as it determines the ability of the gun to hit the target.
If you wonder which air rifle is more accurate than the other, you need to know two things. First – gas piston rifles are known to be more accurate due to faster lock times. Yet, they are only accurate enough for beginners.
Contrarily, more experienced gunners often find that spring-piston air rifles offer more (or at least the same) accuracy as gas pistons.
So, if you’re a beginner and want an accurate gun, choosing a gas piston is a good idea. But, if you’re more experienced, then a springer would definitely work more accurately.
Velocity:
Even though gas pistons offer pressurized air with more force, spring pistons offer faster velocity.
Many gun enthusiasts find that a spring-piston with .177 caliber pellets can offer a velocity of around 1250 ft/s. On the other hand, a gas piston offers around 1000 ft/s velocity. For .22 caliber pellets, the velocity is near 850 ft/s.
You can choose either one depending on your requirements. But, if you want an air rifle with more velocity, a spring-piston is better.
Shot Cycle:
If we talk about the shot cycle, then the gas piston rifle has a sharper shot cycle. This means that the gas release is quite rapid. Hence, the piston moves forward very rapidly.
Also, as per other shooters, you can shoot over 10,000 shots with spring pistons without losing the power. The number increases to 20,000 shots if you own a quality spring piston.
Contrarily, with a gas piston, the shot cycle is just 3000. So, it is quite a lot less compared to spring pistons.
Noise:
If you’re looking for a gun that is neighborhood-friendly and backyard-friendly, then the noise is an important factor. It is also important if you wish to practice a lot.
Gas rams or rifles have an advantage over spring pistons when it comes to noise. Here’s why: spring piston rifles have a coiled spring that could lead to more sound when the pellet is released.
Thus, spring rifles aren’t exactly backyard-friendly. Keep in mind that the sound may dampen with use over time.
On the other hand, gas pistons mostly come with a ‘Sound Suppression Technology’ that dampens the sound. Here, the gun chambers are enclosed with the help of a fluted shroud. This prevents the sound from escaping the gun and thus, reduces the noise significantly.
So, if you don’t want noise, you can opt for a gas piston rifle.
User-Friendliness:
The user-friendliness of both the gas and spring pistons depends on your skillset.
For instance, gas pistons are more user-friendly for beginners compared to spring pistons. It is because you can lock the gas piston more easily. This may also result in more accuracy.
As gas pistons have less noise compared to spring pistons, beginners can use them for training purposes too. The cocking effort is also easier here.
Spring piston rifles are better-suited for experienced gunners. These rifles require you to have proper artillery hold skills.
Artillery hold basically stands for the ability to hold your rifle so lightly that it can recoil in any direction. Developing this skill may take time which is why spring pistons may become less user-friendly for beginners.
Depending on the usage, you can decide which piston rifle suits your requirements.
Spring pistons are usually more suitable than gas pistons for long distances. They are also better for hunting or target shooting. It may be because spring rifles offer more velocity compared to gas pistons. These rifles may also be used in competitions, as they did in the Olympics before.
Gas pistons are more suitable for pest control, small game hunting, and plinking. It is also an ideal option for those wishing to strengthen and train their shooting skills.
The maintenance requirements of both gas piston rifles and spring piston rifles are quite similar as they require less maintenance.
For spring piston, keep in mind the below-mentioned points:
It is essential to lubricate both the spring and piston in a spring piston to ensure a smooth shot cycle.
Make sure the spring piston isn’t cocked as this may cause wear out.
Make use of lubricating oil for piston seals but it should be only around one to two drops.
As for a gas piston, the rules remain the same. But, you may not be required to lubricate it as often as a spring piston.
Price Range:
There are certain things you need to keep in mind when you’re opting for either a gas piston or a spring piston. First, the initial buying costs, and second, the repair costs.
Spring piston air rifles are usually more on the expensive side. They usually start at $200 but the good-quality ones may cost more than that. Contrarily, gas piston air rifles are on the cheaper end as they normally cost less than $200.
However, spring pistons are extremely easy to repair and fix. So, the repair costs won’t be too much. But, it can cost a lot to get a gas piston fixed.
Gas Piston Vs Spring: Which One Is More Popular?
Both spring piston and gas piston air rifles are quite popular amongst gun enthusiasts.
The only difference is that gas piston air rifles are more popular amongst beginners. this is because these guns are comparatively easy to use. They’re also cheap and backyard-friendly which makes them excellent for training purposes.
On the other hand, experienced gunners prefer spring-piston air rifles over gas piston air rifles. It could be because these air rifles offer excellent accuracy and shot cycle if you have the right skills.
Pros and Cons of Spring Piston vs Gun Piston Air Rifle
Let’s check out some of the pros and cons of gas piston air guns vs spring-piston air guns.
Spring Piston:
The spring-piston air rifle is an excellent one with its fair share of pros and cons. Still, it is a great air rifle type for experts and skilled people.
Pros
Cons
Extremely accurate if you know the right technique.
Easy and inexpensive to repair and maintain.
It offers fast velocity and impactful power. It also has a great shot cycle.
It’s comparatively harder to use a spring piston air rifle. It also has more recoil.
Initial buying costs are high.
It is loud and hence, not the best for neighborhoods or backyards.
The gas piston has an advanced mechanism compared to spring rifles. Yet, is it worth it? Let’s check the pros and cons for that.
Pros
Cons
As it is easier and faster to lock a gas piston, it may offer accuracy to beginners.
Quite cheap and pocket-friendly.
Backyard-friendly due to less noise.
Offers an easier and smoother cocking mechanism.
Not as accurate as spring piston rifles.
Repair costs may be extremely high.
Lower velocity compared to spring piston and sharp shot cycle.
Can be stored as there are no spring fatigue issues.
Final Verdict: Gas Piston or Spring Piston – Which One Is Better?
Both gas piston rifles and spring air rifles cater to different types of gun enthusiasts. So, if we compare gas ram vs spring piston, some differences are clear.
For instance, you may opt for gas pistons if:
You’re a beginner wanting to train.
You want a cheaper gun option.
You want to use a gun for plinking, pest control, and small hunting games.
You want a backyard-friendly gun.
On the other hand, you may opt for a spring-piston if:
You’re a more skilled person with a proper artillery hold.
You want more accuracy, speed, and shot cycle.
You don’t have any budget restraints.
You want a gun for proper hunting, target shooting, or even competitions.
So, depending on your requirements, choose either one!
End Note
Gas piston and spring piston air rifles are two of the most popular ones. Both of them are efficient, great for hunting, and more cost-effective than other options.
However, you need to consider your requirements, to know which one would suit your style better. Consider this guide as your roadmap and choose the best gun only!
Frequently Asked Questions
Which Lasts Longer In Storage – Spring Piston Rifle or Gas Piston Rifle?
If you’re planning to store your gun, it is preferable to get a spring-piston rifle as gas one may not last long. Moreover, if there’s any damage, spring rifles are cheaper to repair and maintain.
How Long Do Spring Piston Rifles and Gas Piston Rifles Last?
Spring rifles and gas piston rifles may last for more than ten years if they are kept under good conditions and used properly. Yet, you may still have to maintain them well for a great performance.
Keep in mind that according to a lot of hunters, gas piston rifles last less compared to spring rifles.
The sleeping habits of a deer are probably some of the most interesting out of all the large land mammals. How deer sleep is so different from what we are used to as humans, that it makes them a very interesting topic to look into.
This overview covers a wide range of facts about how deer sleep, why they do it that way, and how it helps them survive in the wild. Let’s get right into it!
Although it is not very common, some deer have been observed sleeping while standing up. The upright position is rare, because most adult deer sleep on their side with their heads up. Young fawns will lie down curled up, with their nose tucked under their legs.
Most individuals will not stand up because they lose muscle control while sleeping, just like humans do.
However, just like humans have the ability to sleep-walk, so can some deer! The main reason the animals might do this is to be extra alert about potential dangers in their immediate surroundings.
2. Deer Can Sleep With Their Eyes Open
Because a prey species like deer need to be on high alert at all times, it is not uncommon for deer to sleep with their eyes open. The animals fall into a daydream-like state for several seconds to minutes, lowering brain activity. The state is similar to what would be considered a sleep state.
Much like sleeping while standing up, sleeping with eyes open is an incidental occurrence for most deer. You might have even seen it while encountering them in the wild, without realizing it!
While bedding down, the animals are more likely to close their eyes for brief periods of time. Keeping their heads up and their other senses sharp, they never lose their ability to sense a potential predator nearby.
3. They Sleep In Super Short Intervals
Humans need about 8 hours of sleep every night to feel well-rested. Deer do it in a completely different way: the animals take incredibly short power naps and stay on high alert at all times.
How long deer sleep depends on how safe they feel bedding down. Most deer sleep 4.5 hours during the day, but will do so in extremely short intervals of about 30 seconds to 3 minutes at a time. During their sleep hours, deer will reach deeper REM sleep for about 30 minutes in total.
It is not uncommon for the animals to switch locations many times in a single sleep session. The short intervals wake them up often, but this is needed to keep them safe. Their resting brain is hard-wired for taking power naps, so to speak.
4. If Deer Sleep In Your Yard, They Feel Safe
Have you ever been blessed with the presence of some deer in your backyard? Then you have been chosen. If a deer shows up to take a nap on your property, it feels safe enough to be around you. They don’t see you as a threat and know they will not be harmed by you.
However cute Bambi might seem from a distance, be mindful of the fact that you’re still dealing with a wild animal. You should never feed wild deer for any reason, their survival should not depend on human feeding.
Especially in summer, fawns might end up in your yard to hide from potential predators. They are curled up and usually stay quiet in a hiding position, which makes a fawn relatively difficult to spot.
Be aware of any sleeping fawns before mowing tall grass
5. Returning To Sleep In The Same Spot
When deer have found a relatively safe bedding area, they are inclined to return to sleep in the same spot repeatedly. While the animals are known to change locations often (even during a single sleeping session), they will come back to a few good bedding locations to sleep in.
In order for a bedding area to feel safe enough to return to multiple times, the animals will have a few requirements for the perfect ‘sleeping spot’:
Sufficient cover so potential predators cannot easily spot them
Open view of a large area in order to spot any potential dangers
The ability to hide from the rain or other weather elements
Soft natural bedding like tall grass or a pile of leaves
6. Fawns Sleep With An Extreme Heartrate
Much like human babies, a newborn fawn is a natural-born sleeper. Compared to adult deer, a young fawn will sleep a lot more, about 95% of the time they are bedded. But don’t think the young animals are relaxed while doing this.
During their extensive bedding time, a fawn has an incredibly high heart rate of around 175 beats per minute. The senses of a baby deer are on high alert and shift immediately when potential danger is detected, dropping their heart rate to an average of only 60 beats per minute.
When the extremely high heart rate drops, the body of a hiding fawn is much more difficult to detect by potential predators. The animals breathe less, tuck their head into their legs, and pull their ears back to become as small and undetectable as possible.
7. Deer Don’t Usually Sleep At Night
People commonly think that deer are most active at night, but that’s not true. Deer are not considered nocturnal, but are instead crepuscular species, meaning they are most active during the twilight hours of the day (dawn and dusk).
While it is true that deer don’t often sleep at night, they are most active during the hours around sunrise and sunset.
The main benefit of being a crepuscular animal is decreasing the odds of getting preyed upon. During twilight hours (dawn and dusk), it is much harder for nocturnal and diurnal predators to track prey. This gives deer and other crepuscular wildlife the edge needed to survive as a species.
8. Winter Hibernation Is Not For Deer
While most deer species do lower their activity in the coldest months, the animals never go into hibernation. It is true that deer will hunker down for multiple days or weeks on end to avoid the cold, but they don’t fatten up enough before winter to survive going into full hibernation mode.
Mule deer, moose, elk, and reindeer are more inclined to be active during the winter months than other species, such as white-tailed deer. These species have adapted to colder climates and will remain active for the majority of autumn, winter, and spring.
It is safe to conclude that hibernation is not for deer, but that doesn’t mean they enjoy being in the cold. Hunkering down and bedding longer is their preferred solution to the cold!
No hibernation, but they do hunker down on cold days
9. Bucks In Rut Rarely Ever Sleep
During the rutting season, bucks change everything about their normal behavioral patterns. A buck will generally not sleep or eat during the height of rutting season. Mals will be too focused on finding a mating partner and driving out competitors.
Only after the buck found a suitable female and has successfully mated, he will take some to snooze and find food.
However, he will spend most of his time defending his territory and female from other interested males that are roaming the area. There will be very little time for a quick nap if you want to have children as a buck!
10. Sleeping Beside The Road Is Common
There is a reason why deer-vehicle collisions are such a common occurrence, especially when the colder months are approaching. An elevated road gives a sense of protection and will be a source of warmth for the animals.
The false feeling of safety the road might provide (the asphalt retaining the heat after the sun has set is the main culprit) motivates deer to stick around and take some rest longer than necessary.
If you find a doe or buck near the side of the road, you might want to consider shooing the animal away when it is safe to do so. Alert oncoming traffic before you do so, because you want to avoid the animals panicking and running into cars.
11. Like All Mammals, Deer Are Able To Dream
Even though a deer won’t stay in the dream state very long due to their short-interval sleeping patterns, a deer is able to dream. Deer get about 30 minutes of REM sleep per day, which is the deeper sleep phase in which dreams are produced.
What deer dreams are made of, we can only guess. Probably about food, other members of their herd, or maybe even about running away from that predator.
Maybe it’s true that when deer dream, they visit us when we are in that dream state ourselves. After all, humans assign a lot of value to deer appearing in their dreams…
"Debate over whether a 22 air rifle can effectively take down a deer has sparked curiosity among hunting enthusiasts. With its lower muzzle velocity...
")
")
")
")
")


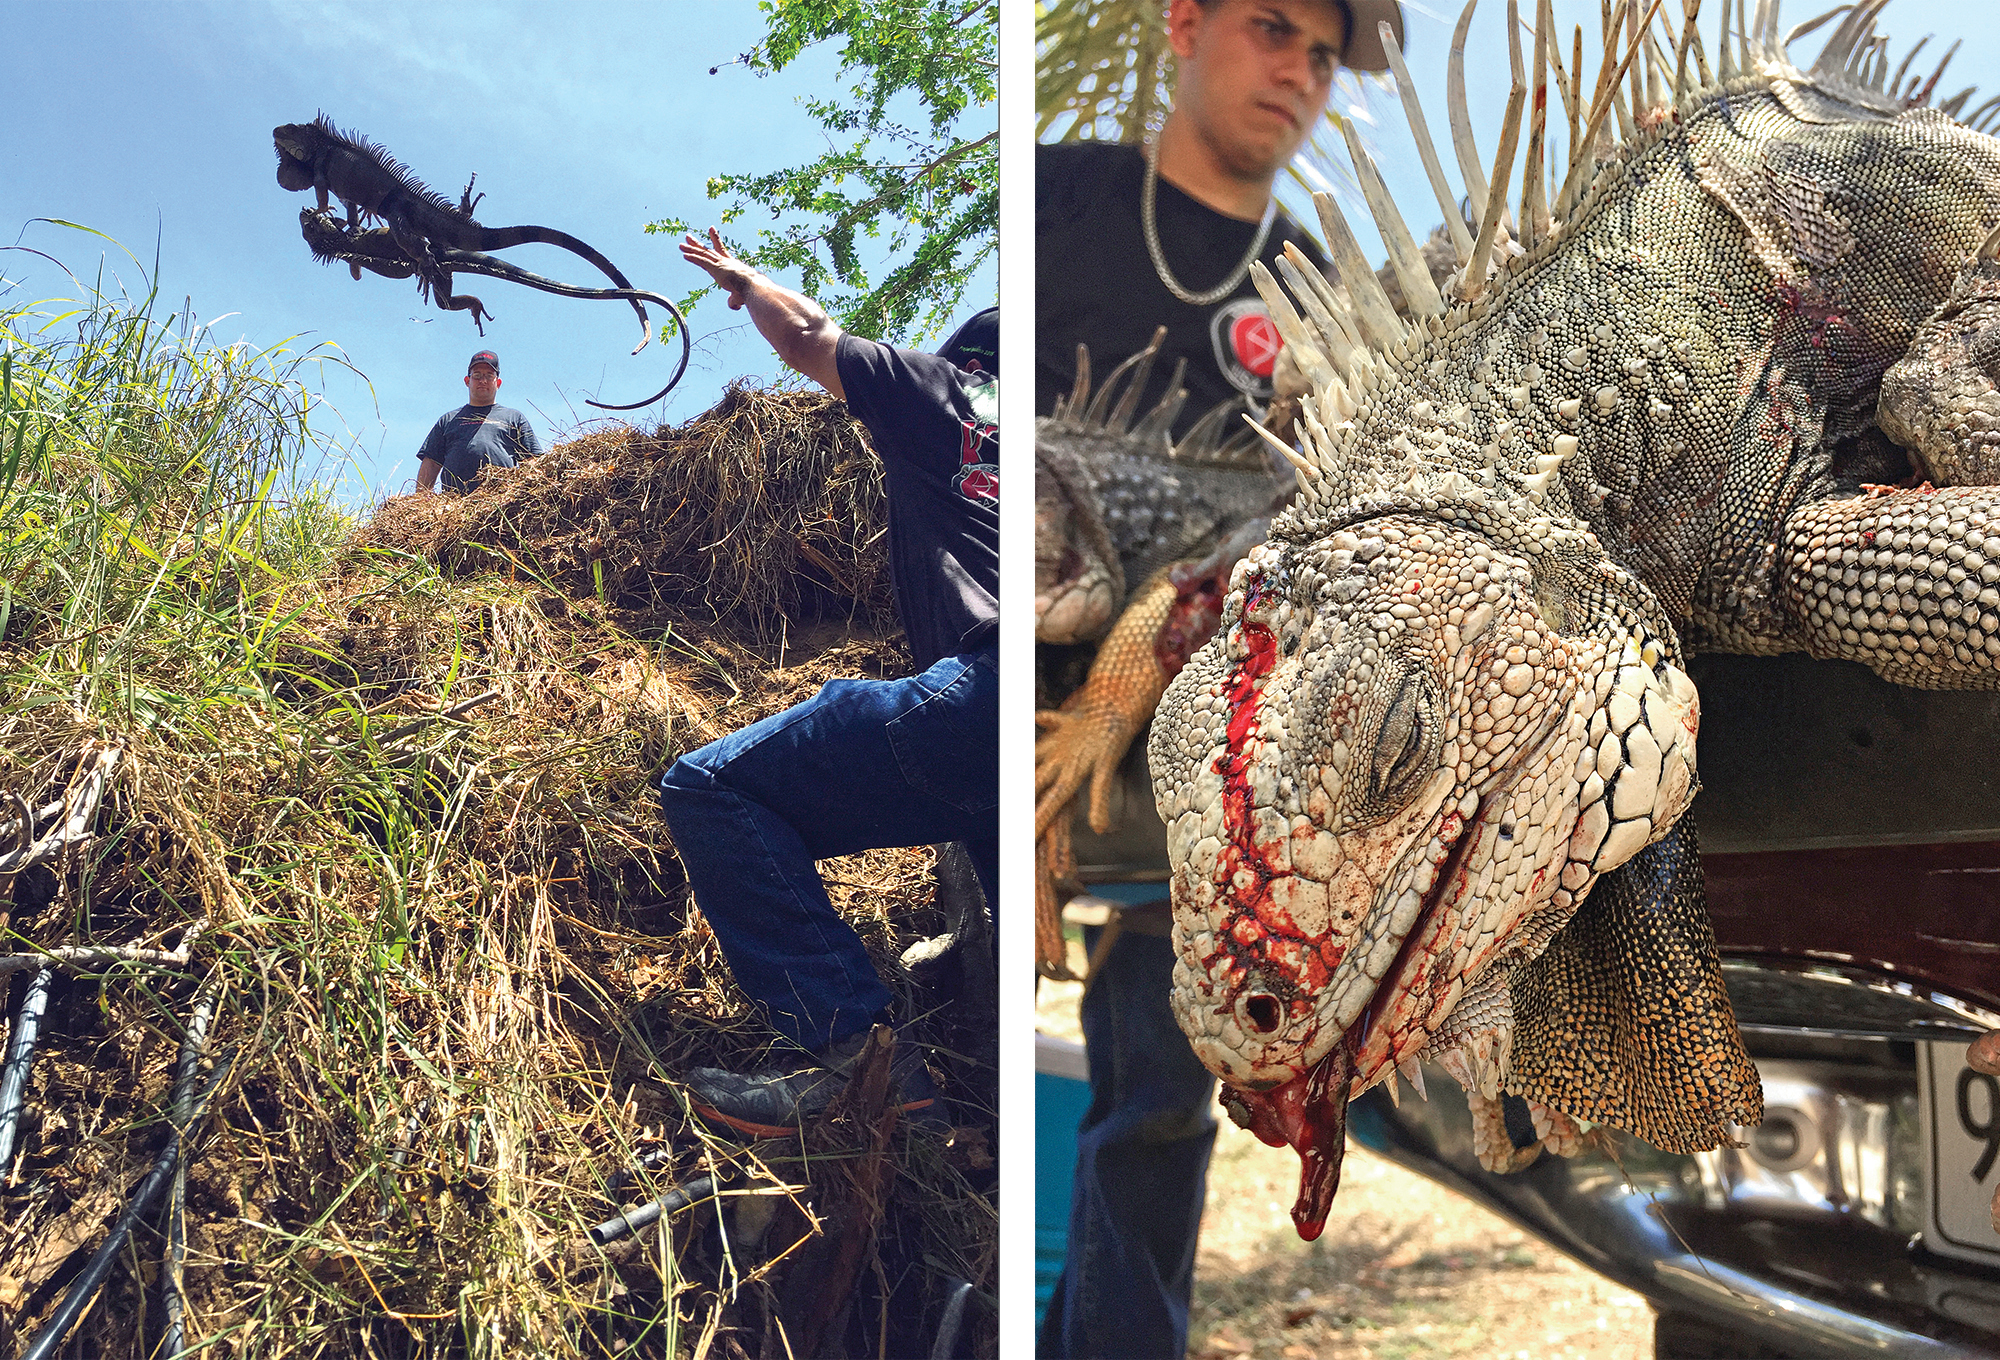

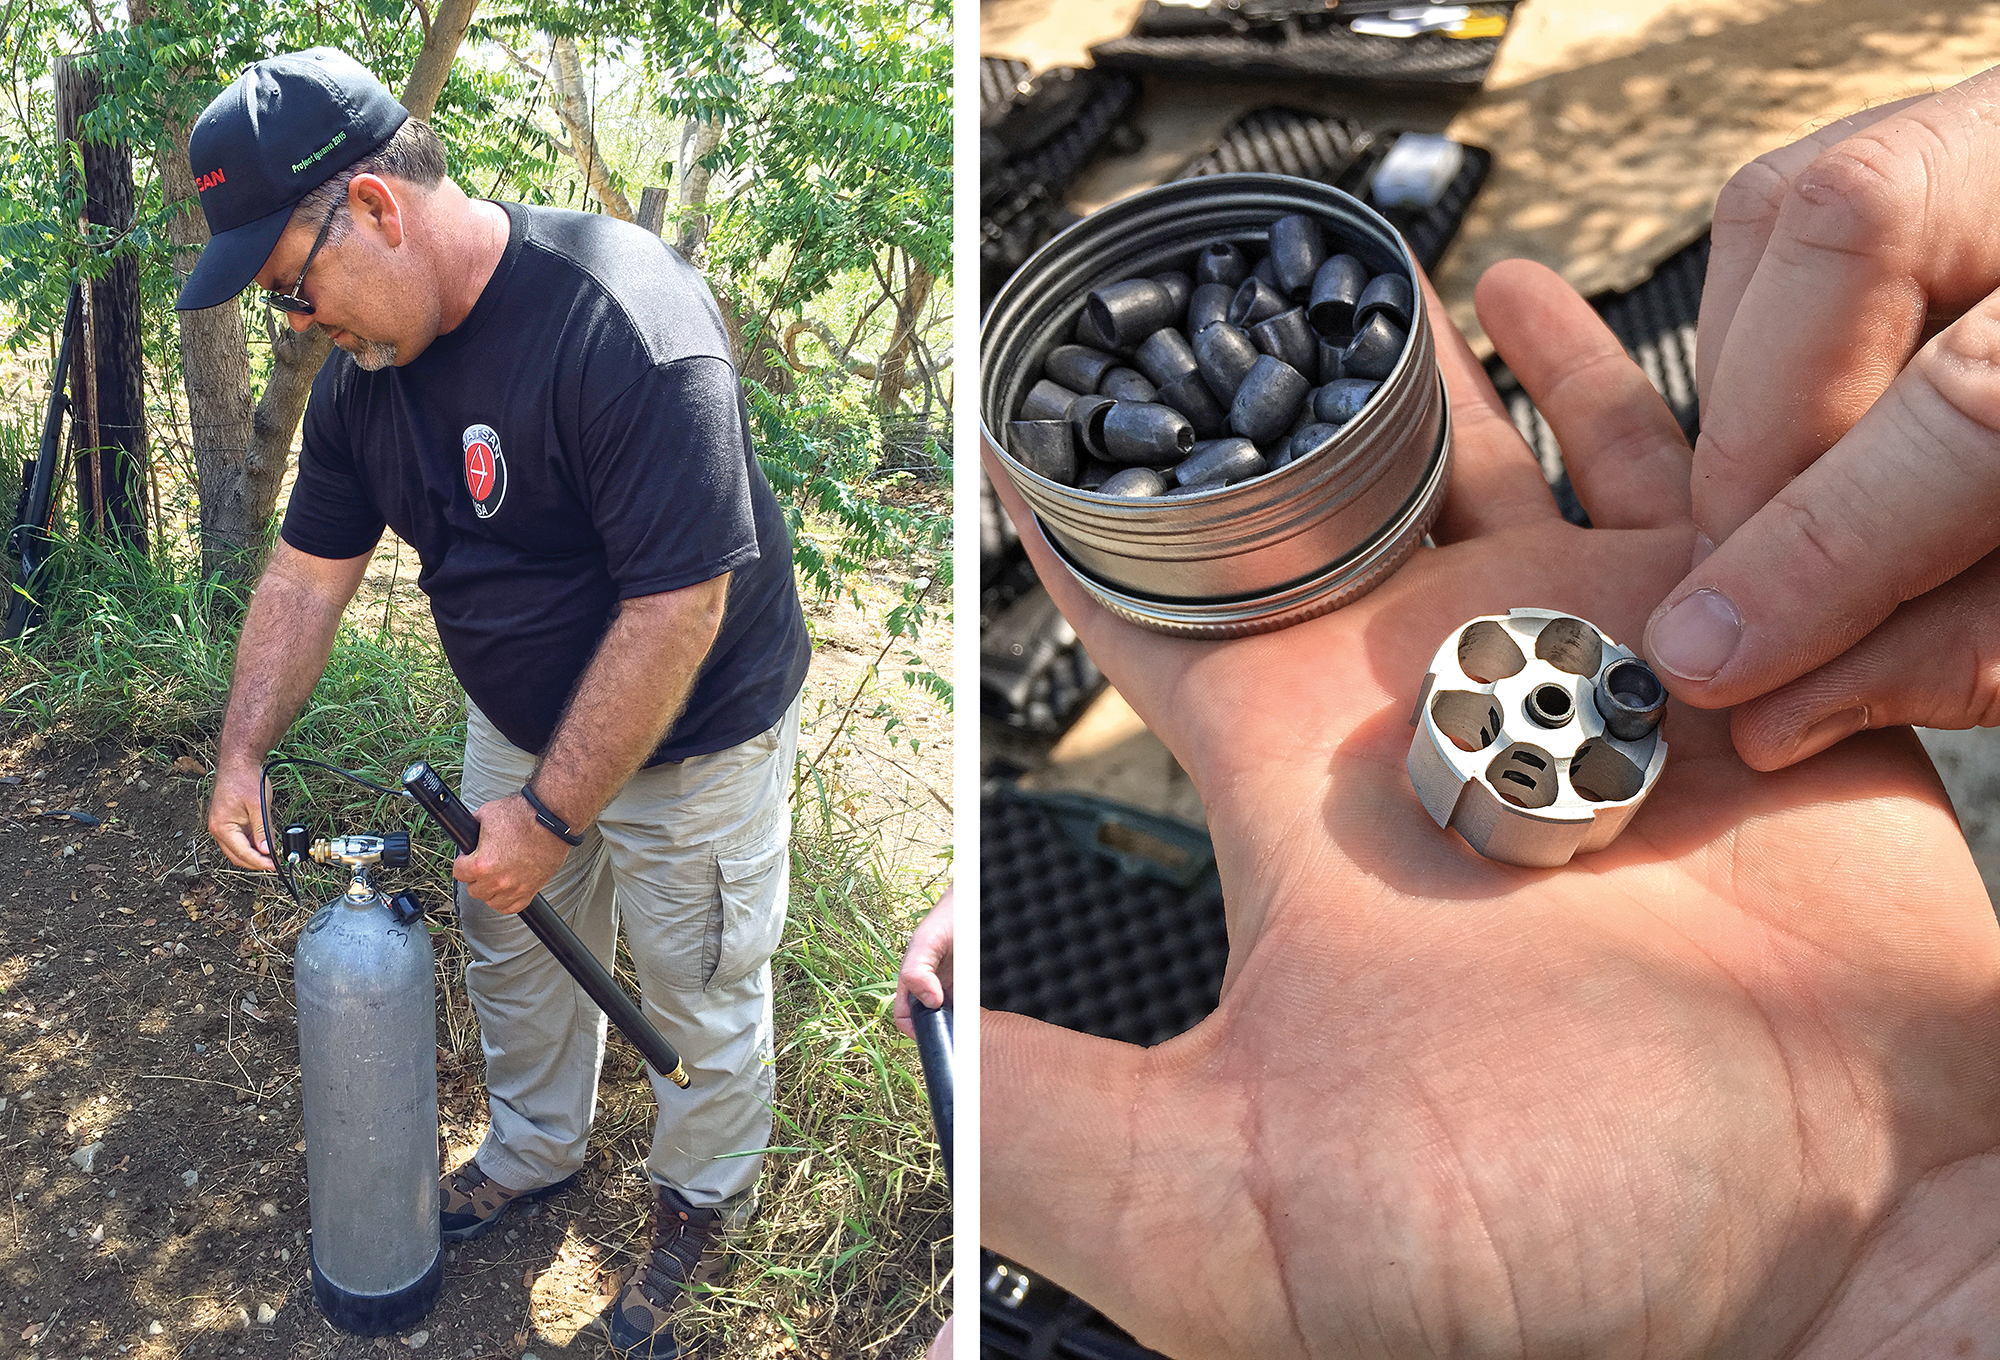


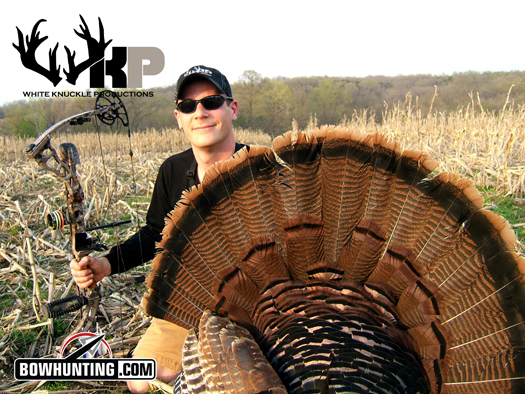
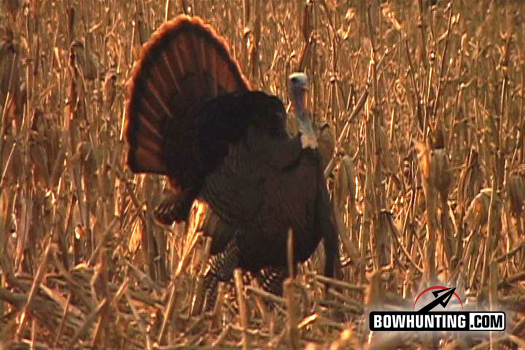 This is a picture of the giant turkey entering the field. My first thoughts were “he’s a shooter”…
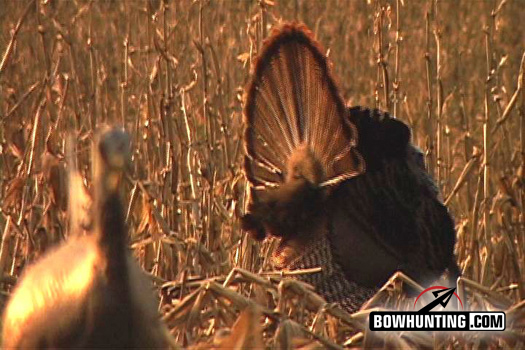 This shows my not-so-fancy decoy set-up in-front of our blind with the big tom circling at 35 yards…
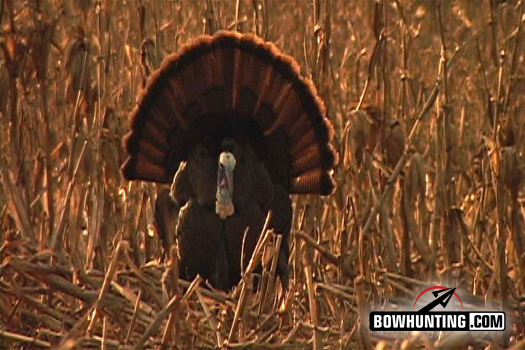
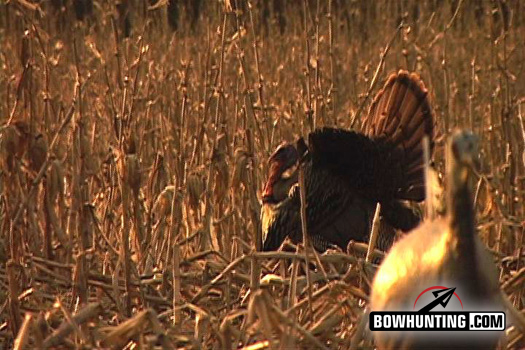 This is when the tom started heading back toward the other hen in the field. It was now or never!
 This is Dallas and I in the bale blind just after the shot…
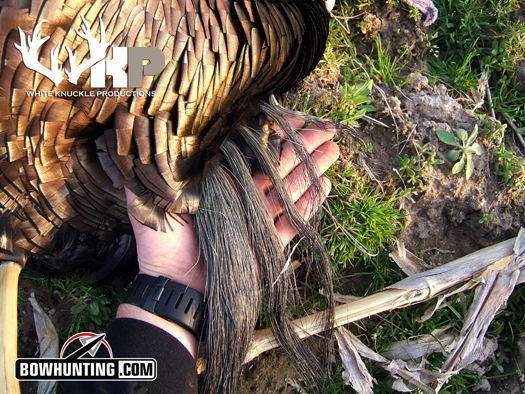 Here is a picture I took of the beards in my hand after just realizing the turkey was a multi-bearded freak bird!
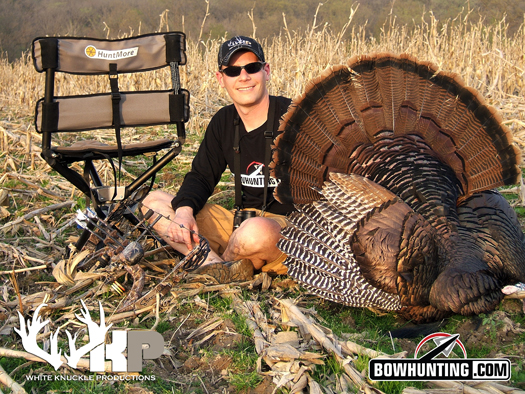
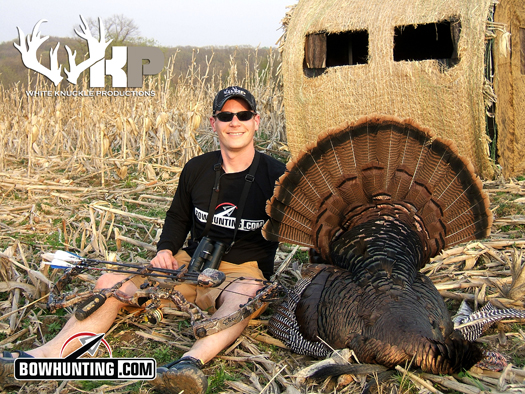 This is the Blind Ambitions Bale Blind that we used for this set-up. It worked perfectly!
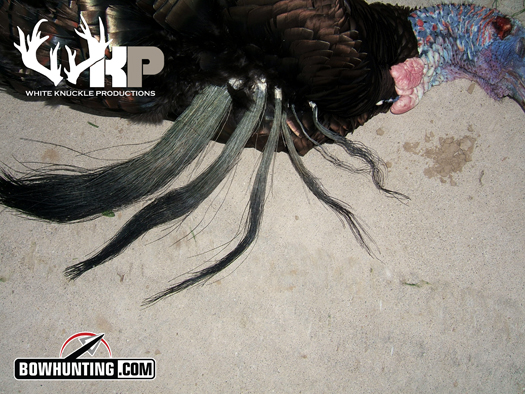 Here’s another picture of the Iowa freaks beard.