Home Blog Page 38

Walleyes In Weeds

0
Walleyes In Weeds
Greg Bohn of Hazelhurst, Wisconsin, enters the Freshwater Fishing Hall of Fame as a Legendary Guide in 2016. He’s spent decades developing fishing patterns for walleyes in weedgrowth.

Greg Bohn of Hazelhurst, Wisconsin, enters the Freshwater Fishing Hall of Fame as a Legendary Guide in 2016. He’s spent decades developing fishing patterns for walleyes in weedgrowth.

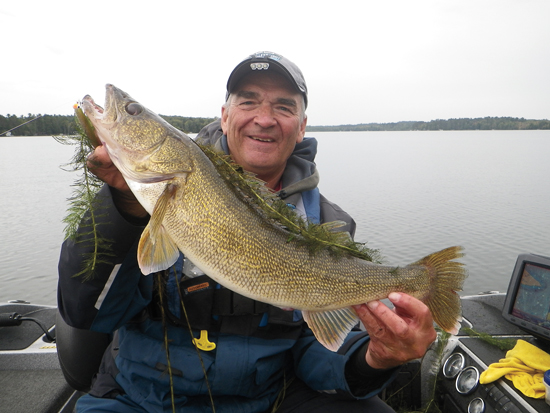
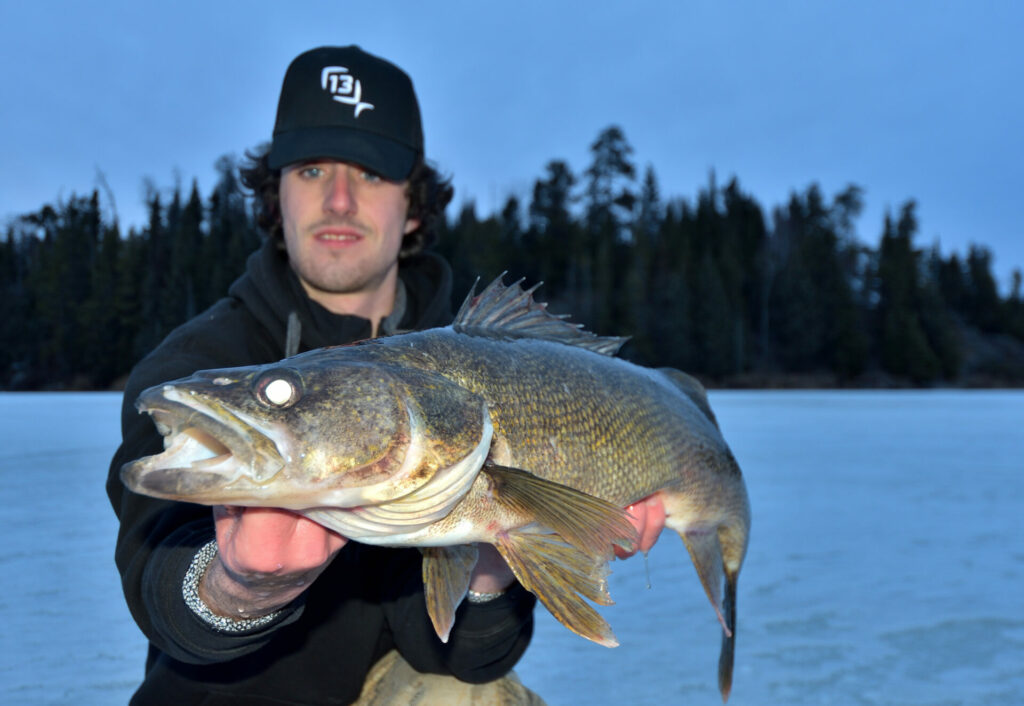
A pair of marble eyes suspended in green shadows. Last thing seen by many a baitfish. The weed-walleye connection is well documented, and many walleye tournaments have been won by targeting walleyes above, outside, and buried in weeds.

Species of aquatic vegetation used by walleyes vary with environments. Seasons ordain certain species of vegetation as walleye kingdoms while evicting walleyes from others. So what weeds do walleyes use most, or in what order as the environment changes with the seasons?

Clasping Leaf Pondweed (Cabbage)

Some think it’s simple: Follow the forage. But it’s hard to find weeds without forage. Other factors are afoot. Where to start on any given day — in green cabbage? Elodea or coontail? Tobacco cabbage? Some other pondweed. Perhaps milfoil?

Wisconsin’s Greg Bohn puts clients on 10-pound walleyes like Miguel Cabrera hits baseballs — at a record pace. He can take clients trophy hunting or go for numbers, day or night. Either way, count on fishing around weeds. For Bohn, vegetation is more than cover. Plants are indicators, gauges, pointers, and signs on his dashboard. “I’m always excited anticipating how the weeds are going to be developed when the season opens in Wisconsin,” he says. “Lakes can be frozen on opening day, and I’ve seen openers with stalks already three feet high. It’s a guessing game until you get out there and investigate.”

In a warm spring, plants grow quickly and chances are good walleyes are in and around some variety of “cabbage.” What anglers commonly refer to as cabbage is mostly clasping-leaf pondweed. But most seasons start with a different plant species — the first one standing, and Bohn’s best early indicator. “Takes time for some types to develop,” he says. “So you have a growth shallow right away, and it progresses deeper during that first month of the season until you’re fishing around different species at different depths in May than in June.”

Bohn’s walleye compass when the season opens is elodea, sometimes called waterweed. “It’s available right at ice-out,” he says. “Elodea grows from a couple feet out to about 8 feet — sometimes in depths of 10 feet. Walleyes love it early. Find elodea and you find walleyes because it’s the only game in town. Perch are looking for vegetation to spawn on most years when the only greenery is elodea, which grows to a height of 10 inches to a foot. Start searching for it early in 2- to 4-foot depths. It generally appears first in bays where the water warms up sooner than the lake.”

Then he looks for what some call broadleaf, tobacco, or brown cabbage, soon followed by clasping leaf pondweed, also called green or narrow-leaf cabbage. “When green cabbage reaches maximum height, the buds pop out above the surface,” he says. “It’s a tough plant. The main stalk can break light line when a big fish wraps in it. It comes up quick and it’s fast growing. It’s the next thing to take off after elodea, and it’s the first type of vegetation most anglers begin to pattern walleyes in.”

Broadleaf, Brown, or Tobacco Pondweed (Cabbage)

Once a big-fish weedbed, always a big-fish weedbed. “There’s something about certain weedbeds that draw big fish almost every year,” he says. “One particular weedbed in a lake may continue producing big fish all your life at a certain point of the season. The attraction sometimes is a steep drop along one edge into deeper water. Sometimes it’s boulders along it. Sometimes it’s consistency of growth year-to-year. It could be they spent a lot of their young lives there, because it’s close to spawning habitat. Little idiosyncrasies that make it attractive in ways we can’t see — that progression is the neatest thing to follow.”

Walleyes are attracted to peak growths of different species of vegetation, but other conditions may determine how walleyes use it. “Walleyes come in-and-out of weeds a lot,” he says. “They react immediately to a change in the surface chop or a change in the light around weeds. They use vegetation differently, based on conditions and weather. They travel half way across the lake to find warmer water in spring. Your temperature gauge becomes your guide. In the 40°F- to 60°F-range, a few degrees makes all the difference. When it gets cold at night early in the season, deeper water is warmer than shallow water and walleyes are in deeper weeds. On sunny days, you find them moving shallower as the water warms — always to a peaking species of vegetation growing in some slightly different substrate.

“As the season progresses, walleyes might be less concerned about a few degrees of temperature change, but temperature remains critical all summer,” he says. “Plant species shift and walleye preferences change, too. They follow the vegetation to an edge, gradually shifting deeper as vegetation extends downward. The 4-foot plants are unproductive by late June, when 8- to 10-foot weededges become prime. It’s a combination of two things — water temperature and maturity of plant growth.”

Elodea

Bohn always works vegetation from the outside edge inward. “Don’t pile right into the vegetation,” he says. “Our initial casts don’t even reach the weededge. Any clumps or points off the edge — that’s where the big fish are. Start well outside the weedline and feel for the edge. You often can tell what kind of plants are present by jigging. If not, try to get a look. Most days, the type of vegetation is important. When you start catching walleyes, you have to know what plants to look for on the next spot.”

Mid-summer cabbage lines and coontail clumps stop between 6 and 20 feet, depending on water clarity. “It takes time for the food chain to get going down there,” he says. “Minnows may not inhabit those deep edges for a while. Until the plants mature, baitfish continue to use shallower vegetation. But those plants may become too thick and walleyes seem to avoid beds that are overly dense. They like newer growth coming into peak height. It’s like a stair-step progression. Walleyes use plants at 4 to 6 feet, then within a week or two they move down to those at 8 to 10 feet, and so on. The deepest are coontail and sandgrass down to about 20 feet and that’s the end of the cycle. That’s where they stay until ice-up.”

Patterns and Presentation

“Walleyes are there big-time or not at all,” Bohn says. “It takes a short time to figure out which plants to focus on. Move quickly because walleyes do. It’s amazing what can happen in seven days as the ‘right weeds’ suddenly become too thick for walleyes and they move to a new restaurant just a few feet deeper. Sometimes walleyes cross the lake to find the next stage of weedgrowth. These movements aren’t necessarily taking place on the same piece of structure or in the same area of the lake. Sometimes it seems like the entire walleye population moves into one particular weedbed for a short time. Usually, though, when they move it’s a pattern that persists around the lake. Say they move to a type of vegetation growing at 10 feet on a sandbar. Every sandbar on the lake that has that type of vegetation has walleyes.

“Wind pushes walleyes shallower,” he says, “but I love to fish vegetation on flat, sunny, calm days right after a cold front. Bluebird days after fronts can be awesome in weeds. Walleyes favor shade and hold where feeding is easy. Look for fish activity on the surface. Young perch dimple the surface and outline a weedbed in calm water. Watch for them skipping out of the water, indicating predators on their tail. But windy days are great, too. In either case, I catch walleyes in weeds with 1/16- to 1/8-ounce perch-colored jigs.”

Milfoil

As surface temps warm between 60°F and 68°F, Bohn switches from fatheads and chubs to leeches, then to crawlers under slipbobbers from 68°F and up — but he uses more artificial softbaits than anything else. “When plant growth is developing, panfish become a nuisance, especially at the leech-and-crawler stages,” he says. “Softbaits take off when the water reaches 60°F. At a certain point every summer, I stop bringing livebait. Softbaits outproduce livebait in warm water.”

He jigs with 10-pound Stren Magnathin. “I like mono with plastics,” he says. “Braids work in vegetation, but the drop is less radical with thicker mono. And when you lift with braid, action is more abrupt because of the lack of stretch. It removes the arc in your lift-drop, too. Walleyes tend to hit on the drop, so having that arc, that pause at the top, and that slower fall is critical. Braid is too abrupt. No need for long casts, either. In weeds, short casts are a must.”

Bohn pitches with a rod at least 7 feet long with a medium power and a fast tip. “G. Loomis makes the BSR852, a 7-foot 1-inch stick,” he says. “It’s better known as a bass rod, but it’s an awesome jigging rod for plastics and walleyes. Medium power and fast action are needed to rip weeds free. For jigging I use a slightly heavier jig with plastics. If I’m using a 1/16-ounce jig with minnows, I use a 1/8-ounce one with softbaits. There are many differences between jigging livebait and plastics. To be productive, you have to appreciate those differences.”

Bohn uses 4-inch soft jerkbaits in minnow shapes in 55°F to 75°F water. “Once leeches and crawlers start working, Kalin’s and Berkley grubs excel,” he says. “Paddletail minnows and small swimbaits — a lot of softbaits work, but I have my best luck in warm water with 3-, 4-, and 5-inch action tails that resemble leeches and crawlers. Ring worms and grubs are good in warm water. Once the water starts to cool and days get shorter, minnow-style baits come back. We began catching bigger fish faster with softbaits than we did with livebait years ago. It’s so effective. I was strictly a livebait guy for years, but now I rarely have livebait on board once the water warms.”

After becoming a “plastics guy,” he designed the Walleye Limit Minnow. “It has the right texture and lifelike flexibility,” he says. “Stiff plastics don’t work well for walleyes. They get bumped and tapped, but not eaten. I think those bumps sometimes indicate walleyes are testing the texture of the bait. The Walleye Limit Minnow is the best soft jerk for walleyes I’ve used.”

Coontail

Most people jig upward all the time. “With softbaits, you need something a little different,” he says. “Every day can be different. Some days it’s pop it up and let it fall, but sometimes they want it moving horizontally then dropping. You have to incorporate a pull, a short swim, or a slow lift, giving walleyes the opportunity to move under the jig. I freeze the rod tip at 11 o’clock, never go beyond noon, and never drop it below 10 o’clock. I watch the bow in the line. When you lower the rod you lose contact with the jig long enough for fish to pick it up and spit it out without feeling a thing. Freeze that rod at 11 o’clock and you feel everything. You see more line strikes and feel more ticks and light bites.”

A jig has to be rigged perfectly with softbaits. “It has to be straight,” he says. “If it’s spinning, circling, or running sideways, it won’t produce. Make sure the lure looks symmetrical and straight — not off balance, bunched up, or crooked. With minnow-shaped softbaits you do more twitching. With action-tails you twitch less and swim more. Hopping them is good, but a slow, steady swim can be best. With livebait, you give them time to get a good hold on it. With softbaits, you want to set the hook immediately. Clients often get bites without setting the hook right away. It’s in and out of their mouths so quickly. Weeds feel almost the same. If you feel a tip or a tap like a perch tapping a nightcrawler, that’s a strike. A lot of strikes are weight strikes — if you feel weight, set the hook.”

With softbaits, you get a lot of “let’s-get-acquainted bumps,” he says. “The best way to get that walleye to strike after a bump is to keep going. Act as if nothing happened and keep jigging. Once you get the lure near the boat, don’t raise it up immediately. Walleyes follow more than muskies. After the lure gets to the boat we catch tons of walleyes by jigging up and down right under the boat. Maybe 6 to 8 inches, and just a couple lift and drops. If they’re there, they react to that abrupt change in retrieve angle. Work it all the way in.”

As mentioned before, Bohn likes perch colors. “Walleyes are on perch-imitating jigs and baits based in green,” he says. “Chartreuse-and-lime, glow watermelon — any shade of green. A perch-glow head in firetiger or parrot is my favorite. All green or green-back, pearl-belly plastics are key in weeds.”

A soft jerk on a small jig swimming through green shadows. Last thing seen by many a marble eye near Greg Bohn.

Top 6 Subsonic .22 LR Loads for Small-Game Hunting

0

Given the ever-increasing proximity of neighbors due to suburban sprawl and the boost in sales of .22 caliber sound suppressors for range and field use, it’s little wonder why subsonic .22 Long Rifle (LR) loads have grown by leaps and bounds in recent years. In fact, MidwayUSA currently lists more subsonic .22 LR options than supersonic on its website. There are several reasons for this shift: Beyond maintaining positive relationships with nearby residents, subsonic .22 LR loads also don’t frighten livestock or game, and their use helps preserve one’s hearing—especially when coupled with a quality suppressor, and they’re often more accurate than their supersonic brethren, too.

To qualify as “subsonic,” the projectile mustn’t break the speed of sound, and that rate varies greatly. Depending on the temperature, humidity, air pressure and elevation, it’s reported to range between 1087 fps and 1129 fps. For extra “cushion,” I opt for loads with velocities at (or less than) 1050 fps. At such speeds, the ammunition doesn’t produce the associated “crack” of supersonic ammo across a host of climates and locations.

Within the realm of subsonic .22 LR ammunition, there exists a multitude of configurations, and not all are well-suited for hunting small game. Outside of a restrained marksman who can consistently make head shots on squirrel-size game, lead, round-nose subsonic loads should be relegated to range work. Even lethal hits will often result in a lost animal. This is particularly true of squirrels, which will quickly scurry into a nest or hole in a tree.

To counteract the loss of energy and terminal performance due to lower velocities, you need a bullet that maximizes the wound channel(s). The most lethal bullet designs for use at subsonic velocities will be a traditional hollow-point or specialized, segmenting hollow-point. I’ve experienced good results with both designs.

Beyond terminal performance, the loads must function flawlessly in the rifle, too. Due to their low velocities—and, at times, low bullet weights—cycling can be particularly problematic for semi-automatic rifles. Such is not the case with bolt-, pump- and lever-action rifles.

For this article, I selected six current, subsonic .22 LR loads suitable for small-game hunting and subjected them to a barrage of tests to evaluate relative sound, accuracy (five-consecutive, five-shot groups at 50 yards), functioning, velocity and terminal performance (in modeling clay at 25 yards). The rifle employed was a Ruger 10/22 fitted with a 16 ½-inch Tactical Solutions barrel with a YHM Mite suppressor, topped with a Weaver Grand Slam 4-16x44mm riflescope. In addition to the particulars of each load and the test results, I also identified the advantages and drawbacks, if any. Please keep in mind that these results are from a single rifle, and each rifle has different preferences. Nevertheless, hopefully this will ease your decision-making process.

1. Winchester Subsonic 42 Max Particulars: Manufactured in Australia, Winchester’s Subsonic 42 Max features—unsurprisingly—a cavernous, truncated-nose, hollow-point, 42-grain lead bullet propelled to 1065 fps. That equates to 106 ft.-lbs. of energy. MSRP: $5.39 per 50-rnd box; midwayusa.com.

Test: Across a Competition Electronics ProChrono Digital Chronograph at five feet, Subsonic 42 Max loads averaged 1001 fps, and were fairly loud. I ranked them as the third loudest. Concerning accuracy, the Aussie loading was disappointing; for five consecutive, five-shot groups at 50 yards, the average was 1.63 inches—the largest of the batch. That being said, functioning in the semi-automatic test rifle was flawless, and the bullets delivered devastating terminal ballistics in the clay. Beyond a large cavity, the bullet traversed the full length of the clay block.

Advantages: Noteworthy terminal ballistics, flawless cycling, reasonable price

Drawbacks: Disappointing accuracy, fairly loud

2. Winchester Super-X 22 Long Rifle Subsonic

Particulars: Available on a somewhat inconsistent basis, Winchester‘s Super-X 22 Long Rifle Subsonic load features a 40-grain lead, truncated-cone, hollow-point bullet propelled to 1065 fps. Also manufactured in Australia, the bullet has five less ft.-lbs. of energy than the abovementioned load. MSRP: $4.99 per 50-rnd. box; midwayusa.com.

Test: Posting an average velocity of 1042 fps, Winchester’s Super-X 22 Long Rifle Subsonic load was the fastest of the bunch, and it was the loudest, too. Moreover, it produced the second largest groups; for 25 shots, the mean was an unremarkable 1.53 inches. There was one failure to eject. As for terminal performance, the 40-grain bullet created a massive wound channel and traveled nearly the length of the block of clay.

Advantages: Impressive terminal ballistics, fast, relatively inexpensive

Drawbacks: Unsatisfactory accuracy, loud

3. ELEY Subsonic Hollow

Particulars: A true premium-grade .22 LR load, Subsonic Hollow is manufactured by ELEY in England and features a 38-grain lead, hollow-point bullet propelled to 1040 fps. Energy is 96 ft.-lbs. MSRP: $9.29 per 50-rnd. box; midwayusa.com.

Test: With a mean velocity of 993 fps, ELEY’s Subsonic Hollow was third fastest, but second loudest. In addition to delivering flawless functioning, the load also proved to be the most accurate; in fact, five, five-shot groups averaged 0.89-inch. In a match-grade rifle, it’d be scary accurate. Despite a great showing in the accuracy department, its terminal performance was somewhat lacking. Although ample to deliver a quick, fatal blow to small varmints and game, larger species might travel a bit further before succumbing.

Advantages: clean, accurate

Drawbacks: expensive, smallish wound channel, somewhat loud

4. CCI Quiet-22 Segmented HP

Particulars: Propelled to a modest 710 fps, what the CCI Quiet-22 copper-plated 40-grain segmented hollow-point bullet lacks in energy—45 ft.-lbs.—it makes up for in terminal performance. During penetration, the projectile breaks into three pieces to increase damage to vital organs and structures. MSRP: $5.93 per 50 rnd. box; midwayusa.com.

Test: From the 16 ½-inch barrel of the 10/22, Quiet-22 Subsonic HP ammunition averaged a modest 664 fps—little wonder why it didn’t cycle in the semi-automatic rifle. Nonetheless, it was incredibly quiet—the least report of any tested—and acceptably accurate. For 25 shots, it had a mean of 1.30 inches. Concerning terminal performance, the Segmented HP created a large initial cavity before splitting into three pieces, each of which penetrated deeply. It’s a devastating design, and the sound it produces when striking is equally eye opening.

Advantages: Remarkable terminal performance, reduced risk of ricochet and over penetration, copper-plated, good accuracy

Drawbacks: Won’t cycle most semi-automatic actions

5. CCI Suppressor 22 LR

Particulars: Designed for flawless functioning in semi-automatic rifles, CCI’s Suppressor 22 LR propels a non-plated, 45-grain lead hollow-point bullet to 970 fps. Energy is 94 ft.-lbs. MSRP: $5.12 per 50-rnd. box; midwayusa.com.

Test: Despite propelling the heaviest bullet in the test, CCI’s Suppressor 22 LR load still averaged 931 fps, and its perceived report was the second quietest. As for accuracy, it was the only real competitor for the ELEY Hollow load; its mean was a respectable 1.17 inches. The 10/22 cycled without issue when loaded with Suppressor 22 LR. Moreover, the heavy bullet created a sizable cavity in the clay before exiting. This load has a lot going for it.

Advantages: Excellent terminal performance, modest cost, quiet, reliable cycling, good accuracy

Drawbacks: None

6. RWS Subsonic HP

Particulars: Manufactured in Germany, RWS’ Subsonic HP load has a traditional-style 40-grain lead hollow-point bullet travelling 1033 fps, for 95 ft.-lbs. of energy. MSRP: $6.99 per 50-rnd. box; midwayusa.com.

Test: With an average velocity of 977 fps, RWS Subsonic HP was middle-ground, and so too was its report. Accuracy wise, the round had a mean of 1.25 inches—not too bad. Cycling, however, was unreliable. While lacking in functioning, it was extraordinary with regards to terminal performance; in fact, this round produced the largest wound channel of all tested. Quarry won’t travel far (if not stopped outright).

Advantages: Impressive terminal performance (largest cavity), mild report

Drawbacks: costly, wax coating easily gets on hands, unreliable functioning in semi-automatic rifles

If you’re not using subsonic loads, you’re really missing out. Go ahead and give some of these loads a try when hunting small game, and if you’re like me, you’re likely to stick with them.

PSA Dagger

0

The Palmetto State Armory Dagger, also known as the PSA Dagger, was created to compete in the compact pistol market against the Glock 19. This is clearly a Glock 19 Gen 3 clone.

What makes the PSA Dagger so different is the fact that it comes in at a $299 price point. This price point makes it extremely attractive, considering Glock’s can be $500 plus dollars.

The Dagger really shines in terms of MSRP, but does it hold up to Glock’s reputation of quality and performance?

Well, that’s why I’m going to do a complete review of the PSA Dagger. I think it’s important to preface this by saying, I purchased this PSA dagger and while we do work with PSA sometimes, I purchased this outright, at the MSRP.

PSA Dagger First Impression

First of all, the PSA Dagger comes in a cardboard box with the foam cut out for the gun.

psa dagger box gun

Upon opening it, you could take the gun out, take the chamber flag out, and the lid holds all of your manuals and other information. You can pull the bottom out and that’s where you’ll find your magazine, and other materials from Palmetto, including your Gun Lock.

PSA did a good job with the box, the opening, the presentation, is all very good. That’s very well done. It doesn’t come in a plastic case, but if you’re like me, you don’t much care about the plastic cases because you’re not going to use them anyway.

I typically have to stack them somewhere in case I ever decide to sell a gun, which I don’t do anymore.

My first impression when I held the PSA Dagger was, is this a Glock, or is this a Sig?

It’s very interesting because it definitely has the Glock frame, but I think what threw me was the texture of the grip.

So, when I held it, I was like, Oh man, this feels like a SIG. But the more and more I held it, the more and more I was like, Okay, this gives you a Glock feel with a SIG texture.

It’s a very interesting feel to the gun, and I really like it. So, I was actually really impressed with a $300 gun in the overall initial feel.

Now, the overall aesthetics and look are pretty much like Glock. There is a little bit of difference in the slide cut.

I think you get a little bit different finish than you would on a Glock or others. It does come with a Magpul magazine. So, no proprietary mags, and you can run standard Glock mags in it as well.

PSA Dagger Features

The features of the PSA Dagger include pretty much everything on the Glock 19 Gen 3.

You have the standard takedown method, you have your magazine release, which is done almost just like a Gen 3 with PSA’s slight touch to it.

Left side of PSA Dagger with Slide Locked to Rear

There is a hump in the middle of the grip like the Gen 3’s are known for. The slide does have a unique design, but it doesn’t have any of Palmetto State Armory’s markings on it. It is just a clear, clean-cut, slide. I do like that.

Now, Palmetto State Armory does have all their information on the grip. The serial number for the gun is located in the same spot it would be on a Glock, and the sights are just standard, three white dot sights with no night sights.

In addition to no Palmetto State Armory markings on the slide, it does have front and rear cut serrations.

Overall, the gun feels good, the slide reminds me somewhat of the blocky design of the SIG P320, but at the same time, still looks like a Glock.

It just doesn’t have the rounded corners on the slide, it definitely has the edges more of a SIG.

Grip and Ergonomics

Like I mentioned in my initial impression of the gun, the grip really struck me.

It definitely has the same texture, that the SIG P320’s have. It has the ergonomics, however, of a Glock Gen 3.

PSA Dagger Grip

I really like what Palmetto did with the grip texture. It does have the little Palmetto State Armory logo in the bottom right-hand corner of the grip, on the left side and on the right side, it would be in the bottom left-hand corner.

It’s definitely visually appealing and it’s also very nice and porous and allows you to get a good grip on the gun.

Establishing your master grip is very easy, and overall, I think they did a great job on the grip.

Sights

The sights on the PSA dagger are a little disappointing, but at $300, I’m not sure what exactly I was expecting.

psa dagger sights

I guess I’ve just become so used to sights on guns coming with night sights. So when I realized the PSA Dagger didn’t have night sights, I was a little surprised.

But again, I thought to myself, “This is a $300 gun. What did you expect?”

The good news is you can change these out to any Glock sights, they haven’t changed their design in years. So, these are definitely changeable.

The one thing I would say I would have done, had it been in stock, is buy the red dot cut slide.

It’s only $80 more, and I definitely would’ve gone that route if that was an option at the time I ordered this gun.

The stock sights aren’t, particularly my favorite type of sights. I prefer no rear dots on the rear sight and just a singular dot on the front sight.

I’ve had no problems with these though. I took it out and shot it, and we’ll get to the actual shooting of it. But as far as sights go, they’re accurate, they were on, had no problems hitting targets.

So the sights, once again, good, cool, would’ve loved to see them as night sights. But again, I think the price point would likely have to have increased.

Magazine

The magazine of this gun is nothing to write home about, it’s just a Magpul Glock 19 magazine. There’s nothing wrong with it.

There’s only one of them, but again, you’re buying a $300 gun. This is in the realm of Taurus and a lot of other guns, but you’re almost getting a Glock quality product for $300.

Magpal Magazine

Now, if you have a Glock 19, and have carried a Glock 19 since they released the Gen 3 version, you have a ton of Glock mags that are already compatible.

I personally have an undisclosed amount of Glock mags, nice try ATF, which will work in the PSA Dagger.

So, I’m okay magazine-wise. I don’t have any issues with the Magpul magazines and so far, this has functioned perfectly fine.

Optics Ready Model

Like I mentioned, under the sight section, this is one thing that I think everybody should know about.

I think you should definitely consider getting the optics-ready version. The pistol world is likely going all red dot. I don’t blame them, it’s fantastic.

If you haven’t done it, try it, you might not like it at first, I didn’t. But give it a shot because it’s actually a really, really, nice way to shoot a pistol.

Once you get used to it, your accuracy is going to increase tenfold and I don’t think you’re ever going to turn back from not owning an optic mountable pistol.

With that being said, get the PSA cut slide from the factory, for 80 more dollars. You’re not going to be able to save any money getting it milled somewhere else.

Even some of the cheapest slide millers I know, charge a minimum of a hundred dollars to cut a slide. So, don’t try to save some money here. PSA’s already done that for you. Go ahead and get the RMR cut slide.

Controls

So, let’s talk about the meat and potatoes of any gun, and that’s the controls. The controls of this pistol are, once again, that of a Glock Gen 3.

You have your magazine release, you have your takedown in the middle of the slide, to where you can field strip the gun and take it apart.

You also have your slide release and also magazine release, and that’s pretty much the basics of the gun. You also have your trigger. So let’s dive in, starting with the magazine release.

Magazine release

The magazine release in this gun does stand up relatively high. It’s fairly easy to depress and does have the same texture as the Glock Generation 3’s.

The grip frame does have a spot cut for it, to where your thumb can fall in. Nothing special, it works.

It drops the mag clear, about what you’d expect from this gun, given the fact that the frame is based on the Glock.

Slide Stop

So the slide stop/slide release is pretty much the same thing as a Glock Gen 3.

They’re not, however, like the Glock Gen 5. So, this is only on the left-hand side of the gun.

PSA Dagger Slide Stop

I prefer the ambidextrous style slide stop slide release as it makes it easier to pull the slide release down.

This does not have that, it is the standard flat slide switch.

There’s nothing to really catch your finger. It’s about as stock as you can get, but it does work.

There are no issues with it, you can lock the mag back easily. You can drop it free, easy.

It does function extremely well, but just know that it’s a stock part on a $300 gun. It’s not going to wow you.

Trigger

The PSA Dagger trigger is probably the only part of this gun that disappointed me to an extreme level.

Trigger of the PSA Dagger

Everything else is pretty much on par with what I expect out of a $300 gun. Granted, the trigger is terrible.

Probably the worst trigger I’ve ever felt. They use a Smith and Wesson M&P trigger design, where it bends in the middle, versus something like the Glock trigger that has the safe action in the middle.

I don’t know the rationale behind this, but what I can tell you is it feels like sandpaper when pulling the trigger. It’s pretty bad.

I don’t want to harp on this too much, as the gun overall, is an extremely nice gun. It’s even fun to shoot, but the trigger is so lackluster that it’s crazy. This was beyond an afterthought, in my opinion.

I’m not here to hate on PSA. I own a number of their products and most of them are fantastic, especially for the price point. But even for a $300 gun, this just feels like sandpaper.

The take-up travel is good, and the break is clean. It’s not very crisp, but it is clean and not spongy.

The reset is short and it’s just back to the wall.

So my beef is really with the smoothness of the take-up which is almost like sand was dumped into the fire control group of this gun, and that saddens me.

But at the same time, it’s a $300 gun and still shoots great and what I found while shooting the gun is while the trigger is gritty it doesn’t have an impact on accuracy, and shooting the gun overall is actually really fun.

PSA Dagger Ammo

If you are in the market for some ammo for your PSA dagger the options are endless.

Accessories

The nice part about the accessories for the PSA dagger, the fact that pretty much any Glock Gen 3 accessories will work.

PSA Dagger Slides

Looking for a baller pistol on a budget? Turn to the PSA Dagger because the number of available slide options from Palmetto are incredible.

SW5 RMR Slide

psa dagger sw5 black gold

I’ve always like the TIN barrels and bolts on guns so forgive me for being a sucker if these aren’t your thing. But for just $329 you can get the SW5 RMR Slide which features a milled slide with an RMR cut and a threaded barrel.

That is a crazy good deal considering Glock threaded barrels typically start at $119 and go up.

SW1 RMR Slide With Copper Threaded Barrel

psa dagger fde slide

With a number of different slide cut options you can really get the look you are going for with your pistol the SW1 RMR Slide With Copper Threaded Barrel is definitively a looker.

One of the great things about Palmetto is they don’t just offer you different colors but also didn’t cut styles and even better features like threaded barrels and optics ready cuts.

PSA Dagger Holsters

Now, the only exception to that is holsters. They’ll fit in some Glock 19 holsters, but not well.

It’s very tight and it’s extremely hard to get out. I think that has a lot to do with the slide, but I believe the retention point on the frame is the same.

The slide is thicker and has a slightly different profile so it doesn’t slide into the holster as easily as a stock Glock 19.

So if you want a Kydex holster for your PSA Dagger you might want to grab one that’s available on their website. But keep in mind it’s slim pickings right now, but hopefully, the selection will grow.

PSA Dagger Flashlight

I grabbed an Inforce Wild 2 flashlight for the PSA Dagger and while it’s a polymer flashlight I don’t even have a holster that will fit my Dagger yet so it’s more or less a light that wouldn’t see a lot of action outside of the range.

Personally, the light is fantastic but it still has it limitations namely it’s a polymer flashlight.

But output wise it’s fantastic!

The dagger is nice because the rail will allow nearly any pistol flashlight to be mounted to the gun.

Aesthetics

The overall look and feel of this gun are fantastic. Starting with the bottom of the grip frame features a nice little cut-out that allows you to grab and rip your magazine if it was ever stuck for any reason.

dagger rightsidelocked

The DLC slide with carry cuts looks fantastic and gives a unique picture from behind the gun with the blocky design of the slide. This side is great and I like what PSA did with it.

PSA Dagger vs Glock 19 Gen 3

The PSA Dagger is a revamp of the Glock 19 Gen 3 and the most notable differences are the aesthetics.

Glock 19 Gen 3 vs PSA Dagger

The internals do feature some slight differences namely the slide rails.

Glock 19 vs PSA Dagger
Glock 19 Gen 3 pictured left vs PSA Dagger pictured right

The PSA Dagger also has a different grip and grip texture as you can see below.

glock19 vs psadagger grip
Glock 19 Pictured Top vs PSA Dagger Pictured Bottom

The slides are nearly identical with the spring guide rod being the biggest difference.

psa dagger slide

Lastly here’s a side-by-side picture of the complete internals.

psa dagger internals

As you can tell there are some clear differences and clear similarities between these two pistols and I think each has its place in the market.

PSA Dagger Durability

North Carolina finally produced some snow for the first time in several years so I figured I might as well make use of such a fine day!

So I put the dagger through a quick and short test for function. By no means do I think these were comprehensive or even a true torture test but it’s more than most people would likely ever put their gun through.

psa dagger snow

I put the Dagger through several various things and it never skipped a beat. The misses were all me being it cold and almost never shooting with gloves on, I accept all of the misses as my fault.

I also dropped it from roughly waist height and shot it one-handed so I could video the results. I racked the slide on my boot and other than my misses it functioned fine.

Overall, I’m happy how the Dagger did in the mild snow test I performed on it.

Shooting the PSA Dagger

Now, shooting the PSA Dagger is actually a little different. It does feel like a SIG texture in your hand, but this thing absolutely shoots like a Glock 19, all day long.

Shooting this side by side with a Glock 19, you’re really not going to notice much difference and for better or for worse, that’s a plus in my opinion.

Will you like to shoot the PSA Dagger? It depends on if you like a Glock 19. It does well on the range, it shoots good, and it puts rounds on target.

I had no flaws, no malfunctions, and nothing bad to say about shooting this gun. I didn’t have any pins walk out on me.

I didn’t have any problems with this gun so far, whatsoever. In fact, it’d be hard for me not to recommend this gun.

Other than to warn people, you’re not going to have a nice trigger.

While triggers are changeable, by the time you throw a new trigger in this gun, you’re getting dangerously close to Glock prices.

If you don’t like the Glock trigger either, and you’re going to replace that trigger anyway, this gun is a value.

Overall shooting this gun is very smooth, very crisp, and clean and I really enjoyed it. The slide and the sight picture are fantastic.

Final Thoughts

My final thoughts on the PSA Dagger are this, I don’t think that this is a Glock replacement.

The Dagger is more of a reason not to buy a Polymer 80 Build. Now, if you’re worried about a serial number, that’s one thing.

But as far as cost savings, or building a cheap Glock, there’s no reason to build a Polymer 80 build, when the PSA Dagger is available at this price point.

Now, if you’re looking for night sights from the factory, or the nice clean trigger, or something of that nature, you might default to a Glock.

The Palmetto State Armory Dagger definitely gives a solid run for the money, and for $300, it is a bargain. I think it fits exactly in the niche it’s trying to fill and will be a great carry gun for a lot of people.

The Dagger, PSA Jakl, and PSA AK are hands down my favorite guns from Palmetto.

How to pick the best ice-fishing line for the conditions

0

Do you want to get the keyboard warriors in a frenzy? Start talking about your favourite ice-fishing line. You’ll be summarily drawn and quartered by the internet police. Like most things in fishing, though, there is no right or wrong answer to the question of which ice line is best. Rather, it boils down to a careful trade-off of considerations. That’s why I have either florescent neon fire-coloured Sufix Performance Ice Fuse or bright yellow HV Maxima monofilament spooled on almost every one of the 58 ice rods I have ready to use at a moment’s notice.

Now, as soon as some folks see that I mentioned a super-line, they’ll wince and tell you that it ices up more than mono or fluorocarbon. Guess what? It does. But I ice fish for the better part of five months—from mid-November until mid-April—in temperatures that often dip down so low that it doesn’t matter if you’re talking Celsius or Fahrenheit. And stripping a small glaze of ice off my gel-spun every few minutes is a small price to pay for the benefits of no-stretch line and instant hookset sensitivity. I especially like that four-pound-test Performance Ice Fuse is the same diameter as the silk a spider spits out to build its web, so I can dance my light perch, crappie and ciscoe jigs effortlessly. And the stuff has zero memory, so coiled line is never an issue. I’m more than willing to get all of those benefits if the only price I have to pay is rubbing my hand up the line every few minutes to remove a bit of ice.

On the other hand, I like the stretch that monofilament gives me when I’m jigging for big walleye on Lake Winnipeg, for example, and lake trout around home. Hefty lake trout, in particular, like to go berserk, and rocket up when you set the hook, so monofilament doesn’t recover as quickly as super-line and you can often control the fish better.

I was talking about this a while back with buddy Donovan Pearase, who runs Blackwater Cats on Lake Winnipeg, and I found his thoughts to be enlightening. “A couple of my guides don’t mind maintaining their braided lines all day long, and stripping the ice off every five minutes,” he said. “But I can’t stand doing that. We’re fishing outside a lot, so I personally use eight-pound mono and a 17-pound test leader that’s as long as the thickness of the ice. That way, when you get a big walleye close to the hole, you will see the swivel, and take your time to get its head up.

“If I am fishing inside a shack, however, I’ll definitely use 15- or 20-pound braid. One of my guides swears by 10-pound braid, because he feels it gives him better jigging and snapping action with a spoon. We’re catching big fish—walleyes up to 15 pounds—so I like a thicker braid tied to a swivel, and then a 17-pound mono or fluoro leader.”

It is interesting, too, that not that long ago we did everything possible to hide our line from the fish, but these days bright red and yellow lines are the go-to for many ice anglers. Just the other day, for example, I had a great time landing 29 black crappies, 11 jumbo perch and two bonus northern pike. And, truth be told, I didn’t feel half a dozen of those fish when they hit. Instead, I kept my Helix 7 sonar unit in front of me, so that my rod tip was lined up like a gun sight, pointing straight at it, and then I simply gazed up and down, alternating between the screen and the spot where my yellow or red line entered the water. As soon as I saw it twitch and ever so subtly straighten out, I set the hook and iced another fish.

Kayak Motor Setup: Choosing the Right Trolling Motor Mount

0

Which Mount Works for Your Kayak?

The pleasure and pride of owning a kayak goes beyond just the independence it allows. For anglers and adventurers around, it allows access to places previously inaccessible…an amazing opportunity until it takes an hour or more to paddle there. Whether you’re sea kayaking, river kayaking, or paddling a local lake, kayakers fall in love with the minimal impacts such a small and quiet boat has on the surrounding environment. While exercise is a primary part of their appeal, a kayak trolling motor can be a great investment to offer some relief on long paddles. That is, if your kayak allows for easy mounting.

The average kayak is not setup to accommodate a trolling motor and most kayak manufacturers do not offer mounting kits designed for their boats. Luckily, we have scoured the market for universal mounts and compared them below for your reference. We have looked at some garage made quality mounts, Brocraft, Railblaza and some basic DIY motor mount designs that are offered on today’s market.

FOUR BOLT STERN MOUNT

Over the last several years, the fishing kayak market has widely adopted the 4 bolt mount popularized by PowerPole Micro Anchors. Although not available on every single fishing kayak, this rapid adoption has made this one of the easiest ways to motorize a fishing kayak. In response to this kayak mount standardization, Newport developed and launched the NK-180S Kayak Motor using this 4 bolt mounting pattern, to ensure a direct fit on the widest number of kayaks available without the need for specialized mounts. Ultimately, this 4 bolt stern mount is the most secure, durable way to motorize your kayak while offering the greatest enhancement in speed, efficiency, and general performance.

LOW QUALITY KAYAK MOTOR MOUNTS

Ranging anywhere from $60 to $200, these mounts look like they were made in your uncles garage, but they can get the job done. These mounts are designed to fit inside rod holders on a kayak that ranges from 26”-36” in width, which can be convenient for existing rod holders on a kayak. For individuals that do not want to drill into their hull, this is an attractive option. Because these kayak trolling motor mounts fit into rod holders, it can work with both Sit-on-top and Sit-Inside kayaks. Depending on the kayak mount, they can be rated to hold up to 55lb thrust trolling motors.

While affordable and easy to install, there are many drawbacks to this style of kayak motor mount. If you do not have rod holders, you will have to install your own. Because it only works with rod holders, there is wiggle and sway, which makes the trolling motor mount unstable. This may cause some concern for users that have a motor hanging over the water. Some of the materials used to make this mount include aluminum and stainless steel, but the down tubes are made from cut PVC that remains unfinished at the ends. If you are looking for the most economical option to get out on the water, and don’t care about looks or quality, this kayak motor mount might be a good fit.

RAILBLAZA KAYAK TRANSOM MOUNT KIT

This is our first choice for a kayak motor mount, which is why we offer it as an option when you purchase out kayak motors. This is the best that money can buy and fits on most kayaks. It’s made with quality materials such as: Anodized Aluminum, Stainless Steel and UV Stabilized Reinforced plastics. This kit is extremely durable and built to last for fresh or saltwater use. When this kit is assembled and installed, it is stable and allows very little sway or movement. Not only can you remove the kit if you would like, but the base mounts are compatible with other Railblaza accessories ranging from rod holders to camera mounts. You can switch from paddling to your kayak trolling motor in under 30 seconds!

Installing this kit requires drilling into your kayak to ensure this kit is secure and stable. This requires tools and can be daunting for some people. The mounting surface also needs to be flat for this mount to be compatible.

BROCRAFT KAYAK TROLLING MOTOR MOUNT

A reasonable priced trolling motor mount for your fishing kayak. $135.99 is right between the pricing for your uncles garage model and Railblaza. This isn’t out of the reach for everyone who is considering a trolling motor mount for their kayak. It’s made with marine grade aluminum which is durable and corrosion resistant for use in saltwater. This mount is also adjustable to fit varying kayak widths and is adjustable to work on different mounting angles.

Downside is that this motor mount is only rated for 35lbs of thrust, which doesn’t inspire much confidence in it’s strength and durability. This kayak motor mount won’t be able to support the 55lb kayak trolling motor that many Newport Vessels customers own. This kit also requires you to drill into the hull of your kayak. However, the mounting equipment provided is not enough to provide a secure and stable mount, with only four screws to hold your new kayak trolling motor. If you are going to risk drilling into your kayak hull, might as well get something secure that you know will work.

DIY

The price from this option can range from $0+ depending on what you already have and what you need to get. This is a great option because you can customize it specifically to fit your kayak. This option gives you the freedom to make the mount of high or low quality to your liking. You can also add additional items or features.

There are some instructions available online. If you do not have the adequate knowledge or experience, you could end up ruining your kayak or end up with a water filled kayak because your kayak motor mount failed.

To learn more about our favorite kayak trolling motor mount, check out the Railblaza mount kit.

Review: Winchester Model 70 Long Range MB

0

It is not uncommon for useful technical improvements in one arena to be adopted by and integrated into another. Materials and manufacturing processes originally devised for the aerospace industry are now commonly used to manufacture firearms. Pistol optics and triggers that began as competition upgrades have become standard options for many defensive handguns. Features developed for precision, benchrest-style rifles are being incorporated into bolt-actions suitable for harvesting big game.

In 2021, Winchester Repeating Arms introduced the Long Range MB version of the Model 70 as a contribution to the growing extended-range hunting rifle market. The features are configured to balance top-end accuracy and recoil management without the rifle being too heavy to be carried comfortably in the field. This Model 70 is available in eight short-action chamberings ranging from .22-250 Rem. to .300 WSM. The rifle tested for this review was chambered for the popular, flat-shooting 6.5 mm Creedmoor, which tends to generate only moderate levels of felt recoil.

The right-hand Model 70 Long Range MB sports the popular Pre-’64-type claw extractor with controlled-round feeding. One benefit of the design is that it locks onto the cartridge rim in order to properly align the cartridge with the chamber, thereby reducing the chances of bullet tip damage. The extractor also makes withdrawing the cartridge from the chamber more positive.

The bolt body is treated to a handsome jeweled finish, and the bolt knob features a knurled band to improve control. Of course, the assembly is fitted with Winchester’s classic three-position safety. In addition to the typical Fire and Safe modes, the lever has a central position that locks the firing pin while allowing the bolt to be cycled—a feature intended to provide added safety when checking the state of the chamber or when unloading the rifle.

The carbon steel of the Model 70 receiver and barrel are treated with a non-reflective, matte-blue finish. The top of the receiver is drilled and tapped to accept optic mounts. The 24″-long, free-floated barrel has a fluted light varmint contour, and a recessed target crown works to protect the rifling from being damaged at the muzzle.

The MB in this rifle’s name stands for muzzle brake; the end of the barrel is threaded 5/8×24 TPI to accept a variety of popular accessories, including sound suppressors, compensators and muzzle brakes. The rifle is fitted at the factory with a 2.5″-long removable muzzle brake contoured and finished to match the barrel. A knurled thread protector is also provided for those who wish to shoot without a muzzle device installed.

This rifle has Winchester’s MOA trigger group, which is marketed as having “triple zero advantages,” including zero take-up, trigger creep or overtravel. The trigger tested lived up to these claims; a smooth-faced, curved steel trigger exhibited an exceptionally clean trigger pull of 3 lbs., 15 ozs., with a short arc of travel and a crisp break with no overtravel. For those who prefer a single-stage trigger, this one deserves consideration. It is protected by a rounded aluminum trigger guard. A hinged steel floorplate supports an internal four-round magazine that is loaded through the ejection port.

Once again, Winchester has teamed up with Bell and Carlson to outfit this rifle with a well-made, weather-resistant composite stock. Using a proprietary molding system and a blend of fibers, resins and polyurethane reinforcement, the Extreme Weather stock maintains its shape in cold and hot environments. At the heart of the stock is an aluminum bedding block extending from the grip to the front sling-swivel stud for a firm, stable lock-up between the rifle’s action and stock.

The Model 70 Long Range MB’s composite stock is tan with a drizzled black “spider web” paint job to break up its outline. A set of flow-through cooling vents are cut into the fore-end that has a wide, comfortable gripping surface with a flat bottom for improved stability when shooting off sandbags. The grip has molded-in checkering to give the shooting hand added purchase. The shoulder stock is capped with a soft, textured rubber Pachmayr Decelerator recoil pad with a length of pull measuring 13.5″.

Our sample proved to be utterly reliable on the range, operating smoothly without any mechanical or ammunition-related issues. The fit and finish were top-notch throughout, with the bolt assembly and controls cycling smoothly. The composite stock provides reliable gripping surfaces with a more solid feel than an injection-molded polymer stock. The rifle balanced nicely with an easy heft that simplified standing shots.

The rifle was test-fired with the factory muzzle brake installed. As expected, the brake noticeably increases the volume of the rifle’s report, but, in conjunction with the recoil pad and the 6.5 mm Creedmoor cartridge, it made for moderate levels of felt recoil comfortable to work with in and out of a benchrest. Formal benchrested accuracy testing was conducted using factory match-grade loads fired at 100 yards. Groups were shot with a Leupold Mark 3HD 3-9X 40 mm optic secured by a Leupold scope mount ring set.Winchester Model 70 Long Range MB shooting results

Winchester lists this rifle as being capable of one-m.o.a. accuracy, or approximately 1″ at 100 yards. This rifle did print a smallest single group of 0.87″, with a five-group average of 1.01″, using Winchester’s USA Ready load topped with a 125-grain OTM bullet. The average extreme spread across all three loads fired was 1.21″.

When attempting to blend two different types of platforms, finding a recipe that works can be tricky. In the case of Winchester’s Model 70 Long Range MB, however, the preferred elements of a hunting rifle mix with features that allow it to comfortably ride the bench for extended-range shooting sessions. This is a well-thought-out rifle with a variety of upgrades that make it stand out from the bolt-action rifle crowd—but it’s the MOA trigger system that unifies this rifle’s features and makes it an excellent option for those in the market for a firearm that fills a variety of shooting roles.Winchester Model 70 Long Range MB specs

10 Essentials For Your Bowhunting Gear

0

Whether you’re narrowing the gap between food and your table, connecting more deeply to nature through conservation, or extending your hunting seasons with archery gear, you’ll never run short of great reasons to try bowhunting.

Gearing up to bowhunt is exciting, and it’s much simpler than most people realize. To help you better understand what you need for your first bowhunt, let’s review 10 basic bowhunting tools.

1. Compound Bow

Compound bows are great for beginning bowhunters and are the most popular style of bow among bowhunters today. Photo Credit: John Hafner Photo

Obviously, a bow of some sort is your most basic need. You have three bow types to choose from, starting with the compound bow. These bows are nearly standard issue for bowhunting today. They’re easier to shoot than traditional recurves or longbows, but require more practice than crossbows to become proficient. Modern compound bows are efficient and don’t require extraordinary strength to draw and shoot.

When selecting a bow, it’s best to seek help from an expert at an archery shop. Hunting bows are not “one size fits all.” Make sure you choose a bow that matches your fit and bowhunting needs. You must become as accurate as possible to enjoy shooting and be lethal in the woods.

2. Traditional Bow

Using a traditional bow for bowhunting is challenging yet rewarding. Photo Credit: T. Ridenour

Traditional recurves or longbows are bowhunting’s simplest weapons. These bows have been used thousands of years, and are more effective today than when our ancestors carried them for hunting and self-protection. Shooting and harvesting game animals with these basic bows is also challenging and rewarding.

Drawing a traditional bow that’s powerful enough to take game animals like deer, elk or bears requires more strength than drawing a compound bow. However, their simplicity makes them the most affordable option for prospective bowhunters with tight budgets.

3. Crossbow

Crossbows are user-friendly, lack recoil and make minimal noise, making them a great choice for introductory bowhunters, if allowed under state regulations. Photo Credit: John Hafner Photo

Until recently crossbow hunting was mostly reserved for senior citizens, or people with injuries or disabilities. Today, most states and Canadian providences allow crossbows during part or all of the regular archery season. Crossbows reduce the learning curve needed to shoot arrows proficiently. Most crossbow archers prefer aiming with a scope like those used on hunting rifles. This makes crossbows fairly easy to shoot accurately, even for those with little or no experience. Crossbow prices vary, but they’re similar to prices for compound bows.

4. Arrows

Arrows aren’t universal. Select an appropriate arrow for your bow and shooting needs by determining the style of your bow, its draw weight and draw length. Visit an archery shop near you for guidance. Photo Credit: T. Ridenour

Once you’ve selected a hunting bow, it’s time to pick your arrows. Arrows must be matched to your bow’s draw weight and draw length. To ensure you make the right choice, consult experts at the nearest archery store.

5. Broadheads

Every bowhunter needs a sharp, reliable broadhead for an ethical harvest. Photo Credit: T. Ridenour

For most target practice, archers shoot arrows tipped with practice points. When it’s time to prepare for bowhunting season, swap your field points for broadheads. Broadheads wield razor-sharp blades that cut through a game animal’s hide, flesh and organs to cause quick, ethical harvesting. Broadheads come in nearly infinite options, but some might be better suited than others for the quarry you hunt and the bow you shoot. Again, ask an expert for advice to ensure your broadhead matches your setup.

6. Bow Accessories

A bow-sight is a reference point for aiming, and typically has one to six pins the shooter adjusts individually to precise distances. Photo Credit: T. Ridenour

This is a broad category. The accessories you need depend on your bow and your budget. Those shooting a compound, crossbow or traditional bow must have a hooded quiver to carry their broadhead-tipped arrows. Most hunting quivers attach to the bow or crossbow, but some bowhunters prefer quivers they carry over a shoulder or attach to a pack.

Next, arrow-rests hold the arrow in place while drawing and shooting. The options are many, and the styles vary by bow and personal preference. Release-aids attach the bowhunter to the bowstring, and feature a trigger that releases the arrow.

Release-aids are standard gear for shooting a compound bow. Those shooting traditional bows use a shooting glove or finger tab, which protects the shooter’s fingers when drawing the bowstring and releasing the shot.

A bow-sight is a reference point for aiming, and typically has one to six pins the shooter adjusts individually to precise distances. You’ll find plenty of options for bow-sights, and the archery store’s pros can help you find your best option. Even so, a sight is not absolutely necessary for some bowhunters, especially those shooting traditional gear. However, they’re a great training aid when learning archery, and deliver consistent accuracy.

Bowhunters who use crossbows require fewer accessories than those using vertical bows. Crossbows are commonly sold in kits with everything needed to start shooting, but many options exist if you dislike what’s included.

Scopes, for example, come in various magnifications, and at highly varying price points. Be sure to consult an archery pro to determine which scope meets your hunting needs.

Crossbow hunters also require a cocking device, which helps them draw the bow and lock its string into the fire-ready position. A simple string-cocker uses a rope and pulleys for this task, but some crossbows feature a hand crank that makes the job nearly effortless.

7. Clothing

Dress in camouflage clothing to go undetected in the woods while bowhunting. Photo Credit T. Ridenour

Bowhunting and camouflage go hand in hand. Camo helps bowhunters remain unseen so unsuspecting game approaches within range. Matching camo to your hunting area can feel overwhelming, but experts at an archery or sporting-goods store can help.

No matter what you choose, be sure to dress in layers. Bowhunting can require bouts of vigorous, sweat-pumping activity followed by long stretches of wet, chilly waiting in harsh elements. Layering helps you stay comfortable by adding or removing layers to match the situation.

8. Backpack

A hunting pack will easily allow you to carry gear, licenses, snacks, a water bottle and other essential equipment. Photo Credit: John Hafner Photo

You’ll need a hunting pack to carry your gear, water, snacks, licenses and hunting gear. If you plan to hunt where you’ll often hike long distances, consider a pack that can carry your bow. And if you hunt areas accessible only by foot, choose a pack that’s substantial enough to help pack out your animal.

9. Boots

Invest in a good pair of hunting boots to help you tackle rough weather and rugged terrain. Photo Credit: T. Ridenour

Veteran bowhunters put good boots at or near the top of their gear list. Whether you’re sitting, still-hunting or spot-and-stalk hunting, boots are vital to consistent success. If you regularly hike a mile or more to reach hunting sites, your boots must offer comfort and support. Stand-hunters, meanwhile, usually place priority on boots that keep their feet warm all day.

10. Ground Blind/Treestand

Treestands conceal bowhunters by elevating them above the animal’s normal view. When using a treestand, never leave the ground without wearing a full-body safety harness to prevent a fall. Photo Credit: John Hafner Photo.

Stand-hunters hide out and wait in treestands or ground blinds for animals to come into bow range. Ground blinds are essentially small, portable camouflage tents that set up where you hunt. Treestands conceal bowhunters by elevating them above the animal’s normal view. Both are excellent options. If you bowhunt from a treestand – the most common method for bowhunting deer – never leave the ground without wearing a full-body safety harness to prevent a fall.

No matter your hunting style, also carry binoculars and a rangefinder. Binoculars help you search the landscape for game and identify it. And rangefinders quickly pinpoint the distance to your quarry.

Did you get all that? No matter which bow you choose or the style of bowhunting you try, expect an adrenaline rush like you’ve never experienced when that deer, bear, elk or turkey walks into range. And to ensure you’re ready for that big moment, start scouting now to find a nearby bowhunting shop to help guide you along.

By: Tyler Ridenour of Bowhunting360.com

Discover the Enchanting World of Elaphocentaurs: Half Deer, Half Human

0

Introducing the Enigmatic Hybrid: Half Deer, Half Human – Unraveling the Mysteries of this Extraordinary Creature.

Exploring the Fascinating World of Half-Deer, Half-Human Creatures

Exploring the Fascinating World of Half-Deer, Half-Human Creatures

The world of centaurs is vast and diverse, with each species calling themselves “tribes.” One intriguing tribe is the hippocentaurs, who are half-human and half-horse. They have a human-like upper body but possess horse-like qualities such as a slightly horse-like face with a longer jaw area, horse-like ears, a broad nose, and horse-like teeth and eyes. Their skin takes on the coloring of their horse half, and they have a mane that runs down the length of their human spine.

Another fascinating tribe is the onocentaurs, who are similar to hippocentaurs but are half-human and half-donkey. They have a smaller color pool compared to their hippocentaur cousins and possess longer ears and slightly slimmer physiques. On rare occasions, an onocentaur and hippocentaur may produce offspring called moularicentaurs.

Unicentaurs are another captivating tribe that is half-human and half-unicorn. They resemble hippocentaurs but have pure white coats and a large horn spiraling from their foreheads. Pterocentaurs are similar to hippocentaurs as well but feature wings growing from their waist just behind where their human body connects to their horse body.

Alacentaurs are centaurs that combine the features of unicentaurs (white coat, horn) with pterocentaurs (wings). Ephialticentaurs stand out with their pure black coat, fiery hair/mane/tail, red-hot hooves, fiery fetlocks, and fiery red eyes resembling nightmares.

Other tribes include zebracentaurs (half-human, half-zebra), kamilopardalocentaurs (half-human, half-giraffe), ichthyocentars (half-human, half-hippocamp), bucentaurs (half-human, half-bull/cow), criocentaurs (half-human, half-goat/sheep), elaphocentaurs (half-human, half-deer), and many more.

The world of centaurs is filled with an incredible variety of species, each with its own unique characteristics and appearances. From the majestic unicorn-inspired unicentaurs to the fierce and fiery ephialticentaurs, these half-deer, half-human creatures captivate our imagination and invite us to explore their fascinating world further.

Unveiling the Enigmatic Centaur Variation: Half-Deer, Half-Human Beings

Centaur tribes come in various shapes and species, each identifying themselves as unique “tribes.” One such tribe is the hippocentaurs, who are half-human and half-horse. However, there are several other intriguing variations within the centaur community.

Among these variations are the lesser-known deer-like centaurs known as elaphocentaurs. These centaurs possess a blend of human and deer features, with their upper bodies resembling humans while their lower halves resemble deer. They have slender arms, graceful deer-like eyes, and prominent antlers on the heads of adult males.

Another fascinating variation is the lupacentaurs, who are half-human and half-wolf. These centaurs exhibit wolf-like characteristics such as fur coloration, pointed ears, clawed fingernails, and wolf-like muzzles. Their presence adds a touch of wildness to the diverse centaur community.

Additionally, vulpecentaurs are centaurs that combine human and fox attributes. Similar to lupacentaurs, they possess reddish fur and large fox-like ears. However, they have smaller and more agile bodies compared to their lupine counterparts.

Lapicentaurs represent another unique variation among centaurs as they are half-human and half-rabbit. With rabbit-like muzzles adorned with whiskers and bucked teeth, long ears that stand tall above their heads, and rabbit eyes that exude curiosity, they bring a playful element to the world of centaurs.

These captivating variations highlight the immense diversity within the centaur community. Each tribe possesses its own distinct physical attributes that reflect their hybrid nature. From mythical creatures like unicorns to real-life animals like wolves and rabbits, these combinations create a rich tapestry of beings that captivate our imagination.

Discovering the Mythical Hybrid: The Human-Deer Centaur

Discovering the Mythical Hybrid: The Human-Deer Centaur

The human-deer centaur, known as the Elaphocentaur, is a fascinating mythical creature that combines the features of a human and a deer. These centaurs have a unique appearance with their deer-like eyes, deer-like face, and antlers on the adult males. They also possess a lithe body and longer, thinner arms compared to other centaurs.

One of the most striking features of the Elaphocentaur is their antlers. These majestic appendages grow from the heads of adult male Elaphocentaurs and come in various shapes and sizes. The antlers are often seen as a symbol of strength and beauty among these creatures.

In addition to their physical attributes, Elaphocentaurs are known for their graceful nature. They move with elegance and agility, embodying the gracefulness of both humans and deer. Their presence in mythology often represents qualities such as gentleness, harmony with nature, and an appreciation for beauty.

The Elaphocentaur’s connection to deer symbolism extends beyond their appearance. In many cultures, deer are associated with traits like intuition, sensitivity, and spirituality. As such, these mythical creatures are often seen as wise beings who possess deep knowledge about the natural world.

Overall, the human-deer centaur or Elaphocentaur is a captivating creature that combines elements of humanity and nature. With their graceful movements, striking antlers, and symbolic significance, they continue to capture our imagination in myths and legends around the world.

The Intriguing Characteristics of Deer-Human Hybrids: A Closer Look

The Intriguing Characteristics of Deer-Human Hybrids: A Closer Look

Deer-human hybrids, known as elaphocentaurs, possess fascinating characteristics that combine the features of both species. These centaurs have a unique appearance, with their upper bodies resembling humans and their lower bodies resembling deer. Their distinctive traits include lithe bodies, longer and thinner arms compared to most centaurs, deer-like eyes, and antlers on the adult males. Elaphocentaurs exhibit a graceful and agile nature, reflecting the elegance of deer in their movements.

In addition to their physical attributes, elaphocentaurs also display certain behavioral characteristics associated with deer. They are known for their keen senses, particularly their exceptional hearing and acute sense of smell. This heightened sensory perception allows them to navigate through dense forests and detect potential threats or sources of food from afar. Elaphocentaurs are often portrayed as gentle creatures who prefer a peaceful existence in harmony with nature.

Notable Features:

– Lithe bodies
– Longer and thinner arms
– Deer-like eyes
– Antlers on adult males

Behavioral Traits:

– Keen senses (especially hearing and smell)
– Graceful and agile movements
– Gentle nature

Elaphocentaurs hold a special place among the diverse array of centaur tribes due to their resemblance to one of the most iconic creatures in the animal kingdom – the deer. The fusion of human intellect and grace with the natural instincts and beauty of deer creates an intriguing hybrid that captivates our imagination.

Note: The above description is fictional and based on mythical creatures commonly found in fantasy literature.

Unraveling the Legends of Human-Deer Centaurs

Centaurs, mythical creatures with the upper body of a human and the lower body of a horse, have captivated our imaginations for centuries. Among the diverse tribes of centaurs, one intriguing group is the elaphocentaurs, also known as human-deer centaurs. These unique beings possess a striking blend of human and deer characteristics.

The elaphocentaurs exhibit a graceful and lithe physical appearance, reminiscent of their deer counterparts. They have slender bodies with longer and thinner arms compared to other centaur species. Their eyes mirror those of deer, exuding an air of gentleness and curiosity. Additionally, adult male elaphocentaurs boast majestic antlers crowning their heads.

These centaurs are often associated with nature and are believed to possess a deep connection with forests and woodland creatures. Their affinity for the natural world is reflected in their behavior and lifestyle. Elaphocentaurs are known to be agile runners, capable of traversing through dense vegetation with ease.

The folklore surrounding elaphocentaurs varies across different cultures. In some legends, they are depicted as guardians or protectors of forests, ensuring the balance between humans and nature is maintained. Other tales portray them as wise beings who possess ancient knowledge about herbal medicine and healing properties found in plants.

Despite their mythical nature, elaphocentaurs continue to capture our imagination as symbols of harmony between humanity and the natural world. Whether portrayed in folklore or modern literature, these enchanting creatures serve as a reminder of our connection to the animal kingdom and the importance of preserving our environment for future generations.

Notable Traits:

– Slender bodies with longer and thinner arms
– Deer-like eyes reflecting gentleness
– Majestic antlers on adult males
– Agile runners with a deep connection to nature
– Often depicted as guardians of forests and possessors of ancient knowledge

From Myth to Reality: The Wondrous Existence of Half-Deer, Half-Human Beings

The concept of half-human, half-animal creatures has fascinated humanity for centuries. From ancient mythology to modern fantasy literature, these fantastical beings have captured our imaginations. Among the many variations of these hybrid creatures, one particular species stands out – the centaurs known as elaphocentaurs.

The Unique Characteristics of Elaphocentaurs

Elaphocentaurs are a tribe of centaurs that are half-human and half-deer. They possess a unique combination of features from both humans and deer, making them truly remarkable creatures. These centaurs have lithe bodies and longer, thinner arms compared to other centaur species. Their deer-like eyes and a deer-like face give them an aura of grace and gentleness.

One distinguishing feature of elaphocentaurs is the presence of antlers on the adult males. These majestic antlers symbolize their connection to the natural world and their affinity for the wilderness. Additionally, their fur tends to take on the coloration and patterns commonly found in deer species.

A Life in Harmony with Nature

Elaphocentaurs embody a deep connection with nature and are often associated with forests and woodland areas. Their agility and speed make them excellent hunters as they navigate through dense foliage effortlessly. Due to their keen senses inherited from their deer half, they possess exceptional tracking abilities, making them skilled at locating food sources or potential dangers.

These centaurs are known for their peaceful nature and harmonious existence with other forest-dwelling creatures. They have been depicted in various tales as guardians or protectors of the woodland realm, using their strength and intelligence to maintain balance within ecosystems.

In conclusion, elaphocentaurs represent a fascinating blend of human and animal characteristics, specifically those of deer. Their graceful appearance and deep connection with nature make them a truly enchanting species. Whether in myth or reality, these half-deer, half-human beings continue to captivate our imaginations with their wondrous existence.

In folklore and mythology, the hybrid creature of a half deer and half human is commonly referred to as a “centaur.” This captivating creature has fascinated cultures around the world for centuries, embodying both grace and strength. Through its depiction in various legends and art forms, the centaur continues to captivate our imagination, representing the merging of human and animal qualities.

The 10 Most Expensive Fish That Are Tasty to Eat

0

The health benefits of fish are numerous, as fish are rich in healthy omega-3 fatty acids. But those looking for a luxurious fish dinner experience might want to skip the cod and canned tuna and opt for a high-quality, tasty fish.

The most expensive fish to eat is bluefin tuna, especially specimens caught off the coast of Japan. A single bluefin tuna can sell for more than $2 million! If you’re looking for a domestic fish to chow down on, you’ll want to choose an American glass eel, as these cost upwards of $2,000 per pound.

Let’s take a gander at the most expensive edible fish so that you can choose a luxury-quality filet for your next fish dinner.

Why Are Some Tasty Fish Expensive?

A standard can of tuna often costs less than $2, but it’s bound to pale in comparison to the tastiest (and most expensive) fish in the world. So for the most refined palate-pleasing experience, you’ll need to pay far more.

Still, you might find yourself wondering, “What qualities make some tasty fish so expensive?” Typically, the three factors that contribute to a dinner-friendly fish’s cost include:

  • Rarity
  • High demand
  • Legal restrictions

Let’s take a quick moment to explore why these aspects influence cost.

Rarity

Rare fish are often the most expensive type of seafood, as diners are willing to pay a high price to enjoy something that few ever get to enjoy. But a rare and tasty fish is even costlier, as it tastes far better than the standard fish filet and is nearly impossible to obtain.

But scarcity alone doesn’t make an edible fish expensive. High demand is just as crucial to a fish’s price.

High Demand

What do the most expensive steak cuts and fish have in common? The tastier they are, the more people want to try a bite!

The most costly types of fish have unique flavors and melt-in-your-mouth textures that make them culinary delights. Unlike a fried cod filet, these tasty fish are often served lightly cooked or raw to ensure diners get an unspoiled experience.

Legal Restrictions

For better or worse, some of the world’s priciest fish are endangered or close to reaching endangerment. After all, the more scarce and delicious a fish is, the more demand there is!

Some regions have strict regulations about specific fish species, limiting the number of certain types of fish that anglers are allowed to catch each year. Unfortunately, these legal restrictions only make these delectable fish more valuable and desirable. An estimated 20% of wild-caught fish imported to the United States are illegal in some way.

Still, if you’re determined to try the priciest fish in the sea, be sure that you’re choosing specimens that are legally obtained. Otherwise, you could be looking at some hefty fines that outdo the initial cost of the fish.

Most Expensive Fish to Eat: Summary List

  1. Bluefin Tuna
  2. American Glass Eel
  3. Pufferfish
  4. Alaskan Wild King Salmon
  5. Swordfish
  6. Yellowfin Tuna
  7. Chinook Salmon
  8. Halibut
  9. Dover Sole
  10. Sockeye Salmon

10. Sockeye Salmon

Sockeye-Salmon

Salmon is one of the priciest fish species in the world, though some types are more expensive than others. Sockeye salmon tends to fall on the lower spectrum in terms of price, though it’s one of the tastiest types of fish you can add to your shopping list.

Notably, this type of salmon is hard to forget, especially if ordered whole. It has bright red scales across most of its body but a distinctly green head. Overall, this fish is considered the most flavorful salmon, though it’s often smoked to accentuate its natural taste.

At $20 per pound, sockeye salmon isn’t the priciest type of salmon, but it will cost you more than cod, tilapia, or mackerel.

Why It’s Expensive

Wild-caught sockeye salmon tend to command the highest prices, as they’re often much larger than farm-bred fish. Larger fish means heftier portions, so heavier specimens always cost more than smaller ones. Still, high demand and transportation costs have helped make this fish comparatively expensive.

9. Dover Sole

Dover-Sole

The Dover sole might look like the most appetizing fish. It has a muddy brown body that’s far flatter than a fresh-caught, round-bellied tuna. But it has a uniquely sweet flavor that’s often compared to spiced chicken or beef.

This flavor profile is unusual, as the Dover sole are saltwater fish. Still, they’re the least “fishy” type of fish you can enjoy, making them an ideal choice for those that tend to avoid seafood.

And with a price tag of about $29 per pound, these flatfish are far costlier than other species of edible fish. Naturally, wild-caught specimens are more expensive than farmed options.

Why It’s Expensive

The primary reason Dover sole fish are expensive is that they’re so tasty. This species is also easy to prepare, with most professional chefs and at-home cooks baking them whole. Because they have a mild flavor profile, they’re a favorite among diners that enjoy the benefits of eating fish but don’t enjoy the taste of seafood.

8. Halibut

Halibut

Halibut is also a type of flatfish, but they can grow to jaw-dropping sizes, making full-grown Dover sole fish look like babies. For example, Pacific halibut can weigh more than 400lbs, and their Atlantic cousins often weigh in at more than 300lbs.

This species is also notable for its low fat content and sweet taste. Many people compare the taste of halibut to tilapia, but milder and thicker. As a result, halibut filets are ideal for fish burgers or filling fish dinners.

However, wild-caught halibut isn’t as common as it once was, making it one of the pricier types of edible fish. Generally, you can expect to spend about $30 per pound to enjoy this saltwater fish.

Why It’s Expensive

Halibut is one of the tastiest and most filling types of fish, and as a result, it’s become one of the most popular types of fish around the world. However, this high demand has boosted the price of halibut filets and made wild specimens scarce. These factors make it pricier than similarly flavored species like tilapia.

7. Chinook Salmon

Chinook-Salmon

Unlike sockeye salmon, Chinook salmon tend to have greenish-white bodies with small brushstrokes of red along their abdomens. However, they can be almost as enormous as their bright ride relatives, making them easy to slice into hefty portions ideal for meals.

Native to the Pacific Ocean, these fish are prized for their savory, buttery flavor and soft texture. But this mouthwatering taste has also made Chinook salmon endangered in some areas and rare in others.

You’ll likely spend about $30 per pound on farmed Chinook salmon.

Why It’s Expensive

There are two reasons why Chinook salmon is one of the most expensive types of edible fish. Firstly, they’re well-known for being one of the most delicious types of salmon, with a rich flavor that’s rarely found in other species.

However, Chinook salmon are also threatened by overfishing, making them increasingly scarce. This rarity and superior flavor profile make it pricier than other anadromous (living in saltwater and freshwater environments) fish.

6. Yellowfin Tuna

Yellowfin-Tuna

Yellowfin tuna (ahi) are gorgeous edible fish with glittering silver bellies and colorful blue-green spines. Native to tropical waters, particularly those off the coastlines of Hawaii, these fish tend to grow into enormous creatures. It’s not uncommon to see anglers catching 300lb or 400lb yellowfin tuna.

Because these fish can grow to impressive sizes, they’re often used for a variety of meals, including sushi and fish patties. But their mild taste and significant portions also make them a popular choice. Ahi typically costs about $30 per pound, but prices may be higher for those living far from tropical regions or coastal areas.

Still, once you’ve tried yellowfin tuna for yourself, you might never be able to go back to albacore! Adding a small handful of some of the world’s most expensive mushrooms to your tuna dinner can make things even better.

Why It’s Expensive

Yellowfin tuna is pricier than other types of fish because it’s gigantic, tasty, and in high demand. Additionally, some diners may pay more for this fish due to high transport costs.

5. Swordfish

Swordfish

The swordfish gets its name from the long, blade-like protrusion sticking out from its head. It’s been a treasured catch among anglers for centuries, but it’s also prized for its meaty filets and mild flavor.

Like other costly fish from around the world, swordfish can grow to jaw-dropping sizes. While it might not be quite as hefty as some tuna or salmon, the average swordfish can weigh about 200lbs. Consequently, a single swordfish can feed quite a few people!

At about $60 per pound, this tasty fish is also one of the most expensive types of seafood.

Why It’s Expensive

It’s impossible to raise swordfish on standard fish farms, as these fish require plenty of space and saltwater to thrive. But marine fisheries are far more costly to maintain than terrestrial fish farms. Additionally, wild-caught swordfish are becoming a rare sight to the high demand for this delicately flavored fish.

4. Alaskan Wild King Salmon

Alaskan-Wild-King-Salmon

Technically, Alaskan Wild King salmon and Chinook salmon are the same species. However, Chinook salmon is the more generic term and often refers to fish bred on fish farms or wild-caught throughout the continental United States.

On the other hand, Alaskan Wild King salmon is almost always a wild-caught Chinook originating from Alaska’s pristine rivers and coastlines. Because these fish have more unspoiled areas to explore and thrive in, they can grow larger than their continental cousins.

Diners may prefer Alaskan Wild King salmon over farm-bred Chinook due to the cleaner Alaskan environment. But the higher demand for Alaskan-caught Chinook salmon results in a noticeable price difference of over $30. For example, Alaskan Wild King salmon often costs $70 or more per pound.

Why It’s Expensive

A cleaner and more expansive environment can result in better-tasting and larger fish. Of course, the same is true of any other commonly eaten animal, including chickens and cows. So you can think of Alaskan Wild King salmon as free-range or grass-fed beef.

It’s higher quality than standard Chinook salmon, which means that folks are often willing to pay a higher price for it. And because it’s caught in Alaska (almost 3,000 miles away from the continental United States), transportation costs are high.

3. Pufferfish

Pufferfish-Sashimi

The pufferfish (also called fugu) is one of the most expensive seafood items on the planet. Unfortunately, it also happens to be one of the most dangerous, as pufferfish contain a combination of potentially lethal toxins.

If prepared incorrectly, pufferfish toxin can kill you in just four hours! And while you might think that this dangerous quality makes pufferfish one of the least-desired fish in the world, it only increases demand.

The most skillful chefs in the world know how to prepare pufferfish in a way that makes it entirely safe to consume. As such, many daredevil diners are more than willing to give this fish a try.

Still, you’ll need to be willing to invest some money to give this fish a try. A single fugu sushi dish can cost $60, and this fish is known to cost $200 or more per pound.

Why It’s Expensive

Pufferfish has a taste that’s challenging to describe, with most diners describing it as absolutely unforgettable. But it can also prove deadly if poorly prepared.

This combination of unique flavor and high risk makes it fugu an attractive experience for many. Still, the primary reason it’s expensive is the skillful preparation needed to make it safe to eat.

2. American Glass Eel

Cooked-Glass-Eel

The American glass eel (sometimes called the bay eel) is native to northeast coastlines in North America. However, it’s not nearly as common as it used to be. As a result, anglers in Maine can now charge outrageous prices for a single pound of fresh-caught eel.

In 2009, the per-pound price for Maine glass eels was about $100. But in 2019, that price tag stood at a hefty $3,000 per pound!

Still, eel typically isn’t the first dish people imagine an exquisite and expensive fish dinner. So, why is the price of American glass eels so high?

Why It’s Expensive

The glass eel is often compared to chicken and catfish in terms of taste, and it’s not beloved due to its flavor profile. That said, this slim snake-like fish is one of the most expensive because it’s become scarce.

Poaching and illegal catching are significant problems, leading to substantial catching restrictions that have inflated the price of these fish. The American glass eel can also grow to an astounding length, occasionally reaching up to six feet long.

This quality makes them ideal specimens for sushi, and the most expensive sushi platters often include at least one cut of glass eel.

1. Bluefin Tuna

Bluefin-Tuna

Bluefin tuna is the most expensive edible fish on the planet. In 2019, a whopping 600-pound bluefin tuna sold for ¥333.6 million (that’s about $3 million). That’s nearly $5,000 per pound!

This type of tuna is native to the North Atlantic Ocean and the Meditteranean Sea. But the costliest specimens are often found in the Pacific Ocean, off the coast of Japan.

While many types of tuna fish grow to enormous sizes, bluefin tuna is one of the largest types of tasty fish. It’s also considered a delicacy due to its increasing rarity and distinct flavor. Still, these aren’t the only reasons bluefin tuna are so expensive.

Why It’s Expensive

Bluefin tuna is one of the most prized sushi ingredients. It’s also constantly in high demand due to its international reputation for being the best-tasting type of tuna.

But this massive and tasty fish isn’t plentiful, primarily due to overfishing and enormous demand. In addition, larger specimens have become increasingly rare over the last several decades, making the heaviest catches incredibly expensive.

Try These Tasty Fish

The most expensive fish to eat is Japanese bluefin tuna. That’s because these fish are massive, rare, and in high demand. That said, bluefin tuna isn’t the only tasty fish that costs a pretty penny.

If you’re feeling in the mood to treat yourself, be sure to consider any of the above options. Though your wallet might be lighter, your belly is bound to feel a little fuller!

Are you hungry for more of the world’s most expensive foods, experiences, and items? If so, be sure to check out our blog now!

Crosman 764SB Review

0

The Crosman 764SB rifle is an upgraded version of the Crosman 760 (see this post for more)

While in keeping with classic design, Crosman adds some extra features,

But let’s see if it deserves a place on your Christmas shopping list in this review.

Crosman 764SB – Guntype

This is a pump pneumatic rifle.

Pump pneumatic air gun is compact, lightweight, recoilless and it gives you control over the power of the gun.

For more on the 5 types of air rifles you need to know before buying, see this post.

The barrel is a smooth bore with a caliber of .177 (4.5 millimeters).

What makes this gun special is its shiny silver barrel.

For more on how to choose the right air gun caliber for your game, see this post.

This Crosman 764 SB is a BB repeater .

With a BB repeater gun, you don’t have to open up and reload or cock every time you want to shoot BBs.

Each time you shoot, a new BB is reloaded automatically.

This rifle is not only a BB gun but also a single-shot pellet gun.

Single-shot rifles tend to be cheap and simple. You can teach a newbie how to handle a single-shot gun in only a few hours.

For more on things you should know about air rifle barrels before buying, see this post.

Having the ability to shoot both BBs and pellets, this Crosman 764 SB gives you an awesome option to switch to pellets in case you get bored with shooting BBs.

All in all, your kids could be both BB shooters and pellet gunners at the same time, how cool is that?

Stock

Now a very important part of the gun: the stock.

Crosman 764SB has a durable, all-weather synthetic stock.

While wooden stock is heavy and easily affected by moisture and temperature, synthetic stocks are lighter

And provide you with stable performance in any weather condition.

Furthermore, synthetic stocks are virtually maintenance-free and are the best choice for shooters who don’t want to waste time with stock preservation.

For more on the in-depth comparison between synthetic and wood stock, see this post.

This gun has a plastic buttpad that helps absorb recoil when you shoot.

In addition, the checkering on the grip and on the pump handle makes it much easier to get a grip and stay on the target.

Also, the stock is ambidextrous: you’ll have the same shooting experience whether you are left or right-handed

Ammo

The Crosman 764 SB uses .177 BBs and .177 pellets as its sources of ammunition.

BBs are cheap: you can buy thousands of rounds of premium BBs for just a few bucks.

.177 is also budget-friendly compared to other types of pellets on the market (more on that here).

Therefore, you can expect thousands of hours of fun shooting without worrying about money spent on ammo.

In addition, this gun gives you the fun of a BB gun and a pellet gun combined in one place.

=> Read Daisy Red Ryder 1938 Review here

Velocity, accuracy and power

For 10 pumps, this Crosman 764 SB delivers up to 615 FPS with lead pellets, up to 700 FPS with alloy, and up to 645 FPS with steel BBs.

This velocity is in the medium range compared to other air rifles.

It’s pretty decent for target shooting and plinking but lacks a bit of power for small pest control.

Cocking and loading

Loading BBs:

To load BBs into this gun, first put the gun ON SAFE.

Swap the BB loading port to the left side, and pour BBs into the gun.

Close the port so the BBs don’t fall out.

On top of the rifle is the button that you need to pull backward.

This allows BBs to flow from the reservoir into the magazine.

To do that, you point it down, shake and twist it till you see BBs line up in the magazine.

It will hold 18 BBs at a time.

Once it’s full, slide the button forward.

That will keep the BBs in the magazine so they don’t fall back into the reservoir.

To shoot BBs:

Slide the bolt rearward, the bolt has a magnetic pole on the front so it will pick up BBs automatically.

When the BB is picked up, slide the bolt forward and you are ready to shoot.

Loading pellets:

Included with Crosman 764SB is the pellet clip containing 5 pellets.

To load the pellet into the clip, place a pellet (with the pellet’s nose pointing forward) into each of five chambers.

It’s best to put the pellet’s skirt level or slightly below the rim of a pellet chamber to avoid jamming.

To shoot pellets:

Move the bolt rearward.

Insert the pellet clip right into its position.

Every time you fire, you move one pellet over to shoot.

When you’re done, reload the clip and five other pellets.

Cocking action:

Point the gun in a safe direction.

Hold the forearm firmly and open it all the way until it stops.

Return the forearm into its position with a straight stroke.

And you just pump the gun one time.

You should pump at least 3 times but no more than 10 times to achieve the best results.

Sight

crossman 764 sight

This gun has a traditional open sight with a fixed blade and ramp in the front sight.

The rear sight is fully adjustable for windage, allowing you to adjust the sight left and right, and elevation (up and down).

crossman 764sb scope

After you teach your kids how to use iron sight as a real shooter, you can put a 4×32 scope for more precision shooting.

The scope has a focusing eyepiece, coated lenses, and turret adjustment

So you can achieve better focus and sharpness of your target image for better accuracy.

For more on how many types of air gun sights are out there and which one is suitable for you, see this post.

Shooting Ability

This gun is ideal for shooting very small rodents at close range, plinking, and target shooting.

It’s suitable for younger shooters (with adult supervision) and for smaller shooters.

Velocity, accuracy and power

For 10 pumps, the Crosman 764 SB produces velocities up to 615 FPS with lead pellets, 700 FPS with alloy, and up to 645 FPS with steel BBs.

This is a medium velocity compared to other pellet guns and a high velocity compared to other BB guns.

More on the power of 764SB in the video below:

Besides, it has a 3/4″ shooting group at 10 yards so this is a great starter gun for kids and beginner shooters.

click for the lowest price

Shooting Ability

The effective shooting range of this gun is up to 20 yards.

It is ideal for shooting very small rodents (like rats) at close range, plinking, and target shooting.

Maintenance

Use this gun with Crosman RMCOIL special oil and you have to put very little effort into its maintenance.

Loudness

This rifle is very quiet. It has a bunch of online reviews without a single complaint about noise.

Specifications

  • Caliber: .177
  • Velocity: 625 FPS
  • Loudness: 3- Medium
  • Barrel Length: 17.0”
  • Overall Length: 33.5”
  • Shot Capacity: 18
  • Cocking Effort: 3-10 pump
  • Barrel: Smoothbore
  • Front Sight: Blade and Ramp
  • Rear Sight: Adjustable for elevation
  • Scopeable: 11mm dovetail
  • Buttplate: plastic
  • Suggested for: Plinking/Fun
  • Trigger pull: 4.5 lbs
  • Action: Bolt-Action
  • Safety- Manual
  • Powerplant: Multi-pump pneumatic
  • Function: Repeater
  • Body Type: rifle
  • Weight: 2.1 lbs
  • Double as a BB repeater or single shot pellet gun

Customer review

Customers love the fun this double-action gun brings.

They find it great value and don’t leave any notable issues in their reviews

Pros and Cons

ProsCons
  • Easy to handle
  • Accurate
  • Awesome double function
  • Adequate scope
  • Made in the USA
  • No notable issue for this gun

Price

The price of the Crosman 764SB is about 60 dollars.

Is it a good or high price?

To answer this question, let’s take a look at the comparison between the 764SB and its twin brother – Crosman 760.

These 2 guns have the same power plant, same scope, same construction.

There are some differences, though: the 760 has the fiber optics sight, while the 764 SB has a traditional iron sight and a silver barrel.

At the time this review was written, the 760 costs about 40 dollars which are 13 dollars cheaper than the 764. 

Therefore, in terms of value for the price, the 760 is definitely the best bang for the buck.

Unless you fall in love with the silver barrel, I think you will be better off going for the 760.

click for the lowest price

Best Air Rifle Deals

Popular Posts

Dry Firing Air Rifles: What You Need to Know

0
"Master the art of precision shooting with dry firing air rifles. Enhance your aiming skills, trigger control, and muscle memory without using ammunition. Discover...

PCP vs Gas Piston: Which One is Better?

0
The perfect airgun is a difficult pick when you are new to gun-hunting. There are a lot of things to keep in mind, starting...

5 Types of Air Guns You Need to Know Before Buying

0
Have you ever wondered how many types of air rifles are out there? Is your head spinning around with various powerplants and you don’t know...

.22 vs .25 Air Rifle: The Ultimate Comparison Guide

0
When I first got introduced to the world of rifles, I often thought that a bigger caliber meant better performance. So, I thought that...

How to choose the right Air Gun Caliber for your game?

0
A story is told of three Native American hunters. Two are smart, the other somewhat ignorant. On the first day of the hunting season, one of...