Home Blog Page 33

Mule Deer in New Mexico | New Mexico State University – BE BOLD. Shape the Future.

0

Guide L-301 Revised by Louis C. Bender and Chris Allison College of Agricultural, Consumer and Environmental Sciences, New Mexico State University

Authors: Respectively, Senior Research Scientist (Wildlife) and Retired Extension Range Management Specialist, Department of Extension Animal Sciences and Natural Resources, New Mexico State University. (Print friendly PDF)

Introduction

Mule deer (Odocoileus hemionus, Figure 1) are one of the most important game animals in New Mexico and the West. The size of the mule deer population in New Mexico is unknown, and densities of mule deer can vary greatly among areas and over time. For example, densities of mule deer ranged from an estimated <1.2 deer/mi2 on private land in Colfax County to <1.9 deer/mi2 on New Mexico State University’s Corona Range and Livestock Research Center (CRLRC), while a recent minimum count found 3.7 deer/mi2 in higher-density areas of the San Andres Mountains (Bender et al., 2011, 2012; L. Bender, unpublished data). On CRLRC, mule deer densities declined from 1.9 deer/mi2 in 2005 to 0.7 deer/mi2 in 2008, highlighting the variation possible in deer populations in response to drought and other factors. In general, mule deer have been declining in numbers in New Mexico since populations peaked around the 1960s, similar to declines seen throughout the West (Heffelfinger and Messmer, 2003). Because of population declines, harvests of mule deer have also declined; deer harvests (mostly mule deer), estimated to be as high as 55,000 in 1960, declined to <10,000 in 2013. Despite declines, mule deer are still present in all 33 counties in New Mexico.

Figure 1. Mule deer are New Mexico’s most important big game species. (Photo by Terry Spivey, USDA Forest Service, Bugwood.org.)

Range and Habitat

There are two subspecies of mule deer in New Mexico, the Rocky Mountain mule deer (O. hemionus hemionus) and the desert mule deer (O. hemionus eremicus). Rocky Mountain mule deer are found in the northern two-thirds of the state and desert mule deer in the southern third. The Rocky Mountain mule deer is larger; the average field-dressed weight of mature (6 years or older) males (bucks) is around 195 lb, with larger deer weighing more than 250 lb. Mature desert mule deer average about 140 lb field-dressed, with the largest deer approaching 170 lb.

Mule deer are extremely varied in their habitats. Rocky Mountain mule deer are found from above the timberline to low-elevation short grasslands, and frequently in urban areas. During winter, deer that use higher elevations usually migrate to lower elevations where food is more easily obtainable and deep snow does not limit their movements.

Desert mule deer prefer shrublands and woodlands in desert mountain ranges and hills, or arroyos in arid desert flats. They normally spend summer and winter in the same general area.

Physical Description

Mule deer have extremely large ears, hence the name. Adults have a reddish coat in summer and a gray coat in winter. The summer coat is fine and silky in texture and the winter coat is coarser and thicker. Desert mule deer are usually lighter or paler than Rocky Mountain mule deer. The reddish-brown fawns are spotted and depend on their protective coloration for safety. They lose their spots two to three months after they are born. A characteristic feature of the mule deer is the large white rump patch that surrounds the base of the tail. The tail itself is white with a small black tip. Unlike the white-tailed deer, the mule deer does not raise its tail in alarm, but holds it against the body as it flees. Mule deer may also stot, or bounce stiff-leggedly on all four legs, when fleeing.

Mule deer bucks have antlers that are forked (Figure 2) instead of being like a white-tailed deer’s, whose points rise from the main beam (Figure 3). The antlers are shed following the breeding season each winter, and new antlers begin growing shortly after the old ones are dropped. The dropping of antlers occurs when the length of daylight decreases, triggering glandular reactions that control the production of testosterone, insulin-like growth factor-1, and other hormones. The same process is involved in the growth of the new antlers, which are covered by a skin called velvet that contains an extensive network of blood vessels. These supply the protein and minerals needed for the growth of antlers, which are the fastest-growing tissues in the animal kingdom. In late August or September, the velvet dries up and is rubbed off on small trees and shrubs as the antlers harden or mineralize. Antler size and number of points depend mostly on the deer’s age, physical condition, and their genetic background (Bender, 2011).

Figure 2. Antlers from a mule deer.

Figure 3. Antlers from a white-tailed deer.

Life Cycle

The breeding season or rut for mule deer in New Mexico begins in late November (northern areas of the state) and lasts until mid-January (southern areas). During breeding periods, mature bucks cover a large area in search of receptive females (does). The does are receptive for about three days. If they are not bred during this time, their cycles will continue, and 28 days later they will again be receptive. Unbred mature does are rare in New Mexico.

There is little actual fighting between bucks because dominance hierarchy has usually been established before peak rutting periods occur. The smaller or less-aggressive bucks recognize their superiors and usually give in to their dominance. The breeding class is usually the prime-aged mature bucks, plus a few younger bucks who are exceptionally large-bodied or aggressive. One buck will breed with many does, so it is not necessary to have equal numbers of males and females. No permanent bond is formed between bucks and does. When the female is no longer receptive, the buck will leave her to seek other does.

Mule deer have a gestation period of about seven months. Fawns are usually born in June and July, later in southern New Mexico and later if does are in poor condition. Normally, a doe has one fawn the first time she gives birth. After this, she may have multiple fawns if she is in good condition. After about age seven the number of fawns will decrease again.

Fawns get up on their feet only hours after birth, but they are rather unsteady and very susceptible to predation. During their first few days, they remain hidden and alone except when feeding (Figure 4). At about three weeks of age, the fawns begin sampling solid foods, and shortly thereafter they begin to accompany the doe almost constantly. Most fawns are weaned by October or November, after which they are dependent on their competitive ability to obtain adequate nutrition. Fawns that are larger at birth, or born earlier, tend to be larger at weaning and therefore are more likely to survive.

Figure 4. Fawns depend upon hiding and lying still for survival during their first few weeks. (Photo by Mara Weisenberger.)

Survival

Typically >80% of unhunted mule deer adults in New Mexico survive each year, although this can drop to <60% during severe droughts (Bender et al., 2007, 2010, 2011). Likewise, survival of fawns can range from >50% to none surviving, and the latter occurs during droughts when condition of adult females is very poor (Lomas and Bender, 2007). Malnutrition is the most common cause of death (excluding hunting) in studied mule deer populations in New Mexico.

Malnutrition is the most common disease of mule deer (Bender et al., 2007, 2010, 2011), and when other diseases and parasitism cause mortality, the actual underlying cause is usually poor-quality food that causes malnourishment. Probably the most publicized diseases of mule deer are the epizootic hemorrhagic disease-bluetongue complex (collectively called hemorrhagic disease [HD]) and chronic wasting disease (CWD). HD is a viral disease that affects deer, pronghorn, and bighorn sheep; it is spread by biting gnats or midges (Culicoides spp.). Although HD can be enzootic (always present in low frequency), in mule deer it is most commonly seen in infrequent epizootics (outbreaks), which can result in a large number of deaths when deer and vector conditions are conducive to outbreaks. Outbreaks occur during late summer or early autumn, usually in close proximity to wet areas. During outbreaks, some deer die quickly with no apparent signs of disease, others may die within a week, some recover but are debilitated, and still other deer show no sign of disease during outbreaks, and survivors may develop immunity to that particular virus serotype (but not necessarily other HD virus serotypes). White-tailed deer are more vulnerable to HD (especially epizootic hemorrhagic disease) than mule deer, and thus high mortality from HD is more common in white-tailed deer and pronghorn than mule deer.

Chronic wasting disease (CWD) is an invariably fatal degenerative neurological disease of deer, elk, and moose. CWD, a transmissible spongiform encephalopathy, is very rare in New Mexico and is limited to portions of the San Andres, Organ, and Sacramento Mountains. Uncertainty still lingers over exactly how CWD is spread and even the causative agent, which is likely an abnormal protein called a prion. Much of the concern about CWD involves its similarity to bovine spongiform encephalopathy (BSE), or mad cow disease; consuming products from BSE-infected cattle has been linked to fatal new variant Creutzfeldt-Jakob disease in humans. However, the World Health Organization has concluded that there is no evidence that CWD can be transmitted to humans. Despite this, hunters should avoid eating venison from infected animals (or other obviously sick animals) and should use simple precautions, such as wearing latex gloves when handling deer or elk from areas known to have CWD. Many states also restrict movement of venison or other parts of deer, elk, and moose from areas or states where CWD is present; be sure to check with local Game Departments for regulations on transporting venison. The Chronic Wasting Disease Alliance website (www.cwd-info.org) is an excellent source for up-to-date information regarding CWD and its management.

Predators kill deer in New Mexico each year. The chief animals that prey upon deer are mountain lions, black bears, Mexican wolves, coyotes, bobcats, and feral dogs. Interactions between predators and mule deer are complex and highly variable across distance and time; the key to understanding predation is differentiating between the act of predation and the effect of predation. Although predators kill deer, predation may have little effect on the population if predation substitutes for (e.g., is compensatory to) other forms of mortality because deer are in poor condition or otherwise predisposed. When predation is additive to other mortality factors, then predation can limit deer populations. Whether predation is mostly additive or mostly compensatory varies with the specific local conditions of the predator and prey communities, and their surroundings.

Mule deer can live about 10-15 years. The average lifespan of bucks is shorter than does, especially in areas of heavy hunting pressure. Because of this, most populations contain only 25-50 bucks for every 100 does.

Food Habits

Mule deer feeding is mainly crepuscular, meaning that they feed mostly early in the morning and again just before dark. They prefer higher-quality foods like forbs (commonly called weeds) and browse (leaves, buds, and new shoots of shrubs and trees), but they also utilize grasses when young and actively growing as well as succulents. Seasonally, mule deer diets are >60% browse in spring, >50% browse in summer and autumn, and >80% browse in winter (Heffelfinger, 2006). Most of the remainder of the diet is forbs, and grasses and succulents (e.g., cacti) usually contribute much less than 10% seasonally.

The actual diet of deer is very diverse and reflects what is available. Common foods in northern New Mexico include aspen, chokecherry, oaks, bearberry, bitterbrush, mountain mahogany, and most other shrubs in the rose family (Rosaceae). Winter diets may be supplemented with firs, pines, and other evergreens, though in limited quantities because many of these conifers contain secondary plant compounds that are toxic to deer, inhibiting function of their digestive systems. In southern New Mexico, common foods include mountain mahogany, oaks, skunkbush, yucca, ceanothus, mesquite pods, globemallow, vervain, and silktassel. Piñon and juniper may be used during dry seasons and winter months despite plant toxins, the effects of which can be minimized by mixing these with other plant species. In all areas, a wide variety of other forbs are important depending upon what exactly is available.

Mule deer are classed as concentrate selectors, meaning they eat lesser amounts of very high-quality foods; hence, they select for foods with high concentrations of readily digestible nutrients such as simple sugars. These are, as noted previously, mainly browse and forbs. Because of their need for high-quality foods, deer are always on the move while feeding. They take a bite and move on, spending little time in one spot, selecting the best foods that are available. This continued movement ensures a properly balanced diet if sufficient plant species are present.

Like other ruminants, the mule deer has a four-chambered stomach. When they eat, the food is swallowed with a minimum amount of chewing. Between feedings, the food is regurgitated and rechewed as cud. When reswallowed, it passes through the other chambers of the stomach and on through the digestive system. Food passes through their digestive system much more rapidly than in elk or cattle, however, and this short retention time limits just how much plant material mule deer can digest. This, combined with a faster metabolism than elk or cattle, is what drives their need for high-quality, easily digestible foods.

Availability of water can influence deer use of a particular area. Their daily intake varies from 0 to 1 1/2 quarts per 100 pounds of body weight. This is influenced by time of year, activity, and the kind of forage the deer is eating.

Sign

The most common sign of deer use of an area is their tracks. The track is from 2 3/4 to 3 1/4 inches long, and the walking stride is 22 to 24 inches long. When the mule deer runs, all four feet leave the ground at once, unlike the white-tailed deer, which pushes off with its hind feet. The resulting track patterns of the two species obviously differ.

When a deer browses, a characteristic stub remains (Figure 5). The jagged, shredded end of the twig results when the lower incisors pinch the twig against the toothless upper gums. The deer pulls and actually tears the twig, leaving a jagged, uneven end rather than a smooth cut.

Bucks remove the velvet from their antlers on small trees and shrubs. The scarred and broken branches and bark are easily observed about 18 inches above the ground. Many of these may be found in an area because one buck will rub several trees.

The dark brown scat of mule deer is usually found in clumps. Each pellet is about 1/2 inch long and tapered on one end. The fibrous material on which a deer has been feeding is often observable in the scat.

Figure 5. Browsing by deer leaves jagged twig ends.

Habitat Enhancement Recommendations

Owners who want to improve mule deer habitat on private lands should keep in mind a wide range of considerations. Ideal range of mule deer provides both food and cover, with shrublands and woodlands providing the best habitat because they provide both food and cover. Conversely, grasslands tend to be poorer habitat because they usually lack cover (Bender, 2012). Diversity is the key to managing mule deer; the healthiest deer herds are those on ranges that supply the greatest variety and abundance of woody browse and forbs of high nutritional quality throughout the year. Whether mule deer need free water is uncertain; they can probably meet their needs from succulent foods. However, they do prefer sites around water, and free water may be required during droughts or while raising fawns. Thus, permanent watering spots should be retained and created where desired, especially in desert mule deer ranges. When new impoundments are built, several smaller holes are more desirable than one large one.

Management and the Future

Hunting is the main source of mortality for adult bucks, and control of hunting seasons is used to manage mule deer populations in New Mexico. The locations, date, and length of seasons are used to control hunter numbers and densities; this in turn controls harvest to some extent. In areas where deer are abundant, antlerless and either-sex hunts are used. This encourages harvest by hunters where numbers need to be reduced and maintains a younger, more productive age structure in the doe population.

Ultimately, however, habitat is the key to mule deer populations. Peaks in mule deer populations in the mid-1900s resulted from obvious and subtle landscape changes associated with human settlement (see, for example, the history in Clements and Young, 1997). Habitat changes resulting from extensive logging, initial overgrazing of grasslands, and large wildfires greatly favored mule deer by creating large areas of shrublands and early successional (saplings) forests. Mule deer responded to these new habitats, especially the huge increase in shrublands, with population increases that peaked generally sometime during the 1940s to 1970s. Later, improved range management favoring grasses over shrubs, control of fires allowing shrublands to grow old or develop into closed forests, and greatly reduced logging all reduced preferred mule deer habitats. These changes have decreased the amount of mule deer habitat in New Mexico and throughout the West. As one example, the amount of forestland in aspen, probably the best mule deer habitat in northern New Mexico, has declined 88% (Bartos, 2001). These changes have driven deer populations down because they have greatly reduced both the amount and quality of mule deer habitat.

Thus, the welfare of mule deer in New Mexico is influenced by other uses of forests and rangelands. Land use policies developed by land management agencies are an important component of mule deer management. Only through coordinated efforts of these agencies and support for management programs from the general public can New Mexico be assured of a healthy mule deer population.

So, what does the future hold for mule deer? The “good old days” of the 1950s and 1960s are gone forever; the circumstances that created so much high-quality habitat can never be duplicated in modern times. However, managers can continue to try to maintain or increase the quality of remaining habitats to increase mule deer numbers above the current low levels. Cooperative Extension programs, the Western Association of Fish and Wildlife Agencies Mule Deer Working Group (www.muledeerworkinggroup.com), and State Wildlife Agencies all have publications and other information available on increasing the quality of deer habitat. For more information on all aspects of mule and white-tailed deer ecology and management, see Deer of the Southwest (Heffelfinger, 2006).

References

Bartos, D.L. 2001. Landscape dynamics of aspen and conifer forests. In W.D. Shepperd, D. Binkley, D.L. Bartos, T.J. Stohlgren, and L.G. Eskew (compilers), Sustaining aspen in western ecosystems: Symposium proceedings [Proceedings RMRS-P-18], (pp. 5-14). Fort Collins: U.S. Forest Service, Rocky Mountain Research Station.

Bender, L.C. 2011. Basics of trophy management [Guide L-111]. Las Cruces: New Mexico State University Cooperative Extension Service.

Bender, L.C. 2012. Guidelines for management of habitat for mule deer: Piñon-juniper, Chihuahuan desert, arid grasslands, and associated arid habitat types [Circular 662]. Las Cruces: New Mexico State University Cooperative Extension Service.

Bender, L.C., L.A. Lomas, and J. Browning. 2007. Condition, survival, and cause-specific mortality of mule deer in northcentral New Mexico. Journal of Wildlife Management, 71, 1118—1124.

Bender, L.C., J.C. Boren, H. Halbritter, and S. Cox. 2011. Condition, survival, and productivity of mule deer in semiarid grassland-woodland in east-central New Mexico. Human-Wildlife Interactions, 5, 276—286.

Bender, L.C., B.D. Hoenes, and C.L. Rodden. 2012. Factors influencing survival of desert mule deer in the greater San Andres Mountains, New Mexico. Human-Wildlife Interactions, 6, 245—260.

Clements, C.D., and J.A. Young. 1997. A viewpoint: Rangeland health and mule deer habitat. Journal of Range Management, 50, 129-138.

Heffelfinger, J. 2006. Deer of the Southwest. College Station: Texas A&M University Press.

Heffelfinger, J.R., and T.A. Messmer. 2003. Introduction. In J.C. de Vos, Jr., M.R. Conover, and N.E. Headrick (Eds.), Mule deer conservation: Issues and management challenges (pp. 1-11). Logan, UT: Jack H. Berryman Institute.

Lomas, L.A., and L.C. Bender. 2007. Survival and cause-specific mortality of mule deer fawns in northcentral New Mexico. Journal of Wildlife Management, 71, 884-894.

Original author: James E. Knight, Extension Wildlife Specialist.

Acknowledgement: Some of the information presented here was obtained from publications of the New Mexico Department of Game and Fish (www.wildlife.state.nm.us). This agency is responsible for the management of big game populations in New Mexico.

To find more resources for your business, home, or family, visit the College of Agricultural, Consumer and Environmental Sciences on the World Wide Web at pubs.nmsu.edu

Contents of publications may be freely reproduced for educational purposes. All other rights reserved. For permission to use publications for other purposes, contact pubs@nmsu.edu or the authors listed on the publication.

New Mexico State University is an equal opportunity/affirmative action employer and educator. NMSU and the U.S. Department of Agriculture cooperating.

May 2014

FX Impact M4 Review

0

In the ever-evolving world of precision air rifles, few manufacturers have pushed the boundaries of innovation quite like Swedish company FX Airguns. Their latest masterpiece, the FX Impact M4, stands as a testament to their commitment to excellence and technical innovation. This review delves deep into what makes the Impact M4 not just another PCP air rifle, but potentially a game-changing platform that sets new standards for what modern air rifles can achieve.

Design and Build Quality

Overall Construction

The FX Impact M4 immediately impresses with its bullpup design, which manages to pack extraordinary capability into a compact package. The standard model, featuring a 600mm (23.62″) barrel, maintains an overall length of just 34 inches while weighing in at a modest 6.85 lbs. The sniper variant, with its longer 700mm (27.55″) barrel, extends to 39 inches and weighs 7.15 lbs – still remarkably manageable for its capabilities.

Material and Build Improvements

One of the most notable improvements in the M4 over its predecessor is the new rigid top plate and scope rail system. The significantly thicker top plate enhances both shooting experience and performance, providing a more stable platform for precision shooting. The innovative rail system features an 11mm dovetail machined into the top, upon which rides a removable Picatinny rail with 30 MOA compensation. This design allows shooters to customize their optics setup for optimal eye relief and shooting position. Currently, FX Impact M4 is one of the best PCP air rifles on the market.

Ergonomics and Handling

The M4’s ergonomics have been carefully considered. The new UG1 AR-style grip and safety switch will feel immediately familiar to modern sporting rifle shooters, while the vertically adjustable rubber buttpad allows for precise fit adjustments. The forward-mounted, reversible cocking lever is particularly noteworthy, offering smooth, effortless magazine cycling that enables rapid follow-up shots without breaking position.

Technical Innovation and Performance

The Revolutionary Regulator System

At the heart of the Impact M4’s performance lies the Adjustable Match Precision MKII (AMP) regulator. This sophisticated system provides unprecedented control over the rifle’s air delivery, allowing for fine-tuning to match specific ammunition and power requirements. The inclusion of dual Wika pressure gauges – one for the air cylinder and one for regulator pressure – gives shooters real-time feedback on their system’s performance.

Power Management and Customization

The M4’s power management system is where it truly shines. The improved Power Plenum 750 system increases post-regulator volume, allowing for a wider power adjustment range without sacrificing shot count. This is complemented by:

  • External micro and macro hammer spring tension adjustment
  • External valve control adjustment
  • Quick Tune System for nearly tool-free adjustments
  • Power Block for optimized power transfer, especially beneficial for heavy slug shooters

The Innovative Barrel System

The Smooth Twist X Superior (STX) barrel system represents a significant advancement in air rifle technology. This system allows for:

  • Interchangeable calibers and barrel liners
  • Custom rifling twist rates for specific ammunition types
  • Dual transfer ports in .22 and .25 calibers, optimized for both pellets and slugs
  • Superior accuracy potential across multiple projectile types

Performance

Power

Chrony tests:

CalibersPelletsFPSFPE
.35JSB Match Diabolo Exact 81.02 Gr845128.49
.30JSB Match Diabolo Hades 44.75 gr87075.23
.177JSB Exact Heavy 10.34g90018.6
.25JSB Diabolo Exact King Heavy 33.95 gr875 57.73
.35JSB Match Diabolo Exact 81.02 Gr915150.66
.35JSB Match Diabolo Exact 81.02 Gr877138.4
.22JSB Diabolo Exact Jumbo Heavy 18.13 gr94035.58
.177NSA 12.5 gr97726.5
.22JSB Diabolo Exact Jumbo 15.89 gr94031.18
.22JSB Jumbo Express 14.35gr100332.06
.22JSB Jumbo Heavies 18.13gr86329.99
.25JSB Exact King 25.4 gr89344.99
.25JSB King Heavies MKII 33.95gr84954.35
.30JSB Exact 44.75 gr82968.31
.25Air Arms Diabolo Field 25.4gr93849.64
.25JSB Exact King Diabolo 25.39gr90746.39
.25Air Arms Diabolo Field 25.4gr89745.39
.25JSB Diabolo King Heavy MKII 33.95gr81650.21
.25JSB Exact King 25.39 Gr110068.23
.30JSB Exact 44.75 gr67545.29
.177NSA Slugs 12.5 gr97726.5
.25JSB King Heavy Mark II 33.9574842.19
.22JSB Exact Jumbo Diablo 15.89 gr94031.18
.30Zan Projectile 45.5 gr81366.8

The Impact M4 delivers impressive power across all calibers:

  • .177 caliber: 35 FPE (foot-pounds of energy)
  • .22 caliber: 87 FPE
  • .25 caliber: 100 FPE
  • .30 caliber: 125 FPE

These figures represent maximum energy achieved with the FX Slug Power Kit installed, making the M4 suitable for everything from target shooting to medium-game hunting.

(For more on the best air rifles for hunting, see this post)

Accuracy

Accuracy tests:

CalibersPelletsDistancesGroups
.177JSB Match Diabolo Exact 8.4 Gr50 yards3/4"
.30Slugs 67 Gr50 yards3/4"
.30Slugs 67 Gr100 yards1 1/2"
.30JSB Match Diabolo Hades 44.75 gr50 yards.557"
.25JSB King Heavy Mark II 33.95 gr100 yards1"
.30Nielson Slug 47 gr. 50 yardsone hole
.22JSB Diabolo Exact Jumbo Heavy 18.13 gr50 yardsone hole
.30JSB Diabolo Exact 50.15 Gr60 yardsone hole
.25JSB Match Diabolo Hades 26.54gr35 yardsone hole
.35JSB Match Diabolo Exact 81.02 Gr100 yards1"
.22JSB Diabolo Exact Jumbo Heavy 18.13 gr95 yards3/4"
.177NSA Slugs 12.5 gr50 yardsnickel size
.22JSB Match Diabolo Exact Jumbo Heavy 18.13gr50 yardsdime size
.25JSB Exact King 25.39gr50 yards3/4"
.22JSB Exact Jumbo 15.89gr50 yards1/2"
.25JSB Exact King Diabolo 25.39gr50 yards0.37"
.25Air Arms Diabolo Field 25.4gr50 yards0.47"
.25JSB Diabolo King Heavy MKII 33.95gr50 yards0.71"
.25JSB Exact King Diabolo 25.39gr100 yards1.34"
.30JSB Exact 44.75 gr50 yards0.557"
.177NSA Slugs 12.5 gr50 yardsNickel-size
.25JSB King Heavy Mark II 33.95 gr100 yards1.5"
.30JTS Dead Center 45.06 gr45 yards5/8"
.30FX Hybrid Slugs 44.5 gr45 yards5/8"
.30H&N Slug HP II 50 gr45 yards3/4"
.30Zan Projectile 45.5 gr45 yards3/8"

Shot Count and Efficiency

The rifle’s efficiency is remarkable, particularly considering its power output:

Standard Model (480cc cylinder):

  • .177 caliber: 375 shots per fill
  • .22 caliber: 270 shots per fill
  • .25 caliber: 130 shots per fill
  • .30 caliber: 85 shots per fill

Sniper Model (580cc cylinder):

  • .22 caliber: 330 shots per fill
  • .25 caliber: 160 shots per fill
  • .30 caliber: 105 shots per fill

Air Management

The system operates with a maximum fill pressure of 250 BAR (3,625 PSI) and a regulator working pressure of 170 BAR. The inclusion of a male Quick Disconnect fitting makes filling straightforward and secure. It’s worth noting that while the manual mentions 300 BAR capability, this is only achievable with aftermarket carbon fiber bottles – the factory bottles should not exceed 250 BAR.

Practical Applications

Target Shooting and Competition

The Impact M4’s precision engineering makes it an excellent choice for competitive shooting. The adjustable match-grade trigger, stable platform, and highly customizable power delivery system make it particularly suited for:

  • Benchrest competition at 100 yards
  • Field target shooting
  • Precision target practice
  • Long-range shooting

Hunting Applications

The rifle’s power output and accuracy make it suitable for various hunting scenarios:

  • Small game hunting
  • Medium game hunting (with appropriate caliber and power settings)
  • Pest control
  • Field shooting

The quick-follow-up shot capability and high magazine capacity (ranging from 23 to 34 rounds depending on caliber) provide additional versatility in hunting situations.

Customization and Versatility

Caliber Options

The Impact M4 offers exceptional versatility through its caliber options:

  • Standard model: Available in .177, .22, .25, and .30 caliber
  • Sniper model: Available in .22, .25, and .30 caliber

The ability to change calibers through the barrel liner system adds significant value for shooters who want multiple capabilities in one platform.

Adjustment Capabilities

The level of adjustability is unprecedented:

  • External hammer spring tension (macro and micro)
  • Valve control
  • Regulator pressure
  • Power adjustment
  • Trigger settings
  • Stock fit and configuration

This level of customization allows shooters to optimize the rifle for specific applications and ammunition types.

Magazine System and Loading

The Side Shot magazine system offers generous capacity:

  • .177 caliber: 34 rounds
  • .22 caliber: 28 rounds
  • .25 caliber: 25 rounds
  • .30 caliber: 23 rounds

The magazine system is well-designed and reliable, with older Side Shot magazines remaining compatible with the M4 platform.

Maintenance and Support

Warranty and Service

The Impact M4 comes with a 3-year transferable warranty, demonstrating FX’s confidence in their product. The Quick Tune System makes routine maintenance and adjustments straightforward, with minimal tool requirements.

Upgradability

The platform’s modular nature allows for significant upgrading potential:

  • Interchangeable barrel liners
  • Different caliber conversions
  • Power upgrade options
  • Additional accessories through the multiple Picatinny rails

Features:

FX Impact M4 PCP Air Rifle

  • FX Smooth Twist X Superior (STX) barrel system
  • Interchangeable calibers and barrel liners (sold separately)
  • Power Block
  • Externally adjustable AMP MKII (Adjustable Match Precision) regulators
  • Externally adjustable hammer spring tension with macro and micro adjustments
  • Externally adjustable valve control
  • Quick Tune System for virtually tool-free adjustments
  • 250 BAR (3,625 PSI) max. fill pressure
  • Max regulator working pressure of 170 BAR
  • Equipped with improved 75cc Power Plenum 750 – allowing for an even wider range of power adjustment
  • .22 and .25 cal M4’s feature Dual transfer ports – one optimized for pellets, one for slugs
  • Male Quick Disconnect fitting
  • Shroud is threaded 1/2×20 for moderator
  • Forward mounted reversible sidelever cocking
  • Picatinny/Weaver optics mounting rail with 30 MOA compensation rides on 11mm dovetail allowing further customization to meet every shooters need
  • Picatinny accessory rails below cylinder and on each side of the forearm
  • New Quick Set Trigger – Adjustable match trigger
  • Wika dual pressure gauges: one for air cylinder pressure, one for regulator pressure.  
  • Height adjustable rubber buttpad
  • FX UG1 AR15 style grip
  • AR15 style manual safety
  • Redesigned Side Shot magazine capacity*: 34 rds. in .177, 28 rds. in .22, 25 rds. in .25, 23 rds. in .30
  • Maximum muzzle energy **:
    • 35 FPE in .177 
    • 87 FPE in .22 
    • 100 FPE in .25 
    • 125 FPE in .30 
  • Includes one side-shot magazine, FX moderator, and 3 year transferable warranty

*  – Older Side Shot magazines are compatible with the M4. 
** – Max Energy achieved with FX Slug Power Kit installed.


600mm (23.62”) Barrel, Standard Models:

  • Available in .177, .22, .25 and .30 cal.
  • Removable 480cc carbon fiber air cylinder
  • Overall length of 34”
  • Weight: 6.85 lbs.
  • Shots per fill: 375 in .177, 270 in .22, 130 in .25 and 85 in .30

700mm (27.55”) Barrel, Sniper Models:

  • Available in .22, .25 and .30 cal.
  • Removable 580cc carbon fiber air cylinder
  • Overall length of 39”
  • Weight: 7.15 lbs.
  • Shots per fill: 330 in .22, 160 in .25 and 105 in .30

Pros and Cons

ProsCons
  • Incredible accuracy up to 100 yards
  • Well-built and lightweight
  • Quiet and backyard-friendly
  • Large rotary mag
  • Great Interchangeable Barrel System
  • Lots of available aftermarket parts and upgrades 
  • A longer Picatinny rail would be nice

Conclusion

The FX Impact M4 represents the pinnacle of current PCP air rifle technology. Its combination of innovative features, unprecedented adjustability, and exceptional performance sets it apart in the market. While it may require a significant investment and time to master, the platform offers tremendous versatility and capability that can serve everything from casual target shooting to serious competition and hunting.

The rifle’s modular nature and upgradeability help future-proof the investment, while its robust construction and comprehensive warranty provide peace of mind. For the serious air rifle enthusiast who demands the ultimate in precision and adjustability, the Impact M4 delivers in spades.

Whether you’re a competitive shooter looking for a winning edge, a hunter requiring versatility and reliability, or simply an enthusiast who appreciates engineering excellence, the FX Impact M4 offers a compelling package that pushes the boundaries of what’s possible in a PCP air rifle.

The combination of Swedish engineering excellence and practical shooting requirements has resulted in a platform that not only meets current demands but sets new standards for what users can expect from a modern PCP air rifle. While it may be more than some shooters need, for those who can utilize its capabilities, the Impact M4 represents the current state of the art in air rifle design and performance.

How to Adjust Your Archery Bow Sight: A Quick Adjustment Guide

0

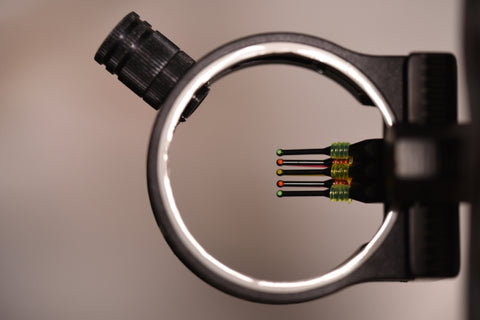
Close-up image of an archery bow sight.

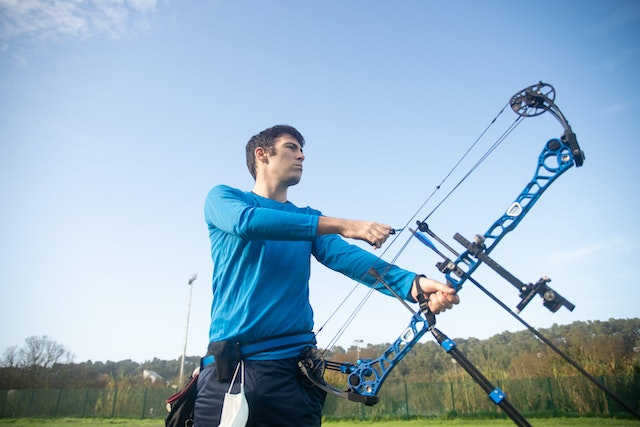
Even if you’re brand new to archery, you’ve probably heard the term bow sight before. But what is it, and why is it significant?

Bow sight refers to a component of the bow that allows you to adjust your aim to shoot more accurately. When it’s not calibrated correctly, however, it can lead to accuracy issues. Bow sight adjustments rectify this.

Now that we’ve squared away those basics, it’s time to get more in-depth about how to adjust a bow sight so you can shoot with pinpoint accuracy. Ready? Let’s dive in now!

What Is a Bow Sight & Why Does It Matter?

Bow sights are the part of an archery bow that allows you to adjust your sightlines and aim your bow better to create a perfectly-aligned shot. Shooting with laser precision is possible with a bow sight, so long as you move the sight pins to their proper spots, which can be done by adjusting the sight housing.

Four Common Types of Archery Bows

Not all archery bows are created equal. In fact, bows come in four main types:

  1. Recurve
  2. Longbow
  3. Compound
  4. Crossbow

The compound bow is perhaps the most common type, but bow sights across all four types of bows are, by and large, fairly similar. Thus, the process for adjusting a bow sight on different bows should be fairly similar as well.

When it comes to compound bow sight adjustment, the more pressing question is whether or not your bow sight is single-pin or multi-pin.

How to Recognize It’s Time for a Bow Sight Adjustment

Are you sighting properly and still not hitting the target? Is it happening again and again? It’s probably not your aim that’s at fault, but rather, the way your bow sight is calibrated.

How to Level Your Bow Sight

Before you get to adjusting a bow sight, you need to adjust the leveling of the sight. There are several axes to adjust the leveling, including a second axis and a third axis.

The second axis level can be seen through the hole of the sight. Imagine hanging a picture on a wall and leveling it. That’s second-axis leveling. Now, imagine leaning a picture up against a wall vs. hanging it straight up and down: that’s third-axis leveling, which is important if you’re going to be shooting at angles (i.e on the unlevel ground).

Leveling in either instance is as simple as loosening the sight (via allen wrench, normally) and then adjusting until the bubble of the level is centered.

How to Adjust Compound Bow Sight: Single vs. Multi-Pin

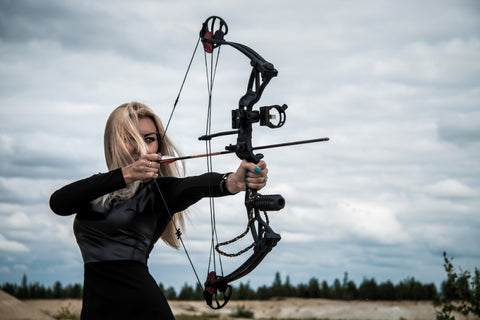
Young blonde female wields a compound bow and looks into bow sight ready to shoot.

Adjusting a bow sight looks different when the bow sight in question is single-pin compared to multi-pin. Let’s break down the steps of bow sight adjustment for each type of pin setup below.

Adjusting a Multi-Pin Bow Sight

Most archers today use multi-pin bow sights. They employ a range of site pins – normally, three, five, or seven – that can be set as aiming references for different distances – normally, 20 yards, 30 yards, 40 yards, 50 yards, and 60 yards. Often, the 20-yard pin will be the top pin and the 60-yard pin will be the bottom pin.

If it’s your first time shooting with a new sight, you’ll have to calibrate it, since you won’t know where your arrow will hit compared to the pins.

Though the highest pin will generally be 20 yards, it’s recommended to start shooting from a distance of 10 yards, using a large target so there’s more margin of error for adjustment.

Shoot, aiming for the bulls-eye, and take note of where the arrow lands. If it is too far in one direction, you’ll want to move the sight in that same direction (i.e. if your arrow hits the left of the bulls-eye, you move the sight housing left). Adjusting the sight is generally done with an allen wrench, which you can buy at any archery shop.

Once you’ve calibrated the pin for 20 yards, you’ll move to each subsequent pin. It’s important to note that you don’t want to move the pins themselves. You want the pins set in their original position until after you’ve calibrated the bow sight entirely. Then, as you shoot, you can move each pin within the sight if needed for minor adjustments.

Adjusting a Single-Pin Bow Sight

Sighting in a single-pin bow can be harder than in a multi-pin sight because it’s difficult to gauge your initial adjustments. That said, the process of actually making those adjustments is fairly simple.

The fundamentals of sight adjustment are the same: make sure you’re adjusting the sight and taking note of where your arrows are landing in relation to the target.

To adjust a single-pin bow sight, you’ll want to loosen the scope housing, then adjust it up and down to shoot from different distances.

You can also move your scope left and right by loosening the scope and re-tightening it.

Discover AccowBow Training Bows

If all the above seems like it’s overly complex, we understand. Archery is a sport that takes practice. But if you’re looking to up your archery game, AccowBow can help! Explore high-quality archery training devices. Try out the 1.0 model or 2.0 second version, and you’ll be shooting like a pro in no time.

A Definitive Guide on Meat Grinder Plate Sizes

0

Whether I’m grinding wild game from the hunt, or a whole cow from my local farmer, meat grinder plates allow me to take control and customize your grinds.

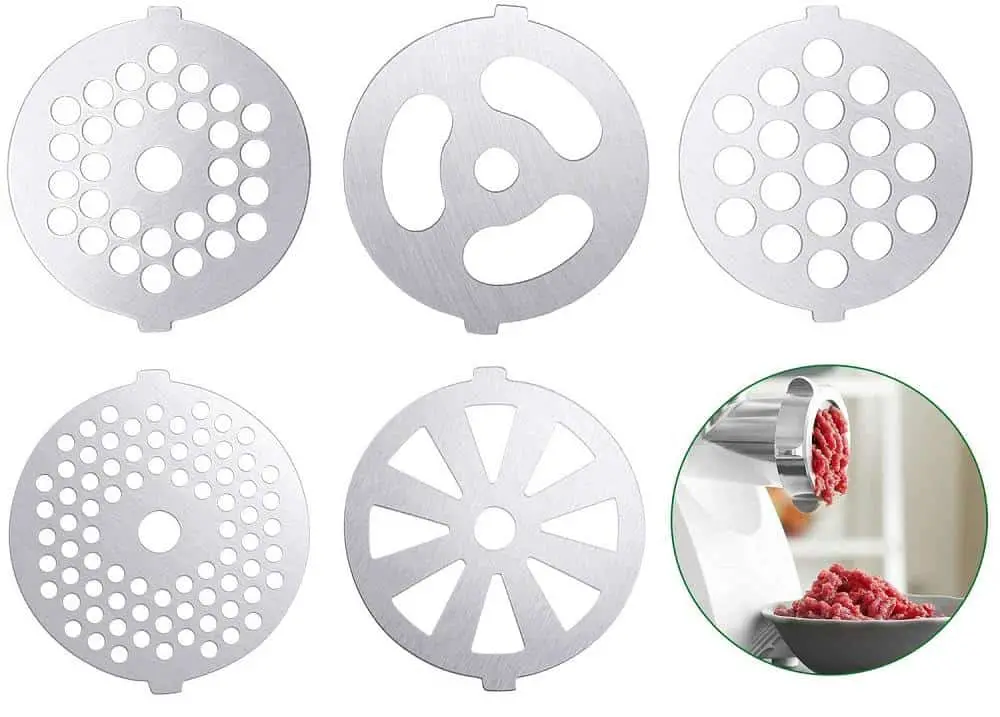
Meat grinder plates are circular discs with holes across them, and the texture of the grind depends on size of the holes in the plate.

Meat Grinder Plate Sizes

Depending on what item you’re grinding the meat for, you will need one or more plates to achieve the right texture.

For example, if I’m grinding meat for summer sausages, I use a 2 ½” grinder plate, but I need both 1/4″ & 5/16″ grinder plates to grind meat to make fresh burgers.

What is the Usage of Meat Grinder Plates?

Whether you’re using a manual or electric meat grinder, you will need to load the machine with appropriate grinder plates to produce the final texture.

When you load the food tray of your meat grinder, it is pushed down through the feeding tube, and through the blade, which cuts down the meat.

If you don’t install meat grinder plates, then the grinding results will be thick and not consistent.

After the meat is processed by the blade, it goes through the holes of the grinder plates to give the ground meat coarse or fine texture.

The main and only job of the blade of a meat grinder is to mince the meat, so that it can smoothly go through the grinder plate holes.

Complete Meat Grinder Plate Size Chart

You can use the chart below to find the right meat grinder plate size for your needs.

Grinder Size Number Plate Diameter Hole Diameter Type of Grind Ideal for Grinding Meat for #5 2-1/8″ 6mm (1/4″) Coarse Sausages such as summer, salami, pepperoni and snack sticks #8 2-3/8″ 10mm (3/8″) Coarse / first grind Chili, chorizo and linguisa #8 2-3/8″ 4.5mm (3/16″) Coarse / second grind Hamburger. Regular sausages # 10/12 2-3/4″ 10mm (3/8″) Coarse / first grind Chili, chorizo and linguisa # 20/22 3-1/4″ 4.5mm (3/16″) Coarse / second grind Hamburger. Regular sausages # 20/22 3-1/4″ 3mm (1/8″) Fine Hamburger, bologna, hot dogs # 20/22 3-1/4″ 12mm (1/2″) Coarse / first grind Chili and stewed meats # 20/22 3-1/4″ 10mm (3/8″) Coarse / first grind Chili, chorizo and linguisa # 20/22 3-1/4″ 6mm (1/4″) Coarse Sausages such as summer, salami, pepperoni and snack sticks # 32 3-7/8″ 3mm (1/8″) Fine Hamburger, bologna, hot dogs and jerky #42 5 1/16″ 4mm Commercial use / coarse Hamburger, salami, summer sausage, pepperoni and bratwurst

What Meat Grinder Plate Sizes Should You Typically Have?

This completely depends on what you will making with the ground meat. If you’re going to be making franks, hamburgers, bologna and beef jerky, 1/8″ or 3/32″ fine grinder plates should be in your arsenal.

You can even make hamburgers and breakfast sausages with 3/16″ or 5/32″ hole size medium grind plates.

For coarse ground meat, that is to make items such as salami, chorizo, bratwurst, sausage, etc., you will need a grinder plate with a bigger hole size such as 1/4″, 5/16″, and 3/8″.

How do I Know What Size Meat Grinder I Have?

The numbers on your meat grinder refer to the size of the grinding head. Depending on the manufacturer, you can find the size of your meat grinder emblazoned on the appliance itself or in the owner’s manual.

In case you cannot find any size number on your grinder plate then just take a measuring tape and measure the diameter of the round plate and also use the same method to measure the diameter of one of the holes. Now use this information to lookup the plat size from the meat grinder plate size chart above.

The most common sizes of meat grinders for home use are #5, 8, 12, 22, and 32, whereas #20, #22, #32, #42 and #52 size meat grinders are mostly used in commercial settings.

Smaller size meat grinders come with smaller feeding tubes, and larger feeding tubes with large size grinders.

If you’re only grinding meat for burgers and sausages, then a smaller size meat grinder will do the job, but if you’re looking to grind wild game several times a year, then you should opt for a larger size meat grinder.

What is the Grinder Plate Size for Sausage?

This depends on the texture of sausages you’re making such as whether you like them with a fine or chewy texture. If you’re grinding meat for bratwurst sausages or summer sausages, you will need coarsely ground meat with a 2 3/4 inches grinder plate.

For chorizo, you will again coarsely grind meat, but this time with a 3 1/4 inches size grinding plate.

But if you’re grinding meat for breakfast sausages, Polish or Italian sausages, you should use a 3/16″ coarse grinding plate and also check out my previous article which covers meat grinder plate sizes for various sausages in detail.

How to Sharpen Meat Grinder Plate?

The grinder plates of a meat tend to get worn out after a period of use, hence need to be sharpened. If you grind with dull plates, great chances are that you won’t get the best texture and consistency from the respective plate.

The best and easiest way to sharpen your meat grinder plates and even knife is with the Sausage Maker sharpening system.

  1. Soak the stones in the sharpening system in water for roughly five minutes. You have to be very gentle with them because they can get damaged easily.
  2. There are two plates in the pack—one with the square hole is for the knife, and the round hole stone for the grinder plate.
  3. If you just want to sharpen the grinder plate, place the stone into the grinder head of the meat grinder first, and then place dull grinder plate over it, and secure them both with the retaining ring, but not too tight.
  4. Power on the meat grinder for only five seconds or so, and voila—the grinder is plate is back to new.
  5. Now repeat this process for the other side of the grinder plate to ensure both sides are sharpened.

There are other ways to sharpening grinder plates as well such as with a sharpening stone, but these will require a fair bit of elbow grease, so it’s better to do the job effortlessly with the Sausage Make sharpening system.

3 Avian X Decoy Setups for Spring Success!

0

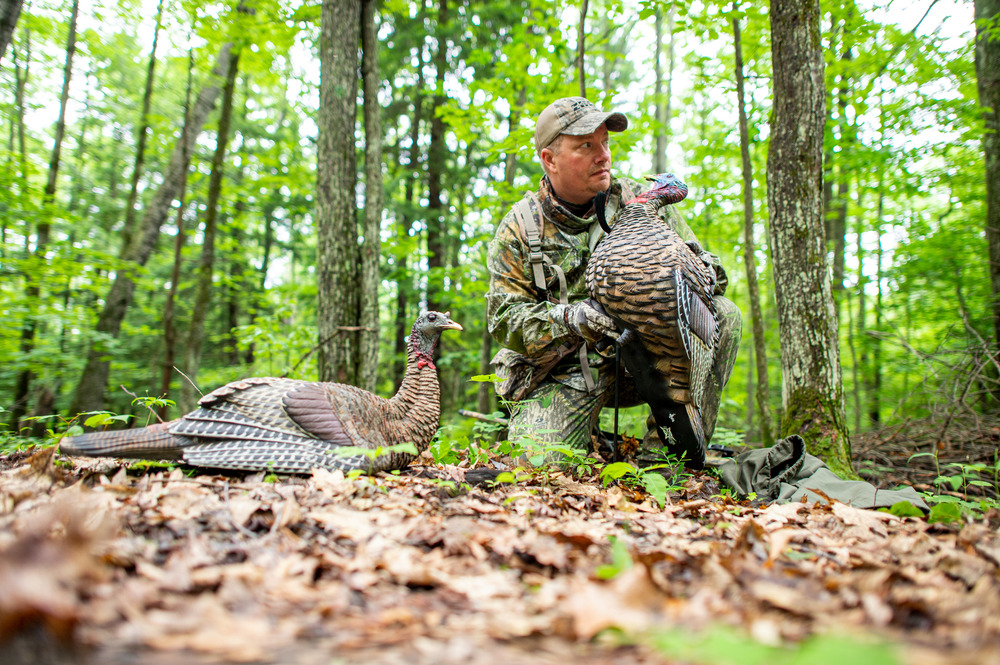
I have been hunting turkeys for 20 years now and I still have a lot to learn, but one thing I do know for sure is that turkey decoys have become a vital part of my turkey hunting success! No, you do not have to use a decoy to harvest a wild turkey, but I love to draw turkeys in close, see how they interact with the decoy and enjoy the show. The Avian X series of turkey decoys will do just that for you. I have been using Avians for the past several seasons and my harvest rate has taken a significant increase from where it was. There are many different types of decoy setups a hunter can use. Here are our 3 BEST Avian X decoy setups to help you be successful this spring!

1. Full Strut Tom/Laydown Hen Combo

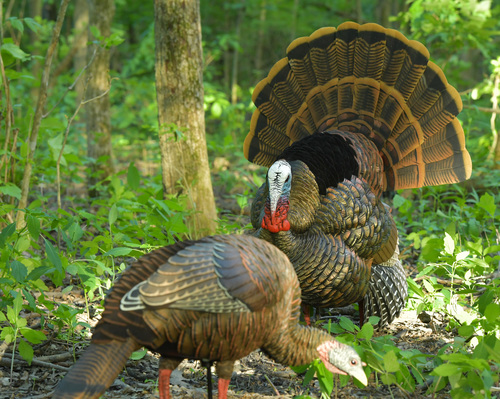
This setup seems to be the most controversial of the three. Some hunters live & die by this setup and others are not fans of the full strut decoy, but if used properly and in the right situations, this is one of my favorite ways to hunt! The LCD or HDR Strutter decoy are both eye-catching and when used in open field settings can be seen from long distances. This scenario is perfect when you have observed aggressive gobbler behavior the in flock of turkeys you are hunting. Paired with the LCD Laydown Hen from Avian, this is a deadly combination. This breeding position is sure to trigger boss toms to come into the decoys for an action-packed hunt at close range.

3 Avian X Decoy Setups for Spring Success!

2. Submissive Jake

If you are hesitant to put out a strutter decoy, then try a submissive jake setup. the LCD Quarter Strut Jake makes this setup attractive to both dominant and sub-dominant gobblers. This decoy option is 15 percent smaller than a real jake. When I pair it with any of the Avian X Hen decoys, it has proven time & time again to drive gobblers wild! This option is less risky if you are worried about spooking subordinate gobblers and running them off your property. I have found this option is most successful during the early part of season when turkeys are still establishing dominance & their pecking order!

3 Avian X Decoy Setups for Spring Success!

3. Lone Hen

If I had to choose one setup to use for the rest of my hunting days, this would be it! I cannot tell you how many times I have pulled toms into range with this option. I am a conservative turkey hunter and if you want to use a decoy but are worried that a male decoy could do more harm than good, you can never go wrong with a lone feeding hen. Avian has both the LCD & HDR series versions of a feeding hen. A gobbling tom will come from hundreds of yards away to try and catch this lone hen’s attention. This feeding posture makes the hen look calm and content, which is always inviting to other turkeys. On many of my hunts, I have started with a lone feeding hen and ended up with a field full of turkeys in my lap. You can never go wrong with this one and it gets my best overall decoy setup!

Avian X has a great line of the most realistic turkey decoys on the market. Check them out today at avian-x.com!

Archery Dude

0

As you embark on your quest for archery greatness, it’s important to remember that progress is achieved through consistent effort, learning, and adaptation. In this guide, we’ll take a look at the many facets of becoming a better archer, hopefully equipping you with the knowledge and tools you need to elevate your skills and even surpass your own expectations. So, prepare to unleash your inner archer as we embark on this transformative journey together.

Unlocking Your Archery Potential

Starting the journey to becoming a better archer can be a rewarding endeavor filled with excitement, challenges, and hopefully some personal growth. By dedicating yourself to the continuous improvement of your skills, you’ll not only experience the satisfaction of hitting your targets with greater accuracy but also discover a passion that can last a lifetime. This guide is designed to help you unlock your full archery potential, offering insights into techniques, equipment, and practice strategies that can elevate your performance.

Navigating the Guide

This guide is split up into several different sections, each focusing on the different aspects of personal archery improvement. From perfecting your form and technique to choosing the right equipment, developing a personalized practice routine, and harnessing the power of mental focus, we’ve got you covered. Additionally, you’ll find answers to common questions on improving in archery, tips on learning from the experts, and advice on competing and growing as an archer. So, let’s get started on your path to archery mastery!

The Foundations of Archery Excellence

Let’s begin by examining the foundations that underpin all successful archers: form and technique. Mastering these crucial aspects of archery will give you a solid base on which to build your skills and develop your own unique style. From the subtleties of stance and posture to the intricacies of aiming and releasing, we’ll guide you through the key elements of archery excellence, ensuring you’re well-equipped to hit the mark every time.

Stance and Posture: The Building Blocks

A solid foundation is key to becoming a better archer, and it all begins with your stance and posture. Try to keep your feet shoulder-width apart, with your non-dominant foot slightly forward. Distribute your weight evenly between both feet, and maintain a slight bend in your knees. Keep your back straight and your head up, creating a stable and well-balanced platform for shooting.

Proper posture not only improves your stability and balance but also promotes consistent shot execution. Remember to maintain this posture throughout your shot, as any changes can affect your aim and overall performance.

Get a Grip: Mastering Bow Control

Developing the correct grip on your bow is crucial for accurate shooting. Your grip should be relaxed and consistent, allowing the bow to sit comfortably in the groove between your thumb and index finger. Avoid gripping the bow too tightly, as this can cause torque and negatively impact your shot. Instead, keep your hand relaxed and let the bow’s riser rest against the pressure point at the base of your thumb.

With a relaxed grip, you’ll minimize the chances of introducing unwanted movement or inconsistencies in your shots. Practice maintaining a consistent grip to build muscle memory and ensure better bow control.

Drawing and Anchoring: Precision from Start to Finish

Drawing and anchoring your bow correctly are essential for shot consistency and accuracy. To draw your bow, extend your bow arm forward while pulling the string back with your other hand, keeping your elbow in line with the arrow. Gradually draw the string back until it reaches your anchor point, which is a consistent point of contact between your hand and your face. Common anchor points include the corner of your mouth or the tip of your nose.

It’s crucial to establish a consistent anchor point for every shot, as this will help ensure your aiming is steady and reliable. Practice drawing and anchoring smoothly to develop a reliable, precise shooting process.

Bulls-eye Aiming: Hitting the Mark Every Time

Aiming accurately requires focus, proper alignment, and a steady hand. To aim effectively, align your bow’s sight pin with your target while maintaining your anchor point. Keep your eye on the target, and focus on a small, specific point rather than the entire target face. Remember to breathe steadily and relax your muscles to minimize any unwanted movement.

As you release the arrow, follow through with a smooth and controlled motion, keeping your bow arm extended and your drawing hand moving along the same plane. Consistency in your aiming and release will help you hit the mark with greater accuracy, leading to improved performance over time. If you really want a crash course in aiming, stance and more, I’ve written a full guide about archery tips for accuracy, check it out to improve your shots.

Gear Up for Success

As you hone your archery skills, it’s crucial not to overlook the role that the right equipment plays in your success. With an array of bows, arrows, and accessories to choose from, finding the perfect combination for your needs and preferences can be a game-changer. Below, we’ll help you navigate the world of archery gear, offering insights and advice on selecting the ideal equipment to complement your abilities and enhance your performance. Together, we’ll ensure you’re fully prepared to tackle any challenge that comes your way.

Finding Your Bow Soulmate

Choosing the right bow is a personal decision based on your preferences, goals, and style. Let’s explore the different types of bows available, so you can find the perfect match for your archery journey.

Recurve Bows: The Classic Choice

Recurve bows are popular among beginners and Olympic archers alike. They feature a simple design with limbs that curve away from the archer when unstrung. Recurve bows offer a balance of power and control, making them a versatile option for target shooting, field archery, and even hunting. If you’re looking for a traditional archery experience with a proven track record, a recurve bow might be your ideal choice.

Compound Bows: High-tech Precision

Compound bows are a modern innovation that utilize a system of pulleys and cams to provide a mechanical advantage. This design allows for a smoother draw, increased accuracy, and reduced holding weight at full draw. Compound bows are often favored by hunters and archers seeking the highest level of precision. If you’re drawn to cutting-edge technology and desire unparalleled accuracy, a compound bow could be your perfect match.

Longbows: Embracing Tradition

Longbows are the quintessential traditional bow, boasting a rich history that dates back centuries. These bows have a simple, elegant design with a long, gently curved limb. Longbows require more physical strength and skill to shoot accurately, making them a popular choice among traditional archery enthusiasts. If you’re passionate about history and enjoy the challenge of mastering an ancient art, a longbow may be the bow for you.

Your Essential Archery Arsenal

Equipping yourself with the right accessories can make a significant difference in your archery experience. Here are some essential items to consider adding to your arsenal:

The Right Arrows for Your Bow

Arrows come in various materials, lengths, and spine stiffness, which can significantly impact their flight and accuracy. Choose arrows that are compatible with your bow’s draw weight and length, as well as your specific shooting needs. Don’t be afraid to experiment with different arrow types to find the ones that work best for you. I’ve written a complete guide all about what type of arrows you should use, check it out for all of the details.

Protecting Yourself: Armguards and Finger Tabs

As an archer, ensuring your safety and comfort during practice and competition is paramount. Two essential pieces of protective gear that can greatly enhance your shooting experience are armguards and finger tabs. These accessories not only protect you from injury but can also improve your shooting consistency.

Armguards are designed to shield your bow arm from potential string slaps that can occur if the bowstring grazes your arm upon release. They are typically made from durable materials such as leather, plastic, or fabric and are secured to your forearm with straps or elastic bands. Choosing the right armguard involves finding one that provides adequate coverage and a comfortable fit without restricting your movement.

Finger tabs, on the other hand, protect the fingers of your drawing hand from the friction and pressure generated by pulling the bowstring. These small, often leather, pieces are worn on your fingertips and create a barrier between your skin and the bowstring, reducing the risk of blisters and calluses. Finger tabs can also enhance your shooting consistency by providing a smooth and uniform surface for the string to slide off during release. When selecting a finger tab, consider factors such as the thickness of the material, the fit on your fingers, and any additional features like an adjustable finger spacer or ledge for anchoring.

By always investing in quality protective gear, you’ll be safeguarding yourself from injury and discomfort while promoting a more consistent and enjoyable archery experience.

Bowstrings and Nocking Points: Fine-tuning Your Equipment

Smart Shopping: Quality Meets Affordability

Common Questions on Improving in Archery

Along the path to becoming a better archer, questions and uncertainties are bound to arise. Addressing these common concerns and providing practical guidance can be instrumental in boosting your confidence and refining your skills. In this section, we’ll tackle some of the most frequently asked questions in the world of archery improvement, and hopefully give you some valuable insights and tips to help you overcome obstacles and continue your upward trajectory. With clarity and understanding, you’ll be well-equipped to navigate the challenges and triumphs that lie ahead.

From what distance is it best to practice in order to increase your accuracy?

When starting out, it’s best to practice from a shorter distance, typically around 10 to 20 yards. This allows you to focus on perfecting your form and technique without the added pressure of hitting distant targets. As you become more comfortable and consistent, gradually increase the distance to challenge yourself and further develop your accuracy. Ultimately, the best distance for practice will vary based on your individual skill level, goals, and the type of archery you’re pursuing.

How can I improve my archery at home?

Improving your archery skills at home is possible with the right approach and resources. Here are a few tips to help you practice effectively at home:

Create a safe shooting area: Ensure you have a clear, unobstructed space to shoot, and always use a suitable backstop to catch arrows. Here’s my guide all about how to build a backyard archery range.

Focus on your form: Use a mirror or video recordings to assess and refine your stance, grip, and drawing technique.

Strength training: Work on building your core, back, and shoulder muscles, which are essential for archery performance.

Stretching and flexibility: Incorporate stretches that target the muscles used in archery to improve your range of motion and prevent injuries. Here are 15 exercises for archery that’ll really up your game.

Mental training: Practice visualization techniques and breathing exercises to enhance your mental focus and manage performance anxiety.

How many arrows should I shoot a day?

The number of arrows you should shoot daily depends on your skill level, goals, and available time. For beginners, shooting 30 to 50 arrows per session is a good starting point. More advanced archers may shoot between 100 to 300 arrows daily to maintain and refine their skills. The key is to focus on quality over quantity: prioritize proper form and technique, and avoid overtraining to prevent injuries. As with any sport, it’s important to listen to your body and adjust your practice routine accordingly.

Crafting Your Personalized Practice Plan

Developing a personalized practice plan is a crucial aspect of your growth as an archer. A well-structured and targeted routine will not only help you build and reinforce your skills but also foster a deep sense of commitment and discipline. Below, we’ll delve into the process of designing a practice plan that aligns with your goals, incorporates effective drills, and emphasizes the importance of rest and recovery. With a tailored approach, you’ll be on the fast track to achieving all of your archery related aspirations.

Mapping Your Archery Journey

Creating a customized practice plan tailored to your needs and aspirations is crucial for steady progress in archery. Start by identifying your short-term and long-term goals, and then break them down into manageable, achievable steps. Be realistic about the time you can commit to practice, and consider incorporating a mix of technical training, strength and flexibility exercises, and mental skills development into your routine.

Aiming High: Setting and Achieving Goals

Goal setting is a powerful tool for staying motivated and tracking your progress in archery. Set SMART goals (Specific, Measurable, Achievable, Relevant, and Time-bound) to provide a clear path to improvement. Monitor your progress regularly and adjust your goals as needed to ensure they remain challenging and relevant to your evolving skills.

Drills That Make a Difference

Incorporating effective drills into your practice routine can help you hone specific skills as well as enhance your overall performance. Consider trying out the following drills:

Blank bale shooting: Blank bale shooting involves practicing your shots at a close distance, typically 5-10 feet, without a target face. This drill helps archers focus on their form, release, and follow-through without the distraction of aiming. By concentrating solely on technique, you can develop consistent and accurate shooting habits that will translate to better performance when aiming at targets.

Endurance shooting: Endurance shooting drills involve shooting a high volume of arrows in a single session, building both physical and mental stamina. These drills help improve muscle memory, increase shooting endurance, and develop mental resilience under fatigue. Remember to maintain proper form and technique during endurance shooting to prevent injury and reinforce good habits.

Various distances: Practicing at various distances is essential for developing adaptability and improving accuracy across different shooting scenarios. Start at shorter distances, gradually increasing the range as you become more comfortable and accurate. This drill helps you understand how your sight picture and aiming techniques change with distance, ultimately making you a more versatile and confident archer.

Pressure drills: Pressure drills simulate high-stress situations, such as competition or hunting scenarios, to help archers improve their focus and performance under pressure. Examples of pressure drills include shooting with a time limit, competing against a partner, or setting specific scoring goals. By exposing yourself to pressure situations in practice, you’ll be better prepared to handle nerves and maintain focus during real-life events.

By incorporating these drills into your practice routine, you can target specific areas of your archery skills and make meaningful progress toward becoming a better archer.

How to Shoot Better Groups with a Bow

Consistently shooting tight arrow groups is a sign of excellent technique and accuracy. To improve your groupings, focus on the following aspects:

Consistent anchor points: Developing consistent anchor points is crucial for achieving accuracy and repeatability in your shots. Drills that emphasize finding and maintaining a reliable anchor point help reinforce muscle memory, allowing you to reproduce the same shooting motion every time. Practice drawing and anchoring your bow with your eyes closed, focusing on the feeling of your anchor point, and then open your eyes to check your alignment.

Smooth release: A smooth release is vital for accurate shooting, as any tension or jerking motion can disrupt your arrow’s flight path. To practice a smooth release, focus on maintaining a relaxed grip and using a consistent release aid, such as a finger tab or mechanical release. Work on releasing the string with a gentle and controlled motion, ensuring that your follow-through is consistent and relaxed.

Bow tuning: Regular bow tuning ensures that your equipment is performing optimally, which in turn improves your shooting accuracy and consistency. Bow tuning involves checking and adjusting various aspects of your bow, such as brace height, tiller, and limb alignment. By becoming familiar with the tuning process and making necessary adjustments, you can maintain your equipment’s peak performance and prevent shooting inconsistencies.

Patience and practice: Becoming a better archer requires patience and consistent practice. Dedicate time to honing your skills, focusing on specific aspects of your technique, and learning from your mistakes. Embrace the process and understand that progress may be slow, but with dedication and perseverance, you’ll see steady improvement in your shooting abilities.

Rest and Recovery: The Forgotten Keys to Improvement

Rest and recovery are essential components of any successful training plan. Schedule regular rest days to allow your muscles to recover and prevent overtraining. Listen to your body, and consider incorporating activities like yoga, meditation, and deep breathing exercises to promote relaxation and mental focus. Remember, balance is key to sustained growth and long-term success in archery.

Mind Over Matter: Mental Strategies for Archery Success

While physical skills and techniques are critical components of archery success, the power of the mind should never be underestimated. Cultivating mental strength and resilience can give you a significant edge when it comes to performing under pressure and overcoming challenges. In this section, we’ll take a look at a few mental strategies to help you build an unshakable mindset, harness the power of visualization, and conquer any performance anxiety. By embracing these techniques, you’ll be poised to unlock your full potential and excel in even the most demanding situations.

Building an Unshakable Mindset

A strong mindset is a crucial element of archery success. Cultivate a growth mindset by embracing challenges, learning from setbacks, and focusing on the process rather than just the outcome. Develop a pre-shot routine to help you mentally prepare for each shot and maintain consistency in your performance. Positive self-talk and affirmations can also reinforce your belief in your abilities and keep self-doubt at bay.

Picture This: The Power of Visualization

Visualization is a proven mental technique used by many top athletes to enhance their performance. By mentally rehearsing your shots and envisioning yourself hitting the target, you can train your brain to execute the desired movements more effectively. Practice visualization daily, both during your practice sessions and in your downtime, to reinforce positive mental images and improve your confidence on the shooting line.

Keep Calm and Shoot On: Conquering Performance Anxiety

Performance anxiety is common in archery, but it doesn’t have to hold you back. Learn to manage your nerves by incorporating relaxation techniques, such as deep breathing exercises and progressive muscle relaxation, into your routine. Focus on the present moment and avoid overthinking your shots. Embrace competition as an opportunity to grow and learn, and remember that even the most accomplished archers experience nerves from time to time.

Learn from the Pros: Their Experience Can Up Your Game

Learning from experienced archers and immersing yourself in the wider archery community can be a transformative experience, offering invaluable insights, inspiration, and camaraderie. Below, we’ll discuss the benefits of seeking professional coaching, attending workshops and clinics, and connecting with fellow archers both online and offline. By embracing these opportunities, you’ll not only expand your knowledge and refine your skills, but also find support and motivation to fuel your passion for the sport.

The Value of Professional Coaching

Working with a professional archery coach can greatly accelerate your progress and help you to really refine your skills. A coach can provide personalized guidance, identify areas for improvement, and offer invaluable insights from their own experience. Look for a certified coach through your local archery club or governing body and consider investing in regular coaching sessions to maximize your potential.

Sharpen Your Skills: Archery Workshops and Clinics

Attending archery workshops and clinics is another excellent way to expand your knowledge and improve your skills. These events typically cover a range of topics, from equipment selection and tuning to advanced shooting techniques and mental strategies. Keep an eye out for workshops and clinics hosted by experienced archers or coaches in your area, and seize the opportunity to learn from their expertise.

Your Archery Tribe: Connecting with the Community

Connecting with other archers can provide invaluable support, motivation, and camaraderie on your journey to becoming a better archer. Join a local archery club or participate in online forums and social media groups to share your experiences, exchange tips, and stay up-to-date on the latest developments in the sport. By immersing yourself in the archery community, you’ll gain access to a wealth of collective knowledge and inspiration to fuel your growth.

Rising to the Challenge: Archery Competitions

Competing in archery tournaments is a thrilling and rewarding way to test your skills, push your limits, and learn from both your successes and setbacks. In this section, we’ll look at the world of archery competitions, highlighting the importance of local and regional tournaments as stepping stones to higher-level challenges. We’ll also discuss the benefits of participating in competitions, as well as strategies for evaluating your performance and adapting your approach for continued growth. Embrace the excitement of competition and prepare to rise to the challenge on your journey to archery mastery.

Stepping Stones: Local and Regional Tournaments

Participating in local and regional archery tournaments is a fantastic way to put your skills to the test and gain valuable competition experience. These events provide a supportive and friendly environment where you can learn from fellow archers and measure your progress against others. Check with your local archery club or governing body for a schedule of upcoming tournaments, and don’t be afraid to take the plunge and sign up!

Embrace the Thrill: Why Competitions Matter

Competing in archery tournaments offers numerous benefits for your development as an archer. It exposes you to the unique pressures and challenges of competition, which can help you hone your mental skills and learn to perform at your best under pressure. Competing also provides opportunities to learn from other archers, gain inspiration, and forge new friendships within the archery community. Embrace the thrill of competition as an essential part of your growth as an archer.

Reflect, Refine, Repeat: Learning from Your Performance

After each competition, take the time to reflect on your performance and identify areas for improvement. Analyze your shooting technique, equipment setup, and mental approach, and seek feedback from coaches, peers, or even video recordings of your performance. Use this information to refine your practice routine and set new goals for your next competition. Remember, every competition is an opportunity to learn and grow as an archer, so keep striving for continuous improvement.

Putting It All Together

Becoming a better archer is not merely about mastering individual skills; it’s about embracing a holistic approach that encompasses technique, equipment, practice routines, mental strategies, knowledge, first hand experience and more.

Throughout your archery journey, you’ll encounter challenges and triumphs, but with dedication, adaptability, and passion, you can transform your archery skills and reach new heights of achievement. Remember to always be open to learning, refining, and evolving, as this is the key to unlocking your full potential in the sport you love. And as you continue to push your boundaries, take a moment to appreciate the incredible progress you’ve made and the exciting opportunities that await you on the road to archery mastery.

Keep Aiming Higher: Your Journey Continues

As you continue on your archery journey, always remember that improvement is a lifelong process. Keep setting new goals, refining your skills, and seeking out opportunities to learn and grow. Embrace the support and camaraderie of the archery community, and most importantly, enjoy the thrill of the sport. With persistence and passion, there’s no limit to how far you can go as an archer. Keep aiming higher, and let your journey to mastery continue.

Dried Ramp Leaf Seasoning / Rub

0

When I can see ramp leaves starting to turn yellow in sunny areas, I know it’s time to grab some leaves to dehydrate for cooking. This rub made from ramp leaves is one of my favorite foraged seasoning blends and is great with vegetables, chicken and pork.

Dried ramp leaves are more gently than either dried onions or garlic, and come along with a bonus: that special rampy flavor you can’t buy in a store. I’ve ended up running out of leaves for the past few years in a row, so this year I made darn sure to get a lot-easy to do since they’re on my girlfriends farm.

After a few days of rotating the dehydrator trays, I had a good gallon jar or so of lightly crumbled ramp leaves-crumbled enough for storage, but not ground to a powder which will eventually lose some (but not all) of it’s flavor if it sits at room temperature.

There’s a lot of things you can do with dried ramp leaves, one of my favorites is to simply put them in broth, but they’re so much more. I’ve always wanted to make a sort of all-purpose dried ramp leaf rub / seasoning recipe that I could use with meat and vegetables though, and with plenty of dried leaves around, it was time.

Now dried ramp leaves are delicious, but too many of them can come off as a bit swampy, if that makes any sense. balance in all things. But how much balance? After a few versions, I decided to cut the ramp leaves 50% with other seasonings.

By comparison, using 50% garlic or onion powder in a rub would be offensively oniony, dried ramp leaves, on the other hand, are more delicate, and can be used with a heavier hand.

The spices here I specifically chose with the ramps flavor profile in mind. Carrot family seasonings are great here since they can easily coexist with the ramps without taking over, like cinnamon or cloves might.

Coriander was the first one I reached for, since the brightness gives a needed lift to the woodsy-ness. Cumin is another great partner, that, while strong in itself, can add a good undertone that the ramps love (another simple rub is just cumin, pepper and dried ramp leaves).

Finally, a healthy dose of fresh ground black pepper adds some warmth that won’t overpower things, and a smaller amount of paprika adds a little color and increases the affinity of the rub for contacting hot oil.

That being said, this rub is just a beginning, not an end. I really encourage you to try out my batch first, but afterwords, depending on what you’re making, there’s some other great additions you might add to the basic recipe. Here’s a few examples:

Additions to make the rub your own

  • Adding lightly toasted sesame seeds can give a nice combination of flavor, similar to zaatar.
  • Dried oregano or even better, dried monarda fistulosa can also work well here.
  • If you want to use the rub with fish, increase the coriander and decrease the black pepper by half.
  • Substitute ground sumac for paprika

How to use

  • Use as a generous rub for pork and beef. Use a lighter hand for chicken or fish.
  • It’s great to rub on smoked meat. For the best crust, season the meat with salt, then rub with the ramp rub and allow to rest overnight before smoking. Same goes for braising.
  • As a sprinkle. Think freshly cooked rice, steamed vegetables, etc.
  • In soups. Use a light hand here since there’s a good amount of black pepper that can make soup spicy.

More

Ramps: Harvesting, Sustainability, Cooking and Recipes

Best Shooting Chronographs

0

One thing that will help you shoot more accurately is if you know your ammunition’s velocity and other related data. Luckily, there’s a tool for that — a shooting chronograph!

Not only can it measure the velocity of your shots but its data can also help you assess your reloading skills. No longer are chronographs only to be found in ballistics labs, but are now priced so as to be a regular part of a shooter’s kit.

Shooting chronographs are easy to use and show you valuable data.

In turn, these data can help you improve your reloading skills and the quality of your shots. Get that bullet to land where you want to with this shortlist of the best shooting chronographs. We’ll take a look at seven great options.

Shooting chronographs offer help when firing long-range shots in target shooting and before hunting trips.

Some of you may already know that I have been in the gun industry for more than 40 years now.

Over the last few years, I have tried and tested over 15 different chronographs. So, if you are unsure about getting one, then this article might serve as your ultimate buyer’s guide. Here’s the summary of the chronographs that I will discuss in this review:

GGD Shooting Chronograph Bullet Speed Tester

  • Unbeatable price
  • Wide velocity range
  • Solid design
  • Not as durable as some of the others

$64 Shop NowClick to read my review Best Shooting Chronographs Caldwell Ballistic Precision Chronograph

  • Can adjust accuracy up to 99.75%
  • Ideal for beginners due to its ease of use
  • Compatible with archery, airguns, firearms, and rifles
  • Oversized sunscreens made of plastic
  • Thin metal rods are bendable

$114 Best Shooting Chronographs Competition Electronics ProChrono Digital Chronograph Shop NowClick to read my review Best Shooting Chronographs LabRadar Ballistic Velocity Doppler Radar Chronograph Caldwell Ballistic Precision Chronograph G2

  • Has Bluetooth, SMS (text), and email features for data transfer
  • Accuracy of +/-.25%
  • Can measure 5 to 9,999 FPS (frames per second)
  • Connect to a mobile device to view advanced statistical data
  • Tripod has an average design

$207 Best Shooting Chronographs MagnetoSpeed V3 Ballistic ChronographBest Shooting Chronographs Shooting Chrony 7000129 Beta Master Chronograph Shop NowClick to read my review Best Shooting Chronographs Competition Electronics ProChrono Digital Chronograph

  • Records up to 99 string shot data in its internal memory
  • Compatible with pistols, shotguns, rifles, and arrows
  • Has a velocity range of 21 feet up to 7,000 FPS
  • Slower speed recording time when used in outdoor shooting
  • Need to buy other accessories (e.g., Indoor Lighting System) for better performance

$110 Best Shooting Chronographs Shop NowClick to read my review Best Shooting Chronographs LabRadar Ballistic Velocity Doppler Radar Chronograph

  • Powers up either by using AA batteries or an external USB power source
  • Can track and record different types of statistical data
  • Good for both outdoor and indoor use
  • Pricier than many other chronographs
  • Not suitable to use for long periods of time

$559 Best Shooting Chronographs Shop NowClick to read my review Best Shooting Chronographs MagnetoSpeed V3 Ballistic Chronograph

  • Can record data up to 1,100 rounds per minute
  • Compatible with many firearms, including airguns
  • Great for pro shooters
  • The Bayonet’s weight affects shooting
  • Data is hard-to-read

$380 Best Shooting ChronographsBest Shooting Chronographs Shop NowClick to read my review Best Shooting Chronographs Shooting Chrony 7000129 Beta Master Chronograph

  • Has an accuracy of up to .5%
  • Long battery life up to 48 hours of continuous use
  • Complex design
  • Read the full manual to achieve best results

$159 Best Shooting Chronographs Shop NowClick to read my review

Why Is a Chronograph Essential?

I have heard many people ask: “Why should we even bother buying a chronograph anyway?” Chronographs are useful, especially for long-range shooters attempting to test their loads’ consistency.

Here are the three big pieces of data that a good chrono will give you:

For beginners, you may find yourself confused by all this (trust me, I was too). Trying to calculate the data of how your load does at the range is a lot of work.

Chronographs help find the right load for you by doing all the painful calculations.

How a Chronograph Operates

Let’s break this down easy. Chronographs are useful pieces of scientific equipment, but using one for our goals is actually pretty easy.

By default, a chronograph’s main goal is to measure time. This is also true for shooting chronographs.

How a shooting chronograph actually works depends on the exact type you get. Right now, there are three general styles.

Skybox Chronographs

Skybox chronographs use a “skybox” to measure when the shadow of the projectile passes two points. It does some math and provides velocity information. This is the most common and cheapest type of chronograph since they are easy to make and the tech is pretty simple. Chronos like the Caldwell down below use Skyboxes.

Best Shooting Chronographs
Caldwell Chronograph “skybox” design

The downside of these is that they can be inconsistent depending on the weather. If you’re under 100% sun when you test one batch of ammo but 70% sun when you test a second batch, your results might not entirely match.

Radar Chronographs

Radar chronographs normally use Doppler radar to bounce a single off of the projectile and get information back from it. This is very handy since it can measure velocity at multiple distances between you and the target.

Best Shooting Chronographs
LabRadar

These are also rather expensive and harder to set up than the other kinds. The good news is they are very accurate and work in all weather conditions.

Electromagnetic Chronographs

Electromagnetic chronographs attach to the barrel or the rifle frame in some way and use a bayonet to extend past the muzzle of the barrel. In the bayonet is small electromagnetics that creates a small electromagnetic field above them. Measuring how that field is disturbed by the projectile enables the computer to math out how fast it is moving.

Best Shooting Chronographs
MagnetoSpeed V3 with an MK Machining ARCA mount

These are decently priced, very easy to use, and work in all weather, but make shooting for groups while taking velocity data at the same time much harder since the weight of the bayonet hanging off of the barrel shifts POI and affects harmonics. This can be solved by getting an aftermarket mount and attaching the bayonet to that.

Where to Use and Store Chronographs

You can use shooting chronographs almost anywhere you wish. Displays are usually easier to read indoors, but I have never had a problem using them outdoors.

My best recommendation is to use your chronograph on a cloudy day. Â

Like guns, you also need to take extra care of your chronograph. You can use a carry bag or kit to store all your chronograph accessories in one place.

7 Best Shooting Chronographs

I have chosen seven of the best shooting chronographs to buy this year. Before we talk about them in greater detail, I have summarized a neat table for you to look at. The table includes the dimensions, weight, and price of each featured chronograph:

NameDimensionsWeightPrice Caldwell Ballistic Precision Chronograph21.5 x 10 x 4 inches3.2 lbs$114.99 Caldwell Ballistic Precision Chronograph G260 x 36 x 36 inches8 lbs$207.00 Gun Gear Depot Precision Chronograph5.1 x 3.1 x 2.0 inches0.4 lbs$64.99 Competition Electronics ProChrono Digital Chronograph16 x 4 x 32 inches2 lbs$110.49 LaBradar Ballistic Velocity Doppler Radar Chronograph11 x 10 x 2 inches2.1 lbs$559.99 MagnetoSpeed V3 Ballistic Chronograph12 x 4 x 2 inches2 lbs$380.00 Shooting Chrony 700129 Beta Master Chronograph20 x 20 x 3 inches7 lbs$159.99

Caldwell Ballistic Precision Chronograph

Let’s start with the Caldwell Ballistic. Its decent price offers strong reliability. In addition, this is one of my first chronograph and its high performance is not reflected in its relatively modest price. The Ballistic also includes ¼-20 threads for tripod mounting and a 15-ft audio jack cable for data transfer. Plus, it also has a carry bag suited for portable travel.

Best Shooting Chronographs
Caldwell Chronograph

The Caldwell Ballistic’s highlight feature is its pinpoint velocity. It has the ability to record readings of 5 to 9,999 fps (frames per second).

It is also factory calibrated and is easy to operate for newbies. Due to its calibrated design, it has a dependable accuracy of +/-.25%. Furthermore, this chronograph also caters to different types of shooters’ needs.

Airguns, arrows, firearms, paintball rifles – you name it! As an archery enthusiast, this chronograph is the one for me.

The Ballistic has a decently sized LCD screen that makes it easy to read. It measures its velocity by MPS (meters per second) or FPS (feet per second).

It records the velocity, SD, and ES of every projectile you fire from your gun. Since it is factory calibrated, its accuracy could reach up to 99.75%.

Like other Caldwells, the Ballistic’s effective accuracy lies at its 48 MHz processor. I saw how it generates quick data when I took my AK-47 rifle out at my local range. Its 15ft jack audio cable allows you to transfer data to all smartphone types.

When I paired it with my iPhone, I read my stats through an Excel sheet format.

Personally, I’ve never had an issue with durability on the Caldwell. Even when I accidentally shot mine with a .22 LR at 5ft, it kept working for almost a year before it finally died on me. Since I did shoot it, I’ll give it a pass for its early retirement.

Caldwell Ballistic Chronograph G2

Compared to the Ballistic, the G2 has a more expensive price in the market ($200+). But this chronograph’s high price equates to its high performance on the range. It has a +/-.25% accuracy like the other Caldwells.

The G2’s upside-down design allows shooters to place it either on a tabletop or with a tripod. Whenever I like to do my shooting test sitting down, I use my G2 instead. It is also compatible with a wide variety of weapons.

Examples are airguns, firearms, arrows, and paintball rifles. If you’re looking for versatile chronographs, the G2 is your best choice!

Best Shooting Chronographs
(Left to right) The Ballistic Chronograph G2 from the official Caldwell site.

The G2 can also calculate more different types of data. This includes the average velocity, extreme spread, minimum, maximum, and standard deviation. It can also measure 5 to 9,999 feet per second (FPS) like the rest of its Caldwell counterparts. Unlike the Ballistic, G2 has its Bluetooth and SMS (text) features.

You can transfer your data using Bluetooth without using a cable jack. Also, you can share your data via SMS (text) or email. I can borrow my friend’s laptop, computer, or tablet to view my emailed data at any time. The G2 also includes a carry bag and a rechargeable Li-Ion battery. Click on the video below to see how the G2 works at the range:

The only downside to the G2 is its need for mobile devices. You need a phone, tablet, or laptop to view your advanced data analysis. Its tripod design is also average like other tripods in the market. Due to its collapsible feature, you can also use the G2 for indoor and outdoor shooting.

GGD Shooting Chronograph Bullet Speed Tester

If you want a feature-rich shooting chronograph but you’re on a budget, you really can’t go wrong with this one from Gun Gear Depot.

With a velocity range of 999m/s (~3200 fps) it offers an excellent range for an enthusiast. It also records groups of up to forty rounds and will calculate kinetic energy (a feature of the much more expensive LabRadar chronograph).

It is powered by a rechargeable lithium battery (USB cable provided) and is portable and versatile. Its LED display is bright and the chronograph works confidently in most weather conditions – the design incorporates its own ‘sky screen’ over the chronograph. Â

If you want to improve your shooting this chronograph is a great entry-point – it’s affordable, simple to operate, and has a solid design. Decent data with no-nonsense. At the current sale price of $64.99 we highly recommend it.

Competition Electronics ProChrono Digital Chronograph

If you prefer a simple yet reliable chronograph, then ProChrono is your best bet. This unit is one of the top-rated models in today’s market due to its wide array of features. It also comes with a decent price of $115.99.

Its accessible interface is also fitting for amateur and expert shooters. The ProChrono is also compatible with arrows, pistols, shotguns, and rifles.Â

The ProChrono from the Midway USA e-commerce site.

One of the ProChrono’s best attributes is its shot string data. Its power-down memory can store up to 99 string shots.

The data shows a bullet’s average velocity, standard deviation, and extreme spread. You can also delete an individual or an entire string by touching a button on its easy-to-use keypad.

The ProChrono’s clear 4-digit LCD screen records both meters per second (MPS) and frames per second (FPS). I use this chrony most of the time because I can view my shot string data in greater detail. The ProChrono’s ability to track 21 feet to 7,000 FPS makes it suitable for large shooting areas. You can check out the model’s review below:

This little guy’s shot timing resolution runs up to 750 nanoseconds. As such, it could display shot string data right away. The ProChrono’s only downfall is its speed recording time on sunny days. Outdoor shooting with this chrony slows down the generation of your projectile data.

LabRadar Ballistic Velocity Doppler Radar Chronograph

The LabRadar is the most expensive chronograph ($559.95)Â included in this review (but with good purpose!).

Unlike other chronographs, this uses radar instead of sunscreens to measure a bullet’s flight. The LabRadar comes with a set of accessories. This includes a USB cable, warranty card, instructions manual, and carrying cases.

The LabRadar from the official LabRadar site.

This unit can run either using an external USB power source or 6 AA batteries. When using batteries, it only wastes ¾ of their power after 4 hours of use at the shooting range.

My friend who owns one of the chronys also commented on how easy the LabRadar’s setup is. It only took him less than 5 minutes to set it ready and 2 minutes to adjust between various loads. You can watch an unboxing and review of this chrony here:

The LabRadar also has the ability to track and gain velocities 100 yards and beyond. To test it, I went over to my friend’s place (the same person before) and used my .308 with it. I got my projectile’s maximum range result of 7.62mm per 100 yards! In addition, it also calculates a bullet’s SD, ES, maximum, minimum, and average velocities. Talk about an all-rounder in stats!

I have noticed a few setbacks with the LabRadar. We start off by talking about its price. The LabRadar costs at least $500 or up on average.

The price combined with the extra accessories you often need to get make this a very pricey option with arguably little benefits over something like a MagnetoSpeed V3.

MagnetoSpeed V3 Ballistic Chronograph

MagnetoSpeed produces reliable chronographs and the V3 is one of them. The V3 comes at a reasonable price ($380) with great inclusions like its data logging feature.

It can collect data up to 1,100 rounds per minute, earning its top speed and accuracy ratings. This unit is suitable for muzzles and suppressors from ½ to 2 inches in diameter. True to its name, the V3 uses electromagnetic sensors to measure velocities by FPS.

Like many chronographs, you can use the V3 on various kinds of weapons, including airguns. The unit comes with a Bayonet that you attach to the muzzle of your gun to track its load data.

This is one of V3’s straightforward qualities as you can fire your shots away and it generates the data you need. Also, you can adjust the unit to rapid mode if you want to take quick shots. I had a lot of fun using it on my Spring Piston at my local range.

The V3 has a kit that includes a lot of accessories. It has a display unit, a Bayonet sensor, an alignment rod, and an instructions manual. It also has downloadable firmware updates and a troubleshooting guide.

If you ever run into problems, you can do the troubleshooting on your own. Scroll down to watch an overview and unboxing video of the V3:

I love my V3 and use it for nearly every range trip. If you mount the unit to your bayonet you’ll have to accept the shift in POI and adjustable for the new weight.

Personally, I use a mount from MK Machining so I can mount my V3 to the chassis of the rifle. For me, this makes the perfect setup.

Shooting Chrony 7000129 Beta Master Chronograph

Long-range shooter enthusiasts, you might want to read this one out. The Beta Master is one of the best long-range shooting chronographs in the market right now.

Along with its top performance, this chrony costs less than two hundred bucks ($149.99). Regardless of what gun you use, the Beta Master has an outstanding accuracy of .5%.

The Shooting Chrony from the Midway USA e-commerce site.

The Beta Master tracks a bullet’s speed from 30 to 7,000 feet per second which makes it ideal for long-range shooting. It also uses one 9 volt alkaline battery as its power source that could last up to 48 hours when used for long periods.

From my personal experience, I don’t charge the Beta Master often because of its long battery life.

This unit can perform a lot of actions, one of which includes its string shot memory. The Beta Master can store up to 60 shots in its internal memory. Like the ProChrono, you can delete an individual or a whole set of string shot data.

Also, this chronograph only weighs less than 3 pounds which makes it convenient to carry around. If you’re curious about how it does on the field, you can click on the video below:

The only major downside that the Beta Master has is its design. This might overwhelm the first-time users but its manual could help you get past that.

Speaking of the design’s downside, I had two of them and found that I had to be careful when closing the unit (it folds in half, like a clam shell) not to get the power cable from the battery caught between the halves. I practically cut the cable on one my units before I’d determined what was happening.

Turns out it didn’t matter much, as I shot the thing a short time later. go figure! But, give it a little bit of practice and you can see how powerful this bad boy can get.

Conclusion

If you wish to buy a cheap yet reliable chronograph, the GGD Shooting Chronograph Bullet Speed Tester has the capacity to record accurate readings with a sale price of $64.99.

For newbies, I recommend the Caldwell Chronograph for its ease-of-use operation and all-in-one package.

MagnetoSpeed V3 goes well with experienced shooters for its complex data calculation.

Which chronograph do you prefer? Share your thoughts below in the comments section!

You might also enjoy:

  • How To Reload Ammo [Ultimate Guide]
  • [Review] Caldwell Shooting Supplies
  • 4 Best Shot Timers

Weihrauch HW90 Review

0

You can never go wrong with a Weihrauch air gun.

And the HW90 certainly proves it.

The HW90 delivers blasting power while retaining impressive accuracy.

The fact that this gun still holds a place in the modern era

And continues to compete with all the classics proving that this gun will not disappoint.

Weihrauch HW90 Gun Type

The Weihrauch HW90 is a gas piston-powered gun.

A gas-powered gun works the same as a spring-powered one; however; in this case, the coiled spring in the chamber is replaced with a gas strut.

The air in the strut is already compressed and when the gun is cocked, more pressure is applied to it.

The pressurized air is kept under tension until the trigger is pulled.

When the gun is fired, the pellet is propelled downrange in the barrel due to the propellant force from the compressed air.

A gas piston rifle has no spring fatigue or spring torque, even if left cocked for hours.

(For more on the 5 types of air rifles you need to know before buying, see this post.)

It provides you with smoother cocking and shooting with less recoil.

It also functions perfectly in low temperatures such as in springtime

When metal springs might normally be affected by harsh weather conditions.

Weihrauch HW90 air rifle has a caliber (the internal diameter of the bore) of:

  • .177 (4.5 millimeters),
  • .22 (5.5 millimeters)
  • and .25 (6.35 millimeter).

Weihrauch HW90 is a break-barrel gun.

To cock it, you need to pull the barrel downwards while holding the gun upwards; insert the pellet and swing it back to its natural position.

The first few times may seem difficult but after a couple of tries, you’ll be able to work it perfectly.

Break barrel guns give you unlimited shooting capacity.

You can shoot thousands of rounds without worrying about running out of gunpowder.

Also, the Weihrauch HW90 is a single shotgun, which means that you can only shoot one pellet at a time.

After each shot, you’ll have to manually cock it and insert another pellet.

Single-shot action gives you control over what type of pellet you want to shoot and how you want to shoot it.

It also improves your shooting skills because you’ll always want your first shot to count. 

Ammo for Weihrauch HW90

Since it can hold three different types of calibers, Weihrauch HW90 produces ammo for each caliber:

  • .177 cals uses .177 pellets,
  • .22 cal uses .22 pellets,
  • .25 call uses .25 pellets.

.177 pellets are lightweight, popular, and very cheap.

This makes them cost-effective and suitable for plinking and target shooting.

.22 pellets are heavier than .177 pellets.

They also produce more downrange knockdown power and have a more stable trajectory (their path toward their target).

This makes it suitable for field hunting and pest control.

For more on the differences between .177 & .22 and which jobs they do best, see this post.

The .25 pellets are heavier than .22 but produce less velocity than .22.

If you’re hunting small games, the .25 will surely take down critters with a single shot. There isn’t much difference with the .22.

However; if you have larger critters like raccoons, you may notice a substantial difference in placement and range

Since .22 requires a precise headshot while a .25 can do the job with a chest shot.

(For more on how to choose the right air gun caliber for your game, see this post.)

Nice Stock

With a plain beech and beautiful varnish, the stock on the Weihrauch HW90 is pure beauty.

It has a well-rounded shape and includes a substantial pistol grip with pressed checkering panels.

The butt has a nice subtle rubber recoil pad and the stock is comfortable on aim.

The Beech stock provides a lot of advantages.

The beech’s hardness is highly resistant to abrasion.

It is also a beautiful wooden texture, which provides a classic feel.

The beech stock has a very nice finish as well as a nice uniform and gorgeous texture. 

(For more on the in-depth comparison between synthetic and wood stock, see this post.)

The substantial pistol grip allows you better leverage on the gun.

The raised cheekpiece allows your eye to align with the scope

While keeping your cheek firmly rested on the solid surface of the firearm for maximum stability. 

The stock is ambidextrous, meaning both left-handed and right-handed folks can use it comfortably.

Weihrauch HW90 Sight and Scope

The sight on the Weihrauch HW90 is a globe front sight and a fully adjustable rear sight.

The front globe sight consists of a hollow cylinder with a threaded cap which allows you to interchange the front sight elements.

The most accurate iron sight shooters like Olympic and international competitions (50m, 3-position) use globe sights

Where the front sight is not a post but an aperture.

The rear sights are fully adjustable for windage and for elevation.

(For more on how many types of air gun sights are out there and which one is suitable for you, see this post.)

Scope Mount:

The scope mount on the Weihrauch HW90 is an 11mm dovetail.

The dovetail is a set of parallel grooves that run along the top of the receiver on which you clamp the base of your scope.

The dovetail is lightweight so it doesn’t add much extra weight and it ensures your scope is nice and tight to the bore.

Surprising Trigger

The Weihrauch HW90 comes with an elite two-stage adjustable trigger.

This amazing trigger allows you to adjust the weight of the pull and the weight of the travel. 

Trigger Safety: A safety device has been incorporated to eliminate the possibility of accidents that occur due to accidental discharges.

The safety engages immediately once the gun is cocked back.

To cock and load the Weihrauch HW90, simply:

Cocking effort and loading

  • Place the gun with the butt stock on your lap, while holding it upwards
  • Slap the barrel downwards and pull it down until it reaches its limit
  • Into the now open breech, insert your pellet into the barrel
  • Cock it back into place and you are ready to shoot

Great velocity, accuracy and power

The velocity of the Weihrauch HW90 is:

  • 1,050 FPS with 0.177 caliber pellets,
  • 853 FPS with 0.22 caliber pellets
  • And 625 FPS with 0.25 caliber pellets. 

Chrony tests have given us the results as:

With .177 caliber pellets

Pellet Name Pellet Weight In Grains  Velocity     (FPS) Muzzle Energy (ft.lbs)
Laser 6.50108417
Hobby6.90109119
R10 Lite7.00104819
Silver Bear7.10109219
Club7.11109719
Super H-point7.40109720
H&N Match HS7.70108719
Laser Sport7.70104019
CO27.70103219
Meisterkuglen Pistol 7.70105419
Napier Pro Hunter7.72105217
Trophy7.8899818
CP Lite7.90100618
Accupell7.90102118
JSB Express7.90100017
Bearcub 8.09100119
JSB Predator8.10102118
Silver Ace8.12100016
JSB Stratton8.20100116
H&N Match8.20102619
Super Point8.3098820
Superdome8.3093919
R10 Heavy8.3094319

With .22 Caliber pellets

Pellet NameWeight in GrainsVelocity (FPS)Muzzle Energy (ft.lbs)
Hobby11.9084019
Silver Bear12.8083020
Laser13.3681819
H&N Match13.7579319
Meisterkuglen13.9078519
Super H Point13.9077920
Trophy14.0078220
Accupell14.3076819
Crosman Premier14.3077919
JSB Express14.3077519
Bearcub14.4476820
SuperPoint14.5079619
Superdome14.5076719
Beeman FTS14.6077819
Ram Jet14.7673719
Silver Ace15.2470718
Napier Pro Hunter15.4079621
Silver Sting15.7474319
JSB Exact15.9074319
JSB Predator16.1072119
Silver Arrow17.1069219
Crow Magnum18.2068419
Kodiak21.1062118

With .25 Caliber Pellets:

Pellet Name Pellet Weight In GrainsVelocity (FPS)Muzzle Energy (ft.lbs)
Laser17.3067814
FTS20.0066017
Silver Ace23.5058615
H&N Match21.0064016
Perfect Rounds24.0058416
Ram Jet24.0060216
Silver Arrow24.2057315
Silver Sting25.0057616
Crow Magnum26.0058017
Silver Bear26.1057717
Ram Point26.9056416
Kodiak 30.7052617
Kodiak Match30.8052317

Crane Hard TV did an intensive penetration test on the HW90 here:

The quiet airgun

This rifle has a great reputation for being a quiet gun.

The silencer included has done a great job in minimizing the sound.

Throughout the multitude of customer reviews, there was not a single complaint regarding the noise.

It’s certainly suitable for backyard usage and urban areas.

Maintain in the right way

The Weihrauch HW90 hardly requires lots of care;

However, you can take these precautions to make sure your air gun remains as good as new: 

  • Maintain your bluing:
    • The outer metalwork of your air gun has a finish known as bluing.
    • Make sure to always keep your rifle dry as this can rust, even when in a damp atmosphere.
    • Clean the dry surfaces with an oily rag; you can use WD40 or 3-in-1.
  • Get a rifle rest:
    • Buy or make a combined toolbox and rifle stand to make working on your gun easier.
    • With additional support, both of your hands are free to work, which makes it easier to work and prevents the possibility of your rifle falling. 
  • Preserve your gun:
    • Keep your guns away safely.
    • Gun cabinets are perfect for keeping your guns safe and dry; just make sure your guns are dried because storing them.
  • Love your stock:
    • Your gunstock is probably the best part of your air gun.
    • Oil finished stocks should be oiled regularly to keep their appearance.
    • The wood needs to be dry and the stock oil should be applied by hand; the heat from your hand warms the oil to help it penetrate the grain.
    • Lacquered stock can be protected using furniture wax or beeswax.
  • Also, remember to oil your gun every 250 shots and to clean the barrel with a cleaning rod every 500 shots.

Shooting purpose

The effective shooting range of the Weihrauch HW90 is up to 50 yards.

Many customer reviews have acknowledged the power it produces within this range.

This gun is suitable for small game hunting, pest elimination, and target practice.

(For more on the best air rifle for squirrels, see this post)

Warranty period

As of this date, the Weihrauch HW90 has a one-year limited warranty.

Specifications

  • Caliber: 0.177 (4.5mm), 0.22 (5.5mm), 0.25 (6.35mm).
  • Loudness: 3-medium
  • Barrel Length: 19.69 inches
  • Overall Length: 45.28 inches
  • Shot Capacity: one
  • Cocking Effort: 46 pounds
  • Barrel: rifled
  • Front Sight: globe with aperture Inserts
  • Rear Sight: adjustable for windage and elevation
  • Scopable: 11mm dovetail
  • Trigger: two-stage adjustable
  • Butt plate: rubber
  • Suggested for: small game hunting/plinking
  • Action: break barrel
  • Safety: automatic
  • Power plant: gas piston
  • Function: single-shot
  • Body Type: rifle
  • Weight: 8.82 pounds

Customer evaluation

If you look at customer reviews for the Weihrauch HW90 on YouTube or PyramydAir, you’ll see some interesting and positive reviews.

They don’t just give the gun five stars; no they go completely insane about it.

Many customers have acknowledged that it’s an absolute joy to own and that it is worth every single penny.

Lots of customers have talked about the splitting power this rifle produces, along with great accuracy and consistent shots.

This air rifle manages to provide consistent ratings in velocity and power, even with different pellets.

Many other customers have testified that the rifle stands the test of time

Since most of them bought theirs in the ’70s and they still function to date.

However; some negative reviews complain about the weight and cocking effort of this rifle.

These are minor issues that you can easily get used to.

Pros and Cons

ProsCons
  • Beautifully finished sportier beech stock
  • Monte Carlo stock
  • Beautiful all around bluing
  • Fantastic trigger
  • Great accuracy 
  • Mind-blowing power
  • Outstanding safety mechanism
  • It delivers on accuracy as advertised
  • Consistent velocities with different pellets
  • Gun is pretty heavy
  • Cocking takes a bit of effort

Price for a quality break barrel air rifle

As of this date, this rifle sells for about $650

Yes, you read that right – this break barrel gun is in the price range of the PCP air rifle.

But for all the features and impressive power it has, this price is justified

And you know you can trust this rifle to accompany you in the field for years to come.

Summary

Weihrauch has been setting the bar on air rifles for over 50 years, and the HW90 certainly delivers.

Its beastly power and accuracy are commendable and that certainly makes it one of the best air rifles on the market today.


2012 Kawasaki Teryx4 750 4×4 Review

0

The 2012 Kawasaki Teryx4 750 4×4 4-occupant Side by Side, looks very similar to its predecessor, the Teryx 750 4×4, but its outer shell is just about the only thing that remained untouched. The 2012 Kawasaki Teryx4 750 4×4 is actually an all-new model, with an entirely different chassis and a totally new and more powerful engine. Also different is the fact that it is available with or without electric power steering; a first for team Green on this type of vehicle.

Trail riding can be an extremely pleasant and enriching experience and our time with the guys and girls from Team Green at the Brimstone Recreation Area, in Huntsville, Tennessee, was exactly that. With their successful RZR4, Polaris was first to come forward with this new concept of gathering friends or family into one recreational intended vehicle, to further heighten the fun inducing capacity of trail riding and nature exploration. The mere idea is very strong and meaningful, with the potential to revive interest in this therapeutic activity that is the responsible use of maintained trails. Another OEM joining in was something to be expected.

Kawasaki’s Teryx model has always pleased us with its fun-inducing performance and by adding two extra seats; the fun can now be shared with loved ones and that is just awesome news. It comes in a basic form, and two others offering a new level of ease and comfort, with Kawasaki’s Electric Power Steering (EPS) system. The LE model, which comes in rich and deep red or yellow, and graced with the addition of superb looking wheels and a roof, was the most stunning of the trio, when arriving at our beautiful ride site. The weatherman had called for rain, but since when do we care what the weather is like, when going out for some fresh air, to enjoy laughter inducing slow and easy obstacle conquering, or responsibly controlled speed runs through puddles of splashing brown liquid. Before I got out there to discover yet another new place of beauty to ride in, eh I mean drive in; the very first walk around an all-new model is always extra exciting and revealing.

The very first thing that pops to attention is the presence of doors, which is an improvement I have hoped to see on as many Side by Side models as possible. Take the doors off if you need to, but these should be present all the time, as it only makes the entire vehicle feel more reassuring in character, without the frequent branch whipping your legs. I just think it is more logical to consider them an integral part of such a family oriented vehicle, and the ones who don’t want them in the way when working, can easily remove them. I gave one a wiggle and no rattling was discovered, as was also the case with everything else. This family buggy is superbly easy to get in and out of. Once inside, you’ll notice a concentrated effort to position everything just right. Despite the fact that Kawasaki doesn’t fabricate cars, they gave this interior quite a bit of auto flair.

The seats are amazingly comfortable and shaped to cup each leg for a more solid bond between the vehicle and its occupants. Hold on a minute here! When I think about it, these would make for awesome car seats! I might just try and bolt a pair down in my vintage Supra. I would later discover them to be so well made, that they blended in perfectly with the suspension’s smooth yet very communicating feel to it. Combined, they rendered the whole trail riding experience smoother to enjoy than usual. A heightened level of class is also present, with a nicely drawn car-like gear selector that still feels like most other Side by Side versions in operation. Other items in the center console, which by the way shield’s heat like no other I have had the chance to stick to, like the hand operated park brake and cup holders that are close enough to reach with an arm stretch and deep enough to hold your water bottle down, even when things get interestingly rough, add to the comfort level of this cool new play safe and work hard machine. For now, I just couldn’t find anything with room for improvement. Sitting on a back seat impressed me even more, as my knees were a good inch away from the back of the front seat and I felt just as comfortable there as in the front. Remember that I am 6’3″ tall and weigh about …eh, well, you know what I mean.

So we were off. A fun and quick pace was reached without having to slam the pedal, and wait for things to happen, I love this Kawa already! Their trusted 749cc engine was entirely revised to provide 15% more power, and I felt it right away. The vehicle’s most magical element is, of course, the suspension. No use having loads of power, if the vehicle just bounces around without keeping a good grip on the ground. High-performance, compression damping and preload adjustable Showa single-chamber gas-charged shocks were installed, to take care of that business, and they really did a great job, in conjunction with those awesome seats we talked about earlier, to render our first 2012 Kawasaki Teryx4 750 4×4 experience surprisingly pleasant, and more about what the area had to offer all-around us, than how the vehicle was behaving. The stability of the vehicle on flatter grounds is also really good, with a few very logical geometric choices made by those talented Japanese engineers at Kawasaki.

Inspired by sport quads and their high needs in control and stability, they kept the width of the frame at both ends as narrow as possible, so that the lower suspension arms could be designed nice and long, to minimize camber changes during the course of the suspension travel. I was also pleased to notice the positive camber in the rear wheels of our fellow media guys up front. This provides a much better feel to the rear, as the tire patch remains at full efficiency, while negotiating turns. I guess I managed to get a few Kawasaki guys worried, when we got to an open and flat gravel area, and I started doing donuts, which of course, I am aware, is a highly non-recommended type of manoeuvre in any Side by Side, but it was important for me to find out just how stable this vehicle really was. First thing I did, was to simply slowly turn around in circles, to discover a very practical tight turn radius. Then, I gradually picked up speed, keeping the steering turned at the maximum, until the back-end started to slide out, instead of having the interior wheels look to lift off the ground. Absolutely perfect! Almost impossible to roll this thing, on this type of surface anyway, a bit like Honda’s Big Red.

Team Green engineers went back to the drawing boards, to figure out what was needed to create a safe and highly capable four-seat rec/utility Side by Side. This pretty much meant redesigning the Teryx machine from A to Z, with an all-new chassis capable of handling the extra load and the new 749cc V-twin engine with an output shaft connected to a centrifugal clutch, to better protect the engine’s components, as well as enabling the drive belt to stay constantly under tension. This significantly improves its function, while riding through rock-filled sections and extends the life of the belt.

Through precise computer-assisted analysis and lots of testing in the toughest conditions imaginable, they ended up with a totally new approach to Side by Side chassis design, using a double cross-beam configuration as the main part of the structure. The Double-X frame design provides much more torsional rigidity, than the ladder-style frame of the two-seater Teryx and most other Side by Side vehicles.

Choose 2WD, 4WD or even more traction with a simpler front differential lock, than all other Kawasaki’s, which are all equipped with manually controlled versions. Just a simple “turn like a key” style electric switch does away with the need to control the locking action with a lever. Short-turning radius, perfectly sealed rear wet brake, and front hydraulic disc brakes that stop you on a dime, sport-inspired suspension, good power, plus room for four. Suddenly the Teryx name takes on a whole new meaning! One that can be truly desirable for people looking to upgrade their old golf kart shaped multi-passenger off-road vehicle or newcomers to the activity who find ATVs too challenging to operate.

If you already own an RZR4 from Polaris, then this one might not be so appealing if you like the racy feel and performance of your current ride. If you are among those who wished for something that would fall in-between the Ranger Crew or John Deere’s new XUV 550 S4 and that extra sporty RZR4, this reliable Kawasaki blends the best of both worlds in a very effective way. You can really have fun with your gang and the next day, enjoy this helpful vehicle to push, haul, and transport a surprisingly huge amount of stuff. One thing I’ve been telling some friends thinking of switching from ATVs to a Side by Side vehicle is to consider a 4-seater, if they want to really go for adventure trips and bring a tent and all necessities for a cool and romantic camping trip.

What I am getting at is that I wouldn’t want to be in your shoes if you are a trail ride loving couple, looking to buy their first Side by Side. The new Wildcat is cool, Polaris has many new choices also, Can-Am Commander vehicles are selling like hotcakes with good reason, and the list of choices will surely keep growing. Can-Am will almost certainly also have a 4-seater to offer soon. If it can be of any help, it is sometimes more important to analyse your true needs, before you travel to a showroom. Make an informed decision and learn about a few different models that you think might fit your bill, and try to experience as many as possible, before you sign anything! Call your dealer and ask if they have a demo model to try. At the very least if you can’t ride it, sit in it anyway and do everything like you would, if you were heading out for a ride. Buckle your seat belt, see how it feels, how the seat feels, where your feet end up, is everything within reach and confortable to operate?

Even sway your body around and get a sense of what would happen to your body, while travelling on rough terrain. Is your shoulder hitting something? For me, the 2012 Kawasaki Teryx4 750 4×4, felt superb in every way and since we are concentrating our efforts on this new vehicle right now, let me outline the biggest advantages it can offer its owner. The balance that the mid-ship engine placement provides, the high-grade suspension and efforts made by engineers in positioning the chassis’ centre of gravity as low as possible. The maximized cornering stability with the front sway bar, the front-end conception with its long A-arm design and adjustment possibilities on both the front and rear shocks. Plus, last but not least, the precision control felt with the smooth operating Electric Power Steering. I think it is also important to mention that the non-EPS base model is still very easy to steer in 2WD and you will only maybe miss it if you have tried an EPS or LE model beforehand. Nicely done Green team!

  • 2012 Kawasaki Teryx4 750 4x4 Review
  • 2012 Kawasaki Teryx4 750 4x4 Review
  • 2012 Kawasaki Teryx4 750 4x4 Review
  • 2012 Kawasaki Teryx4 750 4x4 Review
  • 2012 Kawasaki Teryx4 750 4x4 Review
  • 2012 Kawasaki Teryx4 750 4x4 Review
  • 2012 Kawasaki Teryx4 750 4x4 Review
  • 2012 Kawasaki Teryx4 750 4x4 Review
  • 2012 Kawasaki Teryx4 750 4x4 Review

As I always mention when talking about a vehicle, which is specifically designed for multi-occupant use, the safety of your loved ones should always stay your first priority. So, if you do find some eager passengers make sure they always, without any exceptions, all wear the recommended gear and that their seat belt is securely fastened. Don’t ever attack obstacles or turns with aggressiveness, just to show off the vehicles high performance abilities. Always brake, before you turn! It is a basic rule of thumb that you might remember from your driving course, which becomes all the more important off-road. This vehicle has excellent brakes and safety conscious stability built into it, so there is no reason why your trail riding experience would turn sour.

In conclusion, I have to admit being thoroughly impressed with the performances of this new family-oriented Kawasaki. There is only that front passenger’s hand-hold on the roll cage, which I don’t approve of. The stick shaped handle for the front passenger’s left hand is perfect though, and I would replace the one on the roll cage with one on the dash, to encourage whoever sits there to keep arms inside the vehicle, in case of a rollover. If you do ever get in a situation where you are passenger and the ride does fall on its right side, however unlikely if the vehicle is properly used, I would strongly suggest that you grab that interior stick handle with both hands. A wide bar across the back of the front seats offers hand holds for the rear passengers.

This might have been just a one day experience, but it was one that included very true to life trail rider challenges that attested to the vehicle’s maker’s confidence in its product, like one particularly tough climb with a tricky hook around a big tree right in the middle of it. The 2012 Kawasaki Teryx4 750 4×4 handled absolutely everything like a pro! We can’t wait to get a unit to play with it some more!

For more information on the above mentioned models, please visit the Kawasaki Website

More from Kawasaki on ATV Trail Rider :

Kawasaki ATV Models – Kawasaki UTV Models – Kawasaki ATV Reviews – Kawasaki UTV Reviews

Best Air Rifle Deals

Popular Posts

Gas vs Spring Piston: Which One is Better?

0
Today, you can find 5 different types of air rifles available in the industry. They are: spring pistons, gas pistons, PCP air rifles, variable...

Synthetic vs Wood Stock: The Final Showdown Between Brunette And Blonde

0
I understand that you’re here to get some quick facts on synthetic vs wood stocks Probably to guide your purchase.  Quick alert - the debate...

Can a 22 air rifle kill a deer?

0
"Debate over whether a 22 air rifle can effectively take down a deer has sparked curiosity among hunting enthusiasts. With its lower muzzle velocity...

Guide to find Best Scope for Break Barrel Air Rifles

0
"Unlock the Perfect Shot: Discover the Best Scope for Break Barrel Air Rifles. Enhance your shooting experience with precision and accuracy, as we delve...

Air Gun 101: How many types of Air Gun Sights are there and which...

0
The former American president, Joe Biden, was recently quoted saying: If you need more than ten rounds to hunt, you better stop that business and...