Home Blog Page 204

12 Gauge Turkey Loads: The 8 Best Ammunition Options Available Today

0

These 12 gauge turkey loads will help you drop a gobbler this year.

The trusty 12 gauge has long been the favored turkey hunting shotgun of choice by hunters. In most cases, it offers the best combination of stopping power and long range to reach out and drop those large Toms where they stand. The technology behind both the guns themselves, specialized turkey choke tubes, and turkey ammunition only seems to get better every year.

In truth, our hunting gear today is capable of things our forefathers could only have dreamed about. Today we’re focusing exclusively on turkey loads for 12 gauges. We’ll talk about choosing a shot size to bring down that gobbler and the different benefits between the types of shot.

More importantly, we’ll quickly run down some of the top turkey hunting options as far as ammunition goes for 12 gauges these days. Let’s get ready to bring home that turkey dinner!

What size shot is best for a turkey load?

Most hunters go with either No. 4, 5, or 6 shot sizes for turkey ammo. Perhaps more important than the shot size is the type. Lead shot has always been the traditional favorite for speed and knockdown power purposes. However, in recent years, tungsten has really taken off as a premium magnum turkey ammo. Some hunters have taken advantage of the fact that tungsten is heavier than lead to use shot weights of No. 7 or even No. 8, or 9 shot on turkey. Tungsten is popular for public lands since it’s usually considered non-toxic and can be used in places with lead bans. The downside is that it’s usually very expensive.

Perhaps the best thing to keep in mind is that larger, heavier shot is usually going to be best at longer ranges. However, when you start looking at larger shot, you’re also looking at lower pellet counts. That usually means a tight pattern and less room for error if your shot is a bit off. At the end of the day, there is no right answer to this question. It’s the responsibility of the hunter to do a little experimenting to find out what shot, and load size is going to pattern best in his or her firearm.

This may also require some adjustments between chokes. What works great with a full choke may not function as well with a modified one and vice versa. The good news is, once you figure out what your gun likes, you can usually return to that load season after season with little worry.

Of course, you can also compromise and try to get all the benefits in one shotgun shell. One trend in recent years has been for ammunition manufacturers to make turkey shotshells offering “multi-stage payloads” with differing sizes of shot. The idea there being that one shell can easily cover close, medium, and long distance ranges. Think of it as like a Swiss Army knife but in shotshell form. The downside to these rounds is they may not pattern well in every gun. They can also be surprisingly expensive.

Hevi-Shot Magnum Blend

This offering from Hevi-Shot is one of those loads with mixed lead shot sizes we mentioned earlier. They offer three and 3 ½-inch shotshells with loads between 1 ½ ounces and 2 ¼ ounces. You’re looking at 1,150 to 1,200 fps speeds with these shells, which use shot sizes 4, 5, and 7 for almost all the offerings. Although they also make a 2-ounce load with shot sizes 5, 6, and 7. Magnum Blend is expensive, but many turkey hunters have reported harvests out to 40 and 50 yards using these shotshells.

Winchester Long Beard XR

The Winchesters are a great, mid-priced option for hunters looking for a solid, high velocity lead option. The company offers these shotshells in both three and 3 ½-inch shells with load sizes 1 ¾, 1 7/8, and two ounces. Shot sizes are four and five and you can expect a muzzle velocity of around 1,080 to 1,200 fps. We’ve heard from hunters online saying they’ve patterned these loads out to 50 and 60 yards easily, giving you chances at Toms that normally seem to strut just out of range.

Federal Premium Heavyweight TSS

A tungsten shot option from Federal Premium. These loads have become extremely popular in turkey hunting circles for their long range capabilities. That’s partially thanks to the FLITECONTROL Flex wad, which helps produce nice tight patterns. Shot sizes 7, 7 and 9, and 9 are available in 1 ¾, 1 ½, 2, 2 ½, and 2 ¼ shot charge sizes. The only thing we don’t like is the price which like everything else has gone up recently. We recently priced them on sites like Sportsman’s Warehouse at $59.99 to $85.99 for a box of five.

Remington Nitro Turkey

We don’t want to stuff this list just with expensive turkey loads. Because not everyone can or wants to drop major dollars just to bring home a turkey dinner. Remington advertises a muzzle velocity between 1,200 and 1,300 fps for these shells. They offer these in shot sizes 4, 5, and 6. Short charges include 1 ¼, 1 ¾, 1 7/8, 1 ½, and 2. You’re going to want to keep your shots closer with these. Most users report the pattern loses effectiveness beyond 35 yards. However, for hunters on a budget, Remington Nitro Turkey is a solid option as it comes in around $10 to $12 a box depending on the shot size and load. Remington recently stepped up manufacturing again, so these shells are becoming a little easier to find on store shelves.

Hevi-Metal Turkey

This is a solid option for public land hunters. These shells are loaded with a mixture of No. 4 steel and No. 5 bismuth shot in 3 and 3 ½-inch magnum shells. Load sizes are 1 ½ and 1 ¼. The most pleasant surprise about these rounds are the speeds you can expect. Hevi-Shot says to expect about 1,450 fps from both variations. At around $16 a box, they’re also highly affordable for the public land hunter trying to get things done without breaking the bank.

Winchester Super X Turkey

Another solid budget option. We like the Winchesters slightly more than the Remington Nitro Turkey. Like the Remington, it’s not a long range round. We’d stick within 40 yards using these. However, for copper-plated shot, it’s hard to beat $10 to $12 a box. Winchester offers 4, 5, and 6 shot sizes and 1 7/8, 1 ½-ounce loads. Expect around 1,260 fps with the Super X. For a bargain ammo, this one is hard to beat.

Kent Ultimate Turkey Diamond Shot

Affordable and variety. That’s what Kent offers with their Ultimate Turkey Diamond Shot. For 12 gauges, Kent manufactures shell lengths between 2 ¾ and 3 ½ inches. Load sizes include 1 5/8, 1 ¾, 2, and 2 ¼ ounces. Shot sizes include four and five. Diamond refers to the hardness of the shot. These are some lethal-hitting rounds for an excellent price. We’ve even seen them for sale for under $10 recently. Expect about 1,200 fps muzzle velocities out of these loads.

Winchester Double X

Another solid mid-priced option from Winchester. These magnum turkey loads are available in 4, 5, and 6 shot sizes with load sizes including 1 ¾, 2, and even 2 ¼ ounce sizes. Expect between 1,150 and 1,300 fps speeds from this copper-plated lead shot. Expect to pay around $20 to $25 a box, placing these loads squarely in the middle of the pack as far as price point goes.

READ MORE: 20 GAUGE TURKEY LOADS: 8 OF THE BEST OPTIONS ON THE MARKET TODAY

Types of Tree Seed Pods – Identification Guide With Pictures

0

Identifying seed pods is a great way to recognize different species of trees. One of the benefits of using seed pods for tree identification is that you usually find seed enclosures on the ground. This can make it easier to identify a tree species than using the leaf shape. Tree seed pods can be winged, ball-shaped, coniferous cones, papery enclosures, or long slender pods like bean pods.

Of course, it’s not always possible to use a tree seed pod identification guide to identify trees. Seed pods may only fall to the ground after flowering. And the seed pods on some species of trees persist on the tree throughout winter. However, looking at the shape, size, and color of the seed pod can often help identify the tree.

The term “seed pod” typically refers to the seed-bearing structure of plants in the legume family (Fabaceae). These pods are usually long and slender, containing several round pea-like seeds in a row. However, tree seed pods can also refer to any type of casing that contains seeds from a tree or large shrub.

This article is an identification guide for tree seed pods. In it, you’ll discover how to identify seed pods from trees like maples, elms, ash, silver birch, beech, chestnut, and several types of conifers. Descriptions and pictures of seed pods and other identifying features of trees will help you distinguish species of trees in the landscape.

Tree Seed Pod Identification

The two primary ways to identify seed pods are by looking at their shape and size. However, tree seed pod identification is also possible by the feel of the pod — is it smooth, fuzzy, or spiky? Additionally, some types of seed pods fall relatively early in the season, whereas others stay on the tree throughout winter.

Tree seed pod identification — shape: First, look at the seed pod’s shape. Most trees in the legume family have long, slender, curved pods, like those you’d find on pea and bean plants.

However, many deciduous trees, like ash, maple, and elm, have flattened, papery seed casings called samaras. However, most coniferous trees have seed-containing cones. But chestnut, hickory, and beech trees have rounded pods, sometimes with spiky exteriors.

Tree seed pod identification — size: The seed pod’s size is another identifying feature to help recognize the tree species. There is great variation in the length of some tree seed pods in the legume family. For example, flat redbud tree seed pods measure 3” (7.5 cm) long. However, mimosa tree pods grow 4” to 8” (10 – 20 cm) long, and locust tree seed pods measure 6” to 18” (15 – 45 cm).

The seed pods of trees are called fruits, although we never think of papery winged seeds or long curled pods as fruits. Additionally, sometimes tree seeds are also referred to as nuts.

Types of Tree Seed Pods (With Pictures) – Identification Guide

All trees produce seeds to reproduce. However, many tree seeds develop in pods or other protective structures. For example, some seed pods are like leathery balls, whereas others are woody cones. Then there are papery winged seeds that fall to the ground, spinning like a helicopter’s blades. How can you identify the many types of tree seed pods? Please read on to find out.

Maple Tree Seed Pods

Maple tree seed pods look like a pair of wing-shaped papery structures joined in the middle. Each winged section is called a samara. These seed pods are also named helicopter seeds because when they drop from the tree, they have a characteristic spinning motion. This feature gives the seeds names like whirlers, helicopters, or whirligigs.

Maple tree seed pods grow 1.18” to 2” (3 – 5 cm) long. Seeds from maples are the only samara with true helicopter-like action.

The wing-like structure helps the seeds to disperse in the wind, far away from the tree. Other identification features of maple trees include their leaves with usually three or five pointed lobes, reddish-brown bark or gray-brown bark. Many species of maple trees (Acer spp.) grow up to 150 ft. (45 m) tall.

Elm Tree Seed Pods

Elm trees produce seed pods encased in flat, papery, oval pods. Each elm tree seed pod contains a single seed, and the light green disc-like pods grow in large clusters on the tree. The papery seeds typically disperse from the tree in spring after flowering. Elm tree seed pods measure 0.5” (1.22 cm) across.

Apart from the round seed casing, elm trees can be identified by their deep green, oval, pointed leaves with serrated margins. In addition, elm trees have dark grayish-brown bark that is heavily furrowed and scaly. They also have small clusters of red or green flowers. Elm trees (Ulmus spp.) grow up to 100 ft. (30 m) tall.

Ash Tree Seed Pods

Ash tree seed pods are large oval paddle-shaped papery pods growing in large clusters. The brown winged seeds look like a bunch of dried leaves hanging from branches. Also called keys, the samaras persist on the tree until late fall or early winter. The oar-shaped seed pods measure 2” (5 cm) long.

Another distinguishing feature of ash trees (Fraxinus spp.) is their pinnately compound leaves. Each leaf comprises five pairs of pointed leaflets with a terminal leaflet at the end of the petiole. The leaves measure 8” to 12” (20 – 30 cm) in length. Ash trees typically grow 60 to 80 ft. (18 – 24 m) tall.

Learn more about white ash trees and the identifying features of green ash trees.

Beech Tree Seed Pods

Beech tree seed pods are identified as brown, spiny burs that have a hard shell and are called cupules. Each brown seed pod contains two to four seeds. An unusual feature of beech nuts is their angular shape with three sides. Beech tree seeds measure 0.5” to 1” (1.12 – 2.5 cm) long, and the spiky burs are slightly larger.

Beech trees are deciduous trees belonging to the genus Fagus. Apart from the brown spiky seed pods, identification features of beech trees include large, glossy green leaves forming a rounded, spreading crown. Additionally, beech trees have smooth, light-gray bark. Beech trees grow 60 to 80 ft. (18 – 24 m) tall.

Silver Birch Tree Seed Pods

Silver birch seed pods are tiny, winged seeds that grow in clusters resembling long flower spikes called catkins. Each minuscule seed has a translucent papery casing that opens like two wings. The seeds develop in catkins on the female trees. A single silver birch tree can produce thousands of seeds every year.

Pictures of silver birch seeds look like small flies with a body (seed), two antennae-like protrusions, and a pair of wings. The seeds only measure 0.11” to 0.15” (3 – 4 mm) across. Other identifying features of the silver birch (Betula pendula) are its silvery white bark and triangular leaves with jagged edges growing on weeping branches.

Horse Chestnut Tree Seed Pods

Horse chestnut seed pods are spiky green balls formed by a soft, thick husk. The spongy casing opens to reveal a mahogany brown seed with a recognizable grayish patch. Typically, each horse chestnut seed pod has one or two fruits (seeds). The rounded pods measure 1” to 2” (2.5 – 5 cm) in diameter.

Horse chestnut trees (Aesculus hippocastanum) grow 50 to 70 ft. (15 – 21 m) tall. The large deciduous trees have large conical, upward point clusters of pinkish white flowers, large palmately compound leaves, slightly fissured grayish bark, and a distinctive pyramidal shape.

Buckeye trees, that are related to the horse chestnut trees, also produce seed pods similar to horse chestnut trees. But, unlike chestnut trees (Castanea spp.), horse chestnut seeds and buckeye seeds are toxic and inedible.

Chestnut Tree Seed Pods

Chestnut tree seed pods are large, fuzzy, ball-like pods containing several large edible seeds or fruits. The spiky pods (called cupules) have sharp spines, and each pod contains several brown-colored seeds. An identifying feature of sweet, edible chestnut seeds is that they have a flat side and a small tuft.

Chestnut trees are identified by their lance-shaped, coarsely-toothed linear leaves measuring 6” to 10” (15 – 25 cm). Additionally, chestnut flowers are long, finger-like flower clusters in a creamy-white color. These dangling catkins measure 4” to 8” (10 – 20 cm) long. The fast-growing trees reach impressive heights of 60 to 100 ft. (18 – 30 m).

Redbud Tree Seed Pods

Redbud tree seed pods are large, flattened bean-like pods dangling in large clusters. The narrow, pointed seed pods are green before turning dark maroon or purple and then brown as they dry on the tree. Each pod measures 3” (7.5 cm) long and contains many small pea-like seeds.

Western and eastern redbud trees (Cercis spp.) are deciduous trees growing 25 ft. (7.6 m) tall. Their bright magenta buds appear in spring before opening into showy, fragrant, vibrant pink or reddish-pink flowers. Redbud leaves are heart-shaped, and the green foliage turns yellow in the fall.

Sycamore Tree Seed Pods

Sycamore tree seed pods are spiky round balls that emerge green and turn brown. The small seed balls dangling on long petioles persist through winter before dropping to the ground in spring. Each jaggy seed pod contains many fluffy winged seeds that easily disperse when the sycamore seed pods break open.

The spiky seed balls measure 1” (2.5 cm) in diameter.

Sycamore trees (Platanus spp.) grow 100 to 130 ft. (30 – 40 m) tall. Apart from the brownish spiked seed pods, other identifying features are their maple-like leaves with deep, pointed lobes, smooth, thin colorful flaky bark that looks like camouflage, and insignificant greenish flowers.

Pine Tree Seed Pods (Cones)

Pine tree seed pods are conical structures consisting of woody scales. Pine cones are typically tan or brown and can be egg-shaped or have a slender and conical appearance. Each woody scale encloses a tiny seed that disperses when the cones open. Depending on the species, pine tree cones can range in size from 0.78” to 23” (2 – 60 cm).

Pine cone seed pods can help distinguish pine trees from fir trees. This is because the brown, woody cone-shaped seed pods typically grow downward rather than upward. Other identifying features of pine trees (Pinus spp.) are their evergreen needle-like leaves growing in bunches of two to five and arranged spirally on branches.

Spruce Tree Seed Pods (Cones)

Spruce tree seed pods consist of thin, flexible scales attached to a central stalk creating a conical cone. The slender, cone-like seed pods can emerge green, red, or purple before maturing to brown. Although compared to pine cones, they look similar, spruce cones are not as hard or ridged.

The cone-shaped spruce tree seed pods grow between 1” and 6” (2.5 – 15 cm) depending on the species of conifer (Picea spp.). You can also identify spruce trees by their short, four-sided needles that are individually attached to branches. Unlike fir tree needles, you can roll spruce needles between your fingers.

Fir Tree Seed Pods (Cones)

Fir tree seed pods are cylindrical cones that grow upward on woody branches. Compared to other evergreen conifers, fir tree seed cones are the most colorful. Some are deep purple, pale blue, or reddish-brown color. Fir tree cones can grow up to 10” (25 cm) and look like candles on a tree.

Other identifying features of fir trees (Abies) are their soft, feathery flat needles and smooth bark.

Mimosa Tree Seed Pods

Mimosa tree seed pods are identified as papery bean-like pods that emerge green and turn brown. Each flattened seed pod contains five to ten round seeds. The flat pods grow profusely on trees, dangling from bare branches in the fall. The tree seed pods measure 4” to 8” (1.2 – 2.4 cm) long and 1” (2.5 cm) wide.

Mimosa trees (Albizia Julibrissin) are also identified by their smooth, light gray bark, fern-like pinnately compound leaves, and pink puffball flowers.

Palo Verde Tree Seed Pods

Palo verde tree seed pods are easily identifiable because they look like green, red, or brown beaded chains hanging from branches. The leathery seed pods contain edible oval seeds which are black or brown. The unusual leguminous (bean-like) seed pods measure 2” to 3” (5 – 7.5 cm) long.

Palo verde trees (Parkinsonia spp.) have bright yellow flowers and thorny branches, covered in pinnate leaves with pairs of tiny leaflets growing in pairs oppositely on thorny stems measuring 6” to 9” (15 – 23 cm) long.

Royal Poinciana Tree Seed Pods

Royal poinciana tree seed pods are huge leguminous seed pods growing between 12” and 24” (30 – 60 cm) long. The dark brown, flattened seed-containing pods look like leather straps hanging from trees. These large seed pods emerge in the fall and persist on the tree through winter until spring.

Other identifying features of royal poinciana trees (Delonix regia) are their bi-pinnate feathery leaves, vibrantly colored red flowers, and large, spreading rounded crown.

Locust Tree Seed Pods

Locust tree seed pods are large, flattened, dark brown pods that are distinctively spirally twisted. Each of these contorted or hooked seed pods contains several large oval seeds. Locust seed pods grow 4” to 8” (10 – 20 cm) long and dangle from thorny branches from fall until the following spring.

Locust trees (Robinia spp.) grow 66 to 100 ft. (20 – 30 m) tall. They are identified by their large pinnate leaves, thorn-covered trunks, and dangling clusters of white flowers.

Kentucky Coffee Tree Seed Pods

Kentucky coffee tree seed pods are flattened, thick, leathery pods that measure 5” to 10” (12 – 25 cm) long and up to 2” (5 cm) wide. The large seed pods contain dark-brown or olive-green round seeds, with three to nine seeds per pod. Although the seeds are toxic, you can roast them and brew a coffee-like drink.

Other identifying features of Kentucky coffee trees (Gymnocladus dioicus) are their rough, scaly bark, large, pinnately compound leaves, and small white, star-shaped flowers.

Catalpa Tree Seed Pods

Catalpa tree seed pods are easily recognizable pods due to their slender, cylindrical shape and long length — measuring between 12” and 24” (30 – 60 cm). These long cigar-like seed pods grow in dangling clusters that are green and mature to dark brown. Winged seeds disperse when the pods split open.

Other names for catalpa trees (Catalpa spp.) are the bean tree, Indian cigar tree, and smoking bean tree. The catalpa tree also has showy white flowers, smooth gray bark, and heart-shaped green leaves.

Jacaranda Tree Seed Pods

Jacaranda tree seed pods are round, brown, woody pods with numerous winged seeds. The brownish seed pods grow in clusters on trees and have a twisted appearance. The pods measure 3” (7.5 cm) across and are noticeable on jacaranda trees in late summer. Resembling a small scallop, the pods open to disperse their seeds.

Jacaranda trees (Jacaranda mimosifolia) are famous for their stunning floral displays of blue or bluish-purple trumpet-shaped flowers, attractive bi-pinnate compound leaves, and grayish-brown scaly bark.

Acacia Tree Seed Pods

Acacia tree seed pods are known for their long, slender seed-bearing pods that look like rosary beads or necklaces. However, some acacia species have flattened, broad seed pods that are banana-shaped. The distinctive furry seed pods are typically dark brown and grow up to 10” (26 cm) long. Each legume pod contains several pea-like seeds.

Acacia trees (Acacia spp.) are easy to identify due to their spectacular white or yellow puffball fuzzy flowers, fern-like leaves, and thorny branches.

Related articles:

  • Trees With Long Seed Pods – Identification Guide
  • Trees With Spiky Seeds Balls (With Pictures)
  • Types of Hickory Nuts – Identification Guide

Umarex 850 M2 Review

0

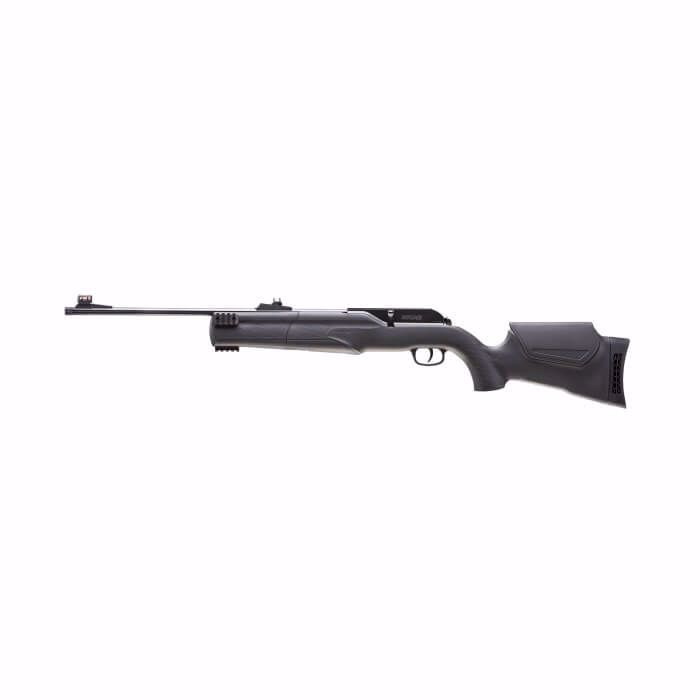
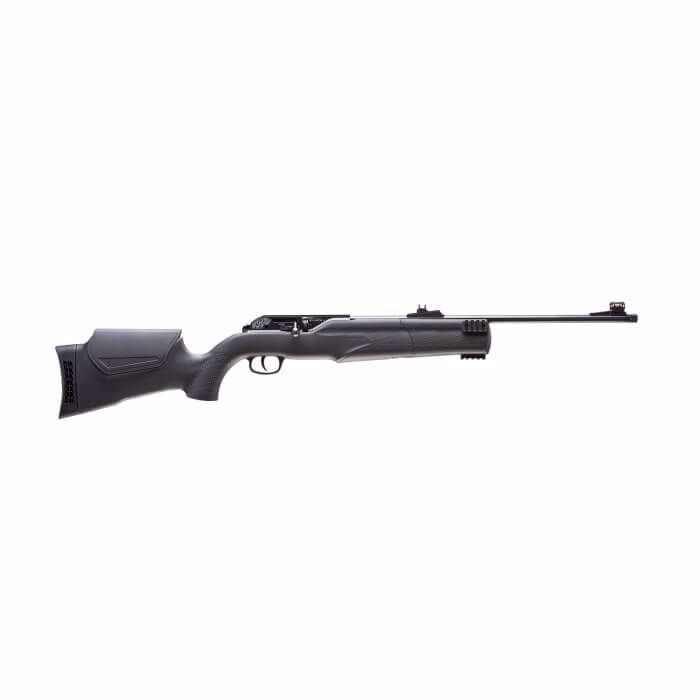
When I first got my hands on the Umarex 850 M2, I’ll admit I had some preconceptions about CO2-powered rifles. Like many airgunners, I’d typically gravitated toward spring-piston and PCP options, viewing CO2 as better suited for plinking pistols than serious rifles. However, after spending considerable time with this German-manufactured piece, I’ve had to seriously revise my thinking. Let me share my experience with this interesting and capable rifle.

First Impressions and Build Quality

The moment I unpacked the 850 M2, I was struck by its solid feel. Unlike many synthetic-stocked rifles I’ve handled in this price range, there’s nothing cheap or flimsy about this one. The ambidextrous stock feels robust and well-engineered, and I particularly appreciate the textured surfaces and molded-in checkering patterns – they’re not just for show but provide genuine grip enhancement.

At 1,180mm long (with the moderator) and weighing in at around 3.6-4kg fully equipped, I found it to be a proper full-sized sporting rifle. I was interested to learn it’s based on the Walther RM8 PCP platform, and this heritage shows in its quality construction.

One feature that immediately impressed me was the removable forearm section housing the CO2 system. With just a push of a button, I can access the CO2 chamber and easily install an 88g cartridge. What really caught my attention was how solid everything feels when reassembled – no rattles, no play, just rock-solid construction.

Power

The heart of any airgun is its power plant, and this is where I had to adjust my expectations. The CO2 system has both strengths and limitations that I’ve come to understand through extensive use. In my testing, I’ve consistently achieved around 750 FPS with 7.0-grain pellets, generating between 8-10.5 ft-lbs of muzzle energy, though I’ve found this varies significantly with temperature.

Speaking of temperature – this is something I’ve had to learn to work with. I’ve noticed approximately 2 FPS increase per degree Fahrenheit rise in temperature, which means my summer shooting sessions yield noticeably better performance than winter ones. I’ve learned to avoid shooting in very cold conditions or when temperatures exceed 95°F, where I’ve experienced valve lock issues.

One aspect I’ve been particularly impressed with is the shot count. I regularly get 160-200+ shots per CO2 cartridge, though I’ve learned it’s best to use the complete cartridge in one session rather than storing the rifle partially used. Through chronograph testing, I’ve observed excellent consistency through most of the shot string, with power dropping off only in the final 20-30 shots.

Chrony tests:

CalibersPelletsFPSFPE
.177 JSB Match Diabolo Exact 8.44 Gr6517.94
.177 Gamo Platinum PBA 4.7 gr790 6.51
.177 H&N Field Target Trophy Green 5.56 gr759 7.11
.177 RWS Hobby 7.0 Grain 717 7.99
.177 Crosman Premier Hollow Point 7.9 gr695 8.48
.177 JSB Match Diabolo Exact 8.44 Gr703 9.26
.177 H&N Field Target Trophy 8.64 Gr699 9.38

check price on Pyramyd Air

Accuracy and Shooting Experience

Where this rifle has really won me over is in its shooting characteristics. I’ve achieved consistent 0.5-inch groups at 30 yards with my preferred pellets, and what’s even more impressive is how well it shoots with various pellet types. I wouldn’t call it particularly pellet-picky – a refreshing change from some other rifles I’ve owned.

The bolt action, while I’d prefer it to be a bit smoother on closing, has proven reliable in use. I’ve grown particularly fond of the 8-shot rotary magazine. It’s well-made from aluminum, and I appreciate being able to load it single-handedly. The O-ring retention system for pellets is a clever touch that I’ve found makes loading both easy and reliable.

The trigger deserves special mention. Breaking at around 2.5-2.6 pounds, it’s better than I expected for a rifle in this price range. Yes, the second stage travel is longer than I’d ideally like, but it’s smooth and consistent, which I’ve found contributes significantly to accurate shooting.

Noise and Suppression

In terms of noise, I’ve found the basic rifle produces a moderate report with that characteristic CO2 “thwap” rather than the sharp crack I’m used to from unsuppressed PCPs. I’ve been using mine with the K3 Neo silencer, which comes with many packages, and it makes an already modest report even quieter. For my backyard shooting, it’s proven ideal.

Sights and Optics

While the rifle comes with fiber optic open sights, I’ll be honest – I quickly mounted a scope. The lack of proper windage adjustment on the rear sight is a limitation I wasn’t willing to work around. However, I’ve been impressed with the thought that went into the scope mounting system. The uninterrupted rail makes mounting options flexible, and the included raised cheekpiece adapter ensures proper eye alignment with a scope.

The Empire kit I purchased came with a 3-9×40 Walther scope. While basic, I’ve found it adequate for getting started, though I’m planning to upgrade eventually.

Practical Use and Value

I’ve primarily used my 850 M2 for backyard target practice and informal plinking, where it excels. The ease of use, good accuracy, and modest noise levels make it perfect for these roles. I’ve also found it to be an excellent rifle for introducing new shooters to the sport – the lack of recoil and simple operation help build confidence quickly.

The ongoing cost of CO2 cartridges (about $6-10 each) is something I’ve had to factor into my shooting budget, though I’ve found the optional adapter for 12g cartridges helps reduce operating costs, albeit with fewer shots per fill.

Features

  • Bolt Action Repeater
  • 8 Shot Rotary Magazine
  • Powered by (1) 88 gram CO2 Cartridge
  • 11mm Dovetail Rail
  • Threaded Muzzle for Compensator installation
  • Adjustable Trigger
  • Automatic Safety
  • Adjustable Fiber Optic Rear Sight
  • Fiber Optic Front Sight
  • Shoots .22 Caliber Lead Pellets

Recommended Use:

  • Target shooting and plinking
  • Pest control: rats, pigeons, iguanas.

Pros and Cons

ProsCons
  • Great accuracy
  • Solid and lightweight feel
  • Trigger is smooth, consistent, and adjustable
  • Great for target shooting
  • Comes with a synthetic cheek rest
  • Is compatible and has high FPS with most pellets
  • Good grip
  • Replacement magazines are hard to find

check price on Pyramyd Air

How Does The Umarex 850 m2 Compare To Other Air Rifles?

Umarex 850 m2 vs Hammerli 850

The Hammerli 850 AirMagnum was a hit at its release as it was a fun-to-use CO2-powered rifle with great specs and a durable polymer finish. The rifle was a great weapon for shooting and getting frequent practice – which should be your priority when looking for an airgun. 

It also featured a 2 stage trigger, rotary magazines, a good quality barrel, and fiber optic fixed sights. Overall, it made for a fun shooting experience which could also make it the best backyard plinker. 

However, compared to the specifications of the Umarex 850 M2, the Hammerli 850 with a .177 caliber can only fire at a velocity of about 650 FPS and lets you fire up to 8 shots. This may make it the best plinking gun, but it is not much of a weapon for a hunt.

In this case, the Umarex 850 M2 is much more flexible as even with the same amount of rounds it offers, the velocity is that of 750 FPS on a .177 caliber, making it faster and more accurate. You can use it for target practice, small hunts, or plinking. 

The following is a quick table comparing and analyzing the features of both these guns. 

CategoryUmarex 850 M2Hammerli 850 AirMagnum
ActionBolt ActionBolt Action
Barrel StyleRifleRifle
Fire ModeRepeating shotsRepeating shots
Dimensions48 x 6.25 x 2.512 x 45.1 x 4.2
Loudness3-Medium3-Medium
Magazine Capacity8
Shots Per Fill200250
MechanismCO2CO2
Velocity750 FPS (.177 cal)650 FPS (.177 cal)

As you can tell, both the guns do not have much of a difference, except that the Umarex 850 M2 slightly outdoes the AirMagnum in terms of velocity. 

While it looks like the Hammerli 850 Air Magnum would definitely be convenient to carry around with its dimensions and shots per fill, accuracy should be the priority for guns and the Umarex 850 M2 serves just that purpose.  

Conclusion

After extensive use, I’ve come to view the Umarex 850 M2 as a highly capable rifle that fills a unique niche. While it won’t replace my PCP for certain applications, it’s become my go-to for backyard shooting and informal target practice. The quality construction, excellent accuracy, and ease of use have made it a valuable addition to my airgun collection.

Yes, there are limitations – primarily the temperature sensitivity and ongoing CO2 costs – but I’ve found these are outweighed by the practical benefits: no pumping or charging equipment needed, reliable operation, and excellent shooting characteristics. For anyone considering a versatile, well-made rifle for target practice, plinking, or as a training tool, I can heartily recommend the Umarex 850 M2. It’s changed my perspective on what a CO2-powered rifle can be.

From my experience, it represents an excellent balance of traditional craftsmanship and modern features, delivering performance that has thoroughly impressed this initially skeptical airgunner. Whether you’re new to the sport or an experienced shooter looking for something different, I believe the 850 M2 deserves serious consideration.

Super Slam of North American Big Game 29

0

The Super Slam of North American Big Game 29 is the ultimate quest for a big game hunter. Are you that hunter who has what it takes? The Super Slam of North American Big Game takes serious dedication and years to accomplish. First, a hunter must register the legal taking of 29 big game animals native to North America. The official archives are kept through the Grand Slam Club/Ovis (GSCO). A hunter must register with GSCO, pay the $25 membership fee and submit the trophy hunt online. The membership and submission of your trophy hunt can be found here:

SLAMQUEST

Here is a list of big-game animals for the Super Slam on North American Big Game 29 and the hunts we have available.

North American Big Game 29 Species

Alaska Brown Bear –

  • The Alaska brown bear is the largest bear in the world, larger than brown bears of Europe and the grizzly bear. Brown bears in Alaska live off of a protein-rich salmon diet and can be found along the Alaska coast and near spawning salmon runs.

Alaska Brown Bear Hunt

Black Bear

  • The Black bear is found in the western United States and has the largest population of any bear in the world. Black bears are found in Alaska, Canada, Florida and Gulf Coast areas.

Black Bear Hunts

Grizzly Bear

  • The grizzly bear is found in a range of areas in North America but the largest populations of grizzlies are seen in Alaska and Canada. Grizzlies like to wander and can kill animals as large as a moose; however, these bears eat a lot of berries, roots, nuts and different types of grasses to survive.

Grizzly Bear Hunts

Polar Bear

  • The polar bear populations are mainly found in the southern part of Hudson Bay and James Bay in Canada. They can be seen on the shores and pack ice of the Arctic Ocean. Polar bears spend years out on the ice but the pregnant females will come ashore to den.

Cougar

  • The cougar is a solitary, silent large cat and are entirely carnivorous. It has many common names such as mountain lion, panther and puma. They are the second-largest cat in the western hemisphere and only North American cougars are allowed to take for the Super Slam quest.

Cougar Hunts

Columbia Blacktail Deer –

  • Columbia Blacktail Deer are found in the North American Pacific Coast region to the southern part of Monterey County of California. These deer have similarities to the mule and Sitka deer but can be distinguished by antlers, overall coloration and tail.

Coues Deer

  • Coues deer are found in southwestern Arizona and a little bit of New Mexico. They are often called little desert dwelling siblings of the whitetail deer. Top End Adventures offers a few Coues deer hunts.

Coues Deer Hunts

Mule Deer

  • Mule deer are found all over in the western United States, western Canada and adapt to a wide range of habitats. Bucks can range from 150 – 300 lbs and will migrate to the high mountainous country by themselves to lower ranges during the winter to avoid deep snow levels.

Mule Deer Hunts

Sitka Blacktail Deer

  • Sitka Blacktail deer are located in the wet coastal rain forests of north-coastal British Columbia and Southeast Alaska. Averaging from 90-120lbs, this subspecies of mule deer is the most common deer in Alaska.

Whitetail Deer –

  • Whitetail Deer are one of the most common deer you will find in North America. They average in weight from 100-200lbs. A very easy way to identify this species is simply in its name, check the underside of the animal’s tail.

Whitetail Deer Hunts

Rocky Mountain elk –

  • The Rocky Mountain Elk is commonly known for having the largest antlers of all elk subspecies. They are found in the Rocky Mountains and many adjacent ranges. An average weight for a bull is 700lbs and their antlers can weigh up to 40lbs alone.

Rocky Mountain Elk Hunts

Roosevelt Elk

  • Weighing in from 700-1,100 lbs, Roosevelt Elk are the third largest mammal in North America. Roosevelts are a subspecies of elk found in western Oregon.

Best Elk Hunting States

Tule elk

  • Tule elk are the smallest species of elk found in North America. These smaller elk are mainly located in the state of California. Females often average 370-430lbs while the males can weigh anywhere from 440-550lbs.

The Best Elk Hunting States

Barren Ground Caribou

  • This medium-sized caribou is mainly found in the Canadian territories of Nunavut and the Northwest Territories. The Barren Ground Caribou are smaller and lighter-colored then the boreal woodland caribou.

Central Canadian Barren Ground Caribou –

  • Living in the tundra and Arctic islands, these caribou can vary in size dramatically depending on where they are located. Mature bulls can weigh 250 to 450lbs and antlers for the CCBGC score around the same as the Quebec Labrador caribou.

Mountain Caribou –

  • Very similar to Woodland caribou, this is an endangered species. They reside in British Columbia and western Alberta. In early 2019, the remaining southern mountain caribou were taken and put into maternity pens.

Quebec Labrador Caribou –

  • This medium-sized tundra caribou is very similar to the CCBGC. Hunts for this subspecies can start at about 10,000 USD.

Woodland Caribou –

  • Mountain caribou, or in other names, Boreal woodland caribou are one of the most endangered mammals in North America currently. These caribou live in the mountain ranges of British Columbia, Alberta, and parts of Idaho and Washington.

Alaska Yukon Moose –

  • The Alaska Yukon or in other names, the giant moose, is a subspecies of moose native to ranges from Alaska to western Yukon. This moose is the largest subspecies of moose to roam the boreal and deciduous forests.

Alaska Moose Hunt

Canada Moose –

  • There is an estimated 500,000 to 1 million moose in Canada. These moose are mainly located on the hillsides of the western mountain ranges. A mature bull’s antlers usually range between 120 and 150cm between the widest tips.

Canada Moose Hunt

Shiras Moose –

  • Measuring over six feet at the shoulder and weighing up to 1,000lbs, the Shiras moose is Colorado’s largest big game animal. Colorado has one of the fastest growing populations in moose in the lower 48 states.

Moose Hunts

Bison –

  • Mostly found in conservation areas, bison can be found in the US, Canada, and Mexico. Bison are commonly called buffalo in the US and Canada but are only distantly related to the true buffalo. Adults can grow up to 6ft and 7in in height and 11ft and 6in in length.

Muskox –

  • Muskox typically weigh in from 500 to 800lbs. These huge mammals have inhabited the Arctic for thousands of years, and their long shaggy hair is well adapted to the frigid climate.

American Mountain Goat –

  • These hoofed mammals are endemic to North America and commonly found on cliffs and ice. Mountain goats will weigh from 90 to 300lbs and are protected by their woolly white double coats.

Mountain Goat Hunts

Pronghorn Antelope –

  • Pronghorn Antelope are mainly found in North America. Their natural ranges are most commonly extended from southern Canada to northern Mexico. The pronghorn is the fastest land mammal in the western hemisphere with running up to speeds of 42 mph for one mile.

Antelope Hunts

California Bighorn Sheep –

  • Known for its large horns, the Bighorn sheep is native to North America. California is home to tell different subspecies of sheep, the desert Bighorn and the Sierra Nevada Bighorn.

Dall Sheep –

  • Dall sheep, or in other names, the thinhorn sheep can be found in northwestern North America. Both male and female sheep carry a huge set of horns, but the females are often shorter and more slender.

Dall Sheep Hunts

Desert Bighorn Sheep –

  • This subspecies of bighorn sheep is native to the deserts of the intermountain west and southwestern regions in the US. With rams weighing up to 250lbs, Desert bighorn sheep are the largest native animal in the Grand Canyon National Park.

Rocky Mountain Bighorn Sheep –

  • Rocky Mountain bighorn sheep are the largest wild sheep in North America, the males can weigh up to 300lbs while just their horns alone can weigh up to 30lbs. The females, or ewes, are about half this size.

Stone Sheep –

  • Native to northwestern North America, the Stone sheep is a southern subspecies of the Dall or Thinhorn sheep. These sheep can be found mainly in British Columbia seen licking minerals at Summit Lake or other Provincial Parks.

20+ Wild Edible Roots, Tubers and Bulbs

0

Wild edible roots and tubers can form the basis for a wild foods diet, providing more calories and nutrition than a few wild foraged weeds.

A while back I was having lunch with my little ones in a park, and a young couple, seemingly on a first date was not too far off. They were having an animated conversation about, of all things…foraging!

I couldn’t help but listen, giggling to myself that the world of dating has come a long way since I was younger, and now these two are trying to woo each other with their foraging prowess.

One of them would brag about their haul of wild leeks (aka. ramps) earlier in the season, and the other was quick to drop every fact they knew about those tasty wild bulbs.

I don’t often meet other foragers out and about in the world and it was tricky for me to bite my tongue as they talked about my passion just a few yards away. Not my place, not my date…but I do hope it works out for that pair!

Right before they headed out, they both vehemently agreed that you never, under any circumstances forage wild roots! Never! That’s just so incredibly dangerous!

Anything below ground has to be off-limits….which I’ll admit is kind of ironic, given the previous brag about wild leeks, though they’re probably only harvesting the leaves.

Irony aside, I was kind of surprised. I dig plenty of wild roots, though I’m no expert on the subject. Of course, there are toxic species, that’s true of leaves, fruit, and anything else.

For some reason, people are intimidated by foraging roots and tubers, partially because it involves a bit more work than plucking edible wild berries off a bush. But also I think a lot of the reluctance stems from fear.

It’s true, there are some incredibly toxic roots out there. But there are also some incredibly poisonous berries, and that doesn’t stop just about everyone from picking blackberries along the hiking trail.

Why? Well, a blackberry looks like a blackberry of course! There’s really nothing that looks like a blackberry, except other edible rubus species, which are also tasty and delicious.

That’s true of many roots as well, and if you learn them, they’ll be no less intimidating than trailside berries.

Wild Edible Roots and Tubers

That experience got me thinking, and I really want to write more about the dense calorie sources that are available in the form of wild roots and tubers. There’s a handful that I forage regularly, but still, there are more that I know but rarely bother with.

I consider myself an adventurous forager, but ya know, sometimes I get lazy like anybody. I know cattail roots make excellent flour, but sometimes lounging by the pond is nicer than wading into the muck to harvest pancake ingredients.

Still, I need a new challenge, and this is enough to spur me into it. A few years back, I decided to try to find every edible berry and fruit in my local landscape, and I came up with more than 50 different species.

Next, I’m going underground to try to find as many edible wild roots as possible.

This obviously isn’t an exhaustive list, and I’m sure there are plenty of tasty roots that I haven’t tried (yet). I’ll work to add to it over time, and please do leave me a note in the comments if you see any that definitely should make the list.

I’ll add links as I write about each one, but for now, I’m posting this as a starting point mainly because I’d like feedback.

What’s your experience foraging wild roots and tubers? What are your favorites? What’s missing from my list?

(Leave me a note below in the comments.)

I did some quick research, and here’s what I found for edible roots. Most I knew, but some I had never heard of, and I have no verification of their edibility beyond spotty online sources, so please verify with other sources and don’t just take my word for this (or anything really, you should always double-check).

  • Arrowroot (Sagittaria latifolia)
  • Bistort (Polygonum bistortoides)
  • Bull Thistle (Cirsium vulgare)
  • Burdock (Arctium sp.)
  • Cattails (Typha sp.)
  • Chickory (Cichorium intybus)
  • Chufa (Cyperus esculentus)
  • Cucumber Root (Medeola virginiana)
  • Dandelion (Taraxacum officinale)
  • Daylily (Hemerocallis sp.)
  • Evening Primrose (Oenothera sp.)
  • Garlic Mustard (Alliaria petiolata)
  • Ground Nut (Apios americana)
  • Lesser Celandine (Ficaria verna)
  • Lotus, American (Nelumbo lutea)
  • Pignut (Conopodium majus)
  • Ramps or Wild Leeks (Allium tricoccum)
  • Sego Lily (Calochortus nuttallii)
  • Shepherd’s Purse (Capsella bursa-pastoris)
  • Spring Beauty (Claytonia lanceolata)
  • Solomon’s Seal (Polygonatum sp.)
  • Sunchokes or Jerusalem Artichokes (Helianthus tuberosus)
  • Trout Lily (Erythronium pudica)
  • Wild Carrot or Queen Anne’s Lace (Daucus carota)
  • Wild Parsnip (Pastinaca sativa)
  • Wild Potato (Orogenia linearifolia)

Be aware that many of these require processing to consume, and are not edible raw straight from the ground. Beyond that, others have toxic or dangerous parts.

The leaves of wild parsnip, for example, can cause a rash from contact with skin. Wild carrot has a deadly toxic look alike too.

Be careful, and do your research before attempting to forage any of these wild roots. Always consult multiple sources, and always be 100% sure of your ID before eating any wild plant.

This is, as I said, just a jumping-off point for further research…and a bucket list of sorts for myself.

Medicinal Roots

Beyond the edible roots, there are a few wild roots and tubers that are “edible” but generally consumed in small quantities for medicinal benefit. You can harvest them and they’re definitely useful, but you’re not exactly going to cook a meal from them.

I’m just adding these here for completeness, given that they are eaten medicinally, even if in small quantities. Know that while they may be edible in small doses, that doesn’t mean they’re not problematic or even toxic in large doses.

  • Barberry (Berberis vulgaris) – An upright invasive bush in the US, and I commonly eat the berries. Haven’t yet harvested roots.
  • Comfrey (Symphytum officinale) – Most sources suggest sticking to external uses only, since even small doses may be toxic, though it has a history of internal use historically.
  • Dock (Rumex Sp.) – Reportedly edible, but I have a reaction to it, and it tastes horrible. Plenty of people use it for both food and medicine though.
  • Echinacea (Echinacea purpurea) – We regularly make echinacea tincture and echinacea tea.
  • Elecampane (Inula helenium) – We use this for homemade cough syrup, and I personally find it extremely effective.
  • Marshmallow (Althaea officinalis) – Marshmallow root tea is incredibly soothing for sore throats and cough, and I keep it on the shelf for winter remedies.
  • Mullein (Verbascum thapsus) – I use the leaves and flowers, and only recently learned the root is used medicinally as well.
  • Japanese Knotweed (Reynoutria japonica) – Traditionally used for Lyme disease.
  • Valerian (Valeriana Officinalis) – Used as a sleep aid, often as a herbal tincture.
  • Wild Ginger (Asarum canadense) – Small doses, and use caution as it may be toxic.

Poisonous Roots

Though obviously you’re not just going to dig up any root and eat it out there in the wild, there are a few to really avoid while foraging roots.

This is definitely not an exhaustive list, but just a few of the most common poisonous roots, especially those that have edible look-alikes.

As always, make sure you’re 100% positive on your identification before eating any wild plant, and always consult more than one source when trying to identify a plant.

  • Belladonna (Atropa belladonna) ~ Most poisonings are from the berries, which are really beautiful and especially attractive to kids. The whole plant is deadly toxic though.
  • Bloodroot (Sanguinaria canadensis) ~ Sometimes used medicinally in external preparations, I don’t think it’s worth the risk. It can cause extreme contact burns and I avoid it altogether. Still a beautiful spring ephemeral to appreciate in the forest, just enjoy with your eyes.
  • Elderberry Root (Sambucus sp.) ~ Though the berries are edible and medicinal when cooked, all other parts of the plant at considered toxic.
  • False Hellebore (Veratrum viride) ~ Occasionally confused for ramps by novice foragers since they appear at the same time in the early spring. Other than being low-growing green leaves, they don’t really look anything like ramps in my opinion. Still, avoid them as a toxic plant.
  • Greater Celandine (Chelidonium majus)
  • Jack in the Pulpit (Arisaema triphyllum)
  • Mandrake (Mandragora sp.)
  • Pokeweed (Phytolacca americana) ~ Leaves are sometimes consumed with the right preparation, even though some sources list the whole plant as toxic. Avoid the roots and berries though.
  • Water Hemlock (Cicuta sp.) ~ A close look-alike with Queen Anne’s lace, but deadly toxic. I avoid Queen Anne’s Lace roots for this reason.

Foraging Guides

Looking for more foraging guides? Read on…

  • 60+ Dandelion Recipes
  • 50+ Ways to Use Yarrow
  • 12+ Chokecherry Recipes
  • 100+ Medicinal Plants and Their Uses

Wild Edible Roots

5 Strategies for Beating Windy Weather Gobblers

0
5 Strategies for Beating Windy Weather Gobblers

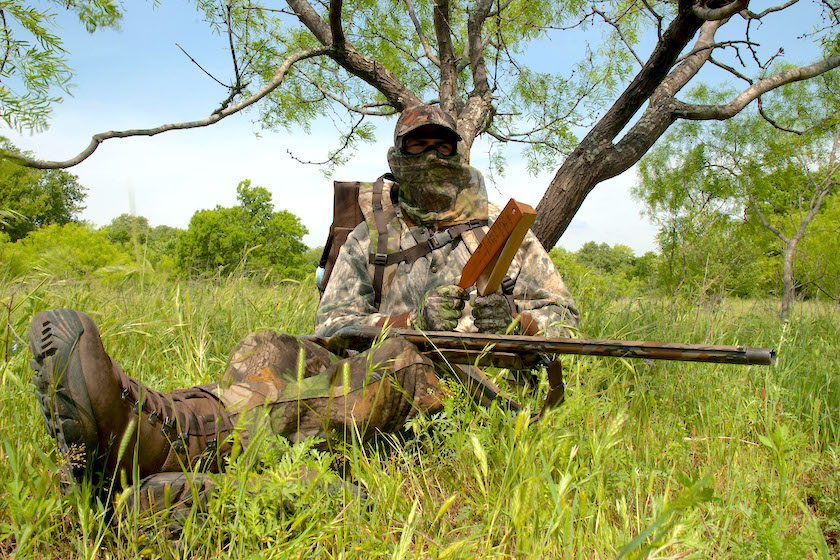
How to hunt spring turkeys when the wind blows and blows and blows. (Photo by Lynn Burkhead)

  • Click here for more articles on turkey hunting from Game & Fish

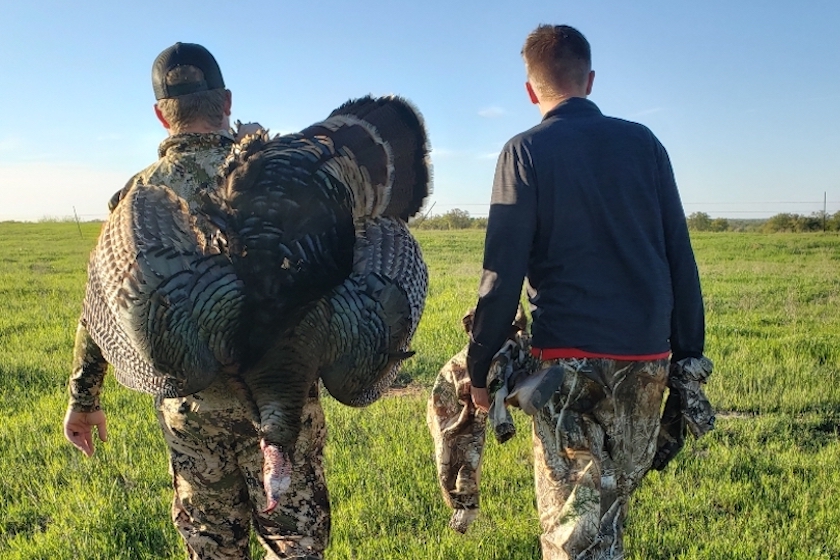
To be honest, it was the kind of day that I’d just as soon stayed at home and taken an overdue nap, even if the calendar was quickly running out of days to spring turkey hunt.

But instead, I dutifully got up and dressed in my camo duds, heading for the door and an afternoon turkey hunt with my longtime hunting pal Doug Rodgers as we headed west to his North Texas turkey lease.

I’ll admit, I wasn’t optimistic. In fact, if it weren’t for the prospect of some late-evening enchiladas at a nearby Tex-Mex place, I might not have even gone. Why? The wind, that’s why.

If you’ve ever hunted anywhere near the Great Plains, you know exactly what I’m talking about, heading out for a hunt when the wind blows and blows and blows.

Turning the weatherman’s anemometer at 25 miles per hour—or more—the southerly gale promised to pump up the atmosphere with unstable Gulf of Mexico moisture and make hearing a gobbler all but impossible.

Add in atmospheric instability from an approaching late-spring cold front, and the day was ripe for severe thunderstorms, hail stones, and tornadoes.

But not heavily bearded and long-spurred Rio Grande gobblers.

Stout wind or not, and tornado weather or not, Rodgers was determined to put yours truly on a good-sized gobbler that afternoon to help end a long drought on my turkey hunting scorecard.

Like a card shark with a couple of aces up his sleeve, the Whitesboro, Texas, resident had a good idea of when and where the birds might be moving about on that howling April afternoon.

Windy-Turkeys
While the wind can be problematic for spring turkey hunters, one way to combat heavy breezes that steal away turkey gobblers is to hunt areas with heavy signs of turkey presence and travel. Even if you can’t readily hear the birds on a breezy day, you can patiently hunt them secure in the knowledge that you’re in a good area that should produce gobbler movement sooner or later. (Photo by Lynn Burkhead)

Armed with a custom-built Lamar Williams boat paddle box call, Rodgers kept working that wild turkey music maker to noisy perfection, eventually striking up a couple of longbeard toms that could hear our loud calling even if we could barely hear their gobbling responses.

In fact, at one point, the biggest tom of the pair actually seemed to come off his feet as he gobbled aggressively in response to Rodger’s calling on the box call. But a gust of wind tore the music away from our ears and we couldn’t hear a syllable of the old boy’s response even if our eyes told us otherwise.

Windy-Turkeys
Warm, windy days are a part of a Great Plains spring turkey season. But deciding to ignore the conditions that make hearing a gobbler next to impossible and going anyway can keep putting a hunter in a position to eventually be successful. (Photo by Dakota Stowers)

Less than a half-hour later, our game of wild-and-windy chess was over as I tagged the Rio Grande bird and Rodgers was putting another mental mark on his paddle call, the kind of wind-defeating instrument that Williams, a Starke, Fla., resident trained by the late great turkey call maker Neil Cost, specializes in turning out each year.

In fact, I’ve never been on a spring turkey hunt before or since with Rodgers where that butternut-and-cedar musical instrument wasn’t tucked away carefully in his turkey-hunting vest.

Truth be told, even if you hunt somewhere else outside of Texas, big winds are a common enemy of turkey hunters everywhere each spring, something that hunters all across the country have to battle in order to tag a longbeard.

One such hunter is Matt Morrett, friend of country music superstar Blake Shelton and a well-known hunting celebrity himself in TV shows, Facebook videos, and YouTube content put out by companies like Hunter Specialties, Avian-X Decoys and Zink Turkey Calls, among others, companies he formerly worked for.

A former world champion turkey caller, nowadays Morrett is the marketing director for the Pennsylvania Game Commission. In addition to promoting the outdoors in his home state every day, he still finds plenty of time to get out and chase longbeards.

With lots of Keystone State experience, as well as travels all across the country, Morrett—always one of my favorite interviews when it comes to turkey hunting—has seen the best and worst that the springtime chase of longbeards has to offer. And more than once, he’s felt the curse of the springtime wind as it blows across his neck.

Windy-Turkeys
When the wind blows hard and heavy on a spring day, it’s tough to hear turkeys gobbling. One way to combat the wind is to use terrain features on a piece of hunting ground to get below the worst of the wind so that you can hear longbeards sound off better. (Photo by Lynn Burkhead)

“I’ve (been) to Alabama before where you get a cold front through and they just shut down,” said Morrett in an interview we had a couple of years ago. “I mean their mouths are shut. I think wind is the toughest thing about hunting any wild animal.”

But windy day or not, the annual spring game isn’t put on hold, at least from a wild turkey’s point of view.

“It’s not that they’re not trying to find hens, not that they’re not gobbling, not that they’re not trying to breed,” said Morrett. “But there’s so many things that go against you (as a turkey hunter) when it’s windy.”

“That’s because a turkey can’t see as well and he’s definitely jittery because he can’t hear as well.”

So how does a turkey hunter combat windy day gobblers in Texas, Alabama, or somewhere else?

Windy-Turkeys
Wait, was that a gobble?!? One of the hardest parts of spring turkey hunting is finding success on windy days where it can be tough to hear even the loudest longbeard sound off. But by putting a few tips into motion, you can tag a trophy tom, even as the wind blows and blows and blows. (Photo by Lynn Burkhead)

1. Make Loud Calls

First, by being armed with a loud call that can cut through the building gale, one like the Lamar Williams boat paddle box call mentioned above or something like a Zink Turkey Calls Wicked Series crystal call.

The latter, a pot style friction call made of Brazilian cherry wood, utilizes the injection of acrylic into the wood and a crystal surface that offers top end high-pitch raspy calls that are loud and reach out to gobblers at a longer range than many other calls do.

2. Find the Sign

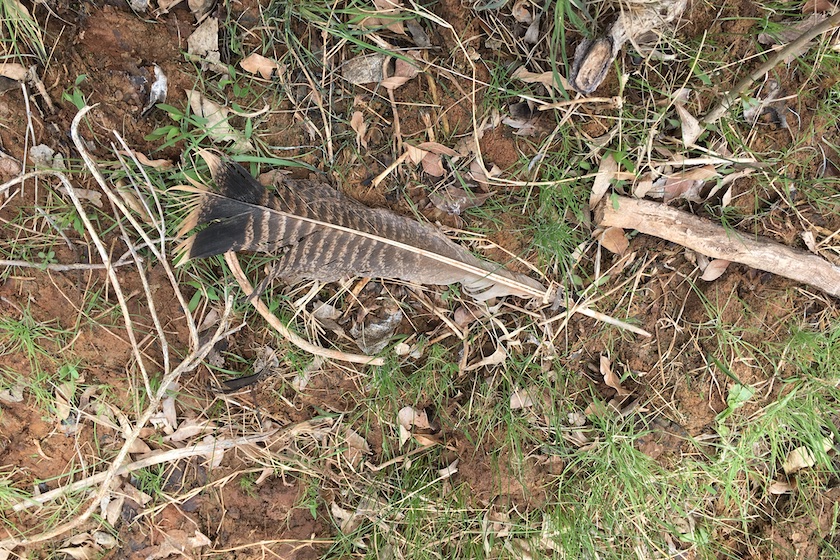
A second key to tagging a mature longbeard when the wind is howling is to do what Rodgers and I did years ago, and that’s to put yourself into areas where turkeys are known to roost, travel, feed, and breed. If the area is lousy with sign ranging from loose feathers to tracks to droppings to scratches in the dirt where gobbler wings have been dragging as big toms strut about, a good tip is to park your fanny there and wait.

Because no matter what the spring conditions are — from a snowstorm like the one that assaulted midwestern turkey grounds this week to triple-digit heat that is only days away in Texas, from drought to thunderstorms, from dead calm conditions to a hurricane-like gale — turkeys are going to continue to do what turkeys do each spring.

“Hens are going to go to the gobblers, they’re going to try to find food and they are going to try to find water,” said Morrett.

3. Use the Wind

A third tactic is to use the wind and put it in your favor while hunting. Eddie Salter, former host of Turkey Man on the Sportsman Channel and a turkey calling champion of great renown, follows a similar strategy when battling windy day gobblers, especially after the passage of a spring cold front.

That strategy centers around loud, aggressive calling and moving into the wind so that the sounds that a wild turkey gobbler makes will travel to the hunter’s ears and not be torn away from them.

4. Use the Terrain

A fourth strategy is to use the terrain to your advantage, seeking to use the wild turf in an effort to help keep the wind’s ill effects a bit tamer. While this isn’t easy in plains territory, it can be more effective in wooded areas, creek bottoms, and hilly terrain where the lay of the land can actually help you hear what’s going on a little better.

“What I try to do is get into an area where I know the birds are at and keep moving,” said Salter. “And if I can, (in hilly terrain) I try to stay down below them. That way, if I can get a bird to gobble, chances are that I may hear him.”

5. Just Go Hunting

And finally, a fifth strategy to employ is to simply get up and go hunting like I did earlier in this wild-turkey tale, even if it’s going to be a windy day. Because the bottom line is that hearing a gobbler on a blustery day means that the battle is already half won. For when the wind blows hard, any gobbler that is close enough to be heard is not very far away.

Armed with a good call and with any sort of springtime luck, the next sound that a hunter hears in the turkey woods might not be a lusty gobble, but it could be the sound of a very loud shotgun going Boom!

Even if that sound is quickly drowned out by the noise of the springtime wind as it blows and blows and blows. But you won’t mind at all as you smile and reach for the turkey tag about to be pulled from your back pocket.

WellFire APS SR-2 Sniper Review

0

Not all air rifles are created equal.

Some are better than others.

Air guns for kids are no exception.

Some are fun to shoot and children-friendly while others are more or less than cheap toys.

Let’s find out if the WellFire APS SR-2 sniper rifle is the good, the bad, or the ugly in this review.

WellFire APS SR-2 Sniper Rifle – Guntype

wellfire aps sr-2 modular bolt action sniper rifle

This is a spring-action airsoft gun.

The spring-powered gun is straightforward, simple to use, and can be very fun to shoot.

(For more on the 5 types of air rifles you need to know before buying, see this post.)

This gun is a bolt-action gun.

The bolt is surprisingly easy to operate but there is one small problem with the bolt:

Should you pull it backward with your fingers holding the bolt’s top, you will cause the bolt’s handle to fall off when you yank it back.

To prevent this from happening make sure you slide your fingers underneath the bolt’s outer piece,

Then you can pull it back without the threat of the handle coming off.

The Welfare APS SR-2 has full metal, tight bore barrel so it can deliver long-range shooting and last for years to come.

It features a small orange tip at the end to differentiate the airsoft gun from the real firearm.

Stock

The stock is made of synthetic in an ergonomic and stylish design.

It’s lightweight and can be adjusted to the best position for your head and neck’s comfort to snipe effectively.

Besides, it has the typical M4 grip (or pistol grip) you find in the real firearm.

Pistol grip orients the hand in a vertical way, similar to the position one would take with a conventional pistol,

So it gives you comfortable and natural holding of the gun.

This gun has a metal and an adjustable bipod which is easily removable.

This bipod allows the user to stand the rifle against virtually any surface for steady shots

And it can be folded away when you need to carry the gun in motion.

Sight

This gun comes with a high-quality 3-9x 32 zooming scope.

32 is the diameter of the front lens, measured in millimeters .

3-9 is the magnification power of the scope: it means that the picture you see through the scope can be adjusted 3 to 9 times bigger than the image you see without it.

Elevation and windage are also adjustable via a side-mounted adjustment screw

And the scope comes with its own metal mount and scope rings so it attaches to the rifle’s base mount without any problem.

This scope significantly improves accuracy, especially long-distance targets, and is extremely functional as an effective tool during the target acquisition process.

You should know that the scope alone is worth $40 to $60 when buying separately so you get a great deal with this rifle.

wellfire aps sr-2 sight

WellFire made the optic rail in the Picatinny style.

A Picatinny rail is almost identical to the weaver rail, except it has a series of ridges located in precise intervals along the rail.

This type of rail gives you lots of benefits: You have more mounting options

And you can swap scopes from one gun the another and use the different scopes in one rifle as well.

And yes, no more worrying about tube length, eye relief, etc since you can place scope rings at any place you want.

Specifications

  • Gun type: Bolt Action
  • Optic ral: Picatinny
  • Stock: collapsible/adjustable
  • Veclocity: 470 FPS
  • Ammo: 0.2 gr BB.
  • Optic: 3-9×32 scope
  • Bipod: Removable/foldable
  • Powerplant: Spring

Pros and Cons

ProsCons
  • Powerful spring gun
  • Ergonomic pistol grip
  • Durable steel barrel
  • Convenient Picatinny rail
  • Awesome scope
  • Eye-opening adjustable bipod
  • The small orange tip in the barrel looks very funny and childish

Price

The price for a Wellfire APS SR-2 sniper rifle is about 100 dollars.

Its price is a little bit high in my opinion, but the quality of this gun is worth the money.

Check Price on PyramydAir

Conclusion

The WellFire APS SR-2 is a great gun for kids and teenagers.

It will make your children happy if you buy this for them as a Christmas gift or birthday present.

wellfire aps sr-2 air gun review

Early Warning System: Campsite Perimeter Security

0

Chuck Norris doesn’t sleep. He waits. But for the regular Joe, being awakened from a deep sleep by a bump in the night can be a brown-pants-inducing experience. At least if you’re in your home, you’re familiar with your surroundings and should be able to navigate through it in complete darkness. You know the floor plan. You know all the avenues of approach. And, with a little prior planning and practice, you have an advantageous position where you can defend yourself and your loved ones from any attempted assault.

It’s one thing to be safe and secure in our homes. It’s quite another to maintain that same level of protection when we’re sleeping under the stars, far from civilization. Whether we’re enjoying all that Mother Nature has to offer on a relaxing camping trip or searching for sanctuary in the midst of a crisis evacuation, dusk brings on a whole new set of challenges when there are no walls and roof around you. How do we guard against those ominous sounds of creatures roaming the wilderness, looking for easy prey? How can we know the difference between man and animal?

Several factors should be considered when selecting an appropriate location to set up an overnight campsite, but that’s the topic for another article. For our purposes, we will assume we’ve selected a good location to make camp and have now progressed to the point of trying to establish some level of security.

Early Warning System: Campsite Perimeter Security

One of the most challenging aspects of setting up perimeter defenses is restricting access to your base camp. The feeling of freedom and open air that campers love also works against us when it comes to protecting our campsite from unwanted wanderers or outright intruders. While selecting a good location for the campsite is a critical first step, it’s only one step in the larger defense-in-depth strategy.

The next step is to create an early warning system for when someone or something approaches our location. For those who don’t have a lot of wilderness time under their belt, you’ll be shocked to find how noisy it is at night, as all manner of creatures venture out under the cover of darkness for their evening meal. Depending on the location and time of year, the noise can really be quite loud. Anything moving around at night can potentially have plenty of background noise to mask its movement. Additionally, if one is bedded down in a wooded area, one will notice that noise tends to ricochet off the trees, making it difficult to localize and pinpoint the source. Do not fall into the false mindset that any intruder wandering into the campsite will make enough noise to wake you and give you time to determine their intentions. Creating an early warning system will ensure you have some measure of advanced notice to an intruder, be they two- or four-legged.

Early Warning System: Campsite Perimeter Security

Early warning systems can be quite simple or very complex, but since most outdoorsmen take a minimalistic approach to travelling in nature, a simple security solution seems the best choice. Let’s look at three simple options for securing your campsite location.

The Old Tin-Can Trick

Early Warning System: Campsite Perimeter Security

If you’re a fan of AMC’s The Walking Dead TV show, then you’ve seen this zombie security system quite often. It doesn’t get any simpler than a length of string, a few empty soup cans, and some small rocks.

Cut an entrance and an exit hole in the can just small enough to lace through the string. Partially cut the lid just wide enough to add a few rocks inside the can, then press the lid shut. Lace the string through several cans, leaving enough string on either end to tie off the ends to make a string barrier. Make the barrier long enough to cover the width of the access path you want to secure. Tie off the ends of the barrier with enough tension to pull the system relatively tight and level across the ground.

A height of two to three feet off the ground is a good all-around height to protect against moderately sized animals and low enough that under the cover of darkness a person wandering around may not notice the alarm and set it off.

Early Warning System: Campsite Perimeter Security

Tip: If this type of setup appeals to you, consider getting a bag of marbles to use in the cans. They roll around much easier and seem to make a more audible alarm when banging around inside the cans. Additionally, a good length of strong fishing line will work better as a string than 550 paracord, and it weighs next to nothing.

The Modified Window/Door Alarm

Early Warning System: Campsite Perimeter Security

While the marble-in-a-can method might work for you minimalists, the MacGyver fans are going to want something a little more “techie” for their campsite. Fortunately, your favorite local hardware store or online shop should have just the thing: small window/door security alarms. Modifying their use for campsite security is only limited by your imagination.

Early Warning System: Campsite Perimeter Security

One simple option is to purchase a doorstop alarm. These alarms function by placing them directly behind a door. They are shaped similar to a doorstop with a ramped area that allows the door to slide over the ramp, effectively pressing the ramp down into the unit. When the ramp is depressed enough, a loud audible alarm is triggered.

A simple method for employing their use is to create a tripwire across an access path. Tie off one end of the fishing line to a tree or other secure object. String the wire across the path and tie the other end of the string off to a short length of stick. Find any object with some mass such as a small log or rock. Prop the object up with the stick, ensuring the line is taut across the path. Place the doorstop alarm under the object positioned in such a way that when the trip line is pulled, the stick is pulled out from under the object, allowing the object to fall on the doorstop, setting off the audible alarm.

Tip: Having four or five units in your pack gives you another simple but effective way to secure multiple access paths to your campsite. Piercing alarms going off simultaneously will be loud enough to scare away all but the most determined predators.

The CAPSS3 Option

Early Warning System: Campsite Perimeter Security

For those who take their campsite security a little more seriously, look no further than Brite-Strike Technologies, which offers a host of handheld and weapon-mounted lights for combative applications. Brite-Strike has also introduced several products for the perimeter alarm market.

The All Purpose Adhesive Light Strips (APALS) are basically solar-powered light sticks that provide about 40 lumens of green or red light for more than 12 hours on a single charge. Smaller than your standard smartphone, these units are lightweight alternatives to chemical light sticks and last twice as long. To provide the same amount of illumination as the APALS for one year, a user would need to purchase 730 chem light sticks at an average cost of $1,200. One APALS retails for about $20. This is quite a no-brainer for those looking for some late-night campsite illumination options that don’t include packing around 15 or 20 chem lights or battery-powered lanterns.

Early Warning System: Campsite Perimeter Security

Another innovative Brite-Strike product is the Camp Alert Perimeter Security System and Survival Signaling System (CAPSS3). The CAPSS3 is a lightweight and compact multifunction unit that offers both security and signaling capabilities for the outdoor enthusiast. The CAPSS3 unit comprises of a 135-decibel audible alarm unit that is triggered by a built-in metallic trip rod. Pulling the rod out of the recess in the unit triggers the alarm.

A small LED red dot is built into the side of the unit that acts as both a visual alarm and provides enough red light at night to read maps or other documents. A larger blue LED light is built into the unit along the length of the CAPSS3. It has the dual function of acting as a visual alarm and offering enough blue light to signal rescuers or to help mark one’s location for airborne search-and-rescue operations. A slide button is located on the face of the unit to allow the lights to be used for reading or signaling. Plus there’s a strobe function that can go off in conjunction with the audible alarm.

Early Warning System: Campsite Perimeter Security

A small key ring is attached to the triggering rod to provide several tripwire attachment options, and each CAPSS3 unit includes two 10-meter-long clear monofilament lines for use as a nearly invisible tripwire. Additionally, the unit comes with a small section of heavy-duty 3M double-sided adhesive tape for attaching the CAPSS3 unit to any surface, such as a tree or a rock. A few small nylon zip ties can also be used to stick the unit onto odd-shaped surfaces. The CAPSS3 survival signaling system has an MSRP of $40 — but wait, there’s more! Each CAPSS3 system also includes two blue APALS at no extra cost.

Tip: The unit is slightly smaller than a deck of cards and weighs only a few ounces, so pack several units in your day pack or bug-out bag. They certainly won’t hurt your back after a long day of hiking yet provide multiple points of security.

Layered Defense

Early Warning System: Campsite Perimeter Security

As you can see, each type of early warning system has pros and cons, but there are certainly more benefits than negatives. Plus, they’re all relatively affordable and easy to set up. If you’re a minimalistic prepper who needs to stay light and mobile, picking any one of these options can give you peace of mind if you’re forced away from your neighborhood and into unknown territory. For those who like to spend a lot of time with Mother Nature but take their personal security seriously (or perhaps their zombie defenses a little too seriously), you can always opt to layer your defenses by using a combination of these systems.

Because not all of us have Chuck Norris-like instincts, having some sort of reliable perimeter security system is the secret to getting a good night’s rest when sleeping under the stars. With the knowledge that you’ll be alerted if a predator — man or beast — enters your campsite, you’ll be ready for anything that goes bump in the night.

Correcting and Adjusting Rifle Scope Parallax

0

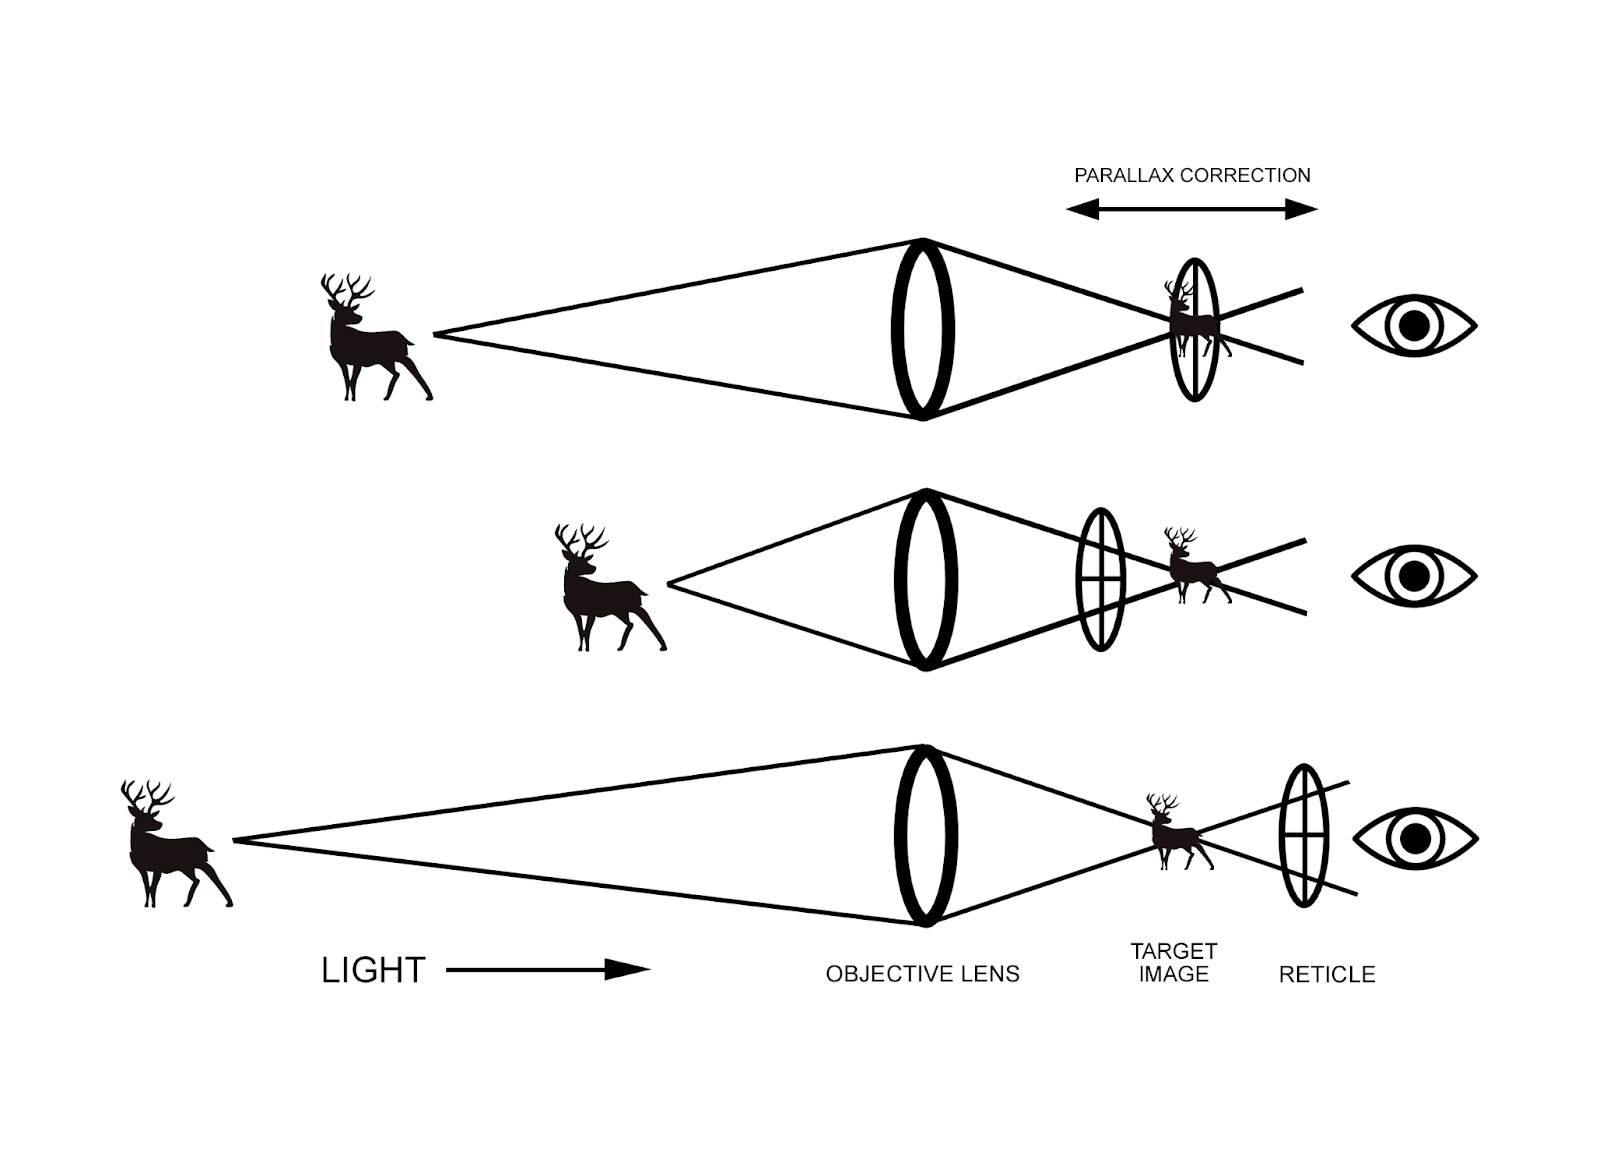
Parallax correction is a feature available in nearly all modern rifle scopes. The effect of parallax is presented when your reticle appears out of focus with respect to your target, and to the focal plane of the scope. Although generally not an issue at ranges of less than 150 yards, this optical effect can greatly alter your point of impact at longer ranges.

The overall goal of parallax correction is to get your rifle scope reticle on the same focal plane as your target image. If these images are not in the same focal plane, either one can appear soft or out of focus when you look at the other through your scope. This causes eye strain and can lead to inaccurate shots or even target confusion for inexperienced shooters.

The Parallax Effect – what you’ll see:

  • The image of your target is clear but your reticle appears out of focus.
  • The image is clear when looking head-on, but the reticle shifts left or right when you move your head or look through the scope at an angle.

Rifle Scope Parallax

How It Works

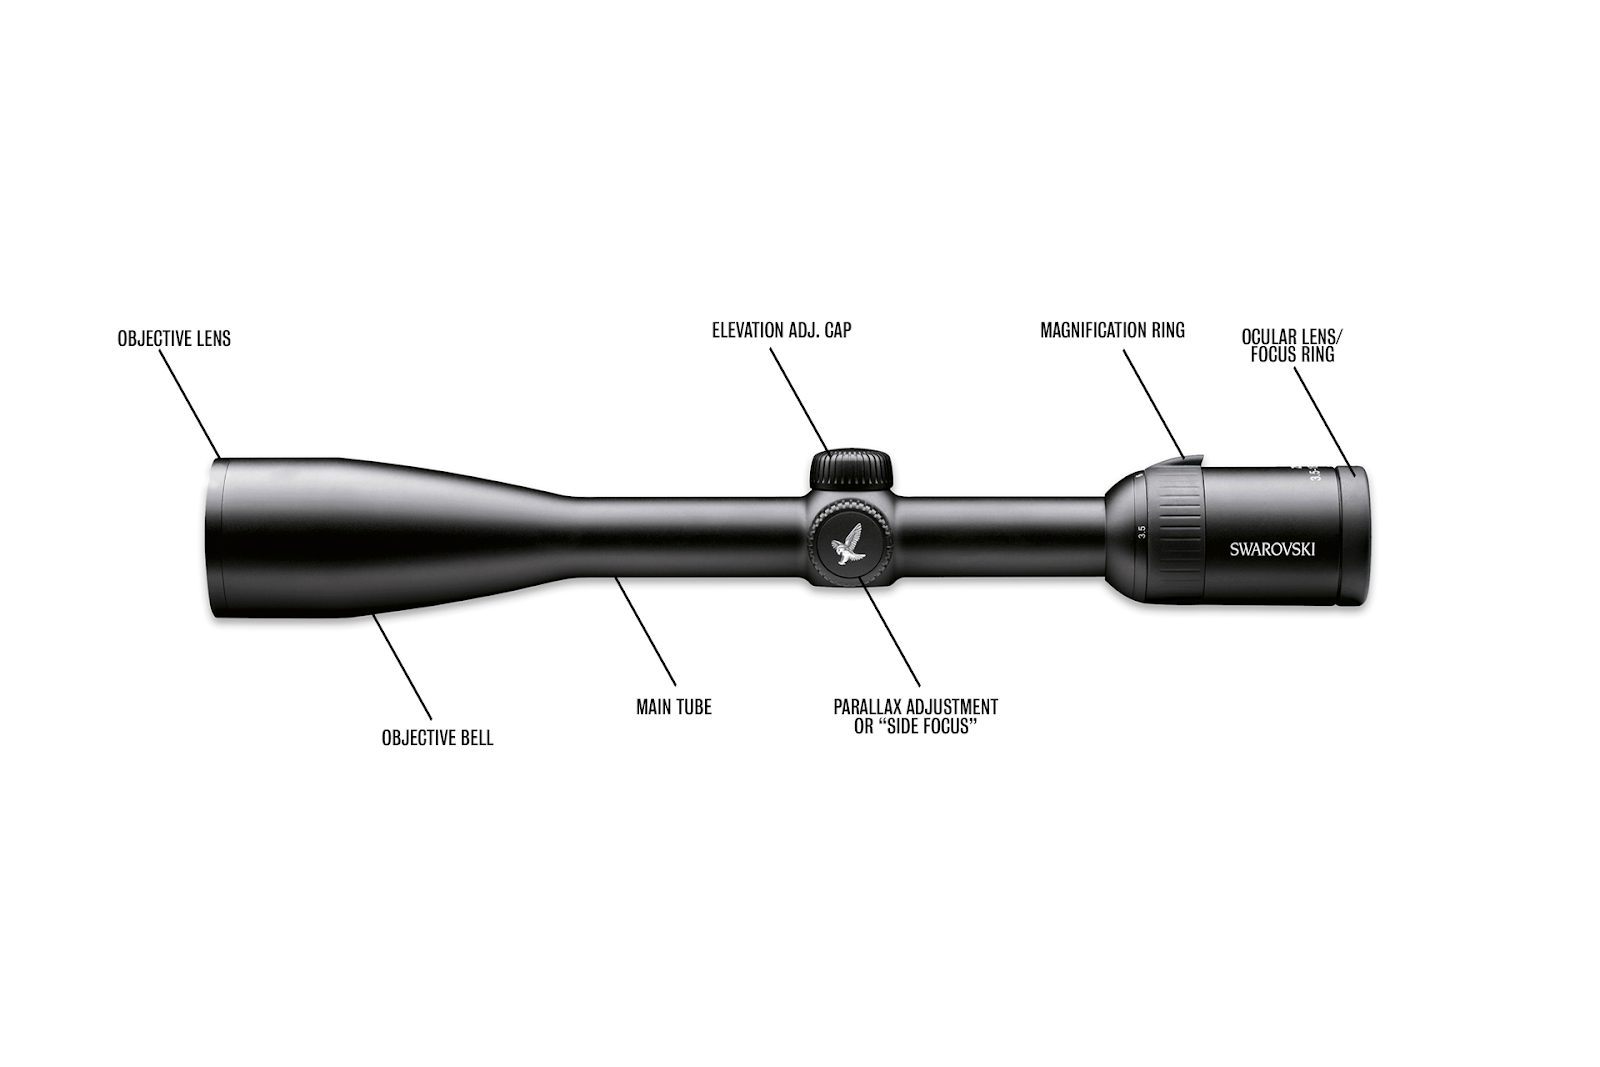
Light enters a rifle scope through the objective lens, is projected onto a prism, and is then flipped, reflected several times, and presented via the ocular lens. Your reticle typically lies between your eye and that projected image, regardless of the “focal plane” (FFP or SFP) of your scope.

When shooting at longer (>150 yards) distances, the focal length of your vision is adjusted by your brain to compensate for the distance to the target. This means that your reticle will appear slightly blurry or move when you adjust your viewing angle. It goes without saying, but if your reticle moves laterally and off-target when you move your head behind the scope, your point of impact will follow!

rifle scope parallax

Focusing Your Reticle

Before attempting to adjust for parallax, ensure that your reticle is in focus. An easy way to do this is to look through your scope at a plain, ideally bright background that’s at least five yards away. Your scope likely has a reticle focus ring on the ocular lens – the one that you put your eye to. Adjust that ring as you would a binocular or camera focus until your reticle is sharp and clear to your eye.

This adjustment will ensure that your parallax correction is valid. This adjustment may vary from shooter to shooter, but as long as the current shooter has the reticle in focus, the parallax adjustment should remain constant.

Correcting Rifle Scope Parallax

Correcting Parallax

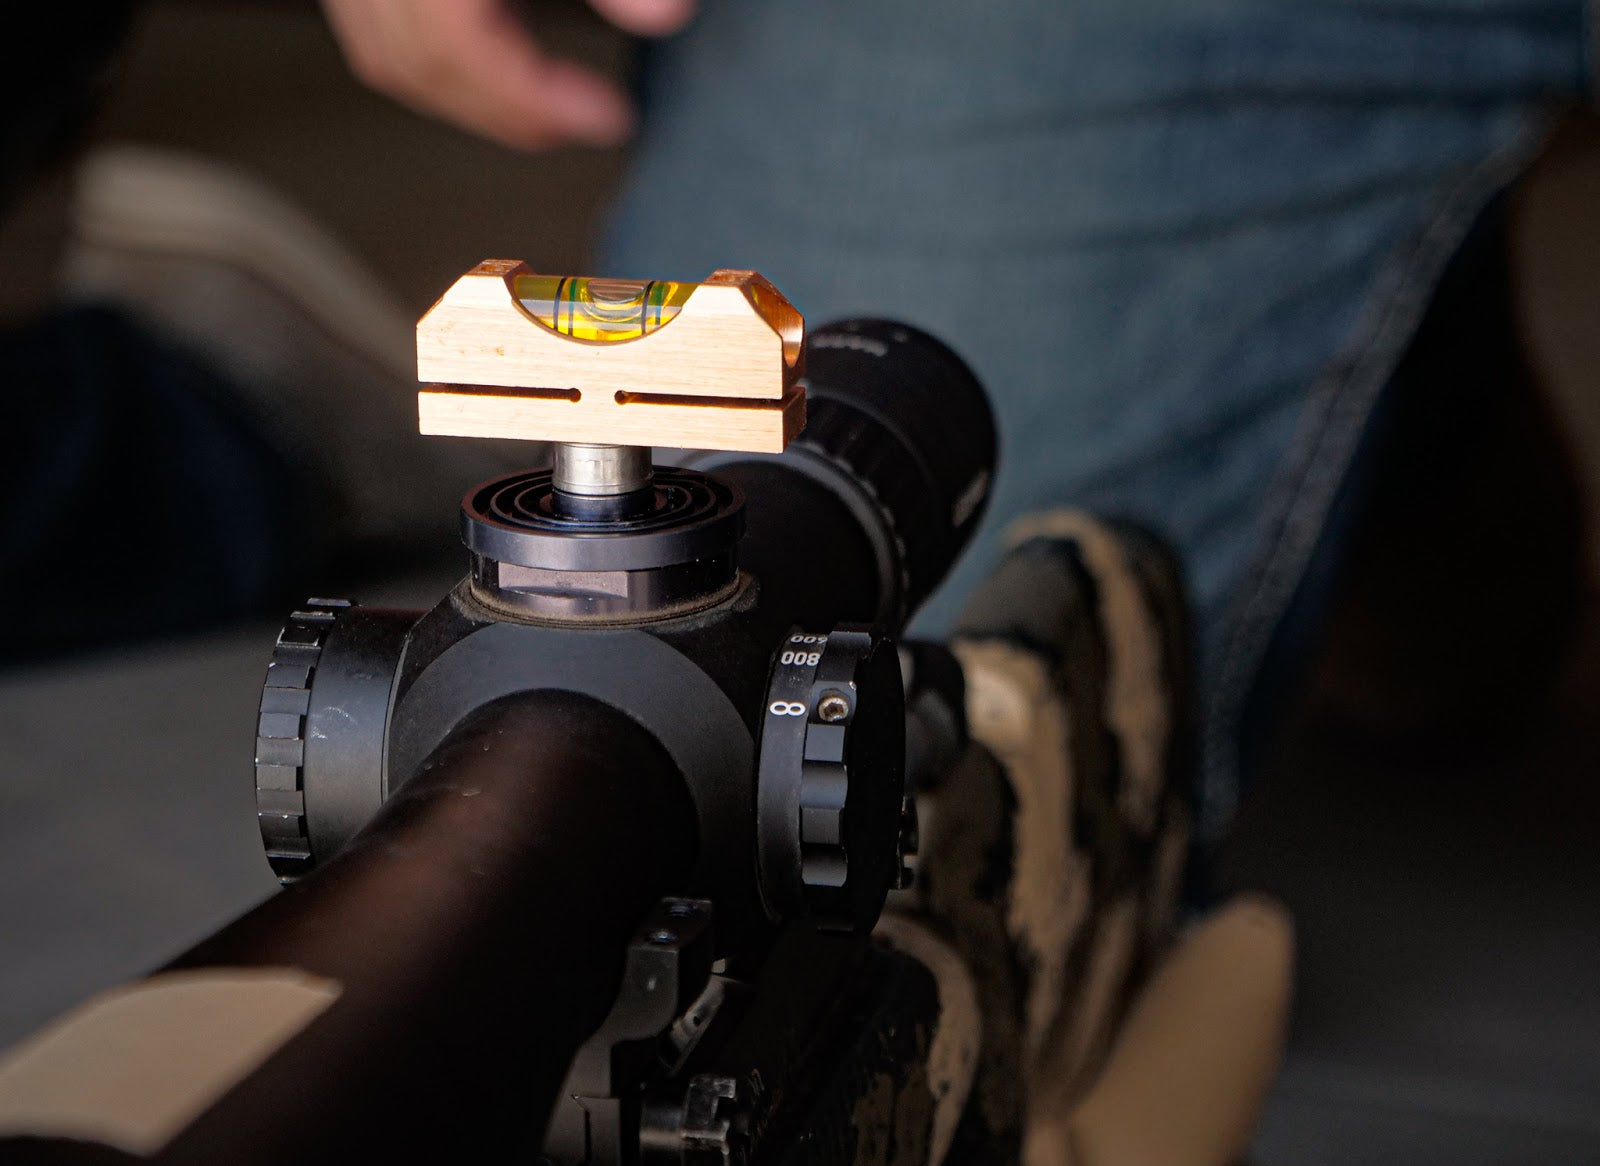
Most modern rifle scopes have a parallax correction system that involves a dial on the side of the main tube, often referred to as a “side focus.” These systems allow a shooter to adjust the image of the target backward or forward to match the focal plane of the reticle. Many of these dial systems are marked with yardage in increments of 50 or 100 yards to aid in correction.

A simple way to find the correct position of the dial is to set up a clear target that stands out well from the background, get your rifle in a secure rest position, and with the magnification at its highest level, look through the scope and begin to shift your head (and therefore your viewing angle) back and forth.

If your reticle appears to move or shift with your head movement, you have a parallax issue. The yardage indicators on your parallax adjustment will be a helpful starting point for corrections. Depending on your range and magnification level, the correction may be extremely fine or up to a full revolution of the dial.

Adjust until your reticle is sharp against your target and appears to lock on to your aiming point. You should be able to view both the reticle and the target without shifting focus. If you have made an adjustment and still have some play, continue making very fine corrections until you can move your angle as far as possible while maintaining a full image through the scope. The same process applies to an objective lens ring-style system, but it is not as precise as the dial type with yardage indicators.

Once you are satisfied with your adjustment at maximum magnification, LEAVE IT. You generally will not have to adjust it again unless the circumstances or shot range are extreme. These adjustments and changes are very slight, so keep that in mind when working to correct this issue.

When buying a rifle scope, be sure to consider the distances you plan to shoot and the ergonomics of its adjustment systems. The best way to familiarize yourself with a rifle scope is to physically hold one in your hands. The style of adjustment is not critical, but the adjustment itself will eliminate a lot of headaches when working to zero your rifle or make those critical shots.

Rifle scope parallax

Best all terrain tires for snow

0

Best all terrain tires for snow: In the world of all-terrain tires, navigating through the plethora of options can be a daunting task, especially when it comes to finding the perfect set for snow. Two common classifications of tires that you may come across are the M+S (Mud and Snow) and the 3-Peak Mountain Snowflake (3PMSF) certified tires. But how do you know which one will provide the best performance in snowy conditions? In this article, we will focus on the top 3-Peak Mountain Snowflake certified all-terrain tires, as they have been proven to deliver superior traction and safety in snow compared to their M+S counterparts.

M+S tires are designed to offer improved traction in muddy and light snow conditions, but they do not undergo the same rigorous testing as 3PMSF certified tires. The 3-Peak Mountain Snowflake symbol signifies that a tire has met or exceeded stringent industry standards for severe snow performance, making them the optimal choice for those who frequently drive in heavy snow or icy conditions. So, without further ado, let’s delve into the world of 3-Peak Mountain Snowflake all-terrain tires and discover the best options for conquering the snowy terrain.

Off road segmentation

When it comes to a pick up truck, the main segmentation of tires comes in the form of on/off road terrain groups. However in this class of tires, there is an even further distribution as below:

SegmentOff roadOn road

All terrain road (ATR) is a relatively new segment mainly driven by the R117 regulation over in Europe to ensure tires meet a maximum threshold of noise level as determined by regulation. Due to the relationship between pattern void volume and noise, this forces the industry to shift towards a lower void design to meet the noise requirements. Hence this spurred the creation of this new segment which has 70% on road & 30% off road focus.

All terrain (AT) is a well known segmentation whereby users do tend to enjoy the fair share of off road activities. Most of the pick up trucks who want to explore the off road activities on a monthly basis do tend to choose this segmentation. The AT segment has a 50% on road & 50% off road focus. There is however an even higher off road segmentation called mud terrain (MT) which has 70% off road and 30% on road. Recently most ATR segment tires.

All season 3 peak mountain

All season tires have always been the go to tires for the American market and this segment has been well established across the years. There are 2 types of all season tires, one with 3 peak mountain & one with only M+S. We have covered these 2 types of tire head to head with Michelin’s Defender T+H (M+S) vs Cross Climate 2 (3 peak mountain) and the M+S all season tires usually are worst in winter performances but excel much better in mileage.

If you are in an area which snows quite heavily, 3 peak mountain all season tires would be definitely a good choice. Below are the best all terrain tires for snow rank based on a compilation of test results.

All terrain road (ATR) with 3 peak mountain

1. BFGoodrich Trail-Terrain T/A

When it comes to off-road tires, no brand is as well known as BFGoodrich. Many consider them as the “God” of all/mud terrain tires and have made their name true countless tire wins in the Baja competitions. BFGoodrich launched its latest foray into the ATR segment with the product called “Trail-Terrain T/A” in 2021. Based on the test results, Trail-Terrain T/A had a big advantage in snow & ice performances while having a low wet & dry performance. The main trade off is between winter against summer performance in this case. If you need a winter performance tire, Trail-Terrain T/A would be definitely a good choice for you.

  • BFGoodrich Trail-Terrain T/A
    • Launch: 2021
    • Press test wins: 0/1
    • Strength: Excellent snow.

Check out our head to head comparison of Trail-Terrain T/A against its competitors.

BFGoodrich Trail-Terrain T/A vs

  • Falken WildPeak A/T Trail

Price

  • 265/60R18 : $244

PS: Updated snow results

BFGoodrich Trail-Terrain T/A vs Yokohama Geolandar A/T G015 vs Falken WildPeak A/T Trail winter results.

The BFGoodrich Trail-Terrain T/A demonstrates superior snow and ice performance compared to its competitors, the Falken WildPeak A/T Trail and the Yokohama Geolandar A/T G015. In snow braking, acceleration, and handling (both subjective and lap time), the Trail-Terrain T/A consistently outperforming the WildPeak A/T Trail and closely matching the Geolandar in certain aspects. Furthermore, on ice braking, the Trail-Terrain T/A still held its top position with a score of 100%, whereas both the WildPeak A/T Trail and Geolandar A/T G015 lagged behind by up to -20%. In summary, for snow and ice conditions, the BFGoodrich Trail-Terrain T/A is the clear front-runner.

2. Yokohama Geolandar A/T G015

Introduced in 2016, the Yokohama Geolandar A/T G015 has quickly become a popular choice for drivers seeking a versatile all-terrain tire with impressive snow performance. While it came in just slightly behind the BFGoodrich Trail-Terrain T/A in Tire Rack’s testing, the Geolandar A/T G015 still offers excellent traction and handling on snow-covered roads. Combining Yokohama’s advanced tire technology with a focus on durability and comfort, the Geolandar A/T G015 has proven itself to be a reliable option for those who face a variety of terrains and weather conditions.

  • Geolandar A/T G015
    • Launch: 2016
    • Press test wins: 0/3
    • Strength: Snow & ice

Check out our head to head comparison of Geolandar A/T G015 against its competitors.

Geolandar A/T G015 vs

  • Falken WildPeak A/T Trail

Price

  • 265/60R18 : $239

3. Falken WildPeak A/T Trail

The Falken WildPeak A/T Trail is renowned for its outstanding performance on both wet and dry terrains. It consistently delivers impressive traction and stability during rainy seasons and on dry roads, making it a top choice for those in predominantly wet or summer climates. However, when it comes to snow and ice, the WildPeak A/T Trail shows some limitations, especially when compared to the Trail-Terrain T/A which excels in winter conditions. For those prioritizing snow and ice performance, the Trail-Terrain T/A stands out. But for those in milder winter conditions and dominant summer weather, the WildPeak A/T Trail is hard to beat.

  • WildPeak A/T Trail
    • Launch: 2019
    • Press test wins: 0/1
    • Strength: Wet & dry

Check out our head to head comparison of WildPeak A/T Trail against its competitors.

WildPeak A/T Trail vs

  • Nitto Nomad Grappler
  • Yokohama Geolandar A/T G015
  • BFGoodrich Trail-Terrain T/A

Price

  • 235/60R18 : $209

4. Cooper Discoverer AT3 4S

Launched in 2018, Cooper’s Discoverer AT3 4S has quickly made a name for itself in the world of all-terrain tires. With outstanding snow performance as verified by Tire Rack’s comprehensive tests, this tire has proven to be an exceptional choice for those who need reliable traction and safety in snowy conditions. The Discoverer AT3 4S combines innovative technology and Cooper’s years of experience to deliver a tire that excels in both on-road comfort and off-road capability, making it a top pick for drivers looking to conquer any terrain.

  • Cooper Discoverer AT3 4S
    • Launch: 2021
    • Press test wins: 2/4
    • Strength: Excellent in wet & snow

Check out our head to head comparison of Cooper Discoverer AT3 4S against its competitors.

Cooper Discoverer AT3 4S vs

  • Kumho Road Venture AT52
  • General Grabber APT
  • Continental TerrainContact A/T

Price

  • 265/60R18 : $264

5. Firestone Destination A/T2

The Firestone Destination A/T2 is a noteworthy contender in the all-terrain tire market, having achieved reasonable snow performance results in Tire Rack’s testing. This tire not only offers a dependable grip on snowy surfaces but also excels in various other conditions. Adding to its list of accolades, the Destination A/T2 recently emerged as the best tire in the highly popular 2022 Tyre Reviews All Terrain Tyre Test. With a well-rounded performance across different terrains and a growing reputation for reliability, the Firestone Destination A/T2 is undoubtedly a solid choice for drivers seeking a versatile and high-performing all-terrain tire.

  • Destination A/T2
    • Launch: 2019
    • Press test wins: 1/3
    • Strength: Dry

Check out our head to head comparison of Destination A/T2 against its competitors.

Destination A/T2 vs

  • Continental TerrainContact A/T

Price

  • 265/60R18 : $259

All terrain (AT) with 3 peak mountain

1. Mickey Thompson Baja Boss A/T

Mickey Thompson Baja Boss A/T: A Legacy of Dominance

Mickey Thompson’s Baja Boss A/T is not just another tire in the market; it stands tall on a legacy of tire-making excellence. Combining aggressive aesthetics with unparalleled on-road handling and performance, this extreme hybrid all-terrain tire symbolizes the very essence of Mickey Thompson’s commitment to quality. The asymmetrical tread design ensures reduced noise and superior all-weather performance, while its Extreme Sidebiters® offer an extraordinary look and exceptional off-road traction. Enhanced with the Powerply™ XD and a Silica-Reinforced Compound, it guarantees puncture resistance, quicker steering response, and improved wet handling. And with a 50,000-mile tread wear warranty, the Baja Boss A/T doesn’t just talk the talk but walks the walk.

Winter Performances: Defining Snow Mastery

When pitched against its close competitors, the Falken WildPeak A/T3W and the Toyo Open Country A/T III, the Baja Boss A/T showcases distinctive prowess in snow conditions. Let’s dissect the numbers:

AT snow results
  1. Snow Braking: With 60.30 feet, the Baja Boss A/T stops more abruptly than both the WildPeak A/T3W and the Open Country A/T III, requiring 82.20 and 80.60 feet respectively.
  2. Snow Acceleration: This metric is where Baja Boss A/T shines brightly. At just 13.60 feet (0-12 Mph), it accelerates significantly faster in snowy conditions than the WildPeak A/T3W and the Open Country A/T III, which require 19.10 and 19.40 feet respectively.
  3. Snow Handling (Subjective): Scoring 4.92 out of 10, the Baja Boss A/T is ahead of the WildPeak A/T3W’s 3.83, though slightly trailing the Open Country A/T III’s 4.67.
  4. Ice Braking: On icy terrains, the three tires are closely matched, with the Baja Boss A/T stopping at 57.50 feet, slightly ahead of the others.

In conclusion, the Baja Boss A/T by Mickey Thompson doesn’t merely ride on its legacy but establishes itself as a leader, particularly in snowy conditions. The numbers are clear: for those prioritizing winter performance, the Baja Boss A/T stands out as the best snow tire in the market.

  • Baja Boss A/T
    • Launch: 2021
    • Press test wins: 0/1
    • Strength: Excellent snow !

Check out our head to head comparison of Baja Boss A/T against its competitors.

Baja Boss A/T vs

  • Falken WildPeak A/T3W
  • Toyo Open Country A/T III

Price

  • 265/60R18 : $291

2. Toyo Open Country A/T III

The Toyo Open Country A/T III is an embodiment of technological advancement in the realm of all-terrain tires. Designed to cater to the needs of light trucks, SUVs, and crossovers, it stands as a testament to Toyo’s commitment to revolutionize the tire industry. Following the footsteps of its predecessor, the Toyo Open Country A/T II, this latest iteration introduces a more aggressive tread pattern, advanced rubber compounds, and numerous features that enhance its grip and durability. Among these, its new tread compound ensures enhanced wet braking, improved handling, and resists cut-and-chip, making it a reliable companion for both off-road adventures and city drives. The tire’s evenly distributed void area improves traction, both on and off the road, and ensures stable handling. Its staggered shoulder lugs offer impressive off-road traction, while the increased lateral grooves magnify its prowess on varied terrains, including snow. The 3D multi-wave sipes not only improve wet and snow traction but also diminish irregular wear. Lastly, the stone-ejecting blocks ensure that the tire remains undamaged, maintaining its performance in tough conditions.

Diving into its winter performance and comparing it to its peers like the Mickey Thompson Baja Boss A/T and the Falken WildPeak A/T3W, the Toyo Open Country A/T III showcases notable strengths. In snow braking, it demands only 80.60 feet to come to a halt, closely tailing the Baja Boss A/T but surpassing the WildPeak A/T3W. When we assess snow acceleration, the Open Country A/T III registers a commendable performance, requiring just 19.40 feet from 0-12 Mph, which is almost at par with the WildPeak A/T3W. As for snow handling, it scores an impressive 4.67 out of 10, beating the WildPeak A/T3W and just slightly behind the Baja Boss A/T. However, its true dominance is evident in ice braking, where it halts at a mere 54.80 feet, outperforming both of its competitors.

  • Open Country A/T III
    • Launch: 2020
    • Press test wins: 0/1
    • Strength: Great snow handling !

Check out our head to head comparison of Open Country A/T III against its competitors.

Open Country A/T III vs

  • Falken WildPeak A/T3W
  • Mickey Thompson Baja Boss A/T

Price

  • 265/60R18 : $283

3. Falken WildPeak A/T3W

When it comes to exceptional winter performance in all-terrain tires, the Falken WildPeak A/T3W undoubtedly stands out. Specifically crafted for those who seek unmatched performance without compromising on safety and durability, this tire is a testament to Falken’s dedication to innovation and quality. Its advanced engineering ensures that the tire not only grips the road seamlessly in harsh snowy conditions but also offers longevity and reliability.

Looking at its winter performance metrics and juxtaposing it with competitors such as the Mickey Thompson Baja Boss A/T and the Toyo Open Country A/T III, the WildPeak A/T3W showcases its merits. In the snow braking test, it requires 82.20 feet to stop, which is slightly longer than both the Baja Boss A/T and the Open Country A/T III. However, it’s in the snow acceleration where the WildPeak A/T3W weakness was shown, registering an 19.10 feet from 0-12 Mph, placing last in the group. While its subjective snow handling score of 3.83 out of 10 trails the other two tires, it’s essential to note that this is a subjective measure, and preferences can vary based on individual experience. But where the WildPeak A/T3W genuinely shines is in ice braking. Stopping at just 55.80 feet, it surpasses the Baja Boss A/T and is incredibly close to the leading Toyo Open Country A/T III.

  • WildPeak A/T3W
    • Launch: 2013
    • Press test wins: 0/4
    • Strength: Good ice braking

Check out our head to head comparison of WildPeak A/T3W against its competitors.

WildPeak A/T3W vs

  • Mickey Thompson Baja Boss A/T
  • Toyo Open Country A/T III
  • Bridgestone Dueler A/T Revo 3

Price

  • 265/60R18 : $275

4. Goodyear Wrangler Workhorse AT

Goodyear’s Wrangler Workhorse AT was launched in 2021 with an all season focus and it is specific only for the American market. Based on the head to head comparison below, Wrangler Workhorse AT was good in dry, noise & objective ice/snow but was weak in wet and subjective snow performances.

  • Wrangler Workhorse AT
    • Launch: 2021
    • Press test wins: 0/1
    • Strength: Dry. noise & objective ice/snow

Check out our head to head comparison of Wrangler Workhorse AT against its competitors.

Wrangler Workhorse AT vs

  • Cooper Discoverer Rugged Trek

Price

  • 265/60R18 : $251

5. Cooper Discoverer Rugged Trek

Cooper’s Discoverer Rugged Trek was launched in 2021 and has been developed specifically for the North American market. Based on the head to head comparison below, Discoverer Rugged Trek was strong in wet and subjective snow performances while lacking behind dry, noise & objective ice/snow.

  • Discoverer Rugged Trek
    • Launch: 2021
    • Press test wins: 0/1
    • Strength: wet & subjective snow

Check out our head to head comparison of Discoverer Rugged Trek against its competitors.

Discoverer Rugged Trek vs

  • Goodyear Wrangler Workhorse

Price

  • 265/60R18 : $275

Summary

In conclusion, selecting the right all-terrain tire for snow is crucial for ensuring optimal performance, safety, and driving comfort. Among the top contenders, the 3-Peak Mountain Snowflake certified tires stand out for their superior traction and handling in snowy conditions. Each tire mentioned in this article offers its unique set of strengths, making it essential for drivers to weigh their specific needs and preferences. Whether it’s the Cooper’s Discoverer AT3 4S, Yokohama Geolandar A/T G015, Firestone Destination A/T2, Mickey Thompson Baja Boss A/T, or Toyo Open Country A/T III, all of these options have proven their worth in the all-terrain tire market. By carefully considering the features and performance aspects of each tire, you can make an informed decision and confidently conquer the snow and various terrains that lie ahead.

Best Air Rifle Deals

Popular Posts

Guide to find Best Scope for Break Barrel Air Rifles

0
"Unlock the Perfect Shot: Discover the Best Scope for Break Barrel Air Rifles. Enhance your shooting experience with precision and accuracy, as we delve...

Air gun 101: Everything you need to know about air rifle accuracy

0
Wyatt Earp has said: Fast is fine, but accuracy is everything And I just thought how many airgunners are obsessed with muzzle velocity and muzzle energy,...

How far can an air rifle shoot accurately?

0
An air rifle's effective shooting range depends on various factors, including the type of rifle, the caliber, and the power source. Generally speaking, most...

Pump Air Rifles vs Break Barrel

0
Exploring the Pros and Cons: Pump Air Rifle vs Break Barrel - Unveiling the key differences and advantages between two popular air rifle mechanisms....

Synthetic vs Wood Stock: The Final Showdown Between Brunette And Blonde

0
I understand that you’re here to get some quick facts on synthetic vs wood stocks Probably to guide your purchase.  Quick alert - the debate...