Home Blog Page 203

Walther P22 Review [Hands-On]: Perfect Rimfire Trainer

0

.22LR is not only great for plinking, but a great introductory round for new shooters.

I originally bought the Walther P22 to teach my wife to shoot, and after thousands of rounds, and plenty of new shooters…I can say that it is a near perfect training pistol.

It has tons of features found on more expensive guns and with relatively affordable .22LR ammo, the P22 can be a no-brainer buy. Read on to see if it fits your purpose!

Features and Specs

Key Specs

  • Caliber: .22LR
  • Capacity: 10+1 rounds
  • Barrel Length: 3.42 in
  • Overal Length: 6.3 in
  • Width: 1.1 in
  • Height: 4.5 in
  • Weight: 17 oz
  • Frame: Polymer
  • Grips: Textured polymer

Key Features

  • Interchangeable backstraps
  • Windage adjustable rear sight
  • Captured recoil spring
  • Double action/single action trigger
  • Threaded barrel
  • Ambidextrous mag release and slide safety
  • Has 2, 10 round mags
  • Safety: manual external, fire pin block, mag disconnect
  • MSRP: $339

More information can be found at Walther.

Pros & Cons

+Great training tool for higher caliber pistols+Can be easily threaded for a suppressor+Super light recoil+Comfortable grips+Ambidextrous controls

-Cheap feeling sights-Gets dirty easily but that’s .22LR

Background

The Walther P22 was one of the original semi-auto .22LR handguns and has been satisfying shooters since 2002.

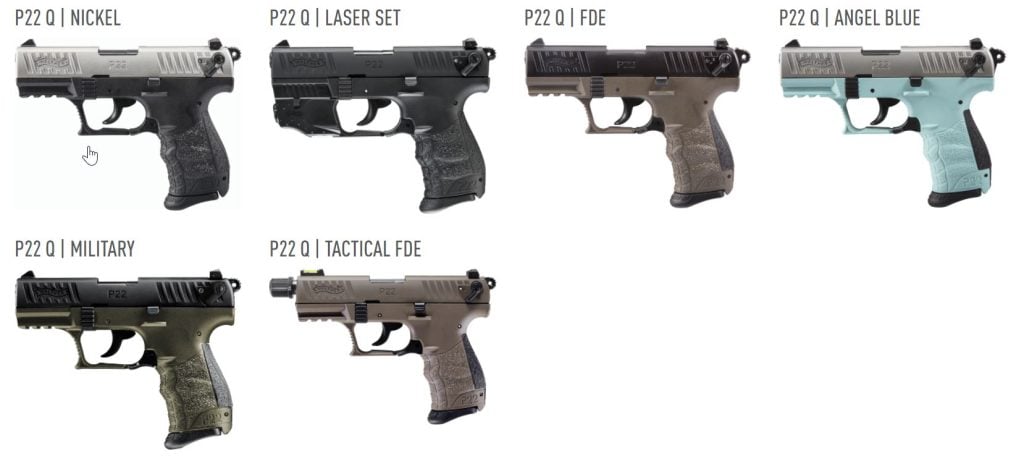
The latest generation is now called the P22 Q and comes in a bunch of colors and variants.

Walther P22 Q Variants

We love how there’s now threaded versions and also versions that come with a laser.

Fit & Feel

The P22 is a solid handgun that has the fit, finish, and features of a much more expensive gun. A lighter polymer frame is the perfect match for the softer shooting .22LR caliber.

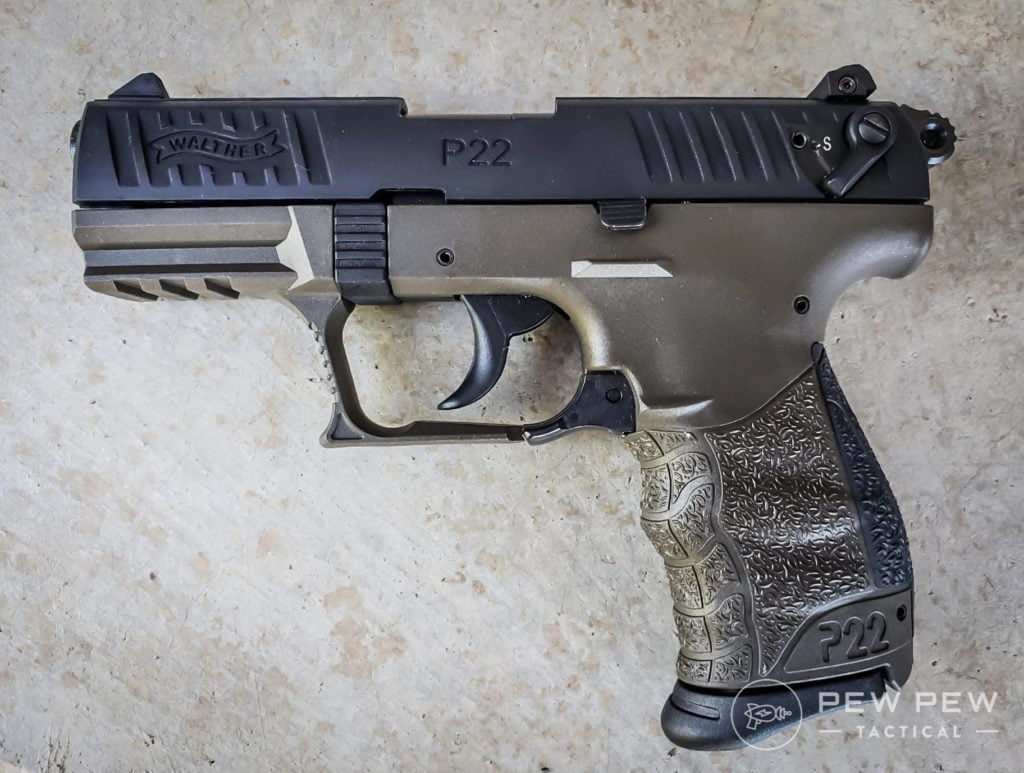
Walther P22 Side
Walther P22 Side

Barrel

Like most .22LR caliber handguns, the P22 has a fixed barrel design so takedown is a bit different than most full-sized guns, but the additional steps are straight forward.

A nice feature of this barrel nut is that an adapter is all that’s required to convert your barrel to a threaded barrel version if you live in a state that allows silencers.

Even though it is fixed barrel, cleaning the barrel is easy as it removes quickly with the supplied wrench, or if you choose, you can simply clean it while it remains attached to the frame.

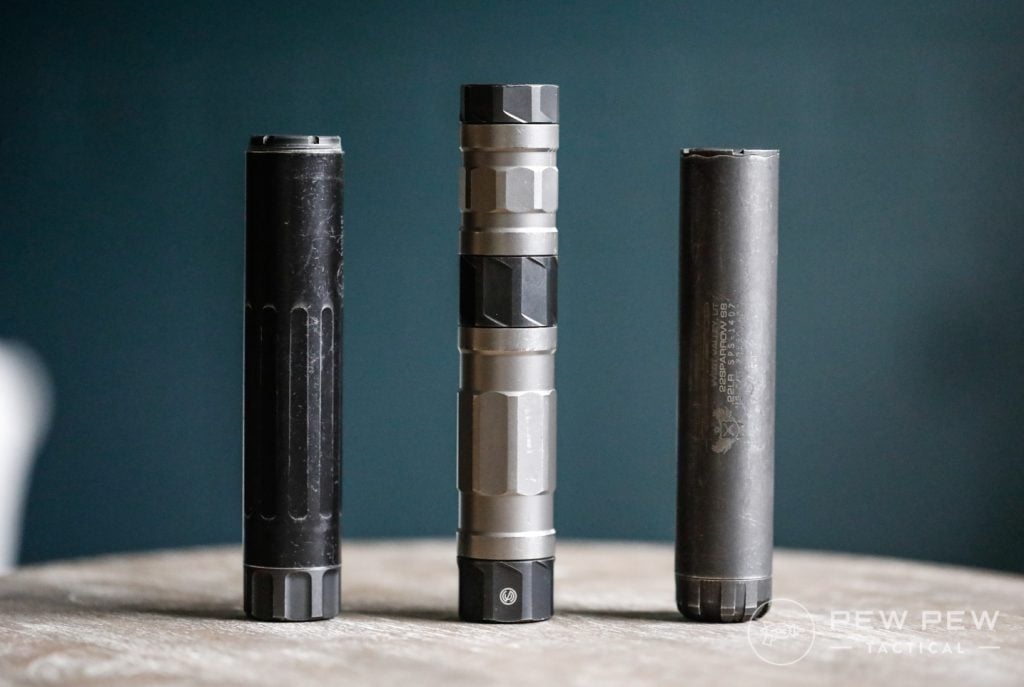
Need some inspiration for a .22LR can? Check out our Best Rimfire Suppressors article.

Best .22 Suppressors

Slide and Frame

While this is a budget-priced gun, it does come with some features not normally found on lower priced guns.

A serrated slide for better grip makes the slide more easier to work, even with sweaty or wet hands. Even the hammer has serrations for added grip!

A loaded chamber window isn’t what most would consider critical, but it is a nice feature that doesn’t get in the way and gives you a simple way of seeing what condition your firearm is in.

Under the slide, you’ll find an accessory rail to mount lasers and lights on making for some nice options.

The magazine release and safety levers are ambidextrous but the slide stop is still built for right-handed shooters.

I’m also not a huge fan of the safety lever on the actual slide, but it is engineered well, and easily accessed by my thumb without having to change my grip.

It also has a very positive feel so you know when you’ve placed the P22 in fire or safe mode.

Grip

Make no mistake about it, this gun is small, and therefore, the grip is also thin and small.

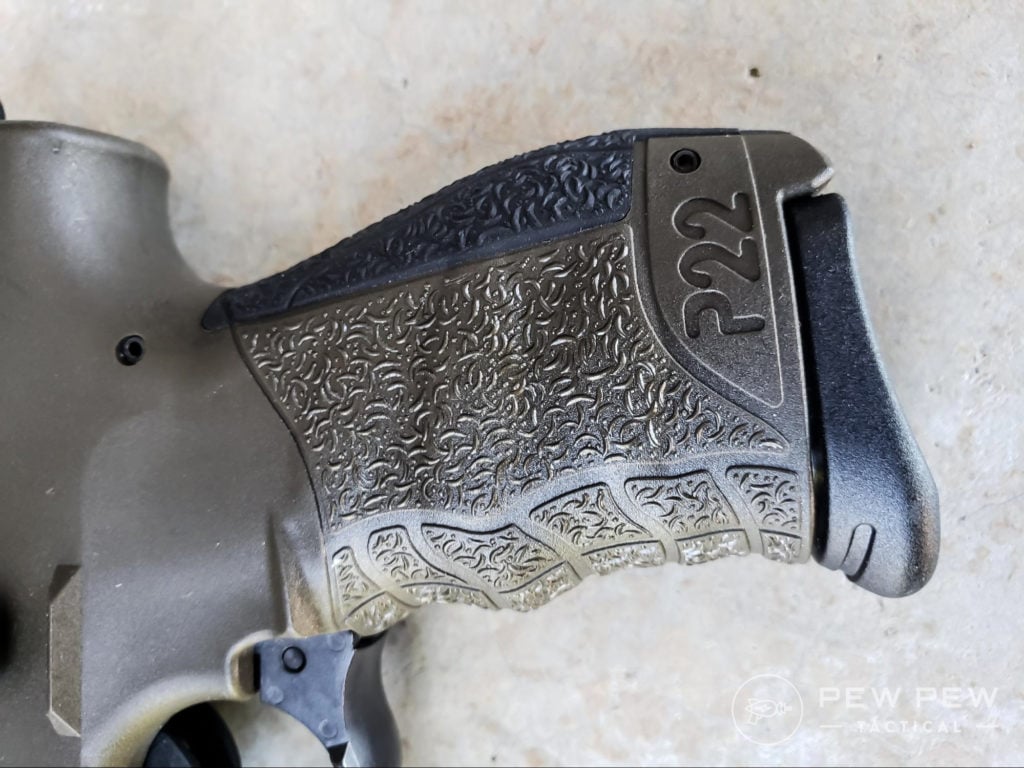
Finger grooves line the grip which is a nice texture; not too rough on contact but provides good grip.

Walther P22 Grip

Out of the box comes an additional back-strap to better fit larger/smaller hands.

Most of the time, a very thin profile gun means an uncomfortable grip, but there are two things working in the P22’s favor…

First, the P22 comes with ergonomic panels, and second, .22LR is a such a low recoil round that the thinner grip doesn’t create the hand fatigue a larger caliber might.

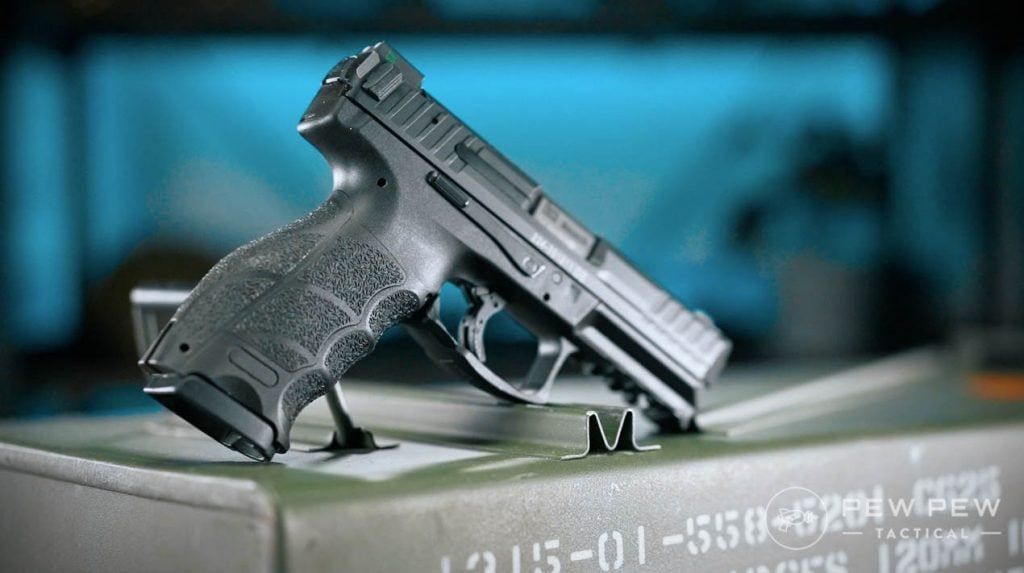
I find the grip is similar to the HK grip on the P30 or VP9 and it is straight up comfy. For my medium sized hands, I love how snug the gun feels.

HK VP9
HK VP9 Grip

What’s even better is that my wife, who has small hands, loves the feel of the grip and overall gun.

Trigger

The action is a DA/SA with a manual safety. You have the mechanical safety on the slide, but the P22 also includes a magazine disconnect safety which prevents the trigger from being pulled unless there is a magazine in the gun.

Newer P22s also have a safety de-cocking feature that allows you to safely drop the hammer using the manual safety.

The DA/SA action is predictable but some may find the 11lb DA pull undesirable, but most of the time you are shooting it in the light 4lb SA stage.

Sights

For me, the only thing that feels “cheap” on the gun is the fact that it comes with what dot polymer sights. While this is good enough for range use, they are no one’s favorite sighting system.

How Does It SHoot?

I have never had an issue shooting different ammo types in the P22, but I have seen that a lot of P22 users claim that their handgun is picky on ammo.

Most agree that higher powered rounds don’t have issues.

Federal ammo is the ammo I consistently run through my 22lr guns and I have always had great success.

Yes, there have been some rounds that stove-pipe or FTE, but I think that is to be expected in any 22lr gun.

I feed by P22 a steady diet of 36 grain Federal, 40 grain Federal Target, and 40 grain CCI.

Sub-sonic ammo will definitely be unpredictable as it the right might not have enough power to cycle the slide.

Keeping the gun clean is definitely important in keeping jams to a minimum. I try to clean my P22 frequently, especially the feed ramp and slide rails.

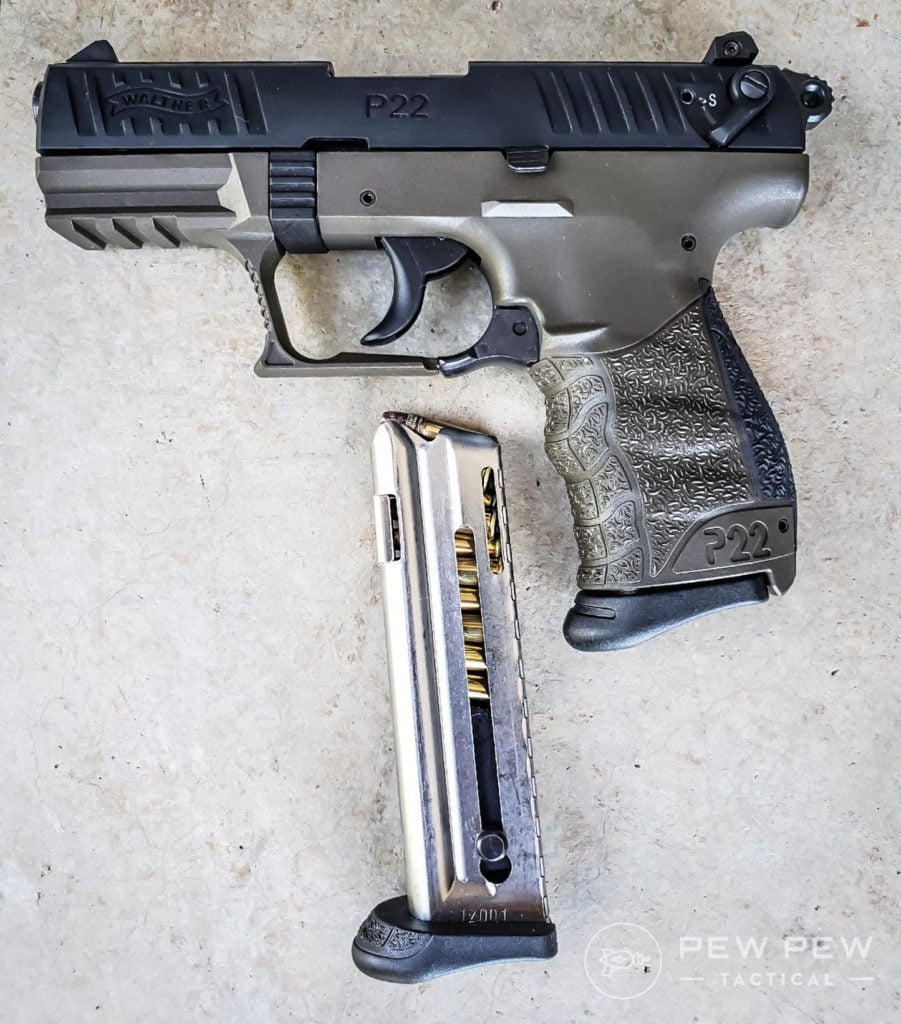
Walther P22 and Magazine

The P22 magazines are metal but pretty thin. Don’t expect these to stand up to too much abuse – thankfully, extra mags won’t break the bank.

Accuracy

My view of .22LR ammo changed after I took my first Appleseed rifle marksmanship clinic. While this doesn’t have anything to do with the P22, it does have everything to do with the round it shoots.

I showed up to the Appleseed clinic with my stock Ruger 10/22 (with a trigger upgrade) and bulk Federal ball ammo (not match, not high velocity). 1” Targets were set back 25 yards and was told to put 5 rounds inside the target with iron sights.

After balking and then realizing they were serious, I definitely cried some internal tears. But by the end of the clinic, not only was I able to do this (shooting prone), but I left with complete confidence in the accuracy of the .22LR round.

With the P22, it is accurate enough to make shooting enjoyable. We are not taking it to target competitions, but making my steel silhouettes ring is easy and a ton of fun.

I would estimate it at 2MOA if you’re doing your thing.

My wife, who doesn’t shoot nearly as much as I do, is able to comfortably put shots on target. This is due to several factors, which include grip comfort, the light weight of the gun, and the lack of recoil and sound.

Recoil

Anyone who has shot .22LR knows that the recoil is minimum.

Even in higher velocity rounds, it is still extremely manageable, making follow-up shots easy and accurate, especially since subsequent shots are single action with the lighter trigger pull.

What Sets It Apart?

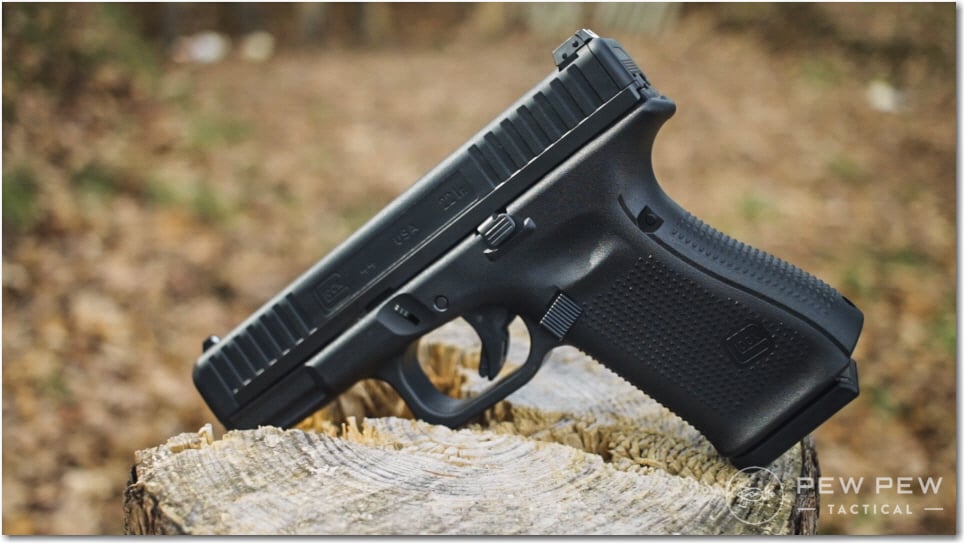
For a while the P22 was the go-to semi-auto .22LR pistol out there. Now you have some competition with the Glock 44, Taurus TX-22, and the Sig Sauer P322.

Glock 44 .22LR
Glock 44 .22LR

Though the TX-22 and Sig Sauer hold more rounds, the P22 can still hold its own based on ergonomics and reliability.

Takedown for cleaning, since you’ll be doing a lot of it, is easy with this tutorial:

By The Numbers

Ergonomics 4/5

The P22 is extremely comfortable, offering some customization of the rear grip panel. With a thin gun width, it is very comfortable to hold with both hands. All of the functions of the handgun (safety, magazine release, slide stop, trigger) are easy to manipulate and many are ambi.

Accuracy 4/5

For having a fun day at the range, it does it perfectly. There is a target barrel that can be purchased which is a longer 5” barrel, but the shorter 3.42” barrel is plenty accurate for plinking.

Reliability 4/5

.22LR handguns get dirty, and it is true that these P22s need to be kept clean (like any other .22LR handgun). If you allow it to get dirty, you may begin to experience issues. I am notorious for not cleaning my guns often and I do notice it with my P22, mostly because of how dirty .22LR ammo is.

Looks 5/5

For a .22LR, I think the P22 looks the best. Besides the fact that it is a small gun, it looks impressive. You can get the P22 in a variety of colors/configurations.

I love the military color scheme on my P22! The serrations on the slide with the Walther marking looks sharp with the grip stippling an attractive functional and beautiful addition as well.

Upgrades: 4/5

There isn’t a huge selection of upgrade parts but there is a decent amount, most of them made or sold by most retailers. Having an accessory rail means that you can fit lights and lasers (or knives) on the end of the handgun

Price/Value 5/5

The price is hard to beat! A fraction the cost of larger caliber handguns, the P22 is affordable, allowing you to invest your money into ammo and accessories. For the features it has, I believe it to be one of the best values on the market.

Overall 4/5

I love the P22! There is something special about this lightweight, feature-packed gun. My friends love to shoot it and many have made their own P22 purchase after shooting mine.

It is so much fun to shoot and is great to teach friends how to shoot. Walther hit a home run with this gun and jammed something amazing into a perfect little pistol.

Upgrades

You’ve got a rail up front so you can always add a light…our favorite go-to is the TLR-1 HL series.

And like we mentioned above…if you want to suppress the P22 all you need is an adapter kit.

And you can always do with extra mags with all the lead you’ll be slinging downrange.

Verdict

This Walther P22 is just plain fun. How else can you send thousands of rounds down range without worrying about ammo cost?

The best part is not having to compromise comfort or features for that cheap and fun range experience.

I can say from experience that the P22 is pure gold with plenty of features, accuracy, and comfort!

How do you like your P22? Got another go-to 22LR plinker pistol that you love? Let us know in the comments! If you’re ready for a rifle to go with your pistol, take a look at the Best .22LR Pistols!

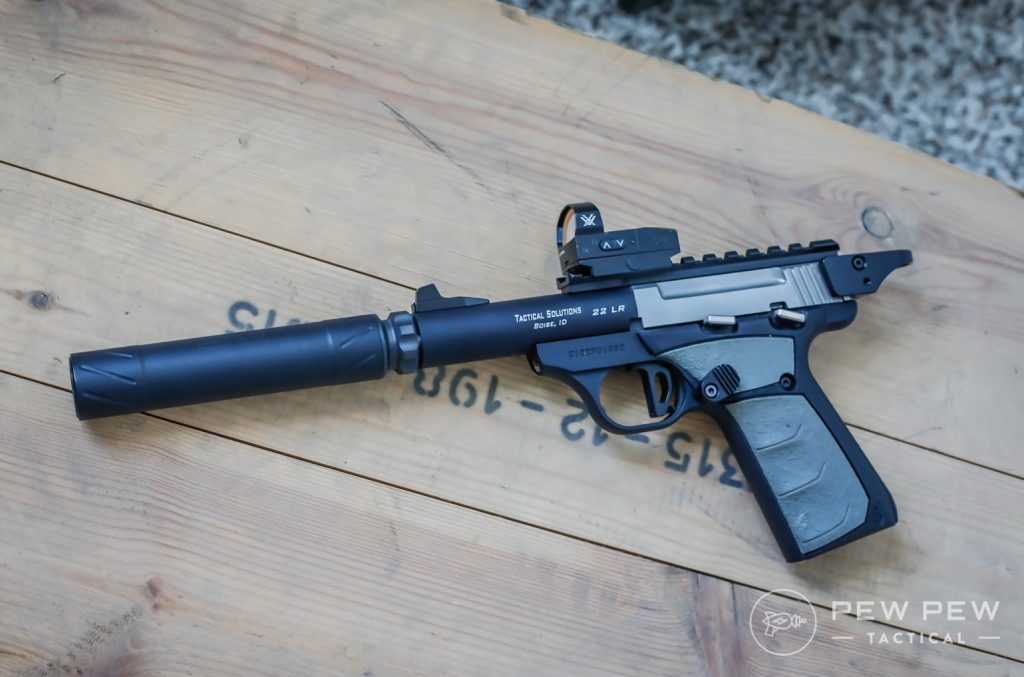
Ruger Buckmark with Banish 22

6 Sneaky Coyote Tactics to Separate Yourself From Pack

0
6 Sneaky Coyote Tactics to Separate Yourself From Pack

There’s no need to let a spot rest after taking a coyote from it. Another will usually be ready to move in and take its place. (Photo by Josh Boyd)

Success is far from guaranteed when predator hunting, and every hunt holds just as many challenges as it does promise. To overcome these challenges, crafty predator hunters dig deep into their bags of tricks to turn the odds in their favor.v

Sometimes, the most overlooked or obscure tactic is the one that puts fur in the shed.

Few predator hunters’ bag of tricks run quite as deep as Tad Brown’s. Brown has spent decades chasing coyotes, bobcats and various other furbearers in every corner of the country, and he’s grown accustomed to meeting predator hunting’s challenges head-on.

The following are six of Brown’s most effective predator tips and tactics, which he regularly employs to produce consistent success.

1. Drive Instead of Walk

Over the years, the idea that vehicle traffic imparts undue pressure on local predator populations has been ingrained in the average hunter’s psyche. However, Brown feels this notion is of little merit, and that traveling as close as possible to your next set by vehicle can often be among the least invasive means of access.

“I won’t walk 10 feet to my spot if I can hop in my truck. Coyotes are so used to hearing vehicles now. You have guys checking cattle, working on plots, putting up hay and driving through farms. It’s a common occurrence, and coyotes do not pay it any attention,” says Brown.

However, he does warn against throwing all caution to the wind, and stresses the importance of remaining aware of common predator hunting fundamentals. “Just get right in there with them, but use a little common sense. You still have to have the wind to your face, and it still makes sense to hide your vehicle.”

2. Hunt Past the Initial Shot

Another tactic Brown feels others overlook is to continue calling even after the hunt’s first shots have been fired. While many believe that the sound of gunfire scatters wary coyotes to parts unknown, Brown says thinking along these lines often costs hunters more shot opportunities than they ever realize.

“Guys tend to think that once they’ve fired a shot, they’ve scared everything in the country. There is nothing further from the truth. I can think of at least a half-dozen instances where I’ve killed or shot at a coyote only to have a bobcat or another coyote come into the call,” Brown says.

He also finds it helpful to vary his calling in the moments directly following a shot. “A lot of times, after I bust a coyote, I will go to a ki-yi or pup distress,” he says. “Doing so seems to have some type of instinctual effect on them, almost like a challenge of sorts. Typically, I’ll only do this for a short period of time before changing back over to a prey sound.”

3. Hunt Quality Sets Regularly

Many predator hunters believe a location can be rendered useless by overhunting it and will allow a spot to rest for a significant period between hunts, especially after it’s produced success. On the contrary, Brown feels that nature fills the void any time predators are removed from an area, and the avoidance of quality setups can cost you fur in the long run.

“Most people discount a location if they’ve already called it. Coyotes are constantly on the move, and one will almost always take the place of another,” Brown says. “It’s almost like waiting in line for the bathroom. Once you take a coyote out of an area, others will be waiting for their turn.”

Brown has seen the benefits of frequently hunting the same spots within areas of high predator traffic on numerous occasions. “There’s a spot on a ranch I hunt that is like my honey hole,” he says. “If I’m out there for four or five days, and the wind is right, that will be the first set every morning. I’ve had hunts where a coyote responds every time I call at that location.”

predator hunting
Over the course of his career, Tad Brown has developed numerous calls and other products for brands like M.A.D. and Hunter Specialties. (Photo courtesy of Tad Brown)

4. Prepare Spots in Advance

For most, predator hunting tends to be a run-and-gun endeavor. Hunters often seat themselves in a promising looking spot and then make decisions on the fly. However, Brown says that one of his most effective strategies is preparing sets in advance.

“There isn’t anything worse than setting down in a spot, calling in a coyote and realizing you’re not in position to take advantage of it,” he says. “I like to go into an area ahead of time and sort out whether I will be able to kill a cat or coyote if they come down a particular road. I treat my predator hunting spots just like my deer or turkey spots. I like to trim shooting lanes and make sure I can see.”

Brown feels that this level of preparation not only increases his odds of success, it makes him a more effective hunter in general. “Sizing up a spot before hunting it allows me to make decisions about where and how to set up for a certain wind, as well as how best to call,” he says. “Knowing these things in advance and preparing each spot allows me to be a more efficient predator hunter and put more fur on the board.”

5. Let Curiosity Be Their Undoing

If you ask any number of predator hunters what they do to finish reluctant coyotes or bobcats, most will be adamant about varying up their calling in a bid to entice a frenzied response. Brown, on the other hand, finds that the best medicine for stubborn predators is often to let their curiosity get the best of them.

“Most guys go to a squeaker bulb or a coaxer sound to finish cats or coyotes. I tend to do nothing. I either stop calling or turn my volume way down. They know what they heard, and shutting everything off is more than a coyote or bobcat can stand,” says Brown.

He also emphasizes the importance of staying vigilant, even if a predator seems to lose interest after calling has ceased. “A lot of times a coyote will seem to slip off, and this might make you think he’s leaving. However, if you just sit there, he’ll often pop back into sight.”

6. Scale Setups Based on Location

Many hunters approach eastern predator hunting with a broad-stroke approach, mirroring many of the techniques that are commonly used when hunting in the Midwest and West. However, Brown feels that hunters often limit themselves by not tailoring their efforts to suit the area in which they are hunting.

“When hunting out West, you typically put several miles between sets. This is rarely the case when hunting in more populated areas in the East,” he says. “You almost have to treat densely populated areas like a miniature golf course. You aren’t driving that ball a couple hundred yards; you’re putting it just a few feet. When hunting the East, I typically tone my calling volume down and make more individual sets.”

He’s also quick to point out that eastern hunters are afforded a significant amount of opportunity based upon the general lay of the land. “If you were to hunt 1,000 acres of land, even if it’s more heavily populated, you can make far more sets back East than would be the case when hunting in the West.”

Much in the world of predator hunting has remained relatively unchanged over the past several decades. However, avowed predator hunting fanatics, such as Tad Brown, continue to experiment with new and innovative means of finding success. By utilizing such techniques in your own predator hunting, you’re likely to find yourself knee-deep in skinning duties this winter.

Coyote Kit

Gear that’ll take your game to the next level.

Alps Outdoorz Enforcer

If your predator hunting keeps you on the move, the Alps Outdoorz Enforcer backpack (above) is a one-size-fits-all solution for quick, convenient and comfortable setup. The Enforcer features 800 cubic inches of storage space, a removable kickstand frame and an integrated memory foam cushion. ($169.99; alpsbrands.com)

FoxPro XWAVE

FoxPro’s new XWAVE e-caller offers hunters a level of versatility that few other calls do. It features two swiveling high-definition speakers, a compatible auxiliary jack for decoy integration and 100 pre-loaded sounds with the capacity for an additional 1,000 sounds. The XWAVE is Bluetooth-enabled, allowing hunters full control from their mobile devices. ($699.95; gofoxpro.com)

Primos Double Bull Stakeout Blind

The Double Bull Stakeout Blind with SurroundView ensures that you are never left scrambling for a hideaway when gunning for predators. This two-wall blind features translucent panels that allow you to see out without predators seeing in. The Stakeout Blind is also extremely portable, weighing only 4 1/2 pounds, and deploys in seconds. ($99.99; primos.com)

Vortex Fury HD 5000

This range-finding binocular makes it possible to glass for coyotes while simultaneously gauging their distance. While looking through these 10X42 optics, a hunter can center a small crosshair and take distance measurements out to 5,000 yards. This state-of-the-art bino features a “scan” mode, which allows for real-time distance measurement when tracking moving predators. ($1,599.99; vortexoptics.com)

DIY Deer Hunter: Build a Wooden Ladder Stand

0

Building A Wooden Ladder Stand For Hunting

There is just something about wooden, homebuilt tree stands. Maybe it’s because I grew up hunting from them, but I just feel more comfortable in a home-built stand, especially when facing an all-day sit. More importantly, the permanent stand expresses just that: permanence. Even though a stand built on a shared property should be open to everyone, there is a very real sense of ownership if you are the one that built it. It’s not just a stand, its Dan’s Stand or Mark’s Stand or Scott’s Stand.

Our farm has a fair amount of pressure on it during the 9-day November gun season, with up to 10 guys spread out over 300-acres of woodlots, CRP and harvested crop fields. Many of the hunters have “their” stand location and have been at that specific spot for most of their lives. Over the last couple years, I’ve been using hanging stands to hunt a 20-acre section that for a variety of reasons, has not been heavily hunted for a decade or more. In that time, I’ve recognized it as a forgotten and ignored gem.

Bucks have scrapes and rubs to let everyone know they are around. I’ve got a wooden tree stand to let other hunters know they’ve entered my zone. By constructing it, I’ll be claiming this section of the farm as my own during the crowded gun season. Even though the secrets out on how good this location has been for me, the other hunters are respectful enough not to build another stand in the vicinity. As the sole bow hunter, I am lucky to have the farm to myself during the long and quiet archery season. With this new stand, I’ll have yet another comfortable set up to use when the conditions are right to hunt a buck from that location.

DIY Deer Hunter: Build a Wooden Ladder Stand

Below are instructions to build the stand. As a bit of a disclaimer, should you decide to take this project on for yourself, understand that your safety is in your own hands. Know the limits of your carpentry skills, and the potential risks involved in constructing your own stand.

Material List

2×4 x 14 treated lumber for the legs.

2×4 lumber for steps, stand platform, seat base and braces, uprights and rails

1×6 boards for decking

14- 5/16 x 4 hex bolts, with nuts and washers to assemble the stand

2 – 6-inch eyebolts with nuts and washers to attach a ratchet strap to.

2- 1/2 x 6 lag bolts with washers

2.5 inch deck screws for decking and ladder steps

Tools

Crosscut saw, electric drill, drill bits, square, tape measure.

Instructions

  1. The treated 2×4’s will run the entire height of the stand. Decide how tall you want the side walls of the stand platform to be and measure that distance down from the top of the treated 2×4. Drill a pilot hole in each 2 x 4 at this location. This is where the platform will bolt on to.
  2. Build the platform base so that it will fit inside of the span created by the ladder. The overall width of my stand is 32 inches, so the floor frame works out to be 29 inches wide by 42 inches deep. Install a 2×4 floor joist in the center to help support the floor boards. On the back of the platform, pre-drill two holes for lag screws to be threaded through when mounting the stand to the tree.
  3. Cut 1×6 decking and attach to platform using screws
  4. Bolt the platform to the legs.
  5. Cut 2×4’s at 32-inch lengths to use as the steps for your ladder. Screw in a step every 18-inches or so until reaching just below the platform base.
  6. The seat frame consists of two, 42-inch, 2×4 rails running the length of the platform with 4, 32-inch long 2×4’s strung between them to make the seat itself. Bolt the front of the seat base to the ladder at your desired height above the platform.
  7. Cut two, 42-inch top rails. They will tie the ladder to the rear uprights.
  8. Cut two rear uprights to length. They should be level with the top of your treated 2×4’s. Bolt the uprights to the platform and top rail.
  9. Bolt the rear of the seat base to the upright using a eyebolt. Besides holding the seat base up, the eyebolts can be used to tighten a ratchet strap around the tree for added stability and support.
  10. With the stand in position, attach the braces between the ladder and the back of the platform base.

To get the stand standing, I brought my brother along for help and we were easily able to “walk” it from flat on the ground, to up against the tree. It’s going to take some repositioning of the stand itself to get it just right, so leave the bolts that hold the stand together just a little loose. You’ll tighten them up as you get the stand in place.

The platform is anchored to the tree using 2 lag bolts. You’ll need to bring along climbing sticks or a ladder to assist in placing the bolts, since the base of the platform will be 6-10 feet off the ground. To make this easier, I waited to screw in the floor boards until after I had secured the stand to the tree and ran the braces. As a secondary safety precaution, a ratchet strap is strung around the tree using the two eye bolts. Once the placement looks good, retighten all the bolts that hold the stand together, make sure your ratchet strap is in place, and you’re ready to hunt.

Improve and accessorize the stand by stapling camouflage fabric to the frame for additional concealment, and attaching your assorted gear hooks, camera arms, etc.

Getting a stand like this in place can sure be an exhausting job. The good news is, you’ll only have to do it once. On our farm in southern Minnesota, stands like this can last decades, only needing occasional and minor repair work.

BEFORE You Buy the SIG P365, Read This REVIEW

0

Does the P365 Live Up to the Hype?!

No gun has received the attention that I’ve seen the SIG Sauer P365 receive since its announcement in January just before SHOT Show. It gets this attention in all fairness, though, because when a gun shakes up the current single-stack 9mm market, dominated by Glock 43’s and M&P Shields, it’s understandable.

For the last 6 years, gun owners have bought into the idea that a concealed carry gun needs to be slim, lightweight, single-stack, somewhere between 6-8 round capacity, and striker-fired. Concealed carriers have also bought into the idea that it MUST be single-stack for a gun to fit those requirements.

Enter the SIG P365. It is all of those things—slimmer than the Glock 43, lighter than the Shield. It has a phenomenal trigger not just for guns in this class but even for any modern defensive pistol. And then there’s the fact that it just happens to hold 10+1 rounds in its standard configuration. That’s four more rounds than the G43 and three more than the M&P Shield. Readily available 12-round magazines boost that to nearly double the capacity of the Glock.

And you wonder why people are going nuts over this pistol.

But they’re also freaking out over some other aspects of the pistol, and not necessarily in a positive way. But first, let’s talk about some of the features and specifications of the gun.

trauma gear banner

Specifications

First Impressions:

Grip

I first got my hands on the P365 just before SHOT Show at a special SIG SAUER Range Day Media event. My good friend, Kyle Lamb, was there as well doing some demonstrations for SIG. Besides being involved in the excitement surrounding the P365, Kyle also has a gun he designed in collaboration with the team at SIG based on the P320 platform, the SIG SAUER X-VTAC 9mm, which is a pretty nice piece of hardware itself.

Kyle did a little demonstration of the P365 on camera with me, and the shots you see me fire there are the first I sent downrange out of this little beast. I call it that because it is like the Little Engine That Could, small in size and stature, but big in performance!

Right away, I knew there was something pretty special about the little gun. Placing it in my hand, I was immediately surprised at how good the grip felt. The P365 takes some of its design cues from P320, X-Series pistols. Particularly in its stippling and smooth trigger guard undercut. The undercut allows the shooter to get an even higher grip on the gun for greater control and flatter shooting.

The P365 sit’s nicely in the hand’s webbing because of the grip’s backstrap and beavertail design. I saw a graphic online with the outlines of 3 of the most popular single-stack 9mm handguns overlaid and compared to the P365.

Analyzing the graphic, I could see that the P365 has a bore axis height as low as anything out there. The low bore axis is surprising because SIG Sauer guns, especially in the Classic line of pistols, have established a reputation of having a bore axis that is relatively high compared to competing designs. Not that this has kept me from shooting them quickly and efficiently.

Bore axis height is an overrated factor, but regardless the SIG P365 performs exceptionally well in this regard.

Stippling on the grip is effective and comfortable. The gun sticks in the hand like it should without being too aggressive for more sensitive skin.

Trigger

The next thing I noticed right away was the trigger. My first trigger press surprised me as I wasn’t expecting it to fire so quickly and easily. Sig says it has a 6- lb trigger.

I have not put a trigger scale on it to test, but I would say 6 lbs. seems about right. But the trigger FEELS lighter than that. It is deceptive. I’m not sure what sorcery (you will see similar references throughout this review) is going on there, but it is a very nice, light, crisp trigger for a striker-fired gun.

The trigger reset is fantastic as well. It is short and distinct. The initial take-up of the trigger is light and free. The travel of the trigger once you “hit the wall” (the point where you feel resistance in the stroke) is about a quarter-inch. Pressing the trigger through the stroke is smooth and even. Once it breaks, there is no perceptible overtravel.

Instead of having the trigger break near the rear of the trigger guard opening, it breaks with about 3/8” open space behind the trigger. The length of pull has an outstanding balance. Shooters with smaller hands will have no problem working the trigger, and larger-handed folk will use it comfortably.

Sights

The original P365 came with SIG-Lite Night Sights. I have owned several SIG pistols with these night sights. They are good, serviceable tritium-based sights, far better than what many firearm manufacturers put on their stock pistols.

However, early into the P365 launch, customer’s discovered their pistols were breaking the tritium vials due to the extreme recoil velocity of the slide. These early pistols were sent back in and replaced with SIG SAUER’s new XRAY3 Day/Night Sights. The XRAY3 sights are fantastic! They are bright in daylight or low-light conditions. The front sight is a tritium vial surrounded by a bright green circle that is very easy to pick up in rapid strings of fire.

The rear notch sight in use works more like a blacked-out rear sight in daytime use, but it also has two tritium dots that show up very nicely in low light. While you can see the two rear dots in the daytime, I don’t notice them. While shooting fast, you get a very bright front sight that is easy to find in the rear notch.

Recoil and Shootability

The next thing I discovered about the P365 is that it is easy and pleasant to shoot. I call it the “little gun that shoots like a big gun.” This is true of the felt recoil and muzzle rise that occurs when firing, but it is also true in how accurate the gun is and the ease with which confidence comes to hit your intended target.

While some smaller guns can be challenging to shoot at a distance or small targets, my experience with the P365 is that if you see that bright green front sight on the target and press the trigger smoothly, you WILL hit for what you aim.

With my Glock 43, it just seems I have to concentrate much more on the sight picture, and even then, it sometimes isn’t enough when shots go where I do not expect them to. My confidence with the P365 is very high, and I find myself shooting it in situations and challenging shots that I usually reserve for my larger, duty-sized guns.

Now back to the handgun’s recoil. Recoil with the P365, like its trigger, is deceptive. It is a small gun, to be sure, so I expected it to be snappy. But it FEELS less snappy than similar guns in this category. Watch this video of me running a Bill Drill with the gun (done at 3.5 yards and shooting a 2.5” group in 1.94 seconds). Pay attention to HOW FLAT the gun is in my hand:

That is some serious voodoo magic. This thing seems to shoot flatter than some of my much bigger, heavier guns. Your mileage may vary depending on how effective and tight you grip your gun, but it is still impressive.

BEFORE You Buy the SIG P365, Read This REVIEW

Capacity

Capacity is where the P365 gets the most significant amount of attention, and rightfully so. I don’t know what kind of witchcraft the engineers in Exeter, NH are employing, but for the size and thickness of the P365 to be able to fit 10 or 12 rounds into a profile that doesn’t look any bigger than an S&W Shield, it is pure witchcraft I’m telling you, pure mysticism!

The reality is that then-new Pistol Product Manager Phil Strader instructed engineers at SIG SAUER to design a new micro-compact pistol. And to start first by developing a double-stack magazine capable of holding at least 10 rounds and making it as small as possible.

The result? Three new patents just based around the magazine made the rest of the design much more easily achieved.

The gun comes with two 10-round magazines, one with a flush base plate and another with a slight pinky finger extension. Oddly enough, after shooting several hundred rounds, I came almost to prefer the flush baseplate when using the 10-round mags.

Due to the trigger guard undercut and other grip design features, I can sneak about half of my pinky onto the gun’s grip. But even if I couldn’t get a full grip on it, I never once felt compromised in shooting the gun well, unlike other competitor’s guns.

A 12-round magazine is also available, and while it extends the grip length, it is still just barely longer than some other guns with standard capacity magazines in them. The M&P Shield with a factory 8-round magazine is longer than the P365 with a 12-round magazine. Wizardry!! Harry Potter would be proud!

Even better than the capacity and the ability to remain a very concealable gun? The 12-round magazine makes the P365 feel and shoots like a different gun. It FILLS the hand, and it FEELS excellent!

The magazines are well-constructed metal-bodied, double-stack magazines. They are pretty much what to expect from SIG if you are familiar with their other mags. Excellent quality, great performing magazines, but they come at a cost. Currently, there are no aftermarket magazine options that I am aware of, so you’ll be getting your fill of extra mags direct from SIG.

Accuracy

The SIG SAUER P365 is accurate. Testing across many different loads, it exhibited outstanding groups. I am not the most skilled bullseye/target shooter (I prefer to go FAST), but the gun is accurate enough for a small defensive tool. Group sizes were consistently around 3 inches at 15 yards (I didn’t have a longer range to test with at the time).

My greatest challenge to shooting more accurately was the width of the front sight post, as it covered up much of the target from 15 yards and out. But I am confident that if you used a Ransom Rest to test inherent accuracy, I am sure the results would be excellent. One of the significant differences with this gun is the trigger. I don’t need to rehash the point, but it is a very shootable trigger; it lends itself to easy, accurate shooting.

Reported Failures

Reliability is the big “elephant in the room” part of the review. Much has been said about the reliability of the P365 in the months since its release. Several people, including some respected reviewers, have indicated that the gun may not be quite ready for prime time. They believed it was released too early, almost like a “beta version” to be tested by the gun-buying masses.

I am not sure what to make of this because my experience with several different P365’s has been quite positive.

But let’s take a look at some of the noted issues that have come up:

Return-to-Battery (RTB) Failures—

In the first month or so of release, customers reported RTB failures. The issues seemed only to affect the very first guns that hit the streets. I shot a couple of different early models and didn’t have a single RTB issue, but many people did. Some of it could have been ammunition issues, but I think there were some legitimate concerns. SIG fixed this on a warranty basis for existing owners and all newly manufactured guns with a slightly stronger recoil spring assembly (RSA). To date, with the two different P365’s I have in my possession, I have not had a single RTB failure.

SIG-Lite Night Sight Failures—

Some early guns were affected by faulty night sights. Again, Sig fixed this issue within a few weeks. All guns had their sights replaced, and new models shipped with the new XRAY3 Day/Night Sights, which are fantastic! (See above.) Also, there were some reports of sights coming loose in their sight channels. I’m not entirely sure just how widespread these issues were, but it seems Sig addressed it, as I have heard no new reports in some time.

Barrel and Slide Peening—

Another “issue” that received quite a bit of attention was peening. The slide excessively banging into the corners of the barrel hood and its slamming between the barrel cam and locking lug caused the excessive peening. I never thought it was much of an issue. Even if peening occurred, I didn’t feel it would be a failure point several thousand rounds down the road. Apparently, SIG Sauer took some steps to address this, but either way, no one’s even talking about this issue anymore.

Trigger Return Spring Failures—

Shortly after that, it was reported (and Tim at the Military Arms Channel experienced this on camera) that some guns were developing a trigger return spring failure. I’ve seen it mentioned that some owner’s springs broke, but I’m willing to bet most of the failures were instances of the spring popping out of position. This issue seems rectified, with no new reports of it in some time.

Primer/Striker Drag—

There is much attention to so-called primer drag, where the striker remains in contact with the primer as the barrel begins unlocking from the slide. Some believe that this is the reason for several broken firing pins. I am a little unclear on this. The reason being that I have other guns that exhibit primer drag, and it is more common with small, striker-fired firearms. Part of the reason for this is that the slide/barrel takes on recoil before unlocking due to the shorter rearward travel. On larger guns, the slide and barrel stay locked together longer and provide more time for the striker to retract before unlocking. I have witnessed primer drag on many other smaller guns, including Glock, Smith & Wesson, and others. Although it does appear that drag marks on the P365 may be more pronounced. I presume this is why it garnered more attention.

Broken Firing Pins—

There were a fair number of reported broken firing pins. Many believe that the primer drag is the culprit for causing this. I suppose it is possible, but let’s first establish that the firing pin itself is much harder than any primer. Regardless, there are plenty of documented instances of broken firing pins. According to SIG Sauer, it is unclear exactly how many of these occurred, but it is a limited number. Companies have developed and released hardened stainless steel replacement strikers as an aftermarket part for those highly concerned about this issue. However, as reports of broken firing pins have decreased substantially, it would seem that this is less and less of a problem affecting the product line. SIG Sauer has since redesigned the striker and reevaluated their manufacturing supplier due to some inconsistencies and out-of-spec hardness and tempering. Some firing pins were too brittle, and the primer drag likely did not help and instead exacerbated the problem.

BEFORE You Buy the SIG P365, Read This REVIEW

Failure-to-Lockback (FTL)—

I’ve seen this mentioned, and in the case of one serious “reviewer,” he has tracked this statistic with monotonous consistency. I personally don’t believe many of these FTL’s are legitimate in that something with either the slide stop or magazine follower failed to work, causing the FTL. I think 99% of these are shooter-induced. What do I mean? Many shooters ride the slide stop with their dominant hand thumb because of its location and the gun’s small size. They may not notice it’s an issue just by looking at their grip, but I suspect due to the small, lightweight gun that the 365 is rotating, the slide stop up into their thumb. I have not experienced any FTL’s with either of my 2 guns. But I am confident when the shooter uses a properly-developed grip, they won’t have this issue. The problem is that most shooters do not have a good grip, and their lack of this has not been an issue on other guns they’ve fired. But it is exacerbated on this platform for whatever reason.

Various ejection/extraction/feeding issues—

I think many of these are ammunition related especially in the case of steel and aluminum-cased cartridges. Most of the malfunctions I have seen in the P365 platform have occurred with steel/aluminum-cased ammo. People will counter with, “Well, my [X brand of gun] has no issue with shooting steel or aluminum-cased ammo!” That’s a fair point. But we cannot make the case that the gun will get us killed by not being reliable in a gunfight simply because it doesn’t like cheap ammo. We don’t carry (I hope) cheap ammo in our defensive guns anyway. I had one malfunction out of over 5K rounds fired with brass-cased ammunition, and it was a +P round (more on this in a moment). Everything else was either steel or aluminum.

A NOTE: M of the above problems appear resolved. However, even if a person were to have a problem with their gun, SIG Sauer has one of the best warranty and customer service programs in the industry. My interactions with SIG’s customer service department have been nothing but positive and professional exchanges.

At this point, I should mention that I have been testing two different P365’s. SIG promised to send me one for review, but I couldn’t wait, so I purchased one myself made in mid-February. You’ll note that this is just a few weeks after they were officially released.

The other gun finally arrived from SIG in late May and was manufactured in the first week of May. I could have contacted SIG and said, “Never mind sending the gun; I have one already.” But I was interested in getting my hands on another one made at a different time for comparison. I heard all these bad things, and I figured the more guns I could experience, the better my test data.

By the time the demo gun from SIG arrived, I had already put almost 2,000 rounds through my personal gun. I fired an additional 3,000 rounds through the two guns throughout the remainder of the summer, about half-and-half. So I ended up with about 3,400 rounds fired through my personal gun and 1,600 rounds through the evaluation gun from SIG. Some fired in pure evaluation, and quite a few in different training courses.

I tested the guns with minimal cleaning. The somewhat loose standard followed was no cleaning, and fresh lubrication applied only once every 500 rounds. You will see from images in this article that my guns are still dirty. I believe that it is much more critical that firearms are well lubricated than being perfectly clean. I’m done evaluating them, so now I will give them an extensive cleaning.

I tested both guns with a variety of ammunition brands, types, and weights over the summer:

  • Sig Sauer Elite Performance FMJ in 115, 124, and 147-grain varieties
  • Sig Sauer Elite Performance JHP in 115 and 124-grain loads
  • SIG Sauer 365 FMJ and V-Crown 115 grain
  • Federal 115 gr FMJ Aluminum
  • Federal 115 gr FMJ Brass
  • Hornady XTP 124 gr
  • G2 Research R.I.P.
  • Winchester Ranger-T 124 gr +P
  • Remington Golden Saber 124 gr +P
  • Winchester 147 gr JHP (Whitebox)
  • Federal Hydrashok 135 gr
  • Federal Hydrashok Deep 135 gr
  • Federal 150 gr HST Micro
  • Winchester Train & Defend (FMJ and JHP both)
  • Remington UMC 115 gr JHP
  • Fiocchi 115 gr FMJ
  • And a few others

Reliability

The gun ran perfectly smoothly until I started shooting the Federal aluminum-cased ammo. This stoppage happened about 200 rounds after shooting a variety of SIG Sauer FMJ loads. On the 212th shot, the Federal aluminum 115-grain case failed to extract, and a double-feed occurred. 16 shots later, the same thing happened. I made it through the remainder of the aluminum-cased ammo (about 80 rounds) without further issues.

One failure-to-feed malfunction occurred at around 700 rounds with one load of 124 grain Winchester Ranger-T +P. Considering the other 4500+ rounds of brass-cased (including several hundred nickel-plated cases and dozens and dozens of +P rounds as well) ammunition fired without trouble, I considered this a fluke. The malfunction that occurred was actually the next round in the magazine, taking a nosedive into the magazine body.

At around 1500 rounds, I fired my first steel-cased rounds through the guns. Neither one would run reliably with them. I averaged about 3 rounds per 10 or 12-round magazine that would double-feed when shooting steel-cased ammo. Talking with other P365 owners, this seems to be a hit-or-miss issue. Some report having no problem shooting the stuff; others have similar issues like mine.

I also tested the new SIG Sauer 365 FMJ and V-Crown 115 grain loads, designed and loaded to shoot and feel identical.

The point is that a person can practice more with the cheaper FMJ rounds and get the same velocity, recoil impulse, and point-of-impact/point-of-aim as the V-Crown JHP defensive loads.

These rounds have also been optimized for the shorter-barreled P365. I liked how they shot very much. I tested the 365 V-Crowns extensively, including in ballistic gelatin, and the performance was excellent. A full review of this ammunition is forthcoming.

Finally, around 2,500 rounds on my personally purchased P365, I experienced my first, legitimate brass-cased round failure. This failure was with a Federal Premium 115 grain brass-cased cartridge. It was a failure-to-extract malfunction. I have since had no other malfunctions with either of the two guns.

Overall, when shooting even just decent quality brass-cased loads, the P365 exhibited a 99.96% reliability rating.

I have spoken with numerous P365 owners, and I have personally witnessed several P365 owners fire their guns. Some of these were in handgun courses I instructed this year. I estimate that I have seen approximately 5,000-6,000 rounds fired through about 10 other P365 pistols. While I have seen a few malfunctions occur, and some seemed to experience more malfunctions than I did, including brass-cased ammunition, I can still count the TOTAL number of malfunctions witnessed in all these other guns on less than two hands. Worst-case scenario, the P365 is still 99.85%+ reliable. This represents a little more than 1 malfunction every 1,000 rounds, and I estimate about 1 in every 750.

How does this compare to other well-established firearms? My Glock 43 has had the same number of malfunctions in fewer rounds fired. I regularly witness malfunctions from a variety of semi-automatic handguns, including Glocks, Smith & Wesson M&P’s, Rugers, etc.

All guns have issues. Sometimes they are ammunition-caused, and I personally feel many shooters rationalize the malfunctions they do experience and claim that their gun is “100% reliable.” I haven’t met a 100% reliable semi-auto yet. Shoot them enough, and you will experience failures.

I personally feel that a failure rate of no more than 1 in every 500 rounds is an excellent standard. These numbers represent a 0.2% failure rate or a 99.8% reliability rate. You will see that the P365 falls above this standard.

Do I consider this good enough for personal defense, including EDC (Everyday Carry)? Yes, I do. As with any gun, you should do testing with a minimum of 500 rounds of your carry ammo.

I am sure some will disagree with my findings, but I can only speak from my own experience and data. And the data does not lie. Everything I wrote above is true. But even with some of the negativity surrounding the P365, here is what I found:

It is a freaking excellent gun!

That doesn’t mean it is without its faults or hasn’t had some growing pains for some people. But for me (and I can only speak from my own experience), the SIG P365 has been a very solid and reliable platform. So let me begin wrapping up my thoughts on this innovative platform:

The Bad

BEFORE You Buy the SIG P365, Read This REVIEW

The grip—

I think the grip is too “shallow.” It is a very small gun. The width of the grip is less than an inch wide which is fine. But I think Sig could have increased the distance between the front strap and the back strap of the grip. That said, I think it feels very nice in hand. I like the contouring, the stippling, the length—there are many great aspects of the grip. I understand that it is a balancing act of building a compact and concealable gun, but that is also shootable for various shooters and hand sizes. I think they did an excellent job. But if I were king for a day, I would have stretched it out just a bit.

Failure-to-Extract Malfunctions—

In my experience, this malfunction is the most common one to occur with the P365 platform. Also known as a “double-feed,” this is where the fired case fails to extract fully. The slide continues rearward, picks up the next round, and shoves it into the rear of the still-chambered empty casing.

To clear this MOAM (Mother-Of-All-Malfunctions), it requires the shooter to lock the slide to the rear, strip the magazine from the gun, rack the slide multiple times, insert a loaded magazine, rack the slide, and chamber a fresh round. In contrast to FTF (Failure-to-Fire) and stovepipe malfunctions that generally only require a Tap-Rack to clear, you can see how this double-feed malfunction can cost a shooter some time to clear it when they might not have that much time in a fight.

Due to the nature of this, it is a little concerning that WHEN the P365 experiences a failure, the double-feed malfunction occurs at a higher rate when compared to most other handgun platforms. I believe this is because of the unique design and small, ultra-compact size. My personal belief is that the gun unlocks a tad early while gas pressure is still elevated, locking the empty casing in the chamber. This results in the extractor slipping off the case’s rim, and we get our double-feed malfunction.

I only experienced this with steel and aluminum-cased ammunition, which are less “slick” than brass-cased ammunition. There may be something to it with the modulus of elasticity of steel and aluminum being substantially higher than brass which would result in steel and aluminum cases contracting after firing back down to an extractable size at a slower rate than brass. I don’t know; I’m just thinking here, which can be downright dangerous at times!

The Front Sight—

While the new XRAY3 Day/Night Sights are excellent and visible, I feel the front sight is a tad wider than it needs to be. Or the rear notch could be wider. The width of the sights is basically the same as what you’d find on SIG’s full-sized guns, which when you shorten the distance between the front and rear sights, the front sight starts to fill the notch more and more. Typically for most people, having a little more light on either side of the front post in the notch is a little quicker to center and send the next shot. But this is a minor complaint because I shoot the P365 just fine.

Magazine Release—

This is also a minor issue I have with the gun, and it may be specific to me, but I think the mag release could be different. The P365 has a raised mag release button which shape follows the contour of the grip. The P320’s have a flat raised button. I think a hybrid approach would have been better—flat, but have the rear of the button start flush with the grip. My issue is that because the grip is so small, occasionally, when I grip a little too firmly with my support hand, during recoil, my hand will accidentally depress the mag release. So I have had to relax my support hand grip slightly to avoid this.

In analyzing the instances where this occurred, I determined that my support hand palm makes contact with the rear portion of the button. Starting the button flush with the surface and manufacturing it to be flat would still enable positive activation when desired but would likely eliminate the accidental dropping of the mag. The grip is small enough that virtually any adult hand and thumb can reach the mag release even if designed as described above.

Things I Like About the P365

Accuracy-

For its size, the SIG Sauer P365 is accurate.

Modular Chassis Construction—

While SIG Sauer does not advertise this fact, the reality is that the gun is built similarly to the P320. Both have a serialized “frame” or chassis that can easily be removed from the grip module. The potential exists for much future innovation and design improvements from both SIG and third-party aftermarket manufacturers. It is also convenient if a person wants to have two different grip modules with different accessories (such as one with a mounted FOXTROT365 weapon-mounted light) that would allow the owner to swap between other setups quickly. I recently picked up a FOXTROT365, and in my limited initial testing, I am quite impressed, and I look forward to putting it to use.

Feel of the Gun—

It just feels good in my hand. The contouring and texturing are excellent. The ergonomics are good. The slide serrations are effective.

Trigger—

There is no other small striker-fired handgun on the market with a trigger better than the one found on the P365. I also feel SIG was brilliant to have the trigger break at 90-degrees, in the “middle” of the stroke, instead of the rear of the trigger guard. Besides the trigger weight, smoothness, and break being good, the position at which it breaks is part of the secret as well, I think. It breaks before the finger can overwrap the trigger, causing any disturbance to the aim of the gun before it is fired.

Size and Capacity—

What’s not to love about 10+1 rounds (standard) and 12+1 rounds (extended) in a micro-compact size and form? This is the first micro-compact gun that tempts me to consider if I could replace my Glock 19 or SIG P320 Compact, both 15-round capacity guns. Packing the P365 around is a cinch. It disappears on my body in either the Tac-Lab M.T.R. or GrayGuns/PHLSTER Classic holsters, and there was tons of holster support for it from the get-go.

Shootability—

I come back to a statement I made earlier. It is the little gun that shoots like a much bigger gun. I LIKE shooting it!

The Verdict

I plan on sending a check to SIG Sauer in Exeter, New Hampshire, to pay them for the review gun they sent me. I like the P365 well enough that owning just one is not enough. Plus, I have plans for some fun upgrades and modifications I’d like to do to one of these guns, mainly because I want to. A tease?—think red dot and compensator as a start …

The P365 is a winner. 13 rounds in a tiny form that is easily concealed and is easy to shoot. Magic, I say.

Magically magical.

More Pics!

Links

SIG SAUER – www.sigsauer.com

GrayGuns – www.grayguns.com

Tac-Lab Holsters – www.facebook.com/TacLab2016/

How to Salt Cure Minnows – Preserving Minnows

0

Preserving Chub, Shinners & Sucker Minnows with Table Salt

You may ask yourself; what is the big deal about salted minnows? Why am I hearing more and more about fishing with salted minnows? I’ll answer that question!

First of all, in some Canadian provinces and many American states, it is illegal to use live bait on some lakes or you can’t use minnows unless they were caught in the lake you are fishing. It’s also illegal to transport live bait or bring live bait into a state, provincial or national park. It’s to stop the spread of invasive and invading species such as the Round Goby or the Rusty Crayfish. That’s one reason to fish with salted minnows.

The second reason is they work fantastic. Walleye, Northern Pike, Muskie, Smallmouth Bass, Largemouth Bass and Lake Trout and many other freshwater fish go crazy for salted minnows. The reason they go crazy is the salt! When a fish swims the muscles produce excess static electricity and there is a special chemical in the skin along the lateral line that discharges this static electricity is the form of ions. Predatory fish have sensors under their bottom jaw that detect these ions and salt mimics the ions. So when fish detect the salt, the dinner bell rings.

How to Salt Cure Minnows: Salting minnows is very easy but I have seen people make a couple of small mistakes that resulted in parts of the minnow rotting before it becomes salt-cured.

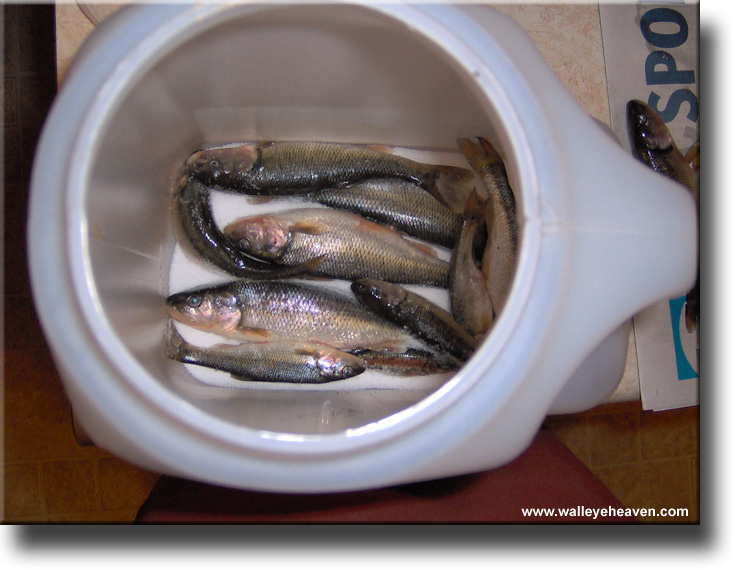
Step 1) Go to the local creek and catch some minnows or buy minnows at your local bait store. Minnows that are too big take a long time to cure and may rot so finger size or smaller is best. Leave your minnows on a newspaper to dry for a couple of hours. You don’t want them to be wet or they may form a crusty coating, which stops the curing process. Minnows bigger than your finger should be scaled and gutted, especially if they are Shinners or other fish with big scales.

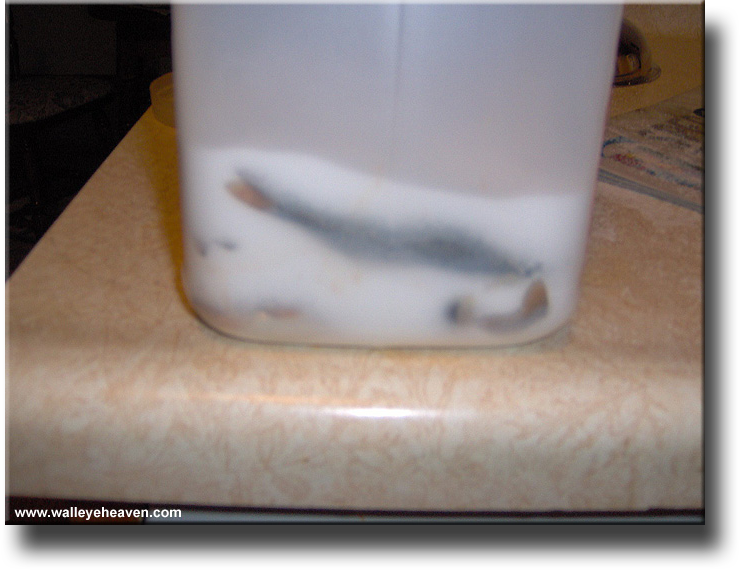
Step 2) Get a container that is at least semi-transparent and has an air-tight lid. Pour about 1/2 inch of salt in the bottom. You can use table salt or pickling salt. Do not use rock salt.

Step 3) Place a layer of minnows on the salt. Make sure they are on the salt and not on each other. Cover the first layer with minnows then cover them with another 1/4 inch of salt.

Step 4) The reason you want a container that is at least semi-transparent is to see if you have minnows touching the sides with no salt touching parts of the minnow. You need to grab a fork and nudge the minnows away from the side and let the salt fall in. You want the minnow completely surrounded by salt and not pushed up to the sides of the container. Then you make sure there is a 1/4 inch layer of salt on top of the minnows and then add the next layer of minnows and keep repeating the process until your container is full of salt and minnows.

Step 5) Buy the wife something really nice, screw on the lid good and tight, put the salted minnows in the refrigerator and then give your wife the gift and at the same time you tell her you have minnows in the fridge. If you are generous with the salt and have an air tight lid, they should not smell at all and the wife will not give you a hard time. If you can’t keep them in the fridge, find the coolest spot possible.

Step 6 The night before you are going to use your dry salted minnows you can re-hydrate them by putting some in a plastic zip-loc bag and pour 100% pure Cod Liver Oil on them. After 12 to 24 hours they should re-hydrate and become plumper.

Fishing with Salted Minnows: With smaller minnows, it’s best to put them on a jig and very gently jig so you do not rip the minnow off the jig. Let the fish suck on the minnow for a few seconds before you set the hook. For the big minnows, it’s best to get bigger single hooks and a small sinker and just let the minnow sink to the bottom and then drag the minnow over the tops of rocks and weeds. When a fish hits, release your bail and let the fish take the minnow for 30 second to give the fish time to get all the minnow in its mouth. Also, many fish (especially Pike & Muskie) hit minnows by the side then spit it out to grab it again head first. So if the fish releases the minnow do not real in. Give him time to bit again.

I hope this page was helpful Gary

Is Squirrel A Rodent? (Quick Facts)

0

Is Squirrel A Rodent? There is some debate over this classification, as squirrels are not technically considered rats or mice. However, they share a lot of the same features and habits, so it’s no wonder people are often confused about what distinguishes these animals.

In this post, we’ll take a closer look at squirrels and investigate what sets them apart from other rodent species. We’ll also explore why they’re such popular creatures and discuss some of the unique things that make them special.

So if you’re curious about squirrels, stay tuned – we’ve got all the answers you need!

What are squirrels?

Squirrels are small to medium-sized rodents that belong to the family Sciuridae. There are over 200 different species of squirrel, which can be found in a variety of habitats all over the world (with the exception of Antarctica).

They are typically omnivorous creatures, which means that they will eat both plant and animal matter. The most common food items in a squirrel’s diet include nuts, seeds, fruits, and insects.

What sets squirrels apart from other rodents is their long tail – which they use for balance while they are climbing trees.

Their furry tails also help to keep them warm in cold weather conditions.

Squirrels are also known for their large eyes and sharp claws, which help them to navigate their way around trees and other obstacles.

(How Long Do Squirrels Live? See this post for more)

What are rodents?

Rodents are a type of mammal that belongs to the order Rodentia.

There are over 2,000 different species of rodents, which makes them the largest group of mammals in the world! They can be found on every continent (with the exception of Antarctica) and come in a wide variety of shapes and sizes.

The smallest rodent is the pygmy jerboa, which only grows to be around 3 cm long, whereas the largest rodent is the capybara – which can weigh up to 100 kg!

Most rodents have four sharp incisors that grow throughout their lifetime. These teeth are used for gnawing, which helps them to eat tough plant matter and also allows them to create burrows and nests.

Rodents are also characterized by their furry bodies and long tails.

So, are squirrels rodents or mammals?

Squirrels are both Mammals and Rodents. This is not an uncommon situation in the animal world as approximately 40% of all mammals in the world are rodents 

Here is a look at how squirrels are scientifically classified:

  • Class: Mammalia (Mammals)
  • Subclass: Theria (Therian Mammals)
  • Infraclass: Eutheria (Placentals Mammals)
  • Order: Rodentia
  • Family: Sciuridae
  • Genus: Sciurus

What do squirrels look like?

Squirrels come in a wide variety of shapes and sizes, depending on the species. However, they all share some common features, such as their long tails, furry bodies, and sharp claws.

They typically have brown, grey, or red fur, although some species can be black or white. The largest squirrel is the Indian giant squirrel, which can grow to be over 1 m long!

(Do Squirrels Eat Meat? See this post for more)

Different types of squirrels:

There are many different types of squirrels, which can be found all over the world. Some of the most common species include the red squirrel, grey squirrel, ground squirrel, and flying squirrel.

The red squirrel is the smallest type of squirrel, with a body length of around 20 cm. They are native to Europe and Asia and have reddish-brown fur.

The grey squirrel is slightly larger than the red squirrel and has grey or black fur. They are native to North America and were introduced to Europe in the 19th century.

Ground squirrels are another type of small squirrel that lives in burrows underground. The most common species is chipmunk, which is found in North America.

Flying squirrels are a type of squirrel that can glide through the air, thanks to their furry ‘wings’. They are found in North America, Europe, and Asia.

Do squirrels make good pets?

No, squirrels do not make good pets. Although they may seem cute and harmless, they can actually be quite aggressive – especially when they feel threatened. They also carry a number of diseases, which can be passed on to humans, such as rabies and typhus. If you’re looking for a small mammal to keep as a pet, you would be better off choosing a different species, such as a hamster or gerbil.

(Do squirrels carry rabies? See this post for more)

Why are squirrels considered pests?

Despite their cute and cuddly appearance, squirrels can actually be quite pesky creatures. They are known for raiding bird feeders, digging up gardens, and chewing through electrical wires. In some cases, they can even cause power outages! As a result of their destructive behavior, many people consider them to be pests.

(For more on the best air rifle for squirrels, see this post)

What damage can squirrels cause?

Squirrels can cause a lot of damage, both to property and to the environment. Some of the most common problems that they cause include:

– Chewing through electrical wires, can lead to power outages

– raiding bird feeders and gardens

– digging up plants and flower bulbs

– chewing on wood structures, such as decks, porches, and fences

HOW TO IDENTIFY A SQUIRREL INFESTATION IN YOUR HOME?

There are a few telltale signs that you may have a squirrel infestation in your home:

– You see squirrels regularly running around your property

– You find holes dug in your garden or yard

– There is damage to your home’s exterior, such as chew marks on siding or holes in soffits

– You hear scratching or scurrying noises coming from inside your walls or attic

If you notice any of these signs, it’s important to take action immediately to get rid of the squirrels before they cause any further damage.

How can you get rid of squirrels?

If you’re having problems with squirrels on your property, there are a few things you can do to get rid of them. First, make sure that all food sources are inaccessible – this includes bird feeders, garbage cans, pet food, and anything else that might attract them. Next, seal up any holes or cracks in your home or garage, as this will prevent them from getting inside. Besides, you can set up live traps to capture the squirrels and release them into a more suitable habitat. Finally, you can take care of it by yourself by using an air rifle.

(For more on the best air rifle for pest control, see this post)

Glodo: Family of Duck Call Makers

0

Ryan Graves

When it comes to historical duck calls, the Glodo name is recognized as being the “pinnacle” of all calls amongst collectors, especially those that collect vintage calls from Illinois and Tennessee. The Glodo name is also accompanied with much mystery and lore. The first mention of an overall Glodo duck call was in Nash Buckingham’s 1928 article, “The Neglected Duck Call” which read:

“Swamp angels and market hunters of that day, however mothered by apparent necessity, were using handmade calls not much different than today’s models. As in most contrivances, our best calls spring from those most early modes. The most noted of early calls was the Glodo, made, I think, by a Frenchman famed for his prowess with gun and call on a once well-known Southern Illinois marsh. My friend, Guy Ward, of Reelfoot Lake and trap shooting fame, is the proud possessor of an original Glodo. I have heard that as a reed producer and toner, Glodo’s experimental turn for metal manipulation was a little short of marvelous.”

Glodo family

Up until the 1980s, it was thought that Victor Jr. was the only call maker in the Glodo family to make calls. Through the vast and relentless research of Mr. Gerald Droge of Anna, Illinois, it is now known that many Glodo family members made calls.

It all started in 1840 when Victor Glodo Sr. immigrated to the United States from France. Victor Sr. landed in southern Illinois, outside of St. Louis, where he met a local woman, got married and started a family. His first son, Victor Glodo Jr., was born in 1845, and his second son, John Nicholas, was born in 1847. At some point in the late 1850s, Victor Sr. lost his wife. Soon after he packed up the two boys and moved to Degonia Township in Jackson County in southern Illinois. Degonia is located along the Mississippi River bottoms between Chester and Murphysboro, Illinois.

Victor Glodo duck call
Victor Glodo Jr Duck Call from Reelfoot Lake Circa 1890’s

In July 1862, both Victor Sr. and Victor Jr. volunteered for service in the Union Army. Victor Sr. was honorably discharged a few months later after suffering a heat stroke and returned to Degonia. Victor Jr. remained in the service and returned home in 1871. Around the same time, Victor Sr. remarried, and his third son, Albert Henry Glodo was born. At this time they were all living down the road in Fountain Bluff where the Big Lake Marsh was located that was earlier mentioned in Nash Buckingham’s article. During this time, they were hunting ducks for the market and when they started to make duck calls.

It can be rather difficult trying to figure out which members of the Glodo family made individual calls that are attributed to them but a trained eye can say that a duck call was more than likely made by one of the family members.

John Nicholas Glodo duck call
Glodo Family call that is thought to be made by John Nicholas Glodo. Circa 1880s

It is not known for certain that Victor Sr. made calls but early records show that he worked as a carpenter and a blacksmith so one could infer that he probably did. It is known though that all three of Victor Sr.’s boys made calls. The calls made by Victor had rounded shoulders, a bulbous stopper, and had a copper reed. Victor made both smooth barrel and checkered calls. His calls were very well made considering that he made them all by hand using homemade carving tools.

The calls made by John Nicholas mostly had flat tops, copper reeds, and a checkering pattern much different than that of his brother Victor. It was stated in an early article of Forest and Stream that John Nicholas was selling calls for as much as $10 in the early 1890s. The calls thought to be made by Albert Henry were similar in design to that of John Nicholas’ but were a bit smaller in stature and the checkering pattern was a little more refined.

Glodo duck call from 1880s
Glodo Family Duck Call. Circa 1880s

In 1888, the Big Lake Marsh where the family market hunted was drained. The once waterfowl rich area would now be farmed for row crops. To continue hunting for the market, Victor Jr. packed up and headed to Reelfoot Lake in northwest Tennessee, and John Nicholas headed for the Big Lake area of northeast Arkansas, near Blytheville, only later to return home.

During this timeframe, John Nicholas’ oldest son, William Albert, started to make duck calls as well as Albert Henry’s two boys, Joseph E. and Walter Albert. The calls thought to be made by William Albert are similar to the calls his dad made but are much more crude. Calls that are attributed to Walter Albert are shorter in stature and have raised panels. Some of his calls have some checkering on them and others do not. Calls attributed to Joseph E. are well made but rather plain in design. The family sold their calls at a general store in Raddle for $1 or $2 apiece. The last of the Glodo family known to have made calls was William Albert’s son, Arzia Emerson, who was born in 1902. Arzia carved things such as ducks, geese, and snakes into his calls.

Glodo family duck call 1900s
Glodo Family Duck Call. Circa 1900s

Although Victor Jr. made duck calls while living in Illinois, it was at Reelfoot Lake where his legend and legacy became larger than life. It is known that Glodo lived in a tent camp on Starve Island where he market hunted and fished commercially. He seemed to have made quite an impression on the locals with his knowledge of the area, hunting ability, and for the duck calls that he was making. He was the person that introduced duck calls to the Reelfoot area, so it didn’t take long before the locals began to hound him for calls. The calls that Victor made while in Tennessee are a much more refined version of what he made while living in Illinois but the calls that he made in his later years of life show that his woodworking skills were diminishing. Around 1900, Victor moved off of Starve Island to an area now known as “Glodo Hollow” on the old Lake Road in Samburg. This is where he died in 1910.

Glodo family duck call 1900s
Glodo Family Duck Call. Circa 1900s

His call making left a legacy in the Reelfoot area and set the standard for many area call makers after he passed. The two most noted call makers that used his design were Sundown Cochran and Tom Turpin. In a 1931 Field and Stream article, Turpin wrote:

“After getting the opinion of many of the most expert duck callers in the country, I decided that the best model is the call produced by Glodo, an old-timer of the jack-knife-school of artists, who made his calls at Reelfoot Lake some twenty years ago. Glodo’s model is on the same principle as the Beckhart and Faifer, both of which are good calls and should satisfy any hunter. I prefer the Glodo for certain features; I think the groove is better shaped, the general proportions better and the reed is wider and shorter”

Albert Henry Glodo duck call
Albert Henry Glodo Duck Call. Circa 1880s

Consider yourself lucky if you have a Glodo family made duck call in your collection as they are very rare and valuable. You can see early examples of Glodo family calls from my collection that are on display at the Ducks Unlimited Heritage Center in Memphis at Bass Pro Shops Pyramid until September 2022. I can be reached at [email protected] and @rkegraves on Instagram.

Crosman Recruit .177 Review

0

The Crosman Recruit .177 air rifle shares lots of similar features with its brother, the Crosman 760 Pumpmaster.

These are in the powerplant, design, scope, loading mechanism, and its double function.

However, it does have some unique characteristics that Crosman 760 doesn’t have and you will find out all in this thorough review.

Crosman Recruit .177 – Gun type

This is a variable pump air rifle.

(For more on the 5 types of air rifles you need to know before buying, see this post.)

The caliber of Crosman Recruit (the internal diameter of the barrel) is .177 inches (4.5 millimeters).

(For more on how to choose the right air gun caliber for your game, see this post).

The barrel is smoothbore which means that it doesn’t have helical grooves inside like the rifled one.

Smoothbore rifles are best for shooting BBs

Because they provide an easy path containing little friction for a BB in the way it travels toward the target.

Crosman Recruit is a repeater air rifle.

Unlike single-shot guns that make you reload every time you want to shoot a single pellet,

Repeater guns allow you to shoot more shots in a given time without bothering the loading action much.

The result? You have more fun in less time. 

Stock

The stock is made of synthetic material.

Synthetic stock is more lightweight than hardwood stock.

In addition, it’s more resilient to weather conditions.

If you live in a hot and humid place, a hardwood stock can expand and contract due to the outside temperature.

You cannot shoot accurately with a gun like that.

However, the synthetic stock is not affected by moisture and temperature.

For more on the in-depth comparison between synthetic and wood stock, see this post.

The stock features non-slip checkering in the grip.

It increases friction between the shooter’s hands and the grip, adds stability to your arms when aiming, and improves accuracy.

In addition, the stock is ambidextrous.

There is no difference if you are a left-handed and a right-handed shooter.

What I love about this gun is its distinguishing characteristic:

  • The length of pull (the distance from the middle of the trigger to the end of the buttstock) can adjust from 12.25” to 14” .

As a result, the stock is adjustable from 36.5” to 38.25”. It is suitable for shooters from 4’ tall to 6’ tall.

If your 8-year-old daughter or son is quite small, the special stock will allow them to reach the trigger with ease.

If you want a present for your 21-year-old nephew, this gun is a perfect gift for him no matter what size he is.

Ammo

Crosman Recruit is a dual ammo gun which means that you can use both BBs and .177 pellets with it.

It is really awesome if you think about the upkeep cost of ammo.

BBs are damn cheap: you just have to pay a few bucks for thousands of high-quality BBs.

And .177 pellets are inexpensive too, compared to .22 or .25 pellets on the market.

Therefore, you can save a lot of money on ammo by using this gun.

For more on the differences between .177 & .22 and which jobs they do best, see this post.

Being a double-function gun, Crosman Recruit gives you unique advantages:

Now you have the fun of a BB gun and a thrill of a pellet gun combined in one place.

What’s more? Your kids can grow up with this gun!

You teach them the fundamentals of marksmanship with BB ammo,

Then when your children master the basics, you can teach them how to shoot a pellet gun without spending money on another rifle.

Velocity, accuracy and power

For 10 pumps, the maximum velocity is up to 680 FPS (207.26m/s) with steel BBs and up to 645 FPS with .177 pellets.

This air rifle has medium velocity compared to other pellet guns but it has high-end speed compared to other BB guns.

For Crosman Recruit, various shooting tests have been conducted by different shooters with positive results.

The common shooting groups are 1/4” at 20 yards and 1/4” at 40 feet.

Most shooters have no problem shooting this gun in less than 100 feet range.

Thus, you can shoot up to 100 feet for maximum performance.

With this air rifle, you will have hours of fun plinking targets.

Common objects such as soda cans, shaving cream bottles, glass bottles, etc don’t stand a chance of not getting blown up.

In addition, Crosman Recruit can penetrate through 10 cans at a time so it has more than enough knockdown power to deal with small pests.

Now you can get rid of those annoying critters around your house such as crows, chipmunks, pigeons, peacocks, rabbits, and so on.

Cocking and loading

Loading BB:

First, you put the gun ON SAFE, and locate the BB loading port on the left side of the gun.

Then you push the loading port cover rearward to open the port.

Pour BB only into the reservoir (the reservoir can hold up to 200 BBs at a time).

Move the cover forward to close the port. Pull the BB retainer button back.

After that, point the barrel straight down.

Shake and twist the gun to fill the visual magazine (the magazine can keep up to 18 BBs ).

Push the BB retainer button back to keep the BBs in the magazine.

Next, position the pellet clip so that the bolt lines up with one of 5 pellet chambers and you’re done.

To shoot BBs:

Tilt the barrel downward, pull the bolt all the way back, and then push it all the way forward.

The magnetic bolt will pick up a BB automatically and you are ready to shoot.

Loading pellets:

Crosman Recruit has a fast-loading pellet clip that holds up to 5 pellets at a time.

To load the pellet into the clip, place a pellet (with the pellet’s nose pointing forward) into one of 5 chambers.

It’s best to put the pellet’s skirt level or slightly over the rim of a pellet chamber to avoid jamming

To shoot pellets:

Move the bolt rearward.

Insert the pellet clip right into its place.

Each time you shoot one pellet, you move another one over for the coming shot.

When the clip is empty, reload it and add another 5 pellets.

Cocking the gun:

Point the gun in a safe direction.

Hold the forearm firmly and open it all the way until it stops.

Return the foregrip to its position and you just pump the gun 1 time.

You should pump this gun at least 3 times but no more than 10 times to achieve the best results.

Sight

The sight of Crosman Recruit is far more than you can expect from a BB/pellet gun.

The rear sight is fully adjustable for windage (allowing you to adjust the sight left and right)

And for elevation (allow you to adjust up and down).

But the most amazing thing is the bright, fiber-optic front sight.

In case you don’t know what a fiber-optic sight is, here is a quick explanation:

A fiber-optic sight is the use of optical fiber for the dots.

It gathers and channels ambient light to the rear sight in a way that it’s brighter than the dark surroundings.

Fiber optic sight is a huge advantage when you shoot in low-light conditions and it provides more accuracy in normal circumstances.

For more on how many types of air gun sights are out there and which one is suitable for you, see this post.

As if the fiber optic sight is not enough for an average shooter to get a tight shooting group, Crosman adds a 4x15mm scope in the package.

This scope gives you more confidence in shooting, although a fiber-optic sight is more than enough in my opinion.

click for the lowest price

Loudness

Crosman Recruit is a quiet gun you can use in your backyard.

It has hundreds of online reviews without a single complaint about noise.

Thus, you don’t have to buy hearing equipment to use it or worry about your neighbor reporting a gunshot.

Shooting Ability

The effective shooting range for Crosman Recruit is up to 30 yards.

It is suggested for backyard bench shooting, fun plinking, and target shooting.

Specifications

  • Caliber: .177 (4.5mm)
  • Powerplant: variable pump
  • Barrel: smoothbore
  • Ammo: BB and .177 pellet
  • Stock: Synthetic, adjustable
  • Front sight: fiber optic
  • Rear sight: fully adjustable for windage and elevation
  • Optic: 4×15 Scope
  • Scope Rail: 11mm dovetail
  • BB reservoir capacity: hold up to 200 BBs
  • Pellet clip capacity: hold up to 5 pellets
  • Safety :Manual
  • Velocity: up to 680 FPS with BB, and up to 645 FPS with pellet
  • Cocking effort: 3-10 pumps
  • Weight: 2.93 lbs
  • Overall Length: 39”

As you can see, the Recruit weighs only about 3 lbs so you can rest assured that your kids can handle this gun with ease.

Pros and Cons

ProsCons
  • Unbelievably cheap
  • Awesome BB/pellet repeater
  • Extremely cost-effective in long term
  • Astonishing adjustable stock
  • High velocity
  • Impressive power and accuracy
  • Excellent iron sight
  • Decent scope
  • Made in the USA
  • Pumping action can be tedious
  • Require some practice to master the pumping action

Price

The price for this Crosman Recruit is just about $40.

It’s so cheap if you consider that this gun is a double BB/pellet repeater.

The price of ammo like BBs and .177 pellets is also cheap, too.

You cannot find another BB gun on the market that is even close to this one.

There are a couple of different listings online with different prices but the listing I found with the lowest price is the cheapest price among online e-commercial sites like Amazon, PyramydAir, Walmart,etc.

Warranty

As of this date, the Crosman Recruit air rifle has a one-year limited warranty from the date of purchase

Customer review

The Crosman Recruit has lots of positive reviews on the biggest commercial sites like Amazon, Walmart, and Pyramydair.

People who rate it 4 and 5 stars love its lightweight, double function, amazing sight, and scope.

They also find it so fun to shoot with their families.

Still, there are some negative reviews about Recruit.

Those reviews belong to people who find it below expectations.

They said that the stock is a joke and the gun does not consist of lots of metal as they expect.

I mean, come on, this gun is only $40, if it has more wood in the stock, the price definitely will go up.

Conclusion

The Crosman Recruit air rifle is a wonderful gun for the money.

It offers a whole lot more than you can expect from a $40 gun.

It’s super cheap, lightweight, fun to shoot, cost-effective, and easy to hit the bulls’ eye with.

This rifle is a great gun for beginner shooters, the best gift for kids who can grow up with it,

And a fantastic which gun families can enjoy together.

MOA vs MRAD Rifle Scopes (Explained in Plain English)

0

Which one is better: MOA or MRAD?

The short answer: it’s your preference. If you use the metric system (meters/centimeters) then go for MRAD. But if you measure in the empirical system (yards/inches) then MOA may be easier.

If you want a more thorough answer along with an explanation of MOA vs MRAD, then keep on reading!

MOA vs MRAD: Why do we care?

Suppose you’re headed out on a hunting trip with your buddies.

You did your research, you read the best rifle scope guide, and you’re ready to go. But then your buddy starts talking in meters and your MOA turrets are adjusting in yards.

His numbers don’t match your turrets, your turrets don’t match your reticle, and now your target has bounded off to another state.

The problem: he was using MRAD while you were using MOA.

MOA and MRAD are basically two different systems of measurement.

When sighting rifle scopes, the reticle and turrets are used together to reach the most accurate shot possible. The turrets change the position of your reticle while your reticle provides an aiming point.

Your turret clicks and the hashes on your reticle can use one of two different systems of scope alignment: MOA or MRAD.

You can have the best long range scope on the market, but if you don’t sight it in using either system, it’s useless.

If you’re looking for help choosing between rifle scopes, here’s the only guide you’ll need to read.

What’s an MOA Scope?

M.O.A. stands for Minutes of Angle; a system based on degrees and minutes. This type of angle measurement is used to calculate the distance to a target and MOA turrets correction for the bullet trajectory.

Basically the math breaks down to this: there are 360 degrees in a circle, and 60 minutes in a degree for a total of 21,600 degrees.

You can find your MOA measurement by multiplying the distance in yards by 1.047, then dividing by 100. You can thank the Ancient Egyptians and Mesopotamians later.

At 200 yards, one MOA equals 2.094 inches. Out to 1,000 yards, 1 MOA equals 10.47 inches, and so on.

For those of us who aren’t Einstein, the easiest way I’ve found is to use a quick-reference conversion chart. That way you don’t miss your prize buck while scribbling away on math problems.

MOA scopes aren’t a perfect system though.

Often calculations are made with 1 MOA at 100 yards (91.4 meters), but you need to count on 100 yards with 1.05 MOA. Up to 100 yards there will be no problem with 1 to 100 comparison, but when shooting over longer distances you’ll be 5% off base and this could mean missing a shot.

This isn’t a problem if you’re only shooting at medium ranges. Read my 4×32 scope guide for more details.

I use an MOA reticle scope on my AR-15 A2 after I removed the front sights for added cool guy points. I’ll show you how to remove the AR-15 A2 sights here.

What’s an MRAD Rifle Scope?

MRAD stands for milliradians (or MIL for short), and was originally developed for artillery in the late 1800s. It’s still the preferred method for military and police force operations to this day, where you’ll commonly here it referred to as a MIL-dot reticle.

Based on a radial line, a unit of angular measurement that is equal to roughly 57.3 degrees, a milliradian is one thousandth of a radian.

This system does not come out to make a perfect circle like the MOA system. Instead, milliradians divide the circumference of a circle into 6.28 equal sections measuring 57.3 degrees each in an MRAD scope.

Thus, every circle has a circle circumference that is 6.28 radians long. Then each radian is going to be divided into 1,000 parts more, which is called Milliradians.

When calculating MRAD in a MIL-based scope, you will be calling it MIL, which is 3.6 inches at 100 yards (91.4m using the metric system) equal to 1 MIL.

I tried an MRAD scope on my M1A that happens to have the best M1A scope mount ever.

MOA vs MRAD: Which is better?

The short answer: neither. The argument is as old as time, but it’s really just the shooter’s preference of rifle scope.

The fight between MOA vs MRAD boils down to a difference in how we format degrees of angular measure. It’s fancy math terminology that basically asks if you use yards or meters.

Technically, the 1/4 MOA clicks are slightly more accurate than the 1/10 MIL, but the MIL values are somewhat easier to communicate.

Reference cards with MIL are easier to read because they are indicated by 2 numbers only, while the cards with MOA are indicated with four numbers. We could go back and forth all day, but you get the idea.

If you like other comparisons, check out my Nightforce SHV vs. Vortex PST guide.

Which do you need?

Choosing between the MOA or MRAD system will take some self reflection, so buckle up.

If you normally think in meters or centimeters, then it is easier to calculate distance with a MOA. If you normally think in yards or inches, then MRAD should be your go-to.

And if you’re not going to calculate distances, it doesn’t matter between the MRAD vs MOA. Do your thing, both types are equally effective for medium- and long-range shooting.

Another thing to take into account is that you also have to consider your hunting partners, teammates, friends, and so on. You’ll want to have a common language so you can communicate together without having to do conversions between the two systems.

Or you could be an absolute rebel and have a scope for each system, swapping it out in the field with the best quick detach scope mounts. Live your life to the fullest.

Most importantly, choose the same system for your turrets and scope reticles. I have a guide on first focal planes vs. second focal planes to help you choose the right reticle as well.

Regardless of all the math, the decision between MOA and MRAD isn’t that important. Clicks with an MOA turret are slightly more precise than clicks with a MIL turret, but at the end of the day it’s a style choice between rifle scopes.

FAQ

5 Best .308 Winchester Semi-Auto Rifles

0

When .223 Remington just won’t do it, many turn to the venerable .308 Winchester. The classic “battle rifle” is a term dedicated to semi-automatic rifles chambered in a full-power rifle caliber — typically the .308 Win. The .308 Winchester often offers the extra performance needed compared to the .223 Remington, and provides shooters with the upper hand.

Whether it’s for fun at the range or in preparation for a SHTF scenario, here are the top five .308 Winchester semi-auto rifles that you can bet your life on.

Why Choose a .308 Battle Rifle?

There are several reasons to choose a .308 Winchester semi-auto rifle over something chambered in a lesser caliber. The two main reasons being superior ballistics and increased effective range. For example, when looking at two comparable Federal loads with a FMJ BT projectile, we see that a 62-grain .223 Remington has a velocity of 3,020 fps and produces 1,255 ft/lbs of energy, while a 150-grain .308 Winchester has a velocity of 2,820 fps and produces 2,648 ft/lbs of energy. This means that, on average, your rifle chambered in .308 Winchester will produce over twice the amount of energy as your standard .223 Remington rifle.

Additionally, the .308 Winchester has a max effective range of roughly 1,000 yards according to the USMC, while the .223 Remington only has a max effective range of around 600 yards. This allows shooters, with proper marksmanship fundamentals and abilities, to put more distance between them and a threat.

In a SHTF or bug-out situation, you could also use a .308 rifle to hunt a wide variety of game. This could be beneficial for survival with the right skills and conditions in place.

Cons of Using .308

Though there are a number of reasons to choose a .308 Winchester semi-auto rifle over something chambered in 5.56 NATO, there are also some cons. The primary impairment will be weight — rifle weight, loaded magazines, and spare ammo will all be heavier. If you are going to be carrying a full loadout for an extended time period or distance, the extra weight exacts a toll on the body. It can also account for limitations on the amount of additional gear you would otherwise be able to carry.

The increased power of the .308 cartridge comes with an increase in recoil, muzzle blast, and report. This makes the rifle harder to fire accurately and can slow down follow-up shots. It can also have a negative effect on your vision or hearing when firing in certain environments, such as indoors or at night, due to the excess concussion and muzzle flash.

You will also have a reduced capacity compared to a 5.56 rifle, moving from a standard 30-round magazine to a 20-round mag. You can find extended .308 magazines, but you will still be dealing with the additional weight and lower capacity compared to extended 5.56 mags.

1. Smith & Wesson M&P10 Sport

Starting off the list as the most budget-friendly option, the Smith & Wesson M&P10 is an AR-10 platform .308 Winchester rifle. This provides shooters with good parts compatibility for upgrading or replacing accessories and components. Constructed of durable 7075-T6 upper and lower receivers, the M&P10 is capable of taking a beating. The 16-inch barrel provides excellent accuracy while keeping the rifle lightweight and maneuverable at only about 6.5 lbs.

The Sport variant comes with a standard A2 handguard, pistol grip, and stock, but the rifle is also available in different configurations depending on your preferences. Overall, the M&P10 Sport allows shooters to get into a quality .308 Winchester semi-auto rifle without breaking the bank.

2. DS Arms SA58 FAL

Introduced in 1946 and dubbed “the right arm of the free world,” the FAL is a well-known .308 battle rifle. The DS Arms SA58 provides an improved version of the original FAL with the inclusion of an M-Lok handguard for attaching accessories, top rail for mounting optics, adjustable side-folding stock, enhanced ambidextrous magazine release, and extended cocking handle knob. Additionally, the rifle features a 16-inch medium-contour fluted barrel and is equipped with an elevation adjustable front sight post along with a quick-adjust dual aperture rear sight.

DS Arms also offers a standard version of the SA58 with an 18-inch barrel and standard furniture that is more in line with a traditional FAL. All parts of the DS Arms SA58 are high-quality and made in the USA.

3. Springfield M1A SOCOM 16

The Springfield Armory M1A SOCOM 16 is the highest evolution of the trusted M1A/M14 series of rifles. The SOCOM 16 model features a 16.25-inch barrel for a more compact and maneuverable overall package. The SOCOM variant of the M1A also incorporates an optic mount, as well as an XS Sights tritium front sight post with an enlarged military aperture ghost ring rear sight that is adjustable for windage and elevation. The M1A includes a 10-round magazine, but 20-round magazines are available. If classic wood and steel is more your style, take a look at the standard M1A.

4. IWI Tavor 7

The IWI Tavor 7 is unique, in that it features a bullpup design. Bullpup rifles move the action to the rear of the firearm. This makes for a more compact rifle, even with the 16.5-inch barrel length. The Tavor is highly regarded as a durable and dependable rifle — partially due to the short-stroke gas piston design with a rotating closed bolt.

The Tavor 7 incorporates an ambidextrous safety lever, magazine release, and bolt catch. Additionally, the charging handle and ejection side can be reversed, making this a great choice for both right and left-handed shooters.

5. FN SCAR 17S

One of the most well-known .308 Winchester semi-auto rifles is the FN SCAR 17S. The .308 SCAR comes in two configurations, a shorter version with a 16-inch free-float barrel called the 17S, and a longer version with a 20-inch barrel called the 20S. Purpose-built for long-range shooting, the short-stroke gas piston system efficiently absorbs recoil for greater precision and faster follow-up shots.

The SCAR features an ambidextrous safety lever, magazine release, and a charging handle that mounts on the right or left side. Further, the SCAR utilizes a telescoping, side-folding polymer stock with an adjustable cheek piece allowing the rifle to be fitted to the shooter.

Honorable Mention: IWI Galil Ace

The Galil Ace is often looked at as a sort of modernized and upgraded AK-47. Typically chambered in 7.62x39mm, there is also a .308 Winchester version of the Galil. It features a 16.5-inch chrome-lined, cold hammer forged barrel and utilizes a 20-round magazine. When compared to the AK, the reciprocating charging handle has been moved to the left side of the milled steel receiver, allowing for weak hand operation.

The Galil features a closed rotating bolt, long-stroke gas piston system that makes it incredibly reliable. Additionally, the rifle features adjustable iron sights with a tritium front post and a two-dot tritium rear aperture. However, the Galil Ace also incorporates a full-length top rail to mount an optic. An adjustable, side-folding stock makes for easy storage and transportation, and allows the shooter to fit the rifle to the desired length of pull.

Conclusion: Best .308 Winchester Rifles

Sometimes having a full-power battle rifle is just what the doctor prescribed. They shoot farther, hit harder, and have a distinct feel that no standard AR-15 can match. So, if you’ve decided that a semi-auto .308 rifle is for you, any of the options on this list are sure to serve you well.

What is your favorite .308 “battle rifle”? Let us know in the comment section.

Best Air Rifle Deals

Popular Posts

Dry Firing Air Rifles: What You Need to Know

0
"Master the art of precision shooting with dry firing air rifles. Enhance your aiming skills, trigger control, and muscle memory without using ammunition. Discover...

Synthetic vs Wood Stock: The Final Showdown Between Brunette And Blonde

0
I understand that you’re here to get some quick facts on synthetic vs wood stocks Probably to guide your purchase.  Quick alert - the debate...

Can a Felon Legally Possess an Air Rifle in Tennessee?

0
"Understanding the Legalities: Felon Ownership of Air Rifles in Tennessee" can a felon own an air rifle in tennessee? In the state of Tennessee, the ownership...