")
")
")
")
")


Table of Contents
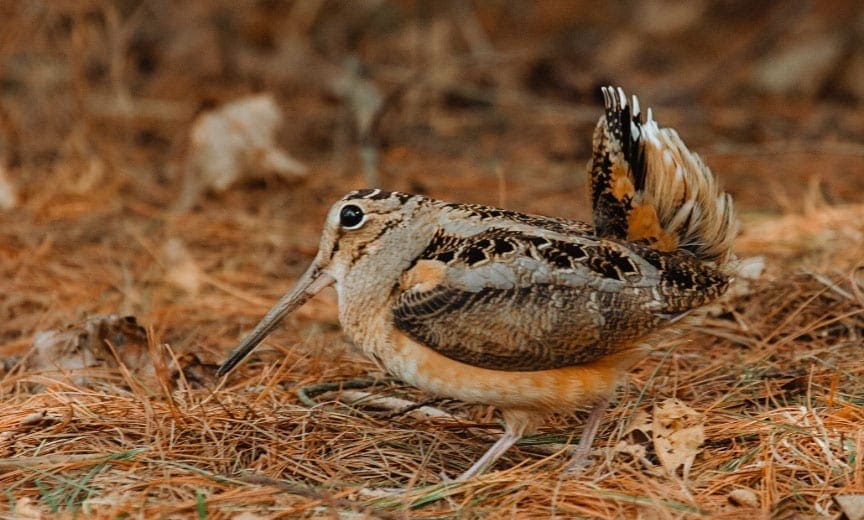
Woodcock may be one of the greatest game birds to pursue for those interested in becoming a bird hunter or in areas otherwise devoid of wild birds
It comes as no surprise that the popularity of American woodcock hunting has risen with the decline of other upland game species in its flyway. In many areas, the bobwhite quail has become a distant whistle and the ruffed grouse merely a ghost. Woodcock are a migratory bird with flyways that stretch from Canada to Louisiana, east Texas, and even Florida. As a result of their geographic diversity, they have earned a variety of nicknames and cultural nods such as “mud bat” and woodcock gumbo. The entire eastern half of the United States hosts woodcock seasons which are regulated by federal migratory game laws. With a crash course in habitat knowledge, the leap to becoming a woodcock hunter is often easier than with other upland game species. Before you know it, that distinct whistle of rising wings will be a calling card for one of your favorite game species.
Are woodcock the gateway bird of the East?
If you ask me, woodcock represent one of the greatest opportunities for becoming an upland hunter. I may even take it a step further and say that they represent one of the best entry-level pursuits for new hunters all around. They offer exciting wingshooting challenges that can sometimes feel more like video-gaming than hard work. For those of us that drift further into the uplands and find ourselves with a bird dog coming along, we soon discover that woodcock may be a new dog’s (and hunter’s) best friend.
The biggest challenge when making the leap to woodcock hunting is learning about habitat, but this is easily achieved even without advanced degrees in ecology. A few basic concepts will eventually blossom into more elaborate ideas and theories with more time spent in the woods.
Woodcock hunting gear
Woodcock hunting gear can be as complex or as simple as you want, which is one of the beauties of upland hunting. Jeans can suffice if you can stand some thorns, or you could go invest in expensive upland-specific pants—the choice is yours. When it comes to topics like chokes and shot size, there are some specifics that make the most sense for the quarry. When it comes to choosing a hunting dog, should you go down that route, that’s a novel but we can at least get you started.
Woodcock shotguns, chokes, and shot size
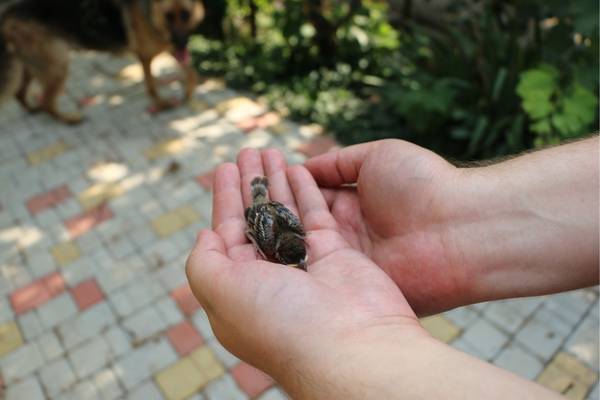
Woodcock are not large birds. On the upper end, a female can weigh as much as a half-pound and on the low end, males can weigh as little as five ounces, so they do not require heavy firepower to bring down effectively and ethically.
The nature of the cover that woodcock inhabit and their behavior towards hunters will make for a lot of close shooting opportunities. This scenario calls for open shogun chokes like cylinder, skeet, and improved cylinder.
The most popular lead shot sizes for hunting woodcock are #7.5, #8 and #9. More obscure specialty loads can take you to #10 shot and to spreader loads, which have a wad designed to allow shot to spread out faster. In the realm of steel, #6 and #7 shot are among the most popular if only because smaller steel loads are very uncommon or non-existent. It does not take a lot to kill a woodcock, so it’s worth considering how many pellets you’re willing to pick out of one before eating. My personal choice is #7 steel.
When it comes to choosing a shotgun for woodcock hunting, it is the answer we all know is always true, but never want to hear: use a shotgun that works for you. The most popular of all the shotgun gauges for woodcock is 20 gauge, but the 12 gauge continues as a cultural staple. More obscure gauges like 16 and 28 find good representation in woodcock hunting, while the more experienced may try the challenge of a .410. The action type does not matter as long as it’s a gun that you can shoot straight with confidence. Note that federal migratory game laws require a shotgun plug when hunting woodcock to reduce the gun’s capacity to three shells. Shotguns with shorter barrels are traditionally valued for woodcock hunting due to the stem density and tight swinging area of their preferred habitat, though there’s plenty of debate over a few extra inches and their added value to overall gun balance… but that’s a discussion for another day.
Woodcock hunting clothing
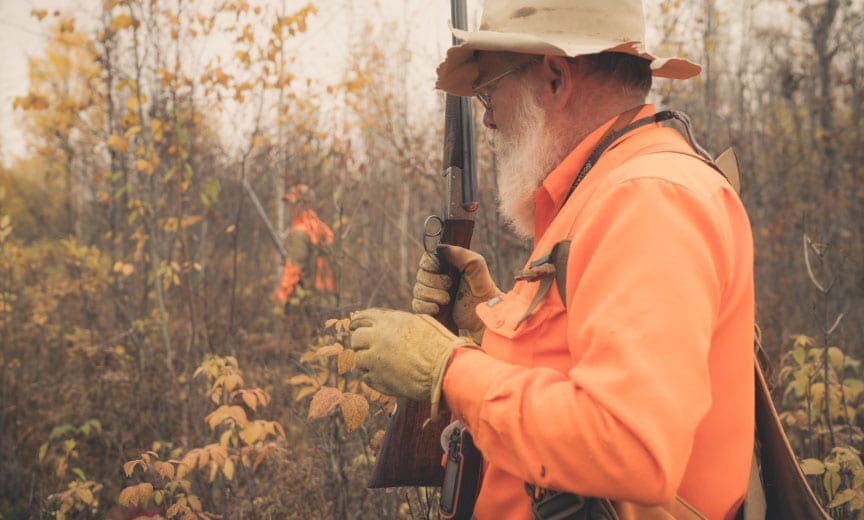
As mentioned, jeans can work just fine in the pursuit of woodcock. There is no need for camouflage, but woodcock hunting certainly calls for blaze orange in the interest of safety. You will need a means to carry shotgun shells (probably 25 depending on your success and shooting consistency), your empty shells, water, birds (hopefully!), and outdoor basics like a compass and even matches and poncho if you wander into remote country. The addition of a dog can increase the list of items to carry quite a bit. Many upland vests and strap vests have been designed over the years by upland junkies, iconic brands, and even some homemade lots. If you get really into it, it’s worth checking out the countless vest options along with a good jacket and upland pants. A pair of leather shooting gloves is nice, but I have survived a solid 25 years in the woods without them.
Boots are the one thing I would not leave open to interpretation. Woodcock tend to live in wet lowland environments as they probe soft soils for earthworms. Some hunters may pitch a solid pair of leather boots, but I will debate it to my grave that rubber boots will always be the best option. Leather boots are great, right up until you step into a wet hole that sends water over the top and into the boot. You can put a fair number of miles in when searching for woodcock, so it’s important to think about comfort and avoiding blisters, too.

Woodcock dogs
Choosing a dog breed (even without a game species involved) is like going to an ice cream stand with an endless number of flavors, not to mention having to choose between cone and cup. You can effectively use a flusher, a pointer, or a dog you rescued at the pound who likes to walk in thick cover. There are some breeds that have even been named because of their particular woodcock hunting ability, like the American and English Cocker Spaniels. But there are also pointing breeds that are just as specialized and well-suited for this type of hunting. I am a pointing dog guy at the end of the day and, just like anything, we all have personal preferences.
If you are considering a dog, think first about what you want out of it. Perhaps join a local hunting dog club like NAVHDA to see some different dogs in action. You should be looking for a dog that has been bred to hunt the region or terrain that encompasses your primary hunting area. Most importantly, once you decide on a breed, carefully vet your breeder. Ask to see their dogs hunt, ask other people for recommendations, and do your homework. It’s an investment of hopefully 12 years or more that will be your shadow each and every day, so it should be taken more seriously than buying a car.
The good thing about hunting the American woodcock with dogs is that the birds generally like to hold tight and not walk. The recent influx of woodcock hunters throughout the flyway certainly seems to be accelerating some walking and running behavior, but still nothing compared to the iconic ruffed grouse, notorious scaled quail, or the classic ring-necked pheasant. Ultimately, for the novice dog handler, woodcock can and will become addicting for both the hunter and the dog.
Getting to know the American woodcock
Woodcock are a migratory bird, so the kinds of places in which they live, nest, and stop over can vary by geographic location. They have two primary flyways: the central, which is essentially from Ontario to northern Louisiana, and the eastern, which is from Quebec to northern Florida. However, we must remember these are man-made lines and recent studies by the United States Fish and Wildlife Service and the American Woodcock Society have shown birds crossing over these flyway systems. The northern reaches of the woodcock flyway are what is considered their “resident” location, which typically includes Canada, upper Midwest states, and parts of New England. The southern areas like Louisiana and east Texas are considered their wintering grounds and are generally dictated by whether the soil freezes, which affects their ability to probe for worms. Any place in between the resident and wintering grounds is often referred to as stop-over states.
Getting to know woodcock cover
Woodcock like young vegetation with a high stem density, or places considered early succession growth in forests. Add in upland shrubbery or alders and if you have trouble walking through it, you can be sure a woodcock would love it. They also need a place to land to get into the cover. I have found that thick areas adjacent to fields, log landings, trails, and meadows tend to hold birds because they have ample openings to set down. Their food source is primarily earthworms, which has more to do with soil type than anything else. If you are ready for advanced theories on that, you can read “Targeting Worms with GIS Soil Data to find Woodcock Habitat.”
To simplify all this, noting that this is not fine science, this is where I would begin:
- There needs to be soft and moist soil
- The brush density needs to be such that it’s hard to walk through and swinging a shotgun seems challenging
- Check for a nearby opening for landing and access
- When all else fails, try hunting along rivers and waterways with dense shrubbery immediately nearby
In recent years I have found woodcock in soft wood (conifer) covers, which is something that trends more commonly as they head south in stop-over states. While I do not know the exact science, my guess is that it’s pretty easy for those short legs to walk on those open floors while still providing cover from predators above.
For the best understanding of woodcock cover, I recommend learning from a biologist and not a novice woodcock hunter like myself. Read: How to Identify American Woodcock Habitat
The nature of migrating birds
The fall woodcock migration is an exciting and sometimes frustrating part of woodcock hunting. If you catch the bug like I did, you may find yourself following the migration south, hunting multiple states and trying to extend your season. When the cold weather comes in, so do the “flights” of woodcocks arriving from north of your location to stop over during the migration to wintering grounds. It’s a tricky thing and many argue the science behind what makes the birds pick up and move, but you will certainly notice that one day a cover can have birds everywhere and the next it will only be a faint memory with remnants of their signs like woodcock splash.
READ: The Unrealized Opportunity of Woodcock Hunting in the Central Midwest
This fleeting presence is something to love, but it is also a warning sign that the birds will eventually be gone. States with no resident populations will find it more inconsistent, so you should not easily give up on a particular spot because things can change from day to day.
OUTDOOR LIFE: How to Hunt the Mysterious Woodcock Migration
Shooting woodcock
There are a couple schools of thought when it comes to wingshooting woodcock. First, it’s important to understand how woodcock tend to flush. The nickname “mud bat” refers to their characteristic rise like that of a bat. Their flight is often like a fluttering, unpredictable dance or zig-zag to the top of the canopy. Once past that, they tend to take off like rocket ships or, as the folks from Modern Wild would say, like “timber rockets.” There are plenty of exceptions to those rules, of course. Sometimes they will liftoff in a deliberate and direct pattern, which some would argue is a tell-tale sign of a resident bird knowing how to escape. Weak flyers are often considered tired flight birds, but neither assumption has been scientifically proven.
One of the greatest things about woodcock—especially if you are hunting with a dog—is that they tend to hold tight, meaning you must come close to stepping on them in order to get them to fly. This is what makes them great for young dogs in training, but can make them a little more challenging to find if hunting without a dog (more on that later).

The most reputable school of thought on shooting technique is to let the bird get away from you a bit before shooting. This allows for their trajectory to stabilize and for your shot to open up to a larger pattern. I usually have an issue containing myself, so as soon as that whistle comes up and the bird is a safe height off the ground, I let the shots fly. You can really approach this however you like, just get some shot safely in the sky when the bird gets up. To be most effective at this, you have to understand one of the more difficult mental barriers in shooting woodcock: ignoring the trees.
I grew up shooting woodcock from as early as I can remember and never once thought about a tree as my barrel swung through thick cover. But for those that did not get programmed at a young age, this can be a hurdle. If the trees and branches get into your head, you will not swing properly and you will always be at a disadvantage when shooting woodcock.
READ: Ignore the Trees when Grouse and Woodcock Shooting for Better Results
Beyond that, understanding the basic theories of effective shotgun shooting, such as the Churchill method, can greatly increase your odds in any wingshooting situation. Practice your gun mount repeatedly, consider the fit of your shotgun, and try patterning your gun to understand the shot pattern before hitting the woods.
Hunting woodcock without a dog
There are undoubtedly people reading this right now and yelling, “Blasphemy!” at their screen. But yes, woodcock can be hunted without a bird dog. Although I started off in my early years hunting over my father’s Brittany, I continued hunting later in life without a dog. Because woodcock hold tight, you will have to carefully grid an area when walking to make sure you have applied ample pressure to get them to flush. They are highly camouflaged, so without a dog’s nose giving you an indication of where they sit, you are unlikely to see them until they take off.
Recovery of shot woodcock without the aid of a dog can be particularly challenging because their camouflaged coloring blends in perfectly with the forest floor. Since they are small and live in dense cover, they can often get hung up on things off the ground, which only adds to the complexity of locating them after the shot. As a conservationist, you owe it to the bird to make a serious effort with or without a dog to recover game in any circumstances.
READ: How to Recover More Birds without a Dog
The controversy and ethics of pass shooting woodcock
Pass shooting woodcock is a technique rarely spoken of and highly controversial. Many consider it to be “unsporting.” I bring it up because you will inevitably discover it and should carefully consider the ethics of such a method. Although legal in some areas, it’s important to remember that legality does not always equate to sustainable practice. As hunters, we should think carefully about the long-term implications of pass shooting woodcock and the impact on future woodcock populations.
Pass shooting woodcock is a method that takes advantage of the final, legal shooting time to shoot woodcock as they move through open areas like fields to move to feeding areas. I often hear stories of early morning waterfowl hunters shooting woodcock at first light, as well. By setting up in a field adjacent to woodcock habitat and waiting for these final or first moments, a hunter will encounter fast-flying birds. These birds are a challenge to hit because they are often at top speeds. At a minimum, I would recommend steering clear of this method and finding a downed woodcock that sailed a long distance is not easy and could certainly start to enter the realm of the unethical. As a responsible culture, we need to make the hard choices even when laws permit it. We should not rely on legislation to dictate our morals and our commitment to sustainable practices.
Eating American woodcock
Although woodcock can be a culinary challenge at first attempt, with a bit of knowledge they can make amazing table fare. A few basic rules can accelerate that process. As renowned upland game chef Hank Shaw would point out, they pluck easily. Aging woodcock is a common practice, accomplished by tossing them in a fridge for a few days with the guts still in and the feathers still on. After a few days, they are better tasting and easier to pluck.
Woodcock cook faster than chicken and must either be cooked to medium rare or for a very long time to allow the meat to fall off the bones. Anything in between will cause you to think that woodcock aren’t worth eating, which is simply untrue. They are “earthy” in flavor and respond well when paired with mushrooms or sweeter things from where they live, such as apples and cranberries. Sure, you can slap bacon on them and of course it will taste great (and like bacon), but they are very good when prepared in other manners as well.
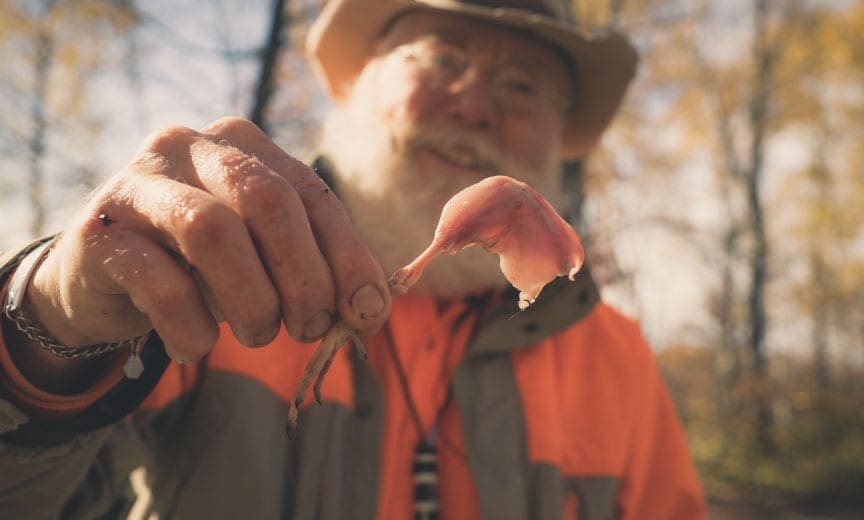
The legs are often thrown away, but it’s worth pointing out that this light, tender meat is arguably the best part of the bird. They can either be cooked as part of a whole bird or saved for a day of woodcock poppers or buffalo legs. Woodcock have become the most common bird prepared in my kitchen.
Woodcock conservation
In speaking of hunting woodcock, we must take note of their current state and their future. Since the populations were first recorded in the 1970s, woodcock have suffered a 1% decline every year. Habitat loss is the largest culprit in this decline, because woodcock often migrate through areas that are heavily developed without consideration for their needs. Recent studies with the Eastern Woodcock Migration Research Cooperative (EWMRC), in partnership with the American Woodcock Society, are hoping to identify areas that are in greatest need of habitat for stop-over cover.
While the populations are considered stable and safe to hunt, and given the migratory nature of the bird, you can feel safe and confident in hunting them in any state that has a legal season. They are currently sustainable and will hopefully begin to rebound if we all do our part to follow the science and support efforts to create more habitat.
Recent mumbling in the scientific community has theorized, but not yet proven, that climate change may be shifting the woodcock range and affecting some breeding behavior. This is worth following as we learn more and consider how this will affect the future of hunting this bird.
Woodcock hunting media content
Woodcock has been written about since medieval times when the Eurasian woodcock would be cooked in court. Eventually hunting practices evolved with dogs to bring them to market. In the Americas, they are known for the poetic culture that surrounds them, which has been explored by many of the upland literature greats. If you are an audio lover, I would suggest heading over to Audible and downloading Woodcock Shooting by Edmund Davis. This 1908 classic is unusual, poetic, and informative. Furthermore, you can check out frequent episodes of the Project Upland Podcast where host Nick Larson’s love for the woodcock and culture is hard to hide.
American woodcock hold the distinct position as the most-covered bird in Project Upland Original Films. Much of that simply reflects the opportunity that surrounded me when my passion brought me along this path. From our first year of films with the Ruffed Grouse Society to the viral film “First Season,” digging through our film library will give many options to get inspired in the poetic vibes of woodcock culture. If seeing drone footage of woodcock points and shooting situations sounds intriguing, check out the film “Legacy.” And for those as nerdy as it comes, you can find our latest film on the topic, “Woodcock Banding,” which explores the unusual ritual of using dogs in the spring to band woodcock with biologist Bailey Petersen.
Project Upland has a long list of woodcock hunting articles that can be found here.
We will continue to evolve this article as we create more content around woodcock hunting in North America, so be sure to check back in. And in the true crowdsource mentality of the Project Upland community, we always like to hear about what questions and ideas you have around the topic. Comment below, email us, or hop onto the Facebook community page to share your thoughts. We hope this article helps with woodcock hunting this season.