Home Blog Page 108

Can You Use A 30-30 For Elk?

0

Fact checked by Steven Lines, lifelong Hunter, and Outdoorsman.

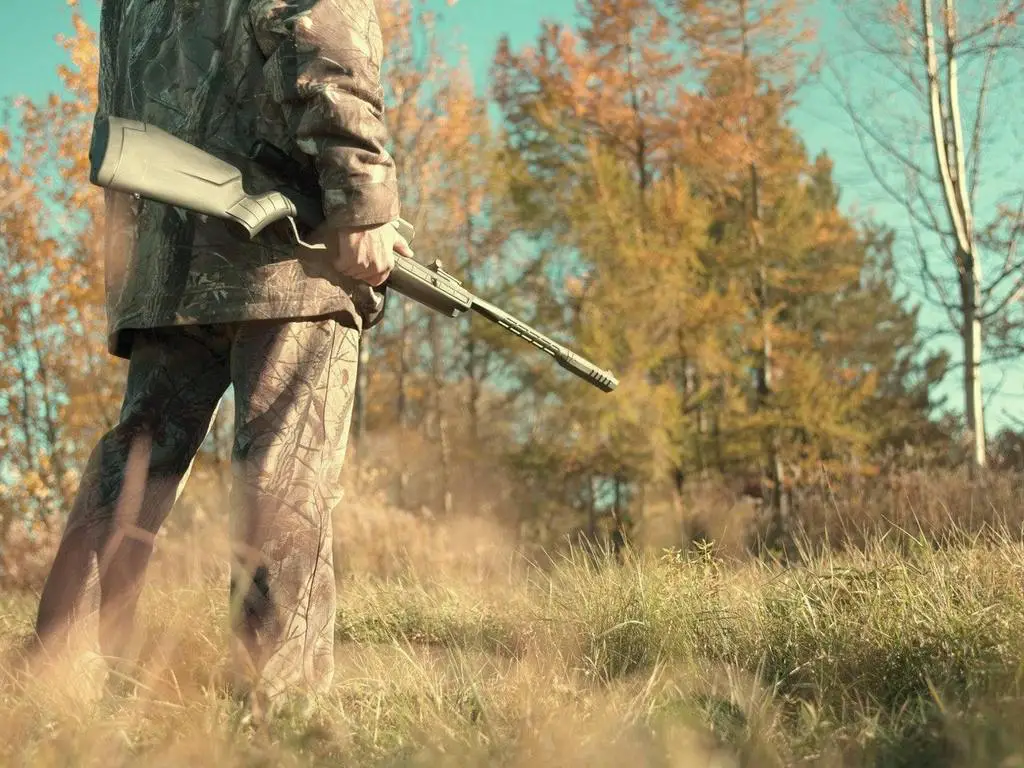
Hunting for elk can be a challenge. These are large animals protected by solid bones. You’ll need to use a powerful gun to get a kill shot. So, will the .30-30 be suitable for hunting an elk?

The .30-30 will be able to kill an elk. But it has a few drawbacks. First, it doesn’t have as much power as other calibers so, you will need to hit the vitals. Also, it has a limited range of 100 yards.

If you plan on hunting for elk, you’ll need to make sure that you are using the right tools. The .30-30 is a popular hunting rifle, especially for these larger animals. Read on to learn more about this rifle and how you can get the most out of it.

Buy Ammo from Guns.com

Ammo from Palmetto State Armory

Performance of the .30-30

To decide whether or not the .30-30 is a good choice for hunting, we need to look at how we can expect it to perform in the field. Here are some of the most important aspects to consider.

Accuracy

If you are hunting for elk, you’ll need to ensure using an accurate gun. This will ensure you can hit the target area and deliver a swift death. If you miss, the animal will suffer needlessly.

You might not get the same accuracy as other calibers, like the .30-06. However, the .30-30 will still be a relatively solid shot. As we’ll discuss later, you’ll need to be reasonably close to the target. From this distance, you should achieve a relatively tight grouping.

There are a few ways to improve your rifle’s accuracy. These include:

  • Using a scope. One of the biggest criticisms of most .30-30 rifles is their accuracy. While they might have an iron sight, this might not be a huge advantage during a hunt. The good news is that you can change this by adding your scope. You should quickly see an improvement in your accuracy.
  • Practice. Whenever you get a new gun, it’s essential to make sure you practice on the range. This will allow you to get used to how the gun feels, adjusting your style accordingly.

Weight

Another benefit of using a .30-30 is how much they weigh. They tend to be some of the lightest guns on the market. This is good for hunters, making it easier to carry.

Recoil

The good news is that this recoil is relatively mild, especially compared with the other guns typically used for elk hunting. This will make it easier for beginners to handle. It will also make it easier for you to make a follow-up shot if required.

Lever Action Rifle

Many .30-30 rifles will be lever action-style weapons. While this might have a few downsides, like limited range, it also presents some upsides. Most significantly, you’ll be easily able to chamber another round. You won’t need to look up from the scope as you do this. As a result, you’ll be able to fire a follow-up shot quickly.

Accessibility

Finally, the .30-30 is among the most popular calibers in the United States. Most major manufacturers will offer a rifle in this caliber. Ammunition is freely available. As a result, buying a gun and ammo will be pretty inexpensive.

What’s the Range of the .30-30?

The .30-30 has a relatively limited range. If you are hunting for large animals, like elk, you’ll need to shoot from within 100 yards. This ensures the bullet will hit with enough force to take them down.

One of the best ways to calculate the range of a gun is by looking at how quickly it fires the bullets. Generally, it will need to travel at 1,500 fps when it makes contact with the elk. How fast it travels will depend on both the gun and the bullet you are using.

Usually, the .30-30 won’t be too powerful. It’s common for most of these bullets to be traveling at 2,250 fps when they leave the gun. This is because of the way that they are shaped, often with a rounded tip. This slows their flight, as it takes more effort to push the air out of the way.

This means that you won’t have a long effective range. You’ll usually need to shoot from within 100 yards. If you don’t, you risk the bullet not having enough force to penetrate the elk. There are a few other elements to consider when deciding the best range for your gun. Let’s look at some of them:

  • The force of the gun. We’ll discuss this in more depth later. But, compared with other calibers, the .30-30 isn’t as hard-hitting. As a result, you will need to move closer to the elk to have a chance of generating enough power to take them down.
  • Accuracy of the shooter. Since the rifle caliber has limited power, you will need to ensure that you can hit the right area. If you don’t, you will only injure the animal and need to rely on a blood trail to find it again. Because of this, you might want to move a little closer for better bullet placement.

Even experienced shooters will struggle to kill an elk from more than 100 yards away with a .30-30. As a result, you will often need to get closer. Depending on your skill, you might need to try for 75 or 50 yards. As a general rule, the closer you can get, the better. You’ll have more chance of delivering a kill shot.

What Can You Shoot With the .30-30?

While the .30-30 has a wide range of uses. While it isn’t known for taking on big game, like elk, you can make a kill shot as long as you are close enough. There are a few other species that you can target with this caliber. These include:

  • Deer hunting (Mule deer/Whitetail deer). This is what this caliber was invented to tackle. It has a long history in this area. It’s estimated that millions of deer have met their end because of the .30-30.
  • Feral hogs. If you are close enough, you will be able to use this weapon to cut through the thick skin of a wild hog.
  • Brown bear. Some hunters have managed to take down brown bears with the .30-30.
  • Moose hunting. Again, type of weapon can provide enough force, but you will need to be within 100 yards for accurate shot placement.

Should You Use the .30-30 on Elk?

Whether or not the .30-30 is right for you will depend on a few factors. First, your hunting style. Some people prefer to shoot from a distance. In this case, the .30-30 isn’t the right caliber for you. Secondly, your accuracy. As it is a weaker gun, you’ll need to be able to hit the target area.

Hopefully, you have a better idea of some of the pros and cons of the .30-30. Whether this caliber is the best choice for you will depend on a few factors.

Hunting Style

One of the most important things to think about is your hunting style. Some people prefer to shoot from a distance, ideally from around 300 yards away. This ensures that they don’t spook the animal by trying to get too close. If this is you, the .30-30 might not be the best option. It just doesn’t have enough power to make shots from a long distance.

In other cases, you might prefer to take a more active role. You might want to stalk your prey, trying to get as close as you can before you take the shot. In this case, the limited range won’t be as much of a hindrance. You’ll also likely appreciate the lightweight nature of this gun. Because of this, the .30-30 might be a good choice.

Accuracy

It’s always important to ensure you can hit the vitals before pulling the trigger. But this is even more important when using the .30-30. These bullets will do a lot of damage, but they might not have the power to break through bone.

Amount to Spend Hunting

Hunting can be an expensive business. If you don’t have a lot to spend, you might want to think about getting the .30-30. These rifles tend to be reasonably inexpensive. Bullets are freely available and will be affordable.

Other Hunting Calibers to Consider

If you are close enough, the .30-30 shouldn’t have any problems taking down big animals, like elk and moose. But, if you plan on hunting big game frequently, there are a few other calibers to consider. This will give you more power and allow you to improve your range. This will let you take a wider variety of shots and give you a better chance of killing your target. Here are some of the other options on the market:

  • .270. This is one of the most popular hunting options for you to choose from. This means that rifles and ammunition will be widely available. Plus, it offers plenty of power. It will leave a huge hole in the side of any bull. This post goes into more detail.
  • .308. This is another hugely popular caliber. It has a tremendously powerful shot with limited recoil. It will offer enough power to take down wildebeest in Africa if you want. You can read more about the .308 here.
  • .30-06. The .30-06 is great if you plan to hunt large animals. It packs a big punch. It also has a longer range. Some reports of hunters taking out elk from over 1,000 yards using this caliber.

Best Bullets for the .30-30

The .30-30 is pretty popular, so you can choose from plenty of bullets. If planning an elk hunt, you will need to use higher-grained bullets. Make sure that they are designed for big game hunting. While these might cost a little more, you can rest assured that they will get the job done. Some of the best options include:

  • 170-grain Core-Lokt. This bullet from Remington is one of the most popular hunting bullets in the world. It’s been used for over 75 years, giving it a powerful reputation. It will be able to retain its bullet weight, expanding when it hits the bull elk.
  • 190 grain Buffalo Bore. This is another bullet that is known for doing a lot of damage. It offers deep penetration and should be enough to take down big game, like elk.
  • 160-grain Hornady LEVERevolution ammo. This bullet has been specifically designed to work with lever-action rifles, like the .30-30. They are also able to fly faster, allowing you to achieve deeper penetration and do more damage.

Trying to find the right hunting bullet can be a challenge. It’s often best to try a few options before deciding which one you want to use. Thankfully, most of these bullets will be fairly low-cost, making it easier to experiment.

Tips When Using the .30-30 for Hunting Elk

Last update on 2024-11-05 / Affiliate links / Images from Amazon Product Advertising API

As we mentioned, the .30-30 might not be the best choice when hunting for big game, like elk. But that doesn’t mean that it can’t be done. Here are some tips you can use to plan a successful hunt:

  • Finding the elk. First, you’ll need to be able to locate the elk. Often, this will mean looking for attractive places to feed and locating water sources. You can look at rub marks on the trees and listen for bugling. Or you can use salt licks to get them to come to you.
  • Practice your stalking skills. If you are going to use the .30-30, you’ll need to be able to get close to the elk. To do this, there are a few basic skills that you will need to master. For example, you will need to learn how to mask your scent successfully. You’ll also have to get used to using the terrain to your advantage. You’ll need to find places to take shelter and move without making too much noise.
  • Customize the gun. Make sure that the gun fits you correctly. This will give you more control and help you control the recoil. You might also want to upgrade the scope. This will make it easier for you to hit the vitals.
  • Hunt ethically. Finally, it’s important to remember the principles of ethical hunting. Don’t take the shot if you are too far away or don’t have the right angle. The last thing you want to do is cause needless suffering to the animal by only wounding it. When you are in position, shoot to kill.

Final Thoughts

Buy Ammo from Guns.com

Ammo from Palmetto State Armory

The .30-30 has a reputation for being highly effective against deer. This is why it is one of the most popular cartridges in the United States. However, it can also be used against elk. You’ll need to get closer, with an effective range of under 100 yards.

As it doesn’t have enough force to go through the bone, you’ll need to make sure that you can hit the vitals properly. Because of this, many people prefer to switch to more powerful calibers when hunting for big game, like elk.

Steven Lines is a hunter and outdoorsman from Safford, Arizona, USA. Since he was a child, he has been hunting and fishing and has over 20 years of outdoor experience. Steven works as a hunting guide in Arizona during his spare time and runs a Youtube channel dedicated to sharing his outdoor adventures with others.

Sources

  • https://www.americanhunter.org/articles/2015/12/20/america-s-most-wanted-ammunition/
  • https://www.ronspomeroutdoors.com/blog/30-30-winchester-is-a-joke
  • https://thebiggamehuntingblog.com/30-30-winchester/

Best USA-Made Air Rifles

0

Introducing American-Made Air Rifles: Unmatched Quality and Precision. Discover the finest air rifles crafted in the USA, delivering exceptional performance and reliability. Experience unparalleled shooting accuracy with cutting-edge technology and superior craftsmanship. Elevate your shooting experience with American-made excellence.

Air rifles made in the usa

air rifles made in the usa

When it comes to air rifles, there is a wide range of options available in the market. However, for those who prefer buying products made in the USA, there are several American manufacturers that produce top-quality air rifles. These air rifles are known for their durability, precision, and reliability.

One of the leading manufacturers of air rifles in the USA is Crosman Corporation. Established in 1923, Crosman has been producing innovative and high-performance air rifles for almost a century. Their products are widely recognized for their accuracy and power, making them popular among both recreational shooters and professional hunters.

Another renowned brand that offers air rifles made in the USA is Airforce Airguns. With a history dating back to 1994, Benjamin Airguns has established itself as a trusted name in the industry. Their air rifles are known for their craftsmanship and attention to detail, ensuring superior performance and long-lasting durability.

In conclusion, air rifles made in the USA offer exceptional quality and performance. With their precision engineering and strict adherence to safety standards, these rifles provide a reliable and enjoyable shooting experience for enthusiasts. Made with pride and craftsmanship, they are a testament to America’s dedication to producing top-notch firearms.

Doe Bleat Call and Synthetic Scents

0

The doe bleat call (or doe grunt) can be a very effective tool in a hunter’s arsenal. Using a doe call during the pre-rut/ rut period can bring in dominant bucks that may ignore a buck grunt. After all, they are looking for does to breed, the fights are secondary. These types of calls can also be especially effective during the later or repeat rut periods when does who “missed” come back into estrus. Just remember, having a buck hear your bleat is one thing; it is another to successfully get him into range for a bow or crossbow.

Doe vocalizations during hunting should be used sparingly. Perhaps make a few doe bleats/ grunts every 30 minutes. Don’t overdue it. When was the last time you heard does making all kinds of noise in the woods? Too much calling is an unnatural presentation. To perfect your calling, look online for videos of both people demonstrating and of the deer vocalizing themselves. You will be a pro in no time.

Once you have the calling down, are you good to go? Not really because you can do better. Generally speaking, when bucks hear another deer vocalize, they don’t come straight in. Instead they tend to circle down wind and investigate the scene with their noses. That is where a good synthetic scent comes in. If you want that smart old buck to believe the doe is there, let him smell her when he is checking it out. A great scent for this early in the season would be Lucky 7 Nanny Doe, one of our Confidence Scents. Now the buck will not only believe he heard a doe make a bleat or grunt, we will smell an older doe, a breeding age doe. He will relax, believe it is real and hopefully pass right by your stand on his way in. If it is the rut, a scent Like Lucky 7 Synthescent Doe In Heat PLUS can be extremely effective. If the rut is in full swing, one of our doe estrus/ buck scent combinations can really rile those big boys up.

Often time, hunters use decoys while calling. Why not add an enticing sight picture with a doe decoy? If you do, removing the odor from it is important and then you’d want to make it smell right. Lucky 7 Decoy Dope is just the scent to accomplish that. If your decoy smells like “nothing”, bucks get very suspicious. If they see her, they want to smell her.

If you haven’t used doe vocalizations before, perhaps it is time to pick up this terrific tactic. It can be very enjoyable to “talk” to the animals you hunt and adds a satisfying new dimension to deer hunting. Nelson Creek Outdoors also carries a couple effective yet affordable deer calls. It is convenient to pick one up at the same time as you order your scents for the year. One of my fondest memories is using one of our grunt calls to bring in a 170 class 10 point buck and then watch as a larger bodied 8 point charged in and kicked his tail. I didn’t get either deer as it happened fast and just out of bow range, but it is still among my most exciting deer hunt memories.

doe bleat call

Doe Bleat Call

Air gun 101: How Nitro Piston technology can make your shooting sport more exciting?

0

In the air gun market today, there are many air rifles made with nitro-piston technology

Even the best-selling lists on gun retailer’s sites have a bunch of nitro-piston air guns at the top

Such as the Crosman Nitro Venom, Benjamin Trail XL 1500, Nitro Venom DuskCrosman Vantage, and so on.

In this post, we will take an in-depth look at the nitro piston air gun so you will know whether you need one, whether one is right for you, and whether you should buy one at all.

When do nitro piston guns come to the market?

The very first air gun made with nitro piston technology was the Nitro Piston Short Stroke (NPSS).

It was introduced publicly for the first time in the summer of 2009 by Crosman Corporation.

Crosman had this technology licensed under the name Crosman Nitro Piston TM and used it for gun manufacturing in a wide range of air rifles.

How it works?

A nitro-piston air gun is a spring gun without a spring.

Instead of using a coiled spring as the power plant, it uses a nitrogen-filled cylinder.

The nitrogen in this cylinder is already kept under pressure and you put more pressure on it when you cock the gun.

The air is held under tension until you pull the trigger.

When that happens, the pressurized air expands and propels the piston forward.

The piston, in turn, comes abruptly at the air-transferred port.

The compressed air has nowhere to go but behind the pellet, as the chamber is sealed completely.

As a result, the pellet is pushed out of the barrel due to the driving force of the compressed air.

Advantages of nitro piston air gun

Nitro piston guns do have plenty of advantages in comparison with spring air guns. Here they are:

First, a nitro piston air gun is lighter than a spring air gun.

This is a real advantage for the guys in the field all day who carry their guns around.

Second, the nitro piston produces much less recoil than the traditional spring gun.

When you shoot a spring air gun, the spring extends, causes strong vibration to the barrel in all directions, and generates lots of recoils.

With a nitro piston gun, the nitro piston extends smoothly and has less effect on the barrel so it has much less recoil.

The minimal recoil of a nitro piston gun gives us several benefits.

First, since the recoil is inconsiderable, a nitro piston gun requires less practice to hold the gun properly.

Second, because of very little recoil, most shooters (even the average skilled shooters) can shoot accurately with minimum effort.

Third, with the spring gun, if you don’t hold your hands in the same place every time you shoot,

A quarter of an inch in the difference of hand position can mean a half of an inch in difference in Point of Impact (the point the pellet hits the target).

However, since there’s less recoil, when you are in the field and have your gun on a bipod or other shooting rests (rock, tree, etc),

There is virtually no effect on POI EVEN if your hand positions change over the shot cycle.

Third, a nitro piston gun fires 55 % faster than a coiled spring gun and 15% faster than a simple gas piston.

It means that a nitro piston has a faster lock time (the time the pellet remains in the barrel until it is discharged)

And a faster lock time means better accuracy.

Fourth, a nitro piston is not affected by the weather.

With a spring gun, the main coiled spring is lubricated with grease.

When the weather gets cold, springs get harder and tougher.

So it slows down the gun and makes it hard to cock. 

With a nitro piston, the nitro cylinder is lubricated with high-tech lubrication

So it operates almost the same regardless of the outside temperature.

Fifth, a nitro piston can be left cocked for days.

With a springer, if you left the gun cocked for a long time, the spring would lose its strength which leads to a reduction in the gun’s power and accuracy.

But with a nitro piston, you can leave it cocked for as long as you like. Nothing wears out.

And a little thing to note is that even though you can leave the gun cocked, you still have to shoot, cock, and de-cock the gun every few months to prevent the seal from getting bonded with the bore.

Sixth, since it doesn’t have spring torque like a spring air gun, a nitro piston gun is very easy to cock with only 28 lb of required cocking effort.

Seventh, a nitro piston produces 70% less noise over the shot cycle than a coiled spring gun.

This type of air gun is absolutely quiet and is great for field hunting where stealth is needed.

Eighth, a nitro piston is more long-lasting than a spring air gun.

The general rule is not to get spring compression over 50% to remain its reliability.

But in the air gun world, it is not uncommon to make the compression up to 100% to maximize performance.

This weakens the spring and shortens its lifespan.

However, with a nitro piston, it doesn’t care about compression. Nothing here affects its life.

That’s why the life cycle of an average spring gun is only 5000 shots while the nitro piston can easily get 10,000 shots before it loses power.

Bonus: Fred Eichler, the most interesting bowhunter in the world, is excited about Benjamin and Crosman’s cutting edge new nitro piston break barrels here:

Disadvantages of the nitro piston

Although the nitro piston has lots of advantages, it does have some disadvantages.

First, if the spring of a spring air gun is damaged or defective, it still works to produce some velocity.

If the gas ram fails, it doesn’t work at all.

But if the gas ram does fail, it will fail in the first few weeks after you buy it so you can return it anytime you want.

Second, it’s hard to find a replacement nitro ram if you want to service and modify this type of air gun.

There’s no way you can purchase an after-market nitrogen strut.

However, these disadvantages are really minor.

Conclusion

Understanding precisely what nitro piston technology is, and its pros and cons give you more information and confidence in the search for the best air rifle that fits you most.

If you want to enjoy smoother cocking, quietness, less recoil, high accuracy, and less maintenance for the gun then a nitro piston gun is for you.

However, if you want to buy a gun to service and modify it for better performance later, you shouldn’t put the nitro piston air gun in the potential buying choice list.

27 Best Tarp Shelter Setups for Camping (with Diagrams, Photos and Instructions)

0

When setup correctly, tarp shelters are like magic. With the right setup, you can stay dry in the rain, block rain, create a shady area to eat lunch, or even keep you warm on an unplanned night in the wilderness. There are literally hundreds of different tarp shelters you can use. Here I’ll go over the most important ones to know for camping, backpacking and survival/emergency use.

Want this information (and more!) in printable format?

Get my Camping Cheat Sheets!

The 42-page guide covers everything you need to know to enjoy the outdoors with confidence. Since you also like tarps, I’ll even give you a discount 🙂

Click Here for 50% Off

Jump to:

  • Infographic
  • Which tarp shelter setup is best?
  • Horizontal Ridgeline Tarp Setups
  • Diagonal Ridgeline Tarp Setups
  • Tarp Setups with Poles
  • Other Tarp Shelter Setups

Tarp Shelter Setup Infographic

tarp shelter setups infographic

Which Tarp Setup Is Best?

The best tarp setups for camping are arguably: the A-frame, Adirondack, plow point, and holden tent. However, the best tarp shelter setup depends on many factors like the weather conditions, how you’ll be using it, and pitching conditions. Ideally, you will learn several setups including at least one which can be pitched quickly, doesn’t require trees or a ridgeline, has a built-in groundsheet, and is closed on three sides for weather protection.

Note: To hang a tarp properly, you’ll need to know the 7 main tarp knots and how to tie out the ridgeline and guylines.

Recommended Tarps:

  • AquaQuest Guide Tarp: All-around good tarp which comes in a variety of sizes (10×10 size is 18.3oz).
  • REI Trail Break Tarp: For when you need a larger tarp for car camping (12’x12′ size and 33oz).
  • Sea to Summit Escapist Tarp: Lightweight tarp which is still durable (medium is 6 ft. 6 in. x 8 ft. 6 in and 9.5oz; large is 10×10 ft. and 12.3oz)
  • Twinn Tarp by Gossamer Gear: Even lighter tarp for serious UL backpackers (just 9.7oz)
  • Free Soldier Tarp: Very affordable tarp which is still lightweight. Plus it has tie-outs going down the middle! (large size is 118″ × 126″ and 42oz)

Don’t forget about cordage!

You will probably need at least 30 feet (10m) for a 10×10 tarp or 40 feet (12m) for a 10×15 tarp. I recommend getting REFLECTIVE paracord so you don’t walk into your ridgeline or tie-out points at night!

Horizontal Ridgeline Tarp Shelter Setups

These tarp shelters all have horizontal ridgelines. These are good options when you have two trees to pitch between. They are easy to learn and give you even headroom throughout.

The downside is that you’ll need a lot of rope (length of tarp + at least 8 feet for tying around trees). Some of the setups require even more rope to tie out guylines for walls or the roof. While many of these setups can be done with just poles, the roof has a tendency to sag.

Remember to make sure the ridgeline is perpendicular to the wind and the opening is on the leeward side!

1. A-Frame Tarp Shelter

A frame tarp shelter setup diagram

A frame tarp shelter setup in real life

The A-frame is one of the simplest and easiest tarp shelters to set up. It’s also somewhat versatile because you can hang it higher to get more headroom or hang it lower to get more interior space.

The major downside is that both ends of the A-frame shelter are open, so wind and rain can get in. For best protection, hang the A-frame so the openings aren’t facing the wind. If possible try to have at least opening next to a natural protection, such as a big bush which will block the wind from getting inside.

Instructions:

  1. Hang your ridgeline about shoulder height.*
  2. Put the tarp over the ridgeline. The midline of the tarp should be directly over the ridgeline.
  3. Spread out the sides of the tarp so they are taut. You can adjust the height of the ridgeline is you want the tarp to be higher or wider.
  4. Peg down the four corners of the tarp. Peg down the entire edge of the shelter for better weather protection.
  5. Use a prusik knot to secure the tarp onto the ridgeline

Notes:

  • A higher ridgeline will give you more headroom but will be narrower. A lower ridgeline will give you more width inside but less headroom.
  • A 9×9 foot tarp hung at a 60 degree angle will give you a width of 4.5 feet and max headroom of 3.9 feet.
  • It’s possible to use poles to hang the A-frame, but you’ll really need to stake them out. Even then, the roof will still sag – so it’s best to use a ridgeline for this tarp shelter.

Pros:

  • Adjustable height and width
  • Very fast and easy setup
  • Weather protection on two sides

Cons:

  • Somewhat claustrophobic inside

2. Lean-To Tarp Shelter

lean to tarp shelter setup

lean to tarp shelter setup in real life

Also called a wind break shelter, the lean-to tarp setup is fast and easy. The downside is that it doesn’t protect against rain well. It’s also not great against wind, unless the wind doesn’t change direction. For this reason, the lean-to is only recommended for tarp camping in good weather or as a quick shelter setup for breaks.

Instructions:

  1. Hang a ridgeline between two trees. Attach your tarp to the ridgeline. Alternatively, tie the top two corners of the tarp to the trees.
  2. Peg out the bottom corners of the tarp.

Notes:

  • You can also use poles to hang a lean-to shelter. In this case, first peg out the bottom two corners of the tarp. Then attach the top two corners to poles and stake them out.
  • The “Envelope” pitch is a variation of the lean-to. Simply fold the tarp under itself to create a groundsheet before attaching it to the ridgeline.

Pros:

  • Very fast and easy to pitch
  • Possible with square or rectangular tarps
  • Can pitch with ridgeline or poles
  • Good headroom and interior space

Cons:

  • Poor wind and rain protection

3. Wind Shed

wind shed tarp shelter diagram

wind shed tarp shelter in real life

Also called a fold-over wind shed, this tarp setup is a cross between a lean-to and an A-frame. Depending on the weather, you can set it up so the roof is flat (for more headroom and shade) or slanted (to repel rain). When the roof is slanted downwards (as in the drawing), the setup is called a “wind shield wedge.”

Instructions:

  1. Hang a ridgeline.
  2. Drape your tarp over the ridgeline so approximately 2/3 is hanging on the windward side and the other 1/3 is on the leeward side.
  3. Extend the longer side of the tarp to make an angled wall. Secure the corners to the ground.
  4. Using rope or poles, secure the corners of the shorter side to make a roof.

Notes:

You can pitch using poles instead of a ridgeline, but it’s somewhat tricky. You’ll need a lot of rope to stake out the poles to make it stable enough. Even then, the roof ends up sagging and doesn’t hold up well in high winds.

Pros:

  • Good headroom
  • Fast and easy setup
  • Wind protection from one side
  • Some rain protection

Cons:

  • Requires a lot of rope
  • Guylines are tripping hazard
  • Difficult to pitch with poles instead of a ridgeline

4. C-Fly Tarp Setup

c fly tarp shelter setup diagram

c fly tarp shelter setup in real life

The C-fly tarp setup is the same as the wind shield setup. The difference is that, with the C-fly, you fold under part of the tarp to create a groundsheet. Because much of the tarp is used for the groundsheet, you won’t have as much interior space or headroom.

As with the wind shield setup, you can keep the roof flat (for more headroom and shade) or angle it downwards (for better rain protection). When the roof is slanted downwards, it’s called a “C-fly wedge.”

Instructions:

  1. Hang a ridgeline about waist or shoulder height. A lower ridgeline will give you more weather protection but less headroom.
  2. Fold the tarp under on line AB. This will be your groundsheet. It should be at least 2 feet wide for one person.
  3. Drape the rest of the tarp over the ridgeline. AB should be on the windward side and CD should be on the leeward side.
  4. Adjust the tarp so line CD is sitting on the ridgeline. The part hanging over the ridgeline (CDFE) will be your “roof”.
  5. Pull corners A and B back to make an angled wall. Then stake them out.
  6. Use rope or poles to secure points E and F to make a roof.
  7. To make the shelter roof more taut, secure line CD to the ridgeline with a prusik knot.

C fly tarp setup instructions

Notes:

  • To keep the wall and roof taut, secure points C and D to the ridgeline using a prusik knot.

Pros:

  • Has groundsheet
  • Adjustable height/interior space
  • Decent weather protection

Cons:

  • No weather protection on two sides
  • Requires a lot of rope
  • Can trip over guylines in the dark
  • Difficult to pitch with poles instead of a ridgeline

5. Adirondack Wind Shed

adirondack tarp shelter setup

This is one of my favorite tarp shelters. It offers very good weather protection while still giving you lots of interior space and headroom. One side is open, so you can have a fire in front of the shelter. Leave the “roof” up in good weather. If the weather gets bad, simply re-stake point D to pull the roof down.

The setup is also fairly flexible: you can experiment with folding the tarp at different places. Make the triangle folds bigger for more weather protection.

Instructions:

  1. Hang a ridgeline about shoulder height.
  2. Fold the tarp so triangle AEF is on the ground. The line EF should be on the windward side and point A on the leeward side.
  3. Drape the tarp over your ridgeline. Line GH should be sitting on the ridgeline.
  4. Pull EFHG back to create a wall. If you aren’t happy with the angle of the wall, adjust the height of your ridgeline.
  5. Stake out points E and F
  6. Pull point C inwards to create a side wall. Stake it down. Do the same with point B.
  7. Using rope or a pole, stake out point D.
  8. To make the shelter more taut, use a prusik knot to secure points D and G to the ridgeline.

adirondack tarp shelter diagram instructions

Notes:

  • If you want to use poles instead of a ridgeline with this setup, you’ll probably need a partner to help.
  • Use fluorescent rope so you don’t trip over your guylines!

Pros:

  • Good headroom and interior space
  • Great wind protection
  • Decent rain protection
  • Has partial groundsheet

Cons:

  • A somewhat difficult setup which requires practice to get right
  • Uses a lot of rope
  • Guylines are a tripping hazard

6. Body Bag Tarp Setup

body bag tarp shelter

body bag tarp setup in real life

Also called a tube tent, this is a simple tarp shelter. Because it is so small and uncomfortable, it’s really only for emergency situations. It is only closed on two sides. However, because the openings are so small, the tree trunks used for pitching will actually provide some weather protection. For even more protection, pitch next to a bush, boulder, or other natural protection.

Instructions:

  1. Hang a ridgeline around thigh height.*
  2. Fold the tarp along AB to create a groundsheet.
  3. Drape the tarp over the ridgeline so CD is sitting on the ridgeline.
  4. Adjust the position of the walls then stake out points A, B, E and F.

body bag tarp setup diagram instructions

Notes:

  • A 9×9 tarp will only give you a bit more than 2.5 feet of headroom at the highest point.
  • I don’t recommend using poles for pitching the body bag setup. The roof will sag and there’s barely any headroom as is!

Pros:

  • Good rain and wind protection from two sides
  • Has groundsheet
  • Quick and easy to set up

Cons:

  • Open on two sides
  • Claustrophobic inside
  • No headroom and very little interior space
  • Have to crawl inside

7. Shade Sail

shade sail tarp setup with hammock

shade sail tarp setup with hammock in real life

The shade sail is also called the “hammock shelter” or the “diamond tarp.” Because it is pitched on the diagonal, you get more coverage. It’s popular for hammock camping and also as a sun shade for camp kitchens or even patios.

Note that the shade sail setup is not the same as the diamond fly. The diamond fly is also pitched on the diagonal, but one corner is staked to the ground. With the shade sail, both corners are elevated.

Instructions:

  1. Hang a ridgeline.
  2. Drape the tarp over the ridgeline. The diagonal midline should be on the ridgeline.
  3. Use a prusik knot to secure the corners to the ridgeline.
  4. Stake out the corners to create two angled walls. Keep the walls angled lower for more weather protection.

Notes:

  • If you aren’t using a ridgeline, then just tie the diagonal corners to trees. Or attach to poles. However, the roof will sag a lot without a ridgeline.
  • The guylines on this are serious tripping hazards. Use fluorescent rope!

Pros:

  • Easy to pitch
  • Lots of interior space
  • Decent protection from rain and wind

Cons:

  • Uses a lot of rope
  • Guylines are tripping hazards
  • Roof sags without ridgeline

8. Baker’s Wind Shed

bakers wind shed tarp setup

The baker’s wind shed tarp setup uses a rectangular tarp. The tarp needs to be at least 10 feet on the long side if you want to sleep in it with your head towards the side walls. If your tarp is very large, you could also sleep with your head towards the back wall of the shelter.

I personally don’t like the baker’s wind shed setup very much. The Adirondack gives you more protection without sacrificing much space. However, the baker’s wind shed can be good when tarp camping with multiple people all sharing one big tarp.

Instructions:

  1. Stake FG to the ground on the windward side.
  2. Pull point A inward. Line AF should be at approximately 90 degrees with FG. Stake point A to the ground. Then the same with point D.
  3. Attach points B and C to a ridgeline or poles.
  4. Tuck corners E and H underneath the shelter to create a partial groundsheet. Alternatively, you can leave them outside the shelter.

bakers wind shed diagram instructions

Notes:

  • Lines AB and CD are the height of the shelter when set up.
  • An 8×16 foot tarp can be folded so line BC is 6 feet long. This will give you a max height of 5 feet and a depth of 9.4 feet.

Pros:

  • Lots of interior space
  • Protection on three sides

Cons:

  • Need a long tarp
  • Not lots of headroom

Tarp Setups with Diagonal Ridgelines

These tarp setups are good for when you only have one tree. You can also use a pole instead of a tree for many of these tarp setups. Unlike with the setups which use horizontal ridgelines, the roof won’t sag as much. Another benefit of these setups is that they don’t use a lot of rope.

You can get by with just 3 feet of rope for pitching some (though I recommend always bringing more just in case!). There is less interior space around the foot-end of the shelter, so the tarp will trap heat better. The drawback of this though is that they are claustrophic and you may need to crawl in feet-first.

9. Bivvy Bag Tarp Shelter

bivvy bag tarp shelter setup

bivvy bag tarp shelter setup in real lifeAlso called the “cornet”, the bivvy bag tarp shelter is incredibly cramped (hence the name). However, it’s also one of the best tarp shelters for bad weather. You can pitch the bivvy bag on one tree or with a single pole. Unlike other tarp shelters which use poles, this one is actually easy to set up.

Ultralight backpackers will also love that the bivvy bag shelter requires just one guyline, so you save weight on rope.

What size tarp for a bivvy bag shelter?

You will probably want a 10×10 foot tarp for the bivvy bag shelter. The smallest size you can get away with is an 8×8 foot tarp. This will give you a shelter with an entranceway 4 feet tall and 4 feet wide and a length of 11 feet. But note that the groundsheet starts between CE (not at point D!). So, with an 8×8 tarp, the groundsheet length is only about 7 feet long. Because the end is so cramped, there’s actually barely enough room for a 6 foot tall person. You only get 3 feet of headroom at the place where the groundsheet starts and it gets narrow quickly.

Instructions:

  1. Fold the tarp in half on the diagonal line AD
  2. While holding the tarp upwards from point D, tuck sides AF and AB underneath so they are slightly overlapping each other. This will prevent the groundsheet part of the tarp from touching wet or muddy ground.
  3. Stake point A to the ground.
  4. Secure point D to a tree or pole.
  5. Adjust the walls and then stake out points E and C.

bivvy bag tarp shelter instructions

Notes:

  • The bivvy bag shelter is sometimes incorrectly called the
  • Because of the shape, this tarp shelter is not good for two people.

Pros:

  • Good weather protection
  • Has groundsheet
  • Uses almost no rope
  • Can pitch with one tree or pole
  • Traps body heat

Cons:

  • Very claustrophobic inside
  • No headroom
  • Have to crawl inside feet first

10. Hunchback Bivvy Bag

hunchback bivvy bag tarp shelter setup

hunchback bivvy bag shelter real life photo

The hunchback tarp shelter is a variation of the bivvy bag setup. It uses a pole to support the roof above the groundsheet. This allows you to angle point D downwards to create a “beak,” which means that the shelter roof blocks rain better.

Instructions:

  1. Fold the tarp in half on the diagonal line AD
  2. While holding the tarp upwards from point D, tuck sides AF and AB underneath so they are slightly overlapping each other. This will prevent the groundsheet part of the tarp from touching wet or muddy ground.
  3. Stake point A to the ground.
  4. Put a pole upright at point G
  5. Secure point D to the ground
  6. Adjust the walls and then stake out points E and C.

hunchback bivvy bag shelter diagram instructions

Notes:

  • This tarp setup doesn’t need a ridgeline or trees at all, but I included it in this section so you can see how it differs from the classic bivvy bag setup.
  • You can also set it up without a pole. In this case, you’ll create a tie-out point at point G and use guylines to attach it to a tree. Then you’ll tie the guyline at point D to the ground.

Pros:

  • Great weather protection
  • Has groundsheet
  • Uses almost no rope
  • Can pitch with one tree or pole
  • Traps body heat

Cons:

  • Very claustrophobic inside
  • No headroom
  • Have to crawl inside feet first
  • Requires a pole
  • Can easily knock pole over

11. Plow Point

plow point tarp shelter setup

plow point tarp shelter setup real life photograph

Also called the plough point, flying V or diamond fly, this is another easy tarp shelter. You don’t need to use a ridgeline at all – just tie it directly to a tree. However, the plow point does have a tendency to sag if you don’t use a ridgeline.

Instructions:

  1. Secure one corner of the tarp down on the windward side.
  2. Tie the opposite corner to a tree or secure it to a pole.
  3. Spread out the sides and secure down the remaining corners.

Notes:

  • Tying the tarp higher will give you more headroom but less interior space and weather protection.

Pros:

  • Very easy to pitch
  • Uses very little rope
  • Only needs one tree or pole
  • Adjustable height and interior space
  • Lots of room for gear storage

Cons:

  • Hard to get sides taut without ridgeline
  • No protection on one side

12. Half Pyramid Free End

half pyramid tarp shelter setup diagram

half pyramid free end shelter real life picture

I personally don’t like this tarp shelter setup very much. IMO, the A-frame closed end or diamond fly give better coverage while providing more interior space. The bit of groundsheet you get with the half pyramid isn’t enough to justify the lost interior space.

However, the half pyramid can be very useful when combined with other tarp setups. For example, you can use it to make a vestibule or close off the entrance of another setup. Or you can put two half pyramids together to make a fully-enclosed tent.

Instructions:

  1. Fold point A under the tarp. Stake down points E and F.
  2. Secure point D to a tree or pole.
  3. Pull in point B to create a wall. Depending on the angle of the roof, you may need to fold under some of the tarp. Stake down the corner. Do the same with point C.

half pyramid free end tarp shelter instructions

Pros:

  • Lots of headroom
  • Easy setup
  • Can be used with other setups
  • Decent weather protection

Cons:

  • Only partial groundsheet
  • Not much interior space

13. Forester

forester tarp shelter setup

forester tarp shelter setup real life pictures

The forester is a more difficult tarp shelter to pitch. It doesn’t work well with tarps made from more rigid materials (like painter’s dropcloth). You are better off using silnylon or canvas. Once you master this pitch though, it’s incredibly useful. You get excellent weather protection without sacrificing usable space.

Instructions:

  1. Stake down corner A on the windward side.
  2. Fold point D downwards to create point G.
  3. Support point G with a pole. It helps to have a partner hold it up for you while doing the next steps.
  4. Pull point C forward to create wall ACG. Stake point C down.
  5. Pull point B forward to create wall ABC. Stake point B down.
  6. Spread out triangles CGE and BGF to make door flaps.
  7. You’ll have a bit of extra tarp material hanging inside the shelter. You can use a clip to hold it out of the way.

forester tarp shelter setup diagram and instructions

Tip: If you are going to use this pitch frequently, I suggest making a little mark on your tarp where the pole should go. Also note the height of the pole. This will make it faster and easier to set up.

Pros:

  • Excellent weather protection
  • Doesn’t require trees
  • Uses very little rope
  • Lots of interior space and decent headroom

Cons:

  • Difficult to pitch, especially alone
  • Requires pole

14. Bunker Half Cone Fly

bunker half cone fly tarp shelter setup

The bunker half cone fly is similar to the plow point in that both are pitched on the diagonal. The difference is that the bunker setup uses two additional guylines to pull out the sides of the tent. This creates a V-shaped roof and two almost vertical walls.

While the configuration means you get slightly less interior space, you get much more headroom. This makes the bunker suitable for multiple people and much more comfortable for multi-night stays. It’s also better for larger tarps because the additional guylines prevent the walls from sagging.

Despite looking easy, the bunker half cone fly is actually a bit tricky to set up. You’ll need a good tarp too since the guylines put a lot of strain on the sides and they can easily tear.

Instructions:

  1. Stake point A to the ground on the windward side.
  2. Tie point D to a tree or a pole on the leeward side. Alternatively, you can run a ridgeline from point A to a tree and connect point D to it. This will help prevent the roof from sagging.
  3. Pull out point B and stake it to the ground. Do the same with point F.
  4. Attach a guyline to point C. Pull it outwards and secure it to the ground. Do the same with point E.
  5. If windy, stake down the edges on AB and AF

bunker half cone fly diagram and instructions

Pros:

  • Good weather protection
  • Lots of headroom in the front
  • Large entryway

Cons:

  • More difficult pitch
  • Roof sags without ridgeline
  • Requires two additional guylines

Tarp Shelters which Use Poles (No Trees Required)

These tarp shelters are a bit more tricky to set up because you’ll need to stake out the poles to keep them upright (which takes some practice). If you have a very large tarp, then you’ll need a long pole – which may require you lashing two poles together. But, these tarp shelters are good to know in case you can’t find a suitable tree for pitching against. They are also great tarp shelters for ultralight backpackers because you don’t need to bring much rope with some setups.

Note that there are also many UL tents which use trekking poles instead of normal tent poles. See the best trekking pole tents here.

15. Holden Tent

holden tent tarp shelter setup

Also called the “A-frame closed end” shelter, the holden setup is one of the best tarp shelters for ultralight backpacking, especially with two people. It is very fast to pitch and doesn’t require any trees.

For a tarp shelter with three walls, there is actually a lot of interior space inside and decent headroom. Since the shelter is open on one side, it doesn’t feel claustrophic either.

My main complaint with the holden tent shelter is that you have to lay the tarp flat on the ground. This means that, if the ground is muddy, the underside of the tent completely dirty. Thus, for muddy weather, you are better off with a shelter like the plow point.

Instructions:

  1. Lay the tarp flat on the ground.
  2. Stake out points A, B and C.
  3. Put a pole under the tarp at point E. You’ll need to angle it slightly forward.
  4. Pull point D forward to create a wall then stake it down. Do the same with point F. You might need to have a partner hold the pole upright while doing this.
  5. Secure the pole in position with a guyline.

holden tent tarp shelter instructions

Notes:

  • Depending on where you stake down the walls, you will end up with either a square or triangular interior.

Pros:

  • Good interior space
  • Decent headroom
  • Weather protection from three sides

Cons:

  • Can accidentally knock over the pole when getting in/out
  • Takes practice to pitch by yourself

16. Dining Fly

dining fly tarp shelter setup

The dining fly is one of the most important tarp shelters to know for car camping. As the name suggests, it is great for creating a covered area for cooking and eating. It might take a few tries to figure out the optimal height and roof angle (and thus the right pole length and guyline position). But, once you figure this out, the dining fly is actually pretty simple to set up.

Instructions:

  1. Lay the tarp flat on the ground where you want your shelter to be.
  2. Attach guylines (about 4-6 feet long each) to all four corners of the tarp.
  3. Stake out all of the guylines. They should be approximately 5 feet away from the corners of the tarp and set at a 45 degree angle from the corners.
  4. Find two very long poles. If you can’t find poles long enough, you can join two poles together using round lashings.
  5. Using half hitches, tie long guylines to the top of each pole.
  6. Push the first pole underneath the tarp so it’s at middle edge. It helps to have someone hold this pole in place while you do the next steps.
  7. Push the second pole underneath the tarp. Now the roof of the dining fly should be completely raised.
  8. Stake out the guylines on the poles.
  9. Adjust the guylines on the corners so the tarp is very taut.

Pros:

  • Excellent headroom
  • Lots of interior space

Cons:

  • Uses two very long poles and a lot of rope
  • Takes practice to set up, even with help
  • Rain and wind enter from sides when pitched high
  • Underside of tarp gets dirty when ground is muddy or wet

17. Toque Tent

toque tent tarp shelter setup

The toque tarp tent is quite different from the other setups. Instead of having the pole in the front of the shelter, the pole is set in the back. This means you end up with more headroom in the back (but a really low entranceway). Two guylines pull on the entranceway to create an awning. This awning does a great job of repelling water away from the shelter. However, the toque tent isn’t very stable in heavy winds.

Instructions:

  1. Fold the tarp so points A and B are together. Stake them to the ground together on the windward side. This is now called “point AB.”
  2. Put a pole under point G. The bottom of the pole should sit on point AB. This will make sides AG and BG stand straight up.
  3. Pull out point C to create triangular wall AGC. Stake down point C. Do the same with point F.
  4. Attach guylines to points D and E. Pull them outwards and stake them down. This will create a low awning.

toque tent diagram instructions

Pros:

  • Pole at back instead of blocking entryway
  • Good rain protection

Cons:

  • Weird interior space
  • Not very sturdy in high winds

18. Tarp Tent

tarp tent shelter setup

The tarp tent configuration can be a bit confusing at first. But, it’s actually not that difficult to set up. It’s a favorite tarp shelter for ultralight backpacking.

Instructions:

  1. Lay tarp flat on the ground.
  2. Stake out points A and B.
  3. Now stake out points C and D, making sure that folds AD and BC are nice and tight.
  4. Tuck corner F underneath fold AD. Then tuck corner E underneath fold BC.
  5. Point H is on the ground. Pull tarp corner G there and stake it in place.
  6. Point J is also on the ground. Pull tarp corner I there and stake it down.
  7. Put a pole underneath the tarp so it stands up at point K. Put a cloth over the top of the pole so it doesn’t tear a hole in your tarp.
  8. You’ll have a flap of tarp hanging in the entryway to the shelter.
  9. Attach guylines to the midway points on the flap (points L and M). Pull the guylines back and secure them to the ground along the walls of the shelter.
  10. Run a guyline from point N to the ground directly in front of the shelter.

tarp tent shelter instructions

Pros:

  • Excellent weather protection
  • Decent interior space

Cons:

  • Underside of tarp gets dirty if setting up on wet or muddy ground
  • Slightly more difficult to learn
  • Pole can get knocked over

Other Tarp Shelter Setups

Once you learn the basic tarp shelter setups, you will be able to experiment with variations to meet your needs — such as staking out an extra side to get more interior space or adjusting the position of the ceiling to block rain. Here are some examples.

19. Modified A-Frame

One wall of the tarp has been pulled outwards in the middle to get more interior space, but the sides are down for weather protection.

modified a frame tarp shelter pitch

20. Kayak Pitch

This is essential an A-frame tarp setup with one side more slanted down than the other. Instead of poles, kayak paddles are used.

kayak tarp shelter pitch

21. Large Bunker

This tarp setup a lot like the bunker half cone. However, there are extra guylines on the sides. This helps pull out the walls to keep them from sagging and to give you more interior space.

large bunker tarp shelter

22. UL Tarp Setup

Pitching low to the ground means you get weather protection even from a tiny, ultralight tarp. The head area is staked a bit higher so it isn’t as claustrophic inside.

ul tarp shelter setup

23. Wind Shed Variation

One walls slants and the other has a partial wedge to make use of the space and tree positions.

wind shed tarp shelter variation 1

24. Wind Shed Variation 2

wind shed tarp shelter variation 2

25. Half Tetra Wedge Cover

This is a flying half tetra wedge setup. The roof is angled downwards, which is great for directing water off the tarp in rainy weather.

half tetra wedge cover tarp shelter

26. Homemade Tarp

Here’s a very small, UL tarp made by Bob Cartwright of The Outdoor Station.

homemade tarp shelter

27. Umbrella

Here’s a way to set up a tarp so it makes an umbrella shape.

umbrella tarp shelter setup

Image credits: “Pyramid and Tarps” (CC BY-SA 2.0) by Umnak “Finland_Canoeing_01” (CC BY-NC-SA 2.0) by jjay69, “Kitchen Tarp” (CC BY-SA 2.0) by Umnak “Bob and Tarp” (CC BY-NC 2.0) by Andy Howell “Our Tarp at Petroglyph” (CC BY-SA 2.0) by Umnak “Tarp camp shelter” (CC BY-SA 2.0) by Umnak “Sheep Camp Tarp” (CC BY-SA 2.0) by Umnak “Inner Point Camp” (CC BY-SA 2.0) by Umnak “Sarah’s tarp” (CC BY-SA 2.0) by Umnak “Tarp Camp on Deer Island, Ernest Sound,” (CC BY-SA 2.0) by Umnak “Tarp Camp, Inner Pt” (CC BY-SA 2.0) by Umnak

Venison Fat & Rendering Deer Tallow

0

Contrary to popular belief, venison fat is useable and worth the effort to harvest. While deer tallow isn’t a common term for most folks, it does serve a purpose and has a place in your kitchen.

Until recent times, people had a pretty intimate connection with their food. They knew where it came from and were typically personally involved in every aspect of it from field to table. This connection also gave them first-hand knowledge of more traditional ingredients and how to use them.

In today’s world, that connection and those traditional ingredients and practices have been largely lost to the industrialization and commercialization of our foodstuffs.

In the past, butchering an animal would’ve been done in a person’s barn, depending on the size of the animal it may have been a local, community effort or simply a family event. When butchering, our ancestors generally took the time to harvest and find a use for nearly every part of an animal, including the fat.

What is deer tallow?

Animal fat that is rendered down from deer, elk, moose, caribou, bear, sheep, goats, bovine, and other ruminants is called tallow. While fat rendered pork fat is generally called lard , fat rendered from birds is called schmaltz, and rendered butter is referred to a ghee.

Simply put, deer tallow is created by the act of slowly heating pieces of fat up to melt it, also referred to as rendering. It is then cooled and stored.

While deer don’t have much fat on them and many, many people say it’s not worth the effort to harvest the fat for rendering, it actually is. Just like rendering lard, deer fat has its place in the world well above vegetable oils, which are actually rancid and has been industrially bleached and deodorized to mask its rancidity.

It can seem like it isn’t worth the effort because venison is such a lean meat, but I promise the effort you take to harvest and render deer fat will be worth it.

Where does deer fat to make tallow come from?

Believe it or not, there are different types of fat on a deer. First, and foremost, there is the caul fat which is the thin, lacy fat surrounding the deer’s entrails and is fantastic for covering venison meatloaves or meatballs or using as sausage casing. You can remove it, package it and freeze it for later use.

Caul fat wrapped burgers on a table
Caul fat is the web-like coating found on the deer’s entrails, it adds fantastic flavor to things like meatballs and the burgers pictured here.

The next type of fat you’re likely to encounter when butchering a deer is the suet. This is the fat inside the body cavity surrounding the kidneys and such. It is hard and waxy. This is generally the fat that is rendered from a cow, while a lot of people say they don’t care for it from a deer. Me? I use it to render, it does have a higher melting point, though. It’s fantastic for soap making, and can just simply be rendered for cooking, too.

Bird eating suet cake out of feeder
Suet is the hard fat found around the internal organs, while I personally use it for rendering, some folks don’t care for deer suet, it can be used as feed for wild birds and your chickens.

And lastly, is the fat on the outside of the carcass, all those bits that you usually cut away and put in the gut heap, it’s good fat. Unfortunately, if you aren’t hanging your deer in the hide, you need to work quickly so the fat doesn’t go rancid.

Yes, deer fat goes rancid fairly quickly. The reason? Deer fat is high in omega-3s, when the temperature gets above freezing and air begins hitting the fat, oxidation begins. Oxidation causes rancidity.

The quicker you can get your deer broken down, cooled, and out of oxygen (in the refrigerator) the less likely the fat will go rancid, the longer it will store, and the better tasting it will be.

What does venison tallow taste like?

Fat is the flavor vehicle of all meat, not the muscle itself, so fat flavor largely depends on diet. While in the past people made pie crusts out of lard (which does have a pork-like flavor), most of society has become accustomed to vegetable shortening, which has no flavor because it’s deodorized and bleached so eating traditional fats can be a bit of a transition.

Depending on where your deer is from will largely dictate what the fat will taste like. If you hunt in the grain belt, it likely ate a good deal of grain and grass and will taste similar to the beef most of us are used to eating. If your deer ate a lot of acorns, the flavor will be equally delicious. Hunting in areas where deer are small and typically very, very lean, the little bit of fat on it may not taste very good (though, it can still be used to make candles and soap, more on that later).

If you aren’t sure if you want to go to the trouble to render fat you won’t enjoy the flavor of, melt a small sliver in a pan with some water and smell it. If you enjoy the smell, it’ll taste good. If you don’t? I still recommend you render it and make it into good soap or deer tallow candles.

Deer fat is very high in stearic acid, which gives the fat a sort of waxy feel that will coat your mouth. But, if you like beef fat, you’ll enjoy deer fat and rendering it into tallow helps calm down that coating feeling that can be too much for a lot of people.

Even rendered, deer tallow will coat your mouth. A little bit goes a long way. Add small amounts to your cooked summer sausages or deer burger and the flavor is amazing and it’s not too waxy. Add too much, it’s waxy and can be unpleasant.

What are the benefits of tallow?

Tallow of all kinds supplies you with all sorts of essential, fatty acids.

  • High in Omega-3s, which can improve cardiovascular health (source).
  • High in conjugated linoleic acid (CLA), which has been shown to help in fat loss (source).
  • Deer tallow has the highest levels of stearic acid of any food, which can reduce LDL, or bad, cholesterol (source).
  • Tallow has a high smoke point and is more stable than industrial cooking oils.
  • It’s also fantastic for your skin making it perfect for soap making, lotions, and balms.
  • It’s a great, sustainable, local option for fat for cooking or skincare options.
  • It enables you to utilize the entire animal, nose to tail, not putting anything to waste.
  • Learning to render your own tallow is a self sufficient skill that is worthwhile so that those skills aren’t lost.

What is deer tallow used for?

Deer tallow can add excellent flavor to steaks and sausages.

Like beef tallow, deer tallow has many uses.

  • It can be used to add to your deer sausages or ground meat in place of unrendered fat to add a little fat and make the venison flavor really pop. Note: don’t use it in uncooked, dry cured applications as the waxiness of it isn’t very palatable.
  • You can use it for frying things like french fries. or sauteeing vegetables.
  • Add it to the top of your venison steak or roast for a burst of flavor.
  • Use it to waterproof leather products.
  • Save the suet to feed your chickens in the winter.
  • Make tallow soap, it’s great for making a facial bar since tallow naturally helps remove impurities from the skin.
  • Make an emergency jar candle.
  • Use it as a fire starter.
  • Make tallow balm for healthy, glowing skin.

How to render deer tallow

You will need:

  • Deer fat trimmed from around the organs and/or the outside of the animal, if it has hit air for very long, you may want to remove trim off the outermost part of the fat.
  • A grinder or a sharp knife and cutting board.
  • A large stock pot
  • Jars or tubs for storage
  • A cup of water

To begin, trim deer fat from the carcass, removing as much meat as you can; immediately refrigerate and cover it until the next day.

Next, you’ll want to either grind the fat with a hand grinder, an electric grinder, or cut it up into small pieces. If you’re cutting it by hand, you’ll want to start with really cold fat, in fact, you may want to pop it in your freezer for a bit to get it really cold, just not frozen.

Alternatively, if you do not have a grinder, you could also pop your trimmed fat into a food processor to get it chopped into little bits.

Place your ground-up fat into a large stockpot, add a cup of water, cover, and cook on the lowest heat setting you possibly can.

Now, you wait. The rendering process will take a long time. It took about 5 hours to render and my 5-quart stockpot was full. You’ll have bits of meat and other impurities that separate from the fat as it’s rendering, this is normal. Check it once in a while to make sure it’s not burning and give it a little stir.

You’ll know the fat is rendered once the impurities are floating (the little pieces of meat generally sink to the bottom of the pot) and the fat is clear and no longer cloudy.

Once rendered, place some cheesecloth in a colander and carefully pour your liquid fat into a bowl.

Next, transfer your strained fat into a pan, or glass jars. I prefer cooling mine in a pan and chopping it up because tallow is very hard when solid and that can make it difficult to get out of the jars.

Deer tallow, like all rendered fats, is shelf stable, once rendered it can be kept at room temperature for a year or longer assuming it is kept cool and out of direct sunlight.

If you’re looking for ideas on how to reconnect with your food, nature, and the heritage way of life, you’ve come to the right place.

Join over 40,000 like-minded folks in my Facebook group, The Self Sufficient Life. You can join by clicking here.

Other Nose-to-tail Wild Game Posts You’ll Love:

  • Easy Pan Fried Deer Heart Recipe
  • How to Cook Venison Liver

Setting Sights on Innovation: Garmin Xero A1i Pro Review

0

The Garmin Xero A1i Pro is the most technologically advanced bow sight ever created. It’s an uncanny leap in archery gear.

I’m always curious what new advancements are going to hit the hunting market and how they may or may not fit into my gear list, especially if it has to do with bowhunting.

For the most part, the progression in the archery/bowhunting space has really been minor year after year. That was until the Garmin Xero came out back in 2018. It was a massive leap in innovation and honestly something that many bowhunters dreamed about having for quite a long time. It’s the first reliable auto-ranging bow sight of our time and a sight that many have come to love.

While the original Xero A1 and A1i were good, the revamped Xero A1i Pro is great.

Garmin Xero A1i Pro: Overview

The new Garmin Xero A1i Pro is everything that the previous version was and more.

This is an auto-ranging digital bow sight made with the intention of delivering unparalleled accuracy when you need it most. It has a small readout at the top of the housing that displays the range to the target, degree of angle, and battery life.

This is also where one can navigate through the menu and customize settings as they see fit.

Garmin Xero A1i Pro - Menu Navigation System
(Photo/Josh Kirchner)

Inside the housing, LED pins (red or green) are visible in either fixed mode or single-pin mode. Your bubble level is located at the bottom of the housing and an on/off button — along with others for menu navigation — are located on the top of the sight itself.

Garmin Xero A1i Pro - Ranging Button
(Photo/Josh Kirchner)

From the sight, there is a cord that runs down to the grip of your bow. At the end of this cord is your ranging button. This is taped onto the front of the grip. With a simple press of this button, the A1i Pro will range whatever the reticle is pointed at and display the exact pin for that range inside of the housing.

It’s pretty amazing.

And for Hoyt users, there is also the A1i Pro Hoyt edition that is Picatinny rail compatible.

Features

Micro Adjust

Xero A1i Pro - Micro Adjusting
(Photo/Josh Kirchner)

One of the major differences in this new Garmin sight is the ability to micro-adjust everything. You can micro-adjust windage and elevation, of course, but you can also adjust the overall pitch of the sight. This ensures that the sight housing is perfectly set up for your eye.

Micro adjustability is a huge improvement and makes setting up the sight leaps and bounds easier than older models.

By the way, this sight walks you through the setup process step by step.

Auto Pin Calibration

Xero A1i Pro - Auto Pin Calibration
(Photo/Josh Kirchner)

Sighting in a Garmin Xero A1i Pro takes less than 10 minutes, and it’s all because of the Auto Pin Calibration feature. Based on your arrow speed, arrow diameter, draw length, and even distance from sight to grip, it will auto calculate your pins out to a personalized max yardage.

Basically, you’ll sight in your first pin followed by sighting in a pin for the farthest distance you’re comfortable shooting. After the sight walks you through that process — and it literally walks you through it — you’re done.

Time to go hunting.

Dynamic Level

If the Dynamic Level feature is turned on while at full draw, you’ll have two extra pins that will pop up if you’re canting (tilting) your bow too much. For a right-hand shooter, if they’re tilted too much to the right, the bottom dot will blink.

If tilted to the left, the top dot will blink. When you’re level, the dots will go away. This helps eliminate canting and, in turn, it improves consistency and accuracy.

Xero A1i Pro - Quick Detach
(Photo/Josh Kirchner)

Many of us are traveling bowhunters. Between the dovetail and the quick detach plug, a hunter can take off their sight, put their bow in a hard case for protection, and simply reattach it when in camp.

Everything will be as it was, and you’ll be ready to hunt.

Other Cool Features

A few other features to mention are XD mode and the ability to pair this sight with your Garmin GPS. XD mode is basically long-range mode. This is what enables you to shoot out to 100 yards plus. You do have to adjust the elevation of the whole sight, but it literally tells you exactly how many clicks to go, which means you can put things back to normal after the fact.

Along with that, this sight can be paired with a GPS. Your GPS will pinpoint exactly where you ranged with the Xero. This means that if you shot a deer, you’d have a waypoint for right where you ranged.

This is a nifty feature and one that could be beneficial in recovering an animal.

My Experience With the Garmin Xero A1i Pro

Testing the Xero A1i Pro
(Photo/Josh Kirchner)

Overall, my personal experience with the A1i Pro has been largely positive. There was a slight learning curve, but that’s to be expected. Once it was set up, I’ve gotta admit, this thing was fun to use and wicked accurate. Like, scary accurate.

It didn’t matter what distance I was standing. As long as I was within my max yardage, which was 87 yards, I almost didn’t even have to look at the range reading. I’d just anchor in and focus on making a good shot.

Hunting with the Garmin Xero A1i Pro
(Photo/Josh Kirchner)

I was in fact able to take this sight out on a bear hunt with me in Arizona for a few days. One of my main worries was battery life. This hunt was one that I spent an immense time sitting in ground blinds. With that being said, I didn’t want to have to turn the sight on should a bear appear. So, I left it on. In 5 days of hunting, the battery level didn’t drop an ounce. That was impressive.

I wasn’t able to shoot a bear on this trip, but with the accuracy this sight provided, I walked into the field with ultimate confidence. I knew I was going to hit the exact hair I’d be aiming at.

So, that was another positive for me. Confidence is everything in bowhunting.

What’s Wrong

We’ve gotta touch on the snowy side of the hill here a bit. While the A1i Pro is an incredible feat in archery technology, it does have its downfalls.

The biggest for me was the worry that it all of a sudden wouldn’t work. This is a computer, after all. There was one time at the range when it decided it didn’t want to range for me. With bowhunting opportunities so hard to come by, this presents some worry.

Testing the Garmin Xero A1i Pro
(Photo/Josh Kirchner)

And because of the absence of pins, if this decides to not work, you’re 100% out of the game. This is cause for concern, especially when talking about things like backpack hunting where what you’ve got is what you’ve got.

Lastly, another thing many are going to lose their minds over is the price. The Garmin A1i Pro is gonna set you back $1299. That number is enough to make one choke on their breakfast and will 100% limit the number of bowhunters that will use the sight.

Another thing to keep in mind is that these sights aren’t legal everywhere. In the majority of the U.S., it’s perfectly fine, but it’s your responsibility to make sure the Xero is legal where you plan to hunt.

Garmin Xero A1i Pro: End Note

Testing: Xero A1i Pro
(Photo/Josh Kirchner)

When the rubber meets the road, there is no denying that Garmin has done something outstanding here. The sight is just plain cool technology. And while it’s not for everyone, I don’t think it’s going anywhere anytime soon, because it will undoubtedly appeal to a lot of people.

I expect Garmin to keep building on this innovative platform they’ve created and in turn, it will make bowhunters more accurate than ever. Who knows, in 30 years, this very well may be the standard in bow sights. Time will tell.

While I don’t know what the future holds, I do know this. The Garmin Xero A1i Pro is going to destroy many X’s and fill many freezers. You can bank on that.

Check Price at AmazonCheck Price at Garmin

Minnesota State Record Fish: The Complete Guide

0

Reading Time: 11 minutes

Known as the Land of 10,000 Lakes, Minnesota is a freshwater paradise. But more importantly, it’s a dream come true for every avid angler. If you’re wondering why that’s the case, the answer is simple – the entire state is brimming with record-breaking specimens! And no, we aren’t exaggerating. We’re probably selling it short. But we’ll let the Minnesota state record fish speak for themselves.

We could endlessly gush about Minnesota being the ultimate freshwater angling destination, but only facts testify to this. So, in this article, we’ll list the most sought-after fish species in Minnesota and give you an account of how they made the headlines. So without further ado, let’s see what all the hype is about.

Biggest Fish Caught in Minnesota by Species

As a freshwater fishing magnate, Minnesota boasts world-famous fish species such as Bass, Catfish, Crappie, Sunfish, and Perch. The list goes on and includes local VIPs like Walleye, Pike, Musky, and Sturgeon, too. But be it a local or global favorite (or both), one thing is certain – there isn’t a shortage of brag-worthy catches.

To see what Minnesota’s record for each headliner is, click on the species below. Bear in mind that the fish are listed in alphabetical order and not according to the latest record.

  • Bass (Largemouth)
  • Bass (Smallmouth)
  • Catfish (Flathead)
  • Crappie
  • Musky
  • Perch (Yellow)
  • Pike (Northern)
  • Sturgeon
  • Sunfish
  • Walleye

Bass (Largemouth)

  • Minnesota state record: 8 lbs 15 oz on Auburn Lake in 2005.

Largemouth Bass are, without a doubt, among the most popular freshwater game fish in the world. Minnesota is no exception. One reason they’re so much in demand is because they’re excellent opponents. They’ll strike your bait with explosive force. The other reason is their abundance. You’ll find them in over 2,000 lakes and almost all major rivers in Minnesota.

The weedy shorelines and underwater structures of Leech Lake, Lake Minnetonka, and Vermillion Lake make an ideal habitat for Largemouth Bass. Besides lakes, you can count on the Mississippi, St. Croix, Zumbro, and Cloquet Rivers to always provide you with a bragging story. From the regular 2-pounders to enviable 5-pounders, these hotspots won’t disappoint with their Largemouth Bass offer.

Curiously enough, the Minnesota state record Largemouth Bass didn’t come from any of these fisheries. The biggest Minnesota Bass was taken from Auburn Lake in 2005. The fish weighed 8 pounds 15 ounces and was 23.5 inches long. And more impressively, its girth was 17.5 inches! This monster dethroned its predecessor, which had held the record for 11 years.

To make the entire story even more interesting, this beast was the first fish of the morning for Mark Raveling, a 54-year-old tournament angler. How about that?

Bass (Smallmouth)

  • Minnesota state record: 8 lbs on West Battle Lake in 1948.

If you thought that Largemouth Bass were all the rage, wait to see what Minnesota Smallmouth Bass have in store for you. Smallies are anything but small. While they weigh between 2 and 4 pounds on average, they can easily outgrow Largemouth and reach 8 pounds. What’s more, the Minnesota state record Smallmouth Bass caught on West Battle Lake in 1948 was an 8 lb brute!

West Battle Lake isn’t the only body of water stocked with Smallmouth Bass. Their population is vibrant in the upper Mississippi and St. Croix Rivers, as well as in all major drainages across the state. They also thrive in Rainy Lake, Mille Lacs Lake, and Basswood Lake. In fact, two of the biggest Minnesota Smallies were caught in these lakes – a Lake Mille Lacs 5-pounder landed in 2001 and a Basswood Lake 6-pounder hooked in 1997.

Long story short, it seems that it’s high time a new Minnesota state record for Smallmouth Bass was made! So, gear up with hard lures, soft tube baits, plastic worms, spinners, or jigs, and hit one of these lakes and rivers in late spring and score the next state record.

The rocky eddies of rivers and crystal-clear shallows of lakes will be your allies when outsmarting Smallies. Once hooked, however, they won’t go down without a fight. More aggressive than Largemouth, Smallies will make you break a sweat – and hopefully a record, too.

Catfish (Flathead)

  • Minnesota state record: 52.25 inches on the St. Croix River in 2017.

Speaking of hefty fellas that will spice up your angling endeavors, have you ever fished for Flathead Catfish? These massive creatures are the second largest fish in Minnesota, preceded only by Sturgeon. Their size and weight often surpass the Smallmouth and Largemouth Bass records combined!

A photo of an angler sitting on a charter boat on the river in front of a shoreline and posing with a small Flathead Catfish caught in Minnesota during the fall season

If you haven’t battled these monsters before, it’s high time you added them to your bucket list. Not only are they size-inspiring, but they’re also fun and easy to catch. You just have to know where to look for them and how to lure them your way.

A usual stink bait, for example, doesn’t work for Flatheads as they prefer live bait. Also, stick to rootwad patches with moderate current, and a Catifsh will almost immediately grace the end of your line. To ensure they stay on the line, use a sturdy 7′ rod with at least a 30 lb test line.

When it comes to the exact spot, look no further than the St. Croix River and its Stillwater region. The St. Croix River has been the most reliable fishery for pulling out giants over the years. This is also the place where the first Minnesota Flathead Catfish record was made in 1970. It was none other than a 70-pounder! But that wasn’t the only jaw-dropping Flathead caught here. Mark Mosby hit the jackpot with a behemoth measuring 4.38 feet in 2017 after only 15 minutes of reeling!

Crappie

  • Minnesota state record: A 5 lb, 21″ Black Crappie on the Vermilion River in 1940.

Unlike Catfish, Crappie aren’t impressive in size. Yet, they rank pretty high on Minnesota’s list of favorite fish to pursue. What’s more, they come immediately after Walleye. So, what’s the catch (pun intended)?

The reasons to love Crappie are numerous. Apart from being delicious and available throughout the entire year, they’ll motivate you to experiment with your angling approaches. A minnow beneath a bobber and a beetle-spin casting lure is effective. But you’ll have to mix and match baits, lures, and techniques until you find the right combo.

Even though Crappie can be elusive, the good news is that they’re widespread. Minnesota’s lakes and rivers are stocked with Crappie. You can wet your line anywhere from Mille Lacs Lake, Minnetonka Lake, and Lake Winnibigoshish to Red Lake, Sand Lake, Lake Andrew, and Bowstring Lake. Wherever you, there, the chances are you’ll end up with a decent 12″, 1 lb specimen.

A record-breaking bruiser, however, was found in the Vermillion River in 1940. The fish in question was Black Crappie which measured 21 inches long and weighed 5 pounds! So now that you know where to look for Crappie and how to outwit them, you’re ready break the old Minnesota state Crappie record.

Musky

  • Minnesota state record: 58.25 inches on Mille Lacs Lake in 2022.

Muskellunge, better known as Muskies, are naturally large fish. They typically grow to be between 28 and 48 inches. Quite a catch, right? Now imagine how rewarding a 4.9-footer is. Well, that’s precisely what the latest Minnesota Musky record is!

The lucky angler who broke the previous record (a 4.8′ Musky caught in 2021) for the longest Musky in Minnesota is Eric Bakke of Princeton. He was trolling on Mille Lacs Lake with his fishing buddy Jon Blood when the trophy fish bit. They measured it, snapped a photo, and returned the fish to the water. Having in mind how Muskies can live 18 years on average, he released it hoping there would be still a chance for someone to clash with this titan.

If this sparked your interest in Musky fishing, then you know where to find the next Minnesota record. But Mille Lacs Lake isn’t the only place with a hot bite. The previous two Musky records were made on Lake Vermillion. With these two powerful bodies of water at your disposal, a superb Musky hunt is guaranteed!

One final tip for landing a prize catch is to align your pursuit with Muskies’ peak season. While the prime time to go after Muskies is in late summer, you’ll usually spot the largest specimens in October.

Perch (Yellow)

  • Minnesota state record: 3 lbs 4 oz on Lake Plantagenet in 1945.

Often overshadowed by their more popular neighbors such as Crappie and Walleye, Yellow Perch aren’t to be missed out on. Perky and tasty, Yellow Perch aren’t the biggest fish around and they most certainly aren’t the best fighters. They are, however, excellent ice-fishing targets. Sure, you can hunt them year-round, but wintertime is when they shine the brightest.

If you want the Perch to bite, you’ll first have to intrigue them. Start with a basic hook and slowly introduce spinner rigs and small jigs. And then boost your odds by adding live bait like worms or crayfish. If you’re ice fishing, use ice flies tipped with grubs as well. Of course, this is just a suggestion and the possibilities are endless.

All in all, you get the point – Yellow Perch are exciting to fish for. They’ll always keep you on your toes. And that’s another reason anglers find a thrill in going after Yellow Perch. Should you need any further motivation to pursue them, we can tell you that Minnesota’s waters are overflowing with Perch.

Lake Winnibigoshish, Leech Lake, Cass Lake, Lake of the Woods, Big Stone Lake, and Mille Lacs Lake are famous Perch fisheries. They’ll treat you to plenty of 10-ouncers. However, if you’re after the new Minnesota state record Perch, you might want to check out Lake Plantagenet. This is where the last record was caught, weighing an incredible 3 pounds and 4 ounces!

Pike (Northern)

  • Minnesota state record: 46.25 inches on Basswood Lake in 2021 and Mille Lacs Lake in 2024.

Next up, we present you Northern Pike. Formidable fighters and aggressive predators, Pike are a beloved sport fish in Minnesota. On top of being worthy rivals, Pike are available in almost all lakes across the state making them must-fish targets when angling in Minnesota. They’re on every angler’s list! With them being everywhere and everyone going after them, it’s no surprise then that the Minnesota state record Northern Pike is a tie!

Yes, you read that correctly – Minnesota has not one but two Pike records! The latest prize fish was caught by Brad Lila on Mille Lacs Lake in 2024 and it shares first place with the 2021 Pike reeled in by Brecken Kobylecky on Basswood Lake. Both creatures were 3.85 feet long! When compared to a common 26-inch keeper, these trophies sound amazing. Apart from quantity, Minnesota boasts quality Pike fishing as well.

To glorify Minnesota’s Pike fishing opportunities even further, we have to tell you that one state record was an ice fishing product, while the other was a summer angling outcome. So, be it summer or winter, a record-breaking Pike is waiting for you in Minnesota!

Mille Lacs Lake and Basswood Lake are the ultimate spots for you to chase that gigantic Pike, but so are the Rainy River, Leech Lake, Lake Winnibigoshish, and Lake Vermillion. Beware that it took 30 minutes and a helping hand for Brad Lila to pull his monster out of hiding. You’ll need serious muscle power and assistance if you want to break the current record.

Sturgeon

  • Minnesota state record: 78 inches on the St. Croix River in 2019.

Speaking of back-breaking action, you’ll most certainly need all the help you can get for these colossal beings. Sturgeon are “living dinosaurs of the fish world” for a reason. They can live over 150 years and weigh an unbelievable three digits! But what about Minnesota’s Sturgeon?

Lake Sturgeon are Minnesota’s largest fish and they can weigh more than 100 pounds. As for length, let’s say that a 3′ fish in the Rainy River is a common occurrence. Darren Troseth, however, was fortunate enough to stumble on what may be the biggest-ever fish in Minnesota! It was none other than a 6.5′ ice fishing catch! This makes the Minnesota state record Sturgeon quite the catch.

Darren, a seasoned angler and an experienced captain, said he had caught many beasts during his lifetime but he had never seen a fish that big! Since one regular hole wasn’t enough, he had to drill four more before he could brag about his trophy! He even immortalized his epic ice fishing moment on the St. Croix River in a video.

Although neither endangered nor threatened, Sturgeon are considered a species of special concern in order to be protected from overfishing and extinction. So, please have this in mind when chasing the Minnesota Sturgeon record.

Sunfish

  • Minnesota state record: 1 lb 12 oz on the Zumbro River in 1994 and Green Lake in 2022.

Slowly but surely, we’re wrapping up Minnesota’s line-up of the state record fish. Maybe they aren’t as mind-blowing as Sturgeon, but Sunfish deserve praise, too. Bluegill, Pumpkinseed, Green, and Hybrid, Sunfish are popular species to fish for in Minnesota. And each has its own record. But the latest Sunfish record was a 2022 Hybrid – and it was the same as the 1994 record. Yes, another tie!

Aaron Ardoff, the holder of the current Minnesota state record Sunfish, always hoped he’d get his hand on trophy Sunny. However, he was targeting Pike and Bass with spinnerbaits on Green Lake when he suddenly realized his dream was about to come true. And, as fate would have it, he landed a record-breaking Sunny that September in 2022.

Aaron’s Hybrid weighed in at 1 pound and 12 ounces! And this chubby fella tied the one reeled in from the Zumbro River back in 1994. For a Panfish that doesn’t always exceed half a pound, this was quite an accomplishment.

Mostly pursued due to their exquisite reputation as table fare, Sunfish are surprisingly good fighters, too. Whether you’re after a plump Sunny like Aaron’s or if you’re into a delicious dinner, Gull Lake, Green Lake, and the backwaters of the Mississippi River will always greet you with a healthy Sunfish population.

Walleye

  • Minnesota state record: 17 lbs 8 oz on the Sea Gull River in 1979.

We saved the best for last – Walleye. Big, mean, fast, furious, elusive, and unpredictable, Walleye are everything a game fish should be. It’s no wonder that Walleye are Minnesota’s state fish and that two counties, Garrison and Baudette, compete for the title of “Walleye Capital of the World!”

To pump things up further, it was Cook County and the Sea Gull River at Saganaga Lake that took the Walleye crown – not Garrison or Baudette. This is where the Minnesota Walleye state record of 17 pounds and 8 ounces was found by LeRoy Chiovitte in 1979. The specimen was almost 3 feet in length with a girth of 21.25 inches.

Don Mickel was on the verge of beating this record in 2012 but he had to release his catch and was unable to confirm its potential. But this is great news for you as it means there’s still room for snatching a true gem in one of Minnesota’s Walleye fisheries.

The average Minnesota Walleye ranges between 1 and 4 pounds, but 8-pounders regularly patrol the waters of Mille Lacs Lake and Lake of the Woods. And then, from time to time, a giant appears.

Minnesota State Record Fish: An Overview

Here’s a quick breakdown of the above-mentioned species, their measurements, and the angling hotspots that made history:

Species Pounds Ounces Length (in) Girth (in) Place Year Bass (Largemouth) 8 15 23.25 17.25 Auburn Lake 2005 Bass (Smallmouth) 8 0 N/A N/A West Battle Lake 1948 Catfish (Flathead) N/A N/A 52.25 32 St. Croix River 2017 Crappie (Black) 5 0 21 N/A Vermillion River 1940 Musky N/A N/A 58.25 N/A Mille Lacs Lake 2022 Perch (Yellow) 3 4 N/A N/A Lake Plantagenet 1945 Pike (Northern) N/A N/A 46.25 N/A Basswood Lake 2021 Pike (Northern) N/A N/A 46.25 23.5 Mille Lacs Lake 2024 Sturgeon N/A N/A 78 29.25 St. Croix River 2019 Sunfish (Hybrid) 1 12 11.25 12 Zumbro River 1994 Sunfish (Hybrid) 1 12 12 13 Green Lake 2022 Walleye 17 8 35.75 21.25 Sea Gull River 1979

Minnesota State Record Fish: A Neverending Story

You’ve reached the end of this article but the list of Minnesota’s state record fish is a neverending story. The records aren’t set in stone and each day brings us closer to a new jaw-dropping trophy that might dethrone its predecessor. After all, this is the Land of 10,000 Lakes and the possibilities are endless.

We’ll keep a close eye on Minnesota’s angling scene and update you as new brag-worthy fish emerge. Who knows, maybe someday we’ll write about you and your fish.

How did you like our Minnesota state record fish blog? What record surprised you? Do you have any Minnesota bragging stories of your own? Hit the button below and share your thoughts with us.

Coyote Trapping Tips – How to Trap

0

Need coyote removal in your hometown? We service over 500 USA locations! Click here to hire us in your town and check prices – updated for year 2020.

Coyote Trapping Tips - How to Trap 
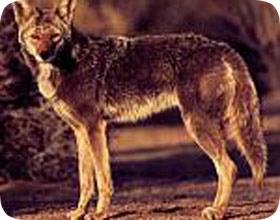
How To Trap A Coyote Coyotes are an amazing successful species that is to be found across the majority of North America, and they have adapted particularly well to living alongside people. They can cause a problem when they come into conflict with domestic pets such as dogs, and have been known to attack livestock and other domesticated animals such as chickens and ducks. Coyotes can also prove to be difficult to deter when they find a good location for scavenging through garbage and other refuse, which is why many people will turn to trapping to solve the problem.

What Traps Can Be Used To Catch A Coyote? There are a number of different live traps that can be used to catch a coyote, although the problem with dealing with the coyote after it has been captured is that it will often have to be euthanized. The most typical type of trap will be one that will take a firm grip of the paw of the coyote and will not be able to be removed until the trapper comes to loosen it. This can be problematic because dealing with a live coyote isn’t necessarily something that a novice trapper should want to do. Another option would be a cage trap, but this will often have a much lower success rate than the grip trap mentioned above. This is because the coyote will naturally be wary of a metal cage and won’t be particularly keen to go inside. Positioning and baiting of a cage trap is vital if it is to successfully trap a coyote. The alternative when trapping a coyote is to use a lethal trap. The most popular trap of this kind is a simply snare, although there are a wide range of commercially produced products and homemade solutions that are also available. The snare works by looping a cord around the coyote’s neck and choking the animal, and because a coyote will naturally struggle and pull away this will happen very quickly. Coyote Trapping Tips - How to Trap Locating And Baiting A Coyote Trap The first question to deal with when trying to catch a coyote is where to place the trap. Snares and grip traps are quite small so will not need as much space as a cage trap. The best traps will be those that naturally lie in the paths that the coyote uses regularly, which can often be identified near fences or field boundaries by looking for tracks or coyote hair. Coyotes will prefer to crawl under a fence even though they can jump over quite high fences, so these are particularly good spots to locate the trap. In terms of the bait for a coyote, meat is usually the best option as it will often attract the coyote from a distance away. It is important in these instances to make sure that the trap is not in an area where it is likely to attract domestic animals, otherwise you may well end up with a traumatized dog if you’re using a live trap. Handling And Removing Coyotes The majority of states will have specific regulations about dealing with pests such as coyotes, and these can vary in different parts of the country. Some places will insist the animal is euthanized, while others will have specific locations the coyote can be taken to. For those who are handling a coyote, wearing thick clothing and protective gloves is an absolute minimum, and keeping handling to a minimum is vital. Coyotes are known to carry rabies and many other parasites and diseases, some of which are transmitted by bites and others can simply be transmitted by contact. Anyone who is nervous or unsure about handling a coyote should bring in a wildlife control expert rather than taking any risks with the animal. For more information about how to trap coyotes, go back to my main coyote removal page or read the about coyotes page.

GLOCK Inc. | GLOCK Pistols | Buy Guns Online

0

SMYRNA, GA. – January 16, 2024 The New Year brings new products to the table from GLOCK, including the first GLOCK Performance Trigger, the expansion of the Gen5 lineup to new calibers, and the introduction of the GLOCK 47 MOS to the commercial market. GLOCK remains the center of trusted versatility and enhanced performance.

“The G47 MOS delivers versatility and dependability for the evolving needs of our customers and has withstood the rigorous testing of the U.S. Customs and Border Protection (CBP)“, says Josh Dorsey, Vice President of GLOCK, Inc. „We are excited to make this model available on the commercial market along with the expansion of the Gen5 product line and the GLOCK Performance Trigger.“

The G47 MOS was developed for the United States Customs and Border Protection (CBP) in 2019. The G47 MOS offers the same reliability and performance as the G17 Gen5 MOS, with a shortened dust cover and maintains parts compatibility with the G17 Gen5 MOS, G19 Gen5 MOS, and G45 MOS. This pistol has the same sight radius as the G17 and is able to showcase exceptional accuracy.

BJ Norris, a 3-year veteran of the United States Border Patrol and member of the CBP National Marksmanship Unit says, „For the agents seeing the shooting team out winning competitions with their duty gun takes away any doubts about performance capabilities.

Due to the highly precise GLOCK manufacturing process, the versatility and interchangability are what makes this pistol unique. The G47 MOS has compatibility with the G19 Gen5 and G45; allowing customers to configure it to best suit their needs. The G47 MOS will replace the G17 Gen5 MOS, while the G17 Gen5 (non-MOS) will still remain in the Gen5 lineup.

Expanding the Gen5 lineup, the G20 Gen5 MOS (10mm AUTO) and G21 Gen5 MOS (.45 AUTO) feature over twenty design changes which distinguish them from their Gen4 predecessors by combining the standards of performance and reliability. The Gen5 enhancements include the GLOCK Marksman Barrel (GMB) utilizing new barrel rifling to deliver improved accuracy, the removal of finger grooves to be more adaptable to a wider variety of hand sizes, an ambidextrous slide-stop lever to provide improved control and flexibility, an nDLC finish making it a tougher and more durable finish that is exclusive to the GLOCK manufacturing process, and a flared magwell to increase performance by making it easier to funnel the magazine into the magwell.

In addition to the new pistol introductions, we are happy to announce the release of the first GLOCK pistol accessory, the GLOCK Performance Trigger. The GLOCK Performance Trigger was designed to meet a different set of criteria and offers a refined trigger pull. The Performance Trigger utilizes a newly designed, flat-faced trigger and maintains the same safety features of the trusted and proven GLOCK Safe Action® System. The GLOCK Performance Trigger must be installed by a certified GLOCK Armorer and is compatible with the following pistol models: G17 Gen5, G19 Gen5, G19X, G26 Gen5, G34 Gen5, G45, and G47 MOS. To purchase the GLOCK Performance Trigger, check with your local dealer for availability.

Best Air Rifle Deals

Popular Posts

How Does an Air Rifle Work?

0
Discover the inner workings of an air rifle with our comprehensive guide! From the mechanics behind its powerful shots to the intricate process of...

Can a 22 air rifle kill a deer?

0
"Debate over whether a 22 air rifle can effectively take down a deer has sparked curiosity among hunting enthusiasts. With its lower muzzle velocity...

5 Types of Air Guns You Need to Know Before Buying

0
Have you ever wondered how many types of air rifles are out there? Is your head spinning around with various powerplants and you don’t know...