Last Updated: September 4, 2019 If you are as obsessed with knives as I am, you may be on the hunt for “the perfect EDC knife.” You know, the one blade that has it all. Naturally, it is the perfect size, features great materials, is beautifully designed, and carries like a dream. But in my mind a perfect EDC needs to go beyond that. It has to be greater than the sum of its parts, and a little “X factor” never hurt either. Lets be real, for a knife to earn some time in the rotation is one thing, but to stand the test of time the knife has to work for you on another level.
Buy the Benchmade 940 at BladeHQ
Buy on Amazon
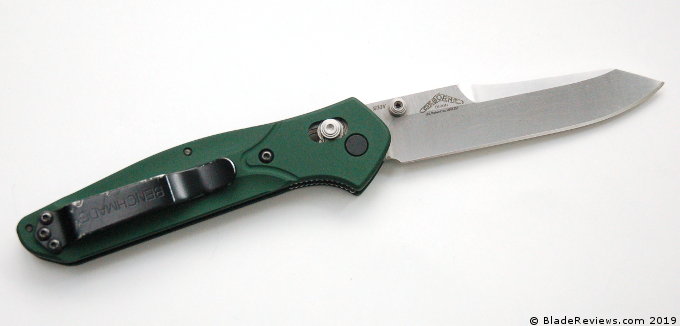
That is what drew me to the Benchmade 940. On paper it has all the basic requirements of a good EDC knife, which is always nice to see. But then the 940 had something else. Maybe it’s the unique handle, or the unconventional blade shape. Whatever it was, it drew me in like a moth to a flame, and I know that I am not the first to succumb to this emerald beauty. The 940 has been in Benchmade‘s catalog for well over a decade, and remains one of their most popular designs to this day. Needless to say, it is high time we gave this classic a thorough review.
The 940 (or “940 Osborne”) has an overall length of 7.87″, a 3.4″ blade, weighs 2.90 ounces, and is made in the USA. In my mind these are real nice numbers for EDC, and that is exactly how I have been using my 940.
But I can also appreciate how the 940 could go beyond a mere EDC item. With an almost 3.5″ blade and an equally generous handle, the 940 could easily be pressed into a self defense role (although I sincerely hope you will never need to use it that way). On the opposite end of the spectrum, the 940 is a beautiful and elegant knife. In many ways exemplifies a modern gentleman’s folder. This is a knife that would do just fine in a suit pocket, or carried on special occasions. So I really like the versatility of the 940. It is fancy enough to make for an upscale EDC, but is big enough to get a lot of work done.
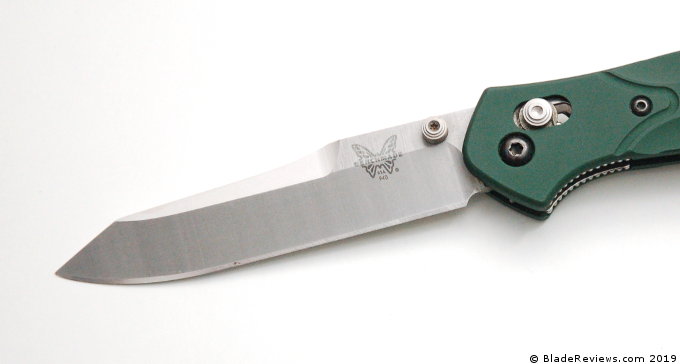
The blade on the 940 is a reverse tanto design. Popularized by the 940’s designer, Warren Osborne, this unique blade shape is best known for providing a sturdy tip, although I think the main draw is just the unique aesthetics. Warren has designed a few reverse tanto models for Benchmade, including the Benchmade Rift and I have generally been impressed by them. This particular blade has been given a high flat grind, and features a swedge running across the top. The 3mm thick blade holds it’s thickness pretty much to the tip thanks to the reverse tanto design. This is an interesting blade shape, and I found it quite capable for all my daily tasks.
The 940 Osborne makes use of S30V for the blade steel, an excellent USA made stainless from the folks over at Crucible. I have spoken about S30V many times before, but as a quick recap S30V is widely regarded as one of the best high end steels commonly found on production knives. When properly heat treated S30V is known for good edge retention, high corrosion resistance, relatively easy sharpening, and a good level of toughness for daily use. I am a big fan of S30V and Benchmade always does a fantastic job with heat treating their blades. Treated to 58-60 HRC, this 940 was no exception.
Handle, Ergonomics and Pocket Clip
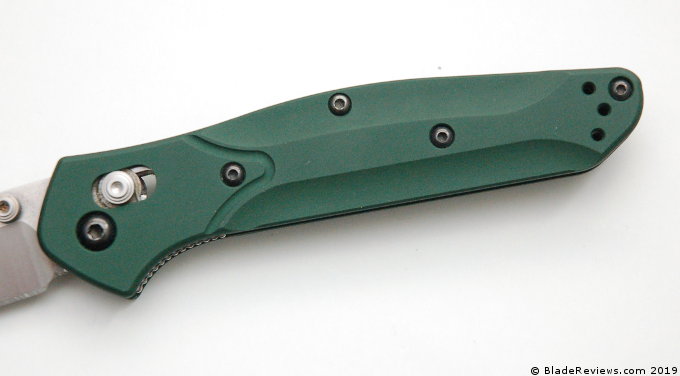
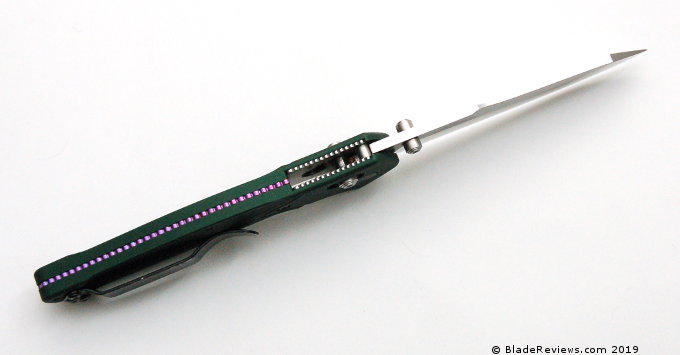
The handle on the 940 is where things start to get interesting. First you have the striking aluminum handles. These have been bead-blasted to an attractive matte finish, and then anodized a deep green. I absolutely love the texture of these handles. They aren’t particularly aggressive, but they aren’t slippery either – given the intended use I found it to be a nice balance. Sandwiched between the aluminum handles is a single piece of anodized purple titanium. This backspacer compliments the green handles nicely, and provides a good deal of visual interest.
As for actual construction, the 940’s handle is top notch. There are partial stainless steel liners, and they have been polished to a lustrous shine. I like how when you peer inside the knife the liners reflect the titanium backspacer. It is a little detail, but some times it’s the small stuff that gets you going. Everything has been screwed together with black hardware, and all the pieces line up perfectly. The overall fit and finish of this knife is exceptional.
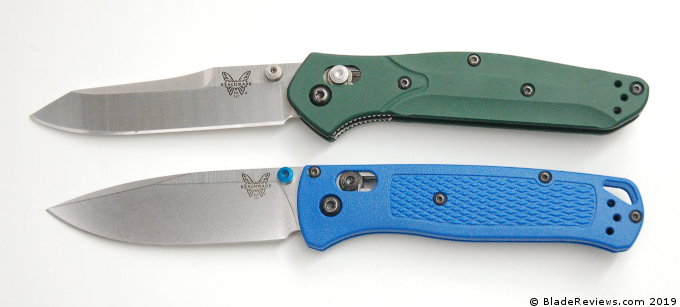
In 2015 Benchmade released the 940-1, a premium version of the 940 with carbon fiber handles and a S90V blade. It’s a beautiful knife and well worth considering if you are a fan of the original 940. Check out our review of the 940-1 here.
In hand the 940 is surprisingly capable. I say “surprisingly” because at a glance we have a rather thin handle here. In practice I found the handle long enough to comfortably accept my larger hand, and the rows of jimping on both the thumb ramp and finger choil provide a good amount of grip. It is a comfortable knife in forward grips, and I can get some good work done with it. The 940 also works well in reverse grip, and in the closed position as well. Actually, when closed, the 940’s thin profile makes it an excellent choice as a kubotan – another nice option to have.
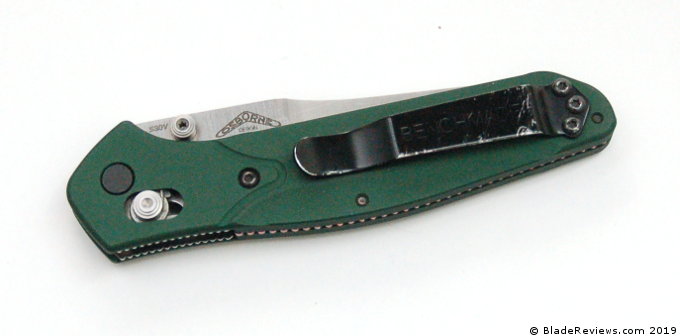
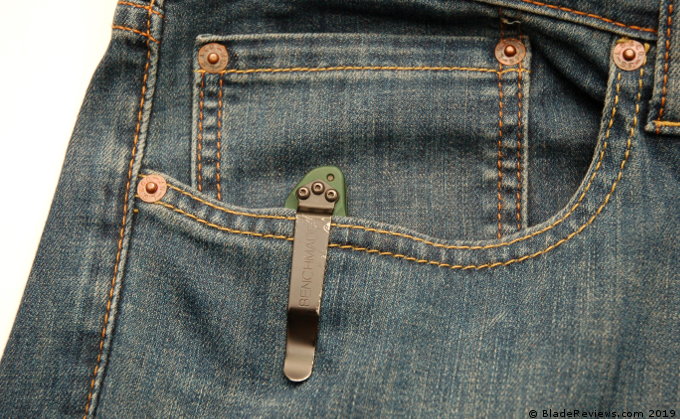
The pocket clip on the 940 Osborne is a standard Benchmade clip – the same kind you will find in models like their classic Griptilian and Mini Griptilian. I am a big fan of this style of clip. It is simple, sturdy, and works quite well. Benchmade drilled and tapped this model for ambidextrous tip up carry. In pocket the 940 carries wonderfully. Thin and lightweight, this is a knife that you forget you are carrying.
Here is your pocket clip shot:
Deployment and Lockup
The 940 makes use of a pair of ambidextrous thumb studs and an axis lock. Much like many of the other Benchmade knives that I have reviewed with this configuration, deployment on the 940 is extremely fast and smooth. The thumb studs are easy to access allowing you to flick the blade out with alarming speed and very little effort. Phosphor bronze washers aid in that regard, and the net result is reliable deployment in any situation.
Similarly, the axis lock on my knife has also been really well done. Lockup is tight with no blade play, yet the lock is easy to disengage with a single hand, and the blade rotates freely into the closed position. It is no secret I am a big fan of the axis lock, and the 940 is a great example of why. If true one hand operation is important to you (as a righty or a lefty) then I find the combination of thumb studs and an axis lock very tough to beat.
Benchmade 940 Osborne Review – Final Thoughts
The 940 combines excellent materials with smart design and wonderful fit and finish to produce an exceptional daily carry item. On paper this has always looked like an awesome knife, so I was very happy to find that the 940 was just as awesome in real life. Everything works, and it works well. The way I see it, the biggest potential downside here is that the knife isn’t particularly cheap, but for a made in the USA folder with these kinds of features, I actually think the price is quite reasonable.
But what about beyond the specifications? Do we really have a “perfect” EDC knife? I must admit, there is something special about this one. The 940 has really distinguished itself as a design and it has a little something extra that keeps me coming back. I don’t doubt that for many people this will be a perfect EDC knife.
I recommend purchasing the 940 at Amazon and BladeHQ. Buying anything through the links on this website earns BladeReviews a small commission at no additional cost to you. All proceeds generated are used to keep the site running. Thank you very much for your support.
“Exploring California’s Hunting Laws: Is Air Rifle Hunting Permitted? Discover the regulations, restrictions, and possibilities surrounding air rifle hunting in California. Uncover the answers to whether this method is legally accepted and gain insights into the state’s wildlife conservation efforts.”
can you hunt with an air rifle in california
In California, the use of air rifles for hunting is permitted under certain conditions. As of July 1, 2019, a new law came into effect that allows hunters to use air rifles to take down small game and non-game mammals. However, it is important to note that this law applies only to certain specific calibers and types of air rifles.
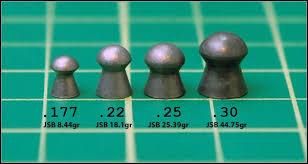
According to the California Department of Fish and Wildlife (CDFW), hunters can use.177 caliber or larger air rifles that shoot projectiles utilizing compressed air or gas. The minimum muzzle energy requirements for these air rifles are set at 6 foot-pounds for taking small game and non-game mammals. Additionally, hunters must possess a valid hunting license and follow all other applicable hunting regulations.
This change in regulation has provided hunters in California with an alternative method for hunting small game and non-game mammals. By allowing the use of air rifles, the state has expanded the options available to hunters while ensuring that the activity is conducted safely and responsibly.
In conclusion, it is legal to hunt with an air rifle in California as long as certain regulations are followed. Hunters must possess a valid hunting license, use appropriate caliber and velocity for the targeted game, and adhere to specific hunting seasons and areas. It is crucial to always check local laws and guidelines before engaging in any hunting activities with an air rifle to ensure compliance and promote responsible hunting practices.
Crossbow scopes have revolutionized the way we hunt and shoot. With the right scope, you can greatly enhance your accuracy and precision, making it easier to hit your targets with ease. But with so many options available, it can be difficult to know which scope is best suited to your needs. In this article, we’ll take a look at the top crossbow scopes of 2024, examining their features, benefits, and drawbacks.
The Hawke Sport Optics 1.5-5×32 IR Crossbow Scope is a versatile scope that offers excellent performance at an affordable price. Its 1.5-5x magnification range allows you to zoom in on your target with ease, while its illuminated reticle makes it easy to aim in low light conditions. The scope is constructed from high-quality materials, ensuring it can withstand heavy use in tough conditions. However, the scope can be a bit heavy for some shooters.
TenPoint Rangemaster Pro Scope
Specifications
Tube Diameter: 30mm
Length: 9.1″
Eye Relief: 3″
Weight: 1lb
Click Value: Adjustable Elevation Turret (1 click = ½ MOA)
Magnification: 2-7X (note: scope magnification dictated by arrow speed)
Designed for Speeds: 380-505 FPS
Scope Caps: Flip-Up
Illumination: Red and Green
Objective Diameter: 32mm
Parallax: 50 yds
Limited Lifetime Operational Warranty
The TenPoint Rangemaster Pro Scope is a top-of-the-line scope that offers exceptional accuracy and precision. Its 1.5-5x magnification range allows you to zoom in on your target with ease, while its multi-coated lens provides a clear view of your target even in low light conditions. The scope is constructed from high-quality materials, ensuring it can withstand heavy use in tough conditions. However, the scope’s price may be a bit too high for some.
Vortex Optics Crossfire II Crossbow Scope
Specifications
Magnification: 2-7x
Objective Lens Diameter: 32mm
Turret Style: Low Capped
Tube Size: 30mm
Adjustment Graduation: ½ MOA
Parallax: Fixed @75 yds
Max Windage Adjustment: 160 MOA
Max Elevation Adjustment: 160 MOA
Travel Per Rotation: 30 MOA
Field of View: 57.5’ – 16.4’ @ 100 yards
Eye Relief: 2.7 in
Length: 9.5″
Weight: 14oz
Unlimited Lifetime Warranty
The Vortex Optics Crossfire II Crossbow Scope is a versatile scope that provides excellent performance at an affordable price. Its 2-7x magnification range allows you to zoom in on your target with ease, while its multi-coated lens provides a clear view of your target even in low light conditions. The scope is constructed from high-quality materials, ensuring it can withstand heavy use in tough conditions. One of the main advantages of this scope is its versatility, as it can be used for hunting, target shooting, or tactical applications. However, eye relief can be a bit finicky.
Bear Archery X Speed
Specifications
Length: 8.5″
Illuminated 9 Position 20-100-yard Reticle
Speed Adjustments From 205 to 430 FPS
1-5 x 24 Zoom Range
30 mm Optical Magnification System
Multi-Coated, Ultra-Clear Glass
Limited Lifetime Warranty
The Bear X Speed Crossbow Scope is compatible with any crossbow with speed adjustments from 205 to 430 fps. You will clearly see your target with multi-coated, ultra-clear glass and 1-5 x 24 x 30mm magnification. The illuminated 9-position 20-100 yard reticle adds to the versatility of this scope.
A scope built to meet the long distance performance and precision of a Ravin Crossbow, the Ravin R170 Illuminated Crossbow Scope is built to help crossbow hunters consistently achieve 3-inch groups at the length of a football field. This high performance scope zeroes in on targets between 20-100 yards with aiming points every 10 yards for precision targeting. The R170 also adjusts to the FPS speed of the crossbow, showing the proper targeting range. The choice of red or green illumination in the scope lets hunters adjust to their hunting situation or match personal preferences. Fully-coated lenses ensure optimal clarity in all conditions and the scope features shock-, recoil-, fog-, and waterproof construction.
Rangefinding Crossbow Scope
Garmin Xero X1i
Specifications
Length: 6.2″
Weight: 1.92 lbs
Multi-Color: Yes
Objective Diameter: 1.2″
Magnification: 3.5x
Field of View: 5 degrees
Eye Relief: 2.4″
Range to Game Targets: 250 yds
Range to Reflective Targets: 500+ yds
Battery Life: 1 yr
Battery Type: 2 AAA lithium batteries (included)
Operating Temp: -20 C to 60 C (-4 F to 140 F)
Water Rating: IPX7, Nitrogen filled
AutoCal: Bow speeds up to 650 FPS, out to 80 yds (73 m)
Laser Locate: yes (with compatible Garmin wearables and handhelds)
Aiming accuracy: 1/2 MOA (1/2″ at 100 yds)
Features
Interface: microUSB
Electric Level
Compass
Angle Compensated Distance
Flight Apex
Auto Brightness
Steady Aim
Configurable Aim Point Shapes
Dual Range Triggers
Shot Counter
Integrated Mount
Roll At Shot
Impulse Duration
Auto Color option
The Xero X1i crossbow scope with built-in laser range finder is the first of its kind. This auto-ranging digital scope with 3.5X magnification automatically measures distance to a target. A single button press lets you range game up to 250 yards away and reflective targets up to 500 yards away. Precise illuminated aim points automatically adjust brightness to conditions and allow you to see your target, unobstructed by reticle patterns.
Based on your bow’s speed, Xero X1i can automatically calibrate all aim points out to 80 yards, allowing for quick and easy setup. The Laser Locate waypoint projection feature works with compatible Garmin devices to show you exactly where the target was located when the shot or range was taken, so you can better track game or find bolts. Create custom bolt profiles with unique aim point stacks for each setup. Target Lock and Steady Shot features assist with ranging and aiming performance to help improve accuracy.
Burris Oracle X
Specifications
Length: 11.9”
Width: 2.95”
Height: 3.28”
Center to Base Height : 2.0”
Field of View: Low – 47ft @ 100 yd / High – 14ft @ 100yd
Magnification: 2-7X Variable Zoom
Wireless Remote
Integrated Inclinometer
Electronic Bubble Level to reduce unwanted cant
Precise Aluminum mount / Adjustment System
Locking Screws
Battery Life: 3000+ activations
Auto-Brightness
Minimum range: 5 yds
Modern, Lightweight Design
Forever Warranty
The Oracle X is one of the most advanced rangefinding crossbow scopes on the market today. The Oracle X features a built-in laser rangefinder that is activated via the wireless remote or the range button on the scope. At the push of a button, the Oracle X instantly displays the distance to your target and provides an exact aiming point factoring in the angle of your shot. The aiming point will also change to stay accurate not matter where you are within the 2-7 power zoom range. The Oracle X is lightweight and robust enough to weather any conditions and is backed by the Burris Forever Warranty.
Points to Consider in Crossbow Scopes
If you are in the market for a crossbow scope, there are several points to consider before making your purchase. Here are some of the most important factors to keep in mind:
Magnification Range: The magnification range of a crossbow scope determines how much you can zoom in on your target. A higher magnification range may be beneficial for long-range shooting, while a lower magnification range may be more suitable for close-range shooting and low-light conditions. Considering that all reasonable crossbow shots will be within 100 yards, I would lean towards a scope that offers a wide range of magnification, but make sure that magnification is offered on the lower end of the spectrum for typical hunting shots.
Reticle: The reticle is the crosshairs that you see when you look through the scope. Some reticles are illuminated, which can make them easier to see in low-light conditions. Some reticles also have range-finding capabilities, allowing you to estimate the distance to your target. Choose a reticle that allows you to compensate for different ranges.
Lens Coating: Lens coating can greatly impact the clarity of the image you see through the scope. A multi-coated lens can provide a clearer and brighter image, even in low-light conditions.
Eye Relief: Eye relief refers to the distance between your eye and the scope. A longer eye relief can make it more comfortable to use the scope for extended periods, while a shorter eye relief may be more suitable for compact scopes.
Durability: Crossbow scopes need to be able to withstand heavy use in tough conditions. Look for scopes that are constructed from high-quality materials and have a reputation for durability or a rock-solid warranty.
Price: Crossbow scopes can range in price from very affordable to quite expensive. In the world of optics, your money is well spent on glass, coatings, and service after the sale. Prioritize these areas over gimmicks that won’t make much difference for normal hunting ranges.
Compatibility: Not all crossbow scopes are compatible with all crossbows. Make sure that the scope you choose is compatible with your specific crossbow model.
By considering these factors, you can choose a crossbow scope that meets your needs and enhances your shooting accuracy and precision.
FAQS
What is the best magnification range for crossbow scopes?
The best magnification range for a crossbow scope depends on the intended use. For close-range shooting, a lower magnification range of 1.5-5x may be more suitable, while for long-range shooting, a higher magnification of up to 16x may be beneficial. Most hunting shots occur in lower light, which will require lower magnification for optical clarity. Prioritize scopes that offer magnification ranges that include the lower, 1-4X range.
Do all crossbow scopes have illuminated reticles?
No, not all crossbow scopes have illuminated reticles. Some scopes come with a standard crosshair reticle that is not illuminated, while others have an illuminated reticle that makes it easier to aim in low-light conditions. It is important to consider your shooting environment and lighting conditions when choosing a reticle.
Can any crossbow scope be used with any crossbow?
No, not all crossbow scopes are compatible with all crossbows. Crossbows have different mounting systems, and it is important to choose a scope that is compatible with your specific crossbow model. It is recommended to consult with the manufacturer or a professional before purchasing a crossbow scope to ensure compatibility.
Once you are sure your crossbow can take a scope, check to be sure the ones you are considering are compatible with your crossbow before you make a purchase.
Closing Thoughts on Crossbow Scopes
Choosing the right crossbow scope can greatly enhance your accuracy and precision, making it easier to hit your targets with ease. In this article, we have examined some of the top crossbow scopes of 2024, considering their features, benefits, and drawbacks. It is important to consider your shooting needs and environment when choosing a scope and to prioritize factors such as magnification range, reticle, lens coating, eye relief, durability, price, and compatibility with your specific crossbow model. By considering these factors, you can choose a crossbow scope that meets your needs and enhances your shooting experience.
Full Disclosure: This post may include affiliate links. There’s no extra charge to our readers for using these.
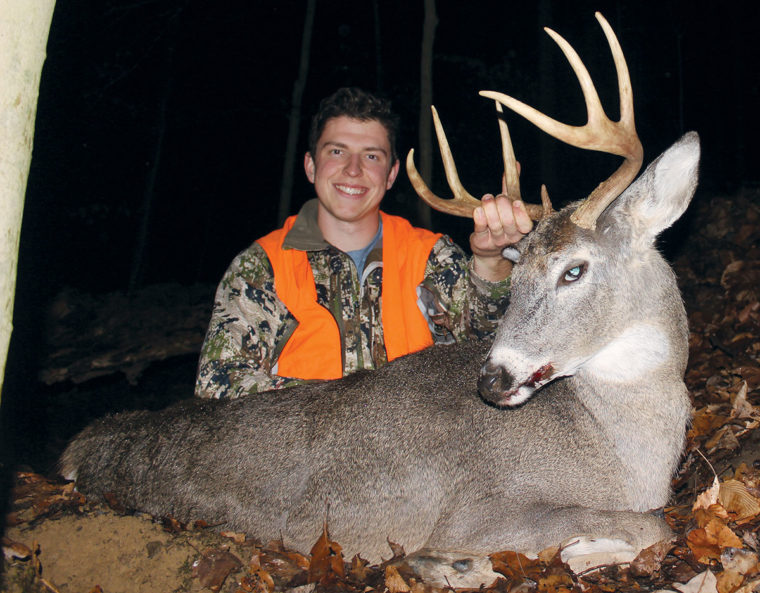
The author with a late-season, public-land buck he killed during the 2020-2021 season in Indiana by hunting a ridge covered in northern red oak acorns.
It was mid-December 2020 in southern Indiana, and my deer season was slipping through my fingers. After two hard months of hunting and over a hundred miles put on my boots, my buck tag was still just as empty as day one. I had hunted hard through early November, the midst of the fabled Midwestern rut, and according to the local hunting forums it appeared everyone in the county and their cousin had killed their buck already. I was hunting pressured public lands, and while I had run into scores of hunters during early season, now it felt like I was the last hunter in the woods. But I wasn’t ready to give up yet because I had one last trick up my sleeve – red oak acorns.
While late-season hunting can feel like a desperate attempt to rectify an unsuccessful season, I have begun to look forward to this part of the season more than the rut. The reasons are simple: There are fewer hunters in the woods in late season, which can vastly improve deer movement on public land; foods are limited on the landscape, concentrating deer; and red oak acorns begin to hit their peak attractiveness to deer after the rut.
The goal of this article is to share in detail my strategy for late-season hunting so you can effectively locate red oaks, scout these trees, and finally kill a buck off this dynamite late-season food source. Since we are going to focus on late-season strategies, we will not be discussing white oaks because these acorns germinate shortly after falling and are only available a few weeks. Red oak acorns do not germinate until spring, so they are available to deer all winter long. For more information on the differences between the red oak and white oak groups, read my article in the August/September 2019 issue of Quality Whitetails.
When the amount of deer sign under a tree gives me an eerie feeling because I feel deer are super close by and could walk up at any instant, I know I need to hunt it!
This is also an excellent time to note that when I refer to red oaks, I am referring to all red oak species, including northern red, southern red, scarlet, black, Shumard, nuttall, and other red oaks. Just the same, when I refer to white oaks, I am referring to many species, including white, chestnut, post, swamp chestnut, chinquapin, and more.
Why Red Oaks?
When most hunters talk about late season, the conversation is normally around a corn, soybean, brassica, or cereal grain food source. These food sources can be effective but may not be available on the land many of us hunt. Whether you have private property without agriculture fields or are confined to public land, the truth is many people don’t have access to standing crop fields to hunt in December and January. Does this mean we just hang up the bow and rifle when the rut ends? Absolutely not! Rather this is the time to return to the oaks you abandoned in mid-October.
Red oaks often get a bad rap from hunters who feel they are inferior to white oaks simply because they have higher tannin content levels on average than most white oaks. What most hunters fail to realize is tannins are found in much of the forage deer eat, and their bodies are adapted to consuming foods containing tannins. Deer food selection is much more complex than simply tannin levels. Deer diets change throughout the year, and deer seldom if ever consume just one type of food in a day. In fact, when deer are heavily consuming acorns in early fall, they are still subsidizing this hard mast with other foods like forbs and woody browse. As seasons change, the deer’s gut microbiome and energy demands shift, which along with availability of foods drives seasonal shifts in deer diets.
There is ample evidence that red oaks are an important winter food for whitetails. A 1985 study in southern Michigan found that over 90% of deer fecal sample matter was acorn matter. This same study noted that snow did not slow acorn consumption because deer dug through the snow to access this food. Similarly, during my master’s thesis research in northern Mississippi, I found deer use of red oak trees peaked in late January and then tapered off afterward. Similarly, many studies have noted deer searching out acorns when they are scarce and consuming them until they are gone. If you can find one of the last trees in the woods to have acorns, your hunt is made!
Learn Trees
Now let’s talk about how to find THE tree to hunt late season. I stress the importance of finding the right tree because this can change weekly and sometimes daily as acorn availability changes. My process for narrowing down a deer killing tree is never ending. In early season I’m merely making observations of what trees are producing. By late November I am keeping tabs on which of these trees still have acorns, and late in the season I am narrowing my efforts down to THE tree where I can kill a buck.
Before you can be an effective red oak hunter, you will have to be able to identify oak species. To learn these, you will need a good guide. I suggest the Virginia Tech Dendrology Factsheets Database for learning basic oak identification characteristics and the free iNaturalist app for identifying trees in the field. As a starter for which species to learn, my favorite late season red oaks are northern red and scarlet oaks in upland forests and Shumard and cherrybark oaks in bottomland forests.
Observe Tree Behaviors
The more you observe oaks and their behavior, the more you will learn their habits. This may sound crazy, but with a little bit of experience you can confidently predict what species will be occurring in what landscape features in your area. For instance, in south central Indiana I most commonly find northern red oaks on easterly or northerly facing slopes. They most often are not on the ridge top but rather on the sides of slopes. Using these behaviors, I look at aerial imagery to find stands of deciduous trees in these types of areas to identify spots that I should scout.
Just as much as you can predict the behavior of a given species, individual trees are unique, particularly in the timing of when they drop acorns. I’ve observed northern red oaks dropping acorns as early as Labor Day and as late as Christmas week. Just like some deer or people seem to operate on different schedules, so do some oak trees. This is why scouting is so important, because without boots on the ground, you do not know when individual trees are dropping acorns! I particularly like to find red oaks that drop super late in the year, because deer seem to be attracted to the only oak in the woods still dropping acorns.
If you notice that the scarlet oaks along the grocery store parking lot are dumping acorns, your next step will be to reference your map and find all your pins for scarlet oak clusters on your hunting grounds.
Look and Listen
Oaks do not consistently produce acorns every year, but rather a given species tends to produce a large mast crop every few years. For red oak species, these mast years occur more frequently than white oaks that generally have bumper crops every five years or so. However, since there are so many species of red oaks there is usually at least one species that will be masting, regardless of the year. For instance, 2020 in Indiana brought a bumper crop of northern red oaks and a decent crop of scarlet oaks. In this same area, 2021 looks to be a bleak year for both species, but southern red oaks are having a good year!
There are clues all around as to what is happening in the deer woods if you pay attention to acorns around you. Start looking under the oaks in your yard, in the parking lot at the store, or along the parking lot at your work to see if they are dropping acorns. When you see acorns raining down, investigate to determine the species. Knowing what’s producing acorns each year will allow you to know what trees to target before setting foot in the woods.
Never Stop Scouting
Every time you are in the woods, pay attention to the oaks around you regardless of the time of year. When you find clusters of oaks that are of good acorn producing size, generally 12 to 30 inches in diameter, drop a pin on your map. Make a special note if there is fresh or old deer sign under these trees which could be clues as to their attractiveness when they do produce acorns.
After you have compiled map pins of oaks in different locations you will be steps ahead for future hunting seasons. This comes in handy when combined with your observations of oak masting cycles in your area. For instance, if you notice the scarlet oaks along the grocery store parking lot are dumping acorns, your next step will be to reference your map and find all your pins for scarlet oak clusters on your hunting grounds. Now, you have an excellent clue to the likely locations of acorns you should be hunting.
Narrow it Down
Simply because you have found acorns doesn’t mean deer are eating them, and it doesn’t mean you have found THE tree you need to hunt. First, take an inventory of as many oaks in the area as you can, if there are only a handful with acorns, then your job will be easy. If there are many, then it will take a while.
Throughout the season, check back in with these red oaks to monitor activity under them. Many species of squirrels, raccoons, foxes and coyotes will chomp acorns and sometimes leave pieces of half-eaten nuts on the ground. But the sure sign that an acorn was munched by a deer is the tell-tale molar marks left when an acorn is smashed between a deer’s upper and lower molars and then dropped to the ground. As deer activity heats up, the leaf litter under these trees will be overturned from deer searching for acorns. Tracks will be abundant, scrapes will be nearby, and if bucks are using the tree there will probably be rubs too.
The hardest thing to know when scouting oak trees is how much sign is enough to pull the trigger and start hunting a tree. I spend a lot of time walking past good-looking deer sign in search of a tree that gives me an overwhelming feeling that deer are nearby. When you find this tree, the intensity of deer sign under it will make your hair stand up because every leaf will be overturned, there will be crunched acorns scattered everywhere, still plenty of fresh acorns left to eat, and deer tracks will be visible in bare soil. When the amount of deer sign under a tree gives me an eerie feeling because I feel deer are super close by and could walk up at any instant, I know I need to hunt it!
Does All This Really Work?
Back to my 2020 Indiana hunting season. My December strategy was simple: walk oak ridges and find northern red oaks where deer were still feeding. As I walked the spines of ridges, I glassed the bark of trees as far as I could see and looked for the trademark long pale grey stripes down tree trunks, the easiest long-range identifying characteristic of northern red oaks. I searched the ground for deer-chewed acorns and overturned leaves under each northern red I found.
After finding a ridge with 10 or so northern red oaks that were covered in hot deer sign, I set a few trail-cameras and started hunting the trees. During my first few hunts, I saw several small bucks and lots of does, but none of the big bucks that were frequenting my cameras. While hiking into the ridge late one morning, I glassed a big buck feeding on the ridge where I was heading to hunt. I waited until he left and then slipped onto the ridge and climbed a tree, settling into my stand about noon. I watched several does and fawns around me on the ridge early in the afternoon. About 4:45 I looked down the ridge to see two bucks feeding under a northern red oak just 80 yards away. I steadied my muzzleloader and dropped the first buck that presented a shot. He tumbled down the slope and came to rest in the creek bottom below.
I left several trail-cameras running under these oaks through the end of winter, and the amount of buck activity blew me away. There were over a dozen nice bucks using this ridge in daylight, including some real studs. The red oaks were hammered by deer until mid-February, long after hunting season had closed. To really put the icing on the cake, I found the matching set of sheds from the big buck I had seen on the ridge as I walked in for my last hunt that morning. Both sheds were lying under a northern red that had been hammered by the deer, just 150 yards from where I had seen the buck.
I’m Sold on Red Oaks
The late-season power of hunting red oaks is a strategy I’m still learning, but every single year I become a little more surprised by how great of a hunting hotspot these trees can be. Red oak acorns’ attractiveness to deer is powerful and lasts until they are gone, which is really highlighted by my hunt and the big set of sheds I found last year. You can bet I will be re-scouting that ridge in December of 2021 in hopes of catching up with that big buck again under a red oak!
The best fixed blade broadheads are ones that have razor-sharp blades, fly like field points from your bow, and inflict maximum damage. We all want that short blood trail to the buck of our dreams.
In this article, we look at what we feel are the 9 best fixed-blade broadheads on the market in 2024. These are broadheads we have tried and tested and wouldn’t hesitate to screw onto the ends of our own arrows this fall.
I’ll give my usual caveat here: while we have our favorite broadheads for various game and situations, there is truly no one ‘best’ option. Also keep in mind that broadheads for crossbows often have different requirements, so we have a whole other article for those.
Which broadhead works best for you will depend on a variety of factors, including your bow setup, arrow selection, ability to tune your bow, and a little bit of personal preference.
As the name implies, fixed blade broadheads have no moving parts. The blades are fixed in position. In some cases, fixed blade broadheads are machined from one piece of steel, so the blades and the ferrule are formed together. That is the case with the G5 Montec broadheads featured above.
Most fixed blade broadheads, however, have replaceable blades that attache to the ferrule in various ways. This is a great feature, because if a blade or blades become dull or damaged, you can simply replace the blade without having to try to sharpen it or replace the entire broadhead.
Pros and Cons of Fixed Blade Broadheads
Features to Consider
Broadhead Weight
Most fixed blade broadheads are going to come in either 85, 100, 125 or 150 grains, with 100 grains being the most common. Any of these will work effectively. It’s really a matter of your overall arrow or bolt setup as to which weight you choose. If you’re just going with a standard mid-weight arrow setup, then I’d recommend sticking with a 100 grain broadhead because they are readily available and will get the job done. However, if you’re like me and prefer a heavier arrow setup with a little higher FOC, then a 125 or even a 150 grain may be your best bet.
The past two seasons I’ve shot 150 grain broadheads on my compound bow setup, and I’ve been extremely happy with the results. This year I may go with the 125 grain Slick Trick Magnum broadheads, which should still work fine. I can always add another 25 grain weight to my insert if I wanted to keep the overall weight the same, but I really don’t think that will be necessary.
Blade Thickness
Blade thickness is an important factor when choosing the best fixed blade broadhead for your setup. It’s going to determine how well your broadheads hold up when they make contact with an animal — especially if they come in contact with any bone. Blade thickness is especially important if you’re shooting a one-piece broadhead with blades that will require sharpening.
If you’re shooting a broadhead with replaceable blades, blade thickness isn’t quite as critical, but you still don’t want the broadhead coming apart as it passes through the chest cavity of a mature buck.
Number of Blades
In your quest to find the best fixed blade broadhead, you may wonder if you should you shoot a two, three, or four-blade broadhead? First off, let me say that any of those three options will get the job done. Like most things in life, there’s tradeoffs to each option. A two-blade broadhead is going to have less resistance, so it will be more likely to pass thru an animal. The tradeoff to that reduced resistance and increased penetration is less overall tissue damage and a smaller blood trail.
Three and four-blade broadheads, on the other hand, should produce a larger wound channel and better blood trail. And while they will have more resistance than a two-blade, as long as you’re shooting a heavy enough arrow setup, penetration shouldn’t be an issue.
Cutting Diameter
Cutting diameter is another important factor when choosing a fixed blade broadhead. Similar to the discussion above about the number of blades a broadhead should have, cutting diameter will impact penetration and the subsequent blood trail. A smaller cutting diameter will have less resistance and will be more likely to pass through, but it will also create a smaller wound channel. That smaller hole will me less overall tissue damage and a smaller blood trail.
That leaves you having to strike a balance between getting a solid pass-thru shot and still inflicting as much damage as possible for a good, short blood trail. Other factors in that decision will be your bow setup and overall arrow setup. If you shoot a lower poundage, short draw length, or a light arrow setup, then you will want to err on the side of smaller cutting diameter to ensure a pass-thru shot.
My preference is a 1 1/4 to 1 1/2-inch cutting diameter from a fixed blade broadhead.
Replaceable Blades vs One-Piece Design
This is another personal preference decision you’ll need to make when choosing the best fixed blade broadhead for your setup. What it really boils down to is, are you comfortable sharpening your broadhead blades? If not, then you need a broadhead with replaceable blades. That way, after you’ve dulled a broadhead from practice shooting or in a hunting situation, you can simply toss the dull blades and install new, razor-sharp ones.
If you are comfortable sharpening your blades, then a one-piece design may be the way to go. A one-piece broadhead is typically going to be tougher and more durable than one with replaceable blades. There are certainly exceptions to that statement but as a rule, it’s true.
Solid vs Vented Blade Design
This is one I see debated at times, but in my mind is a non-issue. The biggest concern I’ve seen discussed with vented broadhead blades is the whistling noise they can make in flight. I’ve seen bowhunters concerned that the noise can alert deer and result in them “jumping the string.” I’ve shot plenty of vented blade broadheads and have never witnessed any issues that I felt were the result of broadhead noise.
The one valid argument for using a solid blade design over a vented blade is that the solid blade is going to be a little stronger and less likely to bend or break. The downside to a solid blade design is that it could result in increased planing in flight, which could result in erratic flight from bows that aren’t perfectly tuned.
Final Thoughts
Choosing the best fixed blade broadhead is not easy. There are tons of options on the market today, and all of them will kill a deer with proper shot placement. That’s not to say, however, that some options aren’t much better than others. To narrow down your choice, use the factors outlined above, and you should find one or more great options from our list above.
Ultimately, you won’t go wrong with any of the broadheads listed above, but hopefully this article will help you find the best fixed blade broadhead for your specific needs.
Going hunting? Need to touch up your gear? Look no further – creating your own camo pattern is easy! With the following tips, you can get that perfect, natural camo look in 15 minutes or less. Follow this easy, step-by-step guide to get the look.
What You Need
Gear to spray paint
Camo spray paint in black, brown, olive and khaki
Drop cloth to protect from overspray
Gloves (optional)
Stencil (optional)
Branches and leaves (ideally from the area you will be hunting in)
STEP 1: Prep your work area
Set up a spray area by covering your work space with a drop cloth. Make sure it is a well-ventilated area – outside is ideal. Using an all-purpose cleaner, thoroughly clean the inside and outside of your surfaces to remove dirt, oil and debris.
STEP 2: Paint your base
Depending on the surface, you may want to do a base colour on your project before layering with the camo pattern. It is always best to start with a base coat when you are working with a brightly coloured object.. One recommended product to accomplish this is Krylon Camouflage Spray Paint. For the base, layer the camo spray paint in black and brown using short, fast bursts. Keep layering colour until most or all of the original colour is gone.
Spray Tip: Make sure you read and follow the instructions on the can for proper spray distances, dry times and recoat timeframes. Products like Krylon Camouflage paint should be shaken for at least one minute after the ball has been released inside the can to ensure proper colour distribution. It is always recommended to test-spray on a scrap piece of paper or on your drop cloth before spraying your project. While painting, hold the can six to eight inches away from the surface and make sure to spray in smooth, even strokes to prevent drips or large areas of concentrated colour.
STEP 3: Create your camo
Layer leaves and branches over your project. Using the lighter colours (olive and khaki), spray in long, sweeping motions across the organic material. Remove the leaves and branches to reveal the pattern below. Repeat this process all around until you are satisfied with the pattern.
Spray Tip: Layer, Layer, LAYER! The more you layer the pattern, the more realistic it will look.
STEP 4
Let it dry. Spray paint typically dries in 15 minutes or less and can be handled in about one hour.
Quick Tips
Choose the right pattern – pick branches and leaves from the area you will be hunting in to create a custom camo look to that area.
Choose the right colours – layer colours so the hues that are most prominent in the area you will be hunting in are most featured. Always use an ultra-flat finish to ensure there is no light reflection.
Pick a stencil – if you’re looking for a more traditional camo stencil, follow the instructions above, but instead of using natural stencils with leaves and branches, download them online. Krylon’s camo stencils can be found at krylon.com
Light coats – for best results, use light, even coats instead of thick, heavy coats of paints. This will prevent drips and will also speed up dry time.
There’s no doubt about Gaston Glock’s pistol, it’s a good gun.
But can it be better?
Absolutely.
One of the most obvious improvements would be an upgraded trigger system. There are roughly a million different upgrades for the trigger out there…so how do you choose?
That’s where we come in…we’ve bought, used, and tested the most popular triggers over thousands of rounds.
Obligatory disclaimer that you should have a qualified gunsmith install and test all this stuff.
Many will say to get a better Glock trigger, you just have to shoot it. And they are right.
Thousands and thousands of rounds (or dry-fire) will polish up the internals and make the trigger much better. Not custom 1911 level…but better than when you bought it.
We cover how to do the infamous Glock 25 Cent Trigger Job with some polishing compound and Dremel.
Another affordable upgrade I do is upgrading the stock 5 lb connector with a Lone Wolf or Ghost 3.5 lb connector. If you built a Polymer80 Glock with a Lone Wolf frame kit…you already have the 3.5 lb connector.
Doing both in my G19 brings the trigger pull down from around 6 lb 6 oz to 5 lb 4 oz and makes it much crisper and with a smoother reset. Perfect for general purpose and maintaining the stock safeties.
Here’s a quick video on the first pull and reset so we have a baseline for the others.
Perfectly manageable, but still room for improvement!
Best Glock Triggers
1. Apex Tactical Glock Enhancement Trigger
Apex is well known for improving the turd of a trigger that comes on Smith and Wesson M&Ps, especially the first models that hit the streets. Obviously, they’ve expanded, or they wouldn’t be on this list.
Apex’s Glock Enhancement Trigger came out a few years ago and is one of the most affordable drop-in trigger systems.
When I say drop-in trigger…I mean it.
It’s a self-contained system with a trigger, trigger bar, and disconnector all built together. You remove your standard Glock guts and fill in the blank. It’s a very simple installation process and very convenient.
The Apex trigger gives you a quick stop initially, so you know when to ease and squeeze the trigger. There’s some minor pull before a clean break.
Also, a much shorter reset that’s followed by a similar pull and clean break again.
Red not doing it for you…they have purple and black too.
One big difference is the flat-faced trigger that still maintains the safety features of the standard Glock. I definitely like flat-faced triggers after using the Apex a bunch. It’s also a little meatier than the other triggers, which I like.
You can combine upgrades with the Zev Competition Spring kit, which I heavily recommend. With it and a polish job…my trigger pull is 5 lb 7 oz and much smoother.
However, I found with mine that I got light primer strikes with the use of the reduced weight striker spring. So be sure to test.
If that happens to you…you might need the Zev Skeletonized Striker ($79) to take full advantage of the springs.
The Apex Glock trigger is my pick for best bang-for-the-buck since it looks cool, is reliable, improves upon the stock trigger, and is priced right.
What’s your take on the Apex trigger? Rate it below.
2. Velocity Trigger
This Velocity Trigger I got sent for testing, and I put it in a new Polymer 80 build with a SeeAll Sight and matching gold Faxon Barrel.
It’s much thinner than the Apex or stock Glock trigger. The flat-faced trigger is also ridged for your finger’s pleasure with a lower-activating safety.
With stock springs and only a 3.5 connector, I was getting 4 lb 12 oz. With the competition spring kit…it should go down some more.
However…one big thing I didn’t like was that in my P80 build and my style of pressing the trigger (pretty high up with thin fingers)…many times, the “safe-action” trigger wouldn’t engage. And I’d be left with no PEW.
Whatever at the range…annoying at a competition…but potentially deadly in a real-life encounter. Not that I would recommend having anything modified on your gun for self-defense.
Otherwise, the trigger was great…longer pull after the initial stop and a nice click.
I would recommend for competition/range if you’re finger placement is usually on the lower half of the trigger or if you have thicker fingers than I do.
3. Overwatch Precision Trigger
The Overwatch Precision is from another P80 build. It also has the competition spring kit.
With everything…I get a super soft 2 lb 12 oz trigger pull. However…it’s pretty spongy when compared to the other triggers. Nice reset, though.
But…runs into the same safety reset problem as with the Velocity (so make sure you press lower or have thicker fingers).
My pick if you really want a light trigger pull throughout. I personally prefer less spongy (even at the expense of pull-weight), so this is my least favorite trigger out of all the series.
4. Zev Fulcrum Ultimate Trigger
My favorite trigger that lives in my G34 for competition shooting. What I’ve shot the most besides stock Glock triggers.
It breaks the cleanest without a lot of pre-travel and no mushiness. Combined with a little 25-cent trigger job polishing and the lightest springs…it comes in at under 3 lb 10 oz.
It’s not much to look at when installed…but the kit comes with an entirely new trigger assembly, lightened springs, and lightened striker (or else sometimes, when you only change springs, you get light primer strikes).
Plus…adjustable pre-travel and over-travel to get YOUR perfect trigger pull. This all comes at a price, though!
5. Tyrant CNC ITTS Trigger
Want a nicer-looking trigger but don’t want to change your trigger pull?
You can check out the Tyrant CNC ITTS Trigger, which replaces the trigger shoe with something purrty.
Fully Modded P80 PF9SS (Glock 43)
Easy enough to install with instructions right here.
It keeps your original trigger pull for safety reasons but makes your Glock look a whole lot better!
Tyrant CNC Glock
And while it doesn’t change the performance of the pull, that machined aluminum sure does feel nice. They come in different color combinations too!
6. Timney Alpha Glock 5
First off, I like the Gen 5 Glock trigger and consider it to be a significant improvement over previous generations.
Pressing back on the trigger, it travels back a few millimeters with minor resistance before stopping at a pretty well-defined wall. Pushing beyond this, the trigger breaks crisply at an average of around 4 pounds on my Lyman Digital Gauge.
Timney Alpha Glock 5
Reset occurs after a slight release and is both audible and tactile. It’s a great trigger for a striker-fired gun, and I have definitely gotten used to it.
Given Timney’s overall reputation in triggers, I was excited to try the Alpha Glock 5. So I cracked open the package and started putting it in.
Hold your mouth jussssst right
Installation was a little challenging due to the small parts, but the instructions were detailed and included good photos. Then, the trigger return spring has to be compressed on the inside of the locking block while installing the locking block.
After installing, I noticed the surface of the all-aluminum trigger shoe was smoother, and the interface with the safety bar in the trigger was also smoother.
The pull weight felt lighter, and I confirmed this on the gauge at an average of 2.5 pounds.
Smooth and pretty
During press, the previously defined wall before break felt softer. And finally, trigger reset felt a bit longer to reach but was still audible and tactile.
Out at the range, the trigger truly shines with a performance you soon become accustomed to and can repeat easily. It’s a great upgrade for around $150.
Honorable Mentions
There are a lot of Glock triggers. Here are some honorable mentions:
Agency Arms ($160): Pretty good as well…but I’d still take the Apex with the spring kit. Personal preference, though…tons of people love it.
Lone Wolf Adjustable ($75): The P80 kit trigger is actually pretty good…and this adjustable upgrade is not too shabby either.
CMC Trigger ($170): Another popular one, but was meh to me when I tried it.
Final Thoughts
We can all agree that sometimes swapping out a Glock factory trigger for something a little nicer can make all the difference when it comes to shooting.
And hopefully, we’ve given you some options to kick your Glock up a notch.
How did we do…what other triggers did we miss that we can test for the next update? Let us know. For a perfect trigger tune-up, make sure to grab a trigger pull gauge. We have our recommendations here!
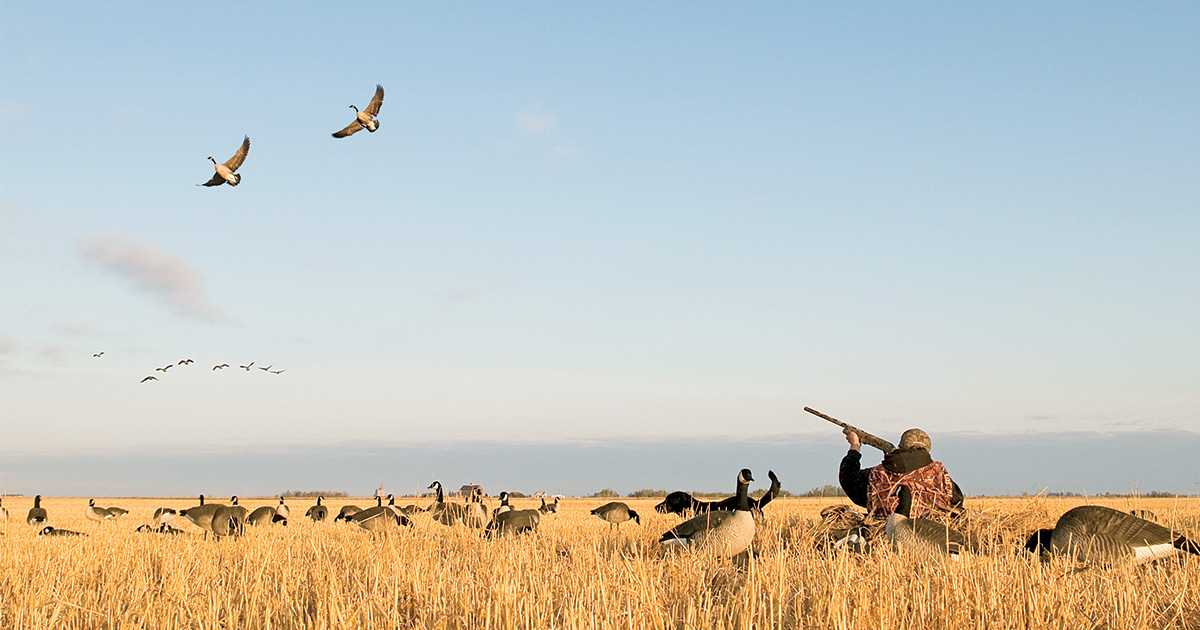
The fall Canada goose migration is one of the grandest spectacles in the natural world. Flying south in large V formations, these big, garrulous birds capture the attention—and the imaginations—of folks all across the country. Hunters in particular look forward to this fall flight as honkers gather in great numbers on migration and wintering areas. Resident geese are also part of the show, and together these birds offer waterfowlers plenty of exciting hunting opportunities.
Over the years, Canada goose hunting has become a highly specialized sport. It takes a combination of hunting savvy, good equipment, and persistent effort to consistently outwit these challenging game birds. Here are 40 tips from some of the nation’s top Canada goose hunting experts to help you bag more geese this season.
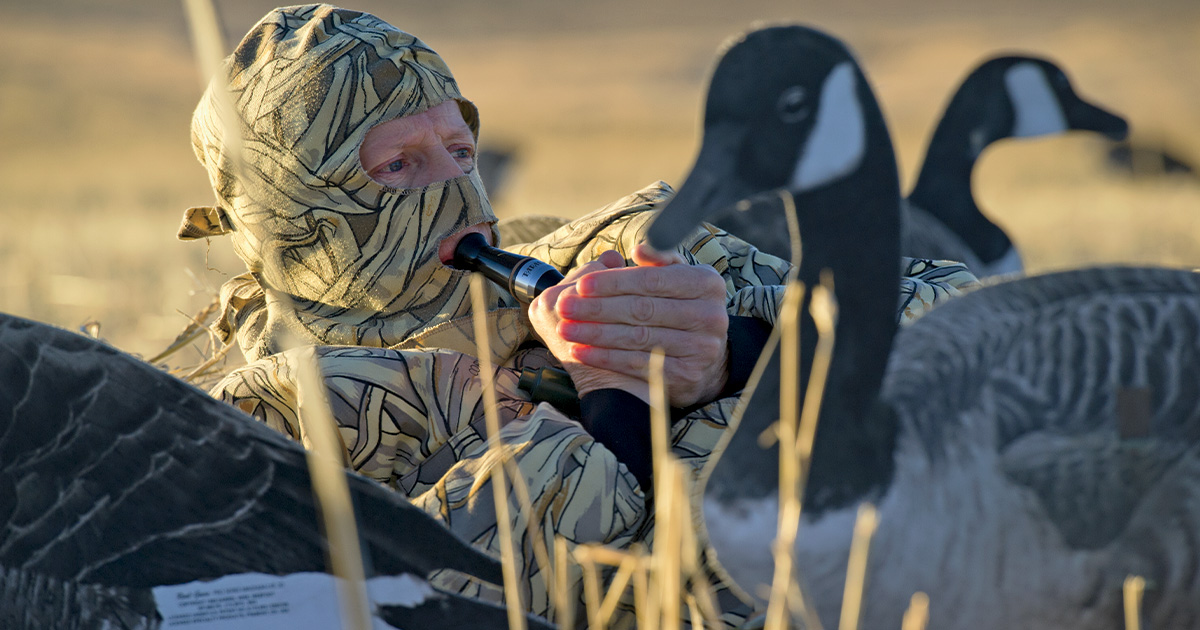
Follow this sound advice to become a more effective goose caller in the field by Wade Bourne
1. Choose the Right Call
Canada goose calls come in three basic styles: resonant chamber, flute, and short-reed. Resonant chamber calls are the easiest to use but are limited in the range of sounds they can make. Flute calls, which take more skill to blow, produce a broader range of sounds and are more realistic and mellow in tone. Short-reed calls produce the widest range of Canada goose sounds and are the handiest calls for expressing excitement and aggression. They are also louder than other calls and require less air to operate. Learning to blow a short-reed call effectively does take some practice, but this call’s versatility makes it well worth the effort for serious goose hunters.
2. Seek Proper Instruction
The best way to learn to call geese is to work one-on-one with an experienced caller. An expert can help you develop proper calling techniques and avoid some of the pitfalls and bad habits that can plague novice callers. The next best way to learn is to watch an instructional DVD or online video. These resources offer plenty of how-to instruction and tips for improving your calling.
3. Start with the Basics
To imitate Canada geese you need to learn four basic calls. The first and most identifiable sound is the honk, which is typically a relaxed, contented call. A cluck is a shorter, faster honk with more intensity and excitement. A murmur is the sound that geese make while feeding and loafing. A moan is a universal call. Sometimes it signals contentment, other times excitement—and it’s typically made by geese in flight or on the water. All other Canada goose calls consist of combinations or variations of these four fundamental sounds.
4. Pour It on Distant Birds
When geese are passing at long distances, hit them with a “wall of sound.” That is, call with loud, continuous honks, clucks, and moans. Produce as much excitement as possible. Do so with a loud, high-pitched call that cracks sharply between low and high notes. Continue hailing the geese with this rapid, loud calling style until they turn your way or fly out of earshot. The goal here is to capture their attention and convince them to come to you instead of flying on to their intended destination.
5. Ease Off When You Turn ’Em
Once Canada geese turn in your direction, shift from loud calling to “ground talk”—contented calls that geese make on the ground. These include murmurs, moans, and occasional clucks. At the same time, be careful to gauge the birds’ reactions. If they start sliding away, revert back to more excited, aggressive honks and clucks. As soon as the flock turns back toward your calling, tone it down again. The more experience you gain, the better you’ll be at adjusting the mood and tempo of your calling to match the reactions of the geese.
6. Convince Them with Comebacks
When Canada geese approach a decoy spread and suddenly veer away, try using comeback calls to convince the birds to return. Many callers believe that only excited moans should be used in this situation. In fact, just about any form of enthusiastic calling can be used to persuade geese to turn back. One very effective comeback routine is a combination of moans, clucks, and spit notes blown loudly and rapidly. The idea is to use excitement and forceful calling to overcome the departing birds’ timidity and pull them back toward the decoys.
7. Synchronize Your Calling
Multiple callers can frequently exert more “pulling power” over a flock of geese than one caller alone. The notes are doubled or tripled, thereby increasing the excitement and attraction to passing birds. Remember, though, that there’s more to it than simply making more noise. Callers should work together to sound as natural as possible. For example, one caller might blow a flute call to produce mellower notes while his partner blows a short-reed call to make higher, sharper sounds. Having a lead caller who sets the tone for others by telling them when to ease off or pour it on is also helpful. Callers should practice calling together to synchronize their cadences and learn to avoid piling notes on top of each other. Be mindful that too much calling can spook geese. If a flock shies away, one or more callers should quit calling to reduce the pressure.
8. Call Carefully on Big Water
On big rivers, lakes, and marshes an abundance of water gives geese plenty of potential landing spots. Catching the attention of flocks passing at long distances and steering them toward your spread is essential in such situations. If the wind is high or the geese are flight birds, call loudly and continuously, toning it down as they draw closer. When the wind is calm or if the geese are local birds coming off a nearby refuge, reduce the noise and call with more discretion than force. In this latter case, use a call that’s deeper pitched and softer.
9. Build Your Skills in the Field
After mastering the four basic calls, practice making them until they become second nature. Learn calling routines that communicate a range of emotions—from calm and relaxed to excited and aggressive. Visit areas where Canada geese rest and feed, and observe how their calls match their interactions. Finally, spend as much time in the goose pit or blind as possible. Experience is one of the best teachers in goose calling. Learn what works best in different hunting situations, and enjoy the success that will come as your calling skills improve.
10. Don’t Overdo It
The biggest mistake most goose callers make is overcalling. Too many callers mistake speed and volume for emotion. Calling geese is more art than science. There’s a definite feel to it. You have to learn to read how the birds are reacting to your calling and make adjustments as you go. Call with a “message” instead of blowing a lot of fast notes. As mentioned earlier, there’s a lot more to goose calling than simply making noise.
Decoys
Set a better goose spread with these tips from the Avery Outdoors pro staff by Bill Buckley
11. Set Decoys Near Good Cover
Keep concealment in mind when you are placing your decoys in open fields or pastures. You will almost always bag more birds by hunting where you can hide, even if it puts you 50 to 100 yards off the X. Look for rows of tall grass, piles of crop stubble, or a dip in the terrain where you can conceal layout blinds. Use online satellite land-cover maps and apps to find good concealment spots that you may not see from ground level. —Casey Self, Kansas
12. Avoid Getting Stuck in a Rut
Hunt the same area with the same spread day after day and it won’t take long for local geese to recognize and avoid your decoys. As the season progresses, give your spread a fresh look by varying the number of decoys you use as well as the configuration. Watch how the birds react. If they’re not decoying the way you’d hoped, change up your spread. Otherwise your luck isn’t likely to change. —Kevin Addy, Pennsylvania
13. Don’t Mix Up Your Decoys
Each type of decoy creates a certain illusion. This is true whether you’re using full-body decoys, shells, wind socks, or silhouettes. Mixing these different decoy types can give your spread a mismatched look, which can keep geese from finishing like they should. Full-body and shell decoys of the same brand are the exception to this rule because they are similar enough in appearance to be used in the same spread. In almost all other cases you’ll see better results if you stick to using one type of decoy in your spread. —Mike Bard, New York
14. Balance Your Spread
Whatever the size of your spread, it should consist of roughly 80 percent feeder and 20 percent “active” decoys. Group most of the feeders upwind of where you want the birds to land, near the spread’s center. Then place the active decoys downwind of this group to look like birds that just landed and are walking toward the feeders. Position some actives around the outside of the spread in small bunches of three to seven decoys, keeping in mind that it’s normal for geese to have their heads up when they first land. You can also position lines of feeders to mimic geese that are competing for a concentrated food source. Watch birds in the fields when you’re scouting and set your spread to imitate them. —Vance Stolz, Colorado
15. Be a Contrarian
If everyone else in your area is hunting in the middle of cornfields, try setting up somewhere else, such as a pasture pond, river bend, field edge, or anywhere that geese are not accustomed to seeing hunters. If other hunters are using big spreads of full-bodies, try a significantly smaller spread of highly realistic fully-flocked decoys. The goal is to make your spread look different from what the majority of hunters in your area are using. —Ben Cade, Minnesota
16. Scale Down Your Setup
You can deploy the best decoy spread in the country, but you won’t fire a shot if you don’t have adequate concealment. The more layout blinds you use, the greater your chances of being seen by incoming geese. If you have six hunters, try setting out three layout blinds and then rotating shooters among them. Escaping detection by decoying geese should be your number one priority. You can also control the hunt better with fewer blinds. Communication is easier. And it’s also easier to call the shots when the geese are coming straight into the decoys, which can result in higher-percentage shooting. —Travis Mueller, Iowa
17. Spread Out Decoys and Hunters
As the season progresses, geese get wise to rows of layout blinds and masses of decoys. By spreading out hunters (always with safety foremost in mind) and hiding them in clusters of decoys, you accomplish several things. First, birds conditioned to looking for rows of blinds will have a harder time spotting danger. Second, setting decoys in scattered family groups mimics a natural, relaxed flock and gives you a bigger footprint and more drawing power. And finally, flagging and calling locations are also dispersed, making you look and sound less like a group of hunters and more like an actual flock of geese. —Ben Cade, Minnesota
18. Get Out of the Way
Late-season geese are adept at spotting suspicious rows of bumps—telltale signs of hunters lying in wait. Setting up with your blinds facing downwind—and therefore directly in line with the birds’ approach—only invites trouble. To reduce the likelihood of being detected, place your blinds 10 yards to the side of the landing hole or parallel to the wind. Now the geese will see nothing but decoys in front of them, and your crossing shots will likely be at backpedaling birds. —Mike Bard, New York
19. Bring High Incomers Down
Few situations are more frustrating than high-flying geese coming straight over your spread and seeing your blinds, as often happens on days with little or no wind. To prevent this from ruining your hunt, grab six decoys and walk 50 to 60 yards downwind (or in the direction the geese are coming) and place them in two groups on either side of your spread. While this will certainly position these decoys beyond gun range, the whole idea is to get approaching birds to lose altitude. When the next flock approaches, the geese will likely focus on these decoys and start dropping. Don’t call until the birds commit, and then be prepared to call and flag aggressively to prevent them from short-stopping. Once you pull the birds past the downwind decoys, call only as much as is needed to keep them on a string. —Casey Self, Kansas
20. Keep Frost Off Your Decoys
Frost presents a real challenge for goose hunters on cold, clear mornings. Even fully flocked decoys can frost up quickly under such conditions, and when the sun rises they’ll shine and flare geese. To reduce the chances of your decoys frosting up, brush up your blinds and organize your guns and gear first, then set out the decoys right before shooting time—as late as you can without missing the first flight. The less time the decoys have to collect frost before sunup, the better. —Arliss Reed, New York
Strategies
These time-honored tactics are sure to improve your goose hunting success by Wade Bourne
21. Find the “X”
In the morning, Canada geese will typically return to the spot where they were feeding the previous afternoon. This is why scouting is crucial. When you find a feeding flock, wait until the birds fly back to roost before going into the field to pinpoint their feeding area. Check the ground for fresh droppings, and when you locate them, take a GPS reading or mark the spot so you can return to it the next morning in the dark.
22. Follow the Leader
Every goose hunting party should have a recognized leader. The job should typically go to the most experienced hunter or caller. The leader watches the geese work and determines not only when to call and flag based on the birds’ reactions but also when to shoot. By directing the calling and shooting for the group, the leader helps ensure that other hunters stay concealed and that the hunt progresses smoothly and safely.
23. Don’t Forget to Flag
Flagging goes hand in hand with calling and should be used primarily to gain the attention of passing geese. Several hunters waving flags intermittently can help pull birds in by simulating a flock of geese landing among the decoys. When the geese turn toward your spread, however, only the lead caller should flag, and he or she should stop flagging when the birds fully commit and are on their final approach. If the geese veer away, resume flagging and calling to regain their attention and turn them back toward the decoys.
24. Hunt without Decoys
While most Canada geese are taken over decoy spreads, pass-shooting and jump-shooting are also effective hunting methods for these birds. Pass-shooters should scout to see where geese are entering and exiting a feeding field, then position themselves in cover beneath these flight lanes. Try to hide as close to a feeding area as possible to intercept low-flying birds. Sometimes a call can be used to entice geese (especially singles) to fly directly overhead. Jump-shooters should use cover such as thickets and fencerows and other topographical features to slip within range of feeding geese and shoot them when they flush. Success with both of these techniques requires sound strategy, patience, and good concealment. Like all waterfowlers, pass- and jump-shooters have an ethical responsibility to not take shots at geese at marginal ranges.
25. Get Low in Small Spreads
Not all hunters can deploy dozens of full-body decoys that offer enough concealment to hide several layout blinds. If you’re using a small spread of three to four dozen decoys, a good way to make layout blinds disappear is to dig them in (with the landowner’s permission). This helps lower a blind’s profile, making it much harder for geese to spot. It takes only a few minutes to dig a shallow “grave” to conceal a layout blind. With mud or sand filled in around its edges and camouflaged with natural vegetation, you will be virtually invisible to incoming birds.
26. Don’t Limit Layout Blinds
Layout blinds aren’t just for field hunting. These portable hides can also be used effectively in other locations, such as on river sandbars, mudflats, pond edges, and sheet water collected in fields after a heavy rain. Some layout blinds can even be equipped with waterproof tubs that allow them to be used in water up to a foot deep.
27. Mind the Details
Pay attention to small details to make your hunting setups as natural looking as possible. For example, when camouflaging layout blinds in a cornfield, use stubble gathered onsite. Add additional stubble to blinds as needed during the hunt. Also, be sure to pick up spent shotgun shells and keep your eyes open for anything out of place that might alert geese to danger.
28. Take it Easy with Young Retrievers
Retrieving a full-sized Canada goose can be a daunting prospect for a young duck dog. You can avoid an unpleasant experience that might dampen a retriever’s enthusiasm for goose hunting if you start your dog out on doves and ducks, and introduce him to geese only after he has a year of duck hunting behind him. If your dog shows some initial reluctance about retrieving a goose, go out into the field with him, pick up the bird, and encourage him to take it from your hand. Soon he should overcome his hesitancy and retrieve geese with gusto.
29. Hunt the Afternoon Flight
In bitter cold weather, Canada geese often adjust their daily routines to conserve energy. One of the ways the birds do this is by spending the morning on the roost and flying out to feed when the temperature peaks during the afternoon. At these times, scouting is essential to determine exactly when and where the geese are feeding. Once you have the birds patterned, get to the field early to make sure you have plenty of time to set up before the first flights arrive.
30. Get Real in the Snow
Grainfields covered in snow can provide productive goose hunting, but you usually have to put in some extra effort to ensure success. For example, you can make your spread look more realistic to approaching geese by using rakes and shovels to expose large areas of dirt and stubble both downwind of and among the decoys. These disturbed areas, which look as if geese have been rooting under the snow to find food, are visible to birds in flight from a good distance. Conceal layout blinds with snow covers and Avery Real Snow Spray to blend in with the white background.
Shooting
Here’s how to make every shot count on your next goose hunt by Phil Bourjaily
31. Angle Blinds for Better Shots
If you shoot right-handed, position your layout blind slightly to the right of the landing hole. You can swing much farther to the left than you can to the right, so this will provide you with more shooting opportunities than if you were facing directly downwind. Position any left-handed shooters on the right end of the line, so they can intercept any geese that slide off on that side.
32. Use Leverage in Layout Blinds
If you have trouble sitting up to shoot out of a layout blind, dig a depression under your seat so you’re partially sitting up when you recline. Alternatively, you can scoop some dirt out from under your feet, which will allow you to dig into the ground with your heels to help you sit up.
33. Carry Lighter Loads for Cripples
If you hunt without a retriever, keep extra shells in your pocket while you’re goose hunting so you’ll have ammo on hand if you need to dispatch crippled geese. Steel 2s or 4s will do the job just fine at about 15 yards.
34. Be Clear on Shot Calling
Agree beforehand who will call the shot and what types of shots the group should take. Although one person should call the shot, there’s nothing wrong with talking it over as the birds approach and reaching a group decision about when to take ’em. Positioning the blinds fairly close together so the whole party can communicate helps everyone stay on the same page as well.
35. Focus on the Head
To ensure clean kills, try for a head shot when geese are decoying at close range. The distinctive black-and-white markings on a Canada goose’s head make it a highly visible target. It’s a good size as well, comparable to the body of a mourning dove. A close-range shot to the head will bag the bird cleanly without leaving a lot of pellets in the breast.
36. Don’t Pass Up Good Shots
When geese hang right over the blinds on a calm day and look down at you from 30 yards up, you might as well shoot. The birds’ vitals are exposed, offering a good killing shot if your gun is loaded with BBs or larger pellets. There’s a good chance those birds are going to see you, especially on windless, sunny days when there are shadows on the ground around the blinds. In my experience, geese rarely commit under such conditions so don’t hesitate to take a good shot if you have one.
37. Slow Down When You Shoot
One trick for successfully shooting geese, especially at longer ranges, is to move the gun more slowly than you think is necessary. Swing slowly through the bird from behind, and pull the trigger when you see some daylight between the barrel and the goose’s head. Most people swing too fast and try to shoot too far in front of geese. Slow down and watch them drop.
38. Be Sure of Your Pattern
The best all-around steel pellet for hunting large Canada geese is BBs, while BBBs and Ts are better at longer ranges. Whatever shot size and choke you choose, your pattern should deliver a minimum of 60 pellets in a 30-inch circle at the longest range you plan to shoot. Anything less lacks the pattern density to ensure multiple pellet strikes in a goose’s vital areas.
39. Get the Gunk Out
To keep semiautomatic shotguns running in the very cold conditions that make for great goose hunts, strip all the oil out of the action and moving parts with something like Birchwood Casey Gun Scrubber Firearm Cleaner. It’s a messy, smelly process, so you’ll want to do the stripping outside. Spray the solvent into the action until it runs out clean, then lightly lube all the moving parts with Break-Free CLP. Be sure to give the magazine tube the same treatment.
40. Always Wear Earplugs
All waterfowlers should take precautions to protect their hearing. Goose hunters in particular are vulnerable to hearing loss from shooting magnum guns with heavy loads. I wear earplugs whenever I hunt. I can hear surprisingly well with them in, and I can still hear today because I wear them.
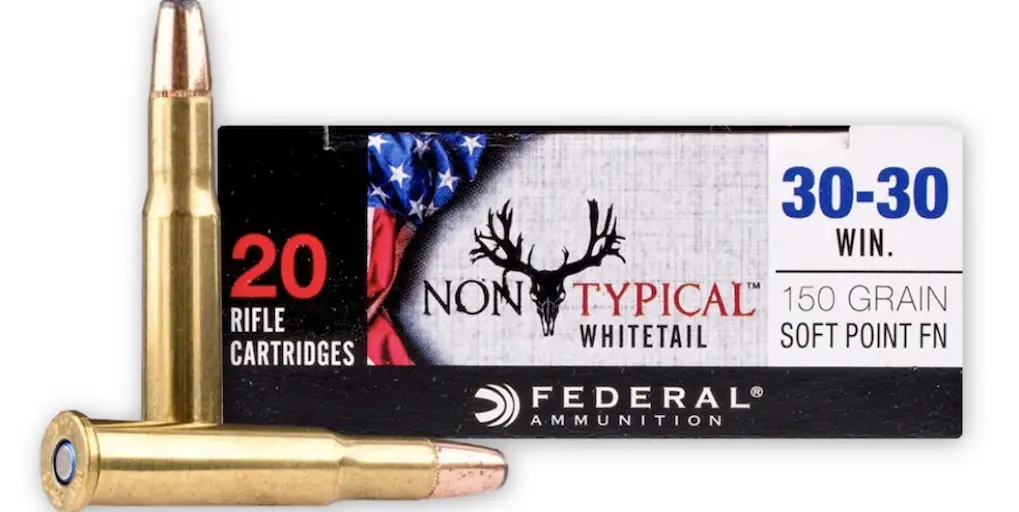
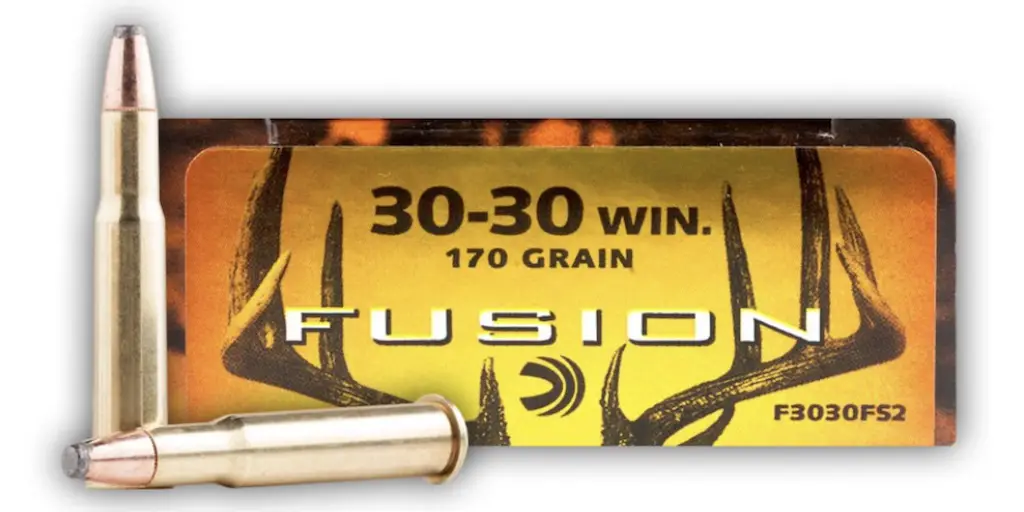
Many people still use the venerable .30-30 for hunting deer and many other species of big game with excellent results. Here are a few great brands of .30-30 ammo that should serve you well next time you hit the woods.
Though the cartridge has been around since the 1890s, the legendary .30-30 Winchester is still an excellent deer hunting cartridge. In fact, as is the case with other older cartridges like the .45-70 Government, .30-30 ammo is now even more effective for hunting many species of big game than ever due to advances in smokeless powder and bullet technology that have occurred over the last century.
Known for its manageable recoil in lightweight and easy to carry rifles and reliable performance at short to medium range, hunters all over the United States still utilize the .30-30 for deer hunting in thick conditions. The .30-30 Winchester is also a very effective rifle cartridge on other species of big game like black bear, feral hogs, and mountain lions.
Fortunately, the major ammunition manufactures like Barnes, Fiocchi, Federal Premium, Hornady, Nosler, Prvi Partizan, Remington, Sellier & Bellot, and Winchester currently offer multiple varieties of .30-30 factory loads specifically designed for hunters. For that reason, regardless of whether you’re using a Marlin 336, a Winchester Model 94, a Savage Model 99, a Thompson Center Contender handgun, or something else, there is something for everyone on the list below of the best .30-30 Winchester ammunition for hunting.
In today’s post, I’m going to show you the best .30-30 ammo for hunting and go over the pros and cons of each individual load.
Note: some of the links below are affiliate links. This means I will earn a small commission (at no extra cost to you) if you make a purchase. This helps support the blog and allows me to continue to create free content that’s useful to hunters like yourself. Thanks for your support.
Hornady LeverRevolution
If you’re looking to squeeze every bit of performance out of the .30-30 Winchester, then go with the Hornady Leverevolution line of ammo. Available with either a 160 grain FTX bullet or a 140 grain MonoFlex bullet (both of which have a flexible tip), this line of ammo is still safe to use in a lever action rifle with a tubular magazine, but those pointed (spitzer) bullets have a higher ballistic coefficient than traditional flat tipped or round nosed bullets.
Though it doesn’t transform the .30-30 Winchester into a long range cartridge, this load does have a flatter trajectory and better downrange performance than just about any other .30-30 Winchester ammo out there.
The MonoFlex bullets are also made of a 100% copper alloy, which also makes them a great choice if you’re a California resident and need lead free .30-30 ammo for hunting.
Before going hunting with this rifle ammo though, make sure you spend some time at the range with it to ensure it functions reliably and shoots accurately in your rifle. If it does shoot well in your hunting rifle, then this is my pick for the best 30-30 ammo for a Marlin 336, a Winchester 94 30-30, or any other lever action or bolt action rifle chambered in that cartridge with a tubular magazine.
Bullet Type: Hornady Flex Tip Expanding (FTX) or MonoFlex
Bullet Weight: 160 grains (FTX) or 140 grains (MonoFlex)
Muzzle Velocity: 2,400 feet per second (FTX) or 2,500 feet per second (MonoFlex)
BUY LEVEREVOLUTION 30-30 AMMO HERE
Also available at: Brownells (FTX), Cabela’s, Lucky Gunner, and Optics Planet
Remington Core Lokt
If you’re a “meat and potatoes” kind of hunter who wants some reasonably priced and dependable 30-30 ammo for hunting deer, feral hogs, and black bear then the Core Lokt 170 grain soft point by Remington Ammunition will probably work really well for you (it’s also available in a 150 grain jacketed hollow point load which is also very good).
It’s not the latest and greatest stuff by any means, but this .30-30 rifle ammunition by Remington has been around for a long time and countless hunters have successfully used Core Lokt ammo to take just about every species of big game in North America.
Bullet Type: Core-Lokt Soft Point
Bullet Weight: 170 grains
Muzzle Velocity: 2,200 feet per second
GET 30-30 CORE LOKT AMMO HERE
Also available at: Brownells, Lucky Gunner, & Remington
Winchester Super X
Winchester’s Super X line of ammo is a great choice for hunters who want some reasonably priced, “no frills” .30-30 ammo. It’s not a sexy or exciting load, but it will really get the job done when hunting deer, black bear, and feral hogs. In addition to the 170 grain round nose .30-30 load pictured above, it’s also available in a 150 grain jacketed hollow point (JHP) load. Buy a box or two of these bullets, sight your rifle in at 100 yards, and it will probably serve you well as a great hunting load for years.
Bullet Type: Power Point
Bullet Weight: 170 grains
Muzzle Velocity: 2,200 feet per second
GET WINCHESTER 30-30 AMMO HERE
Also available at: Brownells and Lucky Gunner
Federal Non-Typical Whitetail
The .30-30 Winchester is an outstanding cartridge for deer hunting and many of the big ammunition companies make special lines of ammo designed specifically for hunting whitetail deer. Federal’s Non-Typical Whitetail is a great example.
Loaded with a 150 grain soft point flat nose bullet, this ammunition delivers hard hitting terminal performance on thin-skinned game like deer. Like all Federal Premium ammunition, this stuff is also renowned for really good accuracy and reliability. It’s also pretty darn reasonably priced.
If you’re looking for the best .30-30 ammo for deer hunting, then Federal Non-Typical Whitetail is a really good choice. Place your shot where it needs to go and no deer will run very far afterwards.
Bullet Type: Soft Point Flat Nose (SPFN)
Bullet Weight: 150 grains
Muzzle Velocity: 2,390 feet per second
GET FEDERAL NON-TYPICAL WHITETAIL 30-30 AMMO HERE
Also available at: Federal
Federal Fusion
Federal’s Fusion line of ammunition utilizes a bullet with a molecularly fused jacket and a pressure-formed core for a more durable construction than many other comparable bullets. The goal was to build a very durable bullet that would offer more controlled expansion and high weight retention. So, this ammunition
They successfully accomplished those goals and Fusion ammunition is known for being very robustly constructed. In general, this .30-30 ammo probably won’t deliver quite as much expansion as stuff like Federal Non-Typical, Winchester Super X, or Winchester Deer Season XP ammo.
Available in both 150gr and 170gr bullet weights, this ammunition is acceptable for hunting a wide range of game. While both will work on thin-skinned game like deer, the 150gr bullets are best suited for that sort of hunting and the 170gr bullets are better for tougher game like feral hogs and black bear. Heck, those 170gr bullets will also work if you want to use your .30-30 for elk or moose hunting.
Bullet Type: Fusion Soft Point
Bullet Weight: 150 grains or 170 grains
Muzzle Velocity: 2,390 feet per second (150 grains) or 2,200 (170 grains)
GET 150gr FEDERAL FUSION AMMO HERE
GET 170gr FEDERAL FUSION AMMO HERE
Also available at: Federal, Lucky Gunner (150gr & 170gr)
Barnes VOR-TX
If you’re a hunter who loves Barnes bullets, then you’re in luck because Barnes also produces .30-30 Winchester ammo featuring their legendary hollow point copper Triple Shock X-Bullet. Designed for rapid expansion, high weight retention, and deep penetration, this is a wonderful load for hunters after game like feral hogs, black bear, and whitetail deer.
This is also a great hollow point bullet for those who want to hunt moose with the .30-30. It’s also 100% copper, which makes this another ideal brand of .30-30 Winchester hunting ammunition for use in states like California that that don’t permit the use of lead bullets.
Bullet Type: TSX Flat Nose
Bullet Weight: 150 grains
Muzzle Velocity: 2,335 feet per second
GET BARNES 30-30 AMMO HERE
Barnes VOR-TX ammo also made cut for my 2019 holiday gift recommendations. To see what other stuff is on the list, check out the following article:
101 Best Gifts For Hunters In 2019
Winchester Deer Season XP
If you’re planning on taking your .30-30 Winchester deer hunting, then Winchester’s Deer Season XP line of ammunition is another interesting choice. It sports a polymer tip similar to the Hornady Leverevolution, but it’s designed specifically to compete with popular deer hunting ammo like the Hornady American Whitetail, Federal Power-Shok, Federal Fusion, Remington Core-Lokt, and the Winchester Ballistic Silvertip in terms of accuracy, price, and outstanding terminal performance.
So, not only is this some very reasonably priced .30-30 ammo, but it also has a very good reputation for producing a giant wound channel and minimizing the distance deer run after being hit. In fact, this would be one of my other top recommended brands of 30-30 ammo for deer hunting.
Bullet Type: Extreme Point
Bullet Weight: 150 grains
Muzzle Velocity: 2,390 feet per second
GET 30-30 WINCHESTER DEER SEASON XP AMMO HERE
Enjoy this article about the best .30-30 ammo for hunting? Please share it with your friends on Facebook and Twitter.
Make sure you follow The Big Game Hunting Blog on Facebook, Instagram, Twitter, and YouTube.
NEXT: BEST 6.5 CREEDMOOR AMMO FOR HUNTING ELK, DEER, & OTHER BIG GAME
An air rifle's effective shooting range depends on various factors, including the type of rifle, the caliber, and the power source. Generally speaking, most...
")
")
")
")
")


 Buy the Benchmade 940 at BladeHQ