Remember when fishing seemed simple? When I think back to my days as a young angler, I often reflect on experiences fishing from shore. No area pond or reservoir was safe, provided I could somehow gain access, even if that meant sneaking in at night. The adventure still feels real. But I’m reminded of another aspect of those early forays: how many fish I caught.
True, most anglers have plugged from the bank for bass, and maybe caught a few bluegills along the way. But my teenage years were filled with bank-fishing trips for a bunch of species: walleyes, steelhead, pike, and even muskies in the right body of water. But today I want to talk about crappie fishing; these delectable panfish are fun to catch, and springtime is the prime time all over the country. Here are a few tips to put you well on your way to a great fish dinner, even if you don’t own a boat.
OK, choosing the right spot is absolutely the most important factor in fishing from the shoreline. Unlike anglers in a boat, shore-bound anglers can’t move all over looking for fish. So it’s critical to get in front of crappies right off the bat. Always pick a shoreline with deep-water access, regardless of time of year. True, crappies go shallow in the spring, but even the shallow spawning areas usually have deep water close by. If you can find a place that offers a nice mix of shallow brush or cover (don’t forget about boat docks), with fairly deep water within casting range, you’ve got a winner. In reservoirs, think major creeks where the channel comes in. On natural lakes, try the outside areas of coves, or steeper shorelines. We’re looking for zones where schools of fish can migrate in and take up temporary residence. Those spots won’t be miles from the main lake.
(Don’t Miss: The 3 Best Lures for Catching a 10-Pound Bass)
2. Outfit Yourself Correctly
When fishing from a boat, a little, whippy ultralight rod will catch you some crappies. But when shore-bound, it’s important to increase your rod length. That will allow for longer casts, and the ability to keep your line up off the water (important when it’s windy). Step up to a 7-foot rod, minimum, and go even longer if you can. A 9-foot, light-power rod, capable of lobbing a float rig, is ideal.
I’m a big believer in braided line, even for crappies. Braids in diameters matching 4-pound mono are ideal, and incredibly strong. This light line allows for effortless casts, and it doesn’t coil up and jump off the spool of your reel. Match with a 6-pound monofilament leader at the business end, and rig everything on the mono. A quick tip: when choosing your braided mainline, don’t shy away from bright colors. They come in handy when watching your line for strikes from the shoreline.
(Don’t Miss: Best Lures for Crappie Fishing: Jigs vs. Minnows)
3. Keep it Simple
I never use live bait when crappie fishing from a boat. But when bank fishing, live minnows can save the day. Most of your fishing will be done soaking a bait for longer than you would from a boat, where the target of your casts is ever changing. Bank fishing is a bit less active, and sometimes the fish eye your presentation for a while before striking. A simple float rig, above a few split shots and a light-wire, long-shanked hook is ideal for bank fishing crappies. Try a slip-float if water depths are greater than about 4 feet, and vary your bait from the top to bottom of the water column.
As for artificial baits, it’s hard to beat a small twister-tail on an 1/8-ounce jighead, or a Beetle Spin. Little crankbaits catch a bunch of slabs, too, and a tube under a float can often keep up with minnows during a hot bite.
(Don’t Miss: 4 Rules of Early Spring Bass Fishing)
4. Try the Night Shift
Some of the best crappie fishing I have ever encountered happened at night, in the early spring, in the Midwest. Yes, it was cold. But that quickly was ignored as I reeled in slab after slab. One thing is for sure: crappies school up and move around quite a bit after dark. The best way to locate a school is to bring them to you through the use of a lantern. Riprap banks, causeways, and the faces of dams are great spots to try. Schools of fish will cruise these shorelines and stop around the edges of lights, one of which should be yours. There, they feed on the shiners and other bait attracted to the same glow. Here, the minnow rig prevails, placed just on the outside of the glowing beacon. Keep your bait high in the water column, and be prepared to wait at least an hour after sunset for the action to kick in. Sometimes, the fishing takes off at midnight, but, believe me, it’s worth it.
5. Wade
Savvy shoreline anglers sometimes have to take matters into their own hands, or feet. Wading can be the best way to access the places fish live. On lakes with decent bottoms and flat shorelines with ample brush, wade-fishing can be dynamite; even better than fishing from a boat. Wading is deadly silent, and it allows anglers to make perfect, effortless casts. Here, it’s best to go with the longest rod possible. In Florida, we often cane pole crappies with 12-footers, dipping right into the thickest cover. Tube jigs tied directly to braided line, without the use of a float, pay off. Be sure you know the water before diving in, and only carry a little gear. Don’t forget a stringer.
This spring, don’t get discouraged if you’re stuck on the shore without a boat. Crappie fishing from the bank can be extremely productive, resulting in some of the best eating fish of the season. Scout a bit ahead of time, and you might find a number of anglers just like you, taking it to the bank, and going home with full stringers.
This article contains affiliate links. We may earn a small commission if you purchase via these links.
Are you shooting too low?
Are you struggling to see your sights at night?
Can you switch out the sights that came with the handgun?
In general, factory sights tend to leave a shooter wanting. It’s customary for stock sights to simply serve as fillers intended to be replaced. Aftermarket pistol iron sights can make a big difference to accuracy, sight and target acquisition, and overall performance.
But what sights are right for you and how are they different?
To pull together this list of the best pistol iron sights, I included a few that I own on various handguns to compare cost, usability, accuracy, and installation. From an owner’s hands-on experience, these pistol sights offer affordability and quality to match or outdo their price points.
Open sights have a rear sight with a window, notch, gap to view the front sight mounted forward on a firearm. This is the sighting system in and of itself. Going forward, open sights will be referred to as iron sights for simplicity’s sake.
Iron sights, open sights – semantics. Really though, open sights are under the iron sight category as iron sights is a catch-all for sighting systems, including aperture sights, that use the naked eye to form a direct line of aim to the target.
Most pistols purchased today come installed with sights. Though some are better quality than others, plastic fillers or basic factory sights are the standard. They do little to improve accuracy or sight visibility and may be why a replacement set is needed.
While this round-up gathers some of the most popular pistol iron sights including my very own aftermarket handgun sights – which I have high opinions of – it’s not all-inclusive. Other things must be considered such as your particular firearm, use with a red dot or suppressor, and of course, heights to ensure the POA matches the POI.
So, here’s a handful of the top handgun iron sights to muse over to help you get started on your sight replacement journey!
7 Best Pistol Iron Sight Reviews
1. TruGlo Tritium Night Sights – Best Budget & Best Night Sights
The TruGlo Tritium Night Sights are some of the most popular night sights in the market. This was a large factor in why I personally purchased four sets for my Glocks. Obviously, affordability played a big role, and from my hands-on experience, they’ve been a value buy with big performance.
Pros:
Price
Tritium night sights
Low profile – no holster snagging
Easy to install on Glocks
Multiple applications
Cons:
Same color dots
I bought these earlier in the year and installed them myself with a sight pusher and hex tool that I bought separately online. The sight pusher was easy to use and to see the sights are lined up correctly from the get-go. Overall installation process is easily a 5/5 rating considering that they’ve not come loose, it wasn’t difficult at all, and I haven’t had to make any adjustments.
Now all my Glocks came with factory sights, and I’ll admit there was a small transition that I noticed adjusting from the U-notch to the square when aligning the dots, and I was accustomed to using the 6 o’clock hold sight picture. However, it’s been a relatively rapid process in overcoming it.
With the Truglos, I put rounds down at 15 and 25 yards with 5-shot groups in the combat sight picture. I was a little slower at 25 yards, and obviously at 15, it’s a lot easier to be consistent and send down round after round. With the factory sights, I was using the 6 o’clock hold, and with the Truglos, I’m shooting with the combat sight picture.
Every one of these Glocks has an OWB holster, and the design has not interfered at all. The glowing tritium lamps are way brighter in person than can be seen in the pics. Would I buy these again? Yes!
2. Trijicon HD XR – Best Glock Night Sights
For non-MOS Glock pistols, the Trijicon HD XR Night Sights serve for fast target acquisition with highly visible night sights. For Glocks 17, 17L, 19, 22, 23-28, 31-35, 37-39, and 45, the HD XRs are a highly popular upgrade from factory Glock sights.
Pros:
Tritium night sights
Highly visible painted front dot
Thin front sight
LEO & competition
For non-MOS Glocks
Cons:
Price
If you’re buying the set, you could be out almost a couple hundred dollars, but you can find them for more than 25-33% off in most cases. In my opinion, that would be a better price that I could justify over full retail cost. It’s worth remembering that they’re Trijicon quality that come with a 12-year warranty on the tritium lamps (from date of manufacture).
I really like the high-visible painted ring around the tritium lamp for fast sight focus. The paint is a photoluminescent (glow-in-the-dark) ring that is a trademark of the HD series. I think combined with the black-out performance of the rear sight during the day but glowing performance at night, its usability makes them operationally ready regardless of the conditions.
The front blade has a 0.122” width. Combined with the 0.169” rear U-notch width, it provides improved target acquisition, more FOV, and long-distance precision. It’s also steeply hooked meaning that if you’re in a rush and a one-hand rack is it, the front sight will catch for a fast first-in-chamber load.
If you’re sporting a Glock MOS, you’ll want the HD XR MOS sights for that longer fit on the rear of the slide. However, they’re stock height, so they won’t co-witness with a RDS if you’re sporting one.
Excellent for the needs of competition shooting and law enforcement, these night sights for Glock will also serve for carry firearms as a home and self-defense sighting system.
3. Truglo Fiber Optic Sights – Best Fiber Optic
The Truglo Fiber Optic Sights are regularly mistaken for night sights. They’re day-use sights with the fiber portions recessed into the sight well for concealment. They will be harder to see and dim in low light, but as fiber optic sights, they’re intended for daytime applications.
Pros:
Price
Fiber optic
Contrasting dot colors
For Glock (non-MOS)
Snag-free design
Cons:
Not good for lowlight
If you’re looking for a budget pair to upgrade stock plastic sights (fillers) on your Glock, Truglo’s fiber optic fits the bill. The best fiber optic sights provide dot visibility in daylight conditions.
As such, poor performance in shadows, lowlight, and dark conditions is to be expected – they are not night sights, so I’d say these are best for use in normal conditions.
Why they stand out to me as value pistol sights are that they’re well-made for the price point. They’re made from solid steel and have a treated Fortress Finish to protect the surface. Even though they’re not adjustable, they’re accurate enough.
With the right tools, they’re very easy to install and but it’s recommended to be installed by a trained gunsmith – per Truglo’s warranty. Obviously, there is a warranty but there are several conditions such as, it applies only to the original purchaser and proof of purchase is required.
I prefer contrasting features, and as these fiber optic sights reflect, the rear dots are green while the front sight is a contrasting red. I wouldn’t say they’re “daylight bright” but that is true of most red dot sights too.
With all that said, I recommended the Truglo fiber optic sights for target shooting and training.
3. AmeriGlo Optic Compatible Tall Suppressor Sights (GL-429) – Best Glock Black Out Sights
The best blacked-out Glock sights to pair with a red dot sight would be AmeriGlo’s optic compatible suppressor height irons. Though low in cost, they offer black-on-black simplicity for eliminating distractions through a pistol mounted red dot.
Pros:
Price
Suppressor height
Blacked-out sights
Glock compatible (except G42/43)
Serrated front sight
Cons:
Finish wear-and-tear
The AmeriGlo serrated sights I field-tested are similar and comparable to these Tall Suppressor sights though not the exact same pair. While they’ve been excellent for duty use thus far out to 25 yards, this Glock 17 Gen 5 was recently outfitted with the Holosun HE509T red dot sight.
The rear has a U-notch, and they’re slightly shorter making for a very low, I’d say, lower ¼ co-witness on the MOS slide with an adapter plate and 0.59” optical RDS height.
In my opinion, the recommended black-out sights would be a better replacement as they’re tall suppressor height sights and co-witnesses in the lower 1/3 with Trijicon RMR red dots. Heights are 0.315” for the very thin front blade and 0.394” for the rear.
Though both sights have neither tritium nor fiber optics, they’re steel with a matte black finish. This has been particularly beneficial as they don’t distract from a functioning pistol mounted RDS, like how it is used right now, or for those who use NODS with that RDS.
The finish is barely starting to wear at the angles after more than a year on my irons, and that can happen. Other than that, they’ve been excellent for target shooting, patrol/duty, and use with a red dot. AmeriGlo sights are made in USA starting with US steel blocks all the way to assembly.
5. Meprolight Mepro Tru-Dot Night Sights – Best Handgun Sights for Old Eyes
In general, aging eyes are having a hard time with front sight focusing and dot visibility in poor light conditions. A possible solution is to consider the Meprolight Mepro Tru-Dot Night Sights with a green front sight filled with tritium for low light and dark conditions.
Pros:
Tritium night sights
Contrasting dot colors
Alloy steel
For Glock (non-MOS)
12-year tritium guarantee
Cons:
Not highly visible in the day
If older eyes are struggling in those lowlight and dark hours, night sights will help with dot visibility. I really like that these Meprolight sights will help with visual acuity because of the green on orange configuration, making them great pistol sights for old eyes.
The front sight has green tritium that allows for easier and brighter dot identification than other colors. The rear sight has orange tritium, and the contrast will ensure the front sight stands out.
The catch with tritium is that they don’t glow during the day. To help with dot visibility during daylight conditions, a white ring is painted around the tritium vials. In my opinion along with some buyers, they’re not as useful in these conditions and this would be true especially for those with bad eyes.
I know that the Mepro sights will fit Glock models except for MOS slides. They’re made from alloy steel. The tritium vials come with a manufacturer guarantee for 12 years which I think is fantastic as it’s on par with Trijicon’s tritium guarantee. The front sight blade is 0.17” in height and 0.16” in width. The rear sight blade is 0.19” in height.
Though older eyes might benefit from sights that offer both fiber optic and tritium dots, they’re more expensive. When you’re in the market for night sights, your eyes might need a little help from the green-on-orange configuration.
Available at: Amazon
6. Sig Sauer X-RAY3 – Best Night Sights for Sig
The X-RAY3 day and night sights are configured for Sig Sauer firearms. Though they’re included as the standard sights on the P229 and Legion series pistols, they’ll also fit the P-series 225, 227, 220, 226, 238, 938, and 320.
Pros:
Day/night sights
3-dot alignment
Fluorescent polymer & tritium
Suppressor height
For Sig P series
Cons:
Dead tritium dots
I don’t have any performance complaints with them, and there are few to no complaints to find online. However, it seems that some sights are turning up with dead tritium vials or they don’t glow after a very short period of ownership. I did find that even though the lifetime warranty doesn’t cover tritium, Sig’s limited 5-year warranty covers tritium components starting from date of manufacture.
As suppressor height sights, they do come just above a suppressor and co-witness with a red dot in the lower 1/3 or a shade lower depending on the firearm and other factors.
The front blade is 0.374” in height while the rear is 0.417”. It will take some trial-and-error to figure out your POA and POI as they have not been set for any sort of sight picture.
The tritium vials provide dot visibility in lowlight and night conditions and are housed inside the steel sights for protection. The front sight has an oversized fluorescent polymer dot that surrounds the tritium for high visibility in daylight but also glows in the dark.
It’s my opinion that they would be excellent for use regardless of the conditions and as such, they offer a lot of value for the money. If you’re not running a red dot, the X-Ray3 does come in Sig size configurations of F6/R8, F8/R8, F8/R6, and F8/R8.
7. Viking Tactics VTAC Sig Sauer – Best Day & Night Sights
The VTAC Sig sights have both fiber and tritium dots ready for day/night use. I own and love them, so they were included as a hands-on field test. I got them because they’re stock for the P320 X-VTAC. They’ll fit most of the P series from the P220 to the P365 as well some out of production ones.
Pros:
Day & night sights
Fiber or steel
3-dot alignment
Tapered front sight (0.110”)
Fits a wide range of Sig P models
Cons:
May shoot low
I sighted-in the VTACs for a 25-yard zero in the combat sight picture. Though others have reported that the sights are 1-2” low at 10 yards or more, I haven’t had such issues. Any flier shots I’ve had, had more to do with my pistol shooting fundamentals than the sights themselves.
The front is a Sig size #6 (0.230”) and the rear an #8 (0.250”). Even though I haven’t had need to switch out sizes, some have found better results with a front 8 and rear 8 combination to bring up groups that were too low with the F6/R8 combo.
I find the tapered front extremely beneficial with its slimming silhouette because it gives me the potential for improved precision with its 0.110” pinpoint post. Because the VTACs are standard height, they didn’t co-witness with the field-tested Leupold DeltaPoint Pro I stuck on there.
The dovetail base can be adjusted with a sight pusher for windage, though windage has never been an issue for me and that seems to be consistent across the board.
There are a lot of dots going on (a total of six!), but dot acquisition and visibility performance has always been easy, and I’ve never confused them.
My eyes find the fiber optics easy and fast to pick up in the day and align in the 3-dot alignment configuration. At night, my eye is immediately drawn to the glowing tritium dots. Though as a side note, there is an option for the black steel rear sight with a day & night front sight.
Though they’re the least well-known sights in this lineup, they offer day and night benefits that are perfectly matched with Sig Sauer P series pistols if you’re considering an upgrade. On my P320, they’re not going to be replaced any time soon. I’ll probably put a different RDS on there, but the VTACs aren’t going anywhere.
What to Look for in the Best Pistol Iron Sights
Overall, iron sights are simple and affordable. However, additional components and various materials can influence the cost, how they perform in certain conditions, and diverse specifications can determine what application they’re best suited to.
For a run-down on the need-to-know info, this guide will get you thinking.
Cost
In general, handgun iron sights will vary in cost depending on material, adjustability, and visibility enhancement components. They can be as affordable as $20 and as expensive as $200. Even so, they’re cheaper than pistol red dot sights with an average starting price point of $250 (approx.).
When considering a budget for pistol sights, you must sum up your needs:
Application (type of shooting: hunting, patrol/duty, competition, carry, home defense, etc.)
Dot visibility for daylight, lowlight, or dark conditions
Durability (plastic housing VS metal)
Adjustability (fixed VS adjustable)
The more you require from your sights, the more expensive they will be. You should also include a budget for the proper tools needed for installation or for a professional install by a gunsmith. A professional install is nearly always recommended by the manufacturer and is sometimes a requirement of the warranty.
Iron SightsPrice RangePistol iron sights cost comparison price range
Fiber Optic Day Sights VS Tritium Night Sights
Both fiber optic and tritium components do not require electricity, power, recharging – any of the inconveniences of illuminated red dot sights. However, these enhanced visibility sights cost more than basic blackout and fluorescent painted iron sights.
Iron SightsDay UseNight UseFiber OpticTritiumOther (Paint)Pistol iron sights dot enhancement comparison
What are Fiber Optic Sights?
Fiber optic tubes are installed into the sight. Ambient light is “collected” into the tube and then concentrated at the end – the dot. They are colored to provide contrast against the target and surroundings for high sight visibility. These are appropriate for day use in normal conditions.
What are Tritium Night Sights?
Tritium gas is concentrated into tiny vials that catalyze a glowing effect with fluorescent materials. They become highly visible in low light and dark conditions where visual acuity is reduced, and other iron sight alternatives would be rendered useless. Though very visible in these conditions, they do not glow during the day, and you cannot temper its brightness at night. These are night sights.
More expensive iron sights will incorporate both fiber optic and tritium dots for day and night use.
Blackout Sights
Blackout pistol iron sights are plain, as in basic. They lack enhancement features as they lack dots altogether. Why would these be preferable on any handgun?
Blackout sights have their purpose. Most of the time, the rear is blacked-out for simplicity to remove as many visual distractions as possible. This allows a dot on the front sight to stand out. In turn, this improves front sight acquisition and focus.
However, when both the front and rear sight are blacked out, they are better paired with a pistol mounted red dot sight. Though taller sights are visible through the RDS, their basic appeal does not distract from the functioning illuminated dot of the RDS.
This is also important when using night vision with a pistol-mounted RDS. Tritium can be seen through night vision and thus is another distraction to the shooter when viewing through the RDS with NODS.
Close range VS Long range
The blade width of the front sight will influence sight acquisition and focus, accuracy, and distance performance. They vary in width, and while some like thin blades, it may be too narrow and can get “lost” against the target or FOV making it slower to pick up.
Conversely, a wider front sight may cover up too much of the target and FOV to make accurate shots at distance. For close range shooting, say under 10 yards, a wider front sight of 0.140” (approx.) and wider will be faster to pick up.
For distance shooting over 10 yards, a front sight of around 0.100-0.125” (approx.) will cover less of the target aiding in precision and target acquisition.
Iron SightsFront Sight Blade WidthFront Sight Blade Width Comparisons
Fixed VS Adjustable
Many pistol sights are fixed and cannot be adjusted. These types are set for a certain sight picture and are sighted in at a specific distance. Therefore, sights are model specific for the handgun. If placed on another pistol or installed incorrectly, the POA will not match the POI.
Not all fixed sights are accurate even though they’re the right sights for the right firearm. Some modifications can be made such as, front sights can be filed down and dovetail rear sights can be pushed left and right for some adjustability.
Easier adjustability is usually a feature of a specialty rear sight for competition shooters. Being able to adjust can result in greater precision, tighter groups, and increased confidence when shooting at various distances.
For more on how to sight-in and adjust, check out our How to Zero Iron Sights how-to guide.
Installation
Most pistol sights are fixed. It’s essential to be specific about blade heights so you can sight-in your iron sights. Some can be “pushed” to try to compensate for left/right (windage) and front sights can always be filed down. However, it’s not as easy to weld more steel to too short front sights.
While a brass punch and mallet is how it was done for a long time, a proper sight pusher is a better tool. Sights with tritium vials can break, and other than being out of the cost of the sight, you’ll want to avoid breaking an alpha-emitter product.
If you don’t have the right tools, are finding it difficult to get tight groups or to raise/lower them, or they’re not fitting right, a professional install is recommended. In fact, the instructions that came with the iron sights likely mentions that a trained gunsmith install the sights.
In some cases, the warranties demand this and warranties can be forfeited if installed with any other method.
Red Dot VS Iron Sights
With as popular and common as red dots are becoming on handguns, some are doing away with iron sights altogether. However, some of us are rooted in the opinion that red dots can fail, and a back-up sighting system remains relevant even in this electro-optic driven sporting industry.
Some comparisons include:
Red Dot ProsIron Sight ProsRed Dot ConsIron Sight Cons
The rage right now is to combine irons and a RDS for a co-witness and never being without a sighting system. For more in-depth comparisons, check out our Iron Sights VS Red Dot guide.
Pistol Red Dot SightsPrice RangeRecommended Pistol Red Dot Sights
Do You Need an Iron Sight Upgrade?
The factory iron sights that came with the pistol are not the end-all-be-all. If groups are off regardless of shooting fundamentals or dot visibility is difficult to acquire, aftermarket sights can be a practical upgrade. Some are tall enough to see over suppressors and red dots.
With various features like contrast enhancements, adjustability, and concealed carry features, upgrading your sights can make all the difference needed in usability, accuracy, shooter safety, and overall performance.
Further Reading
How to Aim Iron Sights [Complete Guide with Photos]
What is the Sight Picture & Sight Alignment? [WITH PICS]
Iron Sights VS Red Dot Comparisons (Uses, Accuracy, Reliability, Durability & More)
Pistol & Rifle Co-Witness Sights Explained!
How to Zero Iron Sights on Pistol & AR-15 (With Photos)
According to www.dictionary.com, cull means “to choose, select or pick”. In other words, deer culling is when a human decides which animal is being taken from the herd. By definition, deer culling is not much different from hunting.
There are a few reasons why a deer herd would be culled:
Herd Reduction
Deer and vehicle collisions
Property damage
Disease Control
Herd Reduction
Herd reduction is often used within urban areas and forest preserves. This type of deer culling normally involves sharp shooters. The goal is to reduce the size of the herd to prevent things like starvation and incest.
Herd reduction does come with quite a hefty price tag. The cost of these deer culls can run from around $340 per deer to $740 per deer. The overall price of herd reduction culling can easily run into the hundreds of thousands of dollars. (1)
Deer and vehicle collisions
Deer and vehicle collisions are a common occurrence in Illinois and result in vehicle damage and injury, including death, to some drivers. Due to the relationship between deer populations and vehicle/deer accidents, the State of Illinois works with insurance companies when determining the states deer herd objectives. While it is controversial, deer culling has been shown to lowered the number of deer and vehicle collisions.
Property Damage
Property damage is a serious issue to Illinois farmers and homeowners. A whitetail deer can consume an average 7 pounds of food per day which equates to 2,555 pounds per year. This can be devastating to a farmer’s revenue earned from his crops.
Residential damage occurs also. Valuable trees and plants can be damaged when a whitetail has turn to them for a food source after their natural habitat has been eaten.(2)
Agricultural damage
There are a three ways in which deer are culled from these properties.
The issuing of nuisance tags to the property owner giving them the ability to cull the deer
Allowing hunters access to the property
Using sharpshooters provided by the state
Urban Damage
With urban/residential damage, sharpshooters are normally used. Only in rare instances, urban hunting zones are established.
Disease Control
This type of deer culling is used in areas where disease is threatening the herd. Control methods in this situation depends on the state. Sharpshooters and traditional hunting methods are often used together to gather information on the disease. After the information is gathered, further action is decided upon.
Deer culling and the future of the Illinois deer herd
Deer culling is an important issue and seems to be a controlling factor with the number of deer in Illinois. We have talked to many people on the subject ranging from hunters to employees of the Illinois DNR. In the near future we will be publishing articles containing interviews that give different angles and viewpoints on the subject of deer culling in Illinois.
The coming sections will include an interview with Jeff O’hare who runs the Facebook page “Stop the Illinois DNR so the Herd Can Grow”. This posts will offer very interesting insight on CWD and what is happening here in Illinois from the perspective of some Illinois hunters.
The final section will be an interview of Doug Dufford, Wildlife Disease and Invasive Species Program Manager for the IDNR. These different perspectives on the CWD and deer culling will allow for greater insight to this area!!
There are big bull elk. Then there are really big, world-record-class bull elk. The Pope and Young Club awards North America’s finest archery-killed wapiti by size in two categories: typical or symmetrical antlers and non-typical or unsymmetrical horns. The minimum score for a typical elk to qualify for the club is 260 inches.
Arizona claims seven of the top 10 Pope and Young typical world record bull elk records. Six of the seven largest archery-killed elk in the world were taken in Coconino County alone. Other P&Y records, including non-typicals, have come out of Greenlee, Navajo, and Graham Counties.
Coconino County accounts for approximately 20% of Arizona’s hunting opportunities. It’s the largest county in the state, with some 95% of the acreage open to the public as United States Forest Service land.
Why are there so many P&Y archery records from that area? First, Arizona has a warm climate, excellent habitat, tightly managed hunting, and a Goldilocks elk population: not too big or too small.
Second, the hunting seasons favor archery, big time. Early archery season covers most of the rut in Arizona, October is closed completely, and then late archery opens in November for another two weeks. Other western states like Montana, Idaho, New Mexico, and Colorado follow the same archery-preferred early seasons.
Third, getting drawn for an Arizona elk tag is about as likely as marrying for love then later finding out there’s money, too.
Let’s take a look at the top five typical archery killed world record American bull elk:
Related: So you Want to Shoot an Archery World Record?
Score: 404”Location: Coconino County, ArizonaDate Taken: 9/15/1992Hunter: William Wright
Think back to 1992, when we striped our faces with black, brown, and green greasepaint, shot long arrows with Wasp Cam-Lok broadheads, and wore Treebark camo and boonie hats. That was the feel of bowhunting the year William Wright shot this impressive bull in Coconino County, Arizona.
Wright’s 404-inch bull is one of six record-setting archery bulls in the top 10 from that county. There’s no information on the story behind his elk — we just know it was the No. 1 bull in the world for eight years until Chuck Adams dropped a giant in Rosebud County, Montana.
Related: Speaking Elk: The 3 Elk Calls You Need to Hunt and Kill Big Bulls
No. 4 – The Chuck Adams Bull
Score: 409 2/8”Location: Rosebud County, MontanaDate Taken: 9/16/2000Hunter: Chuck Adams
With 200 Pope & Young record-class animals to his name, Chuck Adams is a bowhunting legend for good reason. Adams was the first to kill every North American P&Y big game species with a bow and arrow. The feat became known as the Super Slam, a term Adams coined after filling all 27 tags.
In 200, Adams was shooting Easton Full Metal Jacket arrows with a Hoyt bow when he arrowed his 409 2/8-inch bull in Rosebud County, Montana; and his legend went to another level. After unseating the Wright Bull, Adams’ bull held the No. 1 spot in the record books for six years. This special animal was also the 200th elk of his career.
Related: How to Speak Elk, Lesson 2: Understanding Every Funky Sound
No. 3 – The Jed Reidhead Bull
Score: 410 6/8”Location: Greenlee County, ArizonaDate Taken: 9/3/2013Hunter: Jed Reidhead
Jed Reidhead sits in the No. 3 spot in the record books with his 410 6/8-inch bull, killed in 2013. Reidhead connected with this bruiser in Greenlee County, Arizona. Located southeast of Coconino County and separated by Navajo and Apache Counties, Greenlee is a game-rich area with antelope, black bear, Merriam’s turkey, mountain lion, mule deer, bison, whitetail deer, and waterfowl. Days after notching his tag, Reidhead helped put a friend on a 370-class bull.
Related: Bowhunting Elk: 7 Last-Minute Efforts the Can Improve Your Chances
No. 2 – The Shaun Patterson Bull
Score: 412 1/8”Location: Coconino County, ArizonaDate Taken: 9/16/2005Hunter: Shaun Patterson
Another Coconino County bruiser erased Chuck Adams’ record in 2005 when Shaun Patterson, former Arizona State University and Green Bay Packers defensive lineman, shot this massive 8 x 8 typical bull. It was almost a record that didn’t happen.
Patterson said in an interview that he and his guides crawled to within 100 yards of this giant and started bugling. As the bull made his way toward them, a raghorn came out of the trees at 10 yards and busted them. Every elk vacated the premises. Relocating the bull and stalking back into range this time, Patterson made a solid shot, and the bull went down within 100 yards of where he was arrowed. The impressive animal taped out at 412 1/8 inches and earned Pope and Young glory. Today, this previous world record stands at No. 2.
Related: Elk Hunting on Public Land: How to Build a 3-Year Strategy for a New Area
No. 1 – The Steve Felix Bull
Score: 430 0/8″Location: Powder River, MontanaDate Taken: 9/10/2016Hunter: Stephan Felix
On a beautiful Montana morning in September 2016, 100 yards stood between Steve Felix and a jaw-dropping bull. The gold standard of elk — the pinnacle of the world’s finest typical archery bulls — took his sweet time bugling and feeding his way down a basin toward Felix. With a skinny, ragged-out tree marking the outside of his range, Felix waited an eternity before the giant finally followed a 310-class bull into Felix’s reach.
A well-placed 60-yard shot just behind the shoulder of this massive 430 0/8” bull (official score) was all it took. After a half-hour wait, he found the elk not far from where he’d shot it, and the rest is world-record elk history.
(who illustrated the Red Ryder comic book character) approached Daisy with the idea of making a Red Ryder pistol (which later become a famous rifle instead)
5. That 1938 conversation led to what is probably the longest-lasting still-existent licensing agreement in American business history.
The licensing agreement was initiated in 1938, signed in 1939, and the first gun produced in 1940
6. Some of the earlier special editions were based on the 1938 date.
For example, a 50th Anniversary came out in 1988, and the 60th Anniversary gun was sold in 1998.
7. In 2005, Daisy began celebrating anniversaries based on the first date of production (1940), with a 65th-anniversary gun.
The 70th-anniversary model came out in 2010.
This Daisy Red Ryder 75th anniversary edition BB gun is dated 2015, but it debuted just before Christmas in 2014.
Alright, that’s enough for nostalgia, let’s check out this newest version of the Red Ryder!
This air gun uses an under-level cocking system meaning that the level for cocking is located under the forearm.
Unlike break barrel gun in which you have to open the chamber to load the ammo,
with this cocking mechanism, you can quickly get the Daisy Red Ryder back in action with only one, simple level pulling step.
And it requires so little force to do so even a 10 years old child can do these steps quickly and easily .
The caliber (the internal diameter of the bore, measured in inches) is .177 (4.5 millimeters).
.177 is the most common caliber with a flat trajectory (the path the bullet travel before it hits the target)
And flat trajectory makes accuracy simple for everyone, even a newbie shooter (more on that in this post)
While the cocking level is made of aluminum (an upgrade compared to the plastic level on the non-special edition of Daisy Red Ryder), the barrel is smoothbore, steel barrel so it makes the BB fly smoothly.
What makes the 75th Anniversary edition stand out is the 75th Anniversary laser-engraved graphics embedded in the stock.
It catches anyone’s attention and reminds them of the proud history of this starter BB gun since 1940!
However, a hardwood stock can expand or contract due to changes in temperature so sometimes you have to perform glass bedding (filling gap in stock with epoxy-based material ) to keep it in shape.
MidwayUSA shows you how to do just that in the video below:
Ammo
The Daisy Red Ryder 75 Anniversary uses .177 BB as its only source of ammunition.
BB is dirt cheap: you can buy a thousand rounds of premium BBs for just a few bucks so it’s very cost-effective when you do target shooting and plinking a lot.
Sight
This gun comes with traditional open sight: The front sight is a fixed blade and ramp while the rear sight is adjustable for elevation (allow you to adjust the sight up and down).
This feature disappointed me a little bit, I thought that at this memorable anniversary of the 3 quarters of the century, Daisy would make the fully adjustable rear sight
But it seems that they don’t think it’s extremely important for shooters.
Cocking and loading
Step 1: Put the SAFETY ON and load BBs
Push trigger safety from left to right so no red is showing.
Tilt the gun to its right side, place your thumb on the arrow, and push the load-door in and up.
Cup hand under the barrel and slowly pour in new Daisy BBs and then close the loading door.
Step 2: Cock the gun
When cocking, raise muzzle with sight up.
Firmly grasp the cocking lever and pull outward until it is fully cocked.
At this point, a BB could be loaded into the ready-to-fire position and your gun must be handled with care.
Close cocking lever and your gun is ready to fire
Step 3: Feed BBs
Your Daisy has a gravity feed system.
To ensure proper operation, you should always raise the muzzle up while cocking to ensure that a BB rolls into a firing position.
When raising the muzzle, be sure the front sight is pointed upward since the gun will not feed properly if it is on its side
Step 4: Ready and fire
Aim at the safe target, put the SAFETY OFF, and gently squeeze the trigger to shoot.
Velocity
The velocity of the Daisy Red Ryder 75 Anniversary rifle is 350 FPS.
This is not high velocity compared to other BB guns on the market and it doesn’t even have enough power to drop birds so this gun is suggested for fun plinking and target shooting only.
Shooting Ability
The effective shooting range of The Red Ryder is 5 meters away – about 16.5 feet.
This BB gun can be used for plinking, shooting paper targets, and for training new shooters on how to properly and safely handle an air rifle.
Specifications
Caliber: 0.177” (4.5mm)
Velocity: 350 FPS
Loudness: 1- Low
Barrel Length: 10.85”
Overall Length: 35.4”
Shot Capacity: 650
Cocking Effort: 13 lbs.
Barrel: Smoothbore
Front Sight: Blade and Ramp
Rear Sight: Adjustable for elevation
Scopeable: No
Trigger: Single-stage
Buttplate: None
Suggested for: Plinking/Target shooting
Action: Lever-Action
Safety: Manual
Powerplant: Spring-piston
Function: Repeater
Body Type: Rifle
Weight: 2.2 lbs
Customer review
The Daisy Red Ryder has lots of customer reviews with positive ratings.
Almost all the reviews show how people love this BB gun, how it brings back their childhood memory, and plenty of them buying for their children.
There are very few negative reviews of this rifle and no major issue is found.
Pros and Cons
Pros
Cons
Quiet
Magnificent Nitro piston technology
Excellent craftsmanship
Outstanding accurate
Awesome power
Adequate scope
Imported from another country
Price
The price for Daisy Red Ryder 75th Anniversary Rifle is only 50 bucks.
It’s so cheap if you think about how much American history is imbued in it.
The Crosman 1077 air gun has a plastic buttpad to absorb recoil and help you enjoy more shooting without worrying about hurting your arms.
Besides, it features non-slip checkering in the grip and forearm.
The checkerings increase friction between the shooter’s palm and the gun’s stock, add more stability to your arm when shooting, and prevent slippage from the shooter’s sweat.
Ammo
Crosman 1077 has the .177 caliber (the internal diameter of the barrel, measured in inches) so it uses .177 pellets as ammo.
.177 pellet is cheap and lightweight.
It also has various types such as wadcutter, round nose, pointed, hollow point, etc.
Paul Capello, from Airgun Reporter, examined the Crosman 1077 air rifle here:
Loading Crosman 1077 CO2 air gun
Loading the pellet:
First, put the gun on “SAFE”.
Press the release buttons on both sides of the magazine and pull it downward.
Slide the pellet clip pin forward and take out the clip.
With the clip in one hand, use your other hand to insert a pellet at one of twelve pellet chambers (with the pellet’s nose lying forward and the pellet’s skirt flying backward).
Keep inserting the pellet until the clip is full.
Put the clip into the magazine, pull the clip pin rearward, and return the magazine to the stock.
Installing CO2 cartridge:
Put the gun “SAFE”.
Unscrew the piercing tube cap below the barrel and remove it.
Insert the new CO2 cylinder into the gun with the small head pointing rearward.
Screw the cap firmly into place.
Put the gun off safe and fire.
If the gun doesn’t shoot, put it on safe and tighten the screw more (you can use a screwdriver or a coin placing in a slot of the knob to produce more force)
In summary, you can see that it takes very little effort to load the Crosman 1077 gun.
And the best part is you don’t have to break a single sweat to pump or to break down the barrel like other pneumatic rifles and springers.
The sight uses optical fiber for the dots so you could align the target faster and more accurately, even in the low-light shooting condition.
Besides, the rear sight has windage adjustment (allows you to adjust the sight left and right), and elevation adjustment (allows you to adjust the sight up and down).
It has hundreds of customer reviews without a single complaint about noise.
You don’t have to buy hearing equipment even if you have sensitive ears.
Moreover, you can be confident to shoot this gun in the backyard without disturbing your neighbors.
Shooting range and intended use
The Crosman 1077 CO2 air rifle is great for target shooting and plinking up to 30 yards.
It’s not recommended to use this gun for pest control or small game hunting unless in the close range (less than 20 yards)
Crosman 1077 Accessories
The Crosman 1077 has CO2 cartridges as the only accessory.
You can buy a speed loader and an additional pellet clip for a faster reload.
For even greater accuracy, you can buy a scope to mount in an 11mm dovetail scope rail.
Maintenance
The Crosman 1077 semi-automatic air gun requires very little maintenance.
You only need to put a drop of Pellgun Oil on the tip of every CO2 cartridge, another drop on the thread of piercing tube cap, and a light coat of oil on the barrel to prevent rust.
Specification
Caliber: .177
Power source: CO2 cylinder
Velocity: Up to 625 FPS
Barrel length: 20.38”
Overall length: 36.88”
Capacity: 12 shots
Front sight: Fiber Optic
Rear sight: Fully adjustable for windage and elevation
Scope rail: 11 mm dovetail
Safety: Cross-bolt
Weight: 3lbs 11 oz
Buttplate: plastic
Function: Repeater
Checkering: Grip and forearm
As you can see above, the barrel is not very long and the gun only weighs a little more than 3lbs
So it’s very lightweight and easy to carry around for even a 10 years-old child.
Pros and Cons
Pros
Cons
Cheap price
Lightweight
Medium velocity
Highly accurate
Great fiber optic sight
Easy to load and cock, no pumping or breaking barrel effort required
High follow-up shot speed
Impressive semi-automatic feature
Durable stock
Useful checkering in grip and forearm
Provide more shooting and more fun
Not enough power for pest control and small game hunting
Cost of CO2 cartridge can add up if you shoot a lot
Crosman 1077 Price
The Crosman 1077 price is only $70.
You can’t get a better semi-automatic CO2 air rifle at this price level.
Also remember that if you shoot a lot, you should buy numerous pellets (500-count packs at least) and a bunch of CO2 cartridges.
The cost of CO2 capsules and pellets can add up over time, though.
As of this date, the Crosman 1077 semi-automatic CO2 air rifle has a one-year limited warranty from the date of purchase.
Customer Reviews
While researching this product, I always look at the trench in customer reviews.
Although the Crosman 1077 has lots of 4 stars and 5 stars, it also got a bunch of 1-star ratings.
There are 2 issues that arose with the negative reviews:
The first is the problem of leaking CO2 so the gun cannot shoot at all.
But defective products are a risk we always have to face in online buying and air rifle shopping is no exception.
The second is the pellet jamming.
The manual is very clear about how to insert the pellet into the clip properly so make sure you follow the instruction carefully to avoid this problem.
Besides, it is advised that you use only the Crosman pellet to work with the gun to get the best result and avoid any potential damage to your gun.
Yes, Turkeys eat ticks. An adult turkey is one of the best tick-eaters that it can eat nearly 200 or more ticks a day. Wild Turkeys in the forest floors, swamp regions, and grasslands are the best natural pest controllers. Domesticating Turkeys is one of the best ways to keep the ticks in control. But it is more significant to know more about the turkey-tick relations, effectiveness of tick elimination, etc before proceeding with your domestication idea.
Not all tick species are dangerous. Some prominent ticks can be vectors of life-threatening diseases to humans and animals.
Ticks are parasites that feed on blood. They are disease-causing insects with tiny hard heads and oval-shaped bodies. They are typically flat, brown, oval-shaped, and small and measure only a few millimeters in length. Ticks mostly live in woody, and brushy areas, clinging to shrubs and grasses, and they crawl on animals’ hair or skin when they move past and brush against it. You can find a large population and species of ticks in the USA, UK, Europe, and other western countries.
Most prominent diseases carried by ticks include:
Lyme Disease
Tularemia
Anaplasmosis
Diseases transmitted by ticks to humans may cause symptoms as mild as a localized rash to as severe as joint infections, cardiac distress, and even death if left untreated.
Ticks pose a genuine problem to pets, livestock, and local wildlife. Animals become anemic if they are hosted by large number of ticks. If left untreated, anemia can cause lethargy, weight loss, organ failure, and death.
Best Animal For Tick Control
Biocontrol is the correct method to control the tick population in one place. Meaning, we use one organism to reduce the spread of another organism. In that sense, Using natural tick predators on our property helps us keep the tick population in control.
Some animals that help humans control the tick population are frogs, lizards, squirrels, opossums, some birds, ants, and fire ants. In this list, opossums are the best tick hunters that play a vital role in controlling the tick population. They eat almost 5000 ticks per season – a considerable part in tick destruction. But we cannot raise opossums on our farm. Do you know Turkeys are one of the best predators of ticks that is safe and you can possibly grow them in your farm.
Turkeys And Ticks:
How to raise turkeys on our farm to control the tick population?
Raising turkeys on your farm is not a complicated process. They need some extra care than chickens on your farm. These birds spend most of their time hunting, pecking, scratching, and foraging for food. Once you start to have them in the yard, you will love them. They eat some foods like snails, fish, and lizards. They eat grains, nuts, fruits, insects, and vegetables too.
Do turkeys carry ticks?
Yes! They may carry ticks sometimes. But it is not much harmful to humans or other domestic organisms like dogs, cats, cattle, etc. A research found that turkeys eat almost all ticks – in their larval and nymph stages. They also remove a maximum number of ticks from their body during self-cleaning. So, it is hard for the ticks to escape turkeys.
When we raise turkeys on our farm for tick control, proper vaccination, biosecurity against outside contamination, management practices, and good hygiene are essential. Using antibiotics helps us treat and control diseases in turkeys and improve their overall health.
Do Wild Turkeys Eat Ticks?
Yes! They do. You can find wild turkeys in the suburban areas, grasslands, shrublands, etc. more often eating ticks. The presence of wild turkey is a threat to the ticks population. But you might be amazed if you know which type of turkey eat most ticks? If that i your question, here is the fact!
Which type of turkey eat most ticks? – Domestic or wild turkey:
Generally, domestic turkeys do not bother ticks as they have more options to eat other than ticks. They will fill their stomach with grasses, sweet corn, tomatoes, summer squash, lettuce, etc. Thus, it is obvious that wild turkeys are the potential predators of ticks compared to domestic turkeys.
Domesticated Turkeys and all the five subspecies of the Wild Turkeys eat ticks. Wild Turkeys will consume Ticks when they find them. They are not active hunters but they eat ticks on the ground, in the grass, in low vegetation, and even on their own bodies during self-grooming. Even though these birds are tick hosts, they tend to eliminate more ticks than they spread.
How Many Ticks Does Turkey Eat In A Day?
Turkeys have sharp eyesight and acute hearing, making them talented tick gobblers. A fully grown turkey can consume 200 or more ticks per day. A turkey family, including a female turkey and her two generations along with her mate, can consume around 3800 ticks per day.
Can Turkeys acquire Lyme Disease After Eating Ticks?
Lyme disease is the most threatening tick disease spread to humans by infected ticks. Blacklegged or deer ticks act as vectors of Lyme disease in humans and animals.
Turkeys do not get Lyme disease from eating ticks. The ticks have to be attached to the hosts for more than 36 hours to transmit the disease. There is no possibility for this to happen after the ticks have been killed and eaten by the Turkeys.
Other Birds That Eat Ticks
Chicken:
Chickens eat ticks. They will be able to consume 80 ticks per hour. Chickens will help control the ticks in the backyard. Chickens have been discovered as natural predators of ticks by a study published in 1991. They consumed around 3 – 330 little critters in a single session.
Ducks:
Ticks are fond of moisture, and the Ducks are the most appropriate choice in wet and muddy areas. Though ducks cannot completely eat all the ticks in an area, they can significantly keep down the tick numbers. They are beneficial to the farmers.
Guineafowl:
Farmers use guineafowls as a natural tick repellent. Guinea fowl can eat as many as 1000 ticks per day.
Cattle Egret:
The cattle egret is a bird species that lives in grasslands and cattle pastures in many regions. It removes and eats ticks and flies from the body of animals. Thus, these species do their part in controlling the tick population. These birds ride on cattle backs to pick ticks and eat.
They have a diverse diet chart that depends on the habitat. Generally, these birds are insectivores, and their favorite foods are grasshoppers, locusts, and crickets. Ticks are also on their diet chart but only in small numbers. Some other prey of cattle egrets include earthworms, spiders, crayfish, mollusks, tadpoles, frogs, snakes, lizards, rats, fish, and birds.
Partridge:
Partridges look small, plump, and cute. You can find these ground-dwelling game birds throughout the United States and near water sources. They eat ticks and contribute a remarkable portion to tick control. The thick bristles on their tongues act as a brush-like tool for catching insects and ticks. They can pick and consume all types of ticks, even under leaves and grasses. These birds help keep the population of ticks in control by taking ticks as food.
Roadrunner:
Roadrunners belong to the cuckoo family with the native of North America and Mexico. They eat ticks occasionally. So this behavior will not affect the presence of ticks in the environment. These birds get ticks on their feathers and body when they hunt food sources like lizards, mice, insects, snakes, etc.
Their favorite foods: black widow spiders, millipedes, centipedes, crickets, grasshoppers, beetles, caterpillars, snails, mealworms, cockroaches, tarantulas, mosquitos, and dragonflies.
Woodpeckers:
Woodpeckers can naturally eat more ticks. They do this with their long and sticky tongues. The Woodpecker population has a vital role in controlling Lyme disease around the world. Some other favorite foods of woodpeckers: Ants, beetles, termites, spiders, caterpillars, bird eggs, other arthropods, small rodents, nestlings, fruit, lizards, sap, and nuts.
Oxpecker:
An oxpecker is a bird that feeds on ticks and commonly lives in Africa, Asia, and Australia. They often sit on large animals like giraffes, zebras, buffalo, and rhinos. Then they start eating ticks and lice from their body. These birds use their sharp beaks to remove pests from an animal’s skin. Usually, these birds live in woodlands or grasslands and help animals keep their body healthy and clean. They also eat flies, maggots, and all other kinds of larvae from their host body.
Do Quail Eat Ticks?
Quails usually forage on the ground and eat what they find. Many people and various communities, especially farmers use quail for tick control in their farms. They can naturally eat more ticks and control tick infestation. Generally, quails are ground birds that dig around in the ground to find food. They consume ticks when they get them from the ground.
Like any other animal, quails also get ticks. But they do not have proper immunity to tick bites. So sometimes, these ticks bite may create harmful effects on the overall health of quail. Once you find any tick infestation on your farm quail, ask for medical support. Otherwise, those ticks may start latching onto the quail’s skin.
We know that deer ticks are the prime cause of Lyme disease. In some areas, people use quail to control Lyme disease.
How many quails do we need to control ticks in a particular place?
It entirely depends on the area of the place and the severity of the tick infestation. Quails eat all the ticks effectively wherever you allow them to roam freely. Setting them free in the backyard is the best idea to control the ticks population there. Around ten quails are enough for controlling ticks in an area of 1 acre.
Can quails get Lyme disease by eating ticks?
No! They can not get Lyme disease from eating ticks. They receive this disease only when the microbes that cause Lyme disease enter their bloodstream. When quails eat ticks, they will get digested, and there is no direct contact with the bloodstream.
Final Thoughts
Turkeys have proved to be effective in controlling the tick population. So, growing or domesticating some turkeys is best if you live in a tick-infested area. But never forget to follow the precautionary measures advised by the government to prevent tick infections. Turkey treatment might be an additional way to prevent ticks but being precautionary is the basic thing that needs to be followed to prevent tick infections.
FAQ
Q1. Do turkeys transmit ticks?
Wild turkeys do not spread deadly ticks. A recent study shows that turkeys get rid of as many ticks as they carry. The reason? Turkeys eat ticks.
Q2. Which animal eats the ticks the most?
Opossums are one of the top predators of ticks and kill more than 90 percent of the ticks they encounter. Opossums are good at removing ticks, and they can eat up to 5,000 ticks per season.
Q3. What kills ticks naturally?
Eucalyptus and Neem oil can kill ticks effectively. Just combine 4 ounces of purified water into a spray bottle and 30 drops of your carrier oil of choice. Shake well and spray anywhere you want to kill ticks.
The Evolution of a Spike Deer: From Young Buck to Mature Antlers
The evolution of a spike deer, from a young buck to mature antlers, is an interesting process that takes place over several years. In the context of hunting, a “spike deer” typically refers to a young male deer with unbranched antlers. These spikes are generally second-year antlers, which develop after two little round knobbys grow on the top of the skull. The following year, these knobbys push through and form spikes.
As the deer matures, its antlers may develop into more complex shapes and configurations. The third year is when they shed those spikes and grow actual antlers, which are generally forked. At this stage, the deer would be considered a 4-point buck.
Every year, the animal will shed its antlers and they will be replaced by bigger and more elaborate ones. Their antlers usually get bigger with more points each year, up to a point. When a buck lives past his prime and his teeth are worn down, his antlers may not grow as well.
However, there can be variations in antler growth due to genetic factors or other abnormalities. For example, there have been cases where a deer had nine points on one side and only one spike on the other. These anomalies can result from genetic defects within the deer’s lineage.
Managing deer populations is important for conservation purposes. Overpopulated deer can cause problems such as damage to vegetation or increased risk of accidents on highways. Hunting can help control population numbers and provide a source of food if the harvested deer is used for consumption.
In some cases, people have attempted to domesticate deer. Reindeer are semi-domesticated animals that have been used for various purposes like pulling sleds laden with supplies. They were domesticated from wild caribou over 1000 years ago.
Overall, understanding the evolution of a spike deer provides valuable insights into their life cycle and helps inform wildlife management practices.
Understanding the Complexity of Spike Deer in Hunting Contexts
In the context of hunting, a “spike deer” typically refers to a young male deer with unbranched antlers. These spikes are generally second-year antlers, which grow after the first year when the deer has two little round knobbys on the top of its skull. In the second year, these knobbys push through and form spikes, much like wisdom teeth.
As the deer matures, its antlers may develop into more complex shapes and configurations, so it may no longer be considered a “spike deer.” For example, in the third year, they shed those spikes and grow actual antlers which are generally forked. Then you have a 4 point buck. Every year, the animal will shed its antlers and they will be replaced by bigger and badder ones.
However, there are exceptions to this general pattern. Factors such as genetics and environmental conditions can influence the growth and development of antlers in deer. In some cases, a buck may not grow larger or more complex antlers even as it ages due to factors like poor nutrition or genetic defects.
It is important for hunters to understand these complexities when determining whether or not to target a spike deer. While some hunters may choose to pass on shooting spike deer in hopes that they will grow into larger bucks in future years, others may see value in culling spike deer from the population to promote healthier genetics and manage population numbers.
In conclusion, spike deer refer to young male deer with unbranched antlers in hunting contexts. However, their antler development can vary based on factors like genetics and environmental conditions. Understanding these complexities is essential for making informed decisions about harvesting spike deer during hunting seasons.
Debunking the Myth: Not All Spike Deer Stay as Spikes
Understanding Spike Deer in the Context of Hunting
In the context of hunting, a “spike deer” typically refers to a young male deer with unbranched antlers. However, it is important to note that not all spike deer stay as spikes throughout their lives. As the deer matures, its antlers may develop into more complex shapes and configurations, so it may no longer be considered a “spike deer.” This means that the term “spike deer” is not always an accurate representation of the deer’s antler size or age.
Growth and Development of Antlers
Typically, spikes are usually year and a half old bucks. They lose their antlers every year and grow a new set of antlers. With each passing year, their antlers usually get bigger with more points. However, there is a limit to this growth potential. When a buck lives past his prime and his teeth are worn down, he may not be able to consume enough food for optimal antler growth. In such cases, his antlers may not grow as well as they did in previous years.
Variations in Antler Size and Configuration
While it is generally true that bucks’ antlers tend to get bigger with age, there can be variations and exceptions to this pattern. For example, there have been instances where bucks have been observed with only four points on their antlers despite being seen for multiple years. These anomalies can occur due to various factors such as genetics or environmental conditions.
It is also worth mentioning that some younger bucks may exhibit spikes during their second year before shedding them and growing actual forked antlers in their third year. The number of points on the antlers can vary depending on individual genetics and other factors.
The Importance of Deer Population Management
Deer population management is crucial for maintaining a healthy ecosystem. Overpopulation can lead to several issues, including damage to vegetation, increased risk of deer-vehicle collisions, and competition for limited resources. Proper culling of deer populations is necessary to maintain a balance between the deer population and its environment.
While hunting can be an effective method for managing deer populations, it is important to adhere to legal regulations and ethical practices. This ensures that only appropriate deer are harvested while allowing the population to thrive in a sustainable manner.
In conclusion, the term “spike deer” in hunting refers to young male deer with unbranched antlers. However, not all spike deer stay as spikes throughout their lives as their antlers can develop into more complex shapes and configurations. The growth and development of antlers depend on various factors such as age, genetics, and environmental conditions. Proper deer population management through regulated hunting is essential for maintaining a healthy ecosystem.
Factors Influencing Antler Growth in Spike Deer: Age, Nutrition, and Genetics
Antler growth in spike deer is influenced by several factors, including age, nutrition, and genetics.
Age plays a significant role in antler development. A spike deer is typically a young male deer with unbranched antlers. As the deer matures, its antlers may develop into more complex shapes and configurations. This means that a spike deer may no longer be considered a “spike” as it grows older.
Nutrition also plays a crucial role in antler growth. Bucks require sufficient nutrients to support the growth of their antlers. If a buck’s teeth are worn down and it cannot eat as much, its antlers may not grow as well. Therefore, proper nutrition is essential for optimal antler development.
Genetics can also influence antler growth in spike deer. Some bucks may have genetic traits that result in larger or more elaborate antlers compared to others. However, genetic defects can also occur, leading to abnormal or deformed antlers.
In conclusion, the factors influencing antler growth in spike deer include age, nutrition, and genetics. Understanding these factors can help hunters and wildlife managers make informed decisions regarding deer management and conservation efforts.
The Importance of Managing Deer Populations: Culling Spikes for Conservation
Deer populations play a crucial role in ecosystems, but their numbers need to be managed to ensure the health and balance of the environment. One method of population management is culling spikes, which refers to removing young male deer with unbranched antlers.
Culling spikes is important for conservation because it helps maintain a healthy deer population. By removing young males, it allows older bucks with more developed antlers to breed and pass on their genes. This helps ensure genetic diversity within the population and promotes healthier offspring.
Additionally, culling spikes can help prevent overpopulation. When deer populations become too large, they can cause damage to vegetation and crops, leading to negative impacts on other species and ecosystems. By selectively removing spikes, it helps control the growth of the population and reduces the risk of habitat destruction.
It’s worth noting that culling spikes should be done carefully and based on scientific research and population studies. It’s important to consider factors such as the overall health of the deer population, available habitat resources, and any potential impacts on other species in the ecosystem.
In conclusion, culling spikes is an important conservation strategy for managing deer populations. By selectively removing young male deer with unbranched antlers, it helps promote genetic diversity, prevent overpopulation, and maintain a healthy balance within ecosystems. However, careful consideration should be given to ensure that culling practices are based on scientific research and conducted in a responsible manner.
Domesticating Deer: Exploring the History and Role of Reindeer
Domesticating deer is a practice that has been carried out for centuries, with one notable example being reindeer. Reindeer, also known as domesticated caribou, have played a significant role in various cultures around the world. They have been used for transportation, as a source of food and clothing, and even as a symbol of cultural identity.
Reindeer were domesticated over 1000 years ago by indigenous peoples in northern Eurasia and North America. These animals were selectively bred for specific traits that made them well-suited for their roles in human society. They were trained to pull sleds laden with supplies, guided using reins, hence the name “reindeer.”
The domestication of reindeer has had a profound impact on the communities that rely on them. These animals provide not only transportation but also a valuable source of food and materials. Reindeer meat is highly nutritious and rich in protein, while their hides are used to make clothing and shelters. In addition, reindeer antlers are sought after for their medicinal properties.
While reindeer are considered semi-domesticated, they still retain many of their wild instincts. They are hardy animals that can withstand extreme cold temperatures and navigate through harsh environments. Their ability to find food in barren landscapes makes them invaluable to communities living in remote regions.
In conclusion, the domestication of deer, particularly reindeer, has played an important role in various cultures throughout history. These animals have provided transportation, food, clothing, and other essential resources to communities living in challenging environments. The relationship between humans and reindeer showcases the adaptability and resilience of both species when working together for mutual benefit.
(Note: This response is generated by an AI language model and may not fully reflect accurate information or personal opinions.)
In conclusion, while a spike deer is typically identified by its single-point antlers, it can sometimes grow additional points as it matures. This means that not all spike deer will remain spike deer for their entire lives. Therefore, it is important to consider other factors and consult experts when classifying deer based on their antler characteristics.
There are two potential reasons why you may be hunting public land deer this season. First, you may find public land deer hunting challenging and enjoy the freedom the big woods offer. More likely, however, the real reason you are hunting on public land is you have no other choice such as a private lease or your own land to hunt. Hunting deer on public land is the great equalizer. Each hunter has to search for a place to hunt, develop a sound strategy and compete with other hunters all seeking a whitetail buck.
The one advantage hunters have in Pennsylvania when looking for the best public land hunting is that there is plenty of it. Public lands open to hunting can be found in almost every county of the state accounting for more than 4 million acres. All that land, however, comes with a lot of competition and challenges when it comes to deer hunting season.
Finding Public Land Deer Hunting Opportunities in Pennsylvania
The best public land deer hunting opportunities are not as hard to come by as many think. The key is to put the time in and focus on quality areas with minimal pressure and good habitat. Finding these suitable areas is not difficult with the amount of area open to the public.
One place to start your search is with the Pennsylvania Game Commission (PGC) Deer Hunter Focus Areas. This site provides information and an interactive map of recent and current habitat management projects on State Game Lands across the state. These projects are known to attract deer and typically have hunter access areas associated with them. Although these Deer Hunter Focus Areas are a great place to start, remember a lot of other hunters will also be hunting these areas. Ideally, you want to use these locations as a starting point and expand to adjacent areas to hunt whitetails where hunting pressure will be less.
Another starting point for finding public land deer hunting opportunities is the PGC State Game Lands website. This website provides information about the 1.5 million acres of public lands opening for hunting. Here, again, you can use an interactive map to search for areas to scout and download individual maps to take with you on the ground. Both are helpful when planning your public land hunting strategy.
Finally, Pennsylvania State Forests and the Allegheny National Forest also both have vast amounts of land open to public hunting. How to find a good hunting spot on public land starts with doing your research and exploring these opportunities well before deer season starts.
Best Game Lands to Hunt in Southeastern Pennsylvania
State Game Land 145 sits off of State Route 117 in southern Lebanon County. It is approximately 2,800 acres of mixed hardwoods forest. This SGL has many one- and two-acre food plots established to supplement native forage. Hunt thick bedding areas near these food plots to ambush a buck coming or going to feed.
SGL 145 – Lebanon County
Nearby, SGL 156 has over 4,500 acres open to hunting in Lebanon and Lancaster counties. Both mixed hardwood and mixed oak forests exist in SGL 156. Timber management is very active across this area and provides plenty of quality browse and cover for whitetails to enjoy. Hunting public land deer here can be tough as it tends to get pressured, especially during firearms season. Hunt more remote areas and stay away from main trails if possible to increase your chances.
SGL 156 – Lebanon/Lancaster Counties
Another prime public land hunting location in Lebanon and Lancaster counties is SGL 46. Accessible from State Route 897, SGL 46 covers approximately 6,000 acres surrounding the Middle Creek Wildlife Management Area. Focus your public land hunting strategy on hardwood ridges and adjacent to agricultural fields on this public tract.
SGL 46 – Lebanon/Lancaster Counties
Overlooked Public Land Hunting Places
Among all the public land open to hunting across the Commonwealth, hunters frequently overlook state parks as a place to hunt. There is usually a state park within a 20- to 30-minute drive of almost every resident in the state and many have public land deer hunting opportunities.
Two particular state parks in southern Pennsylvania where public land monster bucks roam are Gifford Pinchot State Park and Caledonia State Park. Both of these parks allowing deer hunting, but they have special regulations hunters need to comply with. Gifford Pinchot is located in northern York County just outside of Harrisburg. The hunting grounds surround the lake and are in turn surrounded by a mix of residential and agricultural lands. No centerfire rifles can be used for hunting in the park but you can use bows, shotguns, and muzzleloaders. Caledonia State Park has a smaller amount of huntable land but it is surrounded by the 85,000 acre Michaux State Forest, which offers its own public hunting opportunities. Similarly, this park has special hunting regulations so be sure to check them out before planning to hunt in either of these state parks.
5 Public Land Hunting Tips for Deer Season
Hunting big bucks on public land does not come easy. Make sure these five public land hunting tips are part of your deer season strategy.
Scout All Year Long – You have to put in the time on public lands. This means not only hunting but also scouting. Scouting with trail cameras preseason but also scouting throughout the year to find new spots and plan tree stand set ups is a must. The more time you spend scouting the more likely you will beat out all the other unprepared hunters for that buck spot.
Get a GPS and Learn to Use It – Having a GPS unit is critical to public land deer hunting. It allows you to store hunting spots as waypoints and tracks as trails to your tree stands. Without one, it makes it hard to explore new hunting areas and keep your existing spots as secret as possible.
Use Hunting Pressure to Your Advantage – Almost everywhere in Pennsylvania on public land, there will be hunting pressure. One tip is to use that to your advantage. Position tree stands around highly pressured areas and hunt the pressured deer. This works well in gun season when a high percentage of hunters are in the woods for the first time walking around and spooking up bucks.
Don’t Hunt History – Hunters on public land often hunt the same areas year after year. These places are either familiar or they have had recent past deer hunting success here. With public land, however, things change constantly. Either habitat is changing from management activities or consistent pressure from recreation change deer patterns. Assume nothing each year and instead scout each year to determine if other areas are a better choice to hunt.
Be Able to Adapt Mid-Season – Along with not hunting history, you also need to be able to adapt during the season. Public means anyone can hunt right next to you. You have to have secondary options and be able to adapt your public land hunting strategy on a daily basis based on changing deer patterns or unexpected hunting pressure.
Must-Have Deer Hunting Gear for Public Land
Arguably the two most important pieces of deer hunting gear for public land hunting are a lightweight tree stand and a quality hunting pack. The theme of these two pieces of gear is mobility and being able to adapt.
Lightweight Tree Stand Setup – Hanging a tree stand on public land has to not damage the tree. This means you have to either choose a lightweight climbing tree stand like the Summit Open Shot Climber or go with a hang on stand and use lightweight climbing sticks.
Quality Hunting Pack – You will need a hunting pack for public land deer hunting that holds plenty of gear. Large main pockets, accessory pockets, and a comfortable fit as the Badlands Dash Backpack which is ideal for any day hunting public land during firearms season.
Grains are the unit of measurement used to describe bullet or gunpowder weight. And by “bullet,” I mean the would-be projectile part of a cartridge, not the whole thing. A grain is 1/7,000 of a pound and used in ammo manufacturing worldwide, a true holdout of the imperial measuring system in a time when most standards have gone metric. Reportedly the term is derived from the amount of weight required to balance about 30 wheat or barley grains on a scale.
As far as I can tell, ammunition is the only thing that still uses grains as a standard. Solid medications, i.e. aspirin, were the other remnant of the grain standard until approximately 30 years ago.
Now that we know where this peculiar term came from, let’s discuss why, or whether, it matters when it comes to ammunition choices. After all, the choices are many. In terms of handguns used for personal defense, grain weights typically range from 85 grains in the case of 380 ACP to 230 45 ACP. Of course there are exceptions on both ends of the spectrum, especially if one checks out frangible or lead-free ammunition.
In general, but with many exceptions, lighter grain weights are used for full metal jacket “practice” ammunition. These represent less costly options than the same brand of ammunition in higher grain weights and/or hollow point form. Using 9mm as an example, most FMJ loads are 115 grain. Hollow point 9mm is typically 124 or 147 grain, with 124 being a bit more common and usually more affordable within the same brand.
Greater grain weights can make a difference when firing long distances. The bullet’s arc and point of impact will be lower as grain weight increases, assuming identical powder charges in the rounds. This seeming disadvantage is slight though, and often offset by the heavier bullet being less influenced by wind than the lighter one. And while bullet shape definitely enters into the equation, identical nose-of-bullet construction and identical powder loads will almost certainly offer a greater advantage with a heavier bullet in terms of longer-range accuracy. The most frequent example I’ve seen is the 700 Aggregate, AKA The Humbler Drill historically used by Delta operators as a practice tool but perfectly available to anyone who can download instructions and buy an NRA B8 bullseye target. Dozens of times, I’ve seen the same gun produce very different levels of accuracy on this drill with a simple change of grain weight within the same brand of ammo. With a few exceptions, greater grains mean greater accuracy. If this kind of precision is important to you, time spent on a shooting bench using near-perfect trigger technique will yield a lot of information about how your gun handles various bullet weights.
Most readers are probably more concerned about whether grain weight makes a difference on an active threat than bullseye shooting. My answer is shot placement counts above all. No matter what ammo (or caliber) you carry, it does no good if shots don’t land as intended.
I’d love to stop this article right here, but the terminal ballistics geeks will surely say something about bigger grains equaling bigger OOMPH on target. And to an extent that really only matters in laboratory conditions, yes, there’s a minor difference in hydraulic disturbance with a heavier bullet. But, again with the same powder load as the lighter bullet, or when fired from a shorter barrel, that heavy projectile will go a bit slower. Push the performance envelope of either powder or grains too far in any direction, and the gun won’t function reliably.
Those concerned about the short barrels of many defensive handguns will be well-served to explore options among ammunition especially made for short barrels, or to purchase a chronograph and measure velocity for themselves. Examples of loads specialized for short barrels are Punch by Federal Premium and 365 by Sig Sauer.
As one of my shooting mentors puts it, ballistics is a very mature science. Ammunition makers can predict with great accuracy how a given combination of materials will perform. In fact there’s a repository of knowledge and manufacturing standards that guide ammo development. The Sporting Arms and Ammunition Manufacturers’ Institute (SAAMI) is a consortium of gun, ammo, and defense companies that publish these helpful, voluntary guidelines. Their data is transparent and available for anyone to peruse.
Thanks to LuckyGunner.com, which has a superb range of ammo to choose from and provided some of the ammo seen in this article, along with the manufacturers.
"Debate over whether a 22 air rifle can effectively take down a deer has sparked curiosity among hunting enthusiasts. With its lower muzzle velocity...
Exploring the Pros and Cons: Pump Air Rifle vs Break Barrel - Unveiling the key differences and advantages between two popular air rifle mechanisms....
")
")
")
")
")


 Review – The Best Name In The Air Rifle Game")


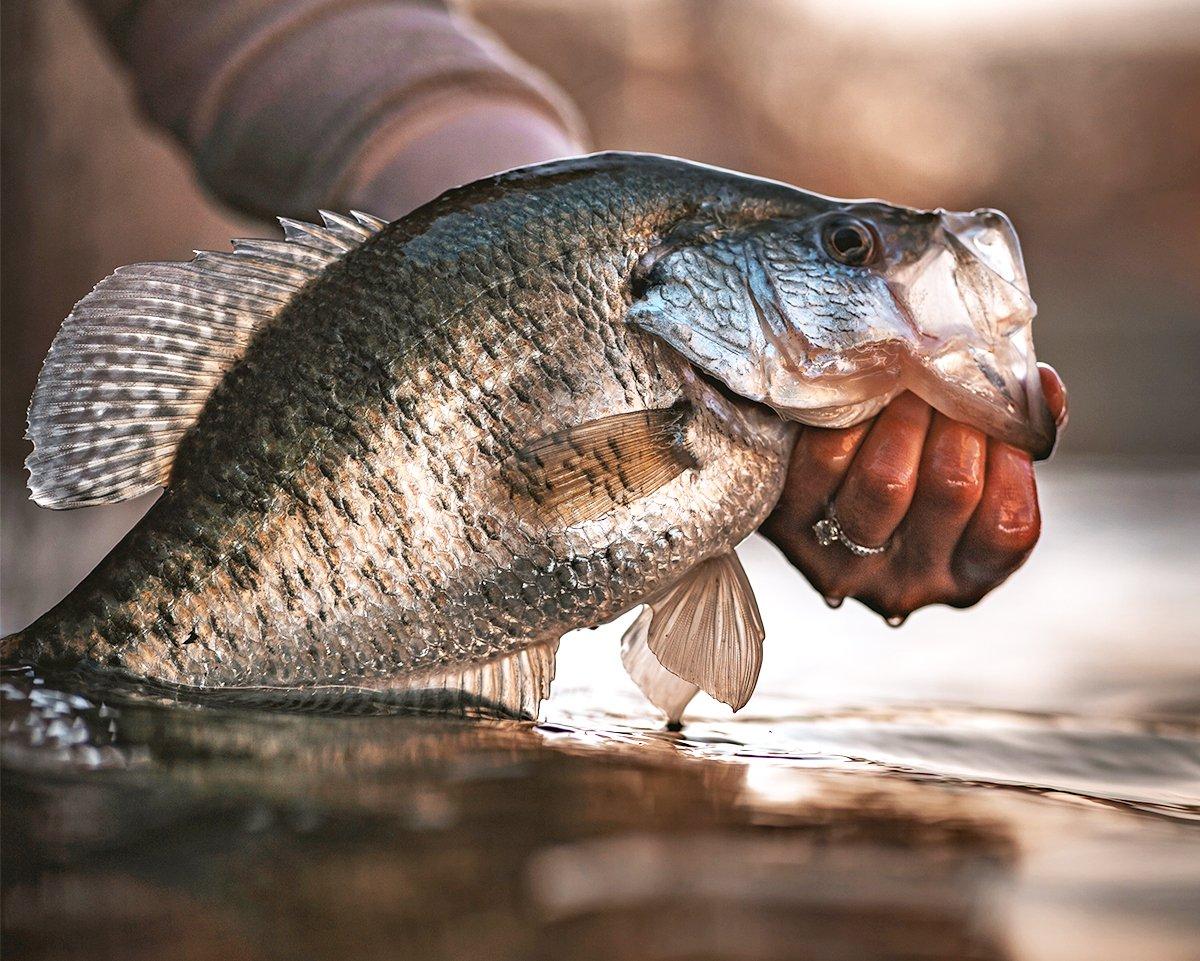
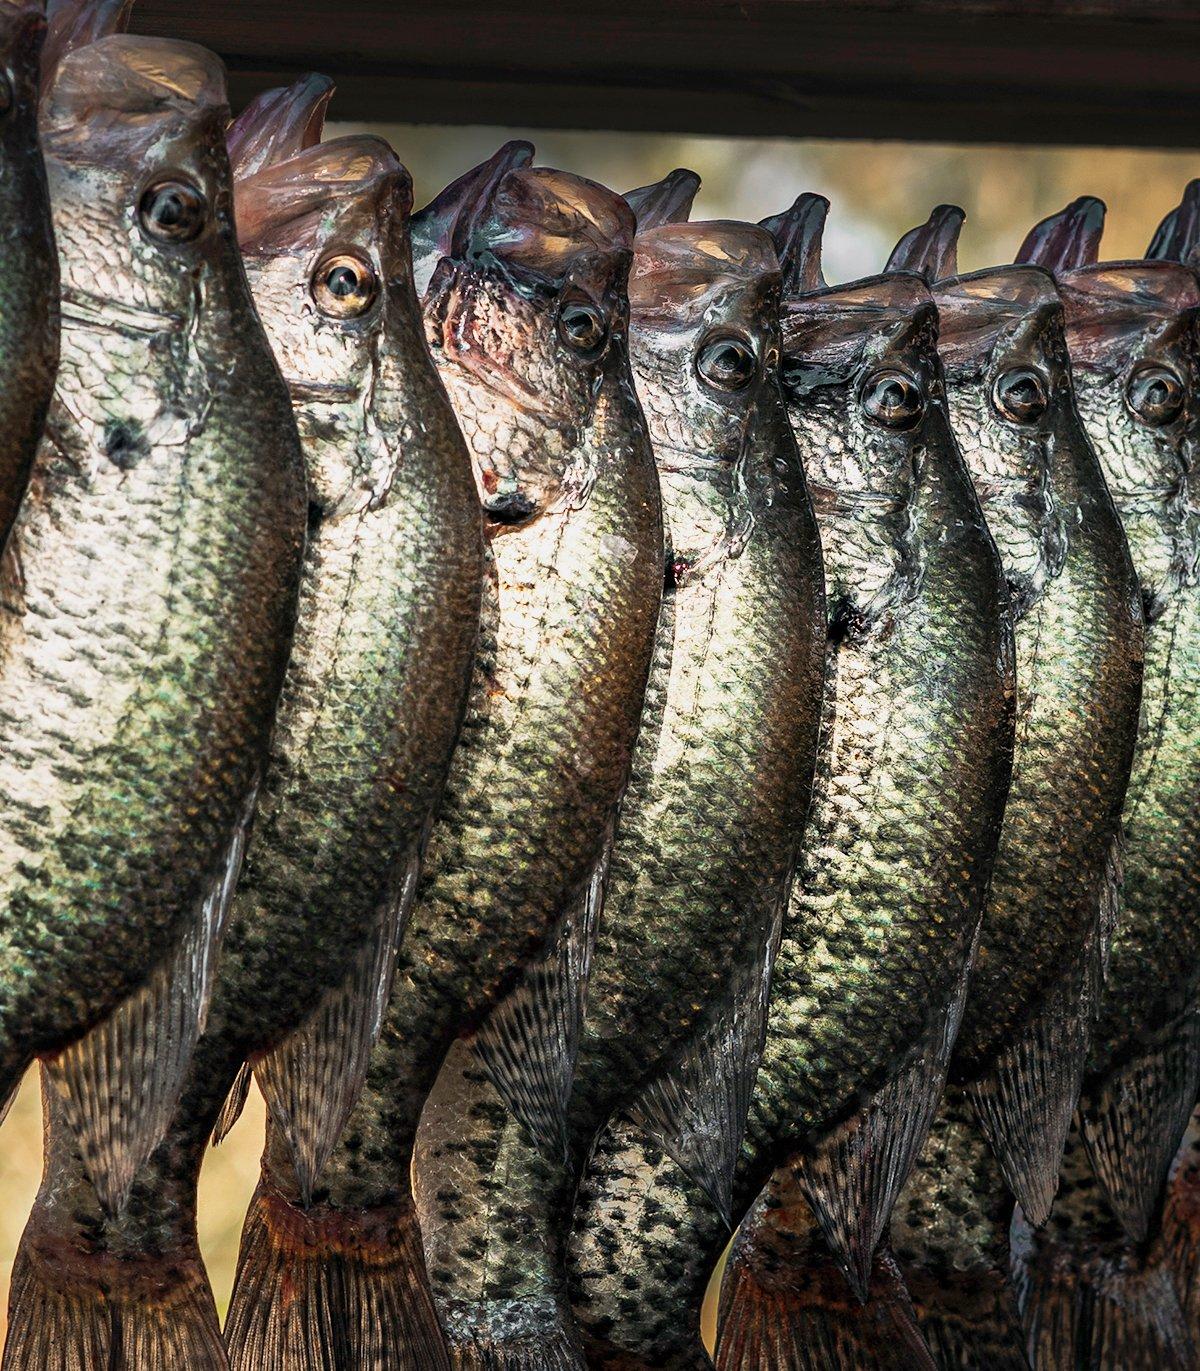
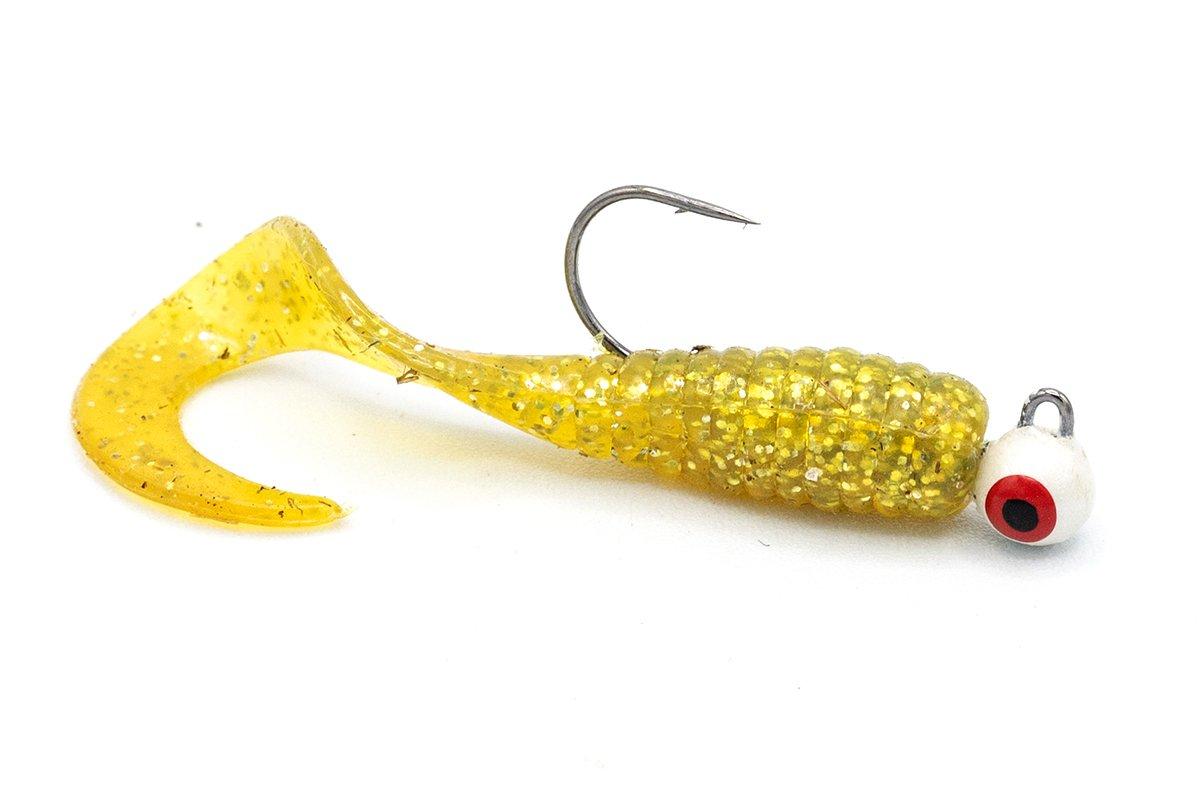
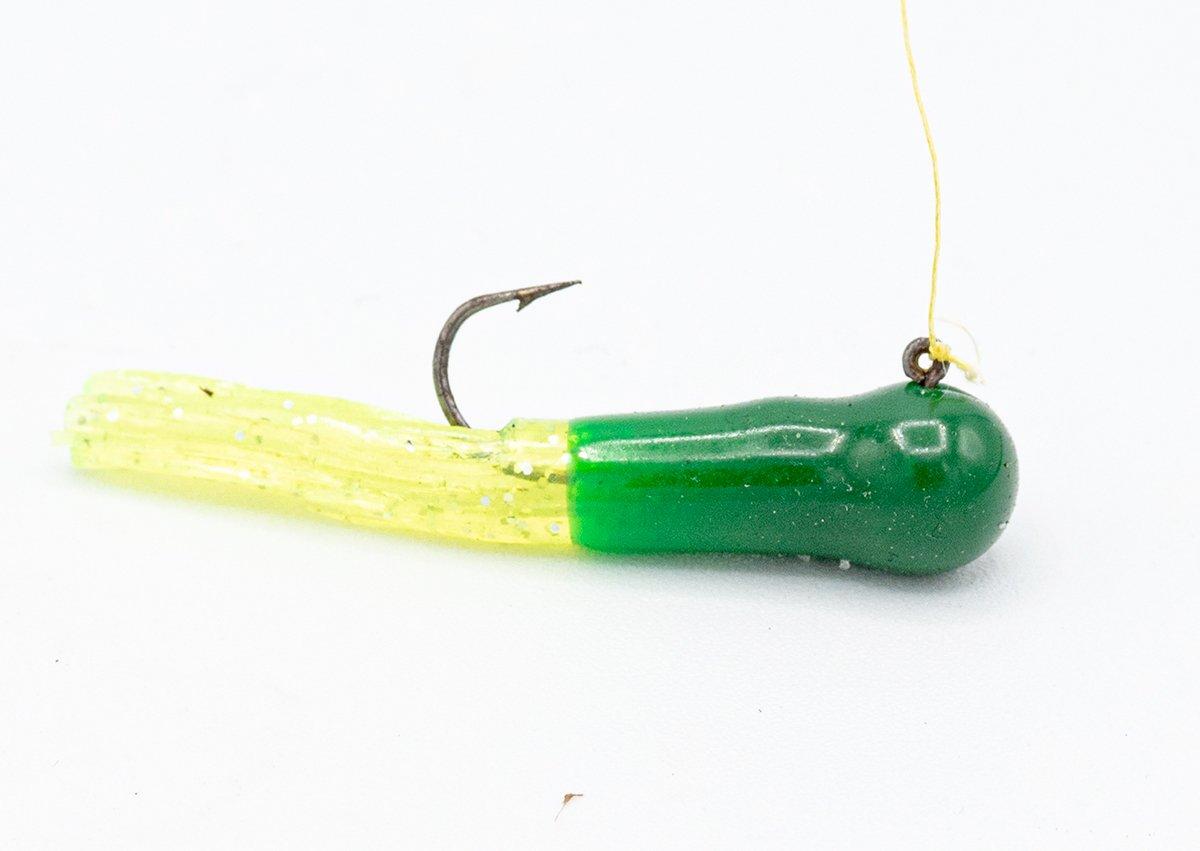
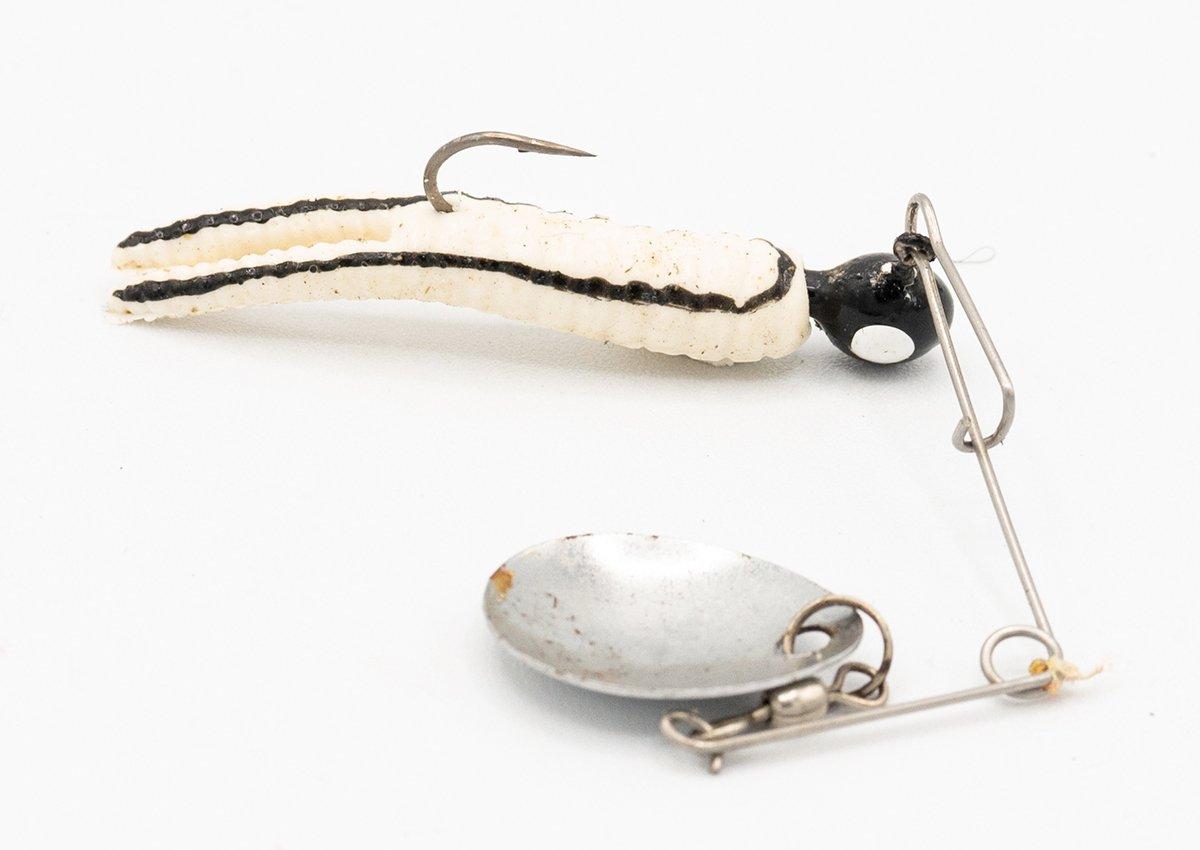

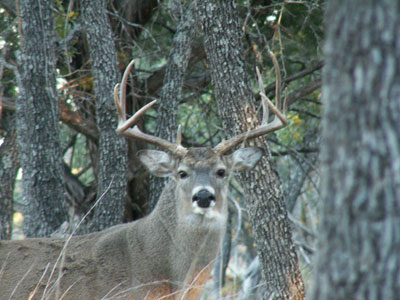 According to www.dictionary.com, cull means “to choose, select or pick”. In other words, deer culling is when a human decides which animal is being taken from the herd. By definition, deer culling is not much different from hunting.
 Property Damage