It’s known as the Night of the Grizzlies. Over fifty years ago, two women were killed by two different grizzly bears on the same night. The repercussions of the incident can still be seen in the way bears are managed today. But it also gave birth to a powerful myth—it’s dangerous for women to spend time in the woods while menstruating.
Back in the early 1980s, Caroline Byrd worked on a seasonal trail crew with the U.S. Forest Service. Most summers she worked just outside of Yellowstone National Park. And for a few of those seasons, the crew was made up entirely of women.
“When people would run across us on the trail, they were always like, ‘Wait, you’re girls!’ and ‘We’d be like, yeah, uh huh, we are!'” Byrd said.
It was a really powerful experience for Byrd; one that meant a lot of hard work.
“Here we were out in the wilderness for 10 days at a time,” described Byrd. “Doing really hard manual labor that’s super satisfying…clearing trails, using a cross-cut saw, and a double bit ax, and a polaski.”
In 1983, she stayed on late, doing end-of-summer stuff like cleaning up campgrounds and marking timber to be cut down. And because it was fall, it was hunting season.
“And that’s when we ran across this hunter’s camp,” said Byrd. The hunter had left groceries inside a wall tent, and had returned to town. While he was away, a mama bear and her cub had ransacked the camp. Bear encounters were rare at the time since the number of bears in Yellowstone’s ecosystem was low. That’s why a special agent came all the way from Colorado to investigate.
“He was aghast that women were working in the back country where there were bears,” said Byrd. “And we were like ‘no, that’s not the issue!’ The issue is this hunter left his food, and bears got into it.”
That’s when the U.S. Forest Service told Byrd and the three other women on her crew that they would no longer be able to work in bear country while they were on their periods.
“Why are we getting restricted like this when this has nothing to do with the fact that there are women on a timber crew working in bear country?” Byrd said. The women were outraged. So they wrote to the Equal Employment Opportunity Office in Denver, and the policy was rescinded. But where exactly did the idea that menstruating women are at a greater risk in bear country come from? That goes back to one fateful night in 1967: the Night of the Grizzlies.
“There was two attacks in Glacier National Park where two different women were killed by two different grizzly bears on the same night,” said Kerry Gunther, the bear biologist for Yellowstone National Park (YNP).
He said the attacks caused the National Park Service to rethink how to deal with bears. The idea was to get bears feeding on native foods instead of human food hand-outs and garbage. Gunther said that meant converting garbage cans and dumpsters into bear-resistant designs, installing food storage boxes in roadside campgrounds and hanging poles for backcountry spots, as well as strictly enforcing regulations that prohibited hand-feeding beers, something once regularly seen in the park. But the Night of Grizzlies also sparked speculation.
“Having two fatalities in just one night was just so rare that people were groping for a reason, and one theory that came about was menstruation might have led to these two fatal bear attacks in Glacier,” said Gunther.
Only one of the women killed was on her period, though. And yet, the theory stuck. That’s why decades later Caroline Byrd and her female colleagues were told they couldn’t work in bear country while they were menstruating. And why in 1988 as a graduate student in environmental studies Byrd tried to debunk the myth.
“I ran a whole statistical analysis of is there anything out there that shows that bears react differently to women than to men? And it came out really strong that no, bears do not respond, or react, or in any way change their behavior based on the gender of the person they’re encountering,” Byrd said.
This lack of definitive evidence remains true today. But so does the myth. And it’s possible Yellowstone’s website may not be helping. A page that’s dedicated to menstruating women in bear country cites Byrd’s statistical analysis. It even breaks down the stats for bear-inflicted human injuries in the park.
For instance, between 1979 and 2018, 50 people were injured by bears within Yellowstone, 39 of those were men, while 11 were women. And out of those 11, none of the women were on their periods. As such, the website indicates, “the bear-inflicted human injury data from YNP does not indicate any correlation between bear attacks and menstruation.”
But the website also says women can take precautions if they’re concerned, like using tampons instead of pads.
“I do feel like the way it’s worded on the website is problematic,” said Margaret Seelie, a reporter that has written about the bears and periods myth.
Another study included on the website is from the late 70s. It tested how polar bears would react to menstrual blood in different scenarios, including how a caged polar bear reacted to a used tampon versus other odors. But both Byrd and Seelie said the research methods were flawed. Seelie also said including the study on the website perpetuates the misconception.
“It’s continuing to support and promote the myth that polar bears or bears are attracted or affected by menstruating women, which is different from a blood soaked tampon.”
Seelie is an avid hiker. Before her own reporting, she was pretty sure that being out in bear country while menstruating was dangerous.
“It’s also part of the menstruation taboo that is in our culture, and this weird fear of menstruation and of menstruating women,” she said. But Seelie explained fears like this keep women out of the woods, and that becomes an issue of quality of life.
“I don’t belong in this air conditioned office,” she said. “I belong out in the world, and I belong out in nature.”
Caroline Byrd agreed, that you shouldn’t have to stay home if you’re on your period.
“It’s perfectly rational for people to be afraid of bears,” said Byrd. “A lot of people are afraid of bears, and that’s just fine. But it’s not rational to be a woman afraid of bears because you’re a woman.”
Have a question about this story? Contact the reporter, Maggie Mullen, at [email protected].
This story was produced by the Mountain West News Bureau, a collaboration between Wyoming Public Media, Boise State Public Radio in Idaho, KUER in Salt Lake City, KUNR in Nevada and KRCC and KUNC in Colorado.
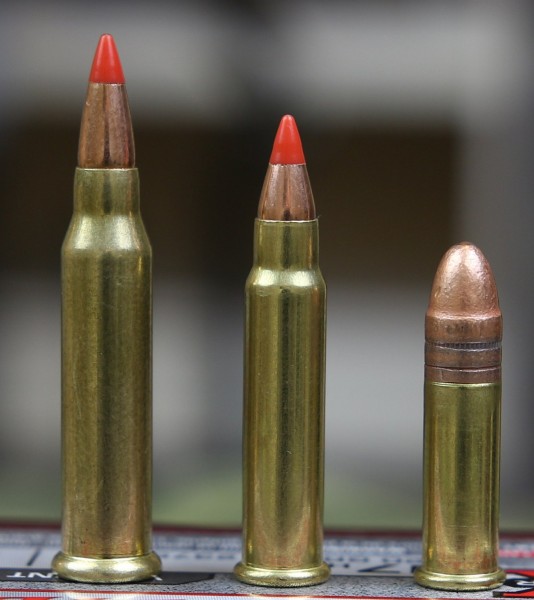
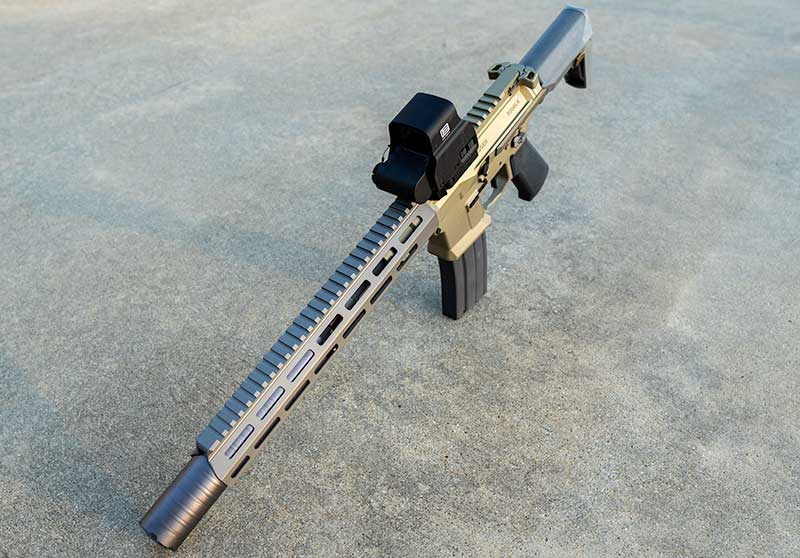
Designed and produced in 2002, the 17 Hornady Magnum Rimfire is pretty new in terms of cartridges, but there is an even newer kid on the block. The 17 Winchester Super Mag (WSM), has been in production since 2013 and is attempting to cut out a piece of the marketplace for a faster 17, and since the cases are made from nail blanks, they’re pretty inexpensive (very similar in cost to 17 HMR.) But is it fast enough?
Price update Sept 2022: 17 HMR is going for about $25 per box of 50 while 17 WSM is pretty close at about $30 per box.
Performance Comparison: Trajectory and Drift
The 17 WSM sends a 20 grain bullet out at 3000 fps, whereas the HMR is sending a 17 grain bullet at 2550 fps. That makes for some difference in the field, with the HMR granting an MPBR of 165 yards, whereas the WSM can do it with 205 yards (I’m running calculations for gopher-sized targets). That’s an extra 40 yards of non-adjusted range. More impressive is the wind drift difference. With a 10 mph crosswind, at 100 yards the WSM will drift 1.6 inches vs the HMR at 3.1 inches over. That could be the difference between a hit and a miss.
Quick numbers: (MPBR is for gophers: vertical target size of 3″)
This is the big difference here. The 17 WSM makes for a decent coyote gun, carrying more energy much further, and the 25 grain bullet gives an option for more weight/penetration of larger varmints. I think the 204 Ruger and 223 Rem are better pure coyote rounds, but the 17 WSM offers a very inexpensive option for coyote control.
Downsides of 17 WSM
I’m going to bullet these out (ha!):
Availability. It doesn’t have mass support, and you won’t find boxes of it at your local hardware store. In fact, depending where you live, you might not be able to find any at all.
Ammo selection: Only Winchester makes the ammo so far. If your rifle doesn’t like either the 20 or 25 grain Winchester rounds, tough luck. Accuracy gremlins may be tied to the quality of ammo as well. “Accuracy at 100 yards with the 25-grain bullets was a bit over an inch; the results of the groups with the 20-grain load were too awful to print in a family magazine.” – John B. Snow article on the Winchester 1885 in Outdoor life. ***Oct 21, 2014 edit: Hornady has announced they are coming out with a 20 grain V-Max load for the 17 WSM.***
The ammo boxes are big and bulky compared with 17 HMR boxes.
Very few rifles are available in 17 WSM.
The Savage B.Mag
Volquartsen has a semi-auto 17 WSM
Franklin Armoury’s semi-auto F17-L
Winchester 1885 Low Wall Hunter
Slightly louder
May die out as soon as other rimfire ammo becomes readily available again. 17 WSM has yet to be firmly established and if none of the other ammo manufacturers end up making it, you might end up with a rifle or ammo that is discontinued or only supported by Winchester.
So, is 17 WSM Worth it?
At this point, 17 WSM is where a lot of new rounds and rifles find themselves: encountering teething problems and in that “will it become a thing or not” area. If you love staying at the leading edge of technology, this is it but be prepared to pay for being at the bleeding edge. Just because your new rifle and cartridge is better on paper than your buddy’s, doesn’t mean that you’ll outperform them in the field and you might end up dealing with growing pains.
Still not sure about these magnum rimfire rounds? Check out my article on the 17HMR vs 22LR.
Want to do your own MPBR calculations? Check out this calculator.
*My latest book, All Weather Whitetailsis now available!
Backing Out For Wounded Whitetails
Trust me I have heard them all, including: “It’s going to rain”, “the yotes will find him first” and “snow is coming”. Although some hunters may not admit it, I think you can even add, “I have to get home” and “I have to work tomorrow”, to the list of reasons not to back out. However, the hunters I personally know who experience nearly a 100% success rate for recovering mortally wounded whitetails, all have one thing in common: Patience. If “when in doubt, back out” is the king of whitetail recovery phrases, “Patience” it’s single root word of success.
Exercising patience with anything in life is difficult and the art of tracking a wounded whitetail is absolutely no exception. But, if you want to consistently find a deer that you just shot, you have to apply a whole lot of patience. The decisions that you make within the first few minutes after you shoot a deer, will directly dictate the rollercoaster of emotions that you experience for hours or even days to come. The reliable level of predictable tracking success is based on the behavior patterns of wounded whitetails.
Top Whitetail Blood Tracking Tips
*A mortally wounded deer will lie down within 200-300 yards (or first thick cover) and will expire in the time-frame of the specific hit. Unless pushed, this will be the final resting place for your deer. If pushed from this location, the deer will usually go in excess of mile or more, depending upon cover, with little to no blood trail. Unless you are extremely lucky the odds that you find your whitetail are extremely low, even if you only jump him 1 time.
*If raining or snowing, you dont have much to lose by waiting. If you have a good hit, the deer will only go a short ways, making recovery relatively easy, even with no blood trail! If the deer had a marginal hit, hurrying to track because of an approaching rain or snow will only push the deer and you have a great chance of losing the deer anyways. Do you have lots of coyotes or other predators in the area? Same thing…jumping a bedded deer will only lead to the same results of jumping him in the rain or snow. 1 jump and he is typically gone for good, so taking a chance that a predator finds him is better than the certainty that he will be lost if he is pushed to early.
*Just because you see a double-lung hit, doesnt mean thats what hit it was. Our mind has a way of tricking us into thinking we did a better job than we did (we practiced, aimed hard, took a careful shot-had to be good!). Believe it or not, a deers reaction is quick enough to completely avoid an arrow, even within 10 yards. If a deer reacts just slightly to the sound of the shot, your arrow can be no where near where you aimed. Also, do we always make a perfect shot?I know that I don’t, which is why I thought is was important to relay this informationt to you.
*Unless you see your deer fall, it is always best to wait until morning, or later in the day, even if you think you made a good shot. This practice has resulted in dozens of 100 yard tracking jobs that ended with a deer that had expired hours earlier. But I can also say that this practice has ended with at least 2 deer that were still warm to the touch.
*If you know you made a double-lung shot, with a heavy blood trail and plenty of bubbles, and are also confident you made a perfect shot; wait an hour and go get your deer. The problem with this is that it takes many years of experience and tons of confidence to determine exactly what situation and hit is yours. Each year there are many lost liver shot deer that fell victims to I know I shot a double lung, when in fact it was not. I consider all my deer trophies, and even if I know I shot a great shot, I still give the animal the time and respect it deserves to expire. If you shoot a buck early in the morning, go have breakfast, go shopping, call some friends or even take a nap (if possible!). An evening tracting job is the same-walk straight home, have a sleepless night, and go get your deer in the morning with no harm done.
*A wounded deer may only be 100 yards away when you exit your stand, dying, so it is critical to sneak out of your stand and away from the deer. Walking towards the deer only 10 feet could result in a fleeing deer that often will cover a 1/2 mile or more prior to settling down again. Remember, that deer really doesnt know what happened, he probably feels sick, and is doing his best to feel hidden, safe and comfortable. The moment a whitetail knows a human is after him, he is gone! It only takes a jacket being un-zipped, an arrow hitting a stick, or even an innocent cough or sniffle.
*Always look for the last place you saw the deer and mark with a tissue, tree, or other natural feature. Still follow the blood trail at the place of the hit to more accurately determine the type of hit, but marking the last place of deer sighting is a great reference. Over the years I have had to climb back into a stand after searching a bit becasue I did not mark the location I last spotted the deer I had just shot only hours earlier. Remembering a fallen log, odd tilt to a tree trunk or even an unusual opening in the woods are all great references for when you return to .
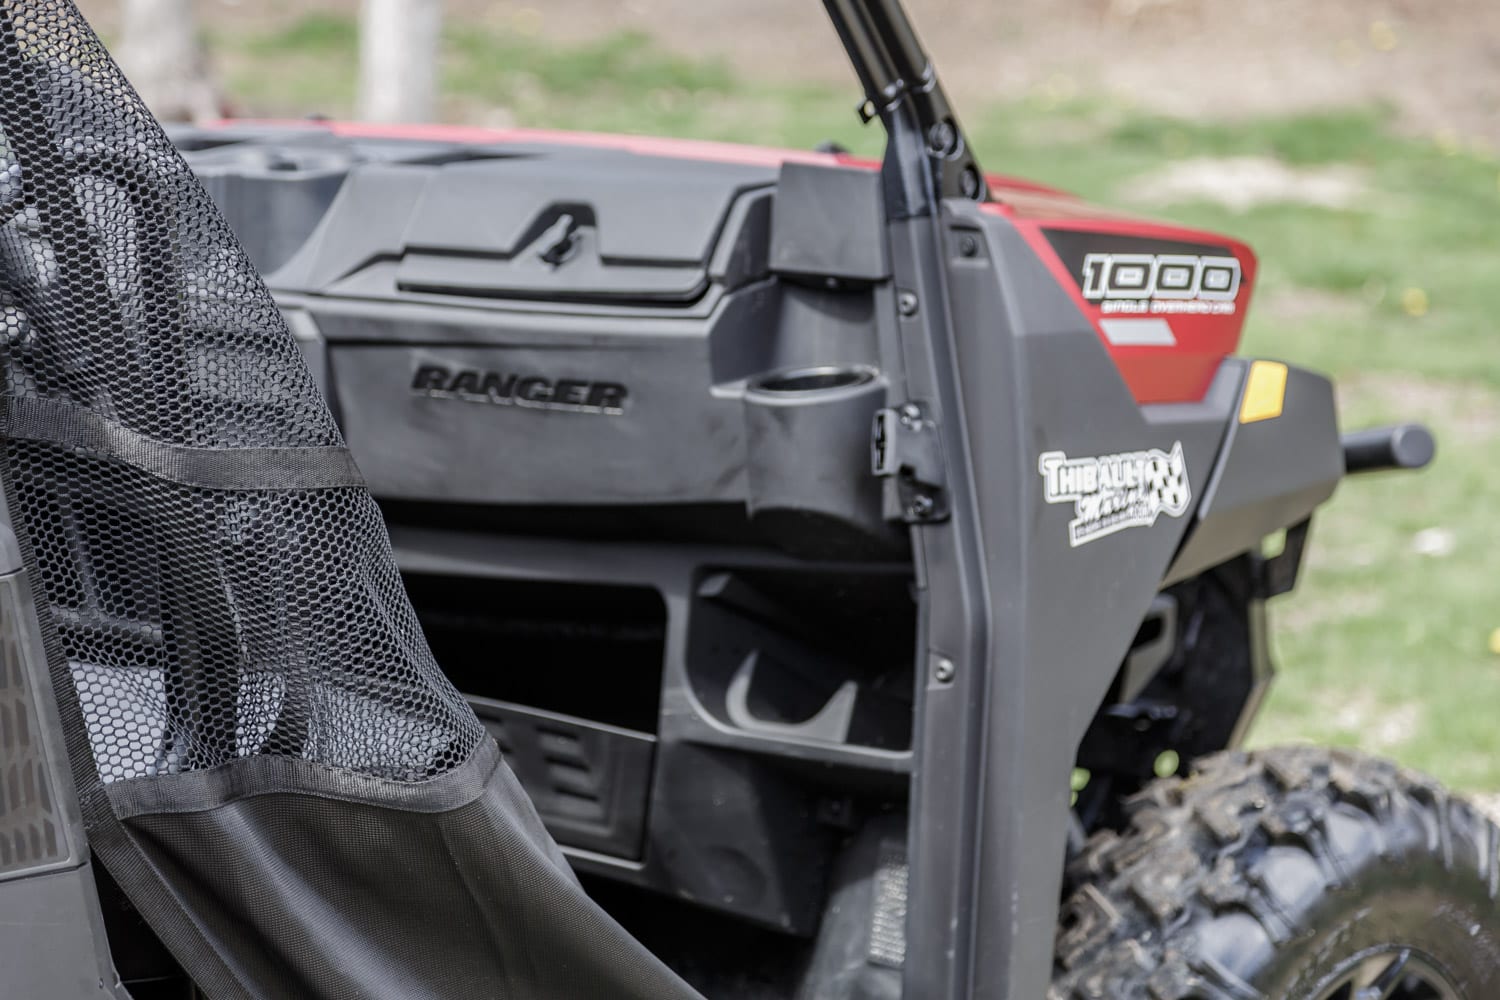
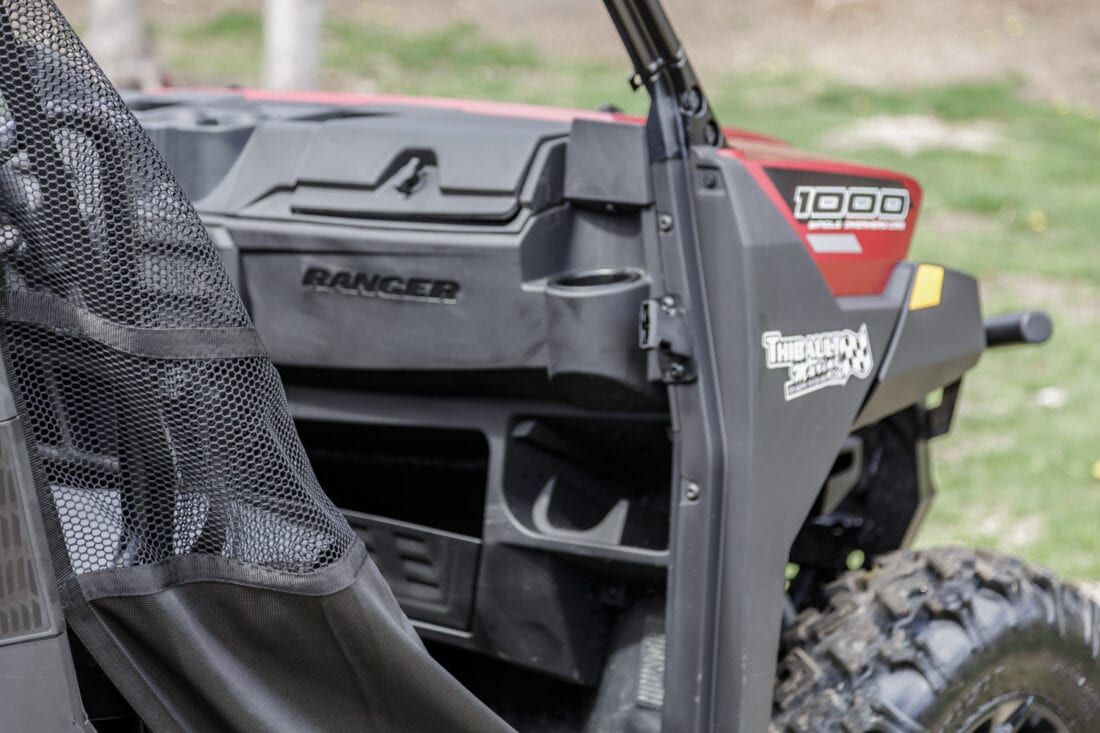
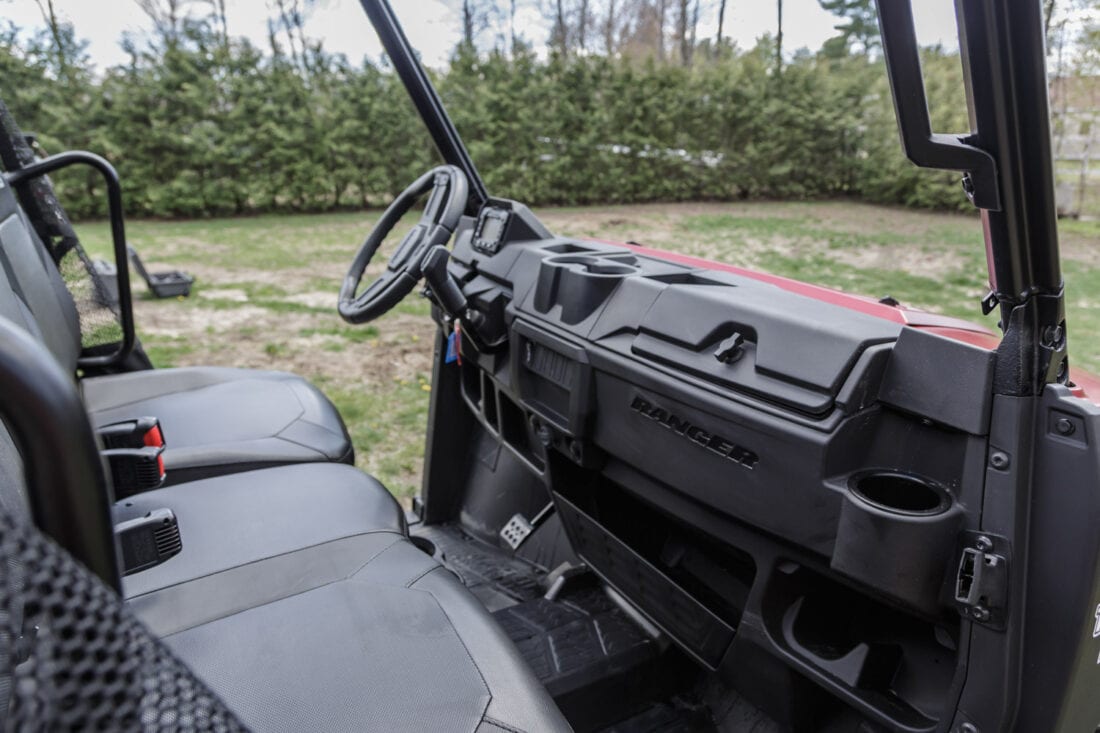
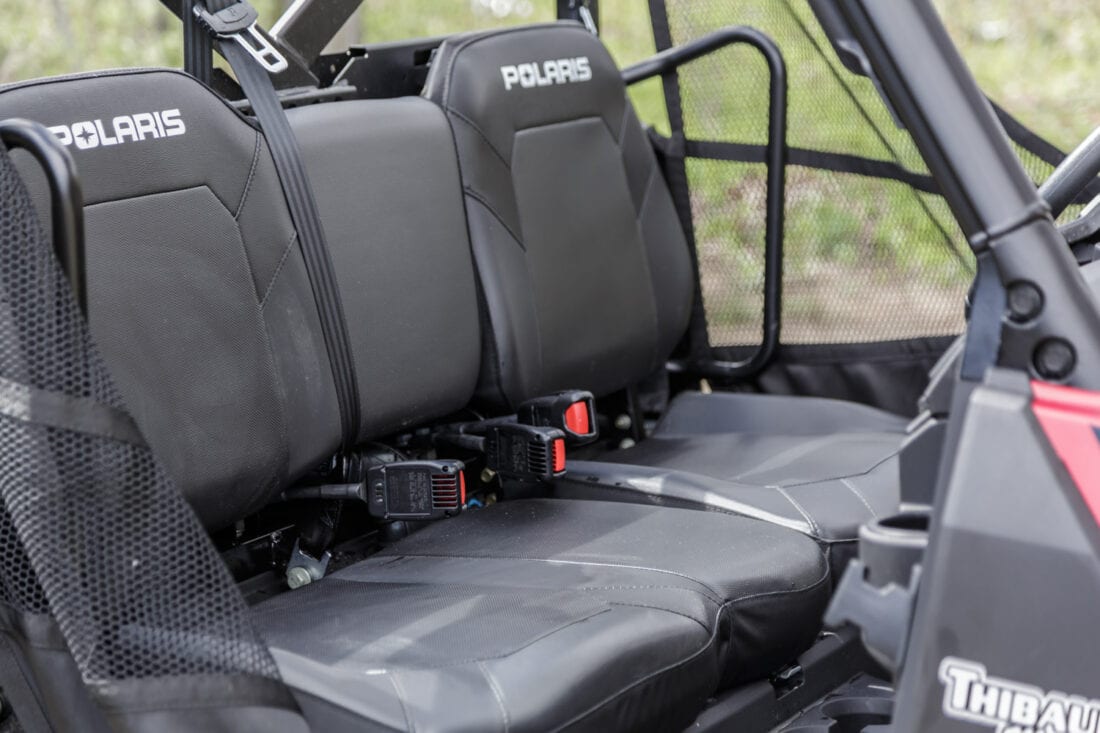
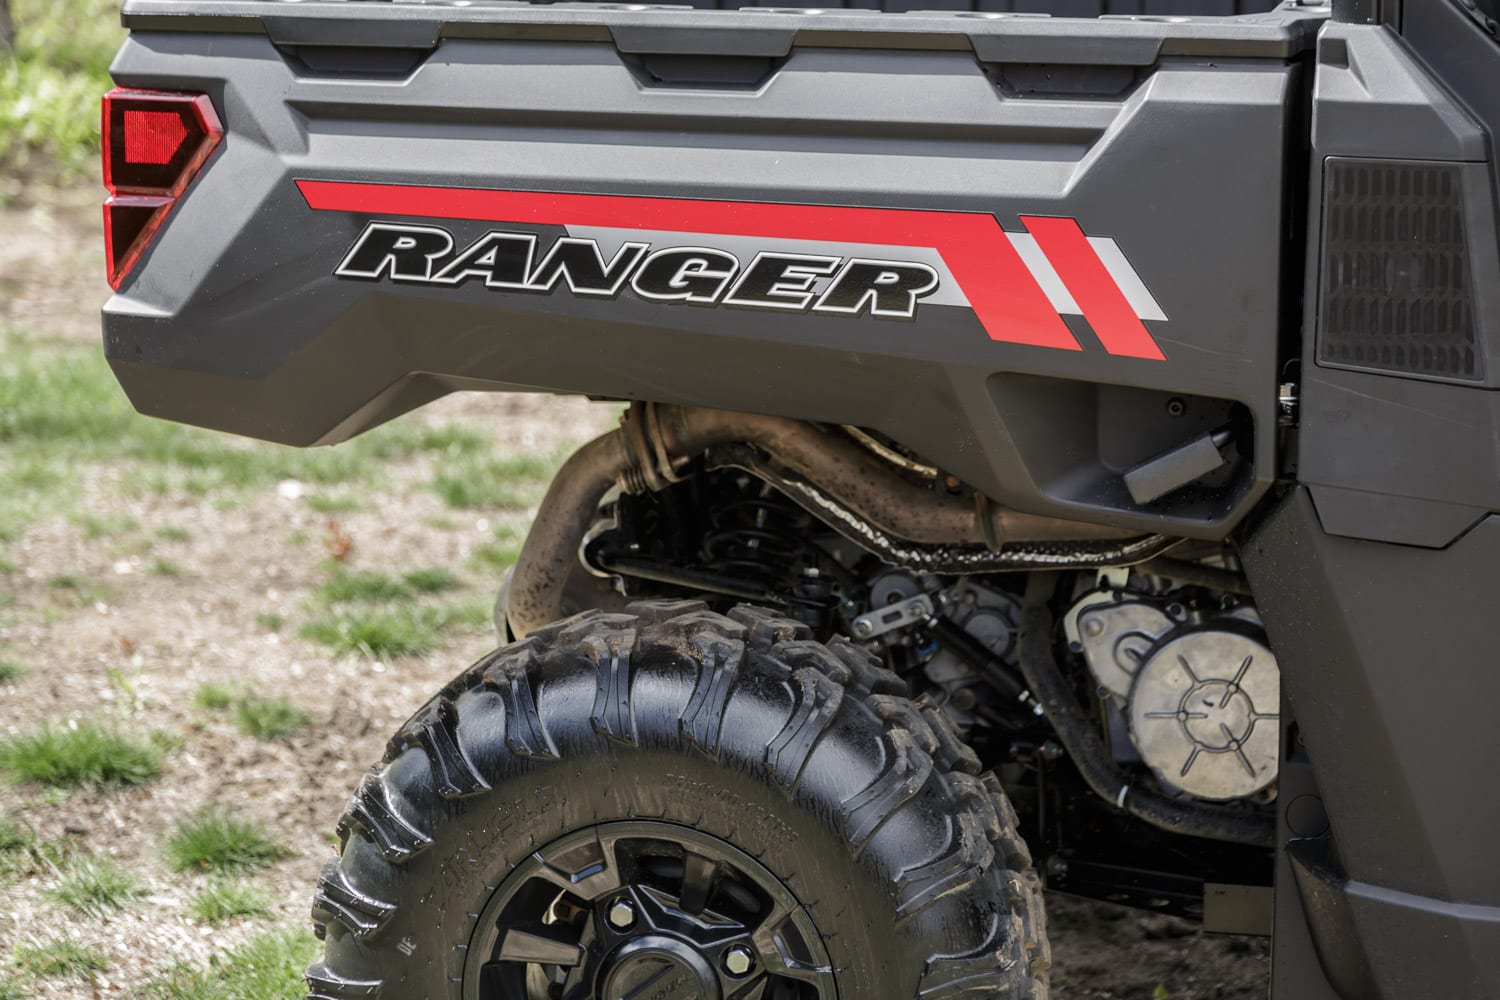
The Polaris Ranger 900 may very well be the most popular UTV of all time. Polaris sold so many of them that when they made the jump to a Ranger 1000 XP, they kept the 900 in the lineup as a lower cost alternative. The continued strong sales of the machine made it clear that the company needed to keep a machine in that slot, but the 900 was in desperate need of some updates, especially when the 1000 XP had a major revision that carried it to the top of the class. The answer is the 2021 Ranger 1000, one of the smoothest UTVs we’ve driven.
When Polaris unveiled the Ranger 1000, it caused some serious confusion as to what was going on in Minnesota. They had the Ranger 1000 XP, but now there was a new Ranger 1000 with less horsepower, a lower price and not as many variations as before? We asked a Polaris representative and he described it like a truck. You have one version of a truck with a basic setup and a smaller engine, and then you have the same truck that comes with more features, a bigger engine and a higher price. There’s a demand for both kinds of trucks, and there’s a similar demand for two versions of the Ranger.
The two Rangers share the same frame, have similar bodywork and a similar suspension design. In fact, much of the machine is similar to its big brother. But the engine is different. The Polaris rep added that they setout to see how they could retain aspects of the 900 engine but ended up creating a completely new motor. The Ranger 1000’s motor, like the XP version, is a 999cc Prostar twin, but the internals are different. The major thing you’ll notice is that the 1000 produces 61 horsepower compared to the XP’s 82 horsepower. Delivery is also strikingly different. While the XP delivers a snappy power curve that makes it fun to trail ride with as well as work, the Ranger 1000 motor feels almost electric. It is very smooth with the power delivery and it is perfect for work around the farm or property, while still being perfectly suited to cruising the trails.
One other thing about the difference between the two machines that will surprise you. Anyone who has ever ridden in a Ranger 1000 XP knows how quiet it is. It is so legendary for how quiet it is that other manufacturers use it as the benchmark for how quiet they try to get their machines to be. The only one we’ve known that came close is the Yamaha Wolverine X4, that is, until now. The Ranger 1000 is even better than the XP at being a quiet riding machine. You can set off on a trail ride and have a pleasant conversation with your passengers without trying to compete with the volume of the machine.
In the field report
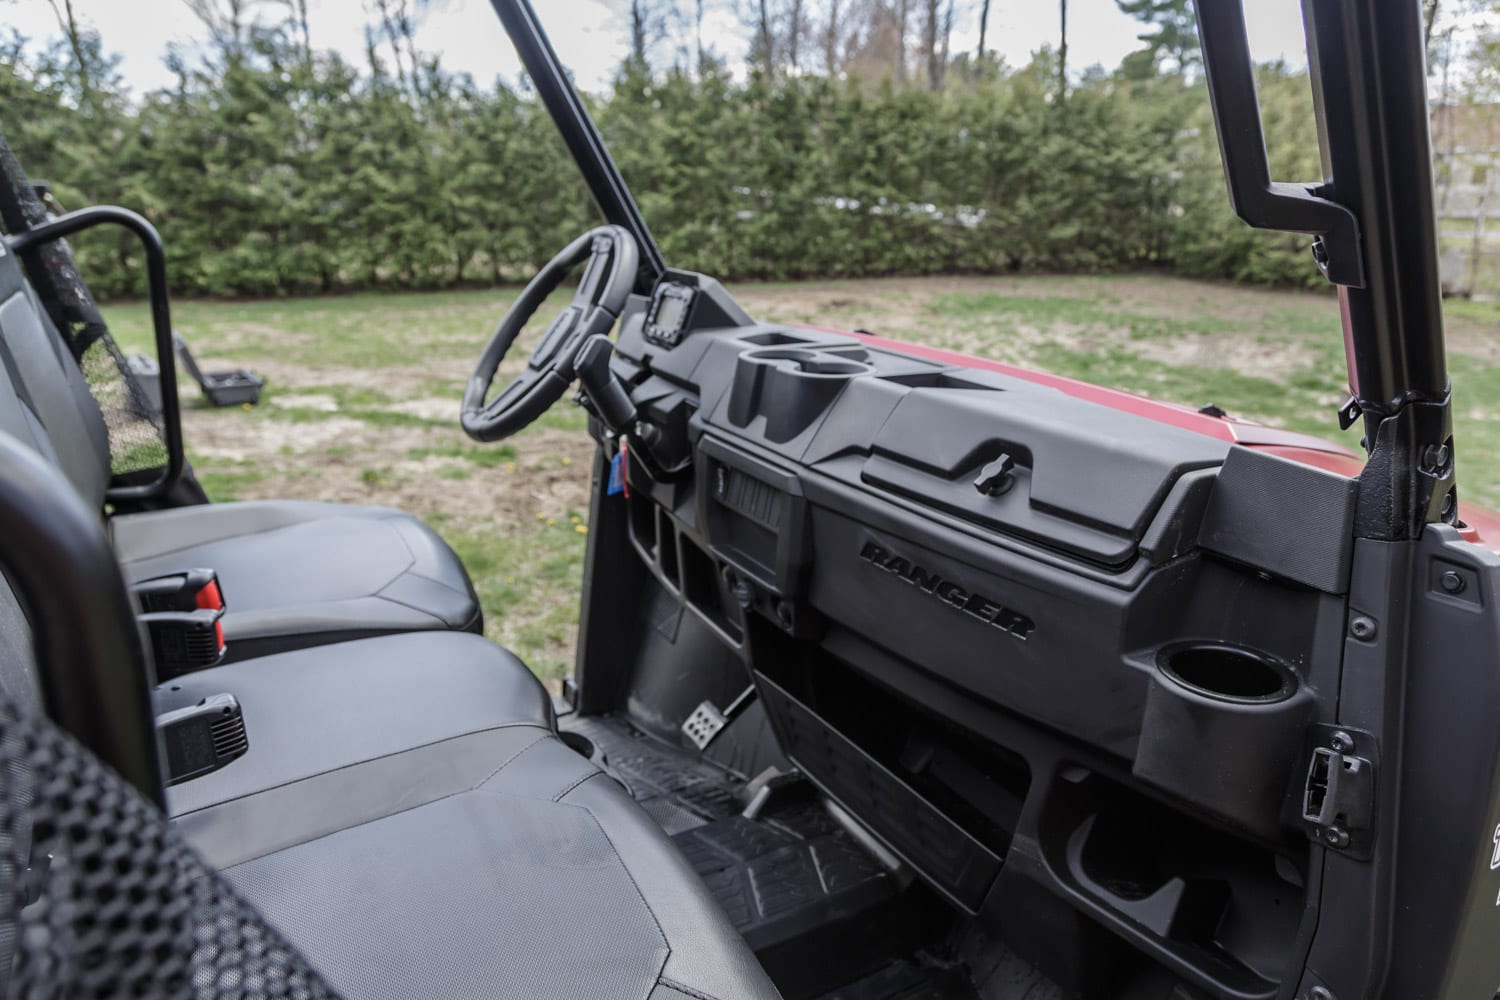
To test out the machine, we set out to find as many scenarios as we could to try it in a real setting where you’d find it. We headed over to a farm and got to work to start things off. We loaded up some feed bags and set out to take care of the animals. We didn’t come as close as we would have liked to meeting the Ranger’s 1,000-pound bed capacity. What we did load up didn’t tax the machine in any way. Like we said before, the machine is super quiet too, so no stampedes were caused. We hooked up a trailer to the machine’s 2-inch receiver hitch and actually towed a small tractor that brought us right to the 2,500-pound towing capacity with the trailer counted in too. The added tongue weight had us grabbing the spanner wrench for the rear shocks, but a few clicks and we were all good. You do feel the weight behind you when you’re trying to power along, but it handled it without causing us concern. A word to the wise, never tell a farmer you really want to see how a machine handles doing a day of normal farm chores. In the end, we got a good idea of how well the Ranger 1000 could handle the work, the farmer got a free day’s labor for us and we slept really well when we got home.
Next up, we set out for a combined trail ride and to check out some spots for hunting season. We had a chainsaw and some other gear we threw in the bed to clean up some brush but ended up using it to clear the trail from a downed tree. Now, we’ve actually used a couple of different Ranger 1000 models, and one came with a Polaris Pro 4,500 winch. If you buy a Ranger, make sure you get one of these. The pro model comes with synthetic rope and they have a rapid return function that reels the line back in super fast after you’re done with it. We winched the tree out without any issues, and the wireless remote is a big help, too.
While on the trail, we did notice that if you want to take the speed up a bit, you’ll find yourself wanting the XP model. The upper range of the power of the Ranger 1000 feels almost governed. It doesn’t cut out or anything, it just reaches its limit, and the machine is so smooth that as you’re hauling along, you’ll run out. It’s the side of us that loves speed and going fast down the trails. We know that there will be those of you that are attracted to the lower price tag and feel of the machine but will find yourself wanting more ponies when you initially thought you’d be happy with what the machine has to offer. That’s a small group of you, but you’re out there. We get it.
One really fun feature, and this is the same with the XP, too. If you plan to or need to use the machine to plow snow, you’re in for a treat. Polaris’ plow system connects right to the frame and can be driven on to. From there, plowing is so easy that it’s fun. You’ll be impressed with how much snow you can push, and the stock 26-inch Polaris PXT tires are pretty basic but get pretty good traction.
Should you buy one?
If you don’t need the added horsepower and/or package offerings of the XP 1000, the Ranger 1000 is a great machine. It is leaps and bounds better than the 900 it replaces and fits it’s intended audience perfectly. It is such a smooth machine that you’ll find yourself truly enjoying it and using it more than you even intend to. If you ae looking for a new Ranger, ask yourself what you need, because the answer may very well be the 2021 Polaris Ranger 1000.
.308 Winchester is rightfully one of the most popular cartridges among U.S. hunters. With a .308 round, you can take down medium to heavy animals, such as elk, at 300 to 500 yards. Also, since the ammo is widely available, you don’t have to suffer to get it.
On the downside, .308 Winchester rounds generate recoil energy between 15 and 18 foot-pounds, which some hunters find excessive. If .308 recoil is too much for you, you don’t have to quit using the round. Instead, minimize felt recoil and enjoy shooting the round by switching to one of the lowest recoil .308 rifles.
Here are some of the best .308 hunting rifles for hunters that prefer less recoil:
Replace your current rifle without overspending by buying the Ruger American Rifle Vortex Crossfire II Combo. It’s arguably the lowest-recoil .308 rifle you can get for less than $800.
However, don’t let the affordability deceive you. The Vortex Crossfire II is just as reliable and effective as many $1,000+ rifles. It even comes with a scope. Also, the rifle has a soft rubber butt pad that softens the kick when you shoot, making firing .308 rounds more accurate and less painful.
Another reason to love the Vortex Crossfire II is it weighs a bit more than other .308 hunting rifles on this list. The extra weight reduces how much recoil transfers to the shooter and minimizes muzzle rise. In summary, the Vortex Crossfire II is one of the best .308 hunting rifles to buy if you want a reliable low-recoil gun that won’t break the bank.
Henry Long Ranger
Do you prefer traditional-looking rifles? If so, the Henry Long Ranger might be for you. The hunting rifle features a 20-inch barrel for optimal accuracy and bullet velocity when shooting .308 rounds. It also has beautiful wood finishes on the stock and forestock.
Like the Vortex Crossfire II, the Henry Long Ranger weighs about seven pounds and reduces how much recoil transfers to the shooter. Also, the Henry Long Ranger has a thick rubber recoil pad on the base of the stock. The recoil pad cushions kickback, making shooting the rifle less injurious to your shoulder.
Nosler M21
If you have over $2,000 to spend on a low-recoil rifle, the Nosler M21 is worth considering. It’s one of the best .308 hunting rifles for precision shooters, and Nosler built this rifle to be reliable and durable in any terrain or weather.
The Nosler M21 also comes with a one-inch recoil pad that cushions the kickback when you fire a round. The thickness of the recoil pad keeps the rifle’s length of pull within a comfortable range to prevent awkward handling that might worsen felt recoil.
Lastly, the Nosler M21 has a threaded barrel where you can easily attach a suppressor or muzzle brake. Attaching either of these accessories will significantly reduce the rifle’s recoil.
Browning X-Bolt Speed Suppressor Ready
The Browning X-Bolt Speed earns its badge as one of the lowest recoil .308 rifles for hunters thanks to features like its radial muzzle brake and Inflex recoil pad. The radial muzzle brake on the barrel has side vents that reduce the force with which expanding gases explode from the muzzle to launch rounds. The result is less felt recoil when you shoot.
On the other hand, the Inflex recoil pad is one of the better recoil pads for minimizing felt recoil and protecting your shoulder when you fire. Lastly, the Browning X-Bolt Speed has a threaded muzzle where you can attach a suppressor to reduce recoil even more.
Springfield Waypoint 2020
The Springfield Waypoint 2020 is a good-looking firearm that delivers impressive performance. While it’s pricier than other rifles on our list, the Springfield Waypoint justifies its price tag with its precision. In fact, the manufacturer is so confident about the precision of this rifle that it offers a .75 MOA guarantee.
The Springfield Waypoint 2020 also gets top scores for reduced recoil. The rifle has less recoil because its integral machined recoil lug spreads out the force that ejects rounds from the muzzle. The rifle also has a removable SA Radial muzzle brake that minimizes kickback when attached.
Wilson Combat Tactical Hunter
Bolt action rifles aren’t for everyone. If you prefer hunting with a semi-automatic, the Wilson Combat Tactical Hunter is one of the best .308 hunting rifles to buy. It’s an AR-10 rifle built with premium components and a matching price tag of $3,000+.
Unlike a typical bolt action rifle, a gas-powered semi-automatic like the Wilson Combat Tactical Hunter spreads recoil across various components, leading to less recoil. The firearm’s recoil is tolerable enough to prevent soreness after a day of hunting.
Winchester XPR
The Winchester XPR is an affordable and effective bolt action rifle that has rightly earned a place among the lowest recoil .308 rifles. Its Inflex® Technology recoil pad reduces felt kickback, and the cross-mounted recoil lug minimizes recoil’s effect on shooting accuracy.
Several models of the rifle are available, such as the suppressor-ready Winchester XPR Stealth SR and the XPR Compact Scope Combo with detachable scope. Each option is available at a different price, allowing you to pick a rifle that matches your budget and shooting needs.
What to Look for in a Rifle
We’ve provided options to choose from if you want to buy the lowest recoil .308 rifle, but which should you choose? Picking the perfect low-recoil rifle requires taking several factors into consideration. For instance, you need to consider the price.
The most expensive rifles typically have premium components, but you don’t need something that expensive if you plan to use the firearm only a few times a year. Instead, pick a rifle that offers your preferred features without exceeding your budget. Below are the features to prioritize when looking for a rifle that fits your budget:
Reliability
You don’t want a rifle prone to misfiring or a firearm that might fall apart during use. Avoid such issues by buying a rifle from a manufacturer with a reputation for building firearms that stand the test of time. The gun should feature high-quality components and treatment that minimizes corrosion or rust, such as bluing or a Cerakote finish.
Accuracy
Hunting with an inaccurate rifle means you’ll be relying on Lady Luck to hit your targets. Since Lady Luck is unpredictable, opt for an accurate rifle that facilitates precision shooting. Accurate rifles typically come with an MOA guarantee, such as the Springfield Waypoint’s .75 MOA guarantee.
Fit
If a rifle is too long or heavy, you will have trouble handling it and experience felt recoil more intensely. Pick a rifle that you can comfortably shoulder and maneuver to track targets.
The rifle should also have a comfortable length of pull (LOP) – the distance between the trigger and the base of the butt plate or recoil pad. A too-short or long LOP will make shooting uncomfortable and inaccurate.
Action
You can opt for a break, bolt, lever, or semi-automatic action rifle. Break action rifles typically hold one or two rounds and require swinging open the barrel to eject and chamber rounds.
Bolt-action rifles have a bolt at the top that you manually slide to eject a spent round and load a fresh one. Such rifles are famous for their accuracy, reliability, and durability. Lever-action rifles work like bolt-action rifles but require working a lever under the shoulder stock to eject and load rounds. On the other hand, semi-automatics automatically eject and load rounds after each shot to help you shoot faster.
Barrel Length
The best .308 hunting rifles have a long barrel (between 18 and 24 inches). The longer the barrel, the greater the accuracy and bullet velocity. However, the longer the barrel, the heavier your rifle will be, which can cause portability and maneuverability issues. Choose a rifle with a barrel long enough to deliver the best shot without compromising your ability to maneuver the weapon conveniently.
Make Any Rifle Lower-Recoil Using a Suppressor
Attaching the right suppressor to your hunting rifle can make the weapon look more lethal and tactical. Besides aesthetics, hunting with a high-quality suppressor has several other benefits.
Benefits of Using a Rifle Suppressor
Reduced Recoil
You can turn your hunting firearm into the lowest recoil .308 rifle by attaching a quality suppressor. A suppressor goes on the muzzle of a firearm to slow the explosive escape of expanding propellant gas, leading to less recoil.
Hearing Protection
Besides reducing recoil, slowing the release of expanding propellant gas reduces gunfire noise. A rifle without a suppressor can be louder than 140 decibels, which is loud enough to cause immediate harm to your hearing. A high-quality suppressor can reduce gunfire noise by up to 36 decibels.
More Stealth When Hunting
A suppressor can also hide your muzzle flash. If prey can’t hear your shot or see your muzzle flash, your location will remain hidden, and you can catch other nearby prey unawares.
Situational Awareness
Sudden muzzle flash in the dark can temporarily render you blind, while unsuppressed gunfire can make you temporarily deaf. A suppressor prevents such outcomes, so you can maintain complete situational awareness and avoid dangers during a hunt.
Invest in a Suppressor Today!
Regardless of which gun you choose from our lowest recoil .308 rifle list, reduce the recoil further by attaching a suppressor. Besides reducing recoil, a suppressor will protect your eyes and ears so you can enjoy hunting for many more ears.
Don’t know where to buy the best suppressor for your rifle? Visit our Silencer Central store today to shop for state-of-the-art .308 rifle suppressors.
So you are in the market for a red dot? Well, it’s not as simple as telling you which is the best red dot sight to buy, or you wouldn’t be on the hunt!
There are many red dots available and while we won’t be able to give you a simple: buy this sight for your gun.
We will provide you with unbiased feedback on as many red dot sights as we can get out hands-on. This post will be forever updated and changed as optics are introduced and/or discontinued.
We want to keep you up to date on red dots because we LOVE red dots.
The internet is full of financial shamers. What does that mean? Post your budget AR build in an AR-15 Facebook group, and you’ll immediately be called poor.
That’s stupid.
Lynx Defense is a premium gear manufacturer and what some would call expensive.
But we will never insult someone for buying what they can afford. We hope it’s our products, but we want people to love firearms and gear as much as we do at the end of the day.
People have families, and money doesn’t grow on trees, so obviously, you want to get the most bang for your buck out of whatever you buy, including your gun’s red dot sight.
Let me be clear there is a difference in quality budget red dots and cheap red dots. We will not be including any cheap red dot sights because they are not quality optics.
So let’s dive in. These will not be in order, so read through each one and determine what’s best for you.
Sig Romeo5
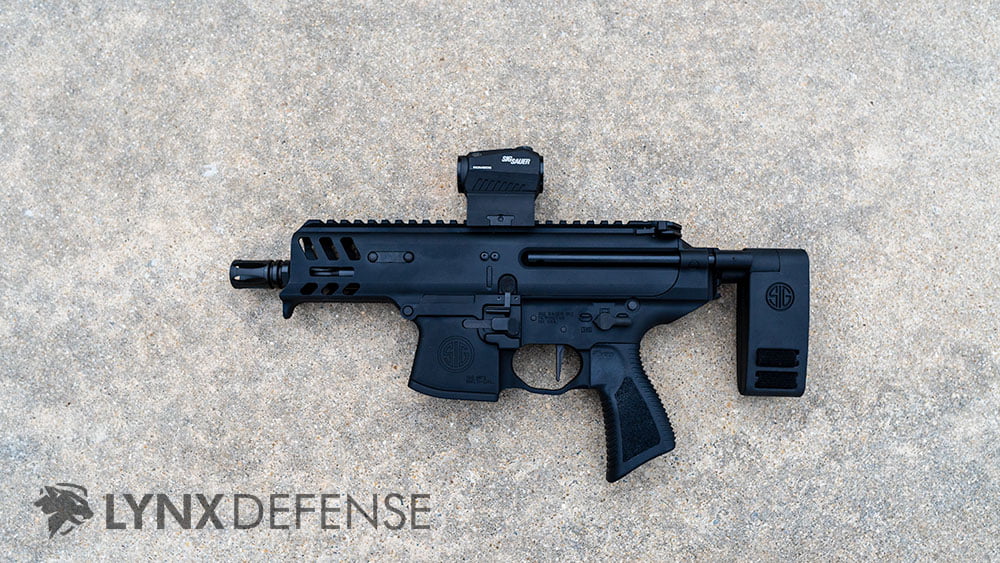
The Sig Romeo 5 red dot sight is one of the most popular red dot sights of 2022. The reason for that is actually pretty obvious when you take a deep look into the Sig Romeo5. We even conducted a full Sig Romeo 5 review.
Sig Sauer Copperhead with Sig Romeo5 Red Dot Sight
First and foremost, the price point is fantastic.
Currently, the Sig Romeo 5 is $114.99 on Amazon.
With that price comes a quality red dot for the price—the Romero5 features over 40,000 hours of battery life on the medium setting.
The MOTAC feature is great to save battery life, and the fact it is IPX-7 waterproof rated makes this a top-notch red dot sight for the price.
This red dot pairs great with any length AR-15 or pistol-caliber carbine. I ran my Sig Romeo5 on my Sig Sauer Copperhead. It now lives on my EPC-9 carbine.
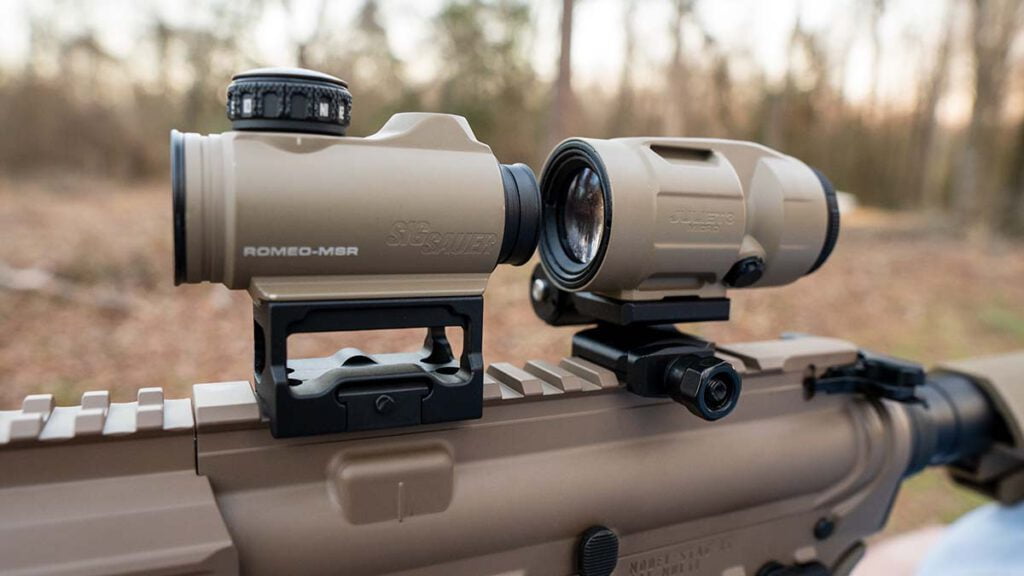
Sig Sauer MSR and Juliet 3 Micro Magnifier
Next up is also a Sig Sauer product but with a little flair.
The Sig Sauer MSR by itself is a decent optic but with the extremely reasonable price of the MSR and Juliet 3 Micro Magnifier, you get a fantastic package for a great price.
The magnifier Romeo-MSR combo adds the ability to get extra distance out of your red dot sight and makes it an extremely attractive option.
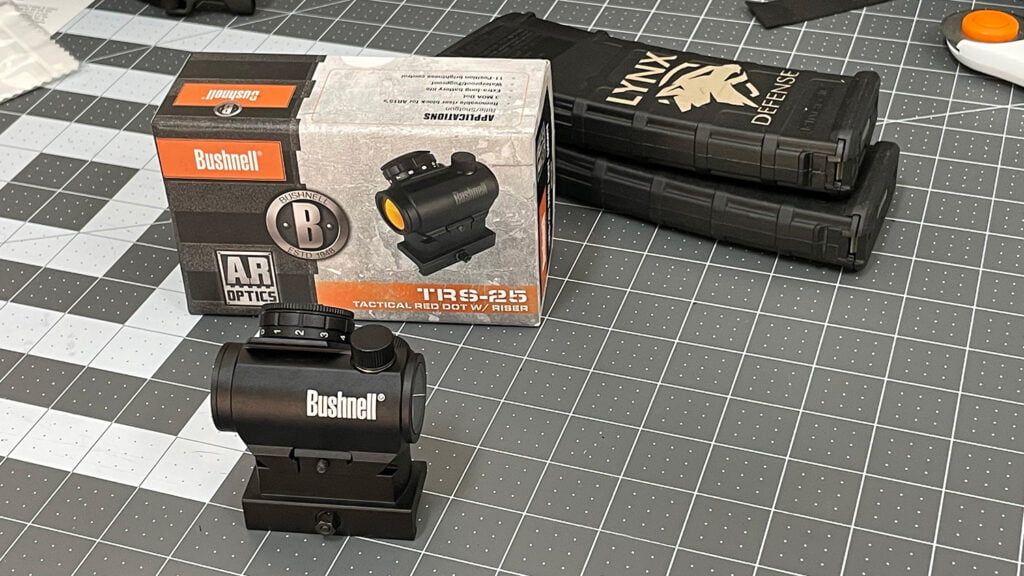
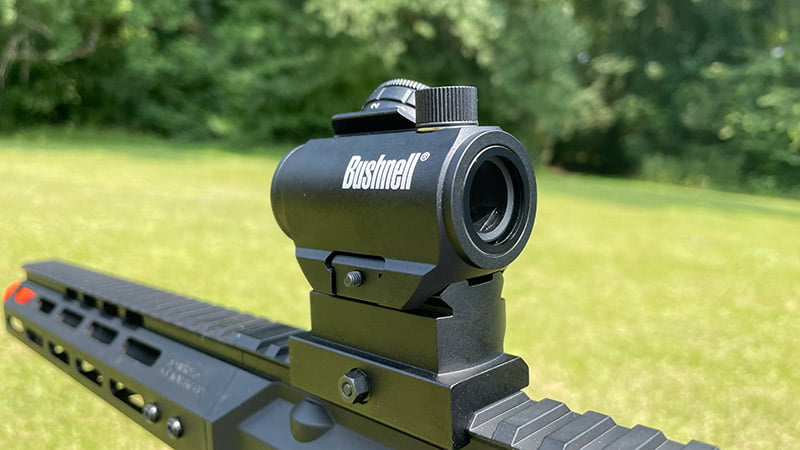
Bushnell TRS-25
The Bushnell TRS-25 is probably the least expensive red dot sight on the market. It’s the cheapest red dot sight I’d be comfortable recommending to people.
Many people are drawn to the Bushnell TRS-25 because it’s an extremely affordable red dot sight.
Amazon regularly has these for around $50-$70 and actually has a pretty decent set of features.
The TRS-25 comes with a 1913 rise block included, which really makes this a bang for your buck.
If your funds are tight and you need a decent optic for the least amount of money possible, grab the TRS-25.
This is an optic you can buy and not feel bad about buying a new optic later and not waste a ton of money.
Don’t go any cheaper than this optic. This is the bottom of the acceptable optic list.
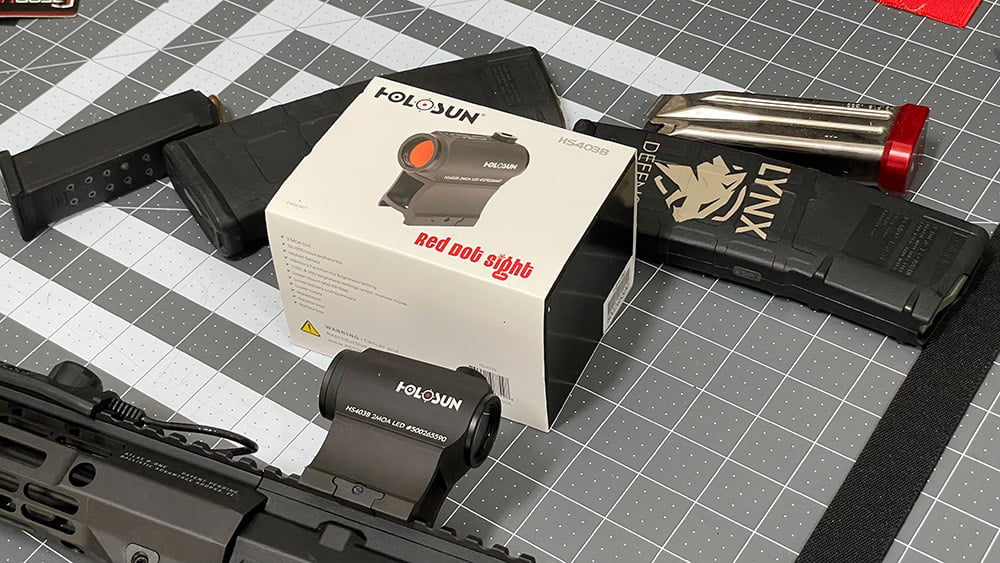
Holosun HS-403B
If you are looking for a decent middle-of-the-road optic, look no further than the Holosun HS-403B a feature-packed sub $200 red dot sight.
This might be the best red for sight for your AR-15! But, let us take a look at why it may be the best optic for you.
The Holosun HS403B is a compact optic with an included riser mount. The only catch is if you don’t like the height of the mount you are stuck with it unless you purchase another mount.
If you are looking for a red dot sight that’s ready to go this is definitely a good option for you.
There are other Holosun optics that I like a little better due to their similar price and increased feature set.
Primary Arms SLx MD-25 Gen 2
The Primary Arms SLx MD-25 is a 2MOA dot that is near perfect for almost any rifle.
Primary Arms SLx MD-25 Gen 2
The ACSS Reticle in the SLx MD-25 has to be one of my favorite reticles. It incorporates the chevron and the horseshoe design to top off the near-perfect combo.
If you are on the hunt for a feature-rich optic that comes with an included mount that packs some quality don’t skip on the PA SLx MD-25.
The battery life for this optic is exceptional and the included riser is near perfect. You can read our Primary Arms SLx MD-25 review in our review section.
Primary Arms SLx 1X MicroPrism
One of the best optics going into the New Year is the PA SLx 1x Micro Prism sight. This thing is small, hence “micro” prism, but it packs a punch!
I absolutely love mine and have run it on a number of guns. I even did a full review of the 1 x Micro Prism.
The best part of the PA SLX 1x Micro Prism is the price and feature set. The fact it has 45,000 hours of battery life and comes in under $300 is incredible.
The overall build quality of the optic is fantastic and if you want something that will make your good look fantastic, this will definitely do that.
If you want the best AR-15 red dot sight grab the SLx with the Cyclops reticle!
Best Overall Budget Red Dot Sight
I’m not in the business of telling people what will work best for them. This country is all about individuals determining what’s best for them.
I’m just trying to provide you with my feedback and help you come to a decision.
So here’s a hypothetical list of things to consider when deciding what budget red dot sight to buy.
Size
Weight
Field of View
Battery Life
Reticle
Features (Shake Awake, included mount, etc.)
So, while it would be nice just to paste a picture of the best overall budget red dot sight, it’s hard to say. Personally, I think the best overall budget red dot sight available right now is the Sig Romeo 5.
An up and company called AT3 also has a decent budget red dot sight called the AT3 RD-50 Pro.
Best High-End Red Dot Sights
High-end red dot sights are all the rage on the Gram! After all, who doesn’t love rocking the best?
I know I do, and I’ve had my fair share of top-tier red dot sights. I really stick to three of my favorites.
Here are the top high-end red dot sights
EOTech HWS XPS2
The EOTech HWS is one of the most popular high-end red dot sight.
Honey Badger SD with an EOTech HWS-XPS2
But it’s slightly more than just your average red dot. More than average, why you ask?
It’s holographic!
But what does holographic mean? Well, I’m glad you asked.
Basically, without getting all scientific, a holographic weapon sight keeps the reticle positioned in an exact area of the glass. So if you move the weapon left or right, the reticle will stay on target.
This allows for accurate shooting even while moving or if something is blocking your optics viewports, such as snow or dirt.
The EOTech HWS XPS2 is my go-to red dot sight if money is not an issue.
I like how the EOTech looks on my guns, and the function and ease of use are top-tier.
Trijicon MRO
The Trijicon MRO came onto the scene in 2015 and has been making the climb to the top ever since.
Noveske N4-PDW with Trijicon MRO Scalarworks MRO Mount
Trijicon is already a well-known sight and optic manufacturer. I personally run their night sights on my Glock 19.
While most people will know the name because of the Trijicon ACOG optic.
MRO stands for Miniature Rifle Optic, and while it’s not the smallest on the block, it’s still smaller than some of its other counterparts, like the EOTech series.
N4 Noveske with 1/3 Co-witness Trijicon MRO
I like the MRO. It’s purpose-built and rugged.
The Trijicon MRO isn’t trying to be something it’s not.
It’s a small package with a wide field of view. The battery life is an impressive 5 years on the medium setting.
The MRO has been put through several torture tests and came through with flying colors.
The mounting options are endless, and from the factory, it comes with several options: no mount, 1/3 co-witness, and full co-witness.
Aimpoint Micro T-2
The Aimpoint Micro H-1 and I go way back. I feel like I’ve got to say this. The H-1 is like your high school prom date. All pretty, dressed up, ready to go out and possibly make some mistakes and get lucky, who knows.
The Aimpoint Micro T-2 is the new hotness so buy it if you’re looking for an Aimpoint Micro. I run my Micro H-1 on the Battle Arms Development rifle pictured below.
Anyway. I purchased the Aimpoint Micro H-1 after owning the EOTech 512 for some time. If you know anything about the EOTech 512, it’s bulky.
So getting the H-1 really changed things up a bit. It was a slim, compact red dot sight that I loved right off the bat.
What’s the best red dot sight?
Picking the best optic for you is essential. It’s hard to choose because there are so many options, but first and foremost, you want to narrow down your price range.
Once you do that, you can start to narrow in on what optics are in that price range that will work for you.
Then, you can look at things like reticles and features such as shake awake, weight, and battery life.
Once you have your price range, you can break down and analyze what red dot sight is going to work for you.
Ultimately, the most important thing is choosing what’s best for you, not what some biased reviewer will recommend.
At Lynx Defense, we try to give unbiased reviews, but of course, we can only really comment on the red dot sights that we’ve used. The ones included in this article are the ones that we’ve got our hands on so far.
Now, of course, we’re in an endless battle to try to get more, how we can bring them to you, and try to review them.
How to pick the best red dot for you?
Picking the best red dot for you is probably one of the hardest questions you’ll ask yourself during your search for a sight.
The fact of the matter is that you’ve probably already decided to get a red dot sight.
There are so many options that you could get an LVPO, a red dot, a holographic weapon sight, or just run iron sights.
It really comes down to what will work best for you and your specific use case or mission.
I think it’s imperative to look at all of your options.
Again, as I’ve stated, it’s important to look at your price range, start from there, and narrow down your options.
After you have a price range, it’s pretty easy to find the high end of your price range, the mid-tier, and then the low end. But to figure out what’s truly just marketing nonsense and what’s a fact, you really want to go to somebody you can trust.
The internet is full of reviews. However, you never know who you can trust or who’s just trying to make a dollar. So a full disclaimer, Lynx Defense has obviously created links throughout this entire post. This entire post has pictures, optics, and links to all the different places across the web you can buy them. Most of those links are affiliate links. We make a small commission based on what you buy if you use our link to get there. Now, basically, what that entails is if we provided you with helpful information, it’s just a reward for us but doesn’t cost you a dime more.
We review all of our optics fairly and give them a fair shake. We are not beholding to any company for any reason under any circumstance. That’s why you’ll see we’ll link to Amazon, to Primary Arms, to EOTech. It doesn’t matter to us. We will link to them if it’s relevant.
We don’t care if you buy using our links or not. So, keep in mind when you’re looking at reviews, and you constantly see the same site or person push the same company over and over again, they could be getting paid for those reviews.
We hear all the time, “I bought this because X, Y, Z influencer said, this was the optic to buy.” When in reality, it didn’t fit their needs at all.
Then they ended up being unhappy with their purchase. That’s not at all what we aim to do here at Lynx Defense. We educate, and then you make the decision based on your needs.
This is why we’re so committed to this particular article and keeping it up to date year after year, month after month, as new optics become available and as we were able to get our hands on new optics.
Obviously, we don’t get a chance to test every single model of every single configuration of every optic ever made.
That would be awesome.
But unfortunately, we don’t have the time or the financial resources to really make that happen.
I really don’t know anybody who does.
So, of course, this post will be somewhat biased in that these are the ones we’ve got our hands on thus far.
These are what we recommend. We’re also going to tell you, that we don’t recommend going below a certain point.
For example, the Bushnell TRS-25 is pretty much the bottom. We don’t recommend going anything below that.
No optic that’s just total plastic, without any metal, it’s out the door.
Anything below the $50, $60, or $70 price point of the Bushnell TRS-25 is a no-go for us.
So keep in mind we’re not going to recommend low quality at all. No matter how cheap it is.
We’re not trying to make a buck. We’re trying to educate.
If we can get rewarded for the time we have invested for this by using the affiliate, awesome, but all we really want is for you to learn something from our work.
Red Dot Sight Reticle Options
Red dot sights have many different reticles, and most of the time, the one that is “best” boils down to your personal preference.
There are different schools of thought that some are better than others for target acquisition, but I won’t go down that road.
Single Red Dot
The single dot reticle is just that, a single dot. That dot can range in MOA and crispness.
Low-end optics could see a lot of distortion around the dot, whereas high-quality optics should have a crisp and clean dot.
The dot can range anywhere from 1-6 MOA.
Circle Red Dot
Circle dots reticles have a circle around the center dot.
These have much faster target acquisitions since you can place your target in the circle for faster but less precise hits.
Personally, this is one of my favorite reticles.
Ranging
Ranging reticles don’t have a standard look. They can vary in shape and size, and function. But the purpose of them remains the same, and they help you adjust your optic for shooting longer or shorter range.
You don’t see this reticle often in AR-15 red dot sights.
Multi Red Dot
Multi-dot reticles are pretty much what they sound like, multiple dots. Typically, multiple dot reticles are used for ranging.
The top dot could be sighted in for 50 or 100 yards, and then you would be able to determine what your bottom dot would be at 150 – 200 yards.
These reticles are popular in EoTech HWS (holographic weapon sights).
Horseshoe/Dot
The horseshoe dot reticle is similar to the circle dot reticle. The minor difference of the circle is open at the bottom creates a horseshoe instead of a complete circle.
Like the ACSS-CQB reticle from the Primary Arms MD-25 above, the center dot is a chevron and not a plain dot. The horseshoe/dot reticles can interchange the center dot and over have ranging dots below the larger center dot.
Crosshair
The crosshair reticle is also not a common red dot reticle. These are typically found in magnification scopes. Some lower-end optics, like NcStar, feature these types of reticles.
Chevron
Chevron reticles look like an up arrow without the tail. This is a reticle popularized by the Trijicon ACOG optic.
What is an MOA Dot?
You often see MOA, which means “minutes of angle,” all over red dot optics product pages.
MOA is a unit of measurement of a circle and is used to determine the size of the dot and how much it will cover your sight picture at a specific distance.
MOA dots usually are between 2 – 6 MOA, and the smaller the number, the less the dot will cover your target.
Other Optic Options
If you are set on a red dot sight the above options are probably the best. But are you interested in other optics?
Low Power Variable Optic (LVPO)
If you are looking for something more than a red dot you might want to get a Low Power Variable Optic (LVPO) like the Vortex Strike Eagle.
Best Red Dot Sight for Astigmatism
Red dot sights can be hell for someone with astigmatism. The dot won’t be crisp and you’ll have difficulty acquiring targets and having a positive shooting experience.
I’ve found that prism optics are probably your best bet when it comes to astigmatism.
My current favorite Prism optic is the Primary Arms SLx 1x Micro Prism.
Iron Sights
If you want to have a more manual optic you can get backup flip-up sights in case your battery dies or the optic fails.
If you want to accessorize your new AR-15 further, read our best AR-15 Flashlight, AR-15 Drum Magazine Guide, and the Best Tactical Flashlight.
Randy Haines of Amery was bowhunting recently when an antlered buck walked near his tree stand in Polk County.
He drew his bow, took aim at the deer and released an arrow, which found its mark.
The events to this point were similar to thousands of other hunting stories in Wisconsin this fall.
But when Haines recovered the animal, he noticed something different.
The young buck had a whitish rump patch and a black tip on its tail. Its facial markings, too, were not something seen on most whitetails.
It was a mule deer, a species found in the western U.S. and parts of Canada and Mexico.
The closest established population of wild mule deer to Wisconsin is found in central South Dakota, according to the U.S. Fish and Wildlife Service.
Haines contacted the Wisconsin Department of Natural Resources and told them about his kill. Conservation wardens and wildlife biologists with the DNR confirmed it was a mule deer.
Haines acted legally in shooting and tagging the animal. He now has one of the most unusual Wisconsin hunting tales of 2015.
The big question is: Where did the muley come from?
Is it a wild deer that traveled from the western U.S. into Wisconsin? Or is it an escapee from a captive facility?
Escapes from deer farms are especially concerning for the health of Wisconsin’s wild deer herd.
If you’re looking at probabilities, a wild mule deer has never been documented traveling 600 or more miles on its own power from its native range into Wisconsin.
On the other hand, animals escape from Wisconsin deer farms or shooting preserves at least several times a year.
State wildlife officials weren’t drawing any conclusions Wednesday.
“At this point, we really don’t know where (the mule deer) came from,” said Bob Nack, DNR big game section chief. “It’s not something we see every day, that’s for sure.”
Nack said the DNR had received reports in recent weeks of a mule deer being sighted and captured on trail cams in northwestern Wisconsin.
So when the kill was reported, it wasn’t a complete surprise.
Conservation wardens inspected the dead buck and found no signs of ear tags or other markings typical of a captive animal, Nack said.
Tissue samples were taken from the mule deer and submitted by the DNR for chronic wasting disease testing.
The deer was not aged by the department, but is thought to be 11/2 to 21/2 years old. It had relatively small, forked antlers and its body appeared to be in good condition.
White-tailed deer, along with their bigger relatives elk (about 200 animals) and moose (a dozen or so), are the only members of the deer family typically found in the wild in Wisconsin.
But a few mule deer have been documented over the years in the Badger State, including one that was killed in 1988, according to Kevin Wallenfang, DNR big game ecologist.
And in 2011, a Vernon County resident sent trail cam photos to Nack that showed what appeared to be a young mule deer.
In was not determined in either case, however, whether the mule deer were wild or escapees.
Could a mule deer walk from its native range to Wisconsin?
If it did, it would have to pass through Minnesota, which has no established mule deer population, according to Pete Takash, fish and wildlife information program leader for the Minnesota Department of Natural Resources.
Depending on where they live, some mule deer do migrate, said Kent Hersey, big game project leader for the Utah Division of Wildlife Resources.
Hersey said typical mule deer movements are 5 to 10 miles between winter and summer ranges, with the extremes being 0 and 100.
Hersey, a native of Pennsylvania, said Wisconsin doesn’t feature typical mule deer habitat.
“I’ve never heard of a mule deer east of the Mississippi River,” Hersey said. “But in some wildlife, a young male will do surprising things.”
Hersey also said this: “You never can discount it being a release from a captive facility.”
Wisconsin has about 500 captive deer facilities. The Department of Agriculture, Trade and Consumer Protection on Wednesday did not provide information on the number of facilities in Wisconsin that have mule deer.
But at least some shooting preserves have captive mule deer and allow paying customers to kill the animals.
Deer Haven Acres in Adams offers mule deer hunting on its fenced shooting preserve, according to its website. And Huntingtripsrus.com advertises mule deer hunts at unspecified locations in Wisconsin.
As chronic wasting disease continues to spread across Wisconsin and other states and provinces in North America, wildlife health advocates are advising increased scrutiny on deer farming practices and regulations.
So a young mule deer several hundred miles out of place isn’t just a novelty that draws interest on hunting chat rooms.
It also raises alarm bells with those concerned about the future of Wisconsin’s wild deer resource.
“I’ve lived in this area my entire life, and I’ve never seen or heard of a wild mule deer here,” said Dave Clausen, a retired veterinarian and former chairman of the Natural Resources Board from Amery. “Maybe we’ll start to see a whole herd of them. Or more likely, it was an animal that escaped. Hopefully we’ll be able to find out.”
Deer farmers are required to report escaped animals. No such reports were available Wednesday.
State wildlife officials didn’t rule out the possibility of it being a wild deer.
“You don’t expect a mule deer in Wisconsin, but when it comes to wildlife, nothing surprises me any more,” Nack said.
Baked buffalo fish is juicy and flaky with wonderfully crispy skin. Flavorful cajun-seasoned fish is stuffed with parsley and topped with a lemon garlic butter sauce. This simple whole buffalo fish recipe looks impressive and serves as a wonderful light and delicious main dish!
Cooking a whole fish can seem intimidating but it’s actually very easy. This recipe will walk you through how to bake a whole fish so that it’s juicy and perfectly tender. Starting with a fish that is already gutted and scaled all you have to do is cover it in your favorite seasonings and then bake!
If you have never heard of buffalo fish before you might be thinking of buffalo chicken wings but using fish instead. But despite its name, buffalo fish is a type of freshwater fish.
Instead of covering it with a creamy buffalo sauce, in this easy recipe, a whole buffalo fish is stuffed with fresh parsley and lemon and then covered in a buttery cajun garlic sauce and lemon slices. It’s an impressive baked fish dinner that everyone will enjoy!
Whole buffalo fish. Fresh fish is incredibly flavorful and it has a wonderful texture. If you can’t get your hands on fresh, make sure to completely thaw before using.
Cajun seasoning. This bold, smoky, and flavorful spice blend is added to the butter sauce.
Lemon. Adds a bright citrus flavor to the fish. Lemon juice is poured over the fish and lemon slices are cooked on top.
Garlic cloves. Minced and added to the sauce to give the fish a bolder garlic flavor and aroma. It complements lemon and seafood very well.
A fresh sprig of thyme. Cooked on top of the fish.
Butter. Melted to create the cajun lemon garlic sauce and helps the skin become extra crispy.
Fresh parsley. Stuffed inside the fish cavity to flavor the inside.
How to make baked buffalo fish recipe
Its best to use fresh fish for this recipe. If you have a frozen buffalo fish, thaw it first. Its best to leave the fish in the refrigerator overnight or until thawed completely. You can also leave the fish on the counter for couples hours.
Remove scales and clean whole buffalo fish. Rinse very well with cold running water and place on the parchment paper lined baking tray. Preheat the oven to 400 degrees Fahrenheit.
Meanwhile prepare your seasoning mix. Melt butter and mix it with Cajun spices, minced or finely chopped garlic and half of the lemon, juiced. Make slits in the fish and cover it with the butter mixture.
Add some inside the fish as well. Place parsley in the fish cavity along with leftover lemon slices. Place slices on top of the fish with thyme springs(optionally).
Bake for 30 minutes or more, depending on the size of the fish. The internal temperature of fully cooked fish should be at least 145 degrees.
What kind of fish is it
Buffalo fish or bigmouth buffalo is a type of fish and not only a cooking style. This freshwater fish is native to the rivers and streams of North America.
It is a large bottom-dwelling fish with greyish/brownish colored skin. Because of its size and shape buffalo fish is often confused with the common carp, but these are two different fish varieties.
While buffalo fish is not as common as other types of fish, it is a tasty whitefish known for its sweet flavor that’s both delicate and flavorful without being fishy tasting.
Because of its slightly firm texture, this fish holds up really well when grilled, baked, or stir-fried.
Substitutions
Buffalo fish. Catfish is a good substitute for buffalo fish.
Seasoning. Creole seasoning or Old Bay seasoning. You could also simply use a blend of cayenne pepper, smoked or regular paprika, black pepper, onion powder, and garlic powder.
Fresh herbs. Use whatever herbs you love! Sprigs of fresh rosemary, oregano, cilantro, or tarragon would taste amazing in this baked buffalo fish recipe.
Variations
If you want to make actual buffalo-style buffalo fish, cover fish fillets with buffalo sauce then bake until tender.
Roast with baby gold potatoes, fingerling potatoes, cherry tomatoes, asparagus, or onions to make a richly flavored and easy side dish.
Frequently asked questions
Side dishes
You can add zucchinis and cherry tomatoes to the baking tray to cook together with the fish. They will turn out lovely. If feeding a crowd cook some white or brown rice or potatoes. It could be roasted potatoes, mashed or scalloped. Or simply boiled with dill and butter- my favorite!
Make a fresh spring salad with romaine lettuce or arugula, kale, cherry tomatoes, onion and cucumbers. Drizzle olive oil and a little bit of balsamic vinegar and enjoy your healthy dinner!
Another great side dishes for white fish are broccoli, Brussels sprouts or asparagus. Perfect for late dinners and very healthy!
Leftovers
Store baked buffalo fish leftovers in the air tight container in the fridge for up to 5 days. Reheat in the microwave for about 1 minutes. Don’t overheat or it will overcook the fish and it may become dry. You can also reheat buffalo fish in the oven. It will take about 5 minutes to reheat with the temperature on 400 degrees Fahrenheit.
Or use you oven broiler! No time needed to preheat, just pop it in the oven and broil for couple minutes. Watch closely, it may burn fast.
More seafood recipes
Ninja Foodi cod recipe
Argentinian shrimp recipe
Air fryer haddock
Air fryer stuffed salmon
Cuttlefish recipe
Whole catfish recipe
Air fryer frozen cod
Ninja Foodi frozen salmon
Baked shrimp oreganata
John Dory recipe
Hope you will like this Baked Buffalo fish recipe as much as we do. Rate the recipe if you like it and leave a comment below if you have any questions or suggestions.
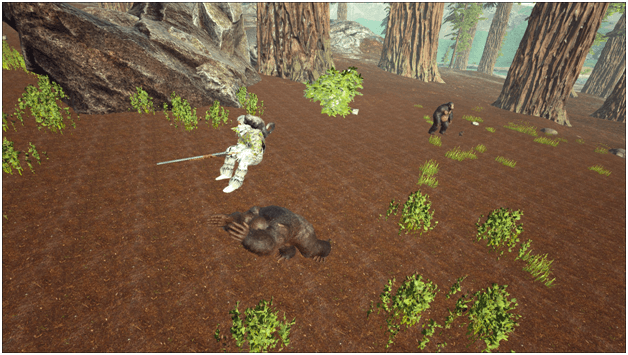
The Gigantopithecus while being observed is docile and just forages berries all day, but when approached, it is extremely territorial and will attack relentlessly those who invade its space.
While Gigantopithecus are adept at picking berries, they can also be taught by their masters to harvest fibers from bushes as it enjoys picking from plants and bushes over most activities.
One of the advantages of having a Gigantopithecus is its ability to toss survivors which can be used strategically to get to hard to reach places.
Check Out Our Other Creature Guides
Shinehorn
Yutyrannus
Megatherium
Mesopithecus
Abilities
Throw Rider
The Gigantopithecus can throw its rider or small dinos great distances or heights.
Throw RiderDefault Controls:
RMB (for PC)
LT (for Xbox)
L2 (for PS4)
Throw Carried DinosDefault Controls:
Press Hold C (for PC)
Right Stick (for Xbox)
Right Stick (for PS4)
Uses
Resource Harvesting
Being adept at harvesting from bushes and plants, the Gigantopithecus can gather a good amount of berries and even fiber.
Defender
Being able to wear helmets, these creatures have a good amount of defense and their base damage is good enough to damage attacker as well as the knockback from their attacks can push away threats.
Damage Dealer
The Gigantopithecus can deal a lot of damage to enemies due to their fast attacks as well as their ability to catch up to enemies.
Transportation
As a multipurpose mount, the Gigantopithecus can carry a rider and act like an extension of the rider, to assist in swimming, running and even fending off even the largest dino’s.
How to Tame Gigantopithecus?
Gigantopithecus are passively tamed which means you need to carry a food item that it eats in your last inventory slot..
Approaching behind the Gigantopithecus is the best route to feed it because If sensed, the Gigantopithecus may attack and it will prolong the taming process or even end up with you getting killed.
Wearing the Ghillie Armor to mask your presence will give the opportunity to feed the Gigantopithecus safely which you need to repeat until the taming bar is filled.
Food
Kibble
Regular Kibble
Other Food
Vegetables
Mejo berries
Other Berries
Saddle
The Gigantopithecus does not need a saddle to be ridden and there are none to be crafted for it but it is possible for it to wear a helmet.
Breeding
Baby
After mating the female Gigantopithecus will gestate and birth a baby Gigantopithecus.
Drops
Resources Harvested From Gigantopithecus Body
Raw Meat
Hide
Variants
Aberrant Gigantopithecus
Aberrant Gigantopithecus can be found in the Aberration map.
Location
Gigantopithecus is usually found in the redwood forests in secluded areas where it can forage in peace.
Maps where there are Gigantopithecus:
The Island
The Center
Ragnarok
Valguero
Gigantopithecus Spawn Location:
The following are spawn maps where the Gigantopithecus can be found
The Island: https://ark.gamepedia.com/Spawn_Map_(The_Island)
The Center: https://ark.gamepedia.com/Spawn_Map_(The_Center)
The Gigantopithecus is a peculiar mount capable of carrying a shoulder mount, a rider and the rider’s shoulder mount, it can chuck the rider and its shoulder mount high walls, assisting in infiltrating bases.
Giving the feeling of wearing a monkey suit when mounted on the Gigantopithecus, owners feel like they are a powerful creature, capable of pushing even larger creatures around.
You can also use the Gigantopithecus in a rousing game of pass the dodo with your tribe or allies to pass the time.
Damages to agriculture across Texas as a result of feral swine problems can add up quickly in areas where the unwanted animals are multiplying at alarming rates. From crop losses, fence damages, contamination of water sources and the potential for the spread of disease, farmers and ranchers are concerned about the escalating problems feral swine pose and the growing costs of dealing with the problem.
But a few Texas property owners are discovering that, like turning lemons into lemonade, feral swine problems can be turned inside out to become a source of non-traditional farm or ranch income.
Leave it to the entrepreneurial spirit of Americans, especially Texans, who can see an opportunity even when one doesn’t seem to exist.
(See related story: Feral hog numbers explode in US and worldwide)
In spite of all the well deserved bad press feral swine have accumulated over the years, there are two reasons that a few (and growing number of) Texans view the wild and wooly creatures in a positive light. The first would be those who either enjoy hunting the creatures or those who accept payment to allow others to hunt them on their property.
Believe it or not, some exotic hunting ranches in Texas charge as much as $900 to target and shoot a large ‘wild boar’. On the low end, hunters pay around $120 to hunt large wild hogs on hunting leases.
The second group of wild swine fans in Texas consists of wild/exotic meat processors and their many customers, mostly from Europe, who favor wild boar meat and often consider it a delicacy. One such “natural” meat company, Frontier Meats of Ft. Worth, markets their popular wild boar bacon to both a growing domestic and foreign buyer base.
In both cases, and in most instances, these ‘wild boars’ are what most of us call feral hogs trapped live on farms and ranches all across Texas and held in specially designed holding pens and sold to buyers for cash.
According to a comprehensive study conducted by a number of academic and government agencies, traditionally the wild boar is a game animal hunted and served in the Northern and Eastern European countries. A taste for this meat remains in Europe. Therefore, Europe is a targeted market for the distribution and sale of Texas feral swine meat.
In the United States, wild boar meat is viewed as an exotic meat served at game meat restaurants, or as a source meat for sausage and jerky products. Therefore, meat brokers catering to the game meat restaurant trade and producers who make a further processed added value meat product are targets for sales efforts.
Feral hog opportunity
A fledgling marketing opportunity also exists in the United States. Direct marketing of wild boar meats through select grocery store chains is being tried in a few test markets to gauge the interest for direct sale of individually packaged branded name wild boar meat.
The laboratory testing of the meat derived from the Texas feral swine indicates that on average it tends to carry less fat than normal domestic swine, making the nutritional information labels look more inviting to a health conscious consumer. By using large slaughter and cutting plants such as Frontier Meats in North Texas and Southern Wild Game in Devine (South Texas), the quality of the meat and the cuts can be monitored more closely and presented to the customer in a pleasing format that makes the product more appealing to a final consumer.
It’s interesting to note that wild game meat processors who market wild swine meat are subject to both stringent USDA and European Union rules and inspections.
As far as how profitable trapping feral swine can be for property owners, the latest available numbers indicate the average price per pound for live animals ranges greatly from 20 cents a pound for animals under 100 pounds to as much as 60 cents a pound for larger swine. If the animal is being purchased by an exotic game ranch for hunting purposes, only boars are allowed by state law. And it should be noted that the Texas Animal health Commission (TAHC) requires all holding pens to meet strict guidelines to prevent feral swine from escaping and/or mixing with domestic swine, and strict record keeping is required on all trapped feral swine. Only disease free animals can be sold.
Already, nearly fifty farms and ranches have received permits for TAHC approved holding pens, so it appears that many farms and ranches are beginning to embrace the idea of turning lemons into lemonade—or in this case, wild swine into bacon and sausage.
For more information about approved holding pen requirements, click here.
"Master the art of precision shooting with dry firing air rifles. Enhance your aiming skills, trigger control, and muscle memory without using ammunition. Discover...
"Understanding the Legalities: Felon Ownership of Air Rifles in Tennessee"
can a felon own an air rifle in tennessee?
In the state of Tennessee, the ownership...
")
")
")
")
")