The 6.5 Creedmoor is beloved by many for its long-range shooting capabilities.
However, the 6.8 Western recently emerged as a worthy contender to dethrone the 6.5 as everyone’s favorite cartridge.
Is that possible?
When comparing the 6.8 Western Vs 6.5 Creedmoor, which one comes out on top?
Let’s find out.
6.8 Western Vs 6.5 Creedmoor
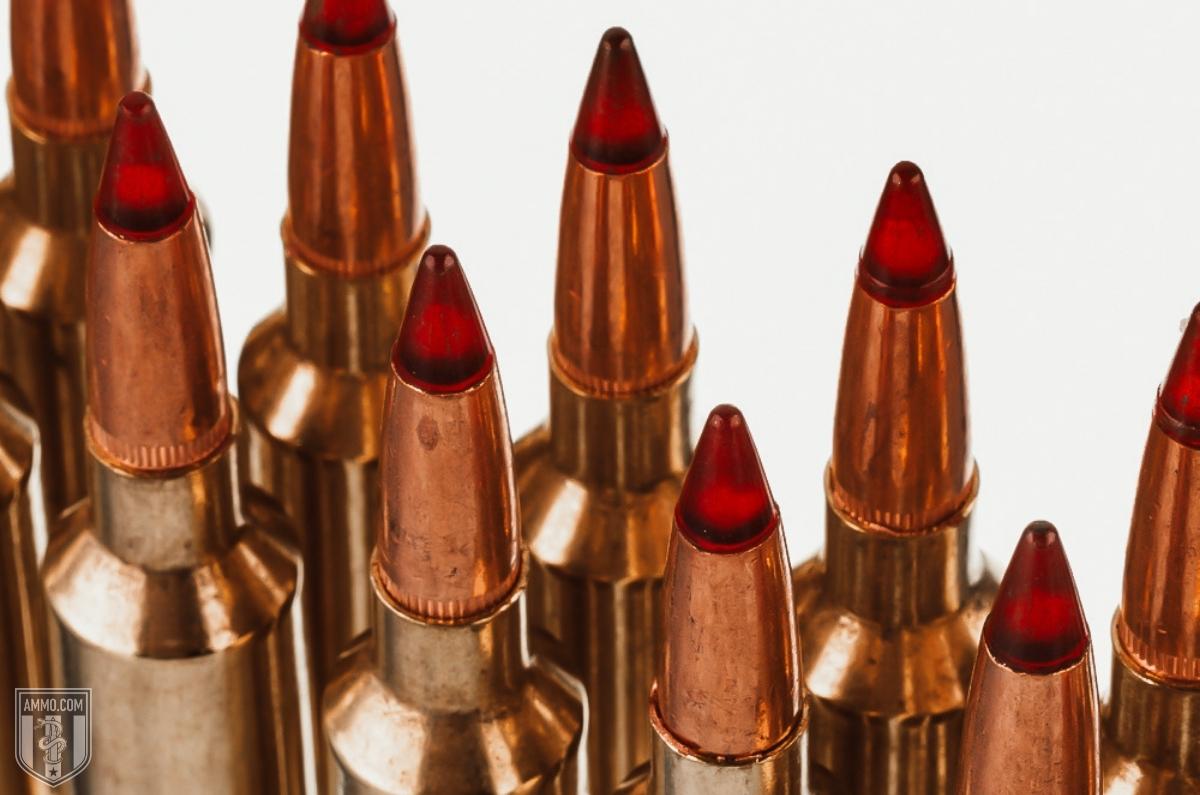
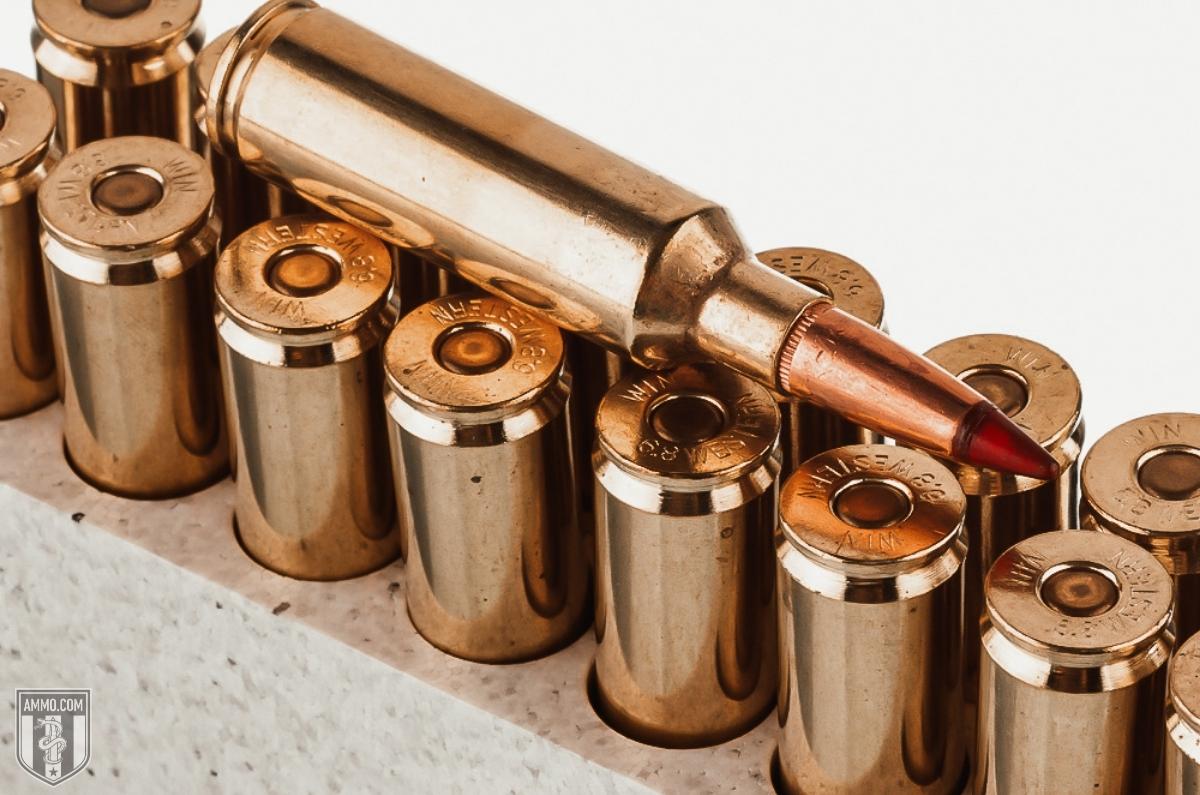
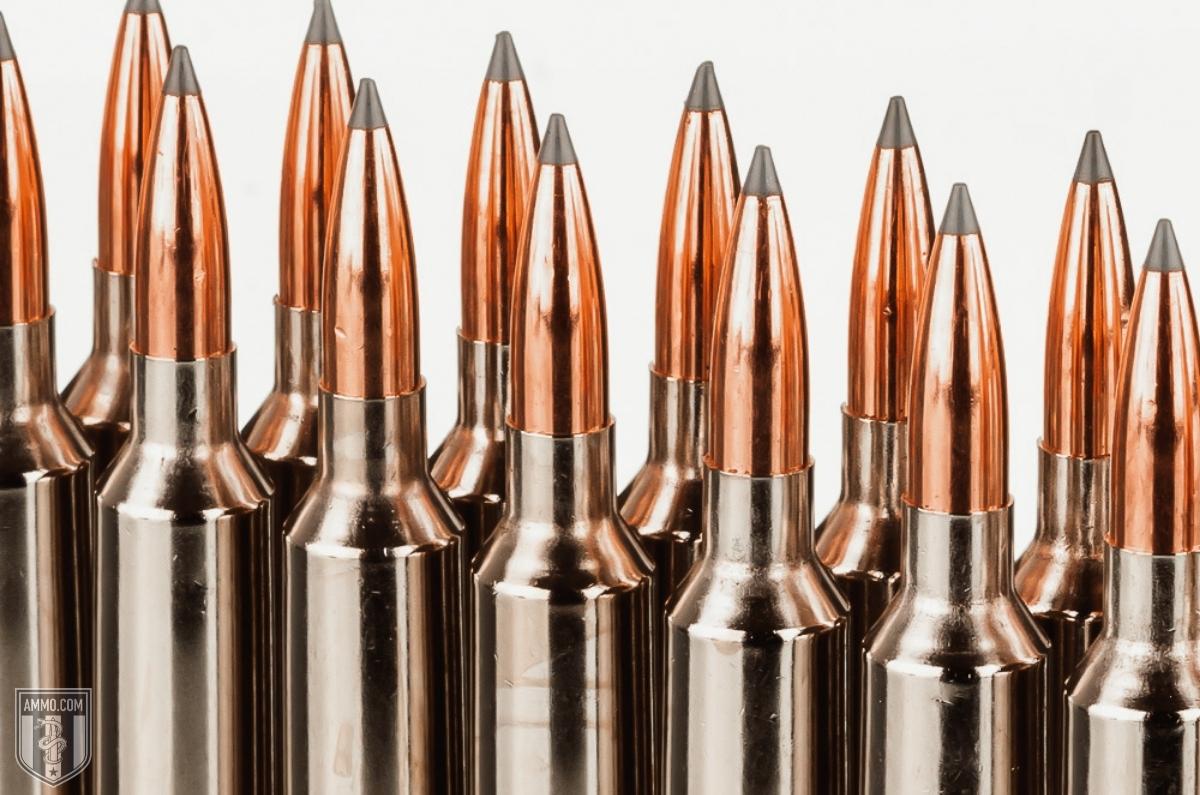
The 6.5 Creedmoor cartridge and 6.8 Western cartridge look similar to each other and the 270 WSM; in fact, if you’re not paying close attention, it would be easy to mix them up.
However, don’t let their similar appearances fool you into thinking they perform exactly the same.
We’ll walk through both calibers regarding their performance and specs to decide a winner for each category.
At the end of the article, we will count the winner of each category to determine a winner.
Cartridge Specs
As I mentioned, the 6.8 Western round and 6.5 Creedmoor round have a similar appearance, but there are noticeable differences if you know where to look.
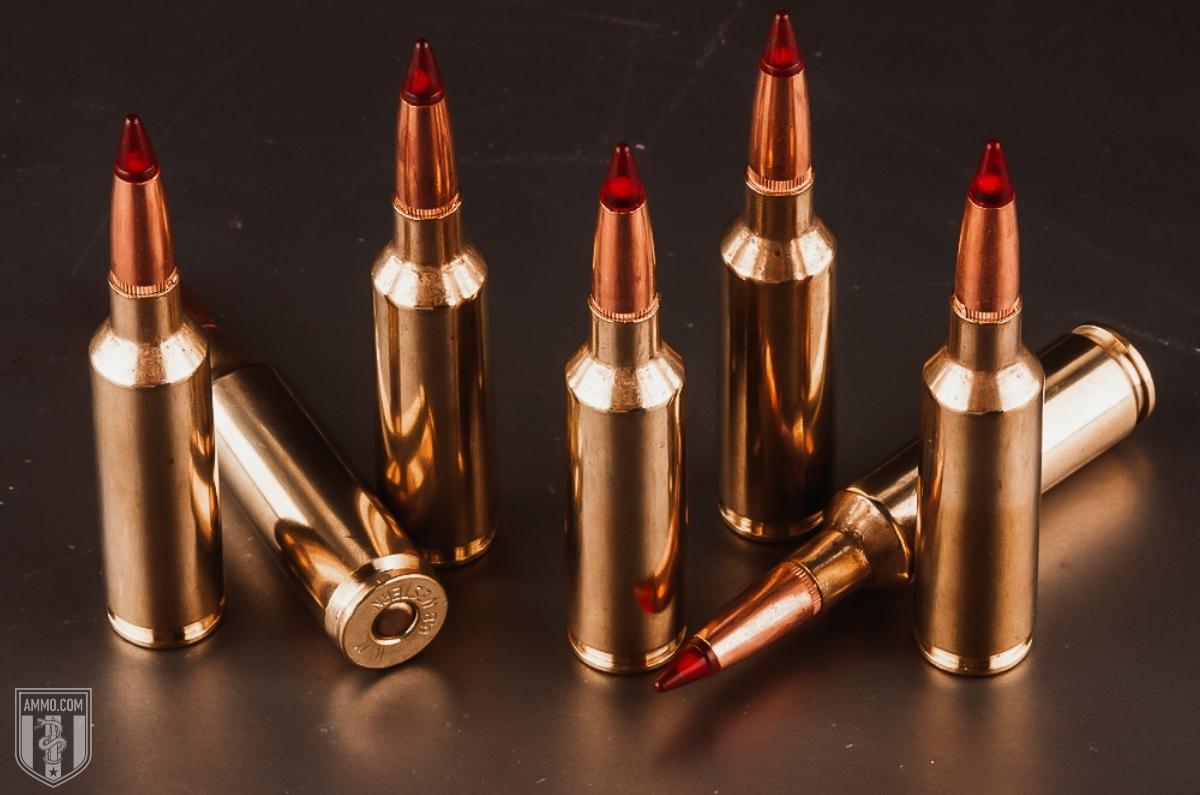
Let’s start with the bullets; the 6.5 Creedmoor uses a .264″ bullet while the 6.8 Western bullet is .277″.
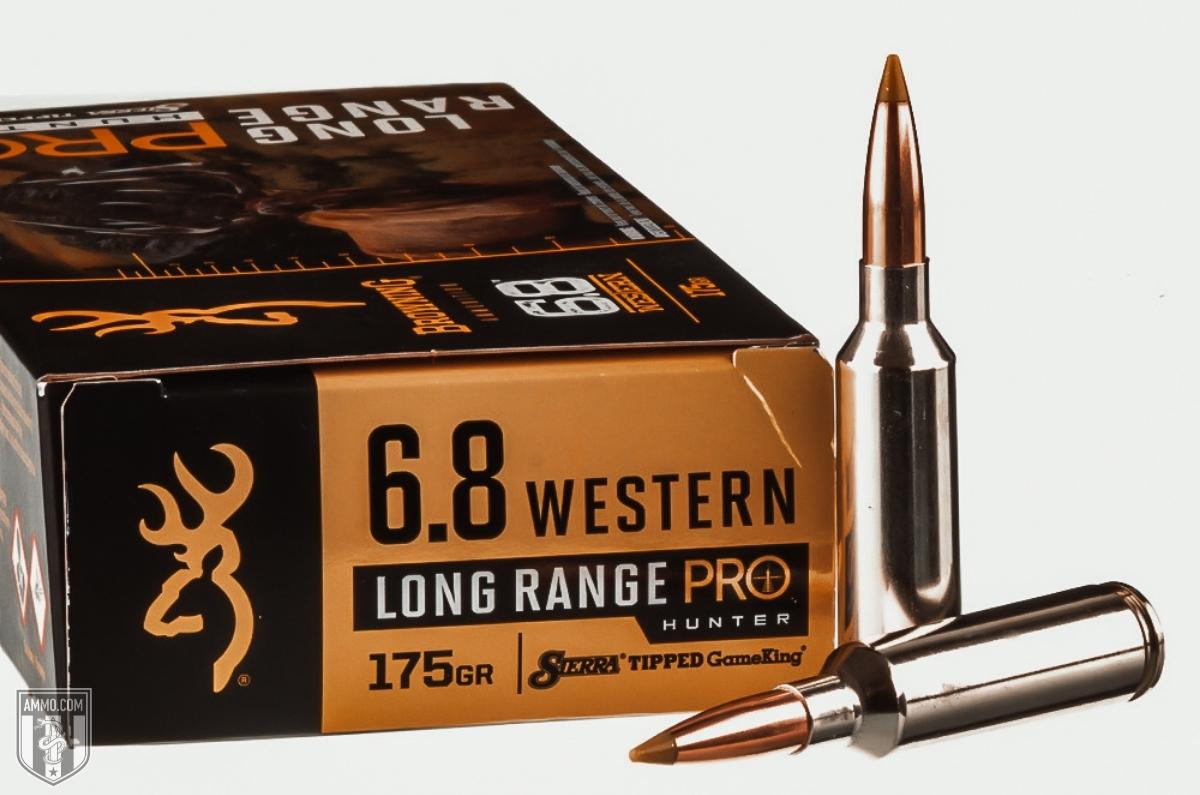
The larger 6.8 Western bullet typically comes in 165-grain – 175 gr. It’s also offered in a 130-grain bullet.
The typical 6.5 Creedmoor bullet ranges in weight from 120 gr to 147gr.
The 6.8 Western has a case length of 2.02″ and a cartridge overall length (COAL) of 2.955″ which is slightly longer than 2.86″, the traditional definition of a short-action rifle cartridge.
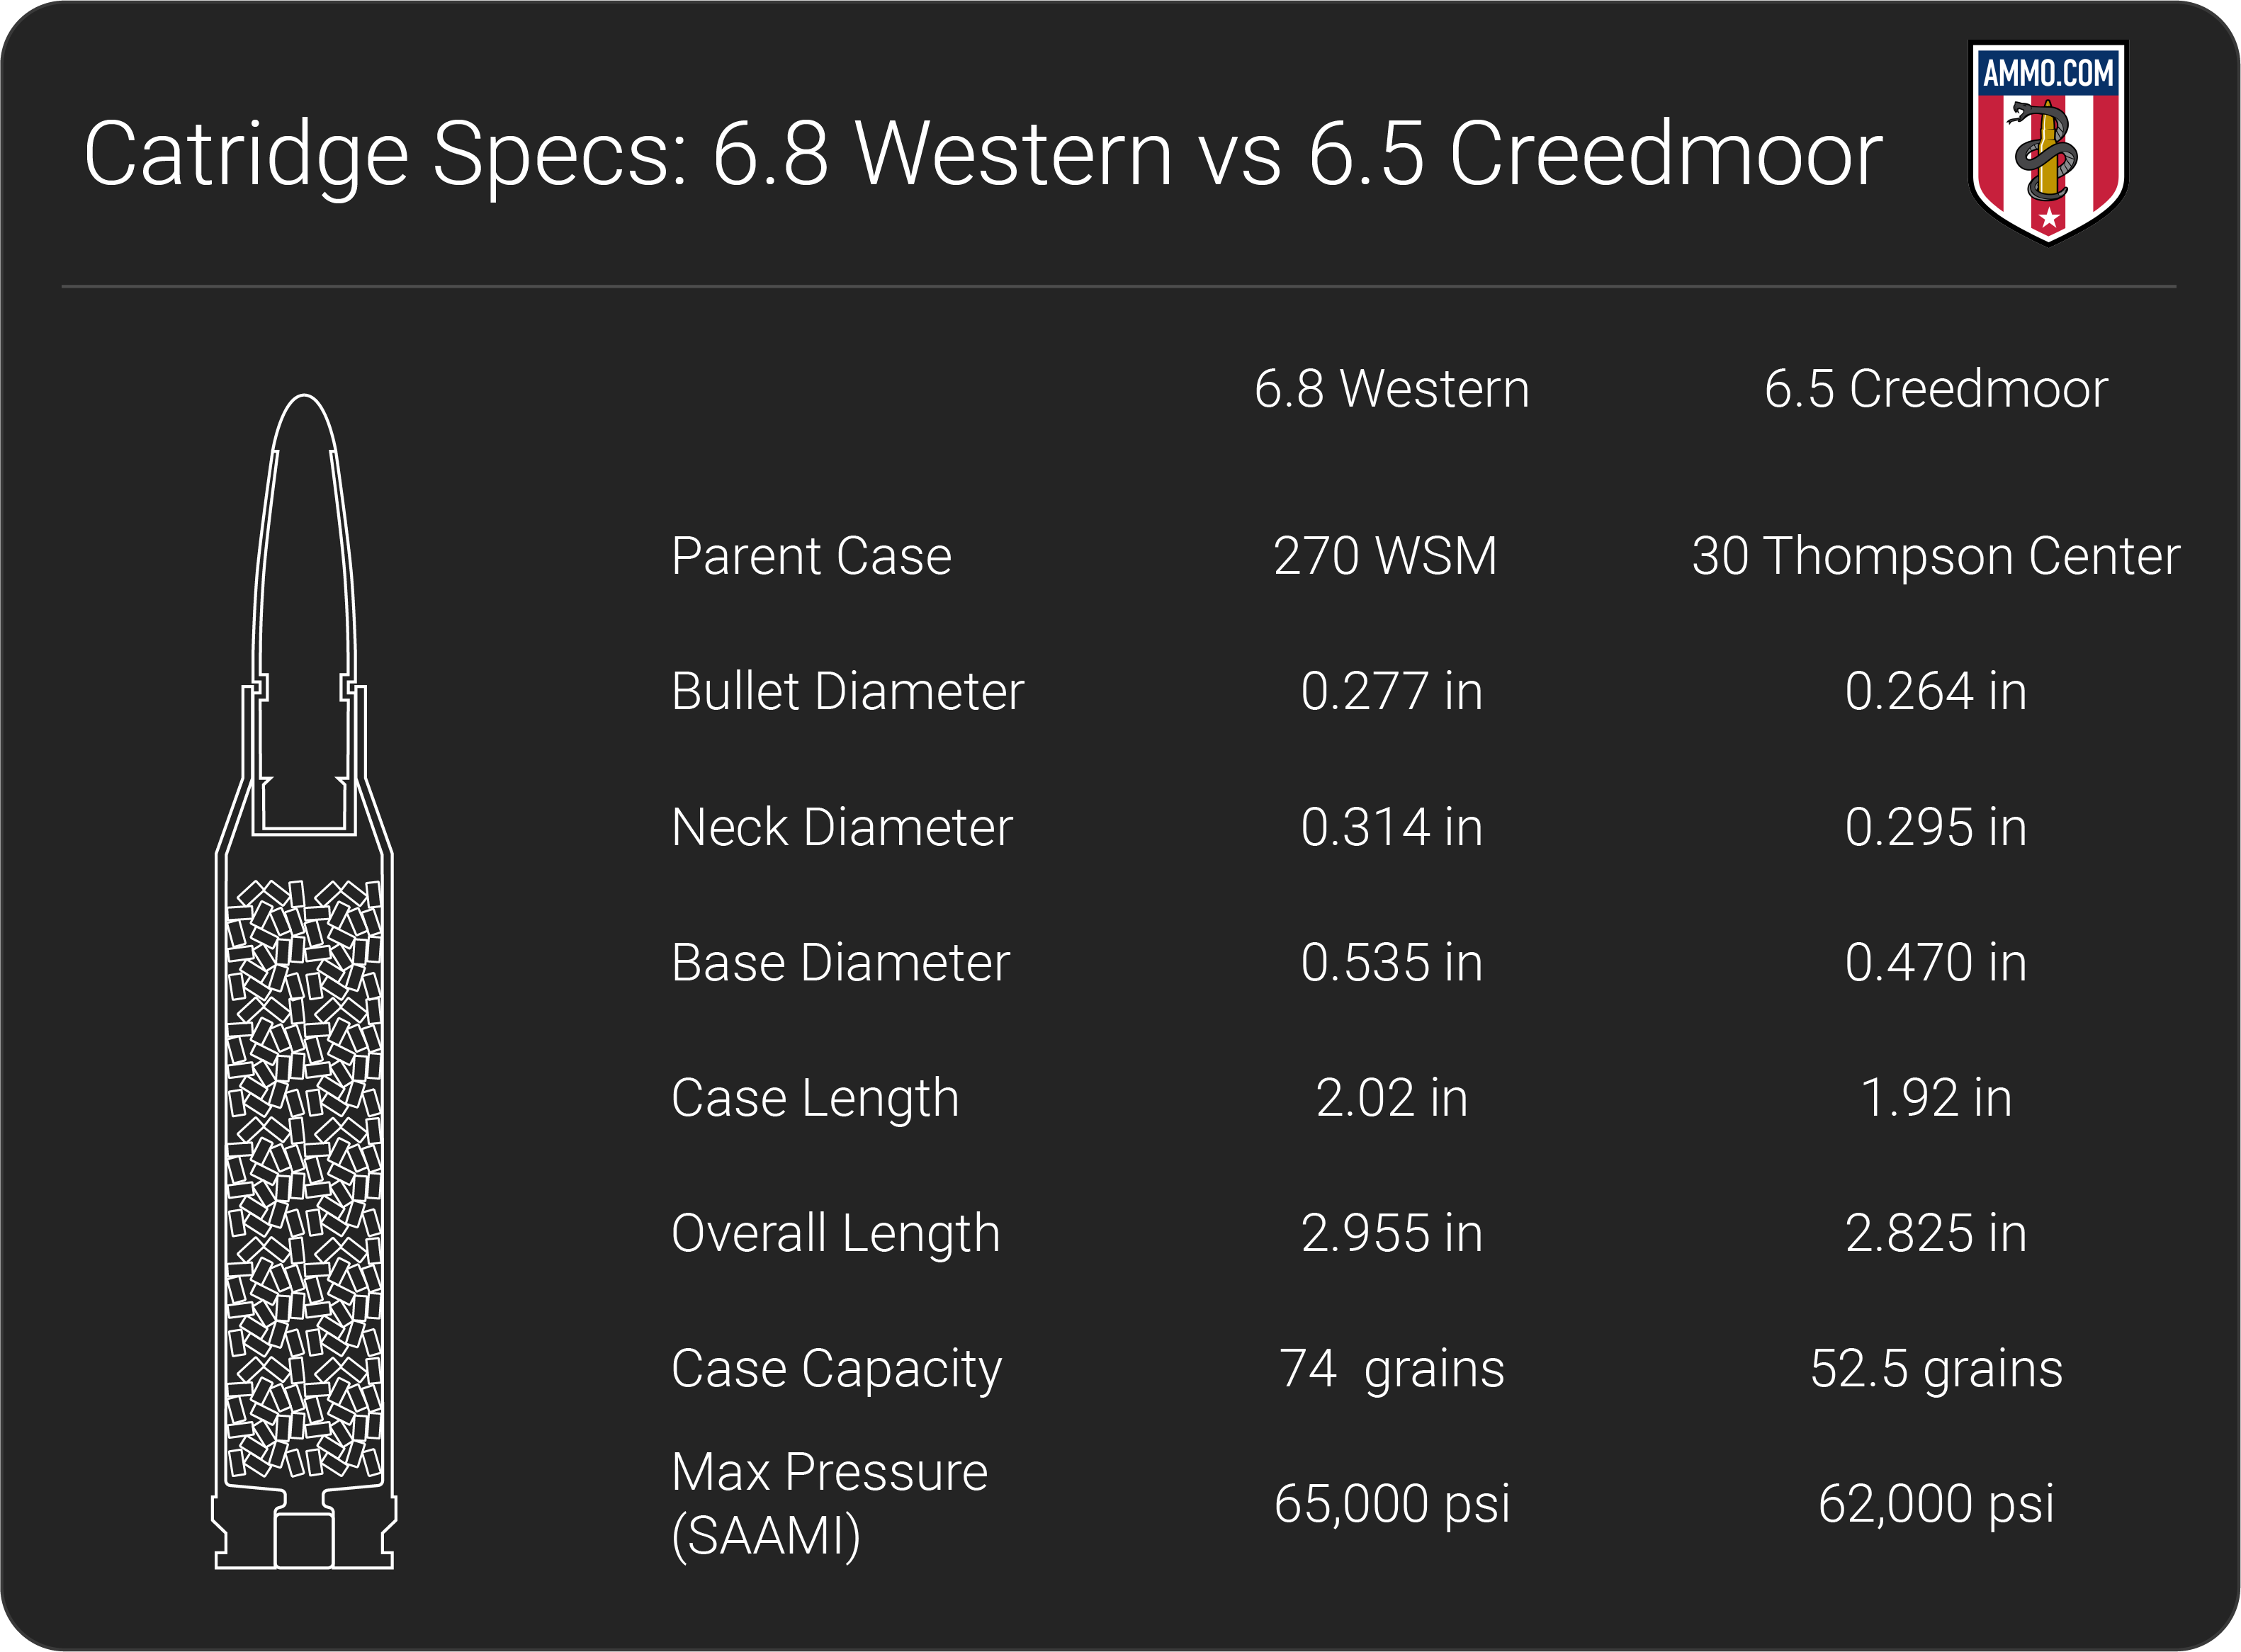
The 6.5 Creedmoor has an overall length of 2.825″ with a case length of 1.92″.
The shoulder angler of the 6.8 Western is 35-degree, while the 6.5 Creedmoor is 30-degree.
The 6.5 Creedmoor has a smaller rim diameter of .473″ than the .535″ rim diameter of the 6.8 Western.
It makes sense that the 6.5 Creedmoor has a smaller case capacity of 52.5gr and maximum load pressure (SAAMI) than the 74.0gr of the 6.8 Western. 62,000 psi for the 6.5 Creedmoor and 65,000 psi for the 6.8 Western.
6.8 Western Recoil Vs. 6.5 Creedmoor Recoil
As a young shooter, I was hesitant to shoot a gun with a lot of recoil. As I’ve matured, I have learned to handle the recoil better, although I’m not an expert marksman.
The lighter the recoil the easier it is to be more accurate.
Recoil still matters to me because I enjoy shooting a lot. If I’m at the range, I prefer not to come home with a bruised shoulder.
While I’m hunting, felt recoil doesn’t matter as much because my adrenaline is usually pumping, but I don’t want a rifle that will knock me out of my tree stand! And if you want an enjoyable hunting experience this fall, make sure you stock up on Hornady 6.5 Creedmoor hunting ammo and bring home the buck of a lifetime.
Felt recoil is determined by several factors, including but not limited to bullet weight, gun weight, recoil pad, and how well you shoulder the rifle.
The 6.8 Western has 30.1 ft-lbs of felt recoil, while the 6.5 Creedmoor only has 15.63 ft-lbs of felt recoil.
The 6.5 Creedmoor nearly has half the recoil of the 6.8 Western, so if you’re sensitive to recoil, the 6.5 Creedmoor is the best option for you.
Trajectory
The bullet trajectory matters because the flatter the bullet shoots, the better for the shooter because the adjustments will be minor compared to a projectile with more drop.
All bullets shoot in an arch because of gravity, but a faster bullet velocity will resist gravity better than a slower bullet so that it will have a flatter trajectory.
The 6.8 Western shoots heavier bullets at a faster velocity than the lighter bullets of the 6.5 Creedmoor, so it has a flatter trajectory.
Zeroed in at 200 yards, the typical 6.8 Western bullet will have a 6.3″ drop at 300yds, 18.1″ drop at 400yds, and 38″ drop at 500yds.
The typical 6.5 Creedmoor bullet zeroed in at 200yds will have 7.9″ of drop at 300yds, 22.4″ of drop at 400yds, and 44.4″ of drop at 500yds.
The winner is the 6.8 Western it has a much flatter trajectory.
Accuracy
Like everything else when shooting, several factors determine the round’s accuracy. The rifle, shooter, recoil, and bullet are contributing factors.
You can take the same rifle but shoot two different brands of ammo from it, and the accuracy will vary.
What I’m saying is that accuracy is a fickle metric.
Both calibers are extremely accurate since both were designed with long-distance shooting in mind.
There will be little difference in accuracy in the hands of a well-trained marksman.
But for the average shooter like myself, the 6.5 Creedmoor will be slightly more accurate than the 6.8 Western because it has less recoil.
The winner by a slight margin is the 6.5 Creedmoor.
Ballistic Coefficient
The ballistic coefficient (BC) measures how well a bullet resists wind drift and air resistance. To say it another way, it’s how aerodynamic a bullet is in numerical form.
High BC bullets are preferred because this means the bullets will resist the wind more.
Generally, heavy bullets will have a higher BC as it takes more force to change the flight of a heavier bullet than a lighter one.
Ballistic coefficient varies from bullet to bullet based on design, weight, and other factors beyond this article’s scope.
Anything over .500 is considered a high ballistic coefficient.
You can generally expect a 6.8 Western 165gr AccuBond Long Range bullet to have a BC of .620. The heavier 170 gr Ballistic Silvertip bullets have a lower BC of .563.
Surprisingly the AccuBond Long Range 142 gr and the Hornady ELD-X 143gr 6.5 Creedmoor bullet have a BC of .625, and the 140gr Ballistic Silvertip has a ballistic coefficient of .509.
The 6.5 Creedmoor has the higher BC, but only slightly.
Stopping Power
Many internet warriors will argue stopping power doesn’t matter, and they’re right, to a point.
A well-placed shot from a small caliber (with little stopping power) can be as effective as a larger caliber.
However, stopping power matters because not every shot is perfectly placed.
Generally speaking, a bigger bullet will leave a bigger hole, so the larger caliber should have more stopping power, but bullet design also plays a role.
A full metal jacket (FMJ) won’t cause as much damage as a jacketed hollow point (JHP).
Stopping power is also determined by how well the bullet penetrates the target. This is often measured as Sectional Density (SD).
Sectional density is the ratio of the diameter of a projectile to its mass.
In theory, a heavier projectile will be longer and have a higher sectional density, meaning it will penetrate further than bullets with less mass and a lower sectional density.
This means that bullets of different weights of the same caliber will have varying sectional densities.
Generally speaking, the 6.8 Western will penetrate further because it has a greater sectional density than the 6.5 Creedmoor.
The 6.8 Western is the winner of this section because it has more stopping power than the 6.5 Creedmoor due to its larger-sized bullets.
Hunting
The 6.8 Western has an advantage here because it was designed as a hunting cartridge; however, don’t discount the effectiveness of the 6.5 Creedmoor as a hunting round.
Both calibers are capable of long-range hunting, so it ultimately boils down to which hunting bullets can be used for the widest variety of species.
Which big game cartridges give you the most bang for your buck? Sorry, I couldn’t resist!
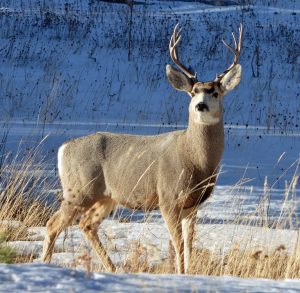
The 6.5 Creedmoor performs best while varmint hunting, whitetail deer hunting, and pronghorn hunting. It can ethically harvest a mule deer, but it’s not recommended to hunt game any larger than deer since it has a small bullet.
The 6.8 Western is capable of ethically harvesting elk. You can use the 6.8 Western while moose hunting, but most hunters prefer a larger caliber because of the increased size of a moose.
The 6.8 Western edges out the 6.5 Creedmoor to win this category of big game hunting.
Home Defense
Unless you’re defending your home from an invading army that’s still a long way off, I wouldn’t recommend these calibers for home defense or self-defense.
These calibers are designed for bolt-action rifles that are not the best for home defense situations.
This is because the bullets will penetrate walls and could harm your family members or neighbors.
They also take a long time to reload and aren’t easy to aim in close quarters.
That’s why I recommend using a 12 gauge or 20 gauge for home defense and a 9mm or .45 Auto for self-defense.
If you only own one gun and it’s chambered in 6.5 Creedmoor or 6.8 Western, by all means, use it to defend yourself, but you should understand the risks you’re taking.
This section is a tie. Neither caliber stands out for home or self-defense.
Long-Range Performance
The 6.5 Creedmoor has incredible long-range performance. It’s not even close when we compare the 6.5 Creedmoor vs. 308 Winchester. The 6.5 easily outperforms the 308 in long-distance shooting.
That’s because the 6.5 Creedmoor was designed to outperform the 308. What about the 6.8 Western?
How does it measure up to the 6.5 Creedmoor?
The 6.8 Western outshoots the 6.5 Creedmoor in long distances because it has a flatter trajectory, a heavier bullet that resists wind drift, and more downrange retained kinetic energy.
The 6.8 Western is the best choice for long-range applications.
Ammo Cost & Availability
One of the most important factors to consider before purchasing a firearm is ammo availability and its cost.
If you often enjoy shooting at the range, it’s best to go with the caliber that is more readily available and costs less per trigger pull unless you have a well-stocked trust fund!
The 6.5 Creedmoor is the older round, so more companies manufacture ammo for it, such as Winchester, Hornady, Browning, and Sellier & Bellot.
The cost per round for 6.5 Creedmoor is $1.50 to $2.75.
The 6.8 Western is still a new cartridge and much more difficult to find because not as many manufacturers are making it.
Winchester and Browning are the two primary companies that make ammo for the 6.8 Western.
As of this writing, it will cost around $2.95 to $4.60 per round.
As more companies begin to make this caliber, I suspect the price to drop at least a little due to competition.
The 6.5 Creedmoor wins this category because the ammo is easier to find and less expensive.
Rifle Cost & Availability
Winchester and Browning are currently the only two making rifles chambered in 6.8 Western because they’re the two companies that developed the new cartridge.
This means they set the price for the rifles. Thankfully, they’re reasonably priced.
A Winchester XPR chambered in 6.8 Western will cost $599, which is the same price as the same short-action rifle chambered in 6.5 Creedmoor.
Both calibers in the Model 70 also cost the same, $1,629.
The Browning X-Bolt chambered in 6.8 Western costs $2,699 vs. the 6.5 Creedmoor costing $2,679.
This difference is minor, but the number of companies who make 6.5 Creedmoor firearms compared to the number of companies that make rifles chambered in 6.8 Western is astounding.
Mossberg, Nosler, Ruger, Remington, Springfield Armory, Weatherby, and many more produce rifles chambered in 6.5 Creedmoor.
So the cost of 6.8 Western rifles and 6.5 Creedmoor rifles is nearly the same, but the overwhelming availability of the 6.5 Creedmoor gives it the win in this section.
Reloading
Reloading is one of the best ways to save money on ammo.
Most shooters prefer to handload because it gives them the greatest control over the final product.
Once you figure out what bullet works best with the twist rate in your barrel and the powder brand that burns cleanest, you can fine-tune each round for optimum performance.
You can control the controllable variables instead of being at the mercy of mass-produced factory loads.
Both calibers can be reloaded; however, since the 6.5 Creedmoor is the older round, more information is available.
Plus, the reloading supplies are easier to find because more people reload this caliber.
Keep in mind this also means there’s a higher demand for all the supplies, so they will be some of the most difficult to find when supplies are low.
As the 6.8 Western grows in popularity, the information will become more available, as will the reloading supplies.
Until then, the 6.5 Creedmoor wins this round.
6.8 Western Vs 6.5 Creedmoor Ballistics
The ballistics of both calibers are similar because they’re intended to be used in comparable scenarios.
However, they are not precisely the same, so the team at ammo.com made a ballistics chart for the 6.5 Creedmoor, and I found some ballistics data on the 6.8 Western.
6.8 Western Ballistics
The muzzle velocity of a 165gr Nosler AccuBond Long Range 6.8 Western bullet is 2,970 Feet Per Second (fps).
At a 200-yard zero, the 6.8 Western bullet will drop 6.3″ at 300yds, 18.1″ at 400yds, and 38″ at 500yds.
Obviously, this information will change as the variables and conditions change, but this will give you a good idea of where to begin.
6.5 Creedmoor Ballistics Chart
Note: This information comes from the manufacturer and only for informational purposes. The actual ballistics obtained with your firearm can vary considerably from the advertised ballistics. Also, ballistics can vary from lot to lot with the same brand and type load.
6.8 Western Development
The 6.8 Western traces its roots to the .270 Winchester Short Magnum (WSM) released in 2002 and its parent cartridge, the 270 Winchester.
The .270 WSM fell short in a few key areas, primarily the lack of twist rate in the rifle barrels, so Winchester and Browning teamed up to improve it with a new cartridge that could handle a faster twist.
They accomplished their goals with the 6.8 Western and released it in 2021. Initially, they received a lot of criticism for introducing a new caliber instead of increasing the production of their other calibers because they were struggling to keep up with demand.
However, that criticism has subsided, and the popularity of the 6.8 Western is beginning to rise amongst long-range shooters and hunters.
6.5 Creedmoor Development
The 6.5 Creedmoor was created out of necessity. In 2005 Dennis Demille was approached by several competition shooters complaining about the unreliability of their guns and 6mmXC ammo.
So he talked with his friend Dave Emary, Hornady Manufacturing’s senior ballistician, who told Demille to make a list of what he wanted from a new cartridge.
Demille came back with his list-
- The cartridge must be able to fit into a magazine for the rapid-fire stages of the competition.
- Less recoil than a 308 Winchester for better follow-up shots and shooter comfort during rapid fire.
- Flatter trajectory than a 308 with an accurate, high BC bullet.
- Good barrel life.
- Uses readily available reloading components so results can be duplicated.
- Reloading recipes printed on the box.
- Produced in quantities that could keep up with demand.
In 2007, Hornady debuted the 6.5 Creedmoor. At first, most people were skeptical of the round, believing it to be too small for hunting and not enough power for long-range competitions.
It didn’t take long for the nay-sayers to become fans, and the rest is history.
Parting Shots
If my math is correct, the 6.5 Creedmoor won 6/11 categories, making it the winner by a narrow margin.
I think it is pretty apparent that both calibers are highly effective rounds, and neither would be a terrible choice for long-range shooting.
However, when it comes to the 6.8 Western vs 6.5 Creedmoor, the lesser recoil of the 6.5 Creedmoor gives it an edge for most people.
If you’re a big game hunter, the 6.8 Western is the way to go.
I can confidently say the 6.5 Creedmoor is not obsolete.
")
")
")
")
")


 No where to be seen…