Find the best hunting rangefinder is quite a task these days with so many great brands and options out there. Long gone are the days where you only had a few top picks to choose from.
Now, each and every hunter has to sort through all of these makes and models, and review each of their best features and characteristics. While today’s models are super advanced, they really haven’t made it easy for us hunters to figure out which one is best suited for our style of hunting.
The Quick Summary Overall, the Best Hunting Rangefinder is the Vortex Optics Crossfire HD!Below you can check out other top options including the… – Best Rangefinder For Bowhunting: Leupold RX-Fulldraw 5- Best Binocular With Rangefinder For Hunting: Vortex Optics Fury HD 5000- Most Affordable Hunting Rangefinder: TIDEWE Hunting RangefinderAnd scroll down to find out the one thing to avoid when picking your rangefinder!
This blog article was personally constructed after comparing my own notes from using a few of these models, to the thousands of reviews and comments out there on the internet.
Additionally, I also had to get on the phone with a few brands to clarify what these specific features mean and how they best help hunters when we’re out in the field.
Of course, I wasn’t able to list and review every single model out there, so I decided to categorize the top picks within a few select categories. These areas are heavily searched by hunters, and I think these choices will benefit hunters the most.
Trivia Question: Do you know when and where the first laser rangefinder was invented? (Click here to see answer).
Full Disclosure: Some of the links below may be affiliate links. If you follow an affiliate link and end up making a purchase, we may receive a small commission at no extra cost to you.
Best Rangefinder For Hunting
Vortex Optics Crossfire HD 1400
The Crossfire HD 1400 is the 2024 best rangefinder for hunting because it is perfect for both bow and rifle hunters, and offers a variety of features designed to enhance your hunting experience. With a maximum range of 1,400 yards and an HD optical system, this rangefinder lets you spot your targets with ease, no matter the environment.
The Crossfire HD 1400 has three target modes and two ranging modes, ensuring accurate readings. It also features a red TOLED display, making the readout clear in any lighting conditions. Despite its lightweight design, this rangefinder is built to last, with durable materials that can withstand the rigors of hunting and the great outdoors.
In conclusion, the Crossfire HD 1400 is the ultimate laser rangefinder for hunters. Its outstanding range, multiple modes, clear display, and lightweight, durable design make it the perfect choice for bow and rifle hunters alike. So if you’re looking for a reliable and versatile rangefinder to take your hunting game to the next level, be sure to check out the Crossfire HD 1400.
For latest prices, and more information about the Vortex Optics Crossfire HD 1400, click below!
Best Bowhunting Rangefinder
Leupold RX-Fulldraw 5
Alert to all bowhunters out there – We have a pick for you!
If you’re a bowhunter or competitive archer, you need a rangefinder that can keep up with you and your tough shots, look no further than the RX-FullDraw 5 – the most advanced archery rangefinder on the market. It uses your bow’s velocity, peep height, arrow weight, and shot angles to provide laser-accurate ranges tailored to your equipment.
But that’s not all – the RX-FullDraw 5 now accepts even lower velocity inputs, accommodating arrows as slow as 170 feet per second. And with its updated flightpath technology, you can choose from two modes to view arrow obstructions up to 85 yards away. Plus, the rangefinder’s Last Target mode can cut through rain, fog, and snow, ensuring accuracy even in challenging weather conditions.
With six times magnification, a bright red OLED display, and a speedy laser engine, the RX-FullDraw 5 gives you a clear advantage on the field. So if you’re looking for a rangefinder that’s customized to your archery gear and conditions, the RX-FullDraw 5 is the ultimate choice.
For latest prices, and more information on the Leupold RX-Fulldraw 5, take a look below!
Best Hunting Binocular With Rangefinder
Vortex Optics Fury HD 5000
The Fury HD 5000 is the ultimate laser rangefinder binocular for hunters, archers, and shooters. With 10x magnification and 42mm objective lenses, it provides an extremely effective and versatile tool for the field.
Its primary HCD mode displays an angle-compensated distance that’s perfect for most hunters and shooters, whether using a rifle or a bow. Choose from two target modes: Best Mode, which displays the strongest range result, and Last Mode, which displays the furthest distance and is ideal for ranging targets behind obstructions. With the Fury HD 5000, you’ll never miss a shot again.
For latest prices, and more information on the Vortex Optics Fury HD 5000, we have that as well!

Most Affordable Hunting Rangefinder
TIDEWE Hunting Rangefinder
The TideWe rangefinder offers 6x magnification and displays vertical and horizontal distance, speed, and can continuously scan all factors influencing your play. It accurately ranges from 3 to 1000 yards with fast measurements within +/- 1 yard and a measuring speed of <0.5s. It is lightweight at only 0.35lb and durable, made from strong materials to protect from drops and is weather-resistant.
This rangefinder is easy to use with a simple button push to get instant range data on an easy-to-read LCD display. It comes with a rechargeable Li-ion battery that can measure 20000 times after a full charge, has a clear LCD display, and an ergonomic design for comfortable handling.
And one last thing – the TideWe rangefinder features a popular camo pattern and includes a bag to save the rangefinder.
For latest prices, and more information on the TIDEWE Hunting Rangefinder, we have that as well!

Things To Consider When Choosing A Hunting Rangefinder
Maximum Distance
Comparing your next rangefinder’s max distance to your weapon of choice and style of hunting is going to be a key consideration point before making a final purchase.
Each manufacturer should properly list out their model’s maximum effective distance, but there’s one thing to keep in mind here….
Some models are only going to highlight the max range at a reflective target. As a hunter, you’ll want to check what that top range is going to be at ‘game’ – not just something that’s 100% reflective.
Pro Tip: Make sure your rangefinder has an angle compensation feature, especially if you hunt from a treesstand.
Ease Of Use & Display
Hunting rangefinders have evolved to offer amazing ranging capabilities, but not all of them offer these top features in an effective package.
If you want a rangefinder that’s going to properly adjust for elevation, wind & fog, choice of reticle, etc. it’s clear that you might have to toggle through a few options within your optical.
After analyzing what all your rangefinder can offer, make sure to spend the time figuring out how to enable these features. Most optimal options are going to offer a simple, single ‘Mode’ model button to toggle through everything. If you’re doing more than this, you might be getting yourself in a more complicated position.
Object Detection
When hunting in wooded areas, or in inclement weather, you need to have a rangefinder that’s going to successful pick up your desired object with minimal interference.
Hunting with a subpar optical in wind and fog, or having brush in between you and your prey can cause serious issues.
Make sure your new hunting rangefinder has some sort of technology that can properly eliminate these peripheral objects to identify what’s important. Not doing so can provide inaccurate range readings.
Hunting Style
Everything above and below in this article is going to come down to this one question – “What type of rangefinder do I need for my hunting style?”
Back in the day, you were ultimately stuck with only a few options when it came to rangefinders. Now, you have the option to choose binocular style, bow-specific, long range, etc.
Of course, you can always choose a more expensive model to take care of more than you need, but if you want to be a little more realistic be sure to compare the available features, alongside price points, to what you’re really going to be needing this for.
Most Popular Rangefinder FAQs
1. What Is A Hunting Rangefinder?
A hunting rangefinder is an optical instrument, typically handheld, that is used to determine the distance between a hunter and their prey.
2. How Do Rangefinders Work?
Rangefinders send a laser beam towards your target. An internal digital clock measures the time it takes for the beam to reach the target and back. It then calculates the distance based on that time.
3. What’s The Difference Between A Hunting And Golf Rangefinder?
All in all, there’s not a lot of core difference between hunting and golf rangefinders. Largely the difference comes in the different modes available, along with their associated price points.
4. How Much Do Rangefinders Cost?
On average, most hunting rangefinders are going to cost you between $100 and $600. While there are some cheaper than this, the quality starts to slip really quick. Lastly, any rangefinder above this price, those that range up to $2,000 are most likely going to be reserved for extreme hunters and guides.
5. What Outdoor Brands Make Rangefinders?
The top hunting rangefinder brands including the following:
1. Bushnell
2. Leupold
3. Nikon
4. Vortex
5. Mavin
6. Swarovski
6. Are There Good Rangefinder Options Under $200?
Yes, there are several great rangefinder options under $200. For an easy list of these, here’s a link to Amazon with the best hunting rangefinders under $200.
One Thing To Avoid!
Make Sure You Have Angle Compensation
Angle compensation is a crucial feature in any hunting rangefinders. It calculates the difference in elevation and provides an accurate reading as if you were shooting on level ground. Without it, the elevation change can create a false reading and result in a missed shot or a wounded animal.
For example, on a 30-degree angle slope with a line-of-sight shot distance of 500 yards, without angle compensation, you would aim for 500 yards. However, with angle compensation, you’ll need to shoot for 433 yards. So, if you’re in the market for a new hunting rangefinder, make sure you choose one with angle compensation.
Answer: The first laser rangefinder was invented in France in 1933.
For a blog about the Best Hunting Binoculars, take a look today!
")
")
")
")
")


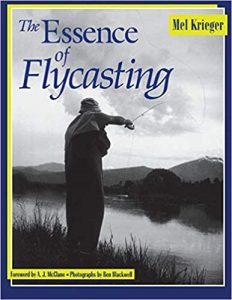 This classic fly fishing instructional text is one of the best books for learning the ins and outs of the sport. The Essence of Flycasting shows you in photographs and diagrams exactly how to perform the intricate movements needed to create the perfect cast.
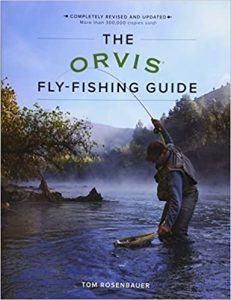 As a company, Orvis knows fly fishing better than almost anybody else. Their fly fishing guide is no exception to this rule. The author has been tying flies commercially since he was fourteen, and his four decades of fly fishing experience are distilled in these pages. A must have for any fly fishing enthusiast.
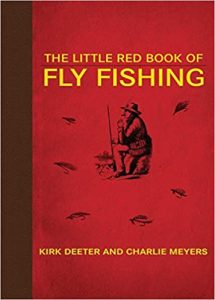 The Little Red Book of Fly Fishing is essentially a pocket guide to the sport of fly fishing, written by two veteran anglers who came together to demystify their passion. Featuring 240 tips that don’t require any advanced physics lessons or innate understanding of how fish think, this is a straightforward guide to the basics of fly fishing.
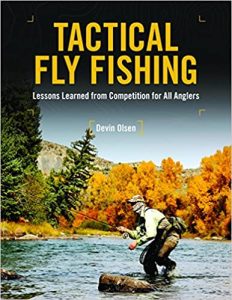 Most of us will never be professional fly fishers, but that doesn’t mean we can’t learn a lot from the pros. Devin Olsen is a repeat medalist in global fly fishing competitions, and his techniques for winning are explained in this volume. He does a good job of taking what he knows and applying it to everyday situations, allowing anyone to fish more successfully on rivers, small streams, and still waters.
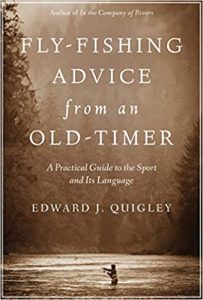 Take some advice from a veteran of the sport and sit down with Ed Quigley’s book on fly fishing. Quigley’s straightforward explanation of the basics and detailed discussions of advanced topics are easy to understand, and his ingenious tips and compelling anecdotes from his own years of experience fly fishing streams from Labrador to Costa Rica and beyond make the book very enjoyable.
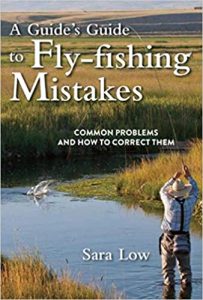 As a licensed fly fishing guide, Sara Low has seen it all. If it can go wrong on the water, she’s seen it- and has some good ideas about how to correct these problems. This book offers solutions for fly fishers on many topics, including approaching fish, fly selection, proper fly presentation, consistent and accurate casting, and techniques for hooking and landing of fish, as well as pointers for fishing in spring, summer, fall, and winter. This isn’t a book you’d typically sit down with and read cover to cover (although you can do that if you want); instead, it’s the book you pull out when you have a problem you want to fix. It’s an invaluable guide for any angler who wants to up their game.
 Fly tying is one of many challenging aspects of fly fishing, and this book is a great introduction to it. It features photographs and illustrated diagrams to help you get the knack of the basic fly components. It illustrates every phase of the tying process, from clamping the hook in the vise to executing the final whip finish, and everything in between. You’ll learn seven of the most effective and foundational patterns for nymphs, streamers, and dry flies.
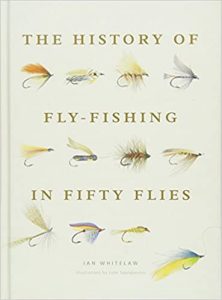 The History of Fly-Fishing in Fifty Flies recounts the history of a sport that dates back 2,000 years, focusing on milestone flies from the first feathered hook to contemporary patterns using cutting-edge materials. While it might seem impossible to choose only 50 flies among the countless fly patterns dating back two millennia, these flies represent the development of the very sport itself. They chart the spread from its modern origins on the chalk streams of England and Scottish rivers to every country in the world. Filled with profiles of the key people involved, tying tips, photographs and illustrations of the flies, The History of Fly-Fishing in Fifty Flies is a fascinating look at the history of this fascinating sport.
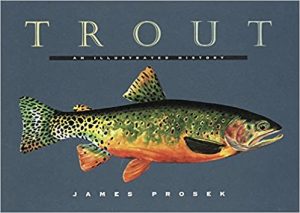 If you want to catch a trout, you need to know as much as you can about it- how it looks, where it eats, what part of the water it likes, and much more about its behavior and evolutionary history. Prosek’s lavishly illustrated book features original watercolors alongside a fascinating natural history of the fish themselves.
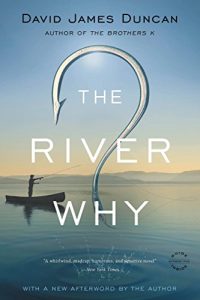 One of the classics of the unofficial fly fishing book canon, The River Why has been popular since its publication in 1983. The novel is a coming-of-age comedy about love, nature, and the quest for self-discovery, set in the Pacific Northwest and featuring one man’s quest for steelhead salmon. The story’s protagonist, Gus Orviston, seeks function in a remote cabin away from his dysfunctional family. For Gus, fly fishing isn’t just a physical experience; it’s a spiritual one as well, as his quest for self-knowledge tests him with unpredictable experiences.
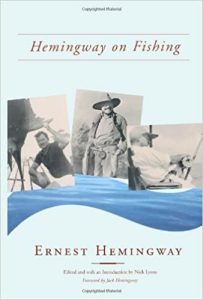 It shouldn’t come as a surprise that the author of The Old Man and the Sea was a passionate angler himself. From his Michigan childhood to his twilight years in Florida, Hemingway was never far from a river or ocean. Fly fishing was a constant feature of his life, and this book collects his short stories and articles that revolve around the pursuit of fulfillment on the open water.
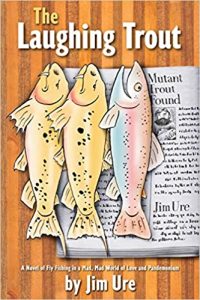 If you’ve ever been on a group fishing trip, you know the mayhem and hilarity that often follow. This story is the story of a professional fishing guide who tricks his annoying game warden cousin- and by extension, most of the world. He watches as his little corner of the river descends into bedlam- but coming clean might mean wrecking his best chance at finding true love. What’s a fly fisher to do when the world descends on his river in search of a fish that doesn’t exist? In this case, he just has to laugh about it.
 The Reel Sisters is the story of five women who would otherwise never be friends, were it not for their devotion to fly fishing. It’s a powerful novel about how anyone, no matter who they are or where they come from, can find themselves through fly fishing and learn a little bit more about how they work in the world each time they step into the river.
 In the same spirit as Garrison Keillor’s A Prairie Home Companion, Scott Waldie’s Travers Corners takes you to a rural town where “nothing much has happened since Herbert Hoover stopped for gas.” What Travers Corners lacks in modern media and conveniences, it makes up for with the quality of the local fishing. You’ll fall in love with the cast of characters in this quirky little community- it’s just a shame they’re all fictional!