If you are looking for a unique and thrilling hunting adventure, stalking javelina is unlike anything you have experienced before. These small but ferocious animals have developed a devoted fan base of hunters who dedicate themselves to the observation and hunting of these southwestern mammals.
The key to a successful javelina hunt is knowing as much about your prey as possible. Here is our comprehensive guide to everything you need to know about the javelina.
The javelina resembles a wild pig and is one of three species of peccary, which is defined as a social, pig-like animal.
They have short, coarse, brindled hair that lightens around the neck, giving the appearance of a collar. They have a snout and small eyes, similar to a pig, and they walk on their front two digits. However, unlike a pig or wild boar whose tusks are curved, the javelina’s tusks are straight, having evolved for crushing fibrous material, seeds, and roots.
Habitat
There are only three species of peccaries in the world. The javelina’s Latin name is Tayassu tajacu, and its cousins are the white-lipped peccary, which lives in Southern Mexico to Northern South America, and the Chacoan peccary that lives in Bolivia, Argentina, and Paraguay.
If you’re wondering where to shoot for javelina, they thrive in rocky, arid climes like the desert of the southwestern United States in parts of Texas, Arizona, and New Mexico. They prefer areas such as the saguaro desert that offer ample supplies of prickly pears and mesquite. You can also find herds close to desert watering holes and other permanent water sources.
As they are unable to cool down through evaporation like other animals, they tend to remain in shady areas such as under cliffs and caves during the hottest parts of the day and venture out to forage when it is cooler.
Habits
Rapacious omnivores, javelinas will eat almost anything they come across. Their primary food sources are desert plants, but, on occasion, they’ll eat grubs, birds’ eggs, bugs, and reptiles like lizards.
Their favorite plants to munch on include sotol, prickly pear, agave, some types of tubers, and acorns from the scrub oak.
Although they aren’t great for eating, the larger predators like black bears, mountain lions, and jaguars all feast on javelinas from time to time. Bobcat, coyote, and other smaller predators avoid the javelina, perhaps because of the threat of its razor-sharp tusks and unshakeable fighting acumen.
Javelinas are incredibly social animals and stay in groups almost all of the time. This means, when you’re out hunting javelinas, if you see one, there are sure to be more somewhere close by.
Physiology
Javelinas resemble pigs in that they have stout bodies, a snout, bristly hair, and a jutting underbite on their bullet-shaped heads. Although they closely resemble the family of pig and boar, they are very distant cousins, as the genetic split between these species occurred over 30 million years ago.
Mature javelinas weigh between 40 and 60 pounds, and they sport brownish-gray bristles with a highlighted, prominent collar between their shoulders.
They have scent glands, as one of their keenest senses is their sense of smell. This particular physiological detail can help you find javelina, as the musky smell they use to communicate and mark their territories is quite pungent and leaves a trail.
They have incredibly poor eyesight compared to their super sense of smell. Because of this, javelinas often feed at dusk in the thick brush where they don’t need good vision to find sustenance.
How to Find a Javelina
Some clues indicating the presence of prey while you’re hunting javelinas are signs of feeding. You’ll see chewed-up prickly pear paddles, shredded agave and sotol, and cow patties that have been rooted. You’ll also see turned-up ground where the javelinas have snuffled through the first layer of undergrowth.
Under rocky overhangs, in tucked-away places in the shade and out of the desert sun, you’ll often find evidence of javelinas bedding down. You can also sniff them out, as their powerful musk glands, located at both their hind ends and heads, exude a pungent, telltale olfactory clue.
How to Stalk a Javelina
The primary tactic of javelina hunting is to spot them, and then stalk them. Glassing, or using your binoculars to spot your prey, should be your focus when hunting javelinas. Set up optics from a high vantage point for the best view and for effective concealment. They camouflage well against the backdrop of the desert, and it may take a while for you to spot a group.
Once you find a group of javelinas, your main tactic should be to play to the wind. Javelinas rely on their sense of smell, so you have to mask your own scent as much as possible so they don’t get wind of your presence.
Once you get within 50 yards of the javelinas, take into account their hearing and eyesight. Although not the strongest of their senses, javelinas can still see and hear you. If you are spotted, freeze for a few minutes. Javelinas have very short attention spans. They will usually forget about you if you are completely still for a while.
How to Bag a Javelina
Javelinas respond with vigor to a distress call of another javelina. Being social animals, they react with a speed and ferocity unmatched by other big game. A call blown outside of 75 yards might not elicit much of a response—but call within range of the bristly creatures, and they’ll come running.
When you’re lining up a shot at individual javelina, remember that their vitals are small, so you must be very accurate to make an ethical shot. Sometimes, a bullet will go through one javelina and hit the one behind it as well.
These aren’t huge animals, but they are some of the fiercest prey animals many hunters have come up against. Match your weapon to your prey and come in close to set up the perfect shot.
Once you’ve bagged javelina, take the time to remove its scent glands, both fore and aft. If left untouched, the scent glands can flavor the meat and hide, leaving a foul taste and odor.
If you want to eat your trophy, you will have to dress the animal in the field to get rid of those scent glands. Once this is accomplished, treat the javelina much like a boar in butchering and cooking techniques. Slow roasted javelina or a javelina stew both make the most of this fierce desert animal.
Although on the smaller side, javelinas are tough little beasts that offer a lot of challenges when spotting them, stalking them, and bagging them. They have a tenacious spirit and razor-sharp tusks that make any hunters’ heart rate speed up.
The velocity of the best air rifles under $300 can be really high – some can even reach 1,400 fps.
N.B. Besides the cost of purchasing an air rifle, there is also the cost of pellets and the cost of recharging compressed air, dry nitrogen, or C02 gas.
If you purchase a springer, you won’t need to worry about the recharging cost .
As an avid air rifle enthusiast, I’ve had the opportunity to examine the Umarex Notos PCP Carbine, and I must say it’s an impressive piece of engineering that combines versatility with practical functionality.
This .22 caliber pre-charged pneumatic (PCP) air rifle stands out for its adaptability and consistent performance across various shooting applications.
One of the most notable features is its adjustable buttstock, which allows shooters to customize the length of pull from 31.375 inches when fully collapsed to 34 inches when extended.
This adaptability, combined with the ridged rubber buttpad, ensures comfortable shooting for users of different sizes and provides excellent recoil management for more accurate follow-up shots.
The power plant is particularly impressive, featuring a 66cc air cylinder that can be filled to 3,625 PSI.
What really catches my attention is the regulated system, set at 1,900 PSI, which delivers 21 consistent, fully-regulated shots per fill. The rifle can actually provide up to 40 shots total per fill, though the latter portion will be unregulated. With velocities reaching up to 700 FPS with 12-grain pellets, this air rifle packs enough punch for small-game hunting, pest control, and recreational shooting.
Noise suppression is a key consideration for many airgunners, and the Notos doesn’t disappoint.
The combination of a shrouded barrel and a three-baffle SilencAir System effectively reduces the report, making it neighbor-friendly and less likely to spook game during hunting sessions.
The loading mechanism is well-thought-out, featuring a smooth sidelever action that makes cycling the rifle both easy and reliable. Shooters have the flexibility to choose between two loading options: a 7-round auto-indexing magazine for quick follow-up shots, or a single-shot tray for those who prefer precision shooting.
This dual-capability makes the Notos equally suitable for hunting scenarios where quick follow-up shots might be necessary, or for focused target practice where precision is paramount.
For optics mounting, the rifle comes with an integrated full-length Picatinny rail, providing ample space for mounting scopes and other accessories.
The inclusion of an integral manometer (pressure gauge) and a male Foster quick-disconnect fill fitting makes monitoring and refilling the air reservoir straightforward and hassle-free.
The 11.75-inch barrel length contributes to the rifle’s overall maneuverability while still maintaining excellent accuracy potential. This makes the Notos particularly suitable for hunting in tight spaces or for younger shooters who might struggle with longer, heavier rifles.
From a practical perspective, the Notos hits a sweet spot in terms of features versus functionality. It offers enough power and accuracy for serious small-game hunting and pest control, while remaining sufficiently user-friendly for recreational shooting.
The regulated shot count ensures consistency for those crucial shots, while the adjustable stock and ergonomic design contribute to overall shooting comfort.
For airgunners seeking a versatile PCP rifle that can handle multiple roles without breaking the bank, the Umarex Notos Carbine presents a compelling package that combines practical features with reliable performance.
The Barra 1100z has genuinely caught my attention, offering features typically found on much more expensive rifles at a jaw-dropping $250 price point.
Let’s cut straight to the chase – what makes this rifle special is its impressive blend of premium features and solid performance. The side-lever action, so often reserved for higher-end PCPs, operates with reliable consistency, while the fully-shrouded barrel keeps noise levels remarkably low – comparable to the much-lauded Benjamin Marauder, which is quite a feat at this price point.
One standout feature that immediately impressed me is the trigger. With a consistent pull weight of 1 pound 11.1 ounces and minimal variation (just one ounce!), it outperforms many rifles costing three times as much.
This kind of consistency is crucial for accurate shooting, whether you’re target practicing or pest controlling.
The Barra 1100z comes ready for serious shooting with two 10-shot magazines and a well-thought-out design that includes an adjustable comb – a feature that taller shooters will particularly appreciate.
The addition of a robust rubber buttpad and ergonomic stock design shows that practical shooters were consulted during development.
Performance-wise, this rifle delivers where it counts. It achieves velocities up to 1,031 FPS with lightweight pellets, while showing excellent accuracy with heavier options.
The sweet spot seems to be with JSB Jumbo Monster 25.39 grain pellets, which delivered the best accuracy in testing and generated 25.83 ft/lbs of muzzle energy.
What really sets the Barra 1100z apart from other budget PCPs is its build quality and attention to safety features. The predominantly metal construction gives it a solid feel, while smart design choices like positioning the pressure gauge on the underside of the stock (rather than at the end of the HPA tube) show careful consideration for user safety. The inclusion of a de-gassing capability – often missing on budget rifles – is another welcome safety feature.
Perhaps most exciting for airgun enthusiasts is Barra’s decision to make spare parts readily available – a rarity in this industry. This opens up possibilities for tinkering and customization that could make the 1100z the next favorite platform for airgun modifiers, much like the legendary QB78.
While it’s not perfect – lacking a regulator and coming in a bit heavy at 7.5 pounds bare – these compromises are more than reasonable given the price point. For optimal performance, I’d recommend filling to 2,600 PSI and refilling after about 20 shots, which helps maintain consistent velocities.
The Barra 1100z represents a significant step forward in what’s possible in a budget PCP air rifle. It combines features typically found on much more expensive rifles with solid performance and build quality, all while maintaining an incredibly accessible price point.
Whether you’re new to PCP air rifles or an experienced shooter looking for a reliable platform to modify and tune, the Barra 1100z offers exceptional value that’s hard to overlook.
When it comes to pre-charged pneumatic (PCP) air rifles, the Hatsan AT44 QES stands out as a remarkable evolution of the proven AT44 platform.
This latest iteration brings impressive features and capabilities that make it an excellent choice for both serious airgunners and hunters alike.
Whisper-Quiet Performance
The standout improvement in the QES model is Hatsan’s innovative Quiet Energy Technology. With an impressive 32% reduction in shot noise compared to its predecessor, this fully shrouded barrel system allows for more discreet shooting sessions.
This is particularly valuable for backyard practice or pest control situations where noise concerns might otherwise be an issue.
Versatility Meets Precision
One of the AT44 QES’s greatest strengths lies in its versatility. Available in three calibers (.177, .22, and .25), shooters can choose the perfect configuration for their needs.
For those focused on hunting or pest control, the .22 and .25 caliber options offer excellent power and accuracy at reasonable ranges. The rifle’s pre-charged pneumatic system, operating at up to 200 bar (2,900 psi), ensures consistent performance throughout each shooting session.
The multi-shot capability is another notable feature, with a generous 10-round magazine capacity (9 rounds in .25 caliber).
This quick follow-up shot capability, combined with the smooth side-lever action, makes the AT44 QES an effective tool for pest control or hunting scenarios where multiple targets might present themselves.
Thoughtful Design and Construction
Hatsan has clearly considered the practical needs of airgunners in the AT44 QES’s design. The ambidextrous synthetic stock makes it accessible to all shooters, while the adjustable vertical recoil pad allows for a custom fit.
The 14.25″ length of pull provides comfortable handling for most adult shooters.
The optics mounting system deserves special mention, as it accepts both Weaver and 11mm mounts. This flexibility means shooters aren’t limited in their choice of scopes or mounting systems.
The inclusion of open sights adds another layer of versatility, especially appreciated if you’re looking for a backup sighting system.
Professional-Grade Features
The Quattro 2-stage adjustable match trigger, complete with a gold-plated blade, provides a crisp and customizable trigger pull that enhances accuracy.
Safety features are comprehensive, including both manual and automatic safety systems, an anti-double-feed mechanism, and a patented anti-knock system that prevents accidental air discharge if the rifle is bumped or dropped.
Practical Performance
What sets Hatsan apart in the industry is their honest approach to performance ratings. Unlike many manufacturers who test with lightweight alloy pellets to achieve impressive but unrealistic velocity numbers, Hatsan tests with lead pellets – the type most shooters actually use. This transparency gives users a more accurate expectation of real-world performance.
Shot capacity is generous, with 30-40 useful shots per fill in .177 and .22 calibers, and 18-27 shots in .25 caliber. The option between standard (180cc) and long (230cc) cylinder sizes allows users to choose between maneuverability and extended shooting sessions.
The Hatsan AT44 QES represents an excellent value proposition in the PCP air rifle market. It combines proven reliability with modern features, impressive power, and practical accuracy in a package that’s both versatile and user-friendly.
Whether you’re interested in target shooting, pest control, or small game hunting, the AT44 QES delivers the performance and features needed for success.
5. Sig Sauer MCX Gen 2 – Best semi-auto air rifle under $300
The last gun on this list is a really fun air rifle – the Sig Sauer MCX .
Sig Sauer is a serious firearm manufacturer.
They were founded in 1853 in Switzerland.
In 1949, their SIG P49, which was used by the Swiss army, quickly became a legend on the battlefield as well as in competition.
Later, they started product lines of hunting rifles, which were also really successful and well-known worldwide.
In 1980, they reached the US market.
American success played an important role in making SIG an international leader in the small arms industry.
Nowadays, they produce the toughest, most precise rifles, pistols, suppressors, optics, ammunition, and airguns, many of which are used by the world’s best militaries.
Their philosophies are to cherish freedom, not compromise, and to be the very best.
The Sig Sauer MCX Gen 2 is a really fun gun — you can see that just by looking at the rifle.
The stock is made of synthetic, and the barrel is made of rifled steel. The butt plate is made of plastic.
It comes in all black.
You can use either the Weaver or Picatinny scope on this gun.
The overall length is 34.7 inches.
The barrel length is 17.7 inches – the short length makes the gun shoot even faster.
The gun uses CO2 gas as the power source.
It’s a semi-auto rifle that can shoot 30 .177 caliber pellets per load.
The max velocity is 700 fps – not so fast.
The rifle shoots loudly but accurately.
This rifle is used for fun plinking, not for hunting as its power is not quite there.
With an even longer riser to axle-to-axle ratio than the previous V3 31, the V3X has a two inch increase out to 33in and a brace height increase from 6in out to 6.5in.
The V3X is offered in two axle to axle lengths, 33in for maximum stability and string angle comfort at full draw for longer draw lengths. The 29in, which is sold separately, is tailored towards ultimate agility in tight spaces; the V3X gives hunters a compact rig without compromising Mathews industry leading accuracy.
The V3X 33 sports a 6.5in brace height and delivers speeds up to 336fps. The geometry of the V3 platform opened up a new threshold of capabilities, allowing Mathews to increase the overall riser length while keeping an ultra compact frame with unmatched stability.
Being paired with the 740 harmonic damper for ultimate stealth and Centerguard technology for perfect timing, the V3X gives gave hard core bow hunters more function than ever before. Now with the introduction of the V3X we get to see the most advanced hunting platform Mathews has created.
Centerguard Cable Containment system places the roller guard in the true centre of the bow, resulting in optimal cam timing and a balanced draw cycle to maximise tunability while also adding additional vane clearance.
Extended Bridged Riser – stability is the key to accuracy, taking a strategic approach to the riser design led to a platform that cut weight while maximising length and rigidity in critical areas. The V3X sports the longest riser to axle-to-axle ratio Mathews has ever built.
Limbs and Limb Cups – deflected limbs and past parallel geometry, paired with a redesigned limb cup, cuts weight while increasing performance and efficiency.
Nano 740 Stealth remains a top priority on the V3X. The riser platform and limb geometry also increased cam efficencies and enhanced the effects of 3D damping for less noise and vibration than ever before. The V3X deploys the Nano 740, which is calibrated and tuned to the specific harmonics of this model. The extended position also provides added balance at full draw.
Since its inception SwitchWeight Technology has been extremely convenient and allows shooters not only the ability to change draw length but also peak draw weight in 5 pound increments via the cam’s module instead of changing limbs. Available in 60, 65, 70 and 75 pound peak weights. Each set of modules are programmed for an incredibly smooth draw and maximum efficency. For further customisation, modules are available in 85% let-off. Also comes in 80% let-off which is not a stocked item but can be special ordered. Please enquire.
Silent Connect System is compatible with the V3X. This optional kit enables hunters to attach Mathews genuine bow rope and bow sling in the field quickly and silently.
Specs at a glance
IBO Speed up to 336 fpsWeight ranges 60lbs, 65lbs, 70lbs, 75 lbs. Please specify weight required. All bows are adjustable 10lbs down from the peak draw weightDraw length range 27.5in-31.5in. Please specify draw lengthBrace Height 6.5inAxle to Axle 33inMass weight 4.67lbsLet-Off 85% standard. Also comes in 80% let-off which is not a stocked item but can be special ordered. Please enquire. Switchweight modules for the ultimate ease in changing the bow’s peak weightMathews genuine bowstrings and cablesExtended bridge riserCenterguard Cable Containment system3D Damping TechnologyAvailable in Right Hand and Left Hand. Please specify RH or LHMade in USA
Diamond Archery has some really popular bows in their line-up, and the two that are most often compared are probably the Diamond Infinite Edge (their most popular model), and the Diamond Edge SB-1 (the model that came right after it).
No products found.
VS
In this post, we’ll take a close look at these two bows, how they compare, and which might be the right option for you.
This is a good place to start. Both bows are made for recreational shooting and bowhunting, but there are plenty of differences to look at. We’ll ping-pong back and forth between bows, and we’ll start off looking at the…
Draw Length:
Infinite Edge: 13 to 31 Inches. The Infinite Edge is Diamond’s go-to “mass market” bow, and when they designed it, they wanted it to be usable by as many people as possible. That range in draw length is good for everyone to very young archers, all the way up to very tall archers (the draw length of 31 inches can fit someone who’s up to about 6-and-a-half feet tall).
SB-1: 15 to 30 inches. The SB-1 has a shorter draw length range (but still pretty large, in the grand scheme of things). That draw length of 30 inches is suitable for folks up to 6-foot-3-inches tall, and if you’re taller than that, the Infinite Edge comes out on top.
Verdict: For most people, this would be a tie. The Infinite Edge is probably a better pick for very young archers, and for folks taller than 6-foot-3-inches.
Draw Weight:
Infinite Edge: 5 to 70 Pounds. This is, at present, the largest draw weight range on a Diamond bow. 5 to 70 pounds should be suitable for just about anyone, but keep in mind that…
SB-1: 7 to 70 Pounds. This ain’t so bad either. Even very small kids should be able to pull 7 pounds (and that’s before we consider the let-off, which we’ll discuss in a second). 70 pounds is pretty high—you can find higher, but that’s up there—and it’s powerful enough to hunt just about all North American large game.
Verdict: A tie, really, but the Infinite Edge has a lower bottom measurement.
Mass Weight:
Infinite Edge: 3.2 Pounds. For a bow in this range, 3.2 pounds is pretty decent, and it’s better than…
SB-1: 3.6 Pounds. This isn’t terrible, but it’s definitely heavier.
Verdict: Infinite Edge gets the prize. That lower mass weight isn’t a big deal if you shoot here and there, but if you engage in hours-long practice sessions, or if you’re a dedicated bowhunter and need to aim for minutes at a time, that lower weight can be important.
Brace Height:
Infinite Edge: 7 Inches. This is a pretty common brace height, and good for hunting bows, because it provides both arrow speed and a liiiiittle forgiveness in your shot. It’s the same as the…
SB-1: 7 Inches. This is one of those measurements that ultimately becomes a matter of preference. 7 inches is reasonable, though, for sure.
Verdict: Tie.
Axle-to-Axle:
Infinite Edge: 31 Inches. Same as the…
SB-1: 31 Inches. What’s fascinating is that these two measurements—the brace height and the axle-to-axle length—make this a very similar bow. And we’ll talk more about that below.
Verdict: Tie.
IBO Speed:
Infinite Edge: 310 FPS. For a mid-range bow like the Infinite Edge, 310 feet-per-second is pretty good, and that’s why we’ve recommended it to new bowhunters. There are bows that will proper arrow with greater speed, but they tend to high-end bows (or crossbows!). 310 FPS is very good. But, obviously, not as good as…
SB-1: 318 FPS. Diamond upped their game with the 318 FPS, and while those 8 feet may not sound like much, the faster you get, the harder it is to increase that measurement. 318 is excellent for a mid-range bow.
Verdict: The SB-1 takes this one, and if you’re bowhunting, those 8 feet per second can make a big difference—game is quick!
Next up in our Diamond Edge SB1 vs the Infinite Edge Pro face-off…
Let-Off:
Infinite Edge: 80%. This is above-average for a bow in this range, and very good for mass-market bow. And that’s why it’s a little surprising that the let-off on the SB-1 is…
SB-1: 80%. We were a little surprised when we found that the SB-1 has a let-off 80%. We thought, because the SB-1 is technically a more advanced bow, the let-off would be greater, but… no.
Verdict: Tie. Don’t get us wrong—80% is still very good, and if you’re going to jack up your draw weight to 50 / 60 / 70 pounds, 80% can provide you with a lot of comfort and ease to aim. But it is surprising that both of these bows have the same let-off.
So it would seem that these two bows are almost identical, right? The specs all seem the same. They even look very similar:
No products found.
They’re not the same, though—there are actually some important differences between the two, so now…
Let’s Compare the “Hidden” Features
It really does seem like these two bows have a whole lot in common. Even the features that are different aren’t really *that* much different. So what gives?
We’ve written… goodness gracious, at this point we’ve written hundreds of bow reviews, and we’ve found the following: 1) people get really obsessed with feet-per-second and let-off and other numbers-based details, but they…
2) frequently overlook the “non-spec” aspects of a bow—and that’s a shame, because those “non-spec” aspects of a bow are often the most important things to look at. And that’s the case here.
There are two main differences between these two bows that won’t show up in a spec list. They are:
The Ease of Adjustability
The Diamond Infinite Edge was a great success for Diamond, and because of its incredible adjustability, it was a great option for both beginners and intermediates. You can make the draw weight light, and then increase it as you gain strength, and you could even buy the bow as a younger person and use it as you got older by extending the draw length. The only problem was…
It wasn’t *really* that easy to adjust. It wasn’t! In many cases, people had to bring it to the pro shop to get it adjusted (and we advised many people to do so).
And that’s one of the real advantages of the SB-1: it’s easier to adjust—and designed to be easier to adjust. Diamond made a lot of effort to make adjustability easier, and they even put videos on YouTube to show people how to do it:
So that’s Big Difference #1, and it’s a big one—especially if you’re new to archery, or getting the bow for a younger person.
The second big difference is…
The Cam System
These two bows have very different cam sets, and if you take a close look, you can see the difference: the cams on the SB-1 are more aggressive and ovoid, whereas the cams on the Infinite Edge are a little rounded. Not only does that aggressive shape of the cams on the SB-1 contribute to the higher FPS measurement, but it also makes for a smoother draw cycle.
Cams are designed to do a lot of things—pulling on the bow string to propel the arrow forward being the main one—but they need to reliable, and the Bowtech Synchronized Binary Cam system—which is on the SB-1 but not on the Infinite Edge—is designed for reliability. It’s manufactured to keep the cams moving as mirror images to each other, so that the nock—the part of the bow string that holds your arrow in place—travels forward in as flat a flat trajectory as possible.
So that’s Big Difference #2: the cam system. Another big difference.
The Diamond Edge SB1 vs the Infinite Edge Pro: Our Verdict
Of these two bows, the SB-1 comes out on top—and that’s by design: it’s *supposed* to be the better bow—but honestly, there’s more in common here than not. Here’s how we’d express it:
> Both are great bows, and both are good for recreational shooting and bowhunting by people of all ages. From a performance angle, they’re very similar, and we’ve been pleased with both—but at the end of the day, the draw cycle is a little smoother on the SB-1 because of the Bowtech Synchronized Binary Cam system.
> If you want a bow that you, yourself, can adjust so that it meets your draw weight and draw length specifications, the SB-1 is probably the better bet. It’s easier to tune for beginners, and there are some really helpful guides on YouTube put up by Diamond.
> If you don’t want to fiddle with the bow, and are fine taking it to a pro shop for tuning, the Diamond Infinite Edge will do you just fine. Have the pro shop rep adjust it to your specifications, and go from there. It’s a solid bow, and we’ve used our model for years.
I started using jigs for trout here in eastern Washington a few years ago.
First as a novel alternative to heavily pressured trout, then as I discovered their versatility and raw effectiveness, they became my out-of-the-truck first shot go-to for all trout species.
In all the lakes I happen to be at the time, large or small, from April to November, jigs catch trout of all sizes as well, or dare I say better than most techniques. Best of all, it gets the attention of larger fish with regularity. So it made perfect sense to me to bring my plethora of jigs with me on a spring trip to western Montana last April.
Turns out, jigs work well over there in all types of water, not just lakes, but rivers as well. And no one, I mean no one is using these things in Big Sky rivers.
Recently transplanted 35 year ex-Forks steelhead guide JD Love and I were floating a few rivers near his new home in western Montana last early spring, and once again in mid-October. The rivers we targeted are no secret; they are some of the more famous trout streams on the planet.
The Jefferson below the mouth of the Big Hole; the big Missouri below the confluence of the Jefferson, Madison and Gallatin; the Madison just above the entrance of Ennis Lake. Even smaller streams like the Beaverhead and Ruby, which we fished from shore, all just a short hike from the parking spot provided excellent jig fishing.
All feature a thousand wild trout per mile (or more) and all are more than famous for brown trout measured in pounds.
Let’s not forget the world record brown trout was caught on a twitched jig.
Our last day of the season was spent floating the Jefferson from Twin Bridges to Silver Star access. It was Wild Kingdom that day; we saw a few moose (a little too close), a billion deer, partying packs of skunks and too many migratory waterfowl.
The jig of trout choice that day (water had 4 feet of visibility) was either a yellow or white ¼-ounce head with a #1 Gamakatsu jig hook; brown/light green hackle collar and 5” fire tiger rabbit strip tail. Lots of contrast, bright colors to show well in the deeper slots and faster water.
We hooked around 40 trout, mostly browns but a few rainbows that would have passes for small summer steelhead back home, including one about 7 pounds that fought like a Dean River steelhead. Most of the browns (and rainbows) in all the rivers we fished were 16 to 24 inches, biggest perhaps 5 pounds. All struck the jigs with a ravenous rip-down.
My “new thang” is large brown trout.
You know we river rats love a new challenge; mine somehow morphed to finding large, wary fish-eating trout on light gear. And since we really don’t have that many brown trout fisheries around my house in eastern Washington, some travel is necessary. Just so happens I now have a great friend who lives a 9-iron shot (and guided there for years in the 70s) from the best brown trout rivers on North America.
Montana trout fishers, fly tossers in particular, have a jones for large brown trout.
Sure, they take big dries and nymphs as well as any trout, but the real kings of the riffles want a steak, not a peanut. As you will find out from the many articles and just conversations with trout fishers, the largest browns will chase and strike something that is almost 1/3 the length of their body.
That is why when you see a guide boat float by bets are there are at least two fly rods on board rigged with 4- to 6-inch gaudy, articulated streamer flies for targeting the rulers of the river.
Big wily browns seem to strike brightly colored jigs a bit more than natural-toned.
Trout seem to strike out of curiosity at these big jigs. This may be why a bright attractor pattern is more effective than a natural one. The trick to getting the largest ones is not so much “matching the hatch,” but showing them a possible large meal when they want it. If a 10 pounder just ate a 12-inch whitefish, he is not eating (striking) again until hungry.
Timing is everything, and covering as much water as possible in a day gives you the best odds of finding one that just strapped on the feed bag.
Gear anglers also know this, as you will see them tossing spinners, some spoons but primarily jointed similar-sized Rapalas to stir up the carnivorous larger browns, and even rainbows. But no jig tossers in any of the rivers. You may think, the natural progression from a large streamer would be a jig tied similar. Nope.
After speaking with several long time guides, plus dialing up the ol’ Internet looking for information, remarkable as it may seem there is just nothing on the subject. If those anglers are out there, there are either very few or they are well hidden and secretive.
Plenty of info on jig twitching in general in lakes or fishing tiny jigs in rivers…tossing big rabbit jigs for trophy browns in rivers, zilch. I really could not believe it, but a light bulb, flickering and fizzling as it was, lit up.
Knowing this, I returned home to the fly vise and did some modifications on the standard-issue trout jig. My working-class jigs are primarily 1/8 to ¼ ounce with hackle body/marabou tails, the whole jig approximately 3 to almost 4 inches. These are marvelous attractors for cutthroat, rainbow, and brook trout; hundreds of great trout have gripped these for me the last 5 years.
Taking a leaf from the streamer fisher’s bible, I made something that mimics the big streamers so popular in Montana and other rivers that feature outsized browns. Except the jig, having a concentrated weight on its head, sinks faster than any sink tip and can be presented where and when a fly, no matter how it is weighted, cannot. Enter the rabbit strip jig.
As we all know, nothing in the water is as life-like as rabbit. Marabou is close, and it is a fine addition (collars, etc.) to a rabbit strip. Jig twitching is all about the world of swimming prey. Big brown trout are meat-eaters; they can ingest (and will attack) something that is 1/3 the size of their bodies.
Whether that prey is small fish, like trout or sculpins, darting crayfish, big leeches or even snakes, they all swim erratically. That is why an undulating, wiggling “breathing” rabbit strip jig pretty much is unbeatable if you want a gimme shot at Ike.
Let’s look at rods, reels, lines for jigging in rivers for large trout, then a bit on techniques for fishing big bunny jigs in rivers.
The Gear
Short, fast action ultra-light rods are key when casting/presenting jigs. My choice is a GLoomis ultra-light spin rod. It loads fast with 1/8- to ¼-ounce jigs, casts and sets hooks with deceptive power. I’ve landed trout to 12 pounds on it and never felt under gunned. Put a Shimano Stradic on it, fill it with 10 pound (fishes heavier) yellow V2 Slick Power Pro, and place a 7-foot top shot of 12-pound high-quality fluorocarbon with a uni knot.
Line shyness is rarely a factor, do yourself a favor and “beef up” that top shot, nothing less than 10-pound test. The super line does not stretch; its 6-pound test mono diameter is perfect for longer casts, spool capacity, amazing feel, and hook sets that mono can’t touch. This outfit or one similar is ideal for tossing/twitching jigs either in a river or in lakes.
I try to keep three rods in the raft/drift boat rigged with jigs of slightly different color schemes, for example, one with white head with brown/green hackle body/fire tiger bunny strip tail; yellow head/dark red hackle body/fire tiger bunny tail and black head/brown hackle body/olive black stripe bunny tail. I’m not a fan of using any type of flash in my jig patterns but if you want, go for it. What isn’t tried won’t work.
The Technique
For smaller rivers, requiring shorter casts and/or shallower holding areas in larger rivers, a 1/8-ounce jig head is all you need.
For example, in the shallow/riffly Madison a 1/8-ounce head got down immediately in the mostly shallow riffly runs, while a ¼-ounce was necessary in the bigger Jefferson and Madison when longer casts and deeper spots are the norm. Read your water, adjust accordingly.
Now you are on one of those famous rivers.
Where do I look for trout? First, unplug your steelheading brain and leave it in the truck. Those gorgeous, long sweeping gravel bars, transitioning from shallow slow flows out to deeper, faster water… forget it. Nobody home.
Only whitefish, sculpin and small juveniles will be there in the “steelhead” transition water. This drove me batcrap nuts looking at all those juicy runs that hold no fish.
These trout live right next to cut banks, near woody debris and slack water side channels (like coho salmon love). If there is no other deepwater escape (like the primarily riffle configured Madison) then look for structure of any type.
If I had to pick one type of water to concentrate on, it would be cut banks.
That is where the insects and small creatures fall off the grasses into the water, plus the best cover. When targeting cut banks, try to position yourself as close to the bank as you can without spooking fish. Casting upstream parallel to the bank allows the jig to stay in the “loaded” water longer. Rather than casting toward the bank and retrieving the jig away, it stays in the strike zone for far more of the presentation.
Before making a cast or beginning a presentation, keep this in the front of the brain at all times: All injured, disoriented creatures move downstream at some pace because they cannot fight the current, or escaping from a predator is far more likely to be successful going swiftly with the current than attempting to go against. Cast upstream from your position whenever possible; this allows the jig to sink unimpeded by current, allowing it to drop into target water as swift as possible.
Your jig should land as close as possible to cut banks, submerged/partially submerged trees, boulders, and edges of back water. Large trout, any trout, will be tight up against this structure/drop off. Work it back, at or slightly slower than current speed back to your position, much like a spinner for summer steelhead. Don’t be too fast to begin your presentation, as this causes the jig to leave the “sweet spot” quickly.
Allow it to drop as close as possible to the bottom as well.
The best part about casting jigs is there is virtually no water that cannot be fished.
Skinny slack edges, plunge pools, long riffles, you name it, the jig works there. Do try to keep the jig near the bottom but try to avoid rapid banging, as all this does is kill the action, chips off all your head paint, and greatly increases the chance for snagging up and losing your jig.
The classic “twitch/drop/twitch/drop/reel” will get bit, but try not to be too robotic or lazy. A short, swift movement of the rod tip will be all you need to impart plenty of action to the jig. Long, up-sweeping motions rarely work. Try to shake up the rhythm of your retrieve, because nothing injured swims in rhythm. They can go side to side, wiggle rapidly, dart several feet, or a few inches. So, there is not one tried and true method of “twitching” for big river trout. There are not two, or five either.
Different speed of retrieve, all through the water column. Try a drift, casting upstream from your position. Pretend its 1985; you have a chunk of pencil lead on and a Corky. Keep the jig just above the bottom, “glide” it along at current speed and impart zero action. Something different is often what works. Regardless of the type of presentation, try to keep a slight bow in the line, never slack but never taught, as if you were spoon fishing. This allows more imparted action to the jig. Also, try and move the rod tip a foot or so rapidly side-to-side when retrieving; it will add a zigzag motion to the jig.
And here’s something I learned after missing too many really large Montana browns- do not give up on a presentation until the jig is ready to be lifted out for the next cast.
I’ve had great fish swirl at the jig just before lifting it out for the next cast. Before you pull the lure out of the water, let it hang and wiggle a bit a few feet off the rod tip. Surprise! That is when you will be glad for at least 12-pound test shock tippet off that braid.
The biggest rainbow I’ve ever caught in Montana was seven pounds, it gripped the jig inches under the water immediately before I was about to re-cast. I peed a little.
When you find yourself in western Montana- and I hope you do- if you just want to catch a lot of trout with the chance for a larger one, toss 1/6th oz. silver bladed/yellow bodied Rooster Tails or smaller, natural-toned jigs. Or indicator fish with a fly rod with weighted nymphs if you really want some numbers.
Casting/retrieving an F-9 rainbow trout pattern Rapala will also get big fish eating browns, but they are not as versatile in ability to hit virtually any type of water like a jig. But remember- big fish, big lure.
And how did we do, last spring and fall twitching large rabbit/marabou jigs for aggressive, carnivorous browns? Well first, check out the pictures smattered around this article and just know there were plenty of players in all the places we fished.
There are so many more rivers, even many other stretches of the same ones we fished that crowding I promise will never be an issue. Even if there are some folks floating in front of you, know that none of them will be twitching big rabbit jigs. They will be nymphing with an indicator or stripping large flies on fly rods.
The novel alternative will always be in your favor. It’s so fun in fact I’m going back to western Montana in 2020 not once but half a dozen times…with 100 newly tied rabbit jigs.
Having in your survival bag a versatile item like a tarp will come in handy during an emergency situation. It will help you gather water, camouflage your supplies and it will provide a good shelter in case nothing else is available. Improvising a basic tarp shelter can keep your head dry, it will help you conserve heat and it provides a sense of comfort and safety.
A polyethylene tarp will go a long way and you should definitely get one for your bug out bag. It is lightweight, durable, draft-proof and waterproof. They come in a variety of sizes and color, and they won’t burn a hole in your wallet.
Making a tarp shelter is easy and there are dozens of different ways and patterns to construct a suitable shelter with only a single tarp.
Before you make your tarp shelter you must consider the following:
The location of your shelter is very important and you should stop and think about it before building your shelter.
The direction from which the wind is blowing should be taken into account or your shelter will sail away.
The ground should be comfortable enough if you plan to get some sleep. Pointy rocks will keep you awake.
The ground should slope slightly for the water to runoff.
If there is no slope, you will have to dig some trenches around your shelter to aid drainage.
Take into account the purpose of the shelter and make it as large as it needs to be.
Consider the weather and chose a model that is stable and won’t collapse if rain or snow are expected.
For all the shelter examples provided here, you can use a 10X10 foot tarp.
The A-Frame shelter is probably the most common shelter one can make. It can be made by stringing the paracord between two trees. Draping over the tarp and staking it down are the final steps required to make this common shelter. The 30-degree angle of the tarp’s roof will create a ten foot-long living area. The shelter will be 8.6 feet wide and 2.5 feet tall. This shelter provides a good rain and snow runoff and a good wind deflection. The downside of the A-frame shelter is that there is no floor and if you haven’t stretchered the paracord tight enough, there will be sagging in the middle.
2. The Sunshade tarp shelter
To create this type of shelter you will need four anchoring points to which you will tie the paracord. This is a shelter parallel to the ground and it’s designed to provide 100 square feet of shade against the sun. some people use this type of shelter during the rain because the water will pool in the middle and it’s easier to collect it. To make it sturdier you can add support poles to the corners. This basic sunshade tarp shelter will provide maximum protection against the sun, but it’s not suitable for cold weather and it can’t support rain for long.
3. The Lean-To tarp shelter
This is another shelter that it’s simple to make and it’s great for deflecting wind or providing sunshade. To make this shelter you need to secure the tarp to the ground on the windward side and support it with the paracord between to anchor points. A 30 degree angle of the tarp will provide five feet of height and 8 feet of width under the shelter. This is an “on the go” shelter because it’s easy to erect and you can quickly take it down. It provides great wind deflection and it will keep you safe from rain or sun heat. The downside of this shelter is that there are not sides and no floor to offer protection against other elements.
4. The tube tent tarp shelter
This is a sturdy shelter that provides a floor and, if properly secured to the ground, will prevent rain from seeping in. To make it, you will need to secure the paracord between to trees and drape over the tarp with the opposite ends secured together. The sixty degrees walls will provide 3 feet of width and almost 3 feet of headroom. This should be enough room for a single adult.
5. The mushroom fly tarp shelter
This type of shelter is very similar to the basic sunshade shelter but it adds a central support pole at the tarp’s midpoint. It is designed for rain or snow runoff and it’s pretty sturdy if you secure the four corners of the tarp well enough. You can make it as tall or as short as you need depending on the length of the pole. This shelter provides a great runoff for rain or snow, but it doesn’t have any sides to protect you from the wind or cold.
6. The cornet tarp shelter
This shelter utilizes the entire length of the paracrod strung from a tree to the ground. The tarp is draped over the paracord diagonally, while the leading edges fold under to form the floor. The corner of the shelter must be faced towards the direction of the wind. You will also need to tie off some drip lines above the entrance of the shelter to prevent rain from running down the paracord and into the shelter. This is a good design for wind deflection and rain/debris shedding. The downside of this design is that it doesn’t offer too much head room and if you are a tall person, you might not have enough room for you and your gear.
7. The dining fly tarp shelter
This is the favorite design for many camper and it’s a simple open air cover. It provides a good sunshade and enough headroom without sacrificing too much space. It keeps away rain but it provides limited protection against the other elements due to its lack of sides. When properly tied down and staked, the dining fly becomes a sturdy shelter and the height of the support pole will dictate the amount of headroom. This is a good model for desert survival because it provides good ventilation and adequate coverage.
8. The wind shed tarp shelter
This type of shelter requires a little practice to get it done the right way. You will need to fold the tarp into thirds and make sure the leading edge of the roof hangs over the groundsheet for adequate rain runoff. The main ridgeline has to be secured with paracords while stretched between two trees. A length of paracord must be added to the bottom fold, where the back panel meets the groundsheet. It provides great wind deflection, but it requires a lot of secure points. The hanging roofline could also sag under rain loads and channel the water onto the groundsheet.
9. The Fold-Over Wind Shed tarp shelter
This design is similar to the traditional wind shed, but it provides more coverage by sacrificing the groundsheet. The height of the paracord ridgeline determines the angle of the roof and the footprint of the shelter. It provides great wind deflection and rain runoff, but it doesn’t protect completely against the elements due to its lack of floor, flaps or sides.
10. The diamond fly tarp shelter
This shelter is suitable for two persons and it’s easy to make. You will need to secure the paracord to a tree and the ground, and drape over the tarp at a diagonal. The length of the paracord and the angle with which it is tied to a tree will determine the overall headroom and width of the shelter. The steep walls will shed rain and will deflect wind if they are well staked. This model will require drip lines, just like the cornet shelter. Depending on the size of the tarp, this shelter can accommodate more than two persons or more equipment, but the lack of a floor and flaps won’t keep out the elements. If the wind changes direction frequently, the shelter can be compromised.
11. The arrowhead shelter
Start the construction of this shelter by supporting the center of two perpendicular edges with five foot long poles or by attaching those edges to trees using a paracord. You will need to stake to the ground the opposite corner so that it creates a series of four triangles. This design will provide 35 square feet of living space and five feet of headroom at the opening. The flap will hand down and make a partial closure. The poles need to be supported by paracord tie-downs. This shelter deflects wind with its low profile and it’s very roomy.
12. The half box tarp shelter
This shelter will require some time to be built and you need to use at least four support poles and as many or more tie downs to hold it all up. The footprint provided is 25 square feet and it has two sides of protection from the elements. If not supported in the middle or kept taut from the sides, it will sag under the weight of water or snow. A full one quarter of the tarp goes unused and folded up behind the rear corner. This type of tarp shelter provides good sunshade throughout the entire day if you position it properly.
13. The barn stall tarp shelter
To make this shelter you can either use four five foot poles for support or two poles and a paracrod attached to two anchor points. The front is supported by poles and the single 90 degree wall provides enough protection, although strong wind can damage the entire structure. This shelter produces a 50 square feet living area but it has no floor. It’s simple to build, but it doesn’t provide adequate protection from the weather.
14. The Square arch tarp shelter
As the name implies, this shelter is an arch with a square top. Starting with two parallel lengths of paracord attached to anchor points approximately 3 feet apart and 3 feet high, drape the ground cloth over the two lengths of paracord and secure the long ends of the tarp with stakes. This is a good shelter for narrow spaces, but the odds of finding four anchor points in the needed proximity is quite low. To allow rain to runoff, make sure you secure one paracord slightly higher than the other. This shelter is three feet wide, three feet wide and ten feet long.
15. The shade sail tarp shelter
This is an easy and quick to build shelter and it requires to diagonally drape the tarp over a length of paracord attached to two anchor points. The opposite corners of the tarp are staked to the ground. This is an open and airy shelter and the lower the angles of the sides are, the better it will deflect wind and the more shade will provide. It provides all day shade and it requires minimal stakes and set up, but it’s not weather resistant and it will not keep you dry.
What not to do when building a tarp shelter:
Don’t build your shelter over an ant nest or any type of burrows
Don’t set up your shelter beneath a dead tree or in the vicinity of one
Don’t attach tarp lines to a tree standing alone or to tall trees. Always go for the short tree in a group of taller trees.
Don’t set up your shelter below the high tide mark of a shoreline
Don’t set up your shelter on top of a hill or ridge.
Don’t set up your shelter on a river bank
Making a tarp shelter is not rocket science and with a little bit of practice anyone should be able to make one. Learning these tarp shelter patterns will come in handy during an emergency preparedness situation.
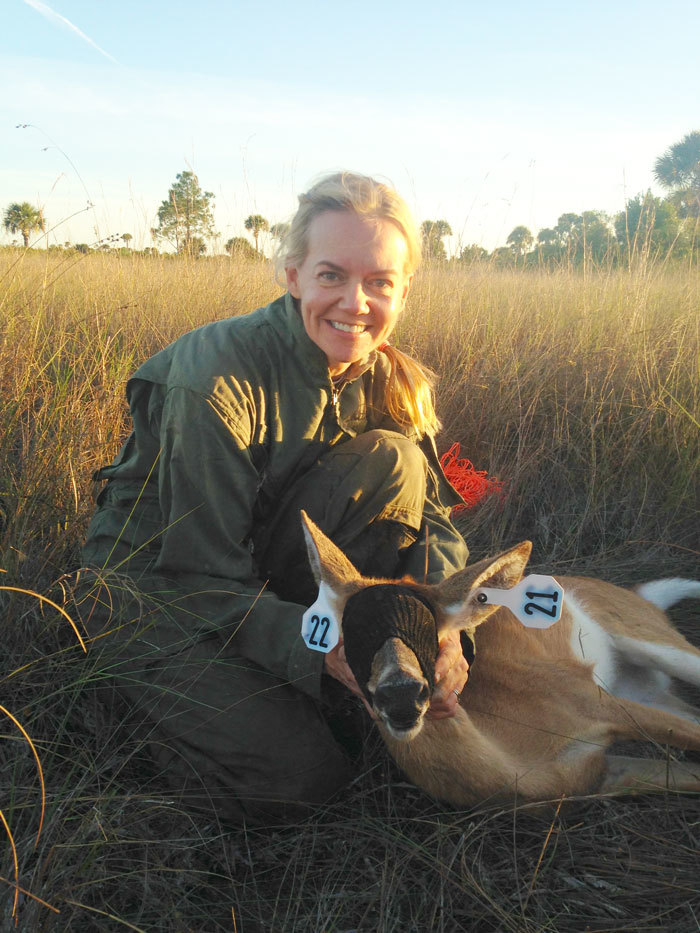
FWC white-tailed deer research biologist Elina Garrison with a doe captured during the South Florida Deer Research Project. FWC photo.
The truth about Florida’s deer rut
There are a lot of theories and differing opinions on what causes the white-tailed deer rut. Hours of daylight decreasing, geographic latitude, genetics, climate, evolution and moon phase are many factors that hunters and deer enthusiasts have debated over the years. To get to the science behind it and learn the facts about what impacts the rut, I asked the Florida Fish and Wildlife Conservation Commission’s (FWC) white-tailed deer research biologist Elina Garrison.
“As winter approaches, decreased daylight triggers does to come into estrus,” Garrison said. “Latitude therefore plays a part as seasonal day length varies with geographic latitude.”
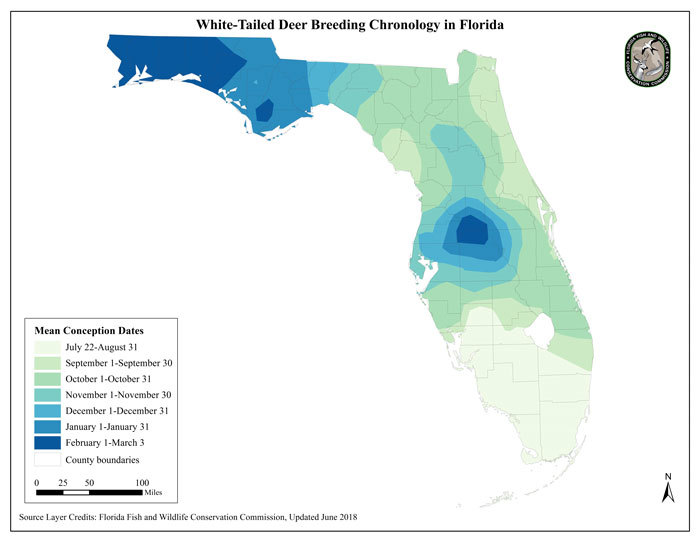
Some hunters believe deer from other states released in Florida years ago is one of the reasons why the deer rut here is the widest ranging of any state – from July in extreme south Florida to early March in extreme northwest Florida and the Green Swamp Basin.
“While it seems unlikely that genetics due to restocking is the only explanation for the variation in Florida’s breeding dates, there is some research that suggests it may play a part,” Garrison said. “Florida, as were many other southeastern states, was part of restocking efforts in the 1940s through the ’60s when deer were introduced, mostly from Wisconsin, Texas, Louisiana and Pennsylvania. The main stocking source for the Green Swamp Basin was from Louisiana. South of there, deer from Texas were mainly used, and north Florida received mainly Wisconsin deer.”
Garrison said climate is a factor, but it really only plays a part in northern, colder states, where the timing of the rut occurs so fawns are born in the spring after the late winter storms and when the most food is available. But they must be born early enough to put on suitable weight and fat to survive the following winter. That’s why there’s such a short window for when breeding must occur in northern states.
The reason the rut varies so much in Florida is because it can, Garrison said. Florida’s relatively mild climate and long growing season allows fawns to be born at various times of the year.
“As far as I know, there are no other states where breeding occurs as early as July and August like it does in extreme south Florida,” she said. “And although difficult to prove, it seems likely it is driven by the hydrological cycles down there. The rut is timed so fawns are born during the driest time of the year, giving them the greatest chance of survival and allowing them to grow to an adequate size before the beginning of the wet season in June.”
Although it is a popular theory among hunters, Garrison says several research projects have proven there is no relationship between the rut and the moon phase. Another interesting fact is the average time a doe stays in heat is about 24 hours.
“The breeding chronology study we did shows that conception dates within an area vary as much as from nine to 110 days, with an average of 45 days, and most does breed within 60 days, meaning rutting activity can occur over a two-month period,” Garrison said.
If a doe is not bred during her first heat, she will come back into estrus again in about 26-28 days, Garrison says. If the doe doesn’t conceive, this cycle can be repeated but normally not more than a few times unless there are not enough bucks to breed all the does. In which case, an area could experience a second or even third peak rut.
If any of this deer talk is getting you fired up to continue hunting this season, then grab your favorite primitive method of take and follow the rut up to the Panhandle and take advantage of Zone D’s late muzzleloader season.
General gun season ends Feb. 17 in zones B and D, but if you’d like to keep hunting deer, Zone D has a late muzzleloading gun season that extends deer hunting opportunities by a week and runs Feb. 18-24 on private lands. The season was established to give hunters an opportunity to continue hunting northwest Florida’s late rut, which runs mid-January through February.
On private land, a $5 muzzleloading gun season permit is required along with a hunting license and $5 deer permit (if hunting deer) to hunt during this season, and hunters have the choice of using a muzzleloader, bow or crossbow. But the only muzzleloaders allowed are those fired by wheel lock, flintlock, percussion cap or centerfire primer (including 209 primers) that cannot be loaded from the breech. For hunting deer, muzzleloading rifles must be at least .40-caliber, and muzzleloading shotguns must be 20-gauge or larger.
There are 14 wildlife management areas in Zone D that have a late season in February, but it’s referred to as the archery/muzzleloading gun season. Those areas are Apalachicola, Apalachicola River, Beaverdam Creek, Blackwater, Chipola River, Choctawhatchee River, Econfina Creek, Eglin AFB, Escambia River, Escribano Point, Perdido River, Point Washington, Tate’s Hell and Yellow River. Season dates vary by WMA, so be sure to check the brochure for the area you want to hunt.
Hunters may use bows or muzzleloaders, but no crossbows – unless they possess a Persons with Disabilities Crossbow Permit. Besides a hunting license, $26 management area permit and deer permit (if hunting deer), hunters who choose to hunt with a bow must have a $5 archery season permit, and those using a muzzleloader need a $5 muzzleloading gun season permit.
All the licenses and permits you’ll need can be obtained at most retail outlets that sell hunting and fishing supplies, Florida tax collector offices, by calling 888-HUNT-FLORIDA or at GoOutdoorsFlorida.com.
Deer and wild hogs are most commonly hunted during this season. Only legal bucks may be taken (even if using a bow). South of Interstate 10 in Deer Management Unit D1, one antler must have at least two points. North of I-10 in DMU D2, all bucks must have at least three points on one side or have a main beam of at least 10 inches long to be legal to take.
On private land, the daily bag limit is two. Bag limits for deer on WMAs differ, so consult the area brochure before you go.
During the late muzzleloader season on private lands and archery/muzzleloading gun season on WMAs, dogs may not be used to hunt deer. However, you may use a leashed dog for tracking purposes. You’re allowed to take deer and hogs over feeding stations on private land, but it is illegal to use such feed on WMAs. And it’s important to know that turkeys are not legal game during this season.
The 2018-2019 fall/winter hunting seasons may be winding down, however, there are still great opportunities to get out there. This February, catch the hunting excitement of the late rut that occurs during Zone D’s late muzzleloader season.
When I first got my hands on some 6.5 PRC ammunition from Hornady, my initial thought was how its performance would compare with other factory cartridges of the same caliber.
A comparison of case capacities is a good starting point for finding out. When filled to the brim, gross water capacity of the 6.5 PRC averaged 67.6 grains. Moving down to smaller capacities, we have 6.5 Creedmoor and 6.5-284 cases made by Hornady at 53.4 grains and 64.3 grains respectively. Moving up to a couple with bigger capacities, we have the 6.5 Remington Magnum at 70.2 grains and the .264 Winchester Magnum at 84.1 grains. Capacities for the 26 Nosler and 6.5-300 Weatherby Magnum are 98.2 and 96.7 grains respectively.
As you can see, the 6.5 PRC holds just over 3 grains more powder than the 6.5-284 and just under 3 grains less than the 6.5 Remington Magnum.
My next step was to compare velocities of the three cartridges in rifles with 26-inch barrels. Before going there, let’s take a close look at our newest cartridge of its caliber.
The 6.5 PRC (Precision Rifle Cartridge) story begins back in 2012 when George Gardner, owner of GA Precision, who is heavily involved in PRS (Precision Rifle Series) competition, approached Hornady about developing a big brother to the 6.5 Creedmoor on the RCM (Ruger Compact Magnum) case. It would be used mainly for banging steel targets beyond 1,000 yards. But that was when the Obama administration was selling far more ammunition for Hornady than the company could produce, and the time and machinery required for developing a new long-range rifle cartridge were not available.
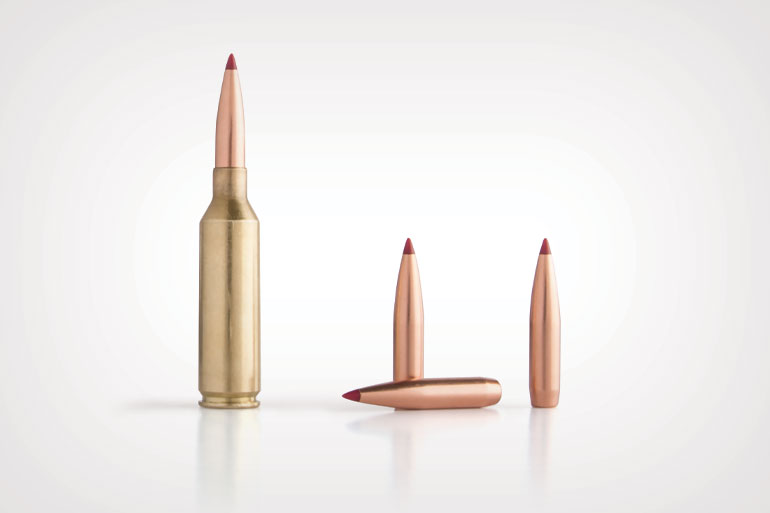
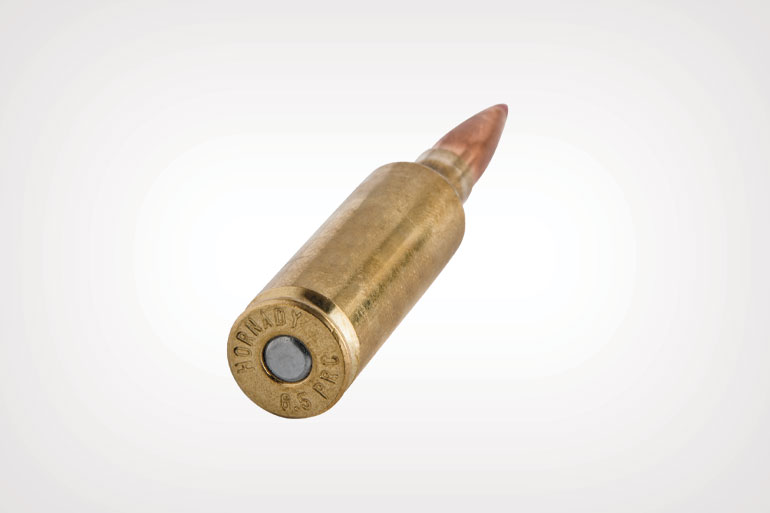
The 6.5 PRC is the latest 6.5mm cartridge to come on the scene. It’s based on the Hornady-developed RCM (Ruger Compact Magnum) case and is a big brother to the popular 6.5 Creedmoor.
So Gardner necked down the 7mm Remington Short Action Ultra Magnum case for 0.264-inch bullets. Remington brass eventually became difficult to find, but by then Hornady was caught up enough to begin producing what would eventually add up to thousands of 6.5mm SAUM cases, all sold through GA Precision. They are headstamped “6.5 GAP 4S,” but the cartridge is more commonly known in hunting and competition circles as the 6.5 SAUM. It is simply the 7mm SAUM case necked down.
Considering the production by Hornady of 6.5 GAP 4S cases, the next logical step appeared to be ammunition coming off the line in Grand Island, Nebraska. Instead, the Hornady-developed RCM case was used to produce the 6.5 PRC. A maximum case length of 2.030 inches makes it 0.015 inch longer than the .338 Compact Magnum case and 0.070 inch shorter than the .300 Compact Magnum. All share a 30-degree shoulder angle.
Most 6.5 GAP 4S rifles are custom jobs, and while plenty of custom rifles in 6.5 PRC are likely to be built, the availability of less-expensive factory rifles from Savage, Montana Rifle Co., Sauer, and others likely to follow makes it more affordable than the 6.5 SAUM. Other advantages are the availability of factory ammo and a reliable supply of less-expensive unprimed cases from Hornady.
Two 6.5 PRC factory loads are currently offered. Hornady Match is loaded with the 147-grain ELD Match bullet at an advertised 2,910 fps, and Precision Hunter pushes the 143-grain ELD-X along at 2,960 fps. Load data is no farther away than the Hornady and Hodgdon websites. Most who publish pressure-tested data will likely stay below the SAAMI maximum of 65,000 psi. Hodgdon stopped at 61,500 psi and 2,995 fps for a 140-grain bullet from a 24-inch pressure barrel. The Hornady data sheets I have don’t include chamber pressures, but maximum velocities listed from a 26-inch barrel are 3,150 fps for 140- and 143-grain bullets and 3,050 fps for the 147-grain ELD Match.
The 6.5 SAUM has proven capable of consistently delivering accuracy inside 1/2 MOA from accurate rifles, and to see if the 6.5 PRC is capable of equaling that, I shot it in a precision-built rifle put together by Don Fraley, owner of Advanced Weapons Technology in Russell, Kentucky. His rifles are on blueprinted Remington Model 700 actions, and since early reports described the 6.5 PRC as a short-action cartridge, we initially assumed the test rifle would be on the short version. Digging a bit deeper revealed that the new cartridge is too long for the short Remington Model 700 magazine. With an interior length of 2.840 inches, it restricts cartridge length to a maximum of 2.815 inches. SAAMI maximum for the 6.5 PRC is 2.955 inches, with the two Hornady factory loads measuring 2.950 inches.
The 6.5 PRC’s closest competitors are the 6.5-284 Norma and the 6.5 Remington Magnum. Layne put them to a head-to-head comparison. From left to right: 6.5 PRC, 6.5 Creedmoor, .260 Remington, 6.5-284 Norma, 6.5 Remington Magnum, .264 Winchester Magnum
A partial solution does exist. The interior length of Wyatt’s Outdoor magazine box for the short Model 700 action is 3.060 inches, and deducting 0.025 inch from that we arrive at a maximum useable cartridge length of 3.035 inches. Its installation requires light machine work on the receiver and modifying the boltstop, both easy tasks for a skilled gunsmith. That magazine will accept Hornady 6.5 PRC ammo, but very little wiggle room remains for chasing the rifling with handloads as chamber throat erosion requires seating high-BC bullets farther out of the case.
Everything considered, I became convinced that the long Model 700 action is the easiest way to squeeze top velocities from the 6.5 PRC while staying within SAAMI maximum chamber pressures. I tried the 6.5 PRC in the magazines of several Model 700 rifles in various calibers, and feeding was flawless in one in .300 Remington Ultra Magnum. The long Model 700 action is only 3 ounces heavier than the short action, so when heading for the hills, I will compensate by leaving a candy bar behind. Using what was originally intended to be a short cartridge in a long-action rifle is hardly new. When loaded with some of the old-school bullets, the original 6.5-284 wildcat works fine in a short action, but seat the new breed of high-BC bullets long and change its name to 6.5-284 Norma and a long action is required.
A Special Test Requires a Special Rifle
The Advanced Weapons Technology rifle I used for accuracy-testing the 6.5 PRC is the Long Bow model. It has a tactical-style bolt handle, an M16-style extractor, and a Lawton/Nosler exterior bolt release from Pacific Tool & Gauge. The HS Precision Pro-Series stock is a combination of fiberglass, Kevlar, and carbon fiber. Steel-reinforced bedding compound applied by Fraley extends from the tang of the receiver to 1.5 inches beyond the recoil lug.
The 26-inch Select Match barrel from Shilen has that company’s ratchet rifling at a 1:8 twist, and the contour is listed by Shilen as Heavy Sendero. It free-floats in the stock. Pertinent chamber dimensions are a 0.2985-inch neck diameter, a 0.2645-inch throat diameter, and a 0.2050-inch throat length. The barrel has an 11-degree crown at the muzzle, and it wears an extremely efficient and surprisingly quiet AWT eight-port brake. The barreled action has a black Cerakote finish. Measured with a Lyman digital scale, the Timney 510 trigger breaks crisply at 35 ounces with a 2-ounce variation. There is no detectable creep or overtravel. The rifle came with a 20-MOA Picatinny base installed, and for accuracy-testing, a Trijicon AccuPower 5-50X 56mm scope in Weaver 34mm tactical rings was used.
While the 6.5 PRC has been described as a short-action cartridge, it is much too long for the magazine of the Remington Model 700 short action. The long Model 700 action of the Advanced Weapons Technology test rifle is only 3 ounces heavier than the short action, and its magazine allows extremely long bullets to be seated completely out of the powder cavity of the case.
The accuracy of different loads fired in a precision-built rifle will vary a bit in accuracy, but the spreads are usually quite close compared to mass-produced factory rifles. Fraley guarantees his rifles to consistently shoot five bullets inside a half-inch at 100 yards, with precision handloads pushing accuracy in the direction of 1/4 MOA.
When good handloading practices and quality equipment and components are combined with a bit of bullet jump and powder charge juggling, it’s fairly easy to produce ammunition capable of half-minute accuracy, but shrinking group size to half that usually requires precision loading. Hornady 6.5 PRC cases were trimmed to the exact same length and their mouths chamfered and deburred. Cases were then capacity sorted and their necks outside-turned just enough to uniform neck wall thickness. Doing so reduced neck wall thickness by only 0.0005 inch, which put diameter of a loaded round at 0.291 inch compared to 0.292 inch for Hornady factory ammo. Primer pockets were uniformed, and flash holes were uniformed and deburred. Prior to being seated, all bullets went through a bullet-sorting stand from Sinclair International. Powder charges were weighed with an RCBS Model 304 scale, and RCBS Gold Medal Match dies were used in a Corbin CSP-1 bullet-swaging press converted for ammunition loading. A 0.289-inch bushing was used in the RCBS neck-sizing die.
In addition to consuming a lot of time, developing a precision load for just a single bullet-powder combination capable of equaling the accuracy of a super-accurate rifle can use up a lot of barrel accuracy life. For that reason, only four bullets were precision-loaded specifically for the test rifle. When accuracy-testing an extremely accurate big-game rifle, I usually shoot three-shot groups, but since the barrel of the Fraley rifle had a rather heavy contour with a muzzle diameter of 0.825 inch, I fired five-shot groups. To illustrate velocities possible with other bullet-powder combinations, I simply worked up to maximum in non-prepped cases.
Most who shoot the 6.5 SAUM use the Federal 215 and CCI 200 Magnum primers, so I was a bit surprised to see both Hornady and Hodgdon use standard-force primers when developing data for the 6.5 PRC. I tried Federal’s GM215M and GM210M primers, and while accuracy was about the same, velocity spread was lower with the former. It was not enough to matter at ethical game-taking distances, but it was enough to matter to those who punch paper or steel at 1,000 yards and beyond.
There is no scarcity of 6.5 PRC handloading components. Layne found accuracy to be about the same with Federal GM210M and GM215M primers, but velocity spread with some powders was lower with the GM215M primers.
Comparison Results
How does 6.5 PRC performance compare with its two closest competitors, all in 26-inch barrels? My Ruger No 1S in 6.5 Remington Magnum departed the factory in July 1965, and I purchased it new-in-box from a friend in 1978. I could never get it to shoot accurately enough to make me entirely happy until Randy Brooks introduced his Barnes X-Bullet in 1985.
Soon after adding a Cooper Model 22 in 6.5-284 Norma to my battery, it accounted for my second-best whitetail deer. My handload consisted of 53.5 grains of Reloder 19 behind the Swift 130-grain Scirocco II. The Model 22 is proof that you don’t have to have a custom rifle in order to enjoy superb accuracy.
Three different rifles might have slightly different stories to tell, but when the three cartridges are loaded to maximum with 140-grain bullets and fired in my rifles, the 6.5 PRC is about 100 fps slower than the 6.5 Rem. Mag. and about 100 fps faster than the 6.5-284 Norma. The 6.5 Rem. Mag. has long been one of my favorite cartridges, but since factory ammo and unprimed cases can be difficult to find, I have to recommend the other two cartridges over it. If, like me, you already have a rifle chambered for 6.5 Rem. Mag., by all means keep it active in the field because it is a great cartridge. But if you are shopping for a new rifle, the other two are better choices.
As it now stands, there are more sources for 6.5-284 Norma ammunition than for 6.5 PRC, although actual availability can vary due to fluctuations in production scheduling. A steady supply of ammunition gives the 6.5 PRC an edge among those who shoot factory ammo, but due to the availability of unprimed cases for both, handloaders should be equally happy with either cartridge. Those among us who cannot resist praising the new without condemning the old will point to the rebated rim of the 6.5-284 case, but decades of experience with that cartridge have not revealed a single problem with it. On the other hand, off-the-shelf factory rifles in 6.5 PRC may eventually far outnumber those in 6.5-284 Norma, and if that happens, it will have a big edge on the road to commercial success.
Congratulations! You’ve caught yourself a chicken of the woods.
These fungi are delicious, nutritious, and gigantic — it’s common to find specimens weighing several pounds. This is a stroke of good luck, but preserving such a massive mushroom can be difficult. What exactly are you going to do with it?
I’m here to break down the best ways to store your shroom according to your resources and preferences. Once you know how to store chicken of the woods correctly, you can use your summer harvest for sustenance through the winter and beyond.
Chicken of the woods will stay fresh for up to seven days in the refrigerator.
The most basic way to keep any food fresh is to keep it cold, so storing mushrooms in the fridge is a logical place to start. This method is best for people who plan to consume, give away, or otherwise use up their chicken within a week.
It is not ideal for long-term storage. The mushrooms lose flavor after two or three days, breaking down and becoming unpalatable after about a week. Of course, some people report their chickens stay good for several weeks in the fridge, but you don’t really want to risk it. If you won’t eat it soon, use a different storage method.
Think the fridge is the best choice for you? Here’s how to do it properly:
Ensure your fridge is 40°F or colder, the safe temperature to store produce, meat, and mushrooms.
Cut out any visible bruising on your fresh mushrooms. Bruising promotes microbial growth and causes mushrooms to spoil faster, so remove it before it can spread.
Aside from trimming the bad parts, do not slice or process the mushrooms before storing them in the fridge. Cut mushrooms spoil faster, so begin with whole fronds or shelves instead.
Do not wash the mushrooms before storing them; wash them before cooking. Excess moisture promotes bacterial growth. You can pick off insects with your fingers and wipe away dirt with a dry rag.
Use a paper or mesh bag instead of a plastic bag or Tupperware. This encourages airflow around the mushrooms and helps prevent bacteria from proliferating.
Store the mushrooms in the central part of your fridge rather than the crisper drawer. The high humidity in the crisper could promote spoilage.
2. Freezer Storage
Chicken of the woods will stay good for up to 12 months in the freezer.
Need a more long-term option? Freezing your chicken of the woods could be the perfect choice. This method is best if you have a substantial harvest you’d like to use up over the next several months.
The jury’s out on exactly how long your frozen chicken will last. The mushroom’s water content and starting quality will be significant factors, but it should last between nine and twelve months if you prep it right.
To cook or not to cook?
People often say you shouldn’t freeze raw mushrooms, which is mostly correct. The majority of fungi contain a lot of water. When frozen, the liquid expands, turning your nice meaty mushroom into a slushie.
However, chicken of the woods has a relatively low water content and will retain much of its original flavor and texture when frozen raw. Of course, the water content can still vary between specimens. Some are more moist, especially young ones. Older fruits or those exposed to a lot of sunlight are drier.
I find raw freezing preferable simply because it reduces the processing time. My only exception is when a specimen is exceptionally young and moist. Then, I parboil or sauté it in oil and white wine before freezing it so it releases some of the juices.
You might want to try both ways to see what works for you. If you freeze chickens raw, remember to cook them thoroughly before eating them — any wild food may contain pathogens, and you don’t want to ingest those!
Is freezing your method of choice? Here’s how to get the best results:
Clean mushrooms thoroughly before freezing. You can even wash them in water, but if you do, dry them with a towel and leave them to air-dry for at least an hour before packaging them. You want to remove as much moisture as possible.
Chop your chicken in slices about an inch thick or leave it whole according to your preferences.
Before packaging, you can “flash-freeze” sliced chickens for a few hours on a freezer tray. This is not a true commercial-style flash-freeze and won’t prevent ice crystals from forming, but it will prevent mushroom chunks from fusing together in the freezer bag.
Use the proper packaging. If you use containers that trap air, ice will form and ruin the mushroom’s flavor and texture. Putting chicken of the woods in a tight, airless bag and using a vacuum sealer to remove air is best. If you don’t have one, don’t sweat it. I have great results with regular freezer bags. Simply portion your mushrooms into the bags, carefully roll out all the air, seal them, and stow them away.
Do not defrost your mushrooms before cooking since this can corrupt the texture. Instead, cook them frozen.
3. Dry Storage
Chicken of the woods will last up to five years when dried.
Drying mushrooms is one of the best ways to preserve them for long-term storage, but it does take away some cooking options from you. While mushrooms like wood ear reconstitute perfectly, chicken of the woods is another bird entirely.
Dried chicken of the woods retains flavor nicely, but the texture gets ruined when dried and reconstituted. Essentially, it becomes mush. While you can’t use it for chicken nuggets, it still makes a delicious addition to stews and sauces. You can even grind it in the blender for some delicious umami chicken of the woods spice powder.
You can dry chickens in a dehydrator, the oven, or open air. I’ve reviewed how to prep and dry fungi in my mushroom dehydration guide, which contains all the information you need to complete the process.
Think dehydration is the way to go? Here’s how to store the harvest once you’ve dried it:
Use mason jars, Tupperware, or Ziploc bags to keep your shrooms fresh for up to a year. Keep the containers in a cool, dark place.
Use mylar bags to keep dried mushrooms fresh for up to five years. To help extend shelf-life further, store the bags in a cool, dark place or the freezer.
Whatever storage container you use, consider adding an oxygen absorber. These neat little packets prevent oxygen from lingering around your dried fungi and stop spoilage in its tracks.
4. Fermenting and Pickling
Chicken of the woods will last for several weeks when pickled and up to eight months when fermented.
Fermenting and pickling are both delicious preservation techniques that rely on acid to prevent microbial growth. Pickling involves submerging food in an acidic brine, while fermentation creates an acidic environment through biological processes. Either one will work well with chicken of the woods.
We’ve discussed both methods in an in-depth pickling guide, which gives you all the info you need to get started. No matter what process you choose, don’t forget to cook the mushroom beforehand. Boiling it in water for five to ten minutes will be sufficient.
Want to try your hand at fermenting or pickling chicken of the woods? Here are some helpful tips:
Slice mushrooms into ½-inch strips before boiling. A thinner slice ensures they cook all the way through.
Customize your brine recipe with herbs and spices to keep things interesting with distinct flavors.
You can use mason jars for pickling, but chicken of the woods are big. To make processing them easier, consider getting yourself a pickling crock that can hold more substantial amounts of fungi. You can transfer it to jars for storage once it has fermented.
Store pickled chicken in your fridge or a cool, dark place to make it last longer.
5. Canning
Chicken of the woods will last up to five years when canned.
Canning chicken of the woods works great for long-term storage. Cans are compact and convenient to stow away in any corner of your home. They’re easy to pop open and they last a long time. The USDA guidelines recommend keeping cans for about a year, but this is more about quality than safety. As time passes, flavor and nutrient content can decrease, but canned items shouldn’t go bad.
Keep in mind that you must use a pressure canner to can chicken of the woods. Mushrooms are a low-acid food and have the potential for deadly botulism growth. Canning them under pressure is the only way to kill these bacteria.
The only exception is if you’ve already fermented or pickled them — in this case, the acidic environment renders it safe to water-bath can them. Check out our guides on water-bath canning and pressure canning for a complete breakdown of the two processes.
Want to try your hand at canning chicken of the woods? Here are some tips for success:
Always cook chicken of the woods before canning it.
Add a pinch of ascorbic acid or a vitamin C tablet to your canning liquid to preserve chicken of the woods’ beautiful natural colors.
If you enjoy canning, consider buying a pressure canner. It makes everything easier and faster and allows you to can more items safely!
Now that you know how to store chicken of the woods, you won’t be scared to harvest the next mega-mushroom you find. Armed with all the knowledge you need to preserve it, you’ll be able to enjoy the fruits of your harvest all year long.
")
")
")
")
")


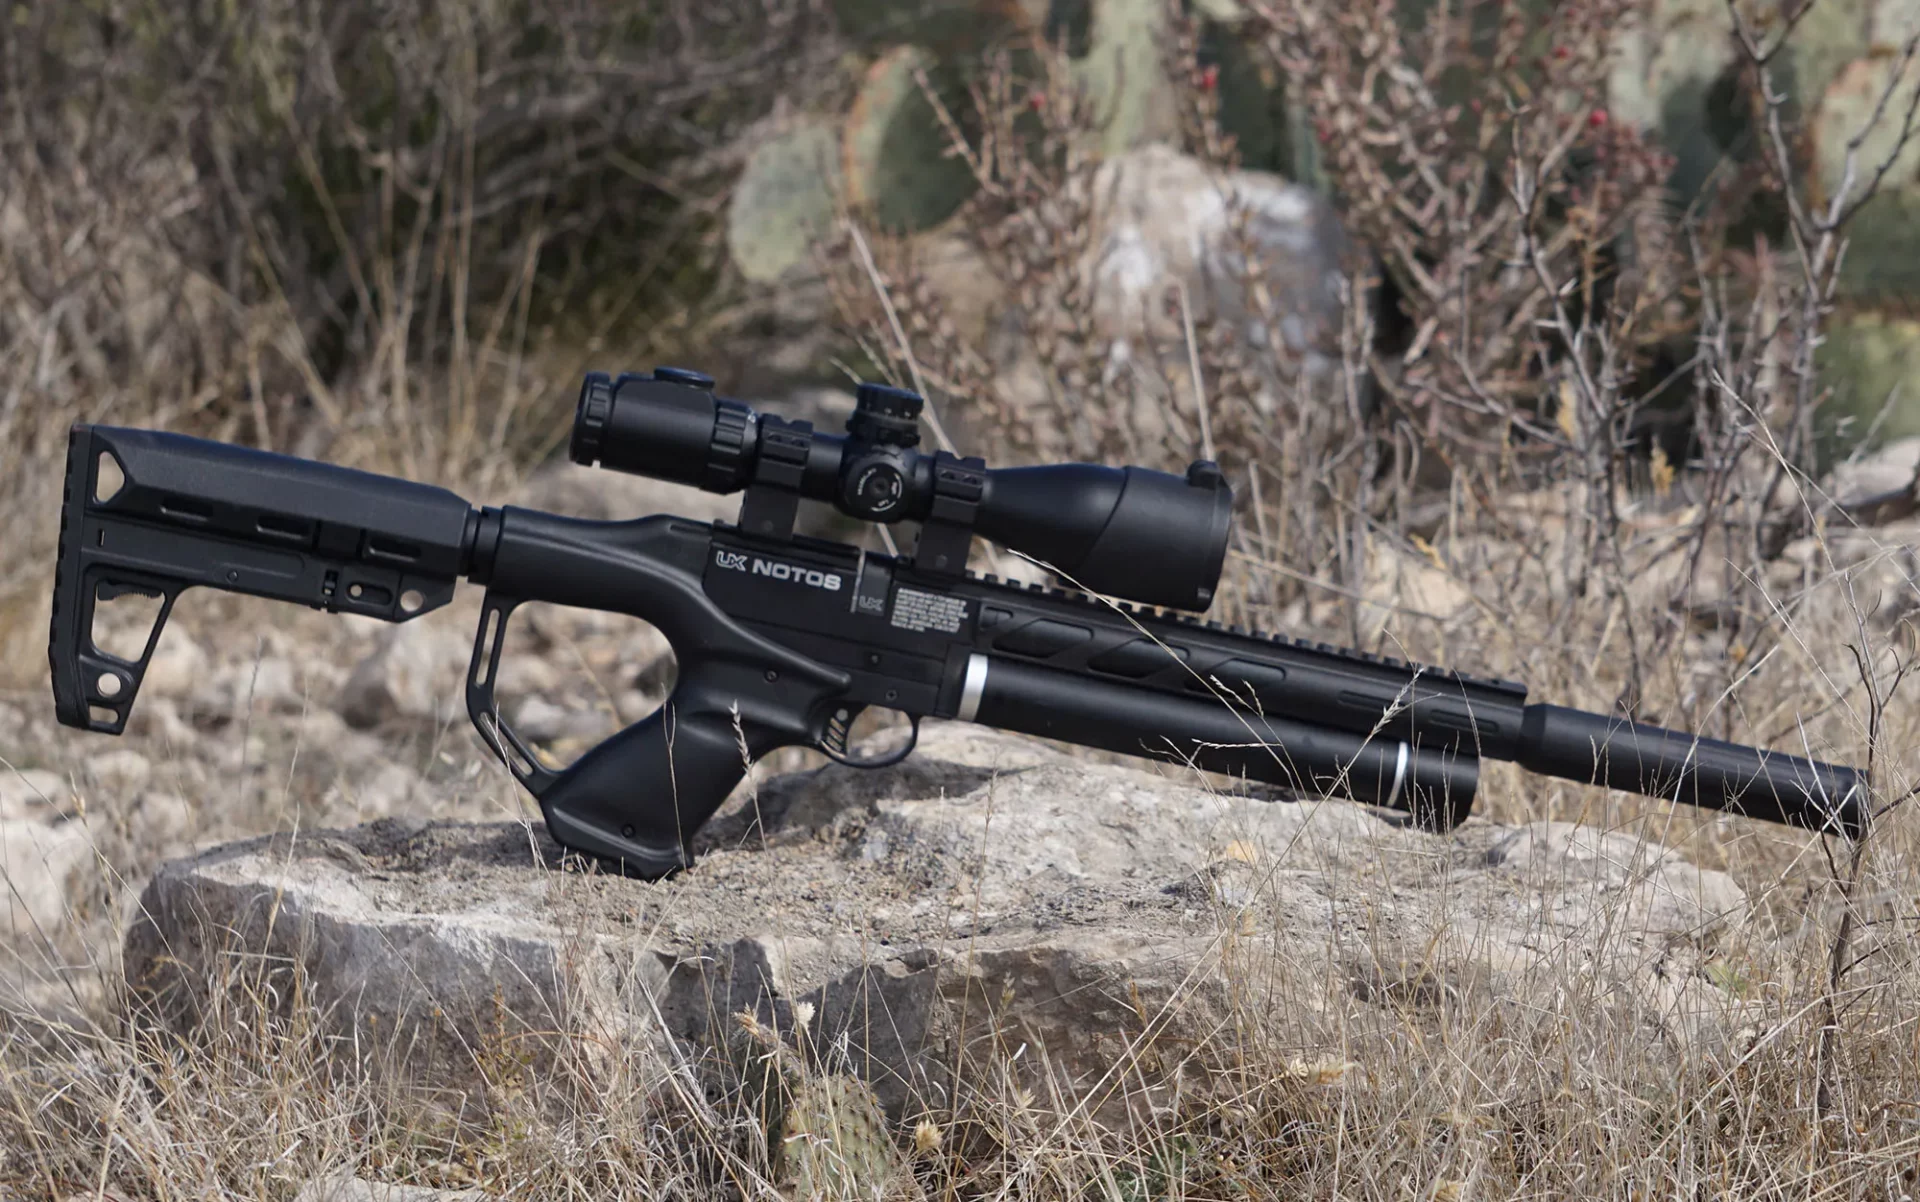

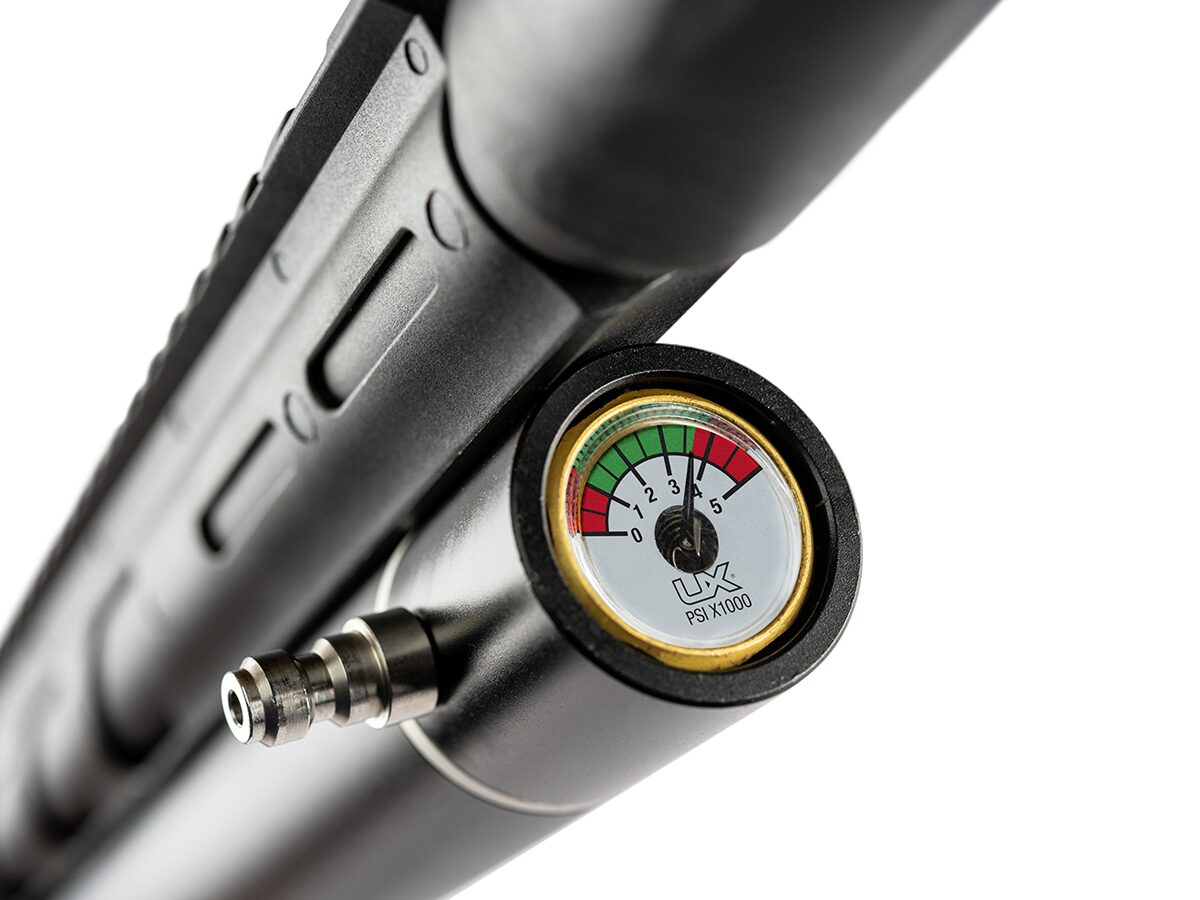

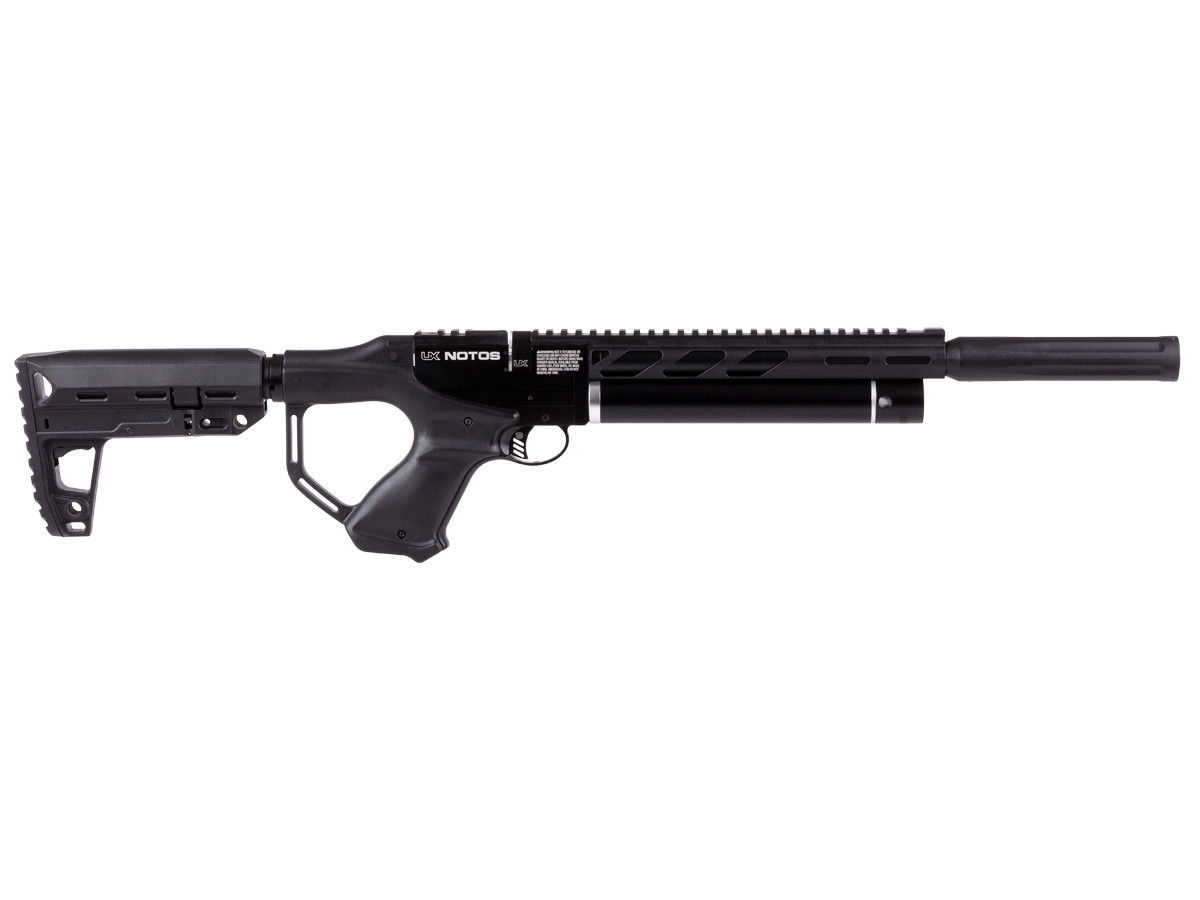
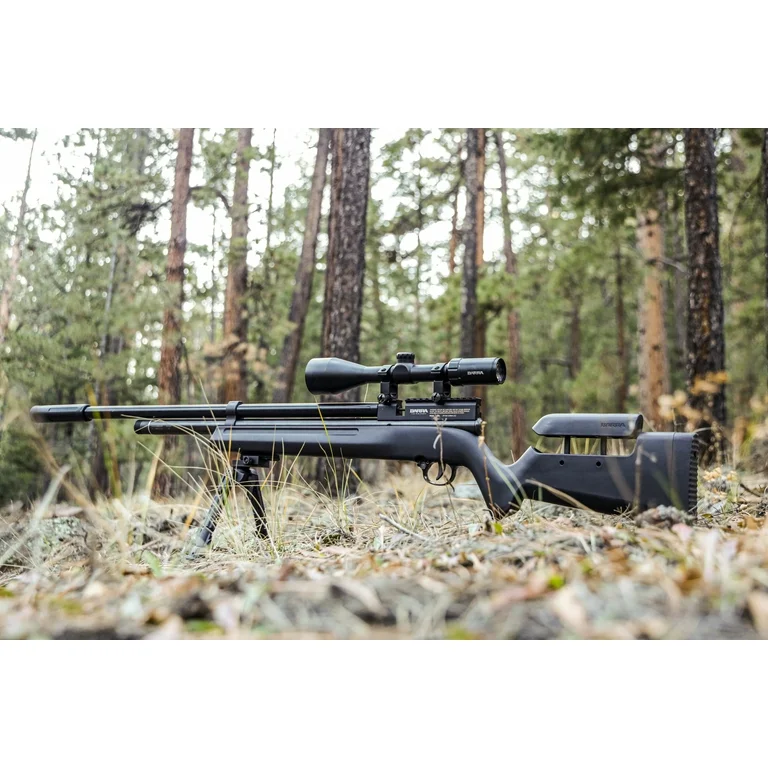
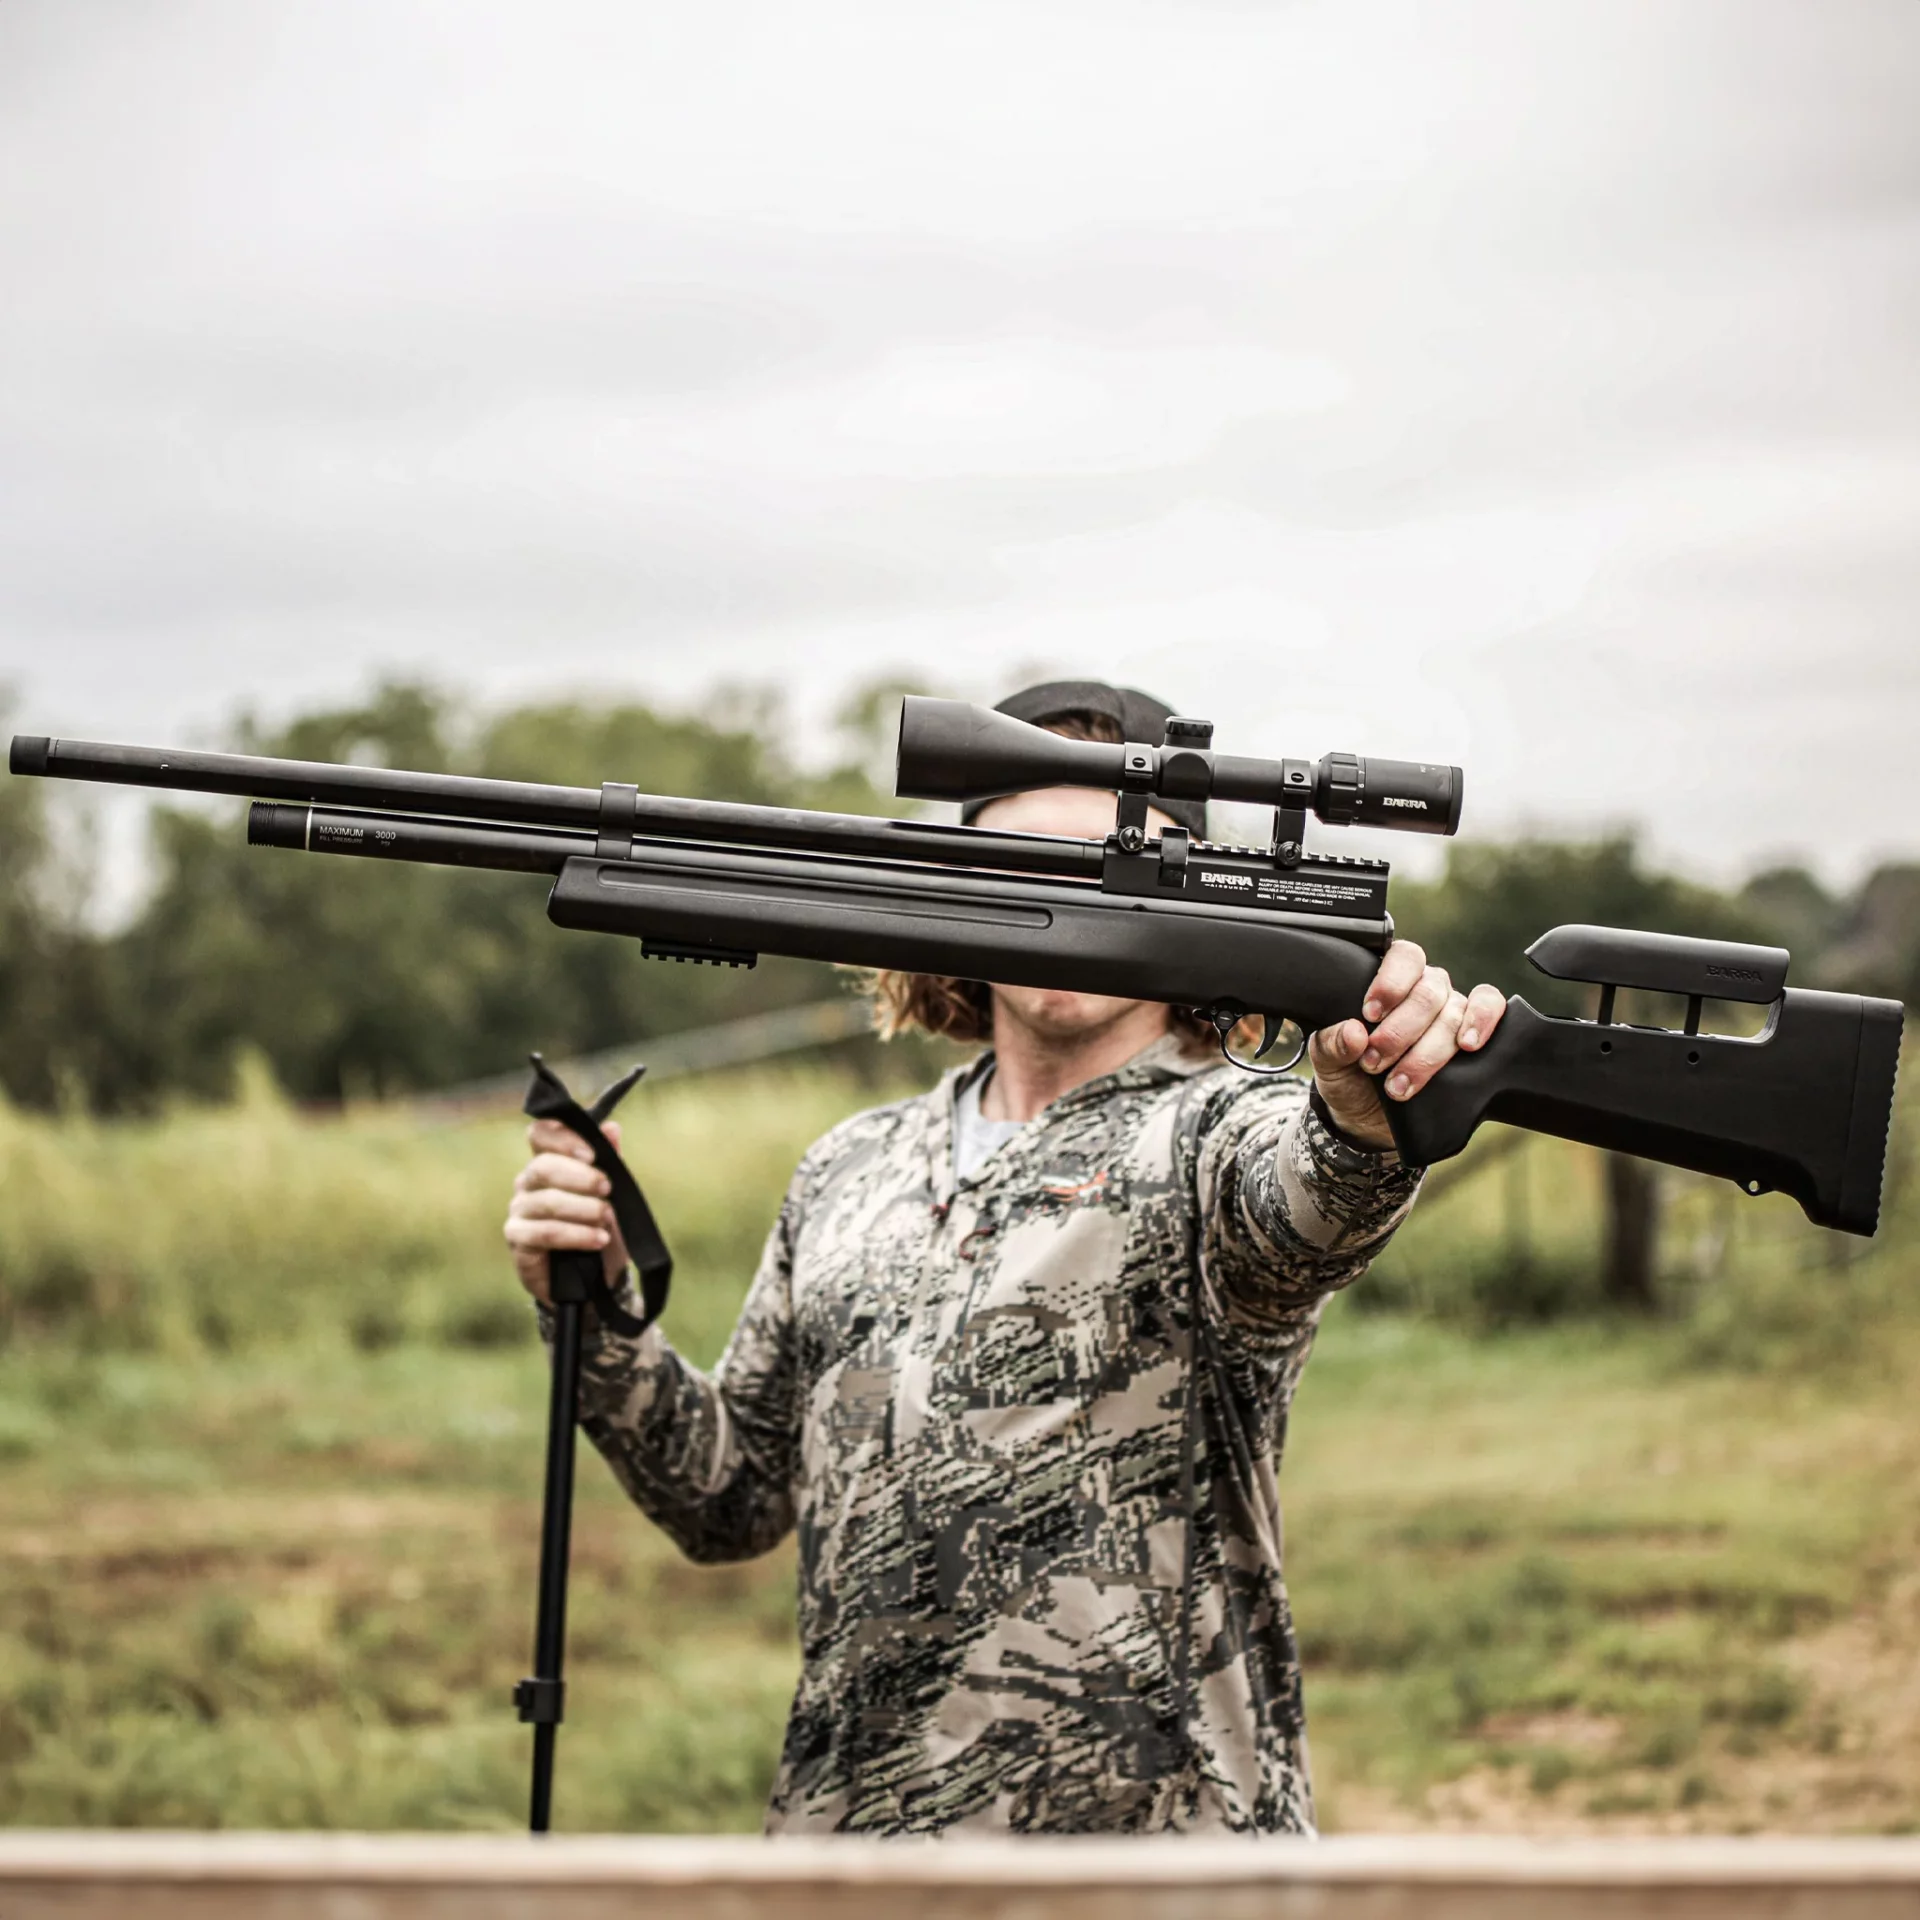
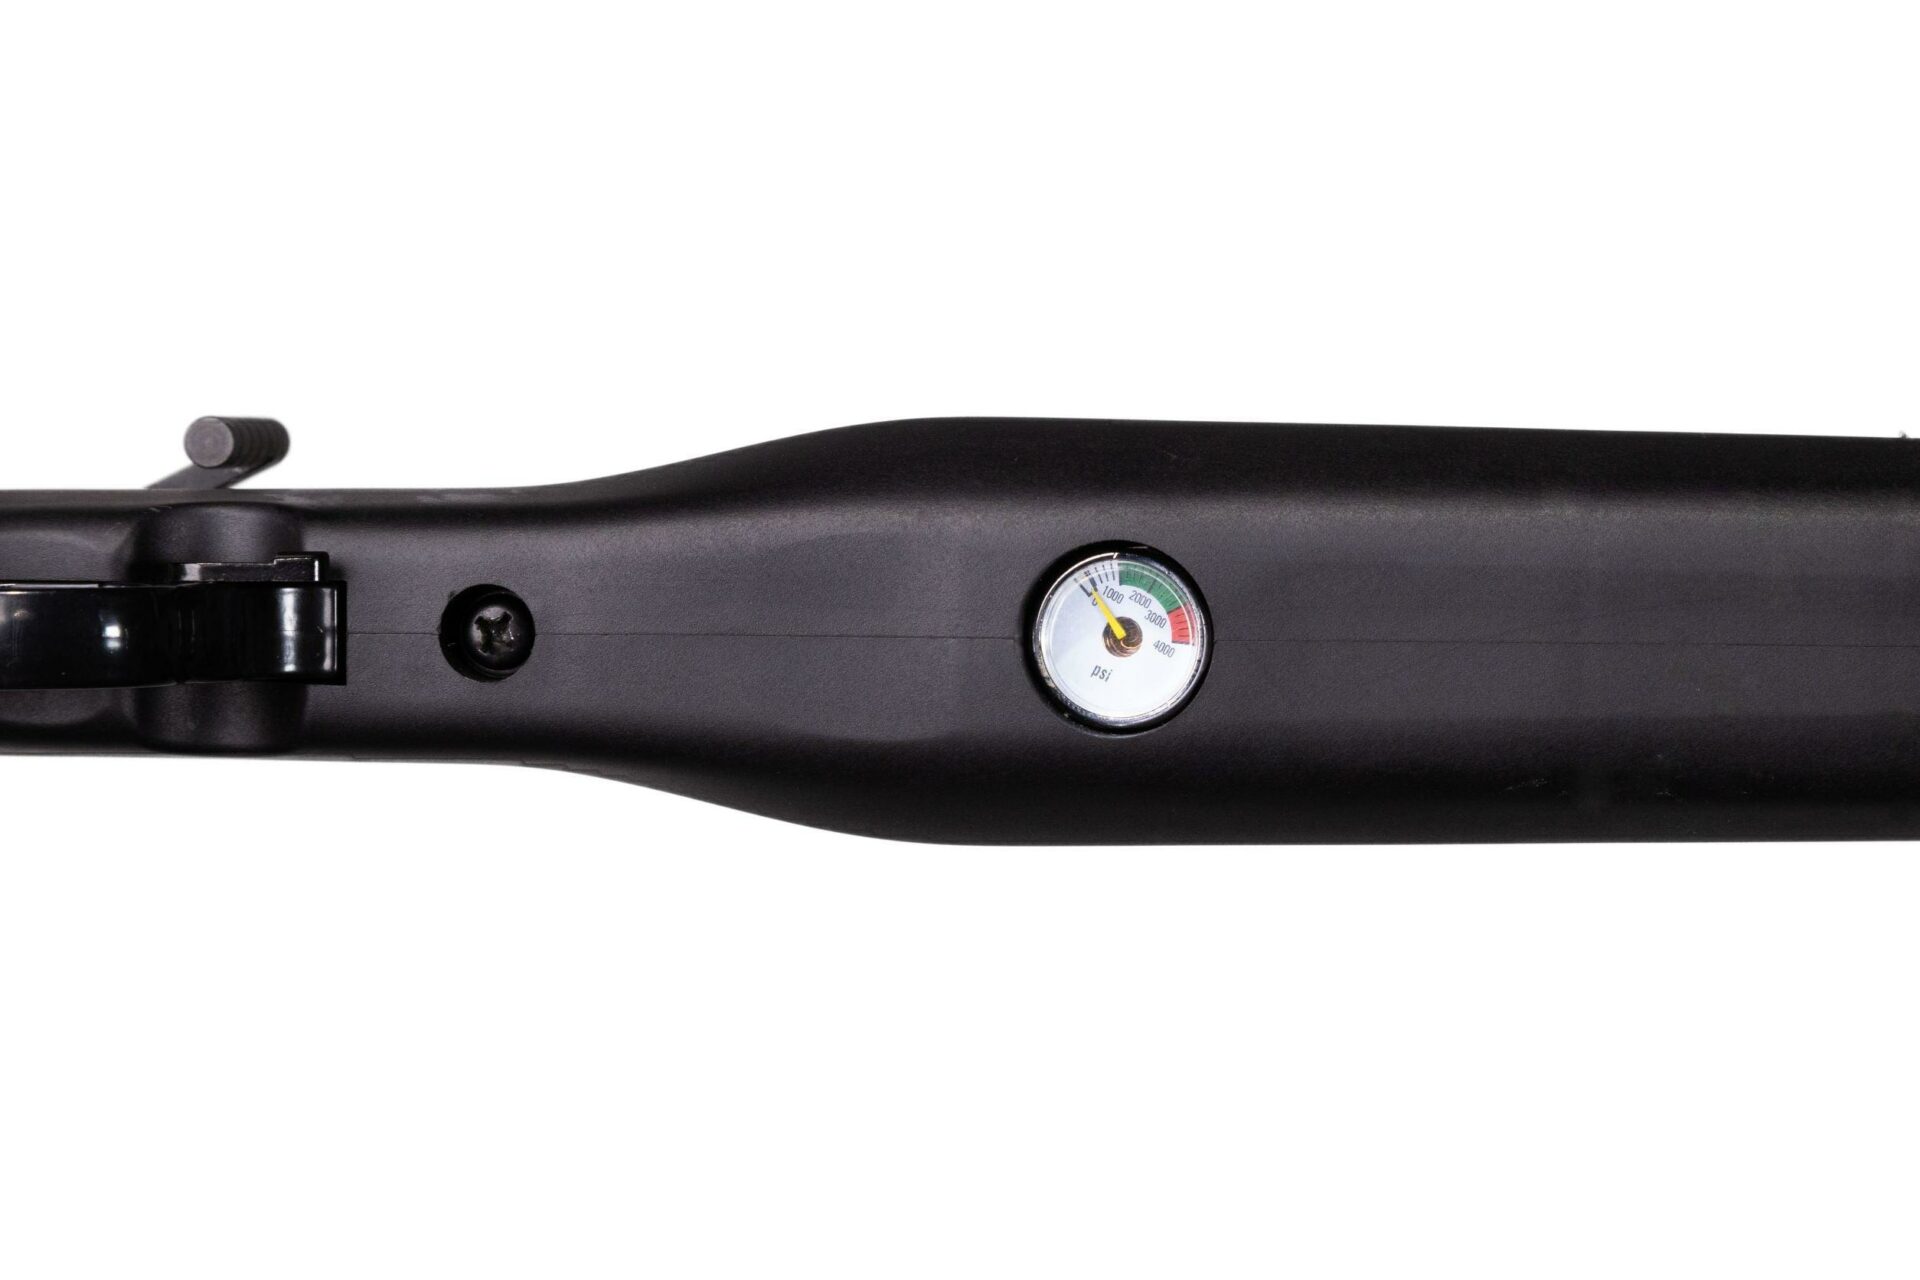


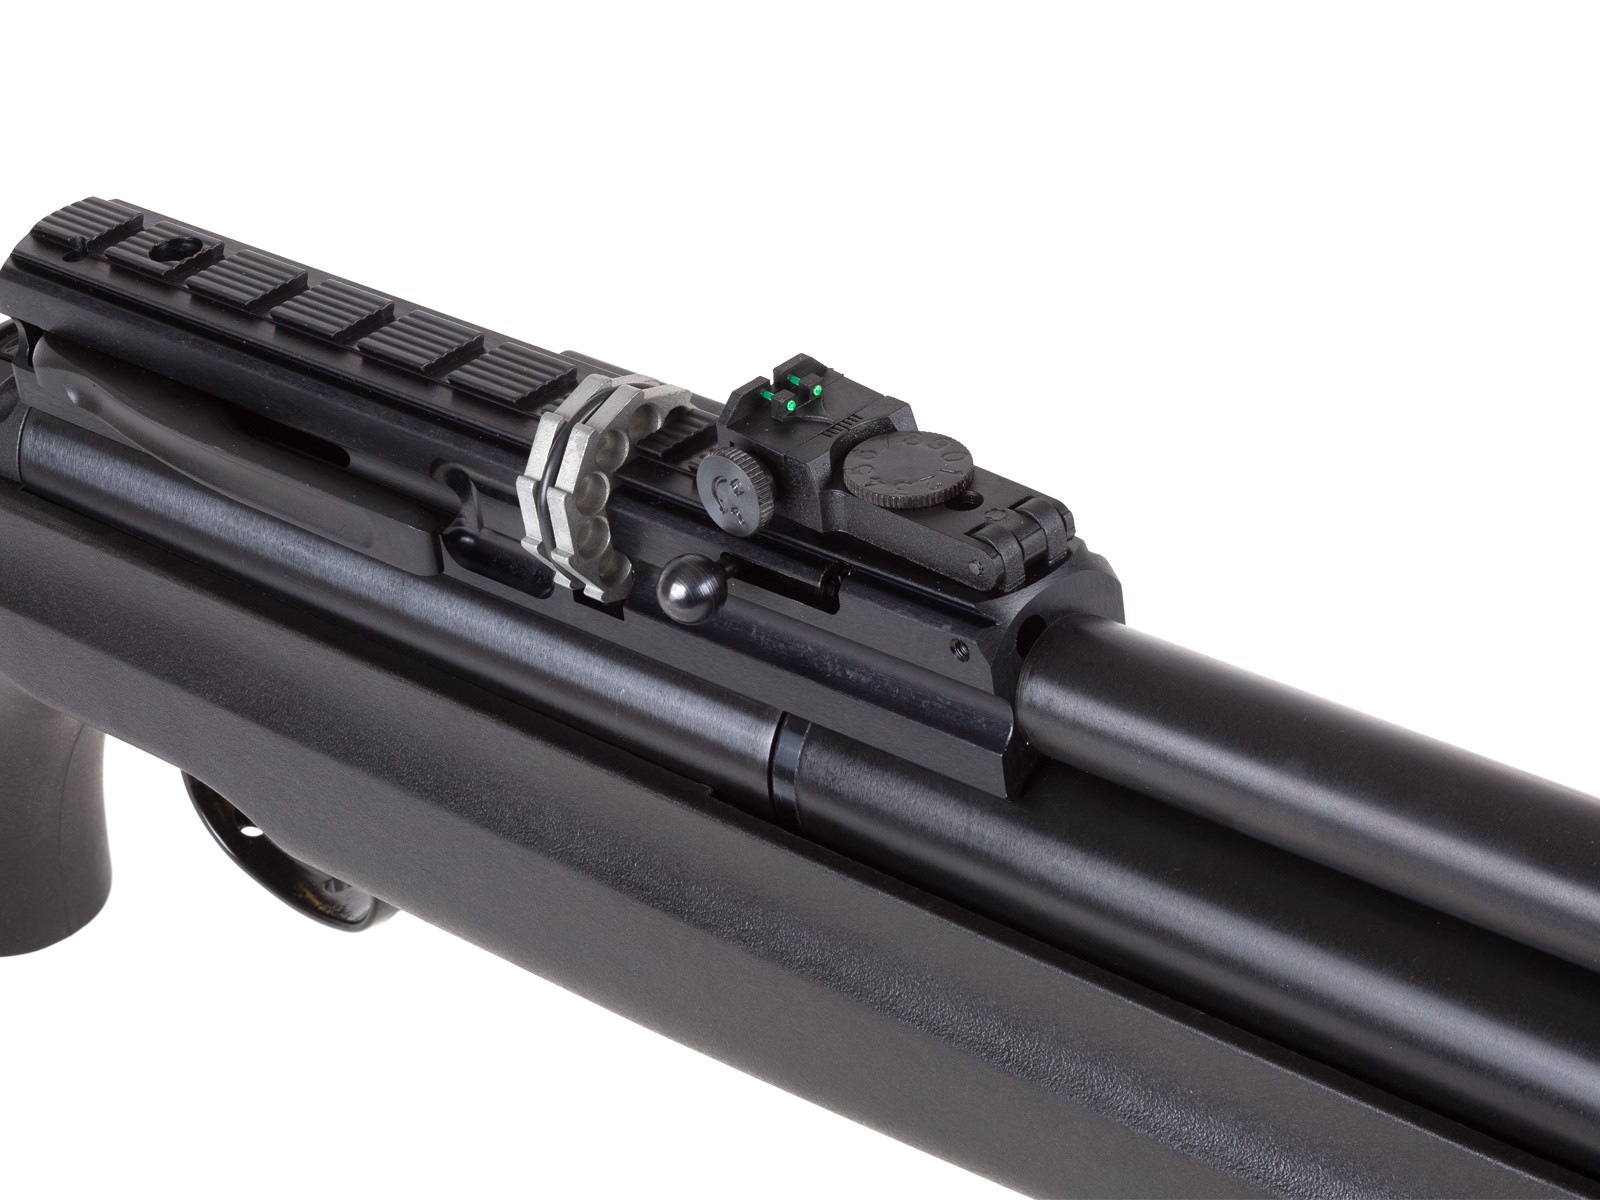


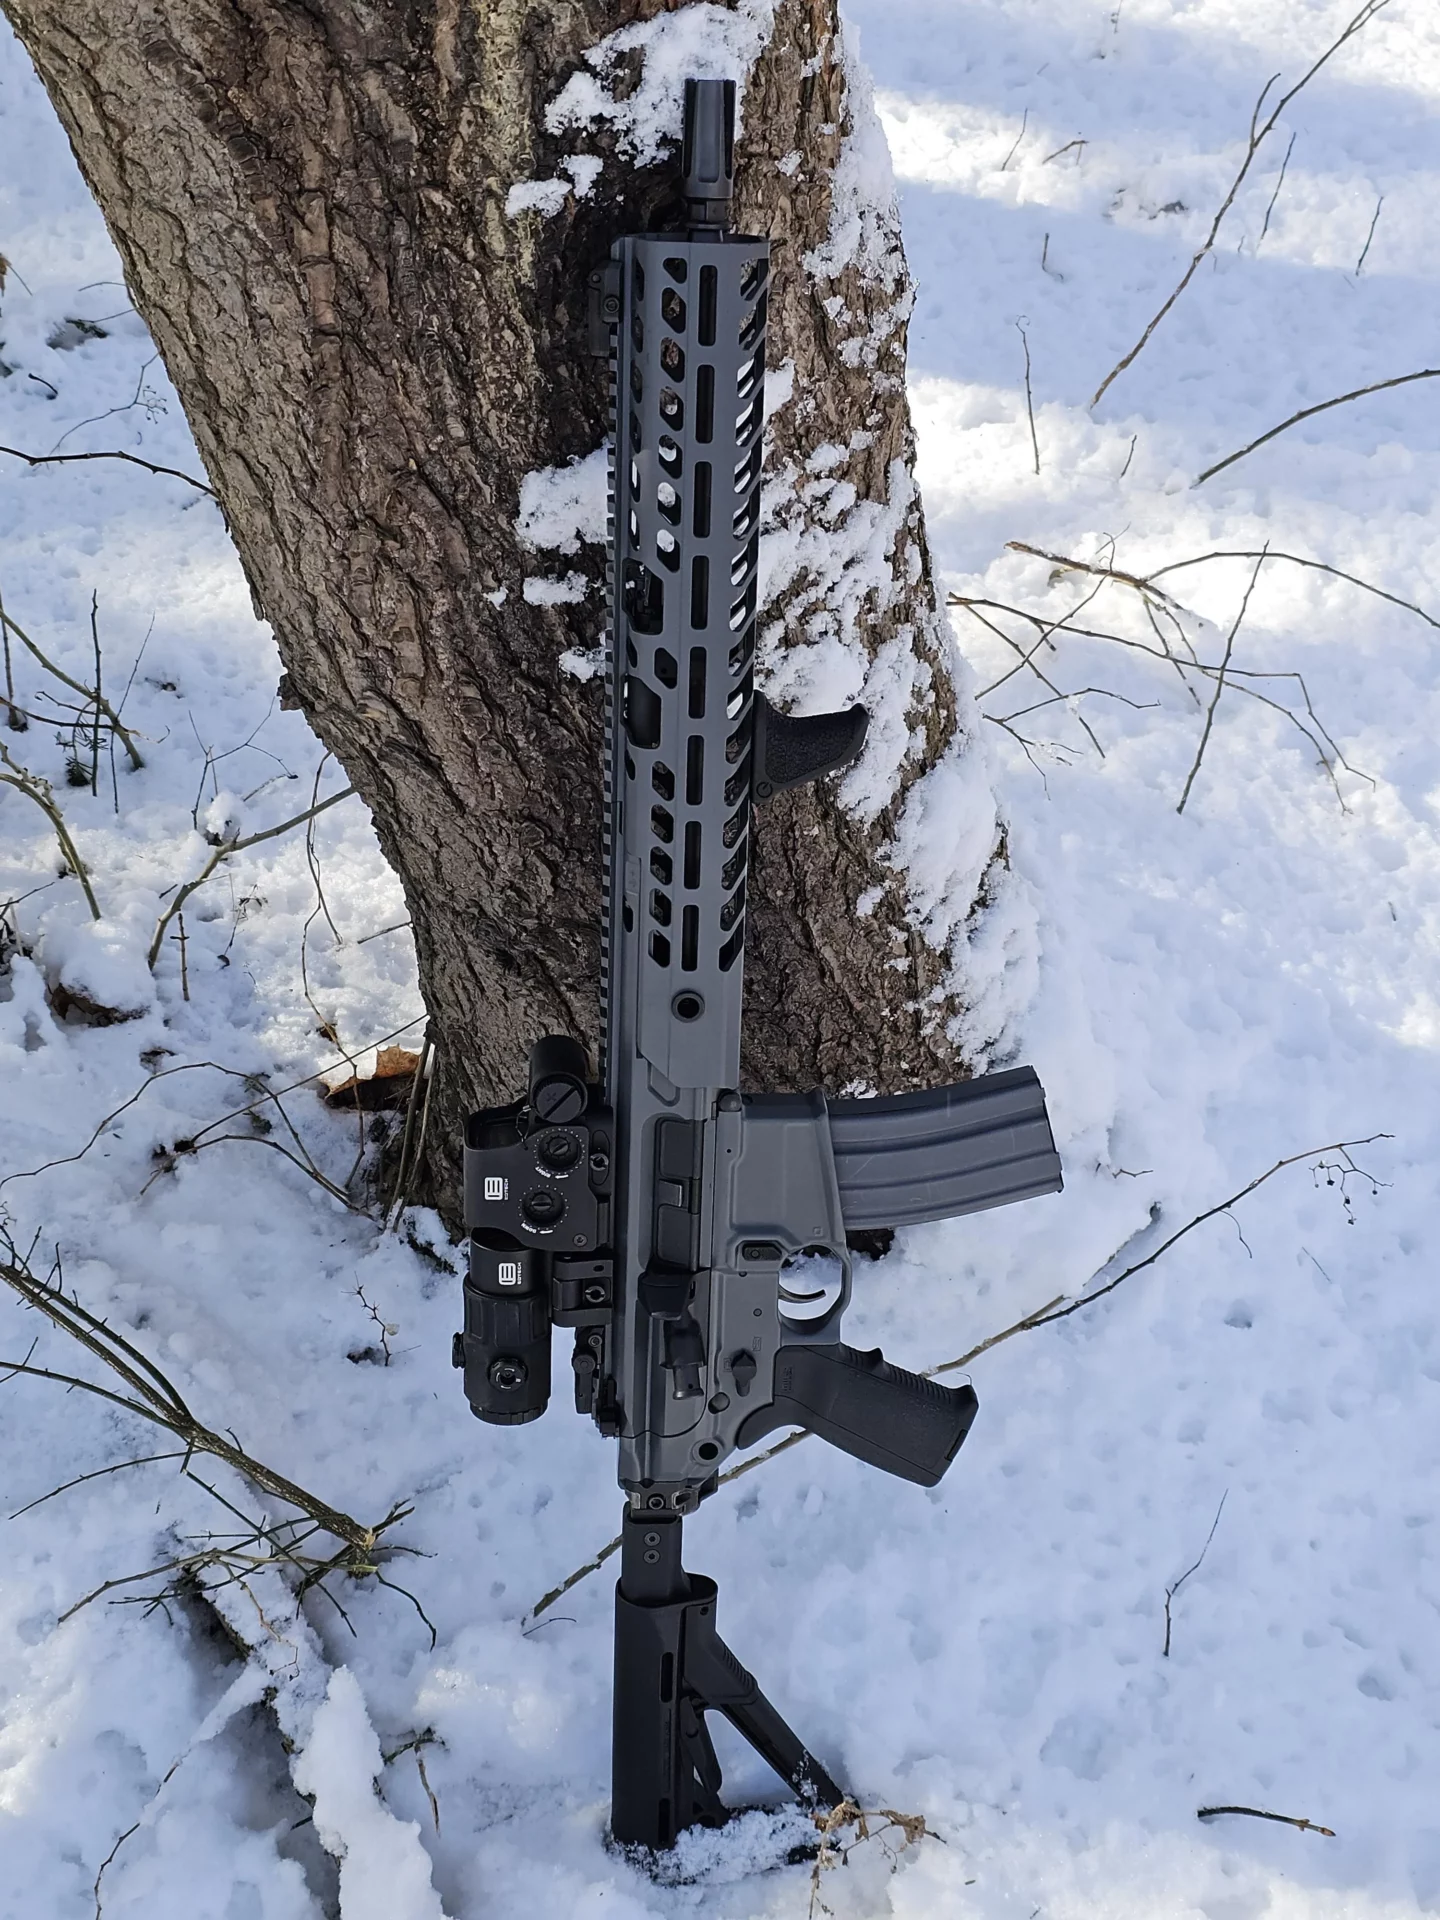


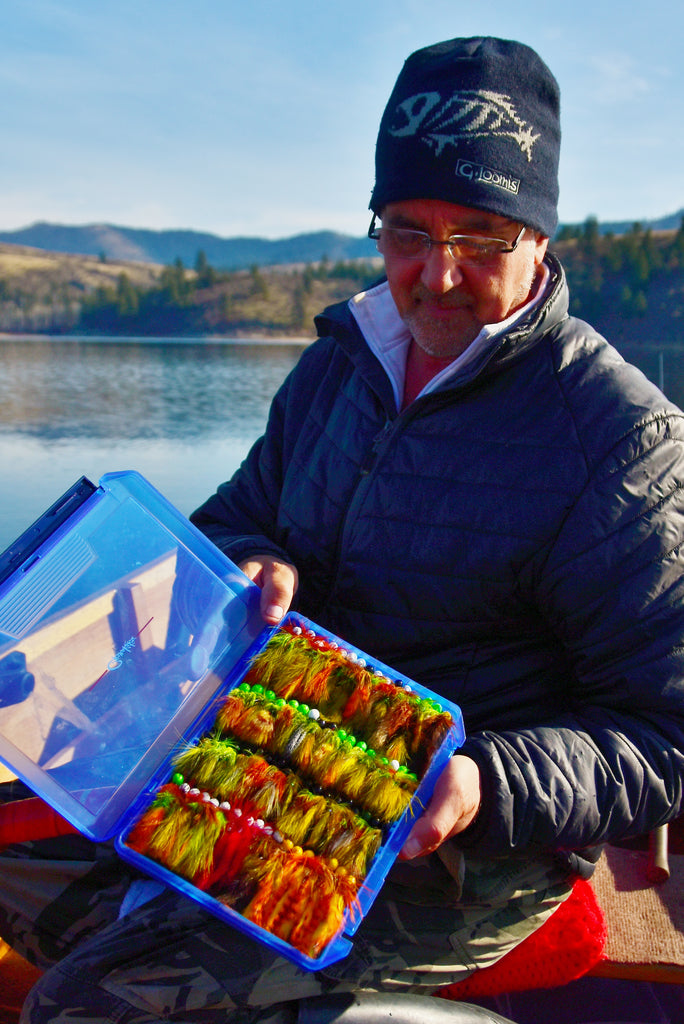


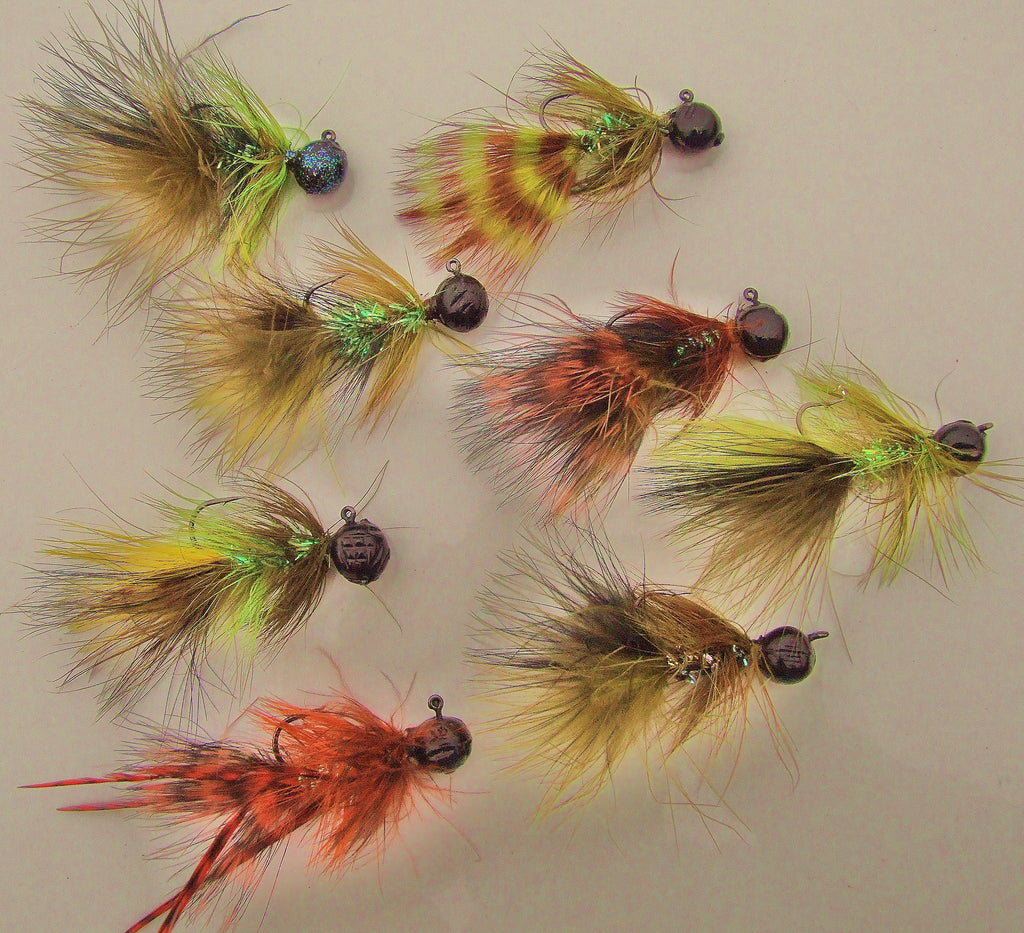

 The novel alternative will always be in your favor. It’s so fun in fact I’m going back to western Montana in 2020 not once but half a dozen times…with 100 newly tied rabbit jigs.
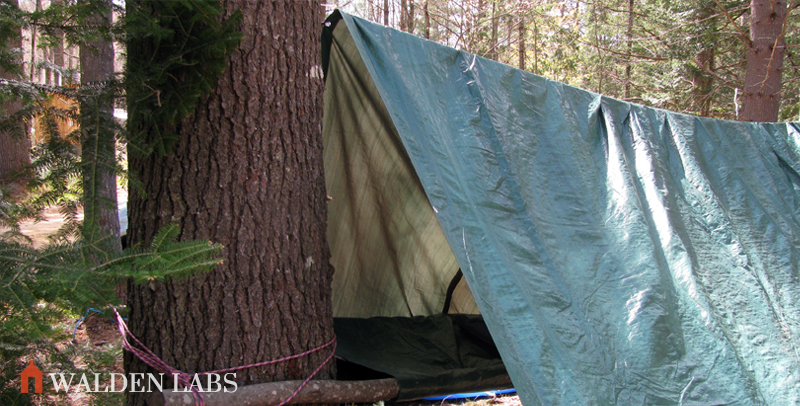
 The A-Frame shelter is probably the most common shelter one can make. It can be made by stringing the paracord between two trees. Draping over the tarp and staking it down are the final steps required to make this common shelter. The 30-degree angle of the tarp’s roof will create a ten foot-long living area. The shelter will be 8.6 feet wide and 2.5 feet tall. This shelter provides a good rain and snow runoff and a good wind deflection. The downside of the A-frame shelter is that there is no floor and if you haven’t stretchered the paracord tight enough, there will be sagging in the middle.
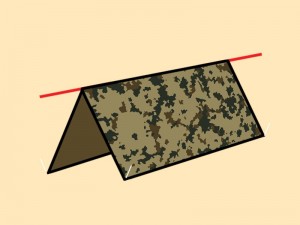 To create this type of shelter you will need four anchoring points to which you will tie the paracord. This is a shelter parallel to the ground and it’s designed to provide 100 square feet of shade against the sun. some people use this type of shelter during the rain because the water will pool in the middle and it’s easier to collect it. To make it sturdier you can add support poles to the corners. This basic sunshade tarp shelter will provide maximum protection against the sun, but it’s not suitable for cold weather and it can’t support rain for long.
 This is another shelter that it’s simple to make and it’s great for deflecting wind or providing sunshade. To make this shelter you need to secure the tarp to the ground on the windward side and support it with the paracord between to anchor points. A 30 degree angle of the tarp will provide five feet of height and 8 feet of width under the shelter. This is an “on the go” shelter because it’s easy to erect and you can quickly take it down. It provides great wind deflection and it will keep you safe from rain or sun heat. The downside of this shelter is that there are not sides and no floor to offer protection against other elements.
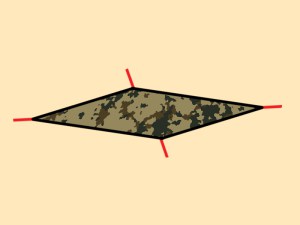 This is a sturdy shelter that provides a floor and, if properly secured to the ground, will prevent rain from seeping in. To make it, you will need to secure the paracord between to trees and drape over the tarp with the opposite ends secured together. The sixty degrees walls will provide 3 feet of width and almost 3 feet of headroom. This should be enough room for a single adult.
 This type of shelter is very similar to the basic sunshade shelter but it adds a central support pole at the tarp’s midpoint. It is designed for rain or snow runoff and it’s pretty sturdy if you secure the four corners of the tarp well enough. You can make it as tall or as short as you need depending on the length of the pole. This shelter provides a great runoff for rain or snow, but it doesn’t have any sides to protect you from the wind or cold.
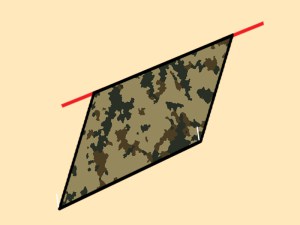 This shelter utilizes the entire length of the paracrod strung from a tree to the ground. The tarp is draped over the paracord diagonally, while the leading edges fold under to form the floor. The corner of the shelter must be faced towards the direction of the wind. You will also need to tie off some drip lines above the entrance of the shelter to prevent rain from running down the paracord and into the shelter. This is a good design for wind deflection and rain/debris shedding. The downside of this design is that it doesn’t offer too much head room and if you are a tall person, you might not have enough room for you and your gear.
 This is the favorite design for many camper and it’s a simple open air cover. It provides a good sunshade and enough headroom without sacrificing too much space. It keeps away rain but it provides limited protection against the other elements due to its lack of sides. When properly tied down and staked, the dining fly becomes a sturdy shelter and the height of the support pole will dictate the amount of headroom. This is a good model for desert survival because it provides good ventilation and adequate coverage.
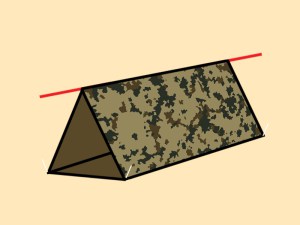 This type of shelter requires a little practice to get it done the right way. You will need to fold the tarp into thirds and make sure the leading edge of the roof hangs over the groundsheet for adequate rain runoff. The main ridgeline has to be secured with paracords while stretched between two trees. A length of paracord must be added to the bottom fold, where the back panel meets the groundsheet. It provides great wind deflection, but it requires a lot of secure points. The hanging roofline could also sag under rain loads and channel the water onto the groundsheet.
 This design is similar to the traditional wind shed, but it provides more coverage by sacrificing the groundsheet. The height of the paracord ridgeline determines the angle of the roof and the footprint of the shelter. It provides great wind deflection and rain runoff, but it doesn’t protect completely against the elements due to its lack of floor, flaps or sides.
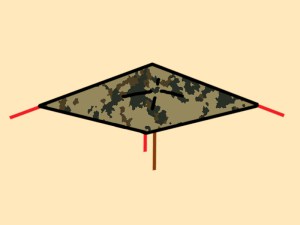 This shelter is suitable for two persons and it’s easy to make. You will need to secure the paracord to a tree and the ground, and drape over the tarp at a diagonal. The length of the paracord and the angle with which it is tied to a tree will determine the overall headroom and width of the shelter. The steep walls will shed rain and will deflect wind if they are well staked. This model will require drip lines, just like the cornet shelter. Depending on the size of the tarp, this shelter can accommodate more than two persons or more equipment, but the lack of a floor and flaps won’t keep out the elements. If the wind changes direction frequently, the shelter can be compromised.
 Start the construction of this shelter by supporting the center of two perpendicular edges with five foot long poles or by attaching those edges to trees using a paracord. You will need to stake to the ground the opposite corner so that it creates a series of four triangles. This design will provide 35 square feet of living space and five feet of headroom at the opening. The flap will hand down and make a partial closure. The poles need to be supported by paracord tie-downs. This shelter deflects wind with its low profile and it’s very roomy.
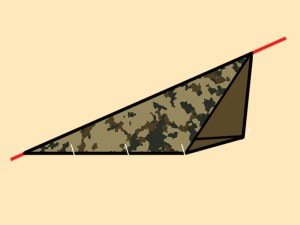 This shelter will require some time to be built and you need to use at least four support poles and as many or more tie downs to hold it all up. The footprint provided is 25 square feet and it has two sides of protection from the elements. If not supported in the middle or kept taut from the sides, it will sag under the weight of water or snow. A full one quarter of the tarp goes unused and folded up behind the rear corner. This type of tarp shelter provides good sunshade throughout the entire day if you position it properly.
 To make this shelter you can either use four five foot poles for support or two poles and a paracrod attached to two anchor points. The front is supported by poles and the single 90 degree wall provides enough protection, although strong wind can damage the entire structure. This shelter produces a 50 square feet living area but it has no floor. It’s simple to build, but it doesn’t provide adequate protection from the weather.
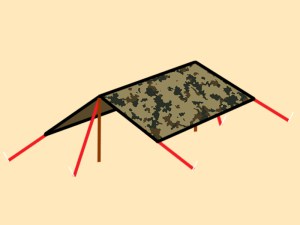 As the name implies, this shelter is an arch with a square top. Starting with two parallel lengths of paracord attached to anchor points approximately 3 feet apart and 3 feet high, drape the ground cloth over the two lengths of paracord and secure the long ends of the tarp with stakes. This is a good shelter for narrow spaces, but the odds of finding four anchor points in the needed proximity is quite low. To allow rain to runoff, make sure you secure one paracord slightly higher than the other. This shelter is three feet wide, three feet wide and ten feet long.
 This is an easy and quick to build shelter and it requires to diagonally drape the tarp over a length of paracord attached to two anchor points. The opposite corners of the tarp are staked to the ground. This is an open and airy shelter and the lower the angles of the sides are, the better it will deflect wind and the more shade will provide. It provides all day shade and it requires minimal stakes and set up, but it’s not weather resistant and it will not keep you dry.