Home Blog Page 68

Best Spotting Scope Under $500: We Review the Top Mid Range Spotters in 2024

0

This article contains affiliate links. We may earn a small commission if you purchase via these links.

If this is your budget, you need to do some serious digging before handing over any cash.

$500 is still a hefty chunk of change, but with brands like Vortex, Leupold, Vanguard, and Bushnell, you’ve got variety and quality on your side.

Let’s take a look and see which brand has the best spotting scope under $500.

Top Spotting Scopes Under $500 (Comparison)

When it comes to spotting scopes, often manufacturers either do it well or they don’t. Many of our top brands that are hunters’ go-to companies had some disappointing hits and misses – mostly misses – in this price range.

Because of this, when putting together the line-up for the $300-500 price range, it was tough to come up with the top three. So, you’ll have to forgive us if we throw in an option that slightly bends the rules – it’s just going to have to do.

We took into account the grade quality of the glass, any special coatings, and ability to see groupings clearly in the 200-400 yard range. Let’s take a look at what we came up with.

The 6 Best Spotting Scopes Under $500

1. Leupold SX-2 Alpine 20-60×80 – Best Overall

The SX-2 Alpine spotting scope is capable of providing clear and sharp resolution throughout all hours of the day and across its entire magnification range. It has a drawback or two, but it’s easily one of the best spotting scopes for its price point.

Pros:

  • HD Optics
  • Oversized eyepiece
  • Rugged construction
  • Fog/waterproof
  • Lifetime guarantee

Cons:

  • ED glass confusion

The SX-2 Alpine has Leupold’s Advanced Optical System with HD quality. Leupold lacks mentioning any ED elements, but the glass was made with calcium-fluoride (much like ED glass, right?) that helps to reduce the dispersion of lightwaves at the objective lens. So yes, while there will be some chromatic aberration, it might only be visible on the higher powers and in difficult light conditions that most spotting scopes struggle with too.

Helping to keep you longer behind the eyepiece by reducing fatigue and compensating for less-than-perfect eye alignment is the oversized 59.94mm eyepiece and the 19-18mm of eye relief. All-day glassing, big game hunts, and long-range spotting of groupings are tasks the Alpine HD is well suited to.

Build quality is covered with an impressively balanced speed-to-precision helical focus, fogproof and waterproof body, and it’s been tested to perform in extreme climate conditions from -40 to 160-degrees Fahrenheit.

If the name is any indication, you may have to put in for a hunting unit where you can test it to its limit. High mountain hunts for black bears, whitetails, mules, elk, and bighorn sheep are more productive when you have glass that can keep up with the harsh alpine conditions.

2. Athlon Argos HD 20-60×85 – Best Value

The Argos HD mustn’t be compared to more expensive scopes as it’s one of the cheapest in this price range. To get a colossal 85mm spotter for under $400, it’s a budget buy with value.

Pros:

  • 85mm aperture
  • Advanced FMC coatings
  • Helical focus
  • Fog/waterproof
  • Extendable sunshade

Cons:

  • Optical quality vs marketing

It may be harsh to be so blunt about the optical quality of the Argos HD, but the marketing implies that it has a couple things that it, in fact, lacks. It does not have ED glass or additional elements that can be confirmed to provide high-definition optics. Athlon says the scope has “phase coated Porro prisms” but Porro prisms are inherently unaffected by beam splitting that occurs in roof prisms.

The gist of it is, Porro prisms are great at maintaining contrast and resolution and will perform better than roof prisms that lack PC coatings. As such, the Argos does well for its price point with or without the supposed PC coatings. It struggles with light loss past 40x and off-axis sharpness as do all spotting scopes at comparable price points.

Looking past the marketing gumbo, it has laudable resolution in lowlight conditions. It’s adequate for hunting, range use, wildlife observation, and amateur lunar observation.

The adjustable features of the spotter, i.e., magnification ring, multi-position eyecup, and extendable sunshade offer smooth responsiveness. The focus knob is touchy at max power, so for instant gratification for birdwatching when seconds count, the Argos might not work for you. For focusing in long-range in the field or the shooting range, you have time to be light-handed here.

For the average range shooter, causal outdoorsman, and spot and stalk hunter, the Argos offers big specs with better-than-average performance for its price point. Now that’s value.

3. Vortex Diamondback HD 20-60×85 – Best for Hunting

Overall, the Vortex Diamondback HD isn’t perfect, but for the money, it offers a lot more than the old series. The VIP warranty can’t be beat, so there’s no fear in taking it into wild country for the hunt. The bottom line is that it performs, it’s under $500, and it’s highly recommended.

Pros:

  • ArmorTek coating
  • Dual focus
  • Long eye relief
  • Argon gas
  • Arca-Swiss compatible

Cons:

  • Chromatic aberration

The Diamondback HD spotting scopes have an HD Optical System, but Vortex did not disclose any ED elements. It suffers from color fringing and can be distracting for birdwatching and lunar observation/digiscoping.

The optics will not hold a candle to the Viper HD let alone the Razor HD. But as the entry-level spotting scope line, the glass quality is more than acceptably functional for wildlife observation, range use out to 1000 yards, and Western deer hunting.

The Diamondback HD is rubber armored, waterproof, and has been purged with Argon gas that is usually seen in the high-end range. It has long eye relief of 20.3-18.3mm, has an adjustable eyecup and sunshade, and a rotating tripod ring.

A new feature is the dual focus for course and fine adjustments with the helical focus collar. It’s compatible with Arca-Swiss tripods without needing additional plates and can be mounted to standard ¼-20 tripods.

The HD models gained weight and the objective got larger. This model weighs 60.9oz, and it’s not a bad thing. The extra weight will help to stabilize the setup especially when you’re in the high mountains and big country where windy conditions are the norm.

The glass isn’t perfect and that’s okay. You can always spend more to get better, but for this price point, the Diamondback HD is a performer.

4. Vanguard Endeavor HD 82 Scope

Remember how we said we were going to bend the rules a little bit? This is where we show you how. The Endeavor is just above the $500 mark, but when it’s on sale, you can get it within this price range. We had to do a little tweaking because we only want to offer you the most reliable and high-performing spotting scopes there are. There’s no point in recommending a dud.

The Endeavor has a beast of an objective lens that can provide ultimate brightness and light collection. To take maximum advantage of the 82 mm lens, it’s been made with extra-low dispersion glass elements, been fully multi-coated, and has BaK4 prism glass. There’s more yet to spill about the Vanguard Endeavor, so keep your eyes peeled for the full review!

5. Visionking 30-90X100SS Spotting Scope

This spotting scope is huge, so it’s no joke to assume this thing will be the king of faraway vision. With extreme, high magnification and a huge 100 mm aperture, no distance will be out of your reach.

Pros:

  • Price
  • Extreme high magnification
  • Huge aperture
  • Dual focus
  • Weatherproof

Cons:

  • Heavy

If you think you can have these spotting scope specs without some serious poundage, you’re kidding yourself. With almost 6 pounds to tote and set up, this is a beast of an optic that you want to use with a quality tripod that can support its weight.

So, what’s the point of such extreme specs? To see more of course! The 100 mm aperture will allow in as much ambient light as possible throughout different times of the day whether it’s bird and wildlife watching or star gazing. With such high magnification, you’ll want to make use of the 2-speed dual focus dials to get the sharpest and clearest image possible.

The BaK4 prism glass is fully multi-coated, but there’s no mention of any phase/prism coatings or extra-low dispersion glass elements. The lack of these additional glass features is surprising for such a high powered scope, and it may mean clarity might not be the best as it reaches max magnification.

Even for a generic, off-brand spotter, it still covered its bases when it comes to durability. It has RainGuard HD water-repellent lens coating (sound familiar? Bushnell tech?), it’s O-ring sealed, nitrogen-purged, and 100% waterproof.

If you’re the type of spotter that likes to get set up and stay stationary, the Visionking scope will work for you. A tripod is included in the buy so you won’t have to immediately fork out for one.

6. Kowa TSN-601 Angled 60mm Spotting Scope

Kowa, a prestigious Japanese brand known worldwide for their quality optics, and we have a spotting scope that just barely fits this price range. Owning a Kowa for 500 bucks just might be the best bargain deal of the day.

Pros:

  • Price
  • Interchangeable eyepiece system
  • Made in Japan
  • Weatherproof
  • 10-year warranty

Cons:

  • Scope body only

Typically, you won’t see spotting scopes sold by eyepiece and scope body separately until you’re spending over two grand. This is indicative of premium quality to ensure you’re purchasing the most appropriate eyepiece system for your spotting application. Want variety? You can buy and use an eyepiece with a different power range.

With the interchangeable eyepiece system, you also have access to see if Kowa compatible digiscoping accessories can work for photography, recording, and capturing rare once-in-a-lifetime moments that you won’t ever be able to duplicate.

Still, if you’re spending only 500 buckaroos on the scope body, you’ve got to wonder how much it costs to get the eyepiece. Expect to add at least a few hundred bucks to your budget.

The Kowa spotter is made in Japan, and they’re usually an excellent source of glass and quality when it comes to optics. When you buy this scope from an authorized dealership, you’ll get their lifetime warranty on it.

It’s nitrogen-purged and O-ring sealed for both fog and waterproof protection. It’s made with polycarbonate materials to keep weight to a minimum without compromising build quality.

What more is there to say? You’re getting a Kowa for 500 bucks!

What to Look for in a Spotting Scope in This Price Range

Spotting scopes in this price range should have a few premium perks thrown in – we’re talking about $500, it’s got to be worth it. However, you’ve got to be brand-specific to ensure you’re getting the best of what you can afford.

If you’re going with a high-powered and heavy scope, you’re going to want to add additional costs for quality, strong, and solid tripods and mounting systems. Just keep that in mind when you plan on spending every penny. Here’s what else you need to look for.

Glass & Coatings

Overall, we should start to see some ED (Extra-low Dispersion) enter the market. Some spotting scopes might have “HD quality” but it doesn’t guarantee ED elements. When it comes to coatings, we should see FMC and extra lens coating formulas to enhance light transmission and protect the lens.

ProductGlassCoatings
Spotting Scope Glass & Coating Comparisons

Magnification & Objective Lens (Configuration)

On average, there will be a lot of 20-60×80 configurations at this price point. Considering the glass quality, this is a good configuration to stay within since more magnification will demand more performance from the glass.

Though most spotting scopes under $500 will have the eyepiece included with the scope, you may see some interchangeable eyepiece scopes available. Though rare to see it at this price point, it can happen.

ProductMagnificationObjective LensInterchangeable Eyepieces
Spotting Scope Magnification, Objective Lens & Interchangeable Eyepieces Comparisons

Eye Relief & FOV

Eye relief will tell you how comfortable the eyepiece will be to use and if you can keep your glasses on or not. I would say that 15 mm is the minimal amount of acceptable eye relief if you wear glasses, but it’s better to have at least 19-20 mm on the long side as it does get shorter at max power.

The field of view can indicate what applications the spotting scope could be good for. Though high magnification narrows the FOV, it can provide close-ups of the target that is good for long-range seeing. On the other hand, a wide FOV is good for watching moving targets while hunting or bird watching.

ProductEye ReliefField of View (@ 100 Yards)
Spotting Scope Eye Relief & FOV Comparisons

Size & Weight

In general, weight and size can be a limiting factor of a spotting scope. They are obviously larger than binoculars, but they offer high and variable magnification with a huge objective lens. Compact scopes would be best for hiking, some hunting, and for fast glassing.

Full-size scopes are excellent performers when tripod-mounted for bird watching, wildlife observation, and amateur astronomy like lunar observation.

You should also consider overall weight, that is, combined weight with a tripod and any counterweights if needed.

ProductLengthWeight
Spotting Scope Length & Weight Comparisons

Durability

Overall, you should expect good glass and solid performance out of a $500 spotting scope. They should be fog and waterproof at this point and come with a warranty that you can rely on in case the unexpected happens.

ProductWaterproofFogproofWarranty
Spotting Scope Waterproof, Fogproof & Warranty Comparisons

We Put The Best Under $500 Through the Ringer!

If you have the chance to shop in person, put your scope through the ringer to really see if it’ll work for you. If one promising purchase ends up being a dud, it’s one purchase too many.

Buying online eliminates the chance to give the spotting scope a test run before you buy, but that’s where counting on our expertise comes into play. If the masses are impressed, you just might be too. Since we’ve put ’em all through the ringer for you, you can rest assured that your money is well placed. It’s called buying confidence – you’re welcome!

Further Reading

  • Zeiss Victory Harpia Spotting Scope Review – 85mm Angled with Dual Speed Focus System
  • Zeiss Dialyt 18-45x65mm Spotting Scope Review (A True Hunters Tool)
  • Zeiss Conquest Gavia 85 T Spotting Scope Review (Ideal for Birders)
  • Vortex Viper HD 20-60×85 Angled Spotting Scope Review (Helical Focus)
  • Vortex Viper HD 15-45×65 Spotting Scope Review (Straight)

The 10 Best Raccoon Baits You Can Use

0

Raccoons are common cohabitors with humans all across North America. These large and furry critters are definitely charming, at least when they are at rest, thanks to their dusky gray fur, iconic black mask, and ringed, puffy tail.

raccoon

And those little paws that are so much like hands in their dexterity!

Precious, but these mobile mammalian miscreants have something of an unsavory reputation thanks to their propensity for breaking into trash, sheds, and even homes in search of food, even stealing it right out the bowls of our pets. The nerve of these procyons!

Unlike most other mammalian pests raccoons represent something of a challenge when it comes time to get rid of them, or relocate them.

This is due to their high intelligence, dexterity, and persistence which put most other animals to shame.

You can find hours and hours of video content on YouTube and elsewhere chronicling people’s trials and tribulations attempting to catch or otherwise dispatch these clever adversaries.

But as it turns out raccoons do have one weakness, an Achilles’ heel you might say. They love food, really love it.

Since they are so preoccupied with obtaining choice and delicious fare it is easy to manipulate raccoons into a trap or a spot where they are easy to dispatch by luring them with the right bait. In this article, we will share with you 10 foods that make ideal raccoon bait.

Know Your Enemy

Before you can set off placing bait for any animal you want to catch, it is beneficial to know a little bit about its behaviors, preferences, and food acquisition strategies.

Raccoons are absolutely voracious and vigorous pilferers of any sort of food stuff that they have access to, from the leftovers and kitchen scraps and trash cans to a bowl of dog or kitty litter left out for the family pet. Nothing seems to be safe or beyond interest for these furry thieves!

That is because raccoons are omnivorous, and indeed might be one of the most omnivorous animals on Earth.

This means that they eat a varied and mixed diet, consisting of animal, insect, and plant matter. Worms and insects are favorites as are aquatic items like crayfish.

That being said, raccoons are noted through study as developing strong individual preferences for food, and in social settings, raccoons occupying a given area will strongly gravitate towards foods typical in that area.

Urbanized raccoons will develop a fondness for human food and often pet food. Raccoons living in more remote places will eat a mixed diet of insects, worms, nuts, berries, and other natural fares.

Though they do not take larger live prey often if ever, they will happily scavenge from carcasses or found sources of animal protein.

Curiously, raccoons always show a strong preference for very moist food and even indulge in what is known as “washing” behavior when they have a water source nearby: they dip and rub their food in water before consuming it.

If you notice a strong bias towards wet, moist, and juicy food on our list below, you’ll now know why!

Raccoons are also highly motivated by scent, and that means the more fragrance that is generated the more appetizing and irresistible it will be for the raccoon in question.

This means that foods that are oily, stinky, or otherwise known for potent fragrance will be your best bet much of the time. Class dismissed, let’s get to the list.

The Best Raccoon Baits You Can Use

1. Marshmallows

Believe it or not, quite a few pest control professionals and several raccoon-catching experts will advocate the use of marshmallows for catching raccoons in suburban and urban areas.

First, these raccoons usually take up with sugary, sweet human foods pretty quickly and some folks even postulate the bright white coloring of the marshmallow catches moonlight at night when raccoons are most active, arousing their curiosity since they might mistake it for bird or reptile eggs, one of their most commonly poached food items in the wild.

If you want to try marshmallows for nabbing a raccoon lurking around your property, you should try both the small, button-sized ones and the larger, extra fluffy ones.

The raccoons might show a preference for one or the other, or they might not, but you should not underestimate how many a raccoon could eat in a short time.

You might need a backup bag to keep enticing them, and remember that raccoons are social, so they are likely to be traveling with friends!

2. Sardines

It is harder to think of a food it is more intensely, ah, flavored and more pungent than sardines.

These cans of tiny fish are definitely a love it or hate it delicacy among humans, and a surefire way to start a fight on pizza night is to include them on a pie intended for sharing.

Nonetheless, raccoons that are acclimatized to aquatic foodstuffs will find them utterly irresistible.

As mentioned above, raccoons have a preference for moist and highly odorific food and sardines check both of those boxes with big, bold red markers.

Sardines will dry out reasonably quickly when removed from their can, so consider dumping them out into a bowl or small dish that will help keep them moist.

Additionally, the larger the surface area that you can provide for their oil will only increase the loft or throw of the scent, increasing the chances that the raccoon will detect it sooner.

3. Peanut Butter

There hardly seems to be a mammal you cannot catch with peanut butter. Mice and rats love it, dogs love it, and as it turns out raccoons lose their minds for the stuff.

This is because the raccoons have always displayed a strong preference for acorns, walnuts, and other nuts throughout history and they are a staple foodstuff for wild raccoons that have not been exposed to human activity or human trash.

You can easily exploit this baked-in preference for delicious nuts by using peanut butter as bait.

Yes, I know that peanuts aren’t real nuts, but they are not analogs as far as food is concerned and are packed with protein and fat which means raccoons will love them.

Peanut butter always has an advantage as bait because it is cheap, and plentiful and the smell won’t drive you out of your mind. It is also easy to set up in or around a trap in any way that might be desired.

4. Roasted Poultry

Roasted poultry is fine raccoon bait, and smells just as appetizing to them as it does to us.

Contrary to legend, it is a vanishing rarity that a raccoon could ever catch and eat a live bird if it was even to attempt at all, though they are in veteran consumers of both bird and reptile eggs as mentioned above.

That being said, you will not find a raccoon in the land that will turn down a delicious dinner of roasted turkey or chicken.

You can use scraps of meat from your own meal, old leftovers that you were going to throw out anyway or even cold cuts from the deli counter that you heat up and slather with a little broth or gravy.

All you need to remember is that raccoons show a strong preference for wet or moist food, so don’t let it dry out and you’ll ensure that the scent stays on the wind and the raccoons will be drawn in like moths to a flame.

5. Roasted Pork

Similar to the roasted poultry entry above, there is just something about a roasted ham slice that raccoons cannot resist. And who can blame them!

Pork is fatty, salty, and delicious according to most human methods of preparation, and the same characteristics that make pork desirable to us mean it will be desirable to the masked bandits.

You have all sorts of ways to prepare pork and any one of them will do fine for raccoon catching so long as you follow the guidelines.

Scraps of pork pulled from a whole hog that has been barbecued are ideal, as are thick-cut ham steaks, something the raccoon can really sink its teeth into.

But you could use thicker dinner cut pork slices, pork chops, or even thin-sliced deli ham. Just remember to keep it moist one way or the other and it won’t be long before your guests show up.

6. Tuna

By now you probably saw the heading for this entry and nodded to yourself: “Yep, that’s good raccoon bait!”.

And you’d be right because tuna is fish, which raccoons typically love, stinky and wet and just the way they like it.

This makes tuna a triple threat for raccoons that works about as well as a mind-control spell. They cannot help themselves!

Tuna has a major advantage for catching raccoons in that typically wild raccoons as well as urbanized ones both enjoy it, so if you are ever in doubt you can head down to the grocery store or even your local corner store and grab a couple of cans.

Just make sure you get tuna that is packaged in oil, not water, if at all possible. Remember, the stinkier the better!

7. Soft Candy

Soft candies of various kinds are another good bait option for raccoons in an urban or suburban environment.

Remember that raccoons are opportunists, and there have been plenty of sweet treats pillaged by these tricky little rascals either sitting in storage, in transit or thrown out in the trash.

That means that raccoons occupying these environments have a serious sweet tooth, a sweet tooth you can exploit.

You should choose candies that are soft and easy to eat not only to make them more palatable but also to ensure that more of their scent gets on the wind.

Assuming the candy will hold up to some extra moisture, it might be a good idea to wet them gently in order to increase their fragrance, and don’t worry about it if they get caught in the rain. Raccoons never mind soggy food!

8. Fruit

Raccoons are perennial fruit eaters, of all kinds, and they especially love soft, juicy sweet fruits like watermelon, cantaloupe and pineapple.

That being said they will eat pretty much any kind of fruit, from plums and grapes to berries and apples. So long as the fruit is cut open or the raccoons can smell it they will be drawn to it.

Brightly colored fruit seems to work best but you can use anything you have on hand. Fresh fruit will work as will canned fruit, so you don’t need to be picky because raccoons sure aren’t.

That being said, make sure you keep a close eye on your bait and refresh the fruit when it starts to rot or dissolve away. Fruit more than most bait seems to do best when it is fresher.

9. Soy Sauce

Soy sauce is not a food per se but it is a condiment and therefore it is technically a food for the purposes of this list.

Regardless, it is extremely pungent and can be poured on other items to greatly increase the loft of its scent, making it a sort of “amplifier” for other baits.

This can be used with otherwise only modestly-appealing baits like bread or added to high-quality baits like roasted pork or poultry to make a dish that will be calling in raccoons from across the county.

If you are struggling to catch a raccoon with what baits you have on hand, consider adding a little shot of warmed soy sauce to it and pouring some extra on the plate or around the dish where you have placed the bait.

This will always give raccoons extra incentive to investigate the intoxicating aroma.

10. Cat/Dog Food

You should have figured this one out long before you ever thought about actually having to get around to catching the raccoon.

Most people find themselves in this situation because of chronically stolen pet food and increasing numbers of hungry, grasping little hands looking for a handout at night.

Raccoons love pet food, particularly cat and dog kibble as well as the ever-precious wet food.

You don’t need to swim uphill if you are trying to bait a raccoon that has been stealing your pet’s food.

Simply relocate some of the food into the animal trap or killzone and wait for the little mongrel to show up and collect his due.

As always, wet food generally works better but if you have dry food that’s okay, simply put out a little dish of water to go with it because apparently there is nothing raccoons love more than dipping dry pet food in a nearby bowl of water.

Conclusion

Raccoons are the half-glutton, half-gourmand of the animal world, and there is a wide variety of baits that will work wonderfully when it comes time to lure them into a diy trap or an ambush.

Read over the suggested baits we have furnished you with on this list and assess them against the environment your raccoons are in. I have no doubt that you’ll have a handful that will work wonderfully.

raccoon baits pinterest

What is the Difference between the Beretta M9 and the M9a1?

0

While most shooters mistake the Beretta M9 and M9a1 as one weapon, their primary differences lay on their outer surface and build as their mechanical alignment and functioning are similar. This article aims at shedding light on the few differences observed between the two.

Well, there is not much to differentiate between them; the few differences that I came across in my research were not one you may ignore. Even the slightest curve in a handguns stock builds holds a significant effect on its performance. Before diving into these aspects, let us first take a look at a general overview of these Beretta products.

Beretta M9

What is the Difference between the Beretta M9 and the M9a1?

The Beretta M9 is an Italian made semi-automatic pistol explicitly designed for 9mm. It is among a long catalog of 9mm Beretta handguns and ranks among the top sellers and most favored in the shooting genre. Its popularity mostly lies in the fact that the US armed forces adopted it as the official side firearm during the ’80s. Because of this, we saw them being a preference for most law enforcement officers in the modern world.

The internal engineering of this handgun features a short recoil accompanied by a single or double action mechanism. Its magazine capacity is 15 of 9mm rounds, which is standard for a day to day handgun user. Its design accommodates both left and right-handed shooters with a reversible magazine release button correctly positioned for the two types of shooters.

The Beretta M9 is also a perfect option for personal or home defense since it is among the most reliable firearms from Beretta. All of its parts are 100% interchangeable, with a wide variety of replacement parts available. Its flexible nature also simplifies its maintenance even when on intense conditions.

Beretta M9A1

What is the Difference between the Beretta M9 and the M9a1?

The Beretta M9a1 is an evolved gun from the M9 and features specific improvements in its design, resulting in a better performance. These modifications make the handgun perfect for tactical encounters mostly to occur with the US marine corps. They incorporate the previous m9 features and marry them to other adjustments and additions to meet the essential need for the ever changing tactic approaches.

The fact that it features more excellent reliability and effectiveness than the m9 makes it an even better option for self-defence and concealed carry. Its performance is traced back to its premium components and flawless manufacturing. Not only is this Beretta handgun deliver quality and consistent performance, but its exterior build is also a sight to behold.

A unique sand resistant coated magazine and a three-dot sight on its build are some of the outstanding improvements placed among the top-rated handguns. In more than one article, the Beretta M9a1 has been mentioned as among the best Beretta 9mm handguns. It is practically the easiest to maintain with its compact nature and vast replacement options. It also features a disassembling button that eases the breaking down the process of the gun. Those who have had the opportunity to feel this weapon can testify to its premium results.

Differences between the Beretta M9 and the Beretta M9a1

Now that we are all familiar with both weapons, why don’t we dive right into the distinguishing features?

Sights

The material used in their make is the only similarity in their sights, as the M9 features a two white dot front sight for your sighting needs. On the other hand, the M9a1 has a more detailed three-dot feature. This includes one dot on the rear segment and the other two strategically positioned at the front piece.

The primary purpose of sight is to ease your target acquisition by providing a fixed plane to base your aim. Beretta gun makers have been in the firearm game for as long as I can remember, meaning that they have undisputed experience in what makes up a perfect sight for a gun. It is no surprise to find that both components on the two weapons are made of steel for more durable and productive use.

I believe that the M9a1 sight is best for most shooters due to their detailed build.

Accessory Rail

I honestly do not see the need to add more accessories to your handgun, mostly Beretta made ones. It just adds on more weight to your gun, offsetting the average balance of the weapon. Despite my opinion, most shooters find lasers and other sighting additions best for their Beretta guns. If you are among this crowd, then you should opt for the M9a1 since it has a Picatinny rail available on the bottom front side of the barrel.

The M9, on the other hand, does not have any railing to accommodate any additional accessory. Instead, at the location where the Picatinny rails on its counterpart, it features a prefix serial number. This differentiation does not make the M9 any less as both these weapons are close competitors in the shooting field.

Magazine

The magazine on both these Beretta handguns has an equal capacity of 15 9mm rounds and is made of the same material. The difference between their magazines being their coatings.

The M9 was first to be released between the two, meaning that it was first to hit the shooting fields. After several trips into the battleground, its users found that its magazine casing faced damage as a result of exposure from sand and other natural elements.

Later, when the M9a1 joined the market, it featured an improved PVD coated magazine casing. This magazine was also sand resistant, meaning that it could maintain its quality finishing even after excessive exposure to these elements.

Grip

Every experienced shooter realizes the importance of a quality grip in a grip. Among the components that hold significant influence in the aim and performance of a gun lies this crucial piece. Both gun grips have proven to be reliable no matter the encounter; however, their nature includes some differences.

The M9 grip has a smooth front and back lining on its grip and only features a side checkering plastic that provides the required grasp on the gun. On the other hand, the M9a1 grip has a strap checkering that provides more natural and comfortable handling of your handgun. It also plays a significant role in reducing the recoil felt, and you will achieve better results on consecutive shots.

Markings

To some, this build engraving might not be seen as a difference. However, since there are not many of the differences to list down between these two similar handguns: I found it an important difference. You can easily tell the difference just by looking at the gun’s engravings.

The M9 is a military used weapon hence its military-style markings on its finishing. On one side of the firearm lies a “US 9mm M9 Beretta USA” engraving that is visible even on a longer distance. The official build and serial number lies on the other side of its body and adds a unique feel to the handgun. It is only featured on the M9, whereas the M9a1 only features a serial number engraving on its surface.

M9 vs 92FS

The Beretta 92FS is among the long catalog of 9mm pistols from the Beretta makers. Actually, the 92FS pistol is based on the M9 model and features explicit modifications that improve its performance both on paper and in the field. These modifications result in a civilian edition of the military-grade M9; its evolution is innovative and features creative adjustments to its functioning.

In this section, we will discuss the minor improvements that lead to this perfect self-defence weapon.

Sights

Like all Beretta 9mm handguns, both these weapons feature iron sights fixed correctly at the front and rear. The M9 then features a two-dot sighting pair, with the front and rear sections having a white dot in their make. To some shooters, this is an excellent characterization that provides them with accurate and satisfying results.

The 92FS, however, has a three-dot sight, which is more detailed and promises even more accurate results. Two of the white dots are strategically positioned on the rear piece while the front company holds the third dot. This third white dot proves to be useful for finessing your aim and improving the target acquisition.

Hammer

Among the complaints that came from the M9 military use included claims that the slide shot back towards the shooter upon firing. This malfunction was responsible for causing severe damage to most military men during combat, compromising the troop’s success.

The Beretta team considered this when designing the 92FS, and installed a larger hammer pin. The giant hammer eliminated the risk of the slide flying backwards to the shooter, allowing for safer use. Considering that the 92FS was explicit for civilian use, such malfunctions would result in extreme damages.

Grip

In comparison to the M9, the 92FS features a narrower handle with a distinguished arc on its hold. Only with close observation of the grip will you notice this arc that extends to the gun’s beaver-rail. The M9, on the other hand, has a broader stock, and no turn is noticeable in its body finish.

Judging from their grip structuring, it is correct to conclude that the 92FS has better handling with its slim grip nature. It allows for a better fit on the shooter’s palm, improving the shooter’s control of his or her firearm. Here are some of the Best Beretta 92F grips

The Best Overall:

In conclusion, both these weapons are perfect options depending on their applications. For tactical encounters, I would suggest the M9, whereas defensive approaches are best for the 92FS.

Most Popular Handgun Accessories

Frequently Asked Questions (FAQs)

Can Civilians Own a Beretta M9?

Regardless of DOD claims, you can successfully purchase a military-grade M9. The only requirement you need to meet is to be in a state that does not restrict firearm usage. Beretta is marketing these pistols as law enforcement pistols.

Why did the Army Replace the M9?

Following claims sourced from army officials, the M9 did not meet required standards for modern combat. Besides, cost analysis showed that its repair costs were equivalent to purchasing new service pistols. This is what led to their discontinuing in certain troops.

Would a 9mm Kill a Bear?

Yes, a 9mm would kill a bear. However, the bear would die of the injuries rather than the weapons stopping power. Before the bear falls to its demise, it will still have enough energy to cause severe damage to you.

Conclusion

The M9a1 is just an improvement of the M9 version, which I highly advocate for because of its magazine coating and Picatinny rail in its build. Its grip is also an aspect that sways most shooters find attractive over the M9.

However, the M9’s association with the US military gives its counterpart a run for its money. In conclusion, both are significant purchases and come at pocket-friendly pricing.

St. Lawrence River Fishing: 2024 Thousand Islands Angler’s Guide

0

Sharing is caring!

Offering some of the best fishing in New York for bass, muskellunge, walleye and several other species, the St. Lawrence River provides world-class angling on a grand scale. Few places in the Empire State have such a broad array of fishing options.

The river originates at the eastern end of Lake Ontario and drains the entire Great Lakes system into the Atlantic Ocean. Much of the river also forms the border between the United States and Canada.

The initial stretch of the river from Cape Vincent to around Morristown—about 60 miles, though measurements vary—is referred to as the Thousand Islands region. It is here that anglers will find much of the best fishing in the St. Lawrence River.

The Thousand Islands (a.k.a. 1000 Islands) region actually includes over 1,500 islands, ranging in size from a few square feet to several square miles.

A vast complex of rocky shoals, deep ledges and weedy embayments, the Thousand Islands supply virtually endless fishing opportunities.

Smallmouth Bass

The bass fishing in the St. Lawrence River is nothing short of spectacular, with smallmouth bass dominating most anglers’ catches.

Smallmouths ranging up to 4 pounds are abundant, and a 5-pounder barely raises an eyebrow.

The river is a frequent setting for bass tournaments, and it almost always takes a five-fish limit weighing over 20 pounds to win here. The St. Lawrence ranked number one on Bassmaster’s annual list of America’s best bass lakes in 2022.

Smallmouth bass abound on the river’s many rocky ledges and shoals. The St. Lawrence offers an endless supply of precisely the type of rocky structure that smallmouths love.

A good depth map is a very useful tool for identifying likely spots in this vast region, but you don’t usually have to go far to find great smallmouth habitat. Spring and fall are the best seasons to catch them in relatively shallow water.

Fishing in bays and around the rocky island shorelines is productive in May and June. In accordance with New York’s bass season, the fishing is catch-and-release-only until the third Saturday in June, by which time bass will be in post-spawn mode.

Summer bass fishing can be extraordinary, but be prepared to fish a little deeper than you’re accustomed to.

Ever since invasive zebra mussels arrived in the early ’90s, the water has become much clearer, and smallmouths are commonly found over 25 feet deep.

At times, they may be as deep as 50 feet, but they’re also known to feed in shallower spots or even suspend over deeper areas early in the morning and on overcast days. On days with a stiff breeze, bass will likely follow it toward windward shorelines.

River currents also drive bass movements and behavior. Although the current may seem imperceptible in many areas, bass still position themselves below current breaks, including islands and rock piles.

Jigs and finesse soft plastics on drop-shot rigs are the baits of choice for fishing deep structure.

A 5″ wacky worm is a great option for shallower areas, with darker, natural colors faring best.

The introduction of round gobies in the last 20 years has been a major change. Bass have increased in size, and studies suggest that gobies now make up 80% of smallmouths’ diet.

Any bait that resembles a goby is a good bet, with dark-colored tube jigs continuing to excel.

Largemouth Bass

With such an excellent smallmouth fishery at their fingertips, it’s unsurprising that many anglers overlook largemouth bass in the St. Lawrence River. But largemouths are also abundant, even if their populations are more localized.

Largemouths thrive in weedy shallows, bays and backwater areas all along the river. Bays like Goose Bay and Chippewa Bay are among the best spots, along with Lake of the Isles, a not-quite-closed-off embayment on Wellesley Island.

There can be great sight-fishing for bedding largemouths in early June—again, it’s catch and release only until the third Saturday. Largemouths continue to bite throughout the summer months, generally in shallower water than smallmouths.

Mouths of bays and channels between islands are good areas to find summer largemouths. Some of the best spots are where rocky structure and weed beds meet.

A very common feature throughout the Thousand Islands is rocky shorelines that drop off toward a weed bed at a depth of 6 to 10 feet. The margin between the rocky drop-off and the weed edge is a prime spot to find largemouths, especially first thing in the morning.

Casting around docks and boathouses is also productive in areas where the shoreline is more developed.

Wacky worms and soft plastic jerkbaits are great largemouth lures, along with spinnerbaits and crankbaits.

Walleye

Walleye in the St. Lawrence River are both large and abundant. The population is maintained through natural reproduction as well as generous stocking by the DEC, which has given walleye fishing a significant boost in the last 20 years or so.

The walleye season in New York begins the first Saturday in May and runs until March 15 the following year. The current state record, weighing 18 pounds 2 ounces, was caught on the St. Lawrence River on opening day of walleye season in 2018.

Various parts of the river offer different walleye fishing opportunities in different seasons. A few hardy anglers do very well fishing rocky shoals during the final, chilly weeks of walleye season in early March.

But the season opener in May is the date that most walleye fanatics look forward to.

By this time, walleye have usually finished spawning, and some of the best spots are mouths of rivers that empty into the St. Lawrence, including the Oswegatchie and Grass rivers.

The best walleye fishing in spring is generally in the section of the St. Lawrence downriver from the region considered to be the Thousand Islands. The Ogdensburg area and below the Moses-Saunders Power Dam in Massena are prime spots in May and June.

Jigging and dragging crawler harness spinner rigs are good tactics in spring, and depths around 20 to 25 feet are often productive. Walleye may be even shallower at night, and some of the best fishing takes place after dark.

Springtime anglers catch a lot of healthy, eating-size walleye in the 18- to 24-inch range, along with the occasional trophy (as the opening-day state record catch will attest to). But the summer months produce some of the biggest walleye of the year.

By summer, the bite shifts up into the Thousand Islands, though the areas below the dams farther downriver can still be productive.

Trolling deep shoals, island points and drop-offs in the Thousand Islands produces some of the biggest walleye from late summer into fall.

This is a great time to catch big ‘eyes, but the action can be slow. Depths in the 30- to 40-foot range are often best.

The Carleton Island area, not far from the mouth of the river in Cape Vincent, is a prime spot.

Try black-colored jigs or live minnows.

Muskellunge

The St. Lawrence River has a longstanding reputation as one of the best places to fish for muskellunge in the world. New York’s state record muskie, a 67-inch fish weighing 69 pounds, 15 ounces, was caught here in 1957.

Along with Lake Erie and the Niagara River, the St. Lawrence remains one of New York’s best places to catch a coveted muskellunge over 50 pounds. That being said, there’s reason to be extremely cautious about the future of the St. Lawrence River muskie fishery.

Muskellunge numbers have dropped precipitously since around 2005, with blame usually directed at round gobies.

These invaders eat muskellunge eggs and can potentially spread a deadly virus. A prominent muskellunge fish kill in 2022 was especially worrying.

But it’s not all doom and gloom. Anglers still catch muskies in the river and have an honest shot at a trophy. Going out with a guide is highly recommended for anyone unfamiliar with the river.

Muskellunge are widespread throughout the Thousand Islands region, and many are also caught farther downriver to the Ogdensburg area and beyond. Trolling is the best way to cover water and maximize potential strikes.

Edges of shoals are the top areas to troll for muskies, with August and September being peak months. Anglers also land some big ones later in the fall as these big predators feed heavily in anticipation of winter.

Ledges and drop-offs provide muskies with easy access to both deep and shallow water, allowing them to follow schools of baitfish in either direction. Depths between 20 and 40 feet are ideal.

Plugs and cranks like Radtke Pike Minnows, Cisco Kids, Jakes and Depth Raiders are favored by many, with 10″ models being standard. Oversized spinners like Mepps Muskie Killers are also excellent options.

Check out all of the best muskellunge fishing lakes and rivers in New York.

Northern Pike

Northern pike are exceptionally common in the St. Lawrence River. Although musky anglers sometimes view them as a nuisance, plenty of folks go out of their way to target pike. And with good reason.

Known for their fierce battles and line-slicing teeth, northern pike are capable of topping 25 pounds. Fish measuring 30 to 36 inches are common in the St. Lawrence.

Pike season opens in May, and the first month is the best time of year to find them in shallow water.

Having just spawned in April, pike will still be in weedy bays all along the river. Button Bay and Chippewa Bay are a couple of the best-known spots, but there are many, many others.

Large pike gradually transition to deeper haunts by summer, particularly favoring weed lines, shoals and points. However, anglers will still catch many at larger bays’ deep mouths, while smaller pike mostly populate the shallows..

The best pike lures for the St. Lawrence River are those that produce some metallic flash, including spinners and spoons. Gold-colored Doctor Spoons are a local favorite, along with Mepps #5 Aglia Bucktails.

Yellow perch are a major forage species for pike, and spoons with some yellow on them tend to draw a lot of strikes.

Spinner crawler rigs, more commonly used for walleye, also catch a lot of pike. Most anglers bait the rigs with either a live nightcrawler or minnow.

Ice fishing for pike is also very popular. Baiting tip-ups with live minnows around submerged islands and weed beds in the river’s bays is the perfect approach in January and February.

Eel Bay and Lake of the Isles on Wellesley Island, the bays around the village of Alexandria Bay, Goose Bay and Chippewa Bay are all excellent ice fishing areas for pike. Wheathouse Bay, a bit farther downriver near Ogdensburg, is also excellent.

Find more northern pike fishing hot spots in New York.

Other Game Fish

The St. Lawrence offers outstanding fishing for many additional species, including some that aren’t traditionally considered to be game fish.

For example, bullhead catfish invade shallow bays in extraordinary numbers every spring, and freshwater drum weighing over 10 pounds are common.

Bluegill and sunfish abound in shallow weed beds as well.

Long story short, don’t forget about these other fish species that also provide excellent fishing in the Thousand Islands.

Here are a few of those additional species we’d like to spotlight:

Yellow Perch

Yellow perch are some of the most abundant fish in the St. Lawrence River, inhabiting reefs and weed beds in prolific numbers. The ice fishing season is an especially popular time to fish for them.

As soon as safe ice forms on bays, anglers start catching great numbers of perch using jigging spoons, grub-tipped teardrop jigs and Jigging Raps.

Big “jack” perch in the 10- to 13-inch range are not hard to come by, though you may have to catch 100 dinks for every 10 jumbos.

Another great time to fish for perch is during the weeks immediately after ice-out, usually from late March to early April. Perch spawn this time of year in protected shallows, and anglers catch a bunch using live minnows.

Emerald shiners are the ideal bait if you can get your hands on some, but fathead minnows will also do the trick, along with bits of nightcrawler and small jigs.

Perch will be found in the backs of practically every bay and protected harbor areas and marinas.

Lots of quality perch will continue to be caught from docks and shorelines in Cape Vincent, Clayton, Alexandria Bay and Ogdensburg from late spring into summer. However, the best fishing for larger perch shifts to shoals on the main river in somewhat deeper water.

Crappie

Bays and backwaters along the St. Lawrence River offer excellent fishing for black crappies.

Even though fun to catch and delicious to eat, anglers often overlook this species to target other fish that are easier to find and catch reliably.

Crappies are notorious for vanishing like ghosts after the spring spawn.

Ice anglers catch their fair share of crappies in the Thousand Islands, with Lake of the Isles arguably the region’s premier crappie haunt. Goose Bay and other bays also have ample crappie populations.

Spring crappie fishing starts to pick up in April after the ice has receded from the bays and the shallowest backwaters begin to warm up. A good string of warm days can bring crappies flocking to the warmest available water.

Lots of scrappy 9- to 12-inch crappies are caught throughout the spawn, which is usually wrapping up by late May. After that, schools of crappies are nomadic and hard to pin down.

There can still be a good bite on summer evenings, as crappies emerge from weed beds just as the sun goes down.

Boat docks and marina areas can also continue to produce in summer, with crappies often seeking shade under structures that reach into deep water.

Common Carp

The St. Lawrence River has been called America’s carp capital, and few places in the country offer more or bigger carp. Anglers commonly catch carp weighing 20 pounds here, and 40-pound fish are available.

Carp are amazing fighters, and battling a carp that big is something you won’t soon forget.

Methods used to catch them vary widely. The presentation is often as simple as a few kernels of sweet corn threaded onto a hook and fished on the bottom. But serious carp anglers often go to greater lengths to target big carp.

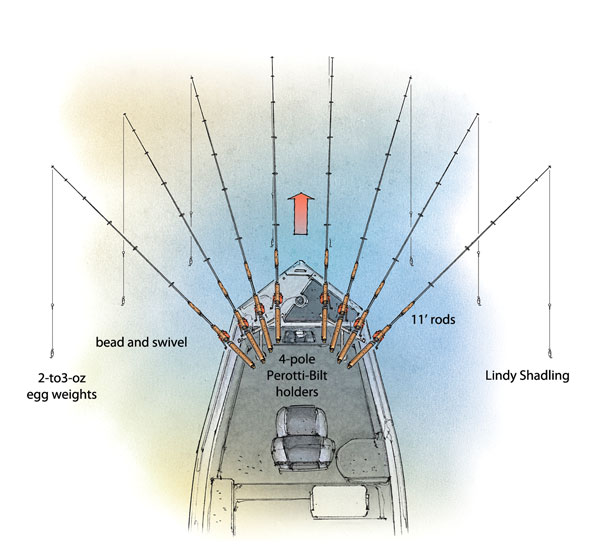
Specialized European-style carp fishing gear and techniques have started catching on in the region, including 12-foot carp rods.

Boilies—hard-boiled baits made using grains and a variety of scents and flavors—are the top carp baits for serious anglers.

The months of June, July and August are the peak of the carp fishing season.

These fish inhabit areas throughout the river and are easily targeted from shore.

Planning Your Trip

The Thousand Islands region has been a major tourism hub in New York going back to the 19th century, and a wide range of amenities are available.

More than a dozen state parks line the shoreline of the river, and several towns offer shopping, dining and lodging.

Alexandria Bay, roughly in the center of the Thousand Islands, is widely considered to be the gateway to the region. Cape Vincent is another major hub at the mouth of the St. Lawrence River as it drains Lake Ontario.

Farther downriver, small cities and towns like Ogdensburg and Waddington also provide access. The river gets quite busy with anglers, campers and recreational boat traffic in summer, but the region’s vast size generally allows elbow room for all.

Getting to the Thousand Islands

The Thousand Islands region is easily accessible from most directions.

Interstate 81 takes drivers on a straight course from Syracuse to Alexandria Bay in about 90 minutes. State Routes 12, 12E and 37 run alongside the river, connecting many towns along its shoreline.

Bank & Boat Access

Anglers have countless options for enjoying the St. Lawrence River.

In addition to the 14 state parks along the river, there are 12 state and municipal public boat launch sites, to say nothing of dozens of privately owned marinas and campgrounds.

Some of the best public access sites, starting at the mouth of the river at Lake Ontario’s eastern end, are located in the following communities:

Cape Vincent

Located at the mouth of the St. Lawrence River, the town of Cape Vincent offers excellent bank fishing and free public boat launch facilities at East End Park, which is also a popular scuba diving site.

Burnham Point State Park offers additional fishing, boating and camping opportunities nearby. This park is the closest access to the excellent fishing areas around Carleton Island.

Clayton

Cedar Point State Park includes a fishing pier, campground and boat launch facilities just west of Clayton. The Clayton Municipal Docks has an additional public launch site and 200-foot floating dock complex.

Alexandria Bay

Alexandria Bay, often referred to as Alex Bay, offers the widest range of access options on the American side of the river.

Bank and boat access is available at the Village Docks and Scenic View Park.

Several excellent state parks are just a few minutes away, including Keewaydin State Park and Kring Point State Park, The latter sits on a peninsula between the main river and Goose Bay. Both offer camping, boat launch facilities, docking and bank fishing.

Another great option is Wellesley Island State Park, just across the Thousand Island Bridge from the mainland. The largest camping complex in the region, this park offers boat launch facilities and excellent fishing access on both the river and Lake of the Isles.

Chippewa Bay

Overlooking the bay of the same name, the hamlet of Chippewa Bay provides a free public boat launch at the end of Denner Road, next to the Chippewa Bay General Store. Cedar Island State Park, accessible only from the water, is a short boat ride away.

Morristown

In addition to a public boat ramp and bank fishing access at Bayside Park, Morristown is a short drive from Jacques Cartier State Park. The latter offers excellent launch and docking facilities, as well as bank fishing, campgrounds, and a swimming beach.

Ogdensburg

The city of Ogdensburg, located at the mouth of the Oswegatchie River, offers ample public river frontage for bank fishing at Morrisette Park and public boat ramps at the neighboring Patterson Street Boat Launch. Additional bank access is available on the Oswegatchie River.

Waddington

The town of Waddington has several excellent options for bank fishing, including ample open shoreline near Waddington Beach. Additional bank fishing and a public boat launch are available at Whittaker Park.

Massena

Several public parks in Massena offer fishing and boating access. The town operates the Fish Massena website, providing a handy guide to getting on the water.

Nearby Robert Moses State Park also offers camping, fishing access and boating facilities. The park is located on Barnhart Island, the northernmost point in New York State, and is accessible by car across Barnhart Island Bridge.

Know Before You Go

The Canadian border bisects the St. Lawrence River, and officials on both sides take the boundary seriously. A Province of Ontario fishing license is required to fish on the Canadian side.

Best .223 Ammo for Coyote Hunting to Bring Them Down Fast

0

There are multiple arguments about the best coyote ammo, but hunters agree on the need to drop them fast.

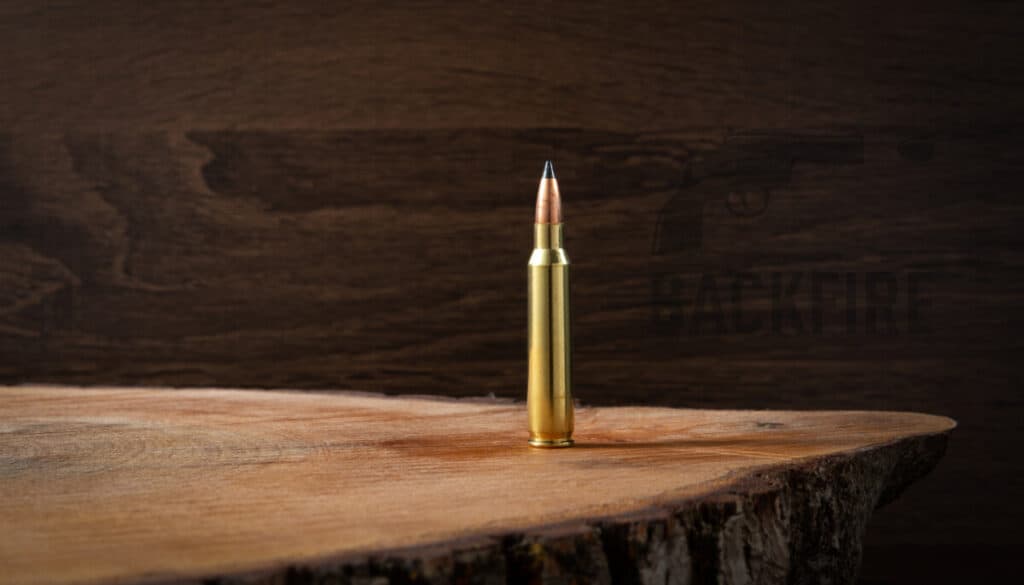
The most effective .223 ammo for coyotes is Hornady Superformance Varmint 53 Grain V-MAX (Order it from MidwayUSA here). It combines the highest ballistic coefficient with great accuracy, the highest velocity, and the least damage to the pelt. There are other options for barrels with fast twist rates and that are more affordable.

Barrel twist rate, shot distance, and affordability will dictate your most likely best performers. Take the best options, and find the most accurate one for your rifle. Read on!

The Most Popular .223 Ammo for Coyote Hunting

By far, the most popular choice for varmint and small predator hunting is Hornady’s 53 grain and 55 grain V-MAX bullets. 71 percent of skilled hunters polled preferred this round after first trying multiple other options.

I personally asked over 500 coyote hunters about their favorite .223 round and why they choose it. The two most popular are Hornady’s 55 grain Varmint Express, and Hornady’s Superformance 53 grain. Most agreed that the Superformance is superior, but many opted for the Varmint Express due to price.

Hornady’s Superformance Varmint is the king of popular coyote ammo for the .223. I find it stunning to get this much following behind anything! Here’s what they had to Say:

  • The 53-grain V-MAX combines both reliable accuracy and the explosive nature desired for a dedicated lightweight coyote round.
  • It’s the best pelt-saving option for the .223.
  • It’s a great compromise between velocity and high ballistic coefficient.

The words “explosive” and “dependable” were common descriptions attributed to this round. One hunter told me “I’ll not leave home without it. Real-world, unbiased reports from hunters continue to choose this over any other.

Hornady’s V-MAX bullet is a polymer tipped, copper-jacketed bullet with a swaged lead core. It’s a boattail design (slightly skinnier at the rear) and has a solid, flat but thin base. It also has a higher ballistic coefficient than most, which is the measurement of a straight-shooting bullet.

The Most Accurate .223 Coyote Ammo

Now let’s go over accuracy. You can’t get what you can’t hit. Accuracy is the most important part of the equation.

Hornady is well-known for making highly consistent, precision-made bullets. Their bullets are some of the more preferred for hand loaders requiring the utmost performance in cutting bullseyes and slaying canines. Hornady’s Superformance ammo is loaded under match-grade quality control.

Nosler is also a leading manufacturer of precision ammo. both companies have excellent attention to detail and quality control in the manufacturing process. Either company is an excellent bet for quality ammo.

They are super consistent in brass thickness, case length, seating depth, and powder charge. If the bullets agree with your rifle, more on that next, you can expect well under MOA (about an inch) groupings at 100 yards. That is what skilled shooters expect to find downrange.

The bullets do need to agree with your rifle. Minute differences in the chamber, throat, and barrel of your rifle will tend to favor one specific ammo over others, sometimes for no apparent reason. You need to choose the most likely accurate bullets, then try them and find the best performer for your rifle.

The best options to choose from tend to consistently be Hornady and Nosler, but don’t be afraid to try something else, sometimes that gives surprising results too. Let the rifle tell you what it likes best. Nosler does tend to over-penetrate a bit more, ruining more pelts than Hornady’s ammo.

So, what sort of accuracy do you need to hit a coyote? A rule of thumb is if you can hit a quarter (1 inch) at 100 yards, while seated at a shooting bench, you should do alright in hunting conditions. It’s important to remember that hunting conditions always reduce a shooter’s precision a bit.

The target area on a coyote is roughly the size of a softball. If you can hit a quarter on the bench, you should be able to drop a coyote in the field.

Best .223 Ammo by Barrel Twist Rate

The twist rate largely determines the best weight range of bullets you use. At .223 velocities, there’s little concern about too much twist rate, just be sure to have enough. Here’s approximately what to expect at .223 velocities.

  • 1 in 14 twist: bullets under 55 grain
  • 1 in 12 twist: bullets up to 55 grain
  • 1 in 10 twist: bullets up to 65 grain
  • 1 in 9 twist: bullets up to 68 grain
  • 1 in 8 twist: bullets up to 70 grain
  • 1 in 7 twist: bullets 55 grain and up

If you are looking at more affordable options, use this as a guide. I recommend Hornady Frontier 55 grain Spire Point. It’s a cheap, functional choice. It just tears up the hide a bit more.

Best Coyote Ammo to Save the Hides.

Coyote hides sell for around $20 plus or minus depending on the quality, and the current fur market. If they are torn up from a large exit wound, they are considered unsellable on the market. To “Save the Hide”, you want to make a small entrance hole and no exit.

That’s where lightweight, fast-moving bullets come in. Modern varmint and coyote hunting bullets are designed to quite literally explode reasonable hunting distances. They usually penetrate about 4 inches into a coyote. Not passing through but destroying the chest cavity.

There are lighter bullets with higher velocities, like Hornady’s lead-free 35 grain NTX, but these have lower ballistic coefficients. There is also a number offered in the 40 grain range. They start out blazing fast, with an impressively flat trajectory, but are tossed around by the wind and ineffective past 150 yards.

Best .223 Ammo for Coyotes Past 200 Yards

At 200 yards, things are starting to change for the lighter rounds, under 50 grains. Even if they are still going fast, they give to the wind too much. Heavier bullets in the same caliber tend to be less affected by the wind. That’s where the ballistic coefficient comes into play.

Once again, the general consensus is that the 53 grain Hornady round is the proven top-performer. At 250 yards, it has less wind drift and therefore kills more coyotes than lighter bullets. There is still plenty of killing power left at 250 yards to roll over a coyote and stop it in its tracks.

If you do want to shoot coyotes much further than 250 yards, I’m gonna recommend a different bullet. Something in the 65-80 grain range. Realize that these bullets will buck the wind better, but will not perform like the Hornady V-MAX and will give you pass through.

You will make hits but may not recover the animal. That’s more for damage control; just getting rid of them.

For shots over 250 yards, it’s really best to use either a faster caliber like the 22-250 or a heavier caliber like the .308 or 6.5 Creedmoor to be sure the bullet isn’t blown off course.

Understanding Rifle Scopes – Serious Shooters

0

We understand Rifle Scopes

Rifle Scopes

Selecting the right riflescope.

How to avoid the common mistakes.

Serious Shooters shows you how.

When buying a new telescopic sight, it is best to start with a clean sheet. There are many things to consider and there is no one type of scope that is good for every gun. Just because your friend has a 3-9×40 on his hunting rifle does not automatically make it the best scope for your hunting rifle.

Buy the best scope you can afford for the gun. Dont put a $99 Shining Deer Special on Old Betsy if your next trip is two weeks in Fiordland. You will never forgive yourself if it fails while you are on The Big Trip. Unless you try to use your riflescope as a spotting scope, (which you shouldn’t), or you are a serious target shooter, you are unlikely to notice large differences in optical quality just by looking through the scope, anyway. The most important reasons for buying a more expensive scope are not that obviously visible. The most important virtues of a telescopic sight are reliability and retaining a zero.

They dont make em like they used to. Right! Modern manufacturing techniques have made todays scopes cheaper, more reliable, and with better lens coatings than what was ever possible before. Many new scopes were impossible to make before the invention of computer optical design programmes.

Dont Buy Old Technology. Don’t buy a particular scope just because your mate’s got one or your uncle had one. One of the most requested scopes in New Zealand is a 30+years old optical design that has poor lens coatings, dreadful reflections and no click-stops on the adjustments. Its sole recommendation is that it doesnt often fog or fail. But neither will many better, newer and CHEAPER scopes.

There a wide range of possibilities when it comes to selecting the best scope for your rifle. Lets look at a few generalizations and go from there. The point is, that you need to match the scope to the type of shooting you will most often be doing, and the rifle it is to go on. Many people get it wrong. They automatically want to put a 3-9×40 on their deer rifle and a fixed 4 power scopes on their 22lr. Why, when rabbits are smaller than deer and are frequently seen at equal or greater ranges than deer.

Lets look at 22s. Most 22s are used for rabbits & possums. Sitting side on at 75 meters a rabbit presents a target roughly the size of a clay house brick. The instant kill area is smaller than a business card. On possums, very often you can only see the eyes. A bit of magnification helps pick up the body and avoid twigs and branches. Both rabbits and possums can usually be relied to sit still for at least a few seconds. Most people only want to buy a fixed 4x power, but we usually recommend a 3-9×40, for most circumstances it is the best all-round scope on a 22lr. In many brands the difference in price between fixed and variable power scopes is usually negligible.

Scopes for Deer, Goat or Pig hunting rifles. Most people by far, ask for a 3-9×40 scope on their deer rifle. If a rabbit has a credit card sized kill area, a deer has one the size of an dinner plate. A goat’s heart/lung area is about the size of a bread and butter plate. A much bigger target than a rabbit, it is frequently seen at 5 to 25 meters and often, on the move. Even at 200metres a dinner plate is a reasonable target, well achievable with a 5x power scope. That is the equivalent of the same plate at 40 meters with no magnification. We feel a 3-9x is more than you need for most deer hunting and lacks sufficient field of view for close running shots. We recommend a 1.5-5x, or up to 2-7x for most deer rifles. The small front lens diameter is not a disadvantage as its field of view and light gathering capability are both greater at lower magnification anyway.

Exceptions where a bigger scope might be appropriate are when the rifle is used principally on Thar, Chamois and deer open country or tops shooting. Then consider a 3.5-10 or 4-14 power.

Scopes for Varmint Rifles. Lets move that house brick sized rabbit out to 100, 200 or even 300 metres. Magpies are worse with a kill zone the size of a 50mm long (2) piece of broomstick. Any takers for the 3-9x?? In this area, more is better. Trade the light gathering for pure magnification. You need it. Ignore scopes with very fine crosshair only reticles. You cant see them in hunting situations where there is no white paper target to aim at. Pick a standard or fine 30/30 or Plex type reticle and buy the most expensive you can afford. In varmint scopes, cost equals quality. Avoid powerful fixed power scopes, as they wont let you take a 25m shot. Use a front lens shade and invest in a laser rangefinder and a bipod. Oh, and a broad stretchy sling to save your shoulder when you have to carry it all.

Hornets need at least 12x to 16x scopes (3-12x or 4-16x). 222s & 223s need at least 16x magnification at the top end. 22-250s and bigger need at least 24x. As you start to shoot your varmint rifle you will start to grow into the more powerful varmint scope. You will actually see your heartbeat bouncing the cross hairs at anything more than a 16x power setting. But, amazingly, after a few months you will learn to shoot between the heart beats (truly) and then you will start to use the top end of your scopes magnification range. Trust me… a magpie at even 200m is a mighty small target. You wouldnt put cross-ply tyres on your sports car. Don’t put a 3-9x on your Varmint rifle.

Variable v/s Fixed Power. The reasons for not buying variable scopes used to be that they were more expensive, had lower quality optics and broke or fogged more often. None of these things are true any more. In many cases a variable power scope is the same price or cheaper now that a similar fixed power scope. The scope makers make so many variable powered scopes, that the unit manufacturing cost is much lower. The staff at Serious Shooters hardly own any fixed power scopes.

Eye relief is the distance that you hold your eye from the back of the scope. Features of eye relief are the distance required to see a clear full picture through the scope, and sufficient distance to protect you from Weatherby or Magnum Eyebrow from a powerfully recoiling rifle. Generous Eye relief means that you can move your eye back and forward through perhaps an inch or two (25-50mm) and still see clearly. Shallow eye relief means there is only one right spot. Scopes like that are not good for quick or running shots. Scope Turrets cover the adjustment dials, usually in the middle of the scope. Target Turrets may be tall, and some may not even have screw-on caps to cover them. Hunting Turrets are small (not tall) and ideally should have clearly defined click-stops in their adjustment. Click stops vary from 2 clicks to the inch, to 8 clicks to the inch, but 4 clicks to the inch is most common.

Scope mounts. There is a bewildering range of options to choose from when selecting scope mounts. They range from $19.95 to way over $500. It is always to your advantage to buy the best scope mounts that you can afford.

Understanding Parallax. Telescopic sights are manufactured to be parallax-free at a particular distance. At the stated distance, you can move your eye around behind the scope and the crosshairs do not wander on the target. This distance is usually 100yds, but some special scopes are focused at closer or greater ranges. Parallax is not a big deal on most deer rifles but is very important at 25m or closer, on very small targets, or for long range precision shooting. It is more noticeable on very powerful magnification scopes; so most riflescopes more powerful than 10x power have a ring on the front (or a third knob on the turret) for dialling the correct parallax. If you have an adjustable parallax scope on a hunting rifle, leave it set on 100yds/mtrs for most shooting, or 25-50yds for close range rabbit shooting.

Light gathering is the ability of your scope to gather all available light from a target and transmit it through the scope to you eye. The larger the front lens or tube diameter, the more light than can be got to your eye.

Magnification. Riflescopes are usually referred to by their magnification power and the diameter in millimetres of the front (objective) lens. i.e. a 4×40, 1.75-5×32 or 4-16×44.

Serious Shooters will recommend the most suitable mounts for your scope and your rifle.

The information contained in this leaflet is copyright of SERIOUS SHOOTERS LTD

For further information contact:Serious Shooters LtdThe Best Gun Shop 726 Great South Road, Penrose, Auckland, New Zealand. Phone 64-9-579-3006

Calling All Hogs: Sounds are Key to Hunting Success

0

Hog Sounds for Hunting

Creating hog sounds for hunting is a crucial element to have success on your next hog hunt. In the past few years, several studies have been done to determine the effects various sounds have on wild hogs. The findings reflect a fact I have known most of my life: hogs are especially responsive to what they hear. Sounds they respond to vary. It could be a twig snapping when a hunter stalks within bow range of a sounder of wild hogs. It could be the low guttural grunts of a sow in estrus. Or it may be the squeal of a piglet in distress. Sounds are definitely a trigger that causes wild hogs to respond with various actions. While the sound of a distressed piglet could cause an entire sounder to charge, the “courting grunts” might be ignored by all but a boar in breeding mode. And boar hogs are always on the outlook for a receptive sow.

I’ve spent a good bit of time around hogs, both wild and domestic. I learned as a boy that hogs will come running to—or away—from certain sounds. My dad raised domestic hogs. Each fall, when the acorn crop hit the ground, he let the hogs out to fatten on the abundant free crop. Because he wanted to keep check on the porkers, he trained them to the sound of the honking car horn on our old International pickup. I can still see those hogs bounding out of the woods on our little farm, heading toward that honking sound, and the ears of dried corn they knew awaited them.

My electronic call had been emitting the sounds of a distressed piglet for several minutes.

Summer Night Calling For Hogs Has Never Been Easier

Then, out in front of my calling position came a sounder of 10 or 12 wild hogs charging straight toward me. I watched them come from a couple hundred yards along the edge of a cut-over corn field. They came within about 40 yards when they stopped, bristles up on the backs of the sows. They paused long enough for me to settle the crosshairs right behind the jaw, in the center of the neck, on a good “eater” sow weighing about 120 pounds.

While this was a calling session that went perfectly, I can also tell you about times when I tried every sound on the caller’s library and had no sign of a porker. Like calling any other game animal, using sound to entice hogs to within shooting range is not an exact science. But, when it works, few things in the outdoors are more exciting!

hog sounds for hunting

A Hog Hunting Boom

When the wild hog boom hit full scale in Texas around 1980, I was already a seasoned hog hunter. Being raised in northeast Texas between the Red and Sulphur Rivers, I knew about hunting wild porkers.

About 40 years ago when hog hunting suddenly became a “thing,” folks from far and wide began pouring into Texas to hunt hogs with outfitters. Many of them leased land specifically for hog hunting. At about this time I had my first “official” training in the art of using a call to bring porkers within range of my bow or rifle. I had a good friend from southeast Texas who was a major duck hunter, and he built his own waterfowl calls. He also loved hunting hogs. When he called one day to say he had developed a new way of hunting hogs, I was all ears (no pun)!

Hog Sounds for hunting from Outdoor Specialty Media Group on Vimeo.

My buddy hunted near the Louisiana border on leased land having some very heavy cover. Lots of switch cane grew along the creeks there, and that provided perfect cover for the area’s large number of wild porkers. Because the hogs had made well-worn trails through the vegetation, their travel routes were easy to find.

We determined that the key to success would be to hunt mid-day when the sounders of hogs were bedded back in the thick stuff. We would ease to the edge of the cover, get within bow range, and either find some natural cover to hide behind or quickly fashion makeshift blinds with machetes.

Sound Success

After that, my friend would go to work with that call. He always started with a series of contented grunts like the sounds that undisturbed, feeding hogs make. Occasionally, he’d create a pig squeal, the sound smaller pigs make when being slapped around by bigger hogs. He would also throw in deeper grunts and what he called a courtship call, which was a fast series of softer grunts.

Once he started, he didn’t stop until he either ran out of breath or we shot a hog. Once I learned that wild hogs would readily come to a variety of sounds, I began using his calls and enjoying success. I have found that regardless of the type of call being used, the key to success is simply being within hogs’ hearing distance.

Later, I discovered electronic calls with speakers that could either emit calls at a soft volume or blast sounds out to distant hogs. The first electronic calls I used were cassette tapes. They worked better for me than the mount-blown calls I previously used. The actual sounds were probably recorded from a pen of domestic hogs rather than squeals and grunts made by hogs in the wild. I did enjoy limited success, especially when hunting areas of heavy cover. There I could get relatively close to spots where I expected the porkers to be.

hog sounds for hunting leads to success

Next-Level Hog Calls

With today’s technology, calling wild hogs has been taken to the next level. For the past several years, I have used an electronic call made by Convergent Hunting Solutions called “The Bullet HP.” As anyone with experience calling game knows, the animals don’t always come running, regardless of how good the call sounds. This holds true with everything from predators to waterfowl.

However, I’ve learned that the odds of getting a wild hog within shooting range are very good. I’d estimate them as being about 60 percent for times when I’m calling in areas nearby the hogs. I usually can at least bring them out of cover. Getting them out into the open for a killing shot is sometimes a different matter, though. Especially considering the heavy cover areas where I often hunt.

When I’ve been hunting relatively open ranchland, I’ve watched hogs come from several hundred yards to the sound of the call when I turn the speaker to high volume. Lone boars often come in slowly, stopping frequently with their snout in the air to test the wind. Sometimes sounders of hogs with sows come in at a gallop to the sound of what they think is a piglet in distress.

Set Up Downwind

Because of hogs’ excellent sense of smell, it’s important to set up downwind of the area where you are calling. While hogs are not nearly as sensitive to movement as turkeys or deer are, don’t think for a minute that they can’t see well. Especially when you’re positioned in open cover. One reason many people think hogs are “half-blind” is that they are low to the ground, so weeds and brush often limit their vision. I have experienced having hogs who were out in the open spook when they spotted me 300 yards away. Rather than set up a portable blind when calling, I usually fashion a brush blind or just conceal myself in cover. First, I make sure I have good visibility out in front and to the sides of my setup.

Hog sounds for hunting gone right
Wild hog after a successful hog hunt

Effective Calling

I’ve found the distressed piglet sound to be very effective in triggering a response from a sounder of hogs. The sound of an aggressive boar or boar fight can also be effective, especially for calling in boars. I’ve noticed one thing that’s true for boar hogs, much as it is for Whitetail bucks. You can often see a “satellite” younger buck skirting around an area where there’s a receptive doe. Most likely hoping to move in on it while other “big boys” are battling. On many occasions, I’ve had younger boars skirt the area around my calling location. The big porkers will usually come straight toward the sound instead. They won’t be at a dead run, but they usually come straight toward the call with a cautious, stop-and-go gait.

Choice of Caliber

Much of my calling has been done during daylight hours, although hunting after the sun sets can be extremely exciting. I have an AGM Rattler thermal scope mounted on my little .223 bolt action Mossberg Patrol rifle for night hunting. Some folks say my caliber choice is too light for hunting hogs. That might be so if shooting running hogs at several hundred yards. But for close work, when I can place my shots in the neck just behind the ear, I’ve found it works great. I love wild pork and have found this caliber and shot placement destroys very little meat. I also don’t have to spend time searching for wounded hogs in the dark.

In Conclusion

Calling wild hogs is just another tool for putting meat in the freezer. If you are new to this idea, you might want to give it a try. Hog hunting isn’t quite as simple as setting up your electronic caller, hitting a button on your cell phone to trigger an app, flipping the safety off your rifle, and shooting a hog every time. First, you have to pattern the hogs. Then you must study the terrain to determine which locations to set up in that is best for success. I can tell you for certain that when you watch that lone boar or sounder of wild porkers heading toward your calling position, your adrenaline level will likely go through the roof! It can be challenging keeping those crosshairs steady with a toothy boar coming your way at close quarters!

For more hog hunting tips, check out this Pack-In Hog Hunting article!

The 8 Best Slingshots For Survival

0

When most people think of slingshots, their heads are probably filled with images of cartoon trouble-makers ala Bart Simpson and Dennis the Menace. And while slingshots can certainly be used for the purposes of making mischief, they were not originally intended for that purpose. Rather, they’re a relatively modern reinterpretation of a much older tool: the sling (like the one used by David against Goliath in the biblical story). And that device, like its modern counterpart, was actually widely utilized for the purposes of hunting and survival.

You might think that, in this day and age, slingshots are all but obsolete — what with guns, bows and arrows, crossbows, etc. But we’d suggest looking at it a different way: using a slingshot is a way of developing better hand-eye coordination, they’re less intrusive and dangerous than firearms, they’re a good deal more approachable from a budgetary standpoint than any of the aforementioned alternatives, and more. If that sounds like something you might be interested in, you’ll definitely want to check out the following guide covering the best slingshots for survival.

Why Carry A Slingshot?

Slingshots as we know them are a relatively modern invention, dating back to just the mid-1800s — a result of the fact that Charles Goodyear invented vulcanized rubber in 1839 and patented the technology in 1844, which slingshots depend upon for their elastic, springy bands. And while they’re typically portrayed in media as the tools of troublemakers, they actually offer quite a lot of genuine value in the hands of a skilled user. We’ve mentioned a few benefits already, but we’d like to take a moment to outline them more in-depth and touch on a few others to better help you understand why you might want a slingshot for survival usage. The following are just some of the reasons you should pick up a slingshot:

Budget-Friendliness: Especially when compared to lethal firearms, slingshots are extremely budget-friendly — both in regards to the initial investment but also in regards to replenishing ammunition (rounds are much more pricey than BBs). In earnest, even the most high-end of slingshots can be purchased for a relatively reasonable price, especially when compared to the alternatives.

Hand-Eye Coordination Development: Target shooting of any kind requires a measure of hand-eye coordination to be done right, but utilizing a slingshot can take even more skill and can help you better develop said skill. Not only does a user need to be able to properly aim to send their ammunition in the right direction, but they’ll also need to properly judge distance, wind resistance, and numerous other factors — much like firing a bow and arrow, but with far less of a monetary investment.

Packability & Portability: The only other projectile weapon that even comes close to the packability and portability of a slingshot is probably a handgun. And, even then, handguns tend to be far heavier, as is their accompanying ammunition. By contrast, there are slingshots (worthy ones) that are small and slender enough to stash in the pocket of your jeans. When it comes to packability and portability, slingshots are tough to beat.

Unobtrusiveness: This ties in closely to the above metric, but we’re including it because it isn’t exactly the same thing. You see, thanks to the fact that slingshots are so compact, they’re also relatively lightweight and easy to use for people of all ages and skill levels. Yes, a professional with years of experience is going to be able to do things a beginner couldn’t fathom, but the learning curve for proficiency is shortened thanks to the manageability of the hardware. Put simply: firing a slingshot is easy to learn but difficult to master.

Marksman Laserhawk III Slingshot

Best Budget Pick: For just a few dollars more than the above option, the Marksman Laserhawk III has some significant upgrades (and one downgrade). These include (but are not limited to) a fully adjustable yoke, a band that’s good for shooting distances of up to 250 yards, and an extremely low weight. As mentioned, there is one downside: this one does not collapse for easier pocketing. Still, if you’re serious about taking your slingshot skills to the next level, this is a superb place to start.

Barnett 16043 Cobra Slingshot

Best with Sight: There is no shame in utilizing training aids, especially when it comes to developing skills that might come in handy in a survival situation. For that reason, we’re fond of the Barnett 16043 Cobra Slingshot. With its metal frame, extended wrist brace, contoured Soft Touch grip, and powerful band, this is an excellent budget-friendly slingshot. But its biggest benefit comes from the included front-end sight, which makes aiming this slingshot even easier and will help you develop your hand-eye coordination faster, especially for beginners.

Hella Flip Folding Slingshot

Best for Travel: The San Francisco-based crew at Hella Slingshots only knows one thing – and that’s how to build a solid slingshot. And, they do so at an affordable price point. Built from a combination of steel and plastic, this slingshot includes a stabilization arm that can fold down for easier transport and comes with a powerful, stretchy band and a faux-leather pouch. As a starter “wrist rocket” style slingshot, this one is an extremely solid buy.

SimpleShot Axiom Ocularis Slingshot

Best for Hiking: As mentioned, there are slingshots on the market that are both high-end and highly compact/portable. The SimpleShot Axiom Ocularis is one such slingshot, measuring up at just 6″ in total height and 2.2oz in total weight. This also happens to be a recreation of SimpleShot founder Nathan Masters’ personal Axiom Ocularis model — which should lend credence to its overall value. Furthermore, it’s built from an injection-molded proprietary thermoplastic material offering “unmatched strength and reliability.” And it can be customized to accept flat bands, tubes, and looped tubes — letting you customize it to your shooting style.

SimpleShot Scout LT Slingshot

Best Small Option: SimpleShot’s Scout XT was one of the brand’s most popular and successful models. But that doesn’t mean there wasn’t room for improvement. Enter the SimpleShot Scout LT you see here, the result of years of work and listening to customer input. This sling is just as capable as its larger counterpart, but measures up at just 5″ in height — making it one of the smallest, best slingshot options available. And since it comes offered with 25 color combinations (five different frames and five different scales), it’s also exceedingly customizable.

Pocket Shot Survival Kit

Best All-in-One Kit: By a wide margin, the Pocket Shot is the most unique and compact slingshot on our list — utilizing a circular frame with a pocket-style pouch that, together, can offer better consistency regarding speed, accuracy, and a shorter learning curve than any other slingshot on our list. But this particular kit is even better, as it actually includes a number of other survival tools, including a fishing line, a saw, a compass, and even a storage tin in which you can store it all. Of course, if you want your pocket shot with a more traditional-style handle, the brand actually offers those, too.

Marksman Pocket Hunter Slingshot

Best for Practicing Your Aim: You can try to fire an arrow with any of the slingshots on this list, but you’ll probably not be very successful. By contrast, however, the Marksman Pocket Hunter Slingshot was actually made specifically with this purpose in mind, marked by a pocket with a paracord pull tab, making it a far superior alternative. In fact, the sale actually includes a 31″ carbon arrow. Whether you’re a seasoned archer seeking out hardware that’s a bit more compact or you’re looking to make the transition into learning how to fire a bow and arrow, this is the slingshot for you.

TOPS Knives Sling

Best Overall: Though the investment comes with a significant jump in price, the overall quality and craftsmanship of the TOPS Sling are more than worth the extra scratch for those serious about their slingshots. After all, it was crafted here in the USA using rugged 1095 carbon steel, which is paired with black canvas Micarta for the handle scales, a top-grain leather pouch, and a powerful band. If you’re the type that had wooden slingshots as a child and you’re looking to recapture those glory days with something a bit more rugged and refined, you definitely can’t go wrong here.

Spider Rigging For Crappie

0
Spider Rigging For Crappie
Morrow’s Crank-Pushing

Spider Rigging For Crappie

Spider rigging for crappie looks simple enough — a bunch of fishing rods weaving a web of lines from bow to stern. A closer look at the boats of crappie pros reveals that their spider rigs are intricate systems based on exact rod positioning and specialized rod-holder designs. The pros set up their spider rigs differently depending on the situation, whether it’s fishing deep brushpiles, open-water structure, shallow vegetation, or for pushing crankbaits.

The most essential pieces of equipment for spider-rigging are the rods and holders. “The key is to make sure the rods are all the same,” says Barry Morrow, a guide on Oklahoma’s Lake Eufaula. “All the rods should be the same length, power, and action, and they should be adjusted to the same height in the rod holders, so that you are able to decipher the motion of the rod tips to detect bites. If you are using different types of rods they’re all bowed differently and respond differently to strikes, making it more difficult to interpret rod-tip and line movement.”

Preferences on rod-holder design vary among the pros, but there’s one that top anglers all agree on: Rod holders need to be stable. “When I mount a set of rod racks, I want those things not to move,” says Alabama guide Brad Whitehead. Beyond that, top spider-riggers have developed individualized setups to suit the situations they fish.

Whitehead’s Deep Brush

Probing deep brush

For spider-rigging over brushpiles on Wilson and Pickwick lakes, Whitehead prefers 12-foot rods at the bow. He places 10-foot rods across the stern for his clients because the shorter rods are easier for them to handle. Rods are spread evenly across the bow and stern for uniform coverage and easy access to the poles. “I’m a fanatic on keeping 11„2 feet between each rod,” says Whitehead, who also keeps each rod tip about 8 to 10 inches above the water.

He usually sets his baits at different depths, varying about 1 to 2 feet. “I want my shallowest rods to my right and left, but the deepest rods are always the two in the middle,” he says. His poles are rigged with B’n’M Capps and Coleman Minnow Rigs (with a 1-ounce weight).

Whitehead’s choice of rod holder is a four-pole Hi-Tek Stuff mount. He positions two of the mounts about 3 feet apart on the bow and stern. “Position rod racks so when you are sitting, you don’t hit your knees on the rod handles,” he says. “Make sure they’re far enough away, but not too far to where you have to bend to get the rods. You want to be able to sit up straight when you grab rods.”

Capps’ Pads

Pad fishing

Six-time national champions Ronnie Capps and Steve Coleman are renowned for their spider-rigging tactics in the lily pad stems at Reelfoot Lake. The key to their setup is a customized pole-holder system with independent mounts rather than a rack that holds multiple rods. “The rod holders cradle the poles so you have no trouble getting your hand between the forks of the holder and the rod butt. And when you grab a pole out of the holder it’s a quick reaction,” says Capps. “You’re able to get your hand in there with no problem.

“The reason for the independent holders is because I want my poles to be ultra still. With a T-bar type mount, on the other hand, if you grab one pole from a set of four, you disturb the other three rods and you can’t detect a bite. With independent holders, you can detect bites well. I also think fish bite better when a pole isn’t moving much.

Capps is constantly moving his poles off the pad stems to prevent hang-ups. He says the individually mounted holders are critical in this situation because getting hung up on one pole doesn’t disturb the others.

The Tennessee pro also prefers a rod holder with a Y-fork cradle rather than a U-shaped cradle, for better hook-sets. “If you see a bite and the line is scooting to the left, you want to set the hook to the right. But with some of the U-shaped holders there is only one way to get that pole out — straight up,” Capps says.

The depth and cover Capps fishes determines how far apart he positions 8 poles across the front of the boat. “If I’m fishing shallow and directly into spots that I expect fish to be in, I bunch poles tight,” he says. “If I’m trying to cover more area on a shallow flat, I set them farther apart.”

For pushing a single 1/16-ounce jig on 6-pound line in the lily pads, Capps uses 16-foot B’n’M jig poles (model BGJP163). “I get more bites having my baits farther from me with 16-foot poles than I do with 14-footers,” he says, also noting that 16-footers allow him to cover a wider swath of water. Extra length also keeps his jigs farther from the boat, away from trolling motor noise that could spook shallow fish.

Huckabee’s Suspenders

Riprap and breakline trolling

Oklahoma guide and tournament competitor Todd Huckabee prefers single-pole fishing whenever possible. But there are certain conditions when he resorts to spider-rigging, such as during the postspawn on his home waters of Lake Eufaula when crappies pull off the bank and suspend 2 to 6 feet deep over riprap and breaklines in the depth range of 10 to 15 feet.

Four-rod Perotti-Bilt rod holders are Huckabee’s choices for spider-rigging. “They are simple and sturdy,” he says. “When a fish hammers one pole, the other three don’t shake — you can tell which pole got the bite.” He mounts his rod holders on each side of the boat’s bow, positioning the rods about 2 feet off the floor. “I want rods set where I can reach over and set the hook quickly, without having to bend over too far,” he says.

His choices for spider-rigging poles are 11-footers with plenty of backbone. “When I get bit I can pull the fish up with that pole in between all the other poles.” he says. Huckabee sometimes varies his presentation between minnow rigs and tandem-jig rigs, but most of the time he spider-rigs with two jigs of varying colors.

Morrow’s Crank-Pushing

Pushing crankbaits

Pushing crankbaits in front of his boat has become an effective spider-rigging trick for Barry Morrow. The tournament competitor and guide rigs each 11-foot pole with a 2- to 3-ounce egg weight, glass bead, and swivel, followed by a Lindy Shadling crankbait on a 3-foot leader. When he fishes tournaments with a partner, Morrow pushes crankbaits with 8 rods, starting with 2 pointing straight out the nose of the boat and the other 6 spread about 2 feet apart on the port and starboard sides.

Morrow also uses 4-pole Perotti-Bilt holders that allow him to easily adjust the rod positions. “I like to have a rod rack that is adjustable vertically as well as horizontally,” he says. Wind and wave action usually dictate how high he positions his rods over the water. He says the lower the better, preferring to keep rod tips about 3 inches above the water.

The next time you see a spider-rigging setup, you might be able to decode their fishing situation. Or someone might be studying your boat, trying to unravel the crappie-catching web you’re weaving.

AR-15 Barrel Twist Rate Explained

0

When looking into improving your accuracy or range with an AR-15, someone will mention your twist rate at some point. What are AR-15 twist rates, and how does it affect shooting accuracy? This AR-15 barrel twist rate guide will answer these questions and help you identify the best twist rate for your gun.

AR-15 Barrel Twist Rate Explained

What Is Barrel Twist Rate?

Bullets fired from guns made after the 19th-century spin/twist during flight. The spin boosts accuracy by enhancing a round’s stability and aerodynamics.

Barrels make bullets spin with the help of grooves or rifling that line the inside of a barrel. Tighter or shorter grooves lead to a faster spin rate, while longer grooves cause a slower spin.

AR-15 rifling twist rate or barrel twist rate refers to the number of times a bullet spins per inch of barrel length. For example, a 1:8 twist rate means a slug will complete a spin once every 8 inches as it travels through a barrel.

If you have a 16-inch barrel with a 1:8 twist rate, the bullet will complete a spin twice before exiting the muzzle. An 18-inch barrel with a 1:6 twist rate will cause a bullet to spin three times before leaving the gun. The more twists a bullet can complete before leaving the barrel, the more stable the slug will be when it exits the muzzle.

Is Twist Rate a Safety Concern?

You can safely fire a bullet of any weight or size from a compatible barrel with any twist rate. While the rate of twist does not affect safety, it can affect bullet accuracy and range. If a barrel’s twist rate is slower than the recommended rate of spin for a specific bullet, you are less likely to hit targets accurately beyond 100 yards.

A barrel with a faster-than-recommended spin rate may have some or no effect on your accuracy if firing a heavy bullet. On the other hand, excessive spin on a light bullet (under 50 grains) may lead to overspin, which can make a bullet unstable enough to fly off trajectory downrange.

Here’s an AR twist rate chart from the NRA that sheds more light. The numbers at the top of the chart refer to bullet weight.

AR-15 Barrel Twist Rate Explained

How Much Does Twist Rate Matter?

The lower ratio of the twist rate, the more spin a bullet will have. For instance, the same bullet fired from a 1:6 barrel will spin faster than one from a 1:7 barrel.

Heavier and longer bullets require a faster and tighter twist rate for adequate flight stability and accuracy. That’s because these bullets are less aerodynamic, and the spin improves the bullet’s ability to overcome wind resistance and travel straight to reach a target. If you select the optimal twist rate for your ammo, you can look forward to better shooting accuracy and range.

Common AR-15 Twist Rates

AR-15 twist rates typically vary between barrels, and the difference can be due to barrel length, rifling, and other factors. You can usually find a barrel’s twist rate listed under its features or specifications. Below are some of the most popular AR-15 barrel twist rates:

1:7

A 1:7 twist rate barrel is a favorite among target practice and combat shooters because it is effective for stabilizing long-range, modern bullets that weigh over 69 grains. The twist rate can also work with most rounds that weigh 55 to 70 grains. It is so effective for combat shooting that the U.S. military uses this twist rate in its M4, HK 416, and M16-A4 rifles.

You can get barrels between 6 and 24 inches with the 1:7 twist rate. The shorter barrels are suitable for close-range combat, while the longer barrels offer better velocity for long-range shooting.

1:8

Compared to other AR-15 twist rates, 1:8 is the most versatile. Barrels with this twist rate can work well with most ammo, offering sufficient stability to 70 to 90-grain bullets and preventing overspin in light rounds. While 1:8 twist rate barrels can fire most slugs with adequate accuracy, the best results occur when firing 60 to 80-grain bullets.

1:9

Barrels with a 1:9 twist offer a slower spin that works best with short, lightweight bullets (40 to 62-grain projectiles). You can use larger bullets with the barrel, but the rate of spin will not be fast enough to deliver optimal bullet stability and accuracy.

Rifle Barrel Twist Rate vs. Bullet Weight

Listening to the rifle barrel twist rate vs. bullet weight conversation, you will discover two sides – one that says bullet weight determines the best twist rate, and the other that believes bullet length determines twist rate. Both sides have a point.

Heavier bullets need more force to propel them in a straight line to hit far-off targets. Adding spin to such bullets makes them more aerodynamic and stable, enabling them to travel further in a straight line. If shooting ammo on the heavy end of the spectrum (over 70 grains), a 1:7 twist rate is ideal. However, if shooting lighter ammo (50 grains or less), a 1:9 twist rate will suffice.

On the other hand, you have experts who say that bullet length determines twist rate more than weight. The argument makes sense because, in most cases, the longer a bullet is, the heavier it becomes.

You also have the new lightweight copper and zinc bullets that are extra long to weigh the same as their lead counterparts. Simply put, many longer bullets have extra weight that requires a faster twist rate for better flight stabilization and accuracy.

What’s the Best AR-15 Twist Rate?

The best twist rate for an AR-15 will depend on various factors, such as your ammo type and how you intend to use your gun. As we’ve established, heavy and lightweight bullets require different rates of spin, but if you want a twist rate that works well with various bullet weights, we recommend 1:8.

Among all the AR-15 twist rates, 1:8 inches is the most versatile and multipurpose. Just check out various AR twist rate charts, and you’ll see that the 1:8 twist rate handles most AR-15 loads well.

While the 1:8 twist rate can handle most loads, it works best with 60 to 80-grain loads. If shooting light ammo, the 1:8 twist rate won’t cause the slug to spin out of control and veer dramatically after flying a few yards. The twist rate can also stabilize slugs that weigh up to 90 grains.

However, if you want the very best bullet stabilization and accuracy, always use the twist rate recommended for your specific ammo.

AR-15 Barrel Twist Rate Explained

Get Premium AR-15 Barrels, Made in the U.S.A.

We’ve reached the end of our AR-15 barrel twist rate guide, and here are the things to remember – a slower twist rate (1:9) works best with lighter, shorter bullets, but it can also stabilize heavy bullets aimed at close-range targets. If you are a hunter or long-range shooter firing long and heavy slugs at targets over 100 yards away, you are better off switching to a faster twist rate (1:7 or 1:8).

How can you get barrels with your preferred AR-15 twist rates? Head to our online store today to shop industry-leading AR-15 barrels that match your unique shooting needs.

Best Air Rifle Deals

Popular Posts

How far can an air rifle shoot accurately?

0
An air rifle's effective shooting range depends on various factors, including the type of rifle, the caliber, and the power source. Generally speaking, most...

Best Air Rifle Brands – Who Makes the Best Pellet Gun?

0
In Jeff Bezos’ own words: "A brand for a company is like a reputation for a person. You earn reputation by trying to do hard...

PCP vs Gas Piston: Which One is Better?

0
The perfect airgun is a difficult pick when you are new to gun-hunting. There are a lot of things to keep in mind, starting...

What can you kill with a 177 air rifle?

0
"Unleash Your Precision: Discover the Power of a .177 Air Rifle to Take Down Targets with Accuracy. Explore the Versatility and Potential of this...

How Does an Air Rifle Work?

0
Discover the inner workings of an air rifle with our comprehensive guide! From the mechanics behind its powerful shots to the intricate process of...