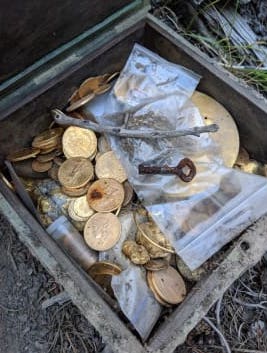
Forrest Fenn’s map and treasure which was recently discovered in Wyoming.
It’s been almost two years since Forrest Fenn’s riddle was solved, and the $2 million worth of treasure he’d buried was found. Until recently, the only thing we knew about its location was that it was in Wyoming. Until now.
A recent article on Outside Online has revealed that the treasure was buried in ‘an iconic American landmark’ in Yellowstone National Park. Park Rangers are aware of the exact location but want to keep it a secret. They’re concerned that should the exact location be revealed, it would become swamped by tourists, damaging the fragile landscape. However, an ongoing lawsuit against Fenn (who passed away in September 2020) may result in that location being revealed.
Author Forrest Fenn confirmed in a blog post in July 2020 that his chest filled with $2 million worth of treasure was found in Wyoming.
Many of the searchers for my treasure had solves that seemed to neatly fit the clues in my poem. Then when the finder found and retrieved the treasure, other searchers wondered how close they had been to the right spot. Because I promised the finder I would not reveal who found it or where, I have remained mostly silent.
However, the finder understands how important some closure is for many searchers, so today he agreed that we should reveal that the treasure was found in Wyoming. Until he found the treasure, the treasure had not moved in the 10 years since I left it there on the ground, and walked away.
Perhaps today’s announcement will bring some closure to those whose solves were in New Mexico, Colorado, or Montana.
To all of those who did not find the treasure, we hope that you got some enjoyment from the chase. f
For a decade, the $2-million treasure chest sat undiscovered in the Rocky Mountains, with the only man who knew where it was leaving clues to its whereabouts, promising whoever found it could keep it. At least four died in its pursuit, and many sacrificed jobs and their livelihoods. Finally, some lucky sleuth found it. But that didn’t stop the disbelievers.
Forrest Fenn with his treasure chest that was found in Wyoming.
As is the case with many mysteries, there were plenty of people calling it a hoax, claiming conspiracy theories and disbelieving it even existed. But Forrest Fenn, the man behind the quest, put those theories to rest by releasing pictures of the discovered treasure.
Photos taken by the man who discovered it.
The 89-year-old art and antiquities collector posted three pictures of the treasure on dalneitzel.com, a fan blog dedicated to the treasure hunt. While some remained skeptical, most of the comments on the site congratulated the finder and thanked Fenn for the experience.
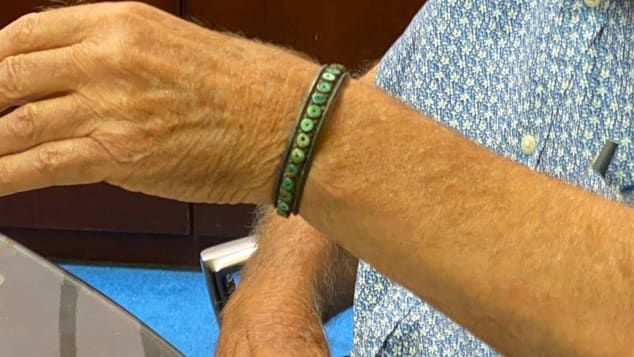
Fenn wearing a bracelet made of silver, which has been tarnished black.
It all started when art dealer and former air force pilot, Forrest Fenn, revealed in his self-published 2010 novel, “The Thrill of the Chase”, that he had buried a lockbox full of about 2 million dollars worth of gold, gems, and artifacts. The clues to the treasure’s whereabouts were hidden in a 24 verse poem that is included in the memoir. Many people have quit their jobs and spent their life savings in the quest to find the buried treasure.
THE TREASURE HAS BEEN FOUND
It was under a canopy of stars in the lush, forested vegetation of the Rocky Mountains, and had not moved from the spot where I hid it more than 10 years ago. I do not know the person who found it, but the poem in my book led him to the precise spot.
I congratulate the thousands of people who participated in the search and hope they will continue to be drawn by the promise of other discoveries.
So the search is over. Look for more information and photos in the coming days.
– Forrest Fenn, June 6th 2020
Forrest Fenn
Mr. Fenn stated that the Treasure was located in the 1,000-mile stretch of the Rocky Mountains from New Mexico to the Canadian border and at least 5,000 feet above sea level, in an area that an 80-year-old would not have trouble accessing. Fenn estimates that over 100,000 people have attempted the search for his treasure and originally said that he hoped the hunt would push more people outside to enjoy the wilderness. Asked how he felt now that the treasure has been found, Fenn said: “I don’t know, I feel halfway kind of glad, halfway kind of sad because the chase is over.”
Related: Police Warn of ‘Deadly Pursuit’ as 2 Have Died in 2 Years Searching for Buried Treasure in Rocky Mountains
Within days of the treasure being found, three separate lawsuits were filed by people claiming they solved the puzzle first, with one lady claiming that the man who got to it first “stole her solve”.
Related: Man Who Found Forrest Fenn’s Treasure May Have to Fight For it as 3 Others Claim They Solved Puzzle First
In March 2020, two Coloradan snowmobilers were searching for Forrest Fenn’s elusive treasure when they became stranded, and one died in a Utah park. In June 2017, New Mexico authorities found the body of Paris Wallace, a Colorado Pastor who had joined the hunt. A year before Randy Bilyeu disappeared while searching for the treasure, his remains were found in the Rio Grande seven months later.
Frog gigging, also known as frog hunting, is a popular activity in parts of the United States, particularly the South and Midwest. Gigging frogs typically involves using a large spear, or gig, to impale frogs in bodies of water and then pulling them out of the water to be cooked and eaten. If you’re new to this pastime, or if you have always wanted to learn how to gig for frogs in the water yourself, then here’s everything you need to know about this fun summer activity!
What is Frog Gigging?
The techniques and equipment involved with frog gigging are relatively straightforward, but to successfully gig a frog, is not. The spear has a small barb with a small barb near it’s tip like a fishing hooks barb; when you gig a frog, it will stay on your spear without slipping off due to the barbs. The barbs of a frog gigging spear help keep your catch secure as you pull them out of underwater hiding spots or through thick vegetation. In general once you have some experience and have successfully learned to gig a frog it’s very easy to gather large amounts of frogs through gigging. Though typically you’ll want a partner to help you as it’s much harder to do solo (We’ll explain why below).
Step 1: Set up your Frog Gig
A frog gigging spear is a long-bladed spear tip traditionally used by hunters who wanted to catch frogs from the shore of a lake or river. A traditional frog gigging spear is thin, with three pronged spear points with small barbs on the end. You can purchase a ready to go spears to gig a frog, or even make one yourself from pretty basic materials. With that said, there are plenty of variations—some frog gigging spears have 3 prongs with barbs on all three ends, some have 2 or 4 prongs on them. Once you’ve got your frog gig grab a partner, and a couple headlamps. If you’d like more information on making your own frog gigging spear, click the link HERE or grab your own Frog Gigging Spear Card HERE
Step 2: Find Some Water to Gig a Frog in!
If you’re looking to gig a frog in the water, the first step is finding some water. Once you do you can confirm their presence by listening to the frogs as they croak; they often call near the water. (Croaking generally gets louder as their proximity to the water increases.) After locating a group of frogs, shine your light out over the water, you can see their eyes glow to confirm their presence. Once that’s done it’s time to go get your equipment together and go gig a frog!
Step 3: Blind the Frogs
You’re now equipped with the perfect frog gigging spear, a partner and an area to hunt. The only thing left to do is shine them, then gig a frog. It’s crucial that you blind the frogs while they are sitting on the bank or in their mud holes, or even in the water so your light needs to be as bright as you can get. You don’t want them to be able to escape, but if you shine it right into their eyes, they won’t be able to see your partner approach (from behind is best) just don’t get between them and the light or they will quickly hop away.
Step 4: How to Spear a Frog
Step up slowly behind the frog. This is a critical part of making sure you take your frog out cleanly and quickly. When ready, aim at the base frog’s head, directly behind his eyes, and thrust, congratulations, you’ve just learned how to gig a frog! Put your frogs into a dedicated frog gigging bag (like a burlap potato sack that’s been wet with cool water) and transfer them to an iced cooler as soon as you can to keep the meat as fresh as possible.
Step 5: Dinner Time!
now that you’ve got a few frogs, it’s time to eat! There’s a lot of resources online that include recipes for cooking frog legs, as well as other edible parts of frogs, so I won’t go into that for now since there’s plenty of information out there.
To purchase your own Gig click HERE
For more information on how to make a Frog Gig click HERE
Before Going Frog Gigging Check your Local Laws
before you go frog gigging check your local laws to determine any special requirements or limits you may have.
Types of Frogs: Only certain types of frogs can be hunted depending on the State. Some States allow more but, as a general rule, most states allow hunting:
American Bullfrogs
Green Frogs
Pig Frogs
Leopard Frogs
Your specific State Wildlife Department is the best place to get up-to-date information and resources for hunting, fishing, and land-use regulations
If you’re planning to kill a wolf in the wild, you need to learn how to skin a wolf in the right way. If you’re not familiar with the procedure, here are some tips for the task. First, you’ll need to gut the animal. You should first cut out the bulging belly. This will make the skin and hair slip off. Once the animal has been gutted, you’ll need to make a small slit down its belly. Be careful not to cut into the ear area, as this will prevent it from spoiling.
If you’re planning to kill a wolf in the wild, you need to learn how to skin a wolf in the right way. If you’re not familiar with the procedure, here are some tips for the task. First, you’ll need to gut the animal. You should first cut out the bulging belly. This will make the skin and hair slip off. Once the animal has been gutted, you’ll need to make a small slit down its belly. Be careful not to cut into the ear area, as this will prevent it from spoiling.
After the skin is rolled up, you can freeze it to dry it. You can also hang the animal to dry and thaw. The next step is to prepare the wolf for skinning. After the wolf is completely defrosted, you can put it on a stretcher and hang it until it is dry to the touch. Once the wolf’s hide is completely dry, you can freeze it.
When you’ve finished skinning the wolf, you can hang it up to dry. The wolf’s skin will be much easier to remove if you hang it on a wall. If you’re not comfortable doing this, you can use a Wolf Balloon to keep the animal upright. Then, you can use a knife to cut the hide into small pieces. You should also avoid cutting yourself while skinning.
If you’re not comfortable skinning a wolf, you should purchase a wolf balloon. A wolf balloon makes the process easier and quicker. Just remember not to try this method if you’re squeamish! And if you don’t want to risk the skinning process, a gambrel is your best option. You can also hang the animal on a gambrel.
You can skin a wolf by removing its head. You can do it yourself by following a few steps. The wolf’s skin can be split and dried. After that, you can freeze the hide and sell it at a fur market. You can also take a wolf to a store that sells pelts and use it for your clothing or furniture. You’ll find a wolf’s body and hair in the local area.
Before you start skinning a wolf, be sure it’s dead. In the wild, a wolf may freeze to death. In cold weather, the animal can be frozen in the shed or at the skinning shop. It can take as much as four days to thaw completely. If you’re not careful, the animal could still be frozen before you get to it. In addition, it may be hard to distinguish a wolf from a dog by the color of its coat.
Before you begin skinning a wolf, you should take care of its feet. This helps prevent injury. Then, you’ll need to prepare the wolf’s head and neck for skinning. You’ll need a squeamish person to help you. If you’re not sure how to skin a wolf, it’s better to call a professional. This will be safer for you.
The first thing you should know about wolves is that they have a lot of senses. They have 200 million smelling cells in their noses and can detect scents up to 100 times better than humans. Moreover, wolves have 42 teeth, and their back teeth are used to crush bones. The front teeth are used for nibbling and pulling, while the tongue is used for cleaning meat. This is an important step in learning how to skin a wolf in the wild.
The wolf’s skin should be clean and dry. It should be completely free of any wounds or cuts. Before you skin a wolf, be sure to prepare its hide for skinning. In the case of a wolf, the skin will be incredibly moist and slippery. It may even be difficult to remove the fur. But that’s all part of the fun! While this process might be a bit messy, it’s a worthwhile experience for the whole family.
The first step in skinning a wolf is to prepare it for skinning. If you’re going to be skinning a wolf in the field, it is best to do it as soon as possible after the kill. If the skin is tanned too dark, it will be too difficult to carry. The last step is to remove the bones. You can use coconut oil or olive oil to tan the hides, or you can use an ice cream solution.
The following ammunition cartridge ballistics information and chart can be used to approximately compare 10mm Auto vs .454 Casull ammo rounds. Please note, the following information reflects the estimated average ballistics for each caliber and does not pertain to a particular manufacturer, bullet weight, or jacketing type. As such, the following is for comparative information purposes only and should not be used to make precise predictions of the trajectory, performance, or true ballistics of any particular 10mm Auto or .454 Casull rounds for hunting, target shooting, plinking, or any other usage. The decision for which round is better for a given application should be made with complete information, and this article simply serves as a comparative guide, not the final say. For more detailed ballistics information please refer to the exact round in question or contact the manufacturer for the pertinent information. True 10mm Auto and .454 Casull ballistics information can vary widely from the displayed information, and it is important to understand that the particular characteristics of a given round can make a substantive difference in its true performance.
Caliber Type Velocity (fps) Energy (ft-lb) 10mm Auto Handgun 1200 550 .454 Casull Handgun 1600 1700
Velocity
As illustrated in the chart, 10mm Auto rounds – on average – achieve a velocity of about 1200 feet per second (fps) while .454 Casull rounds travel at a velocity of 1600 fps. To put this into perspective, a Boeing 737 commercial airliner travels at a cruising speed of 600 mph, or 880 fps. That is to say, 10mm Auto bullets travel 1.4 times the speed of a 737 airplane at cruising speed, while .454 Casull bullets travel 1.8 times that same speed.
Various calibers
Energy
Furthermore, the muzzle energy of a 10mm Auto round averages out to 550 ft-lb, while a .454 Casull round averages out to about 1700 ft-lb. One way to think about this is as such: a foot-pound is a unit of energy equal to the amount of energy required to raise a weight of one pound a distance of one foot. So a 10mm Auto round exits the barrel with kinetic energy equal to the energy required for linear vertical displacement of 550 pounds through a one foot distance, while a .454 Casull round exiting the barrel has energy equal to the amount required to displace 1700 pounds over the same one foot distance. As a rule of thumb, when it comes to hunting, muzzle energy is what many hunters look at when deciding on what caliber of firearm / ammunition to select. Generally speaking, the higher the muzzle energy, the higher the stopping power. Again, the above is for comparative information purposes only, and you should consult the exact ballistics for the particular 10mm Auto or .454 Casull cartridge you’re looking at purchasing.
Please click the above links to take a look at all of the 10mm Auto and .454 Casull ammo we have in stock and ready to ship, and let us know any parting thoughts in the comment section below.
Foundry Outdoors is your trusted home for buying archery, camping, fishing, hunting, shooting sports, and outdoor gear online.
We offer cheap ammo and bulk ammo deals on the most popular ammo calibers. We have a variety of deals on Rifle Ammo, Handgun Ammo, Shotgun Ammo & Rimfire Ammo, as well as ammo for target practice, plinking, hunting, or shooting competitions. Our website lists special deals on 9mm Ammo, 10mm Ammo, 45-70 Ammo, 6.5 Creedmoor ammo, 300 Blackout Ammo, 10mm Ammo, 5.56 Ammo, Underwood Ammo, Buffalo Bore Ammo and more special deals on bulk ammo.
We offer a 100% Authenticity Guarantee on all products sold on our website. Please email us if you have questions about any of our product listings.
Are you going tenting with your dog and not sure which tent is the best choice for you and your best friend? I know there are a lot of choices and it can be daunting to pick out the right dog friendly tent. After frequent camping trips with my now 9 year old dog, Ayla, I’ve been through a few different tents and I’ve definitely come to a conclusion of what I think is the best tent for camping with dogs.
Obviously, there are many factors that play a role in which tent to choose, so I will go through the main factors you should look for in a pet friendly tent and the pros and cons with different tents so that you can make a sound decision based on your dog, camping habits, and needs.
Disclosure: This post may contain affiliate links. That means that if you make a purchase through one of those links, I will get a small commission at no extra cost to you. If you have any questions about these services or products, feel free to ask me.
There are a few things you need to consider before choosing the best tent for camping with dogs. First of all, do you want the dog to sleep inside the tent or not?
The first years I camped with Ayla, I had a tunnel tent and she slept outside in the front department. Later, I got a larger tent and chose to take her inside and we both love it! Now, I would never leave her outside again.
I’ll go through the pros and cons of having your dog inside or outside the tent to help you make the best choice for you and your dog.
RELATED: Best eco friendly backpacks
Advantages of having the dog inside the tent
One major advantage of having your dog inside the tent is that it can’t wander off at night if it becomes curious of something. This means you don’t have to get up at night to chase it.
Even though the dog is in a leash, I find that they tend to slip out of their harness if they really want to.
As a result, you get a better sleep and your dog gets a more relaxed night without having to protect the tent from the outside world.
Another advantage is that it’s so cozy to have your furry friend next to you. I really noticed a big difference on Ayla once I let her come inside the tent and sleep on her blanket in her own corner. She was proud, happy, and very relaxed. Opposed to before, she now sleeps through the whole night.
Having your dog in the tent also makes it easier to leave the tent when you go to the shower or bathroom. Dogs are usually more calm when they have smaller areas to protect so the tent is the perfect place.
If it rains outside, it can be a disadvantage to have your dog sleeping on a mat on the ground as it can get wet, which in turn isn’t very comfortable. Inside the tent you know it’s dry and comfortable for your pet.
Disadvantages of having the dog inside the tent
First of all, if your dog sheds like mine, you’ll get a large amount of dog hair inside your tent. If you usually have your dog in the bed, then you probably don’t mind, so it won’t be a problem.
The other thing that could be a disadvantage is if it rains or your dog gets wet from bathing before entering the tent, it will get humid but can also smell like wet dog, depending on the breed.
On the other hand, you know that your dog is not laying on wet ground outside.
Finally, I can imagine it’s a pain to have a super active dog inside the tent if it can’t lay still and keep spinning around. Personally, I haven’t had this problem with Ayla, as she’s a very calm lady.
YOU MIGHT ALSO LIKE: How to travel locally: A responsible guide to local travel
Features to look for in a dog friendly tent
Now that you’ve hopefully made a sound decision on whether to have your dog inside or outside the tent, let’s have a look at dog-friendly tents for you and your furry friend.
I have listed a few features I think a pet-friendly tent should have (or not have) from my experience of camping with Ayla before we look at the best tents for dogs.
The less tent cords the better
I’ve had a couple of hiking tents and mountain tents with a lot of cords to help the tent stand properly and it might be my clumsiness (they also say the dog resembles its owner), but both Ayla and I found ourselves stumbling in the tent cords in more than one occasion. In the worst case scenarios, this has resulted in a partly collapsed tent.
Needless to say, I’m not a big fan of tents that need a lot of cords to stay erected and I profoundly believe that the best tents for camping with dogs are the ones with fewer cords.
Easy access in and out
Easy access to go in and out of the tent is essential when tent camping with a dog. My first tent wasn’t a very dog friendly tent. It did have a front department where she slept in her bed or blanket, but the tent was small and low.
A 2-person Bergans tunnel tent, perfect for hiking and spending the night in extreme and windy weather in the mountain.
If I had taken Ayla hiking over several days and had to carry the tent in my backpack, I’d definitely use this tent! But not for car camping.
For me, it’s also an important matter that Bergans is a sustainably conscious outdoors brand, striving for a more sustainable production chain.
The one I have now, is excellent. There is no front department, but it’s easy and straight access in and out which means fewer chances of disaster from an eager dog.
I also found a larger tent (3-4 person) with front department is easier to navigate with Ayla around, both because of the height but also because there is generally speaking more room.
Easy access to water
It’s important that your dog has easy access to water. If you have the dog in the front department of your tent, it’s possible to leave a bowl of water there so the dog can drink during the night.
If you opt for having the dog inside the tent, you need to make sure there is a water bowl outside the tent opening so you can let the dog out and drink before bed time and as soon as you wake up. This is especially important in warmer weather conditions.
When I go camping with Ayla during Spanish summer, I often give her water if I wake up in the middle of the night too.
To summarize this, you don’t want to have a tent where you have to get through several tent openings before you can get to the water.
RELATED: Eco friendly camping gear (including dog camping gear)
Best tents for camping with dogs
Based on the above and my experience, I have picked out a few top dog friendly tents to help you pick the best tent for camping with dogs based on your needs.
Vaude Campo Compact XT dome tent
Vaude has this great dome tent which has a spacious front department if you opt for letting your dog sleep outside. It does have space for a blanket or a small dog bed so that your pet can sleep comfortably.
With the front department, it’s easy to have water accessible for your dog all night.
Vaude is one of the leading outdoors brands within sustainability and the majority of their overall materials are vegan.
The only down side with this tent, are the tent cords. Otherwise, this is without a doubt one of the best tents for camping with dogs on the market.
This tent weights 3 kilos and can be packed up for shorter hikes too.
Get a Vaude Campo Compact XT dome tent here
The North Face Stormbreak tent
This tent from The North Face is a great pet friendly tent. Easy to set up, it is the perfect tent for camping with dogs.
It’s easy to get in and out and you don’t have tent cords either you or your dog can stumble in, which makes it a much better experience.
There is a small front department where you can leave a bowl of water. there is room to leave your dog outside as well, depending on the breed.
What I love about this tent, is that it’s easy and with only 3 kilos for the 3-person tent, you can carry it on small hikes too. The 1-person tent (which might be tight if your dog is bigger than a Chihuahua) only weights 1,4 kilos.
Get The North Face Stormbreak tent here
Quechua 2 seconds pop up tent
My current tent is this Quechua 2 seconds pop up tent, which is super handy. It seriously only takes a few seconds to pop it open. No tent poles needed, which means Ayla can’t walk on top of the tent and make a mess while I try to put it together.
When there’s no wind, you don’t even need to peg this tent to the ground, which makes it even quicker to get up and to pack. I also find a lot of camp grounds have hard soil or even pebbles where you pitch your tent and unless you have a hammer or huge muscles (which I definitely can’t brag about), it’s impossible to peg the tent.
This tent is spacious and easy to get in and out of both for you and your pet. I always leave a water bowl for Ayla outside, and when I wake up, I open up so she can stick her head out and drink. It’s also waterproof, which I’ve unintentionally tested by spilling a whole bottle of water over the top.
The only thing I have to pick on when it comes to this tent, is that my friends and I had problems packing it up the first few times and had to ask for help from other campers. This summer, though, I magically found the trick and now I can’t understand that I ever had a problem with it.
Note that the packaging is not suitable for hiking as it packs up really big, though perfect for car camping.
Except from being the less sustainable tent I’ve used so far, Quechua’s pop up feature goes a long way in being user friendly and the fact that you don’t need cords or pegs makes this the best pop up tent for camping with dogs.
Get a Quechua 2 seconds pop up tent here
Conclusion
Rounding up this post on the best tents for camping with dogs, I hope you have the information you need to make a sound decision on what are the best pet friendly tents for you and your dog.
If you have any thoughts, questions, other recommendations you think I should consider in this post, feel free to drop me a comment below.
ZipLine Medical says anyone can use its ZipStitch device for wound closure, and it doesn’t need to be prescribed by a doctor
ZipStitch says its device is 12-times stronger than regular stitches and results in reduced scarring (Credit: YouTube/ZipStitch)
There’s an emphasis in many industries on easy-to-use, cheap alternatives to established products — and healthcare is certainly one of them. Jamie Bell takes a look at ZipStitch — a hospital-grade wound closure device that anyone can use to treat small cuts in seconds.
Whether it’s at home chopping vegetables, playing sports with friends, or cycling to work, minor cuts and flesh wounds can happen just about anywhere in day-to-day life.
Bigger, deeper wounds will often require a trip to the emergency room, and ultimately stitches — a painful, invasive procedure.
In the US, getting stitches is also expensive for anyone without health insurance. Cost range from $200 to as much as $3,000 in some cases.
However, any medium-sized or smaller cut is usually treated outside the healthcare setting using an adhesive bandage or plaster.
While these dressings can stop a small amount of bleeding — and protect against infection — they do little to close the wound and speed up the healing process.
US tissue-repair device company ZipLine Medical has developed a tool called ZipStitch, which combines the convenience of a plaster with many of the benefits provided by having a cut stitched by a doctor.
ZipStitch: The do-it-yourself wound closure device
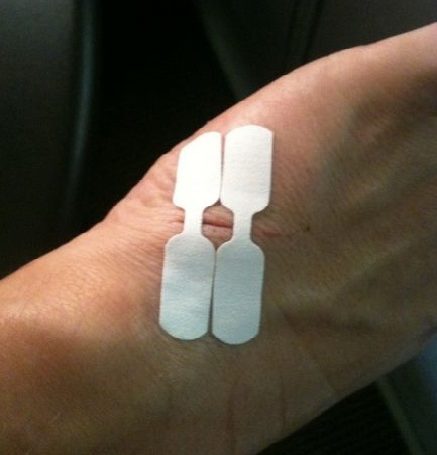
ZipStitch is a small, adhesive device that is designed to be placed over cuts less than 4mm in width.
Once it is stuck down, the user simply pulls each of the four miniature straps on the device, tightening them and closing the break in the skin.
Because it is so small and light, ZipLine Medical believes its product is ideal for everyday first-aid kits, and can be useful for someone to have with them during a range of outdoor activities where minor injuries can often occur, including cycling, hiking or camping.
The company warns, however, that the wound must be cleaned properly and allowed to dry before application.
Not only does this reduce the risk of infection, but it ensures the device will stick to the skin and remain in place.
It is sold online for $29.99 as part of a pack including gauze pads to stop bleeding, alcohol wipes to clean wounds, and bandage to cover and protect the cut once ZipStitch has been applied.
The device is supposedly 12-times stronger than regular stitches and results in reduced scarring.
Although it can only be used to close wounds up to 1.5 inches in length. ZipLine Medical recommends seeking stitches in hospital to close larger cuts.
Unlike conventional sutures, ZipStitch is also non-invasive, which can reduce the chances of bacteria causing infection.
The company says it provides better protection than butterfly bandages and other adhesive plasters, repairing cuts faster and decreasing the likelihood of scarring.
Hospital-grade Zip technology
The device uses ZipLine Medical’s own Zip technology, which has been used by more than 500,000 people in the past five years, and by hospitals in 30 countries.
The California-based company says it delivers faster and less painful wound closure than established methods such as stitches or staples — with 95% of its patients saying they prefer Zip technology to these treatments.
Having proven to be safe and effective in several clinical trials, it gained FDA approval in 2017.
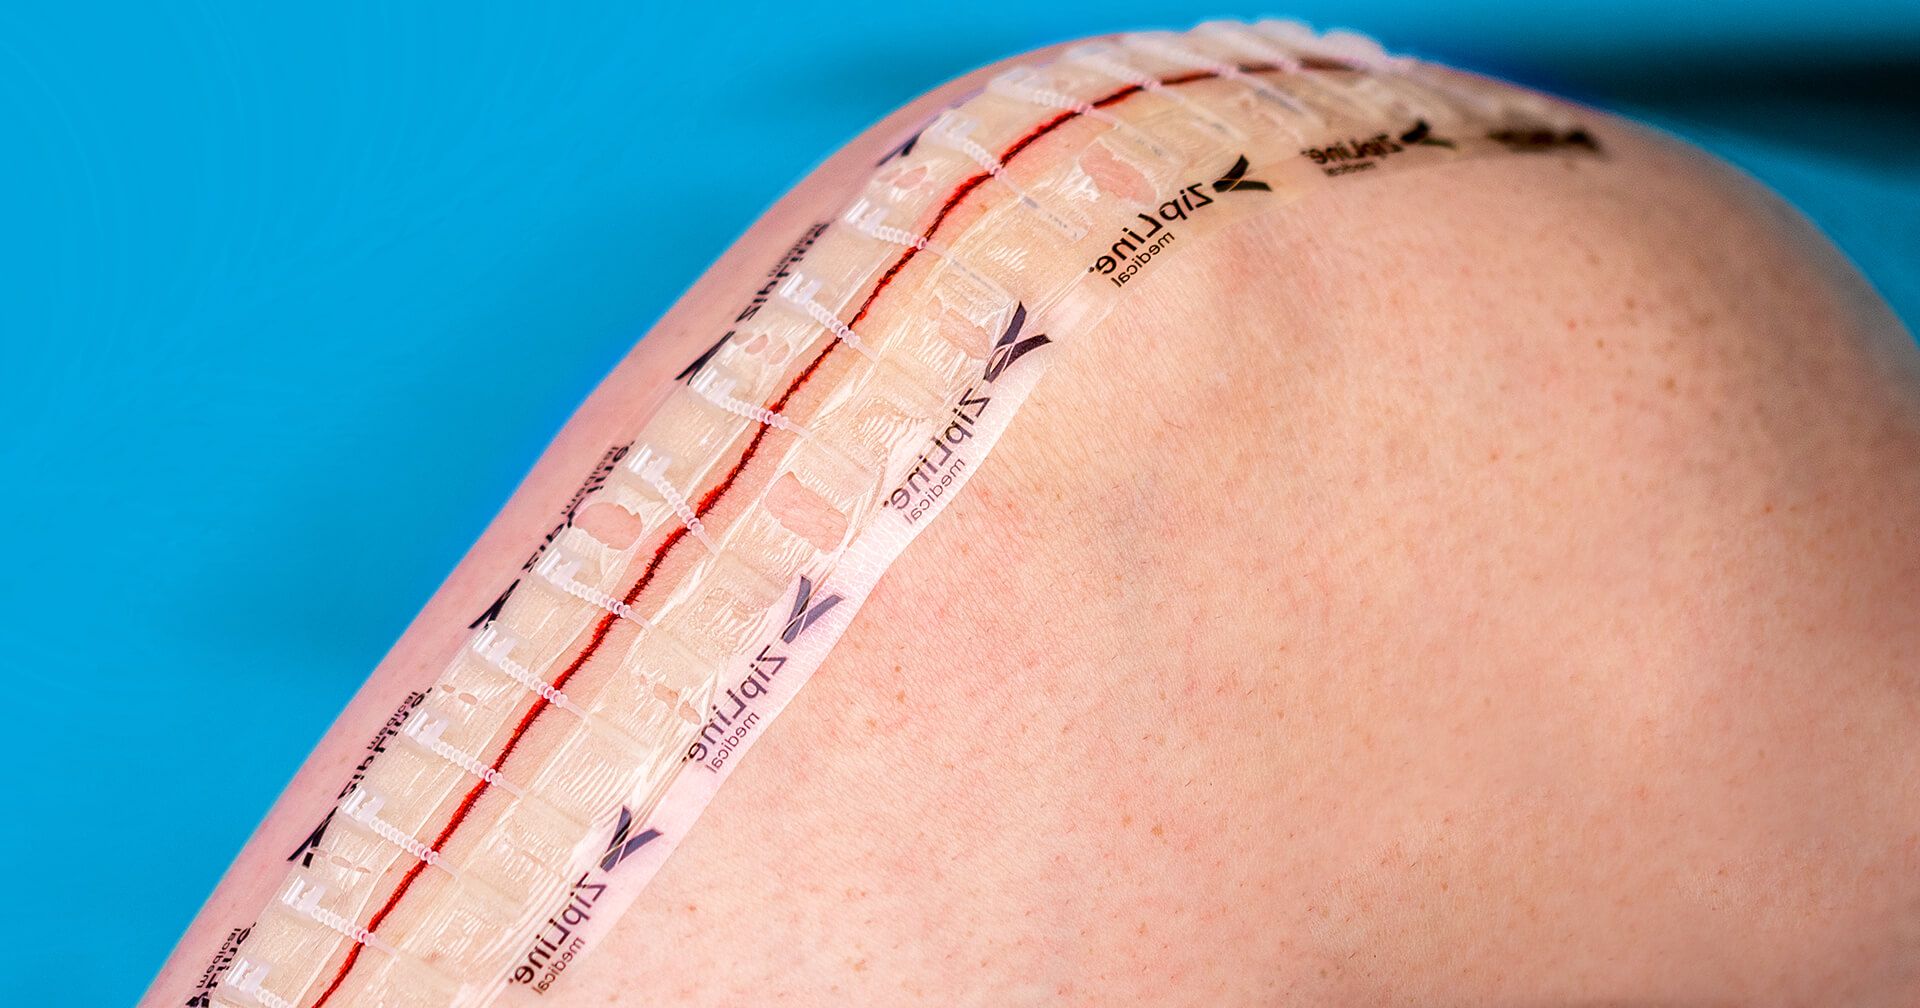
As well as treating minor, everyday injuries, Zip technology has been used to close wounds left by operations including knee and shoulder replacements — which, the company says, has resulted in reduced scarring compared with conventional stitches.
When used to close wounds following these procedures, a longer strip of the ZipStitch device is used to precisely align the edges of the incision.
Zip technology used to close an incision following knee surgery (Credit: ZipLine Medical)
The Zip structure also functions as a cage to offer extra protection from anything that might cause pain or reopen the cut.
Removing the ZipStitch can be done at home by the patient in some cases, and ZipLine Medical says this is as simple as pulling off a Band-Aid.
It is also less painful than removing stitches or staples, and leaves no holes in the skin.
As well as benefits for patients, the company claims the speed at which ZipStitch works can decrease healthcare costs and improve efficiency of patient care by reducing the number of follow-up appointments.
How ZipStitch compares to butterfly bandages and other wound closure devices
The main alternative to ZipStitch is the butterfly bandage — an adhesive strip designed to close small wounds by pulling the skin together.
These outperform ordinary plasters and are also small and light.
However, butterfly bandages cover a much smaller area than the ZipStitch device, meaning only cuts that are very short in length can be closed effectively.
There are several other methods for closing wounds without traditional stitches — German healthcare company McKesson uses a series of adhesive strips to do this.
Butterfly bandages can be applied easily, and do not involve puncturing the skin (Credit: Drew Stephens)
Clozex Medical has developed a wound closure device that comes in several different lengths to treat a variety of cut sizes, and to cope with curvatures and raised areas on the skin.
Skin glue or “liquid stitches” can also be used to non-invasively hold the edges of a cut together. It can also be applied in addition to other wound closure methods like traditional stitches or adhesive bandages.
These other products are not do-it-yourself solutions, and require a healthcare professional to administer them.
Yellow perch are a popular gamefish in their native range in parts of the Midwest and Canada, as well a wider area of North America where they now thrive.
Why not? Perch are incredibly tasty and at times can be caught in huge numbers … if you know what you’re doing.
One of the most important things you’ll need to know to catch lots of fillet-worthy perch is what to put on the hook.
This article reveals dozens of the best baits for perch we know, which at times can result in excellent catches. Some will be obvious, like the ever-effective minnows and worms. Some are a little unusual.
And a few will surprise the heck out of you but can really get the job done.
Many of these bait types can be used all year, whether under the summer sun when you might be fishing deeper water or in the dead of winter while ice fishing.
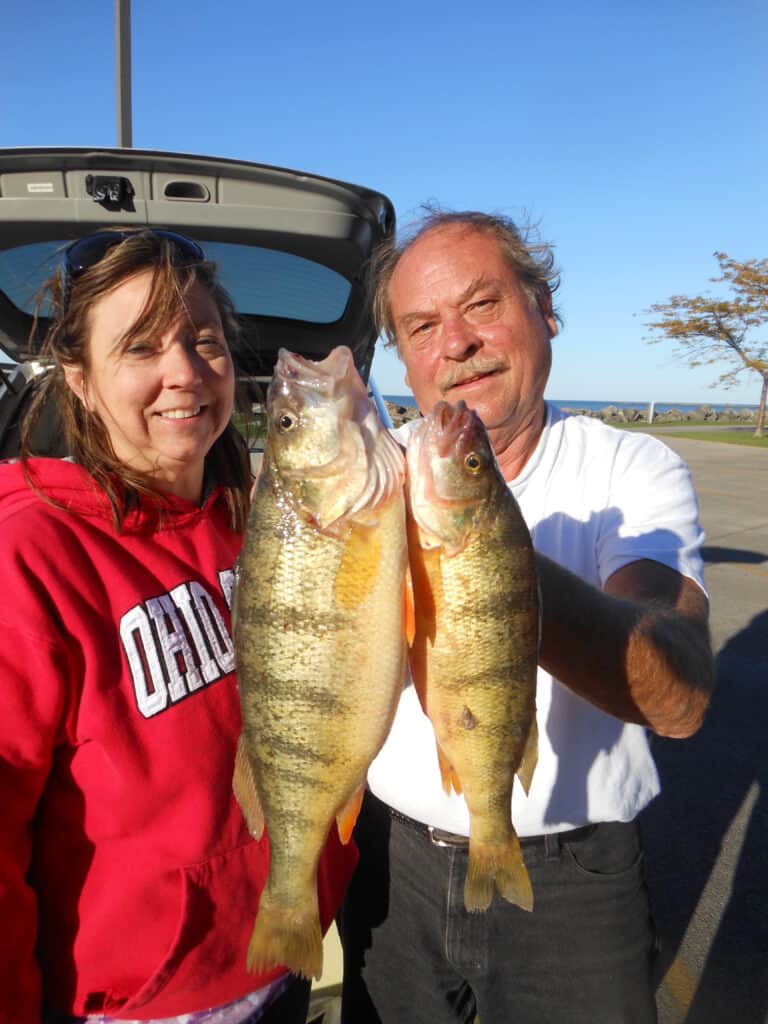
To put this article together, we consulted with Bill Janowich. Simply put, Janowich has been perfecting his fish-catching techniques longer than I’ve been alive.
“I’ve been perch fishing for over 70 years, so I’ve seen a thing or two,” said Janowich, who lives in Ohio near Lake Erie. His favorite perch bait on that Great Lake is a 2-inch shiner minnow.
“However, there are many other fisheries in the world, and many different methods of catching perch,” he told us. “Sometimes, necessity is the mother of invention.”
We already have a complete guide to yellow perch fishing on this website.
This article complements the fishing guide by going into more depth on the many baits that will have you catching these fish 12 months out of the year, whether you’re fishing them under the blazing summer sun or through the winter ice.
A variety of baits also can be used in conjunction with Janowich’s own perch-fishing kit.
“I have personally used most of these baits myself,” he said. “Live bait is usually more effective than artificial lures.”
To help you keep them all straight, we’ll divide the types of baits into broad categories.
Don’t see your secret bait for catching yellow perch? Send us a comment below.
While the smaller perch feed primarily on insects and crustaceans, the big yellow perch you really want to catch love nothing better than a meal-sized minnow or cut bait.
Often the best minnow or cut baits to use are those that live in the water where you are fishing, because that’s what the perch are already eating.
One note here is that live fish aren’t always legal baits, so check the regulations where you will fish to be sure it’s allowed. In some waters or entire states, live fish and other aquatic creatures aren’t permitted because their use can result in invasive species.
Here are some great examples of using fish as bait to catch yellow perch.
Live Minnows and Other Swimmers
Various types of shiners, freshwater shad, and other small fish are incredibly effective yellow perch baits when fished live right near the bottom.
While many perch anglers prefer small minnows, Janowich likes to fish minnows in the 2- or even 3-inch size range. While that seems big for perches’ small mouths, perch love a nice meal and larger perch will be drawn to larger baits.
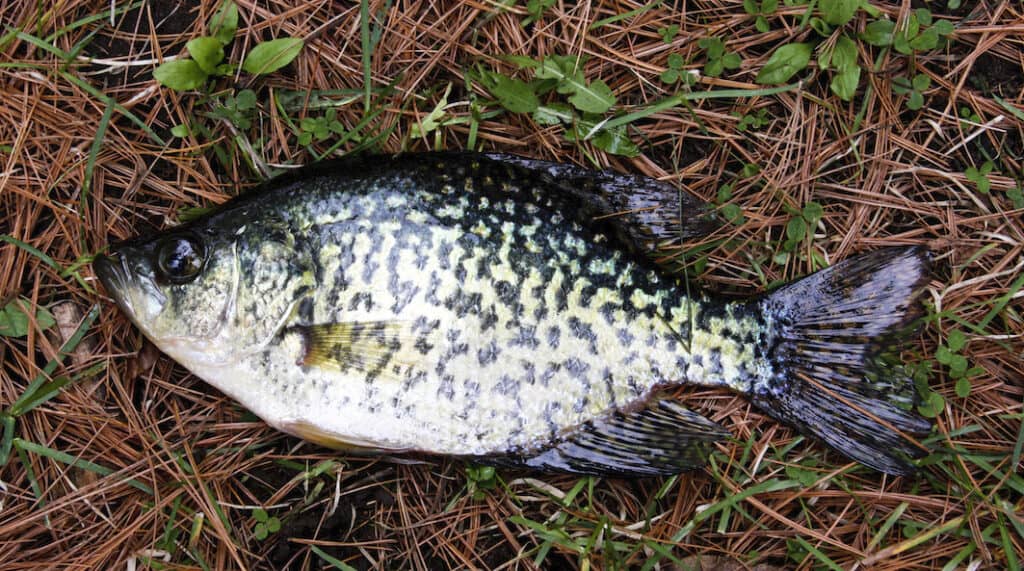
In fact, Janowich caught the 14.5-inch jumbo perch pictured above on a 3-inch emerald shiner. It was certified as an “outstanding catch” in Ohio and “fought like a northern pike,” he said.
If smaller 1-inch baits are all you can get, they will work well but also will result in catching some small yellow perch, but bigger ones also will take it.
The following are some minnow and other aquatic baits that might work well, given their availability and legality where you are fishing. Other local options may also be effective.
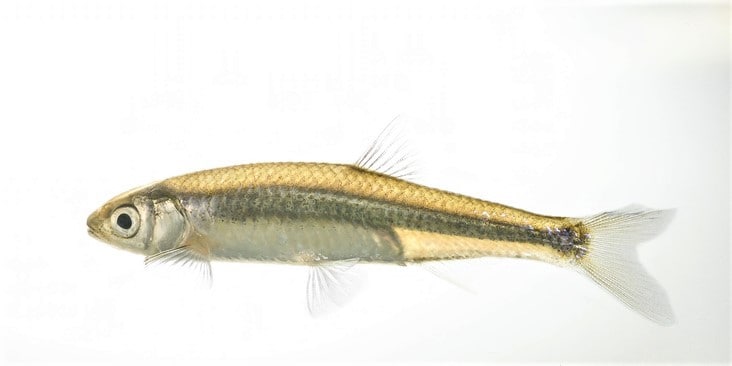
Shiners
Photo by U.S. Geological Survey
This is a common family of minnows with hundreds of types, and they are among the best live bait you can get.
For example, emerald and spottail shiners are native to the Great Lakes, where shiners are Janowich’s first choice for perch bait. Emerald shiners are more common, but those spot-tails can be excellent if you can find them.
Shiner numbers are down in some areas of the Great Lakes, so catching them can be more difficult.
Bait shops also will sell other small bait fish, such as golden shiners and fathead minnows. Minnow prices at bait stores have gone up in recent years, but they are still worth seeking out, Janowich said.
Dead minnows, including commercially brined or home-salted varieties, aren’t as good as the live variety and at times can be mushy, but these still can be among the best bait alternatives if live minnows aren’t available, Janowich added.
Shad (various types)
Photo courtesy of Depositphotos
Depending on where you are, there may be some freshwater shad available. Gizzard shad are fairly common in the Upper Midwest, and thread fin shad are another variety that might be available where you are.
Herring
These are in the same big family as shad and are similarly effective bait where you can obtain them.
Mosquito fish
Often can be caught in shallow water in lakes and ponds, or might be sold locally.
Suckers
There are a wide variety of suckers across the U.S., and if they co-exist with yellow perch, the small ones will be on the perch’s menu.
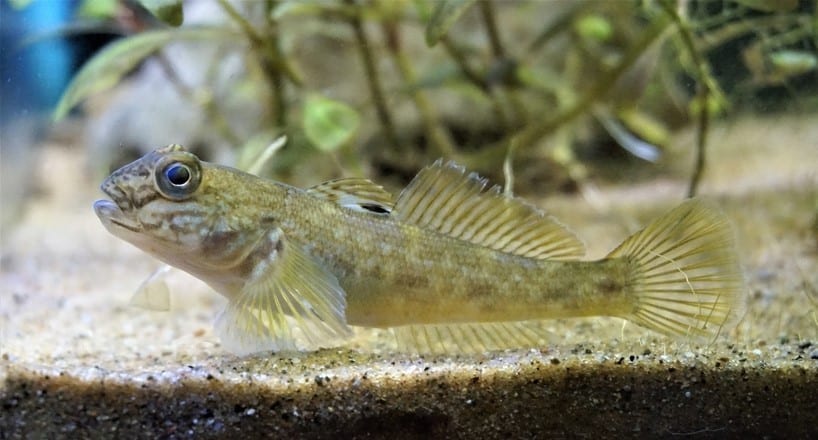
Gobies
Photo courtesy of the U.S. Geological Survey
These are destructive invasive species in many waters including the Great Lakes. Turn the tables when you catch one and turn them into bait.
Crayfish
Live or dead, the soft-shelled ones are especially good perch bait.
Tadpoles
Or pollywogs or whatever you call them, the larval stage of amphibians (often frogs) make excellent bait fished live. They can be found and netted in abundance at certain times of the year, often in the spring.
Freshwater Eels
Smaller eels are excellent perch baits, if you can get them. They are favorite forage for finny fishes and also have lots of action like leeches or lively worms.
Cut Baits
The above types of fish can be used dead, either whole or as cut baits.
Simply fillet larger fish and cut them into about 1-inch long strips of about a quarter inch wide, keeping the skin on to help hold your bait to the hook.
Generally speaking, the best cut baits use fish that are available in the waters where you are fishing.
Some cut bait types to consider include:
Yellow Perch
That’s right. Yellow perch are cannibals and will eat their own. Use the first one (or maybe the first smaller one) for bait to catch more in its own school.
Catch that first perch, especially a smaller one you don’t mind sacrificing, and fillet it out. Cut the fillet into strips that are 1 inch long and about a quarter inch wide, in a pennant shape and rig it up to your hook.
Other types of fish fillets also will often work.
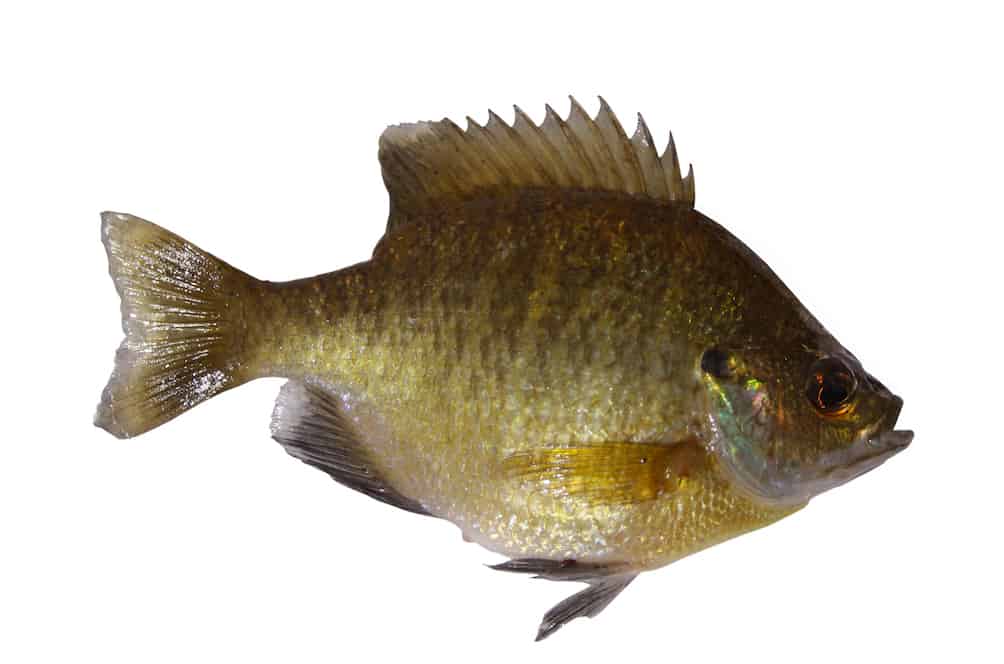
Bluegill
Photo courtesy of Depositphotos
These panfish may be fished as cut baits as described for perch, or if you can catch them small enough, they also can be great live baits for perch.
Bluegill have a naturally sweet meat, and as we’ll discuss more further down in this article, perch love sweets. (Woe is the life of a bluegill, as the bigger ones not only are good eating for humans but make excellent bait for larger fish including giant flathead catfish.)
Crappie
Photo courtesy of Depositphotos
Considered in a similar orbit with yellow perch for their fine eating, crappie cut baits (or very small live crappie) are also a favorite on the perch diet.
White Bass
These are usually larger than yellow perch, but they can be used both for cut baits or, if you catch a very small one, as a live bait for perch.
White Perch
These are often predators of yellow perch, but if you catch a smaller one you can turn the tide and turn it into cut bait or use as a live bait.
Steelhead and Other Trout
While steelhead and their trout cousins are generally too large to use whole, they can be used as cut baits, including using the intestines, fins and eyes (see more on those below).
Fish Tails
Photo courtesy of Depositphotos
That’s right, if you want your bait to look like a fish, start with a fish fin.
Simply cut off a piece of the tail fin, hook it up and drop it down to where the perch are. They’ll pretty much fight to get to it first. And that’s no fish tale (but it is a fish tail).
Yellow perch and some of the other species mentioned above work great for this.
Fish Intestines
“This is an old Canadian charter technique. Catch a fish, cut it open, cut out the intestine, cut it into 3 inch strips and attach to your hook. They last forever and are an excellent bait for all kind of fis,” Janowich said. We’ll take his word for it!
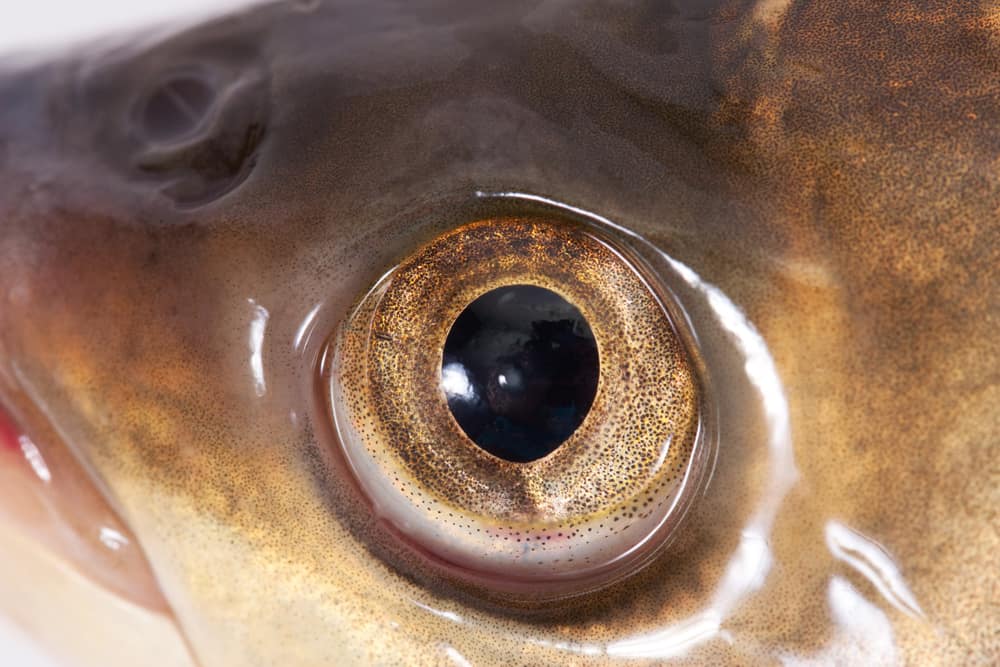
Fish Eyes
Photo courtesy of Depositphotos
Fish eyes, and especially perch eyes, are a tasty offering if you’re a perch.
“Best thing is they’re free and present a ‘good-looking’ choice (sorry, couldn’t resist),” Janowich said.
Worms, Larvae and Other Crawlers
This category covers all sorts of critters in the worm and insect families that fish find irresistible.
Earthworms
Photo courtesy of Depositphotos
The old reliable worm is among the top baits for yellow perch. For one, they simply work. Also, it’s hard to beat their availability, whether from your garden or the bait shop, they are easy to get for a day of fishing.
Nightcrawlers
Photo courtesy of Depositphotos
Buy them at the store or, in some areas, catch them sticking out of their holes at night or hiding out under a piece of wood.
Also known as Canadian nightcrawlers, lob worms and dew worms, these are a premium bait for perch and other game fish.
They can be used whole or cut into pieces, depending on your needs.
There also are African and European nightcrawlers primarily available by purchasing, but the more common North American version is all you really need.
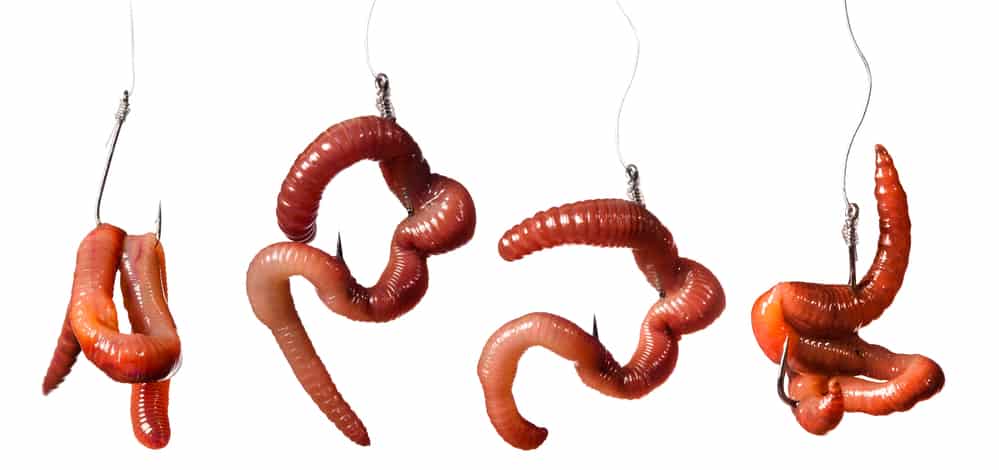
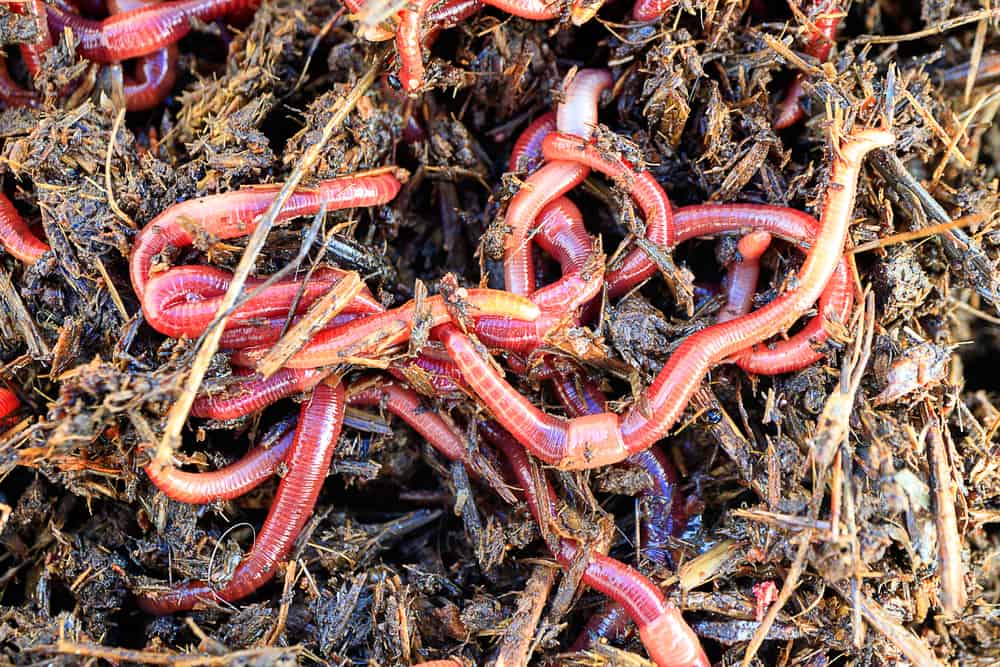
Red worms
Photo courtesy of Depositphotos
Have a garden compost bin? You probably have these small worms, also known as red wigglers. You also can purchase them directly for bait or to start a colony.
They are a little challenging to hook up, but their active wiggling on the hook is nearly impossible for a perch to pass up.
Garden Worms
Whatever you can dig up in the yard or find under a rock at the lake will probably get the job done.
Some types don’t hold on a hook as well as others.
Larval Baits
Mealworms
Photo courtesy of Depositphotos
These yellow critters are beetle larvae and make excellent perch, panfish and even trout bait.
You likely can buy them at a bait shop or pet store (they are sold as food for reptiles, aquarium fish and other pets). They also are fairly easy to raise at home, as I used to do. (Pro tip: the beetles are escape artists, so make sure you have a secure container.)
You’ll use smaller hooks with mealworms than you will with some baits, due to their size.
Waxworms
These are the larvae of a wax moth. Like mealworms, look for them both in bait and pet shops.
Ice fishermen often tip their lure hooks with these or similar live baits for added attraction.
Maggots
Photo courtesy of Depositphotos
Yes, those larvae of the pesky house fly or similar insects. Bait suppliers will carry them in some areas because they are excellent for perch and several other types of game fish, from panfish to kokanee salmon.
Squats and pinkies are generally smaller maggots from other fly species and also work for perch bait. The “caster” form of a maggot, one that is turning into a pupae, also will do the job.
Leeches
These relatives of the earthworm come many species of their own, but leeches can be broadly categorized by blood-sucking and non-blood-sucking.
If you have a choice at the bait shop or while catching your own, Janowich highly recommends the non-bloodsucking variety, and not just because you don’t want them turning the tables and making you the bait.
The non-bloodsuckers feed on lots of things perch eat, which provides a more appetizing scent from the leech.
Janowich likes to hook them right on the sucker end to allow the rest of the leech to wriggle and writhe freely in the water. Perch won’t resist it.
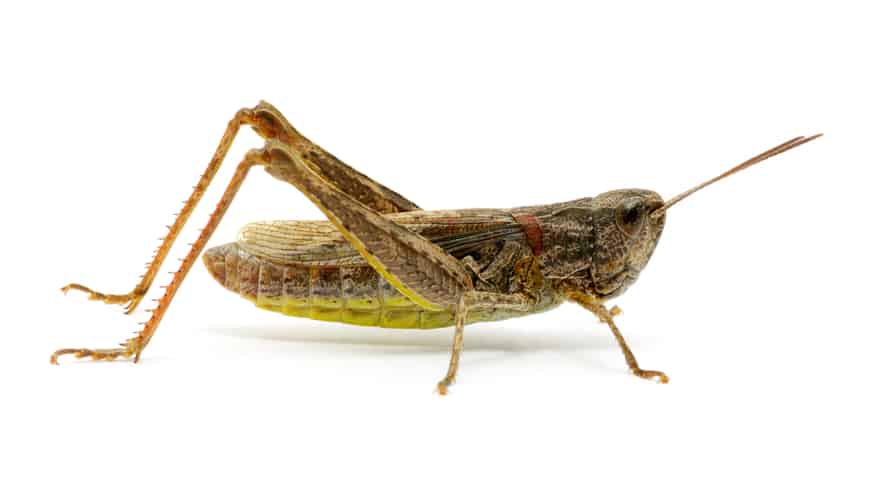
Grasshoppers
Photo courtesy of Depositphotos
Switching to baits found on land, grasshoppers are fantastic baits for perch as well as bluegill, trout and other fish that commonly eat insects.
Once the hoppers come out each year, they should be easy to net in grassy fields and similar areas.
On the hook, they wiggle enticingly, and perch can’t resist.
Crickets
Fish them like a grasshopper, with very similar results.
Compared to grasshoppers, crickets are more likely to be sold in bait shops and pet stores and might be available for longer periods.
But they are a little softer on the hook.
Imitation Baits
This section is about artificial baits made to look much like the real thing, and there are lots of options here because yellow perch will bite plenty of different things.
While purists like Janowich will nearly always stick with the real thing (and the real thing really works), imitation baits have their place.
Some anglers simply don’t want to fuss with live baits or baits that will spoil quickly. Having a jar or plastic bag full of artificial bait already in your tackle box has its appeal.
Note that I’m most experienced with the Berkley line of imitation baits, but try out the ones that work for you.
Artificial Minnows
Hate messing with the real thing … or have trouble finding them to catch or buy?
Artificial minnows along the lines of Berkley’s Gulp! minnows will often do the job, even if not quite as well as an actual live minnow.
We’ve seen some ads for products such as Magic Emerald Shine Minnows that might work similarly.
Artificial Worms
Berkley has a variety of products that fall under the category of fake worms, including PowerBait and Gulp! lines of earthworms, nightcrawlers and angle worms in natural colors as well as some brightly hued options among artificials.
But you certainly don’t have to limit yourself to Berkley products, especially in this category, as lots of companies make soft plastics in worm form.
Try scented artificial worms for increased catches.
Artificial Mealworms
Berkley’s Power Honey Worm is a good imitation bait closely resembling a mealworm, if you like to fish with smaller baits but can’t get the real wiggly kind.
Artificial Maggots
Grossed out by real maggots? Or maybe just don’t have them handy? A jar of Berkley Gulp! maggots can fill that need.
These are a very small bait and often used to tip the hook on a small lure such as spoon, spinner or jig for yellow perch as well as other game fish (including kokanee salmon where I live).
You’ll find some cheaper brands online as well, but we don’t have experience with them.
Artificial Waxworms
Not everyone makes this type as they are somewhat similar to mealworm and maggot baits, but Lunkerhunt has a few varieties that are available through various retailers.
Crappie Nibbles
These tiny pre-formed dough baits work great on the tips of lures.
How do we know? When we’re crappie fishing and put these on the tip of the jig hook, if there are yellow perch in the neighborhood, they won’t stay off the hook.
Even if you’re only after perch, try tipping the hook of a small jig with a Crappie Nibble and fishing it in schools of perch.
A few other companies make similar products as well.
From the Grocery Store
These fishing baits aren’t really intended as such, but they definitely will catch yellow perch. Fresh out of worms or minnows? Stop by the supermarket on your way to the lake.
Meat and Seafood
Hot Dogs
Photo courtesy of Depositphotos
That’s right, “tube steaks” aren’t just for baseball games and campfires. Hot dogs will catch yellow perch in addition to some other game fish (catfish, anyone?). Tear or cut them into bait-sized pieces.
Some anglers suggest that the beef hot dogs, while popular at the ol’ ballgame, are less attractive to perch than those made of chicken or turkey, Janowich said.
Also consider, “smokeys” type of franks are tougher on the hook and produce even more oily scent to attract fish.
Bacon
It’s not just what brings you to breakfast, it’ll bring perch to your fishing hook. Use pieces of bacon raw for best results, as the oily scent it sends out will get the sleepiest perch up and at ‘em. It also will stay put on your hook longer.
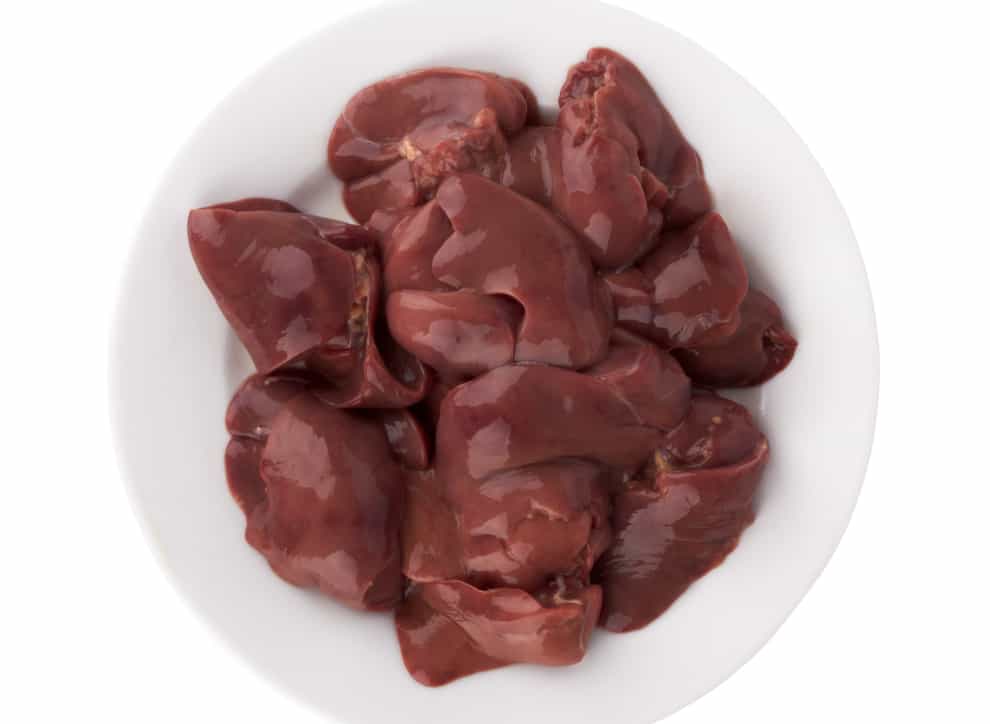
Chicken Liver
Photo courtesy of Depositphotos
These little organ meats are sold both in grocery stores and some bait shops. Yes, they are often thought of as catfish bait, but their scent will bring in the perch and other types of fish as well.
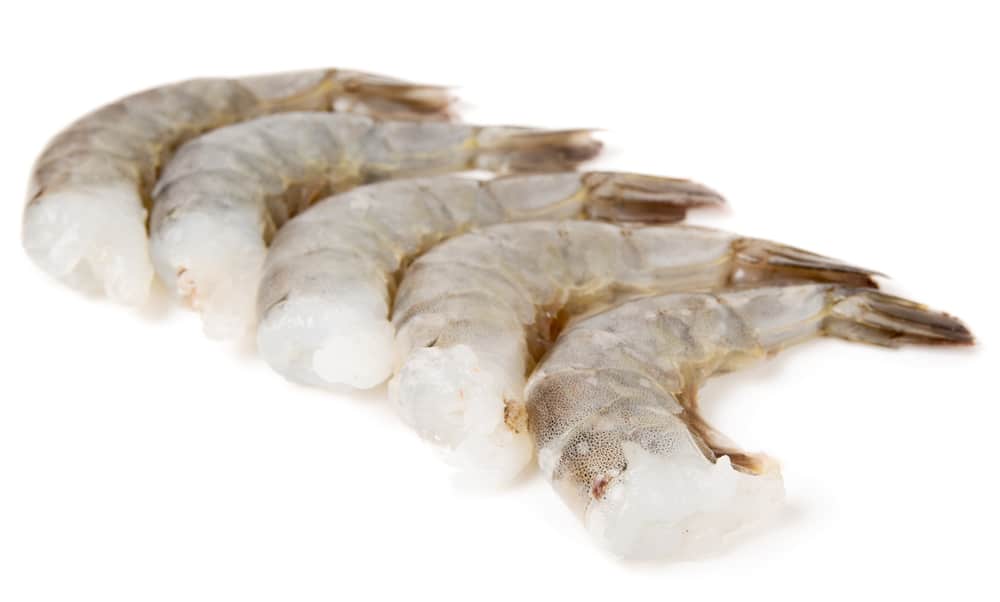
Shrimp and Prawns
Photo courtesy of Depositphotos
Though typically saltwater species are sold for human consumption, shrimp and prawns are excellent bait for quite a few freshwater fish, including perch.
Cut them into fish-sized pieces, but leave the shell unpeeled when possible, as they’ll stay on the hook better if stabbed through the tough shell.
Anchovies
If you think of anchovies only as a pizza topping or perhaps as bait for larger fish like catfish and salmon, you might be missing the boat. Or at least the perch.
Cut these oily saltwater baitfish into pieces and the perch will lining up for a salty bite.
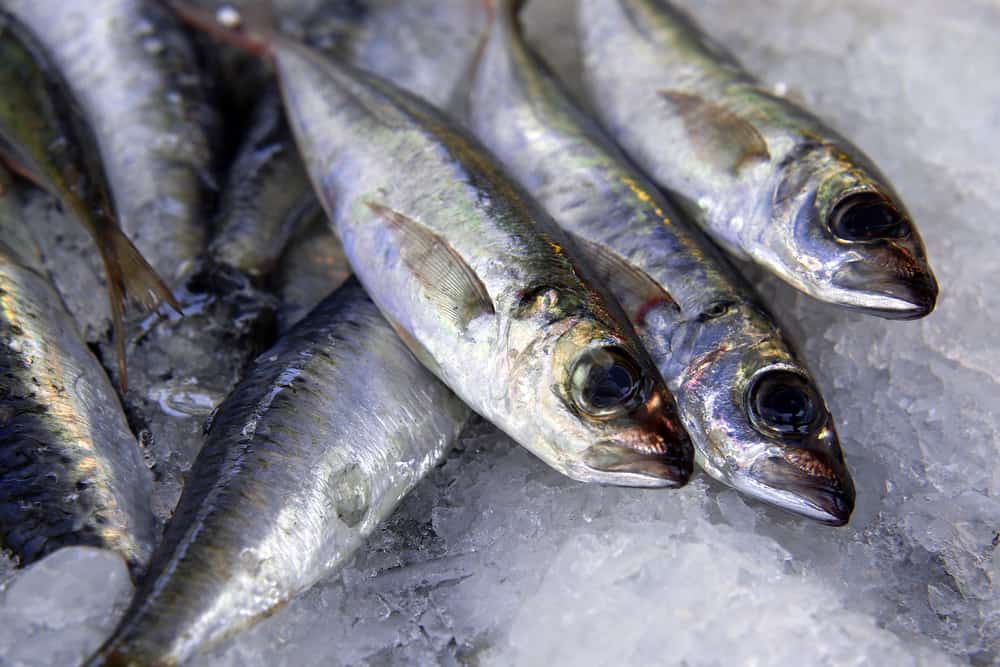
Sardines
Photo courtesy of Depositphotos
You know those jokes about being packed together like sardines?
Well, these oily fish sold in tins have tons fish-attracting scent that a school of yellow perch won’t ignore. These are typically labeled Pacific wild caught.
On Other Store Aisles
Candy
That’s right, just like me, perch have a sweet tooth.
While it won’t last long if you hook a Hershey’s chocolate bar square on your hook, look for chewier textures that are more likely to last in the water.
Our suggestion: Try a candy gummy bear or other shape and you’re likely to land some sweet-loving perch. Heck, there are even gummy worms, so it was made to be!
Chewing Gum
Photo courtesy of Depositphotos
What’s even tougher than a gummy candy? How about chewing gum.
Janowich suggests you chew the gum yourself just a minute to get it the right consistency, but leave most of the flavor in the gum before hooking on a piece.
The sweetness will attract the fish, and the rubbery texture will help keep it on your hook.
Golden Raisins
Photo courtesy of Depositphotos
The light-colored types come in various colors and will catch the fish’s attention better than your standard black raisins.
Hook them in place and they will swell up a bit on the hook while releasing a sweet scent that appeals to perch.
Sweet Corn
Photo courtesy of Depositphotos
Buy a small can of sweet corn. The kernels are sweet, brightly colored and tough enough to stay on the hook while attracting yellow perch.
Garlic
Not a sweet or a meat, but garlic is strongly scented and for whatever reason, fish like it. Why do you think so many artificial baits are scented with it? Try the real thing if you run out of your favorite standard bait.
The Weird
Shoe Laces
Photo courtesy of Depositphotos
Uh-huh. You’ll have to cut them up, but make them look like a worm or a leech on the hook and suddenly a day on the boat when you left the bait at home is a day you’ll probably catch a perch or two.
And it really only has to work once, because you’ve already learned that fish fillets, guts and even eyes of that first catch will bring fish to your hook.
Rawhide
Even better than your typical shoe laces is rawhide, like the ones you tie up your boots with or other types of rawhide.
Strips of rawhide not only look like a tasty worm or eel, rawhide won’t rip off your hook easily. So, cowboy up and catch some perch!
Cigarette Butts
Photo courtesy of Depositphotos
This is the first time on this website that we’ve suggested anglers hook on a piece of trash, but you’d be amazed at how well it can work at times. And they really stay on the hook.
“They stay on the hook for a long time and have been known to produce large quantities of perch,” Janowich told us. “I learned this trick by accident while on a fishing trip to Georgian Bay in Canada. For giggles, I baited one on a hook in shallow, weedy water and the perch went crazy.”
Acknowledgements
Northern Ohio resident Bill Janowich contributed many of the yellow perch fishing bait ideas in this article. Janowich is a life-long perch fisherman and has developed a perch-fishing kit he sells online at catchperch.com.
Do you have a favorite yellow perch bait we haven’t covered in this article? Leaving a comment below gives us the permission to add it to this article and/or publish it elsewhere. Comments must be approved.Leave a name as you would like it to be published and an email we can use to contact you if necessary. Your email address won’t ever be published.
As I’ve shared in past videos, unbeknownst to most Americans, the troublesome, invasive Asian carp is one of the most nutritious and delicious fish in the world. But along with the unique challenges of catching the silver and bighead Asian carp, the next big task is processing them. This is also perhaps the number one deterrent that keeps people from utilizing these fish more frequently. Now, if you don’t mind eating fish in a manner that requires picking out or around the bones after cooking it, such as eating whole rainbow trout or other fish with small delicate bones, then there’s no issue whatsoever, just cook the Asian carp any which way you want and eat and pick away. The bones can be removed quite easily after cooking. However, if you desire a boneless filet, as many Americans are accustomed to, then you’ll have a little more work to do.
The silver and bighead Asian carp have two rows of intricate Y bone structures which require a special technique to get a completely boneless fillet from them. There are lots of great videos out there on this on this topic, and I’ll be making one myself here in the future, so stay tuned for that. But the process that I’m going to be sharing here requires a meat grinder and is very simple. And if you’re a deer hunter who makes a variety of products from your own ground venison, then all this will be very familiar to you.
No matter what method you use for harvesting Asian carp, a vitally important part of processing and eating them, or any fish for that matter, is to bleed the fish out immediately after it’s caught. I did a past video on this if you’d like to learn more. Filleting an Asian carp is initially the same as most any other fish, and it’s very common to filleting cod. There are lots of different ways that you can do this, but this is the method that I find easiest. I make my first initial cut at the dorsal fin and cut right down the backbone to the tail area. Next, I cut around the head about halfway down the rib cage and then meet up with my first cut to finish off the filet. I then wash my fillets off, put them in a cooler, and when I get home, I soak the fillets in salt water for a few hours or overnight to draw out any remaining blood in the filet. After soaking in some saltwater, I remove the skin from the fillet as you can see here.
After skinning, I then trim away the dark meat on the other side which is the slow-twitch muscle fibers of the fish that are used for long-distance swimming. This dark meat tends to have a strong flavor, so it’s good to remove as much of it as you can. To easily do this, I fold the fillet in half and slice the dark meat right off. Again, for this method, you’ll be using a meat grinder, which is a super easy way of processing the Asian carp to turn it into fish patties, fish tacos, fish burgers, fish sticks, fish nuggets, fish cakes, and all kinds of other delicious recipes. To do this, simply run your whole skinned and trimmed fillets through a meat grinder with a small or fine grinding plate. I recommend running the fish through twice for optimal breakdown and blending of the bones, which also adds extra calcium to the finished product, making it even more nutritious. After grinding the filets thoroughly, simply season and shape the ground fish however you desire and start cooking. If you’d like to learn more about the Asian carp, check out the book Eat the Enemy, which is a complete guide to catching and cooking the Asian carp. Check out the video below to see more…
(Thanks for your time! As you may have noticed, there are no annoying, irrelevant third-party ads cluttering up this blog article. If you enjoyed this content and would like to make a donation to help Three Minutes Outdoors with bills and production costs (which are sometimes quite hefty!) it would be greatly appreciated. Click here to make a donation today.)
As an outdoor expert and air gun enthusiast, I never thought I’d be writing about befriending squirrels. However, there’s something undeniably charming about these bushy-tailed critters that can make even the most seasoned hunters want to connect with them. While we typically focus on air rifle shooting and hunting tactics at Air Gun Maniac, today we’re taking a gentler approach to interacting with wildlife. Let’s explore how you can befriend squirrels on your campus, combining our outdoor expertise with a softer touch.
Before we dive into befriending techniques, it’s crucial to understand squirrel behavior. As prey animals, squirrels are naturally cautious. Their survival instincts make them wary of sudden movements and unfamiliar objects or people. This wariness is not unlike the alertness we teach in firearm safety courses – always be aware of your surroundings.
Dr. Jane Acorn, a wildlife biologist at Nutkin University, explains: “Squirrels are intelligent and curious creatures. They have excellent memory, especially when it comes to food sources. This trait can be leveraged when attempting to befriend them.”
The Right Approach: Patience and Consistency
Choosing the Right Location
Just as we emphasize proper positioning in air gun shooting, location is key when befriending squirrels. Find a quiet spot on campus where squirrels frequently visit. Areas with trees or near green spaces are ideal.
Establishing a Routine
Consistency is crucial in both marksmanship and squirrel befriending. Visit your chosen spot at the same time each day. This routine helps squirrels become accustomed to your presence.
The Power of Food: Your Secret Weapon
In air gun sports, we often talk about choosing the right ammunition. When it comes to squirrels, food is your ammunition of choice.
Safe and Healthy Squirrel Snacks
Offer foods that are safe and nutritious for squirrels:
Unsalted nuts (almonds, walnuts, pecans)
Raw vegetables (carrots, sweet potatoes)
Limited amounts of fruit (apples, berries)
Avoid human snacks, chocolate, or salted nuts, as these can be harmful to squirrels.
The Feeding Technique
Start by placing food on the ground and slowly backing away. Over time, as the squirrels become more comfortable, you can try offering food from your hand. Remember the patience required when lining up a perfect shot? Apply that same patience here.
Building Trust: The Long Game
Just as mastering air gun shooting takes time, befriending squirrels is a gradual process. Wildlife expert Tom Oakley from the National Squirrel Association advises: “It can take weeks or even months for a squirrel to fully trust you. The key is consistency and respect for their space.”
Do’s and Don’ts
Do:
Move slowly and speak softly
Maintain a respectful distance
Be patient and consistent
Don’t:
Try to touch or grab squirrels
Make sudden movements or loud noises
Feed them human junk food
Safety First: For You and the Squirrels
As responsible air gun enthusiasts, we always prioritize safety. The same applies when interacting with wildlife:
Wash your hands before and after feeding squirrels
Never attempt to domesticate wild squirrels
Be aware of local wildlife regulations
The Rewards of Squirrel Friendship
While different from the thrill of air gun sports, befriending squirrels can be equally rewarding. You’ll gain a unique perspective on wildlife behavior and potentially form a special bond with these charismatic creatures.
John Bushy, a former competitive shooter turned wildlife photographer, shares: “After years of viewing animals through a scope, sitting quietly and watching squirrels approach me voluntarily was a transformative experience. It’s given me a whole new appreciation for wildlife.”
Conclusion: A Different Kind of Marksmanship
Befriending squirrels on your campus requires a different set of skills than air gun shooting, but many principles remain the same – patience, consistency, and respect for your target. As you embark on this unique adventure, remember that the goal is to observe and interact without disturbing the natural behavior of these fascinating creatures.
We’d love to hear about your experiences in befriending campus squirrels. Share your stories in the comments below, and don’t forget to check out our other articles on responsible outdoor activities at Air Gun Maniac. Who knows, you might find that squirrel watching becomes the perfect complement to your air gun hobby!
The Daisy Red Ryder 1938 75th Anniversary Special Edition – Best Beginner BB gun
Pop quiz:
What’s a classic gun that American kids and adults love altogether?
A Daisy Red Ryder .
Correct. And what’s even better than a Daisy Red Ryder?
A Daisy Red Ryder 75th Anniversary Edition. Oh yeah .
That’s right, buddy.
This special edition got a huge update with an aluminum cocking lever, solid maple wood stock with the golden band on the forearm, laser-engraved graphics in the stock.
It’s eye-catching, lightweight, and well-constructed. This classic rifle makes you fall in love at first sight
Shooting consistently out of the box with extremely high velocity (supersonic included) and superb knock-down power, the Air hawk shoots and feels like the legendary RWS 34 but at 1/2 of the price:
It’s hard to beat this rifle in its price range and that’s why the Ruger Air Hawk deserves a place in the top 5 rifle list.
The purpose of this list, obviously, is to save you time and effort by not going through the hassle of digging into each model among the hundred choices of air rifles in this price range.
All of these rifles are affordable, convenient, and have impressive features worth more than the price you pay for them.
Also, an air rifle under 100$ is not just an air rifle.
The skills you practice with them will directly transfer to the firearm.
"Debate over whether a 22 air rifle can effectively take down a deer has sparked curiosity among hunting enthusiasts. With its lower muzzle velocity...
"Understanding the Legalities: Felon Ownership of Air Rifles in Tennessee"
can a felon own an air rifle in tennessee?
In the state of Tennessee, the ownership...
")
")
")
")
")