Home Blog Page 66

The Ultimate Guide to Game Meats

0

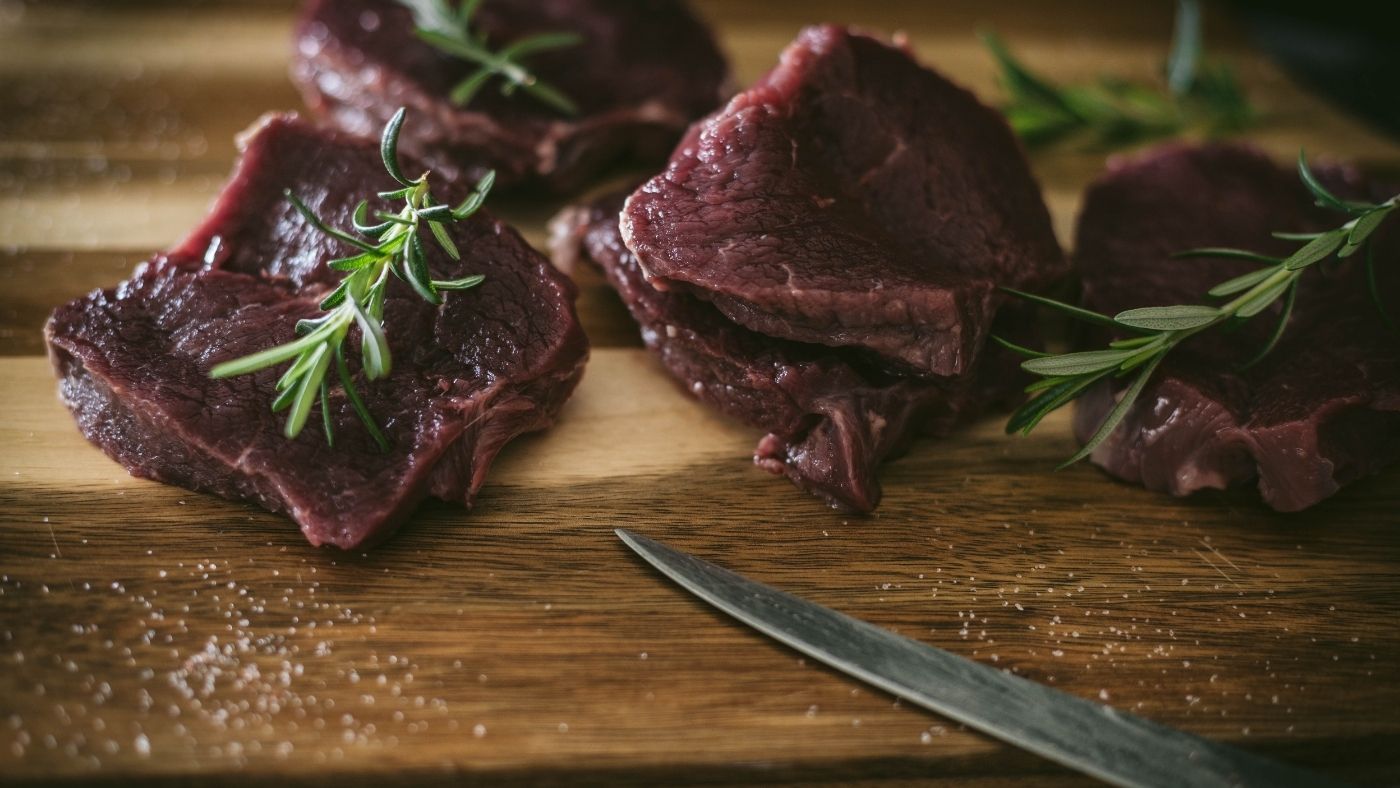
Virtually everything you need to know about game meat from securing it, to how long the supply will last, to preserving it and turning it into delicious meals for your family.

It’s estimated that over 40 million hunters and anglers in the United States and Canada harvest protein from rivers, lakes, streams, fields, and forests every year. These game meats are not only an integral part of self-reliance but also a sustainable and economical way to harvest healthy meats for you and your family.

The first year my husband went deer hunting, I was beside myself when he brought the meat home. I wasn’t sure how to prepare it and my resources were very limited over a decade ago. It took a lot of trial and error to figure out what to do with it.

I was kind of hesitant to even try it. I find that when I’m unfamiliar with something, I tend to shy away from it. But, it was a lot of meat to just let sit in the freezer for a rainy day, and well… we weren’t made of money. So, I found an old recipe book that was my grandfather’s and tried it.

And, I was instantly impressed. Nothing, I mean nothing, compares to the flavor of venison. I much prefer it to beef. My oldest won’t even eat beef, only venison. And then we started expanding into other game meats and I was equally impressed.

While it takes a lot of hard work, you can acquire all of your meat from wild game and never buy meat again. But, if you’re like me and unsure, I’m here to help guide you through everything from defining game meat, going through flavor palates, preparing and preserving meat, figuring out how much your meat will make recipes, and more.

What is considered game meat?

Game meat is traditionally the flesh harvested from any non-domesticated land mammal, bird, or aquatic mammal that is legally hunted for personal consumption. However, many traditional game species are reared on ranches and harvested for commercial sale or even reared on backyard farms and homesteads around the world.

In short, animals that are typically farmed such as bovine, domestic swine, goats, sheep, and domestic fowl are excluded but most others can be considered game, even if they were reared by humans. In some specialized markets, game meats can be found for sale. This is becoming more and more common as people start to shy away from traditional, domesticated animals for food.

Why is it called game meat?

As I mentioned, game is traditionally hunted. Hunting is considered a sport because it tests the skill and ability of the hunter.

The word game is derived from the Old English word “gamen” which means joy, amusement, sport, or merriment. And since, traditionally, game is hunted it falls under the category of sport.

Common game meat in North America

Types of game meat vary based on your geographic location and there are thousands of animals worldwide that can be harvested for meat. In North America, some of the most common game species are:

Venison

Derived from the Latin word “to hunt” the term venison used to be used to describe any type of game meat including deer, rabbits, wild boar, and more. But, today, this term is used to describe the muscles and organs of any type of deer or antelope including, but not limited to, whitetail, elk, moose, and caribou.

Venison is delicious and flavorful. Nothing like bovine, it has a more earthy and rich flavor. It is also much leaner than domestic red meat and can be dry, especially if it is not cooked properly.
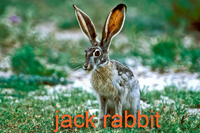
Rabbit

Rabbit meat is often described as being chicken-like in flavor, but it isn’t. While the flavor is mild, it’s also richer. This meat, like many game meats, can dry out quickly as well due to its leanness.

Duck

Duck is probably one of my favorite meats, coming in a close second to venison. It tastes absolutely nothing like chicken. In fact, by culinary standards, it’s often considered red meat despite the fact that scientifically speaking, it’s white.

Duck meat is very rich in flavor and duck breasts are actually fantastic cooked to rare.

Bear

If you’re lucky enough to live in an area where bear, especially black bear, is abundant enough to have a legal hunting season, you may enjoy this meat.

Bear meat is red meat, albeit slightly lighter than venison or beef. Bear meat has been compared to the flavor of venison, though chewier and slightly sweeter. It is typically slow-cooked because it can be quite tough.

Bison

Another favorite of mine is bison. Very lean, much like venison, but very delicious. The flavor of bison is much milder, while still being earthy than that of venison with very little “gamey” flavor going on at all.

Bison meat is a little more coarse than beef, and a. little sweeter, but the flavors are similar.
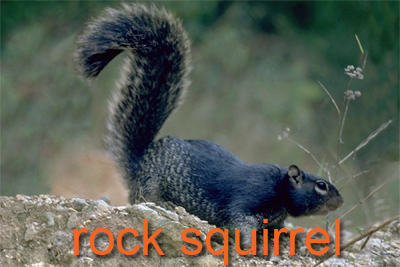
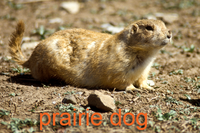
Squirrel

Some folks are taken aback at the idea of eating squirrels, much like rabbits. But it’s estimated over 1.8 million Americans hunt and cook this chicken of the woods. You do have to harvest several to make a decent meal if you have many people that you’re serving, but it can be worth your while.

Like rabbit, squirrel is often described as tasting like chicken, and that’s marginally true. Milder than rabbit, but not quite like chicken. However, due to diet, squirrels actually have a slightly nutty, sweet flavor and the texture is fine.

Beaver

Yep, people eat beaver. Who knew?

Beaver meat is not something I’ve personally tried, but it is described as being quite tough and stringy and very “gamey” in flavor. It’s not something a lot of people seem to like, but others swear by it and say it tastes similar to pork.

Wild Boar

Wild boar is nothing like its domestic cousin. It’s much leaner, higher in protein, and lower in cholesterol.

It has a flavor that can’t really be compared to other meats. The flavor is quite strong, rich, and nutty. The meat is juicy and is often described as a cross between beef and pork, but make no mistake, it doesn’t taste anything like domesticated swine meat.

Goose

Like duck, goose is considered a red meat by culinary terms, but scientifically is a white meat.

The flavor of goose is incredibly rich, comparable to a rare roast beef… but better. Also like duck meat, it is quite fatty, so there are a lot of natural flavors to it and it doesn’t need a lot added to it, unlike chicken.

Alligator

Known in the bayou as the chicken of the swamp, alligator is mild, white meat with a firm texture. It has a flavor similar to that of chicken, but more flavorful with a slightly fishy flavor.

Quail

Quail are quite small, but they have a good meat-to-bone ratio. In fact, the bones are so small, that they’re not typically removed but actually consumed along with the meat.

Quail has a similar flavor to chicken, but is better than most commercially raised chicken as it is richer and more flavorful.

Pheasant

The texture of the pheasant is like most poultry and the flavor is similar to chicken. However, it has a slightly “gamey” undertone with a mild smokey flavor.

Why eat game meat?

Game meat is an excellent choice for so many reasons. It’s healthier, it’s more sustainable, it’s more challenging to procure, it reduces your dependency on failing food systems, and so much more. So… what are the benefits of eating wild game?

It’s Healthy

Wild game is incredibly healthy. It’s much leaner than traditional, domesticated meats. If you put a meatloaf made from ground beef and another made from venison or bison in the oven… you’ll see all the fat at the bottom of the beef pan while the game meatloaf will not have much at all. A surefire way to tell, it’s virtually fat-free (in comparison).

Game meats are also very high in omega-3 fatty acids, an essential component of a healthy diet. According to a study done by Purdue University, their omega 3 to omega 6 ratio is also lower than grain-fed domesticated animals. This is beneficial because if that ratio is too high, it can increase inflammatory responses linked to chronic disease.

These meats were traditionally consumed by hunter-gatherer populations and this study shows that it’s not how much fat you consume, but rather the overall ratio of fats.

Wild game also has high amounts of essential vitamins and minerals such as iron, selenium, zinc, beta carotene, B6, and niacin.

It’s Natural- Antibiotic and Hormone Free

Game meat is harvested from its natural habitats, which means its diet is natural as well.

The meat isn’t farmed to grow fast and beefy, so no hormones are used.

Studies have shown that antibiotic treatment of animals can negatively affect the natural flora in the human gut. Wild game isn’t in need of antibiotics to avoid or treat infections, which means that you don’t have the concern.

It grew in its natural environment, eating its natural diet without human intervention, which, to most of us is a good thing.

It Tastes Better

I’ve known a lot of people to say game meat tastes, well, “gamey” but that’s simply because we’ve spent so long eating grain-fed meats that we don’t know to appreciate the flavor of natural meats.

Game meats have a unique and distinct flavor that is solely from their diet. Ruminants of any kind were never meant to consume grain, but since most domesticated animals are fed grain, it changes the flavor and we’ve gotten used to it instead of the flavor of an animal with a natural diet.

And for most folks, expanding your palette and enjoying the flavor of wild game just takes a little knowledge on how to properly prepare the meat. Most meats are fantastic, tastier, alternatives to more widely known and consumed meats.

It Is Environmentally Friendly

By eating wild game you reduce your carbon footprint. Most animals are harvested locally making the food miles from field to fork very few.

Hunting wild game is conservation and not enough people talk about how beneficial it is. Hunting has a positive effect on the ecology of our natural landscapes. Without hunting, populations would increase out of control to unsustainable levels.

And hunting helps keep natural woodlands and wetlands from being destroyed and conserves natural flora and gives wild bird populations more food allowing their populations to increase.

It’s Sustainable and Self Sufficient

We’ve all, unfortunately, seen the effects of a broken link in our food systems. Grocery store shelves can quickly become barren if even one element in that precarious system is broken down in some form.

However, hunting is a sustainable way to provide protein for you and your family. As I mentioned, it helps conserve natural resources but it also is something that you can do for you and your family to provide at least part of your protein without the detrimental effects of modern, commercial farm practices.

It’s Affordable

While hunting licenses and a bit of gear can cost money, it’s relatively inexpensive and gear doesn’t have to be fancy. Even if you do spend a good amount on the gear, it’s going to pay for itself in no time and you can use that gear for years.

Think about the cost of beef per pound from your local farmer’s market. Then consider the cost of a license and a bow and some arrows, and possibly a tree stand or hunting blind (and maybe some training and targets). You’ll spend less than you would to purchase a whole cow.

Low Risk of Food-Borne Illness

Commercially produced meats are often fed unnatural diets and crammed into spaces putting them at high risk for disease. Then, the meat is taken to the processing plant and the germs are spread all around the plant only to be packaged and brought home to put in your refrigerator.

In fact, a study done by consumer reports found that 97% of chicken contained bacteria that could make you sick. And another study by the center for science in the public interest found that beef is one of the riskiest meats to put in your fridge.

But you don’t have those worries so much with wild game since it lived a natural life, it’s probably healthy. Handling it properly should always be the first and foremost priority and knowing how to properly process it yourself or finding a reputable, small processing plant essential. But the risk is far less than with grocery store meats.

No Additives

Remember pink slime? It’s a filler that, for a short time, wasn’t used due to public pressure. But it didn’t last long.

This product is full of ammonia and is used as a filler in poultry and beef products to help reduce the risk of e. coli in these meats. And then that toxic chemical can slowly build up in the consumer’s system… Think about it.

No worries for pink slime or “saline solution” to increase weight, appearance, and safety in wild game, though.

What is the healthiest game meat?

Game meat of any type is very healthy, especially when compared to common commercial meats like beef. Wild game meat has more omega-3 fatty acids, it is leaner, lower fat, and has lower calories per 100 grams than most commercial meats.

How long will my game meat supply last?

Believe it or not, you can subsist on game meats year-round and never purchase meat again. In fact, it’s a goal of ours to transition to 100% wild game at some point in the future save some sausage casings and pork fat.

That being said, it will take a lot of work and dedication to keep your freezer and pantry full of meat. You can use game meats to help decrease your grocery bill, or you can slowly, but completely, transition to game meats and not have to purchase commercial meat again.

It’s certainly healthier and more sustainable than purchasing commercial meats, even if you’re purchasing those meats from a local, small farm. Which, you definitely should be doing, regardless.

When thinking about the possibility of supplementing or completely switching over to game the question of how much meat you need arises. And, of course, that answer can vary wildly. It’s highly dependent on how much meat you and your family consume each day, how often you feed guests, how often you won’t be eating meat from your harvest due to travel or eating elsewhere, and lastly whether you utilize nose-to-tail eating or only consume the cuts you enjoy.

The table provided below will give you a few ballpark estimates. This table is based off of the average serving size per person, with large game serving sizes being smaller than small game. These are the average weights of meat harvested off of each animal, which will always vary slightly. You can increase the weight yielded if you choose to utilize the entire animal, organ meats, less desirable cuts, etc. But, this can give you an idea:

How do I obtain game meat?

Traditionally, you would, of course, hunt for it. But, times have changed, and as consumer demand increases for more sustainable, natural, and environmentally friendly meats so have production processes.

While selling wild game is illegal, selling game meats that are farmed and processed at a USDA processing plant is not.

Game meats are becoming more and more common on supermarket shelves. While these meats aren’t wild, they are typically ethically grown and allowed natural diets on large ranches. They’re not fattened up with grains and are not given all types of hormones and antibiotics.

You can also oftentimes put your name on a list for a local processor. Many times hunters don’t pick up their meat for one reason or another. You can often get wild harvested game from a local processor for the cost of processing the meat.

Another option, if you’re comfortable and your local laws allow it, is to harvest road kill. While the process of doing this is very time sensitive and dependent on how much of the animal was struck, we’ve personally harvested several bucks off of the highway. If you’re in the area when the accident occurs, you know the meat is fresh and if the entire animal wasn’t side-struck much of the meat may be salvageable. This all depends on your comfort level and local laws, though.

Hunting game meat

Hunting game meat is the traditional method but rules and regulations vary by state. Sometimes, these rules even vary by county or even by hunting zones. I strongly suggest you look up your local rules, regulations, and seasons for your particular area.

Poaching isn’t cool, nor is it necessary. Seasons and bag limits are implemented for numerous reasons. One is to avoid nesting and mating seasons so that the population can reproduce, keeping levels where they need to be. Another is to avoid over-harvesting a particular population conserving it for future hunters and maintaining ecology.

Hunting licenses aren’t very expensive and they help pay to conserve natural wildlife habitats. In fact, without these dollars, it wouldn’t be easy to pay for the maintenance and purchase of wildlife habitats. These licenses also help local fish and wildlife districts know how many hunters and anglers there are which helps them set bag limits accordingly to conserve populations.

So make sure to contact your local Department of Natural Resources of Fish and Wildlife Division to be sure you know what’s legal and what isn’t.

Some states require hunter’s education courses, some allow some weapons and not others, some areas the bag limit will be higher than in others. How many antlered vs antlerless deer you can harvest can vary and more. It’s really dependent on your area.

Hunting is rewarding, though, and a skill I believe everyone should have at least a basic knowledge of. It allows you to provide protein for yourself and your family for just a little bit of money… but it can, and often does, take a lot of time.

Depending on the game you plan to hunt will determine the equipment you need. It’s often helpful to find a more experienced hunter to show you the ropes and help you safely and successfully harvest game until you get a little more experience under your belt.

Purchasing commercially available game meat

Some folks don’t have the desire or ability to hunt game, and that’s ok. Today’s consumer demand for healthy, sustainable, natural meats has grown immensely so the availability of these meats commercially has come a long way.

Most local groceries have at least some wild game meats available, some more than others. And a lot of farmer’s markets have game meats available, making them an excellent stop to see what you can find.

Even if you can’t find these meats locally, many ranches and farms sell USDA-processed meats online and ship them country-wide. So, there are options available to you if you’d like to try these healthier protein alternatives.

How do I preserve game meat?

There are many, many ways to preserve game meat from freezing to canning, to curing. It really depends on your comfort level, your knowledge level, and what equipment you have.

Freezing Wild Game

Freezing meat is, understandably, the easiest and most widely used method for preserving game meats. Many people invest in a vacuum sealer which can help preserve frozen meats for a longer period of time.

I recommend you package meats in individual packages that reflect the amount you and your family typically eat per serving. So, you may package a pound of ground meat, four steaks, or for smaller game, the entire animal.

Canning Wild Game

You can also game meat. While this does require a pressure canner, it’s a straightforward process. I love canning meat, though because it not only frees up freezer space, it makes meals so easy. Since the meat is already cooked during the canning process, it just needs to be warmed a little and you’ve got a meal.

Canned venison is one of my favorite, shelf-stable ways to preserve it.

Curing Wild Game

Another way is to cure meats. Now, this can be things like venison summer sausage, smoked jerky, venison jerky, or smoked hams and bacon. This method requires a bit more time, a larger comfort level, some equipment, and a little more knowledge, but these foods are so tasty, that you’ll be glad you jumped into it.

How do I cook game meat?

Game meat is easy to cook, but it’s not quite the same as cooking domesticated meats. It’s leaner which means it will dry out more quickly and the flavor is slightly different, making the seasonings you use, perhaps, a bit different as well.

These things are true of almost all wild game, with a few exceptions. Cooking venison is an easy enough process, though. You’ll just want to follow a few tips.

• Allow the meat to come to room temperature before cooking, this is true of any game meat, not just red meat. By doing this, you won’t “shock” the meat which can cause it to overcook. This process will take at least an hour, depending on what you’re cooking.

  • Wild game should never be overcooked. Overcooking game will produce a metallic flavor and create a very tough texture.
  • Keep wild game pink and on the rare side for the best flavor. The exception being goose meat which should be cooked to a temperature of 155°F for the best flavor and texture. Bear and wild boar should also be cooked to a minimum internal temperature of 155°F to avoid potential food borne pathogens.
  • Brown the surface after cooking if you’re roasting it in the oven for the best flavor.
  • Allow game meat to rest about 15 minutes after cooking before serving.
  • Game meat is best after cooked and not warmed up later.

What can I do with game meat? (recipes)

A lot of game meats can be swapped for more widely utilized meats like poultry, beef, and pork. As long as you follow the tips to cook it properly, you’ll be well on your way.

Instead of Chicken Use

Rabbit

Rabbit is very similar to chicken and a lot of traditional French recipes use rabbit and have more modern chicken versions of the same dish.

Rabbit can be cooked whole or separated into pieces and even deep-fried like chicken. However, it is best roasted, slow-cooked, or braised. Like this Braised Rabbit in Cream Sauce. The meat is a little tougher than chicken, especially if it’s wild-harvested meat, so slow and low is a great way to prepare it.

Quail

Quail are very small, typically serving an individual, not an entire family. But, they’re packed full of flavor that is similar, though richer, to chicken.

Most often people roast the whole bird, sometimes stuffing it. They are very lean, like most game and they cook quickly so be mindful of that when preparing. A whole bird will take about 20 minutes to cook through, which is when the meat is firm and juices run clear.

Duck

Duck is one of my favorite chicken substitutes. While it doesn’t taste a lot like chicken, it’s similar just richer.

The meat is also a little fattier, which means it doesn’t dry out as easily, making it great for beginners because it’s so much harder to dry out. I love making roasted duck, but the legs smoked and dipped in bbq are to die for as well.

Pheasant

A whole pheasant is very similar in size to a chicken, usually weighing approximate 2-3 pounds. As mentioned above, it’s very flavorful and most people like the flavor of it and don’t find it overly “gamey”.

Pheasant is best prepared by cooking it low and slow since it is much leaner than chicken. As I said, you don’t want to overcook game meats. You’ll also want to add fat to the bird or it will dry out. You’ll want to cook it at a low oven temperature or plan to frequently baste it. Cook to a temperature of 180°F.

Instead of Beef Use

Bison

Bison is an excellent choice for folks trying game meat for the first time. The flavor is unique and earthy, but mild and similar in both texture and flavor to beef.

Bison can be used in place of any dish calling for beef and the cooking method is the same except you’ll want to ensure you don’t overcook it, as it is very lean. Cooking bison to a rare to medium-rare temperature is best, you want a little pink in it.

Venison

Venison… I can’t say enough good things about it. It is by far my favorite and I’ll take a serving of venison over beef any day of the week, and so will my kids.

This meat is perfect in place of beef, prepared correctly and not overcooked it’s bursting with flavor. It’s perfect for making dishes like venison stroganoff, chili, sous vide roast or even a marinated venison steak.

In Place of Pork Use

Wild Boar

Wild boar isn’t the same as its domestic cousins, but it is very similar and the perfect substitute for domestic pork recipes.

Like most game, wild boar is best being cooked low and slow. Making pulled pork is one of my favorite ways, but you can also use the hams, make bacon, and more.

If you’re looking for ideas on how to reconnect with your food, nature, and the heritage way of life, you’ve come to the right place.

Join over 40,000 like-minded folks in my Facebook group, The Self Sufficient Life. You can join by clicking here.

How to Sight in a Bow (Fixed & 1-Pin) & What Distance To Set Your Pins At

0

Have you just purchased your first bow sight and you need to sight it in?

What are the right sight marks for you?

What is the best way to sight-in your bow?

The only way to find out is to get out there and start somewhere, and we’ll show you where that is.

We’ll discuss common distances used to set your pins as well as our favorite way to sight in your bow.

What Distances to Sight in Pins on Your Bow?

What is the best distance to sight in your bow? You’ll find various answers here and there according to the preferences of the person providing the advice. We’ll lead you straight as the best distances for you will depend on a few things:

  • Draw weight/bow speed
  • Type of bow hunting
  • Personal preference for maximum shooting distances

All these factors will be addressed as we discuss the most commonly used sight marks for many bow shooters.

Top Pin Setting

The most common top pin setting for both timber and the open fields is 20 yards.

These days, most compound bows are fast enough to see very little difference in arrow trajectory between 10-20 yards. When this is the case, the first pin is usually set at 20 yards that also serves as a pin for 10-25 yard distances. You may be a few inches high when using the 20-yard pin for a 10-yard shot, and you may be a few inches low for a 25-yard shot.

To enable accurate and precise shots using your 20-yard pin this way, you’ll have to know how your bow, arrows, and sight setup will perform. Get to shooting off some arrows!

Do you have a 5-inch difference or more? Do you need to start with a 10-yard pin instead? If you’re shooting from a tree stand, you just might. You must also know the positions and kill-zone sizes of your game if you’re a hunter.

Low poundage bows that includes 40lb draw weights will require a top pin that should be set for 10 or 15 yards. It’s about shot placement that includes getting close enough to your target with it in a position to take an ethical shot.

Factors to think about:

  • How fast is your bow?
  • Where and what are you shooting?
  • Become proficient with setup to predict how it performs between 10-25 yards.
  • See instructions for your bow sight if there is a recommended top pin distance.

5-Yard Distance Increments

You may see some shooters with sight marks in 5-yard increments. An example includes: 15, 20, 25, 30, 35, and 40 and other similar variations. Again, personal preference is the rule here.

Consistent 5-yard increments are usually seen on sights that have 5 to 7 or more pins, and there are both pros and cons to this pin setup.

Advantages include less gap shooting, pin for every reasonable distance, and smaller yardage increments for confident shooting.

However, the disadvantages can outweigh the benefits. When increments are small, and you have a generally fast bow, the pins will be stacked very close together. It’s likely you will choose the wrong pin to shoot with.

Pins too close together can also block out a significant amount of the target. The more pins you have, the more it clutters your field of view.

10-Yard Distance Increments

Even 10-yard distances are the most common and versatile setup for hunters for many types of prey in the field. It may start with a 20-yard pin and continue from there, or it may start with a 15 or 25-yard pin and follow suit.

10-yard increments allow enough space between the pins to adequately see the target and to appropriately shoot the gaps when necessary. However, difficulty in achieving accuracy and precision at ranges further than 50 yards increases especially when you gap shoot. When you extend your pins out to longer distances, arrow drop, user error, and form issues are magnified.

Holding over or holding under isn’t so easy to do when you’re cold, hungry, tired, or you’re pumping with adrenaline due to the 10-point buck that just came into view 30 or so odd yards away. It may now be helpful to split the distance in 5-yard increments for the bottom pins such as 20, 30, 40, 45, and 50 or 20, 30, 35, 40, and 45. Find the variation that works for your bow setup and your shooting style.

Think about:

  • How many pins should be in your 10-yard increment setup?
  • What maximum distance are you comfortable and skilled enough at to make an ethical shot?

The more pins you have, the further you can shoot out in practice whether you realistically take shots out this far in the field. Practicing at 60 and 70 yards can make your 20-40 yard groupings tighter and easier to make. However, it does clutter your sight picture and it may encourage you to take shots you shouldn’t in the field.

Where is the Middle Ground?

The middle ground is more about having the right number of pins for your setup. There’s no need to clutter your sight picture with more pins than you realistically use in the field.

A general rule of thumb is 3 pins for many hunting applications, and 5 pins for Western or long shot hunting. Of course, there are hunters that do very well with a single pin bow sight to eliminate the process of gap shooting altogether. Where do you sit in the single vs multi-pin debate?

If you’re one of those hunters who push your bottom pins down as far as they can go to get them out of the way, but you keep them for the “just in case” moment, a fixed pin with a floater bow sight would serve you better.

Many times, the bow sight manufacturer will recommend in the setup and sighting-in instructions what distance the first pin should be set with and the distance increments for the following pins.

While 10-yard increments are certainly the standard and is a versatile setup, the goal is to find what setup works best for you. You won’t know it until you get out there and start practicing.

How to Sight-In a Bow

General Preparation Instructions for Sighting In

  • Mount your sight to your bow.
  • Be prepared to spread out sighting-in process over a course of several days due to fatigue that can compromise everything from correct form to accuracy.
  • Have necessary gear and equipment ready i.e. targets, arrows, appropriate laser rangefinder, etc.
  • Safety first: ensure you have the appropriate backstops and area clearance to shoot.
  • Start close to the target: 10 yards to get on paper and to reduce adjustment issues later.
  • Adjust in small increments at a time.
  • Have Allen wrenches or required tools to make adjustments to sight.
  • We like the “one axis at a time” method of sighting in. This process may incorporate use of leveled tape in the shape of a sideways “T”, as a cross, or any target that helps to focus the eye to aim in straight lines.

How to Sight In With a Fixed Pin Bow Sight

  1. Stand approximately 10 yards away from your T target. Starting with the windage axis (left/right), you will want to aim for the vertical part of the target. Let off 3-5 arrows in a line.
  1. Examine the arrows position in relation to the vertical line of the T. Being this close to the target, you want to make sure you’re as dead-on the center of the line as possible. Margins of error will be magnified when you step back to fine-tune your adjustments at longer distances.
  1. To make adjustments, follow the arrow. If your arrows are left of the T, make an adjustment to move the entire sight housing If your arrows are right of the T, make an adjustment to move right.
  1. Repeat this process until your arrows are dead-on center on the vertical line.
  1. Stand approximately 10 yards away from your T target. If necessary, move the top pin high up towards the top of the housing to leave enough adjustment room for the remaining pins on sights with 5-7 pins. Let off 3-5 arrows in a line using your top pin as an aiming point for the horizontal part of the target to begin adjustments for the elevation axis (up/down).
  1. Examine the arrows position in relation to the horizontal line of the T. You don’t have to be so precise with this at 10 yards. If the arrows are further than 6 inches of the line, follow the arrow to make adjustments by moving the entire sight housing. If your arrows are above the line, make an adjustment to move the sight up. If your arrows are below the line, make an adjustment to move the sight down.
  1. Repeat this process until your arrows are within 6 inches of the horizontal line.
  1. Step back to the distance you want to set your first pin for which is likely 20 yards. The top pin is the only pin you can set by moving the entire sight housing at this point in the process. Let off 3-5 arrows aiming with your top pin to hit dead-on the center of the horizontal line as possible. Now is the time to be precise with your adjustments by moving the entire sight housing up or down.
  1. Once you’re hitting dead-on with your 20-yard pin, it’s time to sight-in the remaining pins which will all be adjusted individually. Typically, the next pins will be set for 30, 40, and 50 yards, if applicable. Stand at the distance you want to set your next pin for, let off 3-5 arrows using the appropriate pin to aim with and shoot for the horizontal line of the target.
  1. Examine the arrows in relation to the horizontal line of the T. Be precise in making individual adjustments for the appropriate pin. Again, follow the arrow. When you’re successfully hitting the center of the line, it’s time to move to the next pin until all remaining pins are set for their distance.
  1. Go back to 30 yards and let off 3-5 arrows for the vertical line to fine-tune your windage (left/right) axis with any adjustments if needed. You might notice you may be slightly off at 30 yards since variations in accuracy are magnified at longer distances.
  1. Fine-tune any adjustments by double checking you’re consistently hitting the lines at your set pin distances. If you need to make any fine-tuning adjustments to your 20-yard pin at this point, do it by adjusting the individual pin, not by moving the entire sight housing.

How to Sight In a Bow Sight With 1 Pin

Each manufacturer and model of single-pin sights will have slightly different sighting-in instructions and sight tapes provided. It’s important to follow the setup recommended by the manufacturer to achieve maximum potential and accuracy from your sight.

A well-accepted method is the 20/60 setup which we’ll explain below.

  1. Stand approximately 10 yards away from your T target. Starting with the windage axis (left/right), you will want to aim for the vertical part of the target. Let off 3-5 arrows in a line.
  1. Examine the arrows position in relation to the vertical line of the T. Being this close to the target, you want to make sure you’re as dead-on the center of the line as possible since margins of error will be magnified when you step back to fine-tune your adjustments at longer distances.
  1. To make adjustments, follow the arrow. If your arrows are left of the T, make an adjustment to move the entire sight housing If your arrows are right of the T, make an adjustment to move right.
  1. Repeat this process until your arrows are dead-on center on the vertical line.
  1. If you’re using calibration tape provided by the manufacturer, go ahead and stick it on your wheel or bar now. Turn the wheel or knob all the way to the top until it stops. Stand 20 yards away from your T target. Let off 3-5 arrows in a line using your pin as an aiming point for the horizontal part of the target to begin adjustments.
  1. Follow the arrow. If you’re low, turn the wheel/knob down in small increments at a time. Repeat this process until your arrows are dead-on center on the horizontal line.
  1. If using calibration tape, note the reference number the indicator is lined up with as this is your 20-yard mark. If not, use a pencil or marker to mark where your 20-yard mark is.
  1. Step back in 10 yards at a time to sight-in for 30, 40, and 50 yards. Dial down the wheel/knob each time you move back.
  1. Finally, get sighted-in at 60 yards and make the adjustments necessary by following the arrow. Take note of the reference number the indicator is lined up with or mark this spot as this is your 60-yard mark. Additionally, fine-tune your windage (left/right) axis now to ensure consistent shots.
  1. Match the correct sight tape for your markings or number references provided by the manufacturer and apply it to the wheel or bar. Use the sight-tape to double-check you’re hitting consistently at the matched distances.

Put it to the Test!

Once you’re done sighting-in, it’s time to pull out the 3D and 10-ring targets and put your skills to the test. You may be surprised to find your groups are tighter than ever. But, is this the only way to sight in a bow?

Everyone may use a slightly different sighting-in method, the same way they may use different distances to sight in their pins. Some may adjust for both left/right at the same time as they’re adjusting for up/down shots. It happens to be the mainstream way of adjusting especially when using traditional 10-ring targets.

Use the system you’re most familiar with. Get to know what distances or sight-in method you like best by getting out there and nocking some rounds. Sight in and shoot sharp!

Further Reading

  • How to Measure Scope Ring Height (With Pics & Calculations)
  • How to Adjust a Rifle Scope: 6 Scope Adjustments Explained!
  • How to Level a Scope on a Rifle [Step-by-Step With Pics]
  • What is a Rifle Scope Ruler (Mildot Master) & How to Use It?
  • What is a Prism Scope? Prism VS Reflex VS LPVO!

Non-game Animals

0

Jack Rabbit Cottontail Porcupine

Non-game animals include (but are not limited to) the following: armadillos, bobcats coyotes, flying squirrels, frogs, ground squirrels, mountain lions, porcupines, prairie dogs, rabbits, and turtles. There is no closed season on these animals and a valid hunting license is required. They may be hunted at any time by any lawful means on private property. Public hunting lands may have restrictions. The take of any nongame species for commercial purposes (sale, offer for sale, barter, or exchange) from public lands or waters is unlawful. Note: Take precautions when handling Armadillos, as they could possibly be carrying leprosy.

Prairie dog Armadillo Rock Squirrel

Bobcat

Bobcat

The Bobcat, Lynx rufus, is a medium-sized, reddish brown or grayish cat. Its ears usually have small tufts at the tips, and its fur is longer on the sides of its head than on the rest of its body, forming a ruff. They have a short tail, long legs, and large feet.

Bobcat pelts sold, purchased, traded, transported or shipped out of state must have a pelt tag (CITES) attached. A pelt tag must be attached prior to being transported or shipped out of this state. Pelt tags may be obtained from any permitted bobcat pelt dealer, or TPWD Regional & Field Law Enforcement Offices. For additional information contact TPWD (800) 792-1112, menu 7, option 9 or (512) 389-4481.

Coyote

Coyote
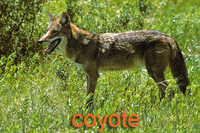
Coyotes,Canis latrans Say, are slender, dog-like carnivores, common throughout Texas. They have adapted easily to the expansion of human communities into their habitat and can occasionally be found in urban and suburban neighborhoods. Coyotes may live alone or in small “packs” of up to 6 individuals. Coyotes are well known for their calls. They howl (a high quavering cry) and emit a series of short, high-pitched yips. Howls are used to keep in touch with other coyotes in the area.

Coyotes are opportunistic feeders and will eat almost anything, alive or dead, garbage, meat, fish, vegetables, berries or whatever they can find easily. Their natural diet consists mostly of rabbits, rodents and carrion. Coyotes are very wary of humans, however they can become accustomed to humans especially if they are fed. Since any wild animal that has no fear of humans can become dangerous, it is important to not feed them at all. Don’t leave pet food out over night, secure lids to garbage cans and keep small pets inside unless supervised. They do not normally pose a threat to livestock, however hungry coyotes may occasionally take small domestic animals or poultry.

Live coyotes are currently under a statewide rabies quarantine that prohibits them from being transported or sold in Texas (see exceptions). For information on the rabies quarantine, visit the Texas Department of State Health Services Infectious Disease Control Unit Web site.

Mountain Lion

Mountain Lion
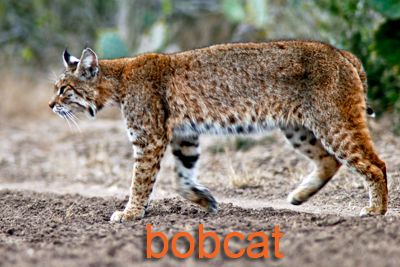
The mountain lion, Puma concolor, also known as cougar, puma and panther, has been an integral part of the Texas fauna for thousands of years, The Mountain Lion has the widest distribution of any wild cat, from Canada to South America. Formerly distributed throughout North America, the Mountain Lion is now found mostly in the remote areas of the western U.S., as well as western Canada and much of Mexico. A small population still exists in southern Florida, where the species is considered endangered. In Texas, the Mountain Lion is found throughout the Trans-Pecos, as well as the brush lands of south Texas and portions of the Hill Country. Sighting and kill reports indicate that Mountain Lions now occur in more counties than they did 10 years ago and appear to be expanding their range into central Texas.

Retiring and shy by nature, and largely nocturnal by habit, the mountain lion is seldom seen in its native haunts. The diet of the mountain lion consists almost entirely of animal matter; but, like the domestic cat, it occasionally eats grasses and other vegetable matter. Deer and javelina are major food items; however, lions have been known to take elk and bighorn sheep as well as a variety of smaller animals. Contrary to popular opinion, mountain lions rarely use caves as dens, preferring cliff crevices, overhanging ledges or enlarged badger burrows instead. If you are in an area where lions are known to be present, hunt with others, not alone.

Turtles

Turtle
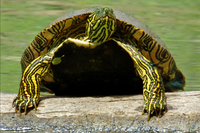
Turtle, tortoise or terrapin? Many people get confused by these terms, often using them interchangeably. Texas has a single species of tortoise, the Texas tortoise (Gopherus berlanderi) and a single species of terrapin, the diamondback terrapin (Malaclemys terrapin). All of the remaining 28 species of the order Testudines found in Texas are called “turtles.”

Box Turtle Texas Tortoise

Softshell Turtle Red-eared Sliders Snapping Turtle

Take or possession of any species of turtle for commercial activity is unlawful.

Diamonback Terrapin Diamonback Terrapin from above

No person may possess a diamondback terrapin at any time.

Frogs

Green treefrog Squirrel treefrog

There are 42 species of frogs and toads in Texas (4 species are threatened and 1 species is endangered).

Bullfrog

Bullfrogs are the largest frog in North America and the frog used by most for food. They are frequently found along the water’s edge and are most active at night. They are hunted usually with a gig, prized for their meaty legs.

What Good Are They (porcupines)

0

The porcupine is willing and able to defend itself against attack, but really just wants to be left alone to live its mostly solitary life.

After his horse tangled with a porcupine and ended up with an ankle full of quills, a friend grumbled, “Porcupines, what good are they?” This is the same question another friend asked years ago when he chided me for “wasting a column writing about porcupines”.

It isn’t an unusual question. Humans tend to judge the value of just about everything by how they are personally benefited or vexed by it. That seems to be particularly true of wildlife. If a personal or even general benefit isn’t obvious, then clearly we don’t need that species.

A porcupine is a mild mannered creature wanting nothing more than to go about its business and be left alone. When a dog, horse or human can’t abide the live-and-let-live attitude of the porcupine, it can and will defend itself. And for some reason, humans are offended by that.

Here is a small animal, weighing less than 20 pounds, and we won’t tolerate an act of self defense? Perhaps it rocks our world a bit much. As the self-proclaimed rulers of this world is it an attack on our sovereignty to have an animal, especially a small non aggressive one, be able to put us in our place?

A complaint about porcupines is that they damage trees. Absolutely true. However, that viewpoint is literally missing the forest for the trees. Porcupines evolved with the forests and are part of a system of forest replenishment. Trees damaged by porcupines provide critical habitat for dozens of other species. These trees then become part of the nutrient cycling essential to forest health. Chewing on trees only becomes a “problem” when that tree happens to be in a human’s backyard or is part of a commercial plantation.

In a greater context, our ancestors probably had greater respect for the lowly porcupine as they were once a staple of many human diets. Today, few humans eat them but they remain an important part of mountain lion fare. Sure, they may only make up a few percent of the average lion’s chow and if a lion went hungry rather than feast on porcupine, it might be character building. But having porcupines available when other food is scarce or difficult to catch may also mean the difference between life and death for a lion, a species humans seem to value.

Aesthetically, porcupines are just as fun to watch as other wildlife. They may not be as flamboyant as an elk, as personable as an otter or as cute as a marten, but fun just the same. And I actually like knowing that I approach a porcupine at my own peril. There is sport in that.

Regardless of these clear values, porcupines are part of the system and as such are worthwhile. What watch repairman or auto mechanic would discard a part just because he doesn’t understand its function? As Aldo Leopold said, “It is the first rule of intelligent tinkering to save all the parts.”

We shouldn’t have to understand porcupines to appreciate them.

Wildlife License Plates

Idaho Wildlife license plates provide essential funding that benefits the great diversity of native plants and wildlife that are not hunted, fished or trapped—over 10,000 species or 98% of Idaho’s species diversity. Game species that share the same habitats (such as elk, deer, antelope, sage-grouse, salmon, trout) also benefit from these specialty plates.

No state tax dollars are provided for wildlife diversity, conservation education and recreation programs. Neither are any revenues from the sale of hunting or fishing licenses spent on nongame species. Instead, these species depend on direct donations, federal grants, fundraising initiatives—and the Idaho Wildlife license plates.

Both my vehicles have Bluebird Plates. I prefer the bluebird because the nongame program gets 70 percent of the money from bluebird plates, but only 60 percent of the money from elk and trout plates – 10 percent of the money from elk plates supports wildlife disease monitoring and testing programs (to benefit the livestock industry) and 10 percent from cutthroat plates supports non-motorized boat access.

Incidentally, in 2014, the Idaho Legislature denied the Department of Fish and Game the ability to add new plates or even to change the name of the elk and cutthroat plates (very specific) to wildlife and fish plates, a move that would have allowed for changing images occasionally and generating more revenue. It would seem that they believe that we Idahoans don’t want a well funded wildlife program. Go figure.

Palomino Trout: What Are They and How to Catch Them

0

It’s not uncommon to find gold in the mountain streams and rivers of the Appalachian mountains, but many anglers venture into these hills in search of a different kind of gold.

The golden rainbow trout is one of the most unique fish in North America and has captured the attention of anglers for more than half a century.

These fish are also known as “bananas” or “lightning trout”, and they are known for their distinctive bright yellow coloration. This golden coloring comes from breeding a West Virginia rainbow trout with a classically colored rainbow trout to create this striking hybrid.

Palomino Trout or Golden Rainbow Trout

Their origins can be traced back to the Mountain State of West Virginia, and they are vastly different in appearance from any other fish you’ll find in the state. The emergence of the golden rainbow trout began in 1955 when workers at a fish hatchery noticed a unique fish that stood out from the rest.

The hatchery-raised rainbow trout, but this one bright fish appeared quite different. Instead of having the same pigmentation as a regular rainbow trout, the trout’s body color was bright yellow. This was due to an extremely rare genetic mutation that normally pigmented rainbow trout do not possess.

Palomino Trout vs Rainbow Trout

This one fish was taken and studied by scientists who worked to produce a new species of golden trout through selective breeding with typical rainbow trout. By selectively breeding this single rainbow trout, the golden rainbow trout originated and has since become one of the most sought-after trout species in fly fishing.

Through these cross breed species of such bright fish, biologists have gone on to produce vast numbers of self-sustaining populations in small creeks throughout North America. The golden rainbow trout or palomino trout has now become one of the most popular trophy fish in the country.

It’s one of the most famous trout species in sport fishing or fly fishing and is sought by nearly every avid angler with a fly rod. From one single fish in West Virginia, an entirely new cross breed has emerged and is bred and sold from fish hatcheries all throughout the United States.

The golden rainbow trout is a beautiful fish that’s known by a number of different names, such as the palomino trout, palomino rainbow trout, golden rainbow, banana trout, golden trout, golden rainbows, and lightning trout. They are also sometimes even called swimming bananas.

Palomino Trout Facts

This article covers all the facts and information you need when it comes to fishing for golden rainbow or palomino trout.

Where to Find Palomino Trout

Palomino trouts have been stocked from various fish hatcheries throughout West Virginia and other states in the eastern part of the country. They are now commonly found in West Virginia and have self-sustaining populations of palomino trout all throughout the Great Lakes region and even the Pacific Northwest.

Golden rainbow trout can usually be caught in most areas where you might expect to find other trout, especially brown trout, brook trout, lake trout, and even salmon species like cutthroat trout. Palomino trout are capable of living their entire life in the wild and can reproduce, unlike other hybrid species like tiger trout.

Palomino Trout Characteristics

Palomino trout (Oncorhynchus mykiss aguabonita) are very similar in their physical appearance to other trout species. Despite being such bright fish, their physical traits – skin color aside – look almost indistinguishable from that of brook trout and regular rainbow trout, as well as brown trout.

Golden rainbow trout, much like rainbow trout and brown trout, will develop a large hooked jaw as they mature. Like other trout, palomino trout have a similar adipose fin, which is found between the dorsal fin and the caudal fin, or tail.

Golden trout are known for having white-colored edges around their dorsal fin, lateral fin, and anal fins. Like rainbow trout, palomino trout also have dark green coloring along the top of their backs. Palomino trout are known to have intersecting horizontally-aligned ovals that are known as parr marks. These fish also sport dark spots along their backs and sides as well.

The palomino trout is known to have red horizontal marks along their lateral line, which is very similar to rainbow trout, which they are closely related to, and also have a purple or reddish lateral line. The belly of golden trout can be a pink or orange color, which becomes more vibrant in spawning males.

Palomino trout are known to grow much larger and faster than regular rainbow trout due to hybrid vigor, which is also known as heterosis. Hybrid vigor is an enhanced function of the palomino trouts’ biological systems as a result of hybrid breeding.

The world record palomino trout is a Pennsylvania fish that weighed 13 lbs, 8 ounces. The fish was caught in Mahoning Creek, Pennsylvania. The population of golden trout in Mahoning Creek is higher in concentration than in any other stream in the world.

How to Catch Palomino Trout

The best method of catching palomino trout is virtually the same techniques you might employ for targeting rainbow trout or brook trout, and even lake trout. They are known to feed voraciously on salmon eggs and, like other species of trout, will strike at many different types of flies and spinner lures.

Palomino trout are known to be much harder to catch than rainbow trout, brook trout or brown trout, but this is mainly thought to be due to the fact that they get more pressure. Like tiger trout, golden rainbow trout are easily spotted in any stream, which means anglers will be able to see them (particularly if using polarized fishing sunglasses) and cast to them effectively.

Catching Palomino Trout on the Fly

The techniques and presentations you might use to catch palomino trout are virtually the same as what you might use for rainbow trout or other species. Some anglers in states like West Virginia have learned that these fish are so highly targeted by other anglers that they have to resort to using flies or nymphs that are very different than what they might normally cast at native brook trout or rainbows.

You’ll want to use dry flies for palomino trout much like you would any other species. It’s also a good idea to fish with streamers that are different than what other anglers are throwing, as the palomino trout in any stream might take an interest in different colors that they are not so used to seeing.

This is a great strategy for states such as West Virginia, where palomino trout are very highly-pressured. The only way to guarantee that you’ll have a greater chance of catching palomino trout when fishing in a popular area is to get to the best locations as early as possible, right before the fish are stocked.

Catching Palomino Trout on Lure

Many anglers that fish for lake trout often use various lures to catch them. Although there are not any known palomino trout in the Great Lakes, you can catch them in some lakes throughout this area. It’s best to use lures like worms or insects to catch palomino trout in lakes as well as streams.

Current (2024) Antler Prices

0

At AntlerBuyers.Com, we strongly believe that antler shed hunters deserve to be well-informed with up-to-date antler prices. That is why we built a tool to deliver the most accurate and current pricing of Elk, Whitetail, Mule, and Moose antlers.

Our data compilation process involves a collection of insights from various stakeholders in the antler industry, including antler buyers, shed hunters, and brokers. To ensure the latest pricing data, our system undergoes frequent updates. The last update was on Nov 8th, 2024.

Don’t agree with the antler prices below? Suggest your antler prices here.

Below are the current (2024) antler prices:

Elk

Whitetail Deer

Mule Deer

Moose

Advertisement

The provided prices can assist you in accurately determining the current value of your antlers.

* The price is an estimate. Click here to see how our antler price data collection works.

What Are Antler Sheds?

Learn More: What Are Antler Sheds?

Antler sheds, often simply referred to as “sheds,” are the discarded antlers of certain animals, primarily those in the deer family, such as deer, moose, elk, caribou, and reindeer. Antlers are the impressive bony structures that grow on the heads of these animals, primarily males. What makes antler sheds intriguing is that they are the natural result of an annual cycle of growth, use, and renewal.

Here’s a breakdown of what antler sheds are and how they come to be:

1. Antler Growth: Antlers start growing in the spring and continue to develop throughout the summer. They are initially covered in a soft layer of skin and fur known as “velvet.” During this growth phase, antlers are rich in blood vessels and sensitive nerve endings, allowing for rapid expansion.

2. Use in Breeding Season: Antlers serve several purposes, including attracting mates and competing with other males during the rut, or breeding season. Male animals use their antlers in combat for dominance and the right to mate with females.

3. Shedding: After the rut, usually in late winter or early spring, antlers begin to weaken at their base. This weakening is a result of hormonal changes and decreasing daylight hours. Eventually, the connection between the antlers and the animal’s skull weakens to the point where the antlers drop off. This natural process is called “shedding.”

Learn More: Does Antler Shedding Hurt?

4. Regrowth: Once the antlers are shed, the animal enters a phase of antler regrowth. New antlers begin to grow, and the cycle repeats itself in preparation for the next breeding season.

5. Antler Sheds: The antler sheds, which are the discarded antlers, can be found in various natural settings, such as forests, fields, and even in backyards. Shed hunters often search for these antler sheds, as they are highly sought after for their aesthetic value and use in various crafts.

What Are Antler Sheds Used For?

Antler sheds serve several important purposes in the natural world. First and foremost, they are a valuable source of minerals for many animals. Small mammals, such as rodents, will often gnaw on antlers to obtain essential nutrients like calcium and phosphorus. Additionally, herbivores like elk and deer themselves may consume antlers during periods of nutrient scarcity, helping them replenish vital minerals after the demanding rutting season.

In the realm of human activities, antler sheds are sought after for various purposes. Many people collect them for their unique beauty and use them in crafts, decor, and jewelry-making. Due to their durability and intricate designs, antler sheds are also used to create knife handles, buttons, and furniture components.

Below are just a few uses of antler sheds:

  1. Crafts and Decor: Antler sheds are prized for their unique appearance and are often used in crafting. They can be carved, polished, and shaped into various artistic and decorative items. These include chandeliers, lampshades, candleholders, and wall art. Their natural beauty adds a rustic and elegant touch to interior design.
  2. Jewelry: Antler sheds are utilized to create exquisite jewelry pieces. Jewelers carve and shape antlers into pendants, earrings, rings, and bracelets. The organic and earthy aesthetic of antler jewelry appeals to those who appreciate nature-inspired accessories.
  3. Knife Handles: Due to their durability and comfortable grip, antler sheds are commonly employed in the production of knife handles. Hunters and outdoor enthusiasts often prefer knives with antler handles for their aesthetic appeal and practicality.
  4. Furniture: Antler sheds find their way into furniture design, particularly in rustic and lodge-style pieces. They are used as chair and table legs, drawer pulls, and cabinet handles. Their incorporation adds a touch of the outdoors to interior furnishings.
  5. Dog Chews: Antler sheds are also used to create natural and durable dog chews. They are a safer alternative to synthetic toys and can provide hours of entertainment for dogs while helping to maintain their dental health.
  6. Cultural and Ritual Objects: In some cultures, antlers have symbolic significance and are used in traditional ceremonies and rituals. They may be incorporated into religious artifacts or cultural regalia, carrying deep cultural meaning.
  7. Educational and Scientific Purposes: Antler sheds are valuable for educational and scientific purposes. They can be used in classrooms and wildlife education programs to teach about animal anatomy and behavior. Researchers and biologists may study antler sheds to learn more about the health and habits of wildlife populations.
  8. Sculptures and Art: Artists often use antler sheds as a medium for creating sculptures and artwork. The natural curves and textures of antlers can inspire intricate and captivating art pieces.
  9. Collectibles: Antler sheds are highly collectible items for those interested in nature and wildlife. Collectors seek sheds with unique characteristics, such as size, shape, or coloration, adding to their personal collections.

Who Buys Antlers Sheds?

Antlers are bought by a variety of individuals and businesses involved in different industries. In the United States and Canada, the primary buyers of antlers are often referred to as “antler buyers.” These individuals specialize in purchasing antler sheds from various sources, including collectors, hunters, and farmers. Antler buyers pay for antlers based on their weight, and they deal with antlers from elk, deer, and moose. Antler buyers journey across the United States and Canada to purchase various types of antlers from sellers.

The uses of antlers by antler buyers typically fall into several categories:

  1. Collectors and Enthusiasts: Some people buy antlers as collectibles or for personal enjoyment. They may appreciate the natural beauty of antlers or use them for decorative purposes in their homes or cabins.
  2. Craftspeople and Artists: Many artisans and craftsmen buy antlers to create unique and handcrafted items such as chandeliers, knife handles, jewelry, and sculptures. Antlers are highly prized for their aesthetic appeal and versatility in artistic endeavors.
  3. Furniture Manufacturers: Antlers are a sought-after material in the furniture industry, especially for crafting rustic or Western-style furniture. They are often used for chair legs, table bases, and other decorative elements.
  4. Decor and Home Improvement Businesses: Businesses specializing in home décor and interior design may purchase antlers to incorporate into their products or design projects. Antlers can add a distinctive and natural touch to home interiors.
  5. Chinese Medicine and Cosmetic Companies: Antlers are an essential ingredient in traditional Chinese medicine and cosmetics. Chinese medicine practitioners and cosmetic manufacturers often buy antlers for their purported health and beauty benefits.
  6. Export to Asia: A significant portion of antlers purchased by antler buyers is exported to countries like Korea and China. These markets have a high demand for antlers, primarily for medicinal and cosmetic purposes.
  7. Wholesale and Retail Markets: Some antler buyers act as intermediaries, purchasing antlers from collectors and hunters and then selling them to various businesses in the wholesale or retail market, meeting the diverse needs of their customers.

If you’re considering selling your antlers, take a moment to check our carefully curated list of verified antler buyers. Additionally, don’t forget to consult our ‘Current Antler Price Chart’ for up-to-date pricing information on elk, whitetail, and mule deer antler sheds.

Learn More:

  • Dispelling Myths & Misconceptions About Antler Shedding
  • What’s The Difference Between Antlers & Horns?

If you have any suggestions or questions, feel free to contact us here.

Want to meet the author? Check out AntlerBuyers.Com about us page here.

Improving The Traditional Cowboy Bedroll

0

The most iconic image of America’s nineteenth-century westward expansion is that of the cowboy. Hardworking, tougher than nails, and full of grit, cowboys worked as ranch hands for large cattle and sheep ranches in the out stretching American west. Besides taking care of the everyday keep of the ranch, cowboys were also hired to herd the wealthy rancher’s livestock long distances and at times through wild and dangerous country to the city markets to be sold.

Because of the rough lifestyle and often harsh conditions they lived in, cowboys had to depend on certain tools and equipment to not only get their work done, but in many instances, to survive. Some of these tools have become a part of the cowboy’s iconic image. A good horse and a comfortable saddle; an accurate and trusty rifle or hand gun—and for a few, both; a sharp and well-built knife, good boots, and his bedroll.

The cowboy bedroll was, although simplistic, a significant item in western culture. A cowboy’s bedroll served multiple purposes: such as a trunk to store his personal items, a safe box, a seat while eating, and of course a bed.

The cowboy bedroll was very portable, and extremely practical for the lifestyle cowboys lived, it was also one of the very few comforts a cowboy had, especially while out on the trail. While traveling it could easily be slung over the shoulder if walking or strapped to the back his saddle if solo. While on a drive, it would be thrown into the back of the bed wagon where it could easily be retrieved at the end of the day. While at ranch headquarters it could be unrolled on the floor or a bunk in the bunk house.

What is a Cowboy Bedroll?

The make-up and design of the classic cowboy bedroll was simple; wool blankets or bedding wrapped in a canvas tarp that usually had buckles or ties that would connect the two canvas flaps together. The bedroll could then be rolled up and strapped tight with a rope or leather strap or belt.

The cowboy bedroll was in many ways a precursor for the modern day sleeping bag. Some versions had a strap to allowed it to be carried over the shoulder. The canvas tarp was meant to provide protection from bad weather. If it rained, the canvas added a layer of protection, attempting to kept them dry and warm. This is only true, however, if the canvas was waterproofed with a combination of beeswax and linseed oil. If it wasn’t, your protection against wet weather was limited.

It is true that traditional canvas will swell and hold out water, but once it is touched from the inside it will begin to wick moister through to the inside, thus defeating the purpose for a canvas covering.

In snowy weather, the canvas would allow the cowboy to stay dry and warm, and at the same time the accumulated snow would provide an insulated layer. If the weather was warm and nice the canvas tarp could be flapped open, allowing him to enjoy the cool night are while at the same time providing a ground cloth.

Improving on the Timeless Cowboy Bedroll

It is unclear when and where the bedroll concept was first conceived. One thing is for sure, however, bedrolls have been around for a very long time, and have been used in a large variety of places and circumstances. Forty-niners used them throughout the gold rush. Soldiers used them during the American Civil War.

They have been popular in Australia for many years and come in many shapes and sizes. In Australia they are called a swag, or a swag bag. In many ways the Australian swag bag has lost the simplicity and convenience of the traditional cowboy bedroll and have at this point morphed into what most people would view as a one-man tent. Although the swag is smaller than most tents, it acts as one since you don’t keep your gear in it roll it up. This for most people destroys the point. One could argue that you might as well use a tent.

You may be wondering how Canvas Cutter has improved upon the functionality, protective qualities and durability of the traditional cowboy bedroll without destroying the simplistic nature and its convenient features.

We at Canvas Cutter follow the KIS rule or “Keep It Simple”. The design and function of the traditional cowboy bedroll is already good, which is why it has been around for almost two centuries. We knew the shape of the traditional cowboy bedroll worked, its functionality was good, the protection it could provide from the elements was fare, but often left one wanting, and the canvas traditionally used was quite durable. These things didn’t need to necessarily be changed, but rather improved and where possible simplified.Often when a company tries to improve on timeless product or idea, the improvements made decreases the products simplicity, which regularly changes the very features that made it great in the first place. So, we asked: “how can we take an already simple concept and simplify it even more while at the same time improve and modernize all its features?”

We started by analyzing what the weaknesses of the traditional cowboy bedroll were, which would allow us to identify what we needed to improve. Once we knew what we needed to improve upon, then we could focus on simplifying those improvements.

Improvement #1: Traditional Canvas to Sunforger Marine Canvas

Canvas was a great fabric choice to use for the cowboy bedroll. It is a strong fabric that can handle the abuse of life in the outdoors. Although the cotton threads woven together would swell when wet making the weave extremely tight and difficult for water to get through, unless the canvas was treated it would not hold water out for long.

In fact, even if traditional canvas is treated – often called “Duck” or “Army Duck” canvas once treated – it will still absorb water when touched from the dry inside of the canvas. This is obviously going to be a problem when one is laying inside the canvas bedroll, and constantly rubbing up against it. The water you are supposed to be protected from will slowing start making its way to the inside, leaving you to wake up cold and wet. This obviously destroys one of the main purposes for using the bedroll.

At Canvas Cutter, we knew traditional canvas does not and would not be suitable for our premier canvas bedroll. To eliminate the afore-mentioned problem one would face with the traditional cowboy bedroll, we chose to use Sunforger Marine canvas.

Sunforger canvas is made from multi-thread spun-yarn, that is woven in a crisscross and diagonal line weave, making the weave significantly tighter than traditional canvas, and increasing the canvas’s strength dramatically at the same time. Marine treated means the canvas has been double treated – making it completely waterproof. The treatment also makes the canvas extremely mildew resistant.

Because of the treatment and tighter weave, the Sunforger canvas will not wick. This means it can rain all night and all day and you will remain warm, dry, and comfortable.

Improvement #2: The Flap System to Zipper

Although the traditional cowboy bedroll did provide some protection against the wind and bad weather, that protection was limited. When the weather was windy and rainy the struggle was oh-so-real.

The canvas tarp was used to create the bedroll cover by overlapping to canvas flaps which were often tied or buckled closed. The cowboy bedroll was open ended at the head, allowing the weather and cold air to come in. Sometimes there was a flap that could be pulled over the head protecting it from rain, but not the wind and cold or any puddled water on the ground around you.

Also, it would take time and patience to flip the canvas flaps over your bedding and tie or buckle them closed while getting wet and cold in the process.

At Canvas Cutter, we used the same simple rectangular shape of the traditional cowboy bedroll, but we got rid of the canvas flaps, ties, and buckles. We simplified the design by installing one zipper.

The heavy-duty YKK zipper (which meets military grade standards), runs from the foot of the bedroll up around the head and back down to the bottom of the bedroll, allowing you to quickly and completely close the inside of the bedroll off to the wind, rain, snow, dust, bugs or rodents that might want to find their way inside.

Whether you left the bedroll back at camp or you’re laying comfortably inside it, you and your gear are protected. Canvas Cutter bedrolls have four zipper pulls and short, weather flaps on each side. These pulls and flaps allow you to unzip the bedroll several inches on each side during bad weather conditions, increasing airflow and reducing the possibility of condensation build up inside the bedroll. Two overlapping seams cover the entire zipper and add additional protection against the weather.

Improvement #3: A Piece of Rope VS 3 Quick-release Buckles

The traditional cowboy bedroll was often kept rolled up by a rope or a leather strap. These got the job done, but the idea could definitely be improved upon.

The rope or leather strap were not connected to the bedroll itself, which meant you had to keep track of it. If it got lost, your ability to keep your bed rolled up and the convenience of carrying it was lost.

To make the roll-up/unroll process, as well as the carrying of the bedroll more simple, quick, and easy, we sewed three one-inch polyester webbing straps with quick release buckles to the bottom of the bedroll and included an easy to carry handle to the bottom of the bedroll.

The quick release buckles allow you to unroll your bedroll in seconds, without the hassle of dealing with knots or keeping track of a rope or strap.

When rolling the bedroll up, the quick release bucks and straps allow you to synch the bedroll as tight as you would like. The straps can also be loosened easily while buckled.

Pioneering Bedroll Convenience

The cowboy bedroll has been an iconic piece of outdoor gear in the west for centuries because it makes life in the rugged outdoors a little easier and more comfortable. It allows you to have a mobile camp, that can be set up or taken down quickly and conveniently.

The soul who conceived the simple idea was a genius, and Canvas Cutter has taken this idea and improved it a thousand times over, hoping this better way of sleeping in the outdoors sticks around for centuries to come.

If you are looking for a light-weight and durable canvas bedroll, pick up the newest addition to our canvas bedroll line up – The SUMMIT.

The Best Glock Suppressor Sights in 2024

0

Not sure what suppressor sights to get for your Glock?

Look no further.

I’ve tested ALL the best Glock suppressor sights, arranged them into categories, and even included accessories and installation techniques.

By the end of this guide, you’ll find the perfect suppressor sight for your Glock.

Let’s get started!

Trijicon Glock Suppressor Night Sight Set

Trijicon Bright & Tough Night Sight Suppressor Set

AMERIGLO GL-506 Tall Black Serrated Suppressor

AMERIGLO GL-329 Tall Suppress

What are Suppressor Sights?

There are two key factors to shooting accurately when using a handgun with iron sights: correct sight alignment and a clear sight picture.

Many shooters own Glock pistols fitted with suppressors or have the best reflex sights installed on their handguns. Unfortunately, your line of sight will be obstructed when using factory sights.

How?

Due to the circumference of most suppressors— being larger than the barrel of the handgun— it can block the sight picture ahead of the front sight.

Also, if you have a red dot installed on the slide, the RDS housing sits in between the front and rear sights. This can obscure your target.

If your pistol is configured this way, you’ll most likely need to install suppressor sights.

These are aftermarket sights that are specially engineered to sit higher than the suppressor, making your line of sight unobstructed again.

The Best Glock Suppressor Sights

If you’re pressed on time, here’s a quick list of the best Glock suppressor sights:

  1. Trijicon Glock Suppressor Night Sights Set: Best Glock 19 Suppressor Sights
  2. Trijicon Bright & Tough Night Sights Suppressor Set: Best Night Sights for Glock
  3. AMERIGLO GL-506 Tall Black Serrated Suppressor: Best for the Budget
  4. AMERIGLO GL-329 Tall Suppress: Best for Glock 17

1. Trijicon Glock Suppressor Night Sight Set: Best Glock 19 Suppressor Sights

The Trijicon Glock Night Set is the best suppressor height sight for the Glock 19.

Trijicon specifically engineered this sight to be used with a suppressor or as backup iron sights.

In fact:

They advertise it to improve shooting accuracy by as much as five times compared to just conventional sights.

My question: Is this true?

Let’s find out!

Brightness

The Trijicon Glock suppressor sights have an exceptionally visible sight picture.

Each lamp is capped with a sapphire jewel intended to evenly distribute the light. I can confirm it performs well in no-light and low-light situations.

The white outline helps with the visibility— day or night. The different colored Tritium lamps give great contrast for quick target acquisition.

I do understand the orange trits have a shorter lifespan, but given the affordable price tag, I don’t mind it at all given the sight picture.

TRIJICON GLOCK SUPPRESSOR FRONT SIGHT

Durability

The Trijicon Suppressor Night Sights have a sleek yet durable finish.

These sights’ tritium lamps are contained inside aluminum cylinders for maximum protection.

It also comes with extra silicone rubber cushioning for heavy recoil. You won’t need to worry about harsh cleaning solvents either.

One con I’d like to point out:

The edges of the rear and front sights are VERY sharp. It becomes uncomfortable after a while unless I’m wearing an undershirt.

Mounting & Installation

The Trijicon Suppressor Night Sight Set is incredibly easy to install.

TRIJICON GLOCK SUPPRESSOR MOUNTED

I used a front sight hex tool

and a universal sight pusher tool from Amazon.

Before installing the front sight, I dropped a little Loctite Heavy Duty Threadlocker to secure the screw into the front sight base. It wiggles slightly but doesn’t affect the accuracy of the gun at all.

On the plus side, it co-witnesses perfectly with my suppressor and Trijicon RMR.

TRIJICON GLOCK SUPPRESSOR FRONT SIGHT

Is the Trijicon Night Sight Set worth it?

If you’re looking for excellent sights that are easy to install on your Glock 19, get the Trijicon Glock Suppressor Night Sight Set.

Why? It guarantees:

  • Quick installation
  • Durable construction
  • Self-illuminated Bright Tritium
  • Excellent low light performance

Plus, Trijicon offers a warranty on all sights to be free of defects in material and workmanship for the lifetime of the original owner. If you find any issues, they’ll replace them free of charge.

TRIJICON GLOCK SUPPRESSOR FRONT SIGHT (1)

Overall, the Trijicon Suppressor Night Sight Set works flawlessly.

In case you didn’t know, Trijicon is on the top of my list for the best mp shield night sights as well. I mean— It’s Trijicon, after all.

2. Trijicon Bright & Tough Night Sight Suppressor Set: Best Night Sights for Glock

The Trijicon Bright & Tough Night Sight Suppressor Set is the best night sight for the Glock.

As a matter of fact:

Almost all of my handguns have Trijicon night sights installed on them.

BUT, I’m not biased. I put these sights through torture and hand-testing

Here’s how it went…

Brightness

The Trijicon Bright & Tough Set is remarkably visible— both day and night.

TRIJICON BRIGHT&TOUGH GREEN ILLUMINATION IN DARK

It’s not too bright where your eye is distracted but bright enough to quickly acquire your target and get a perfect sight picture.

I keep it on my nightstand and I can easily tell how my handgun’s positioned thanks to the trillium.

I prefer the white outline on the front and rear sights. Some shooters choose orange on the front, but all white works just as well, especially if you have old eyes.

On that note:

If you co-witness with red dots and struggle shooting accurately, I recommend checking out holographic weapon sights (like the EOTECH EXPS2 or 3).

Durability

The Trijicon Bright and Tough sights live up to their name— insanely tough.

TRIJICON BRIGHT&TOUGH REAR SIGHT (2)

These night sights are constructed with a metal body and silicone rubber cushions for high-grade durability.

The Bright & Tough sights’ aluminum cylinders protect the tritium lamps from heavy recoil. I’ve also done multiple drop tests and found no issues.

TRIJICON BRIGHT&TOUGH REAR SIGHT (1)

These sights were produced almost two decades ago and they still perform just as well as the day I purchased them.

Mounting & Installation

Installing the Trijicon Suppressor Night Sight Set is a breeze.

TRIJICON BRIGHT&TOUGH MOUNTED

I currently have them mounted on my gen 5 Glock 19 MOS. The front sight takes a little bit of effort to get perfectly aligned and torqued but it worked great in the end.

Plus, they co-witness like a dream with my suppressor and Vortex Sparc red dot combo.

Additionally:

I bought a Safariland Hi-Ride Belt Loop Holster which has a built-in ridge to accommodate the suppressor height front sight.

Overall, I’m very happy with the entire configuration together.

TRIJICON BRIGHT&TOUGH REAR SIGHT

Is the Trijicon Glock Suppressor Night Sight Set worth it?

Absolutely! The Trijicon Bright & Tough Night Sight Set is an excellent choice when you’re running a suppressor on your Glock.

Why? It features:

  • Unmatched durability
  • Enhanced sight acquisition
  • Long-lasting and bright Tritium night sights
  • Compatibility with many Glock models

To top it all off:

The yellow tritium lamp has a warranty for 12 years and the orange lamp for 5 years from the date of original manufacture.

The Trijicon Bright & Tough Night Sight Set may be more expensive but definitely a top choice by many Glock owners.

Speaking of top choices, check out my latest review on the best quick detach scope mounts!

3. AMERIGLO GL-506 Tall Black Serrated Suppressor: Best for the Budget

The AMERIGLO GL-506 Suppressor Set is the best sight for your money.

Before I made my purchase, I did some research and discovered rave reviews on these $45 sights.

I had to try it out myself! Needless to say, I’m impressed.

Here’s why…

Brightness

The AMERIGLO GL-506 performs well in high contrast/light conditions.

Why?

These aren’t night sights. They’re black suppressor height sights with no markings. They still work in lowlight conditions, but not like your tritium night sights.

The front sight post is serrated to reduce glare from sunlight. Also, the rear sight design allows easy, one-handed slide manipulation.

These iron sights are amazing for suppressor use, but here’s why I really like them:

The blacked-out front sight is exceptional for red dot use especially when combined with night vision. It reduces the clutter of your sight picture for simple front sight acquisition.

Many shooters find tritium night sights too distracting, especially in the dark. If you’re one of them, this will work wonders for you.

If not, you can also get the Green Tritium and Orange Outline Front with the Black Rear version.

No products found.

Durability

The AMERIGLO GL-506 sights can stand up to harsh conditions.

Made from machined steel, these sights are durable and reliable— regardless of what type of environment you’re shooting in.

Mounting & Installation

Installation is easy and took me about 10 minutes tops.

Make sure you drop a bit of Loctite Heavy Duty Threadlocker for security. Trust me, you don’t want your front sight coming off with recoil.

I installed the rear sight using the StarONE Universal Handguns Sight Pusher Tool with a plastic barrier and no markings occurred.

This sight set fits all Glock models (except 42/43). It sits at the right height and worked phenomenally with my 9mm suppressor.

It can also co-witness with red-dot sights like the Holosun 510c, the Vortex Strikefire II, or the Vortex Sparc.

Trust me: I tried them all.

Is the AMERIGLO GL-506 Tall Black Serrated Suppressor worth it?

Frankly, the AMERIGLO GL-506 sights are the best bang for your buck when you’re running a suppressor on your Glock.

Why? It comes with:

  • Durable design
  • Affordable price tag
  • Low-light level capability
  • Co-witnesses with many optics

The sights are backed up by AMERIGLO’s warranty. So long as you keep the receipt, you can easily request a replacement or repair. Also, their customer service is always A+.

Overall, the AMERIGLO GL-506 Serrated Suppressor is an excellent addition to any Glock MOS with a suppressor or any other red-dot-ready pistol.

Speaking of great additions: don’t forget to check out my latest Vortex Spitfire 3x review!

4. AMERIGLO GL-329 Tall Suppress: Best for Glock 17

The AMERIGLO GL-329 Tall Suppress is one of the best Glock suppressor sights I’ve used on the Glock 17.

In fact:

These sights worked so well, I shot 200 rounds easily on the day I tested it out on the range.

Let’s take a closer look…

Brightness

With the AMERIGLO GL-329, I have no problems shooting in low and no-light conditions.

The three-dot sight comes with white rings for daytime use & green tritium for low light detection and sight alignment. The large, bold dots make it easy to spot and grab the pistol at night.

The front sight is about .314” high and the rear sight sits at about .310”.

AMERIGLO GL-329 OVERVIEW

I haven’t had any issues personally but always check to make sure this provides enough clearance for your suppressor.

Durability

The AMERIGLO GL-329 Tall Suppress is built to last.

The sights are machined from bar stock steel and assembled with Swiss-made tritium. This combination results in ultra-durability and recoil resistance.

If you plan on using your Glock 17 for home defense and personal protection, the AMERIGLO GL-329 won’t fail you.

AMERIGLO GL-329 MOUNTED

Mounting & Installation

Both front and rear sights took 15 minutes to install.

The package includes both the front sight and a standard, dovetail rear sight.

AMERIGLO GL-329 PACKAGING

I marked the center of the stock sights on the slide with a pencil, then used a brass punch and hammer to drive out the old. I installed the new sights and aligned them with the previous mark I made.

AMERIGLO GL-329 OVERVIEW

Word of advice:

The front sight post does have some wiggle room, so double-check that you’ve got it straight before torquing to spec with the Loctite. Once they’re in, they’ll be secured without issues.

Also:

The top of the front sight is only visible at the very bottom of a Vortex Venom or Viper. If you intend to co-witness with the Vortex red dots, you may need to find taller suppressor heights.

AMERIGLO GL-329 FRONT SIGHT (1)

Is the AMERIGLO GL-329 Tall Suppressor worth it?

If you’re looking for a reliable and reasonably priced suppressor for your Glock 17, the AMERIGLO GL-329 is for you.

Why? It comes with:

  • Low price tag
  • Fits almost all Glocks
  • Popular 3-dot configuration
  • Excellent low-light performance

Additionally, the green tritium lamps are under warranty for 12 years after the date of manufacture and are guaranteed to last just as long.

If they do break, you can easily send them back with the company return form and AMERIGLO will replace or repair it. No questions asked.

With a combination of dependability and affordability, you really can’t go wrong with the AMERIGLO GL-329.

If you’re interested in more awesome handgun sights, check out my latest review of the best Walther PPQ M2 sights.

How to Install Glock Suppressor Sights?

One of the most common upgrades for Glock pistols is replacement sights.

If you install a suppressor or a red dot sight, you’ll most likely need a suppressor sight to shoot accurately— even if you’re using the best sights for the Glock 34.

So, here’s how to install the best Glock suppressor sights:

For the instructions below, I’ll be using the following tools:

  • Front Sight Tool
  • Rear Sight Pusher Tool
  • Loctite Heavy Duty Threadlocker
  • Gunsmith Punch Set
  • Nylon Vice Jaws

Step 1: Disassemble

Safely disassemble your Glock pistols. Make sure your weapon is unloaded, remove the magazine, etc. Then remove the recoil spring and barrel so you only have your slide left.

Step 2: Remove Front Sight

Get your screwdriver and remove the bolt for the front sight.

Make sure you save your old sights. If something happens and you need to return or replace your new sights, you need the original set to put back on your pistol so it can still be serviceable.

I like to screw in the old bolt back into the sight. That way, I don’t mix up the screws.

What I mean is— most of the time, the screw that goes into the Trijicon sight won’t fit into the original Glock front sight.

Step 3: Remove Rear Sight

For removing the rear sight, you have two options: using a rear sight pusher tool or you could also use a hammer and non-marring punch.

I highly recommend using the rear sight pusher tool. With this, you can simply clamp the slide and rotate the “pusher” to gently slide the old sight off.

Step 4: Install New Sights

FRONT SIGHT

Place the new front sight on top of the pistol. Apply a drop of the Loctite onto the new screw. Make sure you hold the sight while tightening the nut.

If you tighten too much, you can damage the sight. Before fully tightening, ensure that the sight is straight so you can make adjustments as needed.

On a side note:

I just made an in-depth guide on the best way to do an AR-15 A2 front sight removal. I highly recommend checking it out!

Moving along…

REAR SIGHT

As with removing the rear sight, I recommend using the pusher tool to install your new sights.

Start by aligning the new sight on the slider, then clamp both the slider and sight down. You can then turn the screw on the “pusher” and move the sight into place.

If you don’t have a sight pusher:

Place the slide into the vice jaw. Stage the new rear sight into the dovetail on the left side of the slide. Once you’re able to get about half of the sight base into the dovetail, start to tap the sight in place with a hammer and non-marring punch.

Be sure you use moderate hammer strikes so as not to hit your slide or your fingers. Lastly, make sure the rear sight is aligned with the rear dovetail. You can typically eyeball it or use calipers.

By the way, if you don’t have a rear sight pusher, here’s a great video guide on how to remove and install your suppressor sights.

Properly installing your suppressor sights is key to accuracy, but having an excellent suppressor sight, to begin with, can reduce a lot of work and frustration.

There are many options on the market and scouting the internet for dependable ones can take a lot of your time. The good news?

I already researched, hand-tested, and listed the best Glock suppressor sights for your every need above 🙂

Now It’s Your Turn

I hope you enjoyed my best Glock suppressor sights guide.

Now I want to turn it over to you:

Which suppressor sight will you pick for your Glock models? Or perhaps you already have one and would like to share your thoughts.

Either way, let me know by leaving a quick comment down below.

FAQ:

Moose vs Human A Fascinating Compared

0

In this article, we study Moose compared to humans. Moose are a large, placid mammal found in North America. They share many similarities with humans, such as walking on two legs and possessing a strong immune system. However, there are also some key differences between Moose and humans. For example, Moose has larger heart than humans and can weigh up to 1,600 pounds! In addition, they have a longer gestation period than humans (around nine months) and give birth to one calf at a time.

Moose and humans have been living side by side for a long time, and these two species are so similar that one might wonder how they distinguish themselves. This article will answer the question, “What is the difference between moose and humans?”

In this article, we will see the difference between a moose and a human and examine the anatomy of both creatures to learn more about them.

Moose Compared To Human

Moose Size Comparison The Types of Moose

Moose are one of the largest species within the deer family. Several subspecies are found across the northern hemisphere, the largest being the Alaskan Moose, also known as the Yukon moose. They can stand up to 7.5 feet tall at the shoulder and weigh over 1,500 pounds.

The Eurasian elk or Moose is slightly smaller, with females averaging around 800-900 pounds while males weigh around 1,100-1,300 pounds. The Shiras moose, found in North America, is the smallest of the subspecies, with females weighing around 500-700 pounds and males weighing around 800-1,000 pounds.

Moose have long legs, a broad faces, and a distinctive “bell” or hanging dewlap under their chin. Despite their size, they are surprisingly good swimmers and can run up to 35 miles per hour over short distances. Moose are a fascinating and impressive species, with subtle differences in size and appearance across their range.

  • Alaska Yukon Moose:

The Alaska Yukon moose is considered the largest subspecies of Moose worldwide. These massive animals can weigh 1,200 to 1,600 pounds and stand up to six feet tall at the shoulder. The largest recorded Alaska Yukon moose was a bull found in the Yukon Territory in Canada, which weighed in at a whopping 1,800 pounds and had antlers that spanned almost six feet across.

With their long legs and impressive antlers, these Moose are built for intimidating displays of strength during mating season. Hunters also prize them for their impressive size and meat, which is lean and high in protein. While the largest Alaska Yukon moose ever recorded may be an anomaly, these impressive animals are still a sight in their natural habitat.

  • Yellowstone Moose:

The Yellowstone Moose, known for their enormous size, are found in the forests of North America and are one of the largest breeds of Moose in the world. The largest recorded Moose was a Bull Alaskan Moose, which weighed over 2,000 lbs and had antlers spanning over 6 feet in width. Despite its enormous size, the Moose is a gentle giant and has never been known to attack humans unprovoked.

Moose prefer to live in isolation and be more active in the early morning and late afternoon. They are herbivores and enjoy a diet of grasses, aquatic plants, and leaves. The Yellowstone Moose’s population has steadily decreased, primarily due to habitat loss and hunting. However, conservation efforts have been implemented to protect and preserve the species. Overall, the size of the largest Moose in the world is a breathtaking sight to see and can only be appreciated through firsthand experience.

Five Cool Facts About the Moose

The Moose, also known as the elk, is a majestic creature in North America. Here are five cool facts about the Moose that you may not know.

  • Male Moose, or bulls as they are called, can weigh up to 1,500 pounds and stand up to 7 feet tall, making them one of the largest land animals in North America.
  • Contrary to popular belief, the Moose is not entirely mute and can vocalize through various sounds, including grunts and bellows.
  • Moose have specially designed nose that allows them to breathe through the snow, making it easier to survive in their natural habitat during the winter months.
  • The Moose is an excellent swimmer and can move through the water at up to 6 miles per hour. This unique skill allows them to cross large bodies of water, which other animals would find impossible.
  • Moose can run up to 35 miles per hour, which, despite their large size, is surprisingly fast. This speed has allowed them to outrun predators and escape danger in the wild. While there are many fascinating animals in North America, the Moose certainly stands out as one of the most interesting and unique creatures nature offers.

Moose vs. Human Size Comparison

When it comes to size comparison between Moose and humans, there is simply no contest. Moose are large and imposing animals, often standing up to 6 feet at the shoulders and weighing up to 1,500 pounds. The average human male is roughly 5 feet 9 inches tall and weighs around 200 pounds. As such, a moose can make a human feel very small indeed.

One of the most striking things about a moose’s size is its antlers. These appendages can grow to be as wide as 6 feet and weigh up to 70 pounds, making them the largest antlers of any mammal in the world. And while they may not use them to attack humans, Moose are known to be extremely territorial and can become aggressive if they feel threatened or cornered.

Overall, while humans may be able to outsmart or outmaneuver Moose in certain situations, there is no denying these majestic animals’ sheer size and power. When encountering a moose in the wild, it is essential to show respect and caution, as they are capable of causing serious harm if provoked. Additionally, it is important to remain vigilant when driving in areas with moose populations, as collisions with these animals can be deadly for both parties involved. Despite their intimidating size, Moose are fascinating creatures that deserve our admiration and protection.

Moose Size Comparison to a Horse

Moose are one of the largest animals in the deer family and are known for their enormous size. They are much larger than horses in terms of height and weight. On average, a moose can stand up to six feet tall at the shoulder and weigh anywhere between 800 to 1400 pounds, almost twice the weight of the average horse.

Their massive antlers can measure up to six feet in width, adding to their impressive size. In comparison, horses are much smaller, with an average height of 15-16 hands and a weight between 800 to 1200 pounds. Standing next to a fully grown moose, you can easily see the significant physical differences between the two animals. Overall, Moose are one of the largest land animals in North America, and their impressive size is just one of the many fascinating things about them.

Moose Size Comparison to an Elk

Moose are the largest deer species in the world, with adult males weighing between 1,000 to 1,500 pounds, while females are smaller, weighing around 800 to 1,000 pounds. In comparison, adult male elk weigh around 700 pounds, while females weigh around 500 pounds. Moose also stand taller than elk, with males reaching up to 6 feet and females around 5 feet at the shoulder. Elk, on the other hand, stand around 4 to 5 feet at the shoulder.

Moose also have larger antlers than elk, with a span of up to 6 feet, whereas elk antlers generally span about 5 feet. The size difference between Moose and elk is due to their different habitats and behaviors. Moose live in colder, more forested areas, while elk typically inhabit more open areas such as grasslands. As such, Moose needs to be bigger and more agile to navigate through dense vegetation.

Moose Size Comparison to a Bison

Moose and bison are both majestic animals often found in the wild. However, when it comes to size, Moose are generally larger than bison. A fully-grown bull moose can weigh up to 1,500 pounds and reach six and a half feet tall at the shoulder. A typical male bison weighs between 800 to 2,000 pounds and stands around six feet tall at the shoulder.

The main physical difference between the two is their antlers and horns. Moose have broad, flat antlers which can span up to six feet across, while bison have shorter, curved horns. Regarding their overall appearance, both animals have distinctive humped shoulder and large head, which is used for grazing on vegetation. Despite their differences, these majestic creatures are both vital to the ecosystem and remain an important symbol of the wild west.

Moose Size Comparison to an Elephant

The Moose and the elephant are two very different but majestic animals. Regarding size comparison, the elephant is the larger of the two. An average adult elephant can weigh anywhere from 5,000 to 14,000 pounds, while a bull moose weighs in at around 1,200 pounds. Elephants can also stand anywhere from 8 to 13 feet tall, while Moose are typically only around 6.5 to 7 feet tall at the shoulder.

Moose does have one advantage over elephants, though, in terms of antlers. A male moose’s antlers can span up to 6 feet across, while elephants do not have any antlers or tusks that can compare. Overall, while both animals are impressive in their ways, elephants take the cake regarding their sheer size.

How Big Is a Full-Grown Moose?

The full-grown Moose is one of the largest land mammals found in North America and Europe. Standing on all four legs, a male moose can reach up to 7 feet at the shoulder, while a female can measure up to 5 feet. Their weight can vary depending on the season, but on average, a bull can weigh anywhere between 800-1500 pounds, while a female can weigh between 600-800 pounds.

Their antlers are also a distinguishing feature, with males having broad, curved antlers measuring up to 6 feet wide. However, females also have antlers, usually smaller and less noticeable. Moose are known for their intimidating size, and despite their large size, they are also agile swimmers and runners. Seeing a moose in the wild is often a highlight for tourists, as they are unique and fascinating creatures.

How Big Is the Largest Moose in the World?

The largest Moose in the world, commonly known as the Alaskan Moose, can grow over 7 feet tall and weigh upwards of 1,600 pounds. These majestic creatures are found primarily in Alaska, Canada, and parts of Scandinavia and are known for their massive antlers that can reach up to 6 feet in width. The largest recorded Alaskan Moose had antlers that spanned 79 inches, making it nearly impossible to imagine how impressive and intimidating these animals can be.

Despite their imposing size, these Moose are generally docile and avoid confrontation with humans. However, they are still considered one of the most challenging big-game animals to hunt due to their elusive nature and the harsh terrain in which they are typically found. The Alaskan Moose is undoubtedly a remarkable animal that commands respect and awe for its sheer size and power.

How Big Are Moose Compared to Humans?

Moose are much larger than humans. An average moose can grow up to 6.5 feet tall at the shoulder and weigh up to 1,800 pounds, while the average human is around 5.6 feet tall and weighs around 160 pounds. Moose has a towering presence and can be intimidating, especially when encountered up close.

How Big Is a Moose Compared to a Bison?

A moose is typically larger than a bison. While the average adult bison stands around 6 feet tall and weighs between 900 and 2,000 pounds, a male moose can reach up to 7 feet tall and weigh between 800 and 1,800 pounds. The antlers of a male moose can also add 4 to 5 feet in height.

How Strong Is a Moose?

Moose are incredibly strong and powerful animals. Adult males, or bulls, can weigh up to 1500 pounds and stand over seven feet tall. Their thick muscles and strong bones allow them to charge through deep snow and rough terrain, easily breaking through tree branches. Moose are formidable competitors in the animal kingdom and should not be underestimated.

What Is the Size of a Baby Moose?

A baby moose is typically born weighing between 25 and 35 pounds and standing about 3 feet tall. As they grow, they can reach a height of up to 6 feet at the shoulder and weigh around 1,200 pounds as adults. The actual size of a baby moose may vary depending on the sub-species and location where they are born.

What is a Moose, and what are they like?

Moose are large, brown mammals living in cold climates worldwide. Moose are the largest land animals in North America and can weigh up to 2,000 pounds. They have two big antlers on their heads that they use to fight for mates and food. The Moose is a shy animal that survives by grazing on grasses and shrubs.

Moose are large mammals weighing up to 1,500 pounds and standing as tall as 6 feet at the shoulder. There are two main types of Moose: the North American Black and the Brown. These moose varieties have unique physical features that set them apart from other mammalian species. For example, Brown moose have large heads with short ears, while North American Black Moose have smaller heads with long ears.

Another distinguishing feature of Moose is their antlers. Antlers give these animals their name – they are similar to horns in shape and size, but they grow on all four legs instead of just on the head. Moose use their antlers to dig for food or to defend themselves against predators. Antler growth is limited by testosterone – when males reach sexual maturity, their antlers start to grow rapidly to attract mates.

While North American Black and Brown moose share many of the same characteristics, they have some differences! For example, Brown moose are more likely than North American Black Moose to inhabit thickly forested environments. At the same time, North American Black Moose are more likely to live in open areas near water sources. Overall, though, Moose are fascinating creatures that deserve our attention – not only for their impressive physical features but also for their unique behavior and ecology.

What is a Human, and how do they differ from Moose?

A human is a warm-blooded mammalian species that stands upright on two legs and has a head with a large brain. They differ in many ways from Moose, the largest land animal in North America. For one, humans are much smaller than Moose. A male moose can weigh up to 1,500 pounds and measure 10 feet tall at the shoulder. Meanwhile, a human female typically weighs about 150 pounds and stands only 4 feet tall at the shoulder. Additionally, humans have shorter noses and ears than Moose. Their fur varies in color from black, brown, gray, or white.

Humans have adaptations that allow them to thrive in colder climates than other mammals. For example, humans have a layer of insulation around their body called a fatty layer which helps keep them warm in cold weather conditions. Humans also have larger lungs that allow them to take in more oxygen when they are running or skiing, allowing them to stay warm for longer periods. Finally, humans have thicker skin than most other mammals which helps protect them from injuries in cold weather conditions.

How does Moose live, and what is their diet?

Compared to humans: Moose are large, hairy, and surprisingly agile animals that can travel up to 30 miles daily. They live in the northern hemisphere and eat mostly plants, though they will also eat small mammals, birds, and fish. Moose have a long gestation period (up to 12 months) and give birth to one or two calves. Cows and calves are scrawny initially but quickly gain weight as they forage for food.

Moose are massive animals and can weigh up to two thousand pounds, and they live in the coldest parts of North America, including Alaska and Canada. Moose are herbivores whose diet consists mainly of grass, leaves, and other plants.

How do humans live, and what is their diet?

In Moose compared to humans: Humans are currently the dominant species on Earth and have developed civilizations and cultures that span the globe. Humans rely on plants and animals for food, but what is the difference between a Moose and a human? Moose compared to humans, so a Moose has a longer life expectancy than a human. They can live up to 25 years in the wild, while humans can only live around 70. A Moose’s diet consists mainly of vegetation (grass, leaves, etc.), while humans have evolved to be omnivorous. This means that they eat both plants and animals.

Why are Moose different from humans: Moose compared to a human?

Moose are different from humans in many ways. For one, they are much larger and have a thicker fur coat than humans. Moose also have longer noses than humans, and their ears are smaller. They also have a differently shaped brain than humans, which may explain why they are better at some tasks than humans, such as navigating in the wild.

When Moose is compared to humans, then Moose is one of the most iconic and recognizable animals in North America. They are large, bulky creatures that stand on two legs and have a long necks. Moose are different from humans in many ways. For example, Moose has four teats instead of two, which helps them to nurse their young.

Moose also have longer tails than humans, and they move more slowly than people do – making them slower runners on average. Additionally, Moose have different adaptations for survival in their environment: they have long noses that help them find food underwater and big antlers that help them defend themselves against predators.

Conclusion

Moose are huge animals that can weigh up to two thousand pounds and have several distinguishing features compared to humans. For one, Moose, compared to humans, Moose have shorter necks than humans and larger heads. Additionally, their ears are relatively small, and they lack a chin. Moose also typically have longer legs than humans, which gives them an advantage when running away from danger or chasing down food.

Finally, Moose tend to possess darker fur than humans, making it more difficult for predators to see in the forested areas where they live.

The biggest difference between Moose and humans is that Moose have a higher level of omega-3 fatty acids in their diet. This means they have a lower risk of heart disease and other chronic diseases, so they are hunted for their meat in some parts of the world. Additionally, their hair contains more moisture than human hair, so it can be used to make clothing and other products.

FAQs

How big is a moose compared to a human?

Moose are much larger than humans, with adult males reaching a height of around 6-7 feet at the shoulder and weighing up to 1500 pounds. Females are slightly smaller but still much larger than the average human. Moose are impressive animals with their massive size and unique antlers, making them a sight in the wild.

How big is the biggest Moose?

The biggest Moose ever recorded was a male Alaskan moose that weighed over 1,800 pounds and stood over 7 feet tall at the shoulders. These massive creatures can have antlers that span over 6 feet and can weigh up to 40 pounds each. Moose are the largest members of the deer family and are found in North America, Scandinavia, and Russia.

What animal is the same size as a moose?

The elk, also known as a wapiti, is the same size as a moose, and they are both members of the deer family and can weigh up to 1000 pounds. However, the Moose tends to be taller due to its longer legs, while the elk has a more slender build.

Why is Moose so strong?

Moose are incredibly strong animals due to a combination of factors, including their large size, muscular build, and dense bones. They can carry and lift objects that weigh up to 1,000 pounds, making them some of the strongest animals in the world. Moose also has a unique way of walking that helps distribute their weight evenly, making them more stable and capable of navigating rough terrain.

Why is Moose so strong?

Moose are incredibly strong due to several factors. Their large size and muscular build allow them to carry their massive antlers and navigate difficult terrain. Moose also has an extremely efficient digestive system, allowing them to extract maximum nutrients from their food, giving them the energy to maintain their strength. Finally, Moose have a keen spatial awareness and an innate ability to adapt to their environment, making them powerful and successful animals in the wild.

The Best 12 Gauge Ammo for Home Defense

0

The Best 12 Gauge Ammo for Home Defense

I’ve always said a shotgun is the best home defense firearm because of its reduced risk of over-penetration, increased stopping power, and accuracy.

However, much depends on the shotshells you load into your gun for personal defense. Various projectiles and brands have different ballistics.

Deciphering all this information is time-consuming and confusing because we’re not constantly comparing apples to apples.

Lucky for you, I have spent many hours researching and testing the best 12 gauge ammo for home defense.

As you keep scrolling, you’ll discover my findings!

Best Shotgun Ammo for Home Defense

Federal LE FliteControl 00 Buck

Specs

Muzzle Velocity: 1,325 fps

Projectile: #00 Buckshot

Shell Length: 2 3/4″

Pros

  • Trusted brand
  • FliteControl wad
  • Designed with law enforcement in mind
  • Works in all shotgun types

Cons

  • It needs a unique choke tube
  • Expensive

Why We Chose It

Federal Premium is an ammunition manufacturer trusted by countless shooters, hunters, and law enforcement agencies.

They’ve gained a positive reputation through years of crafting high-quality ammo and exploring new ammunition technologies.

The FliteControl wad is unlike traditional wads because it acts similarly to a sabot for a slug. The FliteControl wad holds the pattern tighter for longer distances, which increases the rounds effective range.

This shotgun load was designed with law enforcement agencies in mind, which means you can trust it to be very effective in close quarters, as such is the case with home defense situations.

However, there are a couple of drawbacks to this load.

The first is it needs a special choke. Due to the unique wad, it doesn’t perform well with most choke tubes. Luckily, many choke manufacturers, such as Carlson’s and Patternmaster, make the needed choke tube.

The second drawback is the price. These rounds are not cheap, but when protecting my family and myself, the price is the least of my worries.

In my opinion, these drawbacks are minimal when you understand the increased performance you’re gaining from the flight control aspects of the wad and functionality in any type of shotgun.

Honorable Mentions

Rio Ammunition 00 Buck is worth mentioning as a viable buckshot round contender. As a brand, Rio is often less expensive than other brands, which is also the case in this instance.

Yet, just because you’re not paying as much doesn’t mean you’re losing terminal performance or quality, as it reliably works in pump-action and semi-auto shotguns.

The main downsides are these rounds have a rolled crimp, which means they are too long for shell carriers used in 3-gun competitions, and it also cuts down on the magazine capacity.

The other downside is that the wad doesn’t cover the shot, so your barrel will get dirty faster; but if you enjoy cleaning your guns, this isn’t a big deal.

Rio 00 Buckshot is reliable, has a good pattern, and is reasonably priced.

If you’re looking for a buckshot load with a few more pellets, check out Winchester Super-X 3-1/2″ 18 Pellets 00 Buckshot.

The longer shell has more room for the double-aught buckshot pellets and powder, so don’t expect this to be a low recoil 12 gauge ammo for home defense because it will kick much more than the 2 3/4″ shells.

Longer shells are always more expensive, so if you’re trying to be budget-friendly, I wouldn’t recommend choosing 3 1/2″ shells. However, these are worth looking into if you’re needed more knockdown power.

Searching for ammo with more knockdown power? Check out our Winchester 12 Gauge ammo or our Fiocchi 12 Gauge ammo page to get the best match for your needs.

Best Low Recoil 12-Gauge Ammo for Home Defense

Hornady American Gunner Reduced Recoil Rifled Slug

Specs

Muzzle Velocity: 1,300 fps

Muzzle Energy: 1,642 ft-lbs

Projectile: Rifled Slug

Shell Length: 2 3/4″

Pros

  • Trusted brand
  • Designed for reduction of recoil
  • Multiple uses

Cons

  • Expensive

Why We Chose It

Hornady is one of the most trusted brands for self-defense ammo, with choices like the Hornady Critical Defense for handguns. However, they didn’t stop with handgun ammo.

Hornady has successfully ventured into shotgun ammunition. The Hornady American Gunner Reduced Recoil Rifled Slug is perfect for those who find shotgun slugs uncomfortable to shoot because of all the recoil.

While you will sacrifice a little muzzle energy and velocity for reduced recoil, the slug won’t have any trouble penetrating the vital organs of bad guys.

The Hornady Reduced Recoil Rifled Slug is an excellent defense load, but it can double as a solid hunting slug at close range.

The biggest drawback is the price. Because they’re designed for defense purposes and they’re a reduced recoil load, they are expensive compared to other rifled slugs.

Honorable Mentions

The Federal Tactical Truball Low Recoil 2-3/4″ 1 oz is a cheaper option. Rifled Slug. Its ballistics are identical to the Hornady Reduced Recoil load but at half the price.

However, you must buy in bulk to get this price. The price doesn’t reflect the quality of these rounds, as law enforcement agencies trust these rounds in training and real-world situations daily.

Best One-Ounce Slug for Personal Defense

Federal Power Shok 1 oz. Rifled Slug

Specs

Muzzle Velocity: 1,610 fps

Muzzle Energy: 2,521 ft-lbs

Projectile: Rifled Slug

Shell Length: 2 3/4″

Pros

  • Trusted brand
  • Fast
  • Hard-hitting
  • Reasonably priced

Cons

  • Must buy in bulk to get the best deal
  • Will easily penetrate drywall

Why We Chose It

A rifled slug makes an excellent defense round because it is accurate and creates a big hole in the intruder. Pair that with Federal, one of the top ammo manufacturers in the world, and you have a high-quality round at a surprisingly affordable price.

These rifled slugs are more accurate at close and long range because the slug spins as it travels down the smoothbore shotgun barrel.

The one-ounce lead slug is sure to stop any threat; however, it will have a higher risk of over-penetration that you must keep in mind for the safety of your family and neighbors.

When you compare the velocity, muzzle energy, and price, these rounds are tough to beat.

Honorable Mentions

The Winchester Defender 1 oz. Segmented Rifled Slug will help you stop the threat with similar ballistics as the Federal Power Shok shotshells. So if you’re semi-auto or pump-action shotgun cycles Winchester shells better, you have a viable option.

However, these loads are more expensive due to the unique design of the segmenting slug. This slug breaks apart into three pieces once it hits cloth, which causes more wound channels and increased trauma.

Segmenting also reduces the risk of over-penetration.

For a round priced in between the two above, check out the Fiocchi 1 oz. Rifled Slug. The Aero Rifle Slug is designed as a self-defense shotshell for auto-loading shotguns. So if you’re a pump-action lover, this probably isn’t the round for you.

However, if you use a semi-auto shotgun as a defense gun, then the Fiocchi Aero Rifle Slug is one load you should consider.

Choosing the Best 12 Gauge Ammo for Home Defense

Once you’ve bought your home defense shotgun, it’s time to load it with the best home defense shotgun ammo, but how are you supposed to know which is the best when they all claim to be the best?

There’s no simple answer to the question: “what is the best 12 gauge ammo for home defense?” However, there are several factors to remember when buying ammo that will help you make the best decision possible.

Shotgun

Shotgun

Learning which brands and loads your shotgun likes best will take time and testing. However, if the need ever arises, you’ll be glad you took the time and spent the money to find the rounds that cycle and shoot best out of your shotgun.

Recoil

Self-defense loads are often hotter rounds, meaning they have more kick. I suggest finding a reduced recoil round if you’re sensitive to recoil.

Budget

Defense shotshells are often expensive due to the time and testing needed to perfect these loads before the manufacturers ship them to the public.

Since we’re on the subject of money, don’t miss out on our affordable Remington 12 Gauge Ammunition for more options.

I’m typically tight-fisted with my money; however, when protecting my family and myself, I’m willing to spend more to ensure I buy a high-quality product.

Ammo Types

The beauty of owning a shotgun is the wide variety of ammo types you can shoot from the same gun without changing anything except the shell.

This can also be a drawback because it’s difficult for beginners to understand the various shot sizes and types.

Once you understand the differences between the shotgun ammo types, choosing a self-defense shotshell becomes much more manageable.

Saving Money on the Best Home Defense Shotgun Ammo

Shotgun shells used for personal defense are expensive; however, there are several ways to save money.

Buying Bulk 12-Gauge Self-Defense Shotgun Shells

When you buy bulk 12-gauge ammo, sometimes you can save $0.15 per shotshell. This is a significant savings if you practice often and burn through ammo.

The amount of savings will depend on the brand and amount of ammo you purchase. Purchasing 250 rounds will save you more money per round than buying 20 shells at a time. However, buying 1,000 shotshells will give you more significant savings per round.

Reloading Shotshells

Shotgun shells are reloadable, which means there’s an opportunity to save money by reloading instead of buying factory ammo.

This costs more money upfront because you have to purchase the reloading equipment and supplies, but once that initial cost is over, the amount of money you save depends on the speed at which you can pump out shells.

If you can’t find the perfect home-defense round, you might try crafting your own by handloading.

To double up on your savings, try buying shotgun shells in bulk and then reloading them!

Standard 12-Gauge Shotgun Self-Defense Projectiles

As I mentioned earlier, there are various types of projectiles in shotgun shells. There are two primary types I consider home defense rounds and a third that can be used if it’s all you have on hand.

Buckshot

Buckshot

Buckshot is by far the best home defense load because it’s less likely to penetrate, you have multiple projectiles to increase your chances of hitting your target, and it’s reasonably priced.

There are different shot sizes of buckshot. Double aught or 00 Buck is most people’s preference; however, don’t be afraid to go with smaller pellets because there will be more per shell.

Slugs

You might be thinking, what do those little slimy creatures have to do with shotguns?

No? That’s just me?

Well, they don’t have anything to do with shotguns, but a rifled or sabot slug does, and they make good personal defense rounds.

A rifled slug has the rifling on the slug instead of the barrel. The rifling causes the slug to spin, making it more accurate.

The sabot slug has a plastic case or sabot around it that causes it to spin in a smoothbore shotgun; there’s much debate as to which slug is best, but many consider the sabot slug to be technologically superior.

Birdshot

Birdshot

Birdshot is not a recommended load for home defense; however, if it’s all you have, use it, especially if it’s a turkey load.

Birdshot has much smaller pellets than buckshot; therefore, it doesn’t have the same stopping power, but if you have a good choke that keeps a tight pattern, birdshot is deadly, especially at close range.

Shot size selection will be the primary determining factor of the knockdown power of birdshot. The smaller the number, the larger the pellets. For defense purposes, choose the smaller numbers or BB.

Parting Shots

Choosing the best 12-gauge ammo for home defense doesn’t have to be overly complicated. You should make an informed decision, which you’ve made by reading this article, but in the end, you should test out several different brands and projectiles to determine which you like best.

Stay safe!

Best Air Rifle Deals

Popular Posts

What Is An Air Rifle?

0
If you have stumbled upon this article, chances are that you probably have a pest problem at your house. This is a very common...

How Far Can a .22 Air Rifle Pellet Travel?

0
"Unveiling the Power: Exploring the Distance Capabilities of a 22 Air Rifle Pellet. Discover the fascinating journey of a 22 air rifle pellet as...

.22 vs .25 Air Rifle: The Ultimate Comparison Guide

0
When I first got introduced to the world of rifles, I often thought that a bigger caliber meant better performance. So, I thought that...