Home Blog Page 48

The Best Glock Suppressor Sights in 2024

0

Not sure what suppressor sights to get for your Glock?

Look no further.

I’ve tested ALL the best Glock suppressor sights, arranged them into categories, and even included accessories and installation techniques.

By the end of this guide, you’ll find the perfect suppressor sight for your Glock.

Let’s get started!

Trijicon Glock Suppressor Night Sight Set

Trijicon Bright & Tough Night Sight Suppressor Set

AMERIGLO GL-506 Tall Black Serrated Suppressor

AMERIGLO GL-329 Tall Suppress

What are Suppressor Sights?

There are two key factors to shooting accurately when using a handgun with iron sights: correct sight alignment and a clear sight picture.

Many shooters own Glock pistols fitted with suppressors or have the best reflex sights installed on their handguns. Unfortunately, your line of sight will be obstructed when using factory sights.

How?

Due to the circumference of most suppressors— being larger than the barrel of the handgun— it can block the sight picture ahead of the front sight.

Also, if you have a red dot installed on the slide, the RDS housing sits in between the front and rear sights. This can obscure your target.

If your pistol is configured this way, you’ll most likely need to install suppressor sights.

These are aftermarket sights that are specially engineered to sit higher than the suppressor, making your line of sight unobstructed again.

The Best Glock Suppressor Sights

If you’re pressed on time, here’s a quick list of the best Glock suppressor sights:

  1. Trijicon Glock Suppressor Night Sights Set: Best Glock 19 Suppressor Sights
  2. Trijicon Bright & Tough Night Sights Suppressor Set: Best Night Sights for Glock
  3. AMERIGLO GL-506 Tall Black Serrated Suppressor: Best for the Budget
  4. AMERIGLO GL-329 Tall Suppress: Best for Glock 17

1. Trijicon Glock Suppressor Night Sight Set: Best Glock 19 Suppressor Sights

The Trijicon Glock Night Set is the best suppressor height sight for the Glock 19.

Trijicon specifically engineered this sight to be used with a suppressor or as backup iron sights.

In fact:

They advertise it to improve shooting accuracy by as much as five times compared to just conventional sights.

My question: Is this true?

Let’s find out!

Brightness

The Trijicon Glock suppressor sights have an exceptionally visible sight picture.

Each lamp is capped with a sapphire jewel intended to evenly distribute the light. I can confirm it performs well in no-light and low-light situations.

The white outline helps with the visibility— day or night. The different colored Tritium lamps give great contrast for quick target acquisition.

I do understand the orange trits have a shorter lifespan, but given the affordable price tag, I don’t mind it at all given the sight picture.

TRIJICON GLOCK SUPPRESSOR FRONT SIGHT

Durability

The Trijicon Suppressor Night Sights have a sleek yet durable finish.

These sights’ tritium lamps are contained inside aluminum cylinders for maximum protection.

It also comes with extra silicone rubber cushioning for heavy recoil. You won’t need to worry about harsh cleaning solvents either.

One con I’d like to point out:

The edges of the rear and front sights are VERY sharp. It becomes uncomfortable after a while unless I’m wearing an undershirt.

Mounting & Installation

The Trijicon Suppressor Night Sight Set is incredibly easy to install.

TRIJICON GLOCK SUPPRESSOR MOUNTED

I used a front sight hex tool

and a universal sight pusher tool from Amazon.

Before installing the front sight, I dropped a little Loctite Heavy Duty Threadlocker to secure the screw into the front sight base. It wiggles slightly but doesn’t affect the accuracy of the gun at all.

On the plus side, it co-witnesses perfectly with my suppressor and Trijicon RMR.

TRIJICON GLOCK SUPPRESSOR FRONT SIGHT

Is the Trijicon Night Sight Set worth it?

If you’re looking for excellent sights that are easy to install on your Glock 19, get the Trijicon Glock Suppressor Night Sight Set.

Why? It guarantees:

  • Quick installation
  • Durable construction
  • Self-illuminated Bright Tritium
  • Excellent low light performance

Plus, Trijicon offers a warranty on all sights to be free of defects in material and workmanship for the lifetime of the original owner. If you find any issues, they’ll replace them free of charge.

TRIJICON GLOCK SUPPRESSOR FRONT SIGHT (1)

Overall, the Trijicon Suppressor Night Sight Set works flawlessly.

In case you didn’t know, Trijicon is on the top of my list for the best mp shield night sights as well. I mean— It’s Trijicon, after all.

2. Trijicon Bright & Tough Night Sight Suppressor Set: Best Night Sights for Glock

The Trijicon Bright & Tough Night Sight Suppressor Set is the best night sight for the Glock.

As a matter of fact:

Almost all of my handguns have Trijicon night sights installed on them.

BUT, I’m not biased. I put these sights through torture and hand-testing

Here’s how it went…

Brightness

The Trijicon Bright & Tough Set is remarkably visible— both day and night.

TRIJICON BRIGHT&TOUGH GREEN ILLUMINATION IN DARK

It’s not too bright where your eye is distracted but bright enough to quickly acquire your target and get a perfect sight picture.

I keep it on my nightstand and I can easily tell how my handgun’s positioned thanks to the trillium.

I prefer the white outline on the front and rear sights. Some shooters choose orange on the front, but all white works just as well, especially if you have old eyes.

On that note:

If you co-witness with red dots and struggle shooting accurately, I recommend checking out holographic weapon sights (like the EOTECH EXPS2 or 3).

Durability

The Trijicon Bright and Tough sights live up to their name— insanely tough.

TRIJICON BRIGHT&TOUGH REAR SIGHT (2)

These night sights are constructed with a metal body and silicone rubber cushions for high-grade durability.

The Bright & Tough sights’ aluminum cylinders protect the tritium lamps from heavy recoil. I’ve also done multiple drop tests and found no issues.

TRIJICON BRIGHT&TOUGH REAR SIGHT (1)

These sights were produced almost two decades ago and they still perform just as well as the day I purchased them.

Mounting & Installation

Installing the Trijicon Suppressor Night Sight Set is a breeze.

TRIJICON BRIGHT&TOUGH MOUNTED

I currently have them mounted on my gen 5 Glock 19 MOS. The front sight takes a little bit of effort to get perfectly aligned and torqued but it worked great in the end.

Plus, they co-witness like a dream with my suppressor and Vortex Sparc red dot combo.

Additionally:

I bought a Safariland Hi-Ride Belt Loop Holster which has a built-in ridge to accommodate the suppressor height front sight.

Overall, I’m very happy with the entire configuration together.

TRIJICON BRIGHT&TOUGH REAR SIGHT

Is the Trijicon Glock Suppressor Night Sight Set worth it?

Absolutely! The Trijicon Bright & Tough Night Sight Set is an excellent choice when you’re running a suppressor on your Glock.

Why? It features:

  • Unmatched durability
  • Enhanced sight acquisition
  • Long-lasting and bright Tritium night sights
  • Compatibility with many Glock models

To top it all off:

The yellow tritium lamp has a warranty for 12 years and the orange lamp for 5 years from the date of original manufacture.

The Trijicon Bright & Tough Night Sight Set may be more expensive but definitely a top choice by many Glock owners.

Speaking of top choices, check out my latest review on the best quick detach scope mounts!

3. AMERIGLO GL-506 Tall Black Serrated Suppressor: Best for the Budget

The AMERIGLO GL-506 Suppressor Set is the best sight for your money.

Before I made my purchase, I did some research and discovered rave reviews on these $45 sights.

I had to try it out myself! Needless to say, I’m impressed.

Here’s why…

Brightness

The AMERIGLO GL-506 performs well in high contrast/light conditions.

Why?

These aren’t night sights. They’re black suppressor height sights with no markings. They still work in lowlight conditions, but not like your tritium night sights.

The front sight post is serrated to reduce glare from sunlight. Also, the rear sight design allows easy, one-handed slide manipulation.

These iron sights are amazing for suppressor use, but here’s why I really like them:

The blacked-out front sight is exceptional for red dot use especially when combined with night vision. It reduces the clutter of your sight picture for simple front sight acquisition.

Many shooters find tritium night sights too distracting, especially in the dark. If you’re one of them, this will work wonders for you.

If not, you can also get the Green Tritium and Orange Outline Front with the Black Rear version.

No products found.

Durability

The AMERIGLO GL-506 sights can stand up to harsh conditions.

Made from machined steel, these sights are durable and reliable— regardless of what type of environment you’re shooting in.

Mounting & Installation

Installation is easy and took me about 10 minutes tops.

Make sure you drop a bit of Loctite Heavy Duty Threadlocker for security. Trust me, you don’t want your front sight coming off with recoil.

I installed the rear sight using the StarONE Universal Handguns Sight Pusher Tool with a plastic barrier and no markings occurred.

This sight set fits all Glock models (except 42/43). It sits at the right height and worked phenomenally with my 9mm suppressor.

It can also co-witness with red-dot sights like the Holosun 510c, the Vortex Strikefire II, or the Vortex Sparc.

Trust me: I tried them all.

Is the AMERIGLO GL-506 Tall Black Serrated Suppressor worth it?

Frankly, the AMERIGLO GL-506 sights are the best bang for your buck when you’re running a suppressor on your Glock.

Why? It comes with:

  • Durable design
  • Affordable price tag
  • Low-light level capability
  • Co-witnesses with many optics

The sights are backed up by AMERIGLO’s warranty. So long as you keep the receipt, you can easily request a replacement or repair. Also, their customer service is always A+.

Overall, the AMERIGLO GL-506 Serrated Suppressor is an excellent addition to any Glock MOS with a suppressor or any other red-dot-ready pistol.

Speaking of great additions: don’t forget to check out my latest Vortex Spitfire 3x review!

4. AMERIGLO GL-329 Tall Suppress: Best for Glock 17

The AMERIGLO GL-329 Tall Suppress is one of the best Glock suppressor sights I’ve used on the Glock 17.

In fact:

These sights worked so well, I shot 200 rounds easily on the day I tested it out on the range.

Let’s take a closer look…

Brightness

With the AMERIGLO GL-329, I have no problems shooting in low and no-light conditions.

The three-dot sight comes with white rings for daytime use & green tritium for low light detection and sight alignment. The large, bold dots make it easy to spot and grab the pistol at night.

The front sight is about .314” high and the rear sight sits at about .310”.

AMERIGLO GL-329 OVERVIEW

I haven’t had any issues personally but always check to make sure this provides enough clearance for your suppressor.

Durability

The AMERIGLO GL-329 Tall Suppress is built to last.

The sights are machined from bar stock steel and assembled with Swiss-made tritium. This combination results in ultra-durability and recoil resistance.

If you plan on using your Glock 17 for home defense and personal protection, the AMERIGLO GL-329 won’t fail you.

AMERIGLO GL-329 MOUNTED

Mounting & Installation

Both front and rear sights took 15 minutes to install.

The package includes both the front sight and a standard, dovetail rear sight.

AMERIGLO GL-329 PACKAGING

I marked the center of the stock sights on the slide with a pencil, then used a brass punch and hammer to drive out the old. I installed the new sights and aligned them with the previous mark I made.

AMERIGLO GL-329 OVERVIEW

Word of advice:

The front sight post does have some wiggle room, so double-check that you’ve got it straight before torquing to spec with the Loctite. Once they’re in, they’ll be secured without issues.

Also:

The top of the front sight is only visible at the very bottom of a Vortex Venom or Viper. If you intend to co-witness with the Vortex red dots, you may need to find taller suppressor heights.

AMERIGLO GL-329 FRONT SIGHT (1)

Is the AMERIGLO GL-329 Tall Suppressor worth it?

If you’re looking for a reliable and reasonably priced suppressor for your Glock 17, the AMERIGLO GL-329 is for you.

Why? It comes with:

  • Low price tag
  • Fits almost all Glocks
  • Popular 3-dot configuration
  • Excellent low-light performance

Additionally, the green tritium lamps are under warranty for 12 years after the date of manufacture and are guaranteed to last just as long.

If they do break, you can easily send them back with the company return form and AMERIGLO will replace or repair it. No questions asked.

With a combination of dependability and affordability, you really can’t go wrong with the AMERIGLO GL-329.

If you’re interested in more awesome handgun sights, check out my latest review of the best Walther PPQ M2 sights.

How to Install Glock Suppressor Sights?

One of the most common upgrades for Glock pistols is replacement sights.

If you install a suppressor or a red dot sight, you’ll most likely need a suppressor sight to shoot accurately— even if you’re using the best sights for the Glock 34.

So, here’s how to install the best Glock suppressor sights:

For the instructions below, I’ll be using the following tools:

  • Front Sight Tool
  • Rear Sight Pusher Tool
  • Loctite Heavy Duty Threadlocker
  • Gunsmith Punch Set
  • Nylon Vice Jaws

Step 1: Disassemble

Safely disassemble your Glock pistols. Make sure your weapon is unloaded, remove the magazine, etc. Then remove the recoil spring and barrel so you only have your slide left.

Step 2: Remove Front Sight

Get your screwdriver and remove the bolt for the front sight.

Make sure you save your old sights. If something happens and you need to return or replace your new sights, you need the original set to put back on your pistol so it can still be serviceable.

I like to screw in the old bolt back into the sight. That way, I don’t mix up the screws.

What I mean is— most of the time, the screw that goes into the Trijicon sight won’t fit into the original Glock front sight.

Step 3: Remove Rear Sight

For removing the rear sight, you have two options: using a rear sight pusher tool or you could also use a hammer and non-marring punch.

I highly recommend using the rear sight pusher tool. With this, you can simply clamp the slide and rotate the “pusher” to gently slide the old sight off.

Step 4: Install New Sights

FRONT SIGHT

Place the new front sight on top of the pistol. Apply a drop of the Loctite onto the new screw. Make sure you hold the sight while tightening the nut.

If you tighten too much, you can damage the sight. Before fully tightening, ensure that the sight is straight so you can make adjustments as needed.

On a side note:

I just made an in-depth guide on the best way to do an AR-15 A2 front sight removal. I highly recommend checking it out!

Moving along…

REAR SIGHT

As with removing the rear sight, I recommend using the pusher tool to install your new sights.

Start by aligning the new sight on the slider, then clamp both the slider and sight down. You can then turn the screw on the “pusher” and move the sight into place.

If you don’t have a sight pusher:

Place the slide into the vice jaw. Stage the new rear sight into the dovetail on the left side of the slide. Once you’re able to get about half of the sight base into the dovetail, start to tap the sight in place with a hammer and non-marring punch.

Be sure you use moderate hammer strikes so as not to hit your slide or your fingers. Lastly, make sure the rear sight is aligned with the rear dovetail. You can typically eyeball it or use calipers.

By the way, if you don’t have a rear sight pusher, here’s a great video guide on how to remove and install your suppressor sights.

Properly installing your suppressor sights is key to accuracy, but having an excellent suppressor sight, to begin with, can reduce a lot of work and frustration.

There are many options on the market and scouting the internet for dependable ones can take a lot of your time. The good news?

I already researched, hand-tested, and listed the best Glock suppressor sights for your every need above 🙂

Now It’s Your Turn

I hope you enjoyed my best Glock suppressor sights guide.

Now I want to turn it over to you:

Which suppressor sight will you pick for your Glock models? Or perhaps you already have one and would like to share your thoughts.

Either way, let me know by leaving a quick comment down below.

FAQ:

Do deer have any natural predators in North America? If so, what are they?

0

Headline: “What are They? Unraveling the Mystery Behind the Enigmatic Title”

In this thought-provoking headline, we embark on a captivating journey to explore the true nature of “They.” Delve into an intriguing investigation as we decipher the enigmatic title and uncover its hidden meanings. Brace yourself for a mind-expanding experience that challenges conventional understanding and offers new perspectives. Prepare to unravel the mystery and gain a profound understanding of what lies behind this captivating question – What are They?

1. The Circle of Life: Understanding the Predators and Prey

In this article, the author explores the concept of the circle of life and how it applies to various organisms, including deer. They emphasize that predators are a natural part of the ecosystem and play an important role in maintaining balance. Predators such as humans, bears, coyotes, wolves, bobcats, mountain lions, fishers, foxes, eagles, and alligators are known to hunt and kill deer. This relationship between predators and prey is essential for the survival of both species.

The author discusses coevolution and adaptation as key factors in predator-prey relationships. They explain that prey species have evolved ways to escape from predators, while predators have developed hunting techniques to catch their prey. This dynamic interaction between populations ensures the survival of both parties.

It is mentioned that predators cannot exist without prey and vice versa. Without prey, predators would eventually face extinction. However, prey species also benefit from predation as it reduces competition among them. Mother Nature diversifies her strategies to maintain stability in the predator-prey relationship.

The article addresses common misconceptions about predators and emphasizes that they are simply trying to make a living like any other organism. The author highlights the importance of understanding this complex relationship for a better appreciation of nature.

Overall, this section provides an introduction to the topic of predator-prey relationships and sets the stage for further exploration into specific predators such as coyotes and black bears.

2. Deer and Predators: Exploring the Complex Relationship

2. Deer and Predators: Exploring the Complex Relationship

Predator-Prey Dynamics

Predators and prey have always had an uneasy but necessary relationship with each other. Predators, such as humans, bears, coyotes, wolves, bobcats, mountain lions, fishers, foxes, eagles, and alligators, play a crucial role in controlling the population of deer. This relationship is based on simple biology and ecology – deer are prey species and predators naturally kill and eat them. It is important to understand this complex dynamic in order to appreciate the balance of nature.

The Circle of Life

Deer are not innocent victims in a grand conspiracy; they are part of the circle of life. Just like any other organism on Earth, deer have their own purpose and place in the ecosystem. They serve as a food source for various predators who rely on them for survival. Understanding this natural process helps us appreciate the intricate web of life that exists in our environment.

Coevolution and Adaptation

Predators and prey do not evolve independently; they coevolve in response to each other’s actions. This means that as predators develop new hunting techniques or strategies, prey species adapt by developing better ways to escape or avoid predation. This constant interaction between predators and prey ensures that neither can gain the upper hand for long periods of time. It is an unbreakable bond that drives both populations to evolve for their survival.

Predator Exclusion

While predators play a vital role in maintaining ecological balance, there are instances where human intervention becomes necessary to protect certain prey species from extinction. In some cases, predator exclusion measures may be implemented to ensure the survival of endangered or vulnerable prey populations. However, it is important to consider the potential consequences of such interventions and the overall impact on the ecosystem.

The Burger of the Predator World

Deer, particularly white-tailed deer, are widely distributed and serve as a food source for numerous predators. Their abundance and variety make them comparable to a burger in the predator world. From tropical rainforests where jaguars and ocelots hunt them, to the eastern United States where wolves and mountain lions used to rely on them as their main food source, deer have always been an important part of the predator’s menu.

Coyotes: The Opportunistic Predators

Coyotes are fascinating predators that have adapted well to various habitats. They are opportunistic hunters, relying on their keen senses to search, stalk, pounce or rush their prey. While they do incorporate deer into their diet when they are abundant, removing coyotes from the predator equation does not necessarily result in higher fawn survival rates. Coyotes play a role in controlling deer populations and their presence is a natural part of the ecosystem.

Black Bears: Solitary Omnivores

Black bears have historically inhabited forested areas across North America. They are solitary animals that primarily feed on vegetation but also opportunistically prey on small mammals like mice and squirrels. Fawns are also part of their menu during June and July when they are abundant. While bears may occasionally take down a deer, they mainly rely on other food sources such as berries and birdfeeders.

In summary, the relationship between predators and deer is complex yet essential for maintaining ecological balance. Predators play a crucial role in controlling prey populations while prey species adapt to survive predation pressure. It is important to understand this dynamic relationship in order to appreciate the intricate workings of nature’s circle of life.

3. The Role of Predators in Maintaining Ecosystem Balance

3. The Role of Predators in Maintaining Ecosystem Balance

Predators play a crucial role in maintaining ecosystem balance. They are an essential part of the food chain and help regulate populations of prey species. Without predators, prey populations can explode, leading to overgrazing and depletion of resources. This can have negative effects on the overall health and biodiversity of an ecosystem.

Predators help control the population size of prey species by hunting and consuming them. This helps prevent overpopulation and ensures that resources are available for other species in the ecosystem. By preying on weak or sick individuals, predators also contribute to natural selection, ensuring that only the fittest individuals survive and reproduce.

In addition to regulating prey populations, predators also influence the behavior and distribution of their prey. Prey species develop strategies to avoid predation, such as camouflage, defensive behaviors, or changing their habitat preferences. This leads to a more diverse range of adaptations within prey populations.

Predators themselves are also subject to natural selection pressures from their prey. As prey evolve ways to evade predation, predators must adapt their hunting techniques or seek alternative food sources. This dynamic relationship between predator and prey drives coevolution, where both species continuously evolve in response to each other’s actions.

Overall, predators play a vital role in maintaining the balance and stability of ecosystems. They help control population sizes, promote biodiversity through natural selection, and drive coevolutionary processes. Understanding and appreciating this complex relationship is essential for effective conservation and management of wildlife populations.

4. Predator-Prey Dynamics: A Closer Look at Nature’s Economics

4. Predator-Prey Dynamics: A Closer Look at Nature

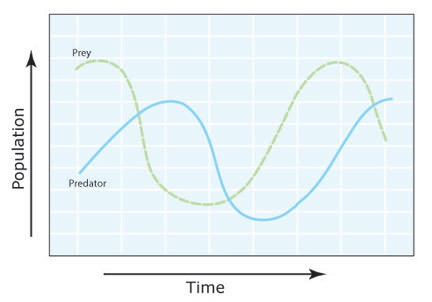
In the complex world of predator-prey dynamics, predators and prey have a necessary but uneasy relationship with each other. Predators cannot exist without prey, and prey may not exist without predators. This balance is crucial for the survival of both populations.

Predators, whether they are single-celled organisms, two-legged humans, or four-legged animals like bears and coyotes, have always hunted and killed deer. Deer, being a prey species, are naturally targeted by these predators. It is a simple fact of biology and ecology that predators kill and eat prey.

While it may be tempting to view deer as innocent victims in some grand conspiracy, it is important to understand that this relationship between predators and prey is essential for maintaining biodiversity and stability in ecosystems. Without predation, some prey species would outcompete others for resources, leading to an imbalance in the ecosystem.

Mother Nature has developed strategies to prevent such imbalances. She diversifies by providing refuge areas for prey species, reducing the efficiency of predators through various means, and increasing investments in alternative prey sources. This results in a dynamic equilibrium where both predator and prey populations can coexist.

Coevolution plays a significant role in this predator-prey relationship. As predators evolve better hunting techniques and strategies, their prey also adapt by developing ways to escape or avoid capture. This constant interaction drives both populations to evolve in response to each other’s changes for survival.

Understanding the complexities of predation is crucial for appreciating the delicate balance of nature. Oversimplifying this relationship would be akin to taking a day off from learning about the intricacies of ecosystems – something we should not do if we want to truly comprehend the circle of life.

In Pennsylvania, where black bears are found throughout all 67 counties, they play an active role as predators in the lives of white-tailed deer. While bears primarily rely on vegetation for their diet, they opportunistically include fawns in their menu during the months of June and July when they are abundant. Bears, like coyotes, are part of the natural predator-prey dynamics that have shaped ecosystems for centuries.

The survival and persistence of predators like coyotes and black bears despite human persecution is a testament to their adaptability and resilience. These animals have learned to coexist with humans even as their habitats have diminished.

In conclusion, the predator-prey relationship is a vital aspect of nature’s economics. Predators and prey rely on each other for survival, and this dynamic equilibrium ensures the continuation of both populations. Understanding this complex relationship allows us to appreciate the intricate balance of ecosystems and the role that predators play in shaping them.

5. Unraveling the Mystery of Predator-Prey Coevolution

5. Unraveling the Mystery of Predator-Prey Coevolution

In this section, the author delves into the concept of predator-prey coevolution and its importance in maintaining a balance in nature. They explain that predators and prey have a necessary relationship with each other, as predators cannot exist without prey and vice versa. The author emphasizes that predation is a natural process and not a conspiracy against deer or any other prey species.

The author then introduces the idea of coevolution, which refers to the simultaneous evolution of two interacting species. In this case, predators and prey evolve in response to each other’s adaptations for survival. This constant interaction ensures that neither predator nor prey gains an upper hand for an extended period of time, leading to a dynamic equilibrium that allows both species to survive.

The author acknowledges that understanding predator-prey relationships can be complex and warns against oversimplifying the concept. They compare it to an economics lecture, stating that staying awake for it is one thing but truly comprehending it is another.

The section concludes by highlighting the importance of diversity in maintaining stability in predator-prey relationships. Mother Nature employs various strategies such as refuge acquisitions for prey, lower returns on predator efficiency, and increased investments through alternative prey sources to prevent an economic catastrophe and ensure the survival of both predator and prey populations.

Overall, this section explores the intricate dynamics between predators and prey, emphasizing their interdependence and how coevolution plays a crucial role in their continued existence.

6. The Burger of the Predator World: The White-Tailed Deer and its Predators

6. The Burger of the Predator World: The White-Tailed Deer and its Predators

The white-tailed deer is a widely distributed member of the cervid family, found in various habitats across North and South America. They are often referred to as the “burger” of the predator world due to their popularity among carnivores. Predators such as jaguars, ocelots, and jaguarondis in tropical rainforests prey on these familiar deer species. In the eastern United States, historical accounts indicate that wolves and mountain lions were the main predators of deer before European colonization. However, these iconic predators have since vanished from the landscape.

Despite the absence of wolves and mountain lions, modern-day predators still play an active role in the lives of white-tailed deer. Coyotes, bears, bobcats, and humans are among those that continue to hunt deer as part of their daily survival. Each predator has its own size, hunting techniques, and prey selection preferences when it comes to targeting deer.

Coyotes, derived from the Aztec word “coytl,” meaning the god of music, dance, and song, are fascinating creatures. They may be smaller than a neighbor’s German shepherd but have a reputation for being formidable hunters. Coyotes can adapt to various habitats but thrive in areas with diverse vegetation cover. Their diet includes mice, rabbits, squirrels, snakes, bugs, fruit, carrion (dead animals), and occasionally young deer less than three months old.

Black bears also pose a threat to white-tailed deer populations. Historically found throughout North America’s forested regions from Alaska to Mexico, black bear habitat has become increasingly scarce due to human development. Pennsylvania is located within their range and sightings are possible in all 67 counties of the state. Black bears primarily consume vegetation but will opportunistically target small mammals like mice or groundhogs, colonial insects, and even fawns during the months of June and July.

While predators like coyotes and black bears may prey on white-tailed deer, it is important to note that deer populations have remained abundant historically. Deer have evolved alongside these predators and have developed survival strategies to ensure their species’ continuation. Coyotes, for example, incorporate deer into their diet when they are most abundant in the summer months. Removing coyotes from the predator equation does not necessarily increase fawn survival rates unless alternative prey options are scarce.

In conclusion, white-tailed deer are a popular food source for various predators in different regions. Predators such as coyotes and black bears play an essential role in maintaining a dynamic equilibrium in nature’s ecosystem. The relationship between predators and prey is complex but necessary for the survival of both species. Understanding this intricate balance helps us appreciate the diverse interactions within the “circle of whitetail life.”

In conclusion, “What are they?” is a thought-provoking question that encourages us to explore the diverse aspects of our surroundings. By seeking answers and understanding the world around us, we can gain deeper insights into various phenomena, entities, and concepts. Embracing curiosity and open-mindedness enables us to appreciate the rich tapestry of life’s wonders.

Can you dry fire a gamo air rifle?

0

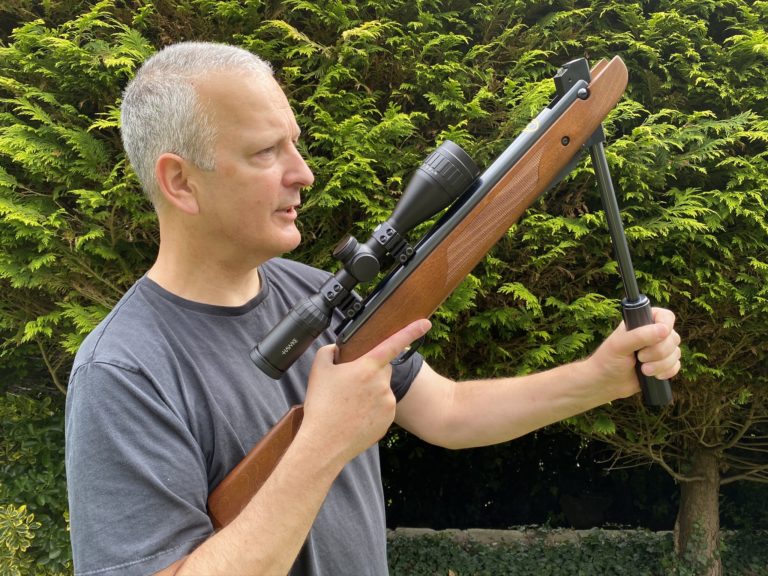
Unveiling the truth behind dry firing a Gamo air rifle, this intriguing headline delves into the possibility of safely practicing without ammunition. Join us on an enlightening journey as we uncover whether this popular air rifle can withstand dry firing, providing valuable insights for enthusiasts and novices alike.

Can you dry fire a gamo air rifle?

Dry firing refers to pulling the trigger of a firearm or air rifle without any ammunition loaded. When it comes to Gamo air rifles, dry firing should generally be avoided. While some firearms can handle dry firing without any issues, most air rifles, including those made by Gamo, are not designed for this practice. Dry firing a Gamo air rifle repeatedly can cause damage to its internal components, such as the piston and spring.

The main reason why dry firing is not recommended for Gamo air rifles is that they rely on the presence of a pellet or BB in the barrel to absorb the force generated during firing. Without an ammunition load, the energy from the compressed air is not dissipated properly and can cause excessive stress on the gun’s mechanism. This can lead to premature wear and tear, reduced accuracy, and potential malfunctions over time.

To ensure the longevity and optimal performance of your Gamo air rifle, it is best to avoid dry firing altogether. Always make sure to load your rifle with appropriate ammunition before pulling the trigger. If you need to practice your shooting technique or test the trigger pull without using actual pellets or BBs, consider investing in snap caps or dummy rounds specifically designed for air rifles. These devices mimic the weight and shape of real ammunition while protecting your gun from unnecessary stress caused by dry firing.

In conclusion, dry firing a Gamo air rifle should be avoided as it can potentially damage the gun’s internal components. Dry firing without a pellet in the chamber may cause the piston to slam forward with excessive force, leading to potential harm. It is advisable to always use a pellet when operating an air rifle for optimal performance and longevity.


The Top 5 Fishing Lures Of All Time (Inshore Edition)

0

Want to know what the absolute best inshore fishing lures are?

We’re constantly getting questions from the Salt Strong community about what the best lures for inshore fishing are, what our favorite lures are and how to fish each lure for different inshore species.

We decided to answer your questions once and for all and show you the top five inshore fishing lures of all time!

To do that, we came together to talk about our favorite lures. We narrowed it down to five that we think every inshore angler should have in their tackle box.

In this podcast episode, we go over the top inshore fishing lures of all time and how to best use them.

Do you have a favorite inshore fishing lure? Have any questions about our top inshore fishing lures?

Let us know in the comments below!

To learn more about the best fishing lures for every kind of fishing and get access to exclusive fishing gear, don’t forget to check out the Salt Strong Insider Fishing Club.

The Top Five Inshore Fishing Lures

We’ve narrowed down the best five fishing lures for inshore fishing after extensive research and testing.

These lures have helped us catch literally thousands of fish. Being confident in how to use them can do the same for you.

In no particular order, the top five inshore fishing lures of all time are:

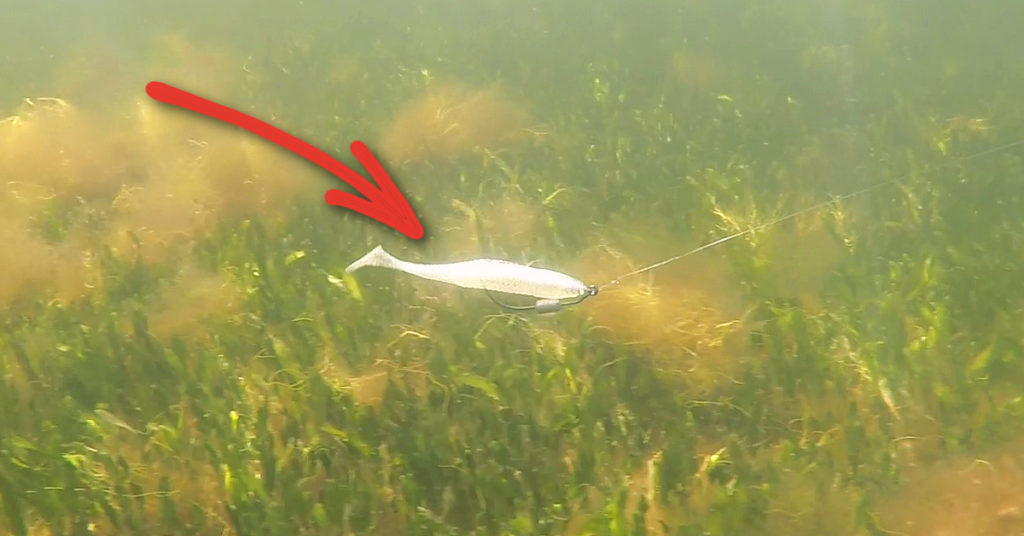
1. The Paddletail Lure

slam shady 2.0 trout attack

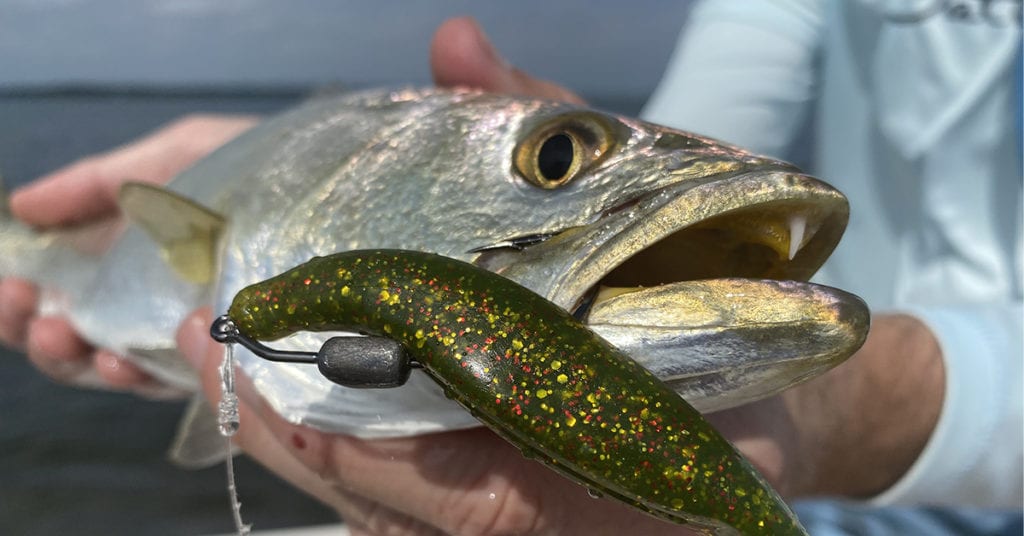
One of the best lures to find fish in new areas is the soft plastic paddletail on a jig head.

This is an inexpensive and easy-to-use lure that catches just about any inshore fish there is. It is especially effective for catching trout and redfish on the flats or near structure.

The paddletail jig can be worked with a straight retrieve or with a twitch-twitch motion bouncing it off the bottom. Both retrievals will catch fish.

There are many manufacturers of paddletail lures, so you have a ton to choose from.

Our personal favorite is the Slam Shady 2.0 paddletail.

It’s white with gold and silver flecks to attract fish, and the tail has incredible action that elicits tons of reaction strikes.

Click here to get a free pack to try out! (While supplies last.)

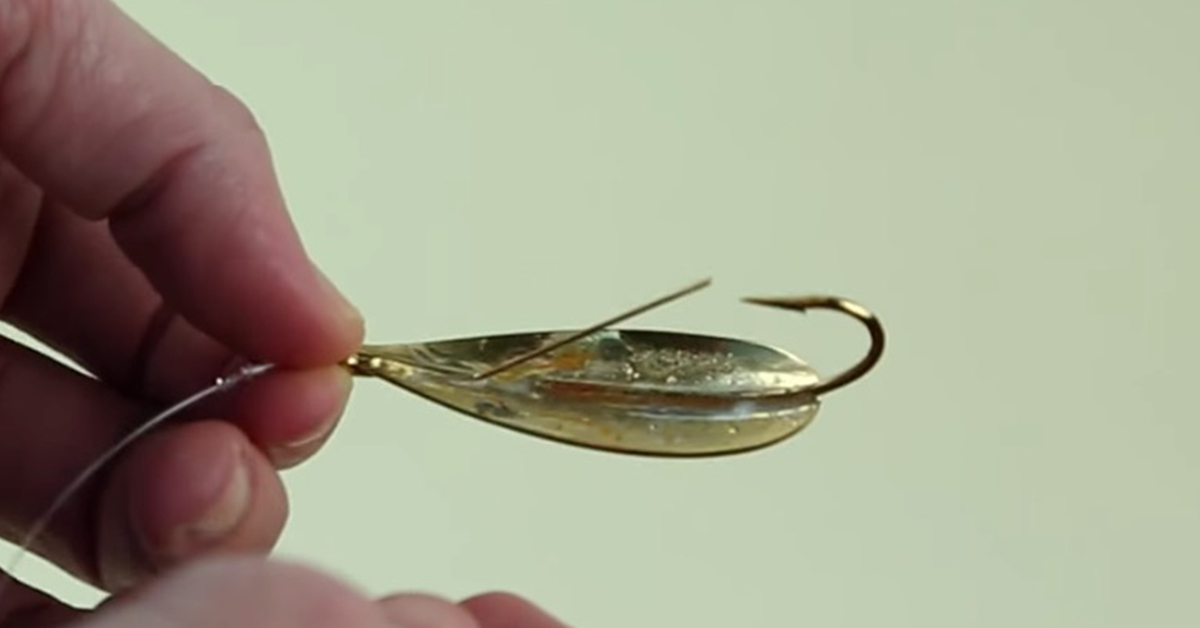
2. The Weedless Spoon

Gold Spoon Fishing Lure

This lure is a timeless classic that catches just about any kind of fish there is.

While these lures do not look spectacular compared to other fishing lures, they are extremely effective.

Spoons create a lot of vibrations and flash in the water. They are designed not to look like any prey in particular, but rather create a lot of commotion and flash that inshore fish cannot resist.

Gold spoons seem to be the most popular of all for inshore anglers, but almost any color can work just fine. Our personal favorite is the Johnson Minnow Spoon, which is a weedless spoon we can work through grass and mudflats.

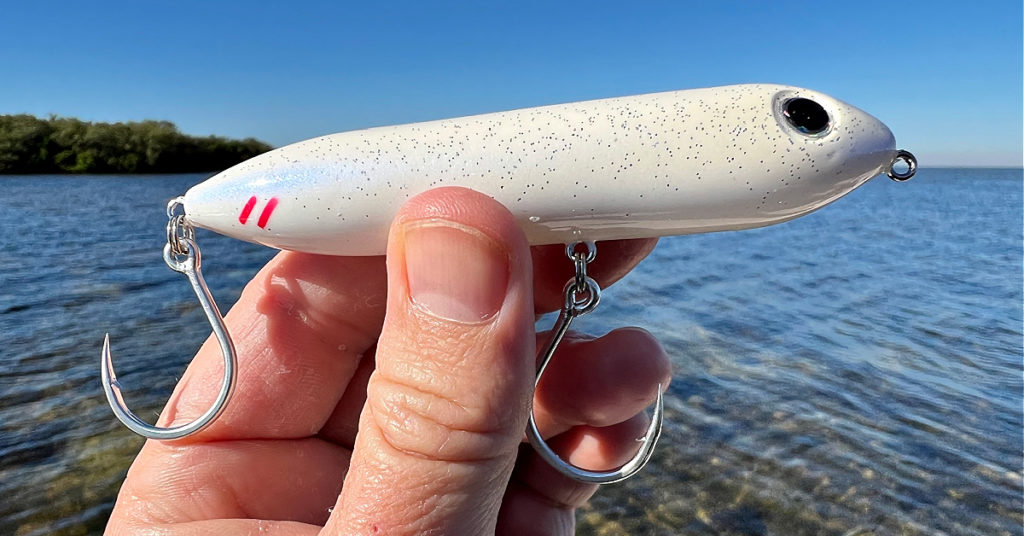
3. Topwater Plugs

Possibly the most exciting way to catch fish, topwater lures are an effective way to entice inshore fish and produce explosive visual strikes.

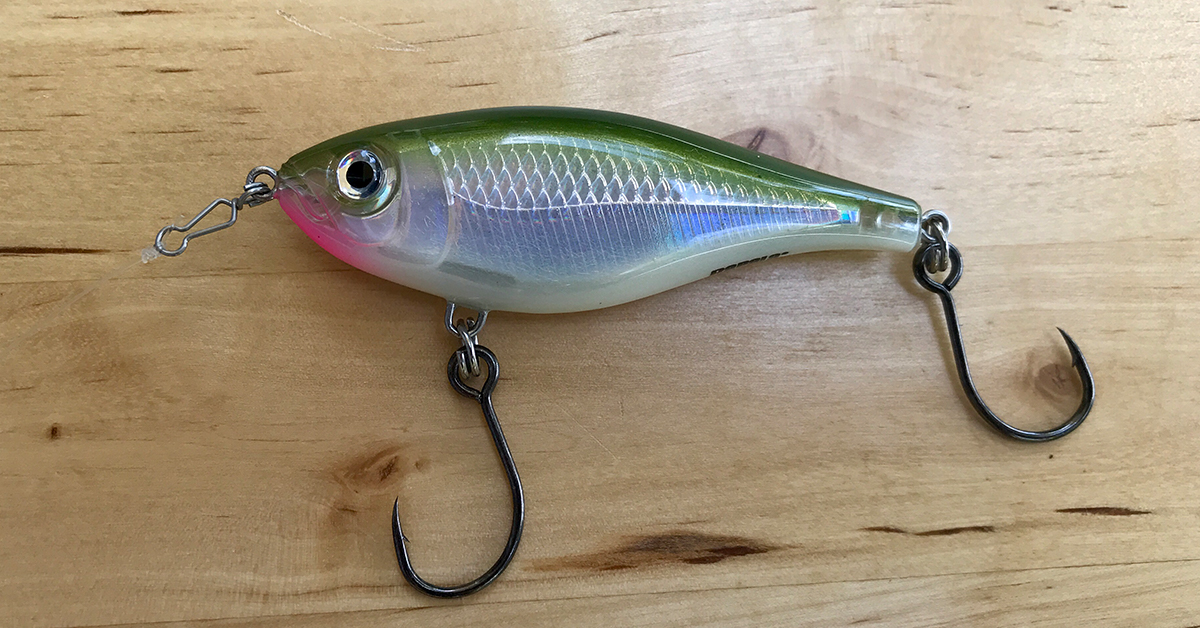
The “walk-the-dog” types of topwater lures are deadly just about anywhere there are inshore feeding fish. They are especially great over shallow water where fish do not have to rise up off the bottom too far to eat the lure.

Some of our favorite topwater plugs are the Heddon Super Spook and the Rapala Skitterwalk. We like to replace the treble hooks with single inline hooks to help keep ourselves safe and for protecting fish that are to be released. Single inline hooks dig into fish with hard mouths better than treble hooks – which is an important advantage when fishing for species such as tarpon.

Our favorite is our very own Moonwalker Topwater Lure.

Tip: fish topwater lures in the early morning and evening/night time for the best results. We particularly like the early morning because there is usually less floating debris (such as dead grass) than at night.

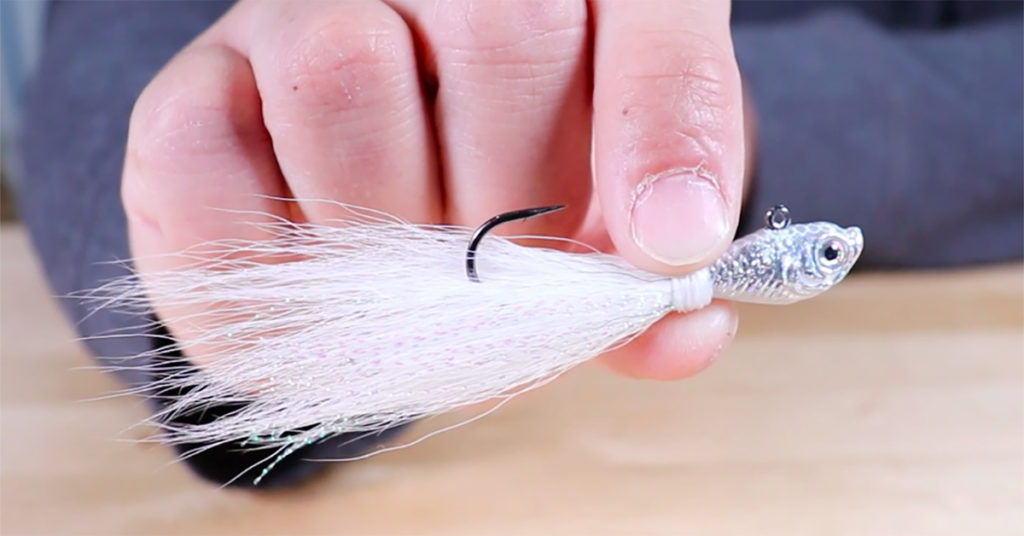
4. The Bucktail Jig

spro bucktail jig review

Bucktail jigs are the original gangsters of inshore fishing and are still just as effective today as they were 100 years ago.

This lure is cheap to buy and even easier to make at home if you have the materials (click here for a jig making tutorial). All it takes is a jig head, some bucktail (which you can buy online or at any fly fishing shop), and thread to hold it all together.

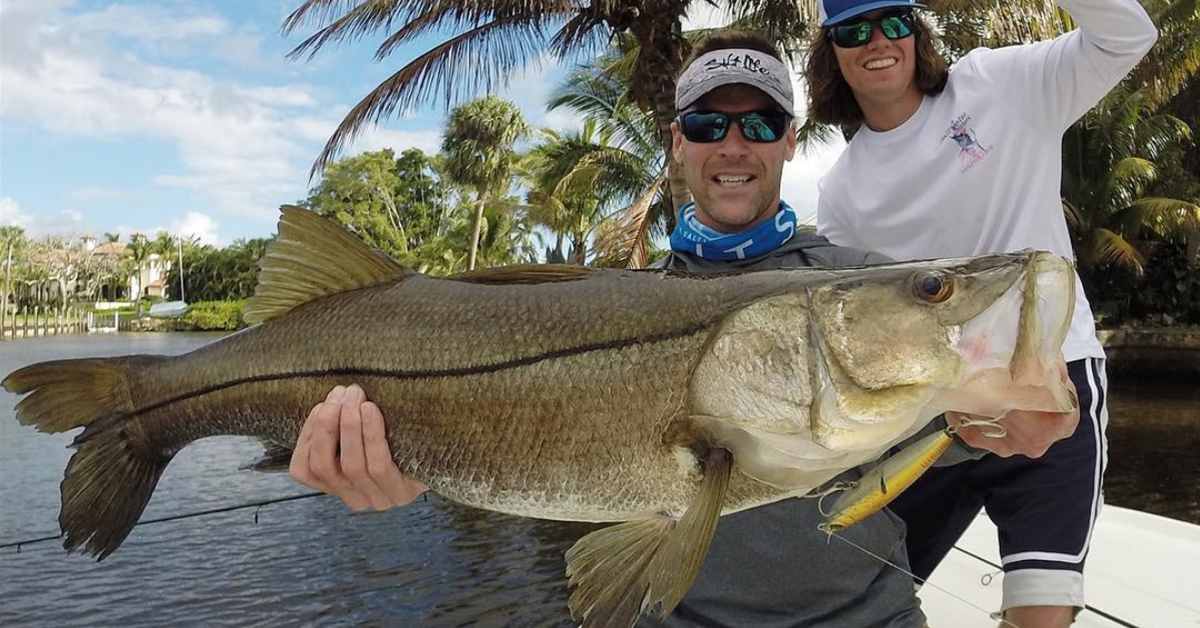
These are one of our go-to lures for big snook and are great for other inshore species such as pompano, redfish, trout, and even bass.

You can use heavier bucktails to catch massive snook and tarpon in deep water with heavy current or use tiny bucktail jigs to catch trout on the flats. Both tactics are effective.

5. Jerk Baits and Twitch Baits

speckled trout on jerk shad late spring

Suspending jerk baits and twitch baits are lures that every inshore angler should have and know how to use.

For soft plastic jerk baits, we love the 5-inch Alabama Leprechaun jerk shad rigged weedless on a weighted hook. This is our go-to rig for fishing on grass flats and is deadly for redfish, trout, snook, and pretty much any other predator fish that feeds on the flats.

Tip: These soft plastic jerk baits have to be rigged correctly in order to work. If they’re rigged incorrectly, they’ll spin or have terrible action in the water and won’t catch fish.

Note: The jerk shad is a lure that helped land a catch of a lifetime when sight fishing from our 3rd-floor balcony (see the balcony catch video here).

Conversely, hardbody twitch baits that work in a similar way to their soft plastic cousins are another lure type you need to know how to use. You can work these just like your jerk baits.

Rapala Twitch Bait

Most twitch baits are not weedless, so keeping these off the bottom is a more effective way to fish these lures.

We especially like the MirrOlure MirrOdine.

It is one of our favorite twitch baits and has a great profile in the water.

Bonus Inshore Lures: Shrimp Lures

One thing we didn’t mention in our top five inshore fishing lures list was lures that imitate shrimp.

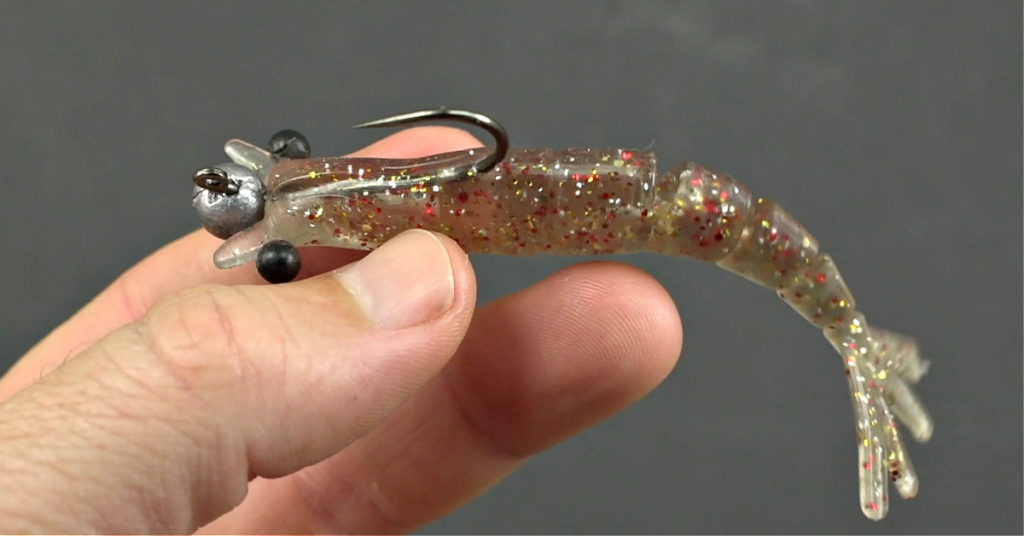
We all know that just about any inshore fish absolutely loves to eat shrimp. Having some lures that look like shrimp is always a good idea as they will likely catch a ton of fish when you use them.

The ultimate artificial shrimp imitation is the Power Prawn shrimp lure rigged on Power Prawn jigheads. This shrimp lure is hands down the best we’ve come across and catches all species of fish!

The Berkley Gulp Shrimp on a jig head is one of our absolute favorite lures when the conditions are turned up and choppy. The scent from the Gulp Shrimp adds another element to entice the fish to eat your lure.

So far, the Gulp products are the only ones we’ve been able to find that smell so good to fish that the used ones can be cut into small pieces for catching tons of pinfish and other small baitfish.

The D.O.A. Shrimp is another staple every inshore fisherman should have. These lures are extremely versatile and can be rigged on an unweighted hook, jig head, and even a popping cork. Each method will catch fish.

Savage Gear shrimp is another one that we’ve had success with, and there of course are many more options.

Learn more about the Insider Fishing Club

Top Five Inshore Fishing Lures [PODCAST]

You can watch the video version of this podcast below (which I highly recommend), listen to the audio version by clicking the play button underneath it, or listen to it on iTunes, Stitcher, or Spotify.

salt strong podcast itunes salt strong podcast stitcher

salt strong podcast spotify

Note: Don’t forget to subscribe to the Salt Strong podcast on iTunes, Stitcher, or Spotify.

Related Podcasts:

  • IS THERE A SECRET WAY TO WORK YOUR LURE?
  • SWIMBAIT, CRANKBAIT, JERKBAIT, & TWITCHBAIT (WHAT’S THE DIFFERENCE?)

Conclusion

Jupiter Snooker with big snook on topwater

Having a couple of lures you can use confidently and often will up your fishing game and help you catch more fish.

The lures above are proven to catch fish. Knowing how to use all of them will allow you to effectively fish the entire water column, which is critical when you are trying to locate where the fish are.

Remember, the most important thing is to find the feeding zone. Most of the time when you find the feeding zone, it won’t matter what lure you’re using — the fish will eat it.

However, these lures will have you prepared for every fishing situation when you do find the feeding zone.

If you have any questions or comments about this article, let us know in the comments section.

To learn more about the Insider Fishing Club, click here now.

P.S. – To see all of the past podcast episodes, click here now.

Tight lines!

Related Articles:

  • 7 ESSENTIAL SALTWATER FISHING LURES THAT CATCH FISH PRETTY MUCH ANYWHERE
  • JOHNSON SILVER MINNOW WEEDLESS SPOON REVIEW & RIGGING TIPS
  • HOW TO CATCH MORE REDFISH, SNOOK, & GROUPER WITH JUST ONE LURE

22 Air Rifle vs. 22lr

0

“22 Air Rifle vs. 22LR: Unveiling the Ultimate Comparison in Caliber Precision. Delve into the world of firearms as we dissect the key differences between 22 air rifles and their traditional counterpart, the 22LR. From accuracy to versatility, discover which caliber reigns supreme for your shooting needs. Explore this comprehensive guide to make an informed decision and elevate your shooting experience.”

22 air rifle vs 22lr

22 air rifle vs 22lr

When it comes to choosing between a 22 air rifle and a 22lr firearm, there are several factors to consider. Both options offer their own unique advantages and disadvantages, making it crucial for individuals to understand their specific needs and preferences before making a decision.

A 22 air rifle is powered by compressed air or gas, usually in the form of CO2 cartridges or pre-charged pneumatic tanks. These rifles are typically quieter than their firearm counterparts, making them ideal for backyard shooting or hunting small game without causing disturbance. They also tend to have lower recoil, which can be beneficial for beginners or those looking for a more comfortable shooting experience. Additionally, air rifles are often less regulated than firearms and may not require a license or permit in certain jurisdictions.

On the other hand, a 22lr firearm utilizes traditional ammunition that contains gunpowder and primer to propel the bullet forward. These firearms are known for their versatility and power, as they can be used for various purposes such as target shooting, hunting small to medium-sized game, and even self-defense if necessary. The availability of different bullet types and higher muzzle velocities also provide shooters with greater range and accuracy compared to most air rifles. However, it’s important to note that owning a 22lr firearm may require obtaining the appropriate licenses or permits depending on local regulations.

In conclusion, the comparison between a 22 air rifle and a 22lr highlights significant differences in power, accuracy, and cost. While the 22 air rifle is suitable for target practice and pest control at short ranges, the 22lr offers superior range, velocity, and stopping power. Additionally, the availability of ammunition and cost-effectiveness make the 22lr a preferred choice for hunting or self-defense. Ultimately, choosing between these two depends on the intended purpose and personal preferences of the shooter.

PCP vs Spring Piston: Which one is better?

0

When reading about guns in the search for the first one that would be perfect for you, an age-old debate comes into question.

Should a beginner start with a traditional, spring-powered gun or a pre-charged pneumatic (PCP) gun? 

The battle of PCP vs spring-piston air rifles can be a bit confusing. 

People have their own opinions on the matter according to their experiences and needs, but what should a beginner who has not even a rough idea do?

This article will help you out in deciding which one works best for you. 

Spring Piston and its Working Procedure:

Spring pistons are the traditional type of guns that you may have seen commonly used. They are the most basic of guns and are easily available at a low price – hence proving themselves very beginner-friendly. 

To get a better understanding of the spring piston, let us look at exactly how it works and whether the mechanism will be well suited for you. 

  1. There are two main components inside the gas chamber – the piston and the spring. 
  2. Upon cocking the gun, the spring starts undergoing compression. This compressed gas causes the air stuck behind the piston to start getting pressurized. 
  3. When you pull the trigger, the spring gets decompressed and causes the piston to move forward when the trapped air behind it is released at high pressure. 
  4. The pellet then comes out of the muzzle at full speed due to this pressurized air . 

This is how the spring in the system works to fire the pellet inside. 

(For more on the best spring air rifles, see this post)

Pre-charged Pneumatic Guns and its Working Procedure

The term ‘pre-charged’ in PCP guns comes from the fact that instead of a regular piston, there is a gas cylinder that is fixed beforehand and does not require continuous reloading.   

The air inside the cylinder keeps a valve closed which also keeps the air trapped and tight inside the tank. Here is how the procedure works:

  1. Upon the trigger being cocked, a hammer inside is ready to fall onto a plunger in front of the valve. The valve is pushed to open due to the energy from the hammer . 
  2. After the shot, the pressure in the tank pushes the valve close. In the beginning, the pressures can be high enough to cause the valve to close quickly. 
  3. After each shot, the pressure in the tank is reduced along with the amount of air stored, which will need to be refilled after it has completely been exhausted. 

Differences Between PCP vs Spring Piston

The primary difference between PCP vs spring-piston air rifles is the recoiling. Recoiling is the backward and forward movements of the arm caused by the pressure of continuous shooting. There is minimum recoiling and movement in PCP guns, causing them to be very comfortable for their purpose, whereas spring pistons are known for their continuous recoiling.

The spring piston recoiling is at risk of injury from its movements, but it is a common misunderstanding that PCPs do not recoil. Recoil is present in the latter, but the difference in comparison of PCP vs spring-piston air guns shows that the contrast in pressure is huge and greatly affects how you need to shoot the rifle.

A spring-powered rifle needs to be shot in the same manner for maximum accuracy, with the most gentle and perfect grip on it to only ever be truly accurate. When gripped too hard, there can be a difference in recoil which can lead to misfiring and accidents as well. This is the risk that spring pistons pose when not held properly. 

A PCP gun, on the other hand, is a more advanced option, so the recoil is minimal and there is better accuracy for the shooter as long as they keep their head and eye position behind the sight remain consistent.

(For more on 5 types of air rifles you need to know before buying, see this post.)

PCP vs Spring: Power

Usually, the muzzle energy that is sufficient for all organized target shooting and hunting sprees is expected to be 12-foot pounds. Though some short-range target disciplines can restrict their muzzle energy to six-foot pounds.

Most PCPs will be adjusted to deliver around 11-foot pounds of muzzle energy or even more! The FPE usually depends on the caliber. For instance, some .25 caliber rifles can deliver up to 50 FPE. 

Hence, high-caliber PCPs offer more FPE. Thus, they become ideal for small, medium, or large game hunting. 

The air pressure in PCPs is also compressed to between 2700 to 3000 pounds per square inch. 

The most common spring-piston caliber for shooting today is still .177 and .22. Depending on whether the hunter is shooting a high-velocity projectile or one with a more arched trajectory, spring pistons give the shooter their choice. 

PCP vs Spring: Accuracy

Another misconception about the PCP vs spring-piston debate is that the PCP will be far more accurate than the spring-piston gun. 

However, that is not the case and springers are just as accurate as PCPs. They have excellent shot-to-shot consistency and can rival or sometimes even outperform a PCP when their respective muzzle velocity is tested. 

Why then, is this debate still prevalent? It mostly comes down to the way the guns are to be used. 

Where air pistons require a lot of practice with grip, aiming, and getting used to the recoil, PCPs have covered some of the hard work required to shoot and seem more accurate. It is not the rifle that guarantees the accuracy, but just the way it is being shot. 

PCP vs Spring: Noise Level

If you wish to practice a lot with your gun, it is important to keep in mind the noise factor of guns as you would not want to disturb the area or catch unwanted attention. 

PCP guns have an advantage over their spring-powered rifle rivals as the latter makes a lot of noise upon firing. 

The coiled spring inside the spring pistons can lead to more sound when the pellet is released. Hence, they are not very advisable to keep if you want to hunt or practice your shooting skills. The sound may, however, dampen with time. 

On the other hand, PCPs are quite noiseless and hence perfect for keeping at home, going hunting, or practicing shooting. The credit goes to the noise reduction system or sound suppression system present in PCPs. 

These systems work by creating several air chambers inside the shroud. As the air passes through each one, the air gets stripped away. Therefore, when the air finally comes out, there’s very little noise.

PCP vs Spring: Upkeep Cost

There is a vast amount of PCPs and air-powered rifles to choose from these days, but the cost is not as appealing to the eye as the varieties may be. 

Spring pistons are comparatively known to be much cheaper than PCPs, but the gap is narrowing as due to demand for the traditional guns, good spring-piston guns are also in the market at big-budget prices. 

However, it is still more economical to start with a spring gun rather than a PCP as PCPs require high maintenance and expenditure for it as well. Besides, some spring pistons offer a degree of high accuracy at a lower price which makes it far more beneficial in the long term.

PCP vs Spring: Which One is Better for Pest Control?

Pests can be troublesome considering they usually come in huge numbers. For this use, a PCP will be more beneficial if you have a whole infestation. They shoot silently and can do the job quicker in case you need to aim or need repeated shots to take care of multiple targets. 

However, it would be a rather expensive choice to waste precious PCP ammo on pests as the gun requires high maintenance and frequent charging. 

Spring guns, though at risk of hard recoil, are cheaper and can be kept just for pest control as they are always ready to use and would not hurt your pockets for maintenance. 

PCP vs Spring: Which One is Better for Hunting Game?

When it comes to choosing PCP vs spring piston pellet guns, most hunters prefer the former due to its obviously advanced machinery with minimal recoiling and sound. 

Moreover, PCPs offer excellent power that is required for medium or large game hunting. On the other hand, spring pistons are better for small game hunting only most of the time. 

A newcomer in the hunting game would be rewarded more quickly if they start with a PCP, which might ensure that their interest in shooting will remain.

One way to go about it is to master the PCP gun before taking on the challenge that is the spring piston. 

Despite being an earlier gun, a lot of hunters still prefer it for its extreme accuracy that comes with mastering the grip and recoiling. The other way around can be done as well, but if you do not know gun holding and its technicalities, it is advised that you go for the safer option. 

Conclusion

Considering that PCPs and spring pistons are still the two most widely used and approved hunter guns, there can be no correct answer to which one is better. There are pros and cons of both depending on what your priorities are, so to narrow it down, here is the conclusion. 

Pros of buying a PCP gun:

  • Constant firing with no recoil problems
  • Cocking the gun is easy
  • Smooth, soundless shooting with better safety
  • Home-house friendly 
  • Good for hunting
  • Powerful for hunting large/medium game

Cons of buying a PCP gun:

  • A more expensive choice than springers
  • Equipment for charging is needed
  • Special maintenance and repair are required frequently

(For more on the best PCP air rifle on the market, see this post)

Meanwhile, to sum up, the pros and cons of spring pistons:

Pros of buying a spring piston:

  • Affordable and easy to maintain than PCPs
  • No need for charging material 
  • An average spring gun lasts about a thousand shots before needing replacement
  • Good for pest control and one-time use.

Cons of buying a spring-powered gun:

  • Recoiling can lower the chances of accuracy
  • Cocking can be difficult for smaller-sized guns
  • There is an increased recoil at higher power levels
  • Noisy and requires a lot of practice

(For more on the best break barrel air rifle that hits like a champ, see this post)

The Flattest-Shooting Rifle Cartridges: A handy table

0

Right now, shooters are obsessed with flat-shooting rifle cartridges. The advent of precision rifle competitions and the laser rangefinder has increased the public’s desire to go long. But what are the flattest shooting rifle cartridges?

The flattest-shooting popular rifle cartridge at 1,000 yards is the 6.5-300 Weatherby Magnum, followed by the .26 Nosler, the .28 Nosler, the .22 Creedmoor, and the 6.5 Weatherby RPM. These cartridges all drop less than 255″ at 1,000 yards.

The following table averages multiple loads for each cartridge and shows an average amount of drop at 500 yards and 1,000 yards for each cartridge.

Cartridge500 yd Drop (inches)1000 yd Drop (in)Muzzle Velocity (fps)

The flattest-shooting cartridges usually have Nosler or Weatherby in their name, and the top three flat-shooting cartridges were created by those respected companies. As much talk as there is about the .270 Winchester’s ability to shoot flatly, it does not compare with these three flat-shooting options.

6.5mm and 7mm projectiles offer very high ballistic coefficients, meaning they offer excellent ability to overcome drag and wind deflection over longer distances. When considering cartridges for their ability to shoot flat, overcoming drag is critical.

When a bullet is fired, many forces are immediately working against it: gravity, wind, and atmospheric drag.

As soon as a projectile leaves the muzzle, the earth’s gravity instantly begins to affect the trajectory of the round. Equally, cutting through the air slows the projectile down, eating away at its energy. Wind also affects bullets differently, and a cartridge’s ability to overcome these three forces makes it better or worse for shooting flat and far.

Spinning high B.C. bullets at faster speeds allows the projectile to get to the target sooner, minimizing the amount of time all three forces have to affect the bullet’s trajectory.

The way in which cartridge manufacturers develop rounds to overcome these forces is the twist rates of the barrels in the rifles the cartridges are chambered in, developing longer, more aerodynamic bullets with narrower ogives and case capacity.

Barrel twist rates spin the bullet out of the muzzle in a spiral much akin to a quarterback throwing a football. The spin rate helps to stabilize the projectile along its path, cut through drag and higher case capacities give the projectile more velocity thus delivering the bullet to the target more quickly.

The 26 and 28 Nosler as well as the 6.5×300 Weatherby Magnum all utilize heavy for caliber bullets with high ballistic coefficients that are stabilized by barrels with fast twist rates. All three cartridges also offer ample case capacity, allowing enough powder to send bullets at drag-defying velocities.

Below is a chart indicating the three best flat-shooting cartridges and their muzzle velocity, drop, energy levels, and felt recoil. Recoil statistics are offered for reference.

The three best flat-shooting cartridges all drop less than 40″ at 500 yards

You can compare these numbers with your favorite cartridge using Backfire’s own table of flat shooting cartridges and you will see that the numbers indicated are in the absolute upper tiers. But let’s take a quick look at a historically popular “flat-shooting” cartridge, the .270 Winchester.

At nearly 100 years old, the .270 Win cannot compete with today’s flat shooting stars.

As you can see, one of our gold standard flat-shooting cartridges (.270 Winchester) does not compare favorably with either of the Noslers or the Weatherby Magnum. Of course, the .270 Win was developed in 1925 when 1000 yard shots were effectively unheard of.

This is not just a product of the .27 caliber bullet and its ballistic coefficient numbers. Case capacity is literally and figuratively the driving force here:

Both Nosler offerings are based on the 300 Remington Ultra Magnum and both boast case capacities of 93.5 grains of water. The 6.5×300 Weatherby magnum, as its name suggests, is based on the 300 Weatherby mag and has a case capacity of 98 grains of water. By way of comparison, the .270 Winchester (based on the .30-06 Springfield) offers a case capacity of 67 grains.

Deciding on the three best flat-shooting cartridges does not come down simply to one statistic, but a combination of all the factors inherent to a cartridge. Velocity, drop, energy and the use of bullets with their own factors which create their ballistic coefficients all should be considered.

Any cartridge that drops less than 40 inches at 500 yards or close to 200 inches at 1000 yards should be considered a flat shooting cartridge. The amount of drop is directly influenced by velocity, energy, rifle barrel, and bullet design.

With those thoughts in mind, it is easy to see why the 26 Nosler, 28 Nosler and the 6.5×300 Weatherby Magnums are the best flat-shooting cartridges offered to rifle shooters today.

Does Flat Shooting Even Matter?

Since nearly all long-distance shooters today use a laser rangefinder, does it even matter which cartridges shoot the flattest? Does it matter if there are -30″ of drop or -40″ of drop if the answer is simply to spin the turret a few extra clicks?

One argument for a flat-shooting cartridge is that it covers mistakes. I was once hunting plains game in Africa when my PH told me, holding a rangefinder, that the wildebeest was 155 yards away. I took the shot prone and then stood up after the wildebeest tipped over after a perfect shot.

I was surprised at the distance, so I asked my PH “That’s just 155 yards?” He got a stunned look on his face and said, “No, TWO hundred fifty-five yards!” Our miscommunication during the shot sequence didn’t matter a bit, because I was shooting a .28 Nosler, which put the shot only 2.8″ low at that distance. A flat shooting cartridge matters.

However, I fully admit that that a flat shooting cartridge is not nearly as important as a cartridge which is resistant to wind deflection. Still, a flat-shooting cartridge will often perform well with wind as well, because it is in the air for less time between the shot and hitting the target.

The Elements That Impact How Flat a Bullet’s Trajectory Is

Gravity impacts all objects the same. The longer the bullet is in the air, the longer gravity can pull on the object. Time of flight impacts bullet drop more than anything else. In fact, we may say that it’s the only thing that matters; however, factors that lead to time of flight changes are important to consider.

The ballistics coefficient of the bullet (a formula which considers the mass, diameter, and aerodynamic drag of a bullet to understand its ability to fight wind and continue on its path) greatly impacts time of flight because it keeps the bullet from slowing down due to inefficiency of flight.

Muzzle velocity certainly makes a difference in how fast the bullet reaches the target, but it is by no means the only factor to consider. For example, the .50BMG and the 6.5 Creedmoor both launch bullets at approximately the same muzzle velocity of 2,700fps.

However, the .50BMG bullet will reach the target with 143″ less drop than the 6.5 Creedmoor, because it has more mass which leads to a higher BC, and that higher BC given the same velocity, makes it slow down less during flight. Thus, the .50BMG drops less at 1,000 yards than the 6.5 Creedmoor.

Hiking With Wide Feet: Wide Width Hiking Boots That Will Make Your Feet Smile

0

Enjoy Happy Trails, the free monthly newsletter from Hiking For Her.

Receive a free resource: Hiking Layering System Explained

If you’re hiking with wide feet, you know what I mean when I talk about smiling feet!

Smile, purr, send little heart emojis into the air, it’s all good when it comes to finally finding a pair of hiking boots that fit your wide feet.

So let’s get to it!

Just so you know, I recommend the brands and stores that deliver the goods. Some of my links go to trusted affiliates, meaning Hiking For Her earns a small percentage of your purchase price.

  • It costs you nothing extra to support this website while hiking with wide feet 😉

Best brands for hiking with wide feet

As a hiker, I have my personal favorites that I know work for my quirky ultra wide feet.

I also follow all the hiker chatter on line, so I learn about hiking boot brands reported to work well for hiker’s wide feet.

Although I try hard to give you reliable information, please be flexible with these recommendations.

Your wide feet are unique, and you will have to experiment with the brands I’m about to recommend.

Ready?

Here are my two lists of wide width hiking boot brands you should look at.

My personal listof hiking footwear that accommodate wide feet

These brands have been on my wide feet for decades:

  • Keen
  • Salomon
  • Zamberlan
  • Merrell

My researched list of wide width hiking boots that are reported to work well

These brands perform well for other hikers with wide feet, based on top selling statistics and trail reports:

  • Oboz
  • LaSportiva
  • Altra
  • Vasque

General tips for shopping for wide boots

Before you dig into particular brands, it’s important to realize that every outdoor brand becomes known for certain important features.

The brands of hiking footwear I’m sharing here have wide width options along with their other options, or are built with a wider toe box to begin with.

But beyond brand names, it is important to know exactly how to shop for wide width trailwear.

  • Drop down to my tips before you buy a pair.

And if this is your first pair of hiking boots, read my detailed tips for selecting the right pair here.

Now let’s take a tour of those brands!

Why Keen boots make hiking with wide feeta comfortable experience

Here’s the whole story in one diagram:

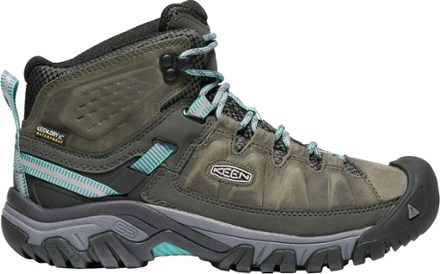
And here’s the boot you will find on my feet for day hikes on established trails, wearing a day pack.

119903KEEN Targhee III Waterproof Mid Hiking Boots

You can read my detailed Targhee review here.

Salomon hiking boots if you arehiking with wide feet

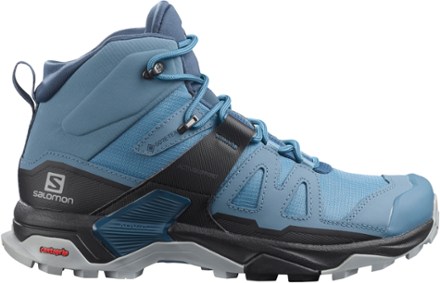
These are the boots I use when I need good traction and ankle support, on day hikes as well as multiday trips.

187457Salomon X Ultra 4 Mid GORE-TEX Hiking Boots

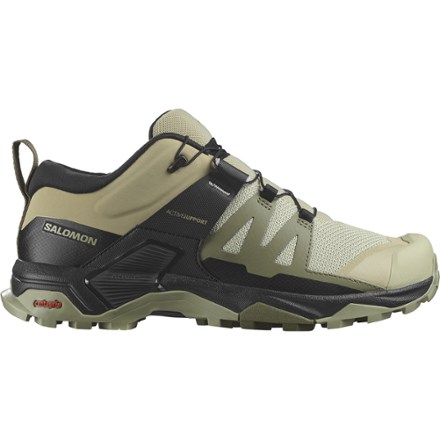
Note that these boots have a high cut. If you don’t want your ankles surrounded and protected, consider these Salomon trail shoes instead.

They are what I wear for straightforward day hikes on non-rocky, dry to moderately muddy trails.

187460Salomon X Ultra 4 Low Hiking Shoes

Zamberlan hiking boots for wide feet

These boots are built for rugged use. And the price reflects that.

So only look at these if you’re going to be wearing them through tough conditions.

Zamberlans are on my feet when I do multiweek backcountry treks, because they stand up to water, rock, jagged trail debris, snakes, and more.

And while they are not labeled “wide width”, the toe box is plenty roomy for my wide feet.

They also receive rave reviews from hikers with toe problems, including hallux rigidus and arthritis.

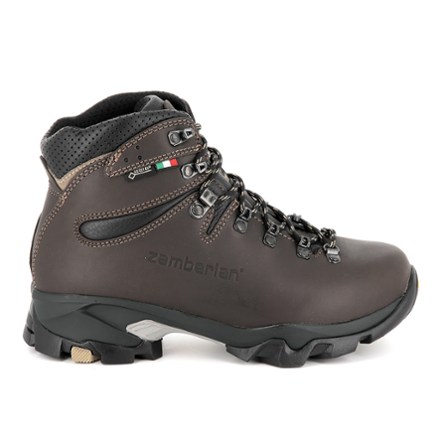
128769Zamberlan Vioz GTX Hiking Boots

An important sizing note

I always go up one full size with this brand, to accommodate foot swelling and my two pairs of hiking socks.

In fact, the first time I bought a pair of Zamberlan hiking boots, I made the mistake of ordering my regular size. They were a bit snug :/

  • So if you’re going to use sole inserts, or are at all concerned that your regular size might be too snug, order up one size.

Merrell trailwear whenhiking with wide feet

These are the trail shoes I wear when I want to go fast and light, with minimal weight on my back.

They give good traction and are quite comfortable.

Ordering up a half size gives you a good chance that you will enjoy roominess, if you have any doubt.

Also, I only wear one pair of socks with them, and never get blisters.

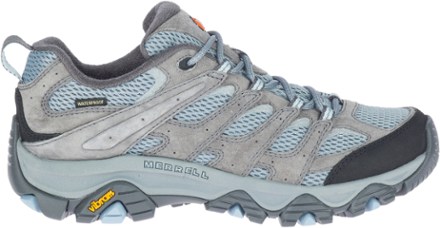
202124Merrell Moab 3 Waterproof Hiking Shoes

Oboz hiking boots in wide widths

These boots seem to run a bit small, so be sure to order up a size, and make certain you select the wide option.

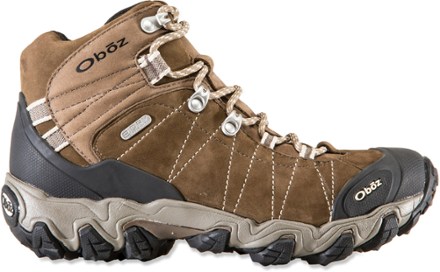
857721Oboz Bridger Mid Waterproof Hiking Boots

LaSportiva boots for wide feet

These boots are ankle protectors, so choose them for trails that will fling roots, rocks and debris at you.

And the tread will impress you.

As with many European brands, they can run a bit narrow. You know what to do if you’re hiking with wide feet!

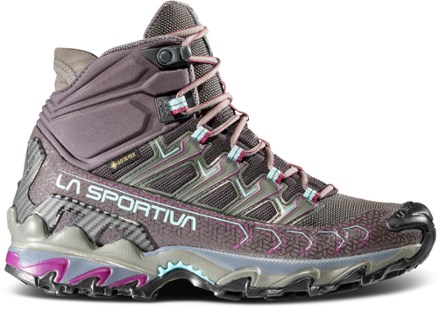
183603La Sportiva Ultra Raptor II Mid GTX Hiking Boots

Altra Lone Peak boots

These boots feature a wide foot bed, nice and roomy for your toes. They call it the “Footshape toe bed”, designed to allow your toes to relax and spread out naturally.

They run up to a size 12.

217487Altra Lone Peak Hiker 2 Hiking Boots

Tips for shoppingfor wide width trail footwear

There are many brands which have given hikers with wide feet good outcomes. And now you’re familiar with some of them.

Here are a few general tips for shopping for wide width hiking boots, to make your choice a bit easier. You want to be hiking with wide feet and a wide smile on your face, right?

Hiking boot reviews are gold mines of information

As with buying any hiking gear, read the reviews and cross check user experiences before trusting your feet to any one brand.

Pay close attention to how reviewers describe their feet.

  • You want someone to mention a wide width.
  • And if you’re lucky, they will also mention their arch height.

If in doubt, go up in size

If you have feet that are just a tad bit wider than “normal”, you might not have to worry about sizing.

But if you have truly wide feet, and have struggled with sizing before, order up a size or at least a half size.

And pay attention when you look at the boot, either on line or in the store.

  • You want the “wide” version if the brand makes regular width as well.

Relax, it’s REI!

Because you are purchasing from REI Co-op, you can return the boots and try another size if they aren’t perfect the first time.

  • More REI benefits here

Be prepared!

I don’t recommend that you pop into a gear store on a whim to try on wide width boots or trail shoes.

Go at the end of your day when your feet are at their maximum size.

And bring your own hiking socks, so you can get an exact feel for how wide the boots run.

  • What’s that? You don’t use dedicated hiking socks? Read this!

If the lacing right out of the box seems weird on your feet, unlace them and try some other lacing techniques, like these.

Pro tip

Need insoles that fit wide hiking boots?

Embrace hiking with wide feet

Don’t let the width of your feet slow you down.

(Ha! A hobbit foot just flashed through my mind. Embrace the width!)

Take good care of your wide feet with my foot care tips for hikers.

BTW, If you’ve found other brands of footwear that makes hiking with wide feet a good experience for you, drop me a line here. I’ll add it to our list!

Home > Best Hiking Gear >

Hiking With Wide Feet: Best Hiking Boots

The 3 Best Trout Fishing Rigs For Rivers And Streams (With Pictures)

0

UPDATED 03 NOVEMBER 2024

by Robert Ceran

Fishing for trout in streams and rivers is very different from trout fishing in lakes and ponds.

First of all, the trout don’t move around very much, so you need to keep moving yourself, and secondly, all of your fishing tactics need to be effective for fishing in water that’s constantly moving.

In order to catch trout successfully in rivers and streams, it’s important to use the right tactics to find trout positioned in feeding lanes close to the main current, and present your bait to them at exactly the right depth.

In this article we’ll discuss the top 3 trout rigs for rivers and streams, and will go over what each of them is best suited for.

How do you rig for trout in a stream or river?

The three most important trout rigs for fishing in rivers and streams are:

  • Fixed bobber rig
  • Drift rig for trout
  • Spinner rig

These three trout rigs cover the majority of all trout fishing applications in rivers and streams, and if you know how to use them effectively, you’ll catch a lot of fish.

That being said, each of them comes in several different shapes and sizes, so there is plenty of room to adapt them to your specific fishing conditions.

Both the fixed bobber rig and the drift rig are great tools for drifting a baited hook with the current, and are ideal for presenting it at the right depth for trout in feeding lanes of rivers and streams.

Each of them comes with its own strengths and weaknesses, and we’ll go into those in more detail below.

The spinner rig is a great option for fishing trout lures in any kind of moving water, from tiny streams to wide rivers, and can be adjusted for each of these scenarios.

Now let’s dive into the details, and discuss each of these rigs more fully.

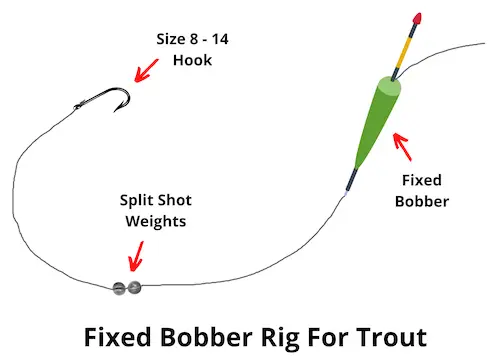
Fixed bobber rig

Fixed bobber rig for trout

This is one of the simplest trout rigs, but works very well for streams and rivers, as it allows you to drift your bait with the current into the most promising spots where trout are likely to be positioned while they wait for the current to bring them food.

Since streams are rarely deeper than 6 or 7 feet, you can cover all depths with a fixed bobber rig, and don’t need to use a slip bobber.

One advantage of using a fixed bobber rig is that you can easily adjust the depth at which you’re fishing by sliding your bobber up or down, and thus fish a range of different depths in every spot, before moving on to the next.

Tying a fixed bobber rig is very easy. You start by threading your bobber onto the line, and then tying the line to swivel or snap swivel.

Next tie a 3 to 4 foot fluorocarbon leader to the swivel, and then tie a size 8 to 14 bait hook to the other end of the leader. And finally, add one or more split shots to the rig to weigh down your baited hook in the water.

The best baits to use with this rig are worms, salmon eggs, or plastic beads (which look like salmon eggs).

You can also use plastic worms, which come in a wide variety of colors. Powerbait doesn’t work as effectively for wild trout in streams as it does for stocked trout in lakes.

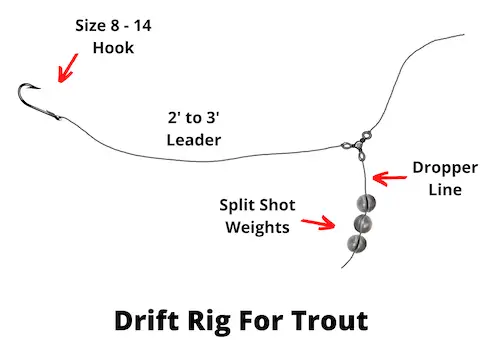
Drift rig for trout

Drift rig for trout

This is the most important rig for drift fishing for trout in strong currents, and in deep runs and holes.

The advantage of this bottom fishing rig is that it presents your bait close to the bottom, where trout are usually positioned while they wait for the current to carry food to them.

The great thing about the trout drift rig is that you can use a weaker dropper line to attach the split shot weights, and if the weights should get snagged on the bottom, you can break off the dropper line without losing the rest of your setup.

Another advantage is that you can easily adjust the amount of weight by adding or subtracting split shot weights, or switching out a pencil weight at the end of the dropper line.

This is very important, as you’re going to encounter currents of different strengths, and will need different amounts of weight to get your rig down to the bottom fast enough.

In order to tie the drift rig for trout, start by tying your main line to one eye of a three way swivel.

Next, tie a 3 to 4 foot long fluorocarbon leader to another eye of the swivel, and then tie your bait hook to the other end of that leader.

Finally, tie a 2 to 3 inch long dropper line to the third eye of the 3 way swivel, and either attach several split shot weights, or tie a pencil weight to the end of the dropper line.

The best baits to use for trout when drift fishing with this rig are worms and salmon eggs, or plastic beads or plastic worms of various shapes and color.

Incidentally, this setup also works very well for catching steelhead from the bank, and you may be able to target both species at the same time in some rivers.

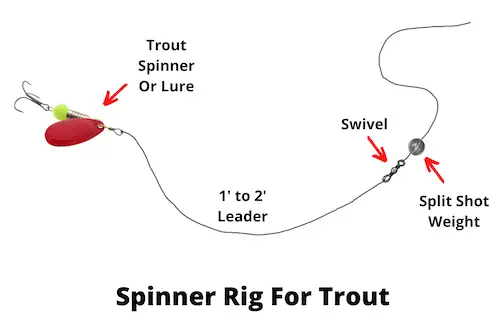
Spinner rig

Spinner rig for trout

This is a classical trout fishing rig that works well in both running and still waters.

When using it in small streams, try to downsize your lures, since the average size of trout is likely to be smaller than in lakes and ponds.

If you’re fishing in bigger rivers, on the other hand, you can definitely upsize your lure size, and will likely be catching bigger fish as well.

While you can potentially tie your main line directly to your lure, it’s better not to do this.

For one thing, you should use a swivel to avoid the lure twisting up your main line, and secondly, if you’re using braided main line, using a fluorocarbon leader will help to avoid spooking fish.

The best way to tie a spinner rig is to start by tying your main line to a size 6 swivel, and then tying 2 to 3 foot of fluorocarbon leader to the other eye of the swivel.

Then tie a bait hook to the leader, and attach one or more split shot weights above the swivel.

The split shot weights are necessary if you’re spinner fishing for trout in a strong current, and need to get your trout spinner or lure down to the right depth as fast as possible.

What is the best rig for trout fishing in streams?

The best rig for trout fishing in streams is the fixed bobber rig. It’s the perfect setup for drifting a baited hook or soft plastic worm along trout feeding lanes in streams.

The correct way to fish a bobber rig is to lift your main line up above the water, which results in the whole setup floating down the stream at a natural speed with the current, and this is by far the best tactic to catch trout in streams.

That being said, you can definitely also use the other two rigs to your advantage when fishing in trout streams.

The drift rig is a great option if you’re fishing in strong currents, and the spinner rig is ideal if you want to cover a lot of water quickly.

What is the best rig for trout fishing in rivers?

The best rig for trout fishing in rivers is the drift rig, since it’s ideal for presenting your bait close to the bottom even in strong currents.

By adjusting the amount of weight on the rig you can easily switch from one strength of current to another.

And since this fishing rig is also great for catching steelhead in rivers, it’s definitely worth learning how to use it effectively.

Best rod and reel setup for trout fishing in streams and rivers

Now let’s talk about the best trout rod and reel setup to use when fishing with these rigs.

All three rigs are best fished with a 7 to 8 foot long light or ultralight spinning rod.

However, when fishing on small streams, you may want to choose a shorter rod around 6 foot long, since that’s easier to use under trees and bushes.

Also, if you’re fishing in big rivers where trout grow larger (or where you could hook into steelhead as well), you probably want to increase the strength of your rod to medium power.

The ideal reel to use with this setup is a 2000 to 3000 size spinning reel spooled with 10 to 20 lb test braided line.

Braid is the best choice of trout fishing line in rivers because it has almost no stretch, which allows you to feel trout bites with more sensitivity compared to mono or fluoro.

While braid is the best choice for your main line, the leader should definitely be fluorocarbon, since that has lower visibility underwater, and presents your bait with more stealth.

Best Hiking Gloves: Cover Up For Comfort

0

Enjoy Happy Trails, the free monthly newsletter from Hiking For Her.

Receive a free resource: Hiking Layering System Explained

The best hiking gloves are the ones you reach for over and over again, because they work well to keep your hands warm and dry.

That’s why I recommend that you have at least 3 types of gloves in your hiking gear locker.

Let’s tackle them one at a time, with an overview of hiking gloves by function.

Best hiking gloves for cold weather

Cold weather hiking the best hiking gloves to guard against hypothermia.

Scary fact:

One of the most neglected areas on a hiker’s body in cold weather are your hands.

  • We all think about protective hats and jackets and pants, but please don’t overlook the importance of keeping your hands warm at all times.

If your fingers are numb, you aren’t going to have the dexterity to adjust your clothing, take the cap off your water bottle, or unfold the map that tells you when an important trail junction is coming up.

And that leads to making mistakes on the trail that can endanger your life, or at least your enjoyment of a hike.

So keep your digits toasty warm!

I have a repertoire of winter hiking gloves, and switch them out as needed.

The least cumbersome pair are fingerless gloves, like these.

  • My fingers are free to manipulate, grasp and tug on my hiking poles, boot laces, and zippers, but the rest of my hands and wrists stay warm.
  • Doesn’t sound like a big deal? It will be when an icy cold wind is blowing, or it begins to rain.
  • And they convert easily to mittens when I need a bit of extra warmth around my fingers.

Fleece hand protectionon a hike

I like lightweight fleece gloves for situations when I know I’d rather not use mittens, like the photo above.

  • They ride along in the bottom of my pack year round, because cold hands are dangerous for extended periods of time.
  • Even a nice summer day can turn nasty at higher elevations. Always put on an extra layer once you top out somewhere the wind can reach you (especially important if you’re sweaty from the exertion of uphill hiking).

Note that these glove options are not weatherproof, so I recommend them only for dry cold conditions.

If you want bombproof gloves with all the features, that also allow you to interface with your phone or GPS screen, expect to pay a bit more.

But revel in the warm, dry hands you’ll have!

Here is a full array of your options.

  • Remember to sort them by weight, weather proofness, and features, as outlined above.

Natural fiber options

Possum down might not be a familiar glove material to you, unless you reside in New Zealand.

Read the Hiking For Her review of Possumdown hiking gloves here.

Another natural choice: alpaca wool gloves, like these.

Best hiking gloves for cool windy conditions

In the spring and fall, I want to stay warm but don’t want extra bulk in my pack or on my hands.

These are the gloves I pull out of my pack when I begin to feel chilled.

  • I know that my core temperature is dropping a bit, and I pay attention by warming up my hands.
  • I also pull on a hat if I’m not already wearing one.
  • More cool weather hiking tips here

Sometimes I know that I’ll be cold part way through the hike, because I’ve consulted my topographical map and recognize a ridge or other windy land feature coming up soon.

So these gloves are kept within easy reach, in my jacket pocket or a top pocket of my backpack where my hiking partner can easily reach them for me.

That way, I don’t need to lose body heat by stopping, removing my pack (there goes all of that delicious warmth trapped against my back!), and digging through gear.

I recommend that you do the same: Keep these gloves handy (oooh, a hiking glove pun).

Why not wearhiking mittens?

I am not a fan of wearing mittens on the hiking trail, with one exception.

Mittens encase my hands in a non-functional configuration, making it hard to grip my poles or do much of anything.

The only exception I make is when I face really cold conditions and I want all of my fingers smushed together to share warmth.

  • I make sure all gear adjustments have been made before I slip on mittens like these.
  • Sometimes I need my trail buddy to help me yank on the second one! And I return the favor.
  • Sometimes I wear these mittens in my sleeping bag if I’m having a hard time falling asleep. For some reason, warm hands relax my entire body.
  • They’re also nice cushioning for sitting on hard cold rocks!

I appreciate the safety loops on these mittens, because I can dangle them above snow or mud from my poles or pack.

Best hiking glovesfor sun protection

I never used to believe in wearing gloves to block UV rays on cloudless hikes…

until I began to require skin biopsies every year for the pigmented spots on my face and hands.

Now I’m a believer in wearing lightweight, light colored wicking fingerless gloves on my summer hiking adventures.

Ever notice how sunscreen tends to wear off?

  • How many times do you reapply it to your hands and fingers?
  • Yeah, not so much for me, either.

This brand is rock solid in the gear industry.

If you’d prefer full sun gloves, they’ve literally gotcha covered! These are handy when you’re hiking over reflective snow fields, to prevent sunburn.

Bonus: Wearing these gloves prevents “age” spots, too.

If you want to go whole hog into UV protective clothing, read this.

A few more tips for buying the best hiking gloves

If you’re just starting out hiking in cooler conditions, and won’t be staying outdoors overnight, you can get away with bargain brands of hiking gloves.

But expect flimsy materials, poorly sewn seams, and less than ideal insulation.

If you’re heading into uncertain weather conditions, or plan to spend at least one night camping in cool/cold/unpredictable temperatures, you absolutely must pay attention to your hands.

Regardless of which brands and styles you go with, be sure your best hiking gloves have:

  • women’s sizing, with a snug but not binding fit
  • a cinching system for creating an airtight seal for really cold conditions
  • appropriate thickness to keep you from over heating or freezing (which is why I have several styles)
  • durable synthetic material on the palms if gripping poles or camera gear is important
  • non-chafing seams
  • wrist straps to prevent loss

Gloves = hiking love

If you are hiking with newbies, children, or a group of folks you don’t know well, bring along a second pair of gloves to hand over when any of them begin to shiver.

Demonstrate without a word that the best hiking gloves are a vital component of your anti-hypothermia strategy.

Be prepared for grateful words and a big smile.

Notice the word LOVE in there?

  • Glove love is where it’s at, y’all.

Ready to tackle warm feet on a hike? I thought you might be up for it 😉

Home page > Best Hiking Gear >

Best Hiking Gloves

I get emails all the time about what I wear on the trail.

That’s why I provide these affiliate links to you: the best gear is instantly available for your consideration, and the gear company sends a few pennies per dollar to Hiking For Her’s website with no added cost to you when you purchase.

Everyone ends up a winner that way: great gear for you, strong gear companies, and more free hiking tips for everyone.

Yeehaw!

And thanks very much for your support. It’s warmly and sincerely appreciated.

Best Air Rifle Deals

Popular Posts

Dry Firing Air Rifles: What You Need to Know

0
"Master the art of precision shooting with dry firing air rifles. Enhance your aiming skills, trigger control, and muscle memory without using ammunition. Discover...

Pump Air Rifles vs Break Barrel

0
Exploring the Pros and Cons: Pump Air Rifle vs Break Barrel - Unveiling the key differences and advantages between two popular air rifle mechanisms....

PCP vs Gas Piston: Which One is Better?

0
The perfect airgun is a difficult pick when you are new to gun-hunting. There are a lot of things to keep in mind, starting...

Air Gun 101: What You Should Know about Air Rifle Barrels Before Buying

0
Have you ever heard the phrase: “Imitation is the sincerest form of flattery”? The Chinese must have been very sincere in emulating this proverb. I...

Air Gun 101: How many types of Air Gun Sights are there and which...

0
The former American president, Joe Biden, was recently quoted saying: If you need more than ten rounds to hunt, you better stop that business and...