If you’re looking to master the art of cutting a tomahawk steak, you’ve come to the right place. With its impressive bone-in presentation and succulent marbling, the tomahawk steak is a true showstopper on any grill or plate.
In this guide, we’ll walk you through the step-by-step process of properly cutting a tomahawk steak, ensuring that you achieve perfect slices that do justice to this flavorful cut of beef.
First, make sure you have a sharp knife that can easily glide through the meat. Begin by identifying the bone that extends from the center of the steak’s thickness, resembling a tomahawk axe handle.
This bone adds flavor and moisture to the meat during the cooking process, making it essential for the overall taste.
Next, position the tomahawk steak on a cutting board with the bone facing upwards. Start by slicing horizontally through the outer fat, creating a clean incision that exposes the meat underneath. Use gentle, controlled motions to avoid cutting into the bone.
Once you’ve created this initial incision, it’s time to reveal the beautifully cooked meat. Hold the bone firmly and carefully make vertical cuts, perpendicular to the bone, to create individual slices of your desired thickness. Take your time and adjust the pressure as needed to ensure clean cuts and presentable portions.
Remember, presentation is key when serving a tomahawk steak. Arrange the sliced portions
When it comes to indulging in a delicious and mouthwatering steak, the tomahawk steak is hard to beat. This impressive cut of beef is known for its large size, frenched bone, and exceptional marbling, making it a show-stopping centerpiece for any special occasion or backyard barbecue.
However, with so many options available, choosing the perfect tomahawk steak can be a daunting task. In this section, we will guide you through the factors to consider to ensure that you select the best tomahawk steak for an unforgettable dining experience.
1. Quality and Grade
The first and most important factor to consider when choosing a tomahawk steak is its quality and grade. The quality of the steak is determined by the amount and distribution of marbling throughout the meat.
Marbling refers to the white streaks of fat that are dispersed within the muscle, enhancing the tenderness, juiciness, and flavor of the steak.
When it comes to grades, the U.S. Department of Agriculture (USDA) assigns three main categories: Select, Choice, and Prime. Select is the lowest grade, with minimal marbling, while Choice has a moderate amount of marbling, and Prime is the highest grade, with abundant marbling.
For a truly exceptional tomahawk steak, opt for Prime grade if available. However, Choice grade can also provide a delicious and flavorful steak.
2. Size and Thickness
Another crucial factor to consider when choosing a tomahawk steak is its size and thickness. The tomahawk steak is renowned for its impressive size, often weighing around 2 to 3 pounds. However, you can also find smaller tomahawk steaks that are perfect for individual servings.
The thickness of the steak is equally important, as it affects the cooking time and doneness.
A thicker tomahawk steak will take longer to cook and may result in a more medium-rare or medium doneness, while a thinner steak will cook faster and may lean towards a medium or medium-well doneness. Choose the size and thickness that best suits your preferences and cooking method.
3. Source and Origin
Knowing the source and origin of your tomahawk steak is essential for several reasons. Firstly, it ensures that you are purchasing a steak from a reputable and trusted supplier.
Secondly, it allows you to support local farmers and businesses. Finally, it provides insight into the rearing and feeding practices of the cattle, which can impact the flavor and quality of the meat.
Look for tomahawk steaks that are sourced from sustainable and ethical farms, known for their commitment to animal welfare and environmentally friendly practices.
Additionally, consider opting for locally sourced tomahawk steaks to support your local community and reduce the carbon footprint associated with long-distance transportation.
4. Price and Budget
While tomahawk steaks are undoubtedly a luxurious and decadent choice, they can also come with a hefty price tag. Consider your budget and the occasion when choosing a tomahawk steak.
If you’re looking to impress guests or celebrate a special occasion, investing in a high-quality tomahawk steak may be worth it. However, if you’re on a tighter budget or planning a more casual gathering, there are still delicious options available at a more affordable price point.
Remember that the price of the tomahawk steak will vary depending on factors such as the quality, grade, size, and source. Take these into account when selecting a steak that aligns with your budget.
5. Personal Preferences
Ultimately, your personal preferences should play a significant role in choosing the perfect tomahawk steak. Consider how you like your steak cooked, whether you prefer a leaner or well-marbled cut, and any specific dietary restrictions or preferences.
If you enjoy a tender and melt-in-your-mouth steak, opt for a tomahawk steak with ample marbling. On the other hand, if you prefer a leaner cut with a bolder beef flavor, consider choosing a tomahawk steak with less marbling.
Additionally, take into account any special dietary requirements, such as grass-fed or organic options. Many suppliers offer a variety of tomahawk steaks to cater to different preferences and dietary needs.
Preparing the Tomahawk Steak for Cutting
Once you have obtained a high-quality Tomahawk steak, it is important to prepare it properly before cutting into it. This will ensure that you maximize the flavor and tenderness of the meat. Here are the steps to follow:
Remove the steak from the refrigerator: Take the Tomahawk steak out of the refrigerator and allow it to come to room temperature. This will help the meat cook more evenly.
Season the steak: Generously season the steak with kosher salt and freshly ground black pepper on all sides. You can also add any additional spices or herbs of your choice to enhance the flavor.
Let it rest: After seasoning, let the steak rest for about 30 minutes. This allows the seasonings to penetrate the meat and enhances the overall flavor.
Preheat the grill: While the steak is resting, preheat your grill to high heat. Tomahawk steaks are best cooked over direct heat.
Oil the grates: To prevent the steak from sticking to the grill, lightly oil the grates. Use tongs and a folded paper towel dipped in oil to rub the grates.
Sear the steak: Place the seasoned Tomahawk steak directly on the hot grill grates. Sear it for about 2-3 minutes per side to create a flavorful crust.
Move to indirect heat: Once the steak is seared, move it to a cooler part of the grill or reduce the heat to medium. This will allow the steak to cook more gently and evenly.
Use a meat thermometer: To ensure that your Tomahawk steak is cooked to your desired level of doneness, use a meat thermometer. The internal temperature should reach 130°F (medium-rare), 140°F (medium), or 150°F (medium-well).
Rest the steak: Once the steak reaches the desired temperature, remove it from the grill and let it rest for at least 10 minutes. This allows the juices to redistribute and ensures a more tender and flavorful steak.
By following these steps, you will be able to prepare your Tomahawk steak for cutting and enjoy a delicious and perfectly cooked piece of meat.
Remember, cooking times may vary depending on the thickness of the steak and the heat of your grill, so it’s important to use a meat thermometer for accurate results. Enjoy your meal!
Essential Tools for Cutting a Tomahawk Steak
When it comes to cutting a tomahawk steak, having the right tools can make all the difference. This thick, bone-in ribeye steak requires some specialized equipment to ensure that you can slice through it effortlessly and present a perfectly cooked piece of meat. Here are the essential tools you’ll need:
1. Tomahawk Steak
Before you even think about cutting a tomahawk steak, you’ll need to have one on hand. This beautifully marbled, bone-in ribeye is known for its unique Frenched bone that resembles a tomahawk axe handle, hence its name.
Make sure you source a high-quality tomahawk steak from a trusted butcher or specialty meat shop.
2. Cutting Board
A sturdy and spacious cutting board is a must-have for cutting a tomahawk steak. Look for a board that is large enough to accommodate the size of your steak and has enough space for you to maneuver your knife comfortably.
A cutting board made of wood or plastic is recommended to prevent bacterial contamination and ensure easy cleanup.
3. Boning Knife
A boning knife is an essential tool for cutting a tomahawk steak, especially when it comes to removing the meat from the bone. Look for a sharp, narrow-bladed boning knife that allows for precise and controlled cuts.
The flexibility of the blade will help you navigate around the bone and separate the meat easily.
4. Carving Knife
Once you have separated the meat from the bone, a carving knife will come in handy for slicing the tomahawk steak into individual portions. A long, thin-bladed carving knife with a sharp edge will ensure clean cuts and help you achieve the desired thickness for each slice.
5. Meat Thermometer
When cooking a tomahawk steak, it’s crucial to monitor the internal temperature to achieve the desired level of doneness. A reliable meat thermometer will help you determine when the steak is cooked to perfection.
Insert the thermometer into the thickest part of the meat, away from the bone, and refer to a temperature guide for your preferred level of doneness.
6. Tongs
Tongs are essential for handling the tomahawk steak while it’s on the grill or in the oven. Opt for long, sturdy tongs that provide a good grip and allow you to flip the steak with ease. Avoid using a fork, as it can pierce the meat and cause the juices to escape, resulting in a drier steak.
7. Grill or Oven
Depending on your preference, you can cook a tomahawk steak on a grill or in the oven. A grill will give you those beautiful grill marks and a smoky flavor, while the oven will provide more controlled heat. Whichever method you choose, make sure it is properly preheated to the recommended temperature.
8. Resting Rack
After you have cooked the tomahawk steak, it’s crucial to let it rest for a few minutes before slicing. A resting rack allows the juices to redistribute within the meat, resulting in a more flavorful and tender steak. Place the steak on the rack and cover it loosely with foil to retain heat.
With these essential tools at your disposal, you’ll be well-equipped to tackle the task of cutting a tomahawk steak. Remember to handle the steak with care and always prioritize safety when using sharp knives. Enjoy the process and savor the delicious results!
Step-by-Step Guide to Cutting a Tomahawk Steak
Are you a steak lover looking to impress your guests with a perfectly cooked and beautifully presented tomahawk steak? Look no further! In this step-by-step guide, we will walk you through the process of cutting a tomahawk steak from a prime rib roast.
With a few simple techniques and the right tools, you’ll be able to create a restaurant-worthy tomahawk steak in the comfort of your own kitchen.
Step 1: Choose the Right Cut
The first step in cutting a tomahawk steak is selecting the right cut of meat. Look for a well-marbled prime rib roast that has been dry-aged for at least 21 days. Dry-aged beef develops a more concentrated and intense flavor, making it ideal for a tomahawk steak.
Step 2: Gather Your Tools
Before you begin the cutting process, make sure you have the necessary tools on hand. You will need a sharp boning knife, a sturdy cutting board, and a pair of kitchen shears. It’s important to have sharp tools to ensure clean and precise cuts.
Step 3: Locate the Bone
Place the prime rib roast on your cutting board with the bones facing upwards. Locate the bone that runs along the edge of the roast. This bone will serve as the handle of your tomahawk steak, giving it its distinctive appearance.
Step 4: Remove the Rib Cap
Using your boning knife, carefully separate the rib cap from the meat. The rib cap is a layer of fat and connective tissue that sits on top of the meat.
Start at one end of the roast and slowly work your way along the bone, gently separating the rib cap from the meat. Set the rib cap aside for later use, as it can be cooked separately for additional flavor.
Step 5: French the Bone
Next, you’ll want to “French” the bone to enhance the presentation of your tomahawk steak. Using your kitchen shears, remove the excess meat and fat from the bone, exposing it for a clean and elegant look. This process will give your tomahawk steak that iconic “handle” appearance.
Step 6: Trim the Meat
After removing the rib cap and Frenching the bone, it’s time to trim any excess fat or connective tissue from the meat. This will help ensure even cooking and a more tender steak. Use your boning knife to carefully trim away any unwanted parts, leaving behind a well-marbled piece of meat.
Step 7: Cut Individual Steaks
Finally, it’s time to cut individual tomahawk steaks from the prime rib roast. Start by cutting perpendicular to the bone, creating thick, bone-in steaks.
Aim for a steak thickness of around 2 inches for that perfect balance of tenderness and juiciness. Once you have cut the steaks, you can season them with your favorite spices and herbs before cooking.
Step 8: Cook and Serve
Now that you have successfully cut your tomahawk steaks, it’s time to cook them to perfection. Whether you prefer grilling, pan-searing, or using a sous vide method, make sure to cook the steaks to your desired level of doneness.
Let the steaks rest for a few minutes before serving to allow the juices to redistribute. Serve your tomahawk steaks with a side of roasted vegetables or a loaded baked potato for a complete and satisfying meal.
5. Tips and Tricks for a Perfectly Cut Tomahawk Steak
If you’re a meat lover, then you’ve probably heard of the mighty Tomahawk steak. Known for its impressive presentation and succulent flavor, this cut of meat is a true showstopper.
However, cooking and cutting a Tomahawk steak can be a bit intimidating if you’re not familiar with the process. Fear not, as we’ve compiled some useful tips and tricks to help you master the art of preparing a perfectly cut Tomahawk steak.
1. Choosing the Right Tomahawk Steak
The first step to achieving a fantastic Tomahawk steak is choosing the right cut of meat. Look for a steak with a thick bone and well-marbled meat.
The bone not only adds an impressive visual appeal but also helps in maintaining the steak’s tenderness and juiciness. Additionally, the marbling is crucial for flavor and ensures the steak remains moist and flavorful during cooking.
2. Preparing the Steak
Before you start cooking your Tomahawk steak, it’s essential to let it come to room temperature. Allowing the steak to sit at room temperature for about 30 minutes helps ensure even cooking throughout the meat. Season the steak generously with salt and pepper, or your favorite steak seasoning, for a burst of flavor.
3. Cooking Techniques
There are several cooking techniques you can use to cook the perfect Tomahawk steak. Here are a couple of popular options:
Reverse Sear: This method involves slow cooking the steak at a low temperature before searing it on high heat to achieve a beautifully charred exterior. Start by placing the steak in a preheated oven at around 275°F (135°C) until it reaches your desired internal temperature. Finish by searing the steak on a hot grill or cast-iron skillet for a few minutes on each side.
Grilling: Grilling a Tomahawk steak is a classic and straightforward method. Preheat your grill to high heat and place the steak over direct heat. Sear for a few minutes on each side to achieve the desired doneness. For added flavor, you can also use wood chips or chunks to create a smoky aroma.
4. Resting and Carving
Once your Tomahawk steak is cooked to perfection, it’s crucial to let it rest before slicing. Resting allows the juices to redistribute throughout the meat, resulting in a juicier and more tender steak. Wrap the steak loosely in aluminum foil and let it rest for about 10 minutes.
When it comes to carving a Tomahawk steak, you’ll want to make thick, impressive slices. Start by removing the bone, which can be easily done by cutting along the bone and using a gentle sawing motion.
Once the bone is removed, slice the steak against the grain into thick pieces, around 1 inch (2.5 cm) thick. Serve the slices on a platter and enjoy!
5. Serving Suggestions
A perfectly cut Tomahawk steak deserves the perfect accompaniments. Here are a few serving suggestions to elevate your dining experience:
Classic sides: Pair your steak with classic sides like mashed potatoes, roasted vegetables, or a fresh green salad.
Sauces: Consider serving the steak with flavorful sauces such as peppercorn sauce, chimichurri, or a rich mushroom sauce.
Wine pairing: Enhance the flavors of your Tomahawk steak with a bold red wine, such as Cabernet Sauvignon or Malbec.
Now that you’re armed with these tips and tricks, you’re ready to tackle a perfectly cut Tomahawk steak.
Whether you’re grilling for a special occasion or simply indulging in a delicious meal, mastering the art of preparing this impressive cut of meat will surely impress your guests or satisfy your own meat cravings. Enjoy!
Frequently Asked Questions (FAQs)
1. How to cut a tomahawk steak?
To cut a tomahawk steak, start by placing the steak with the bone-side down on a cutting board. Use a sharp knife to make a horizontal cut along the bone, separating the meat from the bone. Then, make vertical cuts to portion the steak into individual servings. Serve and enjoy!
2. How long should I cook a tomahawk steak?
The cooking time for a tomahawk steak will vary depending on the thickness of the steak and the desired level of doneness.
As a general guide, grill the steak for 4-5 minutes per side for medium-rare, or adjust the cooking time according to personal preference. Use a meat thermometer to ensure the steak reaches the desired internal temperature.
3. How should I season a tomahawk steak?
For a delicious tomahawk steak, season it generously with salt and pepper on all sides. You can also add additional spices or a dry rub for extra flavor. Allow the seasoning to penetrate the steak by letting it sit at room temperature for about 30 minutes before cooking. This will enhance the taste and tenderness of the steak.
Conclusion
In conclusion, learning how to cut a tomahawk steak is a valuable skill for any home cook or aspiring chef. By following the proper technique, you can ensure beautiful, evenly cooked steaks that are sure to impress your guests. Remember to start with a high-quality tomahawk steak and use a sharp knife to create clean cuts.
Take your time and follow the bone’s natural curve to achieve those iconic long, exposed bones. Whether you’re grilling, broiling, or pan-searing, the tomahawk steak is guaranteed to provide a flavorful and visually stunning dining experience.
Cutting a tomahawk steak is not only about technique but also about appreciating the art of cooking. The bone-in presentation adds elegance to the dish, making it a standout choice for special occasions or celebrations.
From its marbling to its tenderness, the tomahawk steak is a prime cut that commands attention. With practice and patience, you can master the art of cutting and enjoy this indulgent and satisfying piece of meat.
The easiest way to identify a tree is through their leaves, bark, fruits, and tree seed pods identification. While some have distinct leaf colors and shapes, others cannot easily be identified with the leaves, especially during certain parts of the year.
However, it is pretty easy to identify trees with their seeds, especially the ones with distinct seed pods. Some of the trees, like those in the bean family,9 have long pods that make it relatively easy to identify them.
Have you ever wondered which trees release those ‘helicopter’ seeds? This complete guide has everything you need to know.
A seed pod is a distinctive way for a tree to propagate, and nature has some very interesting varieties! By using the tree seed pods identification charts below, you’ll be able to pinpoint lots and lots of tree species.
We know how important trees are in slowing down and reversing climate change and so you might be thinking “How much carbon does a tree capture?” Did you know that some trees store more carbon than others? Learning these different species is more interesting than you think.
Most trees with seed pods are easy to identify because they classify the tree and let you know which botanic family it belongs to. There are so many trees with seed pods that are distributed worldwide.
Even though some grow in their native region, most of them have been spread worldwide. The growth of trees in an area highly depends on the conditions required for the tree to thrive.
For example, you will find most palm and mangrove trees along coastlines because that is where they find their conducive environment to thrive. The chart below is a comprehensive list of trees with seed pods of different kinds.
Identification Guide: Tree Seed Pods Identification
Sometimes, it helps to know what an entire tree or most parts look like. That way, you can automatically identify the tree with any part, including tree seed pods. The tree types and pictures below will give you a foundation on most tree types and what their seed pods look like.
How To Identify Tree Seed Pods: Identification Chart With Tree Seed Pod Identification Pictures
Tree TypeSize1. Maples1.18” to 2” (3 – 5 cm) long2. Catalpas8-20″ long and ¼-½” wide3. Southern Catalpa12-inch (30-cm) long4. Ash2” (5 cm) long5. Hickory2-5 cm (0.8-2.0 in) long and 1.5-3 cm (0.6-1.2 in) diameter
Tree TypeSize6. Chestnut10-30 cm long and 5-7 cm wide7. Sweet Gum1 1/4″ – 1 1/2″ in diameter8. Kentucky Coffee Tree5” to 10” (12 – 25 cm) long and up to 2” (5 cm) wide9. Eastern Redbud3.5 inches long, 0.5 inches wide10. Apples8 mm (0.3 inch)
Tree TypeSize11. Black Locust3 to 4 inches in length12. Northern Catalpa24” (60 cm) long13. Mimosa4” to 8” (1.2 – 2.4 cm) long and 1” (2.5 cm) wide14. Acacia10” (26 cm) long15. Honeylocust6-14″ long and 1-1½” across at maturity
Tree TypeSize16. Buckeye1-2” diameter17. Beech0.5” to 1” (1.12 – 2.5 cm) long18. Sycamore1” (2.5 cm) in diameter19. Silver Maple1.18” to 2” (3 – 5 cm) long20. Elm0.5” (1.22 cm) across
Tree TypeSize21. Cladrastis Kentukea2.5-4” long22. Carob Tree13 – 30 cm in length and about 2.5 cm wide23. Desert-Willow8 inch24. Basswood5 to 10 mm (0.2 to 0.4 in) in diameter25. Yellow Kowhai2.2 inches in length
Tree TypeSize26. Coral Tree12-inch- long27. Western Redbud1½ to 3½ inch long28. Blue Palo Verde1.5 to about 4 inches29. Purple Orchid Tree15 to 30 cm long30. Koa Tree6″ (15 cm) long and 1-1.5″ (2-4 cm) wide
Tree TypeSize31. Japanese Angelica4 mm in diameter32. Yellowwood Tree2½ to 4″ long33. Conifersbetween 1” and 6” (2.5 – 15 cm)34. Silver Birch1-1 1/2 inches long35. Catclaw Acacia3-5″ long
Tree TypeSize36. Screwbean Mesquite2-6″ (5-15 cm.) in length37. Persian Silk Tree4-8″ (10-20 cm.) long, ¾” (2 cm.)38. Royal Poinciana12” and 24” (30 – 60 cm) long39. Cape Wattleup to 10 cm in lengt40. Trumpet Treesabout 3″ (7.6 cm) long
Tree TypeSize41. Horse Chestnut1” to 2” (2.5 – 5 cm) in diameter42. Pine Tree0.78” to 23” (2 – 60 cm)43. Spruce Tree1” and 6” (2.5 – 15 cm)44. Fir Tree10” (25 cm)45. Jacaranda Tree3” (7.5 cm) across
Tree TypeSize46. Hornbeam1″ long47. Linden0.2” (0.5 cm) in diameter48. Tree of Heaven1-2″ long49. Common Hoptree2-2.5 cm (0.79-0.98 in) across50. Tulip Tree3” (7.5 cm) long
Tree TypeSize51. Tipu Tree50-60mm long52. Green Ash2” (5 cm) long53. Australian Black Bean Treeup to 20cm in length54. Lilac Tree¾ inch-long55. Southern Magnolia Tree1″-3″ in length
Tree TypeSize56. Sausage Treegrow up to 10 cm in diameter and 60 cm (2 feet) long57. Ludlow’s Tree Peony4¾-7 × 2-3⅓ cm58. Orchid Tree6-9″ long59. Red Maple Tree¾ to 1 inch60. Golden Rain Tree1¼- 2½ inches long
Tree TypeSize61. Cacao Treelength up to 35 cm (14″) and a width at the centre of 12 cm (4.7″)62. Eucalyptus Camaldulensis Tree2-5 mm (0.079-0.197 in) long and 4-10 mm (0.16-0.39 in) wide on a pedicel 3-12 mm (0.12-0.47 in) long63. Kalumpang Sarawak Treeabout 10 centimeters long64. Pandanus Treea diameter of 4-20 cm (1.6-7.9″)65. Korean Spindleberry1/2” across
Tree TypeSize66. Delonix Regia30 – 75 cm long, 5 – 8 cm wide67. Koelreuteria Paniculata3-6 cm long and 2-4 cm broad68. Ceiba Pentandra15 cm (6 in)69. Albizia Lebbeck Tree12 – 35 cm long70. Joshua Tree2.5-2″ long
Tree TypeSize71. Guanacaste Tree3 – 4 1/2″ long72. Australian Tree Hakea4-5 cm in diameter on average73. Mangrove Tree6″ (15 cm)74. Kapok Tree15 cm (6″) long75. Paulownia Tomentosa Foxglove Tree3-4 centimeters (1+1⁄8-1+5⁄8 in) long
There are advantages and disadvantages to having a tree. Some would be excited to know about the pros and cons of redbud trees. Despite the limited lifespan of these lovely, vibrantly colored trees, they have greatly benefited us and the environment. Spend some time learning about these trees, and prepare to have your mind blown by what you discover.
Popular Types of Trees With Seed Pods
Not all the trees on the list above are common and easy to come across in residential areas. However, you could come across some of them in forests or deserts. Below is a list of the most commonly planted seed pod trees. You have probably come across most of the trees on this list.
Popular Tree TypeSeed Pod DescriptionSizeMaple TreeWing-shaped, papery – helicopters, samaras3 – 5cm longOak TreeCup-shaped cupule, green-brown – acorn1-6 cmPalm TreeBall-likeDepends on the speciesCatalpa TreeCylindrical-shaped, cigar-like, green, dark brown when mature30 – 60 cmLocust TreeSpirally twisted, flat, dark brown, large, with oval seeds10 – 20 cm longAmerican Elm TreeFlat, oval-shaped, disc-like, papery, light green1.22 cm acrossAsh TreePaddle-shaped, oval, large, brown, papery5 cm longBeech TreeAngular-shaped, three sides, brown, hard shell with spiky burs- cupules1.12 – 2.5 cm long
Maple Tree Seed Pods Identification
Maple trees come in different species. They are easily identifiable by their bark, leaves, or seed pods. However, the easiest way is through the papery wing-shaped seed pods, often called samaras.
These samaras are joined at the center, and once they detach from the tree, they have a unique whirling motion. Maple seed pods will therefore be called helicopters, whirligigs, and whirlers. The seed pods grow between 1.18 and 2 inches long.
Once the seed pods have detached from the tree, the whirling action takes them far away from the tree, dispersing the seeds in different places. Maple trees have distinctive features,6 including leaves with pointed lobes. The bark has a gray-brown or reddish-brown color that you cannot miss.
Another identifying feature of the maple tree species is that they grow tall, some growing up to 150ft. Some popular maple tree species are the Red Maple, Silver Maple, and Japanese Maple.
All these trees have different features in color and growing conditions, but they all have samaras with helicopter action. Some grow along river banks, and others can survive pretty well in relatively dry areas. Maple seeds are also edible; the smaller the seed, the sweeter it is. The sizes differ in different species.
Oak Tree Seed Pods Identification (Oak Tree Seeds With Pods)
The fruit of an oak tree is called an oak nut or acorn. It has a tough protective shell that looks like a cup and has a cap. It is, therefore, quite easy to identify oak trees through the cupules or seed pods.
Various oak tree species have distinctive acorns. The acorns differ in shape and size depending on the oak tree species. Some have a smooth cap, others a scaly one, and others have hair.
It also differs in shape; some are oval, while others are ball-shaped. The common colors in mature acorns among the oak tree species are black, red, and brown. However, all the acorns will be green before maturity.
The seed pods have two seeds inside, varying in size from small to large. Small acorns are about 0.5 inches, while the bigger ones can go up to 3 inches in diameter. Oaknuts are edible, with the sweetest ones being from Pin Oak, Cork Oak, and Burr Oak.
However, tanning in acorns is toxic to human beings. It also makes raw oak nuts bitter and untasty. The best way to remove the tanning is to soak the nuts in water and drain them until it is clear.
Identification: Palm Tree Seed Pods
One of the trees that you may find almost everywhere is a palm tree. Ever wonder how many types of palm trees are there?
Palm trees belong to the Arecaceae family and have over 2600 species. The trees grow in warm countries near tropical beaches. However, some species can also grow indoors in cold or temperate climates.
The most common palm tree species are the Pygmy date palm and the coconut palm, which are common along coastlines. There is also the Christmas palm tree and Mediterranean dwarf palm, among others.
It is not easy to miss a palm tree because of its unique characteristics. Every part of the tree can be used to identify it, including the trunk and the seed pods. Palm trees have feather-like, fan-shaped leaves that are long and evergreen.
The trunk is also a good identifier as it has fibers and grows extremely tall in some species. Date palms will grow to about 75ft, while coconut palms can reach 100ft. There are also dwarf palm trees that grow up to 9ft, making it easy to have them as houseplants.
The tallest palm trees are about 200ft, equivalent to a 25-story building. One palm tree species with easily identifiable seed pods is the coconut tree. It has a huge green or yellow fruit that turns into a hard brown seed when it matures. It also has spiky hairs on it and can be quite heavy.
Related Reading: What Are Carbon Offsetting Companies and How To Find the Best One?
Catalpa Tree Seed Pods
Catalpa seeds have long seed pods that dangle from the tree and are very easy to identify. The tree has trumpet-shaped blooms that are white or yellow in color, and the leaves are heart-shaped. These flowers are fragrant, and the tree bark is usually brown or greyish in color.
The Northern Catalpa and the Southern Catalpa are the most common species of the catalpa trees.10 The seed pods appear on the trees in fall and could go to Winter and Spring. However, they are very distinctive because of their slender and long features.
The trees grow very fast and do well in warm temperate places. The trees also live long and could grow up to 50ft above the ground. It has a rounded canopy that spreads out, making the tree perfect for backyards as an ornamental shade tree.
It is easy to distinguish between Northern and Southern catalpas through the seed pods. While the Northern ones grow up to 24 inches long, the others only grow to 12 inches. The pods are green but eventually turn brown and split open, exposing winged seeds.
The seeds are then carried by the wind and dispersed all over. While the catalpa seeds are not toxic to human beings, they lack nutritional content or good taste. Therefore, people do not eat them even if they look like beans.
The shape and structure of the seed pods have earned the tree names like cigar tree, smoking bean tree, and Indian cigar tree. Each node on the catalpa tree has three leaves with a smooth margin and a heart shape. It is a perfect tree to plant in residential gardens.
Locust Tree Seed Pods (Black Locust Tree Seeds and Honey Locust Tree Seed Pods)
Locust trees have many identifiable features ranging from the trunk, flowers, leaves, and spirally twisted seed pods. The tree has white flowers that dangle in clusters and can grow up to 100ft.
Its trunk has thorns, and the leaves are large and pinnate. Locust trees grow very fast and belong to the Fabaceae family. The two most common types of plants are the Honey locust and Black locust trees.7
Even though most of the locust tree species are full of long and sharp thorns, some species are thornless. Therefore, the best way to identify locust trees is through the long and distinct seed pods that hang from the tree.
The seed pods on locust trees can grow up to 20 cm long and have oval seeds inside. It is important to note that different locust tree species have different seeds. While some are edible, and even animals enjoy eating them, others have very toxic compounds.
Locust trees also produce highly durable hardwood that can be used to make furniture and small boats. The trees are also excellent for shade and look beautiful when the flowers bloom in the fall.
American Elm Tree Seeds With Pods (Elm Tree Seed Pods)
Elm trees are popular in residential areas because of their wide canopy that provides shade and the wood it produces. The trees have rot-resistant wood that is flexible but does not split. It is, therefore, excellent for making musical instruments and bows.
While it has many identifiable features, the elm tree’s best feature to use when trying to identify the tree is its seed pods. They have samaras, which in this case have a light papery casing and are round and small.
They grow in clusters and have a light green color that makes them easy to identify. Once the samaras have matured, a single seed forms inside and detaches from the tree in Spring. The tree’s bark is also quite distinct, with furrows and a grayish-brown color.
The trunk and the branches will have a lace-like texture that makes them easy to identify. There are various species of elm trees, with the most common ones being the American, Florida, and Chinese elm trees.
The Chinese elm has a slightly different bark from the rest, but it also has papery samaras. Therefore, the best way to identify elm trees is through the seed pods’ structure and shape.
Ash Tree Seeds With Pods (Ash Tree Seed Pods)
Ash tree seed pods are flat,8 oval, and papery, making it very easy to identify the trees. They look like dried leaves as they hang from the tree branches. They can grow up to 3 inches tall, and the fruit matures in the fall.
The ash tree seed pods are also called samaras. The samaras grow on female trees only because it is the one that produces fruit. Due to the fallen samaras’ mess on the ground, most people prefer to plant male ash trees in their backyards.
The tree has compound leaves with five pairs of leaflets on each one. The leaflets are pointed, and each leaf has a terminal leaflet. The standard height of ash trees is between 60 and 80ft. The bark is grayish-brown in color, and the leaves are about 12 inches long.
The tree seed pods identification on ash trees is made easy by the brown color of the matured seed pods. Before maturity, the pods are green and easy to recognize because of their length. Ash trees come in various species like the Green and White Ash trees. While each has its characteristics, both species have the same types of seed pods on their female trees.
Beech Tree Seeds With Pods
Beech trees are colorful shade trees that form a round, dense crown with branches and leaves. They have beechnuts that make the tree easily identifiable. The flowers are in clusters and start green-yellow in color. However, they later turn into beautiful Autumn shades of yellow, golden brown, and range.
The tree has 13 species, the most common being European and American beech trees. The trees are resistant to diseases and pests, which makes them excellent trees for huge landscapes.
The leaves have an elliptical shape and look glossy with a green color when young. They grow up to 6 by 4 inches. You can see a serrated look on the leaf if you sift through it. The beautiful bright colors on the tree are one of the most direct beech tree identification.
On the other hand, the fruit has a brown color with a shell with three sides and spikes all over it. It is an easy seed pod to identify. Beech trees have a dense crown, which is why it needs enough room to grow. The trees can also grow up to 80 ft.
Tree Seed Pods Identification Florida: Popular Types of Tree Seeds in Florida
Florida has a good climate that makes it possible to have various tree species throughout the landscapes.11 You will find different seed pod trees within Florida. Some trees are planted in backyards, and others in forests and landscapes.
Some of the seed pod trees you will likely find in Florida are palm trees, oak trees, magnolia, and maple trees. All these trees are identifiable through their distinctive seed pods. While some have samaras, others have cupules.
The trees from the Fabaceae family will have long seed pods with multiple seeds inside and split open to disperse. Additionally, some trees in Florida have edible fruits, and others have toxins.
When living in Florida, it is important to know which seed pods belong to which tree. That helps you know which trees will do well in your backyard and which will likely give you much work to maintain.
The full chart above on the various types of seed pod trees and the explanations on popular trees will help you identify tree seed pods in Florida. You can plant a tree with full knowledge of what to expect when the fruit matures.
Trees With Seed Pods in Colorado
The most common tree with seed pods in Colorado is the catalpa tree. It has bean-like pods that have winged seeds inside. It is, therefore, easy for the wind to disperse the seeds, which is why Colorado has many catalpa trees in different locations.
Aside from the Western Catalpa, Colorado has other seed pod trees like Golden Rain, Cottonwood, Blue Spruce, Oaks, and Fir. All these trees have distinct seed pods that distinguish one tree from the other.
Nowadays, more people are taking an active role in protecting the environment. They may be searching for tree seed pods because they are concerned about how many trees cut down each year and want to learn how tree planting carbon offset may help.
Understanding these seed pods is the first step; the next is learning how to grow them. People are making sure that what they are planting endures and fulfills its function – to beautify and fight climate change.
It is crucial to be aware of the benefits of planting trees if you want to achieve environmental sustainability. Remember that internal transformation must precede external change. By using an eco footprint calculator, you should be able to pinpoint the acts that had an adverse influence on the environment and make decisions to lessen those effects.
Related Reading: How Many Trees Are in the World?
With the help of this guide, you will be able to identify different types of trees by looking at their pods and other features like the leaves, bark, and color. Colorado provides an excellent climate for all these different tree species to thrive.
Most tree species are identifiable through leaves, flowers, bark, and trunk. However, some require more than that to know which tree it is.
This tree seed pods identification chart can help you identify trees and protect them to help the planet.
Frequently Ask Questions About Tree Seed Pods Identification
I don’t know how much you paid for your antique duck decoy, but you’re about to be frazzled by how much people have paid for them in the past.
These aren’t out-of-the-packaging duck decoys (and some are not even decoy ducks), but they all have one thing in common: they cost a ton of money.
Over the last few decades, we’ve seen some of the most expensive duck decoys ever sold, and the details are quite interesting.
Vintage duck decoys can be ridiculously expensive. Does this make them more usable or viable than inexpensive, brand-new models?
Not necessarily, but you have to understand that black duck hunting is a pastime. It’s a rite of passage for a lot of young men.
You incorporate it into your life, and other eccentric duck hunters with deep pockets will stop at nothing to claim some of the most coveted factory-made decoys in history.
If you’d like to see a graphical breakdown of expensive wooden decoys, we got you covered:
I’m calling it this because two decoys were sold together for a whopping $1,130,000.
On record, this is the most expensive decoy purchase to date, but it comes with some interesting and unique details.
If you didn’t know, A. Elmer Crowell was a Massachusetts native, who had an eye for carving.
Some people pick up carving vintage or whittling as a hobby, but this man did it so excessively that his work is still revered over a century later.
He began carving vintage and selling his decoys in 1912, up until his passing in 1952, and as we all know, dead artists can make a ton of money.
And that’s what it was: art. Crowell put so much detail into these decoys, that they were picked up by the Fine Arts of Boston (though the timeline is unclear).
They held onto these until their value escalated. In 2007, his pintail drake and Canada goose decoys sold as a bundle.
We know the amount, and the date, but the buyer went completely undisclosed.
The reason these were so expensive is that they were some of Crowell’s first documented decoys.
They were carved sometime around 1915-1917, shortly after he began carving and have held their aesthetics and shape for over a century.
It’s believed that this is because America’s history continues to go on and on. Even though we’re a relatively young country, our rich heritage becomes valuable at an accelerated rate.
It’s like having a piece of history, from your favorite thing, sitting right on a shelf somewhere.
We’re giving Crowell his dues here, and while he isn’t included further down the list since we’ve already mentioned him, it’s important to state that this 1.13 million dollar purchase for two decoys was actually part of a large sale of 31 Crowell decoys, which in total ended up costing about $7,500,000.
2. Red-Breasted Merganser Hen Carving, by Lothrop Holmes
Crowell has been the only one to fetch over a million for a decoy purchase, but that was a pair even then.
An inseparable pair, but more than just a single decoy.
The individual most expensive decoy actually belongs to Lothrop Holmes, but since it was still purchased for a lower denomination, it comes in at number two.
This wooden hen sold for an insane $856,000 and held a record as the most expensive decoy sale for quite some time.
Much like Crowell, Lothrop Holmes actually came from Massachusetts as well, where duck hunting was a common sport.
Lothrop didn’t start out with decoys; it was more of a side hobby that later turned into a career.
Holmes spent his time as a ship’s carpenter for years, which allowed him to grow his proficiency in woodworking.
I’m not mentioning the same creators over and over again, so for the sake of transparency, it’s also important to note that Lothrop’s Ruddy Turnstone sold for $470,000 back in 2000.
3. The Eider Drake Decoy On Monhegan Island
We’re still in New England guys, but this time we’re in Maine.
There’s a ton of mystery shrouding The Eider Drake because even to this day, I can’t credit the original manufacturer.
Truth is, nobody has a definitive answer on that, and we likely never will.
It’s a fetching decoy, but nothing like Crowell or Holmes could make, yet it still sold for a hefty price tag of $767,000 back in 2014. You may recognize it as being the center of the James McCleery collection until it was eventually sold.
Recent research points to a man by the name of Eben Weed being the original creator of this decoy, but some of the evidence is inconclusive.
4. Unattributed Slot Neck Canada Goose Decoy
Because most duck decoys of merit were made in the 1830s to the 1880s, documentation (especially for a hobby) was largely unavailable.
Much like The Eider Drake, this remains unattributed but without potential leads as well, really leaving us all in the dark.
This brought in $553,600 back in 2007 when it was sold by Guyette, Schmidt, and Deeter.
It’s fetching, and for its time, it shows a great level of attention to detail with the colors and shades.
5. The Wilson Merganser Drake Duck Decoy
Gus Wilson may not be the first name that comes to mind when you think of famous decoy designers, but he’s one of the most recent record-holders for duck decoy sales.
This decoy was purchased in 2017, whereas most of the others on this list were bought about a decade ago or longer.
Wilson’s decoy pulled in $330,000, partially because he didn’t make a lot of decoys.
Of the ones that he did make that we’re aware of, their beaks weren’t the best.
Many of them snapped off and were replaced, but this one hit such a high price point because the original beak is still completely intact.
6. The Lincoln Hisser
When it comes to expensive duck decoys, Joe Lincoln is a name that often comes up. He made one of the most realistic goose decoys out there, showing a Canada goose in mid-motion that really makes it look like they’re scurrying along the water while the decoy bobs.
It was the highest ticket item at an $800,000 auction, bringing in $299,000 individually, which greatly surpassed the average for the dozens of other items in the auction.
Joe Lincoln painted decoys well into his 70s and remains an underdog in the decoy world.
7. Graves Mallards
It’s nothing compared to some of these world-famous decoys, but the Graves Mallards brought in $218,500 at another G&S auction.
It was one of the largest amounts of money they made at their 2006 auction.
Bert Graves was a more recent carver than Crowell or Holmes because he made his last decoy in 1956.
For once, we’re not in New England with this origin story, either; Bert is actually from Peoria, IL, and has set the scene for high-quality duck decoys ever since.
8. The Blair Mallard
John Blair was another small-timer in the decoy world, but his ability to carve a fantastic mallard earned him a top spot in the record books.
This simple mallard has an excellent definition, which is part of the reason that it fetched $214,000 and is considered one of the most valuable decoys.
Interestingly, some John Blair decoys have gone for $12,000 or less, but this one mallard has been trading hands and increasing in value for years.
John Blair was a PA native and spent most of his time outdoors when he wasn’t carving duck decoys.
9. Thomas Chambers Simple Wood Duck
It’s simply called a wood duck, but this Thomas Chambers decoy sold for a decent price at $187,000 back in 2004.
Chambers is the only one on this list who wasn’t American-born. Instead, he hailed from Ontario, Canada.
Like many others on this list, he lived until the 1940s but didn’t enjoy much of his work being sold.
To date, he’s reined in close to seven figures from beyond the grave in duck decoy auction sales.
10. Cobb Brant Mallard
Quite simply put, Cobb Brant was one of the oldest duck decoy crafters out there, being born in 1825, but his work still didn’t gain quite the necessary amount of recognition that his peers did.
Still, he brought in $168,000 almost a century later for this single duck decoy.
There’s not a ton of information available on Brant. Though much of his earlier years aren’t recorded, he lived a simple life.
11. Bernie Madoff’s Decoy
The guy we all know and hate. Bernie Madoff might just go down as this century’s biggest American villain, but his decoy fetched a rather handsome amount of money during the auctioning of his estate.
While it’s nothing compared to Crowell, Madoff’s decoy sold $4,750 at auction.
However, as these terms are often interchangeable, it’s important to note that this decoy was actually a structure, not just a carving or decoy duck.
A version of this article was originally published by Ryan Eder on UplandGundog.com in October of 2014.
The best part of the year for the avid bird hunter is when hunting season is just around the corner. If you’re a waterfowl hunter, chances are you have some kind of early season in September for teal or goose. If you’re an upland hunter, you’re just one or two months from chasing roosters in the field. Either way, as bird dog owners we’ve hopefully been training and conditioning our dogs throughout the off-season to keep them in shape and sharp on their skills. I’m not just talking about obvious hunting related skills like finding birds, marking and retrieving. I’m also referring to basic obedience and every day commands that are also extremely important in hunting situations.
Depending on the type of hunting you do, and the type of dogs you hunt with, there can be differences in commands and styles. To account for these differences, I’ll do my best to keep this general and applicable to all types and breeds of hunting dogs. With that said, let’s take a look at some of the most important commands you’ll be using in the field with your dog along with a brief explanation of their importance and how to apply them.
Sit Command
More times than not, I’m hunting with a retriever. I tend to be in a duck or goose blind most of the time, so I’m starting off with the “Sit” command. In the blind, one of the hardest things to train a dog to do is sit and be patient. No one likes a dog in the blind that’s constantly moving around, or a dog that’s not steady while birds are being called and hunters are shooting. A dog that sits well in the blind is more enjoyable to hunt with. That dog is also safer since a dog that breaks prematurely can be in the line of shooting. For you upland hunters, sit is still an important command whether you hunt with a pointer or flusher. For a flusher, you may want your dog to sit on a bird flush. For a pointer, even though you don’t want your dog to sit while hunting, having control of your dog in common areas while hunting at clubs or preserves is still pretty important. In my training program, “Sit” is also synonymous with “Stay”. By this I mean once I tell my dog to sit I expect them to remain sitting until released or asked to do something else. This level of control with your dog is critical both in and out of the field.
Whoa, Stop or Stay Command
To you pointer owners, this command is no stranger. Getting your dog steady on point is a large part of hunting with a pointing breed. The concept of “Stop”, “Stay” or “don’t move” can apply to a number of situations in the field. If you’re hunting with multiple dogs, it’s important for them to honor another point or another dog retrieving a bird. While “Whoa” is not typically a command for this, the concept of “Whoa” is similar. It means “stay where you are, do not move”. This is an extension of the “Sit” command with a flusher or waterfowl dog; “stay where you are” being the message to the dog. There are times where I need my dog to stop and stay, such as when I see him heading for a road or barbed wire fence. Sometimes handlers choose to stop and sit their dog on a whistle, either way, the concept of “Whoa”, “Stop” or “Stay” is incredibly important when handling your dog in hunting situations.
Fetch Command
This is simply a matter of opinion, but my preference in a hunting dog is one that retrieves birds that we shoot in the field. Some people incorporate force fetch in their training program, other people teach “Fetch”, “Hold” and retrieving concepts other ways. Either way, and for obvious reasons, “fetch” or “fetch it up” is something many of us say to our dogs in the field. A dog that doesn’t retrieve well in my opinion can make or break a hunt.
Come or Here Command
Being able to call your dog to you in any situation is important. In fact, this is probably the most important command you’ll teach your dog. It’s the basis of retrieving back to the handler and the ability to call a dog back into range if they’re hunting too far out. Most importantly, this command is a matter of control and safety for your dog in the field. “Come” and “Here” tend to be the most popular commands for this, but many handlers will use a whistle recall as well. This may seem to be a redundant message, but the first time that you have a dog unable to come when called you’ll realize just how important it is.
Kennel Command
Every year I witness someone who wishes they would have tried to teach the kennel command better with their dog. In the home, it is nice to say “Kennel” and have your dog load into their crate without having to lure, push or pull the dog to get them into their crate. The same luxury exists in the field when you want to load the dog into the truck, crate, dog box or trailer after training or hunting. It can be very frustrating to have issues getting your dog loaded into their kennel after a day in the field. If you’re at a gun club or hunt test, or even just a field with hunting friends, it can be embarrassing having a dog that won’t follow this basic command. Make sure to work with your dog on this, and make sure they understand to load quickly, safely and on demand.
Practice at Home for Success in the Field
The basic commands covered in this article are just that. They’re the basics and the minimum standard you should accept from your hunting dog. Most of you probably have them covered and use them every day with your dog. Still, I do recommend practicing them and making sure the dog is sharp so that when hunting season rolls around you don’t encounter any unnecessary issues. Good luck to everyone this fall and happy training!
About Ryan Eder
Ryan is the President of the Upland Gundog Association and a longtime trainer of hunting Retrievers. You can learn more about Ryan and his training methods at the UGA website, www.uplandgundog.com.
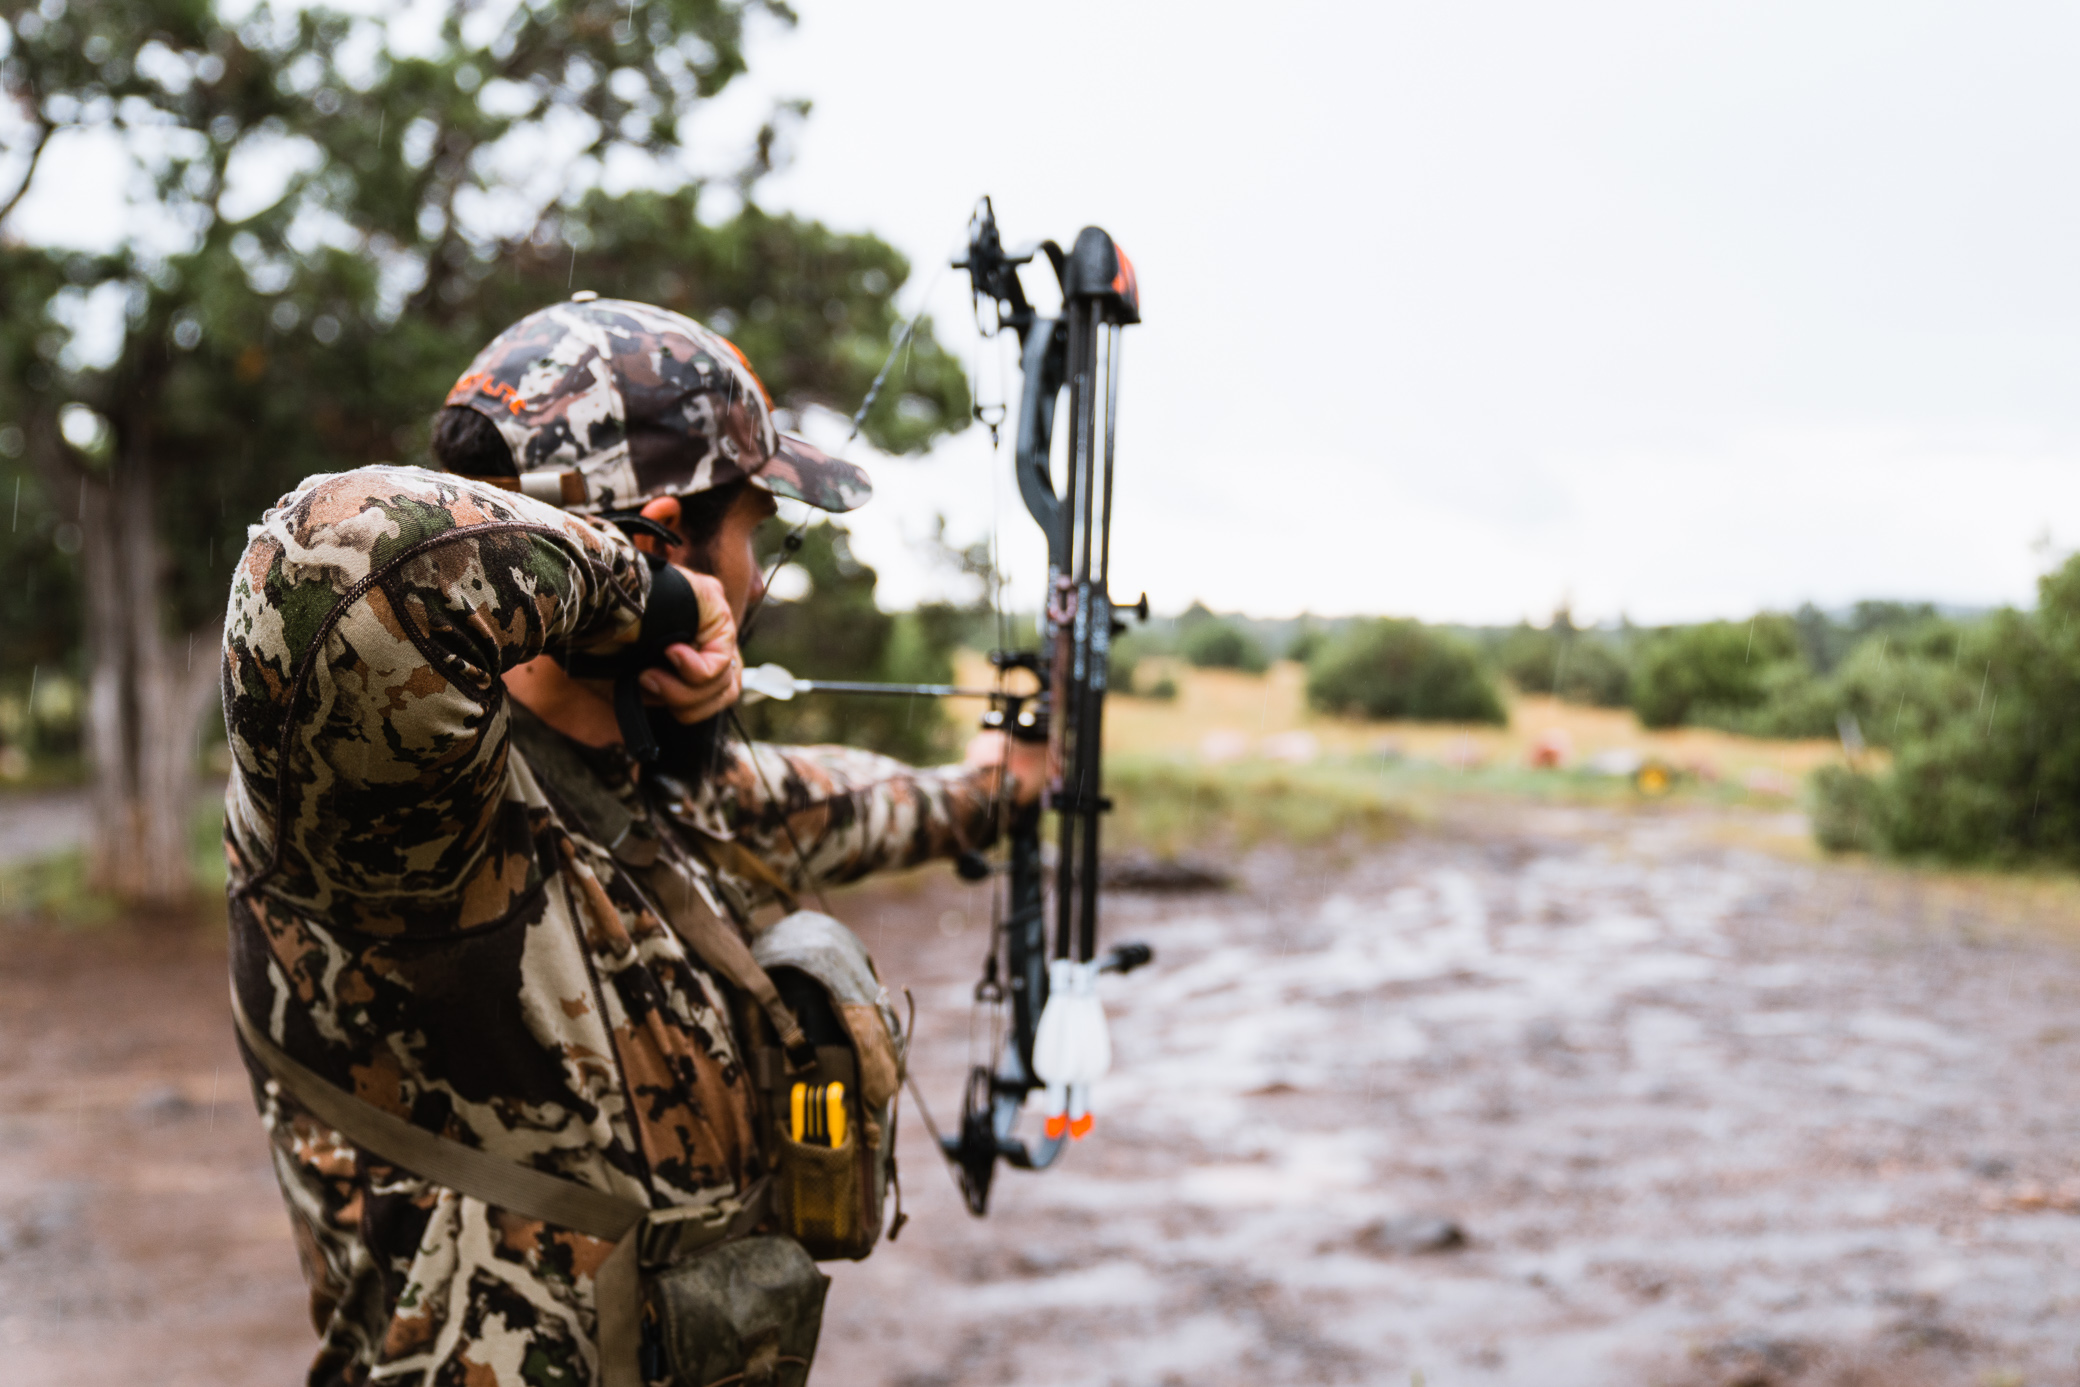
Throughout my childhood, my Dad would tell me old hunting stories from before I was around. At the time, I hadn’t really experienced much of the hunting life, so these stories sunk deep in my mind. One of those stories was of an archery deer hunt in upstate New York. It was just him and his bow. No rangefinder to speak of.
My Dad was sitting up in a tree and a lone buck came in beneath. He pulled his bow back, aimed, and let it loose thinking that deer steaks wouldn’t be far away. What really happened was he watched the arrow fly right over the buck’s back, followed by said buck running out of his life. “Should have aimed lower” my Dad said. It was my first lesson on shooting up or downhill with a bow.
Because of that story, I ALWAYS have an angle compensating rangefinder with me on archery hunts. It’s non-negotiable, because angles are a plenty in bowhunting. Whether it’s a 15 degree angle or a 40 degree one, your arrow will not hit where you want, if you don’t make the proper adjustments for the angle. Angle compensating rangefinders do just that for you.
Whether it’s uphill or downhill, yardage needs to be cut off in order to hit what you’re aiming at. The wordage in this article is referring to Vortex Optics Rangefinders.
Line of sight is the distance from you to your target, whether you are standing on an angle or not. This is how rangefinders read distance from the beginning until angle compensating versions came out. Still to this day though, most rangefinders seem to have a mode for Line of Sight. This article is about using angle compensation though right? So, why is Line of Sight important?
Before angle compensating rangefinders, archers would use cut charts to calculate the proper amount of yardage that they needed to cut off with angled shots. Without getting to deep into the math, they’d take the Line of Sight distance given from their rangefinder, pair that with data from an inclinometer to get the proper angle, and refer to their custom cut chart for their set up. Sounds complicated and takes some extra time I know. It was accurate though and that’s what mattered. In fact, there are still folks that use Line of Sight distance paired with a custom cut chart. In terms of precision, it may be splitting hairs, but this is the most precise way of being accurate on angles.
HCD(Horizontal Component Distance Mode) on Your Rangefinder
When shooting at angles the distance that we actually want to aim for is not Line of Sight, but it is the Horizontal Distance. This is literally the horizontal distance between you and the target. Whether you’re standing even, uphill, or downhill it is the horizontal distance that will put you in the X. And the horizontal distance is always shorter than the line of sight distance, which is why one needs to cut yardage rather than adding it. It can be difficult eyeballing this in the field though and going through the cut chart process takes away valuable time. This is where HCD mode comes in.
The Horizontal Component Distance Mode on your Vortex rangefinder makes the cut for you and it does it with one click of a button. Whatever range this mode spits out for you is the range that you want to aim for. Don’t take more yardage off of this calculation, because you’ll hit low.
In terms of accuracy and precision, I tested the Razor 4000 rangefinder up against a custom cut chart I had made for myself. The calculations were within a 10th of a yard between the two. I don’t know about you, but I’m not that good to tell the difference in a 10th of a yard with my shooting ability. With only a 10th of a yard difference, that arrow is going in the lungs come hunting time.
Here’s a Video Demonstration Using Line of Sight vs. HCD
Closing Thoughts
Back in the days of old, my Dad didn’t have a rangefinder, let alone one that had angle compensating abilities. If he did, that buck feeding beneath his treestand might have been on the wall of the house I grew up in rather than high tailing it through the forest. An opportunity lost.
The fact of the matter is, bowhunting is literally a game of inches. Every little thing matters and any ethical advantage we can put in our favor, it will put us that much closer to success. Angle compensating rangefinders are in our corner. They’ve served me extremely well through the years and I know they’ll do the same for you. That’s my angle and I’m sticking to it.
As an Amazon Associate, I earn from qualifying purchases
Have you ever seen a moose in person? If not, you might not realize just how HUGE these creatures are! Moose make humans look tiny in comparison. In this article, we’ll explore how moose size stacks up to the average person.
Moose Height vs. Human Height
First, let’s talk about moose height versus human height. Bull moose, which are the males, stand a whopping 6 to 7 feet tall at the shoulders. That’s before you even count their antlers! Cow moose, the females, are just slightly shorter at around 5 to 6 feet tall.
Now let’s compare that to the size of a typical human. The average adult man is about 5 feet 9 inches tall. That means a bull moose can be over 2 feet taller than a man! If an average man walked up to a bull moose, he would just reach the moose’s shoulder. A cow moose is still at least several inches taller than a man.
Already from the height alone you can tell that moose are huge compared to us. But it gets even crazier when you look at their weight.
The Immense Weight of Moose
Bull moose tip the scales at 800 to 1,600 pounds on average. Cow moose weigh between 600 to 800 pounds usually. How much does a typical grown man weigh? Around 180 pounds.
So if you did the math, you’d find that one bull moose outweighs an average adult male human by 8 times! Picture 8 grown men standing on a scale. Then picture one moose on the other side. The moose side would drop way down with all that weight!
The Incredible Length of a Moose
The moose’s giant body isn’t just tall and heavy either. They also have an incredible length. From their nose to their tail, moose measure between 6 to 8 feet without the tail included. Add another 1 to 2 feet with the tail, and you get a moose length of 7 to 10 feet. How long is the average man? Around 5 feet 9 inches tall.
So a moose is longer than a full grown man is tall! If a man lay down head to toe next to a moose, the moose would be spilling over extra on both ends. These creatures are absolute giants!
Visualizing the Size Difference
Now that you know the basic height, weight and length of moose, let’s imagine what it would look like if a moose and human stood side by side. Picture it: a 6-foot-tall moose shoulder towering above the man’s head. The massive moose weighs 8 times more than the human. And the moose’s body is so long it’s spilling over the man by several feet in both directions.
When you visualize the size difference, it really paints a picture of how small we are next to these giant animals. If you ever saw a moose in the wild, you would have to crane your neck back just to see to the top of its back. And you could stand between its legs with plenty of room to spare.
Comparing Measurements
Another way to get a sense of scale is to think about specific measurements. For example, a bull moose can have an antler spread of up to 6 feet wide. That’s wider than some bedrooms! Their huge antlers alone could cover an entire person underneath.
Or consider that a moose’s shoulder is often 6 to 7 feet high. That’s the same height or taller than a basketball hoop! Imagine a creature the height of a basketball hoop but much, much bigger. That’s a massive moose!
Respecting the Size Difference
Now I know some of you might think, who cares how big moose are? Why does it matter if they’re so much larger than us? Well, the size difference has some important impacts on how we interact with moose.
For one thing, the immense size of moose means they need to be respected. Because they are so giant and powerful, moose can be very dangerous if they feel threatened. They do not run away from humans like deer often do. Instead, their size makes them confident enough to stand their ground if they perceive a confrontation.
There have been instances where moose have seriously injured or even killed people when they felt cornered or provoked. Given their gigantic stature, it’s easy for a moose to view a human as a pest rather than a threat. So people must be mindful to keep their distance and never purposefully approach or chase moose.
The huge size of moose also determines how we have to hunt them. Special rifles and ammo are required to successfully and ethically hunt such enormous game. And once they’re harvested, the meat and antlers are so bulky that machinery is needed to transport them. It takes serious manpower and equipment to hunt an animal as big as a moose!
Conclusion
So in summary, moose are massive creatures, especially in comparison to us humans. A bull moose can stand over 7 feet tall, weigh up to 1,600 pounds, and span almost 10 feet long. That makes them taller, bulkier, and longer than any person.
The next time you see a picture or video of a moose, take a moment to appreciate their immense size. It takes seeing one in person to fully grasp just how much they dwarf us humans. We must respect the incredible stature of these giants whenever we share their wilderness habitat. So think how tiny and fragile we are relative to these mammoth mammals roaming the northern forests!
FAQs
How tall is a moose compared to a human?
An adult bull moose can stand 6-7 feet tall at the shoulders, not including antlers. Cow moose are slightly smaller at 5-6 feet tall. The average adult human male is around 5 feet 9 inches tall. So a bull moose can be over 2 feet taller than a man.
How much does a moose weigh versus a human?
Bull moose weigh 800-1,600 lbs on average. Cow moose weigh 600-800 lbs. The average adult human male weighs around 180 lbs. A bull moose can weigh over 8 times more than a man.
How wide are moose antlers compared to humans?
Bull moose antlers can span 5-6 feet from tip to tip. That’s wider than some door frames and bedrooms! Moose antlers alone can cover an entire human underneath them.
This year, we decided to breed our sow, Boo, with Duroc genetics. Boo is a mixture of Tamworth and Berkshire genes, which in the past has led to piglets that are fast-growing, vigorous, and, I might add, quite cute to look at!
We wanted to give a new breed of pigs a try this year, however. We decided to go with Durocs. Durocs have a reputation for being some of the hardiest and quickest-growing pigs around.
Here’s what you need to know about the Duroc pig breed. That way, you can decide whether it’s right for you and your farm.
A red pig with drooping ears, the Duroc is a wonderful breed to consider if you are interested in raising market pigs.
It is the second most common breed of pig in the US.
Most Durocs will be a deep mahogany color, as ours were, but you might also find some that are a pale yellow or gold color.
History of the Duroc Pig Breed
They were first bred in the early 1800s in New Jersey and New York. The original parents of the Duroc were red pigs from either state.
The pig is believed to get its red color from the Berkshire pig. The Berkshire is a breed that is now black but was once a rust color, similar to the modern Duroc. Some people also believe that the Duroc contains genetics that can be traced to the Guinea coast of Africa.
A very large pig, the Red Hog quickly rose to popularity for its massive size and its ability to produce large litters of piglets that grew exceptionally fast.
These Red Hogs were eventually bred into the Duroc-Jersey and what is today known as the Duroc. However, the breed wasn’t renamed until 1823.
In 1823, a man named Isaac Frink of Milton, NY raised a red boar of this lineage. It was prized for its carcass quality, growth rate, quiet disposition, and broad shoulder and ham areas.
Though smaller than many of the earlier pigs in this line that came out of New Jersey, it ultimately had a much better carcass quality. He named the breed the Duroc in honor of his famous Thoroughbred stallion, Duroc.
Eventually, the original Jersey line and this new Saratoga-based line were crossed to create a hog that was well-suited for the vast majority of farmers.
It was formally recognized in the creation of the American Duroc-Jersey Association in 1883 (renamed the United Duroc Swine Registry) in 1934.
The breed of choice for a large percentage of American farmers, the Duroc is also a good choice for the modern homestead.
Characteristics of Duroc Pigs
Although the Duroc is not the largest breed of pig you will find to raise on your farm, it is still nothing short of impressive. The average weight of a fully mature boar is close to 900 pounds, while a sow will be around 800 pounds.
With drooping ears, it’s easy to pick this pig out of a line-up of other pigs, most of which have erect ears instead.
As I mentioned earlier, most Duroc pigs will be a deep red in color. However, some are much lighter or even golden or orange in their appearance. Durocs are usually medium-length and have a slight dish of the face. They have large snouts and short, curly tails.
Benefits of Raising Duroc Pigs
1. Great for Outdoor Raising
Raising pigs outdoors, whether on pasture or in a woodland setting, is a great idea for so many reasons. This can really cut down on the amount of barn cleaning that you need to do. It also helps when it comes to improving the health of your animals.
Durocs are perfect for an outdoor environment because they are covered in dense, coarse hair that they shed come summertime. They also have tough, hard skin.
These pigs can tolerate both cold and warm weather with ease.
You don’t have to worry about them becoming sunburned, something that is all too common with other kinds of pigs. The Duroc can, in fact, tolerate most weather conditions without a problem.
As long as you have a muddy area for them to cool off, some rich pastures, and plenty of food and water, your Durocs will have everything they need.
2. Tender, High-Quality Meat
If you ever take a glance at a Duroc pig, your first thought will probably be, “blocky!” The Duroc has a stocky build with plenty of meat in the ham and shoulder area.
We found that the meat ended up being a bit more of a dark red in color, too. This was a testament to their diet as well as the fat distribution and leanness of the meat.
3. Fast Growth Rate
Durocs grow quite quickly, especially when compared to other breeds of pigs. In fact, we conducted a bit of a pseudo-experiment this year. In so doing, we raised both Yorkshire and Duroc piglets for the market.
The results impressed us.
The Yorkshires were slightly older than the Durocs – yet the Durocs reached market weight nearly a month sooner. Anecdotal, but something I saw echoed in many other farmers’ reviews of what it’s like to raise Durocs.
4. Large Litters
Duroc sows are great mothers. They can take care of their young with very few problems.
This is great news considering that the litters can be extremely large. Some say that Durocs can give birth to litters of nearly 2 dozen pigs. This is exceedingly rare, but litters can easily contain around 10-15 piglets if you’re lucky.
Not only that, but Durocs have a long life expectancy – up to 20 years when cared for properly. If you are raising breeding animals, that’s an important factor.
5. Minimal Aggression
Although some people find the Duroc breed to be somewhat aggressive, this isn’t usually the case. There will always be some variation in a breed.
Mostly, though, Durocs raised with other pigs and used to socializing will be quite mild-mannered.
6. Good for Breeding
Because of the reasons listed above, Duroc pigs are some of the best when you are trying to breed certain features into a new line of pigs. In fact, they are often crossed with Tamworths, Yorkshires, and other breeds to create superior pork.
Challenges of Duroc Pigs
1. Extremely Curious and Mischievous
One of the major benefits of raising Durocs is that they are extremely intelligent. In fact, Durocs are so smart that many people wonder whether they can be raised as pets. In short – I don’t recommend it.
Because they are so smart, they are also extremely curious – and extremely mischievous, too. They learn quickly. While they can be trained to be obedient over time, in most cases, if you’re raising market hogs, this isn’t something you’ll have the time to do.
Durocs can be challenging to raise if you don’t have the time or money to invest in some serious infrastructure. By that, I mean these pigs need fences – not just any old fence, but a good fence.
When raising other breeds of pigs, like Tamworths and Yorkshires, we didn’t have to worry about them getting out very often.
A 3-strand electric fence was satisfactory in keeping them contained, even on the occasions when the electricity would be knocked out (they still didn’t test the fence).
Our Durocs, however, seemed to escape regularly. They learned how to lift a gate off its hinges and did this repeatedly. That was along with pushing dirt up and around the electric fence and page wire fence so they could wander wherever they felt obliged to do so.
Duroc pigs are not animals that are well-suited to confinement. Even if your barn is lock-tight, raising these pigs in a sequestered environment is not a good idea. They will not be allowed to root and explore as they please if you do.
2. Skittish Personality
Durocs are known for being extremely independent. Even when raised with other pigs, these smart little buggers aren’t terribly fond of human interaction. They will bolt away at the first touch.
This isn’t necessarily a bad thing when you’re raising pigs for meat. However, keep in mind that it might make them more challenging to handle.
My husband and I have always joked that you can’t force a pig to do something it doesn’t want to. Pigs aren’t like other livestock, such as sheep. These aren’t species that can more or less be manipulated or coerced into doing what you need them to do.
That’s doubly true for Duroc pigs!
However, I have also read that this breed is often used for the show ring. I think that, with a bit of training, you could easily have a Duroc that is friendly and docile enough to be handled. It’s all in how much time you want to commit to it.
3. Must be Raised in a Social Environment
Pigs like to be around other pigs – and that’s true for Durocs. Duroc pigs enjoy other pigs and will get lonely if left to their own devices.
Not only that, but they’ll also get curious! That translates to more pigs trying to escape – not good news for you or your fences.
Therefore, do whatever you can to keep your Duroc pigs entertained with the company of other pigs. Yes, even if they’re pigs of another breed.
How to Raise Duroc Pigs
Duroc pigs should be raised just like any other breed of market pig. Although they can handle most weather conditions, provide them with appropriate shelter like a 3-sided barn. This will help them get out of driving wind and heavy precipitation, along with the burning sun.
A pig will eat an average of 6-8 pounds of feed per day, though this of course varies depending on what you are feeding and what age of pig you are raising.
The average pig will eat up to 900 pounds of food. That is after being weaned from its mother until it is ready for slaughter.
Many farmers use a mixture of corn and soybeans to feed their Durocs. You can also feed any kind of fruit and vegetable, scrap, dairy products, etc.
Don’t forget water as well.
Pigs need a minimum of a gallon of water per day per pig, but potentially more if it’s a larger pig or the weather is warm.
They also need a muddy spot in which to wallow. Be sure to provide this for your pigs when the weather is hot. When it’s cool, a bit of straw bedding will suffice.
Durocs are known for being exceptionally clean animals. They will usually only do “their business” in one corner of the barn, sleeping in the other.
Therefore, the amount of straw you will need is minimal. They have no unique health needs that you would not encounter in other pig breeds, either.
Are Duroc Pigs Right For You?
There are plenty of pig breeds out there for you to choose from, including Yorkshire, Tamworth, Berkshire, Gloucestershire, and more. Why should you choose the Duroc, with all these other options to choose from?
To be fair, the Duroc might not be the perfect breed for everyone.
Take the time to read the information above and to make sure that this is the ideal pig for your small farm or homestead – and if you’re looking for a good meat producer that is smart and stocky, look no further than the Duroc.
Know your limits and what species you are shooting!
Make sure you know how many and of what species you can legally harvest. It’s tempting to just blast away at first light at the first bird you see but take the time to harvest the right birds, it’s the law, too. There are plenty of identification guides online like this one from Ducks Unlimited.
Also, learn what the ducks sound like as a secondary identification source. It can get wild and crazy when a lot are flying so taking the time to learn can save a lot of heartache.
Brrrrrr, layer up!
Its gets cold, so layer up! You can always shed clothing if needed. It’s a fact…it’s colder by the water and that wind stings a bit more with every guest. Layering up will make sure you are plenty warm. Most importantly, cover your head as you lose most of your heat through your head.
Don’t let ‘em see you
Camo is a must! Moreover, if you have a new outer layer (jacket, bibs, etc) rub it around in some dirt to remove the new sheen. Make sure you attempt to match your camo to your hunting grounds as best as possible. Them ducks see real well, so a camo that doesn’t blend is almost as bad as not wearing camo at all.
Don’t Look Up!
Ducks can see incredibly well. Looking up at circling ducks is like shining a spotlight at them! Its sounds funny but go outside and practice looking up with your eyes and not your head. Also, wearing a facemask will help if you have to look up!
Quack, quack calling
Learn how to call but don’t overdo it. The less the better, normally. Don’t try to master every duck noise at once…ease into it. The basic mallard quack, feeding call, hale call and a basic whistle to mimic a teal drake will help them get in range.
Late Season Birds are Spooky
Cut down on your decoys and calling the later in the season. Birds tend to get smarter the more they are shot at. How would you feel if at every restaurant and hotel you stopped at on a thousand mile trip you were shot at? Yeah, you’d be a bit edgy and beyond careful. I typically will only use 2-4 decoys late in the season and no motion type decoys. They seem to avoid those late in the year.
Movement in the Decoys
Ducks don’t normally just sit there. So if you don’t have any wind to move them around purchase a jerk string to add some movement. The spinning wing decoys work well early in the season too but don’t over do it! Sometimes too much movement is a unrealistic.
Match your shot size to your target
No point in firing #2 steel shot at teal ducks. You’ll blow them to pieces. With bigger ducks such as mallards and gadwalls #2 is suitable. There are many guides online that offer recommendations for matching the bird shot size to your prey such as this one from Outdoor Life.
Early Teal Season
There is nothing better than coming back from the morning hunt with a stringer full of teal! Teal are the first birds down in September in Texas where I hunt! Early season teal sometimes act as though they left their brains up north, so take advantage!
They are very fast flyers and are suckers for decoys. No reason to get a teal motion duck decoy. We throw a MOJO dove decoy into our mix and it works great! They are mighty tasty so try eating them Texas style! Cut a slit between the meat and the breastbone on either side and placing a slice of a Texas 1015 onion on one side of the dove breast and a jalapeno on the other side.
Pressurized air is also not affected by temperature changes like CO2 is.
These rifles are powerful, consistent, and accurate.
The gas piston air rifles have attempted to reduce the recoil effect by eliminating the double hit and spring torque associated with steel spring air rifles.
However, the recoil effect is still a little bit greater than that of PCP air rifles.
For the variable pump air rifles, you have to master the cocking action since the power of the shot depends on how strong your pump is.
This is not the case with the PCPs – once filled with air to the maximum fill pressure, all you have to do is pull the trigger, and the pellet fires.
However, a PCP air rifle tends to be more expensive than a CO2 or spring-powered air rifle, and more expensive to refill too .
With high-end features at an entry-level price, the Avenger sets a new standard for similarly priced PCPs to live up to.
Featuring an externally adjustable regulator and externally adjustable hammer spring, the Avenger provides the user with a seemingly infinite amount of performance adjustability never seen at this price point.
A smooth side lever action allows for quick follow-up shots, and the fully shrouded barrel keeps your shooting quiet. Available in .177, .22 and .25 caliber.
Features
Pre-Charged Pneumatic
Sidelever Cocking
Synthetic Stock
Externally Adjustable Regulator (Up to 3,000 PSI / 210 BAR)
Easily accessible Hammer Spring Adjustment Screw
Two-Stage Adjustable Trigger
Max Fill Pressure: 4,351 PSI (300 BAR)
Fully Shrouded Barrel
Picatinny Rail on Fore-end of stock
Holes in front and rear of stock for mounting swivel studs for a sling
Dual Gauges – Reg Pressure (RH Side) and Fill Pressure (LH Side)
Its weight of 5.9 lbs is simply the best as you try your hand on PCP air rifles.
Even young shooters can handle this rifle with great prowess.
In addition to the lightweight, the Hatsan Flash features the popular Picatinny rail which allows you to mount the rifle on a bipod .
This will guarantee you much-needed stability when shooting.
Hatsan did not take any chances regarding the safety of the air rifle.
With the 2-stage Quattro trigger fitted on the Hatsan Flash, there are very little or no chances of misfiring the rifle.
Also of importance to the beginner is the Dovetail mount for fitting a compatible scope.
With this, you can easily master the basics of sighting and be the pro you desire within a few days of practice.
Accuracy
Calibers
Pellets
Distances
Groups
.22
JSB Match Diabolo Hades 15.89 Gr
45 yards
1/2"
.22
Air Arms Diabolo Field Heavy 18 Gr
30 yards
one hole
.22
JSB Diabolo Exact Jumbo Express 14.35 gr
50 yards
0.6"
.22
JSB Diabolo Exact Jumbo 15.89 Gr
25 yards
3/4"
.22
Beeman Crow Magnum 18.21 Gr
20 yards
0.317"
.22
JSB Diabolo Exact Jumbo Heavy 18.13 gr
40 yards
5/8"
.25
JSB Exact King Heavy 33.95 Gr
50 yards
quarter size
.22
JSB Exact Jumbo 15.89 gr
30 yards
dime size
.25
JSB Exact King Heavy 33.95 Gr
35 yards
0.9"
.25
H&N Baracuda Hunter 27.47 Gr
50 yards
quarter size
.22
H&N Baracuda 21.14 gr
10 yards
one hole
.25
JSB Match Diabolo Exact 25.39 gr
20 yards
one hole
.25
JSB Match Diabolo Exact 25.39 gr
37 yards
3/4"
.22
H&N Baracuda 21.14 gr
45 yards
1.15"
.22
Crosman Premier Domed 14.3 gr
45 yards
1"
.22
JSB Exact Jumbo Domed 15.89 gr
45 yards
5/8"
.25
JSB Exact King 25.39 Gr
50 yards
0.38"
.25
JSB Exact King Heavy MKII 33.95gr
50 yards
0.65"
.25
H&N Baracuda Hunter 27.47 gr
50 yards
0.78"
.25
JSB Exact King 25.39 Gr
100 yards
1.97"
Chrony tests
Calibers
Pellets
FPS
FPE
.25
JSB Match Diabolo Exact King 25.39 Gr
854
41.13
.22
Crosman Premier Hollow Point 14.3 Gr
960
29.27
.25
H&N Baracuda Hunter 27.47 Gr
815
40.53
.25
JSB Match Diabolo Exact King 25.39 Gr
837
39.51
.25
H&N Grizzle 31gr
763
40.08
.25
H&N Field Target Trophy 20.06 gr
877
34.27
.22
Crosman Premier 14.3 Gr
970
29.88
.22
JSB Diabolo Exact Jumbo 15.89 Gr
902
28.71
.177
Crosman Premier Ultra Magnum 10.5 gr
918
19.65
.177
JSB Exact Monster Diablo 13.43 gr
845
21.3
.25
H&N Baracuda Hunter 27.47gr
825
41.53
.25
JSB Exact King Heavy MKII 33.95gr
760
43.55
.177
JSB Exact Monster 13.4 Gr
820
20.01
.22
JSB Exact Jumbo Domed 15.89 gr
925
30.2
.25
JSB Exact King 25.39 Gr
691
26.93
.25
JSB Exact King Heavy MKII 33.95gr
627
29.64
.25
H&N Baracuda Hunter 27.47 gr
787
37.79
Coming to its power, the Hassan Flash will shoot pellets at a speed of 1250 fps for the .177 caliber, 1120 fps for the .22 caliber, and 900 fps for the .25 caliber.
In terms of muzzle energy, the air rifle manages up to 29, 38, and 40 FPE for the .177, .22, and .25 caliber respectively.
Such energy is enough to bring down the fox-sized games and other smaller games, including the rabbit, squirrel, raccoon, birds, and possum.
What’s more, this air rifle is relatively quiet, thanks to Hatsan’s QE
Suppression technology, so you won’t scare away every other animal before taking them out.
Fill the 165 cc air cylinder to a maximum of 2900 psi and you are good to go with this best starter PCP air rifle.
Features
Precharged Pneumatic
Bolt action
Skeletonized synthetic stock
QuietEnergy fully shrouded barrel
Includes 2 indexing magazines and single-shot tray
Includes quick-fill nozzle
Precision rifled and choked barrel
Anti-knock system prevents gas wastage when rifle is knocked or bounced
Combo Picatinny and 11mm dovetail rail
Quattro Trigger: 2-stage fully-adjustable match trigger
Fixed 165cc air cylinder, 200 BAR, 2,900 psi
Recommended uses:
Target shooting/plinking
Pest control/small game hunting: pigeons, starlings, grackles, squirrels, rabbits, raccoons, groundhogs, snakes, armadillos
Pros and Cons
Pros
Cons
Great entry level rifle
Lightweight and portable (6 lbs without rings and scope)
This is one of the best-rated PCP air rifles at $500.
Features:
10-shot repeater with auto-indexing feature
Uses compressed air: 2,000 to 3,000 psi (make adjustments as shown in the owner’s manual)
Can be adjusted for different velocities
Internal shroud makes this a VERY quiet gun
Choked barrel delivers superior accuracy
2-stage adjustable match trigger…and the trigger is metal!
Raised aluminum breech for easier loading of circular magazine
11mm dovetail on original/ Lothar Walther Barrels include a Weaver/Picatinny Rail
Turkish Walnut stock with adjustable comb
Reversible bolt — switch from right to left side (with our special service)
Built-in air pressure gauge (manometer)
215cc air reservoir
42.8″ long*
8.2 lbs.*
Air reservoir ends with a male quick-disconnect Foster fitting for fast refills (requires a female Foster quick-disconnect adapter to fill from a scuba tank or hand pump)
Includes one magazine and sling swivel studs
Recommended uses:
Target shooting/plinking
Pest control/small game hunting: squirrels, rabbits, crows, starlings, groundhogs, raccoons, tree rats.
6. Best regulated PCP air rifle: Umarex Gauntlet 2
It is worth pointing out that most PCP air rifles do not operate at the peak value of pressure of the gas tanks.
If the capacity of the gas tank is 3000 psi, the rifle may work best at around 2000 psi.
This means that the rifle will fire the first set of shots at varying velocities until the optimum pressure is reached.
With a regulated air rifle, the pressure of the reservoir is lowered before it gets to the valve.
This way, the air rifle works at the ideal pressure right after refill.
You can therefore fire shots at a relatively constant velocity.
The regulator also increases the capacity of the gas tank to some level.
This increases the number of shots you can fire before having to refill the gas tank.
Regulators can be added to PCP air rifles, but again not all of them.
The Umarex Gauntlet 2 comes specifically regulated by the manufacturer.
The manufacturer once claimed that their Gauntlet model has similar capabilities to other rifles over $1000.
At a retail price of less than $300, you may doubt their claim, but let the features speak for themselves.
The 3000 psi capacity gas tank shoots up to 70 pellets in .177 caliber, and 60 shots for the .22 caliber.
Using the JSB Jumbo Exact 14.35 grain pellets, the Gauntlet air rifle achieves muzzle velocities of up to 807 fps, with an energy outcome of about 21 FPE.
This is certainly enough power in your hands for simple target shooting.
Lighter pellets can achieve speeds of up to 1000 fps, but with reduced energy.
Tests with the Umarex Gauntlet 2 reveal great accuracy up to 80 yards. Quite a great value for money.
Introducing the FX Airguns Impact M4 PCP Air Rifle – a cutting-edge air gun manufactured by Swedish experts.
The Impact M4 breaks through industry boundaries, boasting unmatched precision and performance like no other.
Perfect for precision shooters or anyone looking to improve their rifle’s accuracy, the Impact M4 contains dual Adjustable Match Precision (AMP) regulators for effortless adjustment based on your shooting needs.
Its external micro- and macro-hammer spring tension adjustments allow you to customize the optimal setting for each round of shots you take.
For maximum control, try out the valve control adjustment system which is externally accessible so you can always monitor the internal pressure systems and make tweaks whenever needed.
Furthermore, the new FX Airguns Impact M4 PCP air rifle is the latest breakthrough in airgun technology.
The new dual regulator system pre-reduces air pressure, providing superior regulated power and consistency with fewer standard deviations from shot to shot – a must-have for any serious shooter.
In addition, the unique Power Plenum 720 offers an increased diameter and 72cc volume for efficient and powerful projectiles every time.
Combined with the rifle’s specially designed porting and valving system, the FX Airguns Impact M4 is perfect for precision performance in competition or out on the field. With its maximum output pressure of 250 bar, this top-of-the-line rifle ensures the accuracy you need when it matters most.
The FX Impact M4 comes in 5 different calibers available: .177, .22, .25, .30, .35 , with Black/Bronze colors.
Accuracy
Calibers
Pellets
Distances
Groups
.177
JSB Match Diabolo Exact 8.4 Gr
50 yards
3/4"
.30
Slugs 67 Gr
50 yards
3/4"
.30
Slugs 67 Gr
100 yards
1 1/2"
.30
JSB Match Diabolo Hades 44.75 gr
50 yards
.557"
.25
JSB King Heavy Mark II 33.95 gr
100 yards
1"
.30
Nielson Slug 47 gr.
50 yards
one hole
.22
JSB Diabolo Exact Jumbo Heavy 18.13 gr
50 yards
one hole
.30
JSB Diabolo Exact 50.15 Gr
60 yards
one hole
.25
JSB Match Diabolo Hades 26.54gr
35 yards
one hole
.35
JSB Match Diabolo Exact 81.02 Gr
100 yards
1"
.22
JSB Diabolo Exact Jumbo Heavy 18.13 gr
95 yards
3/4"
.177
NSA Slugs 12.5 gr
50 yards
nickel size
.22
JSB Match Diabolo Exact Jumbo Heavy 18.13gr
50 yards
dime size
.25
JSB Exact King 25.39gr
50 yards
3/4"
.22
JSB Exact Jumbo 15.89gr
50 yards
1/2"
.25
JSB Exact King Diabolo 25.39gr
50 yards
0.37"
.25
Air Arms Diabolo Field 25.4gr
50 yards
0.47"
.25
JSB Diabolo King Heavy MKII 33.95gr
50 yards
0.71"
.25
JSB Exact King Diabolo 25.39gr
100 yards
1.34"
.30
JSB Exact 44.75 gr
50 yards
0.557"
.177
NSA Slugs 12.5 gr
50 yards
Nickel-size
.25
JSB King Heavy Mark II 33.95 gr
100 yards
1.5"
.30
JTS Dead Center 45.06 gr
45 yards
5/8"
.30
FX Hybrid Slugs 44.5 gr
45 yards
5/8"
.30
H&N Slug HP II 50 gr
45 yards
3/4"
.30
Zan Projectile 45.5 gr
45 yards
3/8"
Chrony tests
Calibers
Pellets
FPS
FPE
.35
JSB Match Diabolo Exact 81.02 Gr
845
128.49
.30
JSB Match Diabolo Hades 44.75 gr
870
75.23
.177
JSB Exact Heavy 10.34g
900
18.6
.25
JSB Diabolo Exact King Heavy 33.95 gr
875
57.73
.35
JSB Match Diabolo Exact 81.02 Gr
915
150.66
.35
JSB Match Diabolo Exact 81.02 Gr
877
138.4
.22
JSB Diabolo Exact Jumbo Heavy 18.13 gr
940
35.58
.177
NSA 12.5 gr
977
26.5
.22
JSB Diabolo Exact Jumbo 15.89 gr
940
31.18
.22
JSB Jumbo Express 14.35gr
1003
32.06
.22
JSB Jumbo Heavies 18.13gr
863
29.99
.25
JSB Exact King 25.4 gr
893
44.99
.25
JSB King Heavies MKII 33.95gr
849
54.35
.30
JSB Exact 44.75 gr
829
68.31
.25
Air Arms Diabolo Field 25.4gr
938
49.64
.25
JSB Exact King Diabolo 25.39gr
907
46.39
.25
Air Arms Diabolo Field 25.4gr
897
45.39
.25
JSB Diabolo King Heavy MKII 33.95gr
816
50.21
.25
JSB Exact King 25.39 Gr
1100
68.23
.30
JSB Exact 44.75 gr
675
45.29
.177
NSA Slugs 12.5 gr
977
26.5
.25
JSB King Heavy Mark II 33.95
748
42.19
.22
JSB Exact Jumbo Diablo 15.89 gr
940
31.18
.30
Zan Projectile 45.5 gr
813
66.8
Recommended uses:
Pest control and Small/medium/large game hunting: coyotes, iguanas, groundhogs, rabbits, squirrels, gooses, woodchucks, prairie dogs.
“Deer and illuminated objects can be a dangerous combination. Discover the legality surrounding shining lights at deer and gain insight into the potential consequences of this action in our informative guide.”
Understanding the Legality of Shining Lights at Deer: What You Need to Know
What is jacklighting and why is it illegal in some areas?
Jacklighting refers to the practice of shining a light into a forest or field at night in order to locate animals for hunting purposes. This can involve using car headlights, spotlights, searchlights, or other types of lights, either mounted on a vehicle or not. The purpose of jacklighting is to temporarily blind the animals, causing them to freeze in place and making it easier for hunters to kill them.
However, jacklighting is considered illegal in certain areas due to several reasons. Firstly, it is seen as unsporting because it gives hunters an unfair advantage over the animals. By blinding them with lights, the animals are unable to flee or defend themselves properly. Secondly, jacklighting can be dangerous as hunters may not have clear visibility beyond their targeted animal. This can lead to accidental shootings or injuries if other people or objects are present within the vicinity.
The specific laws and regulations surrounding jacklighting
Different states have varying laws and definitions regarding jacklighting and hunting at night. For example, in Indiana, there are specific regulations that define the prohibited activity of jacklighting. These laws aim to protect wildlife and ensure fair hunting practices.
Similarly, New Jersey has its own legislation that prohibits jacklighting and specifies the consequences for violating state hunting regulations. It is important for hunters to familiarize themselves with these laws in order to avoid legal penalties.
Furthermore, some states have made hunting at night illegal altogether, regardless of whether spotlighting is being used or not. This blanket ban aims to prevent any potential harm caused by nighttime hunting activities.
In addition to these regulations, certain states also specify which types of animals may be hunted with spotlights at night. This helps to control and manage the hunting of specific species, ensuring their conservation and population stability.
Overall, understanding the legality of shining lights at deer or any other animals is crucial for hunters to engage in responsible and legal hunting practices. It is important to respect wildlife and adhere to the laws and regulations set by each state to ensure the preservation of natural habitats and the sustainability of animal populations.
Is It Against the Law to Shine a Light at Deer? Exploring Hunting Regulations
The Practice of Jacklighting
Jacklighting is the act of shining a light into a forest or field at night in order to locate animals for hunting purposes. This practice involves using car headlights, spotlights, searchlights, or other types of lights, either mounted on a vehicle or not. The purpose of jacklighting is to temporarily blind the animals and cause them to freeze in place, making it easier for hunters to kill them. However, this practice is considered unsporting and dangerous in many areas.
Legality and Definitions
In some regions, jacklighting is illegal due to its perceived unsporting nature and potential risks. Laws that prohibit jacklighting often have specific definitions of the prohibited activity. For instance, in Indiana, the law defines jacklighting as shining a light from a vehicle while possessing hunting equipment or firearms. Similarly, in New Jersey, the law states that it is unlawful to shine any light in fields or forests where wildlife may be found during specified periods.
Additionally, hunting at night is illegal in certain states regardless of whether jacklighting is involved. Some states also specify which types of animals can be hunted using spotlights at night. These regulations aim to protect wildlife populations and ensure fair hunting practices.
It is crucial for hunters to familiarize themselves with local hunting regulations before engaging in any activities involving shining lights at deer or other animals. Understanding these laws helps ensure ethical and legal hunting practices while promoting conservation efforts.
The Legal Implications of Jacklighting: Shining Lights at Deer
Illegal and Unsporting Practice
Jacklighting, also known as spotlighting or shining, involves the use of lights to temporarily blind animals, making them easier targets for hunters. However, this practice is considered illegal in many areas due to its unsporting nature. The purpose of hunting is often seen as a fair and ethical pursuit, where the hunter must rely on their skills and knowledge to track and kill their prey. Jacklighting goes against these principles by using artificial means to gain an unfair advantage over the animals.
Furthermore, jacklighting is also deemed dangerous because it impairs the hunter’s ability to see beyond the targeted animal. This can lead to accidental shootings or injuries if other hunters or individuals are present in the vicinity. As a result, laws have been put in place in various states to prohibit jacklighting and protect both wildlife and human safety.
Legal Definitions and Restrictions
In states where jacklighting is illegal, specific definitions of the prohibited activity are outlined in the law. For example, in Indiana, the law clearly defines jacklighting as shining a light from a vehicle while possessing hunting equipment or firearms with intent to locate or take wildlife illegally. Similarly, New Jersey’s law explicitly states that using any artificial light while possessing weapons for hunting purposes is forbidden.
Moreover, some states have also implemented restrictions on nighttime hunting altogether, regardless of whether jacklighting is involved. This ensures that hunting activities only take place during daylight hours when visibility is optimal and reduces the risks associated with nighttime hunting.
In addition to legal definitions and restrictions on jacklighting itself, certain states may specify which types of animals can be hunted using spotlights at night. These regulations aim to protect endangered species or limit excessive hunting practices that could disrupt ecosystems.
Overall, the legal implications of jacklighting are clear: it is considered an illegal and unsporting practice in many areas. By enforcing these laws, authorities aim to preserve the integrity of hunting as a fair and ethical activity, while also prioritizing wildlife conservation and human safety.
Nighttime Hunting Restrictions: Can You Shine a Light at Deer?
Understanding Jacklighting and its Legal Implications
Nighttime hunting, specifically the practice of jacklighting, involves shining a light into a forest or field to locate animals for hunting purposes. This technique temporarily blinds the animals, making them easier targets for hunters. However, jacklighting is considered unsporting and dangerous in many areas due to various reasons. Firstly, it poses risks to both hunters and innocent bystanders as they may not have clear visibility beyond the targeted animal. Secondly, it disrupts natural wildlife behavior and can negatively impact ecosystems. As a result, several states have implemented laws that explicitly prohibit jacklighting.
In Indiana, for instance, the law defines jacklighting as the use of artificial light to spot or locate wildlife while in possession of firearms or other weapons capable of killing animals. Similarly, New Jersey’s legislation also prohibits spotlighting or shining lights on wildlife while having firearms or weapons ready for use. These laws aim to protect the welfare of animals and ensure fair hunting practices.
Furthermore, it is important to note that hunting at night may be illegal even without the use of spotlights in certain states. The restrictions vary from state to state, with some specifying which types of animals can be hunted using spotlights during nighttime hours.
To summarize, jacklighting is a controversial practice that is illegal in many states due to its perceived lack of fairness and potential dangers. The specific definitions and regulations surrounding this activity differ between states but generally aim to preserve wildlife populations and promote ethical hunting practices.
Sources:
– Indiana Department of Natural Resources: Hunting & Trapping Guide
– New Jersey Division of Fish and Wildlife: 2021-2022 Hunting & Trapping Digest
Navigating State Laws: Is Shining a Light at Deer Illegal?
Shining a light at deer, also known as jacklighting, is a controversial practice that is subject to varying state laws across the United States. In some states, such as Indiana, jacklighting is considered illegal due to its unsporting nature and potential danger. The purpose of shining a light into a forest or field at night is to temporarily blind the animals, making them easier targets for hunters. This can be done using car headlights, spotlights, searchlights, or other types of lights.
The specific definition and regulations surrounding jacklighting vary from state to state. For example, in New Jersey, the law explicitly prohibits this activity. However, it’s important to note that hunting at night may be illegal in some states regardless of whether or not a spotlight is being used. Some states also specify which types of animals may be hunted with spotlights at night.
The enforcement of these laws falls under the jurisdiction of conservation officers or other law enforcement agencies responsible for overseeing hunting regulations. Violating state hunting regulations by engaging in jacklighting can result in citations and penalties.
It’s worth mentioning that opinions on jacklighting are divided. Supporters argue that it helps control animal populations and aids in wildlife management efforts. However, opponents view it as an unfair and unethical practice that disrupts natural behavior patterns and poses risks to both humans and animals.
In conclusion, if you are considering using a light to hunt deer or any other animals at night, it is crucial to familiarize yourself with the specific laws and regulations in your state regarding jacklighting or spotlighting. Understanding these laws will ensure you stay within legal boundaries while engaging in hunting activities and contribute to responsible wildlife management practices.
Spotlighting and Deer Hunting: Unraveling the Legalities
What is spotlighting?
Spotlighting, also known as jacklighting, is a hunting practice where hunters use artificial lights to illuminate animals at night. This temporarily blinds the animals, making them easier targets for hunters. Spotlighting can be done using car headlights, spotlights, searchlights, or other types of lights mounted on vehicles or held by hand.
The legalities of spotlighting
The legality of spotlighting varies from state to state. In some areas, jacklighting is considered illegal due to concerns about its unsporting nature and the potential dangers it poses. Hunters engaging in this activity may face penalties for violating hunting regulations.
In states where jacklighting is prohibited, laws often provide specific definitions of the prohibited activity. For instance, in Indiana and New Jersey, there are clear guidelines outlining what constitutes illegal spotlighting. Additionally, some states have laws that prohibit hunting at night altogether, regardless of whether a spotlight is being used or not.
Types of animals targeted
Certain states specify which types of animals can be hunted with spotlights at night. This means that while spotlighting may be allowed for certain species, it could be illegal for others. The intention behind these regulations is to ensure responsible hunting practices and protect vulnerable wildlife populations.
It’s important for hunters to familiarize themselves with the specific laws and regulations regarding spotlighting in their respective states before engaging in this activity. By doing so, they can ensure they are acting within the bounds of the law and contributing to sustainable hunting practices.
In conclusion, shining a light at a deer is generally considered illegal in most jurisdictions. This act can disrupt their natural behavior, cause unnecessary stress and potentially lead to accidents on the road. It is essential to respect wildlife and adhere to laws protecting them for their well-being and the safety of all involved.
"Master the art of precision shooting with dry firing air rifles. Enhance your aiming skills, trigger control, and muscle memory without using ammunition. Discover...
")
")
")
")
")


 Review – The Best Name In The Air Rifle Game")


 There are advantages and disadvantages to having a tree. Some would be excited to know about the pros and cons of redbud trees. Despite the limited lifespan of these lovely, vibrantly colored trees, they have greatly benefited us and the environment. Spend some time learning about these trees, and prepare to have your mind blown by what you discover.
 About Ryan Eder