Home Blog Page 26

303 British vs 30-06 [Which One Is Better]

0

You know what is the most confusing decision if you are a shooter? It is when you have a beautiful rifle and you need to choose the perfect cartridges for it.

So, what are you choosing between 303 british vs 30-06?

Per round of .303 British will cost you $2.50 and .30-06 Springfield will cost $1.90. So, .30-06 is quite cheaper. 30-06 has a velocity of 890 m/s and .303 British has 844 m/s. .30-06 Springfield is more available. But .303 British damages more to the target because of its lower energy than 30-06.

So, let’s get into the article to find the perfect cartridge for you.

A Quick Comparison Between 303 British and 30-06

The 303 British and the 30-06 basically mean .303 British ammo and .30-06 Springfield ammo. Both of the ammo is very popular among shooters. They have some impressive aspects that made them popular among the users.

Now let’s have a quick look into the basic differences between these ammos. For your comfort, I’ve taken the cartridges with the same mass (10g).

Factors.303 British (10g).30-06 Springfield (10g)Velocity844 m/s890 m/sEnergy3,463 J3,820 JMas Pressure (SAAMI)49,000 psi60,200 psiOverall length3.075 in3.34 inAvailablityGoodBetterPrice $2.50/rd$1.90/rd

Though you can compare the cartridges by their aspects the effectiveness also depends on the rifle. So, it is really necessary to have a good rifle to get the best performance from the cartridges.

If there is any defect in your rifle then it can also affect the performance of the cartridge. So make sure your rifle works properly and doesn’t have any defects in it.

Remember there are also differences between 303 enfield vs 303 british.

In-Depth Comparison between 303 British and 30-06

Let’s assume you have a nice rifle and it works perfectly. Then comes the confusion of having cartridges. Because while choosing the perfect cartridges you need to examine so many different aspects.

Now let’s talk about the 303 rifle bullet and 30-06 deeply. So that it will be easier to you to choose the best one for your rifle.

Velocity

Velocity is the most important aspect when you are going to choose the perfect cartridge for you. This shows how your bullet is going to reach the target. And obviously when you’ll shoot you’ll definitely want to reach close to the target as much as possible.

The .303 British (10g) has a velocity of 844 m/s. Which is kind of impressive for many of the users. And this velocity is enough to make a good hit on the target.

On the other hand, the .30-06 Springfield (10g) has a velocity of 890 m/s. Which is 46 m/s more than the .303 British (10g). As this cartridge has more velocity then you can say that it will be more accurate than .303 British (10g).

Winner: As .30-06 Springfield (10g) has more velocity so it wins this segment.

Energy

The impact of a bullet is described in terms of momentum and kinetic energy. The more pressing concern is how much of the energy will reach the goal. If the bullet goes through, a little amount of the projectile’s energy may be transferred to the target.

The majority of the energy may be transferred if the bullet deforms or mushrooms. A slow bullet that transfers all of its energy to the target. Which is more deadly than a quick one that goes through the target.

So, we can see that .303 British (10g) creates 3,463 J of energy. Which is very impressive. And it will create good damage to the target.

Then if you take a look at the .30-06 Springfield (10g) it creates 3,820 J of energy. Which is almost 400 J more than .303 British (10g)’s energy.

You have already got slow bullets or bullets with less energy damage more than the fast ones. So generally .303 British (10g) will damage more than the .30-06 Springfield (10g).

Winner: As .303 British (10g) will damage more that’s why it wins this segment.

Availability

Availablity is one of the most concerning issues while choosing cartridges for your rifle. Suppose you are planning for a long adventure tour. Then you will definitely want to have some extra cartridges with you.

Then again you will be more satisfied with the availability in every place. It will be better if you can get your cartridges in ruler and remote areas right!

So, you will get more availability with .30-06 Springfield (10g). These bullets are very commonly available all around.

You will also get.303 British (10g) in most of the city or town areas. But it won’t be that much available in rular and remote areas.

Winner: For being more available .30-06 Springfield wins this segment.

Price

Price of the cartridges should be the main concern like velocity when choosing bullets right! Because bullets are something that needs continuous investments.

So it is really important to have some cartridges with reasonable price points.

The .303 British (10g) will cost around $2.50 per round. Which is kind of a costly cartridge.

Then the .30-06 Springfield will cost around $1.90 per round. Which is 60 cents less than the .303 British (10g). This may not be seen as a big difference but it will become large when you’ll buy a bulky quantity.

Winner: For being more reasonable .30-06 Springfield wins this segment.

Which One You Should Choose!

As you can see .30-06 Springfield has more velocity and availability with a lower price point. Which makes this cartridge more attractive to the shooters.

But if you want to have less shoot and more damage to the target then.303 British can be your choice. And don’t forget it is also a popular cartridge among shooters.

So, now you can choose as per your preference.

Don’t forget to take safety precautions before shooting. Let me suggest to you some stuff that will keep you safe while shooting.

  • YINSHOME Shooting Ear Protection Earmuffs, Gun Safety Glasses, Earplugs, Protective Case
  • TRADESMART Shooting Ear Protection – Hearing Protection with NRR38 Earplugs, Safety Glasses & Hard Carrying Case

These protection tools will help you to save your ears and eyes while shooting.

FAQs

What is a 303 British comparable to?

303 British, necked down to fire a. 257 projectile, developed in Australia. Which was in the 1940s as a sporterized rifle cartridge. Notably for the Lee-Enfield action; comparable variants also emerged in Canada at the same time.

How accurate is a British 303?

Accuracy may vary depending on the rifle you are using. Most 303s are 60 to 100 years old, so keep that in mind. To 250-300 yards, a competent rifle should have a minute of deer accuracy. Though 303 British has a good velocity to hit accurately.

Is 303 British a good caliber?

Yes, in most cases it is a good caliber. The.303 British cartridge is ideal for hunting whitetail deer and black bears and is good for all medium-sized wildlife. It was a favorite moose and deer cartridge in Canada when military surplus rifles were plentiful and inexpensive.

Conclusion

I hope by now you have got a perfect idea about 303 british vs 30-06. I want to recommend the one as per your needs.

If there are any more queries, please drop them in the comment section.

Be safe while shooting. Take care.

PCP vs Spring Piston: Which one is better?

0

When reading about guns in the search for the first one that would be perfect for you, an age-old debate comes into question.

Should a beginner start with a traditional, spring-powered gun or a pre-charged pneumatic (PCP) gun? 

The battle of PCP vs spring-piston air rifles can be a bit confusing. 

People have their own opinions on the matter according to their experiences and needs, but what should a beginner who has not even a rough idea do?

This article will help you out in deciding which one works best for you. 

Spring Piston and its Working Procedure:

Spring pistons are the traditional type of guns that you may have seen commonly used. They are the most basic of guns and are easily available at a low price – hence proving themselves very beginner-friendly. 

To get a better understanding of the spring piston, let us look at exactly how it works and whether the mechanism will be well suited for you. 

  1. There are two main components inside the gas chamber – the piston and the spring. 
  2. Upon cocking the gun, the spring starts undergoing compression. This compressed gas causes the air stuck behind the piston to start getting pressurized. 
  3. When you pull the trigger, the spring gets decompressed and causes the piston to move forward when the trapped air behind it is released at high pressure. 
  4. The pellet then comes out of the muzzle at full speed due to this pressurized air . 

This is how the spring in the system works to fire the pellet inside. 

(For more on the best spring air rifles, see this post)

Pre-charged Pneumatic Guns and its Working Procedure

The term ‘pre-charged’ in PCP guns comes from the fact that instead of a regular piston, there is a gas cylinder that is fixed beforehand and does not require continuous reloading.   

The air inside the cylinder keeps a valve closed which also keeps the air trapped and tight inside the tank. Here is how the procedure works:

  1. Upon the trigger being cocked, a hammer inside is ready to fall onto a plunger in front of the valve. The valve is pushed to open due to the energy from the hammer . 
  2. After the shot, the pressure in the tank pushes the valve close. In the beginning, the pressures can be high enough to cause the valve to close quickly. 
  3. After each shot, the pressure in the tank is reduced along with the amount of air stored, which will need to be refilled after it has completely been exhausted. 

Differences Between PCP vs Spring Piston

The primary difference between PCP vs spring-piston air rifles is the recoiling. Recoiling is the backward and forward movements of the arm caused by the pressure of continuous shooting. There is minimum recoiling and movement in PCP guns, causing them to be very comfortable for their purpose, whereas spring pistons are known for their continuous recoiling.

The spring piston recoiling is at risk of injury from its movements, but it is a common misunderstanding that PCPs do not recoil. Recoil is present in the latter, but the difference in comparison of PCP vs spring-piston air guns shows that the contrast in pressure is huge and greatly affects how you need to shoot the rifle.

A spring-powered rifle needs to be shot in the same manner for maximum accuracy, with the most gentle and perfect grip on it to only ever be truly accurate. When gripped too hard, there can be a difference in recoil which can lead to misfiring and accidents as well. This is the risk that spring pistons pose when not held properly. 

A PCP gun, on the other hand, is a more advanced option, so the recoil is minimal and there is better accuracy for the shooter as long as they keep their head and eye position behind the sight remain consistent.

(For more on 5 types of air rifles you need to know before buying, see this post.)

PCP vs Spring: Power

Usually, the muzzle energy that is sufficient for all organized target shooting and hunting sprees is expected to be 12-foot pounds. Though some short-range target disciplines can restrict their muzzle energy to six-foot pounds.

Most PCPs will be adjusted to deliver around 11-foot pounds of muzzle energy or even more! The FPE usually depends on the caliber. For instance, some .25 caliber rifles can deliver up to 50 FPE. 

Hence, high-caliber PCPs offer more FPE. Thus, they become ideal for small, medium, or large game hunting. 

The air pressure in PCPs is also compressed to between 2700 to 3000 pounds per square inch. 

The most common spring-piston caliber for shooting today is still .177 and .22. Depending on whether the hunter is shooting a high-velocity projectile or one with a more arched trajectory, spring pistons give the shooter their choice. 

PCP vs Spring: Accuracy

Another misconception about the PCP vs spring-piston debate is that the PCP will be far more accurate than the spring-piston gun. 

However, that is not the case and springers are just as accurate as PCPs. They have excellent shot-to-shot consistency and can rival or sometimes even outperform a PCP when their respective muzzle velocity is tested. 

Why then, is this debate still prevalent? It mostly comes down to the way the guns are to be used. 

Where air pistons require a lot of practice with grip, aiming, and getting used to the recoil, PCPs have covered some of the hard work required to shoot and seem more accurate. It is not the rifle that guarantees the accuracy, but just the way it is being shot. 

PCP vs Spring: Noise Level

If you wish to practice a lot with your gun, it is important to keep in mind the noise factor of guns as you would not want to disturb the area or catch unwanted attention. 

PCP guns have an advantage over their spring-powered rifle rivals as the latter makes a lot of noise upon firing. 

The coiled spring inside the spring pistons can lead to more sound when the pellet is released. Hence, they are not very advisable to keep if you want to hunt or practice your shooting skills. The sound may, however, dampen with time. 

On the other hand, PCPs are quite noiseless and hence perfect for keeping at home, going hunting, or practicing shooting. The credit goes to the noise reduction system or sound suppression system present in PCPs. 

These systems work by creating several air chambers inside the shroud. As the air passes through each one, the air gets stripped away. Therefore, when the air finally comes out, there’s very little noise.

PCP vs Spring: Upkeep Cost

There is a vast amount of PCPs and air-powered rifles to choose from these days, but the cost is not as appealing to the eye as the varieties may be. 

Spring pistons are comparatively known to be much cheaper than PCPs, but the gap is narrowing as due to demand for the traditional guns, good spring-piston guns are also in the market at big-budget prices. 

However, it is still more economical to start with a spring gun rather than a PCP as PCPs require high maintenance and expenditure for it as well. Besides, some spring pistons offer a degree of high accuracy at a lower price which makes it far more beneficial in the long term.

PCP vs Spring: Which One is Better for Pest Control?

Pests can be troublesome considering they usually come in huge numbers. For this use, a PCP will be more beneficial if you have a whole infestation. They shoot silently and can do the job quicker in case you need to aim or need repeated shots to take care of multiple targets. 

However, it would be a rather expensive choice to waste precious PCP ammo on pests as the gun requires high maintenance and frequent charging. 

Spring guns, though at risk of hard recoil, are cheaper and can be kept just for pest control as they are always ready to use and would not hurt your pockets for maintenance. 

PCP vs Spring: Which One is Better for Hunting Game?

When it comes to choosing PCP vs spring piston pellet guns, most hunters prefer the former due to its obviously advanced machinery with minimal recoiling and sound. 

Moreover, PCPs offer excellent power that is required for medium or large game hunting. On the other hand, spring pistons are better for small game hunting only most of the time. 

A newcomer in the hunting game would be rewarded more quickly if they start with a PCP, which might ensure that their interest in shooting will remain.

One way to go about it is to master the PCP gun before taking on the challenge that is the spring piston. 

Despite being an earlier gun, a lot of hunters still prefer it for its extreme accuracy that comes with mastering the grip and recoiling. The other way around can be done as well, but if you do not know gun holding and its technicalities, it is advised that you go for the safer option. 

Conclusion

Considering that PCPs and spring pistons are still the two most widely used and approved hunter guns, there can be no correct answer to which one is better. There are pros and cons of both depending on what your priorities are, so to narrow it down, here is the conclusion. 

Pros and Cons of PCP:

ProsCons
  • Constant firing with no recoil problems
  • Cocking the gun is easy
  • Smooth, soundless shooting with better safety
  • Good for hunting
  • Powerful for hunting large/medium game
  • A more expensive choice than springers
  • Equipment for charging is needed
  • Special maintenance and repair are required frequently

(For more on the best PCP air rifle on the market, see this post)

Meanwhile, to sum up, the pros and cons of spring pistons:

Pros and Cons of Spring-Piston:

ProsCons
  • Affordable and easy to maintain than PCPs
  • No need for charging material 
  • An average spring gun lasts about a thousand shots before needing replacement
  • Great for pest control and plinking
  • Recoiling can lower the chances of accuracy
  • Cocking can be difficult for some wood-stock guns
  • There is an increased recoil at higher power levels
  • Medium to high noise level and requires a lot of practice

(For more on the best break barrel air rifle that hits like a champ, see this post)

.22 Long vs .22 Short: Can you use both in the same rifles?

0

The .22 Short and the .22 Long are some of the oldest American metallic cartridges around, being invented in 1857 and 1871 respectively. Unlike other early rimfire designs, the .22 caliber options can still be found today. The problem is, it is hard to find rifles chambered in these cartridges, so a natural question to ask is can a rifle use both .22 Short and .22 Long?

Generally, .22 Short, .22 Long, and .22 Long Rifle can be safely used in the same firearms. However, some designs such as semi-automatic rifles may not cycle reliably due to lower gas pressures.

How can these cartridges be used in the same rifles? Unlike most modern centerfire cartridge designs, .22 rimfires technically straight wall designs. The only dimension which varies between the Short, Long, and Long Rifle is the length of the case and overall length. When chambered, the bullets aren’t fitted into the throat of the barrel and instead must move slightly forward before engaging the rifling.

A Brief History of .22 Rimfires

In the later half of the 19th Century, firearms manufacturers were making the transition from muzzle-loading projectiles to metallic cartridges. The Alamo in 1836 was fought with long rifles using percussion caps and flintlocks. By 1898 when Teddy Roosevelt was blazing his way through Cuba the official US military cartridge was the .30-40 Krag. In between, US firearms underwent a remarkable evolution.

This is where the .22 rimfire calibers come into play. Rimfire cartridges were an early metallic design and the link between the modern metallic cartridges we have today and the early paper cartridges used before 1850. There are also cartridges known as “pinfire” which were mostly composed of paper but this design was really a paper cartridge with a percussion cap at the base rather than a metallic design.

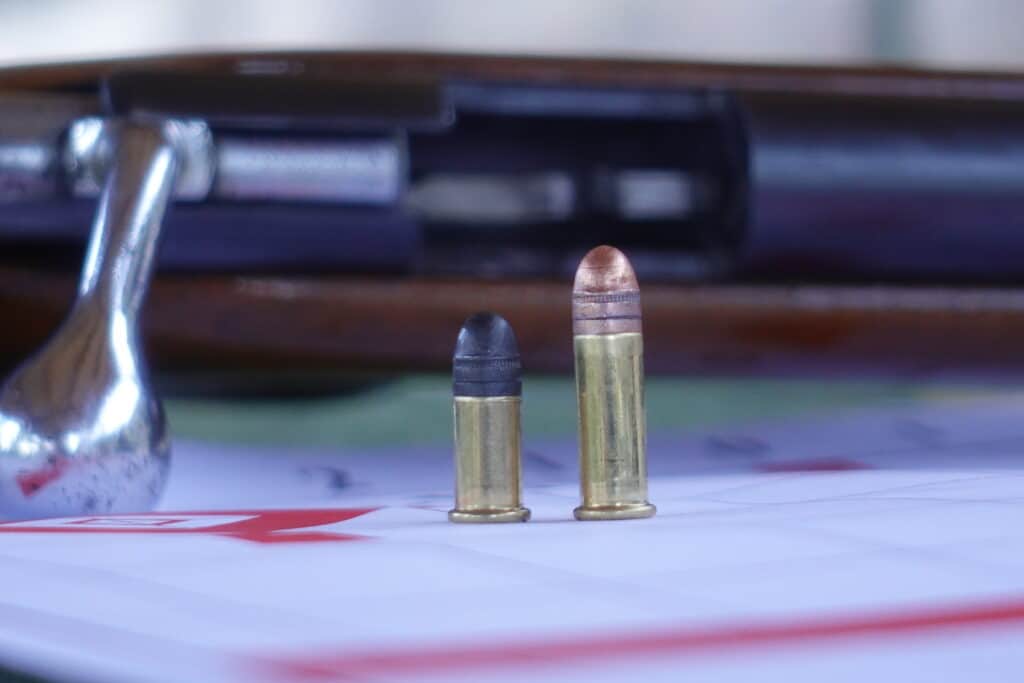
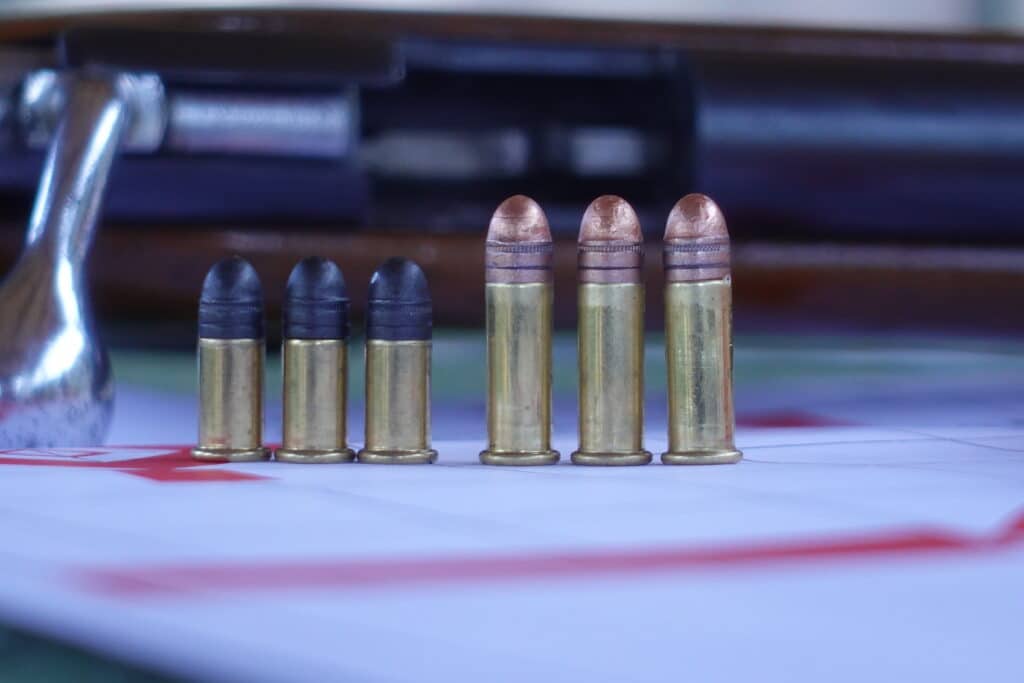
The .22 Short was conceived in 1857 primarily as a personal-defense round and for use in gallery guns which per popular at fairs of the time. It consists of a .222 caliber bullet between 25 and 30 grains in a rimmed case 0.421 inches long containing 4 grains of black powder. The .22 Long uses the same bullet in a case 0.613 inches long using 5 grains of black powder.

In contrast, the .22 LR uses a .222 caliber bullet between 30 and 40 grains in the same case as the .22 Long but with 6 grains of powder. All three share the same specs, though the .22LR is faster and has more energy. In a classic case of ‘third time’s the charm’, the .22LR took off like wildfire and has remained popular to this day.

Given the immense popularity of the .22 Long Rifle cartridge, this brings up an important question. Why go with older, slower, and more expensive cartridges?

A Couple of Benefits

Using the .22 Short and the .22 Long does have a couple of advantages. To start with, more ammunition of both can be stored. Bulk rimfire ammo is often bought and stored in buckets and boxes. Just like with nails and screws, a slightly shorter overall length means the same bucket can hold more rounds and sometimes will even weigh less.

Let’s be real here though, most people aren’t going to go through a trash can full of .22 rimfire cartridges in any reasonable amount of time. I suppose a competition shooter or someone who shoots a particularly high volume for practice will need this much ammo, but 95% of gun owners out there with a rimfire will use their gun for occasional plinking.

Besides high volume shooters, ‘preppers’ might want to take notice. The volume difference between the .22 Long and .22 Long Rifle is negligible, but the volume difference between the .22 Short and the .22 Long is basically 40%. Packing in a lot more bullets into the same space can come in handy if you are one of those people who expects to need decades of ammunition at the ready.

Similar to the advantage in storage, ammo capacity in some guns is greater with the .22 Short. Pump actions and lever guns which use a tubular magazine can be loaded with more .22 Short cartridges in the same magazine compared to either the .22 Long and the .22 Long Rifle.

One example is the Pump Action rifle offered by Henry. On the Gun’s webpage, the rifle can hold 15 Long Rifle cartridges in the tubular magazine, but it can also hold 21 Short cartridges! For squirrels, rats, and other pests this is a huge advantage!

One other advantage, if you can call it that, is some old rifles made prior to the invention of the .22 Long Rifle are specifically designed for .22 Long or .22 Short. If you collect firearms from the period and want such a rifle, getting ammunition for it is going to be cheaper than modifying the bore to accept .22 LR. Such modifications are common and can ruin the value of the rifle, or make the gun dangerous to use.

There are also situations where .22 Short or .22 Long might be preferred to .22 LR. Short range pest control doesn’t need .22 LR to be effective, and the smaller cartridges tend to be quieter in the same gun since they usually don’t exceed the sound barrier. However, the .22LR can be loaded up or down to a wide range of velocity and energy, effectively eliminating this advantage.

A Lot Drawbacks

While both cartridges can still be used, there’s no question that the .22LR has supplanted both of it’s predecessors for almost every use. The .22LR can be made subsonic, is cheaper due to mass production and wider market demand, and has enough power to reliably kill animals up to the size of coyotes.

Heck, the 22LR can even be used for self defense and hunting medium game like hogs and deer, though these uses are not recommended and may be illegal! The point is, the .22LR is accurate, popular, more powerful, and far more flexible than the .22 Short and .22 Long.

Flexibility

As stated, the .22LR can be used for a wide variety of tasks. Can the .22 Short and .22 Long technically do the same things as the Long Rifle? Sure. They can be subsonic, lethal to people and critters, and both have their own niche market. If there was no use for these rimfires then no one would be making them in 2022. However, the use of both the Short and Long is limited.

Range

The .22 Short is good to around 70 yards or so as a squirrel round. Basically, if you can find a squirrel in a tree, the .22 Short can kill it. Similarly, the .22 Long has a slightly longer range. Figures vary wildly but they seem to average out at around 100 yards. That isn’t too shabby and shouldn’t be overlooked for a varmint hunter taking game in the woods or from the roadside.

However, the .22LR can be reliably used out to 200 yards at squirrel-sized game and can reliably take a coyote at 30 yards or so. That’s pretty impressive for such a small, cheap round. The Long Rifle makes for an excellent farm and ranch gun as well as a target gun, hence why Olympians use the .22LR and precision rifle organizations like NRL22 exist.

Speed and Energy

The .22 Short is limited to around 1,050 fps at the muzzle. An especially hot load in a long barrel might reach 1,100 fps but those are outliers. The .22 Long has a slightly heavier bullet offsetting the slight increase in powder, so it’s velocity is in the same league as the .22 Short. 1,070 fps seems to be about average in modern offerings, but realistically it isn’t any different from the Short.

In contrast, the .22LR can be loaded really hot, achieving 1,700 fps. It can also be loaded slow, down to around 950 fps. This is a big reason why the .22LR is more flexible.

While the .22LR produces about 130 ft-lbs of energy at the muzzle on average, with the round touching 200 ft-lbs with hyper-velocity cartridges. The .22 Short maxes out at around 80 ft-lbs at the muzzle and the .22 Long can’t do much better. The .22 Long can be loaded hotter than the Short but that brings up another issue…

Accuracy

All three .22 rimfires are not exactly speed demons. That is actually a good thing though because the rounded nose bullet shape travels much better at slower speeds. A well balanced .22LR is very accurate out to 200 yards or so, with 300 yard accuracy still being pretty good in a match gun.

While both the .22 Short and Long can be accurate in purpose-built rifles, most people will use these calibers in a gun designed primarily for .22LR. Since the rifling isn’t engaged instantly with the shorter cartridges there is more room for a bullet to become slightly unbalanced or engage the rifling off-axis.

Like a football thrown with a less-than perfect spiral, an off-axis bullet will wobble in the air and become more susceptible to wind shear. It will also naturally deviate from it’s path. At short range, this isn’t an issue since we are talking about a fraction of an inch at 20 yards. But at longer ranges the altered flight path can significantly change point of impact in relation to point of aim.

Action Cycling

By far the biggest disadvantage to using the .22 Short and .22 Long in the same gun as a .22 Long Rifle is that auto-loading guns like the Ruger 10/22 likely won’t cycle properly.

The main issue is that the smaller powder volume produces less expanding gases in the chamber. Most semi-automatic rifles utilize a simple blowback action that requires a narrow range of gas pressure to work properly. Too much pressure, like from a 22 Mag, can break the action. Too little pressure, like from a .22 Short, and the action won’t cycle.

While not explicitly dangerous, making a semi-automatic rifle a single shot is quite annoying. What’s even more annoying though is having magazine feeding issues. Long Rifle magazines are designed for the .22LR cartrdige. Most can use the .22 Long without much issue but the stubby .22 Short has problems with a lot of magazine designs.

Recommended Rifles for .22 Short and .22 Long

With all these issues, it’s important to note that as long as the cartridge is properly fed into the chamber, any rifle designed for .22 LR will safely shoot a .22 Short or .22 Long cartridge. The risk of blowing up your gun is about as close to zero as operating a firearm can be. Still, I wouldn’t recommend using anything other than .22 LR in a semi automatic. They are finicky enough as it is.

A good lever or pump action design certainly gives the benefit of increased capacity via a tube magazine. If buying a modern gun and wanting this advantage, the Henry above is a good choice as are Henry’s lever gun variants.

Personally, I’m a bolt action guy. It’s a strong, safe design capable of tremendous accuracy. CZ USA is a good place to start for a modern bolt action rimfire, but there is one gun I have in mind that is plentiful, cheap, and simple enough that a child can use it.

The Winchester Model 67

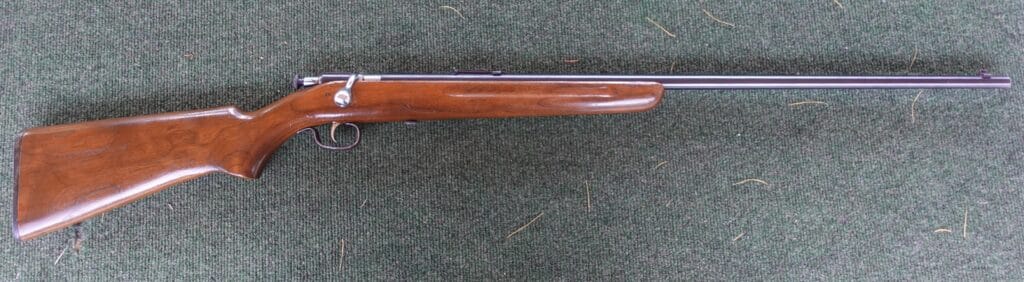
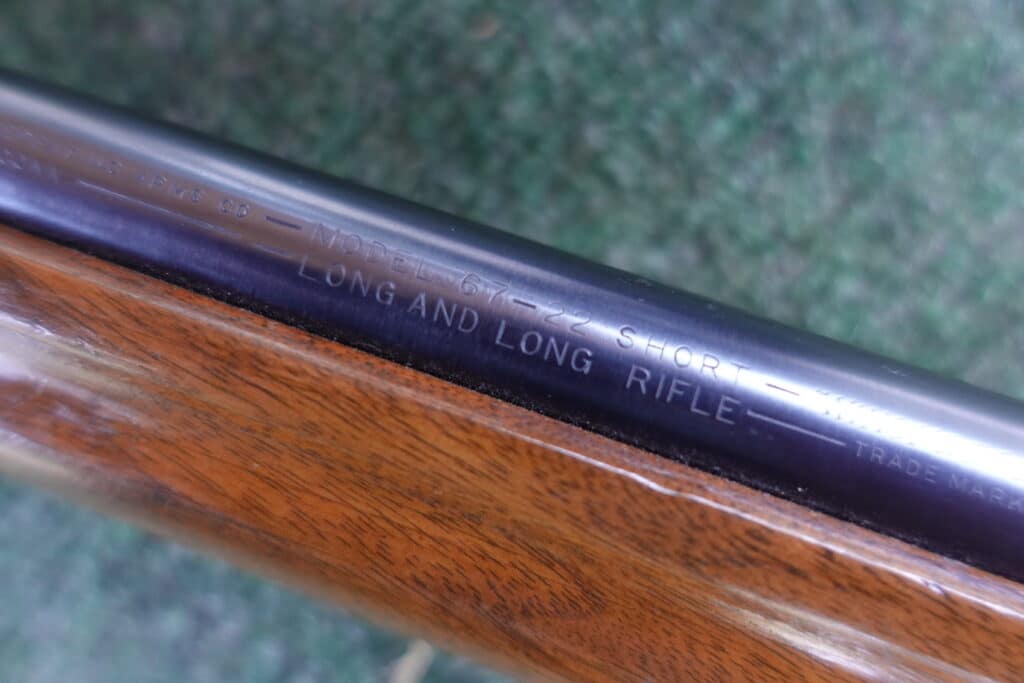
The Model 67 is not an especially noteworthy gun. It is a cheap, single shot .22 rimfire rifle capable of using .22 Short, .22 Long, and .22 Long Rifle. It was produced from 1934 to 1963. The action and barrel are held in with a single screw, and the rifle is equipped with a decent set of iron sights.

We have one in the family that was a first generation model, produced somewhere between 1934 and 1937. This rifle is “Uncle Pete’s Gun”, but that was my Mother’s uncle, so my great uncle. It shot game through the later half of the great depression in North Dakota and most likely was the gun that put food on the table at a time when affording groceries from the store wasn’t always a possibility.

This gun has been in continuous use for almost a century with minimal cleaning and only one refurbishment 20 years ago. Even figuring this gun has spent half it’s life in storage, I’d put the barrel at over 20,000 rounds and still going strong.

Looking at Gunbroker, the Model 67 can be found somewhere between $200 and $300. At a pawn shop or gun show it can likely be found for less. This is in line with the cheapest brand new 10/22 variants! It’s also better quality than a Savage rascal, so this would be a good gun for kids to learn on.

Conclusions

To answer the question in it’s simplest form, yes, 22 Short and 22 Long can be used in the same guns. The difference in pressure is minimal and besides length their dimensions are identical. Using one or the other in a gun that is chambered for both and/or 22 Long Rifle is possible. Occasionally, such a substitution can even be a good thing!

However, it is best to use the appropriate cartridge most of the time. A gun chambered for 22 Long Rifle should be use with 22 Long Rifle in most circumstances. Similarly, a rifle chambered for 22 Short or 22 Long only should NOT have 22 Lon Rifle placed in the chamber lest there be pressure issues or damage to the throat of the barrel.

When buying a gun that can use all three cartridges, look for one which says “For .22 Short, Long, and Long Rifle” or “For .22 S/L/LR”. Rifles chambered for other 22 caliber rimfire cartridges such as 22 Mag are NOT interchangeable and should be avoided.

HEVI-XII Tungsten Shot Shells: Full Review

0
HEVI-XII Tungsten Shot Shells: Full Review

The new tungsten shotgun ammo from Hevi-Shot is a superior, hard-hitting, bird-killing non-toxic load. (Photo By: Jeff Johnston)

If you’re the type of waterfowler who feeds your family by hunting 60 days per year, you probably already know by now that HEVI-Shot tungsten may not be the stuff for you because it’s not cheap. You can get 5 orders of Peking duck down at the local Chinese buffet for less. It’s expensive because there are very few tungsten mines in the world, and this ultra-dense metal is a commodity coveted for making everything from competitive darts to turbine blades and rocket nozzles. But the fact is it’s simply superior to steel, and even a fair margin better than lead bird shot. How?

Imagine a tennis ball and a baseball both thrown 90mph by Pedro Martinez. Which one would you rather get beaned with? The tennis ball, of course, because it’s much less dense and results in much less energy when it hits you. I.e. it won’t hurt as much. The same laws of physics apply to shotgun pellets.

Heavy Set

HEVI-Shot’s XII load uses tungsten pellets that measure 12 g/cc (grams per cubic centimeter). Compare that to steel at 7.8 g/cc, then imagine a No. 4 HEVI-Shot pellet and a steel pellet each going 1400 fps. The HEVI-Shot load is like a swarm of our aforementioned baseballs speeding toward that duck, whereas the steel is like the tennis balls. But most of us know this already.

The big advantage of tungsten, however, is that because it’s denser than steel (it’s also denser than lead, Bismuth, and most other materials) the shooter can choose a shot size two to three sizes smaller than comparable steel load and still maintain the same downrange energies. So by choosing a HEVI-Shot No. 4 pellets for geese over No. 1 steel load, for example, shooters are afforded many more pellets per load for denser patterns and more wound channels on the bird. Fact is, denser pellets penetrate deeper and kill quicker.

Hevi-Shot Hevi XII shotshells
Tungsten just may pack the most punch on the market; HEVI-Shot’s new HEVI XII is now available for 12-, 20-, and 28-guage shooters.

Tungsten Tested

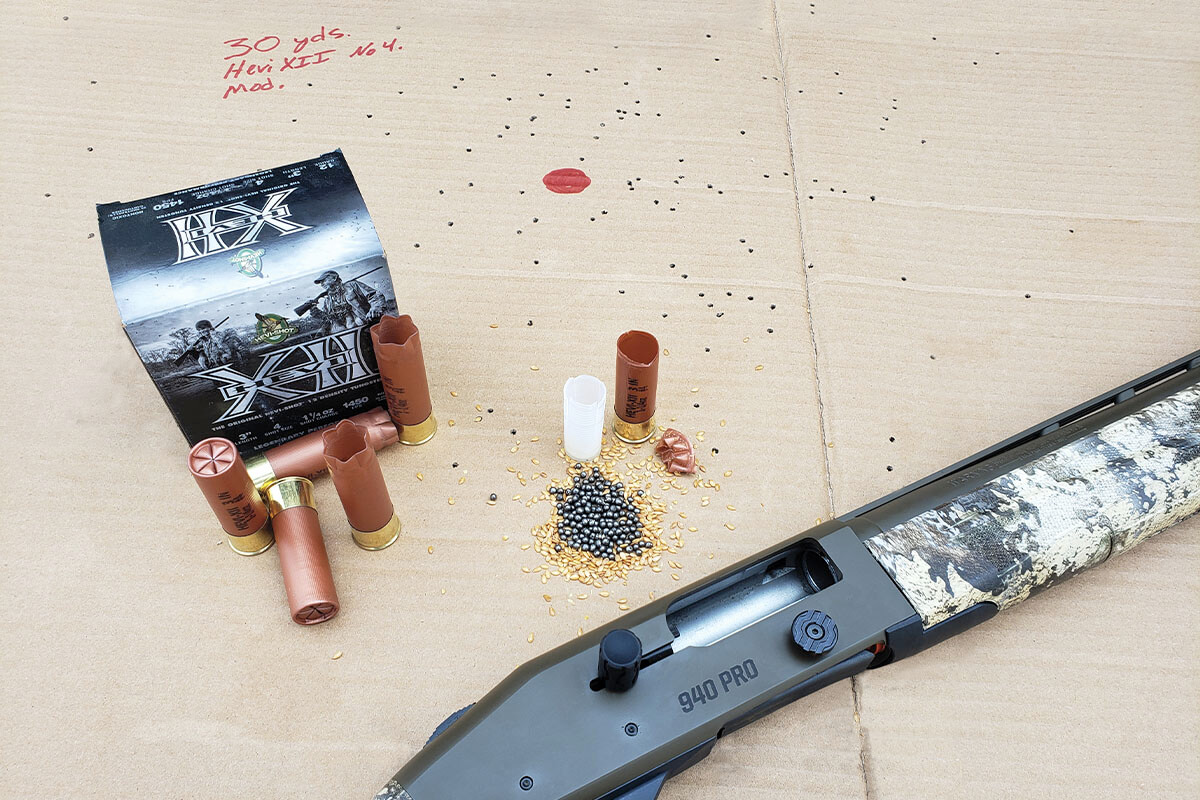
When I tested HEVI-Shot’s new HEVI-XII shell (3”, 1 1/4-oz. No. 4s) here’s what I found: The load contained an average of 166 pellets that together averaged 583 grains, or 1.33 ounces per payload. (That’s more than advertised.) This payload is touted to travel at 1,450 fps, which equals 2,549 ft.-lbs. energy at the muzzle. Although my actual results were very similar, the inputs differed slightly. From my 28-inch barrel I recorded a mean velocity of 1401, that, when multiplied by a payload mass average of 1.33 ozs, equals 2,541 ft.-lbs. But it’s when the individual pellet energies are compared that the heavier tungsten pellets shine like diamonds in a sea of decoy weights: Consider that the average No. 4 HEVI-XII pellet weighs 3.6 grains; when going 1400 fps it results in 16 ft.-lbs. per pellet! Compare that to a 2.4-grain steel pellet going 1,400 fps for 10 ft.-lbs energy and you can understand where your money’s going.

However, this is where HEVI-Shot also gets a little shaky: I had to use a pellet weight average because, due to the process HEVI-Shot uses to make its tungsten shot, the pellets aren’t uniform. A payload of No. 4 shot contains pellets that individually weigh anywhere from 3.4 grains to 6.6. This leads to my second criticism of HEVI-Shot: It is not known for perfectly uniform patterns, which I suspect is a by-product of the varietal shape and weights of the pellets.

Results from my patterning board bore this out. I achieved best results from a modified choke tube. I must add this observation though: Regardless of how non-uniform the patterns look to my eye, ducks don’t seem to mind. All the HEVI-Shot I’ve used in the past have performed admirably on live game.

As for recoil, it’s academic. A 1¼ ounce payload of steel going 1400 compared to a 1¼-ounce payload of tungsten hurts equally bad by producing around 40 ft.-lbs. free recoil energy from a 7.5-lb. shotgun.

Packed to Perform

HEVI-Shot utilizes a healthy load of flaxseed to serve as buffer from the ultra-hard shot that can ding barrels and choke tubes if the choke is too tight or the load is not properly buffered. While I can’t be sure of flaxseed’s performance as a buffer compared to plastics and silicones used in other loads, frankly I’d rather be shooting natural flax seed in my lakes and fields over plastic. Speaking of plastic, HEVI-XII employs a rather simple, 4-petal, 50-grain plastic wad. The load is available in 12-gauge, 20-gauge and, interestingly, 28-gauge in size 2 (12-gauge only) 4 and 6.

HEVI-Shot’s new XII product differs from past HEVI-Shot tungsten shells mainly in that it is packaged in boxes of 25. At around $50 for a box, certainly they cost more than the 10-round boxes, but packaged as such they cost less per shell. Look, I’ve killed my share of ducks, but I also know that regardless of what shell I’m using, sometimes birds refuse to die. More times than I care to admit I’ll empty my gun at a bird only to wing it before it skims down 60 yards out, where I’ll have to shoot it 5 more times on the water. Perhaps you’re better than me, but boxes of 10 just don’t cut it.

In sum, HEVI-Shot’s new HEVI-XII load is far superior to nearly all duck loads that utilize less dense material. If you choose it, you’ll get the added advantage of choosing smaller shot sizes for denser patterns whose individual pellets hit hard. Trust me, you’ll be able to see that difference in the field. You’ll also feel it in your wallet, but that’s just it. New HEVI-XII is expensive to be sure, but in 25-round boxes it’s not as bad as it used to be. What waterfowler can’t appreciate that?

5 Most Important Dog Training Commands for Hunting

0

A version of this article was originally published by Ryan Eder on UplandGundog.com in October of 2014.

The best part of the year for the avid bird hunter is when hunting season is just around the corner. If you’re a waterfowl hunter, chances are you have some kind of early season in September for teal or goose. If you’re an upland hunter, you’re just one or two months from chasing roosters in the field. Either way, as bird dog owners we’ve hopefully been training and conditioning our dogs throughout the off-season to keep them in shape and sharp on their skills. I’m not just talking about obvious hunting related skills like finding birds, marking and retrieving. I’m also referring to basic obedience and every day commands that are also extremely important in hunting situations.

Useful Commands for All Hunting Breeds

Depending on the type of hunting you do, and the type of dogs you hunt with, there can be differences in commands and styles. To account for these differences, I’ll do my best to keep this general and applicable to all types and breeds of hunting dogs. With that said, let’s take a look at some of the most important commands you’ll be using in the field with your dog along with a brief explanation of their importance and how to apply them.

Sit Command

More times than not, I’m hunting with a retriever. I tend to be in a duck or goose blind most of the time, so I’m starting off with the “Sit” command. In the blind, one of the hardest things to train a dog to do is sit and be patient. No one likes a dog in the blind that’s constantly moving around, or a dog that’s not steady while birds are being called and hunters are shooting. A dog that sits well in the blind is more enjoyable to hunt with. That dog is also safer since a dog that breaks prematurely can be in the line of shooting. For you upland hunters, sit is still an important command whether you hunt with a pointer or flusher. For a flusher, you may want your dog to sit on a bird flush. For a pointer, even though you don’t want your dog to sit while hunting, having control of your dog in common areas while hunting at clubs or preserves is still pretty important. In my training program, “Sit” is also synonymous with “Stay”. By this I mean once I tell my dog to sit I expect them to remain sitting until released or asked to do something else. This level of control with your dog is critical both in and out of the field.

Whoa, Stop or Stay Command

To you pointer owners, this command is no stranger. Getting your dog steady on point is a large part of hunting with a pointing breed. The concept of “Stop”, “Stay” or “don’t move” can apply to a number of situations in the field. If you’re hunting with multiple dogs, it’s important for them to honor another point or another dog retrieving a bird. While “Whoa” is not typically a command for this, the concept of “Whoa” is similar. It means “stay where you are, do not move”. This is an extension of the “Sit” command with a flusher or waterfowl dog; “stay where you are” being the message to the dog. There are times where I need my dog to stop and stay, such as when I see him heading for a road or barbed wire fence. Sometimes handlers choose to stop and sit their dog on a whistle, either way, the concept of “Whoa”, “Stop” or “Stay” is incredibly important when handling your dog in hunting situations.

Fetch Command

This is simply a matter of opinion, but my preference in a hunting dog is one that retrieves birds that we shoot in the field. Some people incorporate force fetch in their training program, other people teach “Fetch”, “Hold” and retrieving concepts other ways. Either way, and for obvious reasons, “fetch” or “fetch it up” is something many of us say to our dogs in the field. A dog that doesn’t retrieve well in my opinion can make or break a hunt.

Come or Here Command

Being able to call your dog to you in any situation is important. In fact, this is probably the most important command you’ll teach your dog. It’s the basis of retrieving back to the handler and the ability to call a dog back into range if they’re hunting too far out. Most importantly, this command is a matter of control and safety for your dog in the field. “Come” and “Here” tend to be the most popular commands for this, but many handlers will use a whistle recall as well. This may seem to be a redundant message, but the first time that you have a dog unable to come when called you’ll realize just how important it is.

Kennel Command

Every year I witness someone who wishes they would have tried to teach the kennel command better with their dog. In the home, it is nice to say “Kennel” and have your dog load into their crate without having to lure, push or pull the dog to get them into their crate. The same luxury exists in the field when you want to load the dog into the truck, crate, dog box or trailer after training or hunting. It can be very frustrating to have issues getting your dog loaded into their kennel after a day in the field. If you’re at a gun club or hunt test, or even just a field with hunting friends, it can be embarrassing having a dog that won’t follow this basic command. Make sure to work with your dog on this, and make sure they understand to load quickly, safely and on demand.

Practice at Home for Success in the Field

The basic commands covered in this article are just that. They’re the basics and the minimum standard you should accept from your hunting dog. Most of you probably have them covered and use them every day with your dog. Still, I do recommend practicing them and making sure the dog is sharp so that when hunting season rolls around you don’t encounter any unnecessary issues. Good luck to everyone this fall and happy training!

Ryan EderAbout Ryan Eder

Ryan is the President of the Upland Gundog Association and a longtime trainer of hunting Retrievers. You can learn more about Ryan and his training methods at the UGA website, www.uplandgundog.com.

7 Easiest animals to hunt for beginners

0

Whether you are new to hunting altogether, or are a hunting mentor to a beginner, squirrel, rabbit, pheasant, dove, goose, antelope and bear are the easiest animals to pursue for the novice.

The seven animals on this list all find themselves here for various reasons. They may be easier to locate than other game or easier to get in close to. Some of these animals require little more than an armed hunter afield to harvest, while others may require more effort or different skill sets to acquire. Let’s take a closer look.

Spot/StalkDecoy/CallBaitPush/Drive
Common methods for harvesting game species.

Squirrel

Squirrel hunting is the quintessential beginner game species because they are everywhere, can be located relatively easily, can be hunted with different methods and hunted with small caliber rifles or small gauge shotguns which are both easier on new hunters.

Many seasoned hunters have cut their teeth chasing squirrels through oak forests, honing their accuracy with low-recoiling rimfire cartridges. Hunting squirrels also teaches new hunters other skills necessary to move on to larger game, such as walking through forests as quietly as possible as well as identifying camouflaged game.

Squirrels are often hunted with a spot and stalk method, where a hunter will begin by finding a squirrel rummaging the forest floor for hard mast such as acorns, or moving among the branches of the forest canopy. Squirrels can also be easily drawn into a bait pile, as hunters in states that allow baiting can attest. In this scenario, the hunter may simply still hunt a bait pile and wait for the squirrel to come in to feed, often taking them unaware.

Pheasant

Pheasants find themselves on this list primarily because they can be found in as many as 40 states, and 21 states actually stock pheasants for hunting purposes. Pheasant can be hunted with pointing dogs, but can also be done with a few friends pushing a field to flush the pheasant into the air. Pheasants are taken with shotguns, allowing for a spread of shot to help hit moving birds.

Practice with clays to hone your abilities for taking moving game. Pheasants are medium sized birds and your first flushed pheasant will present a challenging and exciting quarry. Pheasants are also very tasty table fare, adding a strong incentive to your hunt.

Mourning Dove

If the state you hunt in offers a dove season, you are in for a satisfying and educational begining hunt. Doves can be hunted by pushing fields and flushing the birds, or still hunting over a field and simply waiting for the doves to fly by as they move frequently throughout the day.

Mourning doves are small birds and are generally taken with light recoiling shotgun gauges. Though their smaller stature presents a challenging shot, they can be readily harvested with prior range practice. An upside to hunting mourning doves is the quality of their meat, which is delicious. A small group of hunters can take numerous doves, and a cookout is likely to follow your hunt.

Geese

Another migratory bird that beginning hunters can successfully harvest are the different geese species that populate North America. Geese are larger birds that generally fly in flocks, offering multiple, ample-sized targets to the hunter. An added incentive, Goose breast is a tasty meat that hunters will enjoy baked, grilled or fried.

Geese can be problematic for farm owners, who are more likely to allow access to their farms for hunters hoping to harvest these pesky birds. Geese are generally decoyed and called in to the hidden hunter who can take easier shots as the birds begin their descent to the decoy spread. Since geese are generally hunted over fields, retrieving dogs are not necessary, unlike ducks hunted over water.

Rabbit

Like squirrels, rabbits are everywhere, can be harvested using multiple techniques, and are generally taken with lighter recoiling firearms. Most rabbit species are considered excellent table fare, offering a nice reward at the end of a hunt.

Rabbits are generally harvested during a drive, either with dogs or simply with hunting partners but may also be taken using a spot and stalk method. The lighter recoiling shotguns or rimfire rifles are less daunting to beginning hunters, and moving through forest trails and agriculture fields keeps younger hunters engaged.

Antelope

If you live in a state with a healthy Antelope (Pronghorn) population, you have likely seen them grazing the flatlands. Antelope have excellent vision and are the fastest land animal in North America, but because they spend so much time out in the open, they can readily be harvested by a rifle hunter. The trick is to get as close as you can without spooking the antelope before taking a shot.

Using a spot and stalk method on antelope can teach beginning hunters about wind and how to move without detection. Antelope are medium sized game that do not require the hardest hitting rifle cartridges, allowing for newer hunters to be more accurate. Antelope is also a tasty game species.

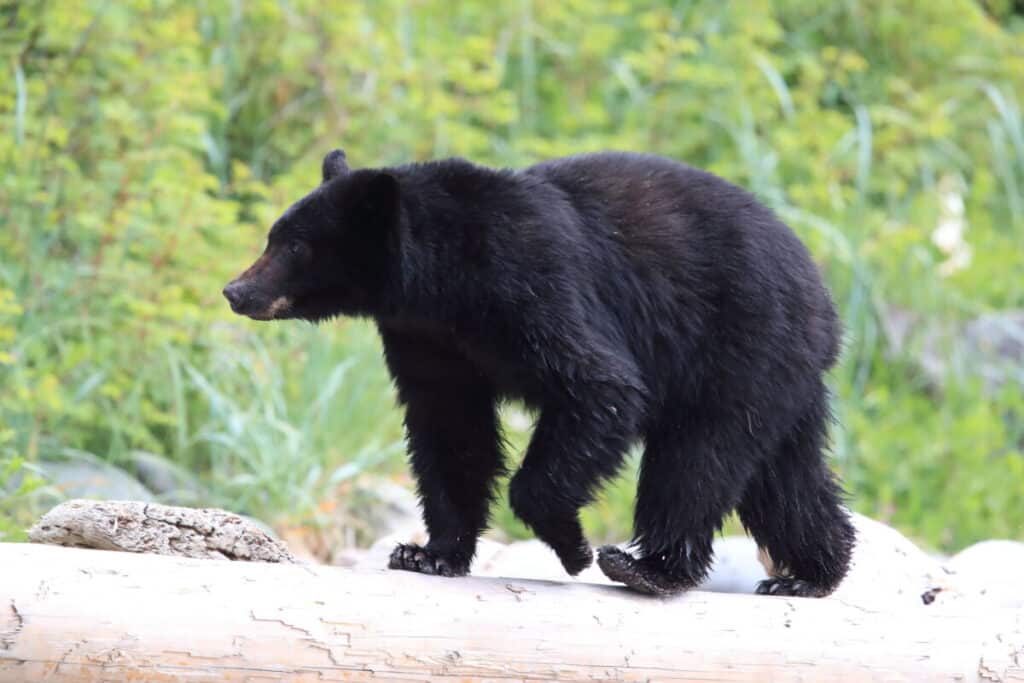
Black bear roaming low tide shores, looking for crabs. Vancouver Island, Canada

Black Bear

Black bears are the largest and most dangerous species on this list, but can be readily brought into close range when hunting over bait piles. Not all states allow baiting, so know your regulations, but if baiting is on the table so may black bear. Be sure to cook bear meat thoroughly since, like pork, bear meat often contains a parasite called trichinosis which can survive if the meat is undercooked.

Larger game means larger caliber rifle for both ethical and efficacy reasons, so practice with the rifle you intend to take afield to ensure a successful and rewarding hunt. Remember, taking a bear at close range over bait is possible, but bears are heavy, so plan on having a friend or two ready to help break down and pack out your harvest.

Honorable Mentions:

Turkey, duck and coyote all deserve consideration as easy animals for beginning hunters.

Turkey

Turkey hunting is generally done by the individual, not in groups. If you are new to hunting and have not yet found hunting partners, turkey hunting is a solid option for a successful, solo hunt. Hunted with a shotgun and generally decoyed and called, there are some skills to learn to harvest turkey. The food quality of turkey makes these skills worth learning.

Duck

Duck species can be found all over North America, and many duck species are excellent on the dinner plate. Ducks are usually decoyed and called over water, generally necessitating a retrieving dog, and are fast on the wing. These attributes make duck hunting somewhat challenging for the beginning hunter, though this is mitigated by their numbers and range across North America.

Coyote

Not generally harvested for their culinary excellence, coyotes are still moderately easy game for new hunters based on their habitat range. Coyotes can be found in every state except Hawaii. Coyotes can be driven, hunted using spot and stalk methods but most commonly called in, baited or a combination of the two.

Can Felons Legally Own an Air Rifle in Oklahoma?

0

“Understanding Felon Firearm Possession in Oklahoma: Unraveling the Legality of Owning Air Rifles for Convicted Individuals”

can a felon own an air rifle in oklahoma

can a felon own an air rifle in oklahoma

In the state of Oklahoma, the ownership and possession of firearms by felons is heavily regulated. However, when it comes to air rifles, the laws are slightly different. According to Oklahoma law, felons are allowed to own and possess air rifles as long as they have completed their sentence and have had their firearm rights restored. This means that if a convicted felon has gone through the necessary legal process to regain their firearm rights, they can legally own an air rifle in Oklahoma.

It is important to note that while felons may be able to own an air rifle in Oklahoma, there are still restrictions and regulations that apply. For example, they must comply with all federal laws regarding firearms, including restrictions on possessing firearms near schools or committing certain crimes while in possession of a firearm. Additionally, any individual who is subject to domestic violence restraining orders or has been convicted of domestic violence offenses may be prohibited from owning any type of firearm, including air rifles.

In conclusion, felons in Oklahoma can legally own an air rifle if they have completed their sentence and had their firearm rights restored. However, it is essential for them to understand and comply with all relevant federal and state laws regarding firearms ownership and possession. It is advisable for individuals with felony convictions to consult with legal professionals to ensure they are fully aware of their rights and responsibilities when it comes to owning an air rifle in Oklahoma.

In Oklahoma, felons are prohibited from owning firearms, including air rifles. State law does not differentiate between different types of firearms. Therefore, it is illegal for a felon to possess an air rifle in this state.

Foraging Wild Ramps (Wild Leeks): Identification and Look-alikes

0

Wild ramps are a type of onion that are delicious, popular, elusive, and sought after. Also called wild leeks, it is very important to properly identify and sustainably forage ramp plants. Once harvested, wild ramps make a delicious and flavorful addition to many meals!

Fresh wild ramp leaves on a wood cutting board.

What are Ramps?

Ramps (Allium tricoccum) are a perennial species of wild onion with a strong onion or garlic flavor. The ramp plant is wild growing in some areas and is also called wild leek, wild garlic, or ramsons.

Wild ramps are native to eastern North America and grow widespread in the eastern United States and Canada. Although I had heard much about them when I lived in the west, I had never seen them before I moved to Vermont!

Allium ursinum, also called wild garlic, is a related species that grows in Europe and Asia and can be used the same as wild leeks.

Ramps grow from March to June depending on your location. They are one of the earliest plants to forage in the spring, which is a happy sight for those of us who have long winters.

Related: What to Forage in Spring: 20 Edible and Medicinal Plants and Fungi

Where Can I Find Wild Ramps?

Wild ramps grow in eastern Canadian provinces, and in much of the northeastern United States, as far west as Minnesota and south as Georgia. It is common to find ramp plants in New England and the Appalachian mountains.

Ramps do not grow wild in the western US but can be planted and grown in a home garden. This is a wonderful way to have access to ramps and their tasty flavor without harming the population.

Wild leeks are found growing in clusters on the forest floor, often popping up through fallen leaves of deciduous hardwood forests. They tend to like damp areas but can be found in many types of rich soil.

Is Wild Leek Invasive?

Sometimes ramp plants grow in huge patches or colonies, so to the naked eye, it might appear that they are invasive. However, they take over 7 years to grow so are not considered invasive.

Wild leeks are actually protected due to overharvesting in many areas.

A close up of wild ramps showing green leaves and a red-purple stem.

How to Identify Wild Ramps

To identify wild ramps for while foraging, look for plants that are low growing, about 4-12 inches high. They have 1-3 broad leaves per plant and either white or reddish-purple stems (there are 2 varieties).

Ramp plants have flowers that bloom in the summer after the leaves have died back. The flowers look similar to cultivated onion flowers and produce black seeds.

A key identifying factor is that they smell like onion or garlic. This is a very important identification characteristic as toxic look-alikes won’t have this smell.

If it doesn’t unmistakably smell like an onion, it’s not a ramp!

A cluster of ramps growing in a wooded area.

Do Ramps Have Poisonous Look-Alikes?

Wild ramps have two extremely dangerous and deadly toxic look-alikes. It’s just as important to identify these properly as it is to identify the ramp plant.

Both of these toxic plants have wide leaves that come up in spring, and neither of them will have an onion or garlic smell.

False Hellebore (Veratrum viride) leaves can look similar to the wild ramp plant in that they are both pleated. This toxic plant can be identified by its ribbed leaves and lack of onion scent. They grow in swamps and marshes, whereas ramps grow in wooded areas.

False hellebore growing.
False Hellebore – a toxic wild ramp look-alike

Lily of the Valley (Convallaria majalis) do not have bulbs at the roots like ramps, instead, they have longer roots and rootlets along the length. They produce many bell-shaped flowers in contrast to the small daisy-like clusters that grow on ramp plants. They do not smell like onion or garlic.

Lily of the valley leaves growing.
Lily of the valley with bell-shaped flowers is a toxic plant

How to Forage Ramps Sustainably

In some areas, wild ramps are protected due to overharvesting so it is important to forage sustainably.

Ramps are a threatened species in many regions, and in some locations, there are regulations on harvesting them. Be sure to check your local laws before foraging them.

Ramps are slow growing, taking 7 years or more to fully mature. Completely pulling up the bulb will kill the plant, so be sure you know how to harvest them correctly before heading out to gather.

A wild ramp patch, with a natural cloth and foraged ramp leaves resting on it.

How to Collect Wild Leeks

It is best to only take one leaf per plant without pulling up the bulb. If the bulb or rhizome (the base of the bulb) is left in the ground it will continue to grow year after year.

If you find a patch where it is clear that other foragers have already taken leaves from the plants, move on to a different patch. Overharvesting the leaves is detrimental to the plant.

A patch of wild ramps growing in the forest.

Harvesting leaves is much easier and cleaner than pulling up bulbs. The good news about only harvesting the leaves is that the leaves have tons of flavor, so pulling up the bulbs is not necessary!

If you live in a region where ramps grow prolifically as they do in some areas of Vermont, it can be helpful in large and very dense colonies to selectively pull up some bulbs.

The bulbs or rhizomes can be replanted either elsewhere in the forest or on your property, ultimately helping the population of ramp plants.

Before pulling up and replanting any wild leek bulbs, research to determine if it is permitted in your region.

Take seeds after the plant flowers in the summer and spread them to other areas of the forest or bring them home to plant in your garden.

A cluster of ramps growing in a wooded area.

How to Grow Ramps

Since the population of wild ramps is protected and in a state of decline, grow them in your yard for a great way to have access to their delicious flavors without threatening the wild population.

Grow ramps from seeds, bulbs, starts, or by transplanting wild plants or rhizomes. Read this guide on how to grow ramps in your backyard for all of the best methods.

They have a long germination period if growing from seed, and once sprouted the plants take 7 years or more to fully mature. Patience is key!

These tasty plants need shade and moisture. They tend to do best under hardwood trees, just like when finding them growing wildly.

A good way to keep this threatened plant around is by growing your own!

How to Use Ramps

Just like their smell, wild ramps have a distinct onion or garlicky taste. The taste will mellow out when cooked but are still very flavorful.

For a stronger flavor, know that wild ramps are safe to eat raw! Try them in this delicious ramp pesto recipe.

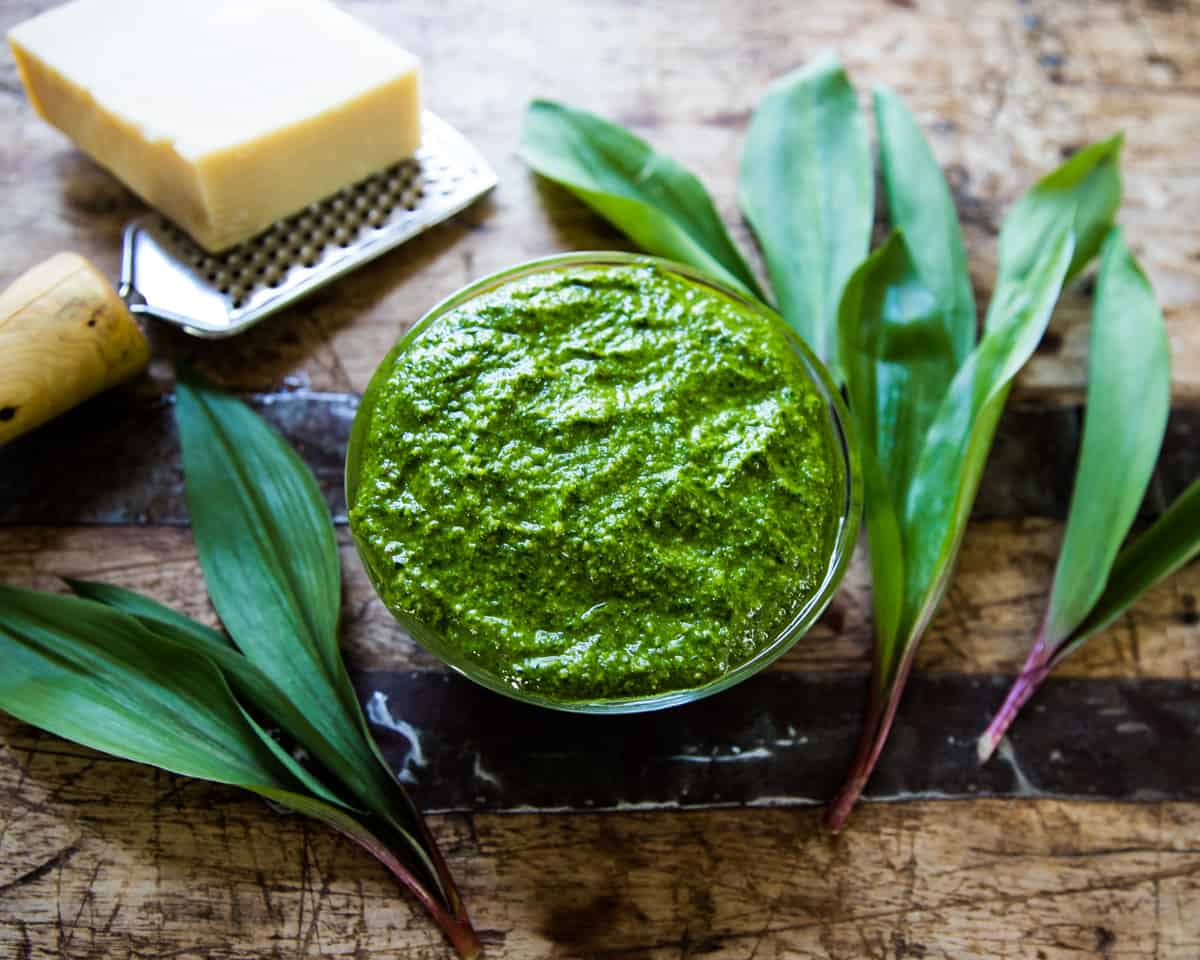
A dish of ramp pesto on a wooden cutting board surrounded by ramp leaves and a block of parmesan and a cheese grater.
Ramp pesto

To preserve ramp leaves and enjoy them all year, make ramp butter and freeze it, or make pickled ramps.

Another great way to preserve wild leeks is to ferment them, of course! Try this ramp kraut recipe.

Add ramps to a delicious dinner and saute them in this ramp pasta, with a side of ramp focaccia bread or buttermilk ramp biscuits, yum!

However you choose to use your sustainably foraged wild ramps, they’ll be a delicious and appreciated part of your meal!

More Spring Foraging Finds:

  • Foraging for Morel Mushrooms
  • Chickweed Foraging
  • Foraging for Purple Dead Nettle
  • Dandelion Foraging
  • Foraging for Wild Violets

Elk Network A PRACTICAL GUIDE TO HUNTING WITH SUPPRESSORS

0

We’re still dreaming of the day when suppressor ownership is legal in all 50 states. Thankfully, great progress has been made in recent years and it is now legal to own a suppressor in 42 of the 50 states.

Making suppressed hunting legal in states where it is legal to own a suppressor has been equally taxing, but also very rewarding. To date, it’s legal to hunt with a suppressor in 41 states.

The most obvious benefit of hunting suppressed is safety, particularly when it comes to protecting your hearing. Noise-induced hearing loss is the most common affliction for hunters. A lot of this comes from hunters forgoing hearing protection year after year for their entire hunting career so that they can hear their surroundings. After all, hearing nature around you is one of the best parts of hunting.

A secondary benefit is that it protects the hearing of your hunting companions. There’s nothing better than sharing an elk hunt with your friends or family, but it can easily be tainted by the sound of an unsuppressed gunshot. Maybe it won’t bother them right away, but over time, it will.

Animals like varmints or predators will go into hiding when they hear a gunshot, so a suppressor is almost a necessity in these instances. Some game animals like deer or elk may completely avoid an area if they are alerted to gunshots. We have seen this firsthand with small game such as ground squirrels that go into hiding for hours after the sound of the first shot and on other occasions not changing a thing because we were shooting suppressed.

Along with not disturbing the game in a given hunting area, suppressors also let you avoid disturbing local residents. Remember, not all hunting is done in the vast majesty of elk country. It may be small in the grand scheme of things, but a decrease in noise complaints is a good thing for everyone.

In this guide, we’re going to dig into all things hunting with a suppressor, including why you need to have one on your next elk hunt.

WHY HUNT WITH A SUPPRESSOR?

As we mentioned, in addition to protecting your hearing, a suppressed firearm allows you to use your unencumbered ears to listen for elk bugling, communicate with fellow hunters, and avoid alerting predators. Quite simply, it allows you to be fully aware of your surroundings from a hearing perspective.

In 2015, Montana Governor Steve Bullock of Montana said it best in a letter to the Montana Speaker of the House, stating: “Suppressors mitigate the sound of a shot, but do not silence it. The use of suppressors for hunting, when hunters cannot wear ear protection because they need to be aware of their surroundings, can help protect against hearing loss. This is especially true for our younger hunters, even those who are not actually hunting but are accompanying their parents in the field.”

Hearing protection in the form of muffs or plugs is as effective but only while being worn. In the field, it is important to be aware of your surroundings, especially in bear, mountain lion, or rattlesnake country. The hunter can easily become the hunted without the situational awareness that hunting with a suppressed firearm offers.

BENEFITS OF HUNTING SUPPRESSED

In summary, suppressed hunting offers a number of benefits that you may have not considered. Here’s a list of those benefits:

  • Protect your hearing
  • Protect the hearing of others
  • Maintain awareness of your surroundings
  • Enjoy sounds of nature, like elk bugling
  • Avoid disturbing other game
  • Reduce noise complaints
  • Reduce recoil

IS IT LEGAL TO HUNT WITH A SUPPRESSOR?

Suppressors are legal to own in 42 states. Only one of those 42 doesn’t allow hunting with a suppressor, and that’s Connecticut. So, if you’re a suppressor owner and a hunter in Connecticut, get in touch with your state legislators and let them know it’s time to join the other 41 suppressor legal states that also allow hunting. Hunters’ voices in the other states made the difference in the other states and they can make the difference in Connecticut, too.

WHAT CAN I HUNT WITH A SUPPRESSOR?

In terms of what you can hunt with a suppressor, the sky is virtually the limit so long as you’re in one of the 41 states where suppressed hunting is legal.

As with all types of hunting – suppressor or otherwise – it’s still a good idea to check with your state and local game laws every year to make sure that things haven’t changed.

ELK HUNTING

Part of the thrill of elk hunting is the challenge. These majestic animals can give even the best and most experienced elk hunter a run for their money season after season. Therefore, any extra leg up you can get on them is welcomed when you’re out on the hunt.

Using a suppressor will keep your sound signature down so that you don’t disturb the rest of the herd when making your shot. This is especially important if, for some unfortunate reason or another, you miss your first shot. The less noise your rifle makes, the better chance you’ll have of getting off a second shot.

Since most elk hunting involves carrying all of your gear with you on the hunt, many hunters try to pack as simple and light as possible. This means that hearing protection often gets left behind. It’s not that a pair of electronic muffs are heavy; it’s simply that they’re one more piece of equipment to carry around. With a suppressor on the end of your barrel, you can protect your hearing without having to keep track of an extra piece of equipment.

DEER HUNTING

Deer hunting is greatly enhanced when using your suppressor. This is because most rifle suppressors offer a reduction in recoil. You may not need a .300 Winchester Magnum for a whitetail deer on the east coast at 50 yards but in the western states, but mule deer are larger and often taken at greater distances. Therefore, a bigger caliber may be more beneficial. The same holds true for other game animals such bighorn sheep and caribou.

Even if you’re using a rifle with lighter recoil for whitetail deer and don’t need the recoil reduction, it’s still nice to have the reduced sound signature to protect your ears.

COYOTE HUNTING

Whether you consider them to be varmints or predators, coyotes are some of the most intelligent and cagey animals to hunt. They recognize gunshots for what they are and even the youngest or most naïve of these creatures will keep a smart distance in spite of your best predator calls once they hear one. To sum it up, like their cartoon namesake, they are wily.

FERAL HOG HUNTING

Another animal with excellent hearing and one that knows the sound of gunshots for what they are is the feral hog. These animals have bred to out of control numbers in the wild and are a pestilence when it comes to agricultural, property, and other forms of damage. Suppressed hunting rifles are a necessity when taking out large numbers of them to protect crops and other things that they like to destroy.

VARMINT HUNTING

Prairie dog and ground squirrel hunters often benefit the most from the use of a silenced hunting rifle while varmint hunting. Animals such as these are well aware of what gunfire means and a large group will retreat to their burrows until they no longer hear gunfire.

A suppressed hunting rifle will allow you to maximize your efforts when you need to take them out in a small amount of time. It will allow you to take shots at them for hours on end, if that’s your intent.

BEST SUPPRESSORS FOR HUNTING

There are a lot of suppressors designed with hunting in mind that all share the same characteristics. You want it to be quiet, but also lightweight. Versatility and the ability to share it among different host guns is always a plus. We took a quick overview of a few different centerfire suppressors.

If you want a suppressor that was purpose-built with hunting in mind, then the BANISH Backcountry is one you should give serious consideration. It only weighs 7.8 oz and is only 5.5” in overall length. It’s also rated for use all the way up to .300 Remington Ultra Mag (RUM), so no matter what your choice for elk hunting, the BANISH Backcountry can handle it. The goal is to pack in ounces and pack out pounds, and the Backcountry will help you do just that.

One of the most versatile suppressors in the world is the BANISH 30. A fully user-serviceable can, it works with all of your rifle calibers from .17 HMR to .300 Weatherby. Testing shows that BANISH 30 reduces the report of a .308 Winchester by as much as 34 decibels. It is made from a strong, titanium alloy for unmatched durability at an extremely light weight.

If you are looking for a suppressor that can handle pistol calibers such as .45 ACP as well as large rifle calibers such as .45-70 Government, give the BANISH 46 a look. Made of titanium and Inconel, the BANISH 46 provides the ultimate combination of durability and weight reduction. The BANISH 46 weighs only 16.3 oz in the short configuration of 7.9”, and 20.4 oz in its 10” configuration.

FREQUENTLY ASKED QUESTIONS

As beneficial as suppressors are to the hunter, one would think that they would be easier to come by. Here are some frequently asked questions that may help you understand the buying process as well as their capabilities.

HOW QUIET ARE THEY, REALLY?

Actually measuring sound reduction with a suppressor can be tricky. We have all seen the various decibel rating charts, but they only tell a part of the story. The actual level of sound reduction and the sound meter, itself, can be affected by humidity, barometric pressure, altitude, and echo.

In general, hunting with a suppressor can lessen the sound of most gunshots by anywhere from 25 to 35 decibels, depending on the silencer and caliber in question. This is below the threshold for most hearing protection commonly worn in or over the ears. If you hunt with dogs, it protects their hearing as well.

The other item of note here is that the vast majority of elk hunting rifles (bolt-action, lever-action, pump-action, single-shot) make the best suppressor hosts because the sealed action means there is no gas leakage. A silenced elk hunting rifle will truly live up to its name in this regard.

HOW DO I BUY A SILENCER WITH SILENCER CENTRAL?

Silencer Central takes the formalities out of the paperwork with our digital process. You select the right suppressor for your firearm and let our expert compliance staff handle the paperwork which is emailed to you to digitally sign. With the fingerprint kit, taking your prints and passport-style photo can be accomplished from the privacy of your own home. To make it even easier, we offer a 4-month, eZ-Pay option so you can pay for your silencer in installments. Our free NFA Gun Trust (a $249 value) is set up for you to better protect the ownership of what is really a lifetime investment. Once approved, you receive notification via email and text message, and we ship the silencer directly to your doorstep.

Additionally, we realize that not all hunting rifles ship from the factory with threaded barrels to attach to your silencer. Silencer Central’s in-house machine shop can thread your rifle for you and ship the barrel straight back to your house.

In addition to stocking popular brands, we also offer BANISH multi-caliber suppressors, a 100% titanium and user-serviceable line exclusively built to our demanding specifications.

SHOULD I PURCHASE A SILENCER USING AN NFA GUN TRUST?

At one time, it seemed like purchasing a suppressor by means of using an NFA Trust was the only way to go. This was mainly to avoid wait times from local law enforcement, obtaining fingerprints, photos and, in some extreme cases, chief local law enforcement figures would flat out refuse to sign any NFA paperwork. Much of this is no longer an issue due to an ATF ruling a few years ago that stated the CLEO only needed to be notified of silencer purchases.

However, an NFA gun trust is not a bad thing to have for estate planning purposes, particularly if firearms and silencers are involved.

HOW LONG ARE WAIT TIMES?

Perhaps the biggest drawback to buying a suppressor is the long wait time to go through the FBI background check. The background check is not long in and of itself, but the time it takes for the application to complete the entire ATF approval process is definitely longer.

At times, trusts can be quicker than individuals but at other times this dynamic can change. E-forms filed online are quicker than paper forms filed by mail. Over the years, we have seen approval times as short as 9 days and as long as 27 months. As of this writing, suppressor approval wait times are running about 270 days.

DO SUPPRESSORS AFFECT PERFORMANCE OR ACCURACY?

This is a bit of a mixed bag. In general, suppressors improve performance and accuracy. The right suppressor will lessen felt recoil and eliminate noise flinch, making your silenced hunting rifle more accurate.

However, attaching a suppressor will often change the rifle’s Point of Impact (POI). Often this shift in POI is minimal and can be corrected by adjusting the optic or iron sights. The important thing to remember is that if you sight your rifle in without a suppressor, you will need to re-zero with the suppressor attached.

Some suppressors will need this every time you reattach if they are the QD (Quick Detach) type that attaches to a flash suppressor or muzzle brake. If you are going the direct thread or thread over muzzle brake (TOMB) route, the shift will be negligible unless you are shooting at extremely long ranges ( greater than 1,000 yards).

WHY IS THERE A $200 TAX STAMP?

In 1934, due to concerns about high-profile bank robberies and interstate crime sprees from Depression-era criminals, Congress passed the National Firearms Act. This was the first major piece of gun control legislation passed in the United States.

Although the original intent was to outlaw specific types of firearms, including all handguns, legislators decided to tax them out of circulation by imposing a $200 transfer tax.

The reason why the NFA tax is $200 is because that was the retail price of a Thompson submachine gun in 1934. It was intended to be a 100% excise tax on a firearm that caught the public’s imagination. When adjusted for inflation, that tax today would be $4,500. This is a reason why silencer development languished for so many years until the 21st century.

Products affected by this tax were machine guns, short-barreled rifles (SBR), short-barreled shotguns (SBS), and, of course, suppressors. Firearms that were not quite short-barreled long arms and those that were disguised to not look like a firearm were classified as Any Other Weapon (AOW) and subject to a $3 tax.

The NFA has undergone some minor changes over the past nine decades, including raising the AOW tax from $3 to $5 and changing the SBR length from 18” to 16”. There have been a few attempts by lawmakers to deregulate silencers and remove them from the purview of the NFA, but as of this writing, there is still a $200 tax on this safety device.

READY FOR YOUR FIRST SUPPRESSED ELK HUNT?

Hopefully, by now you have a better understanding of what to look for in a suppressor for hunting. Weight and length are a factor especially if you must walk a few miles on your first suppressed hunt. You also want one that will reduce sound to a comfortable level and maybe even help in the recoil department.

Armed with the knowledge laid out here we hope we can get you ready for that first suppressed hunt. A suppressor is as important to a hunter as a quality firearm, skinning knife, or optic.

The key to having a great hunt is to do your research, hire experts and guides. Let Silencer Central be your suppressor “hunting guide” and redefine the way you buy a silencer. We deliver silencers the simple way. You select your silencer; we manage your paperwork, and your silencer is shipped directly to your doorstep. It’s the service that’s unheard of.

Call our silencer specialists at 888-781-8778 to get started on your next suppressor purchase or visit SilencerCentral.com to buy online.

How to Make a Deadfall Trap (With 3 Tutorials)

0

Need to catch dinner in the wilderness? Go set a deadfall trap.

Trapping is one of the oldest ways to get food in the wild. People have been using traps to catch small to medium-sized game in between major hunts. Learning how to set a few good traps in ideal locations can cut your chances of starving significantly.

Primitive traps like the deadfall are especially popular among survivalists and bushcraft enthusiasts because they’re straightforward and relatively easy to construct. They also come in different variations that can fit your individual situation and skill level.

Need to brush up on your primitive trapping skills? Read on for easy-to-follow tutorials and tips:

Primitive Trapping Basics

Any prepper or bushcrafter worth his salt should know how to trap animals for food, fur, and other purposes. Actively hunting for game is always best for fresh meat, but trapping can save you a lot of time and energy, especially if you find yourself in a survival situation with little to no modern tools.

Before we look into the ins and outs of making deadfall trap configurations, here’s a quick refresher on the basics of trapping:

What are you trapping?

Your trap depends on the size and species of animal. As a trapper, you have to know what type of animals frequent the area. Watch out for tracks and pawprints, disturbed vegetation, and droppings to identify the critters.

Deadfall traps, in particular, are great for catching small to medium animals like rodents, squirrels, and prairie dogs.

Finding the perfect location to set your trap

Location is crucial when setting traps. Once you’ve identified the kind of animal you want to capture, you can now zero in on where to put your trap. Construct it near the animal’s habitat (outside its burrow or hiding place), or in places where it usually gets food and water.

Set the trap to make it look as natural as possible by covering it with soil or leaves. Unlike humans, animals have a very keen sense of smell, so remove or mask any human trace by wearing gloves and handling the trap as little as possible.

Skills needed in trapping

As mentioned earlier, you have to know what type of animals live in the area, so a sharp set of tracking skills will come in handy when making traps. Trapping requires other bushcraft basics like whittling, making cordage, and tying effective knots, as in the case of most deadfall traps. And, of course, field dressing and bushcraft cooking skills will ultimately come in handy when it’s time to eat.

What’s the best type of bait to use in trapping?

Not all baits are created equal. Use one that will attract your target animal. Most small mammals like rats and squirrels love to munch on nuts, seeds, and fruit, so use those when baiting your deadfall trap.

Safety precautions to follow

Constructing deadfall traps can seriously hurt you if you’re not careful. When setting one up, put a temporary support rock to hold up the deadfall weight. This way, you don’t accidentally activate the trap and crush your fingers.

Local trapping regulations

Some areas regulate or prohibit trapping animals for food or other purposes, so check local regulations before setting out traps.

A Closer Look at the Deadfall Trap

People have been using the deadfall trap since the dawn of civilization to catch a meal—and it remains one of the best primitive traps to this day.

The reason?

Deadfall traps simply work.

This primitive trapping mechanism uses a heavy rock or logs propped up by sticks to capture prey. Once the animal takes the bait, the sticks collapse, and the animal gets instantly crushed beneath the weight. It’s an effective and straightforward way to catch a meal, especially if you don’t have modern supplies at your disposal.

Types of Deadfall Traps

There are three main types of deadfall traps, namely the Paiute, Figure 4, and Split Stick. You’ll find detailed tutorials of these variations below:

Paiute Deadfall Trap

The Paiute deadfall trap is believed to have been invented by the Native American tribe of the same name. It’s also arguably the most popular among the deadfall trap varieties since it’s easy to set up and has a very sensitive trigger that allows you to catch prey in a snap.

The Paiute deadfall trap uses a total of 4 wood components:

  • One long diagonal stick to support the deadfall weight
  • One shorter vertical stick that holds up the diagonal portion
  • One small twig that serves as a trigger stick
  • A small piece of wood that will act as a toggle

What sets it apart from other configurations is that it uses cordage to hold these components together. You can use any available cordage, including dry fibers from plants like milkweed or stinging nettle.

In the video above, you’ll see a detailed tutorial on how to build an effective Paiute deadfall trap using primitive materials and methods.

Traps like these usually take a bit of trial and error before you get it right. Consider vital factors like the angle of the rock, the height of the trap, or the placement of the bait. Adjusting any of these can significantly improve your chances of catching the target animal.

Figure 4 Deadfall Trap

It’s pretty safe to say that the Figure 4 deadfall trap is the Paiute’s less trigger-sensitive cousin. Many find the Figure 4 quite challenging since it needs a sharp set of carving and whittling skills. It also needs some time to master and doesn’t deploy as quickly as the Paiute.

Still, when made correctly, it does a decent enough job, so knowing how to make an effective Figure 4 should still be part of your skills arsenal.

To construct a Figure 4 deadfall trap, you need three sticks:

  • 1 long diagonal stick that holds up the deadfall weight
  • 1 horizontal stick that goes near the base
  • 1 shorter vertical stick that holds everything together and acts as the trigger

All three sticks should be straight and of roughly the same diameter.

Notice that instead of cordage, the Figure 4 deadfall trap uses notches carved into the sticks to hold the entire structure together.

This is the tricky part: each notch should be carved just right and must fit well with each other to support the trap. It’s like making your own puzzle pieces. Carving notches takes considerable skill, so if it’s your first time making this trap, be patient.

The Figure also needs a balance between strength and sensitivity. The trigger, located at the base of the trap, should be strong enough to support the trap’s weight but sensitive enough to deploy quickly.

Because the Figure 4 deadfall trap doesn’t deploy as easily as the Paiute, it’s important to create as many traps as possible to increase your chances of catching food.

Split Stick Deadfall Trap

The split-stick deadfall trap is basically a cross between the Paiute and the Figure 4. It’s got a very sensitive trigger like the Paiute but, similar to the Figure 4, it doesn’t use any cordage.

The principle behind this trap is quite simple.

Take a long stick and cut it roughly in half. Next, carve notches on their meeting points so they loosely fit together. Make a larger notch in one of the sticks to make the trap more sensitive. Then put a small, thin stick in between these two components. This will serve as your trigger mechanism. Once the target animal takes the bait, the entire structure collapses, and the animal gets crushed beneath the deadfall weight.

It’s as easy as that.

Perhaps the only disadvantage to the split stick deadfall trap is that it could easily collapse due to other factors, like the wind. Nonetheless, it’s a good way to practice your bushcraft trapping skills and also catch an animal in the process.

Quick Facts About Deadfall Traps

To sum things up, here are the things you should know about deadfall traps:

  • Deadfall traps are ideal for small- to medium-sized animals such as rabbits and squirrels.
  • The three main types of deadfall traps are the Paiute, Figure 4, and Split Stick traps.
  • Depending on where you live, rigging up a deadfall trap may be illegal, so check local regulations first.
  • Be careful when you’re setting up a deadfall trap. It can seriously harm your hands if you accidentally trigger it.

Final Thoughts

People have been trapping since the beginning of civilization. Although most modern traps are now manufactured, nothing beats knowing how to make primitive traps for prepping and survival.

These traps will be indispensable when you find yourself in a survival situation with little to no modern tools at your disposal.

Deadfall traps require no more than some sticks and a flat slab of rock to make. The Paiute, Figure 4, and Bait Stick deadfall traps are relatively easy to construct and are effective in catching small to medium-sized animals. They’re a good fail-safe in case you can’t catch a meal when hunting or fishing.

Continue practicing your deadfall trap-making skills and you’ll be able to catch small game for dinner in no time.

Best Air Rifle Deals

Popular Posts

PCP vs Spring Piston: Which one is better?

0
When reading about guns in the search for the first one that would be perfect for you, an age-old debate comes into question. Should...

Air gun 101: Everything you need to know about air rifle accuracy

0
Wyatt Earp has said: Fast is fine, but accuracy is everything And I just thought how many airgunners are obsessed with muzzle velocity and muzzle energy,...

Air Gun 101: What You Should Know about Air Rifle Barrels Before Buying

0
Have you ever heard the phrase: “Imitation is the sincerest form of flattery”? The Chinese must have been very sincere in emulating this proverb. I...