If you want a powerful, versatile lighting solution, the best flashlights still offer advantages over headlamps in many scenarios.
Flashlights point wherever you want, not just where your head is pointing. Also, due to fewer weight constraints, they tend to have more powerful, longer-lasting batteries and incredible power for modest-sized devices.
And to be honest, I’m a flashlight buff. Yes, I also use headlamps a lot when I’m outdoors. But more often than not, I grab a small flashlight from my truck center console and, if I need two hands for a project, clasp it in my teeth. I just love having the ability to point it wherever I want without having to crane my neck in a specific direction.
So if you love torches, read on for what we’ve determined to be the best flashlights available today. Because GearJunkie focuses on the outdoors, I rated these based on weight, size, battery life, color rendering, and lighting versatility. You can learn a lot more about how I tested and chose these flashlights below, but right up top, I’d like to state that this guide focuses on truly excellent flashlights that can perform day in and day out — whether you use a light professionally or simply need one for camping or to store at home for a power outage.
This isn’t a list of “light cannons,” as you’ll rarely need one million candlepower model. But, I did include one monster in case super-powered lighting is your jam.
Be sure to read the buyer’s guide and frequently asked questions for helpful tips. Also, have a look at our comparison chart to help steer your decision-making.
Editor’s Note: For our September 6th, 2024 update, we tested the Coast G32 and added it to our lineup. This model is a good budget choice with the option to upgrade to a rechargeable battery.
Best Flashlight With Long Range: Olight Warrior X Pro
Best Flashlight With Zooming Lens: LEDLENSER MT10 Flashlight
Best Flashlight for Mechanics: Blackfire Rechargeable Weatherproof Magnetic Flashlight With Lantern
Flashlights Comparison Chart
Fenix PD36RCoast G32
Why You Should Trust Us
In short, our primary flashlight testers are not just super into the outdoors; they’re also flashlight nerds. We really love the technology that goes into flashlights and headlamps. As the author of this article, I personally spend hours every month testing the newest flashlights to see if they can outperform our favorites listed here.
For the record, it takes a long time and impressive performance for a flashlight to earn a spot in this article. I constantly test new flashlights and updates from our favorite brands and update this article many times each year to keep it up to date with the best flashlights available.
This article has evolved significantly since it was first published back in 2018. At that time, it explained in depth why I love flashlights, and how they are different in use from headlamps. I still love flashlights for their directionality and ease of use in many situations. However, our team has done much more testing since this guide’s inception — and has new recommendations based on those results.
So, how do I test flashlights? First, I use them in controlled environments, measuring both runtime and brightness compared to claimed numbers. I put them on a scale to check the weights. I submerse them in water and drop them onto concrete.
Weighing the Thurnite Archer budget flashlight (batteries included); (photo/Sean McCoy)
These flashlights also get significant field testing. Our team takes them on all kinds of adventures — hiking, mountaineering, backpacking, hunting, boating, and camping are all part of the mix. Most of our team’s tests occur in the mountains of Colorado and fields and forests of the Midwest.
I take all this information and experience and compile the best advice for you. Over the years I’ve tested about 50 flashlights specifically for this buyer’s guide, selected from hundreds pitched to me by brands and examined at events like SHOT Show and the Outdoor Retailer convention. My goal is to give you the same advice I give my best friends.
Buyer’s Guide: How to Choose a Flashlight
There are a few important specs to consider when choosing a flashlight: size and weight, max power output (usually noted in lumens), minimum power output, runtime (especially in lower modes), durability, and waterproofness.
Before we get into some of those details, I’d like to share some details about how I chose flashlights to test for this article. And there have been a lot of them.
Just a few of the many flashlights we’ve tested over the last 10 years; (photo/Sean McCoy)
First, I look for flashlights that work well for both home and outdoor use. This means I look for higher output than flashlights intended primarily for indoor use. I also only include flashlights that can function after at least a 1m drop, are water-resistant, and have a max runtime of at least 8 hours — enough to get you through a summer night at a minimum.
Next comes the question of batteries. Because of the efficiency of modern flashlights, there are now just two real choices: flashlights that run on AA or AAA batteries, or rechargeable flashlights that run off one of many higher-end battery systems and are almost always included in the light. Gone are the days of giant D-cell flashlights. But there is still a significant argument between those who believe disposable batteries or rechargeable batteries are better. I will get into it more below, but our team likes rechargeable batteries more in most cases.
Lumens: Max Output
For most campers, anything over 1,000 lumens is overkill. You’ll often find yourself using much lower settings, especially around camp. However, those big numbers can be nice, especially if you need to see faraway objects.
Battery Life
Another important consideration is if the flashlight uses its own rechargeable battery or if it runs on disposable batteries. Most people will get more value out of a flashlight that offers long runtimes and is easy to recharge.
Battery Type
As noted above, our team prefers rechargeable batteries in most situations. Most rechargeable batteries, such as the 21700 rechargeable li-ion battery included in the Fenix PD36R PRO, offer superior performance to both disposable and rechargeable AA or AAA batteries. But more importantly, flashlights that include this type of high-end rechargeable battery do not have hidden costs. And those who will use a battery more than casually will find that the cost of batteries will very quickly add up to more than the cost of the flashlight.
Next, rechargeable flashlights generally have a charging port or system built in. As you can see with our choices, our favorite flashlights today use USB-C charging. This is quickly becoming the industry standard as it is much faster than micro-USB charging. And unlike magnetic charging systems (or other proprietary chargers), you can easily find a USB-C cable anywhere and likely own several already.
One final note on AA and AAA batteries. Some folks argue that it is easier to replace batteries in the field than to charge them. Our testers have carried small battery chargers on many adventures, and they work great with flashlights for long trips. For trips over a week or two in length, though, disposable batteries still have an edge.
So keep battery and charging style in mind when you buy a flashlight. It will make a difference when you’re packing for a trip as to how many cables you’ll need to bring, or if you’ll need to buy batteries continually through the life of the product.
GearJunkie tested the Coast Polysteel flashlights in the past, eventually breaking them with a shotgun blast; (photo/Coast)
However, it’s convenient to quickly change batteries and refresh your flashlight in the field. Both are valid options but consider how you’ll use the light (and if you mind constantly buying new batteries).
Quality and Output
Modern LED flashlights vary in the quality of their color rendering, meaning you can see color better with some higher-end lights. The best flashlights on the market should always give you a colorized, realistic view.
Better-quality lights also tend to have more efficient LEDs. Some even have “regulators” that electronically manage the power output, resulting in consistent lighting. To expand on that, first understand that most flashlights, even very good ones, lose a little output as they run and deplete the battery. Better flashlights use a regulator to manage this drop-off. Poor flashlights tend to lose power consistently over time, gradually becoming less and less useful as the battery slowly drains.
2 to 3 lbs.; the world record largemouth bass weighed 22 lbs, 4 oz. The North Carolina record is 15 lbs, 14 oz.
Food
Worms, salamanders, frogs, crayfish, snakes, ducklings, insects and fish.
Breeding
Spawning season occurs in spring when water temperatures reach 63 degrees. Female deposits eggs in nest guarded by male bass. From 2,000 to 12,000 fry hatch. Only 5 to 10 will reach 10 in.
Young
When hatched, largemouth bass are known as fry. Fry are less than 1 inch long and eat zooplankton. As they grow from 1 to 3 inches, largemouth bass are known as fingerlings and eat aquatic insects and small fish.
Life Expectancy
Females live longer than males. In North Carolina, 10 years is long-lived. Most survive only 3 to 4 years.
Range and Distribution
In North Carolina, the largemouth bass is found in ponds, reservoirs, streams and rivers throughout the state, as well as in brackish coastal waters alongside saltwater species. Populations are considered good in every area of North Carolina, with the best populations occurring in the Piedmont and Coastal Plain. Bass tend to grow faster and larger in reservoirs, although large fish are also common in many farm ponds and in some coastal rivers.
General Information
Largemouth bass are the most sought-after freshwater gamefish in the United States. There are several reasons for the popularity of this fish. Anglers can usually find waters that contain largemouth bass within a short distance from their homes; they can catch bass that regularly reach trophy size (7 to 15 lbs.); and these fish are exciting to catch, with a battle characterized by head shaking and explosive leaps from the water.
Description
Largemouth bass belong to a group of fish collectively called black bass. Other black bass found in North Carolina include the smallmouth and spotted bass. All black bass belong to the sunfish family, but are distinguished from other sun fish by their elongated bodies. Largemouth bass are distinguished from other black bass by means of the lower jaw, which is longer than those of other bass. The largemouth bass is also a bigger species than the smallmouth or spotted bass. There are two subspecies of largemouth bass: the Florida largemouth bass and the northern largemouth bass.
History and Status
The largemouth bass is a native species of North Carolina. In North America it was originally found from southeastern Canada through the Great Lakes; south down the Mississippi Valley to Mexico and Florida; and up the Atlantic coast as far north as Maryland. As the fish grew in popularity with anglers, it was stocked in other areas and today is found throughout the continental United States and Hawaii, and southeastern Canada. It has also been stocked in Europe, Asia, Africa and South America.
Habitat and Habits
The largemouth bass prefers habitat with lots of structure. This structure may be in the form of weed beds, sunken logs, rocks, brush and standing timber. It uses structure as cover for ambush sites and to hide from larger predators.
Largemouth bass prefer temperatures between 77 and 86 degrees. Bass seldom feed at temperatures below 50 degrees and cannot survive for long at temperatures above 98 degrees.
When water temperatures approach 60 degrees in the spring, male bass swim to the spawning grounds. Male bass spend several days selecting their nest sites. The beds are usually in 1 to 4 ft. of water, but they may be deeper in clear water.
Spawning begins when the water reaches 63 to 68 degrees and remains in this temperature range for several days. A female largemouth bass lays between 2,000 and 7,000 eggs per pound of body weight.
The male guards the nest, fanning the eggs with his tail to keep off silt and debris. He will attack anything that swims near the nest. Despite the male’s vigilance, many eggs are eaten by other fish species. Hatching time for bass eggs depends on water temperatures. If the water is 72 degrees, eggs will hatch in only 2 days, but they take 5 days to hatch in water around 67 degrees. Approximately 2,000 to 12,000 fry hatch from each nest. Of these, however, only 5 to 10 are likely to survive to reach a size of 10 in. Newly hatched largemouth bass feed on tiny crustaceans and other zooplankton until they reach 2 in. in length. Young largemouth bass eat insects and small fish, including smaller bass. The adult largemouth bass will eat almost anything alive that will fit in their mouths. Fish, worms, frogs, insect larvae, crayfish, salamanders, snakes, small mammals, birds and ducklings are also eaten. Anglers use a variety of natural baits and artificial lures to catch largemouth bass.
Springtime movements center around spawning when bass move from deep to shallow water. During the summer months, bass are active in shallow waters during the morning and afternoons, but may move to deeper water at midday, when the water temperature increases in the shallows. When the water starts to cool in the fall, bass return to the shallows to look for food. As the water temperatures decrease during the winter months, bass become more sluggish, their metabolism slows down, and they require less food. They may become active during winter months if several days of warm weather heat the water temperatures above 50 degrees.
People Interactions
Largemouth bass have had a tremendous influence on many people. Tackle manufacturers, boat dealers and bait shops all provide specialized gear for largemouth bass fishing, especially for an increasing number of anglers involved in largemouth bass tournaments. Largemouth bass fishing is big business; many people make their livelihood from this popular sport. Although water pollution is a real threat to largemouth bass and other fish populations in some waters, the largemouth bass is an adaptable species and, overall, its future looks bright.
NCWRC Interaction
After fish kills associated with Hurricane Isabel occurred in northeast North Carolina in 2003, fisheries biologists began an intensive largemouth bass stocking project to evaluate stocking strategies that may be used after future hurricane-induced fish kills. In 2004, largemouth bass of different sizes (8, 2 and 5 inches, respectively) were cheek-tagged with a minute magnetic tag and stocked in the Roanoke and Chowan Rivers; stocking size was related to the time of year that certain sizes of largemouth bass may normally occur. Stockings were evaluated through an intensive electrofishing recapture period; the recapture period was completed in spring 2007. Although an initial boost of tagged individuals was observed in the population, the number of tagged largemouth bass contributing to the population over time dwindled to a mere fraction of the naturally produced largemouth bass. In this case, natural recruitment was likely a product of a few fish that must have survived to reproduce and repopulate a devastated fish community. Still, this study provided valuable insight on a management strategy to monitor largemouth bass recovery. Plans include implementing a sub-adult stocking strategy, when minimal to no natural recruitment occurs after hurricane-induced fish kills.
What’s the most diverse group of guns in use by the world’s military forces?
It’s not rifles, or machine guns, or submachine guns, or even shotguns. Most successful long-gun fall into just a few different designs.
When you see oddball service rifles, you often see them plagued by issues of all kinds I.E. the INSAS, the FAMAS, the SA-80, and even the G36 have all had their problems.
And yes, we know the M16 had issues also.
The most diverse group of military weapons are handguns, aka sidearms. Even within certain countries, pistols can be diversely issued depending on the unit and mission.
Sometimes pistols are such a second thought they are a mishmash of different guns.
For example, see Israel at the near end of this list. Another challenge is how countries outside of Western Europe equip their military forces. In the Western World, there is a big move towards standardization that’s not present with other countries.
U.S. Army new M17
Several countries also don’t put out a press release when they purchase or adopt a new handgun, making it difficult to verify the information.
To be entirely fair, sidearms are just a step above bayonets on the necessity of military equipment priorities. Most countries issue them in small numbers to officers and specialists.
I put my best foot forward to come up with a comprehensive list of the sidearms from around the world. It was a little harder than I initially thought, but the research was still fascinating and fun.
With all this in mind, I’ve tried my hardest to verify the issuance of every firearm on this list. I set my parameters to general issue sidearms.
Some Special ops teams may use something different than the standard forces, and trying to catalog these weapons along with general sidearms would take several articles.
For example, the United States military alone issues the Beretta M9, the M17/18, the MEU/SOC 1911, the SIG P226, the M11A1, the P229R, the Glock 34, Glock 17, Glock 19, Glock 22, and many more we’ve likely never seen. It’s much more reasonable to focus on the general issue sidearms of these military forces.
Since several military forces have adopted the same gun, we’ll group those together to simplify things.
I was lucky enough to be at SHOT Show when it was announced that the SIG P320 would be adopted for military service with the U.S. Army. Needless to say, the folks at the SIG booth were quite excited.
Sig Sauer, SHOT 2018, colorized
The P320, designated the M17 and M18, was adopted in 9mm in full size (M17) and compact (M18) variants. The M17/18 series are quite advanced for military sidearms and feature red dot optics compatibility. Although red dots have not been issued as far as I know.
P320-M17
Like the P320 the ability exists to move the serialized fire control group to different grip modules. The military is quite strict with serial numbers and if the military allows the issued troop to choose a grip module they could get a gun that fits them. One size fits all is rarely a good idea.
Of course, the U.S. Military is nanny like and included a manual safety. In reality, more training would be more beneficial than a manual safety, but who am I to judge big army.
The M17 has since been adopted by the Air Force, the Navy, and the Marines. The M17 is currently being issued to combat arms units first in the U.S. Army. The Army plans to replace every M9 within ten years with an M17/18.
2. Commonwealth Club – The Browning Hi-Power
Canada, Australia, Bahrain, India, Thailand
The Browning Hi-Power is the European 1911.
FN Browning Hi-Power
What I mean by that is its popularity and longevity in military service. The Hi-Power has been used by just about everybody and in only the last few years have more modern designs replaced it.
Original World War II Era Browning Hi-Power
The Hi-Power was one of the first high capacity 9mms that entered regular service. It’s a single action only weapon with a manual safety and a 13 round magazine. The Hi-Power is a beautiful gun that is robust and reliable.
It’s close to 100 years old and is still seeing war.
It’s one of the few guns to see action on both sides of WW2 in service with numerous Allied Forces, including the British, and in the hands of Germans. The Hi-Power is an excellent firearm and was a final fitting design for John Browning.
Its legacy of service across the world is nearly unmatched. Much like the sun never sets on the British empire, the sun doesn’t set on the Hi-Power. While it’s been produced mostly in Europe, the gun is also widely built in South American factories as well.
Modern Browning Hi-Power Mark III with World War II Era Hi-Power
It’s been heavily used in Europe, the Middle East, Asia, and South America. From imported goods to domestic production copies, the Hi-Power is a legend in small arms design.
It’s currently the issued sidearm of Commonwealth countries like Canada and Australia, and as far out as India and Thailand.
Canadian Hi-Power
3. 20+ Nations – The Glock 17, 19, and 34.
The United Kingdom, Sweden, Austria, Finland, Malaysia, Mexico (Navy), Montenegro, The Netherlands, New Zealand, Norway, Poland, Portugal, Romania, Switzerland, Yemen, Venezuela, Uruguay, India, and many more.
It would seemingly be easier to make a list of countries the Glock 9mm series doesn’t serve in. The weapon seems to be everywhere in the world.
Glock 19
Why not? The 9mm Glocks are the flagship of their handguns, and the only difference between the 17, 19, and 34 is barrel and grip length.
Glock 9mm pistols are legendary for their rugged and reliable design. These superbly simple guns work, and keep working. On top of that, Glock has logistics nailed with supplies and spare parts out the yin yang.
UK Glock 17
Generation wise it appears that Gen 3 and Gen 4 models are the most popular variants in the military market. The Glock series also seems to be the most popular choice in countries where Spec Ops have more leeway in choosing a handgun.
The Glock series of firearms are popular the world over for a good reason. They are accurate, easy to use, highly reliable, lightweight, and cheap. The price Glock sells their guns to Police Forces is criminally low, and I imagine the price for military forces is even smaller.
Penny pinchers often give a big say when it comes to new guns, and price always matters. Glock makes their weapons affordable while being high quality. As far as military sidearms go the Glock 17 will likely remain the most popular choice for some time to come.
If you want to get your own Glock, you should take a look at some of these articles:
Best Glock (All Sizes & Calibers)
Best 9mm Glock
Best Glock Upgrades
4. Germany, Ireland, Greece, and Spain – The HK U.S.P.
I love the HK U.S.P. It’s one of my favorite DA/SA guns, and that’s saying a lot. The U.S.P., or universal self-loading pistol, is Heckler and Koch’s premier handgun design.
Germans with their HK USP
It’s a fascinating gun and while 9mm is the chosen NATO cartridge the USP was one of the first guns built around the 40 S&W. The gun was also chambered in 357 SIG, and later 45 A.C.P.
HK45 USP with mounted light
The U.S.P. stood apart from other polymer-frame guns of the time due to its mechanical recoil reduction system. This system is implemented with a heavy captive coil spring around the guide rod that reduced the force of the slide slinging rearward.
This buffers recoil by up to 30% according to H.K. The U.S.P. came to be because of the Offensive Handgun Weapon System, where it was tested alongside prototypes of the Mk 23 Mod 0. From the very beginning the gun was always meant to be a service pistol.
As a service weapon, it has been adopted by at least four countries as the general issue sidearm. In several more countries, it serves as a pistol for Special Operations units. Plus the U.S.P. C. is Jack Bauer’s gun of choice.
5. The French – M.A.C. Mle 50 and PAMAS G1
I’m not picking on the French, but any look into their current small arms will find them lacking. Their military is often ignored and their weapons are often quite old. There are two current service pistols in use, and neither is a new design.
French army MAC50
First we have the ancient, but domestically designed M.A.C. Mle 50 and then the PAMAS G1. The PAMAS G1 is a licensed clone of the Beretta 92F and is built in France.
The 30-year-old G1 was supposed to replace the MAC Mle 50, but it seems the process has been moving along very slowly. They are looking to now replace both pistols as of March 2019.
The M.A.C. Mle 50 is a product of its time, and as a gun designed in 1950, that means it’s a single stack 9mm with nine rounds and a single-action design. It uses the Browning system like a Hi-Power and has an integral barrel feed ramp.
The M.A.C. 50 is a stout little gun that’s known for its durability, clearly, since it’s been around for nearly 70 years now.
The PAMAS G1 is a clone of the Beretta 92F made in France. There are a few differences between the PAMAS G1 and Beretta 92F. The G1 has a decocking lever only, and apparently, the French steel is more brittle.
Since it’s a 92F, it lacks the enlarged hammer axis pin that prevents the slide from accidentally leaving the gun and hitting the operator in the face. However, there is some speculation this was initially caused by +P+ ammo.
PAMAS G1
The French will likely adopt a Glock pistol, but until then, the M.A.C. and PAMAS are chugging along. The PAMAS is certainly a step up from the MAC, but both are likely well past their service life.
6. South Korea – The Daewoo K5
South Korea has a robust and well established domestic arms production history. Rather than just relying on the U.S., the Daewoo brand has produced most of South Korea’s military firearms.
The Daewoo K5 is an innovative and exciting firearm design that has served the Koreans since 1989.
Daewoo K5
The Daewoo K5 is a DA/SA pistol with a hammer, made on metal frame and is chambered in 9mm. The Daewoo K5 holds 15 rounds of 9mm, and in 1989 was quite high tech. It’s slightly dated now, but still an excellent combat pistol.
The K5 features an unusual trigger mechanism, sometimes called Triple action or Double action +. It’s quite similar to the P99, except with an actual hammer-fired handgun. The K5’s hammer can be decoked, while still maintaining mainspring compression.
The DP51 is the export version of the K5
The end result is a trigger pull with the length of a double-action trigger, but the weight of a single-action design. In the states, the Lionheart imported pistol had the same innovative feature. The K5 is a fascinating gun, and in 1989 showed a lot of innovative thought from Daewoo and South Korea.
Daewoo is an interesting company. They make everything from TVs to Cars, and handguns and assault rifles. If you need a slow, fuel-efficient car and a machine gun, call Daewoo.
7. China – Type 92
The Type 92, aka the QSZ-92, is China’s primary service sidearm. This recoil-operated, locked-breech pistol has a rotating barrel locking system like the Beretta PX4 series. This rotating barrel setup is supposed to improve reliability and decrease recoil.
Chinese Type 92
This is an interesting little gun, and it was ahead of its time.
The Type 92 was designed in 1994 and featured a detachable steel frame that holds the fire control group. This sits in the plastic grip and acts very much like a SIG P320’s FCU. The frame can be removed and moved into different sized frames and grip designs.
Whether or not this was ever done remains to be seen. The gun is also chambered in the very odd 5.8x21mm round. This was China’s variant of the 5.7 and was designed to defeat soft armor.
Popular Pistol Calibers
It holds 20 rounds of the 5.8×21 round in a double-stack magazine and has a combination safety/decocker. It’s a DA/SA design and is issued lightly among Chinese forces.
9mm variants also exist for export… for reasons.
I’m betting the 5.8 round handles a lot like the 5.7, and it’s a shame we can’t find out for ourselves.
8. Russia – Makarov, and MP-443
Russian is a weird country for small arms.
Admittedly they are much more focused on their rifles than their handguns. That’s why the Makarov pistol is still around and kicking in use by their military forces. This Great Value brand Walther PP has been serving since 1951.
Rusian Makarov RT
It’s a blowback-operated design that’s very compact for a service pistol. When your handgun is more or less used for executing traitors and subjugating people, I guess size doesn’t matter. The Makarov had a capacity of 8 rounds of what is essentially a +P .380 ACP round.
The most impressive thing about the Makarov is the fact it’s made of only 27 parts. This was perfect for the Soviet Union at the time. It is cheap and easy to produce, and had very few failure points.
The Makarov pistol has been around for so long because the former Soviet Union produced millions of them, and they are robust little pistols.
The MP 443 Grach, aka the PYa, is a more modern Russian service pistol that aims to replace the Makarov. The MP 443 is a modern 9mm Parabellum pistol with a 17 or 18 round magazine capacity. The MP 443 is slowly making its way into the hands of Russian forces, and the gun has been in mass production for eight years now.
Russian MP443
The MP 443 is pretty standard as far as pistols go. It’s a DA/SA design that does allow the user to swap the slide stop lever and manual safety to the right and left sides of the gun. The MP 443 uses a Colt-Browning design and doesn’t do anything revolutionary.
So it’s a lot unlike bored Russians in that sense.
It is an all-steel gun, and while this adds to the gun’s weight, it is quite robust and durable. It needs to be to use the Russian armor piercing 9mm 7N21 armor-piercing round. This s a +P+ style round apparently and is a hard hitter
Russian 7N21 AP 9mm
The MP 443 is another gun we will likely never see, but I doubt it does anything an old SW 3rd gen doesn’t do.
9. Belgium – FN Five-Seven
The Belgium FN Five-Seven pistol is an interesting firearm. It fires the 5.7x28mm round and was developed to share ammunition with the FN P90 PDW. The round it fires is similar to a rifle round in design and shape.
Five-SeveN with Ammo and Mag 2
While the ammunition is long, it’s thin, and this allows the Five-Seven to hold 20 rounds in a flush-fitting magazine. The Five-Seven offers soft armor penetration and very low recoil on top of a flat shooting cartridge that can reach out to 100 yards.
This is a very easy shooting gun, and I can see why a military would adopt it. Plus it’s lightweight, reliable, and is unlike most handguns when it comes to armor and barrier penetration. The gun and the ammo is quite pricey though.
The gun is Belgium designed and is currently replacing the Browning Hi-Power with the Belgium Army. The Five-Seven also serves the Air Force, Special Forces Group, and Federal Police forces. The Five-Seven is an unconventional choice but is an effective weapon.
And of course, it is the firearm of Ivan Chesnokov fame.
We literally cannot think about the FN Five-seveN without thinking of Ivan Chesnokov.
10. Czech Republic – C.Z. 75 Phantom
The Czech Republic has a long history of private firearms ownership and is one of the few European countries to have a strong firearm’s civil rights. C.Z. is also one of my favorite personal gun makers.
Czech soldier with CZ 75 Phantom
The C.Z. 75 has been used extensively by their military for quite some time, and still serves in reserve units.
The C.Z. 75 Phantom is now the primary service pistol. This gun is similar in design to the classic C.Z. 75 but features a polymer frame, Picatinny rail, and a decocker only design. It also uses a larger 19 round magazine, but can also work with classic C.Z. 75 mags.
Lots of CZ 75 mags
The C.Z. 75 Phantom is a robust and accurate weapon. The ergonomics are simply incredible, and C.Z. isn’t afraid to sell the gun in the States, so yay for us. The Phantom is a service pistol with the handling of a competition gun.
It has an excellent trigger, a low bore axis, and is well proven. The Phantom is an excellent gun, and it was a great choice by the Army of the Czech Republic.
11. South Africa – Vektor Z88 and SP1
South Africa has an exciting history of arms design and has both cloned and created their weapons. Their service handguns are a mixture of both. The Z88 was a domestically produced clone of the Beretta 92.
Vektor SP1
They couldn’t license it or receive handgun imports due to the arms embargo on South Africa at the time. Beretta also couldn’t sue because South African’s couldn’t come to court to defend themselves.
The Z88 was a direct clone of the Beretta 92 and, as such, is a DA/SA gun with a decoking safety and a 15 round magazine. The Z88 was a very well done clone and helped modernize the South African military. It still serves today in a limited role.
Z88 and SP1, Forgotten Weapons
After the sanctions were lifted, Beretta was in a place where they could file lawsuits, so South Africa wisely changed the design and came up with the Vektor SP1. This gun utilized the same basic Beretta design with some changes. The safety was moved to the frame, the barrel was no longer exposed, and a 40 S&W variant was created.
The SP1 is a metal frame pistol, and it still utilizes Beretta magazines. It currently serves the South African National Defence Force and the Police Service. It admittedly looks very cool and while limited numbers were imported to the States I’ve never seen one in person.
The SP1 is reportedly a well made combat handgun, and since the weapon is based on a Beretta 92 it’s got a solid platform to start on. South Africa apparently likes the weapon enough that they’ve yet to start shopping for a new sidearm, even without an arms embargo.
12. Italy – Beretta 92FS
Beretta, the world’s oldest still-operating arms company, is an Italian firm. Are we at all surprised that the Italians are using one of Beretta’s most legendary handguns?
The 92FS has served several countries as a military and police sidearm, including our own, for more than 30 years.
Beretta 92FS
The Italian military uses the Beretta 92FS. This DA/SA design features one of the best stock factory triggers on the market. The 92FS has a combination safety and decocker and excellent ergonomics outside of the safety.
The 92FS in it’s M9 form was the gun I used and it’s an excellent weapon. The 92FS is robust, reliable, and well-proven. The direct feed system and open slide design greatly increase the gun’s reliability.
Beretta’s and the U.S. Army’s numerous testing has shown that the weapon is extremely reliable and can take a ton of abuse before it cracks.
The all-metal frame pistol has very low recoil and handles like a dream. It’s perfect for both new recruits and expert shots. The 92FS is Italy’s standard service pistol, and there doesn’t seem to be a rush to swap it out.
13. Brazil – Taurus PT-92
The PT-92 is the Brazillian copy of the Beretta 92, made by Brazillian firm Taurus. It’s not an identical copy of the Beretta. Taurus makes these guns on original Beretta machinery left behind after Beretta’s military contract expired in Brazil.
PT 92
The Taurus PT-92’s most significant and most noticeable change from the Italian Stallion was the use of a frame-mounted combination safety and decocker. Other than that, the PT-92 handles almost identically to the Beretta 92.
This includes the DA/A design, the direct feed design, and the double-stack magazine. The PT-92 has been serving the Brazillian military for decades now without much issue. The teething problems the Taurus guns sometimes have are seemingly not present in the P.T. 92’s design.
14. Israel… A Little Bit of Everything
Tracking down one service pistol for the Israeli army isn’t easy. It seems like they keep a bit of everything around.
The domestically produced Jericho pistol is in the inventory, as well as the SIG P226 and 228, the Hi-Power, the Glock 17 and 19 models, and more.
Sig Sauer 226
Researching this article has shown me that service pistols in the Israeli Army are highly uncommon. The Special Forces and Intelligence agencies all seem to have their particular pistol.
I mean, does the Uzi pistol count as a pistol?
Sure, this was the full-sized Uzi. But it was still his CCW!
The one common thread between Israeli pistols is that they are all quality options. They are well made, proven guns with a long history of service and success.
Conclusion
Service pistols are such a diverse subject to cover, guns that include both past and present designs. The current field of Service pistols around the world is massive, and I was left exhausted after researching and writing this article.
Service pistols are a fascinating subject to research, and I’m surprised to see such exciting diversity. I can’t possibly have conquered them all, so I ask you fine folks in the comments, which ones have I missed? Want more…check out Police Sidearms: From Past to Present.
A reliable camping hatchet or axe can be the difference between mere survival and a truly memorable camping experience
Do any sort of camping and you’re more than aware there truly are the right tools for the job. While implements such as a bushcraft knife are an absolute must to get you out of a backwoods switch, they are, at best, only adequate for certain tasks. Chief among these is processing any amount of wood.
This, when your kit requirements allow, is where the good old camp hatchet or axe comes into play. Antiquated for large tree-felling projects nowadays, these lightweight and heavy-duty tools bring your woodcraft abilities to a new level. From facilitating more elaborate shelter-building attempts and arming you with the ability to collect a magnitude more firewood, hatches and small axes prove a godsend in the harshest environments.
Let’s hack away at what goes into the best of these sometimes overlooked camping and survival tools and what presently are some of the top choices in the wilderness tools.
Camp Axes vs Hatchets
While there is no bright line from when you crossover from an axe to a hatchet, there is a generally safe rule of thumb. Axes sport enough handle to facilitate a two-handed grip, while hatchets are generally wielded with one hand—hence their moniker “hand axe”. Most times too, axes boast a slightly larger and heavier head with a slighter taper. Hatchets, you’ll find, have a much more pronounced taper to their heads in addition to some having other functions incorporated—such as a hammer.
Given this, axes provide more striking power, thus a bit more versatility since they’re capable of heavier work than hatchets, in addition to all the tasks the smaller tool is proficient at. Bushcraters have understood this for some time, with some favoring relatively small axes that make shelter building and wood splitting much less labor intensive. There is a tradeoff in going the axe route, however—no matter what, the great majority of axe options will weigh more than a hatchet.
A hatchet, aside from convenience, has some underlying benefits. Splitting wood in camp is much easier and safer with the hand axe given it’s more controllable and can function in smaller spaces. Many—as mentioned—are tailored to the tasks of camping with multiple functions engineered into them—a tent stake puller is always nice. And even in the realm of bushcrafting, the hatchet proves nimbler than the axe on many tasks—such as using it to whittle wood.
Which is Right For The Wilderness?
Overall, the winner of axe vs hatchet debate when it comes to the outdoors is only something you can determine by analyzing exactly what your needs are when out in the wild.
If your outdoor plans require a deep push into the backcountry, where woodfires are a secondary source of heating and cooking, a hatchet seems more logical. The same goes for excursions where you plan to collect fuel wood immediately around your campsite, as opposed to cutting down a tree.
Conversely, if wood fires are your main source of heat and cooking, even in deeper parts of the forest, and you’re on extended trips an axe might prove more useful. Furthermore, if you are going straight up Grizzly Adams and virtually living off the land, building your own shelters, well an axe provides an advantage. Hunters too, in blind building from fallen trees, could also benefit from the extra leverage allotted by an axe.
Again, these are not hard and fast rules, simply examples of where a hatchet might trump an axe and vice versa. Using each as well as understanding your needs and capabilities in the wilderness will likely point you to making the right choice.
Best Hatchets And Camp Axes
ESEE Gibson Axe
The hatchet is a James Gibson design which is now offered by ESEE. A knifemaker, flintknapper, and bushcraft instructor, James originally designed the Gibson Axe for himself, something to throw into a backpack as he tramped the hills and hollers of East Tennessee. As he tweaked his design, eventually cutting out a prototype made from thin plywood, he focused on its balance and “rocker.”
“An axe with perfect rocker is one of the best handling axes you can handle,” James said. “And I got the rocker perfect on this axe.”
And just what is rocker?
Gibson explains it’s when you take the hatchet and stand it up edge down on a straight surface. As he puts it, the bit’s edge should meet the surface in the “middle of the blade, the cutting edge and its dead center, and the handle [butt] should touch at the same time.”
When he showed a couple of prototypes of the axe to the folks at ESEE at a BLADE Show one year, they decided to add it to their lineup. At the time, ESEE was hearing from its customers that they wanted the company to offer an axe—and Gibson’s hatchet fit the bill.
James designed the handle to have finger grooves and a knob to secure the hand while swinging it. After the axe was made, he learned a hidden feature of his design: it has enough finesse to carve smaller objects. He says he sharpens pencils with it and once cleaned a trout with it. The result “is capable of doing some real work as well. It also has exceptional balance and you can choke up on it and use it like a knife for many applications,” explains Shane Adams, ESEE’s marketing director.
Of course, it being ESEE, the hatchet comes in the company’s oft-used blade material: 1095 carbon steel. “It’s us,” Adams said. “We know 1095 well.” It’s a steel that handles all the variables of the outdoors. “You can sharpen it with a rock if need be,” the marketing director advises. “Stones or systems, it doesn’t matter. I always like to finish on a loaded leather strop when possible.”
Charles Allen, president and owner of Knives of Alaska (KOA), knows the importance of being prepared. The Alaskan master big-game guide who has flown in the Alaskan skies professionally for almost three decades always keeps a hatchet stashed in his bush plane—and for good reason.
“When you look back at the old photos of the early trappers and hunters, you will see three things: a rifle, a knife, and a hatchet or tomahawk on their belts,” he said. “Hatchets are still one of the most useful tools a real outdoorsman can have in the field, and they can save your life by enabling you to quickly make a warming fire or emergency shelter.” When consumers demanded a multi-purpose hatchet, Allen studied the designs carried by the folks who make preparedness their motto: the Boy Scouts. “I looked at the historic Boy Scout’s hatchet I grew up with and know that it is a proven design that is hard to improve on,” he says.
But improve on the Boy Scout model he did with the KOA Hunter’s Hatchet. The hickory handle remains tough yet easy on the hands. Heat-treated properly, the S7 tool steel is designed to absorb the shocks of hard blows. With a Rockwell hardness of 50-54 HRC, the edge of the Hunter’s Hatchet is intended to dent if it collides with something hard, Allen says, such as bone while butchering game. And the head can be returned to a razor-sharp bite with Allen’s recommended sharpening tool: a flat, fine-toothed file.
When designing the Hunter’s Hatchet, Allen was sure to include a wide-enough poll so that users could pound stakes, nails and the like with it, too.
Hunter’s Hatchet SpecsCompany: Knives of AlaskaCutting Edge: 4.25″Head Material: S7 tool steelHandle: American red hickoryWeight: 1 lbs.Overall Length: 11″Sheath: LeatherMSRP: $169
Outdoor Edge Wooddevil
David Bloch, president and founder of Outdoor Edge, wanted a hatchet that could out-cut its class: Something small enough to carry easily but with enough heft to take down a medium-sized tree.
“I looked at and tested a number of compact hatchets on the market and came to the conclusion that most full-size hatchets were too large and heavy to take on outings where weight and volume were limiting factors,” Bloch said. “I also found that most every compact hatchet I tested, while cute in appearance, was not an effective chopping tool.”
During outdoor treks when the quality of your tools will make or break thetrip, the Outdoor Edge WoodDevil may be a guardian angel, made possible by the marriage of a combination of the right balance, a good handle and a wide cutting head.
“The WoodDevil stands up to its name,” David said. “With a 4-inch cutting surface, it has the ability to cut through large diameter material with the respect of its compact size.” Plus, its compact size makes it unobtrusive in the camping bin or pickup truck until needed for whatever task—from hammering tent stakes to “slicing tinder shavings,” he adds.
The 3Cr13 stainless steel in a Rockwell hardness of 52-54 HRC is malleable and resharpens easily, and the black oxide finish allows it to better resist corrosion. The TPR rubber handle provides a non-slip grip that soaks up the shock and vibration during use. It’s packaged in a nylon sheath retained with a fabric fastener that can hang from a belt.
Wooddevil SpecsCompany: Outdoor EdgeCutting Edge: 4″Head Steel: 3Cr13 stainlessHandle: Red ABS plastic with black rubberized TPRWeight: 1.2 lbs.Overall Length: 10″Sheath: NylonMSRP: $40
APOC Double Mukk
As Blake Pogue, product manager of CAS Iberia, tells it, the creation of the Double Mukk started with some pencil, plenty of erasing, and an idea.
“We wanted to bring a full-tang hatchet to market with some unique features at a good price point,” he said. Double-bit axes don’t seem as common as they used to be, but the Double Mukk’s design is grounded in some very real field experience. In fact, it is a design championed by George Sears, the famed outdoor writer with the nom de plume of Nessmuk.
“George Sears was an avid outdoorsman, canoe enthusiast, writer, and conservationist in the late 1800s,” Blake said. “He famously employed a trio of tools for woodcraft —a small folding knife, a thin-bladed belt knife and a short, double-bit hatchet.”
Pogue said after some field testing of their own, the makers learned they didn’t need to tweak much from Nessmuk’s favorite design. APOC Survival Tools makes the hatchet at a forge in Dalian, China, and it’s distributed by CAS Iberia. The blade is 9260 carbon steel, the same material used for swords, among others.
The double edge grants the hatchet additional versatility, as one side is flat ground for delicate carving tasks. The other side is convex ground to better slam through tough cutting jobs. Pogue recommends sharpening a hatchet with a hockey-puck-style sharpener designed for axes because it can easily follow the tool’s convex edges.
“I wanted one tool that could readily build a shelter, prep a fire for a meal, and do the intricate work required to make traps like the figure four,” he said. “If we can accomplish those three requirements, there isn’t much else you’d need but a small knife for food prep, and even then the carving side of the Double Mukk is no slouch!”
The Halfbreed is a very heavy-duty piece. It is thick and hefty, and capable of taking a serious beating and dishing one out. This variant is finished in a dark earth color and comes with a substantial sheath that allows for secure carry adaptable to a variety of belts and packs.
Notable is how heavy the little hatchet is. It feels very nice in the hand and allows for either a low or high grip depending on the task. The grip is round in profile and consists of somewhat smooth scales. The edge out of the box was shaving sharp and easily removed hair from the arm.
The high, comfortable grip allowed for great control when scraping tinder. It also was a beast breaking bricks to make a windbreak for small fires. That said, it is not great for splitting tasks and, due to the thickness of the edge, does not bite deep for chopping. The grip is very comfy for general chores, though because the hatchet has equal weight dispersion along its length, it can fatigue your hand in use. It can be swung quite hard but there is a great deal of wasted energy in each strike because the head doesn’t carry the bulk of the forward momentum.
The dark earth finish was also the fastest to come off in heavy use. This is to be expected; however, be aware that if used heavily, the hatchet head likely will show wear far more than the other review subjects.
In terms of fire-starting ability, the CRA-01 proved mediocre as a striking tool, though it was very easy to control the direction of the sparks. Overall, it is fine for small fire-starting work and if it was what I had, I could easily make it work.
HALFBREED BLADES CRA-01 SPECS: Style: Tomahawk Head Style: Curved edge w/hammer poll Blade Material: K110 D2 tool steel Head Thickness: .31” Blade Finish: Dark earth (available in Ranger green and black) Handle Material: G-10 Weight: 1.7 lbs. Sheath: Kydex w/safety strap, belt and PALS/MOLLE mounting optionsOverall Length: 9.52” MSRP: $400+
Winkler Knives Highland Hatchet
The Winkler has a full tang with scales attached. Worrisome for fear of the handle cracking in hard testing but it held up nicely. The finish is matte and held up well. It has a durable sheath that is simple and intuitive to use.
Despite the edge angles, it bit right into most wood, easily de-limbed trees and handled very light splitting. It stood no chance of taking a large log apart, though anything under 3 inches in diameter was taken to task.
For hammering and strength testing the Winkler held up extremely well. It broke bricks in a single strike and took very little finish damage in the process. Tent stakes were easy to drive in and were barely worth a mention, as a nice part of this little hatchet is it handles just like a 4-ounce tack hammer.
The Highland is a reliable fire maker, generating a showers of sparks and getting a flame going given equal materials. The edge showed no handicap in making kindling.
SPECS: WINKLER KNIVES HIGHLAND HATCHET Style: Camp hatchet Designer: Daniel Winkler Head Profile: Hammer poll Blade Material: 80CrV2 carbon steel Blade Finish: Black oxide Head Thickness: .336” Handle Material: Maple (laminate and walnut available) Weight: 20 ozs. Overall Length: 10 7/8” Sheath: Lined Kydex MSRP: $550
Condor Tool & Knife Mountain Pass AXE
The Condor Tool & Knife Mountain Pass might be classified as a jungle hatchet. It has a low beard and narrow thickness that is arguably much better at cutting wet wood, vines and bamboo in fast, repeated swings. For all intents and purposes, it is a foliage tool. As such it isn’t something for heavy splitting and camp chores. It ships with a very nice sheath of brown leather.
Swinging the Mountain Pass allowed for fast, accurate strikes. It bit in deep with each blow and was easy to withdraw. The edge was perfect for a camp axe when it arrived—not too sharp, not too obtuse. It handled limbs like a pro but was not up to heavy splitting. It sank in but lacked the mass to deliver sufficient splitting energy on the strikes.
A downside to hitting hard wood and other materials is Condor’s profile of the grip. It is visually appealing and very functional but narrow in cross section and wide front-to-back, thus making the impact of each hit apparent in a smaller area of the hand. If the grip was even 1/16 inch wider on each side it would have been an easy favorite in this test.
As far as hard camp work it broke brick easily with one hit, took little damage and easily drove tent stakes. It is not intended for either of these roles, but it did just fine considering it lacks a hammer poll.
The Mountain Pass was not particularly good at splitting fine kindling, but it did well and was easy to strike on, if not a bit large. Putting it in this role immediately made me realize it was really not meant for the work; it’s far better for clearing brush and gathering medium branches to process with a smaller tool.
The Ucon Hawk from TOPS Knives is probably the most visually striking hatchet in the evaluation, as well as the sharpest. It’s large with a wide cutting edge and deep belly. It has a long, very pointy and sharp beard and a substantial grip. It’s questionable the edge needs to be as sharp as it is; a dull knife is clearly a danger but an extremely sharp, full-size hatchet can be a hazard.
The Ucon’s size makes it adept for general camp tasks. However, when it came to splitting, the deep belly and sharp tips made pulling it out of a stubborn log relatively dangerous as the blade rarely penetrated all the way, thus leaving the tips exposed. If you were to put your foot on the log to apply pressure to withdraw the head, a possibility exists that you could injure your foot in the process.
That said, performance was fantastic as a camp tool and it could simply lop off branches in a single swing. The finish held up nicely and the edge stayed sharp even after hard use. It should be noted that only the TOPS and the Winkler had edges unaffected by use. The Ucon ships with a two-part sheath—one part goes over the blade and the other is a belt loop the hatchet can slip through.
For heavy-duty tasks it did well, easily passing through limbs. Splitting was possible, though the hatchet was a bit thin and grip-heavy to dive deep enough to separate a full-size piece of firewood. Breaking brick with the hammer poll was easy; it left virtually no damage to the tool. Driving tent stakes also was easy.
Making fire was a challenge in that you had to be extremely aware of where the tips of the edge were at all times. If you get in the mode where you’re striking rapidly, say if you’re cold and frustrated, you need to calm down and take your time (as you should always do when using any sharp edge). The Ucon produced the finest kindling of the bunch by scraping with its sharp edge. The hatchet needs to lose the super-pointy beards—otherwise it is a great performer.
SPECS: TOPS KNIVES UCON HAWK Style: Camp axe Designer: Leo Espinoza Blade Material: 1095 carbon steel Blade Finish: Tumble Head Profile: Curved blade, hammer poll Head Thickness: .25” Handle Material: Orange and Black SureTouch G-10 Weight: 1.94 lbs.Overall Length: 15” Sheath: Black leather MSRP: $330
A.G. Russell Pocket Safety Axe
The fold-out blade shield of the Russell Pocket Safety Axe is pure wizardry, especially considering the design is well over 100 years old. You won’t be caught saying “Where did I put the sheath?” with this one.
The A.G. Russell Pocket Safety Axe is a Marble’s design from circa the early 20th century. Marble took a small hatchet, 10.6 inches overall, and designed a fold-out metal shield in the handle to cover the bit in lieu of a sheath. Simply ingenious. The A.G. Russell version has a 4.5-inch 1070 spring steel head with a 2.4- inch cutting edge, and a typical old-school hammering base at the rear. The head has a distinctive three-slot mounting system Marble deemed superior to the standard oval style. The 8.8 inch handle is hickory and the whole kit and caboodle weighs 1 pound. Manufacturer’s suggested retail price: $79.95.
With much of its overall weight in the head, this is a very top-heavy hatchet—which can work to its advantage. In the bite test on the privet log, the Pocket Safety Axe finished first simply because the business end has a lot more weight (see the side-by-side comparison image on head thicknesses). Consequently, it chopped each test material well.
The fold-out bit shield has pluses and minuses. On the upside, it’s very convenient and there’s no sheath to keep up with. On the other hand, you have to pack it since there’s no belt-sheath option. Also, you’ll want to wear gloves for extended use, as the hinge mechanism in the handle can dig into the inner fingers. All in all, though, the Pocket Safety Axe is a stellar performer.
SPEC CHECK: A.G. RUSSELL POCKET SAFETY AXECutting Edge: 2.4” Blade Material: 1070 spring steel Head Width: 4.5” Head Thickness: .7” at the thickest Blade Coating: None Handle Material: Hickory Special Features: Metal blade cover in handle Carry: Pocket or pack Weight: 1 lbs. Overall Length: 10.6” MSRP: $80
Boker Plus Escape Hawk
Designed by Australian knifemaker/ designer Peter Fegan, the Boker Plus Escape Hawk is tactical in design. Hawks are primarily used for breaching and combat but can full other chores as well. Only 9 inches overall, the Escape Hawk has a 4.75-inch head of quarter inch-thick SK5 tool steel and a 2.56- inch cutting edge. The head has enough beard to be used for carving, and the curved 7-inch handle is adorned with nicely sculpted, diagonally grooved FRN ( berglass-reinforced nylon) scales. The butt can be used for hammering. The steel is protected throughout with a powder coat. A dual-strap Kydex sheath covers the head. MSRP: $189.95.
The Boker Plus Escape Hawk is a hatchet in disguise. The small hack-it’s 2.56-inch SK5 tool steel bit chopped rope in nice, clean lops, and hacked off nice-sized cedar tinder chips with ease.
Due to its small size, you won’t be doing much breaching with the Boker Escape Hawk, but the pint-sized hack proved its worth. The SK5 steel had plenty of hack, chopping rope in nice, clean cuts, and knocking out chunks of seasoned cedar for tinder. Though the bearded bit can be used for carving, the inward slant of the handle mounting to the head impedes its effectiveness for the purpose a tad. The handle has full-length scales—a bonus for freedom of grip—and the diagonal grooves afforded it the best purchase of the bunch. The Boker Escape Hawk is a hawk that thinks it’s a hatchet.
At 11.5 inches, the Western Blackriver Long Hatchet from Camillus is, indeed, the longest of the test hack-its. It sports a 4.5-inch-wide head with a 2.5-inch chopping edge. On the back side of the head is a gimped flat edge for hammering and a sharpened diagonal slot for cutting cord. The 9.5-inch handle has 5.25-inch black checkered rubber scales, and there is a shaving slot midway between the handle and the head. A ballistic nylon sheath with a firesteel pouch—with firesteel—is included. MSRP: $31.98.
The Western Blackriver Long Hatchet from Camillus is the batonner of the bunch. The thin bit cleaved into the tight hardwood grain like a thief in the night. Once the head was in, the final splitting was done by batonning the upper handle.
The Blackriver has the lightest head of the test group so it didn’t win the chopping wars, but its length and handle design give it a leg up on the others in some functions. The thin head is ideal for batonning, enhanced by the 4 inches of exposed steel below the bit, which can be used as a striking surface. The grip is very comfortable, the rubber scales aiding in impact absorption. The Blackriver will handle many chores around the camp, and the bonus firesteel and pouch on the sheath add value. It’s also by far the most affordable of the group.
Camillus/Wester Blackriver Long Hatchet SpecsCutting Edge: 2.5” Blade Steel: 420 stainless Head Width: 4.5” Head Thickness: .2” Blade Coating: Titanium bonded Handle Material: Rubber Special Features: Firesteel included Carry: Ballistic nylon belt sheath Weight: 1 lbs. Overall Length: 11.5” MSRP: $32
Winkler Hunter Axe LT
At only 9 inches long, the Winkler Hunter Axe LT is a small hack-it, but packs a full 19 ounces of weight—and that’s with a skeletonized handle tang. The Hunter Axe LT has a 3.5-inch-wide, bearded 80CrV2 carbon steel head with 2 inches of cutting edge, and there’s a hammering base out back. The steel thickness is a healthy .25 inch and is coated head to toe in Caswell black oxide. The scales are full-length, highly attractive curly maple. A padded Kydex sheath with nylon belt loops covers the head, and employs a shock-cord retention system for a quick draw. MSRP: $450.
The Winkler Hunter Axe LT’s Kydex sheath has a bungee-style tension cord for quickly releasing the axe from its housing. The sheath as a whole is very well made—a Daniel Winkler trademark.
The Hunter Axe LT may be short but at 19 ounces is the heaviest of the test hack-its—a full 2 ounces more than its nearest rival. The LT almost won the bite contest but didn’t due in part to its weight being more equally distributed than the top-heavy Russell Pocket Safety Axe. The 80CrV2 steel chops extremely well and the Caswell finish is very tough. Though not a carving axe per se, the LT was our best candidate for the chore and would have performed even better with a lower grind angle on the lead edge. The price is high but the Winkler is as close to a custom as you’ll get—plus, the sheath is a marvel in itself.
WINKLER HUNTER AXE LTSpecsCutting Edge: 2” Blade Material: 80CrV2 carbon steel Head Width: 3.5” Head Thickness: .28” Blade Coating: Caswell black oxide Handle Material: Curly maple Special Features: Skeletonized handle Carry: Kydex belt sheath w/tension release Weight: 1.9 lbs. Overall Length: 9” MSRP: $450
Gerber Freescale Axe
Gerber has had a successful series of axes and hatchets made in Finland that feature one-piece, hollow, molded handles for lightweight, optimum strength. An example is the 23.5-inch model in its Freescale series. The forged steel head is mated permanently to a lightweight composite handle, so there is little worry the handle will come loose during use. The oblong profile handle is hollow, which shifts the balance of the axe to being head-heavy. It is very forward weighted and that is a good thing. Use gravity to your advantage as you employ the axe, allowing it to fall naturally as you guide it. A tactile gripping surface in a contrasting green graces the handle. The handle flares at the butt, allowing your bottom hand to hook into it, trapping the handle in your hand so it doesn’t go flying. The handle style reportedly is virtually indestructible during heavy use.
The forged head exhibits a nice, steep “V” profile to help bite hard and deep into wood. A primary edge bevel thins the edge some and makes resharpening easier. A black PTFE coating provides additional corrosion resistance as well as a nonstick surface. A poll is designed as a hammer.
The Freescape is among the least expensive of the review axes, though don’t discount its performance based solely on price. Truth is, this axe is devastatingly effective. With each swing you can feel the forward-weighted balance power the Freescape through wood. The thickness and shape of the handle are just right, allowing a secure grip with both hands. Gerber includes a plastic caddy that seals the cutting edge and protects you and your belongings from being cut. The caddy has a large handle to carry the axe safely, as well for hanging on a pegboard in your garage or utility shed. For how it performs versus what you pay, it is an excellent value. If you’re a frequent axe user or just an occasional one, the Freescape will serve you very well.
A spike model, the RnD Compact Axe is the smallest in the Winkler Knives (WK) axe line, though that doesn’t mean it’s the least capable. The hatchet-like head is only 5.5 inches long. The 80CrV2 carbon steel head is ⅜ inch wide. The tang sports a distal taper toward the handle butt to improve balance and shift weight distribution toward the head. The spike is commonly found on tomahawks and does everything from prying to puncturing. WK also offers a front spike option integrated into the head’s main cutting edge. A black oxide finish helps resist corrosion.
The 80CrV2 offers extreme toughness and edge retention. It withstands an impressive amount of abuse yet remains easy to resharpen, even in the field. Daniel Winkler is a fan of 80CrV2 and uses it a lot for both his knives and axes.
The handle features two prominent grip positions. One is the traditional axe grip held close to the butt. A series of subtle finger grooves seats your fingers, and the butt has a bird’s-beak design that hooks the handle into your hand to prevent it from sliding from your grip. A secondary close-quarters grip is below the axe head at the handle’s humpbacked portion. This facilitates choking up for control in carving, whittling and using the cutting edge like a knife. The RnD feels very balanced and agile in the latter grip, one the other review axes don’t offer. The Winkler would be great at processing kindling and bushcraft chores that require more control with close-in cutting or whittling. Due to its length and weight, it would not be a primary use axe but maybe a complement to a larger model that does heavy splitting or felling chores.
A secondary close-quarters grip is just below the head of the RnD Compact at the handle’s humpbacked portion. This facilitates choking up to provide control for carving, whittling and using the cutting edge like a knife.
The walnut handle looks luxurious but pay heed to where you lay it down in the woods. The walnut’s color blends in well with leaf ground cover and you might lose it easily. Thread a loop of brightly colored pink, red or yellow paracord through the lanyard hole to make the handle stand out. The RnD comes in three handle materials: black Micarta®, maple and walnut.
A molded form-fitting sheath of Boltaron encloses the head. A thick shock-cord-quick-release-retention device secures the sheath in place, yet releases easily and quickly. An interior felt lining facilitates the easy slipping on/off of the sheath, as well as muffling the sound. Two nylon webbing belt loops enable the RnD to ride comfortably at your side. MSRP is $815, the most expensive of the test group. WK is very well known for manufacturing excellence and attention to detail, and the RnD Compact is no exception. For a bigger axe in the same design, check out the full-size model.
The TOPS Knives High Impact is a full-sized hatchet/small axe hybrid that packs a punch. At 20 inches overall and around 3.5 pounds, it is a formidable chopping tool that can be used with two hands as a traditional axe or one handed a la a hatchet.
Starting with a backbone of .38-inch-thick 1075 carbon steel, the High Impact’s main cutting edge is a little over 5 inches—plenty of cutting surface for large and small chopping jobs alike. The Black Traction Coating creates a layer of protection against corrosion and wear. The ergonomic handle is tan Micarta®, with a diagonal machined groove pattern for hand traction. Five pairs of large hex head screws fasten the Micarta scales, and there are two large brass-lined lanyard holes. The handle has a distinctive bulge that helps seat your grip, especially for one-hand use. The handle flares at the butt, creating a comfortable seat for your bottom hand when using two hands.
The first thing you notice is the High Impact’s weight. It’s impressive but will take some getting used to. Once acclimated with the heft, you will discover it is also an advantage for getting momentum in your swing. And when it hits, it lives up to its name. The High Impact takes out chunks of wood with each blow. TOPS has the heat treat on the carbon steel dialed in perfectly. The 1075 retains an edge really well but sharpens easily and quickly.
I tried both grip styles. With one hand, this is where the weight takes some getting used to. Due to the axe’s weight, one-handed use might be limited to short spells. Conversely, using two hands is where the power of this beast is unleashed. You can put power behind the swing and each blow is devastating. You can feel the axe head bite in with each blow. It’s a sure bite as well. The performance with one or both hands is equally impressive. Due to its weight, it’s a great candidate to store in your truck or ATV.
A nicely made leather holster fastens over the head, sealing the edge. Two button-snap straps secure it, though only the one at the end needs to be undone to slide the sheath off. Note the absence of a belt loop attachment to carry the axe. It’s just too heavy. Despite the weight being a factor, the High Impact packs a serious punch and is the heavyweight champ of the test bunch. MSRP: $360. TOPS makes the axe in its factory in Idaho Falls, Idaho.
TOPS Knives High Impact SpecsCutting Edge: 5.75″Head Material: 1075 RC 56-58Head At Its Thickest: .38″Handle: Tan Canvas MicartaWeight: 3.7 lbs.Overall Length: 20″Sheath: LeatherMSRP: $420
Wolf Valley Forge Camp Axe
The Wolf Valley Forge axe ate bundle after bundle of firewood like there was nothing to it.
The Wolf Valley Forge Camp Axe is in a class of its own. It came not with just a functional sling and cover, but also a small whetstone and a jar of wax by Axe Wax to help preserve it. Carrying the Camp Axe is comfortable and allows for a free hand while trekking. The handle is perfectly shaped and came with a leather strike guard.
Ike Bullington is the maker and the quality is immediately noticeable the second you unpack it. It is all properly shaped, textured and balanced for real work and has a very pleasing appearance. However, it is not a wall-hanger. The head is of a traditional profile and designed for a lifetime of work.
The edge arrived razor sharp, easily sharper than most knives. Not only that, but the edge is extremely durable and completely dispels the notion that you need a wedge-shaped splitter.
A sharp axe truly cuts the work in half and this one almost effortlessly passed through wood regardless of grain angle. In taking down bigger trunks it drove in the deepest and was the easiest to free. Chips flew with each chop and it made very short work of even the toughest test materials.
In addition to cutting wood, it was tested driving tent stakes and making kindling, which it did easily. As a camp axe it is very nice in the batoning role, and yes, you can baton an axe the same as you would a knife—so long as you grip it high up to the head and perform the task in a safe standing position as to not deflect the blade into your knee.
Wolf Valley Forge Camp Axe SpecsCutting Edge: 4″Head Material: 4142Head At Its Thickest: N/AHandle: HickoryWeight: 2.5 lbs.Overall Length: 23.62″Sheath: LeatherMSRP: $375
Fox Sekira
Considering what you get, the Fox Sekira is a great axe and relatively inexpensive. It handles like a traditional axe in the swing but has a crescent-profile edge that is shaped much the same as a carpentry axe, though with a longer handle. The head is wide at the cheeks and quite narrow in the blade. It splits very nicely though isn’t particularly deep-biting on each swing.
The head, while substantial, isn’t overly massive and there is a large concentration of weight in the handle. The weight is distributed across the axe, which could lend to some of the increased effort in getting it to send splinters flying.
As far as general performance, the Sekira is about as good as a traditionally constructed axe gets, and lacks nothing in utility. It stayed sharp and experienced no edge chipping, even after quite a bit of heavy use. The only noticeable downside is that the handle, while comfortable and very nicely finished, is somewhat on the large side and rounded from front-to-back.
When hands get wet or cold the axe has the tendency to want to rotate, which can be dangerous if you’re not holding on tight. Other than that minor issue, the Sekira is a fantastic axe that should offer years of hard-use service.
Fox SekiraCutting Edge: 4.33″Head Material: Carbon Steel C45Head At Its Thickest: N/AHandle: HickoryWeight: 3.35 lbs.Overall Length: 23.62″Sheath: LeatherMSRP: $150
Editor’s note: Dexter Ewing, Josh Wayner and Daniel Jackson contributed to this post.
More Axes, Hatchets And Tomahawks:
Bearded Axe: Best Bashers From Here To Valhalla
Best Tomahawks: Our Top Hawks For Backwoods To Battlefields
Wicked Breacher: Ben Seward’s SWAT Axe
Awesome Axes for Chopping Wood Like a True Lumberjack
T2019 archery tournaments are in full speed, and you might be wondering the equipment that’s being used in the highest levels of competition. Improve your overall accuracy and competitive-edge with these top compound target bows.
Mathews – TRX 38
Built off of the proven design of the longer TRX models, the 38 inch axle-to-axle TRX38 fills the void perfectly for shooters looking for a shorter, lighter, more comfortable bow for their draw length. Draw lengths range 23 inches to 30 inches and draw weight goes from 50 pounds up to 70 pounds on the TRX 38. The new 70V percent mod gives shooters a deeper valley while the 80 and standard 70 percent mods remain an option. A true-center nocking point ensures straight and level nock travel, further enhancing shot-to-shot consistency and a 7.5-inch brace height provides unmatched forgiveness. Learn more at Mathews’ website.
Xpedition – Perfexion XL
The Perfexion XL brings to bear the full scope of Xpedition’s aerospace pedigree to influence archery design and unparalleled precision manufacturing. The Perfexion XL’s features the PXT dual limb stop hybrid cam with an unprecedented 6” of draw length adjustment on one base cam, ½” modular draw adjustment and Xpedition’s signature adjustability. The Perfexion XL is fast enough for 3D in spite of its 8” plus brace height, yet still prioritizes the smooth draw that target archers require. Its rigid riser defies flex and recovers with the consistency that had previously been reserved for shoot through designs. It is engineered and assembled to make scores climb and X rings easier to hit. Learn more at Xpedition Archery’s website.
Martin – Axxon 36
The Martin Axxon 36 features the new Tri Loc system. The Tri Loc Axle Cap allowing calibrated cam system clearance and minimal friction for maximum performance and the Tri Loc Axle Cap ensures the setscrew locks into the riser. The Tri Loc Limb Pocket bolts into limbs for the perfect lock and alignment. Balanced Bow Technology provides proper grip location, parallel limbs and weight distribution providing an extremely adjustable and stable shooting platform. The Axxon 36 features Dual Sync Technology providing a smooth draw, quick arrow speeds, and easy tuning for proper arrow flight. No need to worry about cam lean and serving wear thanks to the Helix Cam with the Helix Groove. Limbs come in a 35-50 pound option, adjustable in 5-pound increments, with the Helix Short Draw. The Axxon 36 delivers speeds of 333 fps with a brace height of 6 7/8 inches and 36 ½ inch axle-to-axle length. Learn more at Martin Archery’s website.
Elite – Victory X
Elite Archery’s Victory X target bow is sculpted with Elite shootability and consistency. The Victory X is a bow that delivers 327 fps speeds and starts at 50 pound draw weight and 26 inch draw length. Weighing only 4.4 pounds, the Victory X is built on the high performing Victory platform and features perfect synchronization of the famed two-track cam system. Dual track binary cams with inset mods give the shooter a stable, noise free, draw length specific cam that will remain true to its original setting. The Victory X weighs a mere 4.4 pounds meaning that you can shoot heavy large diameter arrows in tournaments where speed is limited. Learn more at Elite Archery’s website.
Bowtech – Reckoning
The Reckoning was engineered as the first bow to feature DeadLock technology, providing reliable accuracy. This premier bow focuses on a “crossover” product role, and is at home equally as a Target/3D bow in addition to a longer length axle-to-axle hunting bow option. The Bowtech Reckoning features DeadLock Cams offering the ability to quickly and easily adjust the string path and put the energy directly behind the arrow without a bow press. DeadLock features a patented adjustment system that adjusts the cams left or right to perfect the string path and locks down for accuracy that is precise for life with the simple turn of a screw. Deadlock Pocket Locks the entire bow structure as one and eliminates unwanted, accuracy-robbing component movement shot-to-shot. Deadlock Cable Containment reduces torque and increases forgiveness on every shot, translating into consistent accuracy. Learn more at Bowtech’s website.
Hoyt – Prevail Series
The Hoyt target compound lineup is legendary for setting the standard of tournament level accuracy. The Prevail series boasts the XT2000 limb, SVX and X3 Cam & ½ Performance Systems, and more. You will also appreciate the additional rear stabilizer location, which is compatible with Hoyt’s hard-lock rear stabilizer system. The Prevail includes proven Shoot-Thru Riser Technology, 4-angle modular grip system, and adjustable 4-position cable guard technology. The modular grip system allows fine-tuning your grip pressure by changing the angle of the grip with 4 different grip modules: 0, +2, +4 and +6 degrees, with 0 being the standard angle. Top and bottom cams are fused together by a harness system, ensuring they fire at the exact same time, every time, for ultimate consistency and accuracy. Learn more at Hoyt’s website.
Looking for inspirational quotes about hunting? We have rounded the best collection of hunting quotes, sayings, captions for Instagram, status, and messages (with images and pictures) which all hunters who have a love for animals and the outdoors might relate to.
True hunters and outdoorsmen say that they see the sport as a tradition that tests their skills and abilities. To a hunter, it isn’t about the act of killing but rather survival and outwitting their prey. They are passionate about nature and wildlife.
Some animal advocates, might think, it’s just about killing the animal, but a real hunter respects its prey and follows the laws and regulations. Some popular hunting includes deer, duck, goose, rabbit, bear, and more.
Hunting Quotes
“Keep calm and go hunting.” Hunting Quotes
“I like big bucks and I cannot lie.”
“If it flies, it dies. If it hops it drops.”
“There’s no season like deer season.”
“My family tree has a deer stand in it.”
“I’ll never apologize for being a hunter.” Short Hunting Quotes
“If I’ve gone missing, I’ve gone hunting.”
“Every day is a good day when you hunt.” Hunting Captions For Instagram
“Life is short. Call in late and go hunting.”
“Love has 4 letters. So does deer and hunt.” Deer hunting Sayings
“Country girls don’t retreat, they just reload.”
“Hunting is about the journey not the outcome.” Quotes About Hunting
“Father and daughter. Hunting partners for life.” Family Hunting Quotes
“Everybody wants to eat but few are willing to hunt.” Hunting Quotes About Life
“Not all those who wander are lost.” – J.R.R. Tolkien
“Lions don’t dream of hunting, they just go and hunt.” Hunting Quotes Wallpaper
“Sometimes hunting is the only thing that makes sense.”
“Some men are merely hunting; others are turkey hunting.”
“Hunting is not a hobby. It’s a post apocalyptic survival skill.”
“Fishing solves most of my problem. Hunting solves the rest.” Funny Hunting Quotes
“Opening day of hunting season should be a national holiday.”
“Hunting is not a “Blood Sport” it is a sport that is in my blood.” Best Hunting Quotes
“Rifles, racks and deer tracks, that’s what little boys are made of.”
“Fishing poles and hunting gear, dreams of bass and big ole deer.”
“Nothing clears a troubled mind like shooting a bow.” – Fred Bear
“Jingle bells, shotgun shells, time to kill a buck.” – Earl Dibbles Jr.
“A gun is like a woman, son — it’s all how you hold her.” – Rhett Atkins
“Imagine life without hunting. Now slap yourself and never do it again.”
“The history of the bow and arrow is the history of mankind.” – Fred Bear
“You let me hunt is like saying you let me breathe.” – Jase (Duck Dynasty)
“I don’t always tell people where I hunt, but when I do, it’s a lie.” – Dos Equis
“The No. 1 rule of duck hunting is to go where the ducks are.” – Jose Robertson
“Girls who like hunting, fishing and guns aren’t weird. They’re a gift from God.”
“To hunt successfully, you must know your ground, your pack and your quarry.” Famous Hunting Quotes
“The couple that hunts together stays together… or kills each other, one of the two…”
“Wildlife and its habitat cannot speak, so we must and we will.” – Theodore Roosevelt
“If you are not working to protect hunting, then you are working to destroy it.” – Fred Bear
“It’s better to sit in a tree thinking about God than to sit in Church thinking about hunting.”
“You must not only aim right, but draw the bow with all your might.” – Henry David Thoreau Greatest Hunting Quotes
“My biggest fear is that when I die, my wife will sell my hunting gear for what I said I paid for it.”
“In hunting – as in life – sometimes the things you need most isn’t the thing you went looking for.” Hunting Sayings
“Don’t get much better than fall. Bring on the camo, ammo, ducks, and bucks.” – Earl Dibbles, Jr.
“Sunday for me always use to be father’s day, it was the day when both of us went hunting all day.”
“Hunting is not a sport. In a sport, both sides should know they’re in the game.” – Paul Rodriguez
“I’m an outdoors girl – I like to go fishing, riding four-wheelers and hunting.” – Miranda Lambert
“Going to war without France is like going hunting without an accordion.” – Norman Schwarzkopf
“You know, if you need 100 rounds to kill a deer, maybe hunting isn’t your sport.” – Elayne Boosler
“You can see the true heart of a man when you’re out in the woods with a weapon.” – Jase Robertson
“A hunt based only on trophies taken falls far short of what the ultimate goal should be.” – Fred Bear
“There is a passion for hunting something deeply implanted in the human breast.” – Charles Dickens
“I vow to always love hunting season… I mean I vow to always love you. Even during hunting season.”
“You can learn more about bow hunting a deer in a week than a gun hunter will learn in his entire life.”
“If God wanted us to be vegetarians, he would have made broccoli more fun to shoot.” – Earl Dibbles, Jr.
“The only reason I ever played golf in the first place was so I could afford to hunt and fish.” — Sam Snead
“A duck call in the hands of the unskilled is one of the conservation’s greatest assets.” – Nash Buckingham
“A hunter should be well acquainted with his hunting backgrounds, one miss and he could suffer a fortune.”
“Hunting, fishing and archery occupied my every moment. Cared I knew not and cared naught about them.”
“Vegetarians are cool. All I eat are vegetarians — except for the occasional mountain lion steak.” — Ted Nugent
“The lazy do not roast any game, but the diligent feed on the riches of the hunt.” — Proverbs 12:27 (Bible Verse)
“I never knew a man that hunted quail that didn’t come out of it a little politer by comparison.” — Robert Ruark
“Immerse yourself in the outdoor experience. It will cleanse your soul and make you a better person.” – Fred Bear
“Perhaps I should not have been a fisherman, he thought. But that was the thing that I was born for.” — Ernest Hemingway
“If some animals are good at hunting and others are suitable for hunting, then the gods must clearly smile on hunting.” – Aristotle
“In this family, we aim for the game, we wear camo, we respect our rifles, we prey before meals, we lock and load and we never miss.”
“The fascination of shooting as a sport depends almost wholly on whether you are at the right or wrong end of the gun.” – P.G. Wodehouse
“In race between lion and deer, many times deer wins. Because lion runs for food and deer for life. “Purpose is more important than need.” Inspirational Hunting Quotes
“If there is a sacred moment in the ethical pursuit of game, it is the moment you release the arrow or touch off the fatal shot.” – Jim Posewitz
“If I feel free when I hunt, then when I write about hunting I genuinely reproduce that pleasant feeling. I am almost free.” – Miguel Delibes
“The truth is… I’m always saddened when I kill an animal. It’s not remorse I feel, I know why I’m a hunter. It’s out of respect.” – Donnie Vincent
“A true conservationist is a man who knows that the world is not given by his fathers, but borrowed from his children.” – John James Audubon
“It’s about the adventure of being in the center of nature and wildlife, and being grateful to be alive and awake in God’s cathedral.” — Eva Shockey
“Hunting is a relic of barbarism that once thirsted for human blood, but is now content with the blood of animals.” — Christian Nestell Bovee
“Fortunately, as it pertains to guns, my dad and uncle introduced me to guns the way it needs to be done: smart, slow and safe.” — Ted Nugent
“I am my father’s daughter. It was not up to me growing up. I was his hunting and fishing buddy, so I’ve been shooting my whole life.” — Amber Heard
“God grant me serenity. To accept the things I cannot change, courage to change the things I can and the wisdom to know when to just go hunting.”
“Now, therefore take, I pray thee, thy weapons, thy quiver and thy bow, and go out to the field, and take me some venison.” — Genesis 27:3, (Bible Verse)
“Respect your prey: Many native American tribes would forbid a hunter from celebrating his kill, it was thought to insult the animals spirit and would bring bad luck.”
“When a hunter is in a treestand with moral values and with the proper hunting ethics and richer for the experience, that hunter is 20 feet closer to God.” – Fred Bear
“There is no hunting like the hunting of man, and those who have hunted armed men long enough and like it, never care for anything else thereafter.” – Ernest Hemingway
“The hunting partnership between man and dog developed thousands of years ago and from it came a deep bond of affection. I suspect it was the dog’s idea.” – Aaron Fraser
“The old man used to say that the best part of hunting and fishing was the thinking about going and the talking about it after you got back.” — Robert Ruark, The Old Man and the Boy
“When he was young, I told Dale Jr. that hunting and racing are a lot alike. Holding that steering wheel and holding that rifle both mean you better be responsible.” — Dale Earnhardt
“”We wake up while everyone is sound asleep, walk through the mud and water carrying our gear, sit in the freezing rain for hours all for just moments of madness.” We are waterfowlers.”
“You might as well learn that a man who catches fish or shoots game has got to make it fit to eat before he sleeps. Otherwise it’s all a waste and a sin to take it if you can’t use it.” — Robert Ruark
“When done under the rules of good sportsmanship duck hunting is a culmination of art, skill, and scientific endeavor. It is also an act of love, for who loves the birds more than the hunter?” – Bob Hinnan
“Go afield with a good attitude, with respect for the wildlife you hunt and for the forest and fields in which you walk. Immerse yourself in the outdoor experience. It will cleanse your soul and make you a better person.” – Fred Bear
“’The best thing about hunting and fishing,’ the Old Man said, ‘is that you don’t have to actually do it to enjoy it. You can go to bed every night thinking about how much fun you had twenty years ago, and it all comes back clear as moonlight.’” — Robert Ruark
“But love of the wilderness is more than a hunger for what is always beyond reach; it is also an expression of loyalty to the earth which bore us and sustains us, the only home we shall ever know, the only paradise we ever need – if only we had eyes to see.” – Edward Abbey
“A Hunter’s Prayer: We pray our sight be straight and our aim be true. We pray for no pain to the game we pursue. We thank thee Lord for this land. We thank thee for the sights in our stands. We pray for safety one and all. We pray we may return next fall.” – S. Elliot
“A peculiar virtue in wildlife ethics is that the hunter ordinarily has no gallery to applaud or disapprove of his conduct. Whatever his acts, they are dictated by his own conscience, rather than that of onlookers. It is difficult to exaggerate the importance of this fact.” – Aldo Leopold
“I did not mind killing anything, any animal, if I killed it cleanly, they all had to die and my interference with the nightly and the seasonal killing that went on all the time was very minute and I had no guilty feeling at all. We ate the meat and kept the hides and horns.” – Ernest Hemingway
“Deep in the guts of most men is buried the involuntary response to the hunter’s horn, a prickle of the nape hairs, an acceleration of the pulse, an atavistic memory of his fathers, who killed first with stone, and then with club, and then with spear, and then with bow, and then with gun, and finally with formulae.” — Robert Ruark, Horn of the Hunter
I have always tempered my killing with respect for the game pursued. I see the animal not only as a target, but as a living creature with more freedom than I will ever have. I take that life if I can, with regret as well as joy, and with the sure knowledge that nature’s way of fang and claw and starvation are a far crueler fate than I bestow.” – Fred Bear
“I am proud to have been born in Iowa. Through the eyes of a 10-year-old boy, it was a place of adventure and daily discoveries – the wonder of the growing crops, the excitements of the harvest, the journeys to the woods for nuts and hunting, the joys of snowy winters, the comfort of the family fireside, of good food and tender care.” – Herbert Hoover
“Death by violence, death by cold, death by starvation, – these are the normal endings of the stately and beautiful creatures of the wilderness. The sentimentalists who prattle about the peaceful life of nature do not realize its utter mercilessness;…Life is hard and cruel for all the lower creatures, and for man also in what the sentimentalists call a “state of nature.” – Theodore Roosevelt
Hunting and fishing involve killing animals with devices (such as guns) for which animals have not evolved natural defenses. No animal on Earth has adequate defense against a human armes with a gun, a bow and arrow, a trap that can maim, a snare that can strangle, or a fishing lure designed for the sole purpose of fooling fish into thinking they have found something to eat.” – Marc Bekoff
“In a civilized and cultivated country wild animals only continue to exist at all when preserved by sportsmen. The excellent people who protest against all hunting, and consider sportsmen as enemies of wild life, are ignorant of the fact that in reality the genuine sportsman is by all odds the most important factor in keeping the larger and more valuable wild creatures from total extermination.” – Theodore Roosevelt
“The true trophy hunter is a self-disciplined perfectionist seeking a single animal, the ancient patriarch well past his prime that is often an outcast from his own kind… If successful, he will enshrine the trophy in a place of honor. This is a more noble and fitting end than dying on some lost and lonely ledge where the scavengers will pick his bones, and his magnificent horns will weather away and be lost forever.” – Elgin Gates
“Maybe stalking the woods is as vital to the human condition as playing music or putting words to paper. Maybe hunting has as much of a claim on our civilized selves as anything else. After all, the earliest forms of representational art reflect hunters and prey. While the arts were making us spiritually viable, hunting did the heavy lifting of not only keeping us alive, but inspiring us. To abhor hunting is to hate the place from which you came, which is akin to hating yourself in some distant, abstract way.” ― Steven Rinella
Which of these hunting quotes and sayings do you relate the most to? Do you have any other favorite quotes to add? Let us know in the comment section below.
Feel free to share these quotes and sayings on Facebook, Twitter, Instagram, Pinterest, with friends and family.
This post covers the best beginner compound bows for hunting for both youths and adults. These bows are excellent choices for the money and are also high-quality, making them a great value.
There’s no sense in spending a lot of money if you, a youngster, or someone you’re buying for is just getting into bowhunting. A first bow is supposed to be effective but not break the bank. That said, you don’t want to go too cheap or the bow or its parts might end up breaking or make the bow inaccurate, leading to frustration.
Fortunately, there are some great options on the market that are good quality for the price. I’ve listed some of the best beginner compound bows for hunting below.
This post contains Amazon and other affiliate links, which means I’ll receive a commission if you purchase through my link, at no extra cost to you. Of course, you are not obligated to use my links, but it does help fund these posts in hopes of bringing more value to you!
The Bear G-2 has been one of the best-selling bows for beginners in the industry because it’s a ready-to-hunt (RTH) out-of-box budget compound bow package that has a smooth draw cycle, incredible adjustability, and just feels great in the hand. For these reasons, it’s won the hearts of both youth and adult beginner bowhunters.
It has an adjustable draw length of 12-30 inches and an adjustable draw weight of 5 to 70 lbs. This allows new bowhunters to grow with their bow as they progress. Also, Bear Archery is a reputable brand that has been creating bows for a long time.
As I write this post, you can still get the Cruzer G-2 at a very good price, however, Bear seems to be phasing the G-2 out and replacing it with the G-3, so get it while you can!
Check Amazon’s Price Check Cabela’s Price
Bear Archery Cruzer G-3 RTH Compound Bow Package
The G-3 is the next generation of the G-2. The G-3 has an adjustable draw length of 14-30 inches and an adjustable draw weight of 10 to 70 lbs making it slightly less adjustable than the G-2. However, the reduction in adjustability has given it improvements in performance. The most obvious is the 75% let-off, a +5% increase, making it easier for beginners to hold the bow back. All of the accessories are Trophy Ridge.
Check Amazon’s Price Check Cabela’s Price
Check Cabela’s Price
Check Amazon’s Price
Diamond Archery Edge 320 Compound Bow Package
Diamond is another well-known bow company that makes great bows for beginners. Their Edge 320 is one of the best bows for beginners because of its adjustability. The draw length is adjustable from 15-31 inches, and the draw weight is adjustable from 7-70lbs. You can find this bow at about the same price as the Cruzer G-3.
Check Amazon’s Price Check Cabela’s Price
Diamond by Bowtech Prism Compound Bow Package
The Diamond Prism is another great bow for youngsters and adults. The draw length is adjustable from 18-30 inches which fits the majority of hunters and the draw weight adjustable from 5-55 lbs. This bow can grow with the hunter and with these specs, it will fit both teenagers and adults.
This is one of the most popular hunting bows on Amazon because it’s cheap, adjustable, ready to hunt, and it works. It has an adjustable draw length of 18-31″ and an adjustable draw weight of 0-70 lbs.
The adjustability at this price point makes it one of the best hunting bows for the money. The 31″ max draw length is great for individuals with a longer wingspan. Most bows offer up to a 30″ draw length so it’s great to see a budget bow with a longer draw length.
I’m not sure about the build-quality long term, I suggest buying from a reputable bow company.
Check Amazon’s Price
Best Youth Beginner Compound Bows For Hunting
These bows are not designed for adults, they are for youth bowhunters only. Bows in this category will likely need to be upgraded once the kids get older and outgrow their bows. These bows are perfect for kids that are younger than teenagers but are adjustable enough to last them through all or most of their teenage years.
These bows offer some better benefits than the highly adjustable bows for both you and adults. For example; they are smaller and lighter weight making them more manageable to hold for smaller and younger kids. Also, they’re generally cheaper for these reasons.
Bear Archery Royale RTH Youth Compound Bow
This is one of Bear Archery’s bows designed specifically for youth hunters. It has an adjustable draw length of 12″-27″, adjustable weights of 5-50lbs, only 27″ inches axel-to-axel, and only 2.7 lbs without the accessories, making it one of the best bows for youngsters, especially for the price.
Check Amazon’s Price Check Cabela’s Price
PSE Archery Mini Burner RTS Compound Bow Package
The PSE Mini Burner is another great option. It’s a small bow with a lot of adjustability for youth hunters. For example, the bow only weighs 2.5 lbs, the draw weight can be adjusted from 5-40 lbs so any young hunter can pull it back, and the draw length is adjustable from 16 – 26.5 inches. This is one of the best sub-300$ bows for youth hunters.
Check Cabela’s Price Check Amazon’s Price
Diamond by Bowtech Atomic Youth Compound Bow Package
This is Diamond Archery’s bow is the ultimate youth bow for the youngest bowhunters. The draw length is adjustable from 12-24 inches making, so it fits the smallest of youth hunters. The draw weight is adjustable from 6 to 29 lbs, which makes it too light for deer hunting. But it’s a great bow for hunting smaller animals and introducing youngsters to bowhunting. The bow only weighs 1.9 lbs making it the lightest bow on this list. It’s only 24 inches axle to axle, also making it the shortest bow on this list.
Check Amazon’s Price
What To Look For In A Compound Bow For Hunting
In order to get the most for your money there are a few things to consider before purchasing your first bow to ensure you get the most out of it:
Adjustability
For a beginner, a highly adjustable bow is recommended because it will allow the bowhunter to grow with the bow and prevent the bowhunter from outgrowing the bow.
Draw Length
Youth bowhunters will want a bow that has a highly adjustable draw length because it will allow them to grow with the bow instead of outgrowing the bow and needing to buy a new bow.
Draw Weight
An adjustable draw weight is important for youth and adult hunters because as you become stronger you’ll want to increase your draw weight so you can shoot arrows faster, flatter, and more accurately. You’ll also want to be able to start at low poundage and work your way up to higher poundages gradually.
Bow Size (Length, Weight, and Width)
Take into consideration the size of the bow you’re buying. For example, if you’re hunting you might want a short, lightweight, and slim bow that is easy to carry through the brush.
Speed (to an extent)
Speed is important to an extent, but do not fixate on this as a new bowhunter and just buy the fastest bow in your price range. It is better to have a bow that feels good to use.
Draw Cycle Smoothness
The draw cycle has a lot to do with how a bow feels. A smooth drawing bow will feel better in the hand so it is important to try as many bows as you can out to see what you like best before buying a bow.
Let-off
Compound bows are great because they have let-off which reduces the lbs you hold back at full draw. This makes it easier to hold a bow back at full draw for longer periods of time, which is very helpful in hunting situations. Let off is the % of draw weight you are holding at full draw.
So, if you have a 50 lbs draw weight and you have an 80% let-off then you are only holding 10 lbs at full draw. A good let-off is helpful, especially for beginners.
Ready to Hunt Packages
Ready-to-hunt bowhunting packages are great for beginner bowhunters because you don’t have to spend time figuring out all of the accessories for a bow, the bow comes with them. This is a great way to get more for your money too.
As you improve as a bowhunter and learn more you can buy replacement accessories that are of higher quality. This is another great way compound bows grow with you.
Don’t Buy A Used Hunting Compound Bow (Beginners Only)
Many times new bowhunters will buy a used cool-looking bow from someone only to find out that the bow isn’t adjustable enough to fit them. I recommend buying new for your first bow and working with a pro shop to tune the bow and arrows specifically to your body. This way you’ll ensure the bow is shooting the way it is intended to for the most accuracy.
Don’t Buy Soley Based on Bow Specs
It’s important to get your hands on as many compound bows as possible and to try them out in the archery range before spending your money. Each bow will feel different to you. You want the bow that is most comfortable for you.
Print out this list of the best beginner compound bows and bring it with you to the archery shop near you. Try out as many as you can to see what you like best.
Even if you see a better deal online, go into the store and try them out. You’re not obligated to buy a bow after trying them out, so you can go back home and order the one you like best online. This way you’re making a more educated purchase.
More Bowhunting Resources For Beginners:
The Best Anchor Point For Drawing A Bow
27 Best Bowhunting Gifts For Bowhunters In 2024
Top 5 Most Comfortable Tree Saddles For Saddle Hunting [2024]
Our Favorite Flashlights for Hunting of 2024: Bright, Powerful & Durable
I’ve you’ve seriously injured a deer, elk, or any other wild game, it’s your obligation to track that animal down and harvest it, even if it’s dark out. That’s why we’re here to tell you about the best hunting flashlights of 2024. We want you to get your hands on the exact gear you need for a successful hunt.
Whether you’re tracking animals through the night, performing search and rescue after dark, scaring away bears from camp, or poking around your hunting tent, a proper flashlight is an essential piece of the hunting puzzle.
To help you choose the right option, we scoured hundreds of products in search of the brightest, most powerful, and highest-rated LED torches available today. As a result, we’ve whittled down the industry’s best hunting flashlights to the following ten best options from Fenix, Nitecore, SureFire, Streamlight, and more.
We’ve also taken a deep dive into the critical factors that go into choosing a proper light, like luminosity, throw, run time, and weather resistance. And, to help maximize your purchase, we recommended a few add-on accessories that’ll bring out the best in your light.
Ready to brighten up the night with one of 2024’s best hunting flashlights around?
Max Lumens: 1,600 Max Run Time: 115 hours at 30 lumens Batteries: USB-C rechargeable Weight: 5.6 oz Pros: Ergonomic, USB-C rechargeable, incredibly bright for its size, excellent run time, extremely durable and weather resistant, rail mount accessory add-on for guns Cons: Can get hot on turbo mode
The Fenix PD36R is the flashlight I’ll use for the 2024 elk and deer hunting seasons, and I bet it’ll be my go-to torch for many years to come. For my money, it doesn’t get better than this little beast. It does everything I could ask of it.
Straight out of the box, this flashlight feels sturdy and maneuverable in your hand. It’s big enough to get a good grip on and compact enough to clip to your belt unnoticed. It pumps out a powerful beam, has five different brightness settings, and boasts incredible run times thanks to its 5,000 mAh USB-C rechargeable battery.
Because this bad boy has high-end IPX8 water and IPX68 dust resistance, there’s no need to stress if the weather gets nasty or if it falls into the mud. To help out during rifle season, Fenix sells a mounting accessory that allows you to attach and detach the PD36R to your gun’s rail while hunting at dusk.
Thanks to its power, durability, weather resistance, and ergonomic feel, we confidently recommend the Fenix PD36R to hunters of all stripes. It’s highly versatile, too, and would make for a great everyday carry in the offseason.
PRO TIP: Order the PD36R through Fenix’s official website, and they’ll laser-engrave your flashlight with a design and/or custom text for free!
VIEW ON FENIX
USB-Rechargeable Runner Up Nitecore MH25S
Max Lumens: 1,800 Max Run Time: 1,500 hours at 1 lumen Batteries: USB-C rechargeable NL2150 Weight: 5.4 oz Pros: Bright and powerful light with a long throw, USB-C rechargeable, very durable and weather resistant Cons: Could be more ergonomic, turbo mode kills battery life
Nobody loves fumbling around with batteries when their light is losing juice, so we included another powerful USB-C rechargeable option, the Nitecore MH25S. This torch is pretty similar spec-wise to our top overall recommendation, the Fenix PD36R, so you can rest assured it’s good to go.
This bad boy is well-engineered and full of clever features. With 1, 50, 300, 1,050, and 1,800 lumen settings, it packs the brightness to thrive in any environment and has an impressive throw that reaches nearly a third of a mile on its turbo setting. It also has a handy battery indicator, automatic temperature regulation, and can clip to a gun’s rail with a tactical ring accessory.
So, why don’t I recommend the Nitecore MH25S over the Fenix PD36R? For starters, the battery life on the Fenix is slightly better, and it also has a sleeker, more ergonomic design. The Fenix also rings in 30 bucks cheaper than the Nitecore and comes with a free customized engraving.
But don’t overlook the MH25S just yet. It does pack 200 more lumens than the DP36R and has a significantly longer throw. It’s a mighty torch in a compact package and a well-deserved runner-up.
Hunter’s Favorite Do-it-All Flashlight SureFire G2X Pro
Max Lumens: 600 Max Run Time: 52 hours at 15 lumens Batteries: CR123A (2) Weight: 4.4 oz Pros: Comes in four different colors, compact, ergonomic, weapon mountable, very durable Cons: Not as many lumens as we’d like, only two different brightness settings, not USB-rechargeable
This list would be incomplete if I left out the SureFire G2X Pro. It’s a top option among hunters and outdoorsmen and is one of the most widely-used flashlights in the hunting industry. It’s a great all-around torch at an approachable price.
For starters, it’s available in four colors, giving hunters the option to choose a light that’ll match their specific kit. Like the first two lights I mentioned, it’s tough as nails, compact, ergonomic, and weapon mountable. It’s a versatile light that’ll serve you well in the field or as an everyday carry.
But I prefer my Fenix PD36R torch over this one for several reasons. For one, this flashlight uses replaceable CR123A batteries and isn’t USB-rechargeable. It puts out 600 lumens (as opposed to the PD36R‘s 1,600) and only offers two brightness levels (as opposed to five for the Fenix). Specs-wise, it just doesn’t match up.
Overall, the SureFire G2X Pro is a solid little light widely used in the field. Hunters swear by it, and its popularity is something we can’t ignore. No, I won’t swap out my Fenix for this anytime soon, but I imagine it would still get the job done if I did.
Durable, Functional, Available as Rail Mount Streamlight ProTac HL-X | Rail Mount HL-X
Max Lumens: 1,000 Max Run Time: 20 hours at 65 lumens Batteries: Rechargeable 18650 (1) Weight: 6.2 oz Pros: Ergonomic, weather resistant, USB-rechargeable batteries, highly rated for its durability, available as a rail mount for long guns Cons: Battery life isn’t great
Streamlight’s ProTac HL-X is another extremely popular flashlight among hunters and outdoorsmen, and for good reason. It’s powerful, durable, versatile, and also available in a modded version that’ll mount to the rail of your gun.
If you scour through its thousands of five-star reviews, you’ll see why hunters and outdoorsmen love the HL-X: it’s bright, reliable, and serves multiple uses. At 5.5 inches in length and with a max brightness of 1,000 lumens, we think it’s the perfect size and strength to guide you through the dark of the backcountry.
As we mentioned, Streamlight offers a version of the ProTac HL-X that can mount to your gun’s rail. For about $30 extra, this version comes with a built-in mount, retaining clips, and remote switch. Sure, this version would be more practical for tactical and self-defense situations than for hunting big game, but we wanted to highlight it nonetheless.
The ProTac HL-X checks all the boxes for hunters and backcountry explorers alike. We’re not huge fans of its below-average battery life, but other than that, we’re having a hard time finding flaws. Though we still recommend the Fenix PD36R and its optional rail mounting accessory as our top overall option, this light is a no-brainer if you’re a Streamlight fanboy (or girl).
Best Red-Green-Blue-UV Hunting Light Nitecore SRT7GT
Max Lumens: 1,000 Max Run Time: 240 hours at .1 lumens Batteries: 18650 (1) or CR123A (2) Weight: 6.1 oz Pros: Red, green, blue, and UV lights help with blood tracking, preserving night vision, and stealthiness, powerful 1,000-lumen output, very weather resistant Cons: .1, 3, 13, and 1,000-lumen settings leave a significant gap in brightness, not as compact or ergonomic as other options
Nitecore produces some of the market’s most technologically advanced flashlights and flashlights. Don’t believe me? Just check out their SRT7GT. It’s packed with loads of easy-to-access features, most notably its twisting dial that allows you to switch between red, green, blue, and UV lights.
So, how are all these different colored lights useful for hunters?
Red lights work well for stealthiness and preserving night vision
Green lights work well for blood tracking and night fishing
Blue lights also work well for blood tracking but don’t preserve night vision
UV lights are used for blood tracking but only when used with luminol
This feature-rich light could come through in the clutch for hunters, especially those who go after deer, elk, and big game at dusk and want a capable blood tracking solution.
Since I already rock a powerful headlamp with red, green, and blue lenses, I don’t need the SRT7GT. I do, however, think this torch would be an excellent option for hunters with headlamps that don’t feature multiple colored lenses. Blood tracking and privacy lights are pretty important in the deer and elk hunting world, and this versatile light has all the features to get it done.
Very Bright Option for Challenging Environments Ledlenser P18R Signature
Max Lumens: 4,500 Max Run Time: 70 hours at 30 lumens Batteries: 3 x 18650 battery pack Weight: 1.4 lb Pros: Extremely bright and powerful, slick magnetic charging system, compatible with RGB color filters, loads of high-tech features Cons: Heavy, bulky, expensive, lacks a mid-brightness setting
For most hunters, the Ledlenser P18R Signature would be overkill. But for those who get tags in ultra-challenging environments and push themselves to the limit, this hulk of a flashlight might be the ticket.
This bad boy operates at four different brightness settings — Low: 30 lumens, Mid Power: 1,000 lumens, Power: 2,600 lumens, and Boost: 4,500 lumens — that help it thrive in the darkest and most relentless terrain. Its twisting dial at its head allows for fluid adjustment between tight spot beams and wide flood lights, allowing hunters to dial in their beam diameter to fit the surroundings.
It also rocks an impressive set of ‘smart light’ features that combine to make it highly customizable and responsive. This is a high-end flashlight for which gear nerds will fall head over heels.
A flashlight this bright and powerful would be useful for hunters who traverse remote areas with few obstructions. If search and rescue is a real possibility, the Ledlenser P18R will provide you with the power you need to look for lost or injured hunters, send SOS signals, or track animals in wide-open environments.
PRO TIP: Order the P18R Signature through Ledlenser’s website, and they’ll laser-engrave your flashlight with custom text for an extra $10.
Ultralight Hat Brim Clip-On Flashlight Fenix E18R
Max Lumens: 750 Max Run Time: 70 hours at 5 lumens Batteries: USB-rechargeable Fenix 16430UP Weight: 1.7 oz Pros: Very lightweight and compact, USB-rechargeable, durable and weatherproof, can clip to a hat brim, would work great as an EDC light Cons: Small – could get lost, easy to burn through the battery at high and turbo settings
Ultralight backcountry hunters will take any opportunity to reduce their pack weight, and that’s why I’m seriously considering trying out this tiny little Fenix E18R torch for the 2024 season. It’ll give me the lumens I need, and it barely weighs a thing.
It’s a compact little bugger, too, and could stash away easily in my pocket, bino harness, or clip to my hat’s brim to work as a headlamp. It can recharge magnetically via USB, is IP68 rated to stand up against the elements, and cranks out a good amount of brightness for how compact it is. It won’t break the bank, either.
The problem is, I’m great at losing smaller gadgets like this in the heat of the moment, so I’d probably end up securing it to a lanyard to keep it from disappearing. There’s something to be said for an ergonomic flashlight, and this isn’t it.
The Fenix E18R would make a great addition to any hunter’s arsenal whose style gravitates towards lightweight and compact gear. At 750 lumens, it’ll provide plenty of light to navigate through the woods at dark as you follow a blood trail.
VIEW ON AMAZON
Best Value Buy Flashlight for Hunters Ledlenser P7
Max Lumens: 450 Max Run Time: 40 hours at 25 lumens Batteries: AAA (4) Weight: 6.2 oz Pros: Approachable price, reliable, Advanced Focus System lets you control your beam diameter, seven-year guarantee Cons: Not super powerful, weather protection isn’t great (IPX4), four AAA batteries aren’t ideal
Some hunters don’t want to drop 100 bucks on a flashlight, and we get that. For those who are after a torch that won’t break the bank, check out the Ledlenser P7. It’s a solid all-around light with plenty of great reviews.
There’s nothing mind-blowing about the P7, but we dig it anyway. Its 450 lumens are on the lower end of torches we recommend, but hunters still report a bright and powerful beam that gets the job done in the backcountry. We also appreciate its Advanced Focus System feature, which puts out tight, focused beams that can transition between spotlights and floodlights with one hand.
Its IPX4 rating is on the lower end of the water-resistance spectrum, meaning it should be able to handle splashes and light precipitation fine, but might not hold up during a prolonged downpour. Weather resistance aside, this sturdy aluminum light should be able to survive drops and falls just fine.
If you’re looking for a sturdy, reliable light from one of the industry’s most trusted brands, consider the P7. Just don’t forget to register it with Ledlenser, so it’ll be eligible for its seven-year warranty.
PRO TIP: Order the P7 through Ledlenser’s website, and they’ll laser-engrave your flashlight with custom text for an extra $10.
Brightest Torch for Search & Rescue, Distance Tracking Nitecore TM39
Max Lumens: 5,200 Max Run Time: 36 hours at 200 lumens Batteries: Rechargeable internal NPB68HD Weight: 3.0 lb Pros: Incredibly bright and powerful, crazy-long throw, massive battery life, durable, reliable Cons: Very bulky and heavy, impractical for most hunting applications, very expensive
Let’s get this out of the way immediately: the ultra-high-end Nitecore TM39 is as large and powerful of a hunting flashlight as I’m comfortable recommending. It’ll excel in rescue situations or while tracking animals in environments with few obstructions, but it would be overkill for anything else.
This absolute unit is as burly and bright as you could ever ask for. With an insane throw of 1,500 meters, it’ll shine powerful beams as far as the eye can see, whether you’re scanning for humans, animals, or anything else. Nitecore markets it as a searchlight, and that’s precisely how hunters should use it.
At three pounds, the TM39 weighs far more than anything else on this list. It’s not going to stash away unnoticed in your pack, nor will it be effortless to lug around the woods. If I were using it, I’d leave it behind at camp to use in case of emergency and clip my Fenix PD36R to my belt as my more practical hunting carry.
Much like the Ledlenser P18R Signature I wrote about earlier, I only recommend the Nitecore TM39 for those who hunt in remote areas with few obstructions and low visibility. In threatening environments where search and rescue or tracking from a distance is possible, this “tiny monster” is the high-performance torch you need.
Best Blood Tracking Light for Deer & Elk Primos Bloodhunter HD
Max Lumens: 600 Max Run Time: Not listed Batteries: CR123A (4) Weight: 1.1 lb Pros: Best option on this list for blood tracking by far, durable and water resistant, solid run time Cons: A bit bulky, serves a very specific use, will need to be paired with a traditional flashlight or headlamp
The Primos Bloodhunter HD is our favorite overall blood tracking light on the market, and it’s not even close. It’s the go-to option for deer, elk, and big game hunters worldwide and could be the difference between tracking down your kill and losing it to the darkness.
We big game hunters love to think that we’ll nail perfect double lung shots every time, but we also know that hunting rarely goes as planned. If you seriously injure an animal but don’t stop it dead in its tracks, the Primos Bloodhunter HD will help you illuminate its blood trail against leaves, sticks, and the earth.
Remember that this light serves a particular purpose: blood tracking in the dark. It isn’t your traditional hunting torch with a powerful white LED beam that can shine for hundreds of yards, so you’ll need to pair it up with a capable flashlight or headlamp if you want a well-rounded setup.
Batteries, Extra Power & Backup Light
Once you get your hands on a proper light for the upcoming hunting season, you’d better make sure it doesn’t die on you when you need it the most. Here are the batteries, power bank, and backup light that I recommend to cover your bases.
Factors We Consider When Reviewing Flashlights
There’s a lot to consider when choosing which flashlight to lead you through the darkness
The torches on this list are intricate little gadgets, so we made sure to analyze the inner workings of each device before they could make this list. Getting the exact light you need to match your hunting style is essential, so keep a close eye on the following seven considerations as you make your decision.
Lumens
Simply put, lumens are a measurement of brightness. If you’d like a more technical definition of lumens, click here.
Products on this list can shine anywhere between .5 lumens in low mode and 5,200 in turbo mode. Check out our chart below to help you visualize the brightness along this range.
Approximate Brightness in Lumens
1 – 10: Best for up-close uses like cooking, going through gear, and reading
11 – 50: Low brightness, will illuminate immediate surroundings but not much else
50 – 200: Low-to-medium brightness for hiking and use around camp
200 – 500: Medium brightness, suitable for following blood trails
500 – 1,000: Medium-to-high brightness, good for tracking animals from a distance
1,000 – 2,000: High brightness, used in military and during search and rescue missions
2,000 – 4,000: Extreme brightness, the strength of most cars’ headlights
4,000+: ‘Probably overkill’ level brightness, meant for incredibly challenging situations
Throw
A flashlight’s throw measures the longest distance its beam can reach, and is typically measured in meters.
For example, if you have a flashlight with a rated throw of 500 meters and you shine it towards a barn 400 meters away, the beam should be visible on the barn. If you shine the same flashlight towards a barn 600 meters away, the beam should weaken and disappear before it hits the barn.
Throw distance depends mainly on how concentrated your flashlight’s beam is. Spotlights, or more focused beams, will have larger throws, whereas floodlights with wider beams will have shorter throws. Many flashlights on this list allow users to switch back and forth between spotlights and floodlights.
Run Time
Run time, or how long you can expect your light’s battery to run, is measured in hours and minutes. The higher amount of lumens your light is emitting, the lower its run time will be (and vice versa). A light with multiple brightness settings will have multiple different run time ratings.
Batteries
As I mentioned, know exactly which type of battery your light requires, and bring extras along if you need them. Nobody wants to struggle through the woods at night as the beam on their flashlight keeps fading and fading.
The most common battery on this list is the CR123A, though we’ve also included a few lights that use AAAs and 18650s.
You’ll also see a couple of lights with internal batteries that you can recharge via USB, AC (wall charger), or 12-volt (car charger). If you’re hunting with one of these lights, be sure you bring along a battery bank or an inverter so you can charge it.
Durability & Weatherproofing
Hunting is tough on your gear; that’s no secret. While making this list, we did our best to include products known for their durability and weather resistance. Nobody’s got time for a light that’ll flicker and shut off after a few minutes in the rain.
Nor do you want a light that’ll break if you drop it on a rock or back over it with your car.
All the products on this list were built for the outdoors and should thrive in dicey conditions.
Click here for a detailed explanation of IPX ratings, which determine how weather-resistant your flashlight is. If you’re hunting in a dry climate, you could get away with bringing an IPX4-rated light, whereas if you’re hunting in a wet and humid climate, you’ll want to bring along something rated IPX6 or better.
Weight
As an ultralight backpacker and backcountry hunter, I keep the weight of my pack down as low as possible while remaining comfortable. Heavy kits can lead to sore knees, rolled ankles, and drained energy. We hunters need all the help we can get, so why would we want to drag a heavy pack around all day?
That’s why it’s important to consider a flashlight’s weight before committing to it. Search for a light with enough lumens for your hunt and zero in on models within a reasonable weight range.
A few ounces here and there may not seem like a big deal, but they do add up. Don’t buy a heavier light than you need, especially if you’re covering big miles in the backcountry.
Which Flashlight Will You Take Hunting in 2024?
Don’t get left in the dark; buy a robust and reliable flashlight this hunting season
Whether you need a hunting flashlight to track wounded animals through the night, light the way as you search for firewood, scare away predators from camp, or go searching for a lost hunter, you’re here for a reason.
When night falls on your hunting trip, you want to be prepared for anything.
That’s why we analyzed, reviewed, and recommended the industry’s ten brightest and best torches of 2024. From rechargeable LED lights to options with red and green settings to lights explicitly made for blood tracking, we wanted to provide our readers with various options that suit all different hunting styles.
So, what’s it going to be? Are you going to grab our top overall recommendation, the Fenix PD36R? How about the red, green, and blue capable Nitecore SRT7GT? Do you prefer the ultra-bright and powerful Ledlenser P18R Signature?
No matter the luminosity, throw, run time, or weather resistance of your future light, we hope we have simplified the buying process and helped you make up your mind. Night or day, we hope whichever product you choose gets its job done during a safe and successful harvest.
Now, grab that flashlight, pack up your gear, and get ready to brighten up the 2024 hunting season.
Related Posts
Electric Bikes for Hunting: Best Off-Road eBikes
Cellular Trail Cameras for Deer & Big Game Hunters
Far too many bowhunters target practice the exact same way every time. I don’t know about their shots on game but I know that mine rarely involve standing flat-footed at exactly 20 yards while repetitively taking aim at the same spot. This type of shooting has its time, and that time happened weeks ago.
At this point of the summer, with antelope season a mere month away in many states and bigger game opportunities not far behind that, it’s time to get creative with your practice sessions. How you challenge yourself throughout the summer will make you a better shot come fall, I promise.
And it all starts with simple variations on the practice style I knocked just a few sentences ago. It really doesn’t take much to try to get better, but it takes some effort. So, take note of the following 10 steps to make yourself a more lethal shot in the deer or elk woods.
This is an easy one, but it makes sense. If you’ve got a bear hunt planned, or perhaps cashed in your 401K and decided to try your hand at mountain goats, it only makes sense to invest in a 3D target that represents the species you plan to hunt.
I realize this isn’t realistic for some folks because of cost; however, even if you never plan to hunt anything other than backyard whitetails you should still purchase a whitetail target. There is something different about shooting at a 3D target versus a typical block-style target, and it will better prepare you for the real thing.
Odd Angles
Bowhunting is a game of angles, which is obvious if you’ve ever hunted around a newbie to the sport. Neophytes often don’t understand how point-of-impact should change every time a deer or other critter moves. Realizing a true shot angle is often the difference between a carcass-less blood trail and a grip-and-grin photo.
Because of this, take your 3D target and shoot at it from multiple angles. Pay attention to how your point-of-aim differs when dealing with anything other than a broadside shot. Better yet, watch every live deer you can and think about how their vitals are positioned and where you would have to shoot to take them out. This kind of practice is invaluable.
Low Light
It’s easy to step outside after work and fling a couple of dozen arrows when the light is perfect. Unfortunately, unless you’re hunting low- or no-pressure game animals, it’s not likely that you’ll get tons of high light shooting opportunities.
Instead, the deer you wait diligently for are far more likely to show up at dawn and dusk. Shots in the gloaming are extremely common; therefore, you should make it a point to practice during those times. You’ll not only gain a better understanding of how accurate you truly are, but how far you can ethically push it as shooting light wanes.
Piggybacking on the low light target shooting sessions is the reality that you should try to shoot in all possible weather conditions. Windy conditions are pretty easy to come by on the target range and in the deer stand, and you need to know where your effective range sits when the wind is really huckin’.
All Weather
It’s also a good idea to shoot in the rain, extreme heat, or my personal favorite as a Minnesota native – cold. Being truly cold does weird things to bows and shooters’ muscles.
I prefer to see if anything is going to go wrong while I’m shooting in my backyard as opposed to sitting on a late-season food source watching my last chance to fill a tag feed his way toward me.
Fully Clothed
I’ll admit I wear shorts and a t-shirt most of the time I target shoot during the summer. However, as the season closes in and I’m getting ready to actually hunt, I always shoot a few sessions with my entire setup on. This goes for an early season antelope hunt and the outfit I’ll wear, or my opening bell whitetail suit complete with a safety harness. The more realism you can add to the mix, the better.
I spent a harrowing minute of my life on a whitetail hunt one time trying to find my anchor point at full draw while fighting a new face mask. Suffice it to say, I choked the shot in a fit of panic and vowed to avoid that situation at all costs.
Long Range
There has been a pretty good push in the last few years concerning longer-range shooting. Whether you agree with taking long shots at game animals or abhor it, you should consider long-range practice sessions for two reasons. The first is that a lot of time shooting at 50 to 100 yards will make you a much deadlier shot at 20.
The second is that you never know when you’ll botch a close-range shot and get a redemption shot at a gut- or liver-shot buck at three times the original shot distance. That has happened to me twice in my bowhunting career, and both times I made good on the follow-up. That’s incentive enough for me to keep pushing my target shooting distance to the max.
Elevated Shots
If you’re a whitetail hunter and primarily sit in treestands, you owe it to yourself to shoot from an elevated position. This doesn’t mean that you have to set up a backyard stand to shoot from, although if you can, do it.
Otherwise, find a deck that you can safely shoot from and work on your elevated game. This solidifies the necessity of bending at the waist and fosters confidence in shooting that differs greatly from flat-footed, even ground practice.
Real Broadheads
While you’re trying to find ways to take your practice to the next level, don’t forget to shoot real broadheads if at all possible. I say this because some companies provide practice heads, which aren’t a bad idea but don’t necessarily fly the same way as an actual hunting head. Because of this, I take a broadhead from a package and color the blades black.
That becomes my practice head, and although it sucks to sandbag a $15 broadhead, I take comfort knowing that my arrows will fly perfect with an actual broadhead. This goes for both fixed-blade and mechanical broadhead shooters, because even if a company promises field-tip accuracy, that doesn’t make it so.
Small Targets/Consequence Shots
It’s easy to shoot at a great big target because the odds of missing completely are pretty slim (hopefully!). As you pare down the size of your target, you increase the odds that you might miss.
This can lead people to lose their cool and actually miss, which is no different than when buck fever kicks in as an actual buck walks toward your stand. Taking long shots at small targets will teach you to aim small and miss small, which is something we should all strive for in the field.
Coached Shooting
Okay, this isn’t exactly the same as changing up your shooting routine but it is beneficial. If you want to be a better shot, find someone who is a better shot to help you. They can watch your form for flaws from your stance to your release and evaluate your overall shot execution.
If they know what they’re doing, they’ll be able to offer tips on how to shore up your game and be a better shot. If you take their advice and follow it through, you’ll hit more bulls-eyes the summer and more beating hearts in the fall.
Almost as important as tea processing is tea harvesting. As you may know, simply growing the tea plants can be a major challenge for the farmers, and it can take years to perfect.
Finally, after all the work the farmers have put into growing the tea, it comes time to pick the leaves. The tea harvest is something that comes a few times a year and it can actually determine the quality of a tea in many cases. The quality of a tea is not just determined by how the tea is grown and processed, but also how it is picked.
This said, let’s go into the detail to understand the tea harvesting process 🍃🍵
Harvesting tea leaves is an important stage in the tea production process. As you may know by now, a farmer can greatly change the flavor of a tea by harvesting tea leaves from different parts of the tea plant or at different times. This is one of the many calculations a farmer needs to make, in order to improve the flavor of the tea he produces, and to maximize the yield of his tea field.
How to Harvest Camellia sinensis
Harvesting tea leaves is just like harvesting the leaves of any other plant. You want to ideally pick the leaves at the stem, so it doesn’t interfere with the integrity of the leaf itself. Tea harvesting can require a lot of skill and it can be a full time job. For a tea like gyokuro for example, one of the most prized leaf teas in Japan, you need to pick the top three leaves of the tea plant. These are the sweetest in flavor and highest in nutrients.
You first need to identify the top three leaves of the tea plant and then you need to grasp the stem of the tea plant a few millimeters below the third leaf. Then you can gently pull up until you hear a small pop sound, and the leaf should be separated. This method of harvesting tea leaves is extremely time consuming but it can yield great quality green tea.
How many times can you harvest tea in a year?
Harvesting tea leaves is something that can happen up to 4 times per year. After the tea is harvested for the first time in early spring, it can then be harvested a second time in June or July. Tea from the second harvest is the second highest in nutrients and flavor, so it is often used for more inexpensive teas. Farmers may also combine leaves from the first and second harvest to lower the price of the tea, while still providing plenty of flavor. During the summer, the temperatures in much of Japan can get quite hot, so it is a lot of work to harvest during this time.
The tea plant can be harvested a third time in late summer, but this is really more common in southern Japan. The third harvest of the plant will produce very low quality tea that is lower in nutrients. The tea plant needs sufficient time to pull nutrients from the soil and when it is harvested in such a short amount of time, it is unable to produce as strong of a flavor.
In mid October or mid November, some tea plants will be harvested for a fourth and final time. This is known to some as Aki Bancha, or fall harvest. Some farmers choose to sell this tea to customers, but farmers like Mr. Watanabe in Yakushima have a different plan for the leaves. He harvests the leaves in fall and then actually uses them as a fertilizer for the plant. His thought behind this is that the tea plant has absorbed nutrients from the soil all year, so now it must return some at the end of the year.
How are the best leaves selected?
If you are producing a premium quality Japanese green tea, it has to come from the first harvest. The tea plant is harvested up to 4 times from April, all the way to November and the quality declines with each harvest. After the last tea harvest in November, the tea plant has all winter to build up nutrients and it releases those nutrients in the first sprouts of the spring time. These fresh spring leaves are the most flavorful, and therefore they command the highest price.
Tea picked during the first harvest is called ‘Shincha‘ and it is one of the highest regarded teas in Japan. Serious tea drinkers will wait around all year to be among the first to purchase the new Shincha harvest in springtime. This practice used to be more common decades ago, but now with the widespread use of refrigeration, the tea can be kept fresh all throughout the year. Shincha tea, like the Shincha from Mr. Nuruki can be quite flavorful, with a light sweet and savory flavor.
Once fall comes around in Japan, it becomes especially important for farmers to fertilize their tea crop. The soil must be set up for the long winter ahead, so the tea plant can rest and absorb nutrients ahead of the spring harvest. A lot of farmers will use a type of straw on the base of the tea plants. This serves a few important purposes. First, it allows the tea plant to retain moisture by locking in water. It also fertilizes the tea plant and keeps the roots warm through the winter.
After a long winter, the sprouts of the tea plant will begin to come up in the spring and soon they are able to be harvested. The most common way to harvest the tea plant in Japan is with this motorized tea harvesting machine. This is the most efficient way to harvest tea, and it’s one of the reasons why the tea plants are organized in these neat rows. The harvester will trim these like hedges and overtime they will develop a neatly carved shape.
Tea Harvester
The tea harvester is one of the more common tools used in tea harvesting. This tool is operated by two people, as they hold each side of the machine and walk along each side of the tea rows to trim the top leaves.
After being cut, these leaves are kept inside a net and collected afterwards. This tea harvester combines the precision of hand picking with the speed of the mechanical tea harvester, which we will mention next.
Mechanical Tea Harvester
The mechanical tea harvester is an innovative invention when it comes to harvesting tea leaves. This machine is essentially a combine that can be drive between the rows of the tea plant and automatically harvest them. The advantage of the mechanical tea harvester is that it is much faster than the hand held tea harvester. It simply skims the top of the tea bush to trim the top leaves of the tea plant and collect them into a net.
The downside of the mechanical tea harvester is that it is not as accurate as the hand held tea harvester. Because the mechanical tea harvester is so large, it is very difficult to control and you can be as precise with the harvesting as you can be with the hand held version. The results will show up in the leaves. You want larger leaves in the case of gyokuro and sencha and as long as the leaves look good, the tea harvester must work just fine!
Is a Tea Harvester better than a Mechanical Tea Harvester?
Technically the regular hand held tea harvester is better than the mechanical tea harvester, but there are a few different variables. The mechanical tea harvester is large and less maneuverable, but as long as all the tea rows are the same height, it should be able to get the job done. For this reason tea harvested with the mechanical tea harvester is not necessarily worse, it just comes down to what the final leaves end up looking like.
Handpicked tea leaves
Occasionally, tea like ceremonial matcha and Gyokuro will be made with hand picked leaves. This method of tea harvesting extremely expensive in Japan, but the benefit is that the leaves are picked perfectly. On one day out of the year, people from all around the town will gather on this field to pick the fresh sprouts of the tea plant. There is a precise method to their picking. They want to select the top 3 leaves of the tea plant, so they will pick slightly underneath the third leaf. Once the leaf has been picked, they will drop it into their basket and then look for the next one.
If a farmer wants to produce a more inexpensive tea like Bancha, they will select leaves lower down on the tea plant, along with some stems as well. This method of tea harvesting can give the farmer a much higher yield. Theleaves are more mature, and not quite as flavorful. The more mature leaves of a Bancha are lower in caffeine and they can produce a quite pleasant citrusy flavor, with notes of cereal, popcorn and wood.
As you can see, the harvest can be an important factor in determining how prized a tea is. Depending on when it is picked, how it is picked and where on the tea plant it is picked, the tea can be in a completely different category. If you are interested in trying some first harvest teas with larger leaf pickings, we highly suggest you checkout our selection of gyokuro teas. These teas are designed to have an incredibly sweet flavor and a savory finish. They are known as being the most sought after leaf teas in Japan and a lot of work goes into their harvest. Try them out for yourself and let us know what you think!
Wyatt Earp has said:
Fast is fine, but accuracy is everything
And I just thought how many airgunners are obsessed with muzzle velocity and muzzle energy,...
")
")
")
")
")


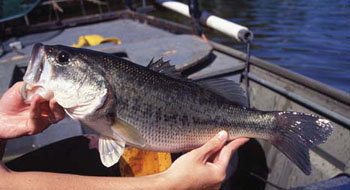
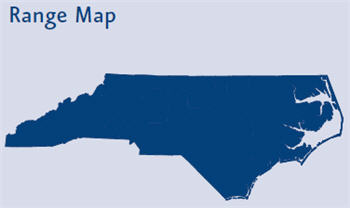 ion
ion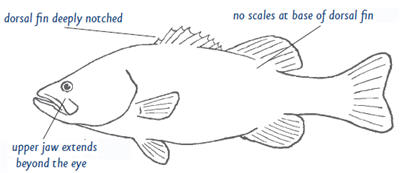 Description
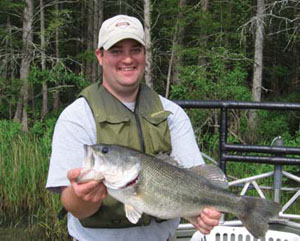 e 50 degrees.
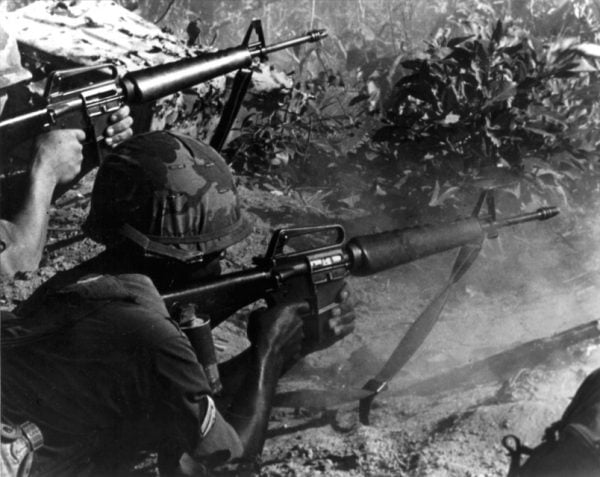
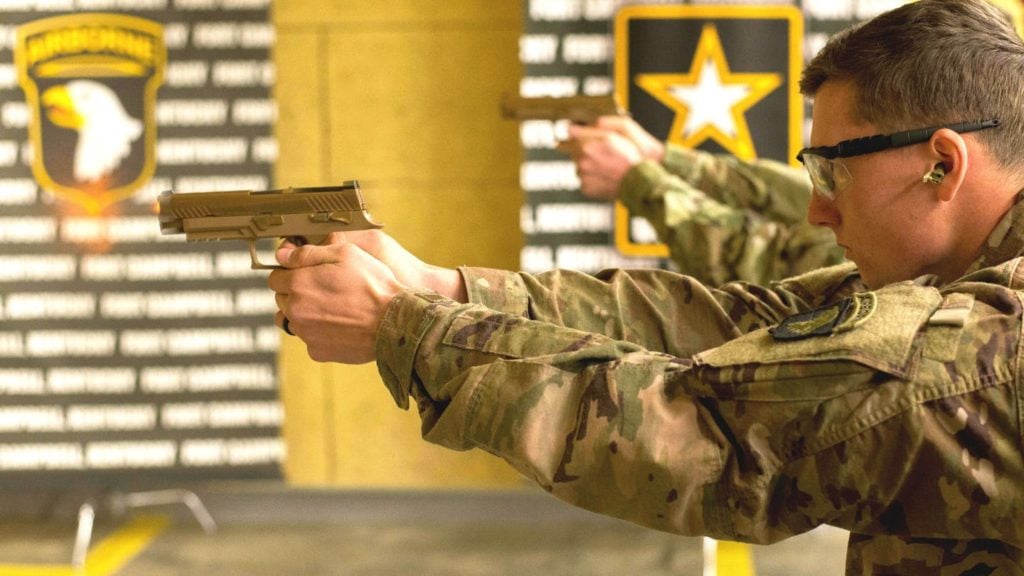


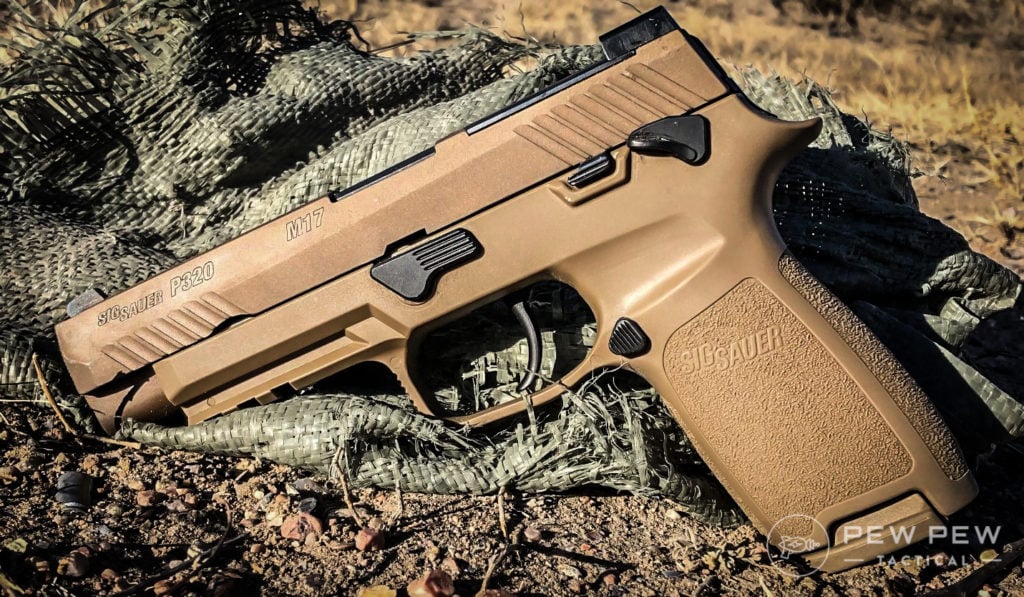
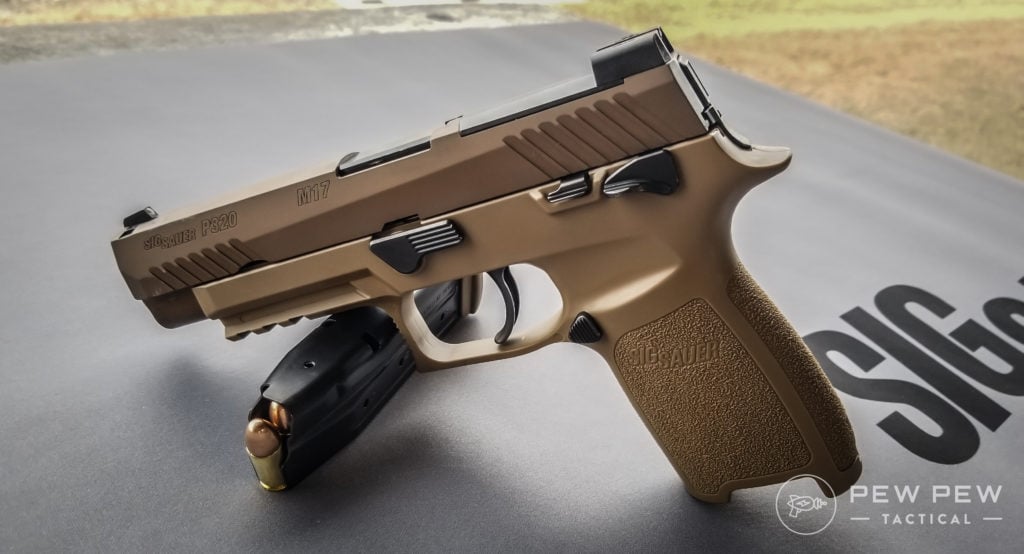
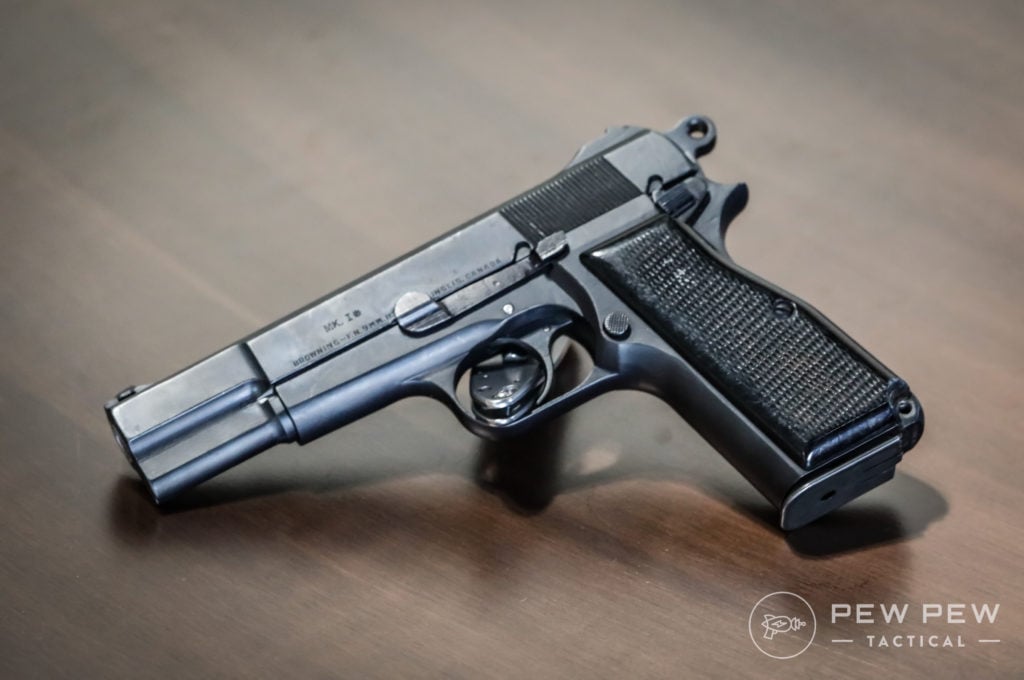
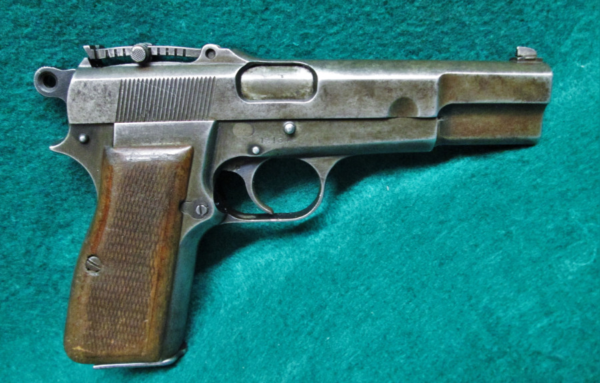

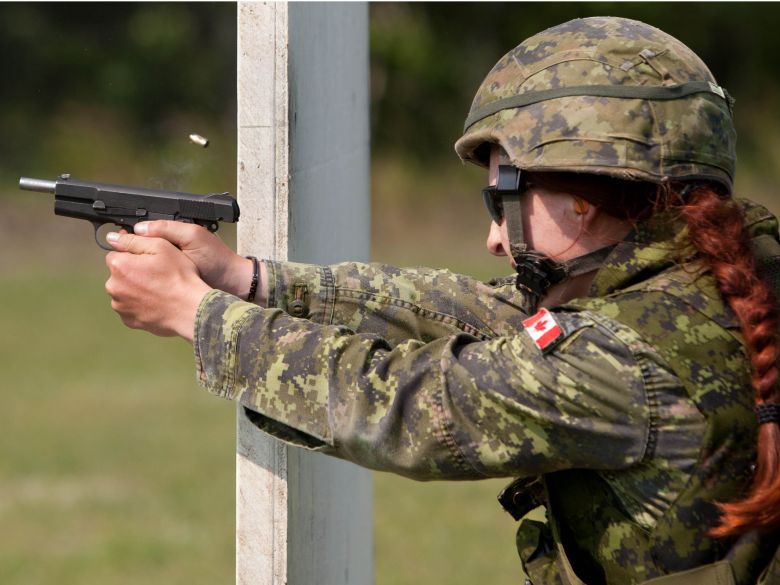
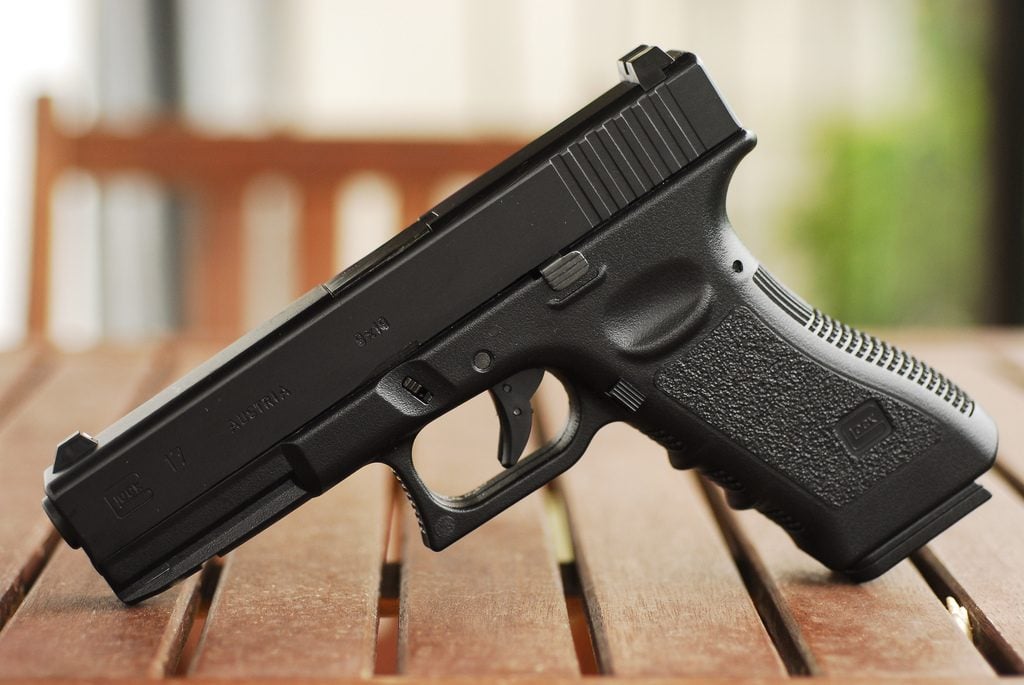
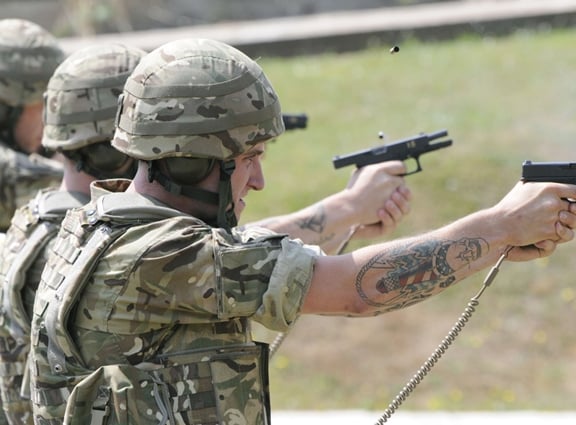
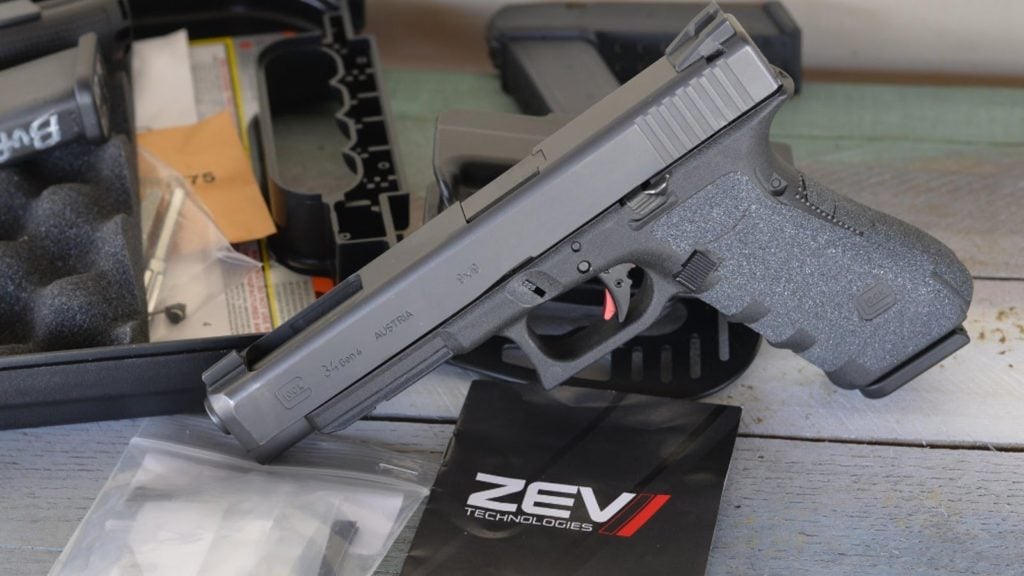

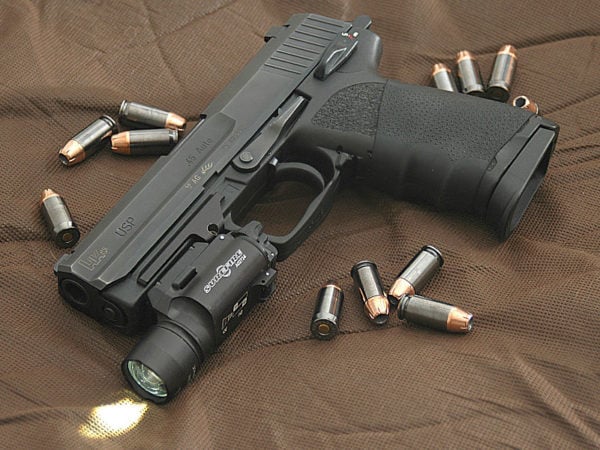

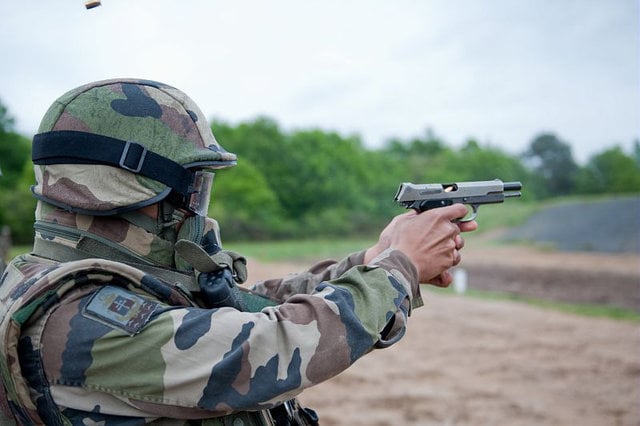
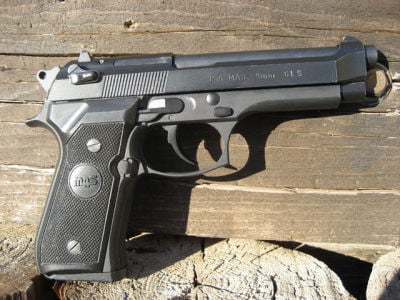
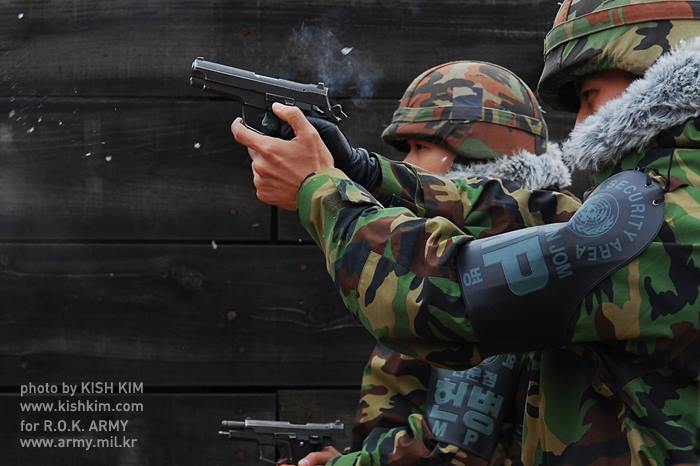
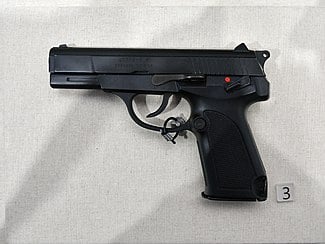

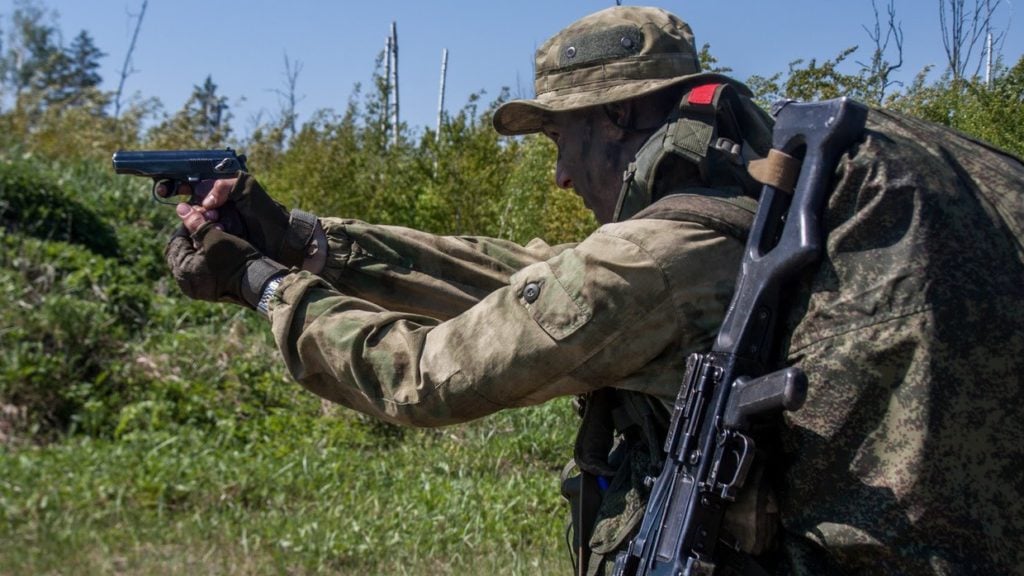
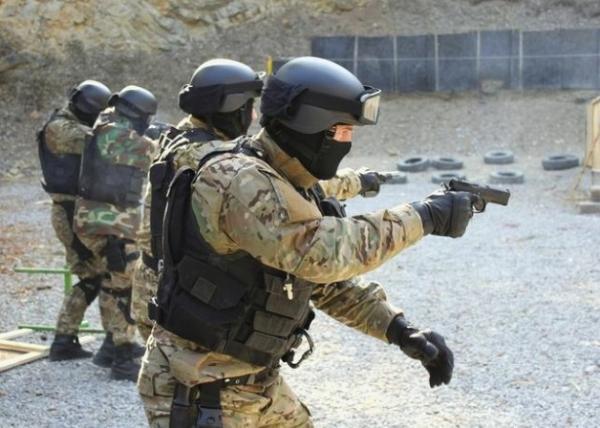
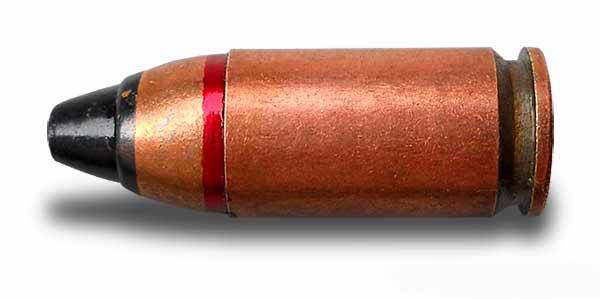
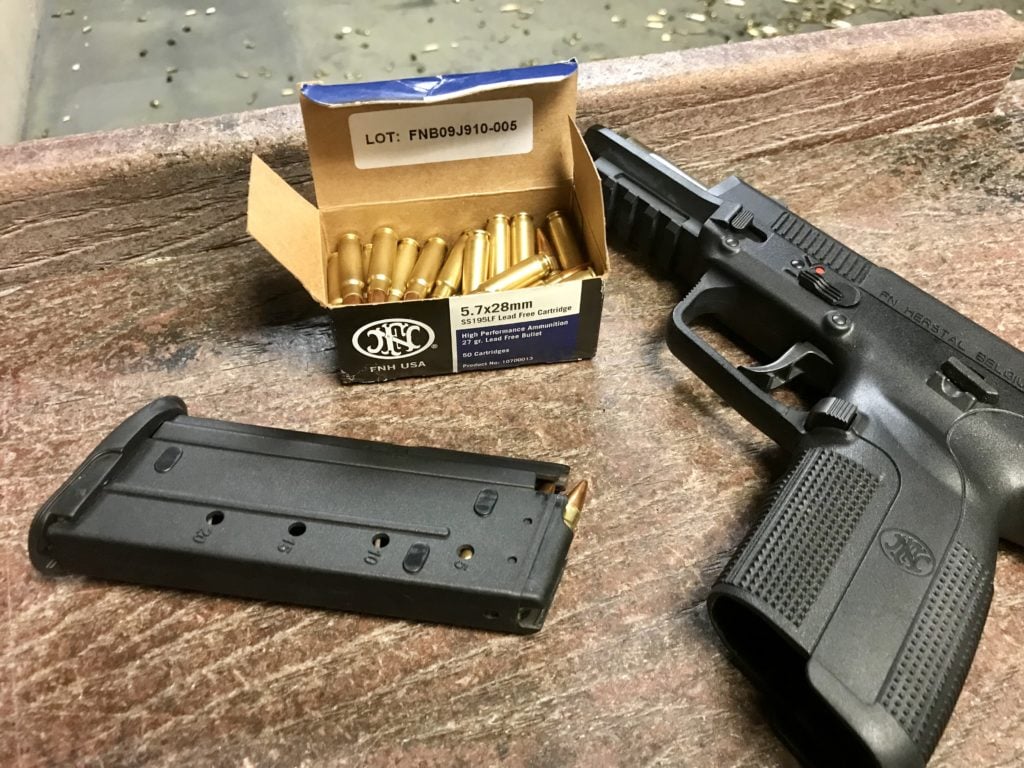


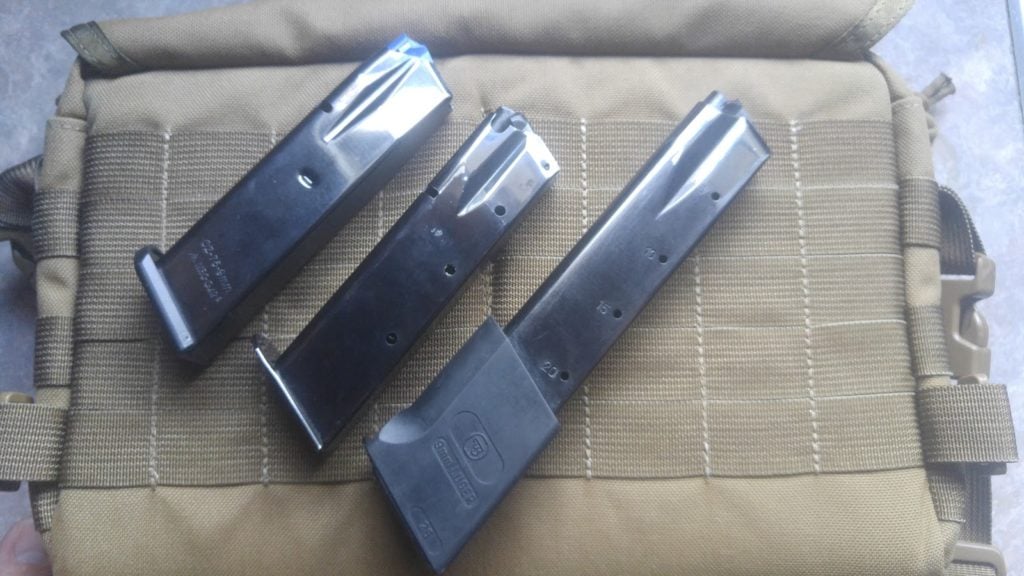
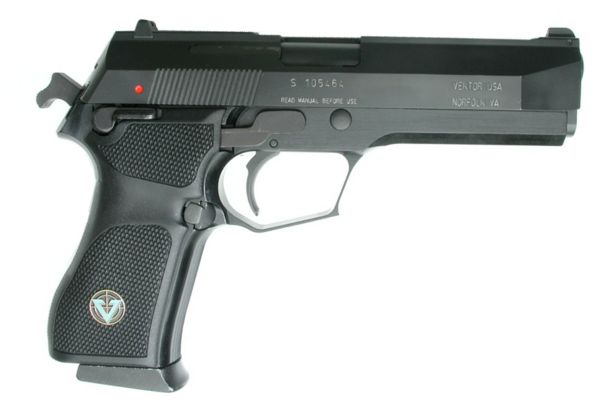
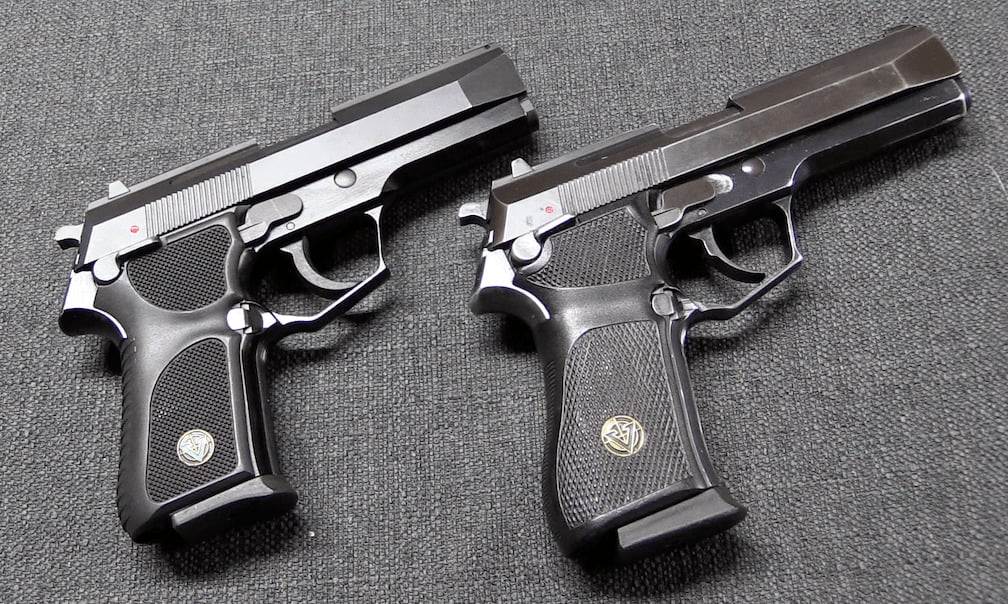
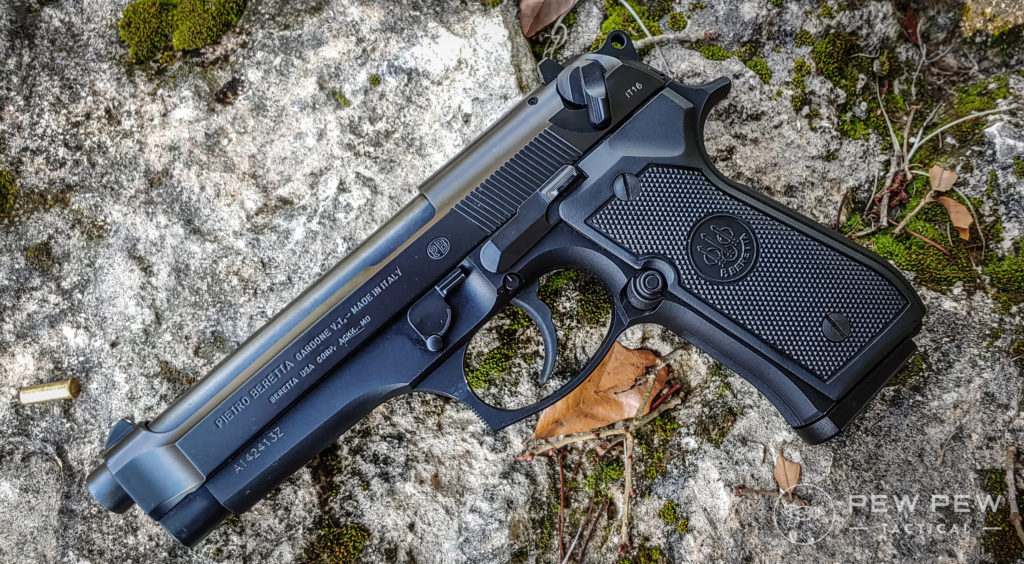
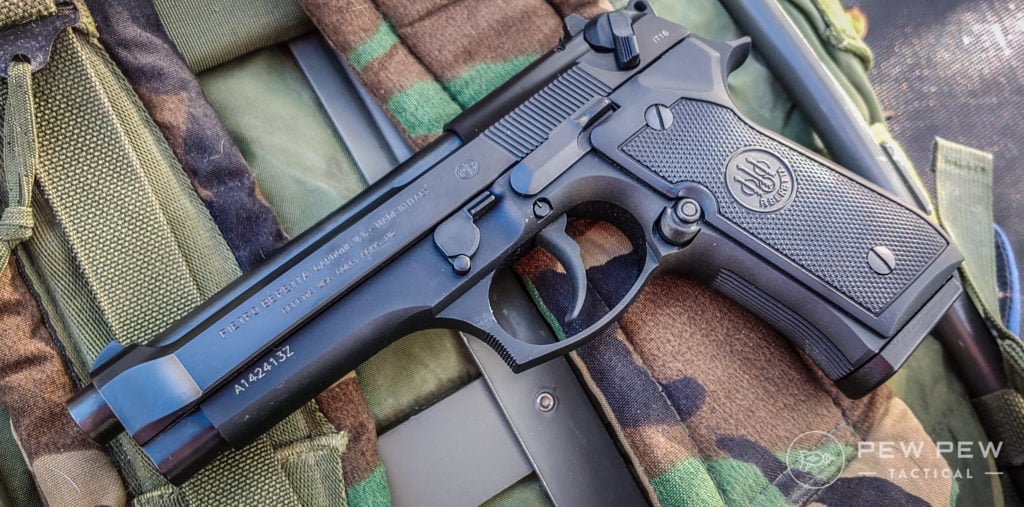

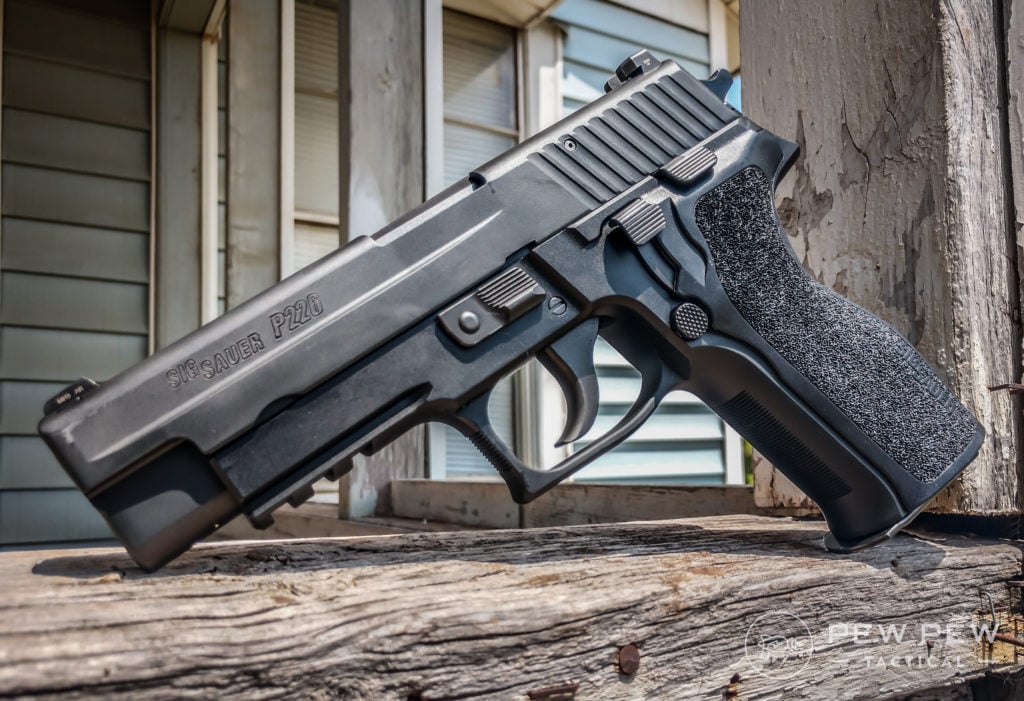
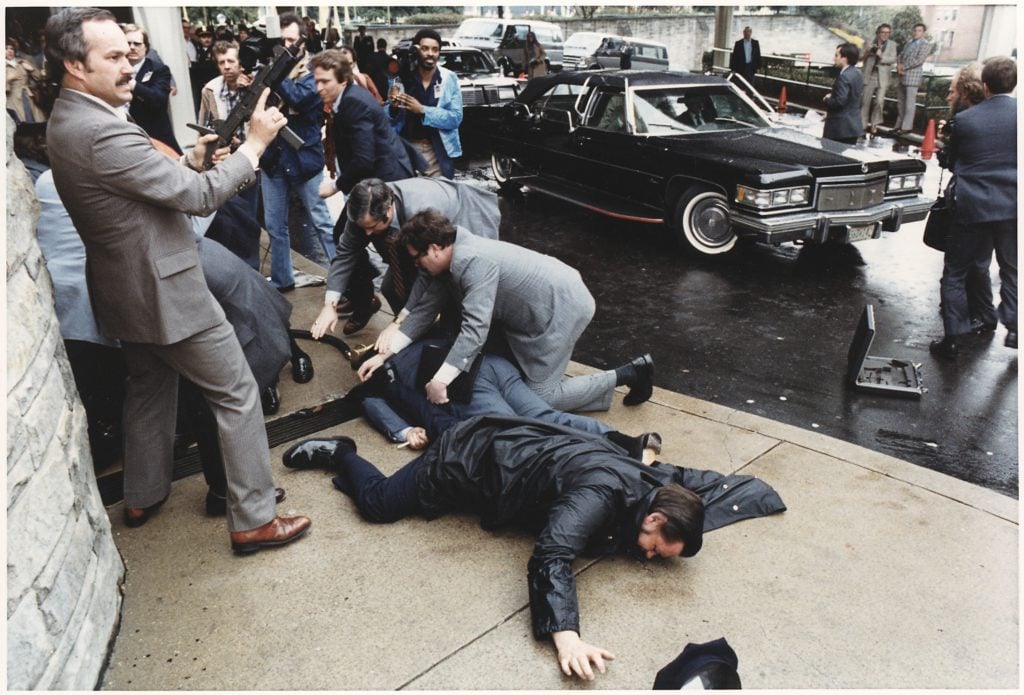
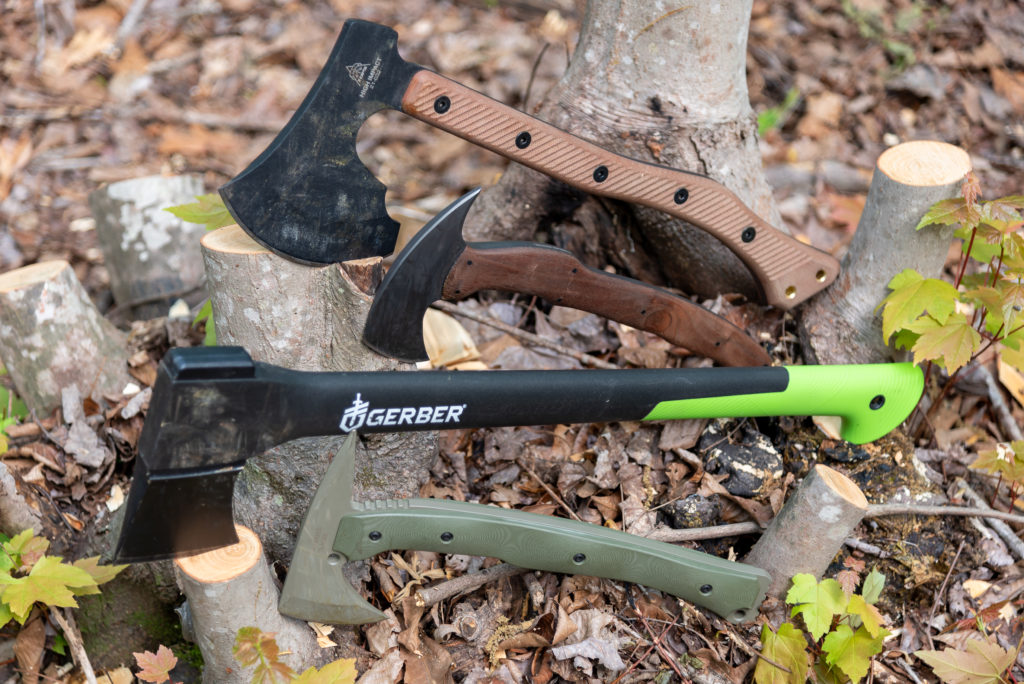
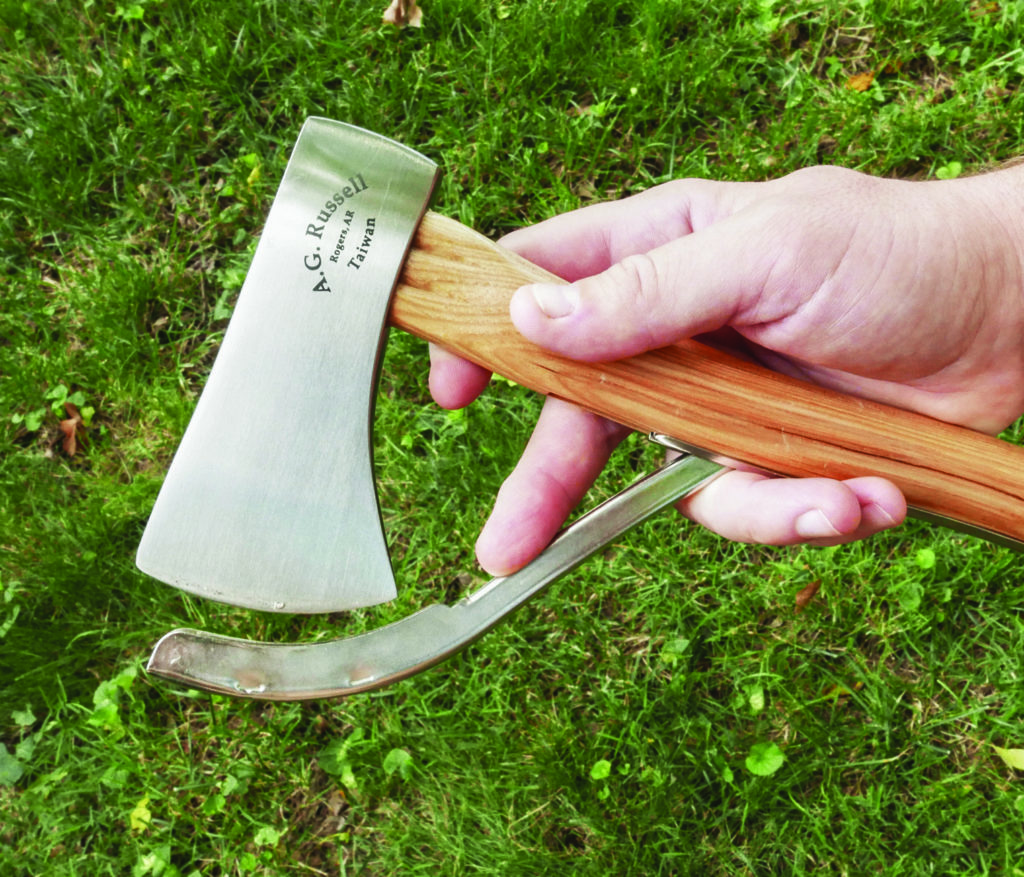
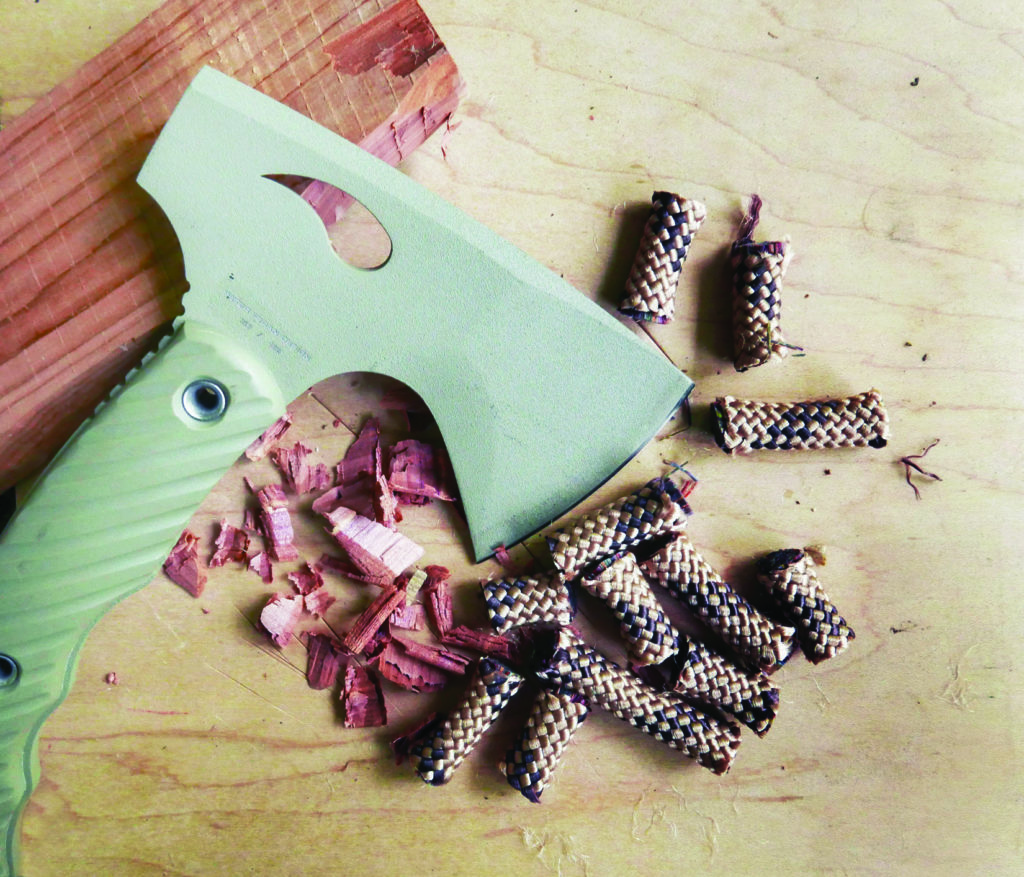
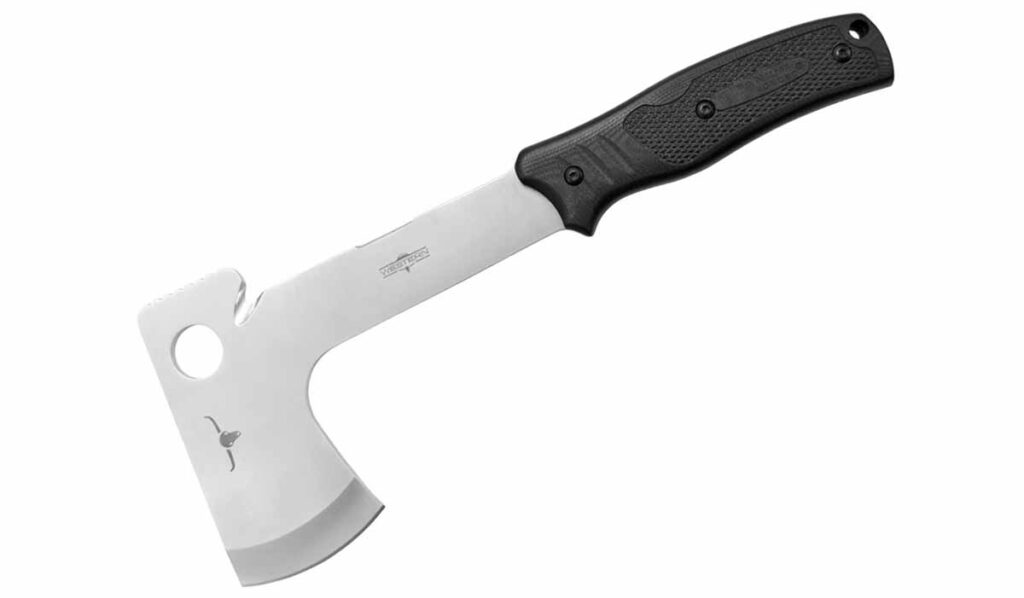
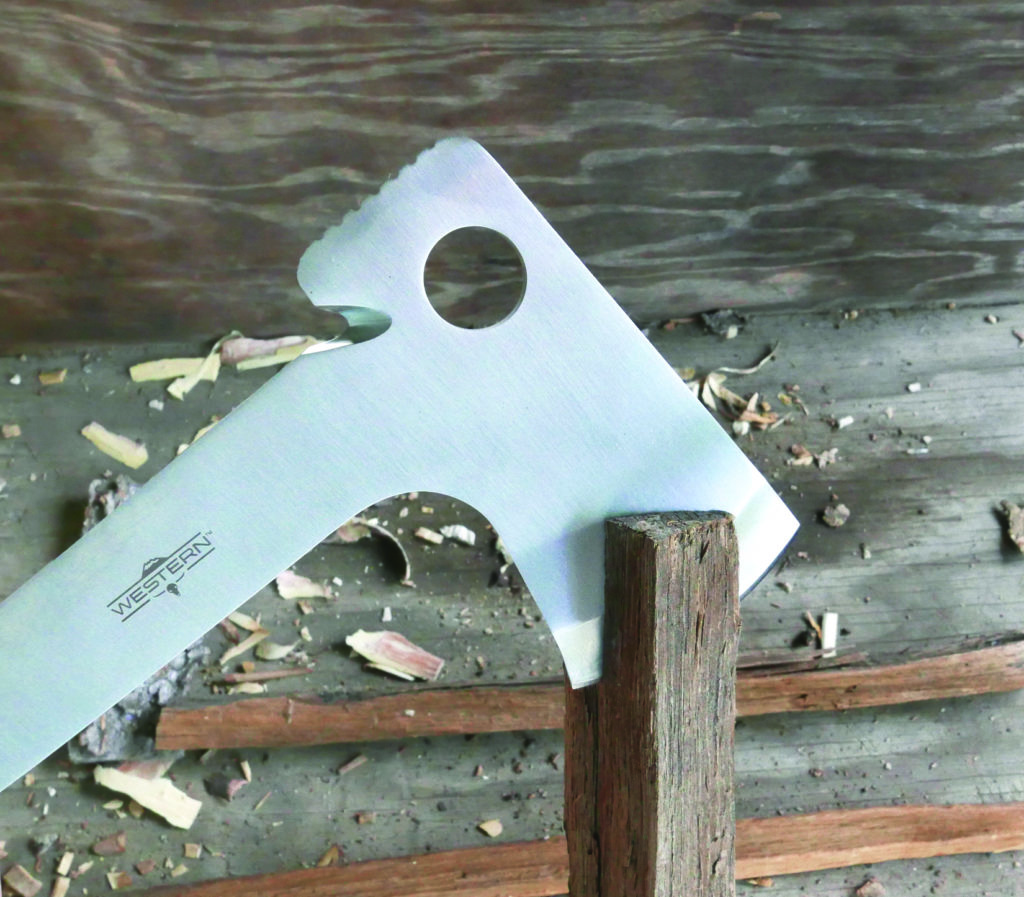
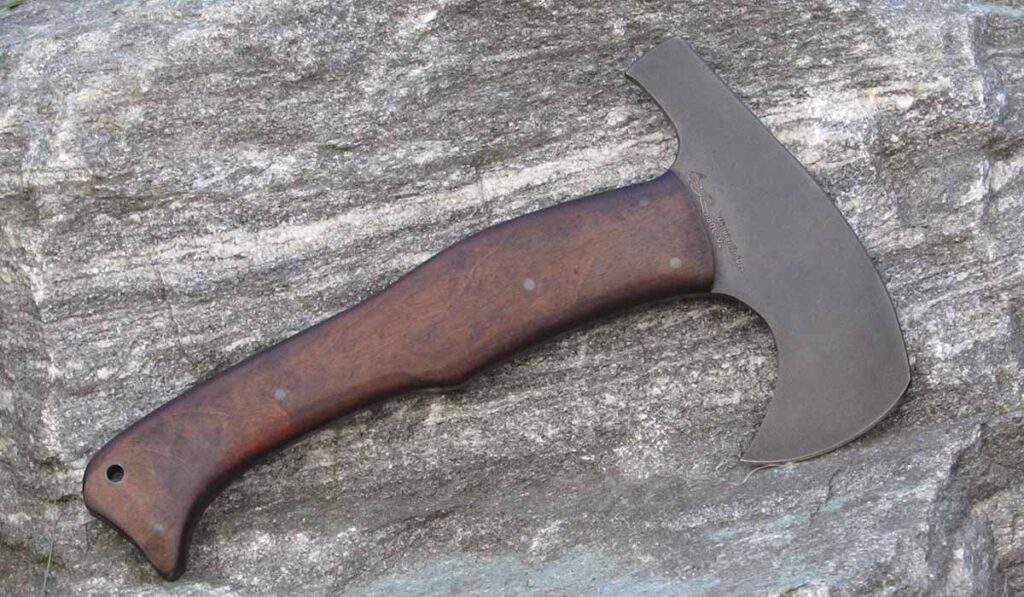

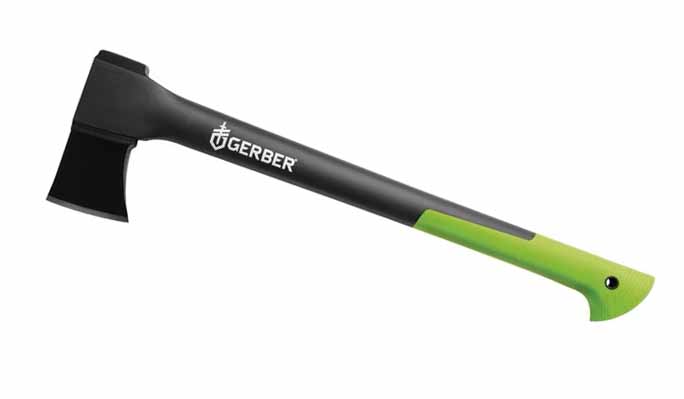
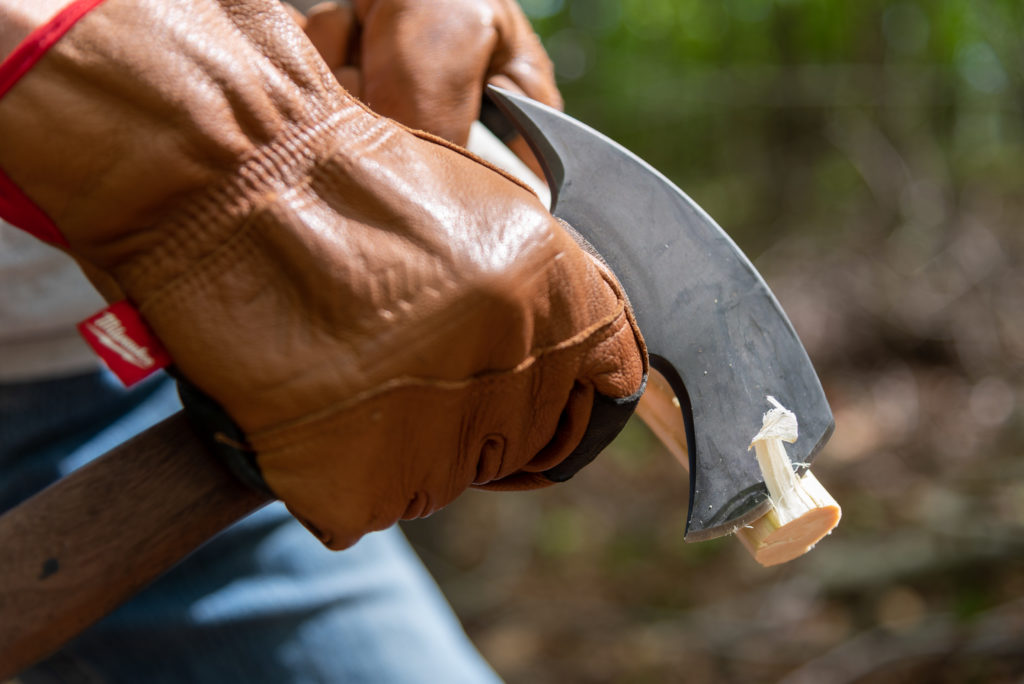
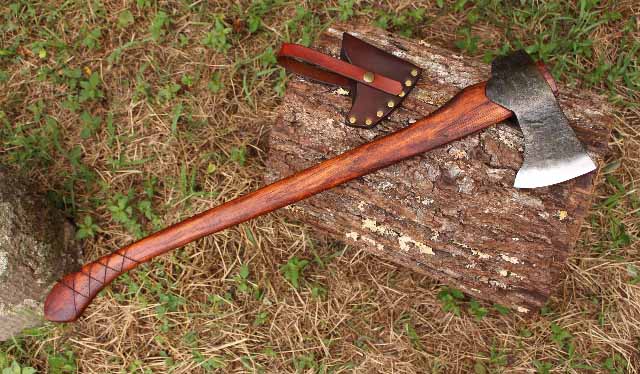
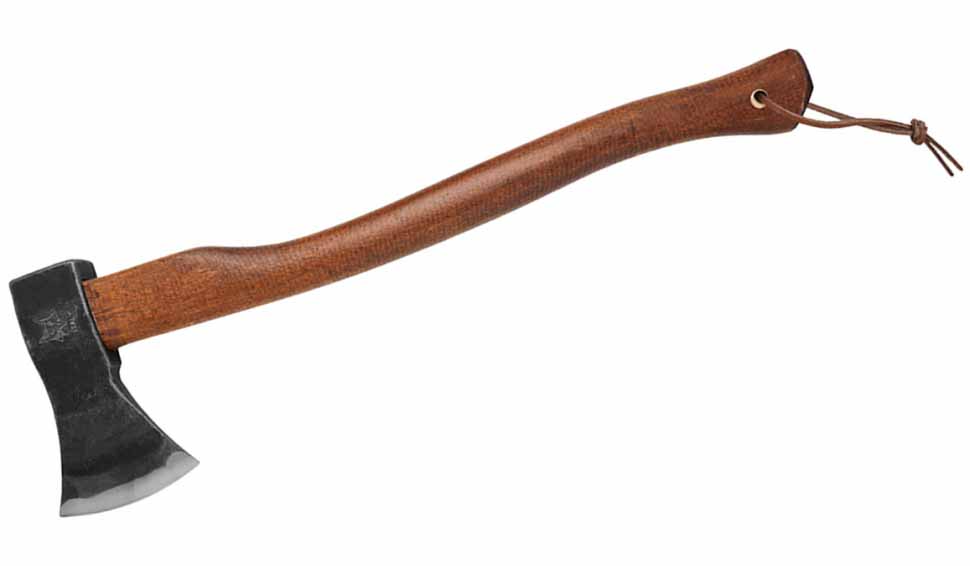


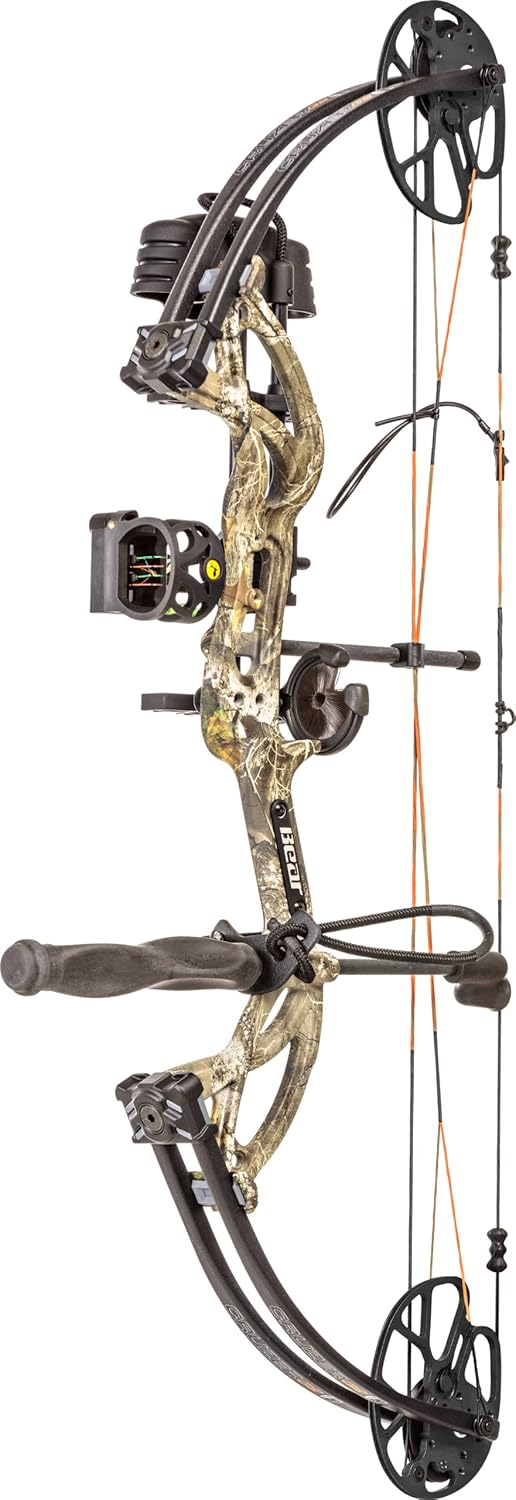
![10 Best Beginner Compound Bows For Hunting [2024] (Budget…](https://m.media-amazon.com/images/I/51O00J33L2L._AC_SL1003_.jpg)
![10 Best Beginner Compound Bows For Hunting [2024] (Budget…](https://m.media-amazon.com/images/I/51quu2av0aL._AC_SL1001_.jpg)
![10 Best Beginner Compound Bows For Hunting [2024] (Budget…](https://m.media-amazon.com/images/I/61uCGTkdIuL._AC_SL1500_.jpg)
![10 Best Beginner Compound Bows For Hunting [2024] (Budget…](https://m.media-amazon.com/images/I/71Bi0QK4LjL._AC_SL1500_.jpg)
![10 Best Beginner Compound Bows For Hunting [2024] (Budget…](https://m.media-amazon.com/images/I/61-Z28-sQzL._AC_SL1500_.jpg)
![10 Best Beginner Compound Bows For Hunting [2024] (Budget…](https://jasontomeoutdoors.com/wp-content/uploads/2018/01/IMG_0833.jpg)


