Ryegrass commonly grows in fields and meadows – and sometimes in our gardens. In fact, you might come across entire fields full of it – likely feeding all manner of local creatures. But do deer eat ryegrass in particular?
Deer will eat ryegrass – but it doesn’t tend to hold much nutritional value for them. Ryegrass is not the same as rye itself – and it’s important to note the distinction before you grow any of your own for deer visitors to your yard.
Is ryegrass good for deer?
Ryegrass isn’t necessarily healthy for deer to eat. While they will happily munch away at the crop, anecdotal evidence suggests that it can lead to digestion problems due to the sheer lack of nutrition available.
Ryegrass is often confused with rye grain, which is considered healthy for deer to eat. Therefore, you must choose the right crop for any plots you may be setting up for wild visitors! Rye grain is popular with deer and feeders mainly thanks to its fantastic protein content.
However, ryegrass couldn’t be much further from its namesake. It grows extremely quickly and can be hard to get rid of when it’s sprouting up in your garden. However, it’s not a good idea to let it grow rampant for deer to eat, and if they are consuming it more than any other treats or vegetation in your yard, it’s worth deterring them with healthier options.
Is ryegrass good for deer food plot?
No – ryegrass does not make for good plot food for deer. It’s likely to be an unhealthy distraction for them, meaning that while you may have left various fruits and nuts for your visitors to eat, they may instead fill up on grass beforehand.
It’s best to avoid planting ryegrass or to include it in your deer food plot because it can soon overwhelm other growths. Instead, focus on growing plants deer love – they will happily munch at a variety of common weeds, plots of wheat, and deer adore eating alfalfa, too.
It is more likely to be worth placing nuts such as acorns and beech out for deer plots and a variety of berries, oranges, and even banana chunks. If it tastes either mild or sweet and doesn’t have thorns or fuzzy leaves, deer will likely eat your crops without fuss.
Deer food plots should also be placed towards the edge of your yard – for example, where your perimeter may join with local forest or woodland – and away from bird-feeding zones so that your visitors can feast alone. The further away your plot is from your home, the better – as deer flight responses will activate if they see human activity.
Will ryegrass help to deter deer from my yard?
Ryegrass won’t deter deer from yards because they will happily eat it out of desperation. Deer normally won’t eat grass at all unless there are better things on offer, and if their local habitat is low on their favorites, they could still head into your yard for a taste. What’s more, plot owners’ anecdotes suggest that deer can grow accustomed to feeding on ryegrass – which can be dangerous.
Planting ryegrass to deter deer may be considered cruel – particularly as food with zero nutritional benefits for them could lead to digestive blockages. It could also result in serious health problems for the local herd. Ruminant diets are highly complex and should be satisfied with extreme caution.
If you’d like to deter deer from your yard, you should instead plant crops that they famously avoid. As mentioned, thorny or fuzzy plants are likely to deter their interest. Deer will avoid cucumber plants and won’t eat ferns, either – therefore, the best course of action is to make your yard as boring as possible for them, or at least to set up a tall perimeter.
What animals eat ryegrass?
Ryegrass is commonly enjoyed by a variety of grazing animals such as cattle. However, it can also attract birds hunting for seeds. Ryegrass will also attract a wealth of insect interest, meaning it can easily deplete, leaving livestock with little to feed on.
However, in some cases, landowners may wish to get rid of ryegrass completely thanks to their low nutritional base and their insect attraction. It is another firm reason why avoiding ryegrass is generally a good idea to keep your garden and local wildlife healthy. When attracting deer to your yard, it’s good to cut ryegrass down as soon as you see it emerge!
Many wing-shooters, especially those with years of hunting experience, would likely share the story of harvesting a banded bird as one of hunting’s greatest memories. Some hunters might pursue doves, ducks, or other game birds their entire lives without ever holding an aluminum leg band in their hands. Still, others may be fortunate enough to have a lanyard covered with these trophies. In addition to becoming prized possessions, bands serve an important role by providing a wealth of information about the birds that wear them and the hunters who pursue them.
Mississippi Department of Wildlife, Fisheries, and Parks (MDWFP) has actively banded migratory birds through-out its history. Most of them are game birds that are important to Mississippi hunters, such as wood ducks, mourning doves, and mallards. Banding helps to understand things such as how long a bird lives, how many birds are harvested, and migration and dispersal patterns. The data helps the U.S. Fish and Wildlife Service (USFWS) and state wildlife agencies like MDWFP develop sound hunting regulations and gain useful information to improve management.
How Banding Works
The U.S. Geological Survey’s Bird Banding Laboratory (BBL) provides all per-mitted banders with numbered bands of the correct size for the species they intend to band. All are inscribed with contact information for reporting the band. Depending on the age of the band, this could be a telephone number, mailing address, website address, or a combination of these (most of the currently used bands include the website www.reportband.gov). In addition to the reporting information, each band also has a unique band identification number. When biologists place one of these small aluminum bands on a captured bird’s leg, they record the band number, bird species, age, sex, and the location and date of banding. All of the banding data are provided to the BBL, which enters it into a central database. This central database holds all of the information from every bird banded by a permitted bander.
When banded (or “marked”) birds are released, they become potential data sources to be collected by hunters or birdwatchers who might encounter them. Biologists sometimes use other marking methods in addition to the standard aluminum leg band. Other common markers include neck collars, nasal markers, dyes, colored leg bands, web tags, radio (or satellite) transmitters, and wing markers. Sometimes ducks or doves can have two bands, one of which could be a reward band. The USFWS began using reward bands decades ago to encourage hunters to report the bands they recovered. Original reward bands were worth $2, but now some of them are worth as much as $100. Reward bands are now used to determine the rate hunters report bands, which helps the USFWS and state agencies estimate harvest rates.
Waterfowl Banding
Hunters know that waterfowl are highly mobile and wide-ranging. Similarly, band-ing efforts are distributed widely across the continent and throughout the year in an attempt to mark a representative sample of the wild population. Most banded waterfowl harvested by hunters are banded during the late summer period while on or near the breeding grounds of the U.S. and Canadian prairies. MDWFP assists with these efforts through membership in the Mississippi Flyway Council, which provides funding and staffing to accomplish banding goals annually in southern Canada.
Banding waterfowl during late summer allows biologists to identify places where ducks nest and their migratory routes to the wintering grounds. For instance, a mallard identified as a newly hatched male (known as a Hatch Year Male) and banded on a prairie wetland in Saskatchewan in early August could be harvested by a hunter in the flooded timber of O’Keefe WMA in the Mississippi Delta in late January. If the hunter reports the band to the BBL, then the harvest data is recorded and can be paired with the banding location information. Through many years of hunter co-operation in data reporting, MDWFP has learned that portions of Saskatchewan are extremely important to Mississippi water-fowl hunters, as these areas produce many of the ducks harvested in the state. Knowing which areas contribute large numbers of ducks to Mississippi allows MDWFP to allocate funding annually from the sale of state waterfowl stamps to conserve waterfowl breeding habitat in Saskatchewan. This targeted habitat delivery, funded by Mississippi waterfowl hunters, helps to ensure harvestable populations for the future.
In some years, MDWFP and USFWS band waterfowl during winter to maintain further sustainable waterfowl populations. MDW-FP biologists and partners have banded approximately 13,000 mallards in Mississippi since 1949. The peak of MDWFP winter banding occurred during the 1970s and into the 1980s. Winter banding helps to understand better how vulnerable waterfowl are during winter, and thus determine their survival rate during the wintering period (and hunting season). For instance, if survival of these winter-banded birds is low, that can suggest there is not enough high-quality waterfowl habitat in the Mississippi Delta. Also, capturing mallards on the breeding grounds that were banded in Mississippi during the previous winter helps pinpoint key waterfowl breeding areas and populations important to hunters.
Resident Wood Duck Banding
There is no doubt that wood duck banding is extremely important to Mississippi hunters. The state’s swamps and bottom-land hardwood forests produce many wood ducks, but, until recently, it was not known how much hunting pressure this important resource could sustain. During the busy months of July-September, MDWFP biologists, WMA managers, and conservation officers worked diligently to band wood ducks on WMAs and private lands throughout the state. In 2008, this hard work was rewarded.
After many years of data collection, analysis, and cooperation with the U.S. Fish and Wildlife Service, Mississippi Flyway states (including Mississippi) received approval to allow an extra wood duck in each state’s daily bag limit. The Commission on Wildlife, Fisheries, and Parks took advantage of this opportunity and increased the wood duck daily bag limit from two to three birds per hunter. This was great news to Mississippi duck hunters in general, as this species is usually near the top of the statewide harvest every year. For areas outside of the Mississippi Delta region of the state, this increase in the wood duck bag limit was extremely important.
Resident Mourning Dove Banding
Mourning dove banding also occurs statewide during the summer months. MDWFP biologists attract birds to open areas with repeated feedings. After the birds become used to finding grain in the area, funnel traps are placed over the top of the food source. Each trap, made out of wire mesh, has two entrances that open inward, and once the birds are inside, the hole narrows so they can’t escape. Biologists record data, band the birds, and release them immediately.
Hunters should inspect harvested doves closely to check for leg bands. Those fortunate enough to harvest banded doves are strongly encouraged to report the information by visiting the website on the band. Similar to waterfowl banding, the data collected from doves banded in Mississippi (i.e., age and sex of the bird and site of banding) helps track when they move and where there go. It also provides estimates of survival and harvest rates. This information then allows MDWFP to improve dove management in Mississippi.
The information obtained by band reporting is critical to maintaining harvestable populations of waterfowl and mourning doves and improving their habitat in Mississippi and throughout North America. The next time you share a hunt with someone on a dove field or in a duck blind, take time to educate them on the importance of banding and band reporting. For more information on MDWFP’s waterfowl management efforts, visit www.mdwfp.com/waterfowl.
(click to enlarge)
Houston Havens is MDWFP Waterfowl Program Coordinator.
Are you a noise-sensitive shooter? Then you must know about the “Subsonic 22LR”, a good round for quiet hunting.
Subsonic .22LR ammunition offers a quieter, more accurate, and less disruptive shooting experience. It is a valuable choice for target practice, hunting, and pest control, contributing to firearm longevity and safety.
In this blog post, we’ll delve into the intriguing world of subsonic .22LR, uncovering its unique characteristics, benefits, and versatile applications.
Let’s start..
What Is Subsonic Ammunition?
The term “subsonic” refers to the bullet traveling below the speed of sound, which is approximately 1,125 feet per second (340 meters per second) at sea level.
These loads range in muzzle velocity from 300 fps to 1,040 fps, depending upon the load and its intended purpose, compared to the standard long rifle load with a muzzle velocity of 1,200 fps.
Subsonic cartridges are loaded to operate at speeds less than sound speed, preventing the bullet from making a supersonic shockwave or “crack” as it travels through the air.
Unlike standard ammunition, which propels bullets faster than the speed of sound, subsonic ammo moves at a quieter, slower pace.
This reduced speed is a defining feature of subsonic ammunition, and it significantly impacts how it performs.
What Are The Characteristics of Subsonic .22LR Ammunition?
Reduced Velocity: Travels at slower speeds, typically around 1,000 feet per second or slower, keeping the bullet below the speed of sound.
Quieter Performance: Generates significantly less noise when fired compared to standard .22LR rounds.
Heavier Bullets: Often features heavier bullets for enhanced stability and accuracy.
Shorter Effective Range: More effective at shorter to moderate ranges due to its lower velocity.
Reduced Recoil: Generates less recoil compared to standard .22LR rounds.
Potential for Increased Bullet Expansion: Slower velocity can increase bullet expansion upon impact.
Shot-to-Shot Consistency: Offers greater shot-to-shot consistency in terms of ballistics.
Versatility: Compatible with various .22LR firearms, including handguns, rifles, and semi-automatic weapons.
How Subsonic .22LR Ammo Differs From Standard .22LR?
Here are the differences between subsonic .22LR ammo and standard .22LR ammo in simple bullet points:
What Is Subsonic 22 LR Good For?
Subsonic .22 LR ammo is a type of ammunition that travels at a velocity below the speed of sound. This makes it much quieter than standard .22 LR ammo, which travels at a velocity of about 1,125 feet per second.
The main applications of subsonic .22 LR ammo are:
Hunting small game: Subsonic .22 LR ammo is ideal for hunting small game such as squirrels, rabbits, and groundhogs. The reduced noise makes it easier to approach the animals without spooking them, and the lower velocity also means that the bullets are less likely to over-penetrate and injure other animals.
Pest Control: Subsonic ammo is a humane choice for pest control around farms and properties, as it eliminates pests with minimal noise disturbance.
Shooting indoors: Subsonic .22 LR ammo is a good choice, as the reduced noise will not disturb others. This makes it a popular choice for target shooting, plinking, and pest control in areas where noise is a concern.
Use with a suppressor: Subsonic .22 LR ammo can be made even quieter when used with a suppressor. This makes it a good choice for situations where stealth is important, such as law enforcement operations or pest control in urban areas.
Reduced recoil: Subsonic .22 LR ammo has less recoil than standard .22 LR ammo. This makes it a good choice for recoil-sensitive shooters like young shooters or people with disabilities.
Firearms Training: Subsonic .22LR ammo is valuable for training, particularly for beginners or individuals learning to manage recoil.
Recreational Shooting: Subsonic .22LR ammo is popular among recreational shooters for target practice. Its reduced noise and recoil make it enjoyable for extended shooting sessions.
Overall, subsonic .22 LR ammo is a versatile round that can be used for various applications. It is a good choice for hunters, target shooters, and anyone who wants to reduce noise.
What Are The Safety And Legal Considerations Of 22lr Subsonic?
Safety and legal considerations are essential when using subsonic .22LR ammunition. Here are some important points to keep in mind:
What Are The Pros & Cons Of 22LR Subsonic?
Subsonic .22LR ammunition has pros and cons, and understanding these can help you decide whether it’s the right choice for your shooting needs. Here are the pros and cons of .22LR subsonic ammunition:
With big bulls standing nearly 7 feet tall and weighing up to 1,600 pounds, moose are massive animals. They’re technically the largest species in the deer family, prized as trophies for their impressive antlers, second only to how delicious their wild game meat is. An even bigger bragging right for a moose hunter: bagging a record-breaking moose.
While we have no way of knowing that is truly the biggest moose ever, we can turn to the Safari Club International record books to see what is the biggest moose that’s ever been downed in North America. But first, a few fun facts on how big moose truly are.
How Big Can a Moose Get?
The size of a moose depends both on its sex and what subspecies it is. Male bull moose are almost always larger than cow moose, but even a small female can weigh over 800 pounds.
The Shiras moose, located in the Rocky Mountains and Pacific Northwest, are the smallest of the moose subspecies, with adult males weighing up to 1,000 pounds. Still, this makes them the largest big game animal in the Rocky Mountains.
Conversely, the Alaska-Yukon moose (also known as the Alaska moose), found in the northwest reaches of North America, is the largest of the subspecies. Male Alaska bulls can weigh up to 1,600 pounds and stand 7 to 8 feet tall at the shoulders. With a massive rack of antlers added on top, these moose can tower over 10 feet tall.
Western Canada moose, also known as Western moose, and Eastern Canada moose, also known as Eastern moose, fall in between Shiras and Alaska moose in size, with Western moose typically being larger than Eastern.
Does Alaska Have the Biggest Moose?
As you might have guessed, yes, Alaska has the biggest moose—not only in North America, but in the world. That’s why the Alaska moose hunt is on the bucket list of many hunters. Alaska moose inhabit boreal forests and mixed deciduous forests throughout Alaska and western Yukon.
Is There Any Bigger Game Than a Moose in the United States?
The only animal larger than a moose in the United States is a bison. Bison can weigh 2,200 to 3,000 pounds, in comparison to a moose’s weight of 800 to 1,600 pounds. However, bison only have moose beat in terms of weight. They “only” stand about 6 feet at the shoulder, and are 8 feet long, making them shorter than moose all around.
Bison can be hunted in Utah, Wyoming, Arizona, Alaska, and Montana, but getting a tag and permit for a hunt is almost impossible. If you’re looking for the biggest game animal to hunt, moose is a more likely bet.
What Makes an SCI Record Moose Kill?
Safari Club International (SCI) recognizes records for four North American subspecies of moose: the Shiras moose, the Eastern Canada moose, the Western Canada moose, and the Alaska-Yukon moose.
To track records of the biggest moose kills, SCI ranks moose by their antler scores, rather than their weight. Using the SCI measuring system to score a moose, hunters must measure the length and widths of each “palm” on the antler (i.e., the big, flat area of a moose antler). SCI also scores the number and length of tines, the circumference of each main beam of the antler at the smallest place, and the greatest outside spread of the moose’s antlers.
All of the measurements are added together for the final score of the moose. The bigger the palm spread, and the more numerous and longer the tines, the better the animal scores.
Unlike the Boone and Crockett Club, which also tracks moose records, SCI doesn’t deduct the score for abnormal points of differences in antler symmetry. As a result, the SCI score is often significantly higher than the B&C score for the same animal.
Safari Club International Moose Records
1. SCI Shiras Moose Record
Though they are the smallest subspecies of moose in North America, Shiras Moose can still weigh up to 1,000 pounds. Shiras Moose live in Colorado, Utah, Wyoming, Montana, Idaho, Oregon, Washington, Alberta, and British Columbia.
Jim Hall set the SCI record for Shiras moose in 2018 when he shot a massive bull near Republic, Washington. Hall had been applying for a moose tag for almost 30 years. He was in the last few days of moose season, after two months of unsuccessful hunting, when he took down the impressive animal.
The moose was estimated to weigh about 650 to 700 pounds and had a combined 242 inches on its antler measurements for a score of 504-7/8 inches. Hall beat the previous record by just 1-1/8 inch.
2. SCI Eastern Canada Moose Record
Eastern Canada moose live in Ontario, Quebec, New Brunswick, Newfoundland, Nova Scotia, Maine, Vermont, New Hampshire, Massachusetts, Connecticut, and New York. Big bulls can weigh nearly 1,400 pounds.
Jeremy Boileau shot the current SCI record Eastern Canada moose with a rifle in Quebec, Canada in September of 2011.
Boileau’s behemoth moose scored an incredible 666-3/8 inches, which is more than 80 inches larger than the next biggest Eastern Canada moose and more than 175 inches bigger than the third-biggest moose in the record book! Not only did the moose have a massive outside spread of 56 inches, but it had a ridiculous 20 points on each antler, which is one of the reasons why it scored so high.
3. SCI Western Canada Moose Record
Western Canada moose live in British Columbia, Ontario, Yukon Territory, Northwest Territories, Nunavut, Alberta, Saskatchewan, Manitoba, Wisconsin, Minnesota, parts of North Dakota and Michigan’s Upper Peninsula. With big bulls weighing nearly 1,500 pounds, they are the largest subspecies of moose found in the continental United States.
Doug Rehbein currently holds the SCI record for the Western Canada moose, for a bull he killed with the guidance of hunting guide Mark Boote of Jennings River Outfitters. Rehbein took the moose in October of 1998 in the renowned moose hunting grounds of the Cassiar Mountains of British Columbia.
This giant moose scored a remarkable 557 inches and had a 64-2/8 inch outside spread with 12 points on one antler with 10 on the other. Though the number of points may seem low for the score, this moose had absolutely massive T-2 and T-4 points, which helped boost it to the record books.
4. SCI Alaska-Yukon Moose Record
Alaska-Yukon moose, as the name implies, live in Alaska and the Yukon Territory of Canada. They’re the largest moose in North America, both in terms of body size and antler size.
The largest Alaska-Yukon Moose in the SCI record books, as well as the highest-scoring moose for all of North America, was taken by Debra Card near Cordova, Alaska with a rifle in September 1999. The bull weighed a ridiculous 1,800 pounds.
Not only is this the only moose on the list taken by a female hunter, but it’s also the biggest moose on record ever hunted in the U.S. Her moose had a whopping 74-2/8 inches spread with 19 points on one side and 20 on the other. It scored an extraordinary 731-1/8 inches.
To put in perspective how gigantic this moose was, it measured 225 inches larger—that’s 68 percent!—than the largest Shiras Moose in the record books.
Other Biggest Moose Harvest: The 1897 Moose
As you now know, SCI lists its record moose by antler size. And while a massive rack is incredibly impressive, what about the largest moose every taken by weight?
That record goes to a monster of a moose taken in September 1897. Weighing 1,808 pounds and standing 7.6 feet at the shoulder, the moose was taken in the Yukon and made it into the Guinness Book of World Records. Over a hundred years have passed and still, no one has touched that record.
But, that doesn’t mean there aren’t still plenty of monstrous bull moose out there to be taken. Start planning your United States moose hunt today.
READ MORE: Biggest Bear in the World: Official World Records for Each Bear Species
When you strip away all the fancy gear, the expensive packs, boots, garments, etc.. hunting elk with archery tackle really boils down to two very simple yet ultra important concepts.
1. Be accurate and precise at distance with your equipment
2. Maximize penetration of your arrow
There is zero argument about elk hunting popularity being on the rise. The influx of new archery hunters, difficulties of legally travel abroad to hunt, and increased content around western hunting all has played a part of the elk hunting surge! With that in mind, we’ve also seen a continuous rise in the questions surrounding the business end of your arrow.
“What is the best broadhead for my elk hunting trip?”
“What broadhead should I be using for elk?”
“What is the best broadhead for elk?”
Elk are certainly not whitetails, but they are certainly not water buffalos either! Outside of the animal itself having a reputation of carrying tough hides and a more dense skeletal structure, what other factors should you be considering when trying to pick the best broadhead to harvest an elk with?
YOUR SHOOTING PLATFORM
Regardless of the animal you are hunting, the very first stop in your process of selecting the right broadhead is your shooting platform. Your bow is the largest factoring part of the equation, PERIOD.
Someone shooting a recurve should not be choosing the same arrow and broadhead setup as someone shooting a crossbow or compound. Taking that a step further, draw weight and length, arrow speed, arrow weight, etc, should all factor in to your broadhead choice.
If we’re talking about a crossbow platform, I am shooting fixed blade broadheads. It’s really that simple. I don’t have to think about it, and I don’t have to consider anything else… I don’t even have to wonder. A fixed blade broadhead that is tough, has excellent penetration statistics, something that has thick blades is what I’m looking for. Flight characteristics at high speeds is critical when shooting a crossbow. A general rule of thumb is vented blades tend to perform better than solid blades and cutting diameters no more than 1 1/2″ tend to be more accurate at longer distances. Our K2-Fixed and Fixed EXT broadheads offer everything a crossbow hunter dreams of.
When we’re talking about compounds you really have a wide variety of broadhead choices. Fixed blades, hybrid blades, and mechanicals are all options but not all are created equal. Pending your bow and arrow setup you have some really good options. The key factor is, again, your bow setup. Understanding your bow’s capabilities with your exact draw length and total arrow weight is ultra important. Low poundage shooters and, in some cases, you folks with short draw lengths really need to take a hard look at fixed blade broadheads. Having the understanding that in certain setups you just can’t afford to lose any KE, these types of scenarios IS THE REASON Afflictor’s hybrid broadheads were created. The patented drive-key design offers next to no loss of KE, and with blades opening at impact, you have a true fixed blade broadhead when entering the animal. We can’t say that about other mechanicals. Across the board, whether you are looking at Afflictor’s fixed blade or hybrid blade broadhead offerings, there’s multiple solutions for all compound shooters. Regardless of your broadhead choice, the important message is make sure you understand your setup and that your bow is a fine tuned machine!
When we are looking at the more traditional setups, these guys tend to like a traditional broadhead, right? A single bevel or potentially other fixed blade options, but some trad guys are actually shooting different hybrid broadheads. Something like our Hybrid X or our K2 Mini in the heavyweight stainless steel versions where they’re getting into 175 grains, are really gaining popularity. An outside the box solution for traditional archers, but hybrid designs can be a viable option.
YOUR ARROW BUILDS
The other consideration on your setup is around your arrow builds.
For seasoned elk hunters, their arrow builds and broadheads go hand in hand with their shooting platform. Since the western hunting is growing and evolving, there’s a lot more new elk hunters in the mountains, and we’re a trend of eastern guys thinking elk are just big deer. “I’m a whitetail hunter and I’m going elk hunting. That mindset is a mistake.
You need to understand you WILL need more Kinetic Energy and Momentum for pass through shots on elk…regardless if you are shooting a mechanical, hybrid, or fixed blade broadhead. You need to understand that the average archery shot on an elk is much longer than the average shot on a whitetail. You need to understand and plan for this. If you are an eastern guy and truly just want to shoot the same arrows for both species, the best advice is to take the “reverse engineer” approach. Build and shoot what will work for the tougher animals and it will work for whitetails.
HUNTING STYLE AND POTENTIAL SHOT OPPORTUNITIES
Where are you going to be hunting?
Are you going to be hunting a waterhole with a standard blind placement?
Are you going to be spot and stalk?
Are you going to be calling?
Are you willing to take a shots that is pushing your limits?
Not all western states have the same elk hunting regulations when it comes to archery equipment. Make sure you read and fully understand the regs of the state where you hold your elk tag. Some states have specific requirements around broadheads. For a quick break down you can check out one of our other blogs by clicking here.
Your hunting style will certainly impact the potential for tough shots. If you are planning to only ambush hunt elk, similar to whitetails, shot opportunities tend to be closer and with less obstructions. If you’re like the majority of elk hunters, calling and glassing to locate animals and then closing the distance, it’s pretty common to face less than ideal shot angles, obstructions, and some serious distance.
All these variable influence what type of broadhead will perform best, but the common theme doesn’t change. Make sure you have enough KE and Momentum with great long distance flight characteristics.
CUTTING DIAMETER
One consistent theme over the years, no matter what part of this industry I’ve been, it seems that elk hunters have a preference for a certain diameter cut, no matter what broadhead that they’re shooting….1 1/2″. Now, of course, there’s highs and lows to that, but I’m just saying as an average, in our experience for most people, what they’re looking for is 1 1/2″ cutting diameter.
The discovery behind that is that seems to be the cut that offers the greatest penetration for most people’s set up. When that broadhead hits that 1 1/2″ mark, it seems to really be able to pass through elk and still carry good flight characteristics.
Why does size make a difference? Well, when you start getting into broadhead diameters that are 2″ and up, you really have to have the right setup to drive that home for enough penetration to do fatal damage. You may also be handicapping yourself a little bit because the larger blades sometimes are a little more fragile. They require a lot more energy to open, penetrate, and to pass through. So you really have to be considerate of your overall setup when you’re considering using a larger cut blade. On top of that, larger blade diameters typically do not fly as well as smaller blade diameters.
FIXED VS MECHANICAL
This debate also lives in the elk bowhunting world too. It will never end…it’s like the old Chevy vs Ford talk.
Fixed broadheads are simple in our eyes. They take out some of the performance variables out of the equation, and you know, with the right placement you’re not going to have any problem with an elk. The challenge is long distance flight characteristics. Even though this shouldn’t be any issue with a well tuned bow, folks still want to shy away from the added work in tuning their setup.
Mechanicals have come a long way since their inception. They’re tougher and more reliable than before. Now you can get them with thick blades and some designs don’t require a lot of energy to open. Again, you have to do a little bit of research around your setup to make sure you’re making the right purchase.
When push comes to shove, you need a sharp broadhead that performs at distance. Outside of understanding the archery regulations in the state you are hunting in, confidence in executing a well place shot is king. What ever broadhead gives you these three things is the broadhead you should be shooting.
Bushcraft skills are essential for survival, especially if you plan on bugging out to a remote location.
The ability to use resources from the environment can save your behind when SHTF—and even help you thrive after—so it’s important to take the time to learn them.
In this article, we discuss bushcraft 101, from basic bushcraft tools to vital skills like foraging, building shelters, making fires, acquiring food, and more. You’ll also find useful tutorials throughout the article, so if you think you need to sharpen those bushcraft skills, read on:
Bushcraft 101: What Is Bushcraft and How Will It Help You Survive TEOTWAWKI?
Here’s the simple truth: Mother Nature provides all of your needs. All you have to do is figure out where to find these resources and know how to use them.
Bushcraft, used interchangeably with “wilderness skills,” focuses on using resources available in the natural environment for survival. This skill set includes fire making, foraging food, tracking, trapping, hunting game, and shelter-building using basic bushcraft gear.
Learning and mastering bushcraft skills will inevitably help you when SHTF.
Remember, in a large-scale disaster, most modern conveniences will go to the dogs. Without the grid, food supply, clean water, functional sewage, and the internet, society as we know it will plunge into chaos.
People will have no choice but to learn the old ways or perish. As a prepper, you’ll have to learn how to make fire, forage for food, purify water, build a shelter, and make tools with what little you can find.
By arming yourself with a sharp set of bushcraft skills, you’ll learn how to survive in a short-term emergency and even be self-sufficient in long-term scenarios. Once you’ve mastered these skills, you can go on to teach others.
Essential Bushcraft Tools
To do bushcraft, you must have the right bushcraft tools. Here are some of the basics to have in your arsenal:
Knife
A sharp and sturdy knife is indispensable in bushcraft. Without it, you’ll be unable to make fire, set up your shelter, hunt and prepare your food, carve other tools—plus a slew of other small tasks.
A durable full-tang knife with a fixed blade is often used for bushcraft. Full tang means the knife’s steel extends all the way through the handle, making it less prone to breakage and damage.
While folding knives are portable and great for EDC, they’re not exactly the safest or most reliable for tasks like woodworking, so stick with a fixed-blade knife instead. A knife with a drop point and a flat or Scandi grind is great for most bushcraft tasks, too.
How long should bushcraft knives be?
Bushcraft knives are usually around 3 and a half to 6 inches long. This length allows them to do both small, detailed tasks and heavy-duty work. Anything smaller will be hard to handle; anything bigger, on the other hand, will be a machete.
Should you go for a high carbon steel or stainless steel bushcraft knife?
As far as material goes, it’s a contest between high carbon and stainless steel. Your choice of steel will depend on your needs.
Carbon steel blades are durable, easier to sharpen, and tend to throw better sparks when used with a ferro rod. They’re more prone to rust and oxidation, however, so they need higher maintenance compared to their stainless steel cousins.
Stainless steel blades, on the other hand, take longer to sharpen, but they keep their edge longer. They require little maintenance and are virtually rust-proof, making them great for humid environments.
Don’t forget about the knife handle
The knife handle should feel good in your hand, too. Bushcraft knife handles are usually made from hardwood, but this absorbs moisture over time, so you can go for synthetic materials like Micarta or G10 fiberglass.
Knife Sharpener
Since you’re using a knife, it only makes sense to include a sharpening stone among your bushcraft tools. There are many knife sharpeners out there—the most common of which include Japanese water stones, whetstones, or oil stones.
Most sharpening stones have two sides: a coarse side for the initial sharpening and shaping, and a finer surface for the finishing touches. Leather belts also make for good stropping materials to keep your knives sharp even when on the field.
Check out the video above if you need pro tips on how to sharpen your knife while on the field or in your bushcraft camp.
Bushcraft Axe
Next up on our list of must-have bushcraft tools is an axe.
This bad boy is capable of doing tasks your knife can’t or shouldn’t do, like felling and limbing trees, cutting and splitting large pieces of firewood, and building permanent shelter.
Like your knife, axe blades can be made from high carbon steel or stainless steel. A bushcraft axe doesn’t have to be the biggest or longest, either.
Large axes with heavy bits may penetrate wood better, but they also require more energy for you to swing. That’s why most bushcrafters prefer using smaller, lighter axes they can conveniently stow away in a backpack. These are easier to carry around and can be used with only one hand.
Another important factor to consider when choosing this bushcraft gear is sharpness. An ideal axe should be able to keep its edge well even after use and abuse.
Lastly, an ergonomic hardwood handle is key for a good grip and chopping power.
Bushcraft Saw
Not all bushcrafters carry axes. Some enthusiasts prefer using a folding saw for woodworking since it’s significantly lighter and easier to carry around. It also makes for straighter cuts in the wood, which is great for building shelter, especially if you want a sturdy one to outlast the elements.
Saws are also more efficient since these bushcraft tools take less energy to cut through wood and produce more output in the same amount of time. Less effort means you have more time and energy left to do other tasks necessary for survival.
Compass
A compass is a pretty straightforward device. You don’t need a lot of bells and whistles in a compass; you just need to have a reliable one that orients accurately. Moreover, you have to know how to use one to find your way in the wilderness.
Firestriker
The last thing on our list of essential bushcraft tools is a firestriker.
Firestrikers or ferro rods are capable of creating fire through friction. Unlike lighters or matches, fire strikers work even when wet, are effective at any elevation, and don’t need fuel. They’re also easier to use compared to their flint-and-steel counterparts.
To know more about ferro rod fire starters, check out this comprehensive review.
Bushcraft Skills You Need to Learn
Now that you know the basic bushcraft tools, it’s time to dive into the skills you need to possess. Remember, it doesn’t matter if you have the sharpest knife or the most accurate compass out there if you don’t have any idea how to use them properly.
Below you’ll find an extensive checklist of all the bushcraft skills to have under your belt:
Foraging for Food and Medicine
Foraging, by definition, is the act of finding and gathering flora and fauna mainly for food. However, you can also use your foraging skills to find medicinal plants and herbs, natural cordage, firestarters, or materials for shelter.
Foraging for Food
Humans started out as hunter-gatherers. Before the dawn of agriculture and industrialization, the forests were our ancestors’ grocery stores.
Some examples of food you can forage in the wild include:
Fruits
Berries
Nuts
Mushrooms
Tubers
Shoots
Flowers, seeds, and weeds like dandelions and nettles are less obvious choices, but you can also forage and eat them when the going gets tough.
Know Your Local Geography
To be a good forager, you first have to know the lay of the land. What types of plants, fruit-bearing trees, and vegetation grow in your area? Where can you find them?
Take cattails, for example. This wild edible is common in most parts of North America and can be found near ponds and marshes. Cacti, on the other hand, are common in the West and Southwest regions of the States and can be found in dry, arid areas like deserts.
Plant Identification
Plant identification is crucial in foraging. Make a mistake, and you’ll end up with a bad allergy, a busted stomach…or you might not live to tell the tale at all.
Remember, Mother Nature may provide for all your needs, but she also has a lot of plants that can kill you on the spot, too, so it’s important to know how to distinguish friend from foe.
Ask yourself:
What do these edible plants look like? What are their distinct qualities, and how can you tell them apart from dangerous ones?
Some wild edibles, like root crops and bulbs, grow underground, so you also have to know how their leaves and shoots look above the surface.
If you’re a complete beginner, keeping a pocket guide with colored illustrations can help a lot. Make sure this pocket guide covers the area or climate that you’re in and carry it with you when out camping or backpacking. Try to identify the plants you can find along the way and take down notes with your personal observations.
You can also take classes with a forager to help you learn faster. These experts have years of insight and may have tips and learnings from their experiences that you can’t find in guidebooks about bushcraft skills.
Growing Seasons for Foraging
Aside from knowing the plants’ geographic location and appearance, you also have to be familiar with their growing seasons. When do these wild edibles grow most abundantly? Are they available only in certain seasons, or can you find them all year round?
Many edible mushroom species, for example, grow abundantly during the hot and humid summers. They grow at the edge of forests at the start of the season, especially after a nice, warm rain shower. By July to August, you can find tons of mushrooms in oak and beech groves or in areas where evergreen trees grow. They can also be abundant in south-facing hill slopes since these areas receive more warmth.
Foraging for Medicine
Plants aren’t only good for food. Many of them also have medicinal properties. To take advantage of these, you must know which parts of the plant to use and how to use them.
Here are some examples of common medicinal plants and what they can help with:
You can steep willow bark into a tea and use it to treat aches, pains, fever, and swelling.
Fennel tea also helps soothe an upset stomach and fight bloating and nausea.
Yarrow leaves and flowers can be used to aid in blood clotting to slow down bleeding. You can also use it to treat fevers and coughs.
Dandelions, usually passed off as weeds, can be turned into a salve for muscle aches and joint pain.
Plantains have excellent anti-inflammatory properties and make good poultices.
Comfrey poultices or compresses are great for fixing wounds and fractures.
Dos and Don’ts When Foraging
Building Bushcraft Shelters
Exposure to extremely harsh conditions can kill you in a matter of minutes, so knowing how to build temporary and long-term shelters is one of the most important bushcraft skills to know.
The good news? There are tons of ways to make bushcraft shelters from just about anything you can find in the environment.
Making cordage using natural materials
Cordage is one of the most vital components of bushcraft shelters. If you find yourself without rope or 550 paracord, you can use natural cordage to assemble frames or lash poles together for your shelter. You can also use cordage for other purposes, like climbing—and creating snares, traps, fishing lines, or bow drills for fire.
Cedar bark is one of the best sources of natural cordage. You can find these trees all over the country, especially if you’re in the Pacific Northwest region. To make cordage from cedar bark, you want to harvest the inner bark or bast of the tree. That’s the stringy, fibrous layer right under the protective outer bark.
As you can see in the video above, you’ll need to peel the outer bark off in one go and harvest the bast to create cordage from the fibers. You’ll want the bark to dry and age before turning it into ropes, though, since moist bark can shrink over time.
Plants like nettles also make for good cordage. Remove the leaves, flatten the stem, and carefully peel the nettle skin off. Once you’ve done that, twist the fibers until you form cordage. Unlike cedar bark, you don’t have to wait for the nettle stalks to dry out before you can use them. They’re also strong and capable of withstanding tension.
Just wear gloves when harvesting these plants—they’re not called stinging nettle for nothing.
Other natural materials you can use as cordage include some species of tall grass, willow saplings, roots, and jungle vines.
Tying Knots
Knot-tying is another one of the most basic but essential bushcraft skills to learn. If you don’t know how tie decent knots, cordage would be of little use.
There are various knots for different purposes. Here are some of our go-tos:
Square knot – This is a multipurpose knot great for tying or connecting two lengths of rope.
Figure eight – This knot retains the strength of the cordage well. It doesn’t unravel with pressure, so it’s good for climbing, creating footholds, or pulling someone to safety.
Bowline knot – Also retains the strength of the rope or cordage. You can tie this with one hand, making it excellent for rescues or for tying down objects.
Clove hitch – This is a quick-release knot for securing cordage to trees.
Tautline hitch – It’s used to adjust the tension on tarp shelters.
For an in-depth look at more knots you can use for bushcraft and survival and how to tie them, check out this post.
Basic Types of Bushcraft Shelters
Bushcraft shelters come in all shapes and sizes. You can find shelter in nature, as in uninhabited caves, under rock overhangs, or near large fallen trees. You can also construct your own from tree limbs, branches, and foliage. Some types of bushcraft shelters you can make include:
Lean-to shelter – a common free-standing shelter with three walls and an open side. This is one of the easiest bushcraft shelters you can construct.
A-Frame shelter – has a triangular, A-shaped frame with a main ridgepole that runs along the top. Also known as the double lean-to shelter.
Dug out shelter – a shelter made by digging a trench on the ground
Fallen tree shelter – a shelter made from the flat base of a tree root
You can read more about how to build these bushcraft shelters and more in this article.
General Shelter Building Guidelines
Whatever type of shelter you’re looking for or are making, here are some things to consider:
Pick a good location. Your shelter should be able to offer adequate protection from the environment and shield you from harsh rain and wind. It should also be located a safe distance away from your water source (about 200 meters).
Choose a relatively flat location to avoid floods.
Avoid setting up camp under large trees. While they offer shelter from rain, they also have thick branches that can fall on you. Plus, they’re prone to lightning strikes and their leaves will drip long after the rain has stopped—their cons outweigh the pros.
Your shelter should be able to reflect and conserve heat. Stone faces or large boulders make for good heat reflectors. You can also construct a wall from medium-sized sticks and line it with foliage and moss, which are natural insulators.
We’ve previously talked about survival and bushcraft shelters at length in our other articles. Here’s a directory of useful info to help you out:
Waterproofing your shelter
Since your shelter is mostly made of wood, you’d want to take extra measures to make sure that it stays dry.
As we mentioned earlier, choosing the right place is essential in keeping dry. Pick a relatively flat and well-draining location, away from trees with a lot of leaves to prevent dripping. Stay away from ravines or canyons—they may be bone-dry now, but they’re notorious for flash-flooding after mild showers.
When building your shelter, don’t make it too big to conserve heat.
You also have to create roofs at an angle so that rainwater flows at the sides. Cover these steep, angled roof frames with broad leaves, starting from the lowest part and working your way towards the top. This way, your roof can work like shingles and shed rainwater without a hitch. Don’t forget to dig a rainwater runoff around your camp so you won’t wake up in a puddle.
Another way to waterproof your shelter is by simply bringing a tarp. Tarps are cheap, hard-wearing, and multifunctional. You can use different configurations to turn it into a shelter, use it as a ground sheet or to put on as an additional layer to your bushcraft shelter’s roof.
When using tarps to waterproof your shelter, make sure that it’s stretched out tautly and is securely pegged to the ground or to a tree so that it doesn’t collect rainwater. If you can’t afford a tarp, use a thick drop cloth or repurpose an old shower curtain.
Related: Waterproofing your survival gear and supplies
Making DIY cement from wood ash
Basic carpentry and woodworking are undoubtedly crucial bushcraft skills to know when making long-term shelters, but if you want to take it up a notch, you can create makeshift cement from wood ash.
As the name suggests, wood ash cement is made by burning biomass like dried bark and leaves. These materials are more common than the usual ingredients used to create makeshift cement like limestone or shells, but contain the same minerals like potassium, phosphorus, and calcium. When done properly, you can use wood ash cement as mortar to reinforce your shelter, or you can turn it into little blocks for various purposes.
The process is pretty labor-intensive and time-consuming, though, so it’s best to make this only if you’ve got the time and resources. As seen in the tutorial above, you’ll need a kiln or oven, a lot of ash from biomass (hardwood ash works best), and some clay or terracotta to use as aggregate.
Still, it’s a good-to-know skill that might come in handy when you’re building a semi-permanent bushcraft dwelling or bug-out camp.
Primitive Firemaking
Fire provides you with heat, light, and protection. This indispensable resource also allows you to cook food, purify water, and fend off predators. Needless to say, knowing how to make fire is one of the top bushcraft skills you should master.
You only need three ingredients to create fire: oxygen, heat, and fuel. These factors are collectively known as the combustion triangle. If one is missing, you can’t ignite a flame.
Oxygen, of course, comes from the air around us. You can best harness oxygen by allowing proper ventilation and by creating efficient firelays.
You can produce heat primarily through friction. Once you create a spark or an ember and it catches on to your fuel, chances are you’ll be able to create a fire.
Fuel comes in the form of combustible materials and is generally classified as tinder, kindling, and firewood.
Tinder is the smallest and finest of the bunch, usually made from thin wood shavings, feather sticks, and other fibrous materials. Its purpose is to catch sparks or embers to burn kindling like sticks and twigs. Once your tinder and kindling are burning, you can feed it larger chunks of fuelwood to keep it burning and to produce hot coals.
Natural Firestarters: Tinder, Kindling, and Firewood
Shavings or curls from fatwood or from resinous trees like cedar, birch, and pine make for excellent tinder, and you can find them almost anywhere in North America.
Tree bark also makes a great tinder and firestarter. Red cedar bark is especially fibrous and can be lit even when damp. You can fluff up red cedar bark to create a “bird’s nest” to catch sparks or live embers.
Birch bark is rich in resins which help them ignite faster. It’s also resistant to moisture and easy to gather. Simply skin dead fallen birch trees with a knife, and their barks will come off in sheets. You can tear birch bark into strips and bundle them up to start a fire.
Fatwood is another term for pine heartwood drenched in resin. Though not as common nor as easy to harvest as the other firestarters mentioned earlier, fatwood shavings light almost instantly, even in super damp conditions. You can also cut them up in chunks and use them as kindling or firewood.
Other natural fire starters include:
Tinder fungus – This black and spongy species of mushroom is used to hold coals or reignite fires.
Cattails – Dry and fluffy, cattails can be found near water or in marshlands. They don’t burn for very long, so they’re usually considered flash tinder.
Pinecones – Like fatwood, pinecones are resinous and can be used as fuel.
Batoning and splitting firewood
Batoning firewood has been a very polarizing topic among preppers. Should you do it and risk ruining your knife? Or should you never do it at all?
Well, whether you’re in favor of it or not, you have to learn how to baton and split wood when you’re left with no other choice.
Batoning is the process of splitting wood with a knife and another blunt piece of wood called a baton. The idea is to lodge the knife onto a block of wood and strike it with the baton, thus splitting the wood into smaller chunks perfect for a campfire. Batoning can sometimes be easier than using an axe or saw, especially when you want to split small pieces of wood quickly.
The downside is that batoning needs a lot of practice, and it can damage your knife in the process. If you’re not careful, you might even end up hurting yourself.
The trick to successful batoning is to make sure that your knife is sharp and its edge is placed perfectly straight onto the block. Then, strike it with the baton nice and hard to split it right down the center.
Primitive Ways to Make Fire
Since primitive folks didn’t have matches or lighters, they primarily made fire through friction, and they produced friction through drills.
There are many types of drills out there, but they more or less have the same basic components: a spindle or a long stick that one uses to create friction and a fireboard, which is a flat piece of wood that collects the embers made by the spindle.
Here are some examples of primitive fire drills:
Hand Drill – The hand drill can be operated by one person and is perhaps the most easily recognizable fire drills out there. The idea is pretty simple: you roll the spindle really fast between your palms, running your hands down its length very quickly until it produces embers. The embers are collected in a small nick or depression on the fireboard and are then transferred to a pile of tinder. Tinder ignites and boom, you have a fire.
Bow Drill – The concept is pretty similar to a hand drill, but this time, you use a flexible stick and a piece of cordage to create a bow. The bow is used to turn the spindle and creates the friction for you.
Two-Man Friction Drill – This one is essentially a bow drill but instead of going at it alone, one person holds the drill upright while the other operates the bow to create friction.
Pump Fire Drill – This type of fire drill is a bit more complicated than the rest. The bow is powered by a manually operated pump mechanism that creates friction.
Aside from drills, another primitive way to create a friction fire is through a fire plough. Instead of using a spindle and a small depression on a fireboard, you make a groove along the length of the fireboard and slide another piece of wood along it, creating friction horizontally. The stick should be around an inch thick and made from softwood for best results.
You can also use flint and steel. This is how they used to kick it back in ye olde days. On one hand, you’ve got a striker made from carbon steel, and on the other, a hard stone made from flint or chert. Striking these materials against each other creates sparks, which catch on dry tinder.
You can perfect this method through practice, but a more convenient way to create fire through the same principle is by using ferrocerium rod fire starters instead.
Which Firelay Should You Use?
It’s not enough to light a fire—you should also be able to keep it going. An excellent firelay will help your fire stay lit throughout the night with little to no maintenance, so it’s important to pick the right one.
Here are some examples of firelays you can construct:
Tipi firelay – As the name suggests, the tipi firelay sports a triangular shape like a tipi shelter and can be made from sticks and twigs. To build it, all you have to do is start from small kindling and work your way to the bigger ones, leaving an opening on the upwind side to ignite the tinder.
Log cabin or upside down fire – This is a self-feeding firelay that burns from top to bottom. Up top, you have your tinder and kindling. The pieces of fuel get thicker as you go down the firelay, allowing the fire to produce a big, hot, and consistent flame with minimal tending.
Star fire – This one is really simple. Start by building a small pile of tinder and kindling, and around it, place large pieces of firewood. The idea is to gradually push the larger pieces of fuel into the fire to keep it going.
Wanna know the nitty-gritty details of making these firelays? Check out these tutorials. If you want to learn more about firemaking in general, here’s the full roster of useful guides and resources:
Finding and Purifying Water in the Wild
Hydration is key for survival, so knowing how to find and purify water in the wild should be bushcraft 101.
Like the other bushcraft skills mentioned in this article, you can find many sources of water out there by first knowing the lay of the land, and by reading natural indications of water, like the following:
Gurgling or rushing sounds – These indicate the presence of running water. Since water flows downward, you can most likely find it in low-lying areas, canyons, and valleys.
Plants and vegetation – Certain plant species, like lilies and cattails only grow near water, so look out for these. Note the quality of the soil, too—muddy or marshy ones obviously indicate water. Large, thick vines and trees can also be sources of water themselves. Before you drink up, however, make sure that the plant is not poisonous and it doesn’t ooze bitter or cloudy sap.
Presence of animals and insects – Grazing animals and herbivores are more likely to lead you to their watering holes. Watch out for birds, too. Birds will fly low and in a formation when in search of water, and will likely hop from tree to tree after having a drink.
When you can’t find a lake, river, or stream to get water from, you’ll have to get creative by collecting rainwater, creating a solar still, or looking for alternative sources of hydration. Here’s a guide on how to go about those methods.
Bushcraft Water Purification
A bandana or shemagh is excellent for taking out debris and dirt from your drinking water, but if you don’t have one on hand, you’ll have to make your own filter. The video above describes the process of how to make one with a bottle and some natural filters like rocks, leaves, and soil.
The idea is to stack the filters up in layers. The large and loose ones, like rocks and pebbles, go at the top to filter big pieces of debris. The filters gradually become finer to take out minute contaminants until you get clear water.
Once you’ve got a decent amount of water, purify it via boiling. Boiling kills microorganisms and viruses that might cause disease.
Related: Best Ultralight Backpacking Water Filters
Trapping and Hunting Game for Food
Berries, roots, and edible plants will keep you alive well enough, but if you want to fill your belly with something more substantial, you will have to learn how to track, trap, and hunt game for food.
Here’s what you need to know about these bushcraft skills:
Trapping
The biggest advantage of trapping is that it saves you time and energy. Unlike hunting, where you have to actively chase after a single quarry, trapping lets you catch a lot of prey without having to run after them.
You can set up traps in different places to increase your chances of catching a meal. This multitasking feat frees up a large chunk of your time, letting you do other stuff like building a campfire or reinforcing your shelter.
When setting up traps and snares, it’s important to develop a keen skill for tracking animals. Know what kind of animal you’re trapping by watching out for things like:
Pawprints
Fresh or worn tracks
Droppings
Disturbed vegetation
The animal’s usual diet within the vicinity
Once you’ve determined your prey, it’s time to move. Here are tutorials that show how to create some of the most common traps out there:
Deadfall Trap
The deadfall trap is one of the earliest and most effective traps known to man. It’s used to catch small to medium-sized prey like rodents and squirrels.
Spring Snare Trap
Simple yet effective, the spring snare trap uses a length of wire or string to create a noose that tightens around the animal’s leg or neck.
Woven Fish Trap
This trap takes a long time and a lot of skill to make, but the payoff will be worth it. This trap lets you catch medium-sized fish and eels.
Prawn Trap
This is a smaller version of the fish trap for prawns and smaller species of fish.
Things to Remember When Making Traps
Traps take a lot of skill and practice. Here are some useful tips to remember when constructing traps and snares:
Prepare the parts of your trap away from the area to avoid disturbing the vegetation and alerting the animals to your presence. All you have to do when you come to the site is to assemble it.
Stay downwind.
Always wear gloves when handling your traps. Animals have a keen sense of smell and can detect your scent. Rub plants, dirt, or the innards of your previous catch onto your trap to mask your own scent and confuse the animal.
Blending in is key. Make sure that your trap blends well with the environment by camouflaging it with leaves, mud, and vegetation.
Avoid using young twigs and cordage when making your traps. These release a scent that alerts animals of potential predators. If you can’t find old materials, age your trap by exposing it to the sun.
Choose your bait wisely. Don’t use bait that the animal can just easily find elsewhere. Instead, use something that will potentially catch their attention.
For an in-depth look at other primitive ways to catch, cook, and eat food in the wild, check these out:
Other Bushcraft Skills You Have to Know
Shelter, fire, water, and food are the four foundations of outdoor survival. Once you develop your skills in these areas, you’ll be able to survive out in the wild without modern resources.
However, that doesn’t mean you have to stop there. These intermediate bushcraft skills will help you take your survival know-how to the next level:
Making Bushcraft Tools
What separates humans from other primates? Our ability to create and use tools to help make our lives easier. This video shows 7 useful primitive bushcraft tools and contraptions you can use in and around your camp.
Natural navigation
You need to know how to get your bearings when out in the woods. When you don’t have a compass and a map, natural navigation techniques will prevent you from getting lost in the wilderness.
Creating watercraft
At some point, you might have to leave your camp and venture out into bodies of water to get food or to explore. You can create a canoe from reeds, as shown in the video above, or construct a raft from driftwood.
Final Thoughts
You know what they say: the more you know, the less you need. Having a sharp set of bushcraft skills will not only help you survive in the wild; they will also help you live off the land and thrive without modern creature comforts long after SHTF.
How good are your bushcraft skills? Do you think you can survive an extreme bug out situation in the woods? Let us know in the comments!
There are many reasons a kid might get a fire under their butt about archery. Maybe they watched Hawkeye, Brave, or one of the Hunger Games movies and want to give it a try. Maybe they watched some of the archery competitions from the 2020 Olympic Games last year or they have a friend who is already into archery inspiring them. Were they super into that bow and arrow toy they got for their birthday one year with the suction-cup arrows? That’s a good sign. Getting a bow and arrow for kids could result in a great hobby, an avid competitor, or even a great bowhunter.
However it got there, I highly suggest supporting your kid’s interest in archery. Like football or dance, excelling in archery requires practice, discipline, persistence, decision-making, attention to detail, and other qualities that are ultimately useful in everyday life. And it’s a heck of a lot of fun.
Shopping for a youth compound bow can seem daunting if you have little to no experience with archery. Even an experienced bowhunter might not know exactly where to start. A thousand questions probably loom, but don’t sweat it! Let’s unravel the intricacies of buying a bow and arrow set for your world-class archers-to-be into understandable terms.
Determining Dexterity
Before you shop for a youth bow, you must determine your child’s dexterity. It doesn’t matter what hand they use to write or hold a fork; it’s all about eye dominance. Don’t worry. This won’t require an expensive eye doctor appointment. All you have to do is:
Have your child touch the tip of their index finger and thumb together to create a circle.
Tell them to fix their gaze on a round object, like a clock or doorknob, that is at least several feet away.
With both eyes wide open, tell them to extend their arm and center the object inside the circle they created with their hand.
Now, tell them to close their left eye.
If the object remains centered in the circle, they are right-eye dominant and need a right-handed bow. If the object moves out of the circle when they close their left eye, it means they’re left-eye dominant and need a left-handed bow. But you’re not ready to shop just yet.
RELATED – Chris Bee Q&A: How Archery Competition Improves Bowhunting Accuracy
Will a Used or Hand-Me-Down Bow Work?
Naturally, when a new childhood interest arises, parents on a budget often seek ways for the youngins to explore that interest without breaking the bank. In this case, that means looking for a used bow or accepting a hand-me-down from a friend or relative. In some cases, this can work just fine.
First, you need to measure your child’s draw length and determine what draw weight they can comfortably pull. A cheap, used bow or even a nice hand-me-down can often not be adjusted to fit your child’s needs. Don’t let “free” or “cheap” overpower good judgment. But if a used bow can be tuned correctly, then go for it. If you’re thinking about buying a used bow from a stranger, we’ll get to that in a bit.
Determining Draw Length and Weight
You can get a good estimate of draw length at home, and here’s how to do it. But it’s best to visit a local archery pro shop to get accurate measurements taken. Sounds expensive, right? Usually, it’s not. Lots of shops won’t charge anything to measure a kid’s draw length or let them test fire a few bows to figure out their ideal draw weight. If you’re going to be shopping at a larger big-box store, be warned, they won’t have an expert on staff. It’s best to start at a pro shop.
You absolutely must have the draw length and weight for your kid’s bow dialed in out of the gate. It’s critical. Get either wrong, and archery will become nothing more than a frustration for them.
You might also be wondering if buying a bow is worth the expenditure for a continually growing child. Fortunately, some bows are designed especially for youth archers with a wide range of draw-length and draw-weight adjustability that will last them into adulthood.
RELATED – Get in Bow Shape: A 21-Day Archery Lesson Plan
So What’s the Best Bow and Arrow for Kids?
These bows are all quite affordable, especially because some will adjust to keep pace with your child’s growth spurts. Plus, that adjustability makes them easy to sell on Facebook Marketplace or eBay if your kid just doesn’t dig archery or moves on to a new bow.
PSE, Bear, Quest, Mission, and Diamond offer highly adjustable bows. None is identifiable as “the best” because that comes down to individual preference regarding fit and feel, and each bow manufacturer designs things differently. The most important attribute to consider is the bow’s grip; it must fit your child’s hand in a natural, comfortable way.
The PSE Uprising features a wide range of adjustability for draw weight and length, making it an excellent first bow and arrow for kids.
The Bear Cruzer G2 is a solid choice. Its draw weight can be adjusted from 5 to 70 pounds and it sports 12 to 30 inches of draw length. It can be set up to fit a 4-year-old girl as well as an adult man who is over 6 feet tall.
The Bear Legit is another good option with a slightly heavier overall draw weight, but it’s still adjustable from 14 to 30 inches and 10 to 70 pounds. It’s great for teenagers interested in both archery and bowhunting. Both models come with accessory packages, not including arrows.
The PSE Uprising offers similar adjustability, as does the Mission Hammr.
When shopping for a bow and arrow for kids, you want to choose a bow that can be adjusted and grow with the child as their draw length and weight increase over time.
All of these bows offer exceptional value, but each has its own distinct fit and feel. Again, when comparing bows from top manufacturers, fit and feel make one bow “the best” for any shooter. It might also be a good idea to choose a set that includes an arm guard. If a kid gets a forearm burn from the bowstring early on, they could develop a flinch. An arm guard can let them shoot with confidence until they get their grip and stance just right.
RELATED – World Record Bulls: The Top 5 Typical Archery Elk
Should You Buy a Used Bow and Arrow for Kids?
You can likely find some of the bows mentioned above for sale in used condition online well below MSRP. But, before you buy used, consider the bow’s condition and lack of warranty.
Bow warranties are only valid to the original owner. If a limb splinters after you buy a used bow, the manufacturer probably won’t replace it for free. Also, bowstrings (usually not covered under warranty, even for the original owner) may have incurred wear from use and you might face the reality of buying a new bowstring-and-cable set for the used bow right away.
It’s important to tune and paper tune a bow and arrow for kids so they start on the right foot.
Lastly, don’t assume that when a used bow arrives on your doorstep that your kid can unbox it and commence shooting. Most likely, it will need to be adjusted to their specs and tuned, which will require a trip to the local archery shop. Shops usually charge by the hour for this kind of work. You might save money initially, but it could cost nearly as much or more than a new bow by the time your kid is ready to hit the archery range.
In contrast, most archery shops include setup and tuning at no additional fee with a new-bow purchase. Plus, you get the warranty, and the bow will have a fresh bowstring-and-cable set, which should last up to two years with proper care, depending on use.
RELATED – The 8 Best Archery Pro Shops From Every Region of the United States
What About Arrows?
Arrows aren’t one-size-fits-all. Arrow shafts are designed with stronger spines (stiffness) for more powerful bows and weaker spines for less powerful bows. Gold Tip, Easton, and Victory are top arrow manufacturers that offer great youth arrows.
Gold Tip Lightning arrows have been a top choice for probably two decades now and would make a great arrow set for kids. It’s a carbon-fiber arrow that’s durable and affordable. Gold Tip has additional options if your kid is interested in bowhunting.
Easton has both aluminum and carbon arrows for young archers. Understand that aluminum shafts can bend under pressure. That means the more kids use them and pull them from targets, the more likely they’ll bend, and then they won’t fly true. But, if you’re confident that your young archer will handle them carefully, consider the XX75 Neos for recreational shooting with lightweight bows. The INSPIRÉ makes for a good carbon arrow choice. Easton has bigger and better options for bowhunting arrows.
You also can’t go wrong with Victory. The Ares, Venus, GenX, and V-Force Jr. are all carbon-fiber arrows designed for youth chasing different pursuits, from recreation to competition.
Arrows will perform best when cut to length based on the bow setup. Save yourself some trouble and buy your kid’s arrows through a pro shop that will measure and cut them to the proper length for you.
Hopefully, most of your youth archery shopping questions have been answered. Should you have more, your local archery dealer should be happy to address them so you can get the little ones slinging arrows soon.
READ NEXT – Bowhunting Starter Kit: Everything You Need to Archery Hunt This Year
Hardworking outdoor apparel and gear, supported by partnership with American Hiking Society
MOUNT HOREB, Wis., April 6, 2022 /PRNewswire/ – Duluth Trading Company is relaunching its Alaskan Hardgear brand under a new brand name, AKHG™. The reintroduced AKHG™ will showcase an expansion into womenswear, extended sizes, all-weather performance apparel and gear alongside a commitment to conserving the outdoors with a two-year partnership with the American Hiking Society. Inspired by the Alaskan wilderness, AKHG™ is built to perform year-round in a variety of conditions – from the harshest to the most serene – and celebrates the rewarding moment arriving at camp and every bit of leg work it took to get there.
“There’s an undeniable growing desire across communities to explore the world around us and partake in the activities that come with being outdoors,” said Neala Shepherd, Senior Vice President, Customer Experience, Duluth Trading. “AKHG™ aims to provide clothes and gear for those who love the rolled-up-sleeves side of adventure and embrace the work that goes with exploring in the wild.”
With more size-inclusive offerings, weather-shielding fabrics, convertible features, and technical design elements that boost versatile, long-term use, each new AKHG™ style delivers superior quality, comfort, and function to let wearers Live Life Less Soft™. The brand continues to feature the ingenuity and innovative technology that Duluth Trading customers have come to know and love.
This spring, brand fans are encouraged to get outdoors and discover the latest from Duluth Trading and AKHG™:
The Crosshaul CollectionWith an exceptionally strong TOUGH COTTON™ finish, the Crosshaul Collection is three times more abrasion-resistant than regular cotton without sacrificing softness or breathability. New styles include the Women’s Plus AKHG™ Crosshaul Collection Cotton Short Sleeve Tee ($34.50) and the Men’s AKHG™ Crosshaul Cotton Hoodie ($64.50).
The Renew Bamboo CollectionThe eco-friendly Renew Bamboo Collection debuts with the Women’s AKHG™ Renew Bamboo Short Sleeve Shirt ($29.50) and similar styles. Transforming bamboo into a modern performance rayon, the fabric is blended with recycled polyester and spandex to enhance moisture-wicking and sun-blocking power, while still feeling supremely soft and flexible.
AKHG™ Olympic Coast Rain GearSeam sealed with a 2.5-layer fabric designed to prevent clamminess, the rugged-yet-soft Olympic Coast Raingear features 15K waterproofing and breathability. Built to withstand high winds and rain, the collection is durable and remains lightweight enough to pack into its own pocket. New styles include the Women’s AKHG™Olympic Coast 2.5L Rain Jacket ($129.50), Men’s AKHG™️Olympic Coast 2.5L Rain Jacket ($129.50), Women’s AKHG™Olympic Coast 2.5L Rain Pant ($119.50), and Men’s AKHG™️Olympic Coast 2.5L Rain Pant ($119.50).
Perfection Loop Fishing ShirtsMade with a lightweight, free-moving nylon blend, AKHG™️ Perfection Loop Fishing Shirts are sweat-wicking, fast-drying, and snag resistant. Featuring a generous amount of pockets, adjustable cuffs, convertible sleeves, a hook-and-loop rod holder for hands-free fly tying, and back vents, the new fishing shirts offer portable performance for long days on the water. New styles include the Men’s AKHG™️Perfection Loop Fishing Shirt ($89.50) and the Women’s AKHG™️ Perfection Loop Fishing Shirt ($89.50).
Strengthening its investment in making the outdoors accessible, AKHG™️ simultaneously launches as the Exclusive Apparel Sponsor of the American Hiking Society’s National Trails Day® for 2022 and 2024. American Hiking Society is a national organization empowering all to enjoy, share and preserve the hiking experience. Aimed at advocacy and trail service, National Trails Day® improves trail access for millions nationwide, hosting events across all 50 states with participation by hikers, bikers, rowers, horseback riders, trail clubs, federal and local agencies, land trusts, and businesses.
About AKHG™AKHG™ is an outdoor apparel brand within the Duluth Trading Co. family that was created for those who roll up their sleeves for adventure and Live Life Less Soft™️. The brand’s collection of apparel, accessories and gear offer functional design inspired by life in the vast Alaskan wilderness. Built to withstand the harshest of climates and toughest terrain, yet versatile enough for varied outdoor recreational uses like hiking, fishing, camping, and snow sports, AKHG™️ is dedicated to honoring the work of play. All products built by Duluth Trading Co. are backed by the company’s “Superior Standard” and supported with outstanding customer service under the “No Bull Guarantee.” To learn more, visit www.duluthtrading.com or one of the 65 Duluth Trading store locations nationwide.
About American Hiking SocietyFounded in 1976 American Hiking Society is the only national nonprofit organization dedicated to empowering all to enjoy, share and preserve the hiking experience.
The fleshing knife is a key component to most fur sheds. If you’re fleshing muskrats, mink, marten and weasels, you can simply use a butter knife, or a small pelt scraper. But if you’ve got any amount of meat and fat to clean off a pelt, you need a fleshing knife.
Fleshing knives come in a variety of shapes and sizes, and a wide range of price points. The very low end, entry level fleshing knives cost around $15-25. Why so cheap? They’re simply a piece of mild steel with a handle on each end. Unlike the better knives, they’re only one sided, meaning you can do a lot of pushing, but little to no cutting unless you sharpen the convex side on your own. They also typically come unsharpened, and don’t sharpen very easily. They can get the job done, and are great for fleshing a few pelts a season, but they require a whole lot of work and will wear a guy out pretty quick trying to do much fleshing. A number of different companies make these knives, some with brand names and some without. Aside from a lack of ergonomics, the entry level fleshing knives don’t have the quality steel that will take a sharp edge and hold it. Sure, you can sharpen them, but they’ll go dull pretty quick, and won’t cut or push nearly as well. Still, if you need a fleshing knife in a pinch, or you only flesh the occasional pelt, one of these will save you a few bucks.
There’s a quick jump, both in price and quality, between the low end and high end fleshing knives – without much in between. Instead of paying less than $30, you’ll be well north of $60 for a good knife. And in my opinion, it’s well worth the added investment. I remember my disbelief when I tried my first good quality knife, a Necker 600, after spending years trying to flesh beavers with the low end knives. It was incredible. One side for pushing, and a razor edge on the other for cutting the tough spots. The high quality steel blade didn’t dull a bit, even after fleshing 20 beavers. In addition to steel quality, the ergonomic shape was easier on the hands and arms, and the knife had a level of flex to it that made for smooth strokes and less tiring. I swore I’d never go back to an entry level knife. If you can afford it, get a Necker, or equivalent fleshing knife like the Wiebe Elite or the Au Sable Superior.
In addition to the low and high end standard knives, there are a number of other styles that some folks prefer. Sheffield and Green English are a bit different style of knife, with a much wider double-edged blade. They come factory sharpened, and lots of folks like them. The Green English is available at a similar price point to the Necker, and the Sheffield is kind of the high end of the high end product – hand crafted in England with the best quality steel.
A relative newcomer to the market, the Caribou fleshing knife has had some really great reviews recently as well. The big time beaver trappers I know who have used it say it has a thinner, more flexible blade than the Necker, and they really like the precision it affords. Check it out!
Unless you’re a skilled clean skinner or one of those guys who fleshes beaver pelts with a small knife over his knee, you need a fleshing knife in the fur shed. It’s as important as the beam, and you certainly get what you pay for. The low end knives are a dime a dozen, and will get you by in a pinch, but a good fleshing knife that’s comfortable and high performing is worth every penny you spend on it. It’s an item that will last for many years, and pays for itself with every pelt you put up.
There is a common misconception that catfish are strictly freshwater fish. In coastal Georgia, South Carolina, and North Carolina, two species of catfish are prevalent. Anglers catch saltwater catfish regularly in these three states. Despite the two species living amongst each other, each has unique characteristics. Here is what you need to know about a hardhead catfish vs. a gafftopsail catfish.
Hardhead Catfish
The hardhead is along the east coast of the United States. Anglers catch a significant of hardheads when fishing the bottom.
What Is The Range Of A Hardhead Catfish
When it comes to range, the hardhead is widely distributed. Anglers catch the species as far north as New England but more frequently between Maryland and Florida.
What Is The Habitat Of A Hardhead Catfish
It is unlikely to find hardheads offshore of the Atlantic ocean except for the waters off the beaches.
The hardhead catfish prefers soft mud or sand bottoms along the coast, rivers, and brackish waters.
How To Identify A Hardhead Catfish
When it comes to identifying a hardhead, they are easy to distinguish from a gafftopsail catfish. The upper half of the sides and top range between gray and black depending on the habitat. The belly of the hardhead is silver to white.
When removing the hook, look closely at the mouth. Barbels extend from the bottom lip. Lastly, the condensed tail is deeply forked.
How Big Do Hardhead Catfish Grow
The hardhead catfish exceeds three pounds; however, it is most frequently caught between half a pound and a pound in weight. When comparing hardhead to other saltwater catfish, the hardhead is of a small size.
How Do You Catch Hardhead Catfish
Hardheads are not picky eaters. Catfish are bottom dwellers; therefore, you must present the bait on the seafloor.
When targeting hardhead, rig a hook beneath a lead weight heavy enough to hold the bottom. Tip the hook with shrimp, squid, cut fish, or chicken, and allow the bait to soak until the fish strikes. Rember to focus on soft seabeds, including sand and mud.
Are Hardhead Catfish Good To Eat
When filleting and eating catfish, the hardhead produces good fillets but is rarely eaten due to its size. The yield is minuscule.
Is A Hardhead Catfish Poisonous
Unfortunately, the dorsal and pectoral fin is covered in a protective slime. The slime layering assists in keeping fish out of harm’s ways. However, the slime results in anglers becoming stung by catfish.
The dorsal and pectoral fin are sharp. Avoid touching the and upper and lower fins when handling the catfish. What is most important is understanding that a venomous slime coats the fish. When the skin becomes punctured by a fin, the slime injects into the skin, causing extreme pain to the person handling the fish.
Gafftopsail Catfish
Despite the similarities, gafftopsail catfish differ from hardheads in many ways. Here is what to know about the gafftopsail catfish.
What Is The Range Of A Gafftopsail Catfish
The range of Gafftopsial catfish is the same as the hardhead. Gafftopsails extend between Florida and the northeast; however, they are less prevalent than the hardhead.
What Is The Habitat Of A Gafftopsail Catfish
The gafftopsail roams widely about the water column in search of food compared to the bottom-dwelling hardhead.
Gafftopsails scavenge for the next meal despite the depth of the water. The fish is caught in rivers, flats, and channels but predominantly in deep waters.
How To Identify A Gafftopsail Catfish
Despite the hardhead and gafftopsail falling under the catfish category, they two are significantly difference in appearance.
The mouth and head of a gafftopsail are significantly larger than a hardhead. As the name implies, the dorsal fin is sail-shaped and extends well above the body. Lastly, the dorsal and pectoral fins feature trailing streamers.
How Big Do Gafftopsail Catfish Grow
When it comes to size, gafftopsails are most frequently caught in the one-pound range; however, they are known to reach up to ten pounds.
How Do You Catch Gafftopsail Catfish
The best gear to target gafftopsail catfish are spinning rod and reel combinations. Like hardheads, use a lead weight and hook to reach the bottom. However, the best bait presentation is live fish.
Are Gafftopsail Catfish Good To Eat
The gafftopsail makes excellent table fare. Cut the flesh into chunks when filleting, douse them in flour, egg wash, and bread crumbs before frying.
Is A Gafftopsail Catfish Poisonous
Similar to the hardhead, gafftopsail are poisonous. Pay close attention to the spines on the dorsal and pectoral fins. A jab with any of the three fins leads to a painful wound that you would wish to have avoided.
Next Time You Head Out Saltwater Fishing You Will Know A Hardhead From A Gafftopsail Catfish
Both the hardhead and gafftopsail catfish are widely distributed across the east coast of the United States. The fish are excellent fighters on light tackle and are suitable for cooking up for dinner. To avoid becoming stung, we suggest wearing gloves when handling the fish. Lastly, remember to obtain a saltwater fishing license.
"Air Rifle Scope vs Rifle Scope: Unveiling the Ultimate Precision Optics. Discover the essential differences and benefits of these two optical devices, empowering shooters...





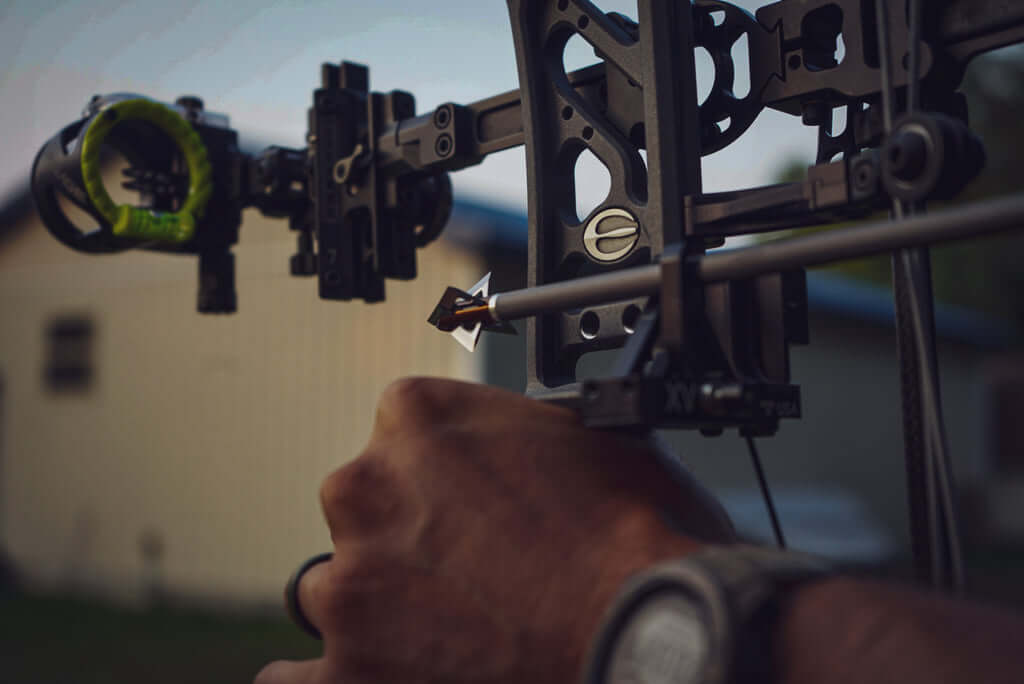
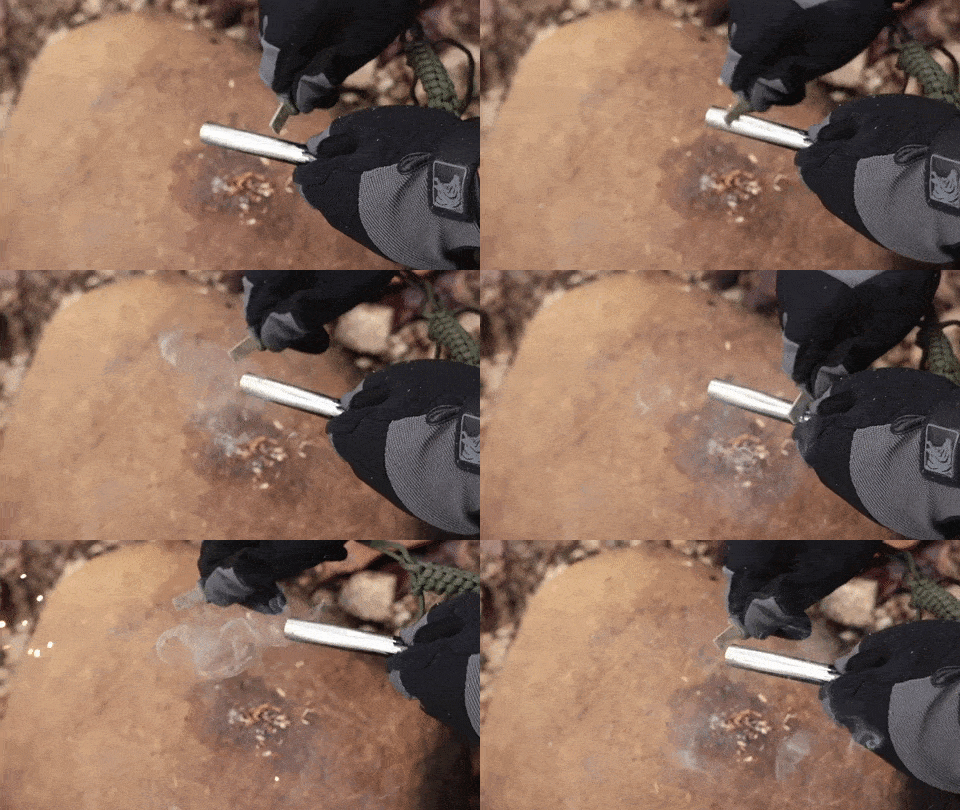













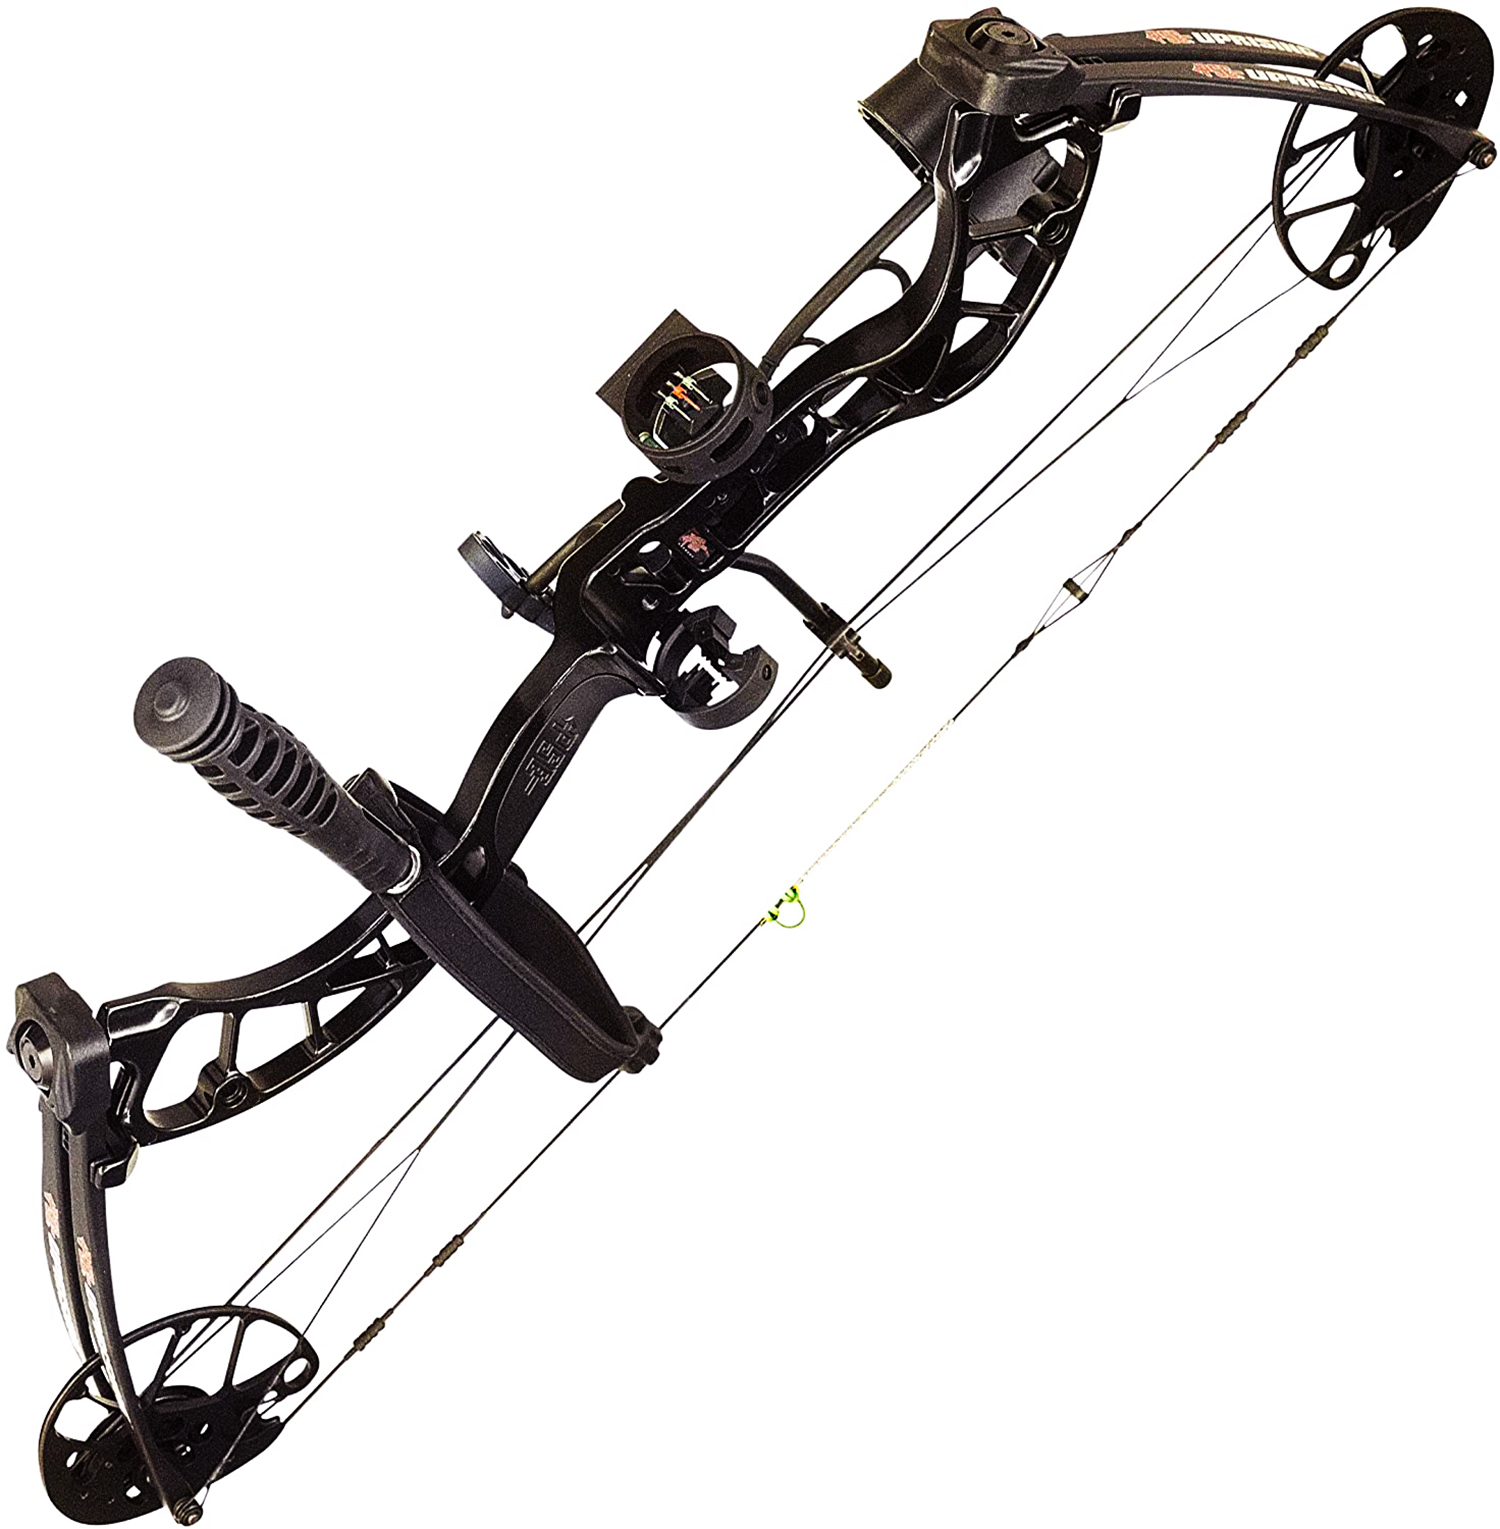
 The fleshing knife is a key component to most fur sheds. If you’re fleshing muskrats, mink, marten and weasels, you can simply use a butter knife, or a small pelt scraper. But if you’ve got any amount of meat and fat to clean off a pelt, you need a fleshing knife.


