Deer hunting is perhaps one of the most American hunting activities, and with the increasing popularity of suppressors, it’s only natural that people will ask if they can hunt deer with suppressors. The answer is by and large a resounding yes! 40 of 50 US states allow hunting deer (and other game) with suppressors, meaning that most anyone who wants to can with a suppressor.
Can You Hunt Deer with a Suppressor?
You can totally hunt deer with a suppressor, and there are a lot of good reasons to! We’ll show you the states that allow hunting with suppressors in a minute, but the good news is that it is quite likely that you can hunt with a suppressor in your state.
If you have a hunting rifle with a suppressor or want to put a suppressor on your hunting rifle, you’ll find a lot of benefits, and precious few, if any, drawbacks. Well, other than the bother of getting an NFA registered device, but that’s not such a big deal in the grand scheme of things.
Anyway, since most places are states that allow hunting with a suppressor, let’s look at the advantages that come with suppressed hunting.
Buy a Rifle Suppressor
Benefits of Hunting Suppressed
From the very beginning in 1909, suppressors have been actively marketed to hunters and for good reason – they make hunting safer and quieter, eliminate the need for bulky hearing protection, and improve accuracy when shooting.
Here are just a few of the reasons why suppressed hunting is better hunting:
Make the outdoors quiet again. The thundering roar of a gunshot spooks game, trains animals to expect hunters and disturbs private landowners and other people sharing the same hunting space. Suppressors, when paired with the right ammo, reduce the sound of a gunshot to hearing safe levels, and “dull the edge” of the sound of a gunshot.
Hunting deer with a suppressor is safer. While in recent years electronic ear muffs that allow you to hear ambient noise while blocking the sound of gunfire have hit the market, the simple fact is most hunters still choose between no ear protection or wearing something that makes it hard to hear what is going on around them.
Using a suppressor on your hunting rifle allows you to hear everything that is going on around you, and not damage your hearing when taking a shot.
Accuracy is proven to be improved when shooting with a suppressor. This benefit has also been touted since the early 20th century. This is because the physics of a silencer reduce felt recoil and muzzle climb. With both of these factors greatly reduced, shooters find their rifles easier to shoot.
So it isn’t that silencers make the gun more accurate per se, but they make it easier for YOU to shoot your gun more accurately.
There are a lot of other little things that make hunting deer with a suppressor nice, too. Your shots are less likely to spook other game in case you miss, you are fully aware of your surroundings, you have less gear to carry on your person, you never have to worry about quickly getting hearing protection in before taking a shot, and of course, reducing noise pollution is simply the responsible, polite thing to do.
Do Suppressors Impact Accuracy?
We already touched on this a bit, but we can look a little deeper into how suppressors impact accuracy.
It is a law of physics that for every action, there is an equal and opposite reaction. Gun owners understand this as recoil. Recoil is moderated through various means, like through heavy guns or dense stocks that help absorb and distribute some of the energetic forces from firing a round. Felt recoil can also be reduced with various shock absorbing materials like rubber buffer pads or even various spring loaded or similar shock absorbers built into the stock.
Semi automatic rifles have some natural recoil reduction built into their operation, as the recoil springs that cycle the action absorb huge amounts of energy that would normally be felt by your shoulder.
Muzzle brakes (while rarely seen on manually operated hunting rifles) are another proven way to reduce felt recoil, as they redirect muzzle gas in such a way as to weaken the recoil impulse.
All these common mechanical ways to reduce or redistribute recoil energy add up to easier shooting. And we all know an easier shooting gun can be more accurately shot. Consider the difference between shooting a .22 rimfire and a punishing .300 Winchester Magnum. While skilled shooters can do well with either gun, I think we can all agree the .22 is a lot easier to shoot accurately.
Suppressors take the recoil reducing ability of a muzzle brake and turn that power up to 11. Because suppressors contain muzzle gas for so long in order to reduce sound, they also double as an insanely effective muzzle brake. Which means less felt recoil, and, you guessed it… the ability to shoot your rifle easier.
Buy a BANISH 30 > >
States that Allow Suppressors for Hunting
There are presently 42 states that allow ownership of suppressors, and 40 of them permit hunting with suppressors. As you can see, that includes some of the best deer hunting country in the nation. Sadly, some highly populated states like California and New York don’t allow hunting with suppressors, but most Americans are in luck!
If your state isn’t on this list, consider connecting with local gun rights advocacy groups and pressing your elected officials to embrace firearms and hunting safety by allowing the use of suppressors when hunting.
Getting Your Hunting Rifle Barrel Threaded
Many common hunting rifles do not have barrels threaded for a suppressor. There are many reasons for this, most of which boil down to cost. Suppressors are an optional accessory that often cost more than the gun they are being mounted on. This means there is little reason to thread every barrel that comes out of a factory.
And for whatever reason, hunters rarely embrace muzzle devices like flash hiders or muzzle brakes on their guns, so most hunting rifles show up without threaded barrels. The exception to this is many semiautomatic sporting rifles which usually have threaded muzzles for common muzzle brakes or flash hiders. These can be quickly fitted with suppressors. But odds are good your favorite manually operated or older semiautomatic rifle isn’t suppressor-ready.
When you consider the best-suppressed hunting rifle is often the one you own and are comfortable with, barrel threading becomes very important. You could trust your rifle to a gunsmith using hand tools or inexpensive machine tools and hope that they’ll do the job right, or you could have your barrel threaded on a state of the art CNC machine that cuts more perfect threads than are possible by any other means.
That’s why we founded Threading Central and offer an easy mail-in barrel threading program! Our state of the art machines will do a more perfect job than even most factories are capable of, and the best part is that it’s incredibly easy and affordable!
Get Your Barrel Threaded
The Best Suppressors for Hunting
The best-suppressed hunting rifle needs the best suppressor for hunting. Of course, we should consider what kind of rifle we are putting a suppressor on. As a general rule, any well-made rifle is suitable to be used as a suppressor host. The “best” suppressed hunting rifle really does become academic, because there is no one single best hunting rifle. So we’ll assume you have a good rifle and want to put one of the best suppressors for hunting on it.
We are a tad bit biased towards our famous BANISH Suppressor line, and for good reason. The all-titanium, user-serviceable and multi-caliber BANISH suppressor is truly the one that fits any gun. We designed the entire line to work with the most popular hunting and sporting rifle and handgun cartridges while offering true hearing safe performance across a range of dozens of different cartridges. No other suppressor line offers the same kind of value, performance, and functionality as the BANISH suppressor.
However, we know that people like consumer choice, and as the nation’s largest silencer dealer, we are happy to sell you whatever silencer you want.
We are also especially fond of the Advanced Armaments 762-SD. Created specifically to address the problems with suppressing .308 Winchester and 7.62 NATO ammo, it also works extremely well with .300 Blackout. And of course, there are umpteen million deer rifles in those wildly popular calibers. And at under $700, it is a real bargain.
If price is your absolute bottom line and you have a .30 caliber or smaller hunting rifle, it is hard to beat the Coastal Gun .30 Caliber LRT which will get you into the suppressed hunting rifle game for well under $600, and will work on many different .30 caliber and smaller rifles.
Get Equipped Before You Hunt
Are you ready to own a hunting rifle suppressor? That’s exactly what Silencer Central is here for.
We’ve long recognized there are distinct markets for suppressors including tactical/military/law enforcement, and the hunter. So, if you to hunt deer with a suppressor, we know a thing or three about the needs of hunters and sport shooters just like you, because you are our entire reason for existence. Our dedicated expert staff can help you select the perfect suppressor for your hunting rifle that meets your unique combination of budget, performance and end-use.
In addition, Silencer Central has offices in all 42 silencer legal states, so we know what it takes for your state. Plus, we are the only silencer dealer who can perform the entire transaction from purchase to submitting ATF paperwork, to delivering your suppressor entirely by mail!
That’s right, for the first time since the 1934, mail order silencers are again possible, and only through Silencer Central. Learn more about the process here, and see how much easier it can make things for you. We also offer a FREE NFA gun trust to all our customers that not only makes registering your suppressor easy but serves as a trust for all your NFA devices.
No matter if you are an experienced silencer owner or are just getting your first hunting rifle suppressor, we are here for you. Drop us a line or send us an email and let’s get you started with selecting the best suppressor for deer hunting (or anything else you can use a suppressor for) right now.
This article contains affiliate links. We may earn a small commission if you purchase via these links.
Are you shooting too low?
Are you struggling to see your sights at night?
Can you switch out the sights that came with the handgun?
In general, factory sights tend to leave a shooter wanting. It’s customary for stock sights to simply serve as fillers intended to be replaced. Aftermarket pistol iron sights can make a big difference to accuracy, sight and target acquisition, and overall performance.
But what sights are right for you and how are they different?
To pull together this list of the best pistol iron sights, I included a few that I own on various handguns to compare cost, usability, accuracy, and installation. From an owner’s hands-on experience, these pistol sights offer affordability and quality to match or outdo their price points.
Top Pistol Iron Sights for 2024
Open sights have a rear sight with a window, notch, gap to view the front sight mounted forward on a firearm. This is the sighting system in and of itself. Going forward, open sights will be referred to as iron sights for simplicity’s sake.
Iron sights, open sights – semantics. Really though, open sights are under the iron sight category as iron sights is a catch-all for sighting systems, including aperture sights, that use the naked eye to form a direct line of aim to the target.
Most pistols purchased today come installed with sights. Though some are better quality than others, plastic fillers or basic factory sights are the standard. They do little to improve accuracy or sight visibility and may be why a replacement set is needed.
While this round-up gathers some of the most popular pistol iron sights including my very own aftermarket handgun sights – which I have high opinions of – it’s not all-inclusive. Other things must be considered such as your particular firearm, use with a red dot or suppressor, and of course, heights to ensure the POA matches the POI.
So, here’s a handful of the top handgun iron sights to muse over to help you get started on your sight replacement journey!
7 Best Pistol Iron Sight Reviews
1. TruGlo Tritium Night Sights – Best Budget & Best Night Sights
The TruGlo Tritium Night Sights are some of the most popular night sights in the market. This was a large factor in why I personally purchased four sets for my Glocks. Obviously, affordability played a big role, and from my hands-on experience, they’ve been a value buy with big performance.
Pros:
Price
Tritium night sights
Low profile – no holster snagging
Easy to install on Glocks
Multiple applications
Cons:
Same color dots
I bought these earlier in the year and installed them myself with a sight pusher and hex tool that I bought separately online. The sight pusher was easy to use and to see the sights are lined up correctly from the get-go. Overall installation process is easily a 5/5 rating considering that they’ve not come loose, it wasn’t difficult at all, and I haven’t had to make any adjustments.
Now all my Glocks came with factory sights, and I’ll admit there was a small transition that I noticed adjusting from the U-notch to the square when aligning the dots, and I was accustomed to using the 6 o’clock hold sight picture. However, it’s been a relatively rapid process in overcoming it.
With the Truglos, I put rounds down at 15 and 25 yards with 5-shot groups in the combat sight picture. I was a little slower at 25 yards, and obviously at 15, it’s a lot easier to be consistent and send down round after round. With the factory sights, I was using the 6 o’clock hold, and with the Truglos, I’m shooting with the combat sight picture.
Every one of these Glocks has an OWB holster, and the design has not interfered at all. The glowing tritium lamps are way brighter in person than can be seen in the pics. Would I buy these again? Yes!
2. Trijicon HD XR – Best Glock Night Sights
For non-MOS Glock pistols, the Trijicon HD XR Night Sights serve for fast target acquisition with highly visible night sights. For Glocks 17, 17L, 19, 22, 23-28, 31-35, 37-39, and 45, the HD XRs are a highly popular upgrade from factory Glock sights.
Pros:
Tritium night sights
Highly visible painted front dot
Thin front sight
LEO & competition
For non-MOS Glocks
Cons:
Price
If you’re buying the set, you could be out almost a couple hundred dollars, but you can find them for more than 25-33% off in most cases. In my opinion, that would be a better price that I could justify over full retail cost. It’s worth remembering that they’re Trijicon quality that come with a 12-year warranty on the tritium lamps (from date of manufacture).
I really like the high-visible painted ring around the tritium lamp for fast sight focus. The paint is a photoluminescent (glow-in-the-dark) ring that is a trademark of the HD series. I think combined with the black-out performance of the rear sight during the day but glowing performance at night, its usability makes them operationally ready regardless of the conditions.
The front blade has a 0.122” width. Combined with the 0.169” rear U-notch width, it provides improved target acquisition, more FOV, and long-distance precision. It’s also steeply hooked meaning that if you’re in a rush and a one-hand rack is it, the front sight will catch for a fast first-in-chamber load.
If you’re sporting a Glock MOS, you’ll want the HD XR MOS sights for that longer fit on the rear of the slide. However, they’re stock height, so they won’t co-witness with a RDS if you’re sporting one.
Excellent for the needs of competition shooting and law enforcement, these night sights for Glock will also serve for carry firearms as a home and self-defense sighting system.
3. Truglo Fiber Optic Sights – Best Fiber Optic
The Truglo Fiber Optic Sights are regularly mistaken for night sights. They’re day-use sights with the fiber portions recessed into the sight well for concealment. They will be harder to see and dim in low light, but as fiber optic sights, they’re intended for daytime applications.
Pros:
Price
Fiber optic
Contrasting dot colors
For Glock (non-MOS)
Snag-free design
Cons:
Not good for lowlight
If you’re looking for a budget pair to upgrade stock plastic sights (fillers) on your Glock, Truglo’s fiber optic fits the bill. The best fiber optic sights provide dot visibility in daylight conditions.
As such, poor performance in shadows, lowlight, and dark conditions is to be expected – they are not night sights, so I’d say these are best for use in normal conditions.
Why they stand out to me as value pistol sights are that they’re well-made for the price point. They’re made from solid steel and have a treated Fortress Finish to protect the surface. Even though they’re not adjustable, they’re accurate enough.
With the right tools, they’re very easy to install and but it’s recommended to be installed by a trained gunsmith – per Truglo’s warranty. Obviously, there is a warranty but there are several conditions such as, it applies only to the original purchaser and proof of purchase is required.
I prefer contrasting features, and as these fiber optic sights reflect, the rear dots are green while the front sight is a contrasting red. I wouldn’t say they’re “daylight bright” but that is true of most red dot sights too.
With all that said, I recommended the Truglo fiber optic sights for target shooting and training.
3. AmeriGlo Optic Compatible Tall Suppressor Sights (GL-429) – Best Glock Black Out Sights
The best blacked-out Glock sights to pair with a red dot sight would be AmeriGlo’s optic compatible suppressor height irons. Though low in cost, they offer black-on-black simplicity for eliminating distractions through a pistol mounted red dot.
Pros:
Price
Suppressor height
Blacked-out sights
Glock compatible (except G42/43)
Serrated front sight
Cons:
Finish wear-and-tear
The AmeriGlo serrated sights I field-tested are similar and comparable to these Tall Suppressor sights though not the exact same pair. While they’ve been excellent for duty use thus far out to 25 yards, this Glock 17 Gen 5 was recently outfitted with the Holosun HE509T red dot sight.
The rear has a U-notch, and they’re slightly shorter making for a very low, I’d say, lower ¼ co-witness on the MOS slide with an adapter plate and 0.59” optical RDS height.
In my opinion, the recommended black-out sights would be a better replacement as they’re tall suppressor height sights and co-witnesses in the lower 1/3 with Trijicon RMR red dots. Heights are 0.315” for the very thin front blade and 0.394” for the rear.
Though both sights have neither tritium nor fiber optics, they’re steel with a matte black finish. This has been particularly beneficial as they don’t distract from a functioning pistol mounted RDS, like how it is used right now, or for those who use NODS with that RDS.
The finish is barely starting to wear at the angles after more than a year on my irons, and that can happen. Other than that, they’ve been excellent for target shooting, patrol/duty, and use with a red dot. AmeriGlo sights are made in USA starting with US steel blocks all the way to assembly.
5. Meprolight Mepro Tru-Dot Night Sights – Best Handgun Sights for Old Eyes
In general, aging eyes are having a hard time with front sight focusing and dot visibility in poor light conditions. A possible solution is to consider the Meprolight Mepro Tru-Dot Night Sights with a green front sight filled with tritium for low light and dark conditions.
Pros:
Tritium night sights
Contrasting dot colors
Alloy steel
For Glock (non-MOS)
12-year tritium guarantee
Cons:
Not highly visible in the day
If older eyes are struggling in those lowlight and dark hours, night sights will help with dot visibility. I really like that these Meprolight sights will help with visual acuity because of the green on orange configuration, making them great pistol sights for old eyes.
The front sight has green tritium that allows for easier and brighter dot identification than other colors. The rear sight has orange tritium, and the contrast will ensure the front sight stands out.
The catch with tritium is that they don’t glow during the day. To help with dot visibility during daylight conditions, a white ring is painted around the tritium vials. In my opinion along with some buyers, they’re not as useful in these conditions and this would be true especially for those with bad eyes.
I know that the Mepro sights will fit Glock models except for MOS slides. They’re made from alloy steel. The tritium vials come with a manufacturer guarantee for 12 years which I think is fantastic as it’s on par with Trijicon’s tritium guarantee. The front sight blade is 0.17” in height and 0.16” in width. The rear sight blade is 0.19” in height.
Though older eyes might benefit from sights that offer both fiber optic and tritium dots, they’re more expensive. When you’re in the market for night sights, your eyes might need a little help from the green-on-orange configuration.
Available at: Amazon
6. Sig Sauer X-RAY3 – Best Night Sights for Sig
The X-RAY3 day and night sights are configured for Sig Sauer firearms. Though they’re included as the standard sights on the P229 and Legion series pistols, they’ll also fit the P-series 225, 227, 220, 226, 238, 938, and 320.
Pros:
Day/night sights
3-dot alignment
Fluorescent polymer & tritium
Suppressor height
For Sig P series
Cons:
Dead tritium dots
I don’t have any performance complaints with them, and there are few to no complaints to find online. However, it seems that some sights are turning up with dead tritium vials or they don’t glow after a very short period of ownership. I did find that even though the lifetime warranty doesn’t cover tritium, Sig’s limited 5-year warranty covers tritium components starting from date of manufacture.
As suppressor height sights, they do come just above a suppressor and co-witness with a red dot in the lower 1/3 or a shade lower depending on the firearm and other factors.
The front blade is 0.374” in height while the rear is 0.417”. It will take some trial-and-error to figure out your POA and POI as they have not been set for any sort of sight picture.
The tritium vials provide dot visibility in lowlight and night conditions and are housed inside the steel sights for protection. The front sight has an oversized fluorescent polymer dot that surrounds the tritium for high visibility in daylight but also glows in the dark.
It’s my opinion that they would be excellent for use regardless of the conditions and as such, they offer a lot of value for the money. If you’re not running a red dot, the X-Ray3 does come in Sig size configurations of F6/R8, F8/R8, F8/R6, and F8/R8.
7. Viking Tactics VTAC Sig Sauer – Best Day & Night Sights
The VTAC Sig sights have both fiber and tritium dots ready for day/night use. I own and love them, so they were included as a hands-on field test. I got them because they’re stock for the P320 X-VTAC. They’ll fit most of the P series from the P220 to the P365 as well some out of production ones.
Pros:
Day & night sights
Fiber or steel
3-dot alignment
Tapered front sight (0.110”)
Fits a wide range of Sig P models
Cons:
May shoot low
I sighted-in the VTACs for a 25-yard zero in the combat sight picture. Though others have reported that the sights are 1-2” low at 10 yards or more, I haven’t had such issues. Any flier shots I’ve had, had more to do with my pistol shooting fundamentals than the sights themselves.
The front is a Sig size #6 (0.230”) and the rear an #8 (0.250”). Even though I haven’t had need to switch out sizes, some have found better results with a front 8 and rear 8 combination to bring up groups that were too low with the F6/R8 combo.
I find the tapered front extremely beneficial with its slimming silhouette because it gives me the potential for improved precision with its 0.110” pinpoint post. Because the VTACs are standard height, they didn’t co-witness with the field-tested Leupold DeltaPoint Pro I stuck on there.
The dovetail base can be adjusted with a sight pusher for windage, though windage has never been an issue for me and that seems to be consistent across the board.
There are a lot of dots going on (a total of six!), but dot acquisition and visibility performance has always been easy, and I’ve never confused them.
My eyes find the fiber optics easy and fast to pick up in the day and align in the 3-dot alignment configuration. At night, my eye is immediately drawn to the glowing tritium dots. Though as a side note, there is an option for the black steel rear sight with a day & night front sight.
Though they’re the least well-known sights in this lineup, they offer day and night benefits that are perfectly matched with Sig Sauer P series pistols if you’re considering an upgrade. On my P320, they’re not going to be replaced any time soon. I’ll probably put a different RDS on there, but the VTACs aren’t going anywhere.
What to Look for in the Best Pistol Iron Sights
Overall, iron sights are simple and affordable. However, additional components and various materials can influence the cost, how they perform in certain conditions, and diverse specifications can determine what application they’re best suited to.
For a run-down on the need-to-know info, this guide will get you thinking.
Cost
In general, handgun iron sights will vary in cost depending on material, adjustability, and visibility enhancement components. They can be as affordable as $20 and as expensive as $200. Even so, they’re cheaper than pistol red dot sights with an average starting price point of $250 (approx.).
When considering a budget for pistol sights, you must sum up your needs:
Application (type of shooting: hunting, patrol/duty, competition, carry, home defense, etc.)
Dot visibility for daylight, lowlight, or dark conditions
Durability (plastic housing VS metal)
Adjustability (fixed VS adjustable)
The more you require from your sights, the more expensive they will be. You should also include a budget for the proper tools needed for installation or for a professional install by a gunsmith. A professional install is nearly always recommended by the manufacturer and is sometimes a requirement of the warranty.
Iron SightsPrice RangePistol iron sights cost comparison price range
Fiber Optic Day Sights VS Tritium Night Sights
Both fiber optic and tritium components do not require electricity, power, recharging – any of the inconveniences of illuminated red dot sights. However, these enhanced visibility sights cost more than basic blackout and fluorescent painted iron sights.
Iron SightsDay UseNight UseFiber OpticTritiumOther (Paint)Pistol iron sights dot enhancement comparison
What are Fiber Optic Sights?
Fiber optic tubes are installed into the sight. Ambient light is “collected” into the tube and then concentrated at the end – the dot. They are colored to provide contrast against the target and surroundings for high sight visibility. These are appropriate for day use in normal conditions.
What are Tritium Night Sights?
Tritium gas is concentrated into tiny vials that catalyze a glowing effect with fluorescent materials. They become highly visible in low light and dark conditions where visual acuity is reduced, and other iron sight alternatives would be rendered useless. Though very visible in these conditions, they do not glow during the day, and you cannot temper its brightness at night. These are night sights.
More expensive iron sights will incorporate both fiber optic and tritium dots for day and night use.
Blackout Sights
Blackout pistol iron sights are plain, as in basic. They lack enhancement features as they lack dots altogether. Why would these be preferable on any handgun?
Blackout sights have their purpose. Most of the time, the rear is blacked-out for simplicity to remove as many visual distractions as possible. This allows a dot on the front sight to stand out. In turn, this improves front sight acquisition and focus.
However, when both the front and rear sight are blacked out, they are better paired with a pistol mounted red dot sight. Though taller sights are visible through the RDS, their basic appeal does not distract from the functioning illuminated dot of the RDS.
This is also important when using night vision with a pistol-mounted RDS. Tritium can be seen through night vision and thus is another distraction to the shooter when viewing through the RDS with NODS.
Close range VS Long range
The blade width of the front sight will influence sight acquisition and focus, accuracy, and distance performance. They vary in width, and while some like thin blades, it may be too narrow and can get “lost” against the target or FOV making it slower to pick up.
Conversely, a wider front sight may cover up too much of the target and FOV to make accurate shots at distance. For close range shooting, say under 10 yards, a wider front sight of 0.140” (approx.) and wider will be faster to pick up.
For distance shooting over 10 yards, a front sight of around 0.100-0.125” (approx.) will cover less of the target aiding in precision and target acquisition.
Iron SightsFront Sight Blade WidthFront Sight Blade Width Comparisons
Fixed VS Adjustable
Many pistol sights are fixed and cannot be adjusted. These types are set for a certain sight picture and are sighted in at a specific distance. Therefore, sights are model specific for the handgun. If placed on another pistol or installed incorrectly, the POA will not match the POI.
Not all fixed sights are accurate even though they’re the right sights for the right firearm. Some modifications can be made such as, front sights can be filed down and dovetail rear sights can be pushed left and right for some adjustability.
Easier adjustability is usually a feature of a specialty rear sight for competition shooters. Being able to adjust can result in greater precision, tighter groups, and increased confidence when shooting at various distances.
For more on how to sight-in and adjust, check out our How to Zero Iron Sights how-to guide.
Installation
Most pistol sights are fixed. It’s essential to be specific about blade heights so you can sight-in your iron sights. Some can be “pushed” to try to compensate for left/right (windage) and front sights can always be filed down. However, it’s not as easy to weld more steel to too short front sights.
While a brass punch and mallet is how it was done for a long time, a proper sight pusher is a better tool. Sights with tritium vials can break, and other than being out of the cost of the sight, you’ll want to avoid breaking an alpha-emitter product.
If you don’t have the right tools, are finding it difficult to get tight groups or to raise/lower them, or they’re not fitting right, a professional install is recommended. In fact, the instructions that came with the iron sights likely mentions that a trained gunsmith install the sights.
In some cases, the warranties demand this and warranties can be forfeited if installed with any other method.
Red Dot VS Iron Sights
With as popular and common as red dots are becoming on handguns, some are doing away with iron sights altogether. However, some of us are rooted in the opinion that red dots can fail, and a back-up sighting system remains relevant even in this electro-optic driven sporting industry.
Some comparisons include:
Red Dot ProsIron Sight ProsRed Dot ConsIron Sight Cons
The rage right now is to combine irons and a RDS for a co-witness and never being without a sighting system. For more in-depth comparisons, check out our Iron Sights VS Red Dot guide.
Pistol Red Dot SightsPrice RangeRecommended Pistol Red Dot Sights
Do You Need an Iron Sight Upgrade?
The factory iron sights that came with the pistol are not the end-all-be-all. If groups are off regardless of shooting fundamentals or dot visibility is difficult to acquire, aftermarket sights can be a practical upgrade. Some are tall enough to see over suppressors and red dots.
With various features like contrast enhancements, adjustability, and concealed carry features, upgrading your sights can make all the difference needed in usability, accuracy, shooter safety, and overall performance.
Further Reading
How to Aim Iron Sights [Complete Guide with Photos]
What is the Sight Picture & Sight Alignment? [WITH PICS]
Iron Sights VS Red Dot Comparisons (Uses, Accuracy, Reliability, Durability & More)
Pistol & Rifle Co-Witness Sights Explained!
How to Zero Iron Sights on Pistol & AR-15 (With Photos)
Welcome to our review of the Parker StingRay bowfishing crossbow. Each package delivered by Parker includes the following items:
The Parker Stingray crossbow
Open sight
Assembly hardware and tools
AMS Retriever Pro Bowfishing Reel
200 feet of Hi-Vis Braided Dacron Line
2 AMS Safety Slide kits
1 Bowfishing Arrow
Muzzy Gator Getter 1600-gr broadhead
Owner’s manual
Warranty card
Crossbow Assembly
Putting the StingRay together is amazingly simple for such a complex hunting package. The riser, or what Parker calls the front-end assembly, attaches to the stock once you’ve installed the cable slide. If your Stingray comes with a scope, it will be premounted for you, so there is no work to be done to get the scope onto the crossbow. Once you’ve attached the riser to the stock, you attach the AMS Retriever Pro Bowfishing Reel, which includes an integrated arrow quiver for storing your bowfishing arrow.
After putting your bow together, you should set the draw weight to whatever you want it to be, between 100# and 125#. The beauty of this design is that you don’t need any special tools or a bow press to set the draw weight. Once the assembly and tuning is complete, you’re ready to move on to sighting in your crossbow.
Accuracy And Power
Whether you have the open sight or the 1X scope with your x-bow, you’ll want to sight in your bow before you hit the water. I was able to have my open sights fine-tuned within a couple of shots, and then I tested the accuracy of the Stingray. The Stingray delivers arrows between 135fps and 150fps, depending on the draw weight you have set. Mine is set to the maximum 125 pounds, so the 1600-gr bowfishing arrow was hitting the target at 150 fps with almost 80 ft. lbs. of kinetic energy.
From 25 yards, I was able to maintain a 1/2″ grouping with this crossbow, and held the same grouping from 35 yards. From 50 yards, I could hold a pattern just 1-1/2” in diameter, which is more than accurate enough for serious bowfishing. With the Stingray sighted in and tested, I was ready to hit the water.
Will Hunters Enjoy the Parker Stingray?
This x-bow is designed for bowfishing, so you won’t take this up against a deer. With that said, it has the stopping power for a deer, but the speed of the arrows is probably too slow to account for the tendency of deer to string jump. I didn’t even try this bow land hunting, using it instead for what it was designed for—bowfishing.
For fishing purposes, this is an excellent crossbow. You can easily penetrate and nab the largest fish, whether you’re in fresh water or salt water. The reel works flawlessly, and the included 200 feet of high visibility line makes it easy to see where your arrow has gone. An illuminated nock will also help tremendously.
What was really exciting about this crossbow was the inclusion of the Muzzy Gator Getter arrow point. I had the good fortune of getting in on an alligator hunt, and chose the Stingray as my tool of choice for hunting gator. During my gator hunt, I was able to fill my limit of gator easily, with the Stingray performing exactly as I expected it to on this once-in-a-lifetime hunting opportunity.
Cocking The Stingray
The Stingray has an adjustable draw weight of 100 lbs. to 125 lbs., and the adjustment can be made without any special tools or a bow press. For some, this light draw weight might mean hand-cocking the crossbow, but I definitely would not recommend this. While it’s easy enough to draw by hand, using a rope cocking device makes your draw much more even and consistent, helping your accuracy considerably. Unfortunately, Parker does not include a rope cocking device with the Stingray, so I would recommend picking one up at your local archery shop when you get your Stingray.
The Crossbow Scope
Parker delivers this crossbow with either an open sight or a 1X scope. I chose the open sight, but I’ve also used the 1X scope in the past. This scope is very good quality, with coated optics for fog-resistance, and excellent light gathering capabilities for use in dark swampy areas. It sights in easily and quickly, and holds true almost indefinitely.
Bolts
Your purchase of the Parker Stingray will net you one bowfishing arrow, which many will say is all that you need. That’s probably true, because the hassle of switching your retrieval line from one arrow to another is more trouble than just pulling your arrow back in and reusing it, but you may want to invest in additional arrows in case yours becomes damaged. Parker recommends 1600-grain arrows for use with the Stingray, and attempting to use a lighter arrow than that could result in some serious problems and injuries for you and your crossbow.
Safety and Design
The Stingray is designed with boat fishing in mind, so it is small and compact. It is also lightweight, and almost perfectly balanced. It features a G2 Bull-Pup trigger with an auto-engaging ambidextrous safety and auto-engaging anti-dry fire mechanism, both of which operate reliably for each and every shot. The vented forearm’s safety finger flange is perfectly sized and positioned to keep you safe when firing your x-bow.
The AMS Retriever Pro bowfishing reel that comes with the Stingray is set up with a right-side crank, so if you are left-handed you may struggle with the retriever reel. It works perfectly, though, and serves wonderfully for reeling in that big catch when you nail it.
Warranty
All Parker crossbows are covered by a 5-year limited warranty, and Parker’s customer service representatives are easy to work with, friendly, and knowledgeable. Make sure to register your warranty within 15 days of your purchase, though, or your warranty may not be valid.
What Crossbow Case Fits the Parker StingRay?
If you use a smaller scope, the Carbon Express Deluxe Case is a nice soft carrycase for $66. If your StingRay is equipped with a bigger scope, opt for the Allen Company case. It is a $30, soft carrycase which offers more space.
Crossbow Review – Summary
Thanks for reading my review of the Parker Stingray. This is an exciting crossbow with excellent potential for hunting alligators and use in bowfishing. If you want to get involved in bowfishing, but would rather use a crossbow than a bow, the Stingray is the crossbow for you. Take a look at today’s amazon.com price on this crossbow and check out our top 10 crossbows rankings for more.
You don’t want your ham radio to die on you when you rely on it the most, which is why durability is one of the most important things to consider when you are picking out a radio.
Some ham radios designed for mobile use, similar to handheld ham radios are built and tested according to strict military standards for shockproofing, waterproofing, and even mold. These are the best ham radios for you if you like to drive your Jeep through rocky and muddy roads.
Even if you are buying a radio for your base station or home setup, you should still opt for something that is built well. These units might not be waterproofed or encased in steel, but the quality of the buttons and knobs should be good enough to withstand frequent use.
Transmission Power Output
Many amateur radio users make the mistake of prioritizing high-power ham radios for their vehicles. After all, the higher the transmission power, the further it transmits, right?
While this is technically true, it shouldn’t be the only thing you look for when you are in the market for mobile radio. The transmission power you need depends on the type of communication you want to engage in.There is no sense in choosing a powerful 50 watts ham radio if you want to use your radio as an emergency unit – a normal two-way radio or VHF/UHF radio of up to 5W would suffice. But if you want to connect with other amateur radio operators all over the world, you would want a mobile radio that offers at least 25-50 watts of power.
At any rate, you should buy a radio that is compatible with an external antenna. This gives you the option to expand your coverage when you need it the most.
User-friendly And Intuitive Menu Setup & Operation
Ease of use is a must when choosing the best mobile ham radio. You don’t want to be distracted by scrolling through menu options when you are driving.
Well-designed ham radios utilize the hand mic for better one-handed control. These designs often include programmable buttons, frequency toggles, and a keypad. Moreover, some radios have a 180 degrees rotatable screen for easy monitoring.
When it comes to menu design, we would recommend choosing a radio that uses a streamlined menu system. Besides being more convenient, a bloated menu can also be frustrating and overwhelming.
Weight, Size And Phisical Factors
You can mount most radios in your dash with a mounting bracket. However, as they tend to get very hot, you might have to consider an alternate spot for your radio if you drive all day. Besides that, getting a bulky and heavy radio can also hamper your efforts to move it around.
Scan Function And Memory Storage
Scan function and memory storage allow you to scan available frequencies and save any channels that you like.
It is much easier to have a one-click scanning feature since you would most likely be driving when you use a mobile ham radio. Typically, you get about 200 slots in your channel storage, which is more than enough for most people.
Newer models offer more robust and convenient saving features. For example, some save your scanning preference so you don’t have to set it up again if your radio reboots. Some save your settings, like volume control and squelch, along with the frequency and channel names.
Did you know that grizzly bears have some of the biggest paws in the animal kingdom?
Not only that, but they also have sharp claws, which they use frequently.
But how big are grizzly bear paws, and how sharp are their claws? And how can you identify a bear print?
In this article, we’ll discuss grizzly bear paws and claws, how you can identify them, their size and sharpness, and more.
Do Grizzly Bears Have Paws?
Grizzly bears use their paws for a variety of tasks, including digging, climbing, and catching prey.
They have five toes on each paw, each with its own claw.
The pads on the bottom of grizzly bear paws act as shock absorbers when they walk, helping them avoid injury when walking over rough terrain.
Through millions of years, grizzly bears have developed specialized paws. They’re wide to support their weight, and the front paws work as paddles when they swim.
Do Grizzly Bears Have Claws?
Grizzlies use their claws to dig for food, excavate burrows for rodents, or hibernacula for other animals. They also use their claws to climb trees, where they often feast on honey or insects.
Claws are also important weapons and tools for grizzlies. They sometimes use them to defend themselves against predators or to kill prey.
Grizzly Bear Paw Facts
Grizzly Bear Paw Size
As grizzlies are large animals[1], they also need large feet to support their weight.
You’d think that grizzly bears wouldn’t be very good runners, due to their large feet, but this is not the case. Grizzly bears can run up to 30 mph.
Related: How Fast Can a Bear Run?
How Strong Is a Grizzly Bear Paw Swipe?
Grizzly bears have some of the strongest paws in the animal kingdom. They use their powerful paws to dig for food, swipe at attackers, and to move objects.
When hunting, they typically use either their powerful bite or swipe. They’ve been known to kill smaller animals with just a single swipe of their paws.
Related: How Strong Are Bears?
How to Identify Grizzly Bear Paw Prints
Knowing how to identify grizzly bear paw prints is important for understanding the behavior of grizzlies and for safety reasons.
The size of grizzly bear paw prints can vary depending on the grizzly bear’s sex, age, and size[2]. Male grizzlies typically have larger paws than females. Cubs have much smaller paws than adults.
When identifying bear prints, know that grizzly bears’ prints are bigger than black bears. Their toes are also more aligned (horizontally).
Grizzly Bear Claw Facts
Grizzly Bear Claw Size
Claws are versatile tools, and something most carnivorous, land-bound animals have. Their claws can be used as a weapon against potential predators or prey, or they can be used as useful tools.
Grizzly bears typically use their paws for excavating dens, or for digging up roots. They’re also used for better grip while climbing.
Related: Can Grizzly Bears Climb Trees?
Besides using their claws as weapons, grizzly bears also use their claws to mark and rub trees. Even though it looks like the grizzly is just scratching an itch when doing so, research shows that it’s a mating habit.[3]
Grizzly Bear Claw Length
Grizzly bears are one of North America’s largest land predators. Their claws are not as big as polar bears, but they’re longer than those of black bears.
Their claws can reach up to four inches in length, and play an important role in grizzlies’ hunting and scavenging habits. Black bears’ claws are usually less than 2”.
How Sharp Are Grizzly Bears Claws?
Grizzly bear claws are very sharp. They are not just for show but play an integral part of the grizzly bear’s hunting and defensive arsenal.
Their claws are used to dig for food, climb trees, and catch prey. Their claws can also inflict serious injuries on people and other grizzly bears. They are sharp and curved, which allows grizzlies to easily tear into flesh.
Besides their claws, grizzly bears also have sharp teeth and a powerful bite, which they also use on prey.
Grizzly bears have a bite force of up to 1,100 PSI.
Related: Bear Bite Force
Grizzly Bear Paw vs. Polar Bear Paw Size
While polar bears have larger feet, their claws are smaller.
Grizzly bear claws are about 2-4 inches long, depending on the individual. Polar bear claws are smaller, about 3.75 inches, but they’re sharper.
There’s a good reason why polar bears have sharper claws: they’re used for better grip on ice.[4]
For most of their lives, polar bears roam around on the ice. If they don’t have a good grip, they would slip most of the time. In combination with this, the food-pads are laced with a slip-resistant substance.
Not only does it allow them to avoid slipping, but it allows them to run across the ice without any issues.
Polar bears are categorized as marine mammals. They spend a significant time in the water and need good paddles. The large paw size also helps them distribute their weight evenly when walking on ice.
Conclusion
Grizzly bear paws and claws are some of the most impressive features of the animal. They are large, strong, and sharp. Grizzly bears use their claws for a variety of activities, including digging, climbing trees, catching prey, and protecting themselves from danger.
Although grizzlies are not as common as black bears in North America, they should not be underestimated. Their size and strength make them one of the most powerful predators in the wilderness.
Need landscaping idea for your duck pen? These sturdy and non-toxic perennials for duck runs are great ones for adding shade, beauty, and even food to your ducks’ environment!
This article contains affiliate links. Click here to learn more.
Landscaping a duck pen is tricky. Just like with chickens, a fenced-in grassy area is soon reduced to bare dirt, once you add ducks!
But it’s completely possible to add wonderful foliage to your duck run – it just has to be sturdy enough to withstand quite a lot of nibbling, dibbling, and trampling. These non-toxic perennials are some of my favorites, and they hold up very well to lots of attention from our ducks.
Whenever you transplant something new into your duck pen, I highly recommend placing some sizeable rocks around the base, so that the roots can’t be unearthed. You’ll eventually be able to remove the rocks, once the plant’s roots take hold, and the earth settles and firms up. Ducks do love to dibble in soft, newly-turned dirt, and mine think that any kind of gardening is group play time!
My favorite perennials for landscaping duck runs
Grapes
Grapes might seem an odd choice, since ducks will clearly eat any grapes within reach, and it might feel like a waste of a good grape harvest. If you grow plenty of grapes for your family in areas the ducks can’t reach, though, it will give you nothing but joy to watch the ducks enjoying their own harvest in the fall.
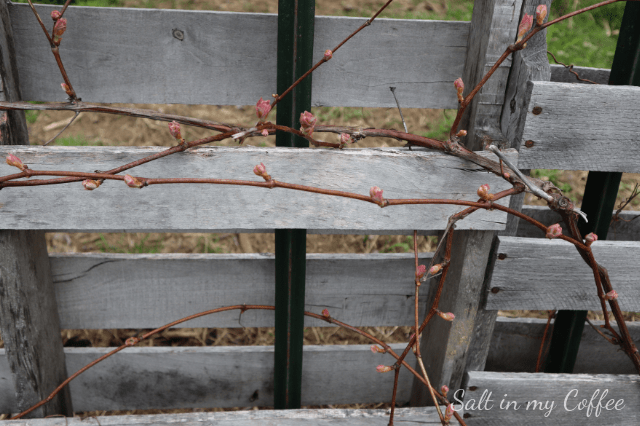
Grapevines are sturdy, and if you train them on a trellis above the run, they can also be a wonderful source of shade!
Mulberries
Mulberries are a bit notorious for being messy – but in a duck pen, there’s nothing wrong with that! Mulberries are safe for ducks, and your feathered pets will adore gobbling them up as they fall.
Mint
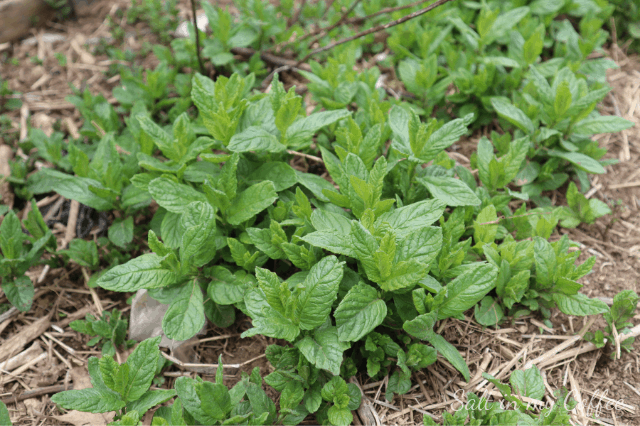
Mint is so incredibly sturdy, and spreads readily. I actually hadn’t intentionally planted it in the duck yard, but it spread there from the other side of the fence and continues to thrive. The ducks enjoy nibbling at it, and it’s a very healthful herb for them. Thankfully, it’s so robust that they never decimate it.
Blackberries & Raspberries
Bramble berries are another wonderful source of food for ducks, and they’re not easily damaged. My ducks seem especially drawn to hanging out among the canes, and watching them stretch to reach the berries once they ripen is just adorably comical!
Comfrey
Comfrey is one of those plants that’s SO sturdy, it can be invasive. Sometimes it seems that the more it’s disturbed, the more it explodes with renewed vigorous growth. These are all wonderful qualities in a duck run! The comfrey in the photo above is small and just begin to grow for the season, but by mid-summer its leaves are so large it can actually serve as a source of shade for the ducks.
Blueberry bushes
Blueberry bushes can be a good addition to a duck run, once they get established. They’re much more delicate starting out, than blackberries, raspberries, or mulberries, so you’ll want to put a protective cage around them to keep them from being decimated before they really take hold. Once they’re sizeable, they can hold their own quite well.
Daylilies
It’s very important to note that there’s a big difference between daylilies and true lilies. Daylilies are edible for humans and ducks. Lilies are toxic. (This post has photos of both and will help you tell the difference. )
I’ve had daylilies in our duck run since we first built it, and they’ve not only survived, but spread. You can see that the plant above has been trampled and nibbled – but it’s doing just fine. Daylilies also provide a wonderful splash of color in the summer when they bloom, which is a joy!
Hostas
Hostas are safe to eat for both humans and ducks, and in my experience, they’re sturdy enough to hold up to the attentions of a flock of ducks. I’ve heard of other duck-keepers, however, that have had their hostas completely wiped out by their ducks.
I think it’s worth giving them a try, knowing that even if they do get eaten, they’re not toxic. That said – you won’t want to plant your only piece of great-grandma’s special hosta in your duck pen, just in case!
Rugosa roses
While any variety of roses are safe for ducks, I really recommend rugosas as being particularly hardy and standing up especially well to heavy duck traffic. While ducks will gobble down any blossom petals within reach, rugosa roses generally grow tall enough that many blossoms with thrive out of reach. Another benefit of roses is that rose hips are edible, and ducks really enjoy them!
This is the list I always send people, when they ask what I recommend for sturdy perennials for duck runs. How about you? What do you have planted in your duck run that works well? I’d love to hear, and hope you’ll let us know in the comments below!
If you liked this post, you may enjoy:✦ How long do ducklings take to hatch?✦ How many drakes can I have in my flock?✦ Hatching duck eggs with high hatch rates✦ How to raise friendly ducks✦ 11 types of poultry for homesteads and farms
This week we continue our quest to determine who is the greatest bass angler of all time. In the previous article we revealed and made a case for three anglers in Denny Brauer, Aaron Martens and Edwin Evers. Again, our criteria are based off the recent list by B.A.S.S. of the ‘All-Time Money Winners.” But before we get to the top two on this list, we have to take a look at some of the old timers who made bass fishing what it is today. Guys who were around when it all began in the late 1960’s like Bill Dance, Roland Martin and Rick Clunn who all dominated the pro tour in the beginning and took full advantage of their early success.
No name or person in the history of bass fishing is more recognizable than Bill Dance with his University of Tennessee baseball cap. To give you an idea how popular that cap is, I ran into Bill at the International Fishing Show known as ICAST in Orlando a few years ago and his PR director had one of Bill caps in his hand while Bill toured the show. I ask him what the extra hat was for, and he said it’s in case someone comes by and snatches his hat off his head. I asked if that had ever happened, and he said yes quite often. When it comes to marketing, no other cap is as recognized as the one Bill Dance wears. His show “Bill Dance Outdoors” is the longest running fishing TV show in history broadcasting since January 5th,1968. Bill does an outstanding job of introducing new tackle and techniques to the public though his show. He’s not just another pretty face for TV, but in his hay day, he was one of the best anglers to ever wet a hook and dominated the tour early on. But he retired from tournament fishing at a very young age in order to focus more on his TV show and sponsor promotions. He pretty much put Strike King Lures on the map and has help make them the leading tackle company in the world.Let’s look at Roland Martin…another of the all-time greats who many will say IS the greatest angler of all time based on the fact that he won 9 Angler of the Year Titles. No one even comes close to that and the fact he won 19 B.A.S.S. events and 19 runner-up finishes. He was in the money 63% of the time as he accumulated over $1 million in winnings during a time when the money was nothing like it is today. If he would have fished in this new era of today with that kind of dominance, his earnings would have exceeded over $4 million in tournament winnings alone not including endorsements and merchandise sales. The only thing that haunts Roland Martin today, is the fact that he never won the Bassmaster Classic. A tournament that just seemed to elude his grasp time and time again. Just a little info about Roland (who resides in Naples Florida) is he loves to turkey hunt and tarpon fish. His son Elite Series Pro Scott Martin has also been very successful in his own right with an FLW Championship under his belt and a very popular TV show called “The Scott Martin Challenge.”
Rick Clunn is another angler whose name always comes up as the greatest of all time and at one time had the title of the GOAT.. Just like NFL quarterbacks who are judged by the number of Super Bowls they’ve won, bass fishing professionals are judged by how many Bassmaster Classics they’ve won. Rick Clunn and Kevin Van Dam lead that list with four Classic wins to their credit. (More on KVD later) Now Rick is a different bird who has always flown a little different route than most other anglers. When other anglers would zig, Clunn would zag. In the beginning and during most of his career, Rick separated himself completely from other pros and I mean literally by staying at campgrounds outside in a tent. He avoided hotels where he felt anglers talked too much and got into each other’s head. He avoided what he called “dock talk.” Rick’s philosophy included a form of meditation known as zenning. It was his way of becoming one with nature. He always felt like the closer he was with nature, the better he could connect with the bass and as Rick would say “become one with the fish.” Over his career, Rick has accumulated over $2.6 million dollars in winnings.
Now let’s looks at the real GOAT (Greatest Of All Time)…Kevin Van Dam. This guy took bass fishing by storm in 1987 and made his presence felt his first year as a touring professional. Allegedly the story goes that he walked up to Rick Clunn (who was the GOAT at that time) and introduced himself as Kevin Van Dam and that he was the guy who was going to start kicking his a#$. Whether this is true or not, it illustrates Van Dam’s confidence in his abilities to catch fish and win tournaments. His mental toughness has far exceeded all other anglers of his generation. If you look at winnings alone, Van Dam has collected over $6.4 million dollars in winnings which is double his closest competitor. He has won 4 Bassmaster Classics (the Super Bowl of bass fishing) and has won more B.A.S.S. events than any other angler in history with 25 and has 16 runner-up finishes to his credit. Over his career, he has been in the money 80% of the time which is an amazing stat in itself. KVD has also capitalized on the business side of bass fishing as well as the lead spokesperson and bait designer for Strike King Lures. There’s not a bass angler in America that does not have at least one KVD endorsed lure in their tackle box. So, you can debate this all you want, but it’s pretty clear based off statistics alone and money earned that Kevin Van Dam truly is the greatest bass fisherman of all time. I hope you’ve enjoyed this breakdown of bass fishing all-time greats. Whether you choose to agree or disagree, it’s hard to argue against KVD. Till next time, don’t forget to set the hook!
Steve GrafOwner/Co-hostHook’N Up & Track’N Down ShowAnd Tackle Talk Live
“Air Rifle vs .22: Unveiling the Ultimate Shooting Companion. Dive into the world of precision and power as we compare air rifles and .22 caliber firearms, exploring their unique characteristics, versatility, and performance. Discover which shooting companion reigns supreme in this comprehensive analysis that will revolutionize your shooting experience.”
air rifle vs 22
An air rifle and a.22 caliber firearm are both popular choices for recreational shooting and hunting. However, there are significant differences between the two that make them suitable for different purposes.
Firstly, an air rifle uses compressed air or gas to propel a projectile, while a.22 caliber firearm uses gunpowder. This distinction affects their power and range capabilities. Generally, a.22 caliber firearm has more power and can shoot at longer distances compared to an air rifle. This makes it a preferred choice for hunting larger game or engaging in target shooting at greater distances.
On the other hand, an air rifle is typically quieter than a.22 caliber firearm. It produces less noise when fired, which can be advantageous in certain situations such as pest control or shooting practice in residential areas. Additionally, air rifles may be easier to handle due to their lighter weight and reduced recoil compared to firearms.
In comparing air rifles and.22 caliber rifles, it is evident that both have their advantages and disadvantages. While air rifles offer convenience, affordability, and lower noise levels,.22 caliber rifles excel in range, power, and accuracy. The choice between the two ultimately depends on the intended use and personal preferences of the shooter.
“Deer may not be hunted with the use of dogs, artificial lights, snares, traps, set guns or any firearm using .17 or .22 caliber rimfire cartridges, except that .22 caliber rimfire magnum cartridges are permitted.”
Where are you reading this guide from? Perhaps it’s Wisconsin.
Their law states:
“It is illegal to hunt deer with any center-fire rifle less than .22 caliber, any rimfire rifle, or air gun”
I wouldn’t want to go over all the laws for the different states and countries in the world.
The point is that they are different.
So make sure you know the exact permissions and prohibitions.
This is but a general guide.
Maximum range
Sometimes you need to shoot far.
Sometimes your prey is at close range.
Did you know different airgun types have different maximum ranges?
Here is a generalized breakdown.
Precharged pneumatic airguns – 75 yards – or 69 meters
3. Best repeater air rifle for deer: Benjamin Bulldog
Names are sure something to go by.
Bulldog! That’s the name.
And the slogan? Big bite, little bark!
That is the reason thousands of people order it year after year.
Look at the following list of Pyramid Air’s top-selling high-end air rifles for the period 2019 – 2024.
Position
2019
2020
2021
2024
1
Benjamin Marauder
Benjamin Marauder
Benjamin Bulldog
Benjamin Bulldog
2
Benjamin Bulldog
Benjamin Bulldog
Air Arms T200 Sporter
Benjamin Armada
3
Airforce Texan Big Bore
Benjamin Armada
Seneca Dragon Claw
AirForce Texan Big Bore
4
Air Arms T200 Sporter
AirArms TX200
Airforce Texan Big Bore
Air Arms TX200
5
Benjamin Armada
Airforce Texan Big Bore
Benjamin Armada
AirForce Texan SS
6
Sam Yang Dragon Claw
AirForce Condor SS
Airforce Condor SS
Benjamin Marauder Filed & Target
7
Air Venturi Wing Shot
Air Arms T200 Sporter
Air Arms TX200
Seneca Dragon Claw
8
Sumatra 2500
Hatsan Gladius
Seneca Sumatra 2500
AirForce Condor SS
9
Air Arms TX200
Sam Yang Dragon Claw
Seneca Wing Shot II
Seneca Wing Shot II
10
AirForce Condor SS
Air Venturi Wing Shot
Airforce Texan SS
Air Arms T200 Sporter
Starting with the big bite, the .357 caliber gives you the authoritative muzzle energy of 200 FPE.
Your ammo can attain speeds of up to 910 fps.
The air rifle is fairly consistent regarding the speed of the ammo.
See the graph below for deeper insight.
NB:
Testing was done with 81-grain JSB pellet
Starting pressure – 3000 psi
Ending pressure – 1900 psi
Moving on to the little bark, the airgun’s barrel is fully shrouded to reduce the noise levels.
With a rating of 4/5, we cannot claim it is the quiet air rifle on our list, but at least it is quieter than the high-power rifles we already mentioned.
Other features of the Benjamin Bulldog
Ultra-modern bullpup design that trims the overall length and reduces weight
Has numerous Picatinny rails for ease of customization – add as many accessories as you can
Accuracy
Calibers
Pellets
Distances
Groups
.357
H&N Grizzly Hollowpoint 82gr
100 yards
1"
.357
81gr JSB Diablo
50 yards
one hole
.357
Airgun Slugs 142 gr
75 yards
1"
.357
Predator Polymag, .35 Cal, 81.01 Gr
50 yards
1/4"
.357
Neilson Speciality Ammo 110 grain slug
55 yards
1/2"
.357
81gr JSB Diablo
50 yards
one hole
.357
.358 slug of 125 grains
50 yards
0.42"
.357
JSB 81 grain
50 yards
0.5"
Chrony tests
Calibers
Pellets
FPS
FPE
.357
JSB Match Diabolo Exact 81gr
905
147.35
.357
Air Venturi Hollowpoint 95gr
777
127.39
.357
Benjamin Nosler Ballistic Tip 145gr
728
170.68
.357
H&N Grizzly Hollowpoint 82gr
907
149.83
.357
Air Venturi Round Ball 67gr
941
131.77
.357
Benjamin Nosler Ballistic Tip 145gr
731
172.09
.357
Benjamin Nosler Ballistic Tip 145gr
784
198
.357
158 grains pellet
880
271.76
.357
Hollow Point 130 gr
900
233.88
.457
Benjamin Slugs 279 Gr
730
330.22
.457
Seneca 300 gr
703
329.3
.457
Seneca 405 gr
579
301.56
.357
Air Venturi Round Ball 67gr
885
116.55
.357
Air Venturi Hollow point 95gr
794
133.02
.357
H&N Grizzly Hollowpoint 82gr
830
125.47
.457
Hunters Supply 298gr
793
416.22
.457
Slugs 230gr
789
318.01
Recommended uses:
Small/medium/big game hunting: deer, prairie dogs, hogs, coyotes, squirrels, rabbits.
5. Most quiet air rifle for deer: Airforce Texan LSS Moderated Big-bore PCP
AirForce Texan LSS PCP air rifle is a powerful and quiet air rifle that is perfect for deer hunting or target practice.
The CF tank’s 475cc, 250 BAR (approx. 3600 psi) fill pressure and updated TX2 valve help boost the Texan LSS’ maximum muzzle energy from an already whopping 600+ foot-pounds of energy to over 800 FPE (in .50 cal)
And, of course, the slightly smaller, carbon-fiber tank weighs less than its aluminum counterpart, bringing the total weight of the Texan LSS down to a feathery 6.35 lbs.
Features:
.257, .308, .357, .457, and .50 Caliber Lothar Walther Barrel
Velocity: up to 1100 feet per second*
Max Fill Pressure: 3000 psi / 200 bar (Only use compressed air or dry nitrogen)
Safety: automatic on cocking
490cc air tank
Pressure Relief Device
Adjustable Power. See our Manual for more information on how to tune your rifle for the specific ammo used.
Low Effort Side Lever Cocking
Available in Original Black Finish
Chrony tests
Calibers
Pellets
FPS
FPE
.457
Hornady Round Balls 143 Gr
1050
350.16
.257
72 grain bullet
1130
204.2
.457
290 grain
813
426
.457
350 grain
780
473
Recommended uses
Pest control – small/medium/large game hunting: deer, hogs, rabbits, squirrels, coyotes.
WILKES-BARRE — The Pennsylvania Board of Game Commissioners this week approved a host of changes that will improve the efficiency and effectiveness of the Agricultural Deer Control Program — better known as the Red Tag Program — which helps farmers address crop-damage issues through the hunting of antlerless deer.
“The Agricultural Deer Control Program is designed to allow farmers to manage the deer populations on their property,” said Game Commission Bureau of Wildlife Management Director Matthew Schnupp. “The changes adopted today make it easier for landowners to enroll in the program, while making it more convenient for hunters to participate through an expanded season and increased number of tags.”
The changes, which were recommended to the Game Commission by those who use the program, will become effective in November 2022.
Changes include:
• An individual hunter no longer would be limited to obtaining one permit for a Red Tag property; they could get up to four. The higher limit is consistent with that used in the Deer Management Assistance Program (DMAP), which also helps landowners meet deer-management goals through antlerless deer hunting. Hunters would be able to keep all deer they harvest.
• The summer period during which Red Tag hunting is closed (currently May 16 – June 30) would be expanded to April 16 – July 31. Permits would be valid from Aug. 1 through Sept. 15, then from Feb. 1 through April 15. Permits would be issued for the license year that begins July 1 and runs through June 30.
• Landowners no longer would be required to report Red Tag harvests. Instead, similar to DMAP, hunters would report for each permit regardless of harvest success.
• All licensed hunters, not just hunters who are Pennsylvania residents, would qualify for Red Tag permits.
• The red snap tags that are the namesake of the Red Tag Program, would be replaced with standard harvest tags issued through HuntFishPA.
• Landowners no longer would need to enroll in the Game Commission’s Hunter Access program before using the Red Tag program, and Red Tag properties no longer would need to be posted with signs.
Antlerless deer, elk licenses
The board voted to allocate 948,000 antlerless deer licenses statewide, which is up from the 925,000 licenses allocated for 2021-21.
Hunting licenses for 2022-23 go on sale in mid-June and become effective July 1. After hunters purchase a general hunting license, they may apply for antlerless deer licenses based on staggered timelines, which will be outlined in the 2022-23 Pennsylvania Hunting & Trapping Digest, to be given free to all license buyers.
The board also voted to issue 178 elk licenses (60 antlered, 118 antlerless) across three 2022-23 seasons. For the one-week general season to run Oct. 31-Nov. 5, 31 antlered and 70 antlerless tags have been allocated. In the archery season open only in select Elk Hunt Zones, to run from Sept. 10-24, 14 antlered and 15 antlerless licenses are available. And there are 15 antlered and 33 antlerless licenses available for the Dec. 31-Jan. 7 late season.
All elk licenses will be awarded by lottery, and hunters must apply separately for all seasons they wish to be eligible to hunt. Each application costs $11.97, meaning a hunter can enter all three drawings for $35.91. Individuals can be drawn for a maximum of one elk license per license year.
More turkey firearmsrestrictions considered
The Pennsylvania Board of Game Commissioners gave preliminary approval to a measure that would provide the Game Commission yet another tool to respond to below-goal turkey populations.
In years past, reducing the length of the fall turkey season was the primary method to increase turkey populations. But last year, the Game Commission eliminated the use of centerfire and rimfire rifles in fall turkey season, noting that relatively few hunters used rifles, but rifles were responsible for about one-third of the fall turkey harvest. That provides an additional means to protect turkey populations without reducing season length.
The measure the board preliminary approved would eliminate the use of other single-projectile firearms — muzzle-loading rifles and handguns, and slug guns — in the fall turkey season. It will be brought back to the July meeting for a final vote.
When eliminating the use of rifles in the fall turkey season, the Game Commission noted that relatively few fall turkey hunters used rifles. Survey data suggested only 14% of fall turkey hunters statewide primarily used rifles, but rifles were responsible for 33% of the harvest.
Eliminating the use of other single-projectile firearms in fall turkey season would seem to impact even fewer hunters. The Game Commission has observed very few fall turkey hunters afield with single-projectile muzzle-loaders or shotguns. At the same time, eliminating the use of those firearms in the fall turkey season works toward the Game Commission’s goal of finding methods other than season-length reductions to stabilize fall turkey harvest numbers.
“Season length adjustments are a part of managing wild turkey populations, and reducing season length sometimes is a necessity,” said Commissioner Scott Foradora, who represents District 3 in north-central Pennsylvania. “But through alternative methods such as restricting the firearms that can be used in the season, season length reductions might be avoided, giving all hunters the opportunity to spend more time in the woods.”
DMAP might be availableon leased hunting lands
Lands where hunting rights have been leased and where a fee has been charged for hunting might soon be eligible to enroll in the Deer Management Assistance Program, commonly known as DMAP.
The Pennsylvania Board of Game Commissioners today gave preliminary approval to a measure that would change the regulation that excludes leased hunting land from the program. The measure will be brought back to the July meeting for a final vote.
DMAP enables public and private landowners to better address their own deer-management goals for properties. Lands enrolled in DMAP are allotted a number of antlerless deer permits that can be purchased by hunters.
Landowners can make the permits available directly from license-issuing agents, or they can choose to issue coupons that then are redeemed for permits. In either case, DMAP permits cost $10.97 each. Hunters can obtain no more than four permits each for properties where coupons are issued, and no more than two permits each for other properties. Each DMAP permit can be used to hunt and harvest an antlerless deer during any established deer season.
The change preliminary approved by the board wouldn’t have major impacts on the DMAP program, but would make a significant difference for landowners who now are excluded.
The Game Commission has determined only about 5% of hunting lands are leased. On those properties, however, the only tool landowners and lessees presently have to address deer-population concerns is WMU-based antlerless licenses allocations, which might not be enough.
Applying the same rules to leased lands and private lands enrolled in DMAP makes sense because public access isn’t required to enroll in the program. Additionally, restricting DMAP to certain lands to encourage public access historically did not lead to significantly more public access or the prevention of leased lands. Leased lands still exist and are part of the Pennsylvania landscape.
Measure could allow for newroad-killed deer disposal option
Permitted professionals hired by those wishing to address nuisance-wildlife problems might soon receive authority to pick up and dispose of road-killed deer.
The Pennsylvania Board of Game Commissioners gave preliminary approval to a measure that would allow nuisance wildlife control operators, who already are regulated by the Game Commission, to offer road-killed deer pick-up from roadways and private property.
Presently, the responsibility for picking up and removing deer carcasses from roadways is split between the state Department of Transportation and the Game Commission, which sometimes hires contractors to collect and dispose of deer.
Each year, the Game Commission receives thousands of calls from the public concerning deer carcasses along roadways and on private property. The agency often will assign its wardens to collect and properly dispose of these carcasses as their schedules and work duties permit, which in some cases doesn’t meet residents’ expectations.
Nuisance wildlife control operators could provide the public an additional resource for road-killed deer removal.
The measure will be brought back to the July meeting for a final vote.
More than 1,000 acresadded to game lands
The Pennsylvania Board of Game Commissioners today and recently approved of acquisitions that would add more than 974 acres to state game lands. Among them are:
• A 278-acre tract in Bear Creek Township, Luzerne County. This land, which adjoins State Game Lands 91, was offered by Natural Lands for the option price of $42,000 lump sum. Natural Lands can acquire the property through partnership grants provided by the Pennsylvania Department of Conservation and Natural Resources and the Open Space Institute.
• A 4.59-acre tract in Bell Township, Clearfield County. This parcel within State Game Lands 87 is being donated by Diversified Production LLC.
• A 158-acre parcel in South Londonderry and West Cornwall townships, Lebanon County, and Rapho Township, Lancaster County. This land, which adjoins State Game Lands 145, is being offered for donation by Natural Lands, which can acquire the property through partnership grants provided by the Pennsylvania Department of Conservation and Natural Resources and U.S. Fish and Wildlife Services.
• A 54-acre tract in Miller Township, Perry County.
• Two tracts totaling 192 acres in Greene and Whiteley townships, Greene County.
• A 288-acre tract in North Bethlehem and West Bethlehem townships, Washington County.
Additionally, the Game Commission acquired one-ninth interest in the 39.76-acre Lola L. Woodring estate property adjoining State Game Lands 311 in Benezette Township, Elk County.
The Game Commission also has acquired a portfolio of oil, gas and mineral rights in Erie Crawford, Venango, Forest, Warren, McKean and Elk counties. These interests, which were donated by Payday Holdings LLC, of Frisco, Texas, are not surveyed and have not had exhaustive title searches conducted. The commissioners accepted the donation by notational vote in December 2021.
Reach Bill O’Boyle at 570-991-6118 or on Twitter @TLBillOBoyle.




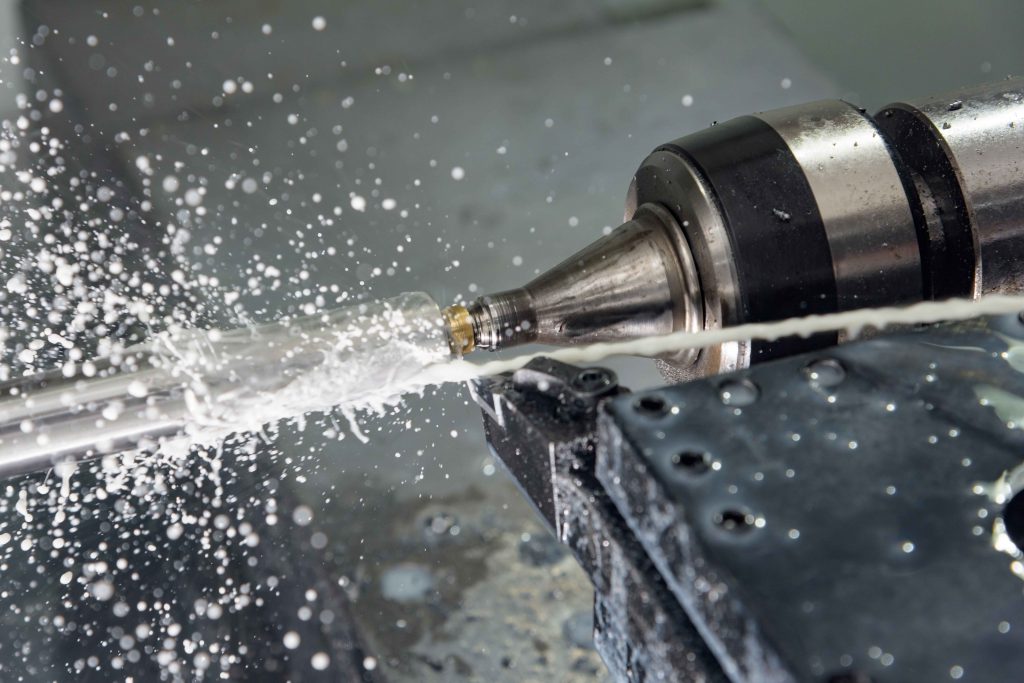
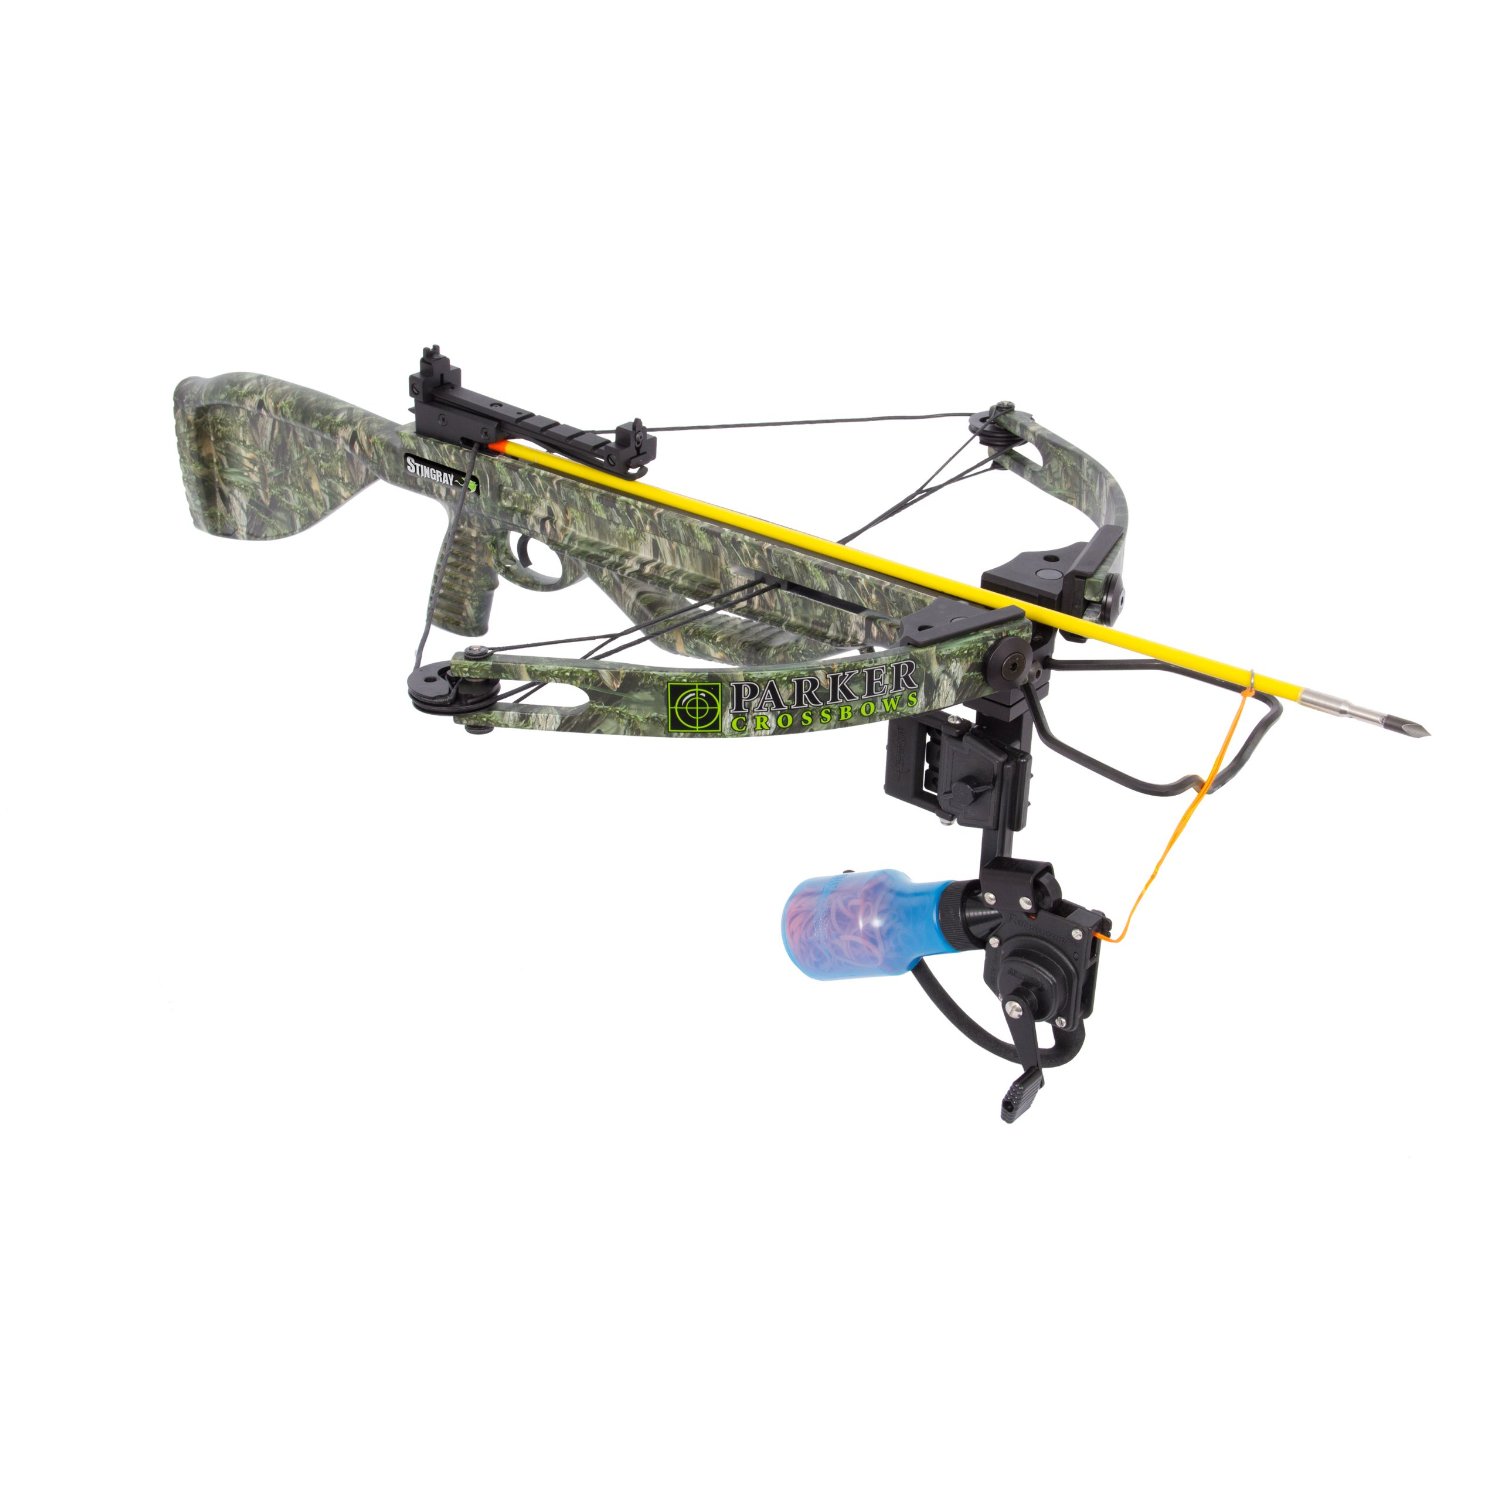 Putting the StingRay together is amazingly simple for such a complex hunting package. The riser, or what Parker calls the front-end assembly, attaches to the stock once you’ve installed the cable slide. If your Stingray comes with a scope, it will be premounted for you, so there is no work to be done to get the scope onto the crossbow. Once you’ve attached the riser to the stock, you attach the AMS Retriever Pro Bowfishing Reel, which includes an integrated arrow quiver for storing your bowfishing arrow.