Bald eagles are incredibly strong birds and highly-skilled flyers. They are often reported as picking up cats and dogs before swooping off with them, but is it true?
An eagle would struggle to pick up and fly away with a cat, but they may attack small cats and kittens.
Eagles primarily feed on fish, and experts estimate that they can carry fish weighing approximately 4-5 pounds. An average domesticated cat weighs between 8 and 10 pounds, which puts it way beyond the carrying capacity of an eagle. In fact, by the time a kitten reaches approximately 4 months old, it will weigh about 4 or 5 pounds, so by the time your kitten leaves the house, it is likely to be too big for an eagle to carry off.
If you are concerned, you can keep your cat indoors, where it is safe from any natural predator, and you can take steps to try and scare away eagles and other birds of prey.
The bald eagle is a formidable bird. An adult has a wing of approximately 7 feet and one can weigh up to 14 pounds. The bird can fly at speeds of nearly 100 mph when diving, and its size and its white head and tail mean that it is difficult to miss when one of these birds swoops.
You are most likely to see a bald eagle swoop around water because its preferred food is fish. They also eat geese, gulls, and other smaller birds. Very rarely, they will dine on rabbits and small mammals, and more rarely, if at all, they may pick up and fly away with a kitten.
Because of the weight of an adult cat, an eagle will not be able to pick up an adult cat and fly away with it. Most experts agree that the maximum amount of weight that even the strongest bald eagle could lift would be 4 to 5 pounds, and an average adult cat weighs twice this, while some giant breeds can weigh three times as much.
How to Protect Your Cat From Eagles
Image Credit: donterase, Pixabay
There are some anecdotal reports of eagles attempting to attack small cats. If you are concerned about this happening, there are some ways that you can help protect your cat.
The simplest method is to keep your cat indoors. Eagles are diurnal, which means that they hunt during the day, so keeping your cat in at night will not keep them free from this winged threat.
Consider installing a pen or exercise run. These prevent your cat from getting out and predators from getting in, while still offering your cat some outdoor space. They can be built onto the back of your property and connected to your home using a standard cat door so that your feline can get in and out whenever they want.
Other Pets at Risk
Rabbits can be at risk of eagle attacks. Wild rabbits are considered tricky prey for an eagle, but they do occasionally get taken. So, if you do have domestic rabbits, ensure that they are kept in a hutch or cage at night, to prevent them from being picked up and carried away.
Summary
The bald eagle is a formidable bird that is capable of flying at great speeds. It has excellent eyesight and is strong. However, the bird usually eats fish and will very rarely eat anything larger than a rodent or very occasionally a small rabbit. Cats, especially adult cats, are considered too large to be under threat from eagles, except in very rare circumstances.
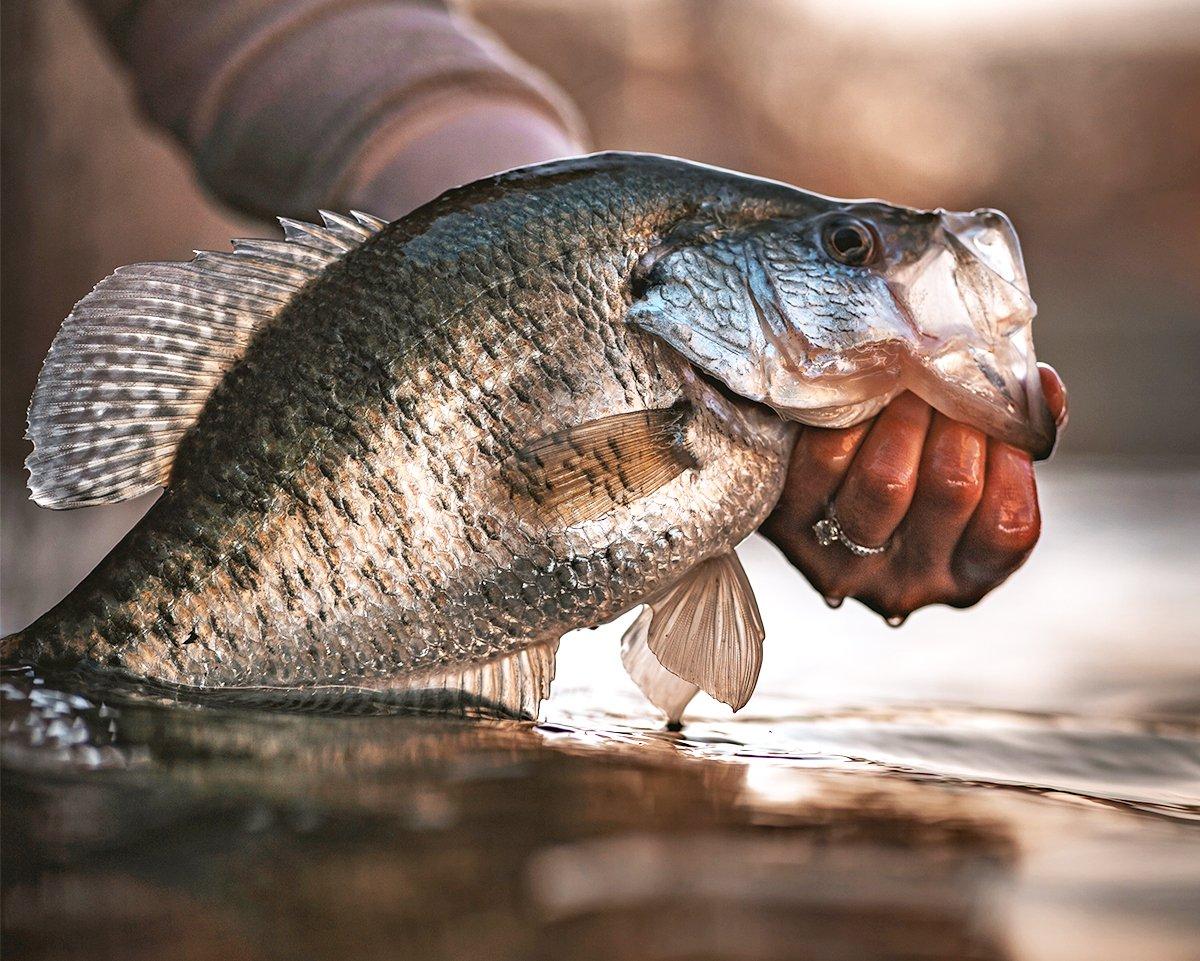
Fishing takes on many forms and why one angler does it versus the next varies as much as personalities do. A handful of anglers after they get very adept at catching fish consistently progress into trophy hunters and chase records, including world record crappie, intentionally. But most any angler would be thrilled to catch a record fish whether it be a state record or the very rare world record.
While in bass fishing, the thought of catching a world record seemed impossible again. Then, it was tied not so many years ago. And in crappie fishing, the black crappie world record was broken just a few years ago and it “officially” has the title of the largest crappie ever caught while the white crappie record has stood for more than 65 years even though it’s just a few ounces less.
With amount of state crappie records being broken in recent years, there will likely be another world record caught very soon. Many think the world records are swimming around now in some of the souths best lakes. But I believe that the world records are likely swimming around in a smaller body of water in the most prominent potential states. States where there is bountiful forage and longer growing seasons offer crappie a long time to get to weigh more than 5 pounds. And with the numbers of 4-pounders coming out of lakes like Grenada, I figure it’s only a matter of time before we see another world record crappie.
Let’s take a closer look at the world records and some of the bigger state record crappies ever caught.
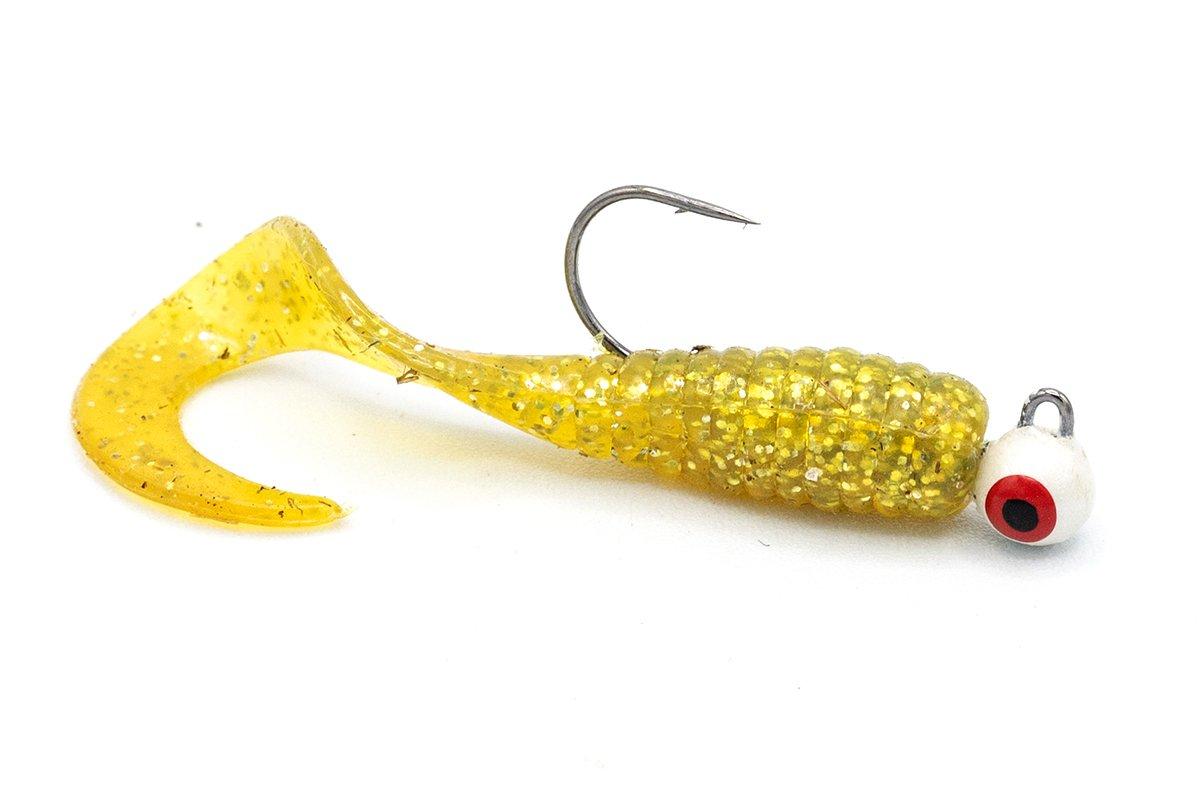
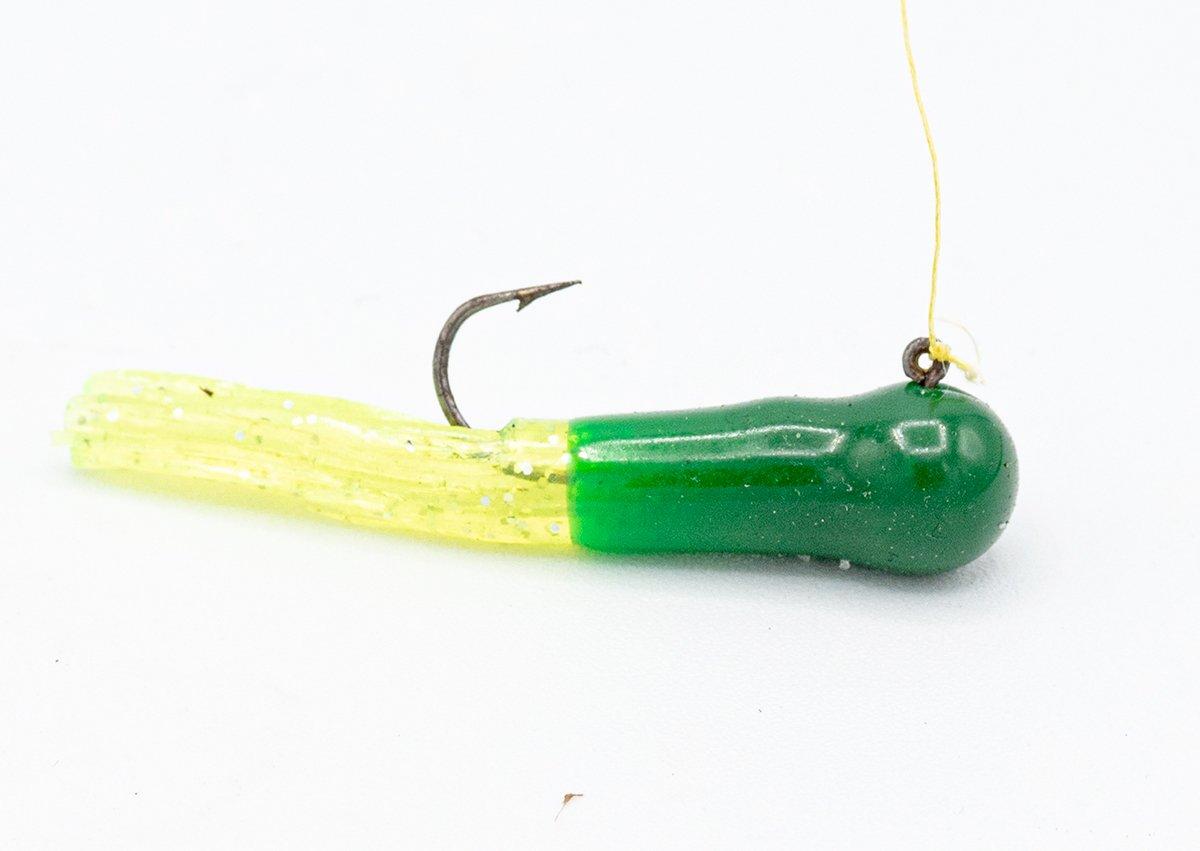
Angler Lionel “Jam” Ferguson was casting a Kalin’s Triple Threat Grub in John Deere color when he got the biggest bite of his life in May of 2018. He was fishing a small private pond in Tennessee when the big black crappie hit. He landed his crappie and weighed it at 5 pounds, 7 ounces, setting not only the new Tennessee state record for black crappie, but it also happened to be the new world record black crappie.
You can find Kalin’s Triple Threat Grub from the following retailers:
BassPro.com
Walmart.com
Amazon
FishUSA
Not only was it the biggest black crappie ever caught, but to our knowledge it is officially the biggest crappie ever landed by an angler as the white crappie world record is 5 pounds, 3 ounces. There were rumors of a 6-pound crappie caught in Louisiana in 1969, but there are no details still to support it and supposedly it was thought to be a hybrid from the photos, so no one recognizes it as a record in the state of Louisiana or by the IGFA because it wasn’t classified as one type or the other. More on that catch later.
He bested the previous black crappie world record of 5 pounds even. You can see the full story of Ferguson’s world record crappie here.
WORLD RECORD WHITE CRAPPIE
Mississippi’s biggest crappie ever
In July of 1957 Fred Bright was fishing below the Enid Dam when he hooked and landed a white crappie weighing 5 pounds, 3 ounces. That record has now stood for 66 years although it’s reported as being caught in the reservoir not the river below it.
There are little to no details on this catch. It is said that he caught the fish with an Orchard Industries Action Rod with a Denison-Johnson reel. But no mention of bait, so most guessed it was caught on a live minnow. But for the most part that’s speculation.
The only mount of the fish was a replica. There are a couple of photos circulating as the official pictures of the catch. But outside of that there is not a lot of information. We’d love to know more on this story if anyone comes across some information that would be helpful.
Many believe the next world record white crappie will come out of Mississippi because so many 4-pounders have been caught in recent years in Mississippi fisheries. And anglers are getting better at catching the nomadic roaming big crappie on the larger reservoirs.
Some believe the record could come from Mississippi but equally likely in Alabama, Tennessee and Texas. These states have long growing seasons, but they also get optimal cooler weather that prolongs a crappie’s life. And they have very fertile fisheries in terms of forage. But some of us believe that the record will come from a smaller overlooked fishery near the world class trophy lakes.
LARGEST CRAPPIE EVER CAUGHT?
The unrecognized tale
So while this is a little tougher than the white crappie record information to track down, in 1969, for a time, the state of Louisiana recognized a supposedly 6-pound crappie that was caught from the bank in an airport canal on a cane pole and minnow.
In the book Crappie! by Jim Robbins, he recounts a story from another editor about the catch:
“Bob Dennie, editor of the Louisiana Conservationist, tells an interesting story of the largest crappie ever caught in Louisiana or, for that matter, the world. In November of 1969, Lettie Robertson was fishing from the bank in the Westwego Canal when she hooked and landed a crappie which was photographed and then weighed on certified scales at 6 pounds. A new world mark that would best either of the two current record holders in the black crappie or white crappie categories.”
“Lettie, glad that all the uproar over the catch was finally over, took the fish home and ate it for supper. However, Lettie’s crappie suffered a worse fate. The photograph could not reveal whether the fish was a white or black crappie, and since no bonafide authority had viewed the remains, it could not be recognized as a world record for either species. The state of Louisiana didn’t understand why there was so much fuss about whether it was black or white, they listed it as the state record sac-a-lait.”
Louisiana only recognizes the two crappie species individual records on their records list now. So probably back then they had no idea their state record crappie was also a world record and would be under much scrutiny. So it never came to be.
Robinson’s record crappie on the left and Echols record crappie on the right.
THE BIGGEST STATE RECORD CRAPPIE
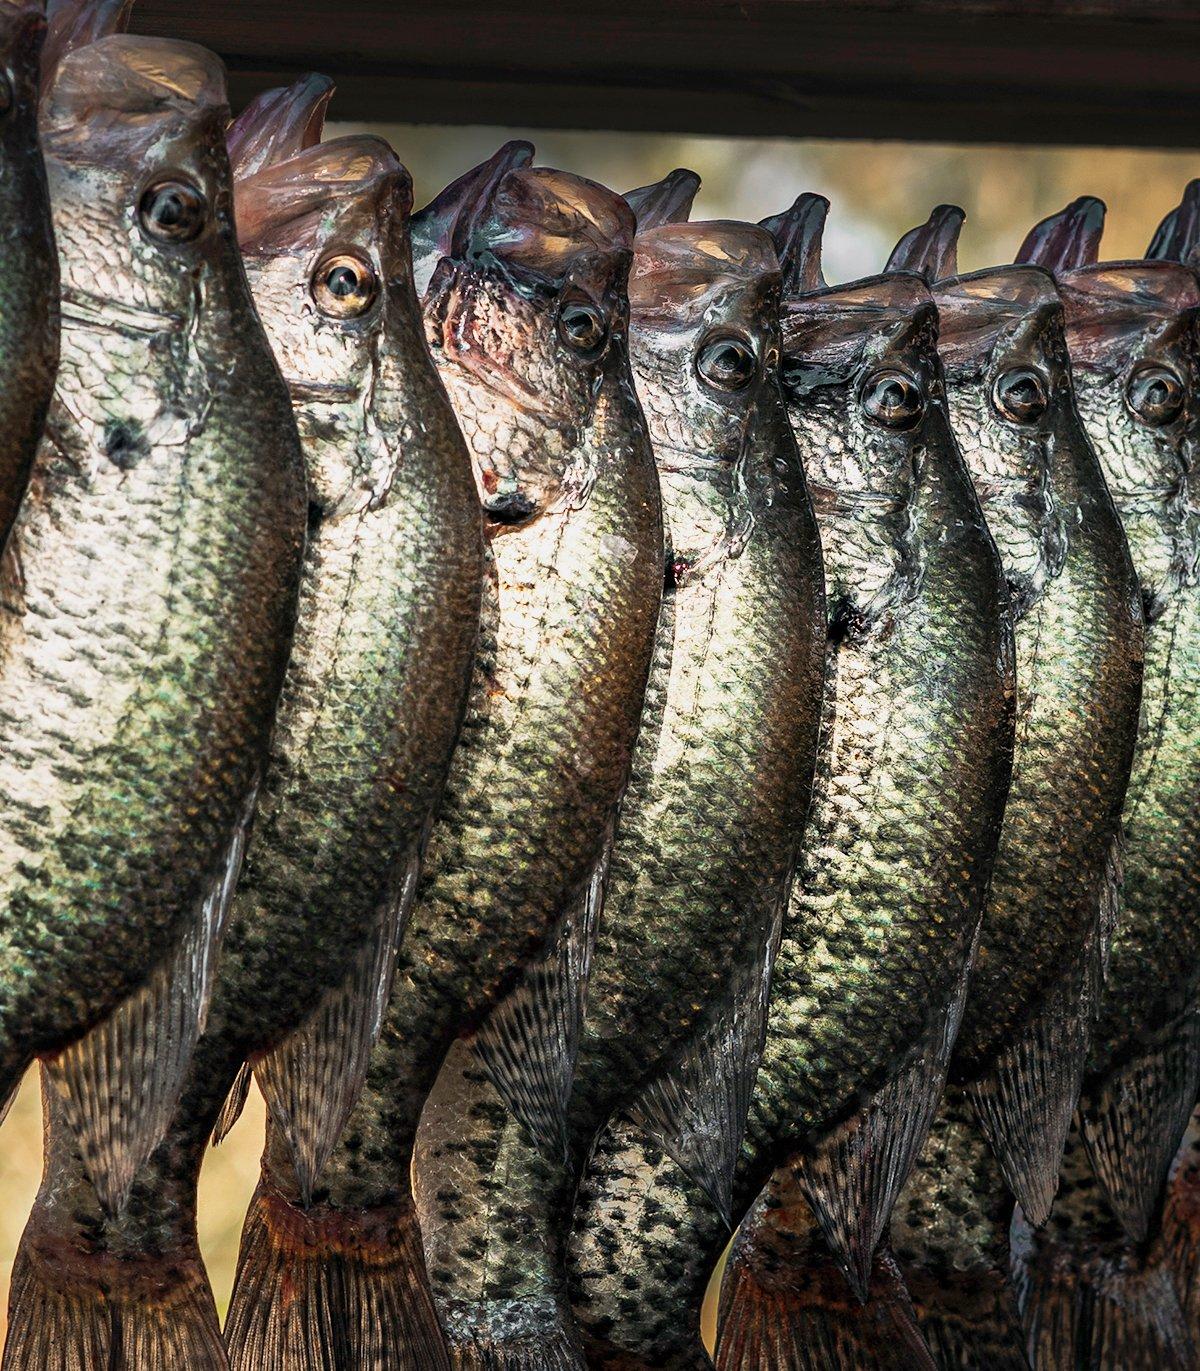
There are numerous state record crappie weighing more than 4 pounds. In fact, 35 of the 50 states have records weighing more than 4 pounds. However only 5 states have crappie records weighing more than 5 pounds. Six, if you think the uncategorized Louisiana crappie claim should stand. Those states are as follows:
Arkansas — 5 pounds even — Lake Wihelmina —Donivan Echols — 2011 Georgia — 5 pounds even — Bibb Co. Pond — Theresa Kemp —1984 Minnesota — 5 pounds even — Vermillion River — Tom Christenson — 1940 South Carolina — 5 pounds, 1 ounce — Lake Murray — H.P. Owens — 1949 Tennessee — 5 pounds, 7 ounces — Jam Fergusson — Private Pond — 2018
A couple of states barely missed the 5 pound mark and are as follows:
Kentucky — 4 pounds, 14 ounces — Watershed Lake — Penny Hopper — 2005 North Carolina — 4 pounds, 15 ounces — Asheboro Lake — Dean Dixon — 1980 Oklahoma — 4 pounds, 15 ounces — Kingfisher Co. Pond — Frank Robinson — 1991 Virginia — 4 pounds, 14 ounces — Lake Conner — E.L. Blackstock —1967
But there’s more to these simple scopes than meets the eye. Which means I’ll be breaking down each scope and its features.
So which air rifle scope is your perfect match?
Keep reading to find out.
Basics of Air Rifle Scopes
These scopes are pretty much the same as a regular rifle scope. They magnify the image you’re aiming at and you’ll be on the same visual plane as your target.
Air rifles themselves are known for their amazing accuracy, so they’re a great addition to your regular range lineup.
But what makes air rifle scopes unique?
These scopes can withstand the double recoil and vibration of an air rifle. So that, plus your improved accuracy, makes the scope completely worth it.
Before we get into the good stuff, let me remind you to please never put a firearm scope on an air rifle. They’re not meant to be together, no matter how cool you may think that would be.
Now, here’s the two different types of air rifle scopes:
Fixed Air Rifle Scopes
The fixed air rifle scope is set to one magnification level. Which means it can’t be adjusted.
But what’s the advantage of a scope that can’t zoom in?
Once you’re sighted in, there’s almost no adjusting required.
So you can get to your target shooting much faster, which is something we can all celebrate.
And what kind of shooting is great for fixed scopes?
If you’re into hunting small rodents or other varmints at a closer range, this is the scope for you.
It’s also nice for the occasional short-range plinking session!
Variable Air Rifle Scopes
The variable air rifle scope can adjust magnification levels between 3-15x. So it offers a great amount of zoom power for shooting longer distances.
But is there a disadvantage to this scope?
Unlike the fixed scope, the variable scope will need adjustments more often while in use after sighting.
And what’s a great activity for this scope?
If you’re looking to hunt larger game at long-range distances, this is your match for an air rifle scope.
What’s the Deal with Objective Size?
Does objective size matter?
It always does!
When you’re looking for the best objective size lens for you, here’s two things to consider.
First, the larger the lens means better magnification.
Second, a larger lens allows more light to enter the scope. Thus, giving you a much brighter and clearer sight before your eyes.
So if you’re planning to use an air rifle scope in low light conditions, such as sunrise or sunset, pick out a larger objective lens.
To find the size of the objective lens, look at the last number in the scope description.
For example, the average variable scope is 3-9×32.
The first numbers before the ‘x’ indicate the magnification power. The number after that ‘x’ gives you the size of the objective lens.
So this scope can magnify between 3-9x and has a 32mm objective lens opening.
All About Mounting Hardware
Now that you’ve chosen your perfect air rifle scope, let’s mount that thing!
Every scope needs to connect to a firearm. So a one-piece or two-piece scope mount is used to fit around the scope. It’s then tightened onto a rail that sits on top of the air rifle.
Mounting is important. And you’ll need certain mounts for certain air rifles depending on the build or recoil power.
For a high-powered spring air rifle with a lot of recoil, I’d highly recommend a one-piece mount.
Why?
One-piece mounts are much stronger than two-piece mounts. They can also withstand more intense recoils from high-power air rifles.
For low-powered spring air rifles with a lot less recoil, a two-piece mount is perfect.
Other Types of Mounting Hardware
To get more specific about the mount you’ll need, check out these various types of mounts:
High mounts are best for larger scopes because it allows the scope to sit higher on the gun. Only use these mounts for 50mm objective lenses and higher.
Medium mounts are slightly smaller than high mounts. These mounts are perfect for 44mm objective lenses or less.
Speciality mounts are required for some air rifles that need a unique mount to fit properly.
Also be aware of the size of your scope tube, which comes in 1 inch and 30mm sizes.
So make sure that the mount you need will also fit around the scope tube.
How to Find a Quality Air Rifle Scope
We all work hard for our money, so finding a high-quality scope is a game-changer.
But how do you find a high-quality scope that’s also worth your money?
Spend some time considering what you’d be willing to spend for a scope. Also think about how often you’ll use this scope and what kinds of shooting you’ll be doing.
After you’ve decided on what you think is a high-quality scope, consider buying one that’s a little bit of a step up in quality.
Why?
Because with air rifles and their scopes, you definitely get what you pay for.
For example, an air rifle scope can generally cost between $30 to $400 and beyond.
Now, I’m not telling you to go break the bank. There are affordable options, of course.
But if you’re looking to use an air rifle scope quite often, then I’d highly recommend buying one that will last you at least a couple of years.
Just like any other piece of equipment, you want it to work well and hold up to the test of time. So you may have to be willing to pay a little more than what you had planned.
But I promise you that it will be well worth it. Especially when you’re having a blast shooting off that air rifle and scope combo.
And there you have my best tips for finding your perfect air rifle scope.
Now go out there and find your perfect match!
Air Rifle Scope vs. Regular Rifle Scope
Despite appearing very similar on the outside, an air rifle scope and a regular rifle scope are built differently.
They are more than capable of being mounted on either type of gun, but doing so recklessly can quickly lead to a broken scope.
Learning the types of guns that can use either scope is important to make sure you’re not flushing money down the toilet by breaking the scopes. However, it’s still possible and sometimes useful to use a scope on the opposite gun.
I’ve done the research and put together a quick guide to show the pros and cons of each type of scope as well as when it’s safe to mount it on a different gun.
Let’s get started!
Differences
One of the biggest differences between the two scope types is how they handle recoil.
An air rifle recoils differently than a normal rifle, and will actually recoil forwards after the initial backwards recoil. This force is not taken into mind with normal rifle scopes, so the forward recoil will tear most rifle scopes apart.
This video takes a deeper look into why air rifles tend to destroy regular rifle scopes:
Parallax is another big difference between the two.
The set parallax for air rifle scopes tends to be around 10m, while many rifle scopes have theirs set around 100m. While air rifles can shoot further than 10m, the scopes are designed for the shorter distance shooting that they excel in.
At the end of the day, the scopes are designed for different types of guns. Unless a scope was specifically designed for both, there will be certain issues with magnification and accuracy due to the change in ammunition.
Similarities
Despite the significant differences in shooting bullets vs. air gun pellets, the scopes have several similarities.
Believe it or not, air rifle scopes are just as tough and durable as high end rifle scopes. In some cases they can even be heavier and thicker.
Air rifle scopes still function well on a regular rifle scope. The opposite is rarely true, but there are a few exceptions. Some companies will actually design their rifle scopes so that they can withstand the stress from the different recoil of an air rifle.
There is an exception if you mount an air rifle scope on a very powerful rifle. The powerful recoil will overwhelm the air rifle scope and break it. They aren’t designed to handle extreme force on one recoil, but rather the moderate force on two.
What This Means
While it’s tempting to save some money and swap the same scopes between different types of rifle, I don’t recommend it. There are plenty of great rifle scopes, and buying a proper one for each rifle can save you much future grief.
Some rifles are listed and designed to work with either one, but getting a scope specific to your type of rifle is always better.
The recoils vary considerably, so getting a scope that specializes in handling this is better than a scope that’s decent at it.
The different ammunition is also something to consider, as a bullet will travel much differently than an air gun pellet.
For the most part, regular rifle scopes will give you more accuracy over longer distances, while the air rifle scopes are better at closer ranges.
At the end of the day, it’s much cheaper to buy two scopes than it is to constantly break your current ones trying to make them work on different guns!
The 4 Best Air Rifle Scope
If you’re pressed on time, here’s a quick list of the best air rifle scope:
Hawke Airmax Airgun Scope 2-7×32: Best Overall Scope for Air Rifle
ATN X-Sight: Best for Night Shooting
UTG 3-9X32: Best Scope under $100
BSA Outlook 3-9X40: Best for the Budget
1. Hawke Airmax Airgun Scope 2-7×32: Best Overall Scope for Air Rifle
The Hawke Airmax 2-7×32 is the best scope I’ve come across for an air rifle.
This optic is a target shooters dream. With a specialty reticle and a huge operative range, there isn’t much you can’t do and do well with the Hawke Airmax.
Choosing a scope for an air rifle is a little bit different than choosing a firearm scope. For more info on what makes an air rifle scope different, check out this guide to air rifle scopes.
To see the best overall airgun optic on the market, keep reading…
Glass Clarity & Reticle
The glass clarity on the Hawke Airmax is fantastic.
The high quality glass is fully multi-coated in 16 layers, so I know it will stay as clean as it was when I took it out of the box.
What really impressed me was the glass-etched reticle. The Hawke Airmax scope uses an AMX reticle,, which was specifically designed for air rifles. The mil-dot reticle floats comfortably in the center of the sight picture. It’s easy to see and kept me on target anywhere from 10 to 100 yards.
The Airmax is optimized for target shooting. It is a serviceable option for varmint hunting, but if that’s your primary objective, check out my first choice for varmint hunting.
Eye Relief & Eye Box
The eye relief is 3.5 inches, which is generous in my book.
The wide eye box made it easy for me to find my target fast.
Durability
The Hawke Airmax Scope is lightweight, durable and best of all, nitrogen purged.
Why does that matter?
Nitrogen purging ensures the scope is 100% waterproof shatterproof and fog proof.
The only issue I had with the design is the lens cap. I found it a little flimsy and hard to maneuver with one hand, so I replaced it with a Butler Creek lens cap.
Elevation & Windage Knobs
The turrets are perfect for in field adjustment.
The Hawke Airmax has extra large turrets that feel good in the hand, and turn easily with a satisfying click. Each click is .25 MOA which makes it easy to get a fine zero. It held zero like a champ.
Parallax & Magnification
The 2-7x magnification is a lot to work with.
I feel confident about taking this to a competition anywhere up to 100 yards. The image is clean, and the parallax turret is east to adjust.
I like this scope for long range target shots, but the variable magnification works perfectly anywhere above ten yards out with no tunneling.
If you are looking for a lower range fixed magnification scope you might want to look into a rimfire scope instead.
Mounting & Rings
To mount the Hawke Airmax, you will need a 1-inch dovetail or pic rail mount kit. I used these Hawke dovetail rings.
You will need a hex screw, which you probably already have. In case you don’t, Winchester makes a nice gun screw set.
Is the Hawke Airmax Airgun 2-7X32 worth it?
The Hawke Airmax is one of the best scopes out there for competition air rifles.
It’s priced surprisingly low for such a great optic. What makes it my top choice is…
Lightweight build
Audibly clicking turrets
Non-telescoping magnification
Specialty AMX reticle made for air rifles
And of course, Hawke backs up their quality promises with a no-fault lifetime warranty, so you can shoot with confidence. If you take your sport seriously, I highly recommend giving the Hawke Airmax Airgun Scope 2-7×32 a try.
2. ATN X-Sight: Best for Night Shooting
The ATN X-Sight 4K Pro is the best sight for night shooting.
In fact, I purchased this optic strictly as a night scope for hog hunting. After seeing how it tremendously improved my accuracy, I kept it on my AR-15 and tested its performance during casual target shooting and deer hunting.
By the end of this review, you’ll know if the ATN X-Sight is for you.
Let’s dive in!
Image Clarity & Reticle
The image quality is bright and clear.
The ATN X-sight is equipped with several reticle patterns and color options, which makes shooting easy. It doubles as both a digital daytime optic and a night vision scope: definitely worth its price tag.
Speaking of night vision…
The X-Sight 4K PRO sports an Enhanced HD NV Mode. I’m certainly seeing a higher quality than other “Night Vision” scopes, including the units that cost thousands of dollars more than the ATN X-Sight.
Although the scope does come with an IR attachment light, I chose to upgrade it with the ATN IR850 SUPERNOVA IR Attachment.
Take my word: it was worth every penny. I was hitting small game at night out to 300 yards without issues.
The ATN X-sight also features a built-in rangefinder and ballistic calculator that’s amazingly accurate.
You just enter your gun and ammo specifications via the ATN Obisidian App on your smartphone, and it takes into account everything that affects your trajectory, including— Relative Humidity, Wind Speed, Wind Direction, Temperature, Barometric Pressure, and Elevation.
Recording and Streaming
Recording videos with the X-Sight 4K Pro came out to be very clear at 10X zoom. Unfortunately, the quality started degrading as I was approaching full zoom. This isn’t uncommon with digital scopes, though.
I did extensive research before buying this scope and found that most shooters who have issues with the product freezing or being pixelated don’t understand the technology.
Make sure you read the instructions on the manual thoroughly and make sure to upgrade the firmware to the latest version.
Also, you can easily google any problem and find a solution- just like you would do with an iPhone.
Moving on, let’s talk about the Recoil Activated Recording (RAV) feature. This was super helpful to me. I didn’t have to worry about pressing the record button every time.
Why?
Because as soon as the X-sight detects recoil, the RAV feature automatically saves that 10-second snip before the shot and 10 seconds afterward.
The videos are stored on the removable micro SD Card for viewing at a later time. The dual streaming option also allows you to simultaneously record and Livestream your hunts. How cool is that?
Eye Relief & Eye Box
The eye relief is excellent, ranging from 3-3.5 inches.
On the flip side, the ATN X-sight’s eye box is a bit narrow.
The 3-14x scope has 460 ft field of view at 1000 yards, while the 5-20x version has 240 ft.
Durability and Battery
This ATN X-Sight is very durable, and the buttons are tactile. The ruggedness reminded me of the battle-tested ACOGs.
The X-sight doesn’t get damaged if left out in the sun, nor does it have to be protected from light exposure, unlike other regular night vision scopes.
The entire unit weighs about 2.2 lbs, which tips the heavier side of the scale, but compared to an AR-10 with a standard scope, the weight difference is about the same.
It took about six hours to fully charge. However, once fully charged, it is said to provide a continuous use of up to 18 hours.
It ran it for about 12 hours on the range, and the battery indicator wasn’t even at the halfway mark, so I’d say ATN advertises the battery life accurately.
Zeroing
Zeroing was remarkably easy thanks to the ‘One Shot Zero’ feature. All you need to do is take one shot, align it with the crosshairs, and push a button. This is extremely helpful if you’re a beginner.
It took me less than 20 rounds using the .308 Winchester to get it perfectly zeroed.
My personal favorite feature is the Profile Manager. Essentially, you can save multiple zeroing-in data for different firearms and ammo. You can easily switch weapons without having to reset everything. This saved me a lot of time in the range.
Magnification
This ATN X-Sight 4k Pro can be purchased with two magnification options: 3-14x50mm and 5-20x65mm.
Which one should you get?
Get the 3-14x50mm if your target range is between 25-250 yards. BUT if you plan on zooming in, you will lose a lot more clarity with the 3×14 than the 5×20.
So if you’re shooting out past 250 yards frequently, I recommend getting the 5-20x65mm model.
Mounting & Accessories
Fortunately, ATN has eased the hassle of a complicated setup.
The ATN X-Sight comes with a versatile mounting system that includes standard rings, an L shape ring, and a Picatinny rail. Simply pick the right ones for your needs.
It took me less than 10 minutes to mount the scope on the Hardened Arms 16-inch 7.62x39mm AR-15 upper.
Word of advice: make sure your mounting screws stay tight. I check mine every time I go to the range. They haven’t come loose yet, but it’s good to keep on top of it.
The sight also comes with a heap of accessories, including:
Eyecup
Sunshade
Lens cover
UBS-C cable
Cleaning cloth
Is the ATN X-Sight 4k Pro worth it?
The days of breaking the bank to have an excellent night vision scope are over. The ATN X-sight is a game-changer.
Why? It’s got:
One-shot zero
4K UltraHD Sensor
Excellent Night Vision
Long-lasting battery life
Recoil Activated Recording
3-14x or 5-20x magnification
Fog proof, dustproof, and fully waterproof
Built-in Smart Rangefinder & Ballistic Calculator
1080p HD Video Recording & Photos to your smartphone
Plus, the scope comes with ATN’s 2-year warranty for returns and repairs, the accessories are covered for one year, and the battery for six years.
For under $1000, the ATN X-Sight 4K Pro displays exceptional quality and value for day and night shooting.
3. UTG 3-9X32: Best Scope under $100
I love the UTG 3-9X32, and you will too.
It has a wonderful reticle, easy adjustment, and includes everything.
If you’re looking for a budget scope, this is the one.
Read on to find out why.
Glass Clarity & Reticle
The image is bright even at high magnification, though I have noticed a little darkening after sunset at 9x power.
The lenses are multi-coated in emerald green to increase light transmission as much as possible, and it works well.
There is a little tickle of distortion right at the edge of the field of view, but not a big deal to me.
You can change the color to red or green, but even if your battery dies you still have the regular black reticle. I bring extra CR1620 batteries in the field with me.
The UTG 3-9X32 reticle is also very usable for a mil-dot. There are nine dots in any direction, giving plenty of different points of aim without the need to touch a turret.
Eye Relief & Eye Box
The eye relief is listed as 3-4 inches, so you need to stay inside that range to get a clear image.
This is probably the one con of the scope, but for my 30-06, it isn’t an issue at all. That’s right where I had the Leupold mounted before moving it to another rifle.
It can be a problem if you have a target 22 and you like to snuggle with your optic. Overall though, I would say that the eye relief is just about right for most shooters.
(If you like it longer or shorter you might want to check out these Ruger 10/22 optics.)
Durability
The UTG 3-9X32 BugBuster is nitrogen purged and built around a framework of strength over all else.
I have yet to have any issue with it holding zero. It literally needs to come loose from the rail to throw it off, and I love that in a scope.
It’s never fogged or given me any kind of problem, even on wet mornings hunting rabbits in 40 degree weather over snow from the previous day.
The caps and sunshade are a bonus, and they help to keep everything well protected and dust free until you are ready to take your rifle out to the field.
UTG has something they call a “True Strength” platform that their scopes are built around, something about the way the pieces inside fit together to keep things in alignment. Whatever it is, it works. My hunting rifle stays on target season after season, and it hasn’t let me down yet.
Elevation & Windage Knobs
The bad news is the knobs require an allen key to adjust.
The good news is that all of the required hardware for the scope is included, even the wrench for the windage and elevation knobs.
Actually I lied, you don’t need to wrench to adjust them in the field, just for zeroing in at the range. The wrench loosens a securing bolt and allows the turret cap to spin freely, so once you are dialed in you can set your tick marks to zero.
This is becoming a pretty common feature on scopes, but in case you are wondering, it allows you to adjust for windage or elevation in the field and then return the knobs to zero without counting clicks.
Speaking of clicks, the adjustments on the turrets are ¼ MOA. Perfect for long-range shooting, whether in competition or hunting mountain goats across a wide canyon.
And yes, there’s a very satisfying click when you turn them.
Parallax & Magnification
Magnification of the UTG 3-9X32 BugBuster is straightforward. Just twist the power ring near the turrets and go, like any other scope.
There is an added bonus that a diopter adjustment comes with a lock. Once you have the reticle clarity set for your eyes, there’s no need to touch it ever again.
Parallax on the BugBuster is adjustable on the end of the scope. That is, where the objective lens is located. A quick twist sets you up anywhere from infinity to as close as three yards.
I’ve dialed in the parallax to the required setting, looked through while moving my head about with the rifle in a rest, not a single problem. The reticle follows the target.
Mounting & Rings
Everything is in the box, even the mounts. I don’t think I need to tell you what a relief that was. Shopping for rings is my least favorite part about being a shooter.
The rings also come with quick-detach mechanisms and fit on Weaver or Picatinny rail systems. If you are going to be dressing up your little black rifle with a long-range scope, you won’t have to shop around for detachable rings.
And what’s more? They’re pretty darn sturdy. Torture tests are conducted by UTG for durability under normal wear-and-tear conditions, and the rings are built just as rugged as any I’ve seen. I think I said earlier, and I’ll repeat it here, I’ve never yet had to re-zero this scope.
Is the UTG 3-9X32 worth it?
This scope is for long-range shooters who want a quality piece of glass at an affordable price range.
The key features of this scope are:
9 mil-dots
¼-MOA clicks
Illuminated reticle
Easy turret adjustment
Quality glass on a budget
All hardware and tools included
Parallax adjustment down to 3 yards
It’s hard to beat this scope for less than 100 clams. I’ve tried almost every budget scope on the market, and found most of them severely lacking. But the UTG 3-9X32 BugBuster gets the job done and does it amazingly for the price.
It also comes with a lifetime warranty.
If you want to put a powerful scope on your rifle, the UTG 3-9X32 is what you need.
4. BSA Outlook 3-9X40: Best for the Budget
The BSA Outlook 3-9×40 is the best scope on a budget.
In fact,
There might not be a lot of flashy features on this scope, but the ones it has I’m ready to compare to optics worth 3x the price.
Keep reading to find out…
Glass Clarity & Reticle
I never would have guessed this scope’s price tag looking through the glass.
The image through the scope is crisp and clear.
For a sub-$100 scope, the glass is incredible. The fully multi-coated lenses are a premium feature that deliver a crisp, clean image.
I will say that at the highest magnification settings, there is a minimal amount of fisheye around the outside of the image. However, it’s hardly noticeable unless you’re looking for it.
The BSA Outlook is outfitted with a simple MIL dot reticle.
I only say simple, because the MIL dot reticle is visible clean without a complex system to distract your eye. In reality, the MIL dot reticle can do so much for the shooter in a small space.
I’m a big advocate for the MIL dot reticle, because, at a glance, you can judge wind, bullet drop compensation, range, and target size regardless of your rifle caliber.
It’s ideal for long-range shooters, varmint hunters, and tactical marksmen.
The BSA Outlook’s reticle is also on a second focal plane, meaning the reticle grows or shrinks with magnification. It’s easy to see at all magnifications for fast and fearless target acquisition.
Eye Relief & Eye Box
This scope has a solid 3.7-4 inches of eye relief. Plenty of space to avoid injury to the eye in case of a strong kickback from the firearm.
The eye box is also forgiving, not causing my eyes to fatigue like other cheap optics.
Durability
Break barrels are brutal on a scope, and I’ve had my fair share of optics eaten up by high recoil. So when my BSA Outlook was still kicking after over 800 rounds, I was more than impressed.
The one-piece constructed optic body from durable, lightweight aluminum is built to withstand serious recoil from even the most powerful air rifle.
It’s the whole durable trifecta of waterproof, shockproof, and fog proof construction.
The low-glare, matte black finish is not only stylish but also helpful when you need to camouflage your position when hunting close-range.
Elevation & Windage Knobs
The low profile elevation and windage turrets have crisp, positive clicks.
Adjustment turns very smoothly on everything from the turrets to the adjustable objective. They’re especially nice for scope in this price range
They do have on flaw though: the hash marks don’t line up exactly on the turrets and each line is offset by a fraction of a hair.
However, they’re still accurate to the ¼” MOA adjustment, and I’d take that over loose adjustments.
Zeroing was easy once I got on paper. And with only a few adjustments on the turrets, the scope has held zero for over 800 pellets.
Parallax & Magnification
So, how much magnification do you get? A very versatile 3x-9x.
At 3x, the image is crystal clear.
As the optic reaches max magnification, there is a minimal amount of fisheye and blur on the outer edges of the image. However, the imaging is still lightyears ahead of other scopes in its price bracket.
This broad magnification range increases accuracy for short to medium ranges with absolutely no parallax at all.
Here’s how I know:
I took my laser range finder and started testing at 10, 20, then 30 yards to verify focus and parallax settings. The marks were good, and I’m more than impressed by the results.
It’s a solid 10 to infinite parallax adjustable scope.
Mounting & Rings
The BSA Outlook comes with its own two-piece dovetail rings. They’re solid with four bolts in each ring.
A set of rubber lens caps are also included to increase the longevity of your lens’ lifetime.
Is the BSA Outlook 3-9×40 worth it?
If you’re looking for an affordable scope that offers versatility and durability for even the highest recoiling air rifle, then the BSA Outlook is my recommendation.
Here’s why:
MIL Dot reticle
Included dovetail rings
Fully multi-coated lenses
Limited one-year warranty
Tactile hand turn/zero reset turrets
And the bonus is it won’t break the bank.
If you’re looking to ring steel without losing a chunk of change, the BSA Outlook 3-9×40 is the air rifle scope for you.
Now It’s Your Turn
I hope you enjoyed my best air rifle scopeguide.
Now I want to turn it over to you:
Which scope will you pick for your air rifle?
Let me know by leaving a quick comment down below.
Food plots require planning, design and management to be successful. Before investing time, labor and money, you should determine the goals of your food plot. If you enjoy growing things, working with the land and nature, and seeing wildlife thrive, you may generally find installing food plots rewarding. If you install food plots as a main goal to grow and harvest trophy animals, you may soon become frustrated. Food plots alone do not create large antlered, trophy sized white-tailed deer. Genetics and the age structure of bucks in a herd influence antler size more than additional food. Food plots should not be used as a substitute for natural wildlife foods. Food plots should only be a small part of a larger management plan for wildlife in your area.
Expectations for Your Food Plot
A balanced management strategy is important to create a sustainable food plot. You should begin with realistic expectations for your food plot based on your land resources and local wildlife populations. Once those expectations are determined, you can begin planning the number of plots, size of the plot, plot location, and species of plants. While many articles and books contain information about simply sizing food plots based on desired wildlife, there are additional variables that should be considered as you design a food plot for your land. Consider the following questions before installing a food plot:
Are deer the only species of wildlife you hope to attract?
What is the population of those wildlife species already in the area or per square mile?
Do you expect to harvest wildlife from hunting or just use the food plots to attract wildlife for viewing?
Do you plan to use the food plot to increase the variety of food for area wildlife, or is there already naturally occurring food or agricultural crops available on your property and surrounding areas?
Do you need additional equipment to prepare, install and maintain the food plot you plan to establish?
How long do you expect to maintain the plot(s)?
How much of a time commitment are you willing to make for future years to keep the plot(s) functional?
How much money are you willing to spend now and in the future to keep the plot(s) productive?
Would your food plots become a conflict if your neighbors are trying to eradicate the wildlife you are trying to attract?
Answering these questions will determine the feasibility of attracting the desired wildlife in your area and your ability to invest time, money and effort in creating and managing the food plot. To help you with this process, this fact sheet is the first of three that serves as a guide for creating food plots for wildlife. This fact sheet covers the design, layout and habitat requirements of deer. The second fact sheet focuses on the planting of the food plot, including what and when to plant along with the equipment needed to plant and care for your food plot. The third fact sheet identifies management strategies to care for the food plot for sustainability and environmental health. This first fact sheet will cover basic considerations for designing your food plot.
Food plot with purple top turnips. Photo by Clif Little, Ohio State University Extension.
Food Plot Size
Food plot size is dependent on the population of deer and the size of your property. For example, creating a food plot for white-tailed deer where heavy populations currently exist, you may need large, numerous plots to prevent over use, especially if few agricultural crops are nearby. In this situation, plots ranging from 2 to 5 acres or more are recommended to handle heavy pressure and minimize excessive injury to plants in the food plot(s).
To help identify areas with heavy pressure and to monitor use, you can create a deer exclosure. A deer exclosure is a small, fenced plot made of wire or plastic materials that prevents deer access to the protected plants. You can monitor the level of browsing, and tell which plants are preferred. For example, if plants such as clover are constantly over-browsed, they will die out in the plot but be present in the exclusion cage, providing a comparison to what would be growing if plants were not over-browsed. If consistent high levels of browsing occur, additional plots or acres would need to be installed so the plant species you want to grow can be maintained in the food plot.
In less densely-populated wildlife areas, or where agricultural crops are plentiful, plots less than 2 acres may provide enough forage to meet your food plot goals. For hunting situations, ¼- to ½-acre plots may be ideal, but choosing or creating areas where enough sunlight reaches the plants is critical. If your food plot is expected to provide feed and/or cover in the late winter months, then the plot should be a minimum of 1 acre and, for this purpose, “bigger is better.”
How many food plots or what total acreage should you install? The level of management and desired impact you plan to achieve determines this. If you intend to “intensely” managing the area for high quality and quantity of forage, installing food plots on 1 to 1 ½ percent of your property can provide positive impact for deer in a given area. This would be 7 to 10 acres of food plots per square mile (or per 640 acres). With a more “average or normal” management approach, a minimum of 5 percent of the property should be dedicated to have noticeable impact for white-tailed deer. To provide optimum nutrition and benefit, food plots should be evenly distributed across the entire property. A variety of crops may be necessary to provide high quality food year-round.
If you have 50 to 100 acres and want to draw, attract or hunt deer on your property, where do you start? First, determine the quantity, quality, type and location of food sources near your land. Then, you can identify supplemental food sources for your food plot to make a significant difference for the wildlife. For example, energy in the diet of white-tailed deer is critical during late fall and winter. So, corn or grain sorghum, which are high-energy forages, could provide much needed energy during that time of the year. This would especially be true in years of poor acorn production. (See the nutritional considerations section for more information on food sources.)
Roadway seeded with annual rye and oats. Photo by Clif Little, Ohio State University Extension.
Food Plot Shape
The shape and layout of the food plot also needs to be considered in your goals. Making an opening in a woodland or installing a food plot in an existing opening can change the ecosystem around the perimeter of the opening. This abrupt change on the perimeter, where one habitat type stops and another begins, is called an edge.
Increasing habitat edges can promote usage of the area by deer and other wildlife. The amount of edge created by a long narrow plot is much greater than a square plot with equal acreage. Also, wavy, uneven edges provide extra length and a more natural look than straight line edges. The distance from cover to the edge may be of concern for small species of wildlife. If the distance is too far, the smaller species may avoid the area because of possible exposure to predators. To help reduce this concern, placing food plots near plentiful cover is beneficial. Many larger game species of wildlife prefer to move along and inhabit woodland edges; however, these woodland edges may increase predation of small animals and cause relocation of some bird species. To prevent this, planting shrubs, vines and other low story vegetation adjacent to the plot creates a soft edge along the perimeter to encourage wildlife movement through those areas.
Also, consider your usage of the area when designing your food plot. If the food plot is designed for hunting purposes, archers may find smaller narrow plots more suitable to reduce shot distances. The width of plots may be less important to firearm hunters.
Some logging roads are great places for food plots if there is direct sun for at least four to six hours each day to provide adequate sunlight for plant growth. You may need to cut back the majority of the tall trees approximately 50 feet from the road, at least on one side of the road, to create adequate light. Placing the tops of these trees near game trails that cross the road may enhance the crossing spot, by providing additional cover. For smaller wildlife species, such as rabbits or game birds, placing food plots near wintertime escape cover is important.
Logging roads that run east/west are ideal for seeding because of increased sunlight. Photo by Mark Landefeld, Ohio State University Extension. This picture shows habitat successional stage 4, a young woodland. Photo by Mark Landefeld, Ohio State University Extension.
Providing Cover
If the goal in managing your property is to attract and keep certain wildlife species on your land, providing the right habitat is critical. All wildlife need food, water and ample cover to thrive. You will be most successful by determining the most limiting, or prominent need, for a selected wildlife species, and then providing it. The first step is to determine the stage of habitat available on your property. The stage of habitat identifies food and cover resources available to wildlife.
The successional stages of habitat are categorized by numbers one through five, and will change over a period of time, if left unattended:
Stage 1 – Bare ground: will become vegetated and turn into a grass or weedy field
Stage 2 – Weedy fields or a tall grass field: provides insects, seeds for food, forage, cover, and will become brushy with time if left uncut
Stage 3 – The brushy stage: low growing shrubs or bushes that provide woody browse, a variety of berries, more seeds and trees start to grow
Stage 4 – Young woodland: has relatively dense number of trees providing cover and food for many wildlife species
Stage 5 – Mature woodland: larger trees with an open understory, provide a variety of nut trees, soft mast and cavity trees for nesting
Once you have determined the stages of habitat on your property, you can evaluate the available habitat resources and plan for those that are limited. Sometimes, enhancing cover and natural food sources (food plots can also be considered habitat) can make more difference in attracting wildlife than installing food plots alone. Single, small food plots have little impact on the overall food supply for wildlife, but creating thick, dense cover of brushy low growing shrubs or bushes, for example, may draw and keep white-tailed deer in a desired location. Wildlife biologists differ on amounts of “sanctuary,” or dense cover, areas for deer, but a minimum of 25 percent of your property area is usually recommended.
Management will help create wildlife habitat. Photo by Clif Little, Ohio State University Extension.
An example of thick, dense cover for deer is 3 to 5 acre blocks of dense vegetation consisting of bushes, trees, briars and other woody vegetation that limits visibility beyond 50-60 yards. These areas, where little to zero human activity occurs, will create a secure bedding area and attract white-tailed deer. Providing quality cover like this should be a top priority if nothing like this currently exists on your property. Again, more is better regarding available space, so establishing multiple dense-cover, or sanctuary, areas is preferred.
If hunting is planned, strategically position food plots in relation to bedding areas to maximize success. Prevailing wind direction should be taken into account so the wind is not blowing from the hunter’s position directly to the bedding area. Normally, cross wind arrangements provide greater advantage for the hunter.
Hedgerows also provide important cover and food resources for many species of wildlife. A hedgerow is typically a line of closely-spaced trees, shrubs, vines and herbaceous plants that provide both food and cover. These structures often form along old fence rows, but may also be constructed where needed. Hedgerows serve as great wind breaks for wildlife in open areas and provide cover for small animals. Hedgerows also serve as travel corridors providing concealed travel areas for wildlife.
Encouraging Natural Foods
Increasing natural food production may be the most overlooked part of many landowners’ management plans. Raspberries, blackberries, apples, crabapples, nuts of all kinds, persimmons, elderberries, sumac, grapevines, dogwood, viburnum, and many other natural foods can provide enormous amounts of nutrition for wildlife if you manage them properly. Many of the above listed trees and shrubs can also be planted or encouraged in hedgerows and soft edges.
American crabapple producing fruit. Photo by Clif Little, Ohio State University Extension.
Within woodlands, a technique called Crop Tree Release can be used to enhance natural food sources for wildlife. A crop tree is one that a landowner wants to favor, or enhance, through the removal of less desirable trees around it. For example, an oak tree’s acorn production will increase as the tree’s crown size increases. To stimulate tree crown growth, a landowner can provide additional sunlight by cutting down, topping or girdling competitors that are overshadowing and reducing sunlight to the crop tree. Releasing crop trees to promote increased growth and food production should be part of a manager’s food enhancement plan.
For more information on crop tree release, see OSU fact sheet “Enhancing Food (Mast) Production for Woodland Wildlife in Ohio.” For this fact sheet, and others on woodland and wildlife management, visit the Ohio Woodland Stewards website at woodlandstewards.osu.edu.
Nutritional Considerations
Each species of wildlife requires a specific quantity and quality of nutrition to thrive in their environment. White-tailed deer, for example, will consume a mixture of grain, forbs (flowering plants), woody browse (leaves and twigs), fungi, grasses, and legumes in various quantities during different seasons of the year. This is necessary for quality antler production, maximum fawn conception, and winter survival. Because wildlife has such a diverse set of food requirements, providing something different, such as mast crops (acorns and other nuts), apples, fruits, berries or other foodstuff not available in your area, may be the best attractant. Remember, too, the length of growing season for each crop can vary greatly, so choose carefully to make crops available for wildlife consumption if you want them producing at a specific time of the season.
Many wildlife biologists classify wildlife food into one of three food categories: primary, secondary, and starvation or filler. To be the most beneficial for wildlife, food plots should consist of primary food species such as clovers and other legumes, large or small grains or brassicas, etc.
Primary foods are consumed by the animal when unlimited supplies of many food varieties exist.
Secondary foods are eaten by the animal when preferred primary foods do not exist, but staple items are instead available and regularly consumed.
Starvation/filler foods are eaten by the animal to keep from starving to death when primary and secondary foods do not exist in adequate quantities.
On average, white-tailed deer consume food at a rate of 3 to 4 percent of their body weight each day, on a dry matter basis, which means measuring weight of food eaten without the water content. This amounts to more than 2000-3000 pounds of dry matter per year. To give you an idea of this quantity, an average acre of alfalfa in Ohio produce 6000-8000 pounds of hay during the growing season. The age of each deer and the season of the year also dictate the amount of food consumed. While supplying high quality forage year-round is needed to maximize growth potential of bucks and does, peak forage consumption occurs at different times during the year. Bucks tend to increase food consumption during antler development, while a doe consumes more feed during lactation. More information about this may be found by searching online for the Purdue University publication FNR-194 about food plots for white-tailed deer.
For an adult deer to simply maintain body condition, a diet of foods containing 6 to 10 percent protein is required. However, for yearling growth and mature buck antler development, the minimum average should be16 percent protein. Adult female deer require a diet of 11 to 15 percent protein during late gestation, but her requirement for optimum milk production may increase to 22 to 24 percent. Fawns, after weaning, require 16 to 22 percent protein for maximum growth. Plants to include in food plots will be included in the second fact sheet in this series.
While you often hear about protein content various plants can provide in food plots, high quantities of carbohydrates are also required in the deer diet. Individual requirements vary seasonally and by the animal’s life stage. Energy is needed to regulate body temperature, to promote growth activity, reproduction and body maintenance. While it is difficult to establish specific energy minimum requirements, mature does and adult bucks require about 25 kilocalories of digestible energy per day for each pound of body weight. This requirement can be higher at specific times, such as peak lactation for the doe or after the breeding season for bucks that have lost a lot of weight. To promote breeding success, does and bucks instinctively feed heavily on food with high carbohydrate levels before rutting activities begin to purposely build up fat reserves, a process called lipogenesis. Items such as acorns, corn and other grain crops provide high levels of carbohydrates that provide energy.
Palatability of the food source(s) should also be considered when trying to provide nutrition for wildlife. Plants may be very high in protein, but if they do not taste good they may be consumed only as a last resort. Also, forage quality generally deteriorates as plants mature during their growing season so manipulation by clipping or bush-hogging grass and legume plants in a food plot at the proper time, before the plant completely matures, helps maintain vegetative, high quality, high protein foods for wildlife consumption.
The next two fact sheets in this series will focus specifically on what and when to plant in the food plot, as well as the equipment needed to plant and care for your food plot. The third fact sheet identifies management strategies to care for the food plot for sustainability and environmental health.
So, you want to commission a wood and metal masterpiece, or maybe try your own hand at stockmaking. If you’re going to shell out thousands of dollars to a custom gunmaker or spend hundreds of hours of your own time inletting, shaping, and finishing a stock blank, you’ll want to use the best materials available. Which wood makes for the best gunstock?
The CriteriaHow do we define “best?” In this context we are dealing with something very subjective—but a few characteristics are clearly desirable. A high-grade gunstock must be strong, dense, possess appropriate grain flow, and be attractive.
The Traditional ChoiceEnglish Walnut has, for centuries, been the choice of top gunmakers when it came to using the best wood available. In the excellent 1941 book The Modern Gunsmith, author and gunmaker James Howe makes his preference clearly known:
“The wood par excellence is walnut, and there is no substitute.”
“…the forests of the whole Earth have paraded their finest growths only to have it firmly demonstrated that walnut is the king of them all.”
“…English walnut, is by far the best”
The Expert DeferralThough I have done a bit of stock work, and I have commissioned a few custom rifles, I am hardly an expert when it comes to wood selection. I reached out to an expert in the field that I trust: custom gunmaker Duane Wiebe. Duane has spent decades hand-building some of the finest rifles that you’ve ever laid eyes on, all with wood stocks. He also doesn’t sell wood so he has no dog in this fight.
Duane’s OpinionThe premier choice for gunstock wood is known variously as Turkish, Circassian, French, English, etc., properly called Juglans Regia…literally “Royal Walnut”.
I’ve used Juglans from Australia, Turkey, Armenia, Tazmania, China, California…the list is almost endless. Wherever walnut will grow, there’s a very good chance of finding fine stock wood.
For the bolt action stock, the choice of a proper blank is far outnumbered by the availability of wood for two piece blanks and this will be reflected in cost. Any blank must be chosen with a critical eye to proper layout. That means the grip section grain should follow as close as possible the curvature of the grip and as parallel as possible to the bore.
The fore-end wood should also closely follow the bore line both vertically and horizontally; a little deviation in grain flow upwards (viewed from the side) is actually a plus. If the grain drops off (downward) the blank is simply unsuitable- at least for a bolt action. In time, the wood will drop away from the barrel…and it will happen EVERY time.
Traditionally, quarter-sawn blanks have been the most sought after, since the figure will usually be almost the same on both sides. This is not to condemn slab sawn and some feel the slab-sawn blank is a little stronger through the grip.
Of course, everyone likes pretty wood, so if you get pretty wood with proper lay out, you better buy that blank- but only if your supplier will swear that the blank is dry and seasoned. It doesn’t take very long for stockmakers and customers to get wise to the money-hungry supplier that sells wet wood. Even then, allowing the blank to set around for a year or longer is a good practice. I weigh the blank with a sensitive scale when it first arrives and write the date and weight on the blank. A weigh-in again in six months or so will tell you right off if the wood was seasoned properly.
I know of two suppliers that absolutely will not sell wood that has not spent a minimum of five years being air-dried. Yes, there are other methods of speeding up the process, but usually frowned upon by the customer or stockmaker who wants the very best.
The RulingJuglans Regia a.k.a. English/Turkish/French Walnut, is the king of woods when it comes to building a rifle stock.
What about American Black Walnut (Juglans Nigra)?: Black Walnut makes for fine stocks, but if we return to the work of James Howe, we get to learn its place in the World. “With the one exception of Juglans Regia, it is the best stock wood extant.” Duane agrees: “For some firearms, a traditional choice would be Black Walnut…pretty good, but not usually in the class of Juglans [Regia].”
My AdviceListen to your gunmaker. If you’ve done your homework and picked a great one (the American Custom Gunmakers Guild is a good place to start your search), he or she should know what the best stock blank for your needs will be. After all, they are the one that will be putting their name on it.
Remember when fishing seemed simple? When I think back to my days as a young angler, I often reflect on experiences fishing from shore. No area pond or reservoir was safe, provided I could somehow gain access, even if that meant sneaking in at night. The adventure still feels real. But I’m reminded of another aspect of those early forays: how many fish I caught.
True, most anglers have plugged from the bank for bass, and maybe caught a few bluegills along the way. But my teenage years were filled with bank-fishing trips for a bunch of species: walleyes, steelhead, pike, and even muskies in the right body of water. But today I want to talk about crappie fishing; these delectable panfish are fun to catch, and springtime is the prime time all over the country. Here are a few tips to put you well on your way to a great fish dinner, even if you don’t own a boat.
OK, choosing the right spot is absolutely the most important factor in fishing from the shoreline. Unlike anglers in a boat, shore-bound anglers can’t move all over looking for fish. So it’s critical to get in front of crappies right off the bat. Always pick a shoreline with deep-water access, regardless of time of year. True, crappies go shallow in the spring, but even the shallow spawning areas usually have deep water close by. If you can find a place that offers a nice mix of shallow brush or cover (don’t forget about boat docks), with fairly deep water within casting range, you’ve got a winner. In reservoirs, think major creeks where the channel comes in. On natural lakes, try the outside areas of coves, or steeper shorelines. We’re looking for zones where schools of fish can migrate in and take up temporary residence. Those spots won’t be miles from the main lake.
(Don’t Miss: The 3 Best Lures for Catching a 10-Pound Bass)
2. Outfit Yourself Correctly
When fishing from a boat, a little, whippy ultralight rod will catch you some crappies. But when shore-bound, it’s important to increase your rod length. That will allow for longer casts, and the ability to keep your line up off the water (important when it’s windy). Step up to a 7-foot rod, minimum, and go even longer if you can. A 9-foot, light-power rod, capable of lobbing a float rig, is ideal.
I’m a big believer in braided line, even for crappies. Braids in diameters matching 4-pound mono are ideal, and incredibly strong. This light line allows for effortless casts, and it doesn’t coil up and jump off the spool of your reel. Match with a 6-pound monofilament leader at the business end, and rig everything on the mono. A quick tip: when choosing your braided mainline, don’t shy away from bright colors. They come in handy when watching your line for strikes from the shoreline.
(Don’t Miss: Best Lures for Crappie Fishing: Jigs vs. Minnows)
3. Keep it Simple
I never use live bait when crappie fishing from a boat. But when bank fishing, live minnows can save the day. Most of your fishing will be done soaking a bait for longer than you would from a boat, where the target of your casts is ever changing. Bank fishing is a bit less active, and sometimes the fish eye your presentation for a while before striking. A simple float rig, above a few split shots and a light-wire, long-shanked hook is ideal for bank fishing crappies. Try a slip-float if water depths are greater than about 4 feet, and vary your bait from the top to bottom of the water column.
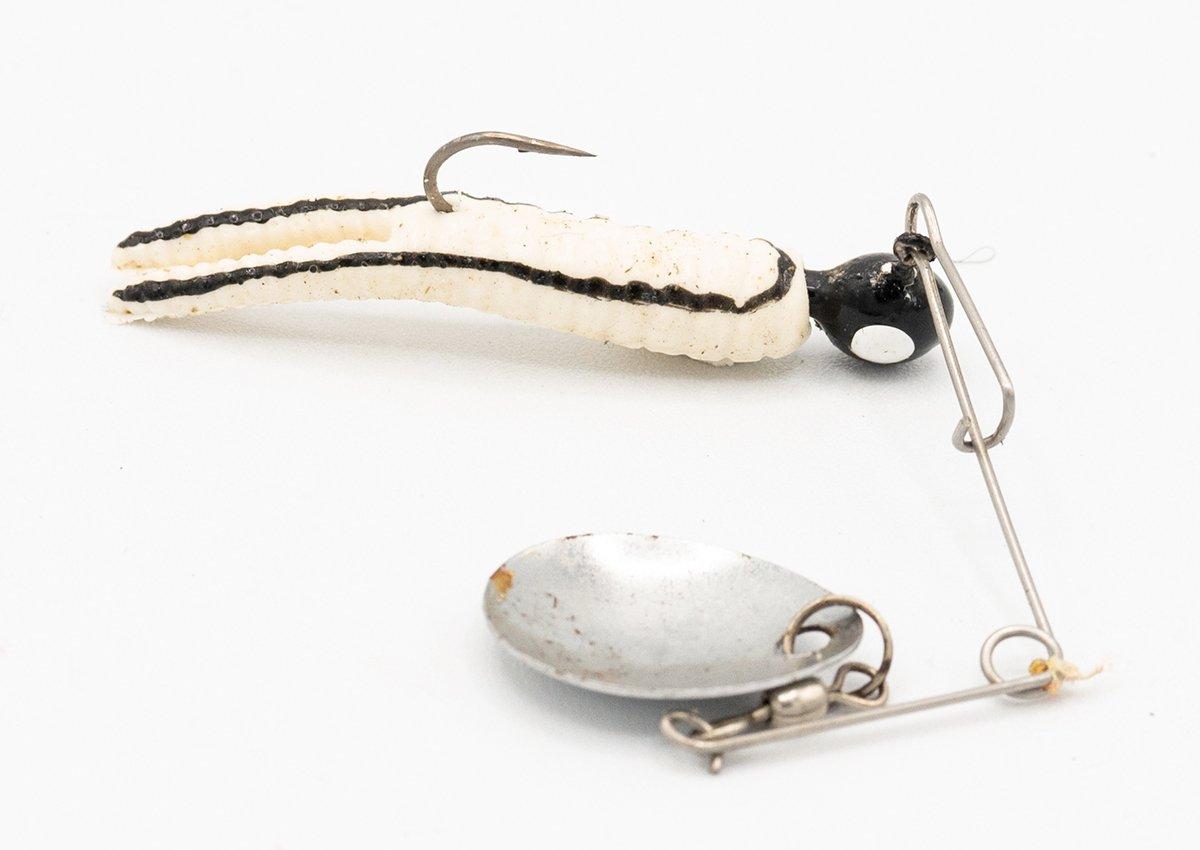
As for artificial baits, it’s hard to beat a small twister-tail on an 1/8-ounce jighead, or a Beetle Spin. Little crankbaits catch a bunch of slabs, too, and a tube under a float can often keep up with minnows during a hot bite.
(Don’t Miss: 4 Rules of Early Spring Bass Fishing)
4. Try the Night Shift
Some of the best crappie fishing I have ever encountered happened at night, in the early spring, in the Midwest. Yes, it was cold. But that quickly was ignored as I reeled in slab after slab. One thing is for sure: crappies school up and move around quite a bit after dark. The best way to locate a school is to bring them to you through the use of a lantern. Riprap banks, causeways, and the faces of dams are great spots to try. Schools of fish will cruise these shorelines and stop around the edges of lights, one of which should be yours. There, they feed on the shiners and other bait attracted to the same glow. Here, the minnow rig prevails, placed just on the outside of the glowing beacon. Keep your bait high in the water column, and be prepared to wait at least an hour after sunset for the action to kick in. Sometimes, the fishing takes off at midnight, but, believe me, it’s worth it.
5. Wade
Savvy shoreline anglers sometimes have to take matters into their own hands, or feet. Wading can be the best way to access the places fish live. On lakes with decent bottoms and flat shorelines with ample brush, wade-fishing can be dynamite; even better than fishing from a boat. Wading is deadly silent, and it allows anglers to make perfect, effortless casts. Here, it’s best to go with the longest rod possible. In Florida, we often cane pole crappies with 12-footers, dipping right into the thickest cover. Tube jigs tied directly to braided line, without the use of a float, pay off. Be sure you know the water before diving in, and only carry a little gear. Don’t forget a stringer.
This spring, don’t get discouraged if you’re stuck on the shore without a boat. Crappie fishing from the bank can be extremely productive, resulting in some of the best eating fish of the season. Scout a bit ahead of time, and you might find a number of anglers just like you, taking it to the bank, and going home with full stringers.
Discover the intricacies of sharptail grouse habitat, effective hunting techniques, and optimizing dog performance for a successful hunt.
Sharp-tailed grouse, often known as sharpies, sharptails, or sharp-tails, are iconic birds of North America’s prairie landscape. Their spring mating ritual takes place on breeding sites called leks. At these sites, sharpies put on an amazing display of calling and dancing called booming. Those same general areas are where broods are raised, and early fall activities occur.
Listen to more articles on Apple | Google | Spotify | Audible
Their survival requires large tracts of unfragmented, treeless landscapes. This is a trait carried into modern times; these birds evolved in what once was millions of acres of ideal grassland habitat that existed before European settlement. Hunting sharp-tails can take hunters to some of the most beautiful landscapes on the continent. Here is a guide to help you get started on a new adventure.
Where to Find Sharp-tailed Grouse
Sharpies dot the prairie landscapes across several north-central and western states, Alaska, and many Canadian territories. Western Nebraska, North Dakota, South Dakota, Wyoming, and Montana harbor the highest populations in the lower 48 states. Smaller, localized, but huntable populations can be found in a few other states, including Minnesota, Michigan, Colorado, Utah, and Idaho.
Vast treeless grassland landscapes provide these amazing birds with ideal nesting and brood rearing habitat. Native grasses provide the perfect substrate for building a nest bowl. The native forbs (broadleaf weeds) attract insects that are necessary for chick growth. Those same insects are also a preferred food for adult birds well into the fall until freezing temperatures arrive. There are a few states listed above where sharp-tails reside in a different type of habitat called barrens. This is a grassland-centered cover type mixed with scattered brush or small trees. Although open grasslands are the breeding grounds for these prairie grouse, there are plenty of opportunities to hunt them in cropland as well. More to come on hunting strategies later.
Seasons and Bag Limits for Sharp-tailed Grouse
Season timing and bag limits are important considerations when planning a sharp-tail hunting adventure. Many states have seasons that open in early September. Early season outings can provide bird contacts with smaller family groups and uneducated birds, resulting in a wonderful opportunity for quality hunting dog work. On the flip side, these early outings often have excessively warm temperatures, making a full-day hunt unlikely. Most sharptail seasons extend well into the winter. Late-season hunters often make contact with larger groups of birds. These large groups have a lot of watchful eyes in the flock, making getting within gun range much more difficult.
Bag limits and possession limits can’t be overlooked. A bag limit represents the number of birds a hunter can harvest during a single day. Bag limits vary across states, but most are between two to four birds. Most hunters know the bag limit where they are hunting, but the possession limit is also important to know. The possession limit is the maximum number of birds you can have from all the days you have hunted, including the current day of your hunt. Most states have a possession limit that is three or four times the daily bag limit. During a long trip or a successful hunt, reaching the state’s possession limit is possible. If this happens, you have a couple of options. You can eat some birds to reduce the number of birds in your possession or donate some birds to another person. Most states require the hunter’s name, license number, date, species, and number of birds being donated.
Keeping birds labeled and identifiable during the remainder of the hunt is something else to consider. Most states require keeping at least one wing attached to the dressed bird so wildlife officers can properly identify the bird species. Additionally, bags of birds should always include the hunter’s name, license number, and harvest date. Keep the birds bagged separately for all the hunters in the party so officers know how many birds each hunter has toward their possession limit.
Some states have various units with different seasons, bag limits, and possession limits. Regardless of your destination, it is important to always check the specific regulations, as seasons and limits can change annually.
Shotguns, Chokes, and Shot Size Selection Recommendations for Sharp-tailed Grouse Hunting
Twenty- and twelve-gauge shotguns are by far the most preferred tool when traveling to sharp-tail habitat. However, a proficient shooter can find success even with a 28-gauge. Sharp-tail hunts can result in 10+ miles of boot leather on the ground in a single day. Whatever firearm you prefer, carrying something on the lighter side, preferably less than seven pounds, can make those long days more tolerable.
As previously mentioned, early season outings often yield juvenile or unpressured birds, resulting in closer shots. Due to this, improved cylinder or modified shotgun chokes are an ideal choice. Any quality pheasant load will suffice, with preferred shot sizes of 4, 5, or 6s. I tend to select 6s for sharptails because they are not a tough bird to bring down, and #6 shot has a higher pellet count than 4s or 5s. As the season progresses, birds become more wary and form larger groups, making them more likely to flush at longer ranges. Using a modified or even a full choke isn’t out of the question during the late season.
Sharptail Grouse Hunting Strategies
Although most states have one continuous sharptail season, it starts early enough in the fall that the birds often behave completely differently in the early season versus the late season. Likewise, they will also shift their preferred habitat location as the season progresses, depending on available food resources and weather conditions.
In the early season, birds are typically still in smaller family groups. They tend to stay near areas where they were raised, which means out in the grasslands. In early fall, sharpies eat insects, particularly grasshoppers, various berries, and green vegetation. Insects and grasshoppers utilize forbs, so finding areas with a diverse array of plants usually harbors the most sharp-tail food and, thus, the most birds.
Vegetation height is also critical to finding birds. Sharp-tails, like other prairie grouse, want to see danger approaching. They prefer vegetation 12-18 inches tall. This provides enough height to conceal them if an aerial predator flies over but is short enough to see long distances. When hunting vast expanses of rolling hills, ridge tops tend to have shorter vegetation, so focus efforts along the tops and sides of ridges.
Additionally, the landscapes these birds utilize are often comprised of low-quality, sandy soil. This soil type lends itself to centuries of wind erosion, which has resulted in bowls and blowouts on some of the side hills. These blowouts usually have a high diversity of forbs and occasional brush pockets. This makes the ideal location for birds to loaf and feed. When hunting ridges, try to avoid silhouetting yourself. Walk just off one side of the ridge and wrap the tops of hills to approach blowouts in a stealthy fashion.
Tall, dense vegetation often found in Conservation Reserve Program (CRP) fields is typically not the ticket, especially during the early season. Unless you’re hunting the more sparse stands in Montana or CRP fields planted with smooth brome, which are often found in portions of the Dakotas, you probably won’t find birds there. Likewise, cattail sloughs and other dense pheasant habitat is not worth hunting. However, the shin-high grasslands become unusable for sharp-tails after the snow flies. They are forced to transition into CRP fields and other similar cover types, so late-season birds will often be found in these taller, denser habitats.
When cropland is near grasslands, birds often shift from their breeding and brooding habitat and move into the crop fields, even during the early season. Birds can be found along the edges but will even occupy the interior of a crop field, especially in unharvested fields. Sunflower fields are highly attractive as they usually have a robust population of grasshoppers and sunflower seeds, providing excellent food options. Corn fields will also hold their fair share of sharpies throughout the season.
Getting within gun range of birds hanging out in the center of crop fields is nearly impossible. However, hunting the margins of those fields can produce some shot opportunities. The edges frequently have grass or weeds that will serve as loafing cover between feeding sessions. Check the waterways or sloughs that meander through crop fields, too. I stand behind my previous statement about not hunting cattail sloughs during the early season, but the edges of those sloughs, if they cut through a crop field, are a different story. There is always a transition zone between the cattails and crops with diverse vegetation. This is where the birds will be found. Waterways that have the proper vegetation height can also provide an ideal opportunity. If birds utilize the interior of crop fields, they typically roost in some type of herbaceous vegetation nearby. If the roost location can be identified, there is an opportunity to walk up some birds at first light before they head out to the crop field for the day.
Although treeless grasslands are the iconic image of sharp-tail habitat most hunters envision, they will sometimes occupy fields dominated by herbaceous vegetation bisected with young conifer tree rows or shrub rows. They will utilize the woody cover as overhead protection from aerial predators, often loafing all afternoon in these locations. Thickets of snowberry, whether part of a planted shrub row or naturally occurring within a grassland, should never be overlooked. These areas are a favorite midday loafing spot. Sharpies will also use rows of conifers during snow events. I have experienced some stellar hunts in these types of locations in North Dakota. Birds tend to hold tighter when hunkered down in woody cover, allowing solid points and close flushes.
Dogs, Sharp-tailed Grouse Behavior, and the Flush
As with any upland bird hunting, keeping the dogs working into the wind, or, at a minimum, a crosswind, is ideal. Both flushers and pointing dogs can effectively corral these skittish prairie birds. Young birds or the occasional single will sometimes allow a pointing dog to pin them down within a few feet. However, sharpies usually will not hold for a dog that crowds too tight. High-headed points are ideal, signifying birds are well out front, sometimes over 30 yards away. These types of points can also indicate the presence of a larger group of birds putting off a wide scent cone.
The wind speed can play a critical role in bird behavior. During windy conditions, sharp-tails lose the ability to hear approaching danger, so they become more wary. Long flushes are the norm. These windy days are the ideal situation to wrap around the peak of a hill and catch birds on the lee side, loafing in a blowout. Wind also reduces a hunter’s ability to hear birds flush, so it’s important to constantly scan left and right as you stroll through the grasslands.
I have always considered a sharptail flush to be quite unique. They seem to leap into flight silently. But, once they are in flight, a very distinct “giggle” can be heard. Another common characteristic is that sharpies are “popcorn” flushers. If some birds start flushing out of gun range, hustling toward the flush site will often result in a shot opportunity of a late flusher or two.
Sharp-tails offer hunters the opportunity to explore some of the most desolate, wide-open spaces in the uplands. Long seasons give hunters the option to hunt smaller family groups during the early season or chase large flocks during the winter. If you have never pursued these regal birds, do some research and plan a trip this season. You won’t regret your time in sharp-tail country.
Love Letter to North Dakota – A Hungarian Partridge and Sharp-tailed Grouse Story
Choosing Shot Size and Chokes for Sharp-tailed Grouse Hunting
I’ve exhaustively tested all the best 177 pellets for hunting on the market. In fact, I tested everything, including: accuracy, reliability, speed and so much more.
By the end of this guide, you’ll find the perfect pellets.
If you’re pressed on time, here’s a quick list of the best 177 pellets for hunting:
Crosman DS177 Destroyer: Best Overall 177 Pellets
H&N Terminator Hollow Points: Most Accurate 177 Pellets
Crosman Premier Super Points: Best for the Budget
GAMO Red Fire: Best for Hunting Rabbits
1. Crosman DS177 Destroyer: Best Overall 177 Pellets
With many options and styles of pellets on the market to choose from, I can easily say that the Crosman DS177 Destroyer pellets are the best on the market today.
A weekend of testing these pellets was a fun project.
You won’t believe some of the results that I had with an air rifle pellet.
So great. So surprising!
Accuracy
The accuracy of Crosman’s dish pellet was spot-on.
Most of the use that I get from my break barrel air rifle is with small game and pest removal.
Testing for that scenario was a hodge-podge course of 15-35+ yards of paper targets, water bottles, and jugs, as well as the trusty ole soda cans.
Man, I set up a treasure-trove of targets to shoot at all over the dang place for this. I was on target for all of them the entire time.
The dish style pointed-pellet/hollow-point combo was true in its travel without fail.
It was great.
Reliability
The reliability of the Destroyers was pretty remarkable given the circumstances.
With all of those tempting targets dangling from trees and sitting atop every flat surface within 40 yards, there was A LOT of shooting done on day one.
Like a kid in a candy store, I was reloading over and over for hours. I went through almost two tins of pellets in one weekend.
Yes. That’s almost 500 pellets all by my lonesome.
There were less than a handful that I would call total duds. That’s crazy good for such an affordable little pellet.
Aside from the ridiculously difficult to open tins, my indulgently excessive shooting was almost entirely smooth and failure-free.
Just goes to show, the best tools for the job don’t always have to cost an arm and a leg.
Pretty sweet when that’s the case, right?
Effective
The impeccable 7.4-grain lead Destroyer .177 pellets are tailor-made for effective performance.
This hunting pellet is designed for complete expansion and energy transfer. Not just impact triggered expansion….impact followed by expansion.
On the paper targets fixed to my trees, the expansion after impact was easy to see.
With some digging in the tree bark, I uncovered pellets that were penetrating several inches with the full bloom of the expansion.
On the bigger water jugs, the same results were visible over and over.
This advantage for my pest removal is a pretty big deal. Other expanding pellets tend to expand at the impact.
For critters like raccoons, woodchucks, or opossum, if my shot is not spot-on the pellet may strike bone and flatten without penetrating and killing the pest.
The good penetration through my target will get me past the bone and then expand in the soft tissue for humane extermination. Getting it done with one shot isn’t just about skill in shooting.
Is the Crosman Destroyer Worth it?
The Crosman DS177 Destroyer Pellet is perfect for a one-shot kill of rodents and small game that are causing trouble around my home.
It’s also such a great pellet for paper range target shooting, and plinking.
The reliable performance with even and effective expansion is ideal.
So go out and get yourself some of these little fellas. Meanwhile, I’ve got a lot of cleaning up on the test range to do! Enjoy!
2. H&N Terminator Hollow Points: Most Accurate 177 Pellets
H&N Terminator Hollow Points: with an imposing name and a vicious look, these pellets are out for blood, garden pest blood that is.
The Terminator Hollow Points are designed for pest management and “extreme accuracy.”
Will these pellets have your yard in tip-top shape or your garden in shambles?
Let’s take a look.
Construction
H&N’s claim to fame was the quality of their construction, so it’s a slam dunk here.
The material used is unpolished lead which is soft and malleable meaning it’s excellent for the “massive expansion” that is advertised for the Terminator Hollow Points.
The design is very similar to most other hollow point pellets on the market with one exception:
From the center of the head, a spike protrudes.
This assists in the initial penetration of the intended target. Additionally, there are notches around the rim of the hollow point that make it easier for the projectile to expand once it hits and enters something.
My only issue was that the pellets look a little bit rougher than what is shown in the advertisements online.
Mine came a little bit scratched up and the point was either dented or rounded enough to where I would not be able to poke myself enough to draw blood. This is extremely minor though because the performance is not affected by this slight discrepancy in looks.
I’m not sure if the point being rounded made much of a difference in effectiveness because I was still able to drop squirrels in one hit. It still gets the job done.
Now, remember this is still unpolished lead. Despite the high-quality construction, you’ll still need to clean your weapon of choice frequently to ensure good and consistent shooting
With that being said, the quality is exactly what you’d expect from H&N: Precise, solid, and dependable.
Accuracy and Practicality
High-quality construction is useless if you can’t hit where you’re aiming; luckily you’ll have no problems with the Terminator pellets.
I used these pellets for two things: garden protection and regular ol’ plinking. I had a good time with both.
H&N has the Terminator pellets being extremely accurate at 25 yards or medium range.
I can personally attest to this. For about two days, I just sat on my back patio and shot at a paper target (with a backstop of course) to see how accurate the pellets actually are.
During my testing, I found that I was able to hit roughly one-inch groups at 25 yards and half-inch groups at 12 and a half. I took this accuracy as a go-ahead to start going after pests in my garden.
I must have gotten at least 6 squirrels in three days. Five out of six squirrels were clean one hits.
There was one instance where the pellet failed to expand and went clean through. The force was sufficient to shock and knock it over long enough for a follow-up.
This brings me to another important personal point:
I do not like squirrels, they have killed many of my plants over the years, but I think an animal suffering is unnecessary. I was very satisfied that I was able to have humane kills due to the design of the pellet.
While large exit wounds are not pretty, you can rest assured that you’re no putting anything in an undue amount of pain. The exit holes are quite large. The Terminators live up to their name and have a massive expansion, like H&N claims.
Another thing I was worried about was over-penetration.
I have kind of close neighbors and initially, I was concerned about hitting windows or houses, even though I was mostly shooting into the ground when I was on the hunt.
It was a relief to find out that these pellets are superb for semi-suburban pest control. I had no over-penetration. The hollow point design and large expansion radius lend itself well to controlled velocity loss.
This means that the pellets lost speed very quickly, usually landing on top of the group behind the animal or bouncing off a tree after passing through my target. This is a great pellet if you’re worried about hitting something unintentionally.
In terms of accuracy, the Terminator Hollow Points are a very solid choice, more so if you’re space is limited.
Price
A tin of 400 unpolished lead pellets isn’t gonna break the bank at $15.39 on Amazon, slightly more expensive elsewhere.
This is definitely worth the cost, especially among similarly priced pellets and brands.
Are the H&N Terminator Hollow Points worth it?
There’s no question about it. These pellets are a must buy if you plan on taking care of a pest problem via airguns and pellet guns.
The construction, accuracy, and practicality all come together beautifully in the H&N Terminator Hollow Point pellets.
3. Crosman Premier Super Points: Best for the Budget
The Crosman Premier Super Points are the best .177 pellets for hunters on a budget.
Crosman Premier is known for their dependable pellets, and the Super Points give you consistent, precise shots without breaking the bank.
But, how do they measure up against more expensive pellets?
Let’s find out!
Accuracy
The Crosman Super Points are made to precise specifications with a far-reaching tip to ensure good, dependable, shot-to-shot accuracy.
Hitting targets within a 50-yard range is no problem. From 40 yards, my average grouping was about 1.5” using the standard iron sights on my Remington Vantage 1200.
It’s not the best accuracy I’ve ever seen, but it’s good enough to get the job done, and a great value for the lower price point.
I’ve shot these through both the Vantage 1200 and a GAMO airgun, and these pellets gave me good, dependable accuracy in both.
Shape and Fit
The Super Points have a pointed, aerodynamic design to ensure the longest range possible.
Although these pellets worked great for me in my two airguns, the fit is very dependent on the bore.
The front drive band is wider than on most pellets, so trying to squeeze them into tighter-bore firearms may damage the pellet, or cause your gun to jam!
However, they fit looser-bore guns tightly, which can give you better velocity. From what I’ve seen and read, they seem to like rotary magazines the best.
Another thing to keep in mind is that the pellets are made from premium lead – which means they can be easily deformed. Make sure you use the flat part of your finger to load them into your airgun.
Reliability
The Super Points feed very well into loosely-bore guns. Crosman Premier usually crafts high-quality lead pellets, and these are no exception.
They’re wear-resistant and give a consistently good performance.
A couple of things to note:
Lead pellets get the job done well, but as mentioned, can be very soft and easy to deform. Make sure you’re very careful, and never drop them onto any hard surfaces!
Manufacturing consistency is also not fantastic.
Although head diameter is usually very consistent, this isn’t the case here.
The weight, on the other hand, is very consistent. We’ll discuss this more in-depth later.
Despite these couple of factors that have the potential to cause issues, these pellets give you clean shots and work well in most loosely-bore airguns.
Speed
Super Points will give you close to the maximum distance you can get with airguns.
They hold their velocity well, which helps with accuracy. Based on my measurements, their average velocity is around 900 FPS!
Before I used them for hunting, I tested the pellets by shooting some through cotton targets. While most other pellets barely broke through 2 layers, these easily went through 4 layers of 100% cotton.
Size
Each Super Point weighs 7.9 grains. They’re a bit heavy to amount to Crosman’s claims of “maximum power” in an air rifle, but they still have impressive velocity and get the job done well.
The average head diameter on the Super Points is 4.52mm, and the average length is 5.37mm.
Although head diameter is usually a very tightly controlled parameter, the Super Points vary slightly from bullet to bullet.
It’s not a huge difference between each pellet, but it’s still something to take note of.
The weight, on the other hand, seems to be at a consistent 7.9 grains throughout each individual pellet.
Price
A box of 500 Super Points retails online for anywhere between $7-$15.
It’s a very good value for what you get, and these are among the cheapest .177 pellets currently on the market.
Recommendations
The Crosman Premier Super Points are great for close-range small game hunting and pest control.
They expand when they get in contact with the target, making them a great choice for hunting squirrels, groundhogs, or birds.
Serious airgunners can expect consistent, precise shots with these pellets.
If you’re a small game hunter on a budget, Super Points are a great choice.
4. GAMO Red Fire: Best for Hunting Rabbits
GAMO Red Fire pellets are the best for hunting rabbits!
Bunnies can raze my entire garden in a single night if not controlled. This means I needed to find the best option for taking care of these furry pests fast!
I’ve always done a decent job with round pellets, so why did I change things up?
What I found out after giving Red Fires a try will probably impress you as much as it did me.
Check this out.
Accuracy
The GAMO Red Fire pellets are very accurate.
Thanks in part to the cone-tipped shape of the pellet itself, GAMO’s design has maximized trajectory consistency.
I was initially testing on targets that I’d set up at 30 yards. From the first shot, I was very impressed with the performance.
No adjustments are needed. No learning curve to adapt to.
Immediately on target, I was ready to get down to business in a blink.
I value quality products, and accuracy is one of the most important features for these pellets. It’s not the only top-notch feature though.
Speed
The excellent performance of these pellets can also largely be attributed to speed.
The actual size of these pellets is a hair larger than the round pellets I’ve used in the past. I was a bit concerned by the appearance that they would be too big for my air rifle, but I was wrong.
The design of the pellet creates such a tight seal in the barrel, that the pellet comes screaming out at incredible speed.
The excellent trajectory also comes hand in hand with more effective stopping power.
Those little furballs are fast and twitchy, giving me only one shot when I catch them in my garden.
If I miss they’re long gone and I’m back to waiting. The high speed of the Red Fire pellet increases my odds of success every time.
Reliability
The GAMO Red Fire pellets are clearly reliable and well made.
Consistency in the way these are made is plain as day. Every tip is centered and in place. The tumbled appearance, without seams or visible defects, is a clear indication of the quality.
I have no worries about failures with the Red Fires.
Many round or poorly made pellets tend to veer way off target on occasion, due to irregular shapes.
I never had any trouble with that problem using the Red Fires. Both on the initial target tests and in my use afterward on the devil-bunnies, I never had a single wayward pellet.
Effective
The Red Fire pellets are so much more effective for rabbits than the round pellets I used to use.
Designed to mushroom on impact, these lethal pellets make a big difference in quickly downing my targets.
When I started, with the paper-over-wood targets, the pellets at everything less than 20 yards would shape into flat discs on impact.
On impact, on the 30+ yard targets, and in my real targets, the expansion was more of the peeled-back shape that I’d expected.
Typical pellets require relatively good precision to get an effective kill-shot that will eliminate the vermin quickly. The Red Fire’s expanding design increased immediate stopping power.
I want to eliminate a pest as humanly as possible. Being able to put the rabbits down quickly is so much simpler thanks to GAMO’s smart design.
Are the GAMO Red Fire pellets worth it?
Yes! For taking care of the rabbits in my garden, I will never use anything other than these pellets again.
The higher speed, consistency in pellets, and effective stopping power are all perfect for Operation Defend-The-Veggies at my house.
I’m so incredibly impressed with these pellets. I’ll be bunny-free in no time thanks to the GAMO Red Fire Pellets. Yes!!
Now It’s Your Turn
I hope you enjoyed my best 177 pellets for huntingguide.
So as a recap:
If you’re looking for the best overall 177 pellets, I highly recommend the Crosman DS177 Destroyer.
Or if you are looking for accuracy, get the H&N Terminator Hollow Points.
If you’re on a budget, then the Crosman Premier Super Points is for you. It is affordable, consistent and precise.
Lastly, if you are into hunting rabbits, then the GAMO Red Fire is what you are looking for.
Now I want to turn it over to you:
Which hunting pellets will you pick?
Let me know by leaving a quick comment down below.
Prepare yourself — I’m about to make a case for the 17 HMR, and .22 loyalists may not like it. Like many reading this, the first rifle round I ever sent downrange came out of the barrel of a .22 lever action. That Winchester rifle was a single-shot, and I remember spending hours by a winding creek near my southeast Colorado home busting aluminum cans off an old, rotted cottonwood stump.
I would go through box after box of ammo, and over time, I considered myself a crack shot with my open-sight .22, especially once I upgraded from whatever ammunition was cheapest at Walmart to better ammo fitted with more accurate projectiles.
Over the years, I shot rabbits, squirrels, and prairie dogs and flat wore out old cans and bottles.
I cracked that old lever action out on a bet a few years back. A buddy of mine had purchased a .17 and put $20 down as a bet that he could outshoot me (open sights) at 50 yards. I took the gamble, and I lost badly.
Later that afternoon, we topped the rifle with a Leupold scope, and that’s when our rimfire accuracy got flat-out scary. At 150 yards, every single time my buddy pulled the trigger, his Hornady 17 HMR clanged steel. Then, he’d work the bolt action’s 70-degree throw, settle in, and clang steel yet again.
It was a special session to witness. The speed the bullet produces is impressive, and when Hornady, along with some assistance from Ruger and Marlin, developed the cartridge, that was the goal. Hornady wanted speed along with excellent downrange accuracy in a rimfire round.
Mission accomplished.
RELATED — Ruger Precision Rifle: Lots of Long-Range Value on a Budget
The 17 HMR (Hornady Magnum Rimfire) cartridge was developed by Hornady in 2002, in collaboration with Marlin Firearms and Ruger. The cartridge is a necked-down version of the .22 WMR (Winchester Magnum Rimfire) and features a smaller, lighter bullet with a higher velocity.
The .17 quickly gained popularity among hunters and target shooters for its flat trajectory and high-range accuracy. It became the fastest rimfire cartridge available, with velocities approaching 3,000 feet per second.
The cartridge has also been credited with reviving interest in the rimfire market, which had been declining for decades. Other manufacturers, including Savage and CZ, began producing rifles chambered in .17 to meet the growing demand.
However, the cartridge has also been criticized for its small size and limited stopping power, making it less suitable for larger game. Some jurisdictions also restrict the use of the cartridge for hunting, citing concerns over its potential to wound animals rather than kill them outright.
Despite these criticisms, the 17 HMR remains a popular choice for target shooting and varmint hunting, with a loyal following among enthusiasts, who appreciate its accuracy and performance.
GOOD GEAR – Embody the Ethos of the Quiet Professional With the BRCC Silencer Smooth Roast
Speed and Accuracy in a Rimfire
In most cases, a necked-down version of the .22 Magnum, the 17 HMR, is loaded with a 17-grain bullet, which allows the caliber to hit muzzle velocities as high as 2,550 fps. However, ammunition manufacturers offer bullets in other grain weights, such as 15.5 and 20.
Speed like this, mirrored with excellent ballistics, enables the round to be 100% flat-shooting out to 100 yards and drop less than 9 inches at 200 yards. Most serious shooters consider 250 yards the maximum effective range of the 17 HMR.
Regarding accuracy, the round can produce dime-sized groups at 100 yards, and those groups remain tight beyond 200. The speed, blended with the design of the 17-grain bullet, prevents the bullet from being overly abused by gusting winds. It is still a light bullet, which needs to be considered when shooting the 17 HMR, but the wind won’t throw it to and fro as it does with lesser rimfires.
If you can get a semi-calm day and lie down on a bench with a quality 17 HMR bolt action rifle, you will be shocked at how accurate the caliber really is.
RELATED — 22 Eargesplitten Loudenboomer and Other Cool Wildcats
What Makes the 17 HMR Great
For starters, you’ll be hard-pressed to find a range gun that’s more fun to shoot. Ammunition, though not ultra-cheap, won’t break the bank, and the firearm produces near-zero recoil. Small-framed shooters, kids, and grown adults can shoot round after round with alarming accuracy without getting beat up.
This is a great training round. Several friends have started their soon-to-be-big-game-hunting youth out on a scoped 17 HMR. The caliber allows youngsters to experience immediate success and not get flinchy because of excess recoil. After learning how to properly acquire targets through a scope, settling in, and squeezing the trigger, youth shooters can quickly move on to other calibers.
Many 17 HMR bolt action rifle owners only use their rifles to bang steel or punch paper at the range. Still, the caliber is also a tremendous mid-range small-game round and has become increasingly popular with varmint hunters.
A bullet like Hornady’s 17 HMR 17-grain V-MAX Varmint Express Rimfire promises honest 200-yard performance, and the polymer-tipped projectile ensures precision and perfect expansion upon impact. The round produces plenty of speed and energy to pop prairie dogs, raccoons, rabbits, and squirrels beyond 200 yards.
Serious predator fanatics who use the 17 HMR typically hunt with the caliber to create a challenge and want coyotes, foxes, and bobcats no farther than 150 yards.
A box of 50 rounds will run you under $20, an important feature to keep in mind when considering whether a bolt action rimfire rifle suits you. Save $100, and you can grab 200 rounds of ammunition.
Outside of Hornady, ammunition kingpins like Federal, Winchester, CCI, and others make affordable 17 HMR ammunition.
GOOD GEAR – Keep Your Coffee Hot or Cold With the BRCC YETI Reticle Rambler Mug
Top .17 HMR Rifles You Can Buy Today
Ruger Precision Rimfire Price: $619
Ruger is well-known for making tough, hard-working, highly affordable firearms for everyday Americans. The company’s Precision Rimfire line of rifles definitely lives up to its reputation.
Tipping the scales at just under 7 pounds, this well-balanced, well-built rifle is a joy to shoot whether you’re punching holes in paper targets or pesky groundhogs. It comes with an 18-inch cold hammer-forged steel barrel threaded 1/2:28 for a suppressor.
One of the best features of this rimfire rifle is the adjustable glass-filled nylon buttstock that makes customizing length of pull and comb height super easy. This one will fit pretty much any shooter from any shooting position. Shooters will also appreciate the externally adjustable with a trigger pull range of 2.25 to 5 pounds.
Henry Varmint ExpressPrice: $654
Henry carries close to a dozen lever action models in 17 HMR, but the Varmint Express is something extra special. This lever-action rimfire is perfect for picking off prairie dogs or plinking random recyclables. It features a checkered American walnut Monte Carlo stock, a 19 1/2-inch round, blued steel barrel, and a buttery smooth action.
While the receiver of the Varmint Express comes grooved for scope rings, the rifle also comes outfitted with rear Williams Fire Sights with fiber-optic inserts.
Alexander Arms Varmint PredatorPrice: $2,395.95
If you’ve got a little extra cash laying around, this rimfire rocket is well worth the investment. If you want a tactical flare to your rimfire shooting, this is a super-fun way to make that a reality.
The Alexander Arms Varmint Predator has the familiar AR-15 manual of arms and has all the modularity of the platform that we’ve come to know and love, so you can accessorize with standard furniture to your heart’s content.
Rad features include a Magpul enhanced trigger guard and stock, a top-notch Velocity trigger, a spiral fluted barrel, two 10-round magazines, and an ultra-cool camo Cerakote finish.
RELATED — 22 Hornet: More Than a Stepping-Stone Cartridge
Cartridge FAQs
What is a 17 HMR good for?
The 17 HMR is equally suitable for plinking, punching paper, ringing steel, and taking small game. Multiple bullet types are available, but it is an all-around rimfire round that serves numerous purposes for the recreational shooter and small-game hunter.
Which is better: the .22 long rifle or the 17 HMR?
Regarding ballistics and downrange performance, the 22 LR can’t touch the 17 HMR. The 17 HMR is faster, more accurate, and hits with more energy.
Is the 17 HMR louder than the .22 LR?
Though it produces minimal recoil, the 17 HMR is slightly louder than the .22 LR, which shouldn’t matter because you should be wearing ear protection.
Is the 17 HMR good for deer hunting?
No, plus the 17 HMR would be an illegal deer-hunting caliber in most states. Though fast and accurate, the speed of the bullet, blended with its grain weight, doesn’t produce enough downrange energy to be ultra-lethal on larger game, such as deer.
What animals can you shoot with a 17 HMR?
The caliber is excellent for small-game animals such as squirrels, rabbits, prairie dogs, etc. Varmint hunters will also use the caliber when hunting coyotes, foxes, and bobcats, and the round is a favorite of fall turkey hunters who prefer to chase wild turkeys with a rimfire rifle.
READ NEXT — Hunt All Year: Only Newbies and the Gainfully Employed Take a Month Off
")
")
")
")
")


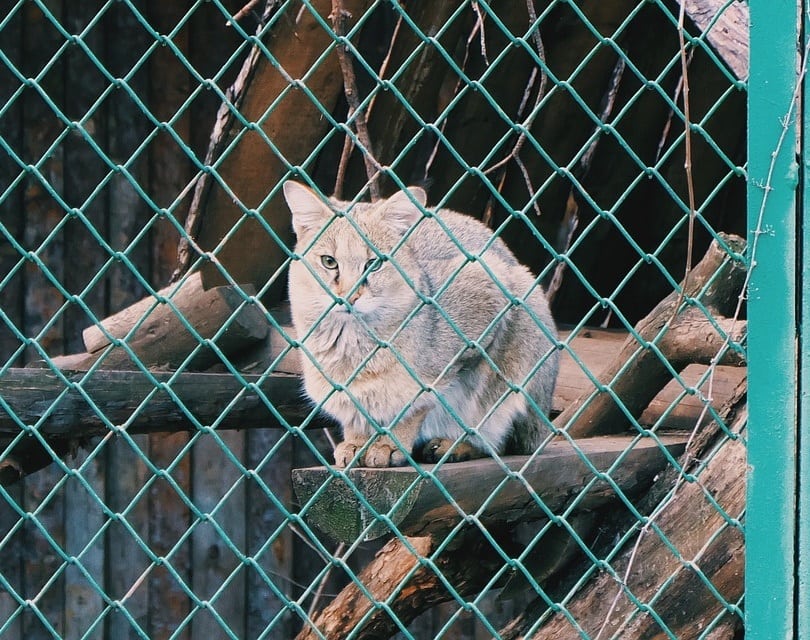
 Food plot with purple top turnips. Photo by Clif Little, Ohio State University Extension.
  Roadway seeded with annual rye and oats. Photo by Clif Little, Ohio State University Extension.
 Logging roads that run east/west are ideal for seeding because of increased sunlight. Photo by Mark Landefeld, Ohio State University Extension. This picture shows habitat successional stage 4, a young woodland. Photo by Mark Landefeld, Ohio State University Extension.
  Management will help create wildlife habitat. Photo by Clif Little, Ohio State University Extension.
  American crabapple producing fruit. Photo by Clif Little, Ohio State University Extension.