Home Blog Page 200

The Top 5 Deer Food Plots

0

The most eye-opening learning experiences that I had in my early years were when I started branching out from my home state of Wisconsin. Falling on my face a few times while trying to improve and manage new deer hunting properties taught me very swiftly that few things work everywhere. Deer all have their own personalities, the habitat changes from fence line to fence line and the specifics of each area are quite different. Combine that all and I’ve found it a bit risky to make blanket statements about whitetails, habitat and even the best habitat improvements. Too often, what’s best for one is an utter disaster for another.

That applies to food plot plantings to a great extent, as well. Go to the northwoods of Minnesota, the Upper Peninsula of Michigan or any other large, exclusively wooded area. The same plantings that are ignored in the farm belt can be true deer magnets in the big woods, simply due to a lack of better options.

Go to the dry, sand country of the Southwest and try growing clover in the desert-like conditions without irrigation. It really doesn’t matter that the deer would love it — if it simply won’t grow.

There are a whole bunch of factors that play into these types of things. Still, the longer that I focus on habitat improvements, I keep coming back to the same five crops that find their way into my various food plots. No, I don’t have any great solutions for the desert, but these will do well for almost everyone else, as they are easily my top five deer plantings.

1. Cereal Rye

Cereal rye is such a backbone of my food-plotting methods that I recently wrote an entire article on it. If you’re not well versed on the benefits of cereal rye, I strongly recommend reading that piece carefully. Cereal rye truly is a food plot and deer-feeding workhorse.

After frost seeding clover into cereal rye, the author leaves the plot alone until the following late August, a few weeks after this photo, when he mows it for the first time that summer.

The highlights are that it does extremely well at building the health of the soils, while being very easy to grow, offering superior weed control properties and it merely goes dormant during freezing temperatures. The dormancy is important since not only is cereal rye a powerful draw during deer season, it also is during any portion of winter that snow depths allow deer to paw through the snow to the feed. At the same time, any temperature thaws result in a near instant snap back to growth mode. This 15% protein source that’s highly digestible two to four weeks before spring green up can be a tremendous aid to whitetail survival and health, as well as a big antler builder.

Rather than go any deeper on the subject, please read the entire article. Basically, cereal rye is a tremendously productive planting for both deer and soil health.

2. Clover

My second choice really depends on one’s latitude and the severity of the region’s winters. If it’s in Wisconsin and points north, clover would actually drop to my third choice. With that being said, for Iowa, Illinois, Indiana and states experiencing similar winters, clover is a solid No. 2. Due to their comparatively mild winters, clover is a year-round food source in such states.

A really nice thing about clover is that it’s easy and low maintenance to grow. You’ll notice that in all but two of these seed types, I am not mentioning product names. With that being said, in both the clover and brassica sections, I feel that I have to. While working as a sunflower breeder’s research assistant for a large seed company for three years while in college, I learned fast that there are all sorts of different types of sunflowers. There are the general varieties, such as dwarfs, multi-headed and the standard, tall sunflower, but you can breed strains of each for virtually any trait imaginable.

Clover can truly be the land manager’s workhorse, because it supplies high volumes of very nutritious foods. Photo courtesy of Antler King.

I explain this because many food plotters realize that deer tend to prefer white clover. The catch is that every white clover available has been bred for varying traits. Some are more desirable to deer than others and their hardiness will vary wildly.

For that reason, I feel the need to point out that when I’m talking about clover, I’m specifically referring to Antler King’s Trophy Clover. I have conducted many field trials with this seed, as closely as I could to those that I conducted for the seed company in college. Antler King’s Trophy Clover, as well as their Honey Hole brassica mix, consistently come out on top for the criteria that I value the most. So, when discussing clover and brassicas, those are the specific seed blends that I’m referring to. This is important to note, as results with others may vary.

With that in mind, here is how I consistently get more than seven years of production out of my clover plots.

It all begins with soil testing and properly amending the soil for clover. I usually plant cereal rye the fall before in the selected plot. Doing so enables me to return in late February or March to frost seed clover into last year’s annual crop. When doing so, I seed at 125% the suggested rate and the cereal rye serves as its cover crop. Its ability to allelopathically control weed competition helps combat grasses and broadleaf weeds, but doesn’t impact the clover.

I let that grow until late summer, when I mow the crop for the first time. After that, I merely frost seed each late winter, now at 50% of the suggested rate, spray a grass-only killer once in late spring/early summer, then mow several weeks later and once again in late summer, and apply fertilizer every second year. I continue repeating that cycle until I swap the plot out for something else or when too many weeds start taking over.

When one considers its highly digestible protein levels, the raw tonnage of forage it produces, its comparatively low cost and maintenance, as well as its year-round ability as a food source, and even its eight to nine month production in the harsh winter regions, clover is a heck of a good choice.
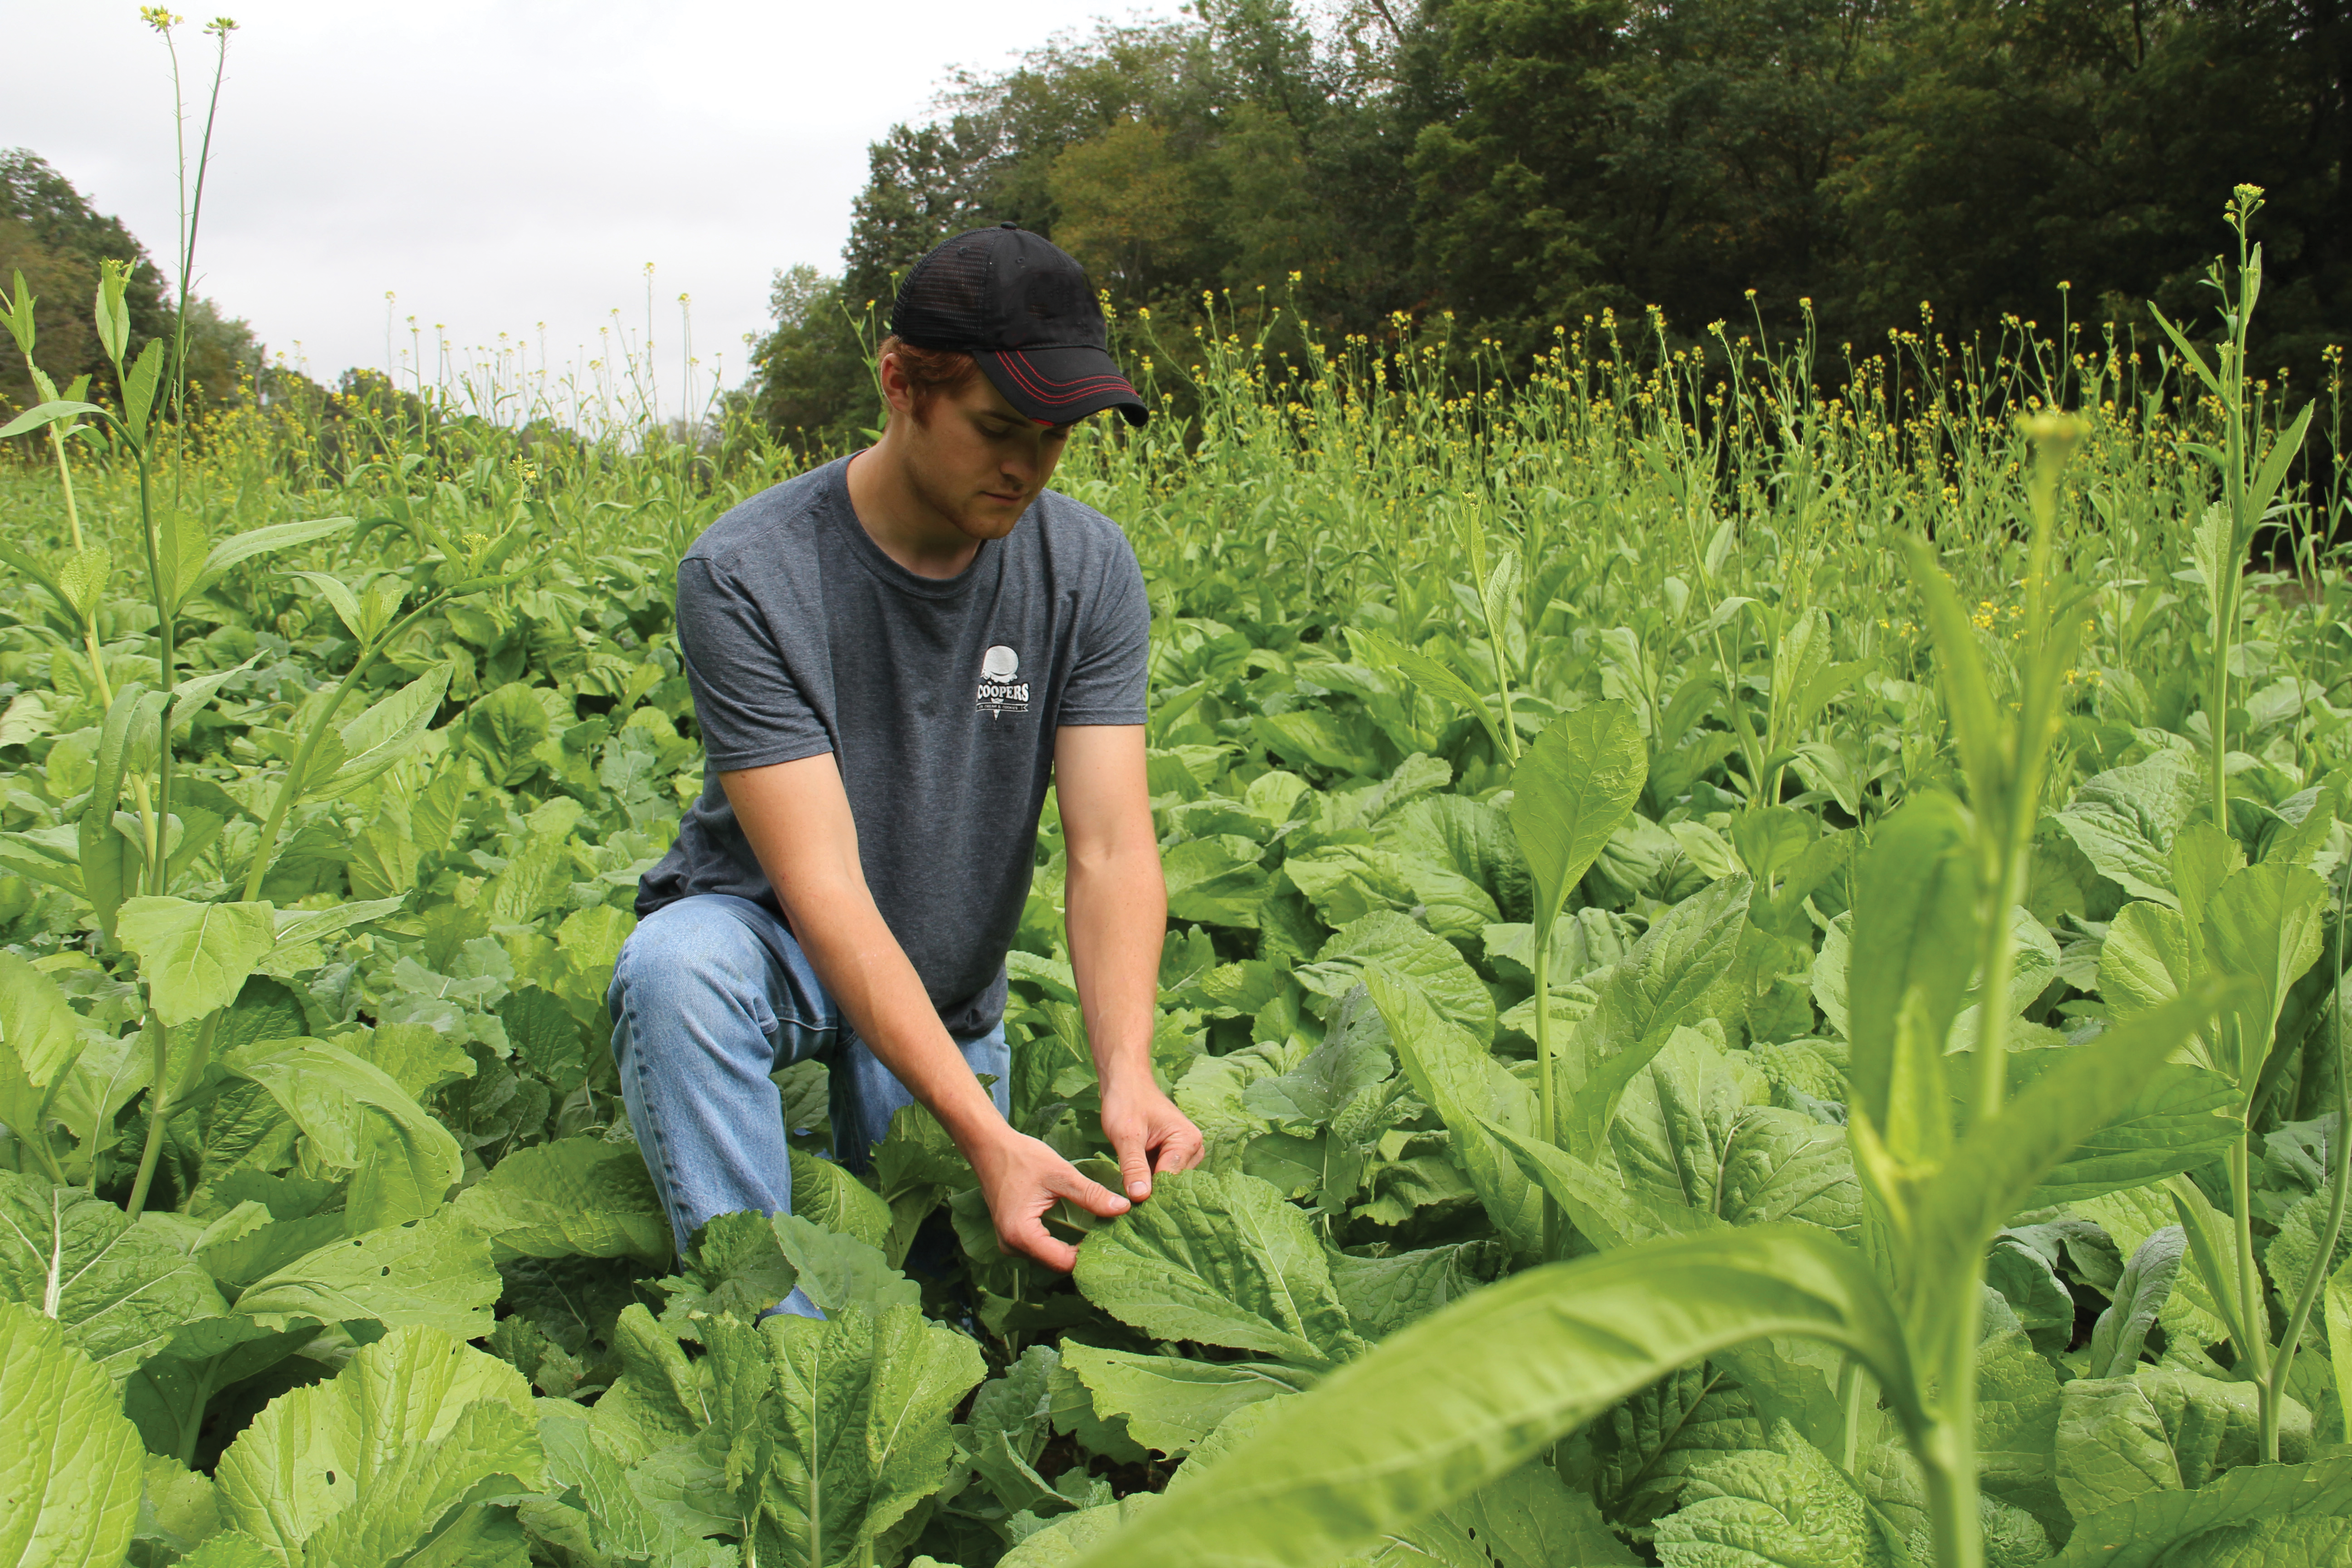
3. Brassicas

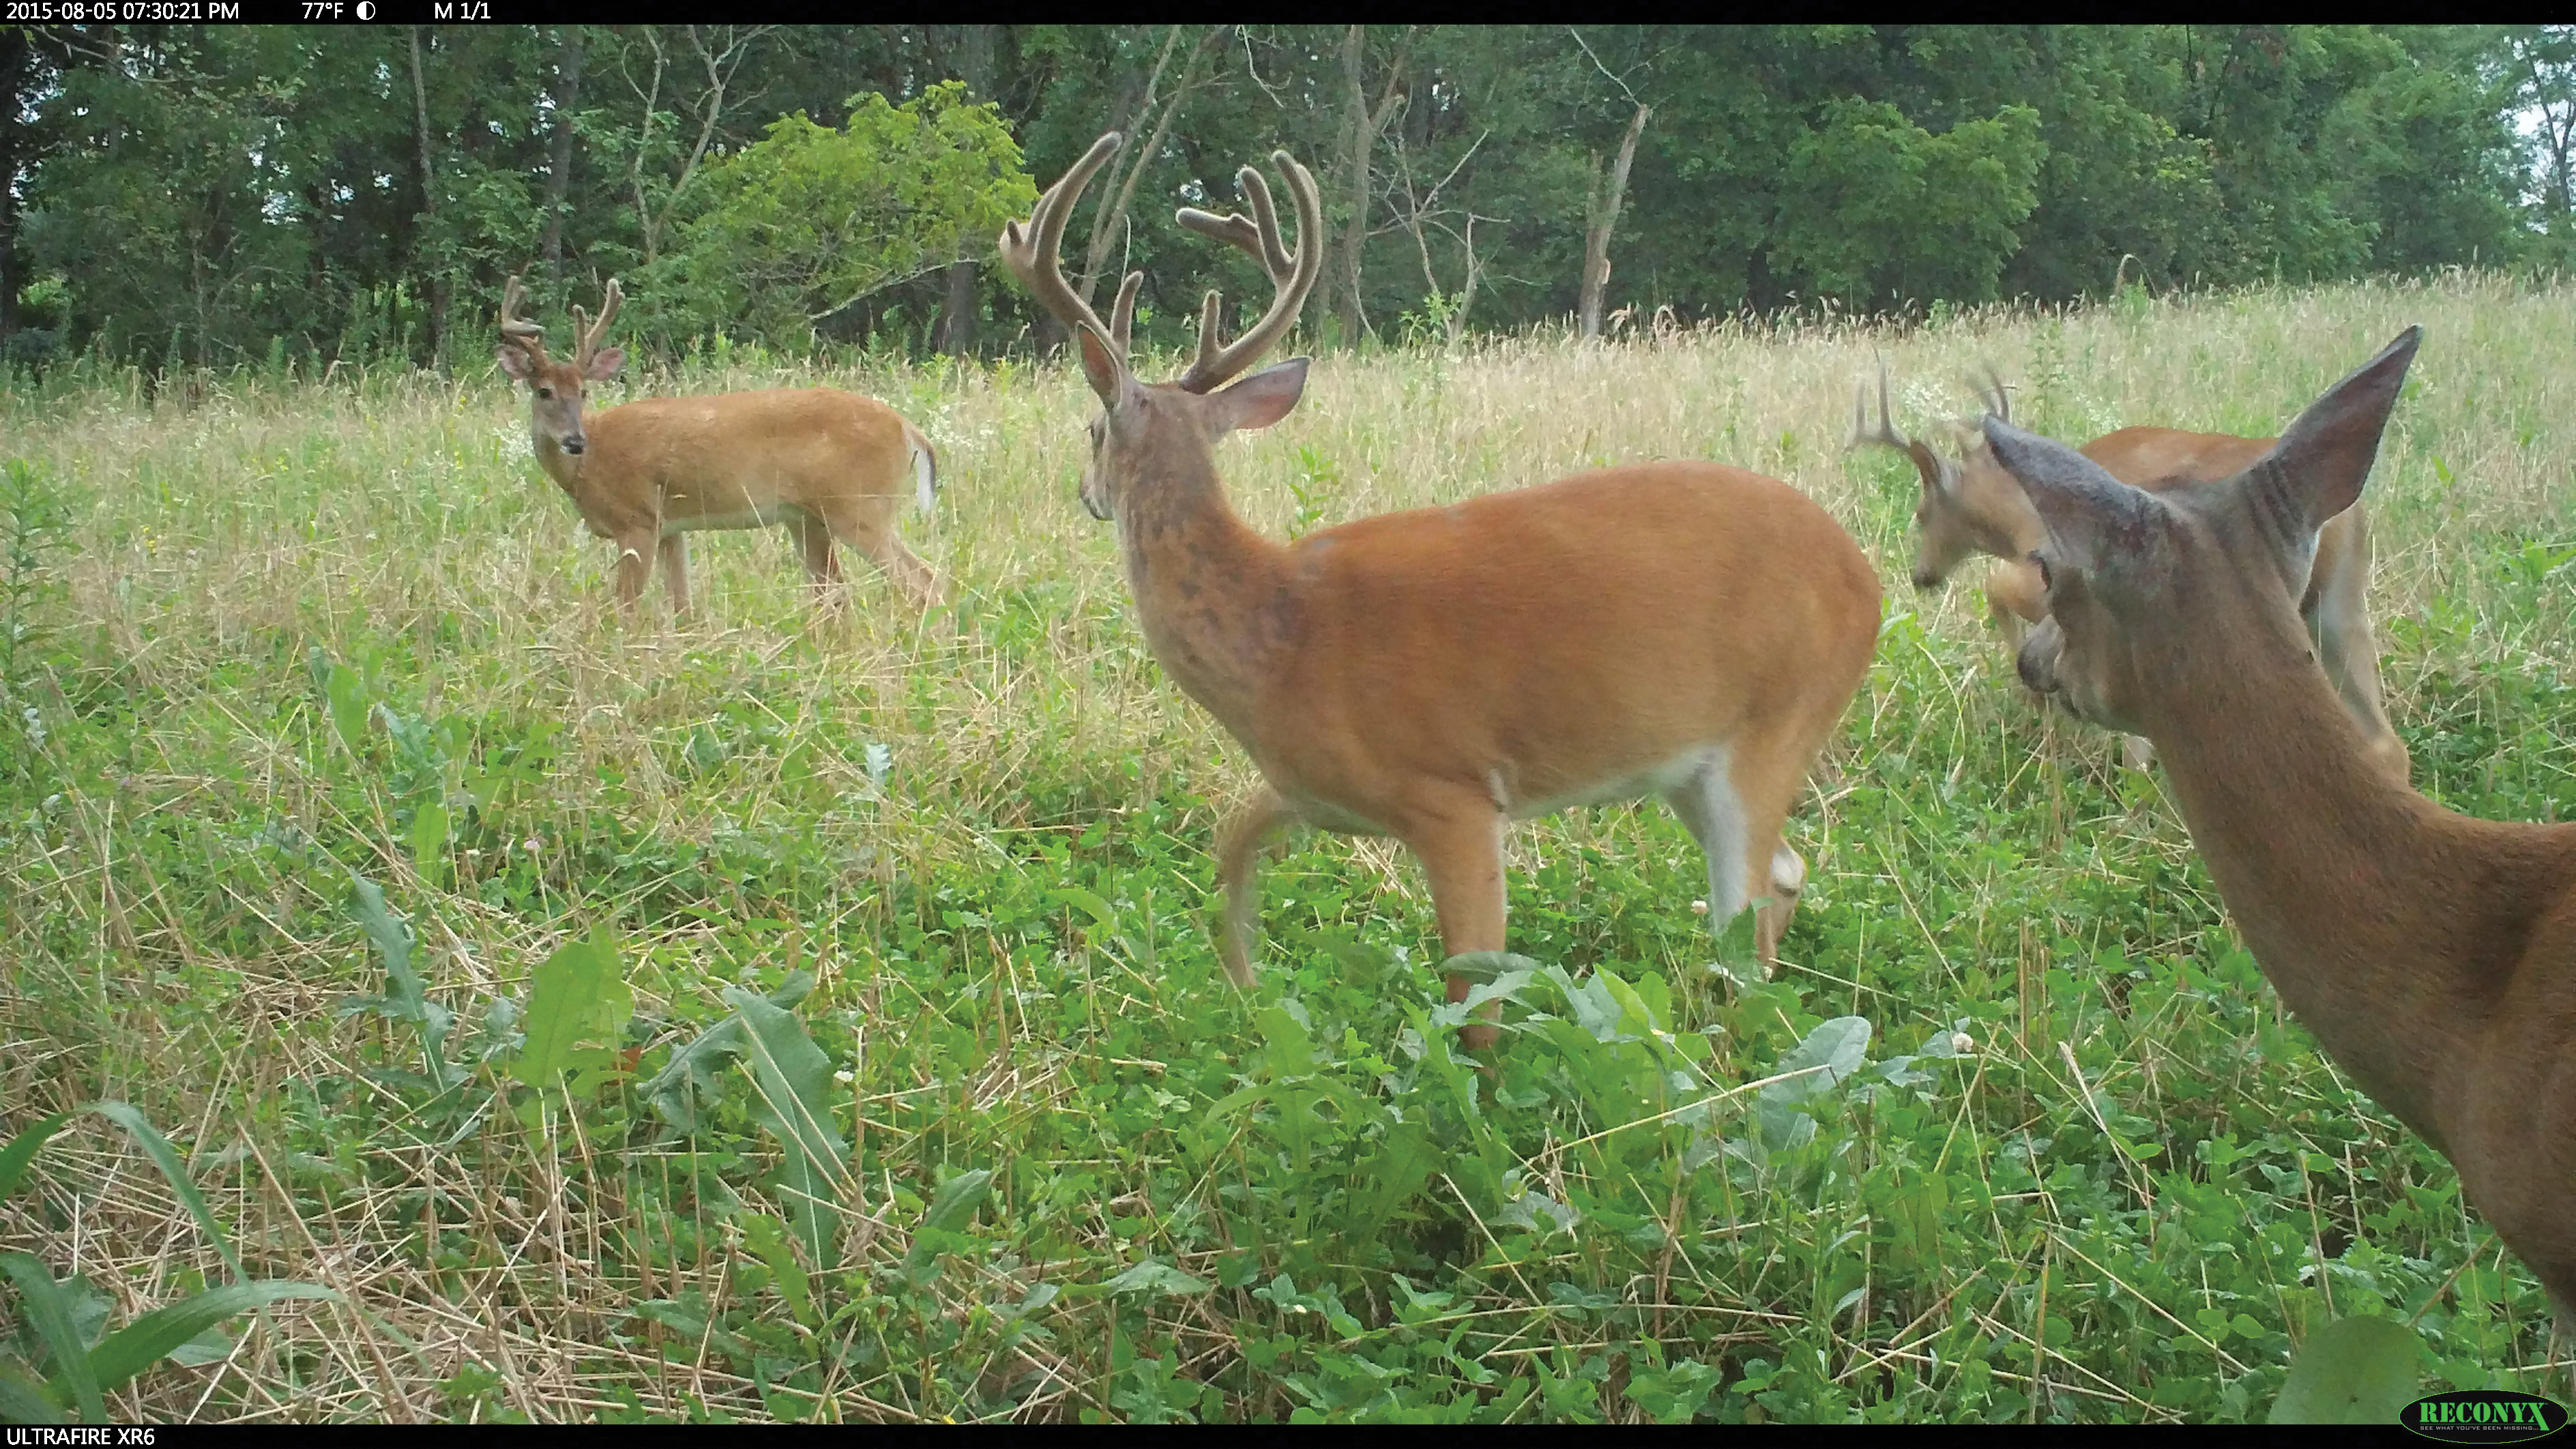
The differences in varieties are significant in the brassica family of plants, as well. This large family of plants has the reputation as being a great late-season option, as frosts bring the sugars up from the roots of many of its members. When that occurs, the deer can go from ignoring them, to wiping out brassicas in the time that it takes for a hard frost to hit.

But, for as good as brassicas can be as a late-season option, the right mix of strains can result in season-long drawing power for a brassica plot.

To get maximum growth from most members of the brassica family, including volleyball-size turnips, the plants need plenty of elbow room, and going heavy on the nitrogen fertilizer is a good idea. Photo courtesy of Antler King.

This was made painfully obvious to me than when managing ground in southeast Minnesota. Within a half-mile of a 2-acre food plot location, deer could find corn, beans, alfalfa, clover, acorns and a surplus of apples, just to name the bigger draws. Still, the 2 acres of Antler King’s Honey Hole that I planted was completely wiped out by before the first week in October. With the germination and growth rates being optimal, I was shocked.

When troubleshooting the situation with the owner, he suggested the brand that he’d always used, as the deer didn’t touch them until after a couple of frosts. When I planted 1/2 acre in that same location the following year, the plot wasn’t touched before November and lasted beyond the end of the season.

The reason for that stark difference was merely the specific brassica strains used. Most brassica mixes contain varieties that peak in desirability after frosts, whereas Antler King’s Honey hole was specifically designed to offer highly attractive early-, mid- and late-season varieties.

Honey Hole also tests extremely well all winter long. As Todd Stittleburg, founder and developer of Antler King Products for the last 30 years recently told me, “I sent random samples of Honey Hole that I collected from a farm in Wisconsin in February to be tested. If you can offer added energy and protein in January it is important, but it is critical in February. If we can turn deer on to a food source with energy close to and with protein three times higher than corn, that’s a really big and helpful deal! That can make a big difference in animal health, survival, reproduction and rack sizes — and we have just that with Honey Hole.”

In fact, it tested at 25.4% protein, in February, well after the plants fully matured.

To get added production in brassica plots, once they reach 4 to 8 inches high, I top seed about 100 pounds per acre with a mix of three parts cereal rye and one part oats into the brassica plot. Since those seeds will just be spread on top of the dirt, timing this before an all-day soaking rain is best.

By letting the brassicas germinate first, they have a head start on growth, allowing them to stay ahead of the mix. That is, until the deer start hammering the brassicas. Then, as the brassicas are browsed down, the mix of rye and oats continues feeding the deer.

Finally, although I’ll go higher than the suggested seed rate on most all other plantings, I won’t on brassicas. The brassica family has a high tendency for preferring elbow room. If you want to grow big brassicas they need space. It’s the one seed blend that I’d rather plant light than heavy, as production really suffers when planted too thick.

4 and 5. Corn and Soybeans

Frankly, I use as little corn and soybeans as I can get away with each year. As often as not, I’m buying corn and beans back from farm renters at their input costs. Depending on the quality of the crop produced, the input costs per acre of corn range from $300 to $450 an acre. For soybeans they run from $150 to $300 per acre.

That right there is why I plant and/or buy back as little corn and beans as needed to reach the property owners’ goals. They are expensive crops to plant for deer food plots, considering that I can plant any of the other crops listed in this article at a small fraction of those costs.

With that being said, soybeans are good at feeding deer from a few weeks after emergence until the pods are finally wiped out by deer, hopefully in the middle of, or later in winter. Beans and their greenery offer good nutrition that entire time.

Corn is high in energy, which can be very important to prep for the rut and then survive winter, but otherwise it’s rather low in nutritional benefits. At the same time, corn isn’t nearly as consistent of a deer food source. They’ll feed on the young stalks, but lay off as they mature. Then, they hit the dried corn again.

The biggest reason that I plant corn and soybeans is to allow the deer to feed on both, without the need to leave the property. When a property has a lot of acres of food plots to use, that’s when I’m adding corn and beans.

When planting the beans or corn specifically for deer, my first step is to try to score free seeds. Various wildlife organizations often give them away. Another option is to become friends with the local seed co-ops. They can’t or won’t sell seed produced the year before. Get to be good enough friends with them and one can get lucky and have them save those seeds for you.

When the seeds are free or cost very little, it becomes much easier to do what I’m about to suggest. That’s to double plant corn and beans that will be left for the deer. After doing the north/south rows like normal, go back over the same plot with east/west rows. If you put that in a good location for deer, you can pretty much bank on them thinning out your crop. Double planting allows for smaller acreages to survive heavy deer browsing and still often produce an acceptable crop.

Then, as the cherry on top, top seed the same 3:1 ratio mix of cereal rye and oats right into the standing crops in late summer or early fall. Do that and you just greatly extended the life of and tonnages produced by the plot, while also building soils and offering more of a smorgasbord feeding option.

Conclusion

Just as I mentioned at the beginning of this article, next to nothing in the habitat improvement or hunting worlds will work best for everyone, in every situation. After having personally broken dirt for food plots all over the Midwest and points north, these are the five plantings that I’ve found to work best for me, in my specific situations in accomplishing my specific goals. I sure can’t promise that you will be as thrilled with all of these plantings as I have been. But, if you aren’t happy with your plots’ production rates, these are good places to start your search for something that will produce the results you are looking for.

— Steve Bartylla has been a Deer & Deer Hunting contributor for more than 25 years. He is cohost of Deer & Deer Hunting-TV on Pursuit Channel, and host of DeerTopia and two top-rated online shows: Grow ’em Big and Hunt ’em Big at www.deeranddeerhunting.com.

The Best Backpack Sprayers Tested in 2024

0

<?xml encoding=”utf-8″>

Built for comfort and ease of use, the backpack sprayer is becoming a go-to tool for gardeners, landscapers, and pest-control professionals—as well as home dwellers who simply want to enjoy a weed- and insect-free outdoor space. A backpack sprayer’s ergonomic design features adjustable shoulder straps and a spray wand, allowing you to carry fertilizer, herbicide, pesticide, or other liquids on your back rather than hauling around a heavy metal cart or handheld manual sprayer.

We tested and reviewed a variety of outstanding backpack sprayers. Preview our top picks below, and then keep reading to learn how these tools work, features to consider, and how to pick the best model for your space and style. Later on, check out our reviews of the best backpack sprayers for lawn and garden maintenance.

  1. BEST OVERALL MANUAL: Field King Max 190348 Backpack Sprayer
  2. BEST OVERALL MOTORIZED: Field King 190515 Battery Powered Backpack Sprayer
  3. BEST BANG FOR THE BUCK: Chapin 61800 4-Gallon Backpack Sprayer
  4. UPGRADE PICK: My4Sons Battery Powered 4-Gallon Backpack Sprayer
  5. BEST PROFESSIONAL: PetraTools Powered Backpack Sprayer with Cart
  6. BEST HOBBYIST: Chapin 61900 4-Gallon Backpack Sprayer
  7. ALSO CONSIDER MANUAL: Solo 4-Gallon Backpack Sprayer
  8. ALSO CONSIDER MOTORIZED: PetraTools 4-Gallon Battery Powered Backpack Sprayer

How We Tested the Best Backpack Sprayers

We considered these backpack sprayers from a home-dweller’s perspective. Although several of our picks offer truly professional-level performance and durability, our testing criteria centered on basic functionality, ease of use, operator comfort, and overall value.

To gauge mobility and operational comfort, we filled each sprayer to capacity with plain water and walked a spray route: putting on and taking off the backpack, walking between house and foundation plants, opening and closing a gate, uphill and downhill, and over small obstacles. Scoring favored sprayers that stayed most secure with less “slosh” and that generally felt most comfortable.

We then pressurized each sprayer, either by switching it on or by manually pumping and tried each nozzle. We noted ease and comfort of operation, speed of attaining initial pressure, motor noise, and drips from spray tips after releasing the spray trigger. The best backpack sprayers were easy to operate, versatile, fast, quiet, and drip-free.

Our Top Picks

This curated list includes backpack sprayers suitable for homeowners, hobbyists, and professionals alike.

Jump to Our Top Picks

What to Consider When Choosing the Best Backpack Sprayer

Before opting for the first hobbyist or professional backpack sprayer you see, take some time to familiarize yourself with the various product factors likely to lead you to the right decision. Consider the pressure (psi), tank capacity, the type of liquid delivery system, and the type of pump that pressurizes the backpack sprayer.

Pressure

Pounds per square inch (psi) is the unit of measure identifying the amount of pressure a backpack herbicide sprayer can propel through its nozzle. The average for a backpack sprayer is around 70 psi, but smaller models can use as little as 40 psi, and a commercial backpack sprayer may use as much as 150 psi.

Pressure is important to ensure that a backpack sprayer operates effectively. Too little pressure will produce an uneven spray that reduces the effectiveness of its contents, while too much will prove excessive for a smaller yard.

If you have a large yard with many hard-to-reach spots, or you are a professional who works in many different-size spaces, a sprayer with a psi rating of 70 or above is your best bet. For those with average-size or smaller yards, a moderate rating between 40 and 70 psi is more than enough to spray your space.

Piston vs. Diaphragm

Backpack sprayers generally come in one of two types of liquid delivery systems: piston pump and diaphragm pump.

  • A piston pump works by drawing liquid from the tank into an enclosed chamber on the upstroke and pushing the liquid out through the outlet valve or nozzle on the downstroke. Piston pump sprayers are more popular with the average home dweller because of their simple design, easy accessibility for repairs, and beneficial psi ratings.
  • A diaphragm pump is designed for the safety of professionals who use potent pest control and weed killer chemicals. It is a sealed system that works by moving liquid from one side of a chamber to the other with a diaphragm so that one side is always full and one side is always empty. The diaphragm pump cannot produce the same pressure as the piston pump but is better suited to pros because it’s made of more chemically resistant materials.

Manual vs. Motorized

Backpack sprayers use an internal pump to draw liquid out of the chamber, through a hose, and out through a wand and nozzle. This pump can be operated manually, or an electric backpack sprayer will often use a motorized system—the pricier option.

Manual backpack sprayers operate via a hand pump attached to the backpack chamber. Pumping manually for an extended period can cause muscle fatigue and pain, so while this style of sprayer is fine for smaller yards, once-per-season jobs, and the average home dweller, it’s less suited to professionals who have to spray for hours at a time. Manual backpack sprayers cost as little as $40 to as much as $150, on average.

Motorized backpack sprayers are powered either by battery or gas, with a battery backpack sprayer offering more versatility and a simpler setup. A motorized sprayer automatically pumps the liquid from the backpack chamber to the wand, requiring no physical work by the user. Intended for large projects and long workdays, a motorized sprayer (which can run between about $100 and $500) is a better choice for the busy professional who’ll rely on it daily.

Tank Capacity

Sprayers are available in a tank capacity range between 2 and 7 gallons. Carry smaller-capacity sprayers with a handle, and tote the largest tanks with a wheeled cart. A 4-gallon backpack sprayer is considered to be about average in size.

Sprayers that fall between these two size extremes are true backpack sprayers—light enough to carry on your back but too heavy to lug around by hand. For typical jobs, such as fertilizing a lawn or spraying an insect infestation, a 4-gallon tank can do the trick for a yard between 5,000 and 10,000 square feet.

Additional Features

Backpack sprayers may include a variety of features, such as a built-in gauge to monitor the pressure of the unit while in use, extra padding in the shoulder straps for added comfort, a foaming nozzle, and a foldaway pump handle that won’t get in the way while spraying. Larger models may offer an extended hose and wheeled cart that can be used for more complex yards and heavier tanks.

Tips for Using a Backpack Sprayer

Backpack sprayers are helpful tools for quickly and efficiently treating the yard and garden with liquid fertilizers, herbicides, and insecticides. But to ensure against over- or under-spraying an area, it’s important to keep the same walking speed and distance from the target during use.

Additionally, users should ensure that the backpack sprayer is properly pressurized at all times so that it’s easier to maintain an even spraying pressure. By taking the time to balance the pressure, the same amount of solution will be applied to each area of the yard and garden.

Before starting to use a backpack sprayer, adjust the shoulder straps so that the unit fits properly. You don’t want to have to deal with a shifting tank of fertilizer, water, or pesticide while working because it will take extra effort to control the moving weight, increasing fatigue.

In general, remember to:

  • Maintain a uniform walking speed.
  • Balance the spraying pressure.
  • Adjust the straps before use for a secure fit.

FAQs

Buying and using a backpack sprayer brings up several questions. We’ve answered some of the common questions below.

Q. What is a backpack sprayer used for?

A backpack sprayer is used to quickly and effectively spray the yard, garden, and trees with pesticide, herbicide, water, fertilizer, or other liquid solution.

Q. What do you put in a backpack sprayer?

You can fill a backpack sprayer with almost any liquid solution that has a similar consistency to water. This includes insecticide, herbicide, and liquid fertilizers. Just make sure the solution isn’t too corrosive or volatile, as these dangerous substances might eat through the walls of the sprayer.

Q. Are backpack sprayers safe?

Backpack sprayers are safe to use as long as they are filled with suitable solutions and proper precautions are taken to protect the eyes, skin, and respiratory system during use. The reason for the added personal protection is that when the liquid sprays from the backpack, some might get caught in the wind and blow back toward the user. While this wouldn’t matter much with water, it could be hazardous when the sprayer is filled with pesticide or herbicide.

Q. How far will a backpack sprayer spray?

The maximum distance that a sprayer can spray a liquid solution is determined by the maximum psi of the unit, the type of nozzle, the wind direction, the force of the wind, and the angle of the spray wand. On average, a backpack sprayer can spray up to about 10 to 20 feet, though there are models that can reach over 30 feet.

Q. How do you clean a backpack sprayer?

To clean a backpack sprayer after using it to apply a volatile chemical like herbicide or pesticide, follow these simple steps:

  1. Responsibly empty any excess solution from the sprayer tank and add about half a tank of water.
  2. Flush the sprayer system by using the sprayer until the tank is empty again.
  3. Fill the tank half full with water again, this time adding any cleaning agents or neutralizing solutions that can help to remove remnants of the herbicide or pesticide solution.
  4. Open all recirculation lines and any other hoses on the backpack sprayer.
  5. Shake or agitate the unit to ensure the cleaning solution reaches every inch of the backpack sprayer.
  6. Fill the tank to the top with water, and agitate again before emptying the sprayer.
  7. Refill the sprayer with water to rinse out any remaining cleaning solution.

Where to Camp While Overlanding

0

Without a place to go, the most outfitted rig to ever grace the backroads is a bit pointless. It’s simple enough to find trails, backroads, or some other adventurous route, but it isn’t easy to find places to call home for the night. Some parts of the country have a distinct lack of public lands. While other areas are fortunate to have plenty of public lands, those come with a host of regulations.

Some overlanders like to wing it, and there’s nothing wrong with the journey being the destination. However, it only takes a couple of times of driving into the night, searching for a place to catch some shut-eye, before you start pre-planning where you’ll spend the night.

So whether you’re a fly by the seat of your pants type, or an expedition detail planning pro, we have some ideas for places to search for your next home away from home.

Camping on Public Lands

Regardless of other factors, most campsites will fall into either the public or private category. On public lands, you’ll often find options to camp in dispersed sites or in a more formal campground.

Many State and National Forest feature organized campgrounds. These vary widely in size, privacy, and amenities. A few might only be a few flat spots tucked into the woodlands off the main forest road, while others are full campgrounds with bathhouses, electric hookups, and concrete pads. Some might have a reservation system in place, but many are first-come-first-serve and fill up quickly during peak seasons.

READ MORE: How to Find Overland Trails

It’s also worth noting that State and National Parks often have campgrounds, but in our experience, they’re usually relatively tame and tightly packed. They’re fine in a pinch, but with a bit of research or willingness to explore, you can generally find better options.

For a truly wild camping experience, most overlanders will look for dispersed camping opportunities. Unless otherwise posted, dispersed camping is allowed on the majority of public lands. These “sites” are usually unimproved and offer a nice isolated spot for individuals or small groups. We say “sites” because that’s a bit of a misnomer. Sometimes it’s just a vehicle-sized flat spot just off of the forest road or trail, other times it might be roomy enough for a few rigs. You never know until you get there, and that’s all part of the fun. Some of the best options for finding dispersed camping opportunities are at the end of spur roads on public lands and the central portions of large sections of public lands.

Private Land Camping

Not that long ago, private camping options in the US would have been limited to campgrounds in popular areas. Many of those are geared towards RVs and rarely offer a very adventurous experience. However, it seems we’re finally catching up to the rest of the world, and people that live in or near wilderness areas are offering up a spot for campers in exchange for a small fee. However, instead of a simple face-to-face interaction, the chosen platform for arranging these sites is usually a mobile application or website. We’ll discuss some of our favorite options for finding privately owned camping options in a bit.

Mobile Apps & Online Trip Planning

We’re fortunate to have a number of online resources at our disposal. These are useful during the pre-trip planning, and they can save the day on the fly.

Several mobile applications and websites are dedicated to sharing information on formal and informal routes. They usually include information about the difficulty of the terrain, camping opportunities, resupply points, and more. Many applications also allow you to build routes or tracks, mark waypoints, and save all of that information for your upcoming trip.

Look for a program that offers both mobile and web-based platforms. That way, you can do your pre-trip planning on a larger screen, then download it to your mobile or a dedicated device. It’s also important to have the ability to store maps offline. You don’t want to get to the middle of nowhere, only to find your cell service is gone, and now you don’t know how to get to the campsite.

Our own Trips & Trails series is a great place to look for your next trip idea. We highlight trails all over the country, ranging from short jaunts to multiday trips, that can match every overlanders skill level.

Dedicated Websites

If you’re looking for more information about camping on public lands, Reserve America and Recreation.gov can be valuable resources. Reserve America manages online reservations for most state and local government park campgrounds in the United States. However, while Reserve America can serve as a good database of sites, campsites on Federal land are only reservable through Recreation.gov. Nevertheless, when used together, these websites are an excellent resource.

Another great online resource is the Hipcamp website and accompanying mobile application. Hipcamp features options ranging from glamping in a luxury tent to tiny house rentals and our personal favorite, a spot in the woods with a fire ring. You can filter by the type of site you’re looking for, search as you move the map, or by specific days and a destination. We’ve found some gems using Hipcamp, particularly on holiday weekends, when dispersed sites are in high demand and campgrounds are jam-packed.

READ MORE: How to Leave No Trace for Overlanders

There are other options available, and when researching sites for a trip, why not use every tool in the box? With a model similar to Hipcamp, thedyrt.com allows you to browse campsites via a location search or by using their map. Most of the results seem to be park campgrounds and larger private campgrounds. Be warned, while exploring our local area on The Dyrt we found an incorrectly listed campsite that was shown to be half an hour away, when in reality it’s in a different part of the state. Other websites and applications such as iOverlander, Boondocking.com, and the USFS & BLM Campgrounds application are also helpful.

Leave No Trace

Regardless if you’re camping in a huge campground, in a secluded dispersed site on public lands, or a nice spot you found on Hipcamp, you should always practice Leave No Trace ethics. Outside of your own minimal impact practices, it’s always a great idea to leave it better than you found by cleaning up trash when you can. When exploring and camping on public lands, familiarize yourself with the rules and regulations of the area. Wildlife Management Areas, State Forest, National Forest, and other public lands can all have vastly different regulations on anything from required permits to bringing in firewood.

Get Out & Explore

While maps, apps, and other forms of research are great, you can’t beat time on the trail. This holds particularly true if there’s a certain area that you frequently visit. If you’re heading to a new destination, try to tag along with a local, or at the very least gather some insider information. In the age of the internet, you can connect with the locals by searching for hashtags and social media groups.

Welcome to Dave Genz.com

0

By Dave Genz

You can’t catch fish if you can’t find them. It’s as true in ice fishing as it is in open water.

There are two things most ice anglers have a lot of trouble with: choosing the right type of lake to fish during the ice-up period, and finding fish once the good “first-ice” bite slows down. Let’s address both of these issues in some depth: (Get it? Depth? Lots of fish go deep during the iced-over period?)

Choose The Right Lake At Early Ice

You should, simply put, fish smaller bodies of water early in the iced-over period. It’s often fairly easy to locate fish on smaller lakes, because it’s a high-percentage move to look in the deepest basin area. Many, if not most, of the fish in a smaller lake will spend the winter in the deepest basin, especially if there’s only one, and it’s significantly deeper than the rest of the lake.

The problem with many smaller lakes is that they develop an oxygen problem as winter wears on. Where those “small-lake” fish are in a biting mood at early ice, you return to those lakes later in the winter and often find no takers.

The fish are still there, of course (unless they suffer a die-off), but they are often severely stressed due to the low oxygen levels.

Bigger Lakes Stay Better Later Into The Season

We’re oversimplifying things here, but it’s generally true to say that larger bodies of water will hold better fishing later into the winter season.

One of the most difficult aspects of catching fish through the ice on larger bodies of water is finding them. With so much turf to search, you can feel lost before you even start. One clue is that you should always fish anywhere you drill a hole and find green weeds. As long as sunlight can penetrate the ice, weeds can actually grow, something many anglers don’t realize. But if you drop down your lure and come back with green weeds on the hook, make good notes on where you are.

Also, don’t just blindly follow the crowds. Many anglers, from past experience, know of good spots. And groups of fish houses pop up over these spots every winter.

Sometimes, even just getting off to the edge of the group of houses, off to the fringe of all the ruckus, can help you find fish that aren’t as “on guard.” Activity moves the fish, especially at midday.

One of my strategies is to go to the crowd of fish houses just to see what type of spot they’re fishing. Is it deep? Shallow? Hard or soft bottom? How close is it to really deep water? By studying the characteristics of the spot, you can often find similar spots by looking at a contour map of the lake, and get off to a new hot- spot that’s all yours.

Another hint: At “prime time,” when the sun is setting at the tree tops, fish often move right into those “community spots” where all the fish houses are. They are pressured and on guard, but they still return to that spot, because it’s where most of their food is in many cases.

Finding Fish At Midwinter

It’s probably tougher to locate fish at midwinter than any other ice-fishing period. Here are some high-percentage haunts, to shortcut the hunt:

Walleye-Classic midwinter walleye locations include deep edges of remaining green weed growth, and good-sized hard-bottom points and sunken humps. First find large expanses of deep basin water, then look for these structural elements close by. Fishing pressure will force walleye off the most obvious spots. Check around the perimeter of groups of anglers, even out over deep water. If you find stair-stepping dropoffs, fish each small “stair” or flat.

Northern Pike-Eating machines that bite good in winter. Sorry to be vague, but they can be anywhere the food is. If a bay is full of small panfish, tip-ups can take pike. But also look for them to drop relatively deeper as winter wears on. Check the outside weed edges, but pay special attention to deeper rock and other hard-bottomed areas near good-sized shallow food shelves.

Largemouth Bass-Often disinterested in feeding at this time of year. There are disagreements about winter movements. Considered by some, including me, to be roamers. By working shallow cover such as weeds or stumps you can catch some on small minnows, but don’t expect to catch a lot of largemouths very often at midwinter.

Smallmouth Bass-Generally, a much deeper midwinter fish, and more catchable, than largemouths. Smallies like expansive areas of rock or other relatively hard bottom, in “deep, but not too deep” zones from about 20-40 feet.

Yellow Perch-Notorious as bottom feeders, and midwinter is no exception. Keep those baits puffing up or sitting on bottom. They tend to be in deeper water, down to 40 feet or so. Don’t look on drop offs, but instead along the flats out from them. Perch feed on insects and larvae that live in the mud, and breaklines tend to be along harder bottom!

Bluegills and other Sunfish-“Where aren’t sunfish?” might be a better question. On some lakes, it won’t matter where you drill a hole; small sunnies will be there waiting. But in general, organic (mud) bottomed bays and flats the bigger the better hold the most consistent sunfish action. If the areas are close to deep water, so much the better.

If you’re willing to hunt for rod-benders, seek out the biggest areas of shallow or deep weed growth. Do your best to get away from the crowds, and be quiet in your approach. And even though sunfish, befitting their name, have a reputation as good daylight feeders, the twilight periods of dawn and dusk are prime big-fish times.

You’ll have to fish your specific water, because some lakes hold big sunfish shallow all winter. Heavy fishing pressure, though, can “cream off” most of the big bulls, making deeper weed- or mud-related fish a better bet. We’ve caught most of our biggest midwinter bluegills in deeper water lately. We look for mud and weeds in 20-30 feet, and sometimes even deeper than that.

Crappies-You will find some nice crappies in shallow flats areas, mixed in with sunfish. But many midwinter slabs are in deep water, often suspended. Look over the areas just away from deep weed edges, or edges of other cover.

Deep points, and deep inside turns, can hold concentrations of midwinter crappies. Searching vast areas of deep water can turn up big schools, but it’s a needle-in-the-haystack proposition.

First printed in 1995

Build This Simple Binocular Mount

0

Requiring only a few parts, this simple and effective setup provides stable images for detailed views of the night sky.

“This is the best binocular mount I’ve ever used!” Those were the first words out of my mouth as I came indoors from testing my just-completed binocular rig.

It’s rare that I build something that actually works better than expected, but finally I’d come up with a binocular mount that provides steady views, is easy to use, very portable, and simple to build. It was a good night.

I’ve written many times about the virtues of mounted binoculars. Indeed, a good number of the objects I’ve observed over the years need steady views to be to be seen at all. I’ve used (and built) many binocular mounts, but most of them have been either expensive, bulky, or, to some extent, awkward to use. The mount shown here has none of those shortcomings and is ideally suited to observers like me who prefers to view the sky while seated or reclining in a deck chair.

The main components of my bino mount can be obtained at your local camera store, but if you’re a photographer, it’s likely you already own many of them. You’ll need a standard camera tripod with a pan/tilt head (the sturdier, the better), a ball head, and a monopod. I used an inexpensive monopod made by Slik and similar ones can be had for around $20. The ball head doesn’t need to be an expensive, heavy duty model unless your binoculars are particularly weighty. Mine is a Stroboframe FLM compact ball head, which typically retails in the $25 range. A nice feature of this unit is that a single knob locks all motions. You’ll also need a right-angle binocular-to-tripod adapter. Avoid the flimsy plastic ones that often come with budget binoculars.

The final component of my bino-mount assembly is the part you make: the bracket that mates the monopod to the tripod head. As ATM projects go, it doesn’t get much easier than this. Only a handful of hardware store parts are needed and none of the dimensions are especially critical.

Shown here are the various pieces of the tripod mounting bracket before assembly.

You’ll need to round up a 2½-inch by 5-inch length of ¾-inch plywood, a ¼-20 threaded insert (a T-nut will also work with a minor modification), a short length of flexible plastic tubing (automotive vacuum hose works well), and a U-bolt. The size of the U-bolt will depend on the diameter of the monopod section you’re going to clamp in the bracket. I recommend using the first segment that telescopes out of the monopod’s body, which measures ¾ inches with my Slik.

Begin construction by cutting a your length of plywood in half so that you have two 2½-inch square pieces — one will be used for the mounting block, the other will form a cradle for the monopod. In the center of one piece, drill a hole that corresponds to the diameter of the monopod section to be cradled. Next, cut that piece in half and set aside.

Turning to the second plywood part, mark the center and drill the hole to accommodate the threaded insert. Screw in the insert until it’s flush with the underside of the block. Next, drill two holes for the U-bolt. Make these a bit bigger than needed to avoid having the bolt’s threads bind on the wood block. You’ll also have to enlarge these holes on the underside so that the U-bolt nuts are recessed. You’ll also probably find that the threaded sections of the U-bolt will have to be shortened with a hacksaw so that they didn’t protrude beyond the surface of the plywood. Paul Oppenheim wrote in with a helpful tip, suggesting, “thread the nuts on first! After you’ve cut the legs, gently back the nuts off the legs, and you will have repaired any thread damage the hacksawing might have caused.”

Finally, slip a short length of tubing onto the U-bolt to prevent it from marring the finish of your monopod.

This view shows the underside of the bracket after assembly, but before painting. Note the recessed holes that accommodate the nuts for the U-bolt.

The remaining work basically consists of affixing (with wood screws and glue) the cradle halves to the mounting block, as shown in the photo above. Give the wood a waterproof finish to protect it from the elements, and let it dry. Now it’s time to assemble the mount. Begin by laying the monopod in the cradle so that the bottom of the thickest section abuts the top of the bracket. Next, slip on the U-bolt and tighten the nuts just enough that the monopod won’t rotate. Attach this to your tripod via the threaded insert, mount your binoculars, and you’re done . . . almost.

Here the mount is fully assembled before painting, just to make sure everything fits properly.

It’s likely the assembled mount will be considerably out of balance and that you’ll need to counter the weight of the binoculars. I made a counterweight from of a plastic peanut-butter jar filled with coins. I simply slide the foot of the monopod through a hole in the lid into a wooden disk in the bottom of the jar. The rubber foot of the monopod seats in a hole drilled part way through the wooden disk. A hose clamp attached to the monopod prevents the lid from sliding down. I filled the jar with all the loose change I had lying around (look under your sofa cushions if you’re a few ounces short), then screwed the jar onto the lid. The nifty thing about this counterweight is that you can adjust it by simply extending the monopod until the balance feels right.

The mount’s penny-ante counterweight (left) and (right) two important purchased items: a tripod ball head and right-angle binocular adapter.

After my original article describing this mount appeared in Sky&Telescope, Richard Frederick wrote to say that he’d found a way to make the mount without having to actually build anything. Instead of making a tripod-mounting bracket, he bought a Interfit tripod clamp. (Bogen also makes a similar unit.) So, if you’d rather spend $25 than the time it takes to make the part described above, you actually can put together my mount with off-the-shelf-parts.

To use the bino mount, leave the tripod head lightly clamped — once you’ve adjusted the counterweight, the binoculars won’t move on their own. Loosen the ball head and aim the binoculars freehand — as if they weren’t mounted at all. Once you’ve swept up your target, lock the ball head, and enjoy the view — the binoculars will seem to float in front of your eyes. And because the motions of the mount have so many degrees of freedom, you’ll find that you can comfortably view a huge swath of sky from one position. Indeed, on most nights, I never move my lounge chair at all. By adjusting my recliner, I can scan from the horizon to the zenith and a generous amount east and west. This really is the best mount I’ve used.

Soon after completing this project, I built a second mount that dispenses with the monopod and allows me to mount two binoculars simultaneously, one at either end of a length of aluminum tubing This way I can readily compare views in my 10×50s and 15×70s, for example. With this configuration, one binocular serves as the counterweight for the other. This two-headed contraption consists of a 48-inch-long piece of 1¼-diameter aluminum tubing in place of a monopod. Into either end of the tubing, I glued a short length of 1¹̷₈ -inch-diameter hardwood doweling with a ¼-20 anchor bolt screwed into it to serve as mounting stud for the ball head. In use this bino mount works the same way as the original monopod version.

With either binocular mount you’ll have the means to get steady views of the night sky, without the expense of a commercial unit or resorting to image-stabilized binoculars. Once you’ve tried using your binos this way, you may never use them unmounted again.

Did you find this article interesting or helpful? If so, consider using this link the next time you shop at Amazon.com. Better yet, bookmark it for future use. Thanks to Amazon’s associates program, doing so costs you nothing yet helps keep this site up and running. Thanks!

(This article is an updated and expanded version of one that appeared in the August 2010 issue of Sky&Telescope)

How To Get Rid Of Iguanas? (Easy Methods)

0

In Florida, iguanas have become a big problem. They’re multiplying so quickly that they’re overrunning neighborhoods and eating through people’s gardens. If you live in Florida and are having an iguana infestation, don’t worry – there are steps you can take to get rid of them. In this blog post, we will outline some of the best methods for getting rid of iguanas so that you can reclaim your yard and garden. Keep reading to learn more!

How to identify if you have iguanas problems?

The first step in getting rid of iguanas is to identify whether or not you have an issue. Iguanas are most active during the day, so if you see one basking in the sun on your property, that’s a good sign that you have an issue. Other signs include iguana droppings in your yard or garden, damage to plants or property, and hearing them rustling around at night. If you suspect you have an iguana problem, the next step is to take action.

There are a few different ways to get rid of iguanas. Read on for tips and tricks that will keep your home iguana-free.

(How to get rid of chipmunks? See this post for more)

Install Barriers:

One of the best ways to keep iguanas away from your home is to install physical barriers. Iguanas can climb, so it’s important to choose a material that they can’t grip onto or chew through. A fence made of chicken wire or hardware cloth is a good option. You can also use rocks or concrete blocks to create a barrier around your property.

Remove Their Food Sources:

Another way to deter iguanas is to remove their food sources. Iguanas like to eat fruits, vegetables, and flowers, so if you have these items on your property, you’re more likely to attract them. If possible, remove any plants that iguanas might find appealing. You can also try to keep your yard clean and free of debris.

Use Repellents:

There are a variety of commercial repellents available that will deter iguanas. These products typically contain ingredients like hot peppers or citronella, which iguanas don’t like. You can apply the repellent around the perimeter of your property or directly on plants that iguanas are attracted to.

Protect Your Pool:

If you have a pool, it’s important to take steps to protect it from iguanas. Iguanas like to swim and can easily drown in a pool if they can’t get out. To keep iguanas out of your pool, you can install a mesh cover or fence around it. You can also try adding a few floating objects that iguanas can use to climb out.

Trapping and Catching Iguanas:

One of the most effective ways to remove iguanas from your property is to trap them and then remove them. There are a variety of traps available, so choose one that’s best for your needs. Once you have the trap set up, baited, and in place, check it regularly to see if you’ve caught anything. If you have, simply release the iguana into an area far away from your home.

If you don’t want to use a trap, you can also try to catch the iguana by hand. This is more difficult, but it can be done if you’re careful. Wear gloves and Approach the iguana slowly from behind. Once you’re close enough, grab it by the tail. Iguanas can be aggressive, so be careful not to get bitten. Once you have a good grip on the iguana, lift it up and away from your body. Hold onto the tail as you carry the iguana to an area far away from your home where you can release it.

Hire a Professional:

If you’re having trouble getting rid of iguanas on your own, you may need to hire a professional. Wildlife removal experts have the experience and equipment necessary to safely remove iguanas from your property.

Do-It-Yourself method:

One of the cheap, effective ways to deal with the iguana problems is using an air rifle: You can take care of a bunch of these vermin by yourself in one good afternoon

(For more on the best air rifles for pest control, see this post)

FAQs

Can You Kill an Iguana in Florida?

The Florida Wildlife and Conservation Commission (FWCC) has defined the iguanas that can be found throughout the South Florida area as an invasive species, not native to the state but recognized as causing a great impact on native wildlife. By being non-native, iguanas are not protected in Florida. This means that they can be captured and killed as long as the killing is carried out in a humane fashion any time they are found on private property, year-round, and without the need to obtain a hunting license or permit.

What smells keep iguanas away?

Some people have had success using commercial repellents that contain ingredients like hot peppers or citronella.

How do you get rid of iguanas in your yard?

You can try to remove any plants that iguanas might find appealing, use a fence made of chicken wire or hardware cloth, or try to keep your yard clean and free of debris. You can also apply repellent around the perimeter of your property or directly on plants that iguanas are attracted to. If you have a pool, you can install a mesh cover or fence around it.

What eats an iguana?

Iguanas are eaten by a variety of predators including snakes, birds, mammals, and other reptiles.

What is an iguana afraid of?

Iguanas are afraid of predators, so anything that might look like a predator to them can be used to scare them off. This includes loud noises, bright lights, and fast movements.

Do wind chimes keep iguanas away?

Some people believe that wind chimes help to keep iguanas away, but there is no scientific evidence to support this claim.

Can iguanas climb walls?

Yes, iguanas can climb walls. They have sharp claws that allow them to grip surfaces, and their long tails give them balance as they climb.

Do iguanas dig holes in the ground?

Iguanas will sometimes dig holes in the ground to create a place to hide from predators or to lay their eggs.

Conclusion

Iguanas are common in Florida, but that doesn’t mean you have to put up with them. If you’re having trouble with these creatures, use the tips and tricks in this blog post to get rid of them for good.

Remington “Rem” Oil Review (Does It Deserve The Bad Rep?)

0

Maybe you know this, but –

Rem Oil’s been getting a bad rep lately.

More specifically, some people are complaining about:

  • The oil being too thin
  • Evaporating easily
  • Not lubing properly
  • Etc.

So, I decided to take a closer look.

  • What is is that people are complaining about?
  • And is Rem Oil really as bad as people say?

Ready? Let’s jump right in…

What is Rem Oil?

Rem Oil is a superior lubricant for firearms. You use it to lubricate your guns, as well as to protect them from corrosion.

I underlined the word lubricant because people keep comparing Rem Oil to different products:

  • Hoppe’s #9 (a solvent)
  • Ballistol (a CLP)
  • Froglube (lubricant)
  • Rmcoil (lubricant)

Rem oil is not a solvent. Rem Oil is not a CLP.

It’s a lubricant – and it works differently from CLP’s and solvents.

But most importantly…

Rem Oil Gets The Job Done

Here’s a fact:

Most gun oils work fine if you use them according to instructions. Including Rem Oil.

Every top brand will be 99% good enough for your needs. Unless you are a competition shooter, or you have unusual weather conditions.

And while Rem Oil may not be the best gun oil on the market…

It gets the job done.

Now you’re probably wondering:

If Rem Oil’s so good then why does it have such a bad reputation?

Look.

I’m certain that the people complaining about Rem Oil are simply using it wrong. There’s no other explanation.

How To Use Rem Oil

Here’s how you use Rem Oil properly:

  1. Apply the oil
  2. Let it sit for a bit
  3. Wipe the oil off completely (Don’t leave a single drop hanging there)

You need to wipe everything off because Rem Oil is a surface treatment.

What this means, is that the only useful part of the oil is the one that sticks to the surface of your gun. Any Rem Oil NOT stuck to the surface is useless.

After proper application, the surface should appear dry. It shouldn’t have a “wax coating”. This may seem unnatural, but that’s the proper way to use this product. You’re basically seasoning the surface as you would do on an iron skillet.

By now you can probably guess that –

The problem that most people have with Rem Oil is that they put TOO MUCH OIL on their gun.

The oil that doesn’t soak in runs off the gun. That’s where the bad rep comes from – that Rem Oil is “runny”.

Rem Oil needs to soak because of how it’s made.

What’s Rem Oil Made Of: The Ingredients

Rem Oil has a mineral oil base. Same as most other gun oils.

What makes it different from some is the added Teflon. Teflon transforms into a super-thin film on your gun’s surfaces. The thin film decreases friction and acts as a barrier against corrosion.

The Teflon membrane sticks to the gun and can’t be wiped away.

It’s the protection factor of Rem Oil. You won’t see it, but it’s there after treatment.

Rem Oil Performance

The real question is:

Is Rem Oil worth the money when compared to other gun oils?

Well, let’s start with the good.

Rust Protection

One thing that Rem’s good for is Rust Protection. There was a comparison I read a few years ago.

Rem Oil received superior ratings for rust inhibition in comparison to Hoppes’s and Breakfree CLP.

Extreme Temperatures

The same test also ranked Rem Oil as #1 gun oil for extreme cold.

I’m talking about minus 20-30 degrees kind of cold. All other oils would gum up and slow the action down.

You’ll probably never shoot your gun under those conditions, but it’s still good to know.

Rem Oil Alternatives

Crosman RMCoil vs Rem Oil

From the specs alone, these two should be equally good.

Both are lubricants, and both are quite thin and runny. Rmcoil doesn’t have Teflon in its formula, so I would pick Rem Oil over it.

Couldn’t find any proper comparison video, so let me know in the comments if you have anything.

Rem Oil vs. Hoppe’s #9

You can see that Hoppe’s No. 9 performs significantly better than Rem Oil when it comes to solvent capability.

Click the play button and see the comparison for yourself.

Side note: I’ve always liked the precision tip bottle of Hoppe’s 9. It makes the oil easy to use. You don’t get that with REM oil.

Rem Oil vs. Froglube

According to the video below, Rem Oil and Froglube perform about the same.

Get whichever is cheapest.

Rem Oil vs. Ballistol

Ballistol is generally regarded as better than Rem Oil.

They’re both mineral oils. But the difference is that:

  • Rem Oil doesn’t emulsify in water. It acts like a normal oil – you put it in the water and sticks to the surface.
  • Ballistol emulsifies in water. It will spread out in the water, and won’t rise back out on the surface. It becomes a part of the water.

So, Ballistol has an advantage.

It remains on your gun after you clean out the water. Protecting your barrel from corrosion.

Bottom Line: Performance

Rem Oil performs best you use it to wipe down the outside surface of the gun. Even though there are better all-rounder gun oils out there, Rem Oil is one of the best for rust protection.

It’s not that good for lubing the moving parts inside the gun that get heated. For the insides of your gun, you’re better off sticking with a proper CLP (such as Ballistol) or solvent (Hoppe’s #9).

Now, the next bit might be just me, but…

As I’ve mentioned above, it’s normal for Rem Oil to ‘dry’ inside your gun.

I don’t know about you but… I want to know that there is a layer of something inside my gun when I’m shooting.

And that’s just not the case with Rem Oil.

Sorry, Rem.

In a nutshell, here’s what you’re getting with Rem Oil:

  • Great friction coefficient score
  • Dries on the surface (less dirt and debris on your gun)
  • Corrosion protection – passes salt spray test according to Govt. requirements
  • Helps remove powder carbon and fouling
  • Low viscosity – soaks into small areas and metal pores
  • Cheap
  • Long-lasting

Frequently Asked Questions

Rem Oil On Wood

Can you use Rem Oil on wood?

No, you can’t use Rem Oil on wood. Be careful around the stock of your gun. What happens is that the oil will soak in and ruin the wood where it meets metal.

Gun oil will ruin the wood. Not at once. But over the years it will soak in and make the wood soft and punky.

It usually happens where the stock meets the receiver. First, the wood gets a dark stain, and then it starts getting soft.

You have to be really careful to keep gun oil off your stock. It’s a common recommendation to store your firearm muzzle-down for that exact reason.

It keeps the gun oil from running into the stock.

Side note: Storing your firearms muzzle-down is a precaution. If your gun oil runs at all, then you’re using too much of it.

Rem Oil Aerosol vs. Wipes vs. Liquid

You can buy Rem Oil in the form of:

    • Rem Oil Aerosol spray
    • Liquid
    • Wipes

All 3 contain the same Teflon formula. The only difference is the form.

Rem Oil Spray

Aerosol spray is the most common.

It’s also the one that I used to spray the outside of my gun.

In my opinion, the spray is the easiest to use.

Rem Oil Liquid

The liquid is the cheapest of the three. Straightforward to use – just put some drops on your gun and you’re set.

Be careful not to put too much.

Rem Oil Wipes

Rem Oil Pop Up Wipes are more convenient for field use. If you’re out hunting and need something to clean your firearms, these are great to keep in your shooting bag.

They’re easy to use – just wipe down your firearm with it. Down the barrel or on the surface – wherever it’s needed.

One pack comes with a dozen wipes or so. One wipe can clean more than one firearm. A common trick is to cut them in half to save money.

Note that the wipes are more expensive than the liquid and the spray.

Which ones should you get? It’s really a matter of preference. If you ask me, I’d say that the spray is the most versatile of the three. Can’t go wrong with the spray.

The Final Word

Rem Oil is alright. It’s not too bad, not too good either.

It gets the job done, but it’s too thin for:

  • Any serious firing (say AR-15)
  • Performance in hotter temperatures

Most importantly –

Rem Oil is inferior to other gun oils on the market.

So why settle for less?

I’ve used Hoppe’s #9 for years. It’s tried and proven for gun cleaning, removing powder and small amounts of copper residue.

I prefer to use Break-Free CLP for gun cleaning. It’s cheap and a large can will last you a long time.

For heavy-duty stuff, Hoppe’s #9 has never failed me.

Now…

And only after the treatment, that’s when I wipe everything down with Rem Oil.

Let me know in the comments if I missed anything, or if anything needs to be added to the article.

Sincerely Yours, Bud

What Ham Radio Should I Get? Part 1!

0

One of the most common questions we get at M.O.R.R. is, “What is the best ham radio to get?”. Which is like answering the question from your tailor of whether you dress to the left or to the right. (Btw, the correct answer is “Yes”) There are literally hundreds of awesome ham radios on the market that will do long range communications extremely well.

The big players in the radio industry are Icom, Yaesu, Kenwood, Alinco, and now Baofeng. Each company will have ham radios very similar in functionality to each other, but with slight stylistic differences. What you get to figure out is what functionalities do you want in your ham radio.

Chances are, you are just starting into ham radio and you have no clue what possibilities are even out there. So, we will help you narrow it down. We are going to go over such things as what you are doing with the ham radio, budgets, functionalities, and, in Part 2, some great ham radios that we have found work well to get you going.

Step 1: What is your Ham Radio Purpose?

First off, you need to ask yourself, “What am I going to be using the ham radio for?”. Are you going to be hiking and camping? So you may need something portable, preferably with an antenna already built into it like an HT (Handie Talkie! Think of a walkie talkie… but a little more complicated).

Maybe you are going to be backpacking away from a vehicle. So, you may want something lightweight, weather proof, and a little more power since you might be in some more remote locations.

Do you want something to install in your vehicle? Do you volunteer with a Search and Rescue team? Maybe you want something to put in your house so you can monitor nearby ham radio repeaters or trails? All of these things are going to impact what ham radio you ultimately choose. So figure out what purpose you are trying to fill before moving on to the next step.

Step 2: What Functionalities Are You Looking For In Your Ham Radio?

Ham Radio – Bands

One of the great things about ham radio as a hobby, is that there is very little oversight. Hobbyists are encouraged to dream up and create whatever they can come up with. This means that some pretty cool features make their way into ham radios sold to the mass public.

Starting at the basic things to look for, you will want to look at what band(s) the radio will operate on. Does it only operate on 2meter? Does it only operate on 70cm? Does it operate on 2m and 70cm? Maybe 3 bands? The best way to figure out your needs is figure out what ham radio repeaters are in the area that you get lost in the most.

On the left coast, 2meter repeaters are everywhere, but there are still some areas that are only covered by 70cm. On the east coast, there are more options of ham radio repeaters. The 1.25m and 6m bands are becoming more popular for backwoods adventures. (A Band is just a section of radio spectrum that tells you what frequency range the radio can operate on)

Ham Radio – Dual VFO

Having a “Dual Band” radio will go a long way to ensure that you can hit a ham radio repeater in an emergency situation. However, do not confuse “Dual Band” with “Dual VFO”. Dual VFO means that a ham radio can listen to and monitor 2 different frequencies at one time. All Dual VFO radios are Dual Band, but not all Dual Band radios are Dual VFO. Just because you can operate on two different bands, doesn’t necessarily mean you can operate on 2 different bands simultaneously.

As people who get lost regularly, we highly recommend getting a Dual VFO Ham Radio such as the Alinco DJ 500T, TYT TH-7800 Mobile Ham Radio, or the Icom IC2730A Mobile Ham Radio. Having the ability to monitor 2 frequencies simultaneously will allow you to monitor a repeater and talk to your buddies on simplex at the same time. Or listen to 2 separate ham repeaters at one time for when someone calls in.

Ham Radio – Power

How much power does the radio operate at? Most ham radio handhelds will transmit around 5 watts of power. Most mobile ham radios will operate around 50 watts of power. Most home ham radios (or base ham radios) will operate around 100 watts of power. You can find some bulletproof mobile ham radios that operate at more than 50 watts, but they will generally only be single banded like the Yaesu 3200 or Kenwood TM-281A.

You can also find a couple of ham radio handhelds out there, like the Baofeng BF-8HP 8W that do more than 5watts of power, but then you start sacrificing battery life and will need to carry extra batteries. Which, may be worth it if you are backpacking and need the extra range of more power.

Ham Radio – Crossband Repeat

One of the more useful ham radio features for the backwoods adventurer, is crossband repeat. Crossband Repeat allows you to turn your mobile ham radio into a mobile repeater! This is awesome for hiking and camping adventures. Or if you help out running communications for a bike race, or race of some sort.

A regular ham radio repeater will take your incoming signal and boost it out from a higher elevation, at a higher power. This effectively increases the range of your signal by as much as 300 miles! Sometimes though, if you are going on a day hike, you may venture outside of the signal range of your 5watt ham radio handheld as you get down into a valley near a river.

You can start the day by parking your vehicle on the ridge, and hike down into the valley. As long as your handheld ham radio can hit your vehicle, then with crossband repeat, your vehicle can then hit a repeater using its 50 watts. The repeater in return talks to your vehicle, which then talks to you off on your hike or geocaching adventure. We use this feature all the time on our TYT TH-7800 Mobile Ham Radio and Icom IC2730A Mobile Ham Radio.

Ham Radio – APRS

One great function for people that are like us and get lost regularly, is GPS. Having a GPS built into your ham radio opens up a whole new world to you called APRS (Automatic Packet Reporting System). APRS is a complex system that takes your GPS coordinates, and reports them to the internet via mini APRS repeaters called digipeaters. Digipeaters are usually placed in key locations, like mountain tops or high elevation ridges. So, if you can get yourself to the top of a ridge or mountain, you have a very high chance to hitting a digipeater.

Having your GPS coordinates and GPS track posted to the internet can come in handy when venturing out away from cell reception. If loved ones or a search and rescue team need to come find you, they will have your last known coordinates and know where to start looking.

Along with your coordinates, APRS can also send emails, send out broadcasted bulletins to others in your vicinity, and text messages!

The Garmin InReach is a neat unit that will send text messages via GPS satellites, but it charges you a monthly fee to do so. APRS works in the same way, but it also does a little more. The only down side to APRS enabled ham radios, is they will cost a little more (50-100$), but, 100% worth it when you need it.

The Kenwood TH-D72A Is an awesome outdoor, IP54 weatherproof ham radio handheld with APRS built in. And the Icom ID-5100 Mobile Ham Radio is perhaps our favorite mobile radio on the market.

Ham Radio – Repeater Book and Programming

Some other great functionalities are repeater directories and ease of programming repeaters. There is an app you can get on your phone called Repeater Book (iPhone, Android). This app has a massive directory of every repeater in the United States. The app will take your GPS coordinates from your phone and list the nearest repeaters to you.

You can then export repeaters over to your radio if it is bluetooth enabled! If you hate programming repeaters (they can be a pain! Which is why we offer our Ham Radio Programming service!), then check out some mobile ham radios like the Yaseu FTM-100DR for a nice, clean, dual band radio. Or check out the Icom 7100 Mobile Ham Radio for an all band, 100w radio that works great in vehicles.

Or, you can check out one of our favorites, the Icom ID-5100 Mobile Ham Radio and its ability to come with a repeater directory built in from the factory. It will then take your coordinates and automatically select the repeater closest to you! Very cool technology.

Ham Radio – Digital or Analog

A big question that has become more of a topic in the past couple of years is, “Do I want a digital or Analog ham radio?” If you are going to be doing any kind of backwoods adventuring, we highly recommend to stay away from digital only radios like Yaseu’s C4FM, or Icom’s D-Star. In flat lands and cities, digital works amazing. You get an always crisp, clean, clear signal no matter how far you get from the repeater or the other person you are talking to.

Analog will fade in quality as you get further away from the repeater. This sounds great in theory, but the problem is that when you do venture far enough away from the repeater that you can no longer hit it, with digital, you simply drop signal. It is like a switch, there is only on or off.

If you are in the backwoods, hiking or backpacking, this can be a huge issue because you will not get any warning when your signal is going to drop. And, if you are not paying close attention, you may not be able to figure out which direction to go in order to get your signal back.

With analog, your signal will start fading and you will be able to know when you are reaching the edge of your signal. Having a ham radio like the Yaesu FTM-100DR that does both digital and analog, can be really nice to have.

There are a few other functionalities and options that ham radios will have. Some of them include the ability to take a picture, and then send it via radio waves to someone. You can also have hands free bluetooth capabilities in your vehicle radios. You can have full colored displays with maps that overlay your gps coordinates. There are waterproof and shockproof radios. And more.

Continue onto What Ham Radio Should I Get Part 2 to see our favorite beginner ham radio picks, why we like them so much, and why you need them in your adventurous life right meow!

Step 3: The Ham Radio Options!

That’s it for Part 1! This ended up going on longer than we anticipated, so head to Part 2 to see Step 3: The Ham Radio Options! and what our radio recommendations are for the outdoors adventurer!

Continue to What Ham Radio Should I Get Part 2!

Thank you for reading! Feel free to leave any comments or questions below! If you want to keep in touch with us when we add new content, join our newsletter! We do special offers that only show up in the newsletter, so make sure you sign up below!

You can also join the community forums and ask questions and see what adventures everyone else is up to!

Join the Off Road Ham Radio Community!

Also, if you don’t have your Ham Radio Technician License, head over to our Online Ham Radio Class and study up! Remember, 15% of your class registration goes back to one of our partners!

And, of course, don’t forget to check out our MORRFlate 4 Tire Off Road Inflation Deflation™ Kit!

[mc4wp_form id=”422″]

10 Orange Mushroom Species

0

Did you find unknown orange mushrooms in your yard, in the wood, or growing on tree trunks? We made a list of 10 species of orange mushrooms to help you recognize them.

The diversity of mushrooms is impressive. Not only do they look different from species to species, but they also impress with their color variety. We can find species ranging from white to red shades to even green and blue.

In this article, we will talk mainly about several species of fungi that develop predominantly orange fruiting bodies.

Keep in mind that it’s not a good idea to try identifying mushrooms based solely on their colors. Some species may have variable colors depending on the different stages of their lives. Some may be white initially, then turn yellowish, later orange, and even reddish close to the end of their life cycle. Therefore, we recommend you pay great attention when classifying them.

IMPORTANT: The toxicity of each species of mushroom included in this article was obtained from several sources. This data and display photos may or may NOT be entirely accurate. The purpose of this article is NOT to advise whether these species of mushrooms are edible or not, but it’s intended to present fascinating facts about the numerous types of orange fungi.

Never consume any wild mushrooms unless you are 100% sure they are edible! Just because a mushroom species is labeled as “Non-Toxic” or “Non-Poisonous” in this article doesn’t necessarily mean it is edible and safe for consumption.

1. Orange Mycena (Mycena Leaiana)

Scientific NameCommon NameFamilyToxicity

Mycena leaiana is a species of mushrooms with origins in North America, but there is a related variety (Mycena leaiana var. australis) that can be seen in the woodlands of New Zealand and Australia. Other common names for mycena leaiana include the orange mycena or Lea’s mycena.

This mushroom species is usually easily distinguished by its bright orange cap with a smooth and sticky surface. Its cap is no greater than 1.5 inches (4 cm) in diameter, has a bright orange color, but this may fade as the mushroom matures. Initially, it has a bell shape but becomes convex with age and frequently forms a depression in the center.

On the underside of the cap, it has crowded orange gills with reddish-orange margins. These are almost free from the stem.

The cap is supported by long and thin stipes, also orange and covered in fine hairs.

Mycena leaiana is a saprobic species. It feeds on dead and rotting wood, leaves, and other organic matter found in the forests. Another particularity of these mushrooms is the fact that they usually grow in dense clusters on deciduous logs.

Although it is oftentimes labeled as non-poisonous, the edibility of Mycena leaiana is unknown. In the absence of any convincing studies concerning these species of mushrooms, it is not recommended their consumption.

2. Orange Peel Fungus (Aleuria Aurantia)

Scientific NameCommon NameFamilyToxicity

Aleuria aurantia is a species of fungus seen throughout Europe, South and North America, parts of Asia, Australia, and New Zealand.

This fungus develops an orange, thin fruiting body similar to a cup, or a husk, hence its popular name, “the orange peel.” When maturing, it can take on a flat or irregular shape and can reach sizes up to 4 inches (10 cm) in diameter under favorable conditions. The underside of the cap may be fuzzy, lighter in color than the top, or even whitish when the mushroom is young.

It doesn’t have a stem. It attaches directly to the ground through a thickening in the center of the cap.

Aleuria aurantia usually appears in late summer to autumn (or even in winter in warmer climates) and grows in clusters on the soil’s surface. It is frequently spotted in urban landscaped areas with disturbed soils, clays, roadside, or covered with wood chip mulches.

Aleuria aurantia is generally considered a non-toxic species and edible if cooked. However, it does not excel in flavor, and many say that it is almost tasteless. It is also quite difficult to pick because it is fragile and breaks into small fragments when touched.

Also keep in mind that there are several poisonous European species that look similar to these mushrooms, such as Caloscypha fulgens or Sarcoscypha coccinea.

3. Jack-O-Lantern (Omphalotus Illudens)

Scientific NameCommon NameFamilyToxicity

Omphalotus Illudens is a species of orange mushrooms distributed mainly in eastern North America and parts of Europe. These mushrooms are largely known as “jack-o’lantern mushrooms” due to their pumpkin-orange color and bioluminescent properties (thought to glow in the dark due to a chemical reaction, but some say that this is just a myth).

Although luminescence is not very common among mushrooms, according to PlantSnap, there are over 80 species of bioluminescent mushrooms. Through the weak light emitted in the dark, these species of fungi attract certain insects that spread their spores, hence, helping their multiplication.

Omphalotus Illudens is a saprobic fungus that feeds with dead organic matter from the forests, such as decaying stumps or dry fallen branches. It usually grows in clusters and is frequently spotted at the base of hardwood trees.

These fungi can reach fairly large sizes, especially at the group level. They are distinguished by a yellow-to-orange cap that initially has an umbrella shape which later flattens. The underside holds true non-forking gills, the same color as the cap, that run down the stem. The cap’s margins are initially curled inward but later can turn upward.

The stalk is long, has a smooth surface with a bright yellowish-orange color, darkening towards the base.

The Jack-O-Lantern mushrooms are toxic and should never be consumed raw or cooked. Unhappily, they are easily confused with edible species such as the golden chanterelle.

4. Goblet Waxcap (Hygrocybe Cantharellus)

Scientific NameCommon NameFamilyToxicity

Hygrocybe cantharellus is a species of small mushrooms found largely in the grasslands and woodlands of eastern North America, Europe, and parts of Australia. It belongs to the genus Hygrocybe (waxcaps), the family Hygrophoraceae and it’s popularly known as the Goblet Waxcap.

It has a small-size cap with a dry surface whose color can vary from light orange to reddish-orange. It does not usually exceed a few centimeters in width, initially has a convex shape, then flattens out and forms a slight depression in the center.

The cap’s edges are usually twisted inwards, slightly lighter in color, and become scalloped when aging. On the underside, it features sharp-edged pale yellow gills that run down the stem.

The stem is thin but relatively long compared to the mushroom’s size, orange in color, but pales toward the bottom.

Goblet Waxcap is considered by many to be a saprobic fungus because it sometimes grows on wood or decaying roots of plants but also thrives in areas covered with moss. It can grow both in small groups and alone.

Depending on the climate, they usually appear from late summer to late autumn.

Hygrocybe cantharellus is generally considered a non-toxic mushroom, but there is limited data on the edibility of this species to be considered entirely safe for consumption. Its reduced size can also be a downside.

5. Lobster Mushroom (Hypomyces Lactifluorum)

Scientific NameCommon NameFamilyToxicity

Hypomyces Lactifluorum, or the Lobster mushroom as it’s commonly known, is a species of parasitic fungus that develops on top of several species of mushrooms. Although it is believed to be distributed mainly in North America, there are numerous records of the existence of this fungus on several other continents.

It is popularly called the “lobster mushroom” because it has the appearance of the outer shell of a cooked lobster and a reddish-orange color.

At maturity, hypomyces lactifluorum contains its host entirely, making the original species impossible to identify visually. Studies also point that this fungus not only changes the look of its host but can also alter its chemical composition.

Among the species of mushrooms that Hypomyces Lactifluorum prefers are those of the genus Russula, Lactifluus, and Lactarius.

This fungus is usually found in hardwood and coniferous forests, places where the host mushrooms mentioned above are regularly found.

It doesn’t have always the same shape. While at times mimics the form of the mushroom species it attacks, other times, it can exercise a pretty irregular shape. The orange color and the lobster shell look covered with tiny pimples may be the best indicators to recognize the lobster mushrooms.

Lobster mushrooms are non-toxic and also edible. They are even sold in certain markets. Still, many argue that there may be situations when these parasitic fungi might become inedible.

Although they are known to only parasite particular non-poisonous species, some say that might be always a slim chance for them to infect a poisonous variety. In this case, it raises the possibility to carry on the host’s toxins.

Unfortunately, I was not able to find any solid study to confirm or disprove this fact, nor any reports of poisonings linked to hypomyces lactifluorum consumption. Therefore, I would recommend you to be cautious, and only consume these when you know the host species.

6. Woolly Chanterelle (Turbinellus Floccosus)

Scientific NameCommon NameFamilyToxicity

Turbinellus floccosus is a species of fungi growing especially in coniferous woodlands across Asia and North America. It has several popular names such as the woolly chanterelle, scaly vase, scaly chanterelle, shaggy chanterelle, and more.

Although the popular name of turbinellus floccosus often includes the term “chanterelle,” and even has some similarities in shape with mushrooms in the genus Cantharellus, they are not related.

Turbinellus floccosus appears especially in late summer and autumn and prefers humid regions with heavy rains. They can grow both individually and in small groups.

These mushrooms are mainly distinguishable through their trumpet or vase-like shape and a central depression that gets deeper when aging. The cap’s top color usually alternates depending on humidity and age and can vary from yellowish orange to a dark reddish-orange.

Instead of gills, turbinellus floccosus possess irregular pale yellow-to-cream wrinkled ridges that go down the whole stem. There is no clear separation between the cap and the stem. Sometimes, multiple fruit bodies may grow from one stipe.

Turbinellus floccosus is generally considered inedible as it is known to cause gastrointestinal problems such as nausea, vomiting, or diarrhea. However, some sources assert that the geographical region in which these mushrooms grow may determine whether or not they are edible. Apparently, those growing in the Pacific Northwest and British Columbia are toxic, while the ones from central Mexico and India are considered edible.

7. Jackson’s Slender Amanita (Amanita Jacksonii)

Scientific NameCommon NameFamilyToxicity

Amanita jacksonii is a species of mushrooms native to North America. It belongs to the family Amanitaceae, which is famous for including some of the most poisonous mushrooms, but also varieties appreciated for their flavor.

The appearance of this mushroom and its color vary depending on its maturity stage. At first, it looks like a white oval egg that rises above the ground. Later, it opens up, forming an orange or reddish-orange hemispherical cap that becomes convex and eventually flat, usually with a small cavity in the middle.

Its pigment concentrates in a central orange or reddish ring at maturity, fading to yellow toward the margins, with orange streaks on the edges.

The underneath has moderately crowded to crowded yellow to yellow-orange gills, free from the stem or slightly attached. It also presents subtruncate to truncate short gills.

A long and slim yellow stem supports the cap, often sprinkled with orange spots at the surface. At the base, you can often see white remnants of the original coating.

Amanita jacksonii is non-toxic and even labeled as edible by various sources. However, there are several deadly Amanita species similar to them. Hence, there is a significant risk of misidentifying this mushroom and ending up consuming a poisonous one.

8. Eyelash Cup (Scutellinia Scutellata)

Scientific NameCommon NameFamilyToxicity

Scutellinia scutellata is a saprobic fungus species found in many regions of the world. It is, in fact, one of the most widespread fungi in the world.

Besides the scientific name, it is also known as the Eyelash cup, Molly eye-winker, or the Common eyelash fungus.

It produces a small fruiting body which is generally seen growing in small groups on rotting wood or on soggy soil. It thrives in swampy environments where there is humidity constantly.

Scutellinia scutellata is easily recognizable due to its oily wet look, bright orange or reddish color, cup shape or flattened, and margins covered with stiff hairs, similar to an eyelash.

Depending on the climate, it can be noticed from late spring to late fall, and sometimes even in winter or spring.

We did not find data regarding the toxicity of Scutellinia scutellata, but most sources seem to indicate that it is not edible.

9. The Orange Bonnet (Mycena Acicula)

Scientific NameCommon NameFamilyToxicity

Mycena acicula, ordinarily known as the coral spring Mycena or orange bonnet, is a species of miniature mushrooms found throughout Asia, Europe, North America, and the Caribbean.

This species of fungus is mainly identified by the small size of its fruiting body, along with several particularities.

The orange bonnet has the classic mushroom look, with an orange-red cap that presents gills underneath and which is supported by a leg. Even at maturity, the cap rarely grows more than 0.4 inches (1cm).

Initially, the cap is hemispherical, later gets a bell shape, and eventually becomes convex. Its surface becomes smooth with the age and shows streaks leading to the edges.

The stem is relatively long compared to the overall size and does not usually exceed 2-2.5 inches (5-6 cm) in length.

These tiny mushrooms grow solitary in wet environments. Are often found on hardwood and conifer twigs or buried under the top layer of the leaf litter. They usually make their presence from late autumn to mid-winter and usually in spring in mountainous regions.

It is not known exactly if these mushrooms contain any toxic chemicals, but they are considered inedible due to their small size.

10. The Golden Trumpet (Xeromphalina Campanella)

Scientific NameCommon NameFamilyToxicity

Xeromphalina campanella is a saprobic species of mushrooms native to North America. It is known by several names such as the golden trumpet, Omphalina bell, or fuzzy foot.

The mushroom is observed in coniferous forests, usually growing in dense clusters on rotting logs and stumps. It is a small mushroom, but it cannot easily go unnoticed due to the fact that it almost always grows in large groups.

The cap of xeromphalina campanella has an umbrella shape when young, then its margins widen and rise, forming a central depression. Its color ranges from brownish yellow to orange. On the underside, it has well-spaced gills that run down the stem. These range in color from pale yellow to orange.

The stalk is thin, light orange near the cap, and brownish to yellow towards the base, which is covered with fine yellow or brown hairs, hence its common name “fuzzy foot.”

Although it is generally considered non-toxic, most sources label Xeromphalina campanella as inedible.

Final Word

This is just a tiny selection of the orange mushrooms that you can observe throughout various regions of the world. Because of their orange color, they are often easily observable in the green grass, growing on trees’ trunks, on decaying wood stumps, on the forest floor, or even in your yard or garden.

We hope you found this list helpful and assist you in identifying mushrooms with this particularity.

Several other species of fungi that produce orange fruiting bodies are:

  • Cantharellus cinnabarinus
  • Cystodermella cinnabarina
  • Entoloma quadratum
  • Gliophorus perplexus
  • Gymnopilus sapineus
  • Gymnosporangium juniperi-virginianae
  • Pycnoporellus fulgens
  • Pycnoporus cinnabarinus
  • Tylopilus balloui
  • Laetiporus cincinnatus

Since you have reached the end of the article, you may also be interested in our selection of 10 yellow mushroom species or 10 red mushroom species.

Please do not eat any species of mushrooms based only on the information presented in this article! Always consult a specialist before determining whether a mushroom is safe for consumption or not.

10mm Auto vs .454 Casull Ammo Comparison – Ballistics Info & Chart Caliber Ballistics Comparison 07 Dec, 2018 Posted By: Foundry Outdoors The following ammunition cartridge ballistics information and chart can be used to approximately compare 10mm Auto vs .454 Casull ammo rounds. Please note, the following information reflects the estimated average ballistics for each caliber and does not pertain to a particular manufacturer, bullet weight, or jacketing type. As such, the following is for comparative information purposes only and should not be used to make precise predictions of the trajectory, performance, or true ballistics of any particular 10mm Auto or .454 Casull rounds for hunting, target shooting, plinking, or any other usage. The decision for which round is better for a given application should be made with complete information, and this article simply serves as a comparative guide, not the final say. For more detailed ballistics information please refer to the exact round in question or contact the manufacturer for the pertinent information. True 10mm Auto and .454 Casull ballistics information can vary widely from the displayed information, and it is important to understand that the particular characteristics of a given round can make a substantive difference in its true performance. Caliber Type Velocity (fps) Energy (ft-lb) 10mm Auto Handgun 1200 550 .454 Casull Handgun 1600 1700 [Click Here to Shop 10mm Auto Ammo] [Click Here to Shop .454 Casull Ammo] Velocity As illustrated in the chart, 10mm Auto rounds – on average – achieve a velocity of about 1200 feet per second (fps) while .454 Casull rounds travel at a velocity of 1600 fps. To put this into perspective, a Boeing 737 commercial airliner travels at a cruising speed of 600 mph, or 880 fps. That is to say, 10mm Auto bullets travel 1.4 times the speed of a 737 airplane at cruising speed, while .454 Casull bullets travel 1.8 times that same speed. Various calibers Energy Furthermore, the muzzle energy of a 10mm Auto round averages out to 550 ft-lb, while a .454 Casull round averages out to about 1700 ft-lb. One way to think about this is as such: a foot-pound is a unit of energy equal to the amount of energy required to raise a weight of one pound a distance of one foot. So a 10mm Auto round exits the barrel with kinetic energy equal to the energy required for linear vertical displacement of 550 pounds through a one foot distance, while a .454 Casull round exiting the barrel has energy equal to the amount required to displace 1700 pounds over the same one foot distance. As a rule of thumb, when it comes to hunting, muzzle energy is what many hunters look at when deciding on what caliber of firearm / ammunition to select. Generally speaking, the higher the muzzle energy, the higher the stopping power. Again, the above is for comparative information purposes only, and you should consult the exact ballistics for the particular 10mm Auto or .454 Casull cartridge you’re looking at purchasing. [Buy 10mm Auto Ammo] [Buy .454 Casull Ammo] Please click the above links to take a look at all of the 10mm Auto and .454 Casull ammo we have in stock and ready to ship, and let us know any parting thoughts in the comment section below. Foundry Outdoors is your trusted home for buying archery, camping, fishing, hunting, shooting sports, and outdoor gear online. We offer cheap ammo and bulk ammo deals on the most popular ammo calibers. We have a variety of deals on Rifle Ammo, Handgun Ammo, Shotgun Ammo & Rimfire Ammo, as well as ammo for target practice, plinking, hunting, or shooting competitions. Our website lists special deals on 9mm Ammo, 10mm Ammo, 45-70 Ammo, 6.5 Creedmoor ammo, 300 Blackout Ammo, 10mm Ammo, 5.56 Ammo, Underwood Ammo, Buffalo Bore Ammo and more special deals on bulk ammo. We offer a 100% Authenticity Guarantee on all products sold on our website. Please email us if you have questions about any of our product listings. Leave a comment Comments have to be approved before showing up Your Name * Your Email * Your Comment * Post Comment

0

The following ammunition cartridge ballistics information and chart can be used to approximately compare 10mm Auto vs .454 Casull ammo rounds. Please note, the following information reflects the estimated average ballistics for each caliber and does not pertain to a particular manufacturer, bullet weight, or jacketing type. As such, the following is for comparative information purposes only and should not be used to make precise predictions of the trajectory, performance, or true ballistics of any particular 10mm Auto or .454 Casull rounds for hunting, target shooting, plinking, or any other usage. The decision for which round is better for a given application should be made with complete information, and this article simply serves as a comparative guide, not the final say. For more detailed ballistics information please refer to the exact round in question or contact the manufacturer for the pertinent information. True 10mm Auto and .454 Casull ballistics information can vary widely from the displayed information, and it is important to understand that the particular characteristics of a given round can make a substantive difference in its true performance.

Caliber Type Velocity (fps) Energy (ft-lb) 10mm Auto Handgun 1200 550 .454 Casull Handgun 1600 1700

Velocity

As illustrated in the chart, 10mm Auto rounds – on average – achieve a velocity of about 1200 feet per second (fps) while .454 Casull rounds travel at a velocity of 1600 fps. To put this into perspective, a Boeing 737 commercial airliner travels at a cruising speed of 600 mph, or 880 fps. That is to say, 10mm Auto bullets travel 1.4 times the speed of a 737 airplane at cruising speed, while .454 Casull bullets travel 1.8 times that same speed.

Various calibers

Energy

Furthermore, the muzzle energy of a 10mm Auto round averages out to 550 ft-lb, while a .454 Casull round averages out to about 1700 ft-lb. One way to think about this is as such: a foot-pound is a unit of energy equal to the amount of energy required to raise a weight of one pound a distance of one foot. So a 10mm Auto round exits the barrel with kinetic energy equal to the energy required for linear vertical displacement of 550 pounds through a one foot distance, while a .454 Casull round exiting the barrel has energy equal to the amount required to displace 1700 pounds over the same one foot distance. As a rule of thumb, when it comes to hunting, muzzle energy is what many hunters look at when deciding on what caliber of firearm / ammunition to select. Generally speaking, the higher the muzzle energy, the higher the stopping power. Again, the above is for comparative information purposes only, and you should consult the exact ballistics for the particular 10mm Auto or .454 Casull cartridge you’re looking at purchasing.

Please click the above links to take a look at all of the 10mm Auto and .454 Casull ammo we have in stock and ready to ship, and let us know any parting thoughts in the comment section below.

Foundry Outdoors is your trusted home for buying archery, camping, fishing, hunting, shooting sports, and outdoor gear online.

We offer cheap ammo and bulk ammo deals on the most popular ammo calibers. We have a variety of deals on Rifle Ammo, Handgun Ammo, Shotgun Ammo & Rimfire Ammo, as well as ammo for target practice, plinking, hunting, or shooting competitions. Our website lists special deals on 9mm Ammo, 10mm Ammo, 45-70 Ammo, 6.5 Creedmoor ammo, 300 Blackout Ammo, 10mm Ammo, 5.56 Ammo, Underwood Ammo, Buffalo Bore Ammo and more special deals on bulk ammo.

We offer a 100% Authenticity Guarantee on all products sold on our website. Please email us if you have questions about any of our product listings.

Best Air Rifle Deals

Popular Posts

What Is An Air Rifle?

0
If you have stumbled upon this article, chances are that you probably have a pest problem at your house. This is a very common...

PCP vs Spring Piston: Which one is better?

0
When reading about guns in the search for the first one that would be perfect for you, an age-old debate comes into question. Should...

Synthetic vs Wood Stock: The Final Showdown Between Brunette And Blonde

0
I understand that you’re here to get some quick facts on synthetic vs wood stocks Probably to guide your purchase.  Quick alert - the debate...