Home Blog Page 134

5 Ways to Use Duck Poop to Enrich Your Edible Landscape Soil

0

There are so many reasons to want to add ducks to your homestead – ease of care, eggs, meat, insect control, and entertainment, to name a few.

For me, though, one of the most incredible things about raising ducks is how much they poop. Yes – I know, this isn’t something most people talk about (at least not in public). But, if you are a homesteader and growing your food, finding good sources of fertilizer for your garden and edible landscapes is a top priority.

So, I say yahoo for duck poo! And here’s why:

  1. Quantity: You get about 0.065 pounds of poop per day, per pound of laying chicken. But you get 0.11 pounds of poop per pound of duck per day. Although it may not sound like a big difference, if you have ten ducks that are 6 pounds each, that means 6.6 pounds of manure per day on average. The same 60 pounds worth of laying hens gets you 3.9 pounds of poop per day. In a year, using ducks as a source of fertilizer, you get almost 1000 pounds more duck poop from a similarly sized flock.
  2. Nutrient Content: Almost all livestock manure is awesome for your garden (so long as the animals were raised well), but duck poop is the bomb! Duck poop is basically like a 2.8:2.3:1.7 NPK fertilizer. According to the same source, no other livestock manure has NPK ratio this high. The closest one is turkey with 2.8/2.4/1.2 but with less poop per pound per day. This means with duck you get the most poop per day and you need the least poop to get the same level of fertilizer.
  3. Dispersal: Duck poop is more liquid than other forms of manure which mean between regular rain and ducks plodding over it, duck manure disperses very quickly into the soil.

Now that you know why duck poop is such a powerful source of fertilizer on the homestead let’s talk about a few ways to use it.

Ways to Use Duck Poop to Fertilize Your Garden

Method 1: Edible Access

Edible Access

Letting your ducks wander directly through your edible landscapes is an excellent way to spread the ‘goodness’ with minimal work on your part. But there are a few things you need to know though.

Ducks need direction. They are creatures of habit, and if you just let them have total access to your landscape at all times, they will forage a bit. Then they’ll spend the rest of their day lounging out in their favorite places. If they are allowed to lounge too long in any one area, they overload areas with poop and stifle plant growth.

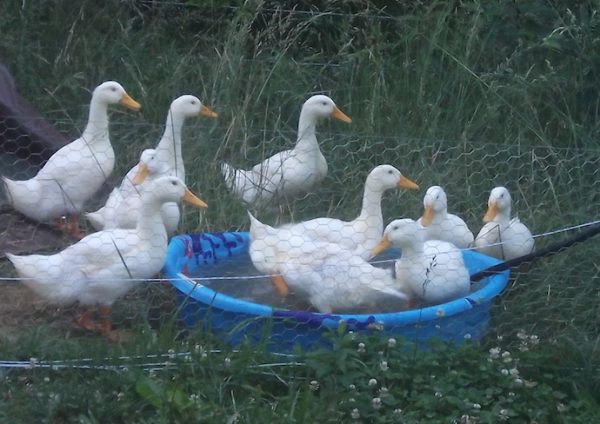
If you want to move ducks around your landscape, get them in the habit of following you to a new area every few days using a feed bucket. Fill kiddie pools with water and set them in that location to encourage ducks to stick around. Make sure there are shaded areas and sunny spots so ducks can be comfortable.

Sometimes just moving their food and water sources to new areas, full of fresh weeds and bugs, will be enough to direct their droppings. However, if you happen to have a large pond or more alluring spaces that might tempt ducks away from their work, then you will have to use temporary fencing to keep ducks where you want them.

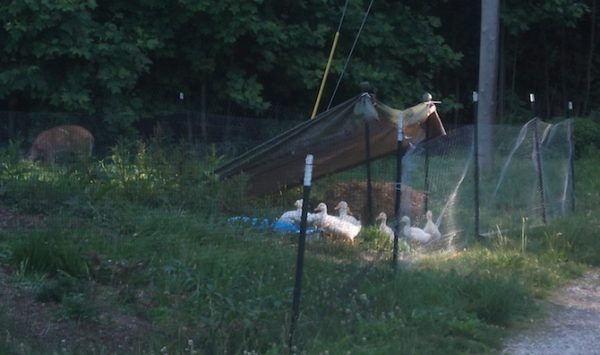
When using ducks in undeveloped areas with no shade, you can create temporary shelters using straw bales, stakes, and tarps.

Electric poultry netting works well so long as you have an excellent charger. Ducks are heavily feathered and tend to be more resistant to shock discouragement than other kinds of livestock.

For birds that don’t fly well, just putting up inexpensive plastic netting (e.g. the 100-foot rolls you can get for deer protection) around garden stakes can also work well to keep most of your ducks contained. Since ducks tend to stick together, as long as most of them stay in the designated areas, even escape artist ducks will linger close to the confinement area.

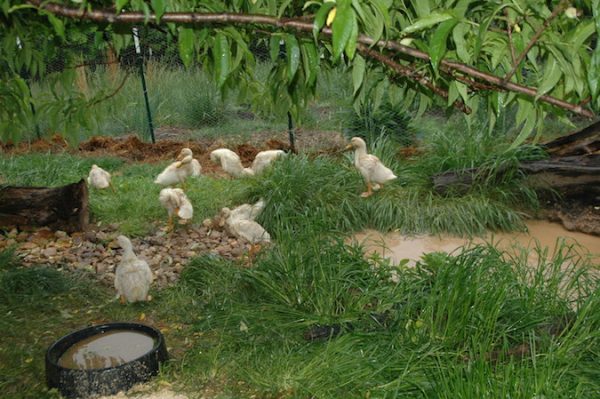
This method works best in established edible landscapes with mature plants, for example under fruit trees. It also works well to develop new areas that have not yet been planted. Avoid letting ducks wander among newly planted areas as disturbed soil encourages them to dig for insects with their beaks. Ducks also tend to trample tender plants.

Method 2: Water Your Growing Areas with Pond Water

Ducks in Kiddie Pool

If you have a permanent pond that ducks swim and poop in, you can usually directly water your garden and edible landscape areas with your pond water. You can simply dip a bucket and dump it where you need it. Or you can get a bit more sophisticated and use gravity or pumps to do the work for you.

If you are just getting started and can choose where to site your duck pond, aim high. If your pond is higher than the rest of your landscape, you can use gravity to do the work of moving duck water for you.

One of our ponds sits uphill from our garden. We have a flock of ducks that live on and around that pond during the growing season. All we have to do to move water from the pond to our garden, is put one end of a hose in our pond, create a suction to draw out the water, and then let it run downhill to our garden.

We’re super low-tech around here. So we connected our pond hose to our house hose bib. We turned on the water from our house and let it run until it was pouring out at the pond. Then we turned off the water at the house which then began to draw back the water from the pond. We quickly connected our hose to a float valve. The float valve keeps that suction we created on all the time.

We put the float valve on a 55-gallon drum, so we always have a ready supply of water in the garden. We can also just take off the float valve and directly water our garden using the hose any time we want. Then we can reconnect the float valve to stop the flow and keep the suction going.

If you don’t have a high pond, then you’ll have to look into pumps. Electric, gas, and even human-powered pumps can all work. You just have to do some research to make sure you get the right pump to move water over both the distance and elevation change to your edible landscape locations.

Kiddie ponds can be emptied daily directly under fruit trees and other established plants.

Method 3: Compost your Duck Litter

I confine my ducks at dusk until about 9:00 am to collect their eggs and keep them safe from predators. It also makes it easier for me to collect their overnight manure.

As we mentioned earlier, duck poop is a bit runny. So, you can’t just scrape and sweep it up like you can with chickens. Given the quantity produced, you’re going to need a lot of litter to keep your ducks from dancing in doo each night. But that’s OK because:

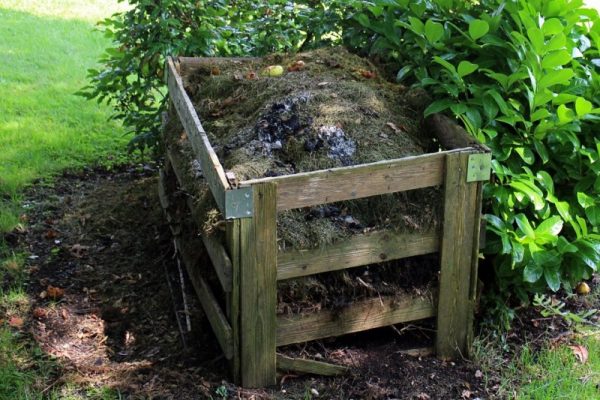
Litter + Poop = Compost

Since hay grows well in my area, is super cheap, and is almost always minimally sprayed, I use hay as duck litter. It takes about one square bale of hay each week for 20 ducks.

Each morning when I let the ducks out, I dump their water around their duck house to more evenly disperse their manure. I layer on about an inch of fresh hay. Straw, wood shavings, and sawdust will also work.

At night, I fill their water and food bowls and close the ducks in at night. The next day I dump the water and apply hay. I do this for about two weeks. Then I use a pitchfork and move all that manured hay into a compost pile. I usually just build the pile to about 4 feet high by 4 feet wide and let it sit there for six months until it is mostly black and crumbly.

Method 4: Don’t Want to Build a Pile? Go Mobile!

Ducks Under Peach Trees

If pitchforking poop is not your thing, then think about a mobile duck coop. Ducks don’t like to climb ramps and roost high as chickens do. So consider using a movable chain link cube with wheels and a tarp top as a duck house alternative.

You can just let ducks have the floor overnight. Add in a couple of movable nest boxes (or not since ducks don’t necessarily use them anyway), and you’re set!

Put your coop in place. Use the same procedure detailed above for a fixed coop. Then after two weeks move your coop. Leave all that good stuff in place, and come back and plant in it a month later.

If you have a lot of predator pressure, consider an electric fence to protect your ducks at night better.

Method 5: Duck and Cover (Crops)

Pekins

If your land is light on organic matter, consider using ducks to help you with your cover cropping. After using either the Go Mobile or the Edible Access method, plant your cover crops.

When you would normally bring in the mower to chop and drop all those cover crops, instead bring back the ducks. The ducks will eat your cover crops, apply more poop, and smother whatever they don’t eat. Then you can move the ducks off, plant your next round cover crop and repeat. If you do this several times, you’ll build soil mass in a hurry and help cut your duck feed costs as well.

Make sure you plant things that are edible for your ducks. Most cover crops are, but do a little research just to be sure. Buckwheat, hard winter wheat, tillage radishes, mustard, rye, Austrian peas, and clovers all work well.

I don’t know about you, but I think all these great ways to use duck poop around the homestead are worth crowing about! So, say it with me…

DUCK-ER-DOO-DLE-DOO!!

5 Strategies for Beating Windy Weather Gobblers

0
5 Strategies for Beating Windy Weather Gobblers

How to hunt spring turkeys when the wind blows and blows and blows. (Photo by Lynn Burkhead)

  • Click here for more articles on turkey hunting from Game & Fish

To be honest, it was the kind of day that I’d just as soon stayed at home and taken an overdue nap, even if the calendar was quickly running out of days to spring turkey hunt.

But instead, I dutifully got up and dressed in my camo duds, heading for the door and an afternoon turkey hunt with my longtime hunting pal Doug Rodgers as we headed west to his North Texas turkey lease.

I’ll admit, I wasn’t optimistic. In fact, if it weren’t for the prospect of some late-evening enchiladas at a nearby Tex-Mex place, I might not have even gone. Why? The wind, that’s why.

If you’ve ever hunted anywhere near the Great Plains, you know exactly what I’m talking about, heading out for a hunt when the wind blows and blows and blows.

Turning the weatherman’s anemometer at 25 miles per hour—or more—the southerly gale promised to pump up the atmosphere with unstable Gulf of Mexico moisture and make hearing a gobbler all but impossible.

Add in atmospheric instability from an approaching late-spring cold front, and the day was ripe for severe thunderstorms, hail stones, and tornadoes.

But not heavily bearded and long-spurred Rio Grande gobblers.

Stout wind or not, and tornado weather or not, Rodgers was determined to put yours truly on a good-sized gobbler that afternoon to help end a long drought on my turkey hunting scorecard.

Like a card shark with a couple of aces up his sleeve, the Whitesboro, Texas, resident had a good idea of when and where the birds might be moving about on that howling April afternoon.

Windy-Turkeys
While the wind can be problematic for spring turkey hunters, one way to combat heavy breezes that steal away turkey gobblers is to hunt areas with heavy signs of turkey presence and travel. Even if you can’t readily hear the birds on a breezy day, you can patiently hunt them secure in the knowledge that you’re in a good area that should produce gobbler movement sooner or later. (Photo by Lynn Burkhead)

Armed with a custom-built Lamar Williams boat paddle box call, Rodgers kept working that wild turkey music maker to noisy perfection, eventually striking up a couple of longbeard toms that could hear our loud calling even if we could barely hear their gobbling responses.

In fact, at one point, the biggest tom of the pair actually seemed to come off his feet as he gobbled aggressively in response to Rodger’s calling on the box call. But a gust of wind tore the music away from our ears and we couldn’t hear a syllable of the old boy’s response even if our eyes told us otherwise.

Windy-Turkeys
Warm, windy days are a part of a Great Plains spring turkey season. But deciding to ignore the conditions that make hearing a gobbler next to impossible and going anyway can keep putting a hunter in a position to eventually be successful. (Photo by Dakota Stowers)

Less than a half-hour later, our game of wild-and-windy chess was over as I tagged the Rio Grande bird and Rodgers was putting another mental mark on his paddle call, the kind of wind-defeating instrument that Williams, a Starke, Fla., resident trained by the late great turkey call maker Neil Cost, specializes in turning out each year.

In fact, I’ve never been on a spring turkey hunt before or since with Rodgers where that butternut-and-cedar musical instrument wasn’t tucked away carefully in his turkey-hunting vest.

Truth be told, even if you hunt somewhere else outside of Texas, big winds are a common enemy of turkey hunters everywhere each spring, something that hunters all across the country have to battle in order to tag a longbeard.

One such hunter is Matt Morrett, friend of country music superstar Blake Shelton and a well-known hunting celebrity himself in TV shows, Facebook videos, and YouTube content put out by companies like Hunter Specialties, Avian-X Decoys and Zink Turkey Calls, among others, companies he formerly worked for.

A former world champion turkey caller, nowadays Morrett is the marketing director for the Pennsylvania Game Commission. In addition to promoting the outdoors in his home state every day, he still finds plenty of time to get out and chase longbeards.

With lots of Keystone State experience, as well as travels all across the country, Morrett—always one of my favorite interviews when it comes to turkey hunting—has seen the best and worst that the springtime chase of longbeards has to offer. And more than once, he’s felt the curse of the springtime wind as it blows across his neck.

Windy-Turkeys
When the wind blows hard and heavy on a spring day, it’s tough to hear turkeys gobbling. One way to combat the wind is to use terrain features on a piece of hunting ground to get below the worst of the wind so that you can hear longbeards sound off better. (Photo by Lynn Burkhead)

“I’ve (been) to Alabama before where you get a cold front through and they just shut down,” said Morrett in an interview we had a couple of years ago. “I mean their mouths are shut. I think wind is the toughest thing about hunting any wild animal.”

But windy day or not, the annual spring game isn’t put on hold, at least from a wild turkey’s point of view.

“It’s not that they’re not trying to find hens, not that they’re not gobbling, not that they’re not trying to breed,” said Morrett. “But there’s so many things that go against you (as a turkey hunter) when it’s windy.”

“That’s because a turkey can’t see as well and he’s definitely jittery because he can’t hear as well.”

So how does a turkey hunter combat windy day gobblers in Texas, Alabama, or somewhere else?

Windy-Turkeys
Wait, was that a gobble?!? One of the hardest parts of spring turkey hunting is finding success on windy days where it can be tough to hear even the loudest longbeard sound off. But by putting a few tips into motion, you can tag a trophy tom, even as the wind blows and blows and blows. (Photo by Lynn Burkhead)

1. Make Loud Calls

First, by being armed with a loud call that can cut through the building gale, one like the Lamar Williams boat paddle box call mentioned above or something like a Zink Turkey Calls Wicked Series crystal call.

The latter, a pot style friction call made of Brazilian cherry wood, utilizes the injection of acrylic into the wood and a crystal surface that offers top end high-pitch raspy calls that are loud and reach out to gobblers at a longer range than many other calls do.

2. Find the Sign

A second key to tagging a mature longbeard when the wind is howling is to do what Rodgers and I did years ago, and that’s to put yourself into areas where turkeys are known to roost, travel, feed, and breed. If the area is lousy with sign ranging from loose feathers to tracks to droppings to scratches in the dirt where gobbler wings have been dragging as big toms strut about, a good tip is to park your fanny there and wait.

Because no matter what the spring conditions are — from a snowstorm like the one that assaulted midwestern turkey grounds this week to triple-digit heat that is only days away in Texas, from drought to thunderstorms, from dead calm conditions to a hurricane-like gale — turkeys are going to continue to do what turkeys do each spring.

“Hens are going to go to the gobblers, they’re going to try to find food and they are going to try to find water,” said Morrett.

3. Use the Wind

A third tactic is to use the wind and put it in your favor while hunting. Eddie Salter, former host of Turkey Man on the Sportsman Channel and a turkey calling champion of great renown, follows a similar strategy when battling windy day gobblers, especially after the passage of a spring cold front.

That strategy centers around loud, aggressive calling and moving into the wind so that the sounds that a wild turkey gobbler makes will travel to the hunter’s ears and not be torn away from them.

4. Use the Terrain

A fourth strategy is to use the terrain to your advantage, seeking to use the wild turf in an effort to help keep the wind’s ill effects a bit tamer. While this isn’t easy in plains territory, it can be more effective in wooded areas, creek bottoms, and hilly terrain where the lay of the land can actually help you hear what’s going on a little better.

“What I try to do is get into an area where I know the birds are at and keep moving,” said Salter. “And if I can, (in hilly terrain) I try to stay down below them. That way, if I can get a bird to gobble, chances are that I may hear him.”

5. Just Go Hunting

And finally, a fifth strategy to employ is to simply get up and go hunting like I did earlier in this wild-turkey tale, even if it’s going to be a windy day. Because the bottom line is that hearing a gobbler on a blustery day means that the battle is already half won. For when the wind blows hard, any gobbler that is close enough to be heard is not very far away.

Armed with a good call and with any sort of springtime luck, the next sound that a hunter hears in the turkey woods might not be a lusty gobble, but it could be the sound of a very loud shotgun going Boom!

Even if that sound is quickly drowned out by the noise of the springtime wind as it blows and blows and blows. But you won’t mind at all as you smile and reach for the turkey tag about to be pulled from your back pocket.

What Do Fawns Eat?

0

“Unraveling the Dietary Habits of Fawns: Exploring What These Delicate Creatures Consume for Nourishment”

1. “Exploring the Dietary Habits of Fawns: What Do They Eat?”

Fawns, which are young deer, have specific dietary habits that play a crucial role in their growth and development. These adorable creatures primarily rely on their mother’s milk during the early stages of their lives. The milk provides them with essential nutrients and antibodies necessary for their survival. This initial diet ensures that fawns receive a balanced intake of proteins, fats, and carbohydrates to support their rapid growth.

As fawns grow older, they gradually transition from a milk-based diet to consuming solid foods. Their diet expands to include a variety of vegetation such as grasses, leaves, buds, and shoots. Fawns are known to be selective feeders and may prefer certain plant species over others based on availability and palatability. Additionally, they may also consume fruits when available.

Dietary Adaptations

Fawns have evolved certain dietary adaptations that allow them to thrive in various habitats. For instance, they possess specialized digestive systems that enable them to efficiently extract nutrients from plant material. Their multi-chambered stomachs aid in breaking down cellulose-rich food sources like grasses.

Furthermore, fawns exhibit browsing behavior by selectively feeding on tender shoots and leaves rather than consuming large quantities of coarse vegetation. This behavior not only helps them obtain the necessary nutrients but also reduces the energy required for digestion.

In summary, understanding the dietary habits of fawns is crucial for conservation efforts and managing their populations effectively. By studying their feeding preferences and adaptations, researchers can gain insights into the availability of resources in different habitats and make informed decisions regarding habitat preservation and management strategies.

2. “Unveiling the Culinary Preferences of Fawns: A Guide to Their Diet”

The Delicate Palate of Fawns

Fawns, the young offspring of deer, have a unique and delicate palate when it comes to their diet. Their culinary preferences are shaped by their natural instincts and the availability of food sources in their environment. While adult deer primarily consume plant-based diets, fawns have specific dietary needs that cater to their growing bodies.

One of the key components of a fawn’s diet is milk. Just like human babies, fawns rely on their mother’s milk for nourishment during their early stages of life. The milk provides them with essential nutrients and antibodies that help strengthen their immune system. As they grow older, fawns gradually transition from a milk-based diet to a more diverse range of foods.

A Varied Menu for Growing Fawns

As fawns mature, they start exploring various food options to meet their nutritional requirements. Their diet expands to include tender shoots, grasses, and leaves from different plants. They particularly enjoy consuming succulent vegetation such as clover and alfalfa, which provide them with important vitamins and minerals.

In addition to plant matter, fawns also incorporate small amounts of insects into their diet. These tiny creatures offer an additional source of protein that aids in muscle development and growth. Fawns may feed on beetles, ants, and other small insects found in their surroundings.

Overall, understanding the culinary preferences of fawns is crucial for ensuring their proper growth and development. By providing them with a balanced diet that includes milk, plant matter, and occasional insect protein, we can support these young deer in reaching adulthood healthily.

3. “Feeding Time for Fawns: Understanding What They Nibble On”

Fawns, the young offspring of deer, have specific dietary needs during their early stages of life. Understanding what they nibble on is crucial for their proper growth and development. Fawns primarily rely on their mother’s milk for the first few weeks of their lives, as it provides essential nutrients and antibodies to boost their immune system. However, as they grow older, fawns gradually transition to solid foods.

What do fawns eat?

1. Grass and Forage: As fawns start weaning off milk, they begin to explore their surroundings and graze on grasses and other types of forage. These young deer often prefer tender shoots and leaves found in meadows or open fields.

2. Browse: Fawns also consume browse, which refers to the twigs, buds, and leaves of woody plants such as shrubs and trees. They may nibble on low-hanging branches or fallen leaves from a variety of vegetation available in their habitat.

3. Acorns and Nuts: Depending on the season and geographical location, fawns may have access to acorns or nuts from trees like oaks or beeches. These provide an additional source of nutrition that helps them meet their energy requirements.

4. Agricultural Crops: In some cases, fawns may venture into agricultural areas where they can find crops like soybeans or corn. While these food sources are not natural for deer, they can become a part of their diet if easily accessible.

It is important to note that while these are common food sources for fawns, their exact diet can vary based on factors such as geographic location, seasonal availability, and the overall health of the ecosystem they inhabit. Providing a diverse range of natural food options within their habitat ensures that fawns receive a balanced diet for optimal growth and survival.

4. “The Nutritional Needs of Fawns: Discovering Their Food Choices”

Fawns, or young deer, have specific nutritional needs that are crucial for their growth and development. Understanding their food choices is essential in ensuring their health and survival in the wild.

Fawn’s Dietary Requirements

Fawns primarily rely on their mother’s milk for the first few weeks of their lives. This milk provides them with essential nutrients, antibodies, and hydration. As they grow older, fawns gradually transition to solid foods. They start nibbling on grasses, leaves, and tender shoots found in their natural habitat. These plant-based foods provide the necessary fiber and carbohydrates for their developing digestive systems.

However, it is important to note that fawns also require protein-rich foods for optimal growth. They obtain this protein from sources such as insects, small mammals, and bird eggs. These animal-based foods supply them with vital amino acids necessary for muscle development and overall health.

To support the dietary needs of fawns, it is crucial to ensure a diverse range of food sources within their habitat. Maintaining healthy ecosystems with a variety of plants and insects will provide fawns with an adequate supply of nutrition throughout their early stages of life.

Overall, understanding the nutritional needs and food choices of fawns plays a significant role in conservation efforts. By preserving their natural habitats and promoting biodiversity within these environments, we can ensure that these young deer have access to the necessary nutrients for a healthy start in life.

5. “From Grass to Leaves: Unraveling the Food Selection of Fawns”

5. "From Grass to Leaves: Unraveling the Food Selection of Fawns"

Fawns, the young offspring of deer, undergo a fascinating transition in their food selection as they grow. This study aims to uncover the factors that influence fawn’s dietary preferences and shed light on their nutritional needs during different stages of development.

Factors influencing food selection

Several factors contribute to the food selection of fawns. One key factor is availability; fawns tend to consume what is most abundant in their environment. For instance, during the early stages of life, when grasses are easily accessible and highly nutritious, fawns primarily feed on grass. As they mature, however, their diet shifts towards leaves from shrubs and trees, which provide a wider range of nutrients necessary for growth.

Another important factor is taste preference. Fawns have been observed to exhibit selectivity based on taste, showing a preference for certain plant species over others. This indicates that individual fawns may have unique preferences when it comes to food choices.

Furthermore, maternal influence plays a role in shaping fawn’s food selection. The mother deer’s diet during pregnancy and lactation can affect the composition of her milk and subsequently impact the preferences of her offspring. If a doe consumes a variety of plants during these periods, it can expose her fawn to different tastes and increase its acceptance of diverse foods later in life.

Understanding the factors that drive the food selection of fawns provides valuable insights into their nutritional requirements at different developmental stages. It also highlights the complex interplay between environmental factors, individual preferences, and maternal influences in shaping an animal’s dietary choices throughout its life cycle. Further research in this area can contribute to wildlife management strategies aimed at ensuring optimal nutrition for growing populations of deer and other herbivorous species.

6. “Cracking the Menu Code: Decoding the Feeding Habits of Fawns”

6. "Cracking the Menu Code: Decoding the Feeding Habits of Fawns"

Fawns, the adorable young offspring of deer, have unique feeding habits that researchers have been trying to understand for years. In recent studies, scientists have made significant progress in decoding the menu code of these curious creatures.

The Importance of Milk

One key aspect of fawn feeding habits is their reliance on milk as their primary source of nutrition. For the first few months of their lives, fawns depend entirely on their mother’s milk for sustenance. This high-fat and nutrient-rich diet is crucial for their growth and development. Researchers have found that fawns consume milk multiple times a day, typically nursing from their mothers in short intervals.

Transitioning to Solid Food

As fawns grow older, they gradually transition from a milk-only diet to consuming solid food. This process usually begins when they are around two to three months old. During this time, fawns start nibbling on vegetation such as grasses and leaves alongside their milk intake. As they become more adept at chewing and digesting plant matter, solid food gradually becomes a larger part of their diet.

Understanding the feeding habits of fawns is essential for wildlife conservation efforts and managing deer populations effectively. By deciphering how these young deer obtain nutrients and adapt to different food sources throughout their early life stages, researchers can develop strategies to ensure optimal nutrition and survival rates among fawn populations.

Is Magnet Fishing Legal In California?

0

Magnet fishing in California is a bit of a grey area. There is no specific law against it, but there are laws against trespassing and littering that could be applied. So technically, magnet fishing is illegal in California if you’re doing it on private property or leaving behind trash. But if you’re careful and respectful, you can magnet fish legally across the state.

Magnet fishing enthusiasts are all over California, including in San Diego, Santa Barbara, and Los Angeles. Here are some of the main rules to follow on magnet fishing in California:

Is magnet fishing legal in California?

Affecting ecosystems:

Make sure you are always picking up your trash and any found debris from magnet fishing. Leaving behind trash or debris is littering and illegal in California. You could face serious fines for leaving trash in public areas if caught.

Also, be mindful of the ecosystem you’re in. If you’re fishing in a river or lake, you could disturb the natural habitat and harm the wildlife. Check local regulations before magnet fishing in any body of water.

Trespassing:

You can only magnet fish on the property you have permission to be on. This means no trespassing onto private property or closed-off areas. You could be fined or arrested for trespassing if you don’t have permission. Violating California law for trespassing can often carry fines of $400 or more, which is not worth the risk.

Metal detector use:

In certain areas, such as San Francisco bay, it is illegal to use a metal detector or magnet fishing equipment. This is because of the sensitive ecosystem and the potential to disturb cultural resources that are located underwater. This is a clearly posted area, and if you see signs that prohibit fishing or the use of metal detectors, it is likely an area that prohibits magnet fishing as well.

The best spots to legally magnet fish in California:

There are many spots in California that are perfect for magnet fishing, as long as you follow the rules. Here are some areas that people are flocking to for magnet fishing:

The LA river:

The LA river has many spots with bridge access and waterways that pass under highways, making it perfect for magnet fishing. However, check for signs prohibiting magnet fishing or trespassing before you start, as there are sections of the LA river that are not accessible to the public.

Legg Lake:

Legg lake is a great place to find old coins, as it is a very popular spot for fishing. This lake is located in South El Monte, CA, and is open to the public for magnet fishing.

Berkeley Marina:

Although it is part of the San Francisco bay area, the Berkeley Marina is a great spot for magnet fishing. There is public access to the water and plenty of areas to fish from the pier. This is an area that does not prohibit magnet fishing as long as you follow the rules.

Marina Del Rey:

One of the largest man made marinas in the United States. There is public access to the water and lots of parks along the channel/waterways This is also an area that does not prohibit magnet fishing as long as you follow the rules.

Common items found in Magnet fishing throughout California:

Magnet fishing in California can be a lot of fun, especially in areas that are commonly used by tourists and locals. Some of the most common items found when magnet fishing in California are:

  • Old coins
  • Buckets
  • Tools
  • Knives
  • Wedding rings

Rings are common in swimming and fishing areas, and you can often take them to the police to be returned to their owners.

If you find any cultural artifacts, such as old coins or tools, it is best to leave them in place and notify the authorities. These items could be part of California’s history and should be preserved. You should also contact authorities should you find any firearms or other weapons, as these could be dangerous.

Overall, magnet fishing is a great way to spend some time outdoors, and you can even find some valuable items. Just make sure to follow the rules and regulations in place to avoid getting fined or arrested. With a little research, you can find the perfect spot for magnet fishing in California.

Benjamin Pioneer Airbow

0

It’s a game changer! The innovative new Benjamin Pioneer AirbowTM ushers in a new era in big game hunting, creating a whole new category of weapon that’s safer than a crossbow, easier than a compound bow, and just as simple to use as an air rifle. Based on Benjamin®’s proven Pre-charged Pneumatic (PCP) system, the Pioneer can be cocked with just two fingers, and de-cocked just as easily. It’s easy to handle, remarkably accurate and delivers wicked-fast 450 FPS velocity and 160-ft.-lbs. of wallop that can take down big game, predators, hogs and more.

Power and accuracy. You can feel it in the air.

Driven by 3,000 psi of compressed air, the Benjamin Airbow shoots up to 450 F.P.S. with 160 ft.-lbs. of energy for devastating effect on any size game. Plus, the unique design of the Airbow propels the arrows form the front of the weapon, rather than the rear, which means no archer’s paradox or canting effect. 2″ groups at 50 yards are easily achievable. In addition, arrows fired from the Airbow stabilize quickly while in flight, providing an expanded kill range for any game animal.

Easier to cock and de-cock.

The Benjamin Airbow is easily operated by an ambidextrous cocking bolt that takes little effort to cock and de-cock… just 2-lb. of cocking force. That means almost anyone, regardless of size or strength, can handle this weapon. And, with no cocking rope to lose or tangle, the Airbow is especially safe for treestand use.

CHARGE IT. COCK IT. FIRE IT. UP TO 8 TIMES.

Unlike crossbows which require re-cocking after every shot, the Benjamin Airbow can fire 8 shots on a single pneumatic charge in the same amount of time it takes to fire 3 shots from a crossbow. Plus, the Pioneer fires full-length arrows with full-weight broadheads and requires very little maintenance, all of which give it a clear advantage over crossbows. Benjamin offers a High Pressure Hand Pump (item 660427 ) and 4,500 psi Charging System (item 660428) as filling solutions.

DRAW A BEAD WITH SPECIALLY DESIGNED OPTICS.

For deadly accuracy, the Benjamin Airbow includes a CenterPoint® 6×40 mm scope that was specially designed with the Airbow in mind. The adjustable objective provides parallax settings from 5 yards out and the custom MTAG reticle provides aiming points out to 75 yards. A canted Picatinny base provides 20 MOA of additional adjustment.

  • Powered by 3,000 psi of compressed air
  • Integrated pressure regulator delivers 8 consistent shots at 450 FPS
  • Ambidextrous top cocking bolt is simple to operate
  • Delivers a game-stopping 160 ft.-lbs. of energy with 375-gr. arrows @ 450 FPS
  • Bullpup configuration is just 33.5″ in length, making it easier to handle, pack and store
  • Includes 3 custom 375 grain arrows with 100 grain field tips, hand-fletched helical vanes with unique spine alignment and nano ceramic Victory ICETM coating for increased speed, greater penetration and easier retrieval
  • Picatinny rail system for mounting accessories
  • Also includes 6x40mm Scope, Sling and Quiver
  • Length: 33.5 inches
  • Weight: 7 lbs.

Be among the first to experience an exciting new way to hunt! Order yours today!

Key Specifications

  • Item Number: 665642
  • Stock: Synthetic
  • Power Plant: Benjamin® PCP
  • Velocity: Up to 450 FPS
  • Energy: 160-ft.-lbs.
  • Overall Length: 33.5″
  • Overall Weight: 7 lbs.
  • Scope: 6x40mm
  • Special Features: includes 3 custom 375 grain arrows with 100 grain field tips, Sling, and Quiver

No Returns on discounted items – feel free to call us for information on accessories and regulations 205-664-3431

Head to Head: .416 Rigby vs. .416 Remington Magnum

0

In the early 1950s, Robert Ruark set off for British East Africa having never killed an animal with a rifle before. His safari battery—a .220 Swift, .30-06 Springfield, .375 H&H and a .470 Nitro Express—was based on the recommendations of friends; he was well advised. While the latter three rifles make up a well-rounded safari battery, it was Bob’s professional hunter—Mr. Harry Selby—who had what would become the most famous rifle of the lot. It was made by Rigby of London on a Mauser 98 action, chambered for a proprietary cartridge: the .416 Rigby.

From its release in 1911 until the beginning of WWII, there were less than two hundred .416 Rigbys made, yet it had developed a great reputation among the serious hunters in East Africa. The design of the huge case, with the 45 degree shoulder and its immense girth, points directly at cordite—the common smokeless propellant at the time of the .416’s inception. Being highly temperature sensitive, cordite would generate dangerous pressures in the tropical heat, resulting in cases being stuck in their receivers. When pursuing dangerous game this is never a good thing. So Rigby designed a very large case in order to keep those pressures down. Driving a 410-grain bullet at 2370 fps, it quickly developed a reputation for being a big-game stopper; few hunters who ever used one for any length of time ever had a complaint. While relatively rare, hunters like John ‘Pondoro’ Taylor loved it, and even W.D.M. ‘Karamoja’ Bell ordered more than one. However, at the end of WWII, Kynoch—the major British ammunition manufacturer—was in financial ruin and ammunition became increasingly rare.

The bore diameter refused to fade, with several important developments that aided its relevance. Bob Chatfield-Taylor necked down the belted .458 Winchester case to hold .416″ bullets, resulting in the .416 Taylor, and American professional hunter George Hoffman necked up the .375 H&H case to give us the .416 Hoffman. Both are sound designs, with the Taylor being housed in a .30-06-length action, and the Hoffman requiring a magnum-length action.

Fast forward to the late 1980s, and we see Remington releasing a very Hoffman-like cartridge: the .416 Remington Magnum. Loosely based on the ailing 8mm Remington Magnum (the 8mm and .416 share the 25 degree shoulder), the .416 Remington adopted the ballistic formula of the later .416 Rigby loads: a 400-grain bullet, at a muzzle velocity of 2400 fps, for 5,000 ft.-lbs. of energy. This came at a price though, in the form of higher chamber pressures. If that didn’t make the shooting world cock an eyebrow, the Model 700 rifle it was chambered in featured a push-feed design (as they all have) and a relatively small extractor. Several instances in truly hot weather—like Zambezi Valley hot—saw some broken extractors and stuck cases, resulting in a hunter holding a club instead of a rifle. I firmly believe those situations arose more from a rifle design problem than from the cartridge. I’ve used the .416 Rem. Mag.—in a controlled round feed Winchester Model 70—in temperatures approaching and exceeding 100˚F and have never had an issue.

Undoubtedly, the Rigby and Remington variants on this bore diameter are the top dogs in this fight, with the .416 Weatherby and .416 Ruger becoming more obscure each year. The .416s fill a definite gap between the very flexible .375s and the heavyweight .458s, giving a best-of-both-worlds solution to the need for a cartridge that will shoot relatively flat, yet have the horsepower to tackle huge beasts at close ranges. So, which .416 do you choose and why?

Firstly, let’s agree that both cartridges—handloading aside—have identical ballistics, pushing a 400-grain bullet at 2400 fps, so velocity is off the menu. Secondly—without steering this into another campfire argument—I believe that a bolt-action rifle for dangerous game should be in the controlled round feed configuration, with a beefy extractor. Too many times I have been in a place where you absolutely depend on a rifle of this caliber, and a broken extractor would be a terrible thing. Both cartridges require positive extraction, each and every time, and I’ll reiterate: the .416 Remington has posed no issue, irrespective of temperature, in a CRF rifle.

So, with the ballistics being equal and the pressure differences posing no problem, who has the advantage? This is one of the rare instances where you’ll see me give the nod to a new design over the old, especially among the African cartridges; I do, in fact, prefer the .416 Rem. Mag. over the .416 Rigby, and I’ll cite the reasons why.

Magazine capacity is my first reason. The Rigby case measures 0.5949″ at its widest, while the Remington (and all the H&H family) measures .0.532″ at the belt; that difference allows for greater magazine capacity for the slimmer cartridge. When it comes to dangerous game, more is better.

Length is also an issue. The Rigby cartridge requires a longer (read heavier) action than the Remington does, which adds weight and expense. There are fewer of these actions made, and therefore they are less-readily available. The .416 Remington rifles can be made more affordably. Thirdly, there is the cost of ammunition. Rigby ammunition is expensive, roughly 30 percent more than .416 Remington ammo. When you take into consideration the cost of a dangerous game safari, it’s a minimal investment, but the Remington represents a better value for identical ballistics.

I’ve also found the recoil of the Rigby cartridge to exceed that of the Remington cartridge. I can and do handle both, but there is a noticeable difference, more than likely caused by the larger powder charge in the bigger Rigby case required to attain the velocity.

If you prefer the Rigby based on cool-factor alone, I totally get it. It deserves the respect it gets; it’s been with us for over a century, and it immediately conjures images of the classic safari era. But looking at it from a practical point of view, I give the edge to the .416 Remington; I’ve shot mine for years, and wouldn’t hesitate to take it anywhere in the world with me.

Looking for previous installments of our “Head to Head” series? Click here.

How Long Do Squirrels Live?

0

How long do squirrels live? What is the average lifespan of a squirrel? Do different types of squirrels have different life expectancies? In this blog post, we will answer all of these questions and more. So, if you’re curious about how long squirrels typically live, keep reading!

The Lifespan of a Squirrel – Wild vs. Captivity:

The average lifespan of a squirrel is around two to five years. However, some have been known to live for up to twelve years. When it comes to captivity, their lifespans are often extended. In fact, some squirrels have been known to live for up to twenty years in captivity! 

Life Expectancy of Squirrels Across Species

Red squirrels: Red squirrels can live up to 5 years in the wild. Their mortality rate is quite high and only 25 percent of these squirrels live longer than a year. They mature at 2 to 4 years old. The longest recorded lifespan of a red squirrel in the wild has been 10 years. The male squirrels tend to live longer than female ones. For most squirrel species, it is the opposite.

Eastern fox squirrels: have an average lifespan of 8 to 18 years in the wild. Most squirrels die before maturity. Female squirrels have been known to live up to 13 years of age, on average, whereas male squirrels are known to live for 8 years, on average.

Southern flying squirrels: Southern flying squirrels live up to three to five years in the wild. Compared to their non-flying relatives, southern flying squirrels have a shorter lifespan in the wild. They tend to live longer in captivity and have an average lifespan of 10 years.

Eastern grey squirrels live up to 12 years in the wild. Their lifespan increases in captivity and their maximum age has been recorded to be 20 years.

Ground squirrels like the Richardson ground squirrel have short life spans of 2-4 years in the wild. Most males only live two years while the females sometimes live for four years in the wild. Similar lifespans have been reported for California ground squirrels.

(Do squirrels carry rabies? See this post for more)

How Do Squirrels Live So Long?

Now that we know how long squirrels live, let’s take a look at what contributes to their longevity. Below are some of the main factors:

Diet: One of the main contributing factors to a squirrel’s longevity is their diet. Squirrels are mostly herbivores and their diet consists mainly of nuts, fruits, and seeds. This diet is rich in antioxidants which help to protect against disease and aging. In addition, nuts and seeds are a good source of protein and essential nutrients which help to keep squirrels healthy and strong.

Exercise: Another factor that contributes to a squirrel’s longevity is exercise. These creatures are very active and they spend most of their time running, jumping, and climbing. This helps to keep their heart and muscles healthy, as well as their bones.

Low-stress levels: Squirrels also tend to have low-stress levels. This is likely due to their simple lifestyle and their natural habitats. They are not exposed to the same type of stressors that humans are, such as working long hours, commuting, and dealing with family and relationship drama. As a result, they experience less wear and tear on their bodies and age at a slower rate.

(Do Squirrels Eat Meat? See this post for more)

Factors that Impact a Squirrel’s Life Span

While diet, exercise, and low-stress levels are all contributing factors to a squirrel’s longevity, there are also some factors that can shorten their life span. Below are some of the main ones:

Predators: One of the biggest dangers to squirrels is predators. These creatures are often targeted by birds of prey, such as hawks and eagles, as well as snakes and other mammals. As a result, many squirrels do not live to see their second year.

Disease: Another factor that can impact a squirrel’s lifespan is disease. Unfortunately, these creatures are susceptible to a number of different diseases, such as rabies, distemper, and mange. If they contract one of these diseases, it is often fatal.

The Average Squirrel Life Cycle:

  • Newborns: Most squirrel species give birth to litters of 2-5 young. The newborns are blind and hairless. They weigh about 1/2 ounce (15 grams) at birth and are about 3 inches (8 cm) long.
  • Weaning: At around 6-8 weeks of age, the young squirrels start to wean from their mother’s milk. During this time, they begin to eat solid food and learn how to forage for themselves.
  • Adolescence: At around 3-4 months of age, the young squirrels reach adolescence. They become sexually mature and begin to disperse from their natal territory.
  • Adulthood: Once they reach adulthood, squirrels live an average of 2-5 years in the wild. However, some species have been known to live much longer.

FAQs

How Does Their Lifespan Compare to Rats?

Rats have an average lifespan of 2-3 years in the wild. This is shorter than most squirrel species, which have an average lifespan of 4-5 years. However, there are some exceptions, such as the eastern grey squirrel which can live up to 12 years in the wild.

Do They Live Longer in Captivity?

Yes, squirrels tend to live longer in captivity than they do in the wild. This is due to the fact that they are not exposed to predators and diseases and they have a more consistent diet. In addition, they usually have access to exercise equipment and toys which help to keep them active and healthy. The oldest recorded age for a captive squirrel is 20 years.

Best way to get rid of a squirrel in your house:

If you have a squirrel in your house, one of the best ways to get rid of it is to call a professional wildlife control company. These companies are equipped with the tools and knowledge necessary to safely and humanely remove the squirrel from your home. Once the squirrel has been removed, they will seal up any entry points to prevent the animal from returning. Or you can get an air gun and take care of it by yourself.

(For more on the best air rifles for pest control, see this post)

The Very Best Trout Fishing Lures for the Pacific Northwest and Beyond

0

Trout fishing is enjoyed by Pacific Northwesterners in every corner of our region, and I have put together a list of my personal favorite best trout fishing lures for you. Some of these are available everywhere, some of these are up and comers, but all of them are effective trout lures. Although I live and fish mainly in Washington State, I have travelled to Oregon, Idaho, Northern California and Montana in search of great trout fishing, and it’s helped me put together this Greatest Hits of Trout Fishing.

Washington, Oregon, Idaho, Montana and California Trout Fishing

The lakes and rivers of the Pacific Northwest provide us with great trout fishing options. You may be headed to a suburban lake in Washington State that has been recently stocked with Rainbow Trout. Maybe you want to head to Central Oregon’s Lakes and fish for a trophy Brown Trout. Idaho and Montana have some of the most beautiful lakes with world-class trout fishing. And don’t forget about California’s epic river and lake trout fishing. While each region has it’s own unique lures and favorite riggings, there are a number of lures that you can’t go wrong with, regardless of where in our beautiful region you plan on trout fishing.

Casting Lures for Trout Fishing

I have spent many hours casting from shore for trout, and have a few favorite trout fishing lures to recommend. Being able to cast a distance is an important factor in shore fishing success. You can accomplish a longer distance cast by using lighter and thinner line, a heavier lure, or both. I prefer 4 pound to 6 pound line for most scenarios where I am trout fishing from shore.

The challenge is finding that perfect lure for the spot you are fishing. You can go with the heaviest lure in your tackle box, but then again it may be too large for the trout in the lake, or it may snag bottom once you are reeling it in, near the shore. The struggle is real! But have no fear, start out with any of these trout lures in the recommended sizes and you will be well on your way!

Also, keep in mind that any of these would make a fine lure to fish from a boat, whether trolling or casting.

Kastmaster Spoon

The Acme Kastmaster Spoon is one of my go-to trout lures for rivers and lakes. Ever since that childhood trip to my Uncle’s Montana ranch, where we fished Kastmaster’s (among others) on the ranch’s lake, I have always had a good time fishing these. There is just something about the action and finish that is a major trout attractor. My favorite sizes are 1/8 and 1/4 ounce. However, they offer some smaller sizes that are more appropriate for alpine lake fishing where the forage is usually smaller.

Roostertail Spinner

The Roostertail Spinner is one of the most universal trout lures in my tackle box. I have caught some really nice trout out of my local streams, lowland lakes as well as up in the high-country. Stick with the 1/16th to 1/8th ounce sizes. I really like a black with silver blade, the rainbow trout, or the frog patterns, but these come in too many fishy colors to mention!

Vibrax Spinner

While the Vibrax Spinner is best known for catching larger fish, it also works really well for trout, in it’s smallest sizes. I really do prefer the Size 0, 1 and 2 Vibrax Spinners for trout fishing, but a Size 3 might just catch you your personal best! Blue Fox Vibrax Spinner – View on Amazon

Mepps Spinner

Mepps Aglia Spinners have been available for a long time, and generations of anglers have caught trout on them across the West. In my home state of Washington, I always carry a few Size 1 or 2 Aglias when I’m backpacking to an alpine lake in the Cascades or Olympics.

Panther Martin Spinner

The Panther Martin Spinner very well may be the most recognizable trout lure ever made! Their simple inline spinner design is a very effective trout catcher. I love fishing Panther Martin Spinners for trout!Panther Martin Spinners – View on Amazon

Trolling Lures for Trout Fishing

The Pacific Northwest has such a wide range of fishable bodies of water where you can catch trout, often times a boat can help you be more effective. If you are fishing from a boat, all these lures are on the top of my list. Most of them have a great action because they are made of lightweight materials, and although they are not designed to be the best casting lures, if you troll them they can give you a rewarding day of trout fishing.

Wedding Ring Lure

When I was a kid, I went to Oregon with a friend’s family and we ended up at their cabin on the local lake’s trout opener. This was the first time I saw the awesome fish catching ability of the Wedding Ring. We couldn’t keep the Rainbow Trout off the standard red-bodied and silver-blade Wedding Ring. Over the years I have collected dozens of Wedding Ring colors and think it makes it to the top of my trout fishing lures if you are trolling. They work great bare, but if you can tip the hook with a kernel of corn you have a Kokanee/Trout killer, tip it with a worm and the Rainbows and Cutthroat won’t be able to resist! You can cut the hook off and replace it with a small fly if you want to change it up.Mack’s Wedding Ring – View on Amazon

Needlefish Spoon

Luhr Jensen’s Needlefish is a great trolling lure for trout. This thin metal spoon fishes well if you troll it behind a dodger or bare. I usually use these in larger lakes off a downrigger, but there is no reason they wouldn’t be effective on a small lake stocked recently with Rainbow Trout.

God’s Tooth Spoon

The God’s Tooth Spoon is the newest addition to my trout fishing tackle box. They have gained recent fame on the lakes surrounding my home near Seattle, and sure are effective! I troll these for Cutthroat Trout in Lake Washington, and Kokanee in other Seattle area lakes with pretty good results. As you can see, I prefer the 50/50 Silver/Gold and the Orange, but there are a number of other good looking colors I am eager to try out.Elgin God’s Tooth Spoon – View on Amazon

Dick Nite Spoon

This small lure has gained fame in Washington and Oregon as a great lure for Trout, Kokanee and even Salmon! The Dick Nite Spoon in Size 1 or 2 will work great in any trout boat fishing situation. Dick Nite Spoon – View on Bass Pro

Flicker Shad

I discovered Berkley’s Flicker Shad trout lures when I was looking for advice on fishing some of Washington’s larger lake systems. A friend suggested this one, because it does a great job of imitating salmon smolt and other forage fish, which Cutthroat and Rainbow Trout will gobble up. It immediately became one of my regular deployments whenever I was fishing on a lake with any salmon returns. Lots of great colors, but my favorite is the Silver/Black Back.Berkley Flicker Shad – View on Amazon

Hot Shot

Luhr Jensen Hot Shot’s are one of the original trout fishing plugs. Some of my very earliest fishing memories were of trolling around on the lake for trout with these. To this day, I always keep a few Hot Shot in Size 50, 60, 70 ready to go! They are best trolled slowly, and they have a very effective wiggle and dive that triggers an aggressive bite. Luhr Jensen Hot Shot – View on Amazon

Mag Lip 2.0 and 2.5

Yakima Bait Company’s newest trout fishing product is the Mag Lip Plug in the 2.0 and 2.5 sizes. This local Washington State company offers a really good assortment of color patterns for trout fishing. I prefer the Metallic Perch, Orange, Craw, Black Glitter and the Frog as my best colors. Make sure you have a few of these if you plan on fishing for trout out of a boat. Yakima Baits Mag Lip – View on Bass Pro

Original Rapala

The Rapala Original floaters are a great trout trolling lure. Attach a small plug snap to the end of your leader to give it a little more action. I prefer to flat-line troll these in smaller lakes. If I am fishing a larger body of water I may troll these off my downrigger as well. My preferred sizes are Size 3, 5 and 7 for starters. Rapala Original Floating – View on Amazon

Jointed Rapala

While the Original Rapala is one of the most widely recognized fishing lures in the entire world, the Jointed Rapala also gains a spot of my best trout fishing lures list. I think I might even prefer it to the Original. The joint gives this lure a unique action unmatched by any other lure on the list. For lakes from Idaho to Oregon and everywhere else in the Pacific Northwest, I’d recommend you start with a Size J-05 or J-07 and go larger if you are hunting for trophy trout.Rapala Jointed – View on Amazon

Trout Fishing Success!

Wherever you go trout fishing, there are bound to be locals. And some of these locals happed to be phenomenal anglers. Those proud few are usually most successful due to the time and effort they put in. If you go to a lake for the first time, it may seem a little challenging to find that perfect technique, lure set-up, troll speed, or location. But just remember that each day is a success, regardless of how many trout you have on the scoreboard. Every day on the water is a blessing, and also provides us with the benefit of another day of experience. If you aren’t already, you will be a great fisher with a little time invested. Good luck out there!

Related Post – Hiking for Mountain Trout in the Pacific Northwest

Ice Fishing for Catfish

0

by Anietra Hamper

A guide to targeting catfish during the winter freeze.

Angler Darren Troseth catches a channel catfish through the ice in Minnesota

Fishing guide Darren Troseth of 3 Rivers Fishing Adventures in Minnesota has targeted catfish on rivers in the St. Cloud area for several decades. In 2007 he discovered the thrill of targeting catfish through the ice, mostly out of necessity since open water is scarce during Minnesota’s brutal winter months.

“Compared to all other fish of the same size, catfish will put up just as good or better of a fight than anything else in the winter so I was drawn to them,” said Troseth.

Troseth carefully targets specific waterways where he knows there are large populations of catfish and he only goes after channel catfish as they are the most active. He seeks out bodies of water that are the warmest in the winter to find the deeper holes and areas with current. Since the ideal spots for catfish have the most inconsistent ice thickness safety is his top concern.

“Safety is very important, especially in areas of moving current and early/late ice. Basic knowledge of how ice forms and paying attention to recent weather patterns need to be part of the routine. People should always be using a spud bar to check ice thickness and wear safety picks, especially during early ice. A floatation type suit such as the Striker Ice Suit is a great idea too,” said Troseth.

The sluggish bottom-feeders are finicky when it comes to surviving the winter. They mostly lay low until spring so they will test your patience and skills. You significantly increase your chances of a bite if you know where to look and how to prepare. Here is some of the top advice for experiencing the fun and unpredictable surprise of ice fishing that can not only step up your catfishing game but change it entirely.

Channel catfish are the most common type of catfish to catch through the ice as they are more active than other species

Understand catfish winter behavior Catfish look for warmer water in the winter months so they are deeper (20-feet deep in many cases). Look for places with a soft bottom and structure or deep slow-moving water where catfish cluster and move together.

Location

Start with the most obvious places such as deep holes and breaks in the water. If you are fishing the tributaries off of a major river you want to target the outside bends of creek channels in 15-25 feet of water.

Water column Just because catfish migrate to deeper water doesn’t mean they are on the bottom. The feeders will suspend above the bottom from three-feet to 10-feet. Getting the bait in this “strike zone” is imperative. Anywhere above or below and the bite won’t happen. In the winter catfish are less motivated to go after food and have a slower metabolism so bait has to be presented properly.

Finding the fish If the fish are not showing on the sonar, keep moving to areas of current such as the narrows between islands or bridges. Since catfish move in schools, they should be visible. The low light periods between 4-8 p.m. are best.

Bait Don’t be afraid to use non-traditional baits and recharge often (at least once an hour) to maximize the scent.

“Some of our best nights have been using a small piece of chicken liver,” said Troseth. “I have also found that using a “glow” jig DOES help with the bite. Glow red and green are my favorites.”

Catfish angler Darren Troseth shows off a hearty channel catfish caught through the ice after scouting out Minnesota lakes with large populations.

Experimentation Winter fishing requires experimentation. If you can see the catfish on the fish finder but they are not biting then you need to change something. You can try different depth, change the bait, or try movement in the presentation.

Tackle A combination of tip-ups and a medium to heavy rod works well for channel catfish or you can use an automatic fisherman device. The ideal line is 8-10 pound ice braid and a fishing leader. As for hooks, use a thick single wire hook since most ice fishing spoons are not made for the strong jaws and soft lips of catfish.

Presentation Very rarely will winter cats just come up and smack your bait. Cold water cats have a tendency to “taste” the bait and swim around it. They may hit it with their whiskers, circle around it some more and even go vertical by coming up from underneath to push it up. Try jigging a little to get their attention but do not overdo it or you will scare them.

Assess the bite Pay close attention to your bite detection. The majority of cold water cats are light biters. Sometimes they will barely pull a float under or even move a spring bobber during the winter.

Final thoughts Some of the best ice catfishing happens on natural lakes and rivers in states with the biggest freeze like Minnesota, Wisconsin, North Dakota, and Iowa. With a little practice and consulting with locals in the area, ice fishing for catfish can open up a whole new direction for catfish anglers.

Editors Note: For a detailed primer on ice fishing in general visit the OnTrack Fishing site.

The Best Tent Stakes for Sand (And Snow)

0

Planning a beach or desert camping escapade? Well, before you sink your toes into the warm sand, let’s talk about a tiny but essential detail: the best tent stakes for sand. If you think you can use the stakes you normally bring on a camping trip, I’m sorry to say that they’ll refuse to play nice with the shifting sands, and they’ll leave your shelter teetering with every gust of wind. You’ll need something more specialized, which is why we’ve put together a list of our favorite sand stakes. Whether you’re a seasoned sand camper or a newbie ready to dip your toes into this unique experience, we’re sure you’ll find an option that works for you in our review below.

In this article, we’ll be reviewing the following best tent stakes for sand:

  • REI Co-op Snow Stake – Editor’s Choice
  • Neso Ground Screw Stakes – Best Overall
  • Syarme Sand Stakes – Cheapest Stakes
  • 7Penn Spiral Ground Anchors – Most Durable Stakes
  • Lifeswell Ground Anchors – Best Bang for Your Buck
  • Eurmax Spiral Stakes – Most Versatile Stakes

Best Tent Stakes for Sand – Reviewed

Don’t let the name deceive you – while the REI Co-op snow stakes are obviously designed to be used in snow, they work just as well in sand. As someone who’s used them in the desert a number of times, I can personally attest to their effectiveness.These snow stakes are thin and wide, instead of cylindrical like most tent stakes. You’ll notice a number of holes along the length of the shaft, which allow the sand and snow to better lock it in place. While I find that this design isn’t quite as secure as a corkscrew stake, I do tend to prefer this style for sand because of how easy it is to use. The price is pretty reasonable as well. You can get four of them for under $30, though from experience, I can assure you that you’ll want more. Six is the bare minimum that you’ll want, though I would probably go up to eight, just to be safe. And if you’re worried about how much you’ll get weighed down with that many stakes, don’t be. They’re only an ounce a piece, so you can go pretty crazy before the weight starts to become an issue.Pros:– Lightweight- Easy to pack away- Effective in multiple environments- Good price- Simple to useCons:– They lack some of the securing power that you’ll find in a corkscrew

Made from recycled materials, the Neso ground screw stakes are what you want to have if the REI snow stakes mentioned above aren’t your jam. These guys are incredibly durable and stable, though they do take longer to put into place than the snow stakes. You’ll need to use the included T-Grip tool to twist them into place, even if the sand is easier to work with than soil.Still, this is where I tend to find fault with corkscrew stakes. Desert environments get pretty windy around sunset, and if you’re starting to make camp around that time, it can be a hassle to set up your tent. If your stakes take awhile to get into place, you’re going to need an extra set of hands or two to help prevent your shelter from flying away in the wind.I do wish these were a little longer, but they work well enough for most desert and beach camping. They’re also slightly more expensive than the REI snow stakes, but not by much, so price is still fairly budget friendly. For a versatile tent stake that can be used in sand and other ground materials, the Neso ground stakes are definitely worth considering.Pros:– Durable- Fairly easy to use- Good price- Nice security- VersatileCons:– Take longer to get into place

What can I say about the Syarme tent stakes? They’re cheap and you’ll know it when you use them for the first time, but hey, they still get the job done…for the most part.Okay, I’m being a little pessimistic. While they aren’t going to receive my “best overall” award, they truly are a good option for the occasional beach camping trip. You get a good number of them for the price, allowing you to secure the corners or your tent along with any guylines that you want to setup as well. As long as you stay away from severe wind gusts, you shouldn’t have any problems with the Syarme tent stakes.But that’s where my flattery ends. Not only do they feel cheap, but they also don’t come with any tool to help you twist them into the ground. Considering how sharp the plastic is in a number of places, it’s a great way to cut yourself, if you aren’t careful.I’m also unimpressed with the length of the stakes. Since they’re designed to be used in the sand, I would have expected a few more inches of length to really help provide the security that you need when the wind picks up. As it stands, you’ll be fine in low and moderate wind gusts, but in anything stronger, you’ll start to have stakes pulling out of the ground.Pros:– Good value for the cost- Decently secure- A good number come in the pack- Fine for relatively fair-weather campingCons:– No tools to help you secure them- They like to pull out in strong wind

The first set of steel tent stakes for sand in this review, the durability is reason enough for me to like these 7Penn stakes. They are a little more expensive than every other product we’ve mentioned so far, but it can be a worthy tradeoff, depending on how you plan to use them.However, my biggest concern with the steel is how much heavier it is too. A full 5.5 pounds is no laughing matter, so these aren’t the sort of stakes that you want to carry with you long distances. Backpacking is automatically off the table, which leaves you with car camping – probably at the beach. If that doesn’t bother you, then most of my complaints end there.Overall, they’re a versatile set of stakes that can be used on a variety of terrains. Even so, considering they’re screw stakes, you’ll want to make sure the ground is pretty soft, otherwise you’ll have a hard time rooting them in place. Or, if you can find a stick to thread through the eyelet, I find that the extra leverage can help the stake dig into tougher soil.Generally speaking, I feel pretty confident in saying that these are the most heavy-duty tent stakes in this review. If you need that tough, no-nonsense reliability and don’t care about price or weight, these are the ones for you.Pros:– Highly durable- Very sturdy- Pretty reasonable price- Versatile- ReliableCons:– Heavy

For the price, the Lifeswell ground anchors are actually a pretty good deal. They have a decent length, and the securing power is better than most stakes sporting this style. The alloy steel is also quite durable, and since there’s less material than what you’ll find on the CORQUE stakes, they’re not excessively heavy either. While they do still have some heft to them, you could get away with carrying a set of these stakes on a backpacking trip, if you didn’t mind the extra pound or two.Unfortunately, I find that they aren’t as easy to screw into place as the CORQUE or the Neso ground anchors. While those two come with a twist stick to give you a handhold and some leverage, the Lifeswell stakes don’t give you this luxury. Instead, if you want the process to go quickly, you’ll need a drill. Obviously, most of us don’t think to bring a drill while camping (and many of us probably wouldn’t want to anyway), but it can be workable for car campers setting up shop on the beach. Backpackers, I’m sorry to say that these just won’t work for you. While you can twist them by hand, I’d recommend going with a different stake option to save yourself the hassle.Still, if you have a way to twist them into place, these stakes are an incredibly versatile option that can be used in a variety of terrains. Especially for the price, they give you some of the best bang for your buck.Pros:– Good value for the price- Versatile- Secure- Durable- Decent weight for how strong they areCons:– Need a drill to be secured

Though they’re designed to be used for securing trampolines, the Eurmax spiral stakes are a versatile option that work well in sand as well. As we’ve established at this point, the spiral shape is very effective at locking the stake into place, despite the ever-shifting sands. And, while I do wish they were longer, these Eurmax stakes still do a pretty good job of providing adequate stability.Like the Lifeswell anchors mentioned above, you will need a drill in order to screw these into place. As someone who’s done a bit of desert camping, I just can’t get on board with this design for backpacking, due to the inconvenience. Sure, it works well for car camping, but that’s hardly a good enough excuse to label it the “best overall.”Still, for what it’s designed for, the Eurmax does a great job. The alloy steel is quite durable, and while the weight is on the higher end, it’s not too much of a burden for car campers who need a solid set of stakes for sand.Pros:– Durable- Pretty solid- Good for car camping- VersatileCons:– Price- Weight

Best Tent Stakes for Sand – Buyer’s Guide

Size

orange tent stakes with holes in them

In sandy terrain, longer tent stakes are going to be your best bet. I’d suggest you aim for stakes that are at least 12 inches in length, as this extra length allows for deeper penetration into the sand, providing better stability for your tent. With longer stakes, you can minimize the risk of your tent getting uprooted by strong winds or shifting sand, giving you peace of mind throughout your camping adventure.Another aspect to keep in mind is the diameter or thickness of the tent stakes. For optimal grip and resistance against sand shifting, look for stakes with a diameter of around 0.4 to 0.5 inches. This size strikes a perfect balance between strength and maneuverability. Not only that, but stakes with a slightly thicker diameter offer better anchoring and minimize the chances of bending or deforming when driven into the sand.

Weight

When you’re dealing with sand, your stakes need to have enough anchoring power to withstand windy conditions and other unusual elements. But at the same time, they shouldn’t be a burden to carry around. After all, who wants to feel weighed down when enjoying a day at the beach or exploring the desert?That’s where lightweight tent stakes come to the rescue. Not only are they easier on your back, but they also make your life much simpler when it comes to setting up camp. That’s not to say that stakes are very heavy – many of them weigh under a pound (and that’s for the whole set), but any backpacker knows that every ounce adds up. Lightweight stakes make your life easier and leave you with more energy to enjoy your surroundings.

Material

blue tent in sand

When it comes to securing a tent, sand poses a unique challenge due to its loose and shifting nature, making it more difficult for tent stakes to maintain a firm grip. However, with the right material, you can increase your chances of a successful setup.One of the best materials for tent stakes in sandy environments is aluminum. Aluminum tent stakes are lightweight, which makes them easy to carry in your backpack, and their durability ensures they won’t bend or break easily. The smooth surface of aluminum stakes allows them to slide into the sand with less effort, providing a solid anchor for your tent (assuming they have holes along their length, or they sport a corkscrew design). Additionally, aluminum is resistant to corrosion, so you don’t have to worry about rust even if you frequently camp near coastal areas.Another popular option for sandy terrains is titanium tent stakes. Although titanium stakes can be a bit more expensive than aluminum, they offer several advantages. Titanium is incredibly lightweight, making it ideal for backpackers who value every ounce of weight in their gear. These stakes also have excellent strength-to-weight ratio, allowing them to withstand the forces exerted by the sand. And like aluminum, titanium is also highly resistant to corrosion, ensuring longevity and reliability in sandy conditions.But both of these materials can get expensive pretty quickly, especially titanium. So for those of you who are looking for a more budget-friendly option, plastic tent stakes can be a viable choice. While not as durable as aluminum or titanium, plastic stakes can still perform well in softer sand. They are lightweight, affordable, and less likely to cause damage to your tent if accidentally stepped on. However, it’s important to note that plastic stakes may not withstand strong winds or very compact sand as effectively as their metal counterparts.

Shape

tent in sand in dunes

Traditional stakes, commonly known as “Y” or “V” stakes, have been the go-to option for many campers. These stakes feature a simple design with a single or double pointy end, and while they work well in various terrains, they may not be the most suitable choice for sandy surfaces. The reason behind this lies in their shape and smoothness, which makes them prone to slipping out of loose sand.To tackle this challenge, tent stake manufacturers have introduced specialized stakes designed explicitly for sandy environments. One popular option is the “sand anchor” stake, which has a unique spiral shape, resembling an auger or corkscrew. The spiral design allows them to twist deeper into the sand, providing a more secure hold. They are especially effective in preventing your tent from getting uprooted during strong gusts of wind.The kind that I use, though, are the REI Co-op snow stakes mentioned above. Since snow and sand are so similar, if you find a stake that works well in one condition, it will almost certainly work well in the other. As far as the snow stakes go, you’ll notice that they have a relatively flat shape which is marked with holes. Snow (and sand) will fill in these holes, providing the grip you need to secure your tent.

Pack Size

A final tip… Make sure you know how many stakes you’re getting in a pack. Especially when buying online, some stakes are sold individually while others are sold as a bunch, so make sure you know how many you need (and how many you’re getting) before you hit that “Add to cart” button.

At Untamed Space, we’re passionate about helping you have the best camping experience possible. Our team of experts have experience camping and backpacking all over the world, allowing them to provide insightful and relevant content to guide you in your outdoor pursuits.All of our reviews are based on a combination of firsthand experience, extensive research, and an analysis of customer feedback. We are an independent website and do not receive payments or incentives from manufacturers to promote their products, and we continuously update our content to provide new information based on product availability. Wherever you are in your journey, whatever gear you’re searching for, you can be sure to find unbiased and up-to-date reviews for all of your needs.

FAQ

Final Thoughts

When it comes to choosing the best tent stakes for sand, certain key features can make a world of difference in ensuring a secure and worry-free camping experience. Sand poses unique challenges due to its loose nature, which means you need stakes with very specific characteristics.On the whole, we believe the Neso Ground Screw Stakes stand out as an exceptional choice, checking the most boxes with their secure design. With their durable construction, impressive length, and spiral shape, these stakes provide optimal security and stability on sandy surfaces. Their ease of use and ability to withstand challenging conditions make them a top contender for any beach or desert camping adventure.

Related Posts:

  • Best Waterproof Groundsheet for Extra Protection
  • 45+ Camping Jokes to Brighten Your Day
  • The 10 Best Survival Watches in 2024
Best Air Rifle Deals

Popular Posts

Can a Felon Legally Possess an Air Rifle in Tennessee?

0
"Understanding the Legalities: Felon Ownership of Air Rifles in Tennessee" can a felon own an air rifle in tennessee? In the state of Tennessee, the ownership...

Air Gun 101: How many types of Air Gun Sights are there and which...

0
The former American president, Joe Biden, was recently quoted saying: If you need more than ten rounds to hunt, you better stop that business and...

How Do Break Barrel Air Rifles Work?

0
A break barrel air rifle is a type of airgun where the barrel breaks open at a hinge point just above the breech. This...