Home Blog Page 129

The Effect of Coyotes on Pennsylvania’s Deer Herd

0

Along with bobcats and black bears, coyotes are one of the few remaining predators of white-tailed deer following the extirpation—regional extinction—of cougars and wolves in Pennsylvania. Many deer hunters believe that “coyotes keep down the white-tailed deer population.” This has led to many coyotes being killed by deer hunters in the name of “saving” the deer herd, but is this true? No. Coming to this seemingly simply answer requires an understanding of population dynamics—how populations change over time—and the ecology of both species.

Following birth, death is the most significant event in an individual animal’s life. What killed an animal is significant to the individual, but on a population level, the individual’s death and cause of death is relatively unimportant. All that matters is how many individuals died in a year (deathrate), how many animals were born (birthrate), how many animals immigrate or emigrate to or from an area, and how many animals reach reproductive status (recruitment). In Pennsylvania, the deathrate of adult white-tailed deer tends to be stable and mainly driven by hunting. Recruitment is the number of fawns that mature into adult deer. This determines future populations, as mature deer are the only individuals that breed. In Pennsylvania, a deer that survives the hunting season has a 90% chance of surviving to the next year, so fawn survival is an important driver of deer population dynamics.

In some places, coyotes keep white-tailed deer recruitment rate low, but in Pennsylvania they do not. Predation is more complex than the simple killing of animals. The effects of predation are broken down into two types: compensatory or additive. Compensatory predation is when predators do not add to the deathrate: the animals that they kill would not have survived the year regardless of predators. Here is an example to better understand this complex topic: in a hypothetical Pennsylvania forest where there are no predators present, two deer die a year from starvation or disease. Then, coyotes enter the forest and eat two deer per year, but deer do not die from any other causes (such as starvation). In this example, predation is compensatory. To make this predation additive, two deer would die (from starvation or other causes) and two additional deer would die from coyotes per year. This woulddouble the annual death rate from two tofour deer per year, thus making predation additive.

For the most part, coyotes in Pennsylvania are compensatory predators of deer. This means, they do not impact a deer population. The deer they eat probably would not have survived the year. This finding has been demonstrated by several studies, one study looked at the deer populations in the Southeast and East Coast, which had recently been colonized by coyotes. If coyote predation was additive then deer populations would go down, but that is not what the study found. It found that deer populations increased following coyote colonization. Another study in South Carolina removed coyotes from a large area for three years, and the researchers found that the deer population was largely unaffected by removal. Instead of being eaten by coyotes, fawns died from other causes like starvation and disease. A study in Delaware reported that only 45% of monitored fawns were still alive 90 days after birth, but not one of the monitored fawns was killed by predators. Again, fawns died of disease, starvation, and vehicle collisions.

A study on fawn survival in Pennsylvania found areas with and without large predators including coyotes, black bears, and bobcats, had a similar survival rate. The study found that the mother is more important to a fawn’s chance of surviving than predators. If she is stressed (by humans or poor habitat), she cannot produce enough nutritious milk to feed her fawn(s). Doe age also has been found to have an impact on fawn survival, older does had higher fawn survival rates. Mature, experienced does are more likely to choose birthing sites with security cover and adequate food nearby. Young inexperienced does typically are left with less secure birthing sites and must travel farther from their fawn(s) to find food.

The Delaware study found that the greatest predictor of fawn survival is weight; fawns that are underweight are prone to higher mortality than heavier fawns. Underweight fawns are more susceptible to cold and rain and therefore more likely to contract disease. An inch of rain in one day doubles the risk of death in an underweight fawn. A heavy fawn is better able to regulate body temperature when wet or chilled. Underweight fawns are also more likely to get caught by predators than those at a healthy weight.

Understanding coyote predation also requires understanding the life history and ecology of coyotes and deer. It is generally accepted that only predators 50lbs or more can consistently take down healthy adult deer without the help of outside forces like injury, disease, or deep snow. Thus, only the largest coyotes could consistently prey on adult deer. This does not mean that coyotes do not eat deer. A recent review of the diet of coyotes, found that cervids (deer, elk, and moose) were the most common food item in their diet followed by rodents, plants, and rabbits and hares. The review could not differentiate between animals that were hunted or scavenged, and according to the study’s author it is likely that most of the cervids that are eaten were probably scavenged (e.g. roadkill, hunter-killed, or individuals that died from other causes).

Since coyotes struggle to take down healthy adult deer, they mainly predate fawns. But fawns are hard to find, they are camouflaged, almost scentless, and spend most of the day motionless in dense vegetation. If a fawn survives its first 30 days, it is highly likely to survive to adulthood, as it will be able to outrun potential predators.

Deer also avoid predation by “predator swamping”. This is when all does give birth around the same time each spring. By doing this, there are so many fawns on the landscape that predators cannot find and eat them all. If a coyote can find and eat one fawn, it will be satiated for a few days giving the rest of the fawns a better chance at surviving the crucial first 30 days. By giving birth in the spring, does are setting themselves up for success as this is the time of year when plants are the most plentiful and nutritious. This not only allows does to produce the most wholesome milk possible, but it also maximizes the potential cover for fawns, so they can better hide from predators.

If the goal of coyote population reduction is to increase deer populations, time and money would be better spent on deer habitat improvements than on coyote control. Proper habitat management increases available food and cover in a forest. Improved habitat conditions not only allow fawns to better escape predation it also reduce stress on does, increasing fawn birthweights and allowing them to produce more nutritious milk. Stress on females can also be reduced by establishing “reserve” areas or sanctuaries on a property where recreation does not occur or is limited. Limiting the use of motor vehicle and high-impact recreation in spring when fawns are especially vulnerable will help their survival.

It is important to remember that even with the best management, deer herd size will always be limited by habitat carrying capacity, the number of animals an area can support. Proper habitat improvement practices can increase carrying capacity. However, it does not go away, and there will always be a limit to the number of healthy deer an area can support.

References

Alex J. Jensen, Courtney J. Marneweck, John C. Kilgo, David S. Jachowski. 2021. Geographic and Seasonal Patterns in Coyote Diet. Proceedings of the 44th Annual Southeastern Deer Group Study.

John C. Kilgo, Mark Vukovich, H. Scott Ray, Christopher E. Shaw, Charles Ruth. 2014. Coyote Removal, Understory Cover, and Survival of White‐Tailed Deer Neonates. The Journal of Wildlife Management.

Justin R. Dion. 2018. Neonatal Survival and Spatial Ecology of Adult Female White-Tailed Deer in the Functional Absence of Predators. Thesis at the University of Delaware.

Justin K. Vreeland, Duane R. Diefenbach, and Bret D. Wallingford. 2004. Survival Rates, Mortality Causes, and Habitats of Pennsylvania White-Tailed Deer Fawns. Wildlife Society Bulletin.

Tess M. Gingery, Duane R. Diefenbach, Bret D. Wallingford, Christopher S. Rosenberry. 2018. Landscape-Level Patterns in Fawn Survival Across North America. The Journal of Wildlife Management.

Todd M. Kautz, Jerrod L Belant, Dean E. Beyer Jr., Bronson K. Strickland, Tyler R Petroelje, Rahel Sollmann. 2019. Predator Densities and White-Tailed Deer Fawn Survival. The Journal of Wildlife Management.

Reviewed by David Jackson

Best oil for air rifle dieseling

0

“Discover the Ultimate Air Rifle Oil: Your Solution for Efficient and Reliable Performance. Unlocking the secret to minimizing dieseling, our carefully formulated oil guarantees optimal combustion, ensuring maximum accuracy and longevity for your air rifle. Enhance your shooting experience with the best oil available on the market today!”

best oil for air rifle dieseling

best oil for air rifle dieseling

When it comes to finding the best oil for air rifle dieseling, it is essential to consider several factors. The right oil can help reduce the occurrence of dieseling, which is the ignition of excess oil in the air rifle’s compression chamber. One highly recommended option is a high-quality synthetic oil specifically designed for air rifles. Synthetic oils tend to have better stability and lower volatility, making them less prone to causing dieseling. Additionally, look for an oil that has excellent lubricating properties to ensure smooth operation and minimize friction within the gun.

Another crucial aspect to consider when selecting an oil for air rifle dieseling prevention is its viscosity. It is generally advised to opt for a lightweight oil with low viscosity. This type of oil will flow easily into all the necessary parts of the gun, including the compression chamber, without causing excessive buildup or clogging. Additionally, lightweight oils are less likely to produce excessive heat during compression, reducing the risk of dieseling occurrences.

In conclusion, choosing the best oil for air rifle dieseling prevention requires considering factors such as synthetic composition, lubricating properties, and viscosity. By selecting a high-quality synthetic oil with excellent lubrication and low viscosity, you can effectively reduce the chances of dieseling in your air rifle. Regularly maintaining your air rifle by applying the appropriate amount of oil will contribute to its longevity and optimal performance.

In conclusion, choosing the right oil for air rifle dieseling is crucial for optimal performance and safety. Synthetic oils with low flashpoints and minimal additives are recommended to minimize the risk of diesel ignition. Regular maintenance and proper lubrication will not only improve accuracy but also extend the lifespan of your air rifle. Remember to consult the manufacturer’s recommendations for specific oil requirements.

Why Can’t You Shoot a Deer in the Head

0

In order to ensure a clean and humane kill, it is important to target the deer’s brain or spine. A head shot will often fragment the skull and damage the brain, making it difficult to ensure a quick and painless death for the animal. Additionally, neck shots can sever the spinal cord and provide a quicker kill, but they are more challenging to execute in the field.

.50BMG Sucks Out Deer’s Eyes?

There are a few reasons why you can’t shoot a deer in the head. First, it’s illegal in most states to do so. Second, it’s not a very humane way to kill the animal. Third, it’s difficult to aim for such a small target. Fourth, if you miss, the deer will likely suffer and die a slow, painful death. Finally, even if you hit your target, the deer’s brain is protected by its skull, so there’s a good chance that the bullet won’t penetrate and kill the animal instantly.

Is It Illegal to Shoot a Deer in the Head

No, it is not illegal to shoot a deer in the head. In fact, many hunters prefer this method as it is considered a more humane way to kill the animal. When done correctly, the deer will die instantly and will not suffer any pain.

Where to Shoot a Deer in the Head With a 22

When it comes to taking down a deer with a .22, there are a few key things to keep in mind. First and foremost, you’ll want to make sure you’re aiming for the right spot – the head. A well-placed shot to the head will take down even the biggest buck quickly and humanely. Secondly, you’ll need to have a good understanding of how your particular gun shoots. This is especially important when hunting with a .22 since they can be notoriously finicky when it comes to accuracy. Make sure you’ve done your homework and know exactly where your bullet will hit at different ranges before heading out into the field. Finally, practice makes perfect! Spend some time at the range honing your skills so that come hunting season, you’re confident in your ability to take down game with one clean shot.

Can You Shoot a Deer Head-On With a Bow

If you’re a deer hunter, you’ve probably wondered if it’s possible to take down a deer with a head-on shot from your bow. The answer is yes, but it’s not easy. Here’s what you need to know about making a head-on shot on a deer with your bow. First of all, shooting a deer head-on is only possible if the deer is facing directly towards you and within range. If the deer is even slightly turned to the side, or too far away, you won’t be able to make the shot. So, when you see a deer standing head-on in your sights, make sure to take the shot quickly before it has a chance to move. Secondly, because of the way a deer’s skull is shaped, hitting it dead-on in the center of the forehead is actually quite difficult. The sweet spot for this type of shot is just below the center of the forehead, where the skull begins to slope down towards the nose. This area is called the “kill zone” and it’s about 3 inches wide on either side of center. So aim just below center when taking your head-on shot at a deer. Lastly, remember that head-on shots are risky because if you miss even slightly high or low, you could potentially wound the animal without killing it outright. So make sure you’re confident in your ability to make this type of shot before attempting it in real life – practice at the range first if needed. And always follow up after taking any kind of shots at game animals so that you can track them down and ensure they’re humanely killed if necessary.

Where to Shoot a Bedded Deer

When you take a deer with a bow, the animal will usually bed down within minutes after the shot. If you wait an hour or more, the deer will likely move off the bedding area. Therefore, it is important to know where to look for a bedded deer. Here are some tips:

1. Look for rubs on trees. These are made by bucks as they scrape their antlers against the bark of trees. The rubs will be most visible on small saplings and young trees. Rubs can also be found on larger trees, but they may be harder to see.

2. Look for tracks in soft soil or mud near water sources such as ponds or creeks. Deer will often bed down near these areas so they can stay hydrated.

3. Examine vegetation for signs of trampling or grazing. This is another indicator that deer have been in the area recently and may still be present. 4 . Use your binoculars to scan likely areas from a distance before moving in closer . This will help you avoid spooking any deer that may be present .

Can You Shoot a Deer in the Neck With a Gun

Did you know that you can shoot a deer in the neck with a gun? It’s true! This method of hunting is often used by experienced hunters who are looking for a clean kill. The reason why this method is so effective is because the neck is full of vital blood vessels and nerves, making it a very sensitive area. When done correctly, shooting a deer in the neck will cause it to instantly collapse and die. However, if you’re not careful, you could end up wounding the animal which would result in it running away and potentially dying later from its injuries. Here’s what you need to know about shooting a deer in the neck: The best place to aim for when shooting a deer in the neck is just behind the ear. This will ensure that your bullet hits all of the vital blood vessels and nerves. You’ll need to have a steady hand when taking your shot as even the slightest movement could result in you missing your target. Take your time and make sure you have a good grip on your firearm before pulling the trigger. If possible, use a rifle when attempting to shoot a deer in the neck. A shotgun can also be effective but it’s more difficult to get precision with this type of weapon. Deer are fast moving animals so you’ll need all the help you can get when taking your shot!

Why Should You Not Shoot Deer in the Head?

When it comes to hunting deer, many people think that the best way to take one down is by shooting it in the head. However, this is actually not the case. There are a few reasons why you should avoid shooting deer in the head, and we’ll go over them all below. 1. It’s Not a Clean Kill One of the main reasons why you shouldn’t shoot deer in the head is because it’s not a clean kill. Even if you have a perfect shot and hit the deer right between the eyes, there’s no guarantee that it will die instantly. In fact, many times they will just be wounded and end up suffering for an extended period of time before finally succumbing to their injuries. If you want to ensure a quick and painless death for your prey, it’s best to aim for the heart or lungs instead.

2. You Might Miss Your Target Entirely Another reason why shooting deer in the head isn’t ideal is because there’s a good chance you might miss your target entirely. The head is a small moving target, and even experienced hunters can have difficulty making such a shot when they’re under pressure. If you do happen to miss, there’s a possibility that you could seriously injure or even kill the animal without meaning to – something that any ethical hunter would want to avoid at all costs. 3. The Meat Might Be Ruined If you do manage to make a clean kill by shooting a deer in the head, there’s still one potential downside -the meat might be ruined. When an animal is shot in the brain, blood vessels can rupture and cause blood splatter throughout its body cavity which can contaminate meat (particularly around entry and exit wounds). This usually isn’t much of problem if you plan on properly cleaning and dressing your game afterwards – but it’s still something worth considering if you’re hoping to get some tasty venison steak out of your hunt!

Why Do You Shoot Deer in the Heart And Not the Head?

There are a few reasons for this:

1. The heart is a larger target than the head, making it easier to hit.

2. A shot to the heart will quickly kill the deer, whereas a shot to the head may only injure it. 3. It is difficult to aim accurately at a moving target’s head, but much easier to aim for its chest area.

Why Shouldn’t You Shoot a Deer in the Neck?

When it comes to hunting, there are a lot of different opinions on the best way to kill an animal. Some people believe that shooting a deer in the neck is the most humane way to go, while others believe that it is simply not effective. So, why shouldn’t you shoot a deer in the neck? There are a few reasons why this method of hunting is not ideal. First, when you shoot an animal in the neck, there is a chance that you will only wound it and not kill it outright. This can lead to a long, painful death for the animal which is something that any hunter wants to avoid. Second, even if you do manage to kill the deer with a neck shot, there is a good chance that you will ruin much of the meat. The bullet can damage the spine and cause spinal fluid or blood to leak into the meat, making it unsavory and unappetizing. Finally, shooting a deer in the neck simply isn’t as efficient as other methods. When done properly, a chest or headshot will instantly drop an animal and ensure that it does not suffer needlessly. For these reasons, it is generally advisable to avoid shooting deer in the neck and opt for another method instead.

Why Don T Hunters Shoot the Head?

When it comes to hunting, there are a number of different strategies that can be employed in order to increase the chances of success. One such strategy is to target the head of the animal, as this is generally considered to be the most vulnerable area. However, there are a number of reasons why hunters may not choose to take this approach. One reason is that aiming for the head can be more difficult than aiming for the body. This is because the head is a smaller target, and also because it can move more quickly than the rest of the animal. As such, hitting the head can be more challenging than hitting other parts of the body. Another reason why hunters may not target the head is that doing so can result in a quick kill, but it can also lead to wounding or even killing the animal without actually causing it any significant harm. This is because if a bullet or arrow strikes an animal in the head, but does not penetrate its skull, then it will likely only cause superficial damage. In contrast, if these same projectiles strike an animal in another part of its body, they are more likely to cause serious injury or even death. As such, targeting the head can sometimes lead to unnecessary suffering on behalf of the animal.

Conclusion

In “Why Can’t You Shoot a Deer in the Head,” blogger Tom Nissley explains why shooting a deer in the head is not always the best option. Though it may seem like the most humane way to kill the animal, it can actually lead to a more painful death. The brain is protected by bones and sinews, making it difficult to destroy with a single shot. Even if the bullet does manage to penetrate the skull, it often ricochets around inside, causing immense suffering. For these reasons, Nissley recommends that hunters avoid shooting deer in the head whenever possible.

Bowhunting Bull Frogs

0

Heath Wood

As a young teenager, I recall five childhood buddies, along with myself, gathering at a family farm for a night of gigging frogs. Being the young boys we were, we decided to cook dinner on one of the banks of the many ponds spread throughout the farm. For a solid hour, my buddies and I waded the pond banks mud, trying to get enough frogs to prepare a feast for our dinner. After we met our required amount of frogs and spent another hour cleaning them, we finally had the fire going and fresh frog legs sizzling in the hot oil of a cast iron skillet. Not only did our young and rebellious group of friends cook dinner, but we also decided to sleep out underneath the stars on that warm summer night.

I traded in my frog gig for a bow and arrow in my mid-twenties, as competitive bow shooting with my friends was my peak interest. However, that night of gigging frogs many summers ago sparked a lifelong passion for spending summer nights in quest of bullfrogs and green frogs that always ends in delicious fried frog legs.

bowfishing bull frogs

Bow Hunting Frog Equipment

The first time I ever shot at a summer bullfrog with a bow was in my early twenties with a compound bow and a few old aluminum arrows that I didn’t care if I lost. After a few misses, well, several misses, I successfully shot frogs from ten to fifteen yards at a consistent rate.

Today, I have upgraded the quality of my equipment yet have kept the traditional archery values by using the Cajun Bowfishing Fish Stick Recurve Fishing Bow.

The Cajun Fish Stick bow was designed to use while bowfishing for larger fish such as carp or suckers. However, the design of shooting an arrow with an attached line is perfect for bow hunting summer bullfrogs as well. Hunting frogs with a good friend a few years back, I watched as he showed off his archery skills by using a homemade recurve bow to shoot giant bullfrogs from his farm ponds. After watching his skills, I made it a personal goal to use a recurve bow on my next frog hunting outing.

bowfishing arrow rest

When hunting bullfrogs on a warm summer night, a quality light is vital to find frogs yet prevent them from seeing you. I prefer the Optical Dynamics OD40 light to help locate frogs before making the shot. When hunting with a recurve bow, it is best to have a partner use the light due to the lack of time to shoot before the frog jumps into the water. Only having a few seconds to shoot is why the Cajun Fish Stick recurve bow is ideal for bowhunting frogs.

Another vital piece of equipment to successfully bow hunt frogs is a user-friendly arrow rest such as the TruGlo EZ-Rest Bowfishing Arrow Rest. The EZ-Rest features a full-containment design to hold the arrow in place no matter the bow’s angle. An arrow rest that keeps the arrow in place is a game changer. Again, the shooter has seconds to draw, aim, and shoot when a frog is located. The quicker the shot, the more frogs, will be taken.

How To Hunt Frogs

bullfrog

Frogs are most active during the summer months of June, July, and August. Being mostly night-active is why most frog hunters began hunting during late evenings, after dark, or throughout the night hours. A few minutes before the last light and after dark are the ideal times for frogs to be on the move. In my home state of Missouri, the frog season begins June 30th and runs through the end of October. Check your local regulations for season dates and guidelines.

The American Bullfrog and the Green Frog are the two most common frogs hunted during the summer and can best be found around farm ponds. When hunting frogs, the hunter must creep around the edges of the pond banks, scanning with a bright direct-beam light to locate frogs. When a frog is located, the light must be kept directly in its eyes to prevent it from spooking and jumping in the water.

After a frog has been spotted, the hunter and whoever is helping shine the light creep until they reach a comfortable shooting range. When using my Cajun Fish Stick recurve bow, I prefer to be ten to twelve yards if possible before stopping. Once we stop within range, I quietly get drawn, aim, and shoot as quickly as possible. Once a frog has been hit, I reel the line attached to the arrow while reeling the frog simultaneously. The daily bag limit for frogs in my home state is eight, so we try to hunt until our limit has been reached, then go directly into cleaning and processing until all the legs have been removed. The legs can then be cooked the same evening or frozen and cooked later.

bowhunting bull frogs

Creating fond memories and carrying on traditions are both hallmarks of life that many hold near and dear to their heart. Even though times change and technologies advance, there is always a bit of tradition found if one looks hard enough. As with new and improved recurve bows, they may be perfected upon, yet a tradition of use goes back many decades. The same goes for frog hunting, this sport is not a new idea, yet it is enjoyable and addictive once you have tried it.

Ramps: How to Forage & Eat Wild Leeks

0

Where to find

Ramps occur in Eastern North America from Georgia to Canada. They’re easily recognized by their 1, 2, or 3 broad leaves measuring 1 to 3 1/2 inches wide and 4 to 12 inches long.

There are a couple of varieties:

Allium tricoccum var. tricoccum: These have wider leaves and red stems.

Allium tricoccum var. burdickii: Also known as narrow-leaf or white ramps.

White-stemmed narrow-leaf ramps (Allium tricoccum var. burdickii) tend to have a milder flavor than the red-stemmed variety. They also have smaller leaves (up to 1 1/2 inches wide), as well as smaller bulbs.

Ramp leaves appear from March to April and last until around mid-May to June depending on the local climate. As temperatures get warmer, the leaves will turn yellow and die.

Look for them underneath dense deciduous forest canopy in soil that’s rich with organic matter.

In general, Narrow-leaf ramps are more likely to be found in more well-drained, dryer woods, while red-stemmed ramps prefer damper soil.

That being said, it’s not uncommon to find both varieties growing side-by-side.

There are some dangerous look-alikes so be sure the plants you pick smell like onion or garlic.

Do not pick the dangerous Lily of the Valley (Convallaria majalis) or False hellebore (Veratrum genus) by mistake.

Again, make sure they smell like onion or garlic. If you’re unsure, let a knowledgeable forager confirm your find or just pass on picking.

It may also be helpful to consult multiple references for more positive identification.

Sustainability

Unfortunately for ramps, they’re super-trendy these days. Chefs, foodies, and other ramp-lovers flock to the mountains by the thousands for a chance to bask in their gourmet-ness.

“Ramp feeds,” known as ramp festivals now, have been taking a toll on ramp populations for years and the added pressure of their recent popularity has really put a hurting on their numbers.

The implications affect conservationists and foodies alike. Cindy and I are conservationists first and foragers second. What this means for us is that ramping is not only unsustainable, but it gets more arduous each year as we climb higher and longer to find undiscovered ramp patches.

Traditionally, the Cherokee dug, and still dig, ramps by leaving the roots. This is done by cutting off the bottom of the bulb with a knife while it’s still in the ground (more on the how-to below).

sustainably digging ramps
Sustainably harvesting ramps – the root is cut off and left intact in the ground.

How to harvest

If you plan on digging ramps on public land, you’ll want to look into whether local regulations restrict harvest amounts, where harvesting is permitted, etc.

In West Virginia where we live, as of 2020, the Forest Service allows harvesting for personal use only – anyone can dig up to two gallons of ramps at a time. That’s about the volume of a plastic grocery bag or, according to the USFS, about 180 plants with leaves and roots.

And digging is no longer permitted in some parks due to declining ramp populations, so please be aware of local rules and conservation issues.

Here are a few things you’ll need for harvesting ramps:

  • Time This one is really important. It’s way too easy to run up to the ramp patch after work with good intentions of sustainbly digging ramps. You get to the trailhead at 5:30pm and it’s 6pm by the time you’re digging ramps. The sun’s about to slip behind the mountains and you’re in a sudden hurry to get your ramps and get out of there. So you abandon your plan and jerk as many roots out of the ground as you can before running out. DON’T DO IT!

    Sustainably harvesting takes more time, so you really need to make allowance for it. Plus it’s a lot more fun to have a leisurely walk into the woods, not worrying about racing the waning light. If you can’t give yourself the time to do it, please consider taking only greens and leaving the bulbs undisturbed. You won’t need nearly as much time if you only harvest leaves!

  • Sharp hunting knife Make sure it’s sharp! A dull knife will do more harm than good – you’ll end up mutilating the bulb so it’s not useable as food and not viable as a plant. You may even want to touch up the blade as you dig, since the grit of the dirt will take your edge. You’ll also want to make sure the blade is at least three or four inches so you can easily reach the root without disturbing the soil.

    If you insist on digging the root, use a hori hori knife to minimize impact.

  • Backpack or shoulder bag I usually put a few plastic grocery bags in a backpack and then load a bag or two with ramps before putting them in my pack, which helps keeps the dirt out of the pack.

The most sustainable way to harvest ramps is to cut only one leaf, leaving the bulb and second leaf to continue growing. This is least impactful on the soil, the plant, and the colony as a whole.

The leaves, in my opinion are the best part, anyway, and taking only leaves is the best way to ensure the colony will remain viable.

Sustainably harvested ramp.

If you insist on taking bulbs, please dig sustainably with a knife: Simply insert your knife into the dirt at an angle and slice off a third or so of the root, leaving it in the ground to re-grow. Then pull the rest of the plant out by its stems.

It will take a little practice to get a feel for where to put the knife. You can also gently pull back the dirt from around the bulb so you can see where you’re cutting. If you do this, make sure to pull back just enough dirt to expose a little bit of the bulb and re-cover the roots after cutting.

That’s all there is to digging. Please be judicious and don’t take any more than you will use.

I find that when I overzealously harvest, it makes more work for me in the long run, because some ramps will inevitably go bad before I can get to them. There’s not much more disgusting than the smell of past-their-prime ramps. And a few ramps go a long way so there’s no need to stockpile them.

Even though we practice sustainable harvest, I’m afraid the ever-inceasing demand will eclipse the slow procreation.

According to North Carolina Extension Horticultural Specialist Jeanine M. Davis, ramps can be transplanted and cultivated from seed in climates where ramps don’t normally grow. Apparently, it takes some effort to germinate seeds when climes are warmer than ideal, but it can be done.

And once a good patch is established, it requires little maintenance. Jeanine recommends the book Having Your Ramps and Eating Them Too by the “Johnny Appleseed of Ramps” for more info on cultivating ramps. Unfortunately this book is no longer in print.

We’ve been growing our own for a while. Our homestead is located in the ramp belt now, but our previous place was outside of ramp habitat. When we lived there, our planted ramps didn’t spread because conditions weren’t ideal.

They did grow, though, and as long as we continued to plant new ramps, we always had a steady supply right outside of our door.

Where to buy

If you’re lucky enough to live in an area where ramps are abundant, it’s not uncommon to see them in the grocery store when they’re in season. Where we live, they’re also common in seasonal dishes served at local restaurants.

Ramps for sale at a local grocery store for $8.99/lb.

How to store

Ramps are only in season for a month or so, but, for us, getting them is only half the problem. I usually come back from a good ramping trip with enough for us to eat fresh before they go bad with a little extra to keep for eating later (I rarely go digging more than once a season unless I come home with a particularly light harvest).

Both leaves and bulbs can be eaten and both are delicious. They’re best used fresh, but both can be put away for eating later in the year.

The easiest way to store ramp bulbs is by freezing: Simply cut off the greens, clean the dirt off the bulbs and cut off the roots (if your ramps still have roots). Then spread the bulbs out on a sheet pan or waxed paper so they are not touching and freeze. This prevents them from sticking together.

Once they’re frozen, put them in jars or plastic containers, seal tightly and put in the freezer for up to six months. You can also wrap them individually in wax paper and store frozen in sealed jars. They can also be pickled but we don’t usually bother.

The greens won’t last long fresh and deteriorate when frozen. They can be dried, but they lose a lot of their flavor. We’ve found the best way to preserve them is by making ramp compound butter (see recipe below). A close second is ramp pesto. Either can be stored in the refrigerator in the short term or frozen for use later.

For short term storage put ramps in the refrigerator as soon as possible. They should be stored uncleaned. If a refrigerator is not immediately available ramps can be kept with the bulbs submerged in a bucket of water and placed in a cool shaded area.

The leaves will start to wilt in the refrigerator after 4 days or so and in the bucket after a day or so depending on temperature.

How to cook

Ramp bulbs and leaves can be diced and used just as you would use onions, green onions, leeks, chives and garlic, but they are much more potent. They pair well with the following:

  • pasta

  • eggs

  • chanterelle mushrooms and other wild mushrooms

  • potatoes

  • stir fried and raw greens

  • pork

Some folks like to eat ramps raw. I like a little chopped up in a salad, but ramps as a cooked vegetable are a lot more fun. My favorite way to eat them is mixed into venison burgers or in ramp and white cheddar soup. And it’s hard to beat ramps and eggs for breakfast.

Mom & Ramps Forever!
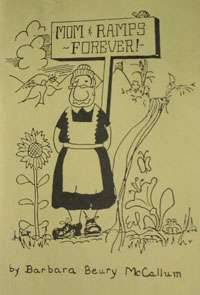
A few years back, Cindy came across this sweet little book from West Virginia called Mom & Ramps Forever! by Barbara Beury McCallum. There’s some fun anecdotal history on ramps in there. It’s also a collection of old timey recipes and stand-bys like pickled ramps and ramp champ – mashed potatoes with ramps. Here’s one of the recipes… quick and easy and sounds tasty:

Ramps With Watercress

“Fry some bacon until crisp, remove the bacon then drain off part of the bacon drippings. Put washed cress into the pan with the water that clings to it. Cook covered, until tender. Garnish with crumpled bacon, finely chopped ramps, and some chopped hard cooked eggs.”

Unfortunately, Mom & Ramps Forever! is out of print, but it’s a nice one for the collection if you can find it.

Review: Beretta A300 Ultima Patrol

0

Quick thought exercise. What’s the first thing that comes to mind when you hear the words “Italian shotgun?” I’d wager most of us would think of a fine Silver Pigeon from Beretta, a gold-medal-winning Perazzi competition gun or the Benelli M4. As a general rule, “affordable” isn’t a descriptor attached to any of these. Even Beretta’s superlative 1301 semi-automatic shotgun runs well into the $1,500s. However, the company has recently lowered the barrier to entry in the Italian-shotgun market in a big way with its A300 Ultima Patrol shotgun.

How low, you might ask? It’s less than semi-automatic shotguns from Mossberg, Winchester and Savage, that’s how low. To find a more affordable semi-automatic shotgun would involve Turkish imports, and while there is absolutely nothing wrong with Turkish firearms, they aren’t Italian. Yes, I may be a tad biased. To be fair, though, the A300 Ultima Patrol isn’t exactly Italian—while it’s an Italian design, it’s made here in the U.S. So, it’s Italian-American, like me. Maybe that’s why I like it so much. However, there’s something to be said for Beretta’s literal 500-year history (in just a few years, the company will have 500 documented years in the firearm-making business). Lastly, the 1301 is pretty much the zenith of semi-automatic, defensive-shotgun design, and while the A300 Ultima Patrol is slightly different, the shared heritage lends significant gravitas to its pedigree. One doesn’t expect a car from Ferrari to be slow, and one doesn’t expect a firearm from Beretta to be deficient.

What are the differences between the 1301 and the A300? That’s a great question, and we reached out to the folks at Beretta for the answer. Dina Sanders, brand marketing manager, tactical for Beretta USA, explained, “The largest difference between the 1301 and the A300 Ultima Patrol is the use of the BLINK gas and bolt system in the 1301, this rotating head bolt system is faster, absorbs more recoil and has fewer parts and so is less likely to fail over time than the bolt system used in the A300 Patrol which uses an older bolt design. In addition the 1301 is made in Italy and the A300 family is made here in the U.S.”

A300 shotguns have been in Beretta’s sporting line for quite some time, so bringing a tactical version into that space made sense. Sanders mentioned, “We expanded the A300 line into the defensive space based on customer requests for an American-made, mid-price point gun to compete with other inertia-driven platforms. Beretta USA gathered feedback from customers of the 1301 and studied trends in the 3-gun space to deliver to customers an ultra-reliable, defensive shotgun with a suite of features serious shotgun users want. When building these guns in America, we are free to incorporate these changes without needing to sacrifice to import restrictions. We believe with the launch of the A300 Ultima Patrol, Beretta now has two amazing, feature-rich platforms at several price points for customers to choose between.”

While the two shotguns do have some differences (in addition to the operating systems, the A300 has a slightly longer barrel), they share quite a bit of their footprint as well. Both have ghost-ring sights, a rail for optics, M-Lok attachment points on the fore-end, QD sling attachment points and oversize controls. From an aesthetic standpoint, the 1301 has a more “finished” look for lack of a better term; however, aesthetics are in the eye of the beholder, and there are plenty who will view the cost-savings of the A300 as an incredibly attractive thing, indeed. The price difference, in excess of $400, will allow for lots of practice ammo, for one thing.

I want to put aside the price point and obvious comparison to Beretta’s other defensive shotgun for a moment, though. The A300 Ultima Patrol is a fantastic shotgun independent of both of these factors. The ergonomics are nothing short of amazing—the gun points extremely well, the areas where one grips the stock and fore-end are aggressively textured to firmly anchor it in the hand and M-Lok slots for lights or lasers are positioned where right- or left-handed shooters will be able to instinctively find them. Prefer a high hold with the support hand? Put your light in the top M-Lok slot on the magazine-support bracket. Not so high? Use the slot on the side of the fore-end itself. Heck, if you want to pretend it’s 2003 and you want a vertical fore-grip, there’s even a slot at the bottom-front of the fore-end for that. Even if you don’t want to add anything, it’s well-designed.

This thoughtful engineering carries over into the little things, too. While the A300 Ultima Patrol only comes with one choke tube (Improved Cylinder), it uses the Beretta Mobil Choke system which offers up a whole world of options should one wish to change constriction. Two separate spacers can change the length-of-pull to better fit the A300 to the shooter. There’s even a small piece of loop backing with adhesive that is custom-cut to match the left side of the receiver, so you can add a shell card of your choosing to keep more rounds on your A300 (and see our Shotgun column, page 36, for more on this topic). All controls are oversize, easy to actuate and intuitive; whether you’re taking the safety off as the sights come on target, releasing the bolt with the massive bolt release or pulling the bolt handle rearward to show clear, there’s no mistaking any of the controls.

Beretta lists the furniture as simply “synthetic,” and it’s here that you start to get a glimpse of some of the differences between the 1301 and the A300 Ultima Patrol. There’s certainly nothing wrong with the synthetic furniture of the A300, mind you; it’s just, well, “plasticky” for lack of a better word. This isn’t an artisanal polymer here, it’s just plain ol’ plastic. Again, for a utilitarian shotgun that’s supposed to serve for home defense under any condition, this is a plus rather than a minus—it’s not a gorgeous walnut that you’ll kick yourself for marring should the gun fall over and bounce off the ground. Besides, I’m wagering that this will be a big hit in the defensive community, and it wouldn’t surprise me in the least to see some of the Big Dogs (Magpul, looking at you here) come out with some upgraded components. In any case, though, what’s on the A300 is perfectly fine.

When it comes to heft, I honestly don’t know what kind of dark magic Beretta used on the A300 Ultima Patrol. The shotgun weighs 7 pounds, 2 ounces, but it felt significantly lighter than that. While I would never fire it that way, I found I could hold it with one hand for more than a few seconds, something I can’t say about my 590 or 870. Guess we know where the “Patrol” part of the name comes into play. Now, granted, this may mean a little more felt recoil when shooting slugs or 00 buckshot, but there are plenty of tips and tricks you can use to mitigate that when practicing. You can work on your stance and utilize the “push-pull” method to help with the recoil, but lightening a shotgun while still leaving it functional can be a wee bit more difficult.

Light weight and felt recoil aside, there’s another aspect to the A300 Ultima Patrol to address, though: the texture. While the aggressive nature of the pistol grip and fore-end will really help anchor the shotgun in your hand while shooting, should you opt for an extended range session or training class, it’s going to do a number on your hands. For anything more than a short practice session, it would be worthwhile to invest in a good pair of gloves to wear when shooting for longer periods. Again, this is by no means a knock on the A300; it’s a balancing act for any firearm to walk the fine line between too heavy to effectively carry for any length of time and too light to shoot more than a handful of rounds. Whether you’re talking about a miniscule semi-auto pistol, an ultralightweight .308 rifle or a shotgun, all have to obey the laws of physics. Be prepared, have the right gear and you will have a better experience all around.

On the range, no surprises were to be found, and that’s exactly what one expects of a Beretta shotgun. A mixture of birdshot, buckshot and slugs was tested in the A300 Ultima Patrol, with everything from light No. 8 birdshot to 3-inch 00 buckshot went through the paces. A handful of slugs were tested just to get an idea of what those were like in this lightweight shotgun (hint: ouch), but for everything that was tested, the A300 ran like a champ. Our Managing Editor, Digital, Kevin Creighton, also had a chance to run a different A300 Ultima Patrol at the shotgun’s launch, and he, too, was impressed with how the A300 ran, stating, “The shotgun made it easy to handle the recoil from the various loads we used for demonstration purposes at the event.”

One critical thing I like to test on any shotgun I review is the pattern. Since the A300 Ultima Patrol is intended for home defense, knowing how popular 00 buckshot will pattern at various distances such as one would be likely to find inside the home is absolutely critical. Yes, you can miss with a shotgun. Shotguns do need to be aimed, and you absolutely need to know the maximum distance where all—repeat, all—of the pellets will land inside a roughly bad-guy-size target. Given the improved cylinder choke tube installed in the A300, I found that Federal Personal Defense 00 buckshot (2 3/4-inch, 9 pellet) yielded a 3-inch pattern at 5 yards, 4.5-inch at 10 yards and 7.5-inch at 15 yards. At 20 yards, pellets were starting to exit the 15-inch wide target, so I switched to Hornady 300-grain FTX slugs, which gave a 2.5-inch group at 20 yards. Interestingly, though, while the 00 buckshot was dead center through the irons, the slugs were slightly high and right. Not a knock on the Beretta, just a note to test everything you’re going to use extensively.

Other than patterning a defensive shotgun, finding a load that it prefers is also critical. Now, I’m not about to wade into the debate opened up by my esteemed colleague Bryce Towsley over whether a semi-auto shotgun is preferable to a pump (I’m agnostic, which is a polite way of saying “far too chicken to stick my neck out on this area of contention”). However, I will note that it’s a great idea to test any semi-automatic firearm with a decent variety of defensive and practice ammunition. It used to be far more common that pretty much every semi-auto out there would have its secret likes and dislikes, but even now in this seeming golden age, it’s better to trust but verify. Before you stock up on a pallet of THUNDERSTICK500 home-defense 00 buckshot, make sure it cycles the action every single time. In the case of the A300 and the admittedly small amount of 12-gauge ammo I put through it, it worked without fail with everything that went in. In testing, just shy of 100 rounds of 00 buckshot and 75 rounds of various birdshot fed, fired and ejected without fail. I’ll bestow my highest compliment on the A300 Ultima Patrol: it was boring. It just plain worked.

What’s the bottom line on the Beretta A300 Ultima Patrol? Well, if you’re in the market for a semi-automatic shotgun for home defense, it’s an excellent choice. It’s the least-expensive way possible to get yourself a Beretta shotgun, at least new, that I can find (I’m certain someone out there can find one cheaper, and I’m sure we’ll hear about it when they do). The A300 works well, has superlative ergonomics, is easy to shoot and comfortable to carry for a day’s worth of training. Not bad for an Italian-American shotgun; not at all. I mean, from the time of the great Christopher Columbus, to the time of Enrico Fermi, right up to the present day, Italian-Americans have been pioneers in building and defending our nation. They are the salt of the earth, and one of the backbones of this country. The Beretta A300 Ultima Patrol carries on that legacy with aplomb.Beretta 1300 Ultima PatrolBeretta 1300 Ultima Patrol specs

Which plants have been most deer resistant in your yard ?

0

Discover the ultimate deer-resistant plants thriving in your yard! Uncover nature’s secrets as we explore which plants have proven most effective in deterring deer. Say goodbye to garden damage and hello to a vibrant, flourishing landscape with our expert insights and recommendations.

1. Discover the Top Deer-Resistant Plants for Your Yard

1. Discover the Top Deer-Resistant Plants for Your Yard

Why is it important to choose deer-resistant plants?

When planning your yard or garden, it is crucial to consider the potential presence of deer. These graceful creatures can wreak havoc on your carefully cultivated plants, causing frustration and disappointment. By selecting deer-resistant plants, you can create a beautiful and thriving landscape without the constant worry of deer damage.

List of popular deer-resistant plants:

1. Lavender: Known for its fragrant flowers and aromatic foliage, lavender is a great choice for deterring deer.
2. Daffodils: These cheerful spring bulbs are toxic to deer, making them an excellent addition to any garden.
3. Rosemary: Not only does rosemary add flavor to your culinary creations, but its strong scent also repels deer.
4. Salvia: With its vibrant blooms and low maintenance needs, salvia is a favorite among gardeners looking to keep deer at bay.
5. Boxwood: This evergreen shrub offers year-round beauty and is highly resistant to browsing by deer.

By incorporating these and other deer-resistant plants into your yard, you can enjoy a stunning landscape while minimizing the risk of damage caused by these grazing animals.

Note: It’s always important to remember that no plant is completely foolproof when it comes to deterring hungry deer. While these plants are known for their resistance, factors such as food scarcity or habituation can still lead to occasional browsing.

2. Effective Plants for Warding Off Deer in Your Yard

2. Effective Plants for Warding Off Deer in Your Yard

Why is it important to ward off deer?

Deer can cause significant damage to your yard and garden by feeding on plants, flowers, and shrubs. They can also trample on your lawn and leave behind droppings that can be unsightly and difficult to clean up. Therefore, it is crucial to find effective ways to deter deer from entering your yard.

Plants that repel deer

1. Lavender: Known for its fragrant blooms, lavender is a great choice for keeping deer away. The strong scent of lavender is highly disliked by deer, making it an effective deterrent. Planting lavender around the perimeter of your yard or garden can help keep these animals at bay.

2. Daffodils: These cheerful spring flowers are not only beautiful but also unappealing to deer. Daffodils contain toxic compounds that make them resistant to deer browsing. By planting daffodils in your yard, you can add color while deterring these unwanted visitors.

3. Rosemary: This aromatic herb is not only a culinary delight but also a natural repellent for deer. The strong scent of rosemary acts as a deterrent, making it less likely for deer to venture into your yard or garden. Consider planting rosemary near vulnerable areas or along the edges of your property.

4. Yarrow: With its delicate white or yellow flowers, yarrow adds beauty while keeping deer away. Deer tend to avoid plants with strong scents or bitter tastes, and yarrow possesses both qualities. This low-maintenance perennial is an excellent choice for creating a deer-resistant landscape.

5. Boxwood: Known for its dense foliage and ability to withstand harsh weather conditions, boxwood is another plant that can help protect your yard from deer damage. Its thick leaves and strong scent make it unappealing to deer, making them less likely to venture into your yard.

Remember, no plant can guarantee complete deer deterrence, as their feeding habits may vary. However, incorporating these plants into your landscape can significantly reduce the likelihood of deer encounters and minimize damage to your yard.

3. Exploring Deer-Resistant Plant Options for Your Yard

3. Exploring Deer-Resistant Plant Options for Your Yard

Why choose deer-resistant plants?

When planning your yard, it is important to consider the potential damage that deer can cause to your plants. Deer are known for their voracious appetite and can quickly decimate a garden if given the chance. By choosing deer-resistant plants, you can help protect your landscaping investment and ensure that your yard remains beautiful year-round.

Types of deer-resistant plants

There are several types of plants that are known to be less appealing to deer. These include plants with strong scents, prickly textures, or toxic properties. Some examples of deer-resistant plants include lavender, rosemary, yarrow, daffodils, and foxgloves. It is important to note that while these plants are generally less attractive to deer, there is no guarantee that they will not be eaten if other food sources become scarce.

By incorporating a variety of deer-resistant plants into your yard, you can create a landscape that is both visually appealing and resistant to deer damage. Additionally, it is always a good idea to consult with local gardening experts or extension offices for recommendations on specific plant varieties that have been proven successful in deterring deer in your area.

Remember to regularly monitor and maintain your yard to ensure the continued effectiveness of these measures against deer browsing. With careful planning and selection, you can enjoy a beautiful garden without constantly battling hungry deer.

4. Enhance Your Yard’s Defenses with Deer-Resistant Plants

4. Enhance Your Yard

Why Choose Deer-Resistant Plants?

Deer can be a common nuisance for homeowners, especially those living in areas with a high deer population. These animals can cause damage to your yard and garden by feeding on plants, shrubs, and flowers. One effective way to protect your yard is by incorporating deer-resistant plants into your landscaping. These plants have natural characteristics that make them unappealing to deer, reducing the likelihood of them being eaten or damaged. By choosing deer-resistant plants, you can enhance your yard’s defenses and maintain a beautiful landscape.

Types of Deer-Resistant Plants

There are various types of deer-resistant plants that you can consider for your yard. Some examples include:

1. Ornamental Grasses: Many ornamental grasses such as fountain grass, maiden grass, and switchgrass are not preferred by deer due to their texture and taste.

2. Herbs: Certain herbs like lavender, rosemary, and thyme have strong scents that repel deer.

3. Perennials: Plants like coneflowers, daylilies, and yarrow are known to be less attractive to deer.

4. Shrubs: Boxwood, juniper, and barberry are examples of shrubs that are typically resistant to deer browsing.

By incorporating these types of plants into your yard, you can create a more deer-resistant environment while still enjoying a visually appealing landscape.

Remember that while these plants may be less appealing to deer, they are not entirely foolproof deterrents. In times of extreme hunger or scarcity of food sources, even supposedly resistant plants may become targets for hungry deer. Therefore, it’s important to combine the use of deer-resistant plants with other strategies such as fencing or repellents for optimal protection against deer damage.

5. Unveiling the Best Deer-Resistant Plants for Your Landscape

5. Unveiling the Best Deer-Resistant Plants for Your Landscape

Creating a deer-resistant landscape

When it comes to designing your landscape, it’s important to consider plants that are resistant to deer browsing. Deer can cause significant damage to gardens, munching on flowers, shrubs, and trees. By incorporating deer-resistant plants into your landscape, you can minimize the risk of damage and maintain a beautiful garden.

One option for a deer-resistant plant is the lavender. Not only does lavender add a lovely fragrance to your garden, but its strong scent also repels deer. Other options include daffodils, which are toxic to deer and therefore rarely eaten by them. Additionally, plants with fuzzy or prickly leaves like lamb’s ear or yucca are less appealing to deer.

Deer-resistant plant options

If you’re looking for more variety in your deer-resistant plant selection, there are plenty of options available. Some popular choices include:

1. Russian sage: This perennial plant features silver-gray foliage and produces delicate purple flowers. It is highly resistant to browsing by deer.

2. Boxwood: These evergreen shrubs provide year-round interest with their dense foliage and can withstand deer grazing.

3. Coneflower: Known for its vibrant colors and ability to attract pollinators, coneflowers are also unappealing to deer.

4. Ornamental grasses: Many varieties of ornamental grasses, such as fountain grass or switchgrass, are resistant to browsing by deer while adding texture and movement to your landscape.

5. Salvia: With its vibrant blooms and aromatic foliage, salvia is both attractive and unattractive to hungry deer.

By incorporating these and other deer-resistant plants into your landscape design, you can create a beautiful garden that is less likely to be targeted by these graceful but potentially destructive creatures.

6. Creating a Deer-Free Haven: Recommended Plants for Your Yard

6. Creating a Deer-Free Haven: Recommended Plants for Your Yard

Introduction

Creating a deer-free haven in your yard can be a challenging task, especially if you live in an area with a high population of these graceful yet destructive creatures. However, by carefully selecting the right plants for your landscape, you can minimize the chances of deer feasting on your precious vegetation. Here are some recommended plants that are known to deter deer and help you maintain a beautiful garden.

Deer-Resistant Plants

1. Lavender: Not only does lavender add a delightful fragrance to your yard, but it is also highly resistant to deer. The strong scent of lavender overwhelms their sensitive noses, making them avoid this plant altogether.
2. Daffodils: These vibrant yellow flowers not only brighten up any garden but are also unappealing to deer due to their toxic properties. Planting daffodils around your yard can help keep these animals at bay.
3. Rosemary: This popular herb is not only great for adding flavor to your cooking but also acts as a natural deterrent for deer. Its pungent smell repels these animals and makes them think twice before venturing into your garden.
4. Boxwood: Known for its dense foliage and ability to withstand harsh weather conditions, boxwood is an excellent choice for creating barriers that deer find difficult to penetrate. Its thick leaves and strong scent make it unattractive to these creatures.

By incorporating these deer-resistant plants into your landscape, you can create a haven that is less appealing to these animals while still maintaining the beauty of your yard.

Note: While these plants are generally considered deer-resistant, it’s important to remember that no plant is entirely immune to hungry deer. In times of extreme food scarcity or when other preferred options are limited, even supposedly resistant plants may become targets.

In conclusion, after observing and experimenting with various plants in my yard, I have found that the most deer-resistant ones are [list of plants]. These plants not only enhance the beauty of my garden but also provide a natural deterrent against deer. By incorporating these species into your landscape, you can minimize damage caused by deer and enjoy a thriving garden all year round.

 The Best Survival Backpacks – Packing For Armageddon in 2024

0

Quick Answers – Are These The Best Survival Backpacks?

#1 Best For Alpine Adventures – Black Diamond Jet Force Pro Avalanche Pack

#2 Best Army Style Survival Pack – 5.11 Tactical Rush Military Pack

#3 Best Big Survival Pack – WintMing 70L Camping Pack

#4 Best Hiking & Survival Pack – Osprey Stratos 36

#5 Survival Backpack For Long Weekends – Condor 3 Day Assault Pack

#6 Best Survival Backpacking Pack – Gregory Zulu 40

#7 Coolest Survival Bag – Kodiak Sitka Leather Messenger

Unfortunately, surviving in the wilderness is not just about a backpack. Bags can cart in plenty of dehydrated meals, but no pack can catch dinner for you. While these bags provide the customisable storage and carrying options to help you get out there, you need to have some survival skills to make it through the night.

Ordering a survival backpack and setting off on mad adventures without due preparation is likely to be a one-way ticket to giardia rather than paradise. Ease your way into the backcountry by making several quick-strike missions that allow you to gauge your readiness and prepare a list of essentials.

Packing up your backpack with the right gear is just as important as getting the correct nylon container. The longer you need to survive off of just the equipment on your shoulders, the more essential it is to get it right.

Stick around after our in-depth look at the best survival backpacks and come along for the ride as we explore some of the best gadgets and lightweight survival gear to fill up your bag with.

Backcountry, behind enemy lines, or on the Bangkok skyline, these powerhouses are in too deep to turn back now. Take your adventure to the next level or prep for anything with the best survival backpacks in the industry.

Each of these bags brings thoughtful design and reinforced materials to every corner and excels in one particular niche better than the competition. Choose your own adventure with the perfect bag for your particular wilderness style.

#1 Best For Alpine Adventures – Black Diamond Jet Force Pro Avalanche Pack

It is highly unlikely the apocalypse is right around the corner, but there are over 100,000 avalanches in the U.S. alone, every single winter. If you plan on spending serious time on snow-covered mountains or anywhere the weather can turn south fast, you need to prep with the mentality that it’s only a matter of time before rocks or snowfall will start tumbling down.

Spending less time in the lift line furthers your need for fundamental avalanche protections. Featuring a battery-powered electric fan that expands in one pull across your body, this beast can supply four airbags before it needs a recharge. The battery system means no unwieldy Co2 cartridges or single-use waste. The only thing this Alpine survivalist is missing is a jet pack.

This high tech backpack can save your life and stow it all, with models that fit between 10-35 litres of lifesaving equipment and a few yummy snacks. A modular booster system allows you to have access to all three different sizes depending on how long you plan on getting out there today.

#2 Best Army Style Survival Pack – 5.11 Tactical Rush24 Military Pack

The most iconic military style day pack on the market has pages full of copycats for many great reasons. The Rush24 means this pack can fit everything you need for 24 hours of survival rain, sleet, snow or shine in a muted exterior that’s tough as nails. Inside, the bag uses a half-zip to open up 37 litres of storage with great organisational mesh and full-on pockets.

When it ships to your front doorstep, the rough rider’s backpack will have about 14 different small orange flags that point out where this bag goes above and beyond the call of duty. Pouches and quick-access points are hidden across the exterior, and comfy shoulder straps help carry a heavy load.

The straps running across the outside of this survivalist are a carabiner away from hauling oversized sleeping pads, ropes, or anything else you want to bring without cramming.

#3 Best Big Survival Pack – WintMing 70L Camping Pack

At an incredibly affordable price, you can get your hands on 70 litres of camouflage storage by tomorrow and get into the woods before the end of the week. All this storage space brings more than enough room for staying deep into the woods for a week, or practically infinitely, if you find a water source.

You can collapse the bottom section to bring the storage down to 50 litres from 70, but this will be a heavy pack no matter what you fill it with. I wouldn’t recommend walking serious mileage with this thing fully kitted up, but whenever you do get to camp for the night, you’ll have all you need on your shoulders.

#4 Best Hiking & Survival Pack – Osprey Stratos 36

If we had to pick one pack to rule them all, it might be this lightweight Osprey option. For everything from weekend hikes to carry-on travel, this bag sits at a unique juncture that will help you fly through obstacles like a fast train.

At a mere 36 Liters, it may be slightly smaller than what you had in mind for surviving the apocalypse. Still, this ingenious bag can hold well above its weight. A hydration reservoir and rain cover give the pack protections usually reserved for more extensive hiking options, and a comfortable hip belt finished off the job.

Unlike other slim hiking backpacks, the awesome backpack makers at Osprey wasn’t afraid of a few extra grams and kept plenty of weight distributing comforts in this bag’s back. You should always plan for a bit of adaptability, so what better place to start than the most versatile bag in the business.

#5 Survival Backpack For Long Weekends – Condor 3 Day Assault Pack

Many backpacks can make backcountry survival more manageable, but few are built with surviving in mind more than this impressive kit. Condor has been on the frontlines of hardcore camping and survival equipment of all sorts, and no other product on their line is more recognisable than this epic assault pack.

Condor optimised the survival backpack for three-day trips. With upwards of 50 litres of storage spread across seven compartments, you can stretch out your stay if you pack smart. Once the main compartments are filled up, or for any oversized gear that still needs hauling, take advantage of the nylon straps that wrap around the pack’s exterior to lug some extras.

As long as you find shelter before the showers, this stable bag will bring everything you need to stay out in the woods a while longer.

#6 Best Survival Backpacking Pack – Gregory Zulu 40

Right on the edge of glory sits this 40 litre legend. 40 litres is an incredibly happy medium in the backpack spectrum, bringing more than enough storage for a day or weekend trip without going overboard.

The Zulu series has storage capacities on all sides of the scale. Unless you plan to get out deep into the woods and stay in one place for a long time, anything more significant than this bag will start weighing you down.

Couple that perfect size bag with loads of high-quality build materials and a solid weatherproofing system, et voila; you’ve got a survival bag that can handle serious mileage.

#7 Coolest Survival Bag – Kodiak Sitka Leather Messenger

Hollywood has taken plenty of stabs at survival looks and post-apocalyptic gear hauling. This leather messenger would fit nicely on Jones’ shoulder in the temple of doom or wandering the streets of zombie-infested New York to bring your next survival mission a signature style.

No, this is not a severe survival option. Anyone planning on walking serious mileage or wandering far out of cell service with a home in the bag should probably bring more than this top-grain leather sidebag option. That doesn’t mean this well-built satchel is a slouch. Every inch of this bag is reinforced and built out of some of the most durable brass and natural materials.

As part of a complete arsenal or flung over your shoulder on your next two-wheeled adventure, this bag has a real place in your arsenal without providing high tech storage some other survival bags bring to the table.

Now that you’ve found a great survival partner, it’s time to fill ‘er up. Your bag will only get you as far as the gear inside of it, so let’s look at a few absolutely critical aspects of any prepper’s checklist.

This gear, plus the right survival backpack, will elevate you from surviving to thriving.

For each piece of gear, just a short write up about what it is, why you need it, and why this is the best one you can buy

Black Diamond Twilight Bivy

This bivvy bag may just be the best lightweight shelter on the planet. Whether you plan on packing the farm or keeping the weight down, the Twilight has earned a place on your packing list. Every trip into the woods can wind up an overnighter. At way less than a pound, this bivvy provides excellent protection and should be taken along on every walk into the woods.

Thanks to its four seasons of weather protection, heavy flooring reinforcements, and breathable mesh panel, this bivvy can be employed in a hurry and offers an excellent place for shut-eye no matter where you wind up for the night.

Leatherman P4 Multi-Tool

The closest thing to hauling along your toolshed, this multi-tool can set up camp, help fix ripped tarpaulin, gut a fish, and gather firewood, all while fitting in the palm of your hands. 21 tools are easily accessible thanks to the magnetic technology that lifts this multi-tool above the competition.

Grayl Geopress

Wilderness survival is all fun and games until you run out of water. Luckily, filters like this Geopress means as long as you can get to a water source, you can whet your lips around 24 ounces of purified water in eight seconds.

That speed makes the Geopress the fastest in the industry at cleaning up dirty taps and flowing rivers. The press goes above and beyond by filtering out heavy metals, microplastics, and usually uncovered water pollutants.

Medical Kit

Whether heading out of the house for an hour or never coming back, please find room for a first aid kit. While bringing along any combination of Neosporin and bandaids is better than nothing, this all-encompassing medkit has 82 different pieces to address injuries and nasty surprises while on the road.

The kit comes stacked with an impressive assortment of medical equipment and found space for other survival essentials. Beyond first aid, this medkit provides an emergency blanket, tactical knife, and fire starter tools that will get you through a bad night in the woods.

I wouldn’t want to come across any of these survival backpacks in a dark alley. Built to last and full of scrappy features, every bag on our list will give you a fighting chance. All you have to do is pair up the particular blend of characteristics that best pushes you forward, sharpen up your cartography skills, and get out there.

The survival backpacks we looked at today are only part of the puzzle. When surviving without a roof over your head, the only thing you can expect is the unexpected. Over-prepping yourself for whatever you’re getting into and a foolproof list of emergency plans if shit hits the fan are other essential ingredients in wilderness survival.

Prepping begins with your Nylon knapsack. These survival backpacks all pack the necessary space and intelligent upgrades to set you on a path toward success.

 The Best Survival Backpacks - Packing For Armageddon in 2024

And for transparency’s sake, please know that some of the links in our content are affiliate links. That means that if you book your accommodation, buy your gear, or sort your insurance through our link, we earn a small commission (at no extra cost to you). That said, we only link to the gear we trust and never recommend services we don’t believe are up to scratch. Again, thank you!

Pillar Bedding : Part One

0

In the firearms industry it seems there is always a “trend” that is accepted as the state of the art for a period of time and then something else will come along and replace it. Right now aluminum bedding blocks seem to be the “trend”. I recently posted our views on the ABB so I won’t get into that today but there is a related trend I think needs to be addressed. “Pillar Bedding” or bedding using aluminum pillars.

First a little history: Many years ago when wood stocks ruled the world there was very few things that would improve the accuracy of a rifle as much as “glass bedding” would. Almost no factory guns came bedded and most shot barely acceptable. Glass bedding usually enhanced the accuracy as well as increased the dependability by limiting the effects of humidity and water which played havoc with point of impact (POI). By using an epoxy based product that was reinforced with some fiberglass, thus the term glass bedding, one could form a much better mating surface between the stock and the receiver. By reducing or eliminating any stresses caused by poorly match surfaces it allowed the rifle to shoot more consistently.

In the benchrest community they found that by torquing both guard screws with a torque wrench they could actually tune the way the gun would shoot. They were constantly checking the toque, between matches and even between groups, and most found that the more they shot the rifle, the more the amount of torque would decrease. They reasoned that the stock must be compressing some due to the pressure and stress associated with shooting. As a result they drilled out the holes around the guard screws to the next larger size (usually from 5/16 to 3/8 or 1/2 inch.) When bedding the action they would allow these larger holes to fill up with bedding material. After removing the screws (of course they waxed them first) they would then drill out the screw hole to 5/16th for some clearance, but that would in effect leave a pillar of 1/16 to 3/16” wall thickness of bedding material. The bedding material was dense and rigid so it made a nice pillar that would keep the stock from compressing under the pressure of 40-60lbs of torque, plus the stress of firing the rifle.

Not long after the pillar bedding process was developed, fiberglass stocks came onto the scene. While benchrest shooters were convinced that pillar bedding had a positive effect on the accuracy of their rifles they assumed that the same process would help to improve accuracy of a fiberglass stocked rifle. The process quickly adapted itself to “glass” stocks.

When Chet Brown and Lee Six first introduced fiberglass stocks to the competitive world in the late ’60’s, they used a process that left the stock with a “foam” core. The stocks were made of fiberglass cloth outer shells with the action area and barrel channels actually molded during the initial process. They would use a low density urethane foam to expand the material from the inside and force it out against the walls of the mold to form the gun stock. As a result between the receiver area and the bottom of the stock (where the guard screws are) there was a foam core. The foam was light weight to keep the weight of the stock within reason and when cured was rigid (unlike polystyrene of foam rubber) but had very little compression strength. In short order it was found that pillars were absolutely required in order to keep from compressing the stock when tightening the guard screws.

As a general rule, the same procedure was used to make the pillars as was used with wood stocks. Simply drill the guard screw holes over size and fill them up with bedding material. The draw back to this technique was that occasionally there would be some excessive shrinkage in the bedding material due to the volume of bedding compound that flowed down around the screws. Though this resulted in a less than perfect job from a cosmetic stand point, it had no adverse effect on the performance of the bedding. When guys like my father and Wally Hart and Fred Sinclair started to take on this type of work for their fellow competitors they felt a need to produce a better looking job and the use of precut aluminum pillars was introduced. More on the technical information on aluminum pillars in Part two.

When Gale McMillan introduced his fiberglass stocks in 1973 they were made in pretty much the same manner as the brown stocks. Urethane foam was a major component and this pillar bedding was a main ingredient in all benchrest stocks he made. Gale only made benchrest stocks for the first two years he was in business. Due to the weight limitations in benchrest, light stocks were a must and the materials used were not nearly as strong as they could have been in a stock weighing much more. Pillar bedding was one way to make up for their lack of strength in the receiver area.

Stay tuned for part two on November 2nd!

The 10 Most Expensive Fish That Are Tasty to Eat

0

The health benefits of fish are numerous, as fish are rich in healthy omega-3 fatty acids. But those looking for a luxurious fish dinner experience might want to skip the cod and canned tuna and opt for a high-quality, tasty fish.

The most expensive fish to eat is bluefin tuna, especially specimens caught off the coast of Japan. A single bluefin tuna can sell for more than $2 million! If you’re looking for a domestic fish to chow down on, you’ll want to choose an American glass eel, as these cost upwards of $2,000 per pound.

Let’s take a gander at the most expensive edible fish so that you can choose a luxury-quality filet for your next fish dinner.

Why Are Some Tasty Fish Expensive?

A standard can of tuna often costs less than $2, but it’s bound to pale in comparison to the tastiest (and most expensive) fish in the world. So for the most refined palate-pleasing experience, you’ll need to pay far more.

Still, you might find yourself wondering, “What qualities make some tasty fish so expensive?” Typically, the three factors that contribute to a dinner-friendly fish’s cost include:

  • Rarity
  • High demand
  • Legal restrictions

Let’s take a quick moment to explore why these aspects influence cost.

Rarity

Rare fish are often the most expensive type of seafood, as diners are willing to pay a high price to enjoy something that few ever get to enjoy. But a rare and tasty fish is even costlier, as it tastes far better than the standard fish filet and is nearly impossible to obtain.

But scarcity alone doesn’t make an edible fish expensive. High demand is just as crucial to a fish’s price.

High Demand

What do the most expensive steak cuts and fish have in common? The tastier they are, the more people want to try a bite!

The most costly types of fish have unique flavors and melt-in-your-mouth textures that make them culinary delights. Unlike a fried cod filet, these tasty fish are often served lightly cooked or raw to ensure diners get an unspoiled experience.

Legal Restrictions

For better or worse, some of the world’s priciest fish are endangered or close to reaching endangerment. After all, the more scarce and delicious a fish is, the more demand there is!

Some regions have strict regulations about specific fish species, limiting the number of certain types of fish that anglers are allowed to catch each year. Unfortunately, these legal restrictions only make these delectable fish more valuable and desirable. An estimated 20% of wild-caught fish imported to the United States are illegal in some way.

Still, if you’re determined to try the priciest fish in the sea, be sure that you’re choosing specimens that are legally obtained. Otherwise, you could be looking at some hefty fines that outdo the initial cost of the fish.

Most Expensive Fish to Eat: Summary List

  1. Bluefin Tuna
  2. American Glass Eel
  3. Pufferfish
  4. Alaskan Wild King Salmon
  5. Swordfish
  6. Yellowfin Tuna
  7. Chinook Salmon
  8. Halibut
  9. Dover Sole
  10. Sockeye Salmon

10. Sockeye Salmon

Sockeye-Salmon

Salmon is one of the priciest fish species in the world, though some types are more expensive than others. Sockeye salmon tends to fall on the lower spectrum in terms of price, though it’s one of the tastiest types of fish you can add to your shopping list.

Notably, this type of salmon is hard to forget, especially if ordered whole. It has bright red scales across most of its body but a distinctly green head. Overall, this fish is considered the most flavorful salmon, though it’s often smoked to accentuate its natural taste.

At $20 per pound, sockeye salmon isn’t the priciest type of salmon, but it will cost you more than cod, tilapia, or mackerel.

Why It’s Expensive

Wild-caught sockeye salmon tend to command the highest prices, as they’re often much larger than farm-bred fish. Larger fish means heftier portions, so heavier specimens always cost more than smaller ones. Still, high demand and transportation costs have helped make this fish comparatively expensive.

9. Dover Sole

Dover-Sole

The Dover sole might look like the most appetizing fish. It has a muddy brown body that’s far flatter than a fresh-caught, round-bellied tuna. But it has a uniquely sweet flavor that’s often compared to spiced chicken or beef.

This flavor profile is unusual, as the Dover sole are saltwater fish. Still, they’re the least “fishy” type of fish you can enjoy, making them an ideal choice for those that tend to avoid seafood.

And with a price tag of about $29 per pound, these flatfish are far costlier than other species of edible fish. Naturally, wild-caught specimens are more expensive than farmed options.

Why It’s Expensive

The primary reason Dover sole fish are expensive is that they’re so tasty. This species is also easy to prepare, with most professional chefs and at-home cooks baking them whole. Because they have a mild flavor profile, they’re a favorite among diners that enjoy the benefits of eating fish but don’t enjoy the taste of seafood.

8. Halibut

Halibut

Halibut is also a type of flatfish, but they can grow to jaw-dropping sizes, making full-grown Dover sole fish look like babies. For example, Pacific halibut can weigh more than 400lbs, and their Atlantic cousins often weigh in at more than 300lbs.

This species is also notable for its low fat content and sweet taste. Many people compare the taste of halibut to tilapia, but milder and thicker. As a result, halibut filets are ideal for fish burgers or filling fish dinners.

However, wild-caught halibut isn’t as common as it once was, making it one of the pricier types of edible fish. Generally, you can expect to spend about $30 per pound to enjoy this saltwater fish.

Why It’s Expensive

Halibut is one of the tastiest and most filling types of fish, and as a result, it’s become one of the most popular types of fish around the world. However, this high demand has boosted the price of halibut filets and made wild specimens scarce. These factors make it pricier than similarly flavored species like tilapia.

7. Chinook Salmon

Chinook-Salmon

Unlike sockeye salmon, Chinook salmon tend to have greenish-white bodies with small brushstrokes of red along their abdomens. However, they can be almost as enormous as their bright ride relatives, making them easy to slice into hefty portions ideal for meals.

Native to the Pacific Ocean, these fish are prized for their savory, buttery flavor and soft texture. But this mouthwatering taste has also made Chinook salmon endangered in some areas and rare in others.

You’ll likely spend about $30 per pound on farmed Chinook salmon.

Why It’s Expensive

There are two reasons why Chinook salmon is one of the most expensive types of edible fish. Firstly, they’re well-known for being one of the most delicious types of salmon, with a rich flavor that’s rarely found in other species.

However, Chinook salmon are also threatened by overfishing, making them increasingly scarce. This rarity and superior flavor profile make it pricier than other anadromous (living in saltwater and freshwater environments) fish.

6. Yellowfin Tuna

Yellowfin-Tuna

Yellowfin tuna (ahi) are gorgeous edible fish with glittering silver bellies and colorful blue-green spines. Native to tropical waters, particularly those off the coastlines of Hawaii, these fish tend to grow into enormous creatures. It’s not uncommon to see anglers catching 300lb or 400lb yellowfin tuna.

Because these fish can grow to impressive sizes, they’re often used for a variety of meals, including sushi and fish patties. But their mild taste and significant portions also make them a popular choice. Ahi typically costs about $30 per pound, but prices may be higher for those living far from tropical regions or coastal areas.

Still, once you’ve tried yellowfin tuna for yourself, you might never be able to go back to albacore! Adding a small handful of some of the world’s most expensive mushrooms to your tuna dinner can make things even better.

Why It’s Expensive

Yellowfin tuna is pricier than other types of fish because it’s gigantic, tasty, and in high demand. Additionally, some diners may pay more for this fish due to high transport costs.

5. Swordfish

Swordfish

The swordfish gets its name from the long, blade-like protrusion sticking out from its head. It’s been a treasured catch among anglers for centuries, but it’s also prized for its meaty filets and mild flavor.

Like other costly fish from around the world, swordfish can grow to jaw-dropping sizes. While it might not be quite as hefty as some tuna or salmon, the average swordfish can weigh about 200lbs. Consequently, a single swordfish can feed quite a few people!

At about $60 per pound, this tasty fish is also one of the most expensive types of seafood.

Why It’s Expensive

It’s impossible to raise swordfish on standard fish farms, as these fish require plenty of space and saltwater to thrive. But marine fisheries are far more costly to maintain than terrestrial fish farms. Additionally, wild-caught swordfish are becoming a rare sight to the high demand for this delicately flavored fish.

4. Alaskan Wild King Salmon

Alaskan-Wild-King-Salmon

Technically, Alaskan Wild King salmon and Chinook salmon are the same species. However, Chinook salmon is the more generic term and often refers to fish bred on fish farms or wild-caught throughout the continental United States.

On the other hand, Alaskan Wild King salmon is almost always a wild-caught Chinook originating from Alaska’s pristine rivers and coastlines. Because these fish have more unspoiled areas to explore and thrive in, they can grow larger than their continental cousins.

Diners may prefer Alaskan Wild King salmon over farm-bred Chinook due to the cleaner Alaskan environment. But the higher demand for Alaskan-caught Chinook salmon results in a noticeable price difference of over $30. For example, Alaskan Wild King salmon often costs $70 or more per pound.

Why It’s Expensive

A cleaner and more expansive environment can result in better-tasting and larger fish. Of course, the same is true of any other commonly eaten animal, including chickens and cows. So you can think of Alaskan Wild King salmon as free-range or grass-fed beef.

It’s higher quality than standard Chinook salmon, which means that folks are often willing to pay a higher price for it. And because it’s caught in Alaska (almost 3,000 miles away from the continental United States), transportation costs are high.

3. Pufferfish

Pufferfish-Sashimi

The pufferfish (also called fugu) is one of the most expensive seafood items on the planet. Unfortunately, it also happens to be one of the most dangerous, as pufferfish contain a combination of potentially lethal toxins.

If prepared incorrectly, pufferfish toxin can kill you in just four hours! And while you might think that this dangerous quality makes pufferfish one of the least-desired fish in the world, it only increases demand.

The most skillful chefs in the world know how to prepare pufferfish in a way that makes it entirely safe to consume. As such, many daredevil diners are more than willing to give this fish a try.

Still, you’ll need to be willing to invest some money to give this fish a try. A single fugu sushi dish can cost $60, and this fish is known to cost $200 or more per pound.

Why It’s Expensive

Pufferfish has a taste that’s challenging to describe, with most diners describing it as absolutely unforgettable. But it can also prove deadly if poorly prepared.

This combination of unique flavor and high risk makes it fugu an attractive experience for many. Still, the primary reason it’s expensive is the skillful preparation needed to make it safe to eat.

2. American Glass Eel

Cooked-Glass-Eel

The American glass eel (sometimes called the bay eel) is native to northeast coastlines in North America. However, it’s not nearly as common as it used to be. As a result, anglers in Maine can now charge outrageous prices for a single pound of fresh-caught eel.

In 2009, the per-pound price for Maine glass eels was about $100. But in 2019, that price tag stood at a hefty $3,000 per pound!

Still, eel typically isn’t the first dish people imagine an exquisite and expensive fish dinner. So, why is the price of American glass eels so high?

Why It’s Expensive

The glass eel is often compared to chicken and catfish in terms of taste, and it’s not beloved due to its flavor profile. That said, this slim snake-like fish is one of the most expensive because it’s become scarce.

Poaching and illegal catching are significant problems, leading to substantial catching restrictions that have inflated the price of these fish. The American glass eel can also grow to an astounding length, occasionally reaching up to six feet long.

This quality makes them ideal specimens for sushi, and the most expensive sushi platters often include at least one cut of glass eel.

1. Bluefin Tuna

Bluefin-Tuna

Bluefin tuna is the most expensive edible fish on the planet. In 2019, a whopping 600-pound bluefin tuna sold for ¥333.6 million (that’s about $3 million). That’s nearly $5,000 per pound!

This type of tuna is native to the North Atlantic Ocean and the Meditteranean Sea. But the costliest specimens are often found in the Pacific Ocean, off the coast of Japan.

While many types of tuna fish grow to enormous sizes, bluefin tuna is one of the largest types of tasty fish. It’s also considered a delicacy due to its increasing rarity and distinct flavor. Still, these aren’t the only reasons bluefin tuna are so expensive.

Why It’s Expensive

Bluefin tuna is one of the most prized sushi ingredients. It’s also constantly in high demand due to its international reputation for being the best-tasting type of tuna.

But this massive and tasty fish isn’t plentiful, primarily due to overfishing and enormous demand. In addition, larger specimens have become increasingly rare over the last several decades, making the heaviest catches incredibly expensive.

Try These Tasty Fish

The most expensive fish to eat is Japanese bluefin tuna. That’s because these fish are massive, rare, and in high demand. That said, bluefin tuna isn’t the only tasty fish that costs a pretty penny.

If you’re feeling in the mood to treat yourself, be sure to consider any of the above options. Though your wallet might be lighter, your belly is bound to feel a little fuller!

Are you hungry for more of the world’s most expensive foods, experiences, and items? If so, be sure to check out our blog now!

Best Air Rifle Deals

Popular Posts

What can you kill with a 177 air rifle?

0
"Unleash Your Precision: Discover the Power of a .177 Air Rifle to Take Down Targets with Accuracy. Explore the Versatility and Potential of this...

Air Gun 101: What You Should Know about Air Rifle Barrels Before Buying

0
Have you ever heard the phrase: “Imitation is the sincerest form of flattery”? The Chinese must have been very sincere in emulating this proverb. I...

Can a Felon Legally Possess an Air Rifle in Tennessee?

0
"Understanding the Legalities: Felon Ownership of Air Rifles in Tennessee" can a felon own an air rifle in tennessee? In the state of Tennessee, the ownership...