Home Blog Page 121

The Most Common Archery Injuries And How You Can Avoid Them

0

Archery is a rewarding and exciting sport that requires a combination of skill, focus, and physical fitness. While it is generally considered a safe sport, certain injuries can occur if proper precautions are not taken, leading to serious archery injuries. However, this should not scare you away from it. As an archer, one way to simply minimize the risk is by practicing archery safety and taking appropriate precautions. The most typical archery injuries are in the arm and shoulder and can be avoided by using the proper technique and allowing for proper recovery. In this article, we will discuss the most common archery injuries and how you can avoid them.

What Are The Most Common Archery Injuries?

Archery injuries can be caused by various factors, such as poor technique, improper equipment, overtraining, or a lack of physical conditioning. The most common archery injuries include tendinitis, strains, sprains, blisters, and calluses. These injuries can range from minor to severe and affect different parts of the body, such as the shoulder, elbow, wrist, back, neck, and fingers. Here’s an overview of some of the common archery related injuries.

Tendonitis

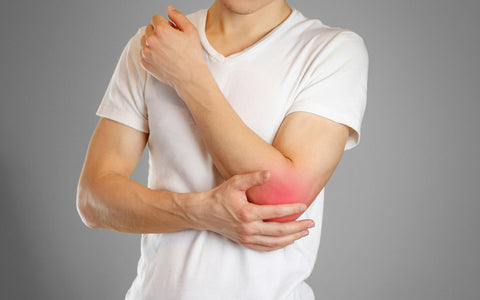
Tendinitis is an inflammation of the tendons that can occur in the shoulders, elbows, or wrists. Tendonitis of the elbow is the most common form experienced by archers and is referred to as “Archer’s Elbow”. This is often caused by repetitive motions of drawing the bow and improper technique, which can result in microscopic tears in the tendons. The symptoms commonly seen here are stiffness, tenderness, sharp pain, a dull ache-particularly when moving the injured area, and mild swelling in the affected area.

How To Prevent Tendonitis In Archery?

To prevent tendinitis, it is essential to warm up before shooting and to stretch your arms, shoulders, and back. Be sure to include specific strength training exercises to strengthen your archery muscles. Additionally, it is important to use proper technique and form to avoid overuse of muscles involved in bow drawing. Also, ensure your draw weight isn’t more than you can comfortably handle. Taking regular breaks and rest when you start to feel fatigued can also help prevent tendinitis.

Strains And Sprains

Strains and sprains are common injuries that can occur in the back, neck, or bow arm shoulder resulting from overstretched or torn muscles and ligaments. These injuries can be caused by poor posture or improper form. Symptoms include severe joint pain, stiffness, and limited range of motion around the affected parts.

Two types of strain that can be experienced include rotator cuff injuries and repetitive strain injuries. The rotator cuff refers to the group of muscles surrounding the shoulder joint that stabilizes the shoulder. As an archer, you put stress on your rotator cuff each time you draw the bow. Injuries to the rotator cuff muscles are usually the result of poor shooting mechanics and repetitive strain.

Repetitive strain injuries, on the other hand, describe an injury to the muscles, nerves, or tendons, particularly of the forearms and elbows or wrists and hands, due to repetitive motion and overuse. You may initially notice symptoms only while performing specific actions. But without proper treatment, symptoms may worsen and become a chronic injury resulting in constant or longer periods of pain and increased healing time.

How To Prevent Strain And Sprain Injuries In Archery?

To prevent strains and sprains, it is important to maintain good posture and technique while shooting. Among the several options of archery stances, choose the one that makes shooting most comfortable. Additionally, taking regular breaks and resting when you start to feel tired can also help prevent strains and sprains. Wearing appropriate and well-fitted protective gear, such as a back or neck brace, can also help reduce the risk of these injuries.

Blisters And Calluses

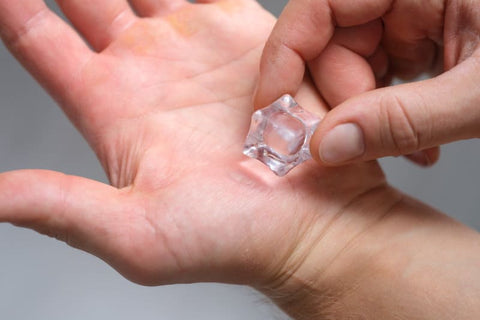
Blisters and calluses can occur on the fingers from the friction experienced when gripping the bowstring. This is a common injury that can be caused by using the bow for extended periods of time. One of the main symptoms is that the archer will have a reddish and sore finger. However, it could start tearing if not treated, leading to more serious cases that can prevent you from using your bow. To avoid such situations, it is advisable to treat them immediately.

How To Prevent Blisters In Archery?

To prevent blisters and calluses, it is important to use a finger tab or gloves to protect your fingers. It will help cover your fingers and act as a barrier between your fingers and the string. However, it’s important to choose comfortable gloves that won’t interfere with your bow draw, as that can hinder your ability to shoot accurately. Additionally, using a proper bow grip can also help prevent these injuries. Also, ensure you’re placing your fingers on the proper spot on the bowstring and avoid excessive finger tension while hooking the string.

While many archers go for gloves, some use sports tapes for their shooting. And, of course, that isn’t a bad idea. In summary, ensuring proper extra support and protection reduces the risk of injury.

String Slap

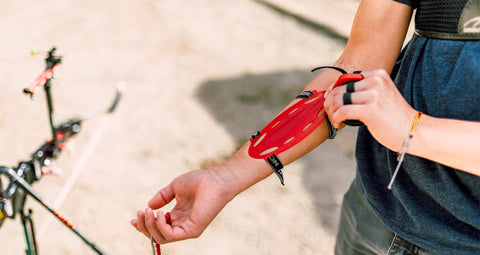
String slap is a common injury, especially among beginner archers, regardless of whether you are shooting a compound bow or a recurve bow. It occurs when the bowstring snaps against the inside of the bow arm upon release. Even experienced archers may occasionally experience string slaps. The chances of experiencing a string slap are increased by poor posture or when loose clothes or other items get in the bowstring’s way after it’s released. A string slap is not usually a serious injury and may only result in skin discoloration or a bruise at the point of impact, but it could be pretty painful. To avoid this discomfort and unsightly bruising, it is best to take precautions to prevent string slaps.

How To Prevent String Slap Injuries In Archery?

One main solution to string slap injury is to invest in good quality arm guards and, as much as possible, avoid wearing loose fitting clothing.

Below are other steps that, when practiced diligently, will increase your chances of enjoying your archery experience without string slaps:

  • Work on your bow grip: Hold your bow with a relaxed yet firm grip, with the handle resting between your thumb and index finger and your knuckles forming a 45° angle.
  • Adjust your brace height: A brace height that’s too short puts your wrist too close to the string, increasing the chances of a string slap. Ensure your bow brace height is kept at a standard for safe arrow fires.
  • Practicing proper elbow rotation: Keep your arm out of the string’s path by rotating your elbow out and away.

Extra Tips To Avoid Archery Injuries

In this segment, we will discuss extra tips to help you avoid injury and enjoy the sport safely and injury-free. These tips will help you understand the best practices for preventing archery-related injuries and to make the most of your archery experience.

Equipment

It is important to use the right equipment for your level of skill and physical abilities. Using equipment that is too heavy or too advanced for your skill level can lead to injuries. To prevent equipment-related injuries, it is essential to consult a coach or professional to make sure you are using the right equipment and technique. Additionally, it is important to regularly maintain and check your equipment to ensure it is in good working condition and fit for use.

Overtraining

Overtraining is another common cause of injuries in archery. It is important to listen to your body and to give it time to recover. To prevent overtraining injuries, it is essential to set realistic training goals and to schedule regular rest days. Additionally, it is important to avoid pushing yourself too hard, especially if you are experiencing pain or discomfort.

Physical conditioning

Keeping your body in good physical condition is important for avoiding injuries in archery. This includes overall fitness, flexibility, and strength. A well-conditioned body will be less prone to injuries and will be able to perform better. To prevent injuries related to poor physical condition, it is essential to maintain a regular exercise routine that includes both cardio and strength training. Additionally, it is important to focus on exercises that target the specific muscle groups used in archery, such as the shoulders, back, and arms. Also, it is important to maintain a healthy diet and stay hydrated, as this will help keep your body in optimal condition.

Gradual progression

When starting out in archery, it’s important to start with lower draw weight and shorter draw length, gradually increasing as your strength and technique improve. Using an appropriate draw weight for your strength and skill level will help prevent overuse injuries and allow your body to adapt to the sport gradually.

Proper warm-up

Before shooting, it’s essential to warm up your muscles to prepare them for the activity. This can include light cardio, such as jogging in place and stretching exercises for the shoulders, back, and arms.

Avoid over-drawing

Overdrawing can put unnecessary stress on the shoulder, elbow, and wrist, increasing the risk of injury. It is important to use a bow with the correct draw length for your body size and to avoid over-drawing.

Proper stance and footing

Maintaining a proper stance and footing while shooting can help prevent injury. This includes keeping your feet shoulder-width apart, keeping your back straight, and keeping your weight evenly distributed between both feet. Poor posture can also lead to injury and affect your accuracy. Make sure you keep your back straight, shoulders relaxed, and head up when you shoot.

Listen to your body

Archery is a sport that requires a lot of focus, but it’s essential to listen to your body when it tells you to take a break. If you feel pain or discomfort, stop shooting immediately, and rest until you feel better.

Can I Bypass Archery Injuries If I Follow The Right Practice Techniques?

Yes! By improving your form and following the right archery safety techniques, you have a good chance of bypassing archery injuries and enjoying a safe archery experience. To avoid injuries like blisters, practicing the proper drawing techniques will be particularly helpful.

What’s more? There are a couple of techniques you must not gamble on. These techniques will improve your archery shooting.

Final Takeaway

Archery injuries are common, but they are avoidable. Ways to avoid them include perfecting your stance and draw technique, avoiding overuse of your shoulder and arm muscles, using an appropriate bow weight, and regularly exercising the muscles used in archery. With the guide above, you should be able to know how to deal with the risks that come with archery.

Record Fish

0

How To Certify a State Record Freshwater Fish

  1. The angler must have a valid Florida freshwater fishing license or be exempt pursuant to s. 379.353, F.S.
  2. The fish must be caught legally using an active hook-and-line method (bush hooks, snatch hooks, set lines, trotlines, etc. are excluded) in fresh waters of Florida.
  3. If possible, keep the fish alive. If it is not possible to keep the fish alive, place it in ice water. Avoid freezing the fish because it will dehydrate causing it to lose weight. More information on how to handle and care for fish can be found at: https://www.trophycatchflorida.com/trophycare.aspx
  4. Before contacting the Florida Fish and Wildlife Conservation Commission (FWC), weigh the fish to determine if a possible state record exists and if possible, take a photograph of the fish on a scale with the weight clearly visible.
  5. Make arrangements with the FWC to have the fish species certified by an FWC fisheries biologist, and to have an FWC employee witness the official weighing, on a certified scale and take measurements. When certifying the fish species as a largemouth bass, an FWC fisheries biologist does not have to be physically present, and the species can be certified by photograph or video, so long as an FWC employee witnesses official weighing and documentation.

FWC Regional Offices:

Northwest Region (850) 265-3676Northeast Region (352) 732-1225North Central Region (386) 758-0525Southwest Region (863) 648-3200South Region (561) 625-5122

  1. Fill out a Freshwater State Record Fish application and have the application signed by an FWC fisheries biologist. Applications can be obtained from local FWC offices or on the internet at www.MyFWC.com/fishing.
  2. Mail the completed application to: Florida Fish and Wildlife Conservation Commission, Record Fish Program, 620 South Meridian Street, Tallahassee, FL 32399-1600.

Measurement Standards

  1. Measure the fish’s total length and girth to the nearest one-quarter inch. Total length is measured with the mouth closed and tail fin pinched together. Girth is the measurement around the widest part of the fish (see illustration).
  2. Weight shall be determined on a scale certified by the Florida Department of Agriculture and Consumer Services. A certified scale must meet the requirements of the National Institute of Standards and Technology and is approved by the National Type Evaluation Program. Weighing shall be done by an FWC employee and recorded to two decimal places.
  3. To replace an existing record, versus tying one, the weight difference must EXCEED the following: (i) nearest one-quarter ounce (0.02 pounds) for fish up to five pounds, (ii) to the nearest one-half ounce (0.03 pounds) for fish more than five pounds and up to 10 pounds, and (iii) to the nearest one ounce (0.06 pounds) for fish more than 10 pounds.

If your fish does not qualify as a state record, the Big Catch Angler Recognition Program rewards anglers who catch a memorable-sized fish. Qualifying anglers receive a colorful citation showing the type of fish caught and a window sticker to proudly display their prowess. To qualify, the fish must be legally caught and exceed the specified minimum length or weight. The catch must be witnessed, and a Big Catch form completed. Details can be found on applications available at many tackle stores, FWC offices, in the Freshwater Regulations Summary, or on the internet at http://bigcatchflorida.com.

More information is provided about the various species on our Freshwater Fishes of Florida pages.

* Uncertified record. Strong evidence exists, but not all the reporting requirements were met.** Following genetic and other analyses, it is now believed that redeye bass do not exist in Florida. This record was certified prior to those studies being conducted.

A Brassica Breakdown: Variety and Timing

0

The Incredible, Edible Brassica

A look at which brassicas are best at various times of the season and under different conditions.

Todd Amenrud

different types of brassicas

From the time Toxey Haas and BioLogic first guided “whitetail deer management” into the age of planting brassicas, we have been researching, learning more about them and understanding better how to utilize different brassicas to help us accomplish a wide variety of management goals. If you have enough ground to devote to your food plot program, most managers would agree that a well-diversified food program with an assortment of plants that will offer your herd what they need regardless of the time of the season or current conditions is the way to go. Some of the plants you choose would likely be perennials, but for the best in attraction during the hunting season it’s hard to beat a food plot full of luscious late summer to fall planted annuals. When it comes to annuals, many readers know that brassicas are, in my opinion, the best deer food God ever created. They are my favorite plantings for numerous reasons; they are the most attractive, best producing (yield), most nutritious, easiest to plant and one of the hardiest growing food plot choices we have. Combine that with the fact that they’re also great for the soil. What’s not to like? Sure, I live in the North, but those in the South shouldn’t be so quick to snuff them. They work the same throughout the South, but closely examining the palatability timeframe and conditions under which each variety of brassica performs best is more important in the South than in northern climes. At first (about 20 years ago) we at BioLogic ran into a couple instances of having to battle the “whitetails’ learning curve.” When you introduce a plant deer have never seen before, one that if they tried it before the sugars had developed may have been bitter, it could take them a season or two to become accustomed to it. However, that was rare and I haven’t heard of it happening in years. Annuals, in general, are typically easy to plant and since these are late summer to fall plantings, (depending on your location north to south) the summer weed cycle should be over for the most part. While always called a fall planting, you’ll see that I call these late summer to fall plantings. Because if you wait to plant some of these until it’s literally fall (September 22 or 23, depending on the year and your location), in some areas you may end up with a failure, or at the very least you’re not getting the most out of the plants, especially brassicas. Many still plant their brassicas when they have always traditionally planted their cereal grains. In the northern region and into Canada, brassicas should be planted during July through early August and cereals planted from late July (in the far north around the Canadian border) through August or even September further south (Iowa, Illinois, Nebraska, etc). Obviously that should be adjusted a bit later the further south you go, all the way into October for the Deep South. Years ago, when Toxey Haas and Grant Woods first introduced brassicas to the food plot market, rape was the primary type of brassica used. As most of you probably know, brassicas require cold temperatures to convert the plants’ high levels of starch into sugar and transform it into its most attractive, palatable stage. Initially, for some in the South the brassicas weren’t reaching their most appealing state until after the hunting season was over. Since then, BioLogic has introduced other types of brassicas that develop their sugars much earlier, and even in the South are likely the best attraction and nutrition you can plant – bar none. A common progression during the hunting season would see your herd switch from legumes (both perennials like clover or alfalfa, or annuals like soybeans or cowpeas) to cereal grains (like oats, wheat or triticale) to brassicas (like radishes, turnips, rape and kale). While there are many other things we can offer our herd, with these three types of plantings your herd should have a palatable food choice throughout most of the hunting season or until each type of food runs out. Different crops will dramatically extend the palatability timeframe of your plot. To take that “variety approach” a step further, within every type of crop, by planting a different assortment of each it will also extend the amount of time your plot will remain attractive, especially when it comes to brassicas. From my experience, they will attack radishes first. Whitetails will first lay siege to the green tops, then finish by devouring every bit of the long root tubers. These aren’t your “auntie’s dinner radishes,” these are large tubers that resemble a “huge, white carrot” rather than our more familiar small, round, red and white radishes. My favorite blend is BioLogic’s Deer Radish, it’s not just my preferred brassica planting, it’s my favorite planting, period. From my experience they will begin eating these radishes as early as late August in the north and around early October further south (northern Alabama) until they’re gone. So if you plant enough, they can last throughout the season. Next, your whitetails will typically set their sights on various turnips and beets. While sugar beets are actually in a different plant family and are not a brassica, they are very similar. Just like turnips, they hold a high concentration of sucrose, however it is contained mostly in the root bulb (They still eat the tops.) as opposed to brassicas that have sugars contained throughout the plant, and the sugar presence is caused more by photosynthesis than cold temperatures. I usually see them hit these plants after the radishes, and I use them for attraction during the months of November and December and on until they’re gone. My favorite blend is Winter Bulbs & Sugar Beets, and just like the radishes, they will consume the entire plant. First they’ll eat the greens and then the root bulbs. The radishes are easier for them to pull out of the ground to consume, so with turnips and beets you’ll often see partially eaten bulbs or they’ll scoop out the top and inside of the turnip or beet so it looks like a “beet bowl” left in the soil.

green globe turnip food plot
Green Globe Turnip

Lastly, they tend to hit rape, canola and kale after the radishes, turnips and beets. These last three brassica types do not produce large root bulbs or tubers like radishes, beets or turnips, but they produce an amazing yield of sweet, green forage. I tend to use these last three brassica types more as winter nutrition than hunting time attraction, but especially when it comes to the blend Maximum, you may want to also plant some for hunting attraction. Maximum produces a yield of more succulent, nutritious forage than any other planting I’ve ever seen. While they certainly may hit these brassicas as soon as cold temperatures convert the plants’ huge green tops to become sweet, if you have radishes and turnips also planted, they’ll typically consume rape after the other two brassica types. Kale is especially cold hardy. Kale’s large leaves will stay green and attractive long into the winter even if covered by several feet of snow. I tend to utilize kale only as winter nutrition. Remember that the timeframe I’m suggesting for these to be their most attractive is just an estimate. It can vary from year to year and region to region. As an example, in the “big woods” where there isn’t a lot of agriculture or other crops to back up your food plots, they may eat any of these as fast as they come out of the ground. Or, if we have an unseasonably warm fall it may take the brassicas longer to develop their sugars, pushing back the entire attraction calendar. I didn’t want to be too northern biased in this piece, so I asked the “frenetic food plot scientist of Alabama,” Austin Delano, who also heads-up BioLogic’s Research and Development, “How do you notice whitetails reacting to each of these plant varieties throughout the south?”

Austin said, “I definitely agree with the order. I think deer density, surrounding food sources (or lack of), a deer herd’s familiarity with the plot, and weather conditions during that year are all variables that can determine how fast and when a brassica plot is consumed.”

He also echoed how important it is to have a “blend” with varying maturity rates and palatability timeframes.

Delano continued, “As far as a north/south comparison, I do think deer consume brassicas earlier in the fall the further north you go. Not just because the onset of cold weather changes the plants, but it also changes a deer’s metabolism and increases their need for heavier carbohydrate foods like brassicas. I also believe that brassica consumption (regardless of type) increases over time and gets earlier in the year when they are planted in the same area every year. In other words, deer that have several generations of exposure to brassicas typically use them earlier and more often.”

Basically he’s also talking about a learning curve, but now it’s working in the opposite direction, in the deer’s favor. I guess it’s in our favor too. The other great thing about brassicas is not only are they the best attraction I have ever seen, they are without a doubt the absolute best nutrition you can provide for your herd. With an average crude protein content of 32% to 38% (depending on the cultivar and stage of growth) and a TDN (Total Digestible Nutrients) of over 80%, that would suit me fine, but add to it they yield more than any other planting and they are great for the soil (radishes especially). Check mate! Brassicas win! As I said, best deer food God has ever created.

deer in brassica field

More often than not, I plant my cereals and brassicas separately, for several reasons. However, if a manager wants a fast, simple, “one and done” plot, a blend of cereals and brassicas (and sometimes other plants) together may be your ticket. Blends like Full Draw, Last Bite, Green Patch, or Winter Grass Plus provide brassicas mixed with cereal grains. An annual or bi-annual clover is sometimes added to provide extra nutrition or a flush of nutritious forage reemerging after dormancy the following spring. Delano also told me, in his home state of Alabama, he likes to mix Trophy Oats with Deer Radish. He said it’s an easy to do, “one and then you’re done” hunting plot. Provided you plant enough, this can keep them coming back for more throughout the entire hunting season. I don’t know anyone who tests more food plot options than Austin, or many who know as much about deer management, so when he says so, I take it as fact. There are several reasons why a manager may choose to plant each (oats and radishes) separately, but as a simple plan for an uncomplicated, yet diverse hunting plot I would consider this. Think about all the options we have to plant for whitetails, we’ve only partially covered brassicas (and one beet type). We didn’t even talk about spring planted crops that can also be very attractive to whitetails like corn, buckwheat or clover. Or other late summer/fall planted annuals like winter peas, which are amazingly appealing to whitetails. One important thing to mention is that brassicas can also be planted with perennials. In the North they traditionally plant perennials during the spring, but in the South this can be a great way to kill two birds with one planting. If you’re in the transitional region or north and habitually have problems with weeds in your perennials, planting a brassica/perennial blend during the late summer can produce a great start to a perennial plot. Blends like Perfect Plot or Premium Perennial are my go-to products for this. You just need to make certain when planted you give the perennials 50 to 60 days of growth so they can establish their root systems, which will ensure their survival and reemergence after winter dormancy. With the perennial/brassica option since obviously the brassicas are annuals and won’t come back, I would suggest that you over-seed with a pure perennial like Clover Plus or Non-Typical the following spring to fill in any spaces vacated by the annual brassicas growing there the previous year. In a very roundabout way, I guess I’ve tried to convey that “variety in a food plot program is important” and “brassicas are my favorite food plot crop.” All of the plants mentioned are great choices for a food plot, but they’re eaten at different times or under different conditions, which is exactly why it is wise to plant a variety if you have enough acreage to devote.

Can You Eat Bowfin Fish?

0

Are you a fish food lover searching for a unique delicacy to try? Or perhaps you’re an adventurous foodie seeking out new and exciting flavors?

Either way, you may have heard of the bowfin fish – a prehistoric-looking creature found in the freshwater lakes and rivers of North America. But the question remains, can you eat bowfin fish?

In this article, we’ll dive into the culinary world of this intriguing fish and explore whether it’s a delicious delicacy or better left untouched.

So, let’s reel in the facts and discover if the bowfin fish is a tasty treat or a fishy foe! It is safe to eat bowfin fish, but most people don’t like the flavor because they don’t prepare it properly.

Unless it is properly prepared, it will have a soft, mushy texture. The flavor is often compared to catfish but with a meatier taste.

Can You Eat Bowfin Fish

Is Bowfin Fish Edible And Safe To Eat?

The bowfin, scientifically known as Amia calva, has an elongated body and a mottled olive-green and brown coloration, which makes it look rather unattractive.

Its body is covered in heavy scales, its head is armored with bony plates, and its mouth is filled with sharp teeth.

Additionally, this fish has a slimy texture and can swim backward, making it quite unusual in appearance and behavior.

Although bowfin is considered safe for consumption, many people may not find it appealing due to its unpleasant appearance and taste.

In fact, there are plenty of other fish species that are more desirable for eating. Unfortunately, some game fishermen categorize bowfin as “trash fish” and end up killing them unnecessarily.

How Does A Bowfin Fish Differ From Any Other Fin Fish?

How Does A Bowfin Fish Differ From Any Other Fin Fish

It’s just like filleting other fish, but there’s a slight difference since the ribs extend a little further down toward the anal fin than in white bass or stripers.

Compared to most game fish, the meat of this fish has a softer texture and should be cooked quickly.

Bowfin Fish And Its Nicknames

There may be no fish in North America with more informal nicknames than bowfin. What’s in a name, anyway?

No matter what we call it, a bowfin would still be a badass, ready to shake off the trash fish label (and possibly your ego and hook as well).

However, bowfin has long been regarded as “trash” and “rough” fish by general fishing communities, as their nicknames suggest.

The usual BS folklore can be blamed for this:

  • They harm game fish.
  • They are difficult to catch.
  • They are certainly unattractive to eat.

It is important to note that these common beliefs are unfounded.

Experience of Eating Bowfin

Experience of Eating Bowfin

While bowfin will fight spiritedly when you put them at the end of your line, most people believe you shouldn’t eat them, but they are wrong.

There is no comparison between them and walleye, northern pike, or sunfish, but they can be prepared so that they taste better.

When bowfin is wrongly prepared, its flesh will be soft and jellylike, and although it might be edible, most people won’t consider it palatable. They would be right when prepared wrong.

There is a reason why they call the bowfin the mudfish. The strong mud flavor is what keeps many bow fishermen away from them.

Bow fishermen report that the fish are edible, but not something they’d choose to eat. As bowfin age, they accumulate mercury in their bodies, and when a bowfin is older, it will have more mercury.

The risk of mercury harming an unborn child is particularly significant for pregnant women.

There is a risk that it can harm parts of a child’s body, such as the lungs, kidneys, and nervous system. Additionally, it could damage the nervous system of a young child. Nevertheless, mercury is an issue that affects all predatory fish.

What Does Taste Like?

What Does Taste Like

While bowfin is not a common food choice, a few daring fishermen have sampled it and reported that the texture is soft, and the taste is unremarkable.

Many found the mushy consistency and greyish color unappetizing, leading them to believe that it lacks flavor and texture. As a result, the majority of people tend to avoid eating bowfin due to its unappealing appearance and lackluster taste.

Why Is Bowfin Fish Called Cotton Fish?

Two words rarely used together: bowfin and morels. It is well known that bowfin is so vilified as table fare (unlike morels) that they are referred to as “cotton fish” due to the belief that they are generally pale in color and mushy.

Proper meat care and preparation pay dividends when it comes to cooking fish and game, and bowfin is no exception.

Their flesh is usually softer because they are often caught in relatively warm water in the dog days of summer. Filets that have been frozen do not keep well; when they come out of the freezer, they thaw into a squishy, cotton-like mass.

It’s important to keep bowfin alive as much as possible before filing, and then immediately prepare it for the table. Regardless of how soft the filets are, they firm up as they heat. A lightly breaded end product rivals pike or walleye.

Bowfin eggs, unlike their primitive counterparts, gars, often considered toxic, are considered a type of caviar, a la “Cajun caviar”.

Why Is the Bowfin So Hated?

Why Is the Bowfin So Hated

Unfortunately, many fishermen dislike bowfin and often kill them when caught. This is due to a misconception that bowfin prey on young game fish that are more desirable for fishermen.

Moreover, there is a lot of confusion between bowfin and snakeheads, which are not native to North American waters and are considered to be invasive species.

Bowfin, on the other hand, is native fish that has been around for a long time and are the only surviving member of the Amiidae family.

While they may not be the most attractive or desirable fish to catch, they play a valuable role in their ecosystem and should not be indiscriminately killed.

It’s important to distinguish between bowfin and snakeheads and to recognize that bowfin is not as destructive or invasive as its non-native counterparts.

Why Do We Need Bowfin?

Bowfins are highly adaptable and tend to thrive in the sluggish, less oxygenated waters of lakes and rivers. As a key predators, they play a crucial role in maintaining the balance of their ecosystem by preying on the most abundant fish species.

This helps to control the population of foraging fish and prevents overpopulation. Despite its unappealing appearance and unremarkable taste, the bowfin is a valuable part of our natural heritage and has been around for millions of years.

While we may not recommend eating this fish, it’s essential to recognize its ecological significance and strive to preserve its existence for many more years to come.

By protecting the bowfin, we are not only conserving a unique species but also safeguarding the delicate balance of our aquatic ecosystems.

Conclusion

While the bowfin fish may not be a popular menu item, it is indeed edible and enjoyed by some as a flavorful delicacy.

With its unique taste and texture, it can be prepared in a variety of ways and is worth trying for those with an adventurous palate.

However, it’s important to keep in mind that the bowfin fish can be difficult to catch and has a lot of bones, so it may not be the easiest fish to prepare.

How Strong Is An Orca? Orca Bite Force and 13 Other Facts

0

Orcas are extremely fascinating large black and white mammals who rule any body of water they live in. You may have heard about Orcas attacking other animals and even occasionally humans — so you may be curious about how much damage their bite can actually do.

Orcas have an estimated bite force of 19,000 PSI which means they are at the top of the ocean food chain and can take down anything that comes into its path. However, although Orcas spend most of their time hunting for food, they are not typically overly aggressive mammals and won’t generally bother with some other types of sea creatures.

In the wild, Orcas live an average of 30 to 50 years — with female Orcas occasionally living up to 100 years old. In captivity, this number is much lower — Orcas typically only live about 17 to 29 years. And there are many more interesting facts about Orcas including how they use their teeth as well as how they compare to sharks and other animals.

How Strong Is An Orca’s Bite?

It’s difficult to get an exact measurement of how hard an orca can bite, but it’s estimated that its bite force is an incredible 19,000 PSI (Pounds per square inch). To put this into perspective, the dog with the highest bite force (the Kangal) has a bite force of 743 PSI. This bite force can vary depending on the size, age, and sex of the Orca doing the biting, as well as how it is measured.

How Sharp Are Orca’s Teeth?

The large teeth of an Orca are conical (cone-shaped) and interlocking. These teeth are very sharp however they are not meant to use to simply chew food — they’re meant to rip the food apart into smaller chunks the Orca can simply swallow.

How Many Teeth Does An Orca Whale Have?

Orcas have teeth lining both their upper and lower jaws — they have 48 to 52 teeth in total! Orcas have 10 – 14 large teeth on either side of their jaw on both the upper and lower jaws. Their teeth start to grow in when they are just a few weeks old and will have their complete set of full-grown teeth by the time they are about 11 or 12 weeks of age.

How Big Are Orca’s Teeth?

Orcas have 48 to 52 teeth and all of them grow to be about four inches long. They are quite sharp in addition to being large for their size.

Do Orcas Teeth Grow Back?

Orcas only get one set of teeth in their lifetime, so any teeth they happen to lose will not be replaced. Since their teeth are large and they have quite a strong base, they don’t lose them too easily. So, most Orcas will retain most of their teeth throughout their lifetime.

Orca Teeth vs Shark Teeth

Although they may seem similar, Orcas and Sharks are quite different, and one main difference is the number of teeth they have as well as how they use them.

Orca Teeth. Orcas have only one set of roughly 50 teeth and they use these sharp, strong teeth to rip their food apart before they swallow the chunks whole.

Shark Teeth. Sharks have many rows of teeth — so they can have a few hundred up to a few thousand teeth! Sharks continuously lose their teethby biting and chewing (losing around 100 teeth a day is not uncommon!) but there are always new teeth ready to replace them. Sharks use their triangular-shaped, razor-sharp teeth to kill, rip apart, and chew up their prey.

Are Killer Whales And Orcas The Same Thing?

Orcas are commonly referred to as killer whales and the names are often used interchangeably — even by marine experts.

However, killer whales are actually not whales at all! Killer whales are actually dolphins — in fact, they’re the largest member of the dolphin family. All whales, dolphins, and porpoises fall under the order of Cetacea. However, it’s the teeth of an Orca that makes them fall under the suborder called Odontoceti — which means toothed whale. This is one popular theory about why Orcas are referred to as killer whales.

Another popular theory about how Orcas became known as killer whales is that in the past whalers called Orcas “killers of whales” and the name eventually got shortened and it stuck.

Are Killer Whales Aggressive?

While killer whales can look very aggressive when it comes to finding and eating their prey, they don’t generally seek to harm humans on purpose. And the aggression they show is simply them tearing apart their food to feed themselves and the other Orcas in their pod.

However, if an Orca is in a situation where they feel threatened, are protecting their family, or are prodded when they’re feeling emotionally unstable, they will likely lash out and injure — or even kill — any human that’s in their vicinity. It’s also often said that if killer whales are kept in captivity, they may get frustrated and depressed and lash out at a trainer or another human.

Generally, the aim of a killer whale is only to play in a friendly way with the humans they come into contact with. But unfortunately, their playing often will hurt a human because of the Orca’s strength, and the fact that they will often drag them underwater where they will usually drown.

Can Orcas See Color?

Orcas have excellent eyesight and they can see colorbut not in the same way that humans can. Orcas have two types of color receptors while most humans have three types of receptors. Therefore, Orcas have trouble seeing the red-green axis.

Do Orcas Eat Sharks?

Although sharks are major predators of the waters they live in, the one great natural enemy of a shark is the Orca! The Orca will win in a fight against a shark almost every time.

However, Orcas generally don’t hunt for sharks because while they will usually win, sharks have razor-sharp teeth and the fight they put up will generally harm the Orca before the Orca can finish them off.

Orcas have a very diverse carnivore diet and will typically hunt a variety of fish, as well as penguins, seals, moose, seabirds, whales, and even other dolphins. Orcas tend to hunt in pods of about 40 — mostly made of up families. Resident pods tend to be less aggressive and hunt only for fish and smaller sea creatures, while transient pods work together to hunt larger marine mammals — which they then share amongst themselves.

How Tall Is An Orca’s Dorsal Fin?

The dorsal fin is a major distinguishing feature of the Orca. Just behind the dorsal fin is a saddle-shaped grey area, referred to appropriately as a “saddle”.

Once an Orca is fully grown, its dorsal fin is tall and triangular and is an average of six feet tall.

Most female Orcas have slightly smaller, more curved dorsal fins that reach about three to four feet high.

How Big Do Orcas Get?

Orcas are considered to be the largest species of the dolphin family. Male Orcas will grow to be between 20 – 26 feet long, with female Orcas generally being a bit smaller — coming in between 18 – 22 feet long. To put this into perspective male Orcas are roughly the size of a bus. The longest Orca ever recorded was 32 feet long.

Male Orcas will typically weigh 12,000 pounds or more, while female Orcas generally weigh between 8,000 and 11,000 pounds.

Even when they are born, baby Orcas (calves) are roughly seven to eight feet long and weigh an average of 400 pounds.

How Often Do Orcas Eat?

Orcas need between 150 and 300 pounds of food every day in order to stay healthy and active. If an Orca is extremely active, they may need up to 375 pounds of food to make up for the calories they burn while hunting and traveling.

It’s not uncommon for an Orca to spend up to 90% of their day hunting for food.

Could An Orca Bite A Crocodile In Half?

With their super sharp teeth, an Orca very likely could bite a crocodile in half, however,it’s quite unlikely that would actually happen. Since Orcas tend to tear their food up before they eat it if they were to capture a crocodile, they would likely hold onto it with their teeth and slam it around until it was immobilized and then use their teeth to rip it apart.

Alternatively, if it was a large Orca that came upon a smaller crocodile the Orca may just swallow up the entire crocodile whole.

You Might Also Like:

  • How Strong Is A Grizzly Bear?
  • How Strong Is A Jaguar?
  • How Strong Is A Crocodile?
  • How Strong Is A Wolf?
  • How Strong Is A Hippo?
  • How Strong are Great White Sharks?
  • How Strong are Chihuahuas?
  • How Strong Is A Husky?
  • How Strong are Pit Bulls?

Best Budget Muzzleloaders for 2024

0

Over the last few years, prices on just about everything in the hunting industry have been gradually increasing, with muzzleloaders being no exception to this trend. With those price increases, we have seen many new and exciting products introduced, such as the Traditions NitroFire™ and the CVA™ Paramount.

However, the majority of hunters have a hard time justifying the purchase of a muzzleloader that is in the $600 to $2000 range, especially the hunters that live in regions with limited muzzleloading opportunities. Knowing this, we want to ensure that we offer highly effective muzzleloaders for a price that can be easily afforded by anyone who would like to give muzzleloader hunting a shot.

Our team set out to determine which muzzleloader is the best for hunters on a budget. Both of the muzzleloaders that were considered by our team are available with a scope for under $400. Below are our top two picks for the best budget muzzleloaders, with the winner listed at the end of this article.

CVA™ Wolf V2

The CVA Wolf™ V2 has been one of the most popular muzzleloaders in the US for almost a decade. With the compact design and affordable price point, the Wolf V2 is an excellent choice for someone looking to get into muzzleloading at an affordable level. The ability to get this muzzleloader with open sights for around $300 and with a scope and case for under $400 makes the CVA Wolf V2 an extremely attractive gun for many hunters. With a weight of only 6.25 pounds, its compact and lightweight design makes it perfect for all hunting applications. It also features the CVA Quick Release Breech Plug, which allows for tool-free removal of the breech plug and a hassle-free cleaning process. When it comes to budget muzzleloaders, the CVA Wolf V2 is leading the pack as one of the best.

CVA Wolf V2 With Scope Mount

Traditions™ Buckstalker XT

The Traditions™ Buckstalker XT™ offers all of the same great features of the original Buckstalker design, yet for 2024, Traditions has added the Elite XT™ trigger. This is the same premium trigger that is offered in the Traditions Pursuit VAPR™ XT and it provides a crisp and clean trigger pull.

Traditions prides themselves on producing some of the safest muzzleloaders on the market and with its trigger safety and internal block safety, the Buckstalker XT is no exception. This rifle also features the Traditions Accelerator Breech Plug, which is removed in only three turns, making the cleaning and unloading process incredibly quick and easy.

The Buckstalker XT is available with a scope for under $400 and can be purchased with a CeraKote™ finish for a small increase in price. The Traditions Buckstalker XT is a feature-rich muzzleloader that is sure to be effective in the woods and on the range.

Traditions Buckstalker XT Muzzleloader

Conclusion

Both CVA™ Wolf and Traditions™ Buckstalker XT muzzleloaders are excellent choices for anyone on a budget and wanting to experience muzzleloading, however, our choice for the best budget muzzleloader goes to the Traditions Buckstalker XT.

Though it is not quite as affordable as the CVA Wolf, we believe that the additional safety features, the Elite XT trigger, and the ability to upgrade to a CeraKote finish, give this muzzleloader an edge over the CVA Wolf.

We hope that this makes your decision a little bit easier and if you have any questions then feel free to contact our knowledgeable customer service at [email protected] or 1-855-236-5000.

Where Warm Waters Halt in The Thrill of the Chase Treasure Hunt ~ by Del Shannon

0
treasure hunt book
The Thrill of the Chase book (with treasure poem inside)

Where Warm Waters Halt

By Del Shannon

(The following is written in a manner of ‘in my humble opinion’)

Where warm waters halt…

This is the now iconic first clue written by eccentric millionaire Forrest Fenn. He’s earned the “eccentric” title in spades because of a single act: About 7 years ago – nobody is exactly sure except Fenn himself – he stole into the mountains north of Santa Fe, New Mexico and hid a treasure chest filled with $2 million of gold, gems and other valuables. And in an act that can only be called defiant, he wrote a book and a poem that describes the route to get to the treasure and dared anyone to try and unlock the riddle and claim his cache.

Since publication of Fenn’s The Thrill of the Chase in 2010, thousands of theories have been offered up as the location of this first clue. The location of the starting point of the hunt for Fenn’s treasure puts into context every other clue. Fenn has said you’re wasting your time if you’re searching without knowing where to start.

So where do warm waters halt? Not far from Questa, New Mexico.

forrest fenn treasure hunt his books
Forrest with some of his books

I first heard about Forrest Fenn and his treasure chest while sitting in the breakfast area of the Taos Hampton Inn eating a self-made waffle and sipping coffee. I was there working on the reconstruction of the Cabresto Dam, just east of Questa. The Today show was on in the background and this is when I first saw Fenn, his piercing eyes revealing more intelligence than his carefully selected words. He was explaining that all you had to do was follow the nine clues spelled out in a simple poem and you were rich. Just like that, my curiosity was piqued.

Buying Fenn’s book and starting my search around Questa and Taos was obvious and easy. The land seemingly disappears into oblivion at the Rio Grande Gorge and thrusts to the heavens just steps away at the Sangre De Cristo Mountains, creating billions of hiding spots. Working in the area revealed that the landscape and its population are one and the same. The people of Questa and Taos stand out as easily as the canyons and peaks that surround them, none is even remotely like another.

Very little in the The Thrill of the Chase pointed me to anything that resembled the area around Questa and Taos. Fenn waxes Quixotic about his youth spent doing anything but focusing on school, holding a special place in his heart for Yellowstone.

One story in particular gnawed at me like an obsessive-compulsive beaver. In an early chapter titled “First Grade,” Fenn recounts being bullied by a boy named John Charles Whatever who often threatens to beat up Fenn, while at other times waves around a jar of olives in his face. The more I read and reread this passage the more it began to look like a ham at Chanukah – bizarrely out of place.

All I had to go on was the name “John Charles” and his olives, so I started there. After internet searches with dozens of permutations, I finally got lucky. After reading a history of Questa, once known as Rio Colorado, I learned that the great explorer, John Charles Fremont, once spent a few months during the winter of 1849 in Questa.

Fremont had tried to cross the southern Rocky Mountains in Colorado during the winter of 1848-49 and convinced 32 gullible men into joining his folly. Fremont was from an era where braggadocio was a suitable proxy for intelligence and thrived in an environment of delusional arrogance. By December 1848 eleven of his party had frozen to death and most others had started eating their belts. The party finally gave up and began limping their way south to New Mexico.

The surviving members stumbled into Questa in January 1849, but Fremont, sensing his men would be in an extended sour mood once they could again feel their feet and hands, headed for Taos. He was off to California a few weeks later

A tragic story, but this new knowledge didn’t appear to put me any closer to the Fenn’s treasure. John Charles Whatever’s olives did.

Besides being a lover of history, Fenn is a fly fisherman. The Red River fights its way out of the mountains near Questa, its last gauntlet is a maze of basalt boulders below a fish hatchery. Fed by springs, the water stays a consistent 48 degrees in the winter. In this same stretch of water there is a mid-winter (January through March) hatch of blue winged olive flies, which, along with the warmer water, coax brown trout out of the colder waters of the Rio Grande…along with the fishermen.

Fremont and his olives were pointing to Questa.

Thrill of the Chase book (opened to chapter ‘In Love with Yellowstone’

Still, more detail was needed, which came from another of Fenn’s stories. One evening, while re-reading the In Love With Yellowstone chapter I stopped after Forrest described his dismay after his father sold the families ’36 Chevy for a ’41 Plymouth. Why on earth was this such an important part of his life? And why didn’t he use the numbers ‘19’ in front of these dates. Every other reference to a year in The Thrill of the Chase uses all four digits – 1926 for example, the year his parents were married.

Forrest’s attempt at alarm over this car sale seemed insincere. After chewing on ’36 and ’41, which were details that seemed misplaced, and while using Google Earth to snoop around the Questa area, I noticed the latitude in the lower right hand corner. If I hovered the little electronic hand directly over the center of the village and it read 36 degrees, 42 minutes north. Hmmm… Then I moved it to the fish hatchery and it read – exactly – 36 degrees, 41 minutes, 0 seconds north. Holy crap!

Two hints at the starting place are compelling. If I could find a third it would concrete the location of “where warm water halt.” A local fly fisherman supplied my requested last hint.

Van Beacham is well known in Taos as the owner of the Solidary Angler, a local fly fishing shop and guide business. He’s also the author of A Flyfisher’s Guide to New Mexico, and this is how Van describes the Red River from the fish hatchery to its confluence with the Rio Grande in his book. “The lifeblood of the Rio Grande Gorge, the spring-fed section of the Red River extending from the hatchery downstream about 4 miles to the confluence with the Rio Grande is the main spawning tributary for browns and cutbows in the bigger river. It also provides major holding water for big cutbows and browns since the water stays about 48 degrees all winter long. Due to the warmer water temperatures, the Red River is the premier natural winter fishery in northern New Mexico.”

The Red River provides “holding water” for cutbow and brown trout because of its “warm water.”

It takes very little effort to connect the words “halt” and “hold.” In fact, they essentially mean the same thing. The word “hold” takes its origin, its etymology, from the Germanic word “halten,” which means “to hold.”

Bingo.

Warm waters halt in the Red River between the fish hatchery and its confluence with the Rio Grande. This is where anyone seriously searching for Fenn’s treasure must start.

thrill of the chase treasure hunt map
Poem and Treasure Map

Where to from there? Down river. Rio arriba.

In Fenn’s opening chapter titled “Important Literature” one of the books he talks about is For Whom the Bell Tolls. As with John Charles Whatever and his olives, if you look only at the surface you immediately reach a dead end, but when you dig a bit you realize there’s more to learn. Before Hemingway used the title for one of his books, For Whom the Bell Tolls was a line in a poem written by John Donne, a 16th century metaphysical poet. Donne begins with the famous first line of his poem, “No man is an island…” and ends with “…and therefore never send to know for whom the bells tolls; it tolls for thee.”

Follow the Rio Grande downstream from its confluence with the Red River and you eventually reach the John Dunn Bridge, named for the famous Taos gambler and entrepreneur Long John Dunn, an escaped convict from Texas who built the first bridge and toll road across the Rio Grande at this location. The splinters of Dunn’s original timber bridge are somewhere near El Paso, carried there by numerous spring floods, and in its place stands a steel truss bridge built by Taos County. Connecting John Donne and John Dunn was easy and obvious, especially after learning that both Dunn and Donne are different spellings of the Gaelic word for “brown.” And because Dunn and Donne are proper nouns, capitalize the ‘B’ and you have Brown. Voila.

But John Dunn’s home wasn’t at the bridge, it was in Taos just north of the plaza in the area now occupied by the John Dunn House Shops. How could the home of Brown be at the Dunn bridge if Dunn never lived there?

This problem was resolved by the author Max Evans and his book Long John Dunn of Taos. This homage to Dunn describes, among other things, his early 1900’s transportation company – really just several horses and a stagecoach – and how he met Taos visitors and artists at the nearest train depot in Servilleta, then the only way in or out of Taos. He piled them into his stage, headed east in a cloud of dust across the Taos plateau, and then snaked them into the Rio Grande Gorge via a harrowing and ridiculously steep switchback road.

Dunn built a stone hotel at the bottom of the gorge and on the edge of the Rio Grande where travelers were forced to spend the night, most of whom were grateful for the stop and for surviving the tormenting trip into the gorge, before delivering them to Taos the next morning. Dunn’s hotel was run by his mother, Susan Jane Dunn, who also lived at the site. A short rock wall on the east side of the river is all that’s left of Mrs. Dunn’s home, the home of Brown.

All of that is pretty convenient, but I still wanted more on Dunn. It turns out The Thrill of the Chase is almost overflowing with references to John Dunn. In the chapter “Looking for Lewis and Clark” Fenn talks about taking Babe Ruth candy bars with him when he and Donnie went into the mountains outside of Yellowstone for several days. The problem is the candy is actually called “Baby” Ruth bars. If you look into Babe Ruth you learn that a man named John Dunn (everyone called him Jack) signed Ruth to his first major league baseball contact. Hmm…

Or look at Fenn’s odd reference to Robert Redford in the “Important Literature” chapter. One of Redford’s most famous movie characters was The Sundance Kid (aka Harry Alonzo Longabaugh). In 1897, Longabaugh was arrested by Carbon County Montana Sheriff John Dunn after he and others from his gang robbed a bank in Red Lodge, MT. Wow!

Three separate John Dunn references in The Thrill of the Chase aren’t a coincidence.

The second clue – Put in below the home of Brown – points to the John Dunn Bridge. It’s too far to walk from where warm waters halt at the confluence of the Rio Grande and Red River; about 14 miles if you drive or eight-ish miles if you fight your way on foot down the Rio Grande. All these hints point to these locations as the first two clues.

But be wary from here. ‘Putting in’ could mean crossing the river or heading either up or down the canyon. And if you cross the river, which direction do you cross from? Do you head west or do you head east? You could go in three directions from the Dunn Bridge. I have my own ideas of where to head next, but not the chest, so they remain only ideas.

An obvious question remains: Why am I sharing this? It’s not as if I haven’t tried to find Fenn’s treasure on my own. I’ve made many trips to areas I felt certain that, when I walked out, I would be struggling to carry over 40 pounds of gold, jewelry and artifacts back to my car. But I’ve learned that the search isn’t as simple as my romantic visions make it out to be. It took a couple of years to unlock these first two clues and it may take much longer to unlock the rest.

And if I’m completely honest with myself, I’ll admit that I’d like the treasure found, in direct contrast to Fenn’s wishes that it be discovered 1,000 years from now. I’m a sucker for a good challenge wrapped in a mystery. So far I’ve done this alone, but I could be persuaded to work with someone else or as part of a larger group in the right circumstance. It’s always more fun to work with a team.

lost treasureFor the record, I didn’t contact Fenn for this story. What would he have said to me anyway? At best he would have complemented my sleuthing. More likely he would have just silently shrugged, smiled at me with his quick eyes, and walked away. I figure he’s done what he wanted to do and, whether or not he enjoys the attention he’s created, I’d make my own choice and leave him alone.
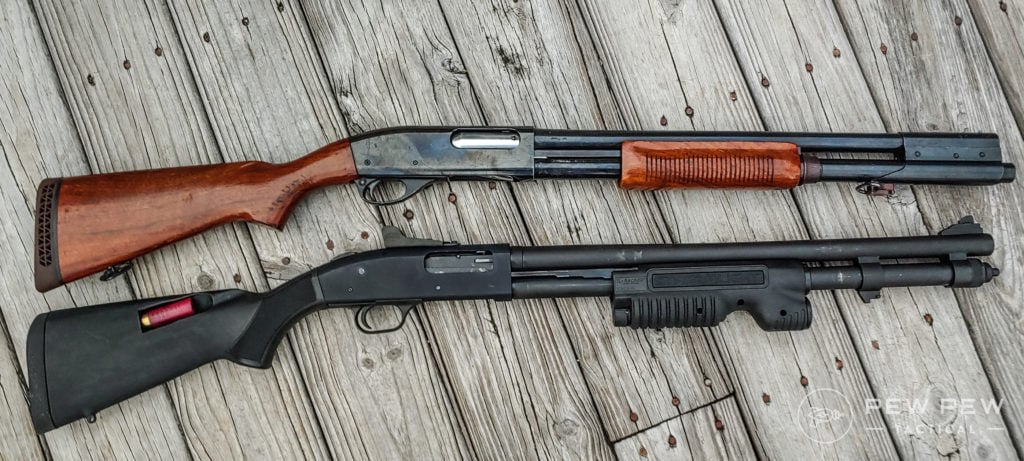
A final thought. To me, Fenn’s poem is a love letter to an area he unquestionably adores and which also helped him heal from his time in Vietnam. When you dig into the history of the Vietnam war, you learn that there is a Red River there too and pilots who flew into this maelstrom found some of the most dangerous air over this river.

I like to think that what Fenn found in New Mexico’s Red River was the thorough opposite of Vietnam’s. The paradox was not lost on him. In my mind I can see him casting for brown’s while marveling that one Red River could be filled to overflowing with death while the other held out its hand and reminded him there were still places where he could gently ease the visions of war from his head, replacing them with the rediscovered memories of the trout he chased in his youth as they led him, once again, to peace.

~by Del Shannon

.

If you would like to share your story or thoughts on MW, please send your submission to [email protected]!

Always Treasure the Adventure!

.

7 Easiest animals to hunt for beginners

0

Whether you are new to hunting altogether, or are a hunting mentor to a beginner, squirrel, rabbit, pheasant, dove, goose, antelope and bear are the easiest animals to pursue for the novice.

The seven animals on this list all find themselves here for various reasons. They may be easier to locate than other game or easier to get in close to. Some of these animals require little more than an armed hunter afield to harvest, while others may require more effort or different skill sets to acquire. Let’s take a closer look.

Spot/StalkDecoy/CallBaitPush/Drive
Common methods for harvesting game species.

Squirrel

Squirrel hunting is the quintessential beginner game species because they are everywhere, can be located relatively easily, can be hunted with different methods and hunted with small caliber rifles or small gauge shotguns which are both easier on new hunters.

Many seasoned hunters have cut their teeth chasing squirrels through oak forests, honing their accuracy with low-recoiling rimfire cartridges. Hunting squirrels also teaches new hunters other skills necessary to move on to larger game, such as walking through forests as quietly as possible as well as identifying camouflaged game.

Squirrels are often hunted with a spot and stalk method, where a hunter will begin by finding a squirrel rummaging the forest floor for hard mast such as acorns, or moving among the branches of the forest canopy. Squirrels can also be easily drawn into a bait pile, as hunters in states that allow baiting can attest. In this scenario, the hunter may simply still hunt a bait pile and wait for the squirrel to come in to feed, often taking them unaware.

Pheasant

Pheasants find themselves on this list primarily because they can be found in as many as 40 states, and 21 states actually stock pheasants for hunting purposes. Pheasant can be hunted with pointing dogs, but can also be done with a few friends pushing a field to flush the pheasant into the air. Pheasants are taken with shotguns, allowing for a spread of shot to help hit moving birds.

Practice with clays to hone your abilities for taking moving game. Pheasants are medium sized birds and your first flushed pheasant will present a challenging and exciting quarry. Pheasants are also very tasty table fare, adding a strong incentive to your hunt.

Mourning Dove

If the state you hunt in offers a dove season, you are in for a satisfying and educational begining hunt. Doves can be hunted by pushing fields and flushing the birds, or still hunting over a field and simply waiting for the doves to fly by as they move frequently throughout the day.

Mourning doves are small birds and are generally taken with light recoiling shotgun gauges. Though their smaller stature presents a challenging shot, they can be readily harvested with prior range practice. An upside to hunting mourning doves is the quality of their meat, which is delicious. A small group of hunters can take numerous doves, and a cookout is likely to follow your hunt.

Geese

Another migratory bird that beginning hunters can successfully harvest are the different geese species that populate North America. Geese are larger birds that generally fly in flocks, offering multiple, ample-sized targets to the hunter. An added incentive, Goose breast is a tasty meat that hunters will enjoy baked, grilled or fried.

Geese can be problematic for farm owners, who are more likely to allow access to their farms for hunters hoping to harvest these pesky birds. Geese are generally decoyed and called in to the hidden hunter who can take easier shots as the birds begin their descent to the decoy spread. Since geese are generally hunted over fields, retrieving dogs are not necessary, unlike ducks hunted over water.

Rabbit

Like squirrels, rabbits are everywhere, can be harvested using multiple techniques, and are generally taken with lighter recoiling firearms. Most rabbit species are considered excellent table fare, offering a nice reward at the end of a hunt.

Rabbits are generally harvested during a drive, either with dogs or simply with hunting partners but may also be taken using a spot and stalk method. The lighter recoiling shotguns or rimfire rifles are less daunting to beginning hunters, and moving through forest trails and agriculture fields keeps younger hunters engaged.

Antelope

If you live in a state with a healthy Antelope (Pronghorn) population, you have likely seen them grazing the flatlands. Antelope have excellent vision and are the fastest land animal in North America, but because they spend so much time out in the open, they can readily be harvested by a rifle hunter. The trick is to get as close as you can without spooking the antelope before taking a shot.

Using a spot and stalk method on antelope can teach beginning hunters about wind and how to move without detection. Antelope are medium sized game that do not require the hardest hitting rifle cartridges, allowing for newer hunters to be more accurate. Antelope is also a tasty game species.

Black bear roaming low tide shores, looking for crabs. Vancouver Island, Canada

Black Bear

Black bears are the largest and most dangerous species on this list, but can be readily brought into close range when hunting over bait piles. Not all states allow baiting, so know your regulations, but if baiting is on the table so may black bear. Be sure to cook bear meat thoroughly since, like pork, bear meat often contains a parasite called trichinosis which can survive if the meat is undercooked.

Larger game means larger caliber rifle for both ethical and efficacy reasons, so practice with the rifle you intend to take afield to ensure a successful and rewarding hunt. Remember, taking a bear at close range over bait is possible, but bears are heavy, so plan on having a friend or two ready to help break down and pack out your harvest.

Honorable Mentions:

Turkey, duck and coyote all deserve consideration as easy animals for beginning hunters.

Turkey

Turkey hunting is generally done by the individual, not in groups. If you are new to hunting and have not yet found hunting partners, turkey hunting is a solid option for a successful, solo hunt. Hunted with a shotgun and generally decoyed and called, there are some skills to learn to harvest turkey. The food quality of turkey makes these skills worth learning.

Duck

Duck species can be found all over North America, and many duck species are excellent on the dinner plate. Ducks are usually decoyed and called over water, generally necessitating a retrieving dog, and are fast on the wing. These attributes make duck hunting somewhat challenging for the beginning hunter, though this is mitigated by their numbers and range across North America.

Coyote

Not generally harvested for their culinary excellence, coyotes are still moderately easy game for new hunters based on their habitat range. Coyotes can be found in every state except Hawaii. Coyotes can be driven, hunted using spot and stalk methods but most commonly called in, baited or a combination of the two.

14 Types of Mushrooms in Michigan (Pictures)

0

Mushroom foraging has dramatically increased in popularity in the last few years. More and more people are passionate about getting outside and learning about the land they live and work in. Harvesting wild fungi is one way to participate in your local ecosystem, and if you live in Michigan, you are in a prime mushroom-hunting zone. Mushrooms prefer temperate climates with clear seasonal divisions.

Michigan is a great state for mushroom foraging because it has an abundance of forests, regular rainfall, and well-defined seasons. There are over 2,500 wild mushroom species that live in the state, and between 60 and 100 are edible.

Keep reading this article to learn about edible and toxic mushroom species in Michigan. We’ll talk about their growth habits, the conditions necessary for their flourishing, and, if they’re edible, what you can make with them.

14 Mushrooms in Michigan

This list contains both edible and non-edible mushrooms. When foraging is your responsibility to ensure that you properly identify the mushrooms on this list. They are clearly labeled and described with pictures and indicators of whether they are edible.

If you believe you have ingested a poisonous mushroom, seek immediate medical attention. Some poisonous mushrooms have slow-acting toxins.

Edible Mushrooms

The mushrooms in this section are safe for human consumption. Remember that all mushrooms must be cooked before eating, and that it’s your responsibility to properly identify a mushroom. If you’re in doubt, don’t eat it!

1. Hen-of-the-Woods

Hen of the woods mushroom
Hen-of-the-woods mushroom | image by Eric Huybrechts via Flickr | CC BY-ND 2.0
  • Scientific name: Grifola frondosa
  • Average size: 6 to 15.5 inches in diameter
  • Can be found: in oak forests
  • Edible: Yes

The hen-of-the-woods is a tree-growing mushroom species that shares some traits with its relative, the chicken-of-the-woods. They are two different species, however.

In Michigan, go hunting for hen-of-the-woods in oak and hardwood forests during late summer and fall. They live on dead, dying, and living trees.

The cap of the hen-of-the-woods ranges from 6 to 15.5 inches across. It’s wavy and multi-layered because the caps are clustered.

The texture is smooth and dusky brown. When cut apart, the flesh is solid and white.

2. Oyster Mushroom

Oyster mushroom
Oyster mushroom | image by Bernard Spragg. NZ via Flickr
  • Scientific name: Pleurotus ostreatus
  • Average size: 1 to 6.5 inches in diameter
  • Can be found: in aspen groves
  • Edible: Yes

The Oyster mushrooms are highly visible edible mushrooms that grow in the forests of Michigan. In the state, you’re most likely to see them in aspen forests. They have barely any stem and look like a cap is simply growing right out of the tree’s bark.

The light brown or white cap is 1 to 6.5 inches in diameter and they are relatively smooth to the touch. After harvesting this mushroom, don’t eat the stem. The flesh is white and tastes neutral.

They grow in clusters on living trees. Cooking these mushrooms is a simple task. They make a great side dish, especially as the weather gets colder.

3. Honey Mushroom

Honey mushrooms
Honey mushrooms | image by Charles de Mille-Isles via Flickr | CC BY 2.0
  • Scientific name: Armillaria mellea
  • Average size: 1¼ to 4¾ inches in diameter
  • Can be found: hardwood forests
  • Edible: Yes

The honey mushroom is a hardwood-reliant, tan or white mushroom that grows in forests. Michigan is the honey mushroom’s western range limit. It grows most often near the Great Lakes region in prolific clusters shaped almost like floral bouquets.

The mushroom’s cap measures between 1¼ to 4¾ inches across. The size changes depending on what part of the cluster the individual fruiting body grows in.

They are mild-tasting and have very pronounced fibrous gills on the underside of the caps. Notice a ring around the stem to identify them.

4. Bear’s Head Tooth Mushroom

Bear’s head tooth mushroom
Bear’s head tooth mushroom | image by John Carl Jacobs (JCJacobs) via Wikimedia Commons | CC BY-SA 3.0
  • Scientific name: Hericium americanum
  • Average size: 6 to 7¾ inches long
  • Can be found: on living and dead deciduous trees
  • Edible: Yes

In Michigan, the bear’s head tooth mushroom can be found in undisturbed forests. It grows directly from dead trees, stumps, and even living trees. While most recorded specimens were discovered on deciduous trees, others have been found on evergreen trees.

Bear’s head teeth have no circular caps like other mushrooms do. Instead, they grow in a linear pattern similar to a tree branch. Most average between 6 to 7¾ inches long.

On the ‘branch’ are hundreds of tiny frondlike spines. The full effect was similar enough to appear like the jawbone of a bear, which is how the mushroom got its name.

5. Golden Chanterelle

Golden chanterelle | image by Dr. Hans-Günter Wagner via Flickr | CC BY-SA 2.0
  • Scientific name: Cantharellus cibarius
  • Average size: 1 to 4 inches in diameter
  • Can be found: in forests and near recently burned areas
  • Edible: Yes

The Golden chanterelle mushrooms are a great starting point if you’re learning to forage. In Michigan, golden chanterelles grow in forests with abundant deciduous trees, such as the upper peninsula and the northern lower peninsula.

The cap of the golden chanterelle is between 1 and 4 inches across. It has wavy edges and the whole mushroom is funnel-shaped.

When foraging for this fungi, you will probably smell it before you see it. Its primary trait is its strong smell. Observers say the mushroom’s aroma is of apricots and citrus.

6. Dryad’s Saddle

Dryad’s saddle
Dryad’s saddle | image by stanze via Flickr | CC BY-SA 2.0
  • Scientific name: Polyporus squamosus
  • Average size: 2 to 12 inches across
  • Can be found: in hardwood forests
  • Edible: Yes

The dryad’s saddle is a creatively named mushroom that sprouts from the trunks of dead or living trees in early spring. It’s one of the first mushrooms you’ll see when foraging for fungi in Michigan. While looking for morels, it’s a great idea to keep an eye out for the dryad’s saddle too.

Most of this mushroom consists of a large cap that ranges from 2 inches to up to a foot across! The external texture is scaly and its color is light brown or warm tan. They are pretty thin like a pancake and the flesh is white when cut apart.

7. Black Morel

Black morel
Black morel | image by Thomas Woyzbun via Wikimedia Commons | CC BY-SA 4.0
  • Scientific name: Morchella angusticeps
  • Average size: 1 to 3 inches tall
  • Can be found: in forests near dying hardwood trees
  • Edible: Yes

If you aren’t looking for a golden chanterelle, chances are you’re probably looking for a morel. Morels are great mushrooms to cook with. They add a wild, nutty flavor to dishes, not to mention a little luxury too.

In Michigan, hunt for morels in the spring. They grow in high-moisture environments near dying hardwood trees.

The caps are taller than they are wide. Most caps measure about 1 to 3 inches tall, but only 2 inches wide.

They are dusky brown and dark inside all of the folding and honeycomb patterning. The stem is chunky for how small the cap is, and sometimes it looks disproportionate.

8. Short-stemmed Russula

Short-stemmed russula
Short-stemmed russula | image by Katja Schulz via Flickr | CC BY 2.0
  • Scientific name: Russula brevipes
  • Average size: 2 ¼ to 7 ¾ inches across
  • Can be found: under needles in coniferous forests, esp. Douglas Fir
  • Edible: Yes

The short-stemmed russula is a mushroom of variety. It adapts to different tree types, can grow alone or in groups, and grows from summer into late fall and even winter, if it’s warm. In Michigan, it can be found underneath piles of pine needles.

The caps measure from 2 ¼ to 7 ¾ inches in diameter. They’re usually tilted in a saddle-like shape. They’re thick and well supported by a robust stem.

While these mushrooms are edible, they need a lot of seasoning because they can sometimes be bitter. Mushroom hunters often let them alone until they transform into lobster mushrooms thanks to infestations of another fungus.

Non-edible Mushrooms

These mushrooms cannot be eaten. Some are inert and can’t be eaten, but some are toxic and have the potential to cause hallucinations or even death. Do not eat any of the mushrooms on this part of the list.

9. Death Angel Mushroom

  • Scientific name: Amanita bisporigera
  • Average size: 1 to 4 inches across
  • Can be found: growing from the ground in mixed forests
  • Edible: No. TOXIC

The death angel mushroom is aptly named; it’s one of the most deadly mushroom species in the world. Consumption of this mushroom results in poisoning from amatoxins, which attack the liver and kidneys. In Michigan, find this mushroom during the summer and fall in coniferous or deciduous forests.

Death angels have a cap averaging 1 to 4 inches in diameter. It is smooth and white, as is the rest of the mushroom.

However, there is a baglike volva around the base of the fungus and a small, scarflike ring near the top. They grow in groups and have many closely spaced gills.

10. Panther Mushroom

Panther mushroom | image by xulescu_g via Flickr | CC BY-SA 2.0
  • Scientific name: Amanita pantherina
  • Average size: 1 to 7 inches in diameter
  • Can be found: near conifers and pines
  • Edible: No. TOXIC

The Panther mushrooms are common throughout the northern United States, including Michigan. Unfortunately, they’re extremely toxic so they should never be harvested or handled. They grow in Michigan’s pine forests because they have a symbiotic relationship with the fungi in the trees’ roots.

A panther mushroom’s cap feels scaly and measures between 1 and 7 inches across. The small scales fall off when touched. They are somewhat bulbous and form a squat figure against the dirt from where they grow.

11. False Morel Mushroom

False morel mushroom
False morel mushroom | image by Michael Mortensen via Flickr | CC BY 2.0
  • Scientific name: Gyromitra esculenta
  • Average size: 2¼ to 6 in diameter
  • Can be found: underneath conifers
  • Edible: No. TOXIC

The False morel mushrooms look similar to true morels so they were named to tell the two species apart. Unfortunately, false morels are poisonous and pose a health risk to humans. In Michigan, you can find false morels in the springtime in pine forests.

Don’t be scared about telling them apart from true morels. It only takes a little practice. False morels have extremely wrinkled, ‘brainlike’ caps 2¼ to 6 inches across.

Their stems are proportionally very small compared to true morels. Lastly, they are reddish, not cool brown like true morels.

12. Eastern Jack O’Lantern

Eastern Jack O’lantern
Eastern Jack O’lantern | image by Virginia State Parks via Flickr | CC BY 2.0
  • Scientific name: Omphalotus illudens
  • Average size: 2” to 4” in diameter.
  • Can be found: in forests
  • Edible: No. TOXIC

The eastern Jack O’Lantern’s creative name comes from its bright orange color. This is a sign for all mushroom foragers to stay away: this mushroom is highly toxic. It contains a poisonous compound called illudin, which destroys the human body’s ability to replicate DNA.

Eastern Jack O’Lanterns grow in highly layered shelf-like aggregates. An individual mushroom’s cap measures between 2 and 4 inches in diameter.

The outer edge is slightly frayed and darker orange. Lastly, the mushroom has another interesting trait: it glows in the dark!

13. Autumn Skullcap

Autumn skullcap
Autumn skullcap | image by Rocky Houghtby via Flickr | CC BY 2.0
  • Scientific name: Galerina marginata
  • Average size: ½ to 1 ½ inch in diameter
  • Can be found: on dying conifers
  • Edible: No. TOXIC

The autumn skullcap is known by many names, including the funeral bell and the deadly galerina. The names all describe the same mushroom, which is extremely poisonous. In Michigan, it can be found in dense forests, especially ones with a high percentage of conifers.

The cap is folded inward so that the outer edge is underneath the umbrella of the mushroom. This edge curls outward as the mushroom ages.

Normally, caps range between ½ to 1½ inches across. Be careful when searching for mushrooms similar to the autumn skullcap. Most deaths have been due to cases of mistaken identity.

14. Death Cap Mushroom

Death cap mushroom
Death cap mushroom | image by Lukas Large via Flickr | CC BY-SA 2.0
  • Scientific name: Amanita phalloides
  • Average size: 2.25” to 6” in diameter
  • Can be found: Oak forests
  • Edible: No. TOXIC

The Death caps are extremely toxic mushroom species that grow in Michigan’s oak-dominated forests. They can grow in groups or alone, but they’re almost always around oak trees. If you see one of these mushrooms, leave it alone.

The mushroom’s white or gray cap is about 2 ¼ to 6 inches across. It drapes down like a small umbrella.

There’s also a growth around the base that looks like a bag; this growth is called a volva. The stem also has a crumpled ring that is level with the outer edge of the umbrella.

Remington 870 Vs. Mossberg 500: [Battle of the Pumps]

0

The American pump shotgun market is ruled by two guns, the Mossberg 500 and Remington 870.

These guns have been subject to at least as much debate as to the 9mm vs. 45 ACP or the Glock vs. 1911.

rem Vs mossberg
Remington 870 (top) and Mosberg 500 (bottom)

While they are very similar, they are also very different. Just saying Mossberg 500 or Remington 870 is a bit misleading. Both guns have dozens of variants.

These guns are not just a single line but a series of shotguns.

With Mossberg, we have the 500, the 535, the 590, the 590A1, the Shockwave, and so on.

With Remington, we have the Express, Wingmaster, Tactical, the TAC 14, the DM models, and more.

Tac-14 Fireball
Tac-14 Fireball

We are keeping this generalized to the specifics of these family of shotguns. When necessary I’ll mention exceptions within these families if rules are broken.

I want this to be a look at both the inside and outside of the guns and what’s important to shooters.

Both guns are similar, and they come in 12 gauge, 20 gauge, and 410. Both are pump-action shotguns, both are American made, and both can be used for home defense, hunting, and police and military use.

Types of 12ga Shotgun Shells (L to R: Bird, Buck, Slug)

There are quite a few differences, though. That’s what we are going to explore today, the differences between these two guns.

The Controls

The most significant difference any shooter can easily pick up on is the difference between the safety locations on a Remington 870 and a Mossberg 500.

Safeties
Mossberg safety over the tang (top) Vs. Remington’s cross-bolt safety (bottom)

The Remington 870 uses a traditional push-button safety located on the trigger guard. Mossberg uses sliding safety located on the tang of the receiver.

The Remington 870’s safety is positioned behind the trigger and easy to reach.

It can be used with any stock system with ease. It is much more friendly with right-handers, but that being said, a left-handed friend of mine uses an 870 and destroys us at shooting clays.

Remington 700 Safety Button
Remington 870 Safety Button

The Mossberg 500 safety is completely ambidextrous but challenging to use on shotguns with pistol grips. This includes practical pistol grips that utilize stocks as well.

It takes a mighty reach upwards on Mossbergs with pistol grips

Mossberg 500 Safety Switch

While the safeties are the easiest difference to spot, the other difference is the slide release. Both the Mossberg and Remington position the slide release on the left side of the trigger unit.

Remington places there forward of the trigger, and Mossberg positions theirs behind the trigger.

The Remington 870 suffers from the fact that you have to break your firing grip to reach forward and release the slide. The Mossberg 500 series can be activated without breaking the firing grip.

The Difference in Actions

One difference you can’t see, but you can feel is each gun’s actions. Both use twin steel action bars for increased durability.

You notice how handy those twin action bars are when you handle something like an old 1897 and feel how fragile a single action bar is.

The Remington 870 uses a robust, one-piece design that combines the action bars and pump. The Mossberg 500 series uses two pinned action bars that are anchored to a separate slide assembly.

Inspect and clean the rails
Remington 870 Rails and Pump

The end result is the Mossberg pumps tend to feel sloppy, and they move around quite a bit. You can feel the slop in your hands as you pump the weapon.

The Remington 870 tends to be tighter and smoother. It gives an overall higher quality experience. If you want to tune a gun up, get a Remington, and you’ll be shocked at how smooth a competent smith can get a Remy action.

receivers
Mossberg 500 featuring some easy to install upgrades

The 500 series does make it easier to replace and repair the action. Should a bar get bent, it’s easy to unpin the bar and remove and replace it. If a Remington 870 bar gets bent, it can be challenging to pull out the entire system and replace it.

Material Differences

One of the most significant differences you can’t see is what material makes up your shotgun’s receiver.

Don’t feel bad.

Most people can’t look at a metal and tell you what it is.

This material difference is one of the biggest differences you’ll likely never notice.

Remington 870 (8)
Remington steel receiver (top) and Mossberg aluminum receiver (bottom)

The Remington 870s use good ole ‘fashion American steel. Well, I don’t know if it’s American, but it is steel. This gives the 870s a more substantial receiver overall.

The Mossberg 500 series uses aluminum receivers. While steel is stronger, there is likely never going to be a time you can break a Mossberg 500’s aluminum receiver. While the difference exists between the materials, there is no practical advantage to using steel over aluminum.

AR-15s are made from aluminum, and we trust it’ll work.

The most significant practical difference is the weight of the guns. Remingtons, on average, tend to be heavier guns by anywhere from a pound to half a pound when like vs. like is compared.

Remington 870 with Streamlight
Two lovely Remmingtons, an 870 Express (top) and a very cool Ohio National Guard 870 (bottom)

More weight isn’t exactly a good or bad thing, it’s just different. Stalking deer? Lightweight is nicer. Skeet shooting? Heavier makes for a smoother swing.

Magazine Tubes

Another somewhat hidden, but often desirable feature for shotguns is extending the magazine capacity. Shotguns are typically restricted to a relatively low ammunition capacity. The ability to add a few extra shots can be highly desirable.

Careful, that spring might go sailing!
Remington 870 with Streamlight and aftermarket extended magazine tube

With the Mossberg 500, it’s complicated. Adding more capacity is difficult because of the magazine and barrel design. To do so, you need a new barrel and matching tube to do so.

You can’t just screw on an extension and go for it. The barrel attaches directly to the magazine tube and not around it. The Mossberg 590 series corrects this and allows you to connect a magazine extension directly to the tube.

The Remington 870 is traditionally a simpler weapon to utilize when it comes to adding an extension. Remove the magazine cap and then screw on the extension.

Uncle Buck Drill
Careful, that spring might go sailing!

Well, that was the old days. Now on a lot of models, they are dimpling the magazine tube.

This makes it impossible for the spring and for rounds to travel into an extension. It’s likely the tactical models don’t have this dimpled magazine tube, but a lot of the non-tactical models will.

The only solution is too remove the dimples yourself via power tools or pay a gunsmith to do it.

12ga Shotgun Shells, Opened (L to R: Bird, Buck, Slug)
MFW it’s time to drill something

You can’t swap the magazine tube for another without a dimple because Remington solders the magazine tubes in place.

These soldered tubes can be a major hassle if you damage the tube and need to replace it.

With Mossberg designs, you simply have to heat up the Loctite and unscrew the magazine tube.

Extractors / Ejector

Improper extraction and ejection are likely the most common cause of firearm’s malfunction outside of ammo related issues. Needless to say, it’s an important function. Shotguns deal with an odd round when you think about it.

Remington single extractor
12ga Shotgun Shells, Opened (L to R: Bird, Buck, Slug)

It’s a bulky hybrid of plastic and brass that’s often cumbersome, comes in various lengths, and can be all sorts of different weight and projectile types. Being able to extract and eject any and all shells are essential.

Remington uses a single extractor that grips the rim of the shells and rips them outwards.

Mossberg dual extractors
Remington single extractor

Mossberg uses two extractors to help guarantee reliability. The dual extractors are great because if one breaks, the other will still work, and you can run the gun until you can repair it.

Fiddler on the roof I dont know
Mossberg dual extractors

I’ve fired a lot of rounds from shotguns, especially 870s and 500s, and I’ve never had a single extractor break, but redundancy is often an effective safety measure.

The good news is both can be replaced at home with both guns.

Each gun’s ejector is a different story. Mossberg continues its tradition of being user accessible with an ejector that screws in. Remington continues to be the iPhone of shotguns with a riveted ejector making it challenging to replace.

I stripped a Mossberg 590 receiver for a friend, and it took a little heat gun action and a flat head screwdriver to remove the ejector. I wouldn’t know where to start with an 870.

Shell gates
How to remove the ejector on a Remington 870

The Shell Lifters

The shell lifters aren’t exactly something you think about when you first handle a shotgun.

Once you start loading and shooting a lot, and primarily when you shoot Mossberg 500s and 870s a lot, you notice that the Mossberg is more comfortable to load.

The Mossberg uses a patented shell lifter that is both skeletonized and in the always up position.

The Remington uses a standard shell lifter that stays down and acts as a gate to the gun. It’s a solid slab of metal that sits below the bolt and action. To load a shell, you press the shell lifter up and slide it into the tube.

Mini Shells
Shell gates! Remington (top) and Mossberg (bottom)

The shell lifter can slow you down, and when you are going fast, it likes to pinch you.

The Mossberg skeletonized and always up shell lifter is out of the way, and you can smoothly load one or two shells with little effort.

The skeletonized lifter also allows you to fix malfunctions easier. You can reach through the bottom of the gun, and this can help you free a stuck shell.

The Small Things

Here are a few small things you may want to consider when purchasing either gun. These didn’t fit into any other category and are not significant enough to warrant their own category. So let’s not forget about the small things.

Adding an Optic

The Mossberg 500 series are all tapped and ready to add a scope rail and an optic. The Remington 870 is not universally tapped, which means a trip to the gun smith, or a Burris Speedbead system needs to be installed.

Check out more in our Best Shotgun Sights article.

Mini Shells

Mini shells are tons of fun! They are low recoil, easy to shoot, and decently affordable.

Both guns can fire them, but the Mossberg 500 series can be fitted with an adapter from Opsol.

Excellent bill and ted
Mini Shells are just too much fun to not have around

This mini clip allows the mini shells to feed 100% of the time. The 870 cannot be fitted with this adapter.

Barrel Thickness

The Remington 870 has a thicker barrel than a standard 500. It’s equivalent to a Mossberg 590. You can buy the upgraded Mossberg to get the thicker, stronger barrel.

Price

The Mossberg 500 tends to be cheaper, but the Remington 870 is only a hair more expensive. It’s also fitted with a steel receiver and a thicker barrel. The 590 series are more expensive than the 870 Express models, as well.

Remington 870 (17)

A US Army Testing Procedure

The US Army has a testing procedure called the MIL-SPEC 3443 test, which is a brutal 3K round test that pushes shotguns to the edge.

The Mossberg series has been the only shotgun to pass this rigorous test.

Here’s us with our 590A1 and some Winchester 00 buckshot…

The requirement calls for a metal trigger group, so only the 590A1 and 500 MILS qualify to fit the criteria.

Customizability

If you want to customize your gun, you can go with either model and be quite successful with that goal. There are crazy amounts of parts out there for both weapons.

You can do almost anything.

You can swap stocks, pumps, add sights, side saddles, and more to each gun. You can do a ton with either, and it’s hard to say which is better overall.

Remington 870 (15)
My collection of Remington 870 shotguns

Both guns are straightforward to customize, and you have plenty of options to do so.

Of course, we have articles to help you with both!

  • Best Remington 870 Upgrades
  • Best Mossberg 500 & 590 Upgrades

Which One is For You?

That’s a good question.

My chosen home defense shotgun is the Mossberg 590, but my favorite shotgun ever is my antique Ohio National Guard Remington 870.

Remington 870 Vs. Mossberg 500: [Battle of the Pumps]
Ohio Army National Guard Remington 870.

Both guns have their favorites, and I will say Remington guns have been rough since 2007.

Once Freedom Group took over, quality went downhill noticeably.

However, they seem to have turned that around!

A lot of their new guns are looking, feeling, and shooting much better these days.

If you are having trouble deciding, let’s examine a few considerations.

  • If you want a gun, you can service and fix yourself, choose the Mossberg 500 series.
  • If you want a gun that uses a pistol grip with stock, then choose the Remington 870.
  • If you want a gun that you can abuse and not spend a ton of money on buy a basic Mossberg 500.
  • If you want a gun, you can beat up and likely pass on down to your kids, buy an OLDER Remington 870.
  • If you’re left-handed, go with a Mossberg.
  • If you want a gun that’s tight, smooth, and feels ultra-lux, go with the Remington 870 Wingmaster.
  • If you want what the military uses, go with the Mossberg 590A1.

And if you want even more options, we also have a video on the Best Pump Action Shotguns for Beginners.

Conclusion

Both the Remington & Mossberg are super popular and reliable pump action shotguns. Mossberg has the ambidextrous safety, double-extractor, nicer shell lifter, tons of upgrades, and is used by the military. While Remington has the smoother action, steel receiver, and better pistol grip setup.

The right one for you is a personal choice, but now you have the tools to make that choice.

My big question to you is, which one is for you, and why? Let us know in the comments! Don’t forget to get some feed for your new shotty, take a look at The Best Shotgun Ammo: Home Defense & Target Shooting! Or if you want to upgrade it…Best Home Defense Shotgun Upgrades.

Best Air Rifle Deals

Popular Posts

Air gun 101: What is a PCP air rifle? Is PCP gun the best...

0
A PCP air gun is one of five types of air rifles in the market today. PCP air guns have become more and more...

PCP vs CO2 Guns: Which One is Better?

0
The most talked-about debate between hunters and gun enthusiasts is what the best power source of a gun is.  The five main sources of power...

How to choose the right Air Gun Caliber for your game?

0
A story is told of three Native American hunters. Two are smart, the other somewhat ignorant. On the first day of the hunting season, one of...