Home Blog Page 54

Can You Refreeze Venison After It’s Thawed Out?

0

Hunting season can mean a generous amount of deer meat to process and enjoy. But if you are like me, you set out a pack of venison to cook, and then life gets in the way…

Can you refreeze that venison after it’s thawed out?

The Deer hunting community seems to have this rumor floating around…” you cant refreeze deer meat!”

But that’s just not true…

You can refreeze thawed venison without safety concerns, provided you make sure it has been kept cool and dry, such as in the refrigerator. After that, the only real issue with re-freezing is that you may notice a distinct drop in taste and tenderness from moisture loss.

If you are looking into making the most out of your venison, keep on reading.

In the rest of this article, I’ll get into the details of how protein-rich and flavorful venison meat is processed and stored and how refreezing them could impact quality.

Table of Contents

  • Can You Refreeze Defrosted Venison?
    • What Is Venison?
  • What Happens When You Refreeze Defrosted Venison?
  • How To Transport and Process Freshly Hunted Venison
  • How Do You Store Venison?
  • Do You Need To Freeze Venison?
  • How Should You Thaw Venison?

Can You Refreeze Defrosted Venison?

According to the US Department of Agriculture, you can still refreeze thawed meat, although you must handle it correctly before being refrozen. This includes keeping venison thawed in the refrigerator for a maximum of four days or at room temperature for no more than two hours.

Thawed meat also cannot be left out of the fridge at a temperature above 90 °F (32.22 °C) for more than an hour.

Be mindful, however, that these standards are the essential elements of safely storing and preparing meat products for future consumption. Safety, though, does not necessarily guarantee quality.

Unfortunately, the taste and quality of venison can deteriorate when refrozen, so this is something you will also have to consider.

It’s also important to fully understand the meat you’re working with, as it has slightly different properties to beef and pork.

What Is Venison?

Venison is any portion of deer meat that is edible. Generally, venison includes all the deer’s internal organs, such as the heart, kidneys, liver, intestines, and of course the main cuts of red meat. It takes its name from the Latin word venatus, which literally means “to hunt.”

Composition-wise, it resembles that of beef and can also be prepared into similar cut-types such as chops, cutlets, tenderloins, and ribs.

In the United States, Canada, and other countries like Australia, deer hunting is extremely popular. Hunters help regulate populations, and in turn, provide funding through license sales that help fund conservation efforts.

Whitetail deer is the most popular big game mammal in the United States, and millions of ethical hunters harvest and process their own venison for the dinner table.

Me included!

What Happens When You Refreeze Defrosted Venison?

We’ve already established that refreezing defrosted venison a second time is generally safe, given that you observe certain safety caveats.

Many are curious, though, about the specific trade-offs when you refreeze venison and why it is usually discouraged.

While refreezing venison is safe, it can come with quality tradeoffs. In a mini-experiment, tasters compared two types of cooked venison meats, with the first thawed once and the second twice. They found the twice-frozen venison meat either less tender or less flavorful.

Still, it depends on the overall food preparation and handling, as one of the tasters reported that they did not notice any difference between the two types of meat’s overall flavor.

How To Transport and Process Freshly Hunted Venison

Freshly hunted venison needs to be processed correctly to avoid contamination and possible poisoning. Licensed venison processors adhere to safety standards to produce safe, retail-quality deer meat.

Upon transporting deer carcasses from hunting to initial processing, handlers must ensure that environmental elements or fecal matter do not contaminate the raw meat.

During transport, pack ice cubes into the deer’s cavity to keep its insides cold. Ice must be contained in a sealed pouch as once it melts, excess water inside the cavity may lead to spoilage. Carcasses must also be processed immediately and placed away from sunlight to maintain their freshness.

Especially when the ambient air is above 40 °F (4.44°C), hunters must refrigerate venison as soon as possible, ideally within three to four hours.

If you bring your venison carcass to a meat processor, they could refuse to handle it if they find apparent signs of meat mishandling. The measure is necessary to keep you and the rest of your family safe by consuming only fresh venison, so it is best not to argue with them.

How Do You Store Venison?

You should store venison below 4 °F (-15.56°C). Raw, uncooked venison also cannot stay in the refrigerator for more than four days. However, if you plan to cook it after a more extended period, there is always the freezing option.

Just make sure to portion your venison into meal-sized cuts to prevent you from thawing excessive amounts when you decide to cook it.

Also, ensure that the packaging you’re using to store your venison in before freezing is not permeable to the air.

Freezer burns often occur when meats are frozen in the presence of oxygen, resulting in the deterioration of meat quality, color, and taste.

To prevent freezer burns, wrap your raw venison portions in butcher paper. I recommend using Reynolds Freezer Paper Plastic from Amazon.com. This packaging has a wax-lining on the side the meat touches preventing oxygen from penetrating the meat during storage.

You can also invest in a vacuum sealer like the FoodSaver FM2100-000 Vacuum Sealer Machine System and buy rolls of vacuum-sealer bags like the Vacuum Sealer Bags Heavy Duty.

All you have to do is put your raw venison portions into the bags and let your vacuum sealer do the work. The sealer sucks the air out of the bag, ensuring that your venison is in an oxygen-free environment for the entire freezing time.

See Also: Can You Eat Venison Rare?

Do You Need To Freeze Venison?

You do need to freeze venison if you don’t plan on eating it right away to prevent bacteria and parasites from ruining it. At low enough temperatures, the activity of these organisms can completely halt due to the slow movement of molecules inside the meat.

The US Food Safety and Inspection Service recommend freezing all kinds of meats, including venison, to 0 °F (-18 °C) to keep them safe for consumption indefinitely.

However, prolonged freezing time may affect the quality of meat. Fortunately, the quality of frozen raw venison will remain more or less the same for 8 to 12 months as long as it is prepared and packed correctly.

How Should You Thaw Venison?

To thaw venison, you can either let it thaw in the fridge, immerse the whole package in cold water, put it in a microwave, or skip the separate thawing part and cook it immediately. The most important thing to note is that It is not safe to thaw venison at room temperature.

It will likely take one to two days to thaw venison in a fridge, and if you store them in large chunks, each pound of venison could take an additional five hours of thawing time.

If you need the thawed venison a little faster, you can opt for the cold water thawing. Place the venison in a leak-free container, usually a plastic pouch, and completely immerse in cold water.

While the last step can be much faster, you will also have to be physically present to change the cold water once every half an hour and check for possible water leakage into the meat as this could lead to spoilage.

See Also: Why Does Eating Venison Give Me Gas?

  • How to Clean a Deer Skull Found in the Woods (EASY STEPS)
  • 3 Easy Ways to Whiten Deer Antlers (Skulls)
  • How to Preserve a Coyote Tail (Easy Method)
  • How Dangerous is Public Land Hunting?
  • How Much Do Coyote Pelts Sell For?
  • Are Creeks Considered Public Land? Well…It Depends.
  • Are State Forests Public Land?
  • Can You Use Climbing Spikes on Public Land?
  • Is it Legal to Pick Flowers on Public Land?

Whitetail Blood Tracking Guide

0

*My latest book, All Weather Whitetailsis now available!

Backing Out For Wounded Whitetails

Trust me I have heard them all, including: “It’s going to rain”, “the yotes will find him first” and “snow is coming”. Although some hunters may not admit it, I think you can even add, “I have to get home” and “I have to work tomorrow”, to the list of reasons not to back out. However, the hunters I personally know who experience nearly a 100% success rate for recovering mortally wounded whitetails, all have one thing in common: Patience. If “when in doubt, back out” is the king of whitetail recovery phrases, “Patience” it’s single root word of success.

Exercising patience with anything in life is difficult and the art of tracking a wounded whitetail is absolutely no exception. But, if you want to consistently find a deer that you just shot, you have to apply a whole lot of patience. The decisions that you make within the first few minutes after you shoot a deer, will directly dictate the rollercoaster of emotions that you experience for hours or even days to come. The reliable level of predictable tracking success is based on the behavior patterns of wounded whitetails.

Top Whitetail Blood Tracking Tips

*A mortally wounded deer will lie down within 200-300 yards (or first thick cover) and will expire in the time-frame of the specific hit. Unless pushed, this will be the final resting place for your deer. If pushed from this location, the deer will usually go in excess of mile or more, depending upon cover, with little to no blood trail. Unless you are extremely lucky the odds that you find your whitetail are extremely low, even if you only jump him 1 time.

*If raining or snowing, you dont have much to lose by waiting. If you have a good hit, the deer will only go a short ways, making recovery relatively easy, even with no blood trail! If the deer had a marginal hit, hurrying to track because of an approaching rain or snow will only push the deer and you have a great chance of losing the deer anyways. Do you have lots of coyotes or other predators in the area? Same thing…jumping a bedded deer will only lead to the same results of jumping him in the rain or snow. 1 jump and he is typically gone for good, so taking a chance that a predator finds him is better than the certainty that he will be lost if he is pushed to early.

*Just because you see a double-lung hit, doesnt mean thats what hit it was. Our mind has a way of tricking us into thinking we did a better job than we did (we practiced, aimed hard, took a careful shot-had to be good!). Believe it or not, a deers reaction is quick enough to completely avoid an arrow, even within 10 yards. If a deer reacts just slightly to the sound of the shot, your arrow can be no where near where you aimed. Also, do we always make a perfect shot?I know that I don’t, which is why I thought is was important to relay this informationt to you.

*Unless you see your deer fall, it is always best to wait until morning, or later in the day, even if you think you made a good shot. This practice has resulted in dozens of 100 yard tracking jobs that ended with a deer that had expired hours earlier. But I can also say that this practice has ended with at least 2 deer that were still warm to the touch.

*If you know you made a double-lung shot, with a heavy blood trail and plenty of bubbles, and are also confident you made a perfect shot; wait an hour and go get your deer. The problem with this is that it takes many years of experience and tons of confidence to determine exactly what situation and hit is yours. Each year there are many lost liver shot deer that fell victims to I know I shot a double lung, when in fact it was not. I consider all my deer trophies, and even if I know I shot a great shot, I still give the animal the time and respect it deserves to expire. If you shoot a buck early in the morning, go have breakfast, go shopping, call some friends or even take a nap (if possible!). An evening tracting job is the same-walk straight home, have a sleepless night, and go get your deer in the morning with no harm done.

*A wounded deer may only be 100 yards away when you exit your stand, dying, so it is critical to sneak out of your stand and away from the deer. Walking towards the deer only 10 feet could result in a fleeing deer that often will cover a 1/2 mile or more prior to settling down again. Remember, that deer really doesnt know what happened, he probably feels sick, and is doing his best to feel hidden, safe and comfortable. The moment a whitetail knows a human is after him, he is gone! It only takes a jacket being un-zipped, an arrow hitting a stick, or even an innocent cough or sniffle.

*Always look for the last place you saw the deer and mark with a tissue, tree, or other natural feature. Still follow the blood trail at the place of the hit to more accurately determine the type of hit, but marking the last place of deer sighting is a great reference. Over the years I have had to climb back into a stand after searching a bit becasue I did not mark the location I last spotted the deer I had just shot only hours earlier. Remembering a fallen log, odd tilt to a tree trunk or even an unusual opening in the woods are all great references for when you return to .

The Best 20 Gauge Ammo for Home Defense, Whitetail, and Upland Game

0

The Best 20 Gauge Ammo for Home Defense, Whitetail, and Upland Game

The venerable 20 Gauge is an often-underrated round, but the truth is it’s still an excellent option for sport shooting, hunting upland game or deer, and even home defense. It’s also a great option for new or recoil-sensitive shooters looking for something with less recoil than a typical 12 gauge.

These days, there is a plethora of great 20 gauge ammo choices out there for us to use, so much so that choosing the right one from all the ones available can actually be a little difficult.

We’re going to fix that.

Below you’ll find all of the best 20 gauge ammo options out there today. We’ve got picks for hunting (bird and buckshot), trap/skeet shooting, having fun at the range, and even self-defense. If you simply can’t wait, the best 20 gauge ammo overall is Winchester Super-X #3 Buckshot.

If you’re new to 20 gauge ammo and want to learn more about how to pick the best ammo for your shotgun, check out our Buyer’s Guide HERE.

Otherwise, keep reading because we went through a lot of 20 gauge shotgun shells to get this comparison done, so let’s dive right in.

Top 5 Best 20 Gauge Ammo Picks

1) Winchester Super-X #3 Buckshot – Best Overall

2) Winchester Defender #3 Buckshot – Best for Self-Defense

3) Federal Premium TruBall Rifled Slug – Best Slug Ammo

4) Remington Premier TSS #7 Shot – Best Turkey ammo

5) Federal Game Load Upland #7-1/2 Shot – Best for Upland Game

Best 20 Gauge Ammo Overall

Winchester Super-X #3 Buckshot

Specs

  • Shot Load: 20x #3 Buckshot
  • Length: 2 ¾”
  • Muzzle Velocity: 1200 fps

Pros

  • Very affordable
  • Available in bulk
  • Variety of shot loads available

Cons

  • Patterning less consistent
  • Might not cycle as well in gas or inertia-operated guns.

Why We Chose It

Whether you’re blasting clays, hunting on the cheap, or just stocking ammo for the end of days (which feels more and more like it could be any day now) it’s hard to go wrong with Winchester Super X.

Winchester offers a variety of shot loads from target loads/birdshot to slugs and high-brass buckshot. We’ve chosen the latter option here but really they’re all solid options you can buy cheap and stack deep.

The 20 gauge buckshot in particular is a good budget hunting or home-defense option that’s unlikely to let you down, though it does lack a little bit when compared to higher-end ammo that’s more tailored for defense or deer hunting.

Still, Super-X is plentiful, affordable, and more than sufficient for most tasks. And it’s the best on this list for turning money into noise at the range, which is a valuable attribute too. This is by far the best 20 gauge ammo for target shooting you’ll find.

Best 20 Gauge Ammo For Home/Self-Defense

Winchester Defender #3 Buckshot

Specs

  • Shot Load: 20x #3 Buckshot
  • Length: 2 ¾”
  • Muzzle Velocity: 1,145 fps

Pros

  • High-Velocity
  • Ideal Self-Defense Load
  • Copper Plated

Cons

  • More expensive than standard buckshot

Why We Chose It

12 gauge shotguns may be the default scattergun choice for home defense, but the humble 20 gauge makes for a great home defense shotgun too, especially with modern ammo shooting a plated payload

Winchester Defender is a high-brass, copper-plated buckshot round available in segmented and rifled slugs as well as #3 buckshot depending on your needs and whether you’re worried more about longer or shorter ranges.

We’ve chosen the buckshot option here because it offers a good shot size, and less recoil than some other roughly equivalent 20 gauge shells out there. Twenty #3 buckshot pellets are basically the equivalent of emptying a full magazine of handgun ammo with a single trigger press, so this is more than enough for close-range threats.

It has an advantage over traditional deer hunting loads because of that harder copper plating that makes it more akin to a steel waterfowl load, albeit with much larger pellets. We didn’t get the recoil gauges out, but it also seems to have lower felt recoil than some other defensive options.

Best 20 Gauge Slug Ammo

Federal Premium TruBall Rifled Slug

Specs

  • Bullet Weight: 328gr TruBall Hollow Point Slug
  • Muzzle Velocity: 1600 fps
  • Length: 2 ¾”

Pros

  • Inexpensive
  • Very High Velocity
  • 1.4” groups at 50 yards

Cons

  • Non-plated/jacketed lead projectile

Why We Chose It

For slugs, you have quite a few options but our favorite is the Federal Premium TruBall Rifled Slug. This is a great slug option for smoothbore barrels and is perfect for any medium-sized game or even self-defense in a pinch. A ¾ oz lead slug is going to make anything from a whitetail to a home invader take notice pretty quickly.

Federal uses a plastic ball (the TruBall in question) to lock the slug into the wad securely, which helps to firmly center the slug in unrifled barrels which translates into a big increase in downrange accuracy. It also helps the wad and slug to separate cleanly at the muzzle.

This is a great option for anyone that wants more versatility out of a smooth-bore 20 gauge barrel and is perfect for virtually any application that calls for a slug.

Best 20 Gauge Turkey Load

Remington Premier TSS 20 Gauge Ammo

Specs

  • Shot Load: 1.5oz #7 or #9
  • Length: 3
  • Muzzle Velocity:1,100

Pros

  • High-Velocity
  • 18g/cc Weight
  • Tungsten Super Shot Payload

Cons

  • Very Pricey

Why We Chose It

Remington’s Premier TSS is a favorite with turkey hunters that want to make every shot count due to its tight pattern and ultra-dense shot load. The specially-designed, ultra-dense tungsten pellets hit hard and make it easier to go with smaller (and more) shot and still get the same energy downrange due to the increased mass.

Mass x velocity in this case equals more dead birds than you get with a standard lead shot as these tungsten pellets are more than 50% the density of your average turkey load.

It is expensive, but if you’re like me you aren’t bagging birds left and right, so making every shot count matters more here and the extra expense is worth it. For a 20 gauge load, this is especially worth it even at short ranges.

Check out our available stock of Remington 20 Gauge Slugs or Fiocchi 20 Gauge ammo for more options.

Best for 20 Gauge Ammo for Upland Game

Federal Game Load Upland #7-1/2 Shot

Specs

  • Shot Load: 7/8 oz #7-1/2
  • Length: 2 ¾”
  • Muzzle Velocity: 1,210

Pros

  • Low recoil
  • Tight patterns
  • Affordable

Cons

  • Lead shot not allowed in all areas

Why We Chose It

The Federal Game Load Upland #7-1/2 is an excellent choice for do-all upland game load that won’t break your budget. These 20 gauge shells produced a nice, tight pattern in our hands and were extremely effective against quail, dove, and any other upland game that dare cross our path.

Packed into a nice, compact 2 ¾” shell length, Federal Game Loads had slightly less recoil than other offerings from Federal like their Vital-Shok, Power Shok, Hevi-Shot, and Top Gun. These game loads also proved to be a great option for sporting clays, as we had a great afternoon exploding clay pigeons with them.

The only downside to these game loads is that they are loaded with lead shot, which is prohibited in some areas. However, Federal has steel shot Game Loads if you need them, but for the price you simply cannot beat the classic #7-1/2 lead shot payload Federal offers.

Parting Shots

There are a ton of great options out there for 20 Gauge ammo, and hopefully, we’ve given you a good idea of what’s available and where to start your search.

Anyone going after larger game birds might be interested in Remington Premier TSS while anyone looking for a low-recoil self-defense option should check out the Winchester Defender line. Budget-wise, it’s hard to beat good old Winchester Super-X in either birdshot or buckshot loads.

And of course, there are other great options out there that we haven’t covered here, so be sure to check out our full range of 20 Gauge ammo to see if there’s something else that might be better suited to your specific needs.

Don’t forget to check out our Hornady 20 Gauge Slugs page for more slug options.

20 Gauge Ammo Buyer’s Guide

Congratulations on your new 20 gauge shotgun! I promise you are going to fall in love with this scatter gun as all the different varieties of 20 gauge ammo offer a ton of versatility without the punishing recoil of a 12 gauge.

No matter if you got a classic pump action like a Mossberg 500 or beautiful Benelli 828 Over/Under, we can help you pick the best shotgun loads for your new, favorite 20 gauge.

Below is our Buyer’s Guide to help you understand how to pick the right shotgun ammo for your new 20 gauge.

What’s a Gauge? Shotgun Bore Size Explained

If you’re familiar with shotguns, you’ll know that a lower gauge means a bigger caliber. However, if you’re new to shotguns or firearms in general, this can be a confusing concept to grasp.

Handgun and rifle calibers are defined by their internal bore diameter. A 40-caliber handgun has 0.40 inch diameter bore. This means the bigger the number, the bigger the bullet the gun can fire. However, shotgun gauges are determined by a more archaic system.

Gauge is determined by the number of lead balls with the same diameter as the barrel that add up to one pound.

So, for 20 gauge shotguns, it requires 20 lead balls with a 0.615 inch diameter to equal one pound. To put this into perspective, a 12 gauge shotgun has a 0.729” diameter bore.

Although this is really technical, just remember that for shotguns, a higher gauge corresponds to a smaller bore diameter.

Rifled vs Smooth Bore: What Slugs to Buy?

When it comes to deer hunting, you simply cannot beat a slug for pure stopping power and terminal performance. And although everyone seems to be gushing over their beloved 12-gauge deer guns, the 20-gauge shotgun is an extremely effective whitetail terminating machine.

Shotgun barrels come in two options, smooth bore or rifled. Smooth bore shotguns have no internal rifling and are the more classic design. Rifled barrels have rifling similar to handguns and centerfire rifles that help stabilize slugs by introducing spin to the projectile.

However, purchasing slugs for your new 20 gauge venison harvester can be confusing as there are two varieties available: rifled and sabot slugs. And understanding which shotgun ammo goes with your barrel is critical for downrange performance.

Rifled slugs are designed for smooth bore shotguns.

These slugs have rifling on the projectile that helps the slug begin rotation in the barrel. Rifled slugs shout NOT be used in a rifled barrel as this can cause leading and will negatively impact accuracy.

Sabot slugs are essentially a large bullet fired from a shotgun. The bullet is held in a plastic cup that falls off after the slug leaves the barrel. Sabot slugs are excellent for long range shots as the traditional bullet design is considerably more aerodynamic than a rifled slug.

Sabot slugs are used in rifled barrel shotguns.

Sabots can be safely fired from smooth bore shotguns but you will likely find they are considerably more accurate when fired from a rifled barrel.

Birdshot vs Buckshot: Shot Size Explained

The difference between birdshot and buckshot is the size of projectiles (shot/pellets) loaded into the shotshell and their penetration ability.

Buckshot fires larger pellets in lower numbers while birdshot fires smaller pellets in much higher quantities. Buckshot loads have high penetration while birdshot typically have lower penetration ability.

Read more about buckshot and birdshot here: Buckshot vs Birdshot.

As its name implies, birdshot is primarily designed for hunting birds like quail, grouse, pheasant, duck, goose, and even turkey. However, birdshot is capable of small game hunting and is quite capable against rabbits, squirrels, and even snakes.

Although primarily developed for bird and small game hunting, birdshot is also used for shotgun shooting competitions such as skeet, trap, and sporting clays.

birdshot pellet chart

Pellet shot size works on an inverse scale, just like shotgun gauge, meaning that the larger the shot number, the smaller the pellet size. For example, #5 shot is larger than #8 shot. The most common birdshot sizes you’ll see at the ammo counter are 7, 7 ½, 8, and 9 which can be used for bird hunting and sporting clays.

Although some birdshot loads can carry well over 500 pellets, these lightweight projectiles don’t carry a lot of kinetic energy. Although perfect for felling birds or bursting clay pigeons, they are less effective on large game or in self-defense.

For that you’ll need something with a bit more oomph behind it…like buckshot.

Buckshot, like its name suggests, was designed for hunting medium to larger game. As a “buck” is a term for a male deer, buckshot was primarily designed for whitetail hunting.

Buckshot fires larger pellets but fewer of them. Furthermore, they are often loaded with more powder than birdshot, giving them higher recoil but increased penetration and range. However, unlike birdshot, buckshot typically has a tighter pattern as you want all that stopping power put into a smaller area to harvest big game.

Just like with birdshot, buckshot gauge is measured in reverse. This means that No. 4 Buck will be smaller than No. 1 Buck.

buckshot pellet chart

Buckshot is typically not used on birds or small game due to the amount of kinetic energy it carries. Using buckshot on a bird is considered, by many, unethical and typically renders the majority of the meat inedible.

Although buckshot might not be the best choice for bird hunting, its widespread use by law enforcement has led many homeowners to rely on a home defense shotgun loaded buckshot shells for protection.

Why are 20 Gauge Shotshells Yellow?

One thing you might notice is that virtually every 20 gauge shotshell is colored yellow. This is done to prevent them from being confused with 12 gauge shotgun ammo.

If a 20 gauge shotshell we accidentally loaded into a 12 gauge shotgun, a 12-gauge shell loaded behind could cause the 20-gauge shell to fire inside the magazine causing catastrophic damage to the firearm and potentially the shooter.

Although there is not an industry mandate that all 20-gauge shotgun ammo be yellow, most every manufacturer holds to this unofficial standard.

To learn more about how 12 gauge compares to 20 gauge, check out this article: 12 Gauge vs 20 Gauge.

What Shotgun Ammo Should You Buy? Buckshot vs Birdshot vs Slugs

Now that you have a better understanding of what types of 20 gauge shotgun shells are available, let’s talk about what you should be loading into your scatter gun.

For general target shooting, sporting clays, or upland game, you’re going to want to get some game loads or bird shot. This type of shotgun ammo has low recoil and fires a lot of tiny pellets to give you a good pattern and the highest probability of hitting your target. These loads are typically filled with #7-1/2, #8, or #9 shot and can be bought in bulk from companies like Rio, Fiocchi, Remington, Winchester, and Federal.

For home defense, buckshot is the best choice. A typical 20-gauge shotshell filled with #3 buckshot will contain around 20 pellets. This means when you squeeze the trigger, you are essentially firing the equivalent of twenty 0.25” caliber bullets at the same time. That will stop just about any threat pretty quickly if you ask me! Multiple pellets also have the added advantage of increasing your chances of hitting vital organs to incapacitate a bad guy as quickly as possible.

For deer hunting, slugs are your best friend. Although buckshot was designed for big game hunting, many states and territories prohibit its use for this purpose. This is because at longer ranges, buckshot spreads out and increases the potential for only wounding a deer. Slugs, on the other hand, provide hunters with higher levels of accuracy at longer ranges and focus all the shotgun’s power into a single point. Slugs increase stopping power and reduces the potential for merely wounding the animal.

Shotgun slugs can be used for home defense, however over-penetration is a big problem. A 20-gauge shotgun slug is great when hunting in the woods where over-penetration doesn’t really matter, but indoors you need to consider the safety of your family members. A 20-gauge slug will typically have no issues passing through any would-be home invader and several layers of drywall behind them, possibly hitting an innocent bystander or a loved one. Therefore, it is our recommendation that buckshot should be primarily used for home defense over slugs.

Now that you know which shotgun ammo to buy, let’s get back to our Top 5 List of the best 20 gauge ammo available by clicking HERE!

6 Sneaky Coyote Tactics to Separate Yourself From Pack

0
6 Sneaky Coyote Tactics to Separate Yourself From Pack

There’s no need to let a spot rest after taking a coyote from it. Another will usually be ready to move in and take its place. (Photo by Josh Boyd)

Success is far from guaranteed when predator hunting, and every hunt holds just as many challenges as it does promise. To overcome these challenges, crafty predator hunters dig deep into their bags of tricks to turn the odds in their favor.v

Sometimes, the most overlooked or obscure tactic is the one that puts fur in the shed.

Few predator hunters’ bag of tricks run quite as deep as Tad Brown’s. Brown has spent decades chasing coyotes, bobcats and various other furbearers in every corner of the country, and he’s grown accustomed to meeting predator hunting’s challenges head-on.

The following are six of Brown’s most effective predator tips and tactics, which he regularly employs to produce consistent success.

1. Drive Instead of Walk

Over the years, the idea that vehicle traffic imparts undue pressure on local predator populations has been ingrained in the average hunter’s psyche. However, Brown feels this notion is of little merit, and that traveling as close as possible to your next set by vehicle can often be among the least invasive means of access.

“I won’t walk 10 feet to my spot if I can hop in my truck. Coyotes are so used to hearing vehicles now. You have guys checking cattle, working on plots, putting up hay and driving through farms. It’s a common occurrence, and coyotes do not pay it any attention,” says Brown.

However, he does warn against throwing all caution to the wind, and stresses the importance of remaining aware of common predator hunting fundamentals. “Just get right in there with them, but use a little common sense. You still have to have the wind to your face, and it still makes sense to hide your vehicle.”

2. Hunt Past the Initial Shot

Another tactic Brown feels others overlook is to continue calling even after the hunt’s first shots have been fired. While many believe that the sound of gunfire scatters wary coyotes to parts unknown, Brown says thinking along these lines often costs hunters more shot opportunities than they ever realize.

“Guys tend to think that once they’ve fired a shot, they’ve scared everything in the country. There is nothing further from the truth. I can think of at least a half-dozen instances where I’ve killed or shot at a coyote only to have a bobcat or another coyote come into the call,” Brown says.

He also finds it helpful to vary his calling in the moments directly following a shot. “A lot of times, after I bust a coyote, I will go to a ki-yi or pup distress,” he says. “Doing so seems to have some type of instinctual effect on them, almost like a challenge of sorts. Typically, I’ll only do this for a short period of time before changing back over to a prey sound.”

3. Hunt Quality Sets Regularly

Many predator hunters believe a location can be rendered useless by overhunting it and will allow a spot to rest for a significant period between hunts, especially after it’s produced success. On the contrary, Brown feels that nature fills the void any time predators are removed from an area, and the avoidance of quality setups can cost you fur in the long run.

“Most people discount a location if they’ve already called it. Coyotes are constantly on the move, and one will almost always take the place of another,” Brown says. “It’s almost like waiting in line for the bathroom. Once you take a coyote out of an area, others will be waiting for their turn.”

Brown has seen the benefits of frequently hunting the same spots within areas of high predator traffic on numerous occasions. “There’s a spot on a ranch I hunt that is like my honey hole,” he says. “If I’m out there for four or five days, and the wind is right, that will be the first set every morning. I’ve had hunts where a coyote responds every time I call at that location.”

predator hunting
Over the course of his career, Tad Brown has developed numerous calls and other products for brands like M.A.D. and Hunter Specialties. (Photo courtesy of Tad Brown)

4. Prepare Spots in Advance

For most, predator hunting tends to be a run-and-gun endeavor. Hunters often seat themselves in a promising looking spot and then make decisions on the fly. However, Brown says that one of his most effective strategies is preparing sets in advance.

“There isn’t anything worse than setting down in a spot, calling in a coyote and realizing you’re not in position to take advantage of it,” he says. “I like to go into an area ahead of time and sort out whether I will be able to kill a cat or coyote if they come down a particular road. I treat my predator hunting spots just like my deer or turkey spots. I like to trim shooting lanes and make sure I can see.”

Brown feels that this level of preparation not only increases his odds of success, it makes him a more effective hunter in general. “Sizing up a spot before hunting it allows me to make decisions about where and how to set up for a certain wind, as well as how best to call,” he says. “Knowing these things in advance and preparing each spot allows me to be a more efficient predator hunter and put more fur on the board.”

5. Let Curiosity Be Their Undoing

If you ask any number of predator hunters what they do to finish reluctant coyotes or bobcats, most will be adamant about varying up their calling in a bid to entice a frenzied response. Brown, on the other hand, finds that the best medicine for stubborn predators is often to let their curiosity get the best of them.

“Most guys go to a squeaker bulb or a coaxer sound to finish cats or coyotes. I tend to do nothing. I either stop calling or turn my volume way down. They know what they heard, and shutting everything off is more than a coyote or bobcat can stand,” says Brown.

He also emphasizes the importance of staying vigilant, even if a predator seems to lose interest after calling has ceased. “A lot of times a coyote will seem to slip off, and this might make you think he’s leaving. However, if you just sit there, he’ll often pop back into sight.”

6. Scale Setups Based on Location

Many hunters approach eastern predator hunting with a broad-stroke approach, mirroring many of the techniques that are commonly used when hunting in the Midwest and West. However, Brown feels that hunters often limit themselves by not tailoring their efforts to suit the area in which they are hunting.

“When hunting out West, you typically put several miles between sets. This is rarely the case when hunting in more populated areas in the East,” he says. “You almost have to treat densely populated areas like a miniature golf course. You aren’t driving that ball a couple hundred yards; you’re putting it just a few feet. When hunting the East, I typically tone my calling volume down and make more individual sets.”

He’s also quick to point out that eastern hunters are afforded a significant amount of opportunity based upon the general lay of the land. “If you were to hunt 1,000 acres of land, even if it’s more heavily populated, you can make far more sets back East than would be the case when hunting in the West.”

Much in the world of predator hunting has remained relatively unchanged over the past several decades. However, avowed predator hunting fanatics, such as Tad Brown, continue to experiment with new and innovative means of finding success. By utilizing such techniques in your own predator hunting, you’re likely to find yourself knee-deep in skinning duties this winter.

Coyote Kit

Gear that’ll take your game to the next level.

Alps Outdoorz Enforcer

If your predator hunting keeps you on the move, the Alps Outdoorz Enforcer backpack (above) is a one-size-fits-all solution for quick, convenient and comfortable setup. The Enforcer features 800 cubic inches of storage space, a removable kickstand frame and an integrated memory foam cushion. ($169.99; alpsbrands.com)

FoxPro XWAVE

FoxPro’s new XWAVE e-caller offers hunters a level of versatility that few other calls do. It features two swiveling high-definition speakers, a compatible auxiliary jack for decoy integration and 100 pre-loaded sounds with the capacity for an additional 1,000 sounds. The XWAVE is Bluetooth-enabled, allowing hunters full control from their mobile devices. ($699.95; gofoxpro.com)

Primos Double Bull Stakeout Blind

The Double Bull Stakeout Blind with SurroundView ensures that you are never left scrambling for a hideaway when gunning for predators. This two-wall blind features translucent panels that allow you to see out without predators seeing in. The Stakeout Blind is also extremely portable, weighing only 4 1/2 pounds, and deploys in seconds. ($99.99; primos.com)

Vortex Fury HD 5000

This range-finding binocular makes it possible to glass for coyotes while simultaneously gauging their distance. While looking through these 10X42 optics, a hunter can center a small crosshair and take distance measurements out to 5,000 yards. This state-of-the-art bino features a “scan” mode, which allows for real-time distance measurement when tracking moving predators. ($1,599.99; vortexoptics.com)

Are Deer Nocturnal, Diurnal, or Crepuscular?

0

Have you ever wondered if deer are nocturnal, diurnal, or crepuscular?

Many people assume that because deer are often seen at night, they must be active primarily during the dark hours.

However, a closer look at the habits of deer reveals that they are actually quite versatile when it comes to their activity levels.

So, what’s the truth? Let’s take a look at the evidence and find out!

What Is The definition of Crepuscular?

The word crepuscular comes from the Latin word crepusculum, which means twilight.

Crepuscular animals are those that are most active during the twilight hours of dawn and dusk.

This is when light levels are low but there is still some visibility.

Several factors contribute to why some animals are more active during these times.

For example, predators typically hunt during the day when visibility is good.

This leaves many prey animals with a window of opportunity to feed during the low-light periods of dawn and dusk when predators are less likely to be out hunting.

In addition, temperature changes throughout the day can also influence animal activity levels.

For example, many reptiles become more active in the mornings as they bask in the warm sun to help regulate their body temperature.

What Is The Definition of Diurnal?

The word diurnal comes from the Latin word diurnus, which means day.

Diurnal animals are those that are most active during the daytime hours.

This is when light levels are high and visibility is good.

(Can Deer Swim? See this post for more)

What Is The definition of Nocturnal?

The word nocturnal comes from the Latin word nocturnus, which means night.

Nocturnal animals are those that are most active during the nighttime hours.

This is when light levels are low and visibility is poor.

Are Deer Nocturnal?

The word nocturnal comes from the Latin word for night, and it refers to animals that are most active during the darkness of night.

Many people assume that deer are nocturnal because they often see them at night.

However, deer are actually quite versatile when it comes to their activity levels.

While they may be more active at night, they are also known to be active during the day.

(Do Female Deer Have Antlers? See this post for more)

One of the main reasons why deer are often seen at night is because they are less likely to be disturbed by humans during this time.

Additionally, nighttime provides deer with a cooler temperature which helps them stay comfortable while they are active.

Nighttime also offers deer increased protection from predators.

So, while deer may be more active at night, this does not mean that they are strictly nocturnal animals.

Instead, deer are crepuscular, which means that they are most active during the twilight hours of dawn and dusk.

(Deer, Elk, Moose: What’s the Difference? See this post for more)

Are Deer Diurnal?

The word diurnal comes from the Latin word for the day, and it refers to animals that are most active during the daytime hours.

Many people believe that deer are diurnal because they often see them in the daytime.

However, as we mentioned before, deer are actually quite versatile when it comes to their activity levels.

While they may be more active during the day, they are also known to be active at night.

When Deer are Most Active?

Deer are known to be crepuscular, which means that they are most active during the twilight hours of dawn and dusk.

However, they are also known to be active during the daytime and nighttime hours.

One of the best ways to determine when deer are most active is to track their movements.

By doing this, you can better understand when they are moving around and how often they are changing their patterns.

Additionally, you can use this information to help you decide when the best time to hunt deer is.

If you’re interested in tracking deer, there are a few things you’ll need to get started.

First, you’ll need to purchase a wildlife camera.

These cameras can be placed in areas where deer are known to travel and they will take pictures or videos of the animals as they pass by.

You can then use these images to track the deer and see when they are active.

Additionally, you’ll need to purchase a trail camera mount.

This will allow you to attach your camera to a tree or other object so that it does not get knocked over or stolen.

Once you have your camera and mount, you’re ready to start tracking deer!

(What is a 10-point buck? See this post for more)

Are deer crepuscular all the time?

No, deer are not crepuscular all the time.

While they may be most active during the twilight hours of dawn and dusk, they are also known to be active during the daytime and nighttime hours.

Ultimately, the time of day when deer are most active will depend on a variety of factors, including the temperature, the availability of food, and the presence of humans.

(What Is A Baby Deer Called? See this post for more)

Factors That Make Deer Active During The Day

There are a few factors that can make deer more active during the day. One of these is the temperature.

If it is too hot or too cold, deer will often seek shelter and become less active.

Additionally, if there is not enough food available, deer may travel further distances during the day in search of sustenance.

Finally, the presence of humans can also impact deer activity levels.

If deer feel safe and comfortable around humans, they may be more likely to be active during the daytime hours.

However, if they feel threatened or scared, they will typically avoid humans and be more active at night.

What Makes Deer Nocturnal?

There are a few factors that can make deer more nocturnal.

One of these is the presence of predators.

If deer feel like they are in danger, they will often travel and feed at night when predators are less active.

Additionally, if food is scarce, deer may be more likely to forage at night when they are less likely to be seen by other animals.

Finally, humans can also impact deer activity levels.

If deer feel threatened or scared by humans, they will typically avoid them and be more active at night.

What Do Deer Do At Night?

When deer are nocturnal, they typically spend their night feeding and traveling.

They will often move to different areas in search of food and water.

Additionally, they may use this time to mate or care for their young.

Tips For Hunting Deer That Are Nocturnal

If you’re interested in hunting deer that are nocturnal, there are a few things you can do to increase your chances of success.

First, try to avoid hunting during the daytime hours when deer are more likely to be active.

Second, use a wildlife camera to track the movements of deer in your area.

This will help you to see where they are traveling and when they are most active.

Finally, consider using a trail camera mount to attach your camera to a tree or other object. This will help to keep it from getting knocked over or stolen.

FAQs

Do Deer Sleep At Night Or During The Day?

Deer do not sleep at night or during the day. Instead, they take short naps throughout the day and night. These naps usually last for a few minutes to a few hours.

Do Deer Hibernate?

No, deer do not hibernate. However, they may become less active during the winter months when food is scarce and temperatures are cold.

What Does Baby Deer Eat?

Baby deer, or fawns, typically eat the same things as adult deer. This includes plants, fruits, nuts, and insects. However, they may also consume milk from their mothers.

When time do deer come out to eat?

Deer typically eat during the early morning. However, they may also feed at night if they feel threatened or if food is scarce.

How long do deer sleep?

Deer do not sleep for long periods of time. Instead, they take short naps throughout the day and night. These naps usually last for a few minutes to a few hours.

Conclusion

So the answer to the question: Are deer nocturnal? is No. Deers are crepuscular, meaning they are most active at twilight hours, but they can also be active at other times of the day and night.

MRAD Vs. MOA Rifle Sighting: The Only Article You’ll Need

0

Sighting in or “zeroing” a rifle is the art of aligning iron or telescopic sights with the barrel, thus allowing the shooter to place bullets predictably at a given distance. In this article, we will focus on telescopic sights or “scopes” because they offer significant advantages over open sights, especially at longer distances.

Scopes have evolved with greater clarity and magnification to match the increasing power and precision of rifles and ammunition. Two systems for aligning scopes have developed independently. Each has a distinctly different origin and approach. The Minute of Angle (MOA) method is an ancient base-60 scheme conceived for astronomy. The Milliradian method is a base-10 scheme developed for artillery in the late nineteenth century. Nonetheless, both are equally effective, using segments of arc to express a certain amount of change in trajectory at a set distance.

MOA — Minute of Angle

Brief

One minute of angle, also known as an arcminute, is equal to a deviation of approximately 1 inch at 100 yards, 2.00 inches at 200 yards and 3.00 inches at 300 yards. One increment of adjustment on many MOA scopes moves the reticle alignment 0.25 (1/4″) of an arcminute or 0.25 inches at 100 yards, 0.50 inch at 200 yards and 0.75 of an inch at 300 yards. These measurements apply to both windage and elevation and are accomplished by rotating a turret adjuster on the scope. Some scopes move reticle alignment in .0125 (1/8″) increments, but many shooters consider this too narrow to be useful, especially at great distances.

Let us consider some examples. If you had a bullet drop of 1.50 inches at 200 yards and wanted to zero your rifle at this distance, you would need to adjust the elevation turret of your scope up by 3 increments or .75 of an arcminute because a minute of arc equals 2 inches at 200 yards. Using these convenient figures, we can generate the following results in Table 1 showing approximate arcminute deviations and the value of one increment at various ranges.

Arcminute DeviationsIncremental Scope Adjustments of 0.25 100 yards = 1.0 inch100 yards = 0.25 inch 200 yards = 2.0 inch200 yards = 0.50 inch 300 yards = 3.0 inch300 yards = 0.75 inch 400 yards = 4.0 inch400 yards = 1.00 inch 500 yards = 5.0 inch500 yards = 1.25 inch 600 yards = 6.0 inch600 yards = 1.50 inch 700 yards = 7.0 inch700 yards = 1.75 inch 800 yards = 8.0 inch800 yards = 2.00 inch 900 yards = 9.0 inch900 yards = 2.25 inch 1000 yards = 10.0 inch1000 yards = 2.50 inch

In order to compensate for a windage error of 2.50 inches to the right at 500 yards, you would need to adjust the windage turret toward the left by 2 increments or 0.50 arcminutes because a minute of arc equals 5.00 inches at 500 yards.

In Depth

The MOA system was handed down from the Sumerians in the 3rd millennium BC. The modern practice of dividing a circle into 360 degrees began with the Sumerians. The Babylonians further refined this measurement by dividing each degree into 60 minutes of arc. Since an arcminute is 1/60th of a degree, there are 21,600 (60 * 360) arcminutes in a full circle. Being a standalone system that is somewhat arbitrary, MOA feels akin to Imperial units, even though it is not part of that system and postdates it by more than two millennia.

True MOA

Shooting purists acknowledge a difference between commonly understood MOA and “true” MOA, which adheres strictly to the underlying mathematics. This meticulous attitude is necessary when acquiring targets that are several hundred yards away because the minor variations of rounded numbers are magnified by distance. In June of 2017, a Canadian Special Forces sniper downed an Islamic State militant from just over 2 miles away. The bullet took 10 seconds to reach its target. Shooting at this distance and accounting for wind, angle of trajectory, light aberration, and even the Earth’s curvature leaves no margin for error. More practically speaking, striking a mule deer from 400 yards, down a powerline slash in Western Montana requires you to be “on your game.”

Calculating the exact deviation of one MOA is a problem of geometry. The circumference of our circle is determined by the radius or distance from the shooter to target. At 100 yards, using the formula of 2 π r, we find that 2 * 3.14 * 100 = 628 yards. As there are 36 inches to a yard, the circumference in inches is 22,608. Now, all that remains is to divide by the number of MOA’s in a circle (21,600) and the quotient is 1.047. This is the actual deviation of one MOA at 100 yards.

Using this precise figure, we can generate the following table of MOA deviations, yielding greater accuracy. Note that the variance from rounded numbers is nearly half an inch at 1000 yards.

TRUE Arcminute DeviationsTRUE Incremental Scope Adjustments of 0.25″ 100 yards = 1.047 inch100 yards = 0.2617 inch 200 yards = 2.094 inch200 yards = 0.5235 inch 300 yards = 3.141 inch300 yards = 0.7852 inch 400 yards = 4.188 inch400 yards = 1.0470 inch 500 yards = 5.236 inch500 yards = 1.3088 inch 600 yards = 6.282 inch600 yards = 1.5705 inch 700 yards = 7.329inch700 yards = 1.8323 inch 800 yards = 8.376 inch800 yards = 2.0940 inch 900 yards = 9.423 inch900 yards = 2.3558 inch 1000 yards = 10.47 inch1000 yards = 2.6175 inch

Let us consider a few real-world examples using these more acute numbers. The bullet drop of a Norma 150 grain, 7mm Magnum bullet is 21 inches at 400 yards. Compensating for this drop would require an adjustment of 20 increments of one-quarter MOA for a total of 5 MOA because one minute of arc equals 4.188 inches at that distance.

Suppose you are shooting a 180 Grain Remington Express in 30.06, from a rifle zeroed at 200 yards. The range of your target is 400 yards, producing a bullet drop of 23 inches. You are shooting to the north and there is a 10 mph wind from the east. In order to compensate for the drop, you would need to adjust the elevation turret up by 22 increments. Wind drift would be about 12 inches, based on the known ballistic coefficient for that bullet, requiring a windage turret adjustment of 11 increments to the right for a total change of nearly 3 MOA.

MRAD — Milliradian

Brief

A radian or “rad” is the standard unit of angular measure used in many areas of mathematics. A Radian is slightly under 57.3 degrees. A milliradian or “mil” is one thousandth of a radian. There are approximately 6283 mils in a full circle.

Just as arcminutes have a predetermined value at various ranges, so do milliradians. These are typically expressed in meters (metric system) rather than yards, for reasons we will examine shortly. Milliradian scopes usually adjust in one-tenth (.10) increments because one full mil makes a sizable difference, even at 100 meters.

The deflection of .10 mils is understood to be 1 cm at 100 meters, 2 cm at 200 meters and 3 cm at 300 meters. The fact that the milliradian system works out to whole numbers makes calculating trajectory and adjusting for windage and elevation very straightforward. If, for example, you have to account for a bullet drop of 33 cm at 300 meters, you would need to adjust the elevation turret up by 11 increments. Compensating for wind drift of 3 cm to the right at 100 meters would require an adjustment of 3 increments to the left.

In Depth

The milliradian system is an International System of Units (SI) derived method of angular measurement. All SI units are based on science. A radian is mathematically defined as an arc-length equal to the radius of its circle. Therefore, the milliradian or “mil” is equal to 1/1000th of the radius. It was first proposed by Swiss engineer, Charles-Marc Dapples, in the mid-nineteenth century and came into prominent use for French artillery during World War I.

The established deflection of .10 mils is .9999 centimeters (cm) at 100 meters, or for all practical purposes, 1 cm. A difference of one ten-thousandth (.0001) of a centimeter is simply too small to be worthy of distinction. Even at 1000 meters, the margin of error would be a mere 1000th of a centimeter (99.99 vs 100 cm). Therefore, at 200 meters a tenth of a mil is considered 2 cm and at 300 meters it is 3 cm. We can extrapolate from these numbers to produce the table below.

Mil DeviationsIncremental Scope Adjustments of 0.10 Mils 100 meters = 10 cm100 meters = 1.0 cm 200 meters = 20 cm200 meters = 2.0 cm 300 meters = 30 cm300 meters = 3.0 cm 400 meters = 40 cm400 meters = 4.0 cm 500 meters = 50 cm500 meters = 5.0 cm 600 meters = 60 cm600 meters = 6.0 cm 700 meters = 70 cm700 meters = 7.0 cm 800 meters = 80 cm800 meters = 8.0 cm 900 meters = 90 cm900 meters = 9.0 cm 1000 meters = 100 cm1000 meters = 10.0 cm

Table 1. Mil and 0.10 mil deviations at ranges from 100 to 1000 meters.

Now for some real-world examples. Suppose you are firing a 140 grain 7.62 mm bullet, from a weapon zeroed at 100 meters, at a target that is 300 meters down range. The bullet drop would be 42 centimeters. You would need to adjust the elevation turret up by 14 increments, since each tenth of a mil would equal 3 cm at that distance. Next you are sighting with a Hornady 140 grain 6.5 mm Creedmoor at 500 meters and it is hitting 5 cm to the right. You would need to adjust your windage turret 1 increment to the left, since each tenth of a mil equals 5 cm at 500 meters.

MOA vs. MRAD

Each system has advantages. Here are a few considerations:

MOA Advantages

  • 1/4 MOA adjustments (2.1675″@1000 yards) are nearly twice as refined as 1/10 mil adjustments (3.93701″@1000 yards).
  • MOA is more familiar if you live in a country that uses Imperial measurements.
  • Most ballistic tables are in feet and yards.

MRAD Advantages

  • Base 10 metric values calculate more easily.
  • More high-end equipment is MRAD & more pros use it.
  • The US Military and many other forces around the globe have standardized on MRAD, influencing production & use.

Beyond this, both systems are equally effective. The question is not which is superior but which is better for you. Generally, if you are more comfortable with the Imperial system of measurements (inches, feet, yards), than the MOA system will feel more familiar. If you favor the Metric system (centimeters, meters), then MRAD may quickly seem like an old friend. Whichever system you choose, you will probably require at least a passing understanding of the other because they overlap in some important ways.

  • Many scopes mix the two systems, having a mil dot reticle but turret adjustments in one-quarter minutes of arc.
  • Although math is simpler in the base-10 metric system, most ballistic charts are in imperial measurements, requiring conversion from feet and yards to centimeters and meters.

Subtension

Subtension refers to the length of arc at a set distance, described by two radii that are separated by a certain angle. Subtension is a relative term and subject to the system of measurement used. In the context of MOA, for example, it would be evaluated in arcminutes, yards and inches.

So, imagine that you are looking at an object at a distance of 100 yards and the width of your view is two minutes of arc. The subtension would be 2.094 inches. We would say that the angle of two MOA is subtended by an arc distance of 2.094 inches at 100 yards. Not surprisingly, an arc of one milliradian at 300 meters is subtended by a circumferential distance of 30 centimeters. While these terms may seem initially confusing, speaking correctly about such concepts is the beginning of thinking correctly about them and ultimately leads to the power of using them properly.

Subtension becomes valuable when using a scope reticle to calculate the size or distance of an object, as well as the accuracy of shot placement. Next we will examine the application of subtension for this purpose in greater detail.

Triangulation

The process of determining a distance or location by using the knowledge of two other points is known as triangulation. It applies equally to MOA and MRAD and the principles are the same. We will use the latter for illustration because the math is more transparent.

Mil scopes are those with turrets that adjust in increments of mils and also have crosshairs that are segmented into mils (the space between one dot center and another). Milliradian measurements can be used to zero your scope at a given range, assess your shot groupings, determine the size of a target or calculate the range.

You can determine the accuracy of your shots from a known distance by using the reticle as a ruler. If your rangefinder reads 1000 meters and your bullet lands 1 mil-space to the right, then you are off by about 100 cm or 1 meter (subtension). The size of groupings can be found by the same method. If your shots appear to be separated by no more than a mil at 1000 meters, then they are all within 1 meter of each other. Similarly, a target image that appears to be 1 mil high at a range of 1000 meters is actually about 1 meter tall. You can also calculate the range in meters if the target size is known. Just divide the size of your target in millimeters by the number of mils it spans on the reticle. Let us say that you are firing upon a paper sheet that is 1 meter square (1000 mm) and it spans 1 mil on the reticle. Dividing 1000 by 1 yields a quotient of 1000. The range is 1000 meters.

Magnification

Magnification is an important consideration when triangulating. If the reticle is installed on the first focal plane of the scope, it will alter by magnification exactly as the view and remain constant with respect to target image. Such a reticle may be used at every level of amplification. However, if the reticle is installed on the second focal plane, it will remain fixed in size as the view changes, varying the ratio between mils and image. In this case, triangulation may only be performed at one designated magnification; usually at the highest point or halfway.

Calculations and Conversions

Here are some formulae that make manipulating both Imperial and Metric measurements more accessible:

Formulae for Milliradian Based Reticles

Distance to Target (Yards): D=H/I×1000Where D is target distance (yards), H is target height (yards), I is image size (mils), and the quotient is multiplied by a factor of 1000.

Distance to Target (Yards): D=H/I×27.77Where D is target distance (yards), H is target height (inches), I is image size (mils), and the quotient is multiplied by a factor of 27.77.

Distance to Target (Meters): D=H/I×25.40Where D is target distance (meters), H is target height (inches), I is image size (mils), and the quotient is multiplied by a factor of 25.40.

Distance to Target (Meters): D=H/I×1000Where D is target distance (meters), H is target height (meters), I is image size (mils), and the quotient is multiplied by a factor of 1000.

Distance to Target (Meters): D=H/I×10Where D is target distance (meters), H is target height (centimeters), I is image size (mils), and the quotient is multiplied by a factor of 10.

Formulae for Arcminute Based Reticles

Distance to Target (Yards): D=H/I×95.5Where D is target distance (yards), H is target height (inches), I is image size (MOA), and the quotient is multiplied by a factor of 95.5.

Distance to Target (Meters): D=H/I×87.30Where D is target distance (meters), H is target height (inches), I is image size (MOA), and the quotient is multiplied by a factor of 87.30.

Distance to Target (Meters): D=H/I×3438Where D is target distance (meters), H is target height (meters), I is image size (MOA), and the quotient is multiplied by a factor of 3438.

Distance to Target (Meters): D=H/I×34.38Where D is target distance (meters), H is target height (centimeters), I is image size (MOA), and the quotient is multiplied by a factor of 34.38.

Application

So far, our examination of this subject has been mostly theoretical and the calculations approximate. In the field, there are many considerations. You need to watch a few hundred bullets of your favorite caliber go down range from your preferred setup before you can make calls that result in consistent hits at distances well over 100 yards. Still, shooting accurately begins with assumptions based on theory. Then it must be refined by hard core experience. There is no shortcut to shooting accurately in such highly variable situations as big-game hunting or battle. You just have to live there for a bit. Keeping that in mind, here is some useful advice.

Scope and Mount

Standardize on ONE System

Choose a scope that has reticle segments and turret increments in the same system and mount similar scopes on ALL of your weapons. Use either an MOA reticle and 0.25″ MOA adjustments or a mil-dot reticle and 0.1 MRAD adjustments. Splitting between the two will add an additional layer of complexity to your calculations when zeroing, ranging, etc.

Mount and Align Your Scope

Mount your scope as low as possible, using established procedures. This process has many variables and is beyond the breadth of this article. If you are unsure, have a gunsmith mount it for you.

Set Eye Relief

Check and adjust the eye relief. If the focal distance of the scope is not adjusted correctly, it will strike your forehead when the weapon recoils and cut a neat ring into your skin.

Align the Reticle

Make sure that the cross hairs are exactly in line with the vertical and horizontal planes. If they are not, all of your adjustments will be off. This condition is referred to as reticle cant.

Sighting In

Get Set & Level

Get yourself and the weapon set and solidly supported in a comfortable position, on a level plane. All testing and adjustments depend upon your steadiness and precision in handling the weapon.

Zero Point

Decide on a point at which you want the rifle to be dead-on. This should be chosen based on the bullet trajectory and your anticipated shooting range. Bullets travel in an arc, at first rising slightly with energy and then falling as they succumb to gravity. Consequently, your Point-of-Aim (POA) and Point-of-Impact (POI) intersect at two points: early and later in flight. Typically, you want to adjust the zero point so that where you are aiming and where the bullet will strike are close over a significant distance. Thus, you have a spectrum of ranges at which you will be accurate within a few inches.

In some cases your shooting distances may far exceed the overlap between POA and POI. In that case, you should make the weapon accurate at the target range you are most likely to encounter.

Test, Test & Test

Test repeatedly in three-shot groups, adjusting the weapon according to your results. Use the same factory ammunition or carefully constructed reloads every time, at the test bench and when engaged in the field.

Try to limit the variables with each testing session. Go at the same time of day, in the same weather, using your usual mode of dress, etc. Later during practice, you will deliberately alter these variables to improve your coping skills.

Ranging and Sizing

Making determinations of target size and range requires a keen eye for detail because images may appear quite small at a distance. Conversely, your target may be larger than the segmented portion of the reticule. Thus, arriving at accurate reading requires you to make an educated assessment. Here are a few pointers:

Multiply & Divide

Suppose your target is less than one graduation or is one plus a fraction. Compare the fraction with the next whole segment on the crosshair. Is it a forth, half, three-quarters?

What if your target is larger than the graduated portion of the crosshairs? Most scopes only span about 10 graduations along each axis (5 on either side of center for both vertical or horizontal). Position the scope so that one side of the target is at the edge of the dots or lines. How much of the target image is off the graduated portion? Imagine the dots or lines continuing. How many would there be? Another tactic is to divide your subject in half or into quarters and measure a section. Then multiply your reading accordingly to obtain the correct product number that represents the whole.

Increase Your Average

It may be difficult to assess the size or proximity of a target if it is standing on a hill, positioned at an angle, or shifting posture. In this case, it may be useful to take multiple measurements and average the results to obtain a more accurate product. Suppose you are targeting a pronghorn buck that is grazing on a hill. This animal is known to be about 36-40″ high at the shoulder. Use your reticle to measure the height from the shoulder to the front hooves. Now, readjust and evaluate the distance from the top of the hind quarters to the rear hooves. Add the two numbers and divide the sum by two. If your final value is 6 MOA, the buck is approximately 600 yards distant.

You can use the same technique when the subject has assumed two different stances while you are watching.

Scale

What if your target is standing near a known value, such as a fence line. Livestock fences average about 50 inches in height. Compare your subject to this and calculate accordingly.

Non-Graduated Reticles

Some reticles have only plain crosshairs but that need not defeat your purpose. Perhaps you are evaluating a black bear at 200 meters. While keeping the rifle very steady, put the crosshair at the shoulder of your target. Now use the elevation turret to slowly adjust the crosshairs halfway down to the paws while counting the clicks. You may need to estimate if it is standing in ground cover. Suppose it was 25 increments of 1/10th mil. Your subject is approximately 80 cm or 36 inches tall.

Holds and Windage Adjustments

Calculations do not always turn out clean and even. Sometimes the firing solution falls between adjustments. Suppose, for example that you need a vertical adjustment of 7.5 cm at 300 meters. Since each tenth of a milliradian is equal to 3 cm at that distance, there is no whole number of adjustments or “clicks” that would equal the necessary deviation. In order to compensate, you must perform a hold or hold-over. Making holds can be difficult, since you must estimate how much to aim above your target at a given distance to account for the adjustment. In the previous example, adjusting the vertical turret two increments up would elevate the POA 6 cm. Your hold must produce an elevation of 1.5 cm to complete the solution. Looking through a scope at 300 meters, this might be barely the thickness of the crosshair!

Holds are not always made because the solution lay between clicks. Suppose you are sitting on a powerline slash and an eight-point, white-tail buck crosses your field of vision at 150 yards. He will be back in the woods in a matter of seconds. There is no time to adjust your scope before you take the shot. If your rifle is zeroed at one-hundred yards, you will need to compensate by estimating how much to aim over your target for a strike.

Likewise, windage adjustments must sometimes be made on-the-fly. This is also referred to as Kentucky windage, no doubt a reference to the famed Kentucky frontier rifle and the skill of the men who used it. If you are compensating for a wind drift of 7.5 inches to the left at 300 yards, two clicks would bring you approximately six and a quarter inches of change. You would need to adjust your POA slightly to account for the remaining inch and a quarter.

Kentucky windage is used not only to account for motion of the air but also in leading a fast moving subject such as a bird in flight. Even though your target is moving much slower than a bullet, it will not be in the same place when the bullet arrives. You must aim ahead of your target enough to compensate for its forward motion while the bullet travels down range. Leading a moving object is a complex topic and performing it well is an art acquired over time. While it is beyond the breadth of this article, there are many fine writings available to instruct you.

One very useful tool for developing skill at windage adjustments is the Beaufort scale. It uses a series of common observations to estimate wind speed. One way to make your judgment of wind speed acute is to train with an anemometer. Digital anemometers accurately measure wind speed and are very affordable. Once you have used such a device to calibrate your perception of the wind, you can make precise calls on-the-fly with nothing but your five senses.

The Beaufort Scale

1mph-3 mphSmoke moves in direction of wind, slight movement of grass. 4 mph-7 mphWind felt lightly on the face *Very Accurate* 8 mph-12 mphLeaves turn, twigs and treetops will be in motion. 13 mph-18 mphLoose paper, dust, and paper will blow around, small tree branches will move. 19 mph-25 mphLarge tree branches move, entire trees will sway if small. 25 mph-30 mphLarge branches will be in constant motion and walking against the wind becomes difficult.

Between the Lines

Fine shooting is both a science and an art, which is why skilled shooters are so highly respected. There is much that falls between the measurements and calibrations. Equipment factors such as scope mount, action type, barrel length, rifling twist rate, bullet configuration, fouling and even barrel flux resulting from high temperature-among others-all affect placement. Your strength, visual acuity, breathing, shooting position, steadiness and mood determine your mastery over the weapon. Add situational variables including wind, altitude (which changes air density), luminosity, visibility, angle of inclination, distance and so on, and you have an infinitely fluid equation that results in a different answer every time. How well you control and interpret these elements will make the difference between a hit and a miss.

One way to improve your skill is to practice with known target sizes, at given distances, under varying conditions. Deliberately set up so that the target image is too small or too large, the wind and light are different, you are shooting up or down hill, etc. How does a 125 cm target look at 400 meters? What about a 9 inch target at 100 yards? How does your perception change in low light at dawn or dusk? What happens when you are shooting up toward your target?

This sort of practice will gradually calibrate your eye and your mind until it becomes an extension of the scope. You will, in effect, become one with your weapon. In fact, the truth is that YOU are the weapon. The rifle is merely a tool.

Use the information you have obtained here to improve your performance. Happy shooting!

This article is the outcome of much research and the first-hand practice of many shooters. However, individual experiences vary. If you have results that differ from ours or conflict with our findings, we would love to hear your perspective.

Iowa's Legendary World Record

0

By Duncan Dobie

Taking a world-record buck is hard under any circumstances. Doing so with a 45-pound recurve and wooden arrows is even more remarkable.

Such was the situation in 1962, when then-34-year-old Lloyd Goad shot his 14-pointer in southern Iowa. At the time, the deer was the top bow typical of the modern era, at 197 6/8 net Pope & Young points, and he’d wear the crown for three years.

Lloyd died on Dec. 20, 1993, and remarkably little has been written about his great whitetail. The following was taken from his handwritten account of the historic hunt.

“I started hunting squirrels with a neighbor when I was about 14 years old,” Lloyd wrote. “Kenny was several years older than me. All of his close hunting buddies had been called off to service during World War II, but he was unable to go because of a heart condition. He was one of the finest hunters I ever knew.”

After getting married, Lloyd found a new hunting partner in his wife’s brother, Donald. They enjoyed many trips to hunt small game near the Des Moines River, in an area that later became part of Red Rock Lake.

Around 1953, the Conservation Commission opened a special deer season with a limited number of permits for a two-day shotgun hunt. It was a new experience for both men.

“Gradually our enthusiasm for deer hunting in Iowa spread,” Lloyd wrote. “We didn’t fill our tags each year, but for about six or seven years we had some very rewarding hunts.

“During the late ’50s, more and more shotgun hunters began to invade our territory,” he noted. “About that time, several of the original bowhunters in our area brought in the biggest bucks I’d ever seen! I decided the challenge of bowhunting for deer was something I wanted to try.

“Midway through the 50-day 1961 bowhunting season, I purchased some hunting equipment from the closest archery dealer around, a man named Elwood Stafford, who lived in Albia, Iowa,” Lloyd noted. “I bought myself a 45-pound York Crescent recurve bow and some cedar shafts tipped with Hill’s Hornet broadheads.

“Being a veteran bowhunter himself, Elwood was very helpful in showing me some of the fundamentals of bowhunting,” Lloyd noted. “I knew I should do a lot of practicing, so I acquired several bales of straw from a farmer. I placed them against the lube room wall of the service station (which Lloyd ran), along with several layers of cardboard.

“The longest distance I could get from the target without running the risk of having someone walk in front of an arrow was about 40 feet. Studying this distance from a gun hunter’s perspective, I said to myself, ‘This’ll be a cinch!’ But the many scars on the cement block wall were grim reminders of the misses and broken arrows that resulted from my first few practice sessions. After several days, though, I began to get the feel of a decent release, and I started shooting some reasonable groupings.”

With less than two weeks left in the 1961 season, Lloyd headed for the Monroe County woods. Hunting on the ground, he got a shot at a button buck — but the arrow sailed about four inches over the deer’s shoulder. Days later, Lloyd missed a forkhorn walking broadside at about 20 yards. That arrow deflected off a tree limb.

Although disappointed, Lloyd was now hooked on bowhunting. “Those two misses gave me more of a thrill than practically all of my shotgun kills,” he wrote.

Lloyd then had two more misses during the early weeks of the 1962 season. Little could he know that his next shot — only his fifth at a wild deer — would bring down one of the greatest typicals of all time.

“When the last day of the ’62 archery season appeared on the calendar wall at the service station — Dec. 2, 1962 — I was still without a deer,” Lloyd wrote. “I resolved to take the entire day off and hunt all day long, if necessary.

“The day began pretty much like any other — up early, a good-luck wish from my wife, Loretta, and I started on the 18-mile ride to my stand with the windows and vents open on my pickup to help rid my clothes of all household odors. Before heading into the woods, I applied a liberal dose of buck lure on the sleeves and legs of my camouflage suit and a little extra on my cap for good measure.

“To a large degree, the good fortune I was about to experience was due largely to several outings I had shared with a good friend named Paul Pearson,” Lloyd wrote. “Paul had been one of the best wolf hunters in southern Iowa during his younger years, and he taught me a lot about reading the woods and looking for deer sign — especially about trails and crossings. Since most bowhunters hunted on the ground in those days, my preferred method was to set up near a major trail not far from a little-used road crossing. You could get there quickly and quietly without spreading a lot of scent in the woods, and I found that deer liked to use these trails.

“When I reached the area I intended to hunt, I met a hunting buddy, Bob DeMoss, who planned to do some squirrel hunting in the same general area. I also ran into two other bowhunters. One had shot a doe the evening before, and he was back to look for it. He planned to continue his search in an area just north of where I wanted to hunt. His friend said he would cover a trail to the west, in case something was chased out.

“Bob decided to hunt squirrels in the timber on some state forest land just south of me across a dirt road. So I decided to hunt a well-used trail not far from the road — pretty much in the middle of all this activity — in hopes that something might happen.”

Lloyd quietly slipped into a small, triangular patch of woods near the right-angle intersection of two dirt roads. He took a stand next to a large elm not far from a fencerow that ran from one road to the other.

Hunting conditions were perfect. The area was cloaked in a heavy mist, the kind big bucks love to sneak around in. Lloyd barely had time to pick his spot before he heard a noise coming from toward the road.

“I took a peak around the elm, and there he came — slipping through the wild plum sprouts and sumac bushes with his h

ead down. He had so many points on his head that I couldn’t distinguish his antlers from the limbs of the bushes. My heart started pounding so hard I thought he must be deaf not to hear it,” Lloyd recalled.

“He walked up to the fence and stopped behind some brush not 20 feet away. I was behind the tree, and he couldn’t see me trembling. I could have taken a shot through a small opening in the brush at that time, but the experience of four previous misses had taught me that it was simply too risky. I waited.

“He just sort of melted over the fence with no effort. My bow was already in position, and all I had to do was pull it back. When I did, he stopped and looked straight at me at a distance of 18 steps. He was already beginning to whirl around and go back into the brush as I released.”

Lloyd waited a half-hour and then eased back to the truck. He met Bob a few minutes later and showed him the buck’s enormous tracks in the road crossing. Lloyd returned four hours later with friends, and they soon found the buck. Hit in a leg artery, he’d gone less than 150 yards.

“He carried 14 points and weighed 224 pounds field dressed,” Lloyd beamed. “I couldn’t have planned a more perfect ending to any season!”

This trophy had an almost perfectly symmetrical 7×7 rack, and at 197 6/8 typical, he was an easy archery world record. His mark fell three years later, when Mel Johnson arrowed his 204 4/8-inch typical in Illinois. That buck remains No. 1 in P&Y.

In 1986, Curt Van Lith arrowed a huge 11-pointer in Minnesota, tying Lloyd’s buck for No. 2 in P&Y. Their deer still share that spot, though they figure to drop with confirmation of the 203 3/8-inch Hubert “Tiggy” Collins buck, taken in Saskatchewan last fall. (See the February and August issues.)

Lloyd kept bowhunting for many seasons after downing his Iowa record. He was often asked how it felt to have to settle for shooting bucks smaller than one he’d already taken.

“Every deer is a new experience,” Lloyd would reply. “And every shot is a challenge. Not every deer will make the top of the record book, but they all make my book — bowhunting pleasure!”

Once one of Larry Huffman’s Legendary Whitetails, this giant now is in the “King of Bucks” collection at the American National Fish & Wildlife Museum in Springfield, Missouri. For more on the Goad buck, visit legendarywhitetails.com.

12 Gauge vs 20 Gauge: The Shotgun Shootout

0

12 gauge vs 20 gauge
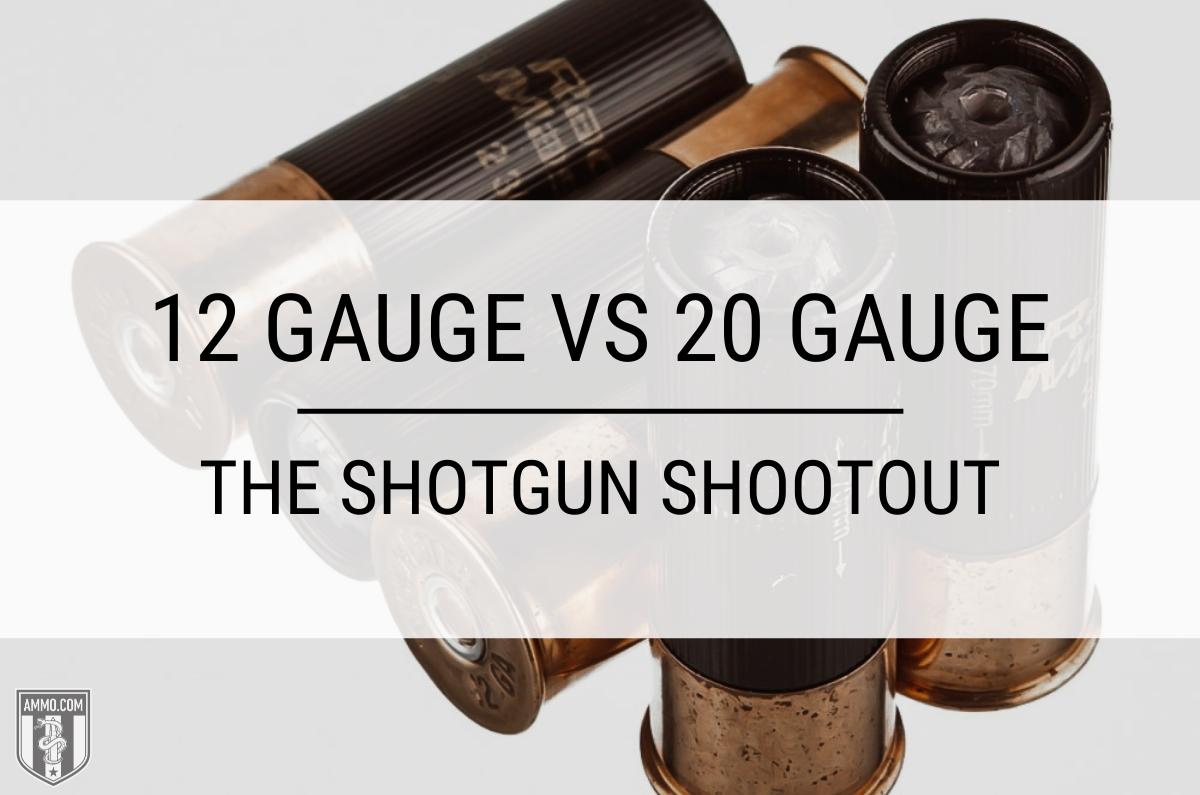
The versatility of a shotgun cannot be matched by many other types of firearms. You can select from a wide variety of gauges, barrel lengths, chokes, shot sizes, and more. This allows a shooter to utilize a shotgun for a multitude of purposes like hunting, home defense, and sporting clays.

However, all the different varieties and purposes can be overwhelming to new shotgun owners. Instead of covering every potential shotgun variation, it’s best to focus on the biggest question new shooters have, “Which gauge works best for me?”

Most prospective shotgun owners will narrow their choices down to two options: 12 vs 20 gauge.

The 12-gauge shotgun is the most effective one-gun solution for hunting, target shooting, and home defense. However, that doesn’t mean that the 12-gauge is the best choice for every situation.

In this article we will analyze the advantages and disadvantages of the two most popular shotgun options, 12 and 20-gauge.

What’s the Difference Between 12 Gauge vs 20 Gauge?

The difference between 12 and 20-gauge shotguns is their bore diameter. A 12 gauge has a bore diameter of 0.729” compared to 0.615” for 20 gauge. This means that a 12 gauge can fire larger payloads of buckshot at higher muzzle velocity at the cost of higher felt recoil.

12 Gauge vs 20 Gauge: Understanding Shotgun Gauges

If you’re familiar with shotguns, you’ll know that a lower gauge means a bigger caliber. However, if you’re new to shotguns or firearms in general, this can be a confusing concept to grasp.

Handgun and rifle calibers are defined by their internal bore diameter. A 40-caliber handgun has 0.40 inch diameter bore. This means the bigger the number, the bigger the bullet the gun can fire. However, shotgun gauges are determined by a more archaic system.

Gauge is determined by the number of lead balls with the same diameter as the barrel would add up to one pound.

For a 12-gauge shotgun with a bore diameter of 0.729” it would require twelve lead balls to equal one pound. Likewise, for 20 gauge guns, it requires 20 lead balls with a 0.615 inch diameter to equal one pound.

A Special Note On 20-Gauge Shells: Yellow is the New Black

If you’re new to shotguns you might not be aware that all 20-gauge shotgun shells are required to be colored yellow, regardless of payload.

This is to endure that a shooter does not mistakenly load a 20-gauge shell into a 12-gauge shotgun. If this were to happen, it’s possible that a 12-gauge shell loaded behind could cause the 20-gauge shell to fire inside the magazine causing catastrophic damage to the firearm and potentially the shooter.

For this reason, it has been mandated that all 20-guage shells are colored yellow to make them easily distinguishable from 12-guage shells.

Recoil

12 Gauge vs 20 Gauge recoil comparison chart

When it comes to felt recoil, 20-gauge shells win by a country mile. As 12 gauge shells pack a heavier payload of projectiles and powder they will always have more recoil than comparative 20 gauge ammo. This chart compares the felt recoil experienced by the shooter for three popular 12 and 20 gauge Winchester SXP hunting loads.

Less recoil gives a 20-gauge shotgun two distinct advantages.

The first advantage is the comfort factor to the shooter. Although felt recoil will be different between shooters, the low recoil impulse that the 20-gauge shells impart on its user’s shoulder often results in increased accuracy. Less recoil means that it is less likely for a shooter to develop a flinch or raise their head off the stock just prior to firing.

The second advantage is speed of follow-up shots. Regardless of whether you need to line up two quick shots on a pheasant you just kicked up or if you need to perform a mag dump in a self-defense situation, the lighter recoil of the 20 gauge makes this an easier task.

Accuracy/Pattern Density

To understand pattern density, it’s important to understand how a shotgun ammunition works.

A shotgun shell, or shotshell, is a plastic hull with a primer at the bottom. Inside the hull is a powder charge and on top of that is a plastic cup known as a “wad” to hold the projectiles known as “shot” which are essentially just round steel or lead balls.

Shot sizes will vary depending on what you’re planning on using the shotgun shell for. For self-defense you would want to use something larger like #00 buckshot (pronounced “double aught”), or if you’re hunting something smaller, like grouse or pheasant, a smaller option like #8 birdshot would be ideal.

One common misconception is that once the wad and buckshot leave the shotgun barrel, it behaves like a swarm of bees and scatters quickly. However, what happens is that the shot leaves the barrel in a column and begins to disperse.

There are numerous factors that affect how the projectiles disperse, such as minor imperfections on the surface of the shot, muzzle velocity, and stringing.

Stringing is a process where the shot at the top of the wad is deformed less during firing, while shot at the bottom of the wad endures the added pressure and weight of all the shot above it causing it to deform. This means that the buckshot at the top of the column will reach the target faster (because it’s more aerodynamic) than the shot at the bottom of the column.

The width of dispersion of shot when it reaches the target is referred to as pattern density. If the patter density is too wide, it’s possible to miss a smaller bird like a quail, at range. Conversely, if the pattern density is too tight it will be harder for shooters to score hits.

One other factor that can affect pattern density is the type of choke used in the shotgun barrel. A choke typically screws into the barrel and acts like a forcing cone, making the lead or steel shot a more compact column as they exit the barrel. Chokes will create a tighter pattern density but should not be used with slugs.

As the 12 gauge has a wider bore diameter, it can fit more shot into a wad. This means that it will have a higher pattern density than 20 gauge shot.

Stopping Power

The 12 gauge shotgun has been well known for its stopping power due to its effectiveness in trench warfare during WWI and in the jungles of the Pacific theatre during WWII. Furthermore, the 12 gauge Remington 870 pump-action shotgun is a favorite of law enforcement and can be found in squad cars across the United States.

There’s no denying that a 12 gauge load packs a huge punch, but how much? In the table below we compare three popular loads for both 12 gauge and 20-gauge shells.

Let’s compare the rifled slugs for the purpose of this explanation.

12 Gauge vs 20 Gauge ballistics table

Even though both slugs exit the barrel with the same muzzle velocity of 1600 FPS, the 12 gauge load has a muzzle energy of 2488 foot-pounds while the 20 gauge load clocks in at 1865 foot-pounds (that’s a 33% difference!)

Although the disparity will vary between different loadings, 12 gauge shotgun ammunition will generally always have more stopping power than a comparative 20 gauge load.

Hunting

When it comes to getting into the woods for some hunting, you’ll find plenty of 12 and 20-gauge shotgun shooters in their tree stands or deer blinds in the fall.

Both shotgun gauges are extremely popular for hunting all types of game animals from upland bird, waterfowl, turkey, and even whitetail deer.

Proponents of the 20-gauge shotgun will cite its recoil advantage over the 12 gauge and suggest that it is more than sufficient for all sizes of game. On the other hand, 12-gauge aficionados will bring up the shotshell’s hard-hitting terminal ballistics and extended range that the 12 gauge offers.

Although 20-gauge loads can be effective for turkey hunting, waterfowl, and deer, the major issue is that you need to be at close range. As the 20 gauge shotshell has a lower muzzle velocity compared to the 12 gauge, the 20 will lose velocity faster and how a shorter effective range.

Therefore, the majority of hunters will grab their 12-gauge shotgun when they plan to hunt larger game animals like duck, goose, turkey, and deer. The extended range and stopping power more than make up for the additional felt recoil in most cases.

However, for small game or bird hunting, the 20-gauge is usually the best option. With its low recoil, it allows manufactures to produce a lighter gun that is quick and maneuverable. This makes it easier for hunters to quickly bring their gun to bear on a grouse or pheasant they kicked up. Furthermore, the lower recoil of the 20-gauge allows for extremely quick and accurate follow-up shots.

Just make sure you have adequately prepared your ammo. Don’t forget to check out our Fiocchi 20 Gauge ammo page for more options.

There’s absolutely no reason why you can’t bring your 12-gauge shotgun bird hunting as they are extremely effective. Although, if given the choice, most game hunters will opt for the lighter gun, and that’s most often a 20-gauge.

If you can only purchase one shotgun, then the 12-gauge is the best option as it does it all.

However, if you have the financial capability to purchase both, a 20-gauge shotgun is an excellent choice for small game while you can still employ your 12-gauge medium to large game hunting.

Self-Defense/Home Defense

When it comes to home defense, it’s hard to be a shotgun. Although some shooters contest that a handgun is the better choice, it simply does not compare to the sheer power that a shotgun offers.

For home defense, it is inadvisable to use rifled slugs as they will typically over penetrate and could hit an innocent bystander in the home or apartment next door. Buckshot is what you want loaded in your self-defense shotgun.

There is some scholarly debate amongst ballisticians as to which buckshot is the best option for home defense. Many swear by #00 buckshot as it is considered the gold standard for self-defense, however other state that #1 or #2 buckshot is more than sufficient for any home defense situation.

If you’re unfamiliar with buckshot designations, here is a chart explaining the difference.

12 Gauge vs 20 Gauge buck shot

As you can see, the difference between #00 buckshot vs #1 buckshot is 0.03” in projectile diameter. This debate has been beaten to death on the Internet, however the bottom line is that any would-be home invader will likely not be able to tell the difference.

But that brings us to which shotgun would be better for home defense? 12 vs 20 gauge?

Many shooters like the feel of a 12-gauge shotgun for home defense. It’s what the military and police use and for some people, that’s all they need to know. Others like the lower recoil of 20-gauge shells and feel they are more accurate with this ammo.

For close range engagements like those in a home, it won’t make much difference which shotgun you choose. Both will be more than effective in defending your life and the lives of your friends and/or family members.

Just make sure to load up with a quality buckshot (NOT birdshot or slugs) and you should be more than adequately prepared to take on any threat that enters your home and threatens your life.

Ammo and Rifle Cost/Availability

The beautiful thing about shotguns is their versatility. You have so many options, from a single shot, pump action, and even a semi-auto, the world is your oyster when it comes to shotguns.

Furthermore, entry level pump action models are typically inexpensive compared to most centerfire rifles and handguns. You can easily pick up a Remington 870 or Mossberg 500 for around $300 new in box at the time of writing.

Check out our stock of Remington 12 Gauge Ammunition for more options.

However, this does not mean that all shotguns are so affordable. If you’re looking to get into sporting clays, skeet, or trap shooting, most competition-ready shotguns will command several thousand dollars.

Although a 20-gauge shotgun typically requires less materials to produce, there is very little difference in price between 12 and 20-gauge shotguns.

As for variety, you will not lack for options for either gauge. However, there are going to be more options for the 12-gauge as it is the most popular gauge in North America due to its versatility.

The same is true for ammo cost. Although the 20-gauge shells are smaller and require less material for construction, there is very little difference in cost between 12 vs 20 gauge.

Since we are in the subject of the ammo cost, don’t forget to check out our Remington 20 Gauge Slugs page.

Just like for rifle variety, you will find more options when you are purchasing 12-gauge shells as they are the most popular. There are still plenty of options for 20-gauge ammunition, just less than 12 gauge.

Buying in bulk is always smart, make sure to check out our stock of bulk 12 gauge ammo.

Reloading

Reloading shotgun shells is something that many reloaders enjoy doing. However, as shotshells are relatively inexpensive, most reloaders do not bother reloading used hulls.

The cost savings for reloading shotgun shells is so low that only high-volume shooters ever worry about doing it, as it is usually cheaper just to buy new factory shotgun ammo. However, if you love the idea of optimizing your shotgun ammo, there’s nothing stopping you for loading your own shotshells.

Please note that shotshell reloading requires a specialized press that cannot be used for centerfire rifle and handgun reloading.

A Brief History of The Shotgun Shell

In their infancy, most firearms could fire a single projectile or multiple as they all had a smooth bore. Early firearms like those used by the settlers of the New World needed this versatility to survive by hunting small birds to deer with the same gun.

However, with the introducing of rifling during the mid-16th Century, rifles and shotguns became two separate entities with different purposes.

At this time, shotguns were mostly used for bird hunting but also saw use in law enforcement and protection details.

Did you ever “call shotgun” as a kid when getting into a car? This phrase dates back to the Wild West when the person sitting next to a stagecoach driver would carry a shotgun to protect the cargo or passengers from outlaws.

The first shotgun shell was introduced by the French gunsmith, Casimir Lefaucheux, in 1836. Most early shotgun shells were made entirely of brass as paper cartridges were unreliable and couldn’t be reloaded.

It wasn’t until 1960 when Remington introduced the plastic shotgun hull that is used today.

Final Shots: 12 Gauge vs 20 Gauge

There’s no denying that the 12 gauge is the “jack of all trades” option in the shotgun world. There plenty of target load options for sporting clays, trap, and skeet, heavy slugs for deer, and a variety of birdshot for turkey, waterfowl, and upland birds.

Not only is the 12 gauge a potent option for all forms of hunting, it is an extremely effective home defense option when loaded with quality buckshot shotshells.

However, just because the 12-gauge can do it all, that doesn’t mean that it’s always the best option.

The 20-gauge shotgun has proven itself to be a capable upland bird gun as it is fast, maneuverable, easy to carry, and packs enough punch to fell pheasants, grouse, and doves without issue. At close range, it can also be utilized for turkey, deer, and self-defense with proper loads. And it can do all of these things with approximately 33% less recoil than a 12 gauge.

Which shotgun gauge is best for you depends on your personal needs as a shooter. If you are recoil sensitive and only plan to hunt upland birds then the 20-gauge shotgun will be everything you need it to be.

The ideal choice would be to own both, however if you are on a budget then the 12-gauge shotgun is the best option as it does everything you could possibly want at a very reasonable price point.

Deer-Calling Tactics For Each Phase of the Rut

0
Deer-Calling Tactics For Each Phase of the Rut

Be mindful of wind direction when calling during the pre-rut, as bucks tend to circle downwind before approaching a call. (Shutterstock image)

This article appears in the East edition of the November Game & Fish Magazine, now on sale. Learn how to subscribe

If you’re reading this, you are witnessing the power of attraction, and the next few moments will determine whether you read this article in its entirety or move on to something else.

The same concept applies to calling deer during the various phases of the rut. Even if you get a buck’s attention with a call, a number of variables ultimately affect whether it brings him in for a closer look.

While November can be an incredibly unpredictable month in the whitetail woods, the use of calls can be effective during the pre-, peak- and post-rut stages. But you need to understand what the deer are doing during each of these phases and offer up the right auditory lure.

PRE-RUT (Oct. 26 to Nov. 7)

Most deer have transitioned from their summer food source to their fall and winter food sources by now. Wooded areas that have good, healthy oak stands will become highly sought out by does and bucks alike. Knowing the locations of these areas can really help you home in on where to call, especially since does will often be on their feet in these areas.

Get your rattling antlers out because we are about to stir some things up. The bucks are now at an all-time high in testosterone levels and looking for that first doe in heat. Tensions are on the rise, and as daylight movement increases, bucks often move into territories where they really don’t belong. Get the biggest set of rattling antlers you have, smash them together every 30 minutes and be ready.

  • BINGE WATCH all 6 episodes of Rut Crash Course

In areas with low deer densities or where there may not be many mature bucks, however, this may not be the best tactic. If this is the case where you hunt, keep things social through contact grunts and doe bleats. Continue to be mindful of wind direction and watch carefully—these bucks will work their way to your call from the downwind side.

Adding a buck decoy and facing the head in the direction from which you expect a buck to approach can really help close the distance. Try to be as scent-free as possible, and if you plan to use a deer scent, I suggest using buck urine rather than estrous. The key to this phase is imitating a buck on the move, working to be the first to breed.

Rut Crash Course: Rattle in Big Bucks

PEAK RUT (Nov. 8 to Nov. 20)

It’s time to put the grunt tube to work. The does are in estrus and the bucks are begging them to stop and let them breed. My go-to sequence for the peak rut is a trailing grunt. I do 8 to 15 short grunts followed by a long grunt every 15 to 20 minutes and remain vigilant. A buck passing by will often hear this and come in to try to get in on the action. Unlike in the other phases, I have found during the peak of the rut that bucks will come from all different directions regardless of the wind direction. They will often come into this grunting sequence almost immediately, rather than take a prolonged, cautious approach.

Very seldom do I use a bleat call, but have found during this phase that a bleat is sometimes the tool that brings a buck in close. Occasionally I will use a bleat call in a soft manner, but mostly only if I see a buck that is hung up and won’t commit. The best luck I’ve had is with grunting. When that doesn’t work, wait 20 minutes and grunt again.

Snort wheezes can be highly effective in this phase. Seldom have I called in a buck with a blind snort wheeze, but several times I’ve stopped bucks in their tracks. If you have a decoy, pairing it with the snort wheeze can be a deadly combo. A buck that hears the call will want to know what he’s getting himself into, so having something visual highly increases your odds of drawing him in, especially if he’s cruising or hung up outside of shooting range.

Rut Crash Course: 3 Deer Calling Strategies

POST-RUT (Nov. 21 to Dec. 12)

In areas where the deer herd is balanced, I’ll treat the post-rut like the pre-rut. The use of rattling antlers and soft grunts can really get a buck moving during this time. A few of my biggest and most mature bucks have been killed in late November and early December with calling. In 2017 I was able to lightly rattle in three separate bucks, which enticed two of them to fight under my stand. I eventually took the more mature of the two.

Although this isn’t common and was a unique experience, it led me to believe that just because the peak of the rut is over, breeding is not. Some does have gone unbred, bucks still have high levels of testosterone and deer are still communicating often.

In areas with lower deer densities or where the balance is heavily in favor of the does, I don’t do as much aggressive calling during this phase. Instead, I’ll opt for lighter contact grunts and bleats. Deer are still very vocal regardless of densities or sex ratios, but in areas where there are fewer bucks, fighting for does often isn’t necessary, so I tend to withhold the aggressive tactics.

The key to successful calling is to understand how and why deer communicate, create curiosity during certain times, and stay vigilant. Keep your focus, spot them before they see you and be ready, because calling deer during the rut can be both exciting and rewarding for those who are patient and persistent.

308 vs 5.56 / 223: Ballistics, Ammo, & More

0

History: M4 vs M14s

The most significant performance difference between 5.56 NATO and .308 Win.—or its 7.62 NATO twin—was on full display during ground operations in the global war on terrorism. M4s chambered in 5.56 NATO performed admirably during the close quarters combat common in Iraq, but effectiveness diminished when Afghanistan’s mountains extended engagement distance.

The M4’s shorter barrel is nimble in buildings, but it’s not designed for long-range precision. It also compromises the projectile’s initial velocity, because not all powder may burn completely before it leaves the gun. That can result in increased drop during travel and additional time for wind to push it off course. Bullets delivered from those house-clearing carbines also don’t carry a lot of energy after lengthy travel.

Insurgents, on the other hand, were behind heavier calibers, many of them capable of slicing through breezes and carrying authoritative punch upon arrival. The U.S. military’s Semi-Automatic Sniper System, basically a fully outfitted AR-10 chambered in 7.62 NATO, proved an effective response, but they were not available in sufficient numbers.

The solution had been collecting dust in armories since the Vietnam War. It was a stockpile of M14s whose short stint as the official service rifle ended in 1964 when it was (ironically) replaced by M16. That 7.62 NATO chambering called it back to duty, and M14s retrofitted with optics, rails and bipods in the hands of our troops responded to terrorist attacks at distances far beyond the effective range of M4s.

The 7.62 NATO (twin of the .308 Win.) is the clear winner of the two in the distance race. The 5.56 NATO, however, leads the way in those shorter sprints to the finish line.

7.62x51 NATO vs 308 Winchester side by side bullet comparison

7.62×51 NATO vs .308 (Are they the Same?)

Visually these cartridges are identical twins—assuming they’re dressed with the same bullet—but like any siblings, there are subtle differences. The .308 Win. can handle chamber pressure up to 62,000 psi, while 7.62 NATO (or 7.62×51 mm) ammo comes in at 50,000 psi. That means an AR-10 chambered for .308 Win. eagerly and safely digests 7.62 NATO. The reverse, however, is not true. The scarcity of catastrophic failures caused by the improper combination is a clear indication of the uncompromising focus on safety firearm and ammo companies maintain.

Precisely how we arrived at two different names is a story that begins in 1952, when Winchester Ammunition introduced the .308 Win. cartridge. The U.S. military, in the meantime had been experimenting with a replacement for the .30-06 Sprg. cartridge that got us through World War II and Korea. In 1954 the U.S. Army rolled out a 7.62×51 mm cartridge, the identical twin. Some claim Winchester worked with the government on the design but launched early under the company name for marketing reasons. Others, of a more conspiratorial nature, claim someone in the company gained access to the military’s specifications.

Either way, another name was about to enter the picture. The communist menace was growing at the time, and members of the North Atlantic Treaty Organization (NATO) were eager to standardize ammunition between allied nations to alleviate logistics problems. In 1957, a version of the 7.62×51 mm with pressure reduced to reliably run military machineguns and semi-automatics, was accepted and standardized under the label 7.62 NATO.

While AR-10s in .308 Win. can run 7.62 NATO, it’s dangerous for .223 Rem.-chambered AR-15s to run 5.56 NATO cartridges. They are visually similar, but the military version generates higher pressure. An AR-15 chambered for the NATO cartridge, however, can safely run .223 Rem., although some loss in accuracy is possible. [See our article about AR10 Calibers for more information on other calibers for AR10 uppers and AR-10 rifles.]

Bullet Slow Motion

Ballistics at Distance

Stopping Power

The amount of energy .308 Win. delivers downrange is staggering compared to that of the 5.56 NATO. It’s a huge concern for anyone who hunts big game, and illustrates one of the reasons the U.S. military pulled M14s out of mothballs.

Federal’s American Eagle line—staying with a single manufacturer to avoid the varying barrel lengths different brands sometimes use in testing—demonstrates the difference. Its 55-grain 5.56 NATO load generates 1,223 ft.-lbs. of energy at the muzzle, but the figure drops to a paltry 277 at 500 yards. Conversely, the company’s .308 Win. load with 150-grain bullet launches with 2,648 ft.-lbs. and at 500 yards still delivers 1,089 on target. That’s almost four times the stopping power at five football field lengths.

Wind Drift

Federal’s testing also demonstrates the difference in cartridges when it comes to wind drift. The results are reported for a 10-mph breeze, at full value—perpendicular to the bullet’s direction of flight—and again give the nod to .308 Win. The 5.56 NATO cartridge is off target by 38.1 inches at 500 yards. The .308 Win., however, moves 23.3. That’s more than a foot.

Bullet Drop

The 5.56 NATO load wins when it comes to drop,offering a flatter trajectory than it’s big brother 308 Winchester.With a 200-yard zero, it drops 38.1 inches at 500 yards. The .308 Win. figure is 47.2, or 9.1 inches lower.

Bullet drop, however, is relatively predictable, thanks to the fact that acceleration due to gravity remains 32 feet per second/per second, whether in gale-force winds or 10 mph breezes. Bullet drop compensating reticles harness that fact by providing the correct holdover for that rifle and cartridge at a known distance. You can also dial a rifle’s turret the correct number of clicks to adjust, which is the preferred military solution after lots of practice and copious note taking. For that reason, most precision marksmanship courses recommend, often, “dial for elevation, hold for wind.”

Of course, doping the wind at both the shooting position and target, while gauging crosswinds across 500 yards, is an art that takes years of practice. Reducing potential error by a foot is a huge advantage for .308 Win., along with the added energy delivered on target.

The numbers might make an AR-10 chambered in .308 Win. seem like the clear choice, but there are reasons many enthusiasts find the 5.56 NATO a better one.

Recoil

Recoil is likely the most over-discussed firearm subject that exists. Calculating the precise amount generated when a cartridge is touched off is easy, but how much of it reaches the shooter and is felt—perceived recoil—defies a simple equation.

Bear in mind, both cartridges are tame on the shoulder. The muzzle energy generated by the .308 Win. cartridge above, however, is nearly double that of the 5.56 NATO, resulting in a significant increase in raw recoil. That translates to increased muzzle rise with each shot, lengthening the time it takes to get back on target if a follow-up shot is required.

That fact gives an AR-15 chambered in 5.56 NATO a big advantage if it’s serving as a home-defense gun or pursues speedy predators. That’s one of the reasons the U.S. military has stuck with a cartridge that’s performed so well in Iraq’s urban engagements.

The cycling of a semi-automatic firearm drains some of that recoil compared to a bolt gun, however, long before it ever reaches the shooter. So does every ounce of the gun’s weight, along with accessories and scope. Add a recoil pad and perhaps even a muzzle brake and that .308 Win. recoil is almost as pleasant to shoot at a 5.56 NATO, but it won’t be nearly as nimble in that configuration. [See our complete comparison of AR10 vs AR15 rifles.]

Hunting & Bullet Choices

In many areas of the country pursuit of big game is not legal with a 5.56 NATO-chambered rifle. It is, however, allowed nearly everywhere with a .308 Win.

The smaller cartridge just doesn’t retain the kind of energy downrange for most hunters to deliver ethical one-shot stops. Even in practiced hands, the selection of bullets available today is limited, and most often available in match, full metal jacket or predator-hunting designs. There are some controlled expansion bullets available, but .308 Win. gets the nod here, thanks to an inventory of projectile choices that overwhelms those available for 5.56.

5.56 vs 308 side by side bullet comparison

Ammo

Bargain-basement prices for 5.56 NATO and .223 Rem. may not have survived the pandemic’s ammunition shortage, but they’re still inexpensive compared to other centerfire rifle cartridges. It’s hard to find a sporting goods store or FFL that doesn’t have a few boxes on the shelf, cases in back or pallet staged by the cash register. If high-volume practices are on the schedule, it’s the best choice.

That’s not the case with .308 Win. or 7.62 NATO. These cartridges are more expensive, although it’s hard to beat the performance downrange, along with the its long history of winning matches and bagging big game.

[308 ammunition can often be up to twice as expensive as 5.56 or 223 ammo, but offers a huge variety of grain weights for hunting and long range shooting. See our infographic comparing 2022 ammo prices by caliber.]

Which is Better?

[As Eric Shattuck said in his article about AR-10s vs AR-15s, “Ultimately, the choice between an AR-10 (.308) and an AR-15 (5.56/223) comes down to what you need out of your rifle.” We couldn’t agree more! If you’re looking for a rifle to do competitive target shooting, long range shooting, or medium to large game hunting, then 308Winchester is the way to go. However, if you simply want a low cost, versatile self-defense or plinking gun, 5.56 NATO/223 Remington will be the better option.

We would like to extend a huge thank you to Guy Saji for his work on this article comparing 308 Winchester and 5.56 NATO/223 Remington. Leave a comment below about your favorite AR-platform caliber and read about 6.5 Creedmoor vs 308 next!]

Best Air Rifle Deals

Popular Posts

Dry Firing Air Rifles: What You Need to Know

0
"Master the art of precision shooting with dry firing air rifles. Enhance your aiming skills, trigger control, and muscle memory without using ammunition. Discover...

Air gun 101: The differences between .177 & .22 – Which jobs they do...

0
I’ve always believed the popular phrase: “It’s not the size of the dog in the fight that matters - but rather the size of the...

.22 vs .25 Air Rifle: The Ultimate Comparison Guide

0
When I first got introduced to the world of rifles, I often thought that a bigger caliber meant better performance. So, I thought that...

What can you kill with a 177 air rifle?

0
"Unleash Your Precision: Discover the Power of a .177 Air Rifle to Take Down Targets with Accuracy. Explore the Versatility and Potential of this...

Can a 22 air rifle kill a deer?

0
"Debate over whether a 22 air rifle can effectively take down a deer has sparked curiosity among hunting enthusiasts. With its lower muzzle velocity...