Home Blog Page 51

Where Warm Waters Halt in The Thrill of the Chase Treasure Hunt ~ by Del Shannon

0
treasure hunt book
The Thrill of the Chase book (with treasure poem inside)

Where Warm Waters Halt

By Del Shannon

(The following is written in a manner of ‘in my humble opinion’)

Where warm waters halt…

This is the now iconic first clue written by eccentric millionaire Forrest Fenn. He’s earned the “eccentric” title in spades because of a single act: About 7 years ago – nobody is exactly sure except Fenn himself – he stole into the mountains north of Santa Fe, New Mexico and hid a treasure chest filled with $2 million of gold, gems and other valuables. And in an act that can only be called defiant, he wrote a book and a poem that describes the route to get to the treasure and dared anyone to try and unlock the riddle and claim his cache.

Since publication of Fenn’s The Thrill of the Chase in 2010, thousands of theories have been offered up as the location of this first clue. The location of the starting point of the hunt for Fenn’s treasure puts into context every other clue. Fenn has said you’re wasting your time if you’re searching without knowing where to start.

So where do warm waters halt? Not far from Questa, New Mexico.

forrest fenn treasure hunt his books
Forrest with some of his books

I first heard about Forrest Fenn and his treasure chest while sitting in the breakfast area of the Taos Hampton Inn eating a self-made waffle and sipping coffee. I was there working on the reconstruction of the Cabresto Dam, just east of Questa. The Today show was on in the background and this is when I first saw Fenn, his piercing eyes revealing more intelligence than his carefully selected words. He was explaining that all you had to do was follow the nine clues spelled out in a simple poem and you were rich. Just like that, my curiosity was piqued.

Buying Fenn’s book and starting my search around Questa and Taos was obvious and easy. The land seemingly disappears into oblivion at the Rio Grande Gorge and thrusts to the heavens just steps away at the Sangre De Cristo Mountains, creating billions of hiding spots. Working in the area revealed that the landscape and its population are one and the same. The people of Questa and Taos stand out as easily as the canyons and peaks that surround them, none is even remotely like another.

Very little in the The Thrill of the Chase pointed me to anything that resembled the area around Questa and Taos. Fenn waxes Quixotic about his youth spent doing anything but focusing on school, holding a special place in his heart for Yellowstone.

One story in particular gnawed at me like an obsessive-compulsive beaver. In an early chapter titled “First Grade,” Fenn recounts being bullied by a boy named John Charles Whatever who often threatens to beat up Fenn, while at other times waves around a jar of olives in his face. The more I read and reread this passage the more it began to look like a ham at Chanukah – bizarrely out of place.

All I had to go on was the name “John Charles” and his olives, so I started there. After internet searches with dozens of permutations, I finally got lucky. After reading a history of Questa, once known as Rio Colorado, I learned that the great explorer, John Charles Fremont, once spent a few months during the winter of 1849 in Questa.

Fremont had tried to cross the southern Rocky Mountains in Colorado during the winter of 1848-49 and convinced 32 gullible men into joining his folly. Fremont was from an era where braggadocio was a suitable proxy for intelligence and thrived in an environment of delusional arrogance. By December 1848 eleven of his party had frozen to death and most others had started eating their belts. The party finally gave up and began limping their way south to New Mexico.

The surviving members stumbled into Questa in January 1849, but Fremont, sensing his men would be in an extended sour mood once they could again feel their feet and hands, headed for Taos. He was off to California a few weeks later

A tragic story, but this new knowledge didn’t appear to put me any closer to the Fenn’s treasure. John Charles Whatever’s olives did.

Besides being a lover of history, Fenn is a fly fisherman. The Red River fights its way out of the mountains near Questa, its last gauntlet is a maze of basalt boulders below a fish hatchery. Fed by springs, the water stays a consistent 48 degrees in the winter. In this same stretch of water there is a mid-winter (January through March) hatch of blue winged olive flies, which, along with the warmer water, coax brown trout out of the colder waters of the Rio Grande…along with the fishermen.

Fremont and his olives were pointing to Questa.

Thrill of the Chase book (opened to chapter ‘In Love with Yellowstone’

Still, more detail was needed, which came from another of Fenn’s stories. One evening, while re-reading the In Love With Yellowstone chapter I stopped after Forrest described his dismay after his father sold the families ’36 Chevy for a ’41 Plymouth. Why on earth was this such an important part of his life? And why didn’t he use the numbers ‘19’ in front of these dates. Every other reference to a year in The Thrill of the Chase uses all four digits – 1926 for example, the year his parents were married.

Forrest’s attempt at alarm over this car sale seemed insincere. After chewing on ’36 and ’41, which were details that seemed misplaced, and while using Google Earth to snoop around the Questa area, I noticed the latitude in the lower right hand corner. If I hovered the little electronic hand directly over the center of the village and it read 36 degrees, 42 minutes north. Hmmm… Then I moved it to the fish hatchery and it read – exactly – 36 degrees, 41 minutes, 0 seconds north. Holy crap!

Two hints at the starting place are compelling. If I could find a third it would concrete the location of “where warm water halt.” A local fly fisherman supplied my requested last hint.

Van Beacham is well known in Taos as the owner of the Solidary Angler, a local fly fishing shop and guide business. He’s also the author of A Flyfisher’s Guide to New Mexico, and this is how Van describes the Red River from the fish hatchery to its confluence with the Rio Grande in his book. “The lifeblood of the Rio Grande Gorge, the spring-fed section of the Red River extending from the hatchery downstream about 4 miles to the confluence with the Rio Grande is the main spawning tributary for browns and cutbows in the bigger river. It also provides major holding water for big cutbows and browns since the water stays about 48 degrees all winter long. Due to the warmer water temperatures, the Red River is the premier natural winter fishery in northern New Mexico.”

The Red River provides “holding water” for cutbow and brown trout because of its “warm water.”

It takes very little effort to connect the words “halt” and “hold.” In fact, they essentially mean the same thing. The word “hold” takes its origin, its etymology, from the Germanic word “halten,” which means “to hold.”

Bingo.

Warm waters halt in the Red River between the fish hatchery and its confluence with the Rio Grande. This is where anyone seriously searching for Fenn’s treasure must start.

thrill of the chase treasure hunt map
Poem and Treasure Map

Where to from there? Down river. Rio arriba.

In Fenn’s opening chapter titled “Important Literature” one of the books he talks about is For Whom the Bell Tolls. As with John Charles Whatever and his olives, if you look only at the surface you immediately reach a dead end, but when you dig a bit you realize there’s more to learn. Before Hemingway used the title for one of his books, For Whom the Bell Tolls was a line in a poem written by John Donne, a 16th century metaphysical poet. Donne begins with the famous first line of his poem, “No man is an island…” and ends with “…and therefore never send to know for whom the bells tolls; it tolls for thee.”

Follow the Rio Grande downstream from its confluence with the Red River and you eventually reach the John Dunn Bridge, named for the famous Taos gambler and entrepreneur Long John Dunn, an escaped convict from Texas who built the first bridge and toll road across the Rio Grande at this location. The splinters of Dunn’s original timber bridge are somewhere near El Paso, carried there by numerous spring floods, and in its place stands a steel truss bridge built by Taos County. Connecting John Donne and John Dunn was easy and obvious, especially after learning that both Dunn and Donne are different spellings of the Gaelic word for “brown.” And because Dunn and Donne are proper nouns, capitalize the ‘B’ and you have Brown. Voila.

But John Dunn’s home wasn’t at the bridge, it was in Taos just north of the plaza in the area now occupied by the John Dunn House Shops. How could the home of Brown be at the Dunn bridge if Dunn never lived there?

This problem was resolved by the author Max Evans and his book Long John Dunn of Taos. This homage to Dunn describes, among other things, his early 1900’s transportation company – really just several horses and a stagecoach – and how he met Taos visitors and artists at the nearest train depot in Servilleta, then the only way in or out of Taos. He piled them into his stage, headed east in a cloud of dust across the Taos plateau, and then snaked them into the Rio Grande Gorge via a harrowing and ridiculously steep switchback road.

Dunn built a stone hotel at the bottom of the gorge and on the edge of the Rio Grande where travelers were forced to spend the night, most of whom were grateful for the stop and for surviving the tormenting trip into the gorge, before delivering them to Taos the next morning. Dunn’s hotel was run by his mother, Susan Jane Dunn, who also lived at the site. A short rock wall on the east side of the river is all that’s left of Mrs. Dunn’s home, the home of Brown.

All of that is pretty convenient, but I still wanted more on Dunn. It turns out The Thrill of the Chase is almost overflowing with references to John Dunn. In the chapter “Looking for Lewis and Clark” Fenn talks about taking Babe Ruth candy bars with him when he and Donnie went into the mountains outside of Yellowstone for several days. The problem is the candy is actually called “Baby” Ruth bars. If you look into Babe Ruth you learn that a man named John Dunn (everyone called him Jack) signed Ruth to his first major league baseball contact. Hmm…

Or look at Fenn’s odd reference to Robert Redford in the “Important Literature” chapter. One of Redford’s most famous movie characters was The Sundance Kid (aka Harry Alonzo Longabaugh). In 1897, Longabaugh was arrested by Carbon County Montana Sheriff John Dunn after he and others from his gang robbed a bank in Red Lodge, MT. Wow!

Three separate John Dunn references in The Thrill of the Chase aren’t a coincidence.

The second clue – Put in below the home of Brown – points to the John Dunn Bridge. It’s too far to walk from where warm waters halt at the confluence of the Rio Grande and Red River; about 14 miles if you drive or eight-ish miles if you fight your way on foot down the Rio Grande. All these hints point to these locations as the first two clues.

But be wary from here. ‘Putting in’ could mean crossing the river or heading either up or down the canyon. And if you cross the river, which direction do you cross from? Do you head west or do you head east? You could go in three directions from the Dunn Bridge. I have my own ideas of where to head next, but not the chest, so they remain only ideas.

An obvious question remains: Why am I sharing this? It’s not as if I haven’t tried to find Fenn’s treasure on my own. I’ve made many trips to areas I felt certain that, when I walked out, I would be struggling to carry over 40 pounds of gold, jewelry and artifacts back to my car. But I’ve learned that the search isn’t as simple as my romantic visions make it out to be. It took a couple of years to unlock these first two clues and it may take much longer to unlock the rest.

And if I’m completely honest with myself, I’ll admit that I’d like the treasure found, in direct contrast to Fenn’s wishes that it be discovered 1,000 years from now. I’m a sucker for a good challenge wrapped in a mystery. So far I’ve done this alone, but I could be persuaded to work with someone else or as part of a larger group in the right circumstance. It’s always more fun to work with a team.

lost treasureFor the record, I didn’t contact Fenn for this story. What would he have said to me anyway? At best he would have complemented my sleuthing. More likely he would have just silently shrugged, smiled at me with his quick eyes, and walked away. I figure he’s done what he wanted to do and, whether or not he enjoys the attention he’s created, I’d make my own choice and leave him alone.

A final thought. To me, Fenn’s poem is a love letter to an area he unquestionably adores and which also helped him heal from his time in Vietnam. When you dig into the history of the Vietnam war, you learn that there is a Red River there too and pilots who flew into this maelstrom found some of the most dangerous air over this river.

I like to think that what Fenn found in New Mexico’s Red River was the thorough opposite of Vietnam’s. The paradox was not lost on him. In my mind I can see him casting for brown’s while marveling that one Red River could be filled to overflowing with death while the other held out its hand and reminded him there were still places where he could gently ease the visions of war from his head, replacing them with the rediscovered memories of the trout he chased in his youth as they led him, once again, to peace.

~by Del Shannon

.

If you would like to share your story or thoughts on MW, please send your submission to [email protected]!

Always Treasure the Adventure!

.

Best .22 Air Rifles – Top 10 fantastic guns for the money (Reviews and Buying Guide 2026)

0

Once, when talking to a close friend who was into air rifles and hunting,

It became clear that he actually had some confusion when it came to buying an air rifle.

With such a wide variety available, he didn’t really know where to turn.

So he turned to me. 

Specifically, he wanted to know about the best .22 air rifles on the market today.

I’m a bit of an encyclopedia when it comes to air rifles, and I’m always happy to do a little digging anyway.  

So I decided to check out some excellent options myself to help him out and share some of the key insights with you. 

10 Top-rated .22 Air Rifles 2026

If you are in a hurry, here is an overview of the highlight candidates in our list of best .22 air rifles in 2026:

IMAGEPRODUCTDETAILSLINK
Best .22 Overall
Benjamin Marauder
  • Calibers: .177, .22, .25
  • Max Velocity: 1100 FPS
  • Max Muzzle Energy: 45 FPE

check price on midwayusa


check price on airgundepot

Best .22 Under $200
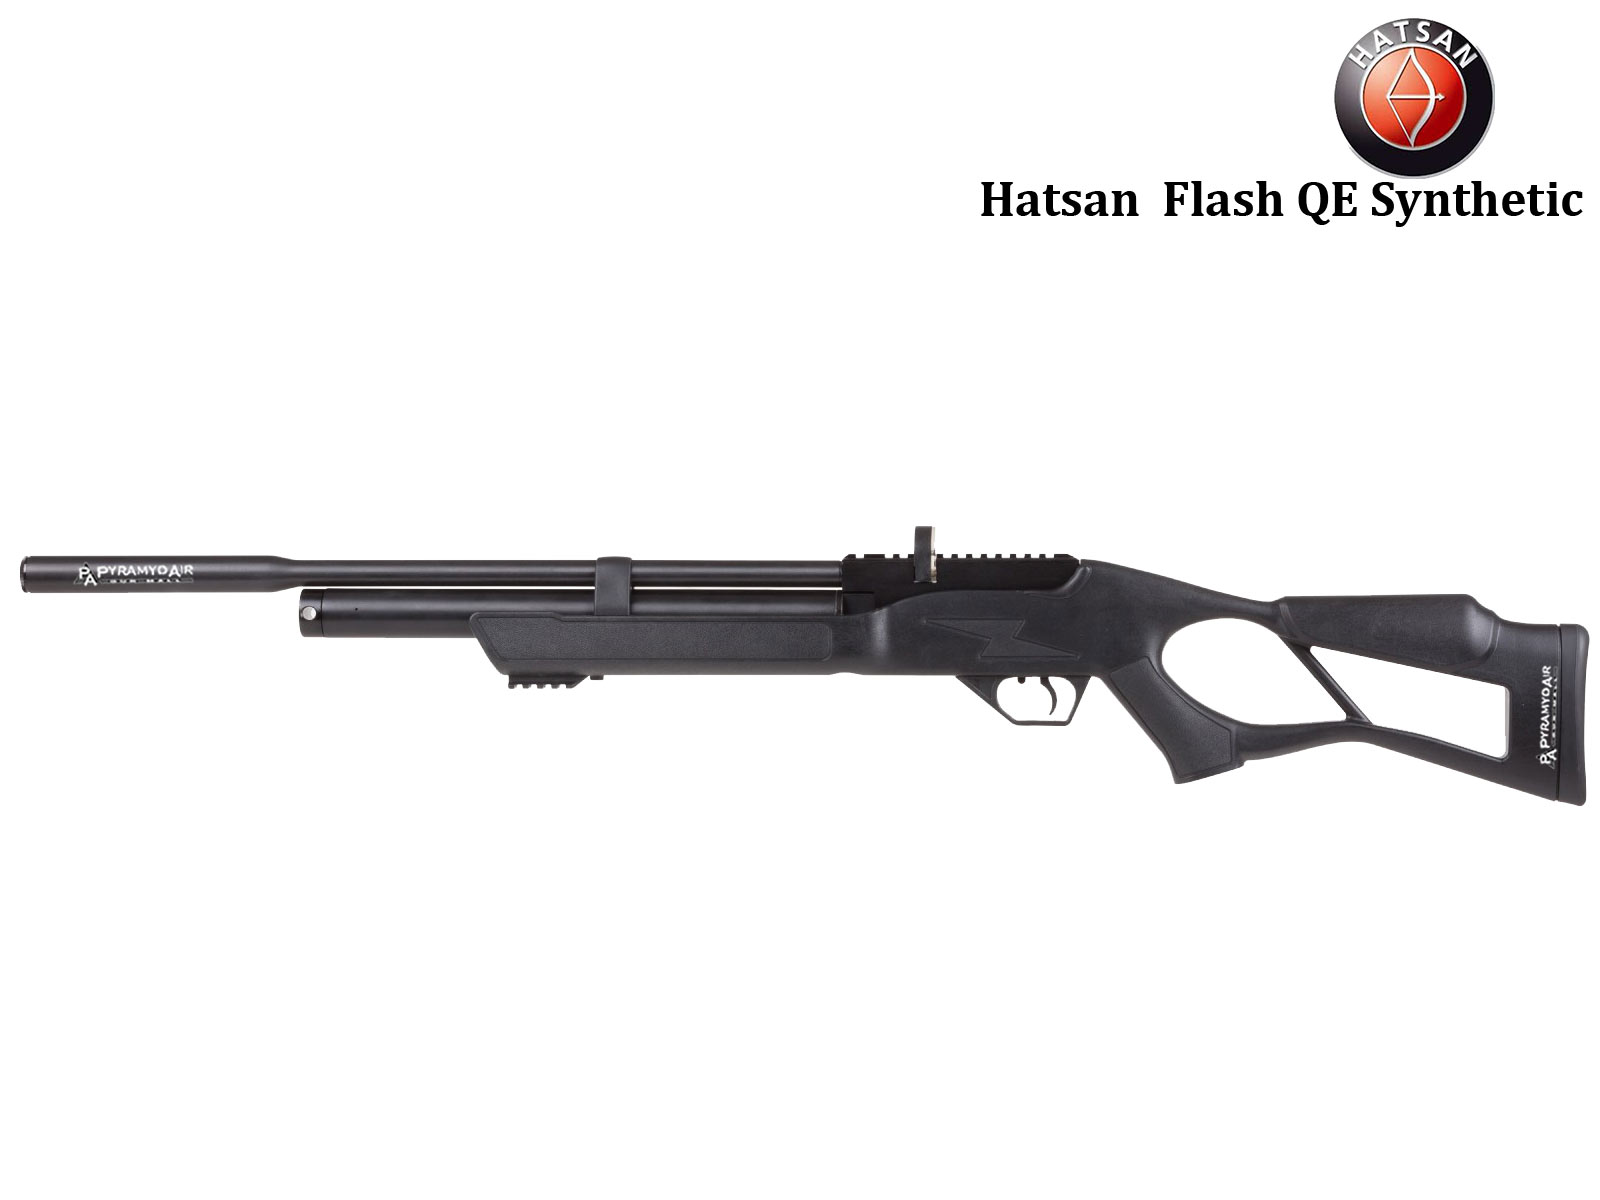
Hatsan 95 Walnut
  • Calibers: .177, .22, .25
  • Max Velocity: 1000 FPS
  • Max Muzzle Energy: 24 FPE

check price on midwayusa


check price on airgundepot

Best Springer .22
Air Arms TX200 MKIII
  • Calibers:  .177, .22
  • Max Velocity: 930 FPS
  • Max Muzzle Energy: 18 FPE

check price on midwayusa


check price on airgundepot

Best .22 Under $300
Hatsan 135 QE
  • Calibers: .177, .22,.25,.30
  • Max Velocity: 1250 FPS
  • Max Muzzle Energy: 34 FPE

check price on midwayusa


check price on airgundepot

Best .22 Regulated PCP
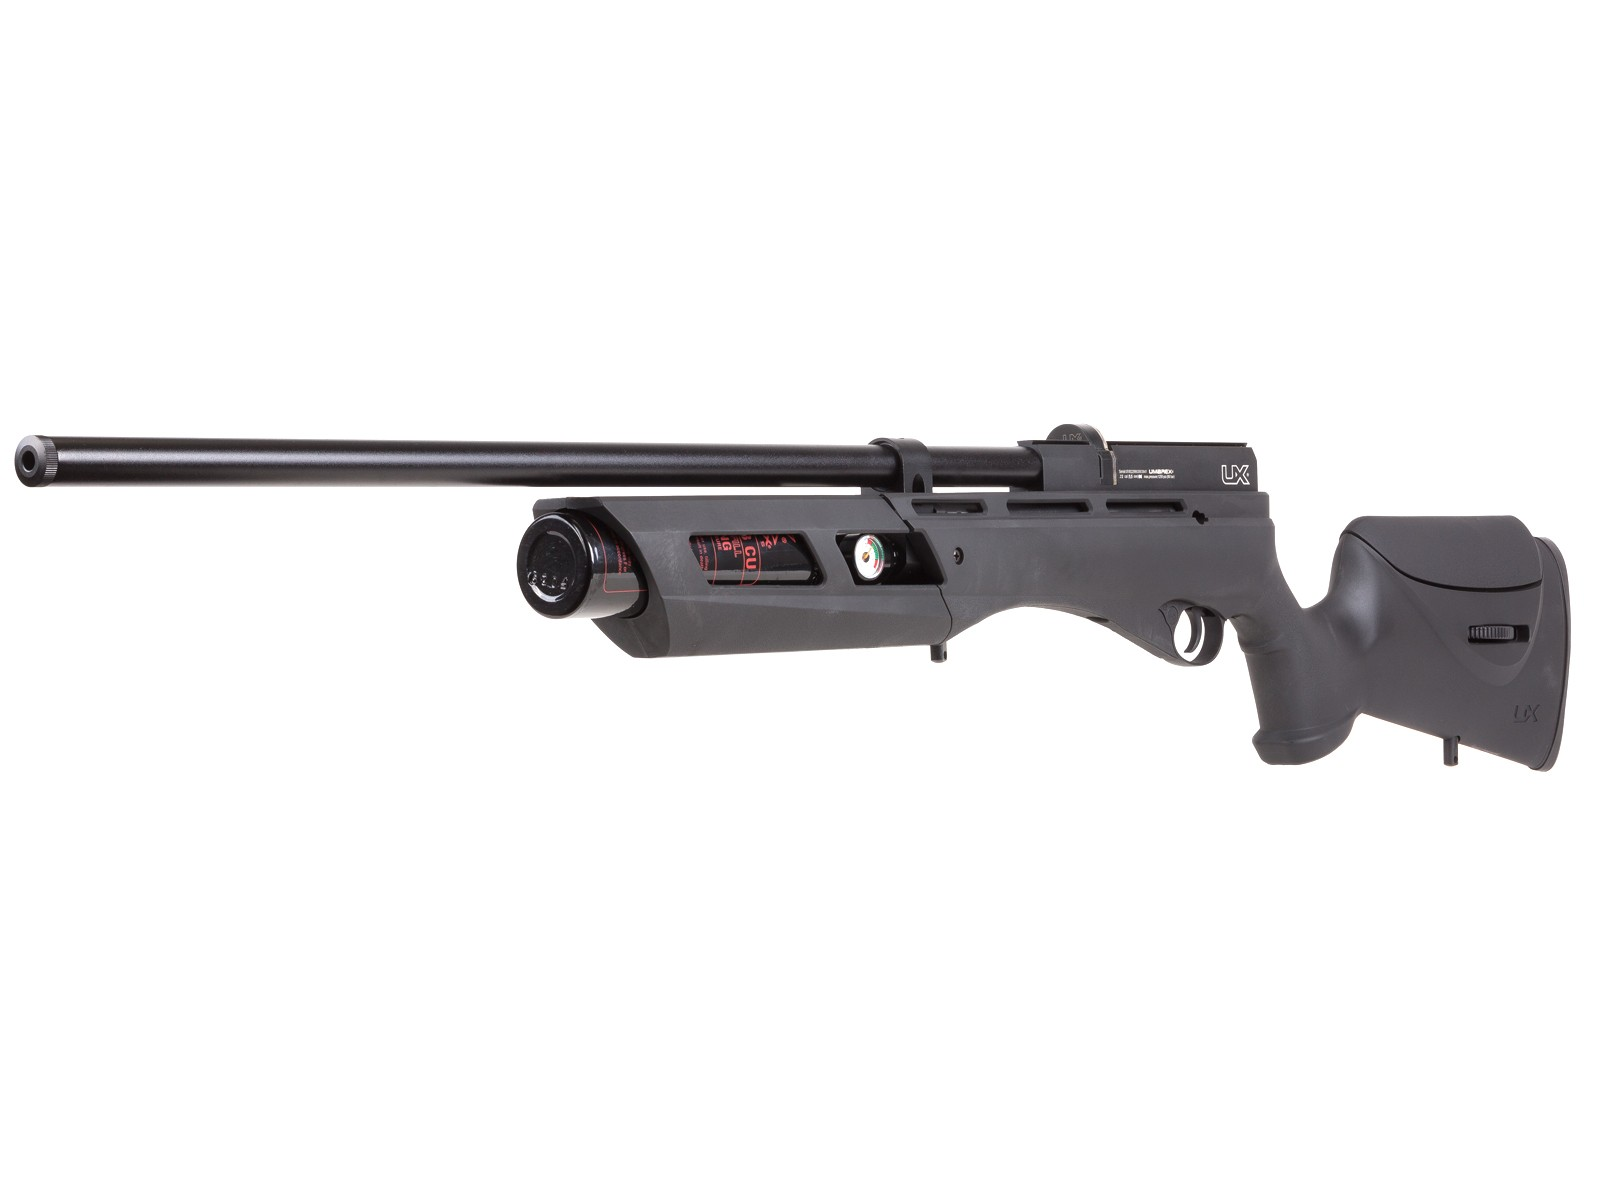
Umarex Gauntlet
  • Calibers:  .22, . 25
  • Max Velocity: 900 FPS
  • Max Muzzle Energy: 51 FPE

check price on midwayusa


check price on airgundepot

Best Budget .22
Diana Stormrider
  • Calibers:  .177, .22
  • Max Velocity: 1050 FPS
  • Max Muzzle Energy: 26 FPE

check price on midwayusa


check price on airgundepot

Best .22 For Hunting
FX Impact M4
  • Calibers: .177, .22, .25, .30
  • Max Velocity: 1020 FPS
  • Max Muzzle Energy: 128 FPE

check price on midwayusa


check price on airgundepot

Best .22 Replica
Springfield Armory M1A
  • Calibers: .177, .22
  • Max Velocity: 1000 FPS
  • Max Muzzle Energy: 18 FPE

check price on midwayusa


check price on airgundepot

Best .22 For Small Games and Pest Control
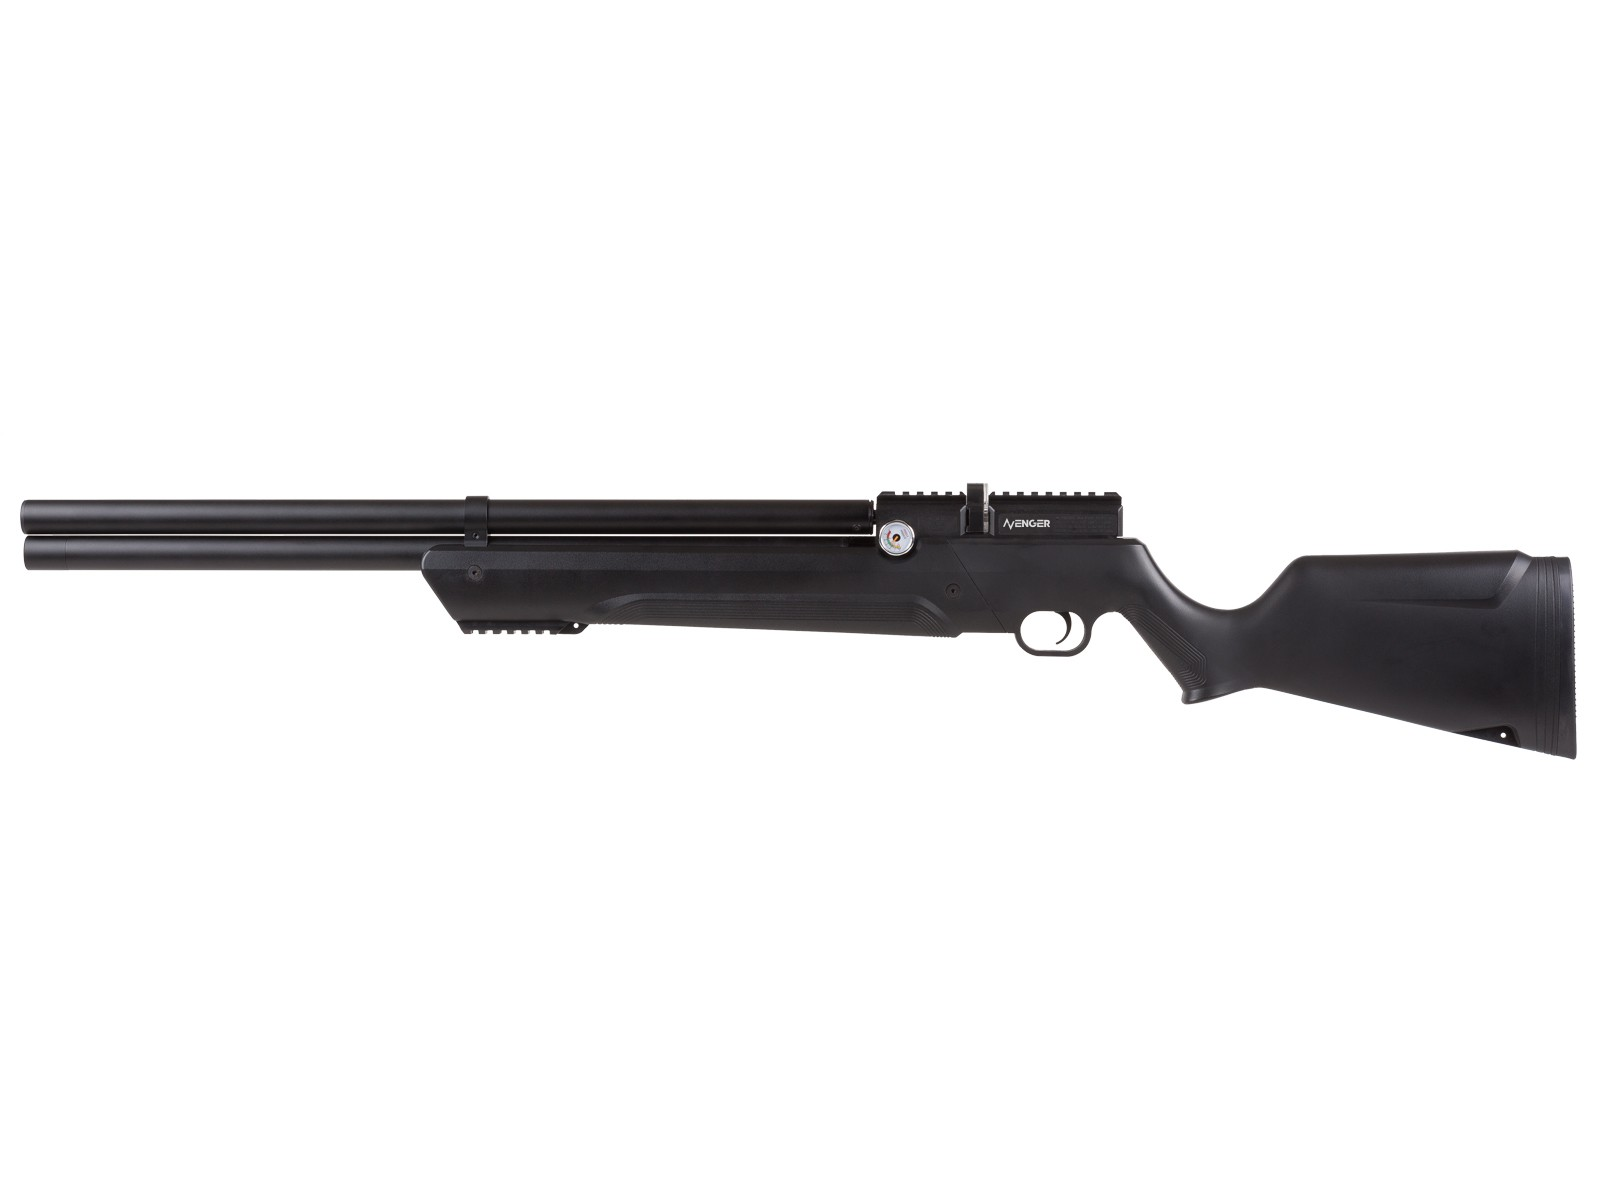
Air Venturi Avenger
  • Calibers:  .177, .22,.25
  • Max Velocity: 1000 FPS
  • Max Muzzle Energy: 45 FPE

check price on midwayusa


check price on airgundepot

Best Fit and Finish
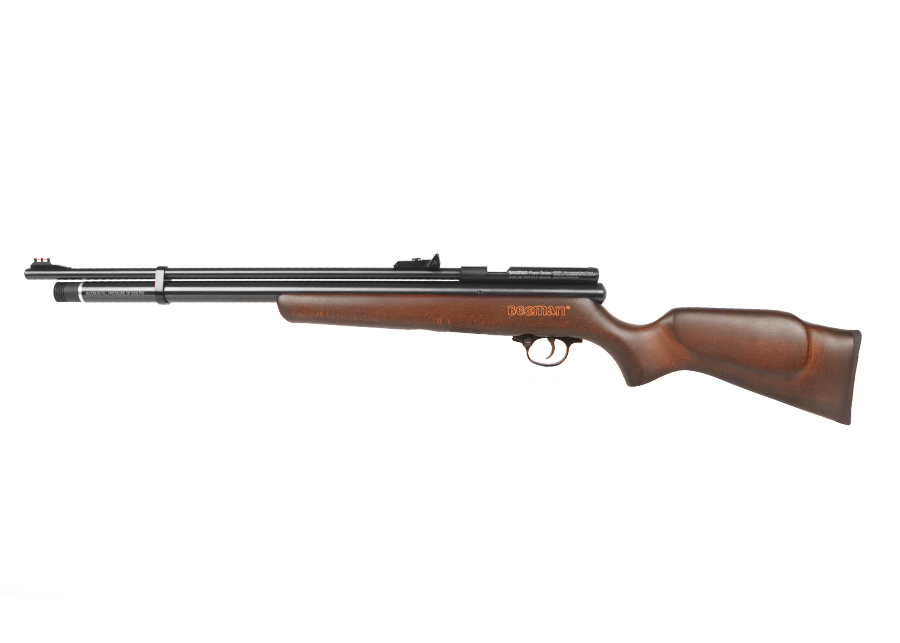
Beeman R9
  • Calibers: .177,.22,.25
  • Max Velocity: 935 FPS
  • Max Muzzle Energy: 24 FPE

check price on midwayusa


check price on airgundepot

Now that we know what to look for in a .22 air rifle, let’s go into the details with the best ones in the market:

Best Value .22 PCP Air Rifle For Small Game And Pest Control: Air Venturi Avenger

The Air Venturi Avenger air rifle is one of the best PCP rifles.

Further, it is a class apart when trying to hunt down animals or keep your backyard clean from pests. 

It is Pre-Charged Pneumatic and comes with side lever cocking.

For one charge, you get repeater-based shooting with a maximum of 60 shots.

The maximum pressure allowed is 4351 PSI. 

A pressure gauge helps keep a track of the adjustments you make.

It is available on the right side of the rifle.

Use the hammer spring to fine-tune your rifle for great power and performance. 

The barrel is rifled and shrouded.

Hence, the noise levels are considerably low when compared to many other PCP rifles.

For one load, you can fire up to 10 shots in repeater motion. 

In case, you wish to convert it to the single-shot mechanism, add your single-shot tray given with the package. 

While the two-stage adjustable trigger gives comfort and safety, you still have to manually reset the safety switch on the whole. 

A Picatinny rail on the front of the stock gives room to accessorize your rifle.

Also, a standard 11 mm dovetail is available to mount your scope. 

Shooters can easily carry their rifles when going hunting with the studs present at both ends of the rifle.

Through these studs, you can connect a sling for ease of use. 

The accuracy is guaranteed with the 950 FPS velocity on this rifle.

The FPE or muzzle energy provided with various pellets is also commendable.

It ranges between 20 to 56 FPE.

Therefore, providing enough power to shoot the pests and for small-game hunting. 

(For more on the best air rifles for pest control, see this post)

Check the table below for more details regarding Air Venturi Avenger’s muzzle energy and velocity. 

Chrony tests

CalibersPelletsFPSFPE
.25JSB Diablo MKII Heavies, 33.95 gr843 53.59
.22JSB Diabolo Exact Jumbo Heavy 18.13 gr86530.13
.22JSB Monster 25.39 gr87342.98
.22JSB Match Diabolo Hades 15.89 Gr85025.5
.25JSB Match Diabolo Exact King 25.39 Gr91046.7
.25JSB Match Diabolo Exact King 25.39 Gr90045.68
.25H&N Barracuda 31.02 gr83347.81
.22JSB Match Diabolo Hades 15.89 Gr88027.33
.22JSB Monster 25.39 gr91246.9
.22JSB Match Diabolo Hades 15.89 Gr89027.96
.22JSB Diabolo Exact Jumbo Heavy 18.13 gr90032.62
.25Slug 41 gr78556.12
.22Slug 25 gr82537.79
.22JSB Diabolo Exact Jumbo Heavy 18.1 Gr93234.92
.22Crosman Premier 14.3 Gr95028.66
.25JSB Hades 26.54 gr91749.57
.22JSB Beast Jumbo 34 Gr85054.56
.22Crosman Premier Hollow Point 14.3 Gr82221.46
.25NSA Slugs 26.8gr 90248.43
.25JSB Match Diabolo Exact King 25.39 Gr94450.25
.25JSB Match Diabolo Hades 26.54gr875 45.13
.22Crosman Premier Hollow Point 14.3 Gr97630.25
.22JSB Exact Jumbo Monster 25.39 gr89044.67
.22JSB Diabolo Exact Jumbo Heavy 18.13 gr86730.27
.22NSA Slugs 20.2 gr94840.32
.22FX Hybrid Slugs 22gr90840.29
.22H&N Slug HP 21 gr
84633.38

Accuracy

CalibersPelletsDistancesGroups
.22JSB Diabolo Exact Jumbo Heavy 18.13 gr50 yards1/2"
.25JSB Match Diabolo Exact King 25.39 Gr35 yardsnickel size
.22JSB Diabolo Exact Jumbo Heavy 18.13 gr10 yardsone hole
.22JSB Match Diabolo Hades 15.89 Gr25 yards0.41"
.22JSB Match Diabolo Hades 15.89 Gr50 yardsone hole
.25JSB Match Diabolo Exact King 25.39 Gr30 yardsone hole
.22Air Arms Diabolo Field Heavy 18 grain50 yards1"
.177JSB Exact heavy Diablo 10.34 gr25 yards1/4"
.177JSB Exact heavy Diablo 10.34 gr50 yards1/2"
.177JSB Exact heavy Diablo 10.34 gr100 yards1 1/2"
.177JSB Exact heavy Diablo 10.34 gr27 yards0.26"
.22JSB Match Diabolo Hades 15.89 Gr107 yards2"
.22JSB Diabolo Exact Jumbo Heavy 18.13 gr50 yards3/4"
.22H&N Barracuda Match 21.14 gr25 yardsone hole
.22H&N Barracuda Match 21.14 gr50 yards1/4"
.22JSB 18 gr50 yardsone hole
.22JSB Diabolo Exact Jumbo Heavy 18.13 gr40 yardsdime size
.22JSB Diabolo Exact Jumbo Heavy 18.13 gr50 yardsnickel size
.22JSB Match Diabolo Exact Jumbo Monster 25.39gr30 yardsone hole
.22JSB Beast Jumbo 34 Gr50 yardsdime size
.22Crosman Premier Hollow Point 14.3 Gr20 yardsone hole
.22JSB Diabolo Exact Jumbo Heavy 18.13 gr50 yards0.5"
.22JSB Diabolo Exact Jumbo Heavy 18.13 gr75 yards.688"
.22JSB Diabolo Exact Jumbo Heavy 18.13 gr100 yards1.25"
.25JSB Match Diabolo Exact King 25.39 Gr50 yardsone hole
.22Crosman Premier 14.3 Gr45 yardsone hole
.25JSB Match Diabolo Exact King 25.39 Gr50 yards0.45"
.22JSB Exact Jumbo Monster 25.39 gr50 yards0.33"
.22JSB Diabolo Exact Jumbo Heavy 18.13 gr50 yards0.38"
.22NSA Slugs 20.2 gr50 yards0.59"
.22FX Hybrid Slugs 22gr50 yards0.48"
.22H&N Slug HP 21 gr
50 yards0.62"
.22FX Hybrid Slugs 22gr100 yards1.55"
.22FX Hybrid Slugs 22gr50 yards0.42"
.22Jumbo Exact 16 gr50 yards1.07"
.22Patriot Javelin Slugs 23 gr50 yards0.63"
.22Patriot Javelin Slugs 23 gr100 yards1.67"

Additionally, the rifle weighs just 6.4 lbs without a scope and is perfect for use even with young people. 

The package also comes with two magazines and hence you are always loaded with more rounds.

Moreover, you can choose to add various types of pellets with no problem in this rifle. 

A male disconnect quick filling helps the users to quickly and smoothly fill their rifles.

It also comes with a dust cap to prevent the accumulation of dirt and dust. 

Many plastic parts are involved and the durability of the trigger or stock comes into question.

Also, the noise levels are high.

This demands the inclusion of baffles to bring the noise down. 

read review here

Features

  • Pre-Charged Pneumatic 
  • Sidelever Cocking
  • Synthetic Stock
  • Externally Adjustable Regulator (Up to 3,000 PSI / 210 BAR)
  • Easily accessible Hammer Spring Adjustment Screw
  • Two-Stage Adjustable Trigger
  • Max Fill Pressure: 4,351 PSI (300 BAR) 
  • Fully Shrouded Barrel
  • Picatinny Rail on Fore-end of stock
  • Holes in front and rear of stock for mounting swivel studs for a sling
  • Dual Gauges – Reg Pressure (RH Side) and Fill Pressure (LH Side)
  • Male Quick Disconnect Fill Fitting
  • Easy Access Degassing Screw 
  • Manual Safety
  • 11mm dovetail/weaver combination scope rail 
  • Magazine Capacity: 10 rds. (.177 & .22), 8 rds. (.25) 
  • Includes two magazines and single shot tray

Recommended uses:

  • Target shooting/plinking
  • Pest control/small game hunting: squirrels, raccoons, jackrabbits.

Pros and Cons

ProsCons
  • Excellent value for the money
  • Lightweight and well-balanced
  • Powerful and easy-to-use
  • Light weight and easy to load magazines
  • Easy to cycle the bolt for loading
  • Great trigger adjustment and regulator pressure adjustment
  • The stock is hollow

Best Springer .22 Air Rifle: Air Arms TX200 MKIII

If you are on the lookout for a spring piston-based air rifle, you are in the right spot.

Air Arms TX200 has been around in the shooting range for many years and the modifications made with the latest versions are super cool. 

You get an underlever design with a fixed barrel to maintain accuracy and consistency.

Also, there’s no need to worry about choosing the pellets as this piece works great with just about anything inserted in the barrel.

The rifle comes with a Lothar Walter Barrel for a superior loading system. 

To talk about accuracy, you can fire with a maximum velocity of 755 FPS.

Also, it is a single-shot rifle.

Thus, for the accuracy mentioned, you can hit your targets without many misses. 

Many people would go for this air rifle for looks.

The metallic finish makes it stand out from the crowd. 

You can choose between the various offerings for right and left-handed types.

However, it is not an ambidextrous rifle. 

Users have a checkered forearm and pistol grip with this air rifle.

Hence, you get a firm grip without you missing the target while aiming for perfection. 

The Monte Carlo Cheek helps get you the best sight in place. 

Coming to the sound dynamics, it has a shrouded barrel in place.

Due to this, the sound emitted reduces to around 71 dB.

While it might not be the quietest one, it sure qualifies for use in your backyard. 

Equipped with the two-stage trigger mechanism, you are no longer in fear of losing your fingers.

Automatic safety comes in place with a smooth trigger.

As per the description, the recoil was moderate making it an apt use for more than just game hunting.

The ventilated rubber recoil pad helps in the recoil mechanism. 

You can go ahead and use it for plinking, shooting spinners, tin cans, and paper targets. 

The one problem noticed in comparison to other air rifles is the weight.

It carries a weight of around 9.3 lbs.

Therefore, many felt it was a burden carrying it around everywhere. 

Moreover, users found the rubber protecting the cocking stamp intruding on their way while taking aim. 

Overall, you can go for this rifle for the spring piston technology and accuracy for a whole range of purposes. 

Accuracy

CalibersPelletsDistancesGroups
.22JSB 18.31 grain pellets50 yards< 1 inch
.2214.66 grain H&N Field Target Trophy50 yards< 1 inch
.177JSB Exact Heavy Diabolo 10.34 gr 20 yards0.21"
.22Air Arms Diabolo Fields12 meters1/2 inch
.177JSB Exact Heavy Diabolo 10.34 gr 25 meters< 1 cm
.177H&N Sport Baracuda 10.6550 yards0.88"
.177Air Arms Diabolo Field Heavy 10.3 gr25 yards0.44"
.177JSB Match Diabolo 7.87 gr25 yards0.33"
.177JSB 10.34 gr25 yards0.25"
.177Air Arms Field 8.4 gr35 yards0.7"
.177 Air Arms 10.3 gr40 yardsdime size
.177 Air Arms 10.3 gr50 yards1/4"
.177H&N Sport Baracuda 10.6520 yards1/4"
.22Crossman Premier domed 14.3 gr35 yards1/2"
.22JSB Diabolo Exact Jumbo 15.89 gr50 yards1/4"
.22H&N Baracuda Green 12.65 gr25 yardsone hole
.177Air Arms 10.3 gr50 yards1/2"

Chrony tests

CalibersPelletsFPSFPE
.22JSB 18.31 grain pellets57211.29
.2214.66 grain H&N Field Target Trophies63513.13
.177RWS Meisterkugeln 8.2 gr 93215.82
.177RWS Meisterkugeln 8.2 gr 93615.95
.177RWS Meisterkugeln 8.2 gr 94116.13
.177RWS Meisterkugeln 8.2 gr 93115.78
.177RWS Meisterkugeln 8.2 gr 93715.99
.22Air Arms Diabolo Field 16 gr62013.66
.177JSB Exact Heavy Diabolo 10.34 gr 787.8914.26
.177JSB Match Diabolo 7.87 gr89814.1
.177 Air Arms Diabolo Field Heavy 10.3 gr83015.76
.177H&N Sport Baracuda 10.6580315.25
.22Crosman 14.3 gr75017.87
.177Air Arms Diabolo Field Heavy 10.3 gr82515.57
.177Crosman Premier Light 7.9 gr88013.59
.177Beeman Laser 7.16 gr96614.84
.22Crosman Premier hunting pellets 14.3 gr73517.16
.177RWS Hobby 7 gr96014.33
.177JSB Diabolo 8.4 gr73210
.177Air Arms Diabolo Field 8.44 gr90815.46

read review here

Features

  • Spring-piston
  • Underlever
  • Sliding breech
  • 11mm optics dovetail grooves
  • No open sights
  • Beech Monte Carlo stock
  • Raised right-hand cheekpiece
  • Checkered forearm and pistol grip
  • Ventilated rubber recoil pad
  • 2-stage adjustable match trigger

Recommended uses

  • Target shooting/Plinking
  • Pest Control/ Small game hunting: Armadillos, Chipmunks, Grey Foxs, Possums, Porcupines, Prairie Dogs, Crows, Pigeons, Raccoons, Rabbits, Rats, Skunks, Squirrels, and Turkeys.

Pros and Cons

ProsCons
  • Underlever design and fixed barrel for accuracy and consistency
  • Famous Rekord trigger design.
  • Easy to clean
  • Beautiful blue chrome finish
  • Extremely accurate
  • Great for Field Target
  • doesn’t have open sights

Check Price on midwayusa

Best Budget .22 Air Rifle: Diana Stormrider Multi-shot Gen 2

Diana Stormrider has come out with a PCP or Pre-Charged Pneumatics that is well within people’s budget.

It means that the rifle gets going once you pull the trigger.

Moreover, the PCP factor means that it’s an air-powered rifle. 

When calculated in terms of FPE, it gives 20 FPE and 900 in terms of FPS.

The cylinder has a maximum capacity of 2900 psi for charging to manage this accuracy. 

Also, beginners can use this rifle with repeating shots to never miss a target.

Hence, it makes this Diana Stormrider rifle a great .22 air rifle for small game hunting. 

You get 7 shots in one cycle of this air rifle. A small flick and bolt action reload the next set.

If you want to try out single shots, you can include a separate tray for the same. 

The German Beech stock has a checkered texture that grabs many eyes.

The checkering gives a better grip to the user for the non-slippage of the rifle. 

Both young and old shooters can take a field ride with this rifle.

Trying to add a mountable optic for long-sight shooting?

Make use of the 11 mm dovetail for this feature.

A fully-adjustable rear sight makes the sight all-clear. 

Both left and right-handed shooters can use this rifle for their purposes.

However, right-handed have a better advantage with a raised cheekpiece. 

You have two-generation rifles to choose from.

The major difference comes in the trigger mechanism.

Gen. 1 has a single-stage trigger.

However, the 2nd generation comes with automatic safety and an adjustable 2-stage trigger. 

You can consider this gun one of the more weight-friendly rifles.

It weighs a mere 5-pound which classifies it as easy to use. 

The Gen 2 comes with a better-muffled sound level.

Moreover, the rifle is not choosy when it comes to ammo. 

When you come to the downsides of this rifle, there is an easy accumulation of dirt and dust in the fill plug.

The loading of pellets into the barrel is not smooth.

You find that the bolt on the barrel disturbs the bullet while entering. However, no compromise in accuracy is observed due to this. 

The magazine given was not of great quality.

Loading more than one bullet at a time was hard as you need external pushing. 

Accuracy

CalibersPelletsDistancesGroups
.22Predator Polymag 15.89 gr40 yardsdime size
.22JSB Diabolo Exact Jumbo Heavy 18.1 Gr55 yards0.5"
.22Crosman Premier Hollow Point Pellets, 14.3 Gr30 yards0.5"
.22H&N Field Target Trophy 14.66 Gr50 yards3/4"
.177Crosman Premier Light 7.9 Gr25 yards0.5"
.177JSB Match Diabolo Exact 8.44 Gr20 yardsdime size
.177H&N Excite Hollow Point 7.4gr25 yardsnickel size
.177H&N Excite Hollow Point 7.4gr40 yardsquarter size
.22Crosman Premier Hollow Point 14.3 Gr50 yards1/4"
.22JSB Diabolo Exact Jumbo Domed 15.89gr 25 yards7/16"
.22Crosman Premier Domed 14.3 gr25 yards9/16"
.22JSB Diabolo Exact Jumbo Domed 15.89gr 45 yards3/8"
.22Crosman Premier Domed 14.3 gr45 yards7/8"
.22JSB Match Diabolo Exact Jumbo RS 13.43 Gr50 yards1.05"
.22JSB Match Diabolo Exact Jumbo RS 13.43 Gr100 yards3.6"

Chrony tests

CalibersPelletsFPSFPE
.177Crosman Premier Domed Field 10.5g87617.9
.22Crosman Premier Hollow Point 14.3 gr705 15.79
.22Slug HP 21gr760 26.94
.177JSB Exact Heavy 10.34 gr825 15.63
.177Crosman Premier Ultra Magnum 10.5 gr 92519.95
.22H&N Sniper Lights 14 gr90025.19
.22H&N Hornets 16gr87026.9
.22JSB Diabolo Exact Jumbo Domed 15.89gr 82924.25
.22JSB Match Diabolo Exact Jumbo RS 13.43 Gr88723.47

read review here

Features

  • PCP
  • Bolt-action
  • Repeater
  • Up to 26 FPE in .22 / 20 FPE in .177 with lead pellets
  • Up to 900 fps in .22 / 1050 fps in .177 with lead pellets
  • Manual safety
  • Gen. 1 Rifles feature a single-stage, non-adjustable trigger
  • Gen. 2 Rifles have the new DIT (Diana Improved Trigger) 2-stage adjustable trigger
  • Checkered beech stock
  • Raised cheek piece for right-handed shooters (stock still usable for left-handed shooters)
  • Fully adjustable rear sight
  • 11mm dovetail
  • Integrated manometer (pressure gauge)
  • 200 BAR/2900 psi fill pressure
  • 9 shot magazine in .177 / 7 in .22
  • Includes fill probe with male quick disconnect fitting
  • Includes rotary magazine and single-shot tray

Recommended uses

  • Target shooting/plinking
  • Pest control/small game hunting: rats, squirrels, rabbits.

Pros and Cons

ProsCons
  • Budget friendly
  • Light weight and easy to operate
  • Quiet and Backyard friendly
  • Enough power for pest control and small games 
  • Needs better instructions on magazine loading

check price on midwayusa

Best .22 Air Rifle Under $200: Hatsan 95 Combo with Walnut Stock

The Hatsan 95 Combo Walnut Stock air rifle is on our list mainly for the budget-friendly option.

If you want air rifles that have basic features and are under $200, go for this. 

Let’s get down to the basics.

It is a single-shot rifle with a rifled steel barrel.

The maximum velocity you can achieve with the rifle would be 800 FPS.  

Users can get maximum automatic safety from the 2-stage trigger.

Your hand has total control over the trigger and also the SAS (Shock Absorber System) gives less recoil after effects.

Hence, no damage to your body after shooting.

You get two sights to take perfect aim.

The red front sight is fixed while the green rear sight is adjustable.

Also, a dovetail of 11mm lets you mount the optics. 

This rifle is all about the safety aspect.

If you find the barrel broken, the anti-bear trap mechanism works to prevent the safety switch from going off automatically. 

Moreover, you can avoid any untoward accidents as the gun trigger is safe from accidental pull. 

No more left and right confusion when it comes to this rifle.

The ambidextrous Turkish walnut stock gives room for both types of users. 

Any shooter would love to have a firm grip on their rifle while shooting.

This gun gives the perfect hold with a checkered pistol and forearm grip. 

The rifle comes under just 7.9 lbs and is well within the normal range in terms of weight. 

With the right pellets in place, you can term this option one of the most accurate .22 air rifles.

You can utilize these rifles for shooting targets, taking care of pests around the house, or small game hunting when needed. 

Cocking was a bit hard in the beginning but smoothed out after repeated use of pellets.

However, first-time users will find the cocking a major hiccup to start with. 

To add on the noise front, it is not the quietest in the market.

The sound from the shooting and usage of parts led to the increased noise level.

The wood finish on the rifle was also not the best that I had seen in many .22 air rifles out there.

Also, some plastic parts were probably in use due to the low price. 

Besides, the Hatsan 95 comes in 2 versions: spring and Vortex gas piston.

Accuracy

CalibersPelletsDistancesGroups
.22Crosman Premier 14.3 Gr10 yards dime size
.22Crosman Premier 14.3 Gr40 yardsNickel size
.22JSB Diabolo Exact Jumbo 15.89 Gr30 yards1/2"
.25H&N Baracuda Hunter Extreme 28.24 gr25 ft1/2"
.22JSB Match Diabolo Exact Jumbo Heavy 18.13gr50 yardsdime size
.22Beeman Silver Bear Hi-impact 12.65 gr20 yards3/4"
.22Crossman Premier 14.3 gr15 yardsnickle size
.22Crossman Premier 14.3 gr25 yardsquarter size
.22Predator Polymag 15.89 gr25 yardsdime size
.22Crossman Premier 14.3 gr50 yards3/4"
.22JSB Diablo Jumbo Heavy 18.13 gr25 yardsone hole
.22H&N Baracuda Hunter 18.21 Gr40 yardsone hole
.22H&N Field Target Trophy 14.66 Gr35 yardsone hole
.25JSB Match Diabolo Exact King 25.39 Gr30 yardsquarter size
.22H&N Field Target Trophy 14.66 Gr40 yards quarter size
.22H&N Baracuda Green 12.96 gr50 yardsquarter size
.25JSB Match Diabolo Exact King 25.39 Gr20 yardsnickle size
.25JSB Match Diabolo Exact King 25.39 Gr45 yardsquarter
.22H&N Field Target Trophy 14.66 Gr20 yards 0.15"
.22H&N Field Target Trophy 14.66 Gr40 yards0.18"

Chrony tests

CalibersPelletsFPSFPE
.22JSB Diabolo Exact Jumbo 15.89 Gr830
.25JSB Match Diabolo Exact King 25.39 Gr604
.22H&N Slug 21 Gr615
.22H&N Baracuda Green 12.96 gr812
.25JSB Match Diabolo 25.3gr593
.25Predator Polymags 26gr618
.25Beeman 31 grain domed650
.22RWS Hobby .22 cal, 11.9 Grains957
.25JSB Match Diabolo Exact King 25.39 Gr632
.22H&N Sport Field Target Trophy 14.66 Gr780
.22RWS Hobby 11.9 gr917
.25H&N Baracuda Hunter 27.47 Gr603
.22Crosman Premier 14.3 Gr840
.25Predator GTO 16.54 Gr775
.25JSB Match Diabolo Exact King 25.39 Gr570
.25Benjamin Premier 27.8 gr538
.25Hatsan Vortex Supreme Pellets 19.91gr632
.25H&N Field Target Trophy 20.06 Gr625
.25H&N Hornet 22.07 Gr614
.25JSB Match Diabolo Exact King 25.39 Gr595
.25H&N Baracuda Green 19.91 gr702
.25H&N Field Target Trophy 20.06 Gr783
.22Crosman Premier 14.3 Gr825
.22H&N Field Target Trophy 14.66 Gr810

read review here

Features

  • Gas piston
  • Breakbarrel
  • Single-shot
  • Avaliable in .177, .22 and .25 calibers
  • Offered with upgraded Quiet Energy Integrated Sound Moderator as an option
  • Rifled steel barrel
  • Quattro 2-stage adjustable match trigger (adj. for trigger-pull weight, first stage, second stage & length of travel)
  • 11mm optics dovetail
  • Fixed TruGlo fiber optic front sight (red, 0.060″)
  • Fully adjustable TruGlo fiber optic rear sight (green, 0.035″)
  • Anti-beartrap mechanism
  • Manual safety and Automatic cocking safety
  • Ambidextrous Turkish walnut stock
  • Checkered pistol grip and forearm
  • Rubber recoil pad
  • SAS (shock absorber system) that reduces felt recoil
  • 7.80 lbs. (gun only)
  • Includes 3-9×32 Optima scope, mount, scope lens covers and hex wrench

Recommended uses

  • Target shooting/plinking
  • Pest control/small game hunting: squirrels, raccoons, woodchucks, blue jays, foxes, coyotes, rabbits.

Pros and Cons

ProsCons
  • Exceptional build quality utilizing German steel
  • Quality construction at an unbeatable price
  • A beautiful Turkish Walnut stock
  • Great Tru-Glo open sights and a Quatro (adjustable) trigger
  • Good checking on the stock
  • Easy to load pellets
  • Easy to push on and off
  • Handy Picatinny rail
  • The vortex gas piston can remain cocked for an extended period of time
  • Accurate and powerful for pest control/small game hunting
  • The trigger guard is plastic

check price on midwayusa

Best .22 Air Rifle Under $300: Hatsan Model 135 Vortex QE

When compared to the other air rifle from Hatsan, this option comes with considerable changes. 

The Hatsan Model 135 Vortex QE Air Rifle is again a single-shot gun but with a vortex gas piston design.

You never have to take special care when the gun is out in cold weather.

The vortex gas piston qualifies the rifle for smooth use even in hard times. 

Also, the safety standards are still of high standards with the 2-stage trigger in place.

Again, the anti-bear trap mechanism doesn’t allow the accidental pull of the trigger when the barrel has issues. 

The major advantage of picking this rifle would be the sound factor.

You get the shrouded barrel and an integrated sound moderator to qualify this rifle as a quiet .22 air rifle in the market. 

Who wouldn’t want a majestic-looking walnut stock finish on their rifles with an elevated cheekpiece?

Also, the cheekpiece has adjustable options to suit your needs.

Overall, this rifle ticks many boxes when it comes to design and looks. 

The optics sing a successful story, also.

The adjustable rear sight comes with a green Fiber Optic mechanism.

Moreover, the front sight is again Fiber optic but is fixed with no changes possible. 

Ambidextrous people can use the Hatsan model rifle with ease.

Again, the checkered grip and forearm hold helps to keep the gun in place while aiming for your targets. 

Users do not feel the recoil as the SAS or Shock Absorber System helps reduce it.

No vibration too!

When it comes to accuracy part, the air rifle worked astonishingly well.

The power to shoot targets was also great.

Moreover, the rifle is not a picky eater of pellets and takes many types. 

However, the one disadvantage that pulled this otherwise good rifle down was the weight.

It was 9.9 lbs and quite heavy for the old or young generation. 

The effort taken to cock the rifle was not easy.

Especially for beginners, it was a lot to ask for.

This makes the rifle not suitable for kids or women. 

Accuracy

CalibersPelletsDistancesGroups
.25JSB Diabolo Exact King Heavy 33.95 Gr25 yardsdime size
.25JSB Diabolo Exact King Heavy 33.95 Gr35 yardsnickel size
.30JSB Diabolo Exact 44.75 Gr25 yardsquarter size
.25H&N Grizzly 31 gr 40 yards1"
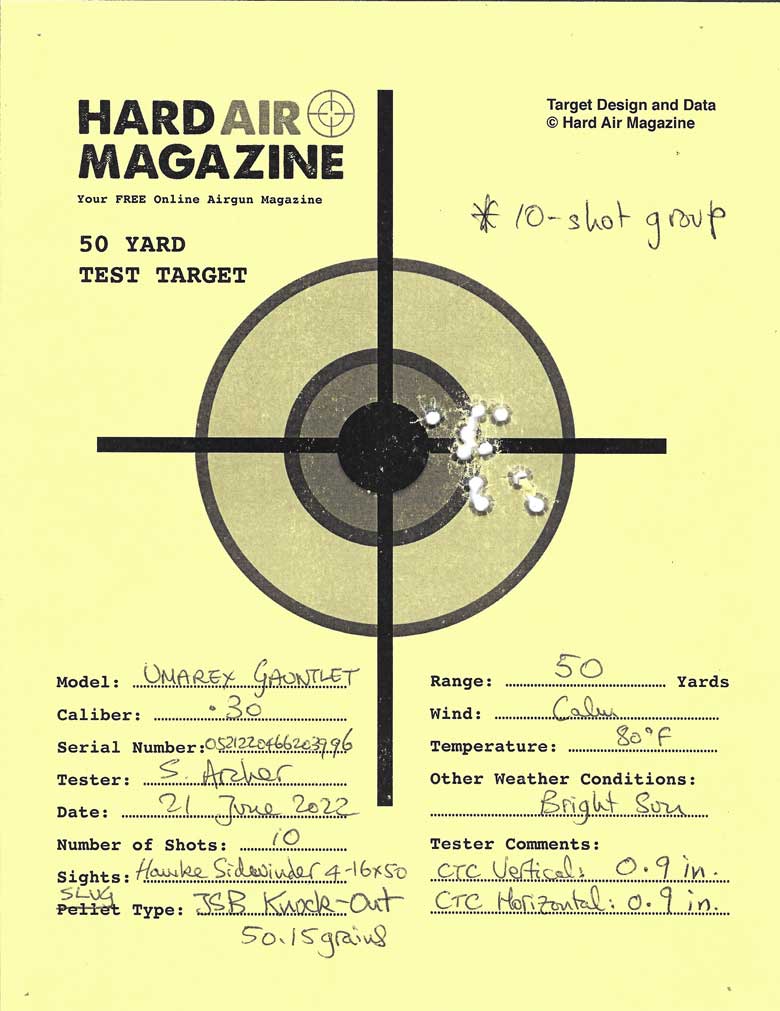
.30JSB Diabolo Exact 50.15 Gr30 yardsone hole
.30Predator Polymag 44.75 gr50 yards.75"

Chrony tests

CalibersPelletsFPSFPE
.25JSB Diabolo Exact King Heavy 33.95 Gr74642
.30 JSB Diabolo Exact 50.15 Gr55334.06
.30 Predator Polymag 44.75 gr53328.24
.30JSB Exact 44.75gr53428.34
.25H&N Field Target Trophy 20.06 gr78027.11
.25H&N Hornet 22.07 gr750 27.57
.30JSB Diabolo Exact 44.75 Gr57032.29
.25H&N Grizzly 31gr69233
.22 JSB Match Diabolo Exact Jumbo Heavy 18.13gr810 26.42
.25JSB Diabolo Exact King 25.39 gr82037.92
.30 JSB Diabolo Exact 50.15 Gr59539.43
.22H&N Slug HP Heavy 36 Gr716 40.99
.30Predator Polymag 44.75 gr55030.07
.30JSB Diabolo Exact 50.15 Gr553 34.06
.22Crosman Premier 14.3 gr92427.12
.25H&N Field Target Trophy 20.06 Gr78527.46
.22Predator Polymag 15.89 gr93831.05

read review here

Features

  • Vortex gas-piston
  • QuietEnergy fully shrouded barrel and integrated sound moderator – approximately 50% quieter
  • Breakbarrel
  • Single-shot
  • Rifled steel barrel
  • Quattro 2-stage adjustable match trigger (adj. for trigger-pull weight, first stage, second stage & length of travel)
  • 11mm and Weaver optics rail with scope stop
  • Fixed red TruGlo fiber optic front sight
  • Fully adjustable green TruGlo fiber optic rear sight
  • Anti-beartrap mechanism
  • Automatic safety
  • Ambidextrous Turkish walnut Monte Carlo stock with an adjustable, raised cheekpiece
  • Checkered pistol grip and forearm
  • Rubber recoil pad with SAS (shock absorber system) that reduces vibration
  • 9.90 lbs.

Recommended uses

  • Pest control/small game hunting: squirrels, rabbits, raccoons, coyotes, groundhogs.

Pros and Cons

ProsCons
  • Incredible wood and craftsmanship
  • Beautiful stock and barrel
  • Adjustable 2-stage trigger
  • Very steady and balanced due to the weight
  • Universal weaver/11mm dovetail rail
  • Nice fiber-optic sights with adjustable rear
  • Adjustable cheek rest and recoil butt pad
  • Effective shock absorbent system at reducing the recoil
  • Heavy 
  • Cocking mechanism takes power
  • Hard to find ammo if you choose a .30 caliber version

check price on midwayusa

Best .22 Air Rifle for Hunting: FX Impact M4

Its external micro- and macro-hammer spring tension adjustments allow you to customize the optimal setting for each round of shots you take.

For maximum control, try out the valve control adjustment system which is externally accessible so you can always monitor the internal pressure systems and make tweaks whenever needed.

Furthermore, the new FX Airguns Impact M4 PCP air rifle is the latest breakthrough in airgun technology.

The new dual regulator system pre-reduces air pressure, providing superior regulated power and consistency with fewer standard deviations from shot to shot – a must-have for any serious shooter.

In addition, the unique Power Plenum 720 offers an increased diameter and 72cc volume for efficient and powerful projectiles every time.

Combined with the rifle’s specially designed porting and valving system, the FX Airguns Impact M4 is perfect for precision performance in competition or out on the field. With its maximum output pressure of 250 bar, this top-of-the-line rifle ensures the accuracy you need when it matters most.

The FX Impact M4 comes in 5 different calibers available: .177, .22, .25, .30, .35 , with Black/Bronze colors.

Accuracy

CalibersPelletsDistancesGroups
.177JSB Match Diabolo Exact 8.4 Gr50 yards3/4"
.30Slugs 67 Gr50 yards3/4"
.30Slugs 67 Gr100 yards1 1/2"
.30JSB Match Diabolo Hades 44.75 gr50 yards.557"
.25JSB King Heavy Mark II 33.95 gr100 yards1"
.30Nielson Slug 47 gr. 50 yardsone hole
.22JSB Diabolo Exact Jumbo Heavy 18.13 gr50 yardsone hole
.30JSB Diabolo Exact 50.15 Gr60 yardsone hole
.25JSB Match Diabolo Hades 26.54gr35 yardsone hole
.35JSB Match Diabolo Exact 81.02 Gr100 yards1"
.22JSB Diabolo Exact Jumbo Heavy 18.13 gr95 yards3/4"
.177NSA Slugs 12.5 gr50 yardsnickel size
.22JSB Match Diabolo Exact Jumbo Heavy 18.13gr50 yardsdime size
.25JSB Exact King 25.39gr50 yards3/4"
.22JSB Exact Jumbo 15.89gr50 yards1/2"
.25JSB Exact King Diabolo 25.39gr50 yards0.37"
.25Air Arms Diabolo Field 25.4gr50 yards0.47"
.25JSB Diabolo King Heavy MKII 33.95gr50 yards0.71"
.25JSB Exact King Diabolo 25.39gr100 yards1.34"
.30JSB Exact 44.75 gr50 yards0.557"
.177NSA Slugs 12.5 gr50 yardsNickel-size
.25JSB King Heavy Mark II 33.95 gr100 yards1.5"
.30JTS Dead Center 45.06 gr45 yards5/8"
.30FX Hybrid Slugs 44.5 gr45 yards5/8"
.30H&N Slug HP II 50 gr45 yards3/4"
.30Zan Projectile 45.5 gr45 yards3/8"

Chrony tests

CalibersPelletsFPSFPE
.35JSB Match Diabolo Exact 81.02 Gr845128.49
.30JSB Match Diabolo Hades 44.75 gr87075.23
.177JSB Exact Heavy 10.34g90018.6
.25JSB Diabolo Exact King Heavy 33.95 gr875 57.73
.35JSB Match Diabolo Exact 81.02 Gr915150.66
.35JSB Match Diabolo Exact 81.02 Gr877138.4
.22JSB Diabolo Exact Jumbo Heavy 18.13 gr94035.58
.177NSA 12.5 gr97726.5
.22JSB Diabolo Exact Jumbo 15.89 gr94031.18
.22JSB Jumbo Express 14.35gr100332.06
.22JSB Jumbo Heavies 18.13gr86329.99
.25JSB Exact King 25.4 gr89344.99
.25JSB King Heavies MKII 33.95gr84954.35
.30JSB Exact 44.75 gr82968.31
.25Air Arms Diabolo Field 25.4gr93849.64
.25JSB Exact King Diabolo 25.39gr90746.39
.25Air Arms Diabolo Field 25.4gr89745.39
.25JSB Diabolo King Heavy MKII 33.95gr81650.21
.25JSB Exact King 25.39 Gr110068.23
.30JSB Exact 44.75 gr67545.29
.177NSA Slugs 12.5 gr97726.5
.25JSB King Heavy Mark II 33.9574842.19
.22JSB Exact Jumbo Diablo 15.89 gr94031.18
.30Zan Projectile 45.5 gr81366.8

read review here

Features

FX Impact M4 PCP Air Rifle

  • FX Smooth Twist X Superior (STX) barrel system
  • Interchangeable calibers and barrel liners (sold separately)
  • Power Block
  • Externally adjustable AMP MKII (Adjustable Match Precision) regulators
  • Externally adjustable hammer spring tension with macro and micro adjustments
  • Externally adjustable valve control
  • Quick Tune System for virtually tool-free adjustments
  • 250 BAR (3,625 PSI) max. fill pressure
  • Max regulator working pressure of 170 BAR
  • Equipped with improved 75cc Power Plenum 750 – allowing for an even wider range of power adjustment
  • .22 and .25 cal M4’s feature Dual transfer ports – one optimized for pellets, one for slugs
  • Male Quick Disconnect fitting
  • Shroud is threaded 1/2×20 for moderator
  • Forward mounted reversible sidelever cocking
  • Picatinny/Weaver optics mounting rail with 30 MOA compensation rides on 11mm dovetail allowing further customization to meet every shooters need
  • Picatinny accessory rails below cylinder and on each side of the forearm
  • New Quick Set Trigger – Adjustable match trigger
  • Wika dual pressure gauges: one for air cylinder pressure, one for regulator pressure.  
  • Height adjustable rubber buttpad
  • FX UG1 AR15 style grip
  • AR15 style manual safety
  • Redesigned Side Shot magazine capacity*: 34 rds. in .177, 28 rds. in .22, 25 rds. in .25, 23 rds. in .30
  • Maximum muzzle energy **:
    • 35 FPE in .177 
    • 87 FPE in .22 
    • 100 FPE in .25 
    • 125 FPE in .30 
  • Includes one side-shot magazine, FX moderator, and 3 year transferable warranty


600mm (23.62”) Barrel, Standard Models:

  • Available in .177, .22, .25 and .30 cal.
  • Removable 480cc carbon fiber air cylinder
  • Overall length of 34”
  • Weight: 6.85 lbs.
  • Shots per fill: 375 in .177, 270 in .22, 130 in .25 and 85 in .30

700mm (27.55”) Barrel, Sniper Models:

  • Available in .22, .25 and .30 cal.
  • Removable 580cc carbon fiber air cylinder
  • Overall length of 39”
  • Weight: 7.15 lbs.
  • Shots per fill: 330 in .22, 160 in .25 and 105 in .30

Recommended uses:

  • Pest control and Small/medium/large game hunting: coyotes, iguanas, groundhogs, rabbits, squirrels, gooses, woodchucks, prairie dogs.

Pros and Cons

ProsCons
  • Incredible accuracy up to 100 yards
  • Well-built and lightweight
  • Quiet and backyard-friendly
  • Large rotary mag
  • Great Interchangeable Barrel System
  • Lots of available aftermarket parts and upgrades 
  • A longer Picatinny rail would be nice

check price on midwayusa

Best .22 regulated PCP: Umarex Gauntlet 2

Users looking to get a great deal on hunting rifles can opt for the Umarex Gauntlet 2 air rifle which is PCP and synthetic. 

It is a 10-shot repeater gun to take perfect shots of the animals you are hunting.

So, you never have to miss out on your target ever again.

If you wish to go for single shots, place the single-shot tray to change it likewise. 

With the repeater tray, you no longer have to take time out after shooting to reload.

Load them in an array and you are good to go for the entire round. 

Every shot that comes out maintains the same velocity with the help of a built-in regulator.

Your pressure gauge plays a huge role in deciding the accuracy.

Also, the tank has about 3000 psi per charge for the number of shots planned.

All the lead shots went with an accuracy of around 900 FPS much to the delight of the shooter. 

Along with the FPS, another notable feature of Umarex Gauntlet 2 is its excellent FPE.

The table below represents different FPE numbers with the respective pellets. 

Chrony tests

CalibersPelletsFPSFPE
.22H&N Field Target Trophy Green 10.03 gr960 20.53
.22JSB Exact Heavies 18.13 gr775 24.19
.22Predator GTO Lead-Free 11.75 gr930 22.57
.22RWS Hobbies 11.9 gr895 21.17
.22JSB Diabolo Exact Jumbo RS 13.43 gr895 23.89
.22Crosman Premier Hollow Points 14.3 gr874 24.26
.25JSB Match Diabolo Exact King 25.39 Gr880 43.67
.22JSB Diabolo Exact Jumbo 15.89 Gr79322.19
.22JSB Diabolo Exact Jumbo 15.89 Gr90028.59
.22Crosman Premier 14.3 Gr89025.16
.25Hybrid Slugs 26gr870 43.71
.22Crosman Premier Hollow Point 14.3 Gr90526.01
.22JSB Diabolo Exact Jumbo 15.89 Gr78121.53
.25JSB Match Diabolo Exact King 25.39 Gr88544.17
.25JSB King Heavy MK II 33.39 gr80748.3
.22JSB Match Diabolo Exact Jumbo RS 13.43 Gr89323.79
.25JSB Match Diabolo Exact King 25.39 Gr92147.83
.25JSB Match Diabolo Exact King 25.39 Gr92448.15
.25JSB Match Diabolo Exact King 25.39 Gr97353.39
.25JSB Match Diabolo Exact King 25.39 Gr87743.37
.22Crosman Premier Hollow Point 14.3 Gr82421.56
.22JSB Jumbo Express 14.35 gr832 22.06
.22JSB Exact RS 13.43Gr 85521.81
.22Air Arms Diabolo Field 16 Gr80823.2
.22RWS Hobby 11.9 gr91021.89
.22Crosman Premier 14.3 gr83422.09
.22JSB Diabolo Exact Jumbo Heavy 18.13 gr76423.5
.22JSB Diabolo Exact Jumbo 15.89 Gr81923.67
.25JSB Match Diabolo Exact King 25.39 Gr89845.47
.22JSB Diabolo Exact Jumbo 15.89 Gr80823.04
.25JSB Match Diabolo Exact King 25.39 Gr88544.17
.25JSB Match Diabolo Exact King MKII Heavy 33.95 Gr79247.3
.22H&N Sniper Light 14 gr84121.99
.22JSB Match Diabolo Exact Jumbo RS 13.43 Gr84621.35
.22JSB Diabolo Exact Jumbo 15.89 Gr80522.87

Accuracy

Calibers PelletsDistancesGroups
.22JSB Diabolo Exact Jumbo RS 13.43 gr50 yards0.79"
.22JSB Diabolo Exact Jumbo RS 13.43 gr80 yards1"
.22H&N Baracuda Match 21.14 Gr30 yardsone hole
.22JSB Diabolo Exact Jumbo 15.89 Gr25 yardsnickel size
.22Crosman Premier Hollow Points 14.3 gr40 yardsquarter size
.22JSB Diabolo Exact Jumbo 15.89 Gr40 yardsone hole
.25H&N Baracuda Hunter Extreme 28.24gr60 yards0.5"
.25Hybrid Slugs 26gr45 yardsone hole
.25H&N Field Target Trophy Domed 19.91 Gr50 yardsquarter size
.22JSB Match Diabolo Exact Jumbo Heavy 18.13 Gr50 yards1/2"
.22Crosman Premier Hollow Point 14.3 Gr35 yardsone hole
.25JSB Match Diabolo Exact King 25.39 Gr25 yardsone hole
.22JSB Diabolo Exact Jumbo 15.89 Gr50 yards0.5"
.22JSB Match Diabolo Exact Jumbo RS 13.43 Gr45 yards0.5"
.25JSB Match Diabolo Exact King 25.39 Gr36 yards3/8"
.25JSB Match Diabolo Exact King 25.39 Gr50 yards5/8"
.25JSB Match Diabolo Exact King 25.39 Gr100 yards1/4"
.25JSB Match Diabolo Exact King 25.39 Gr75 yards5/8"
.25Air Arms Field 25.4 Gr65 yardsquarter size
.22JSB Diabolo Exact Jumbo Heavy 18.13 gr30 yardsone hole
.22JSB Diabolo Exact Jumbo Heavy 18.13 gr75 yards3/4"
.22JSB Diabolo Exact Jumbo Express 14.3 Gr50 yards0.5"
.22JSB Diabolo Exact Jumbo Heavy 18.13 gr35 yards0.285"
.22JSB Diabolo Exact Jumbo Heavy 18.13 gr40 yards0.480"
.22JSB Diabolo Exact Jumbo Heavy 18.13 gr45 yards0.475"
.22JSB Diabolo Exact Jumbo Heavy 18.13 gr50 yards0.69"
.22JSB Diabolo Exact Jumbo Heavy 18.13 gr40 yards0.5"
.22JSB Diabolo Exact Jumbo Heavy 18.13 gr20 yardsone hole
.25JSB Match Diabolo Exact King 25.39 Gr50 yards0.59"
.25JSB Match Diabolo Exact King MKII Heavy 33.95 Gr50 yards0.66"
.25JSB Match Diabolo Exact King 25.39 Gr100 yards1.46"
.22H&N Sniper Light 14 gr50 yards1.02"
.22JSB Match Diabolo Exact Jumbo RS 13.43 Gr50 yards1.22"
.22JSB Diabolo Exact Jumbo 15.89 Gr50 yards1.17"
.22JSB Diabolo Exact Jumbo 15.89 Gr100 yards2.18"

read review here

The main feature when you are hunting is the less noise levels.

You do not want to alarm your animals thereby making them speed away.

The rifle maintains the quiet environment needed after firing.

This rifle has a fully-automated barrel to do the trick. 

Features

  • Precharged pneumatic
  • Sidelever action with knurled drop-down handle 
  • 24 cu. in. removable aluminum air cylinder
  • Improved, precision tactical synthetic stock
  • OD Green stock (.30 cal)
  • Flat Dark Earth stock (.22 & .25 cal)
  • Aircraft-grade aluminum receiver
  • 4500 PSI/310 BAR fill pressure
  • 1900 PSI regulator (.22 cal), 2100 PSI regulator (.25 cal), 2800 PSI regulator (.30 cal) 
  • Max. velocity: 1075 FPS (.22 cal), 985 FPS (.25 cal), 1000 FPS (.30 cal w/ 44.75 grain), 950 FPS (.30 cal w/ 50.15 grain)
  • Max. power: 33 FPE (.22 cal), 51 FPE (.25 cal), 99 FPE (.30 cal)
  • Magazine capacity: 10 rounds (.22 cal), 8 rounds (.25 cal), 7 rounds (.30 cal)
  • Expected shot count: 70+ (.22 cal), 50+ (.25 cal), 25 (.30 cal)
  • 4 baffle design, 8 dB sound reduction over original Gauntlet 
  • 1/2×20 threads with knurled thread protector (.30 cal)
  • Single-stage adjustable trigger
  • Textured rubber buttpad
  • Integrated manometer
  • Height-adjustable cheek comb
  • Picatinny Scope Rail 
  • M-LOK accessory slots on sides and bottom of forearm
  • Foster quick-disconnect fill port
  • Weight: 8.5 lbs.
  • Barrel length: 28.25″
  • Overall length: 47″
  • Includes 2 rotary magazines and 1 single shot tray

Recommended uses:

  • Target shooting/plinking
  • Pest control/ small game hunting: woodchucks, squirrels, rabbits, squirrels, doves, young hogs, bobcats, starlings, crows, coyotes, and hyraxes.

Pros and Cons

ProsCons
  • Durable matte-black synthetic stock
  • Not pellet picky
  • Fully shrouded barrel
  • Regulated at a cheap price
  • Accurate up to 80 yards
  • A little bit heavy

check price on midwayusa

Best Fit and Finish .22 Break Barrel Air Rifle: Beeman R9

Break barrel rifles are a specialty from Beeman and this choice will not disappoint you.

You can take this gun for your hunting expeditions and target shooting games.

The success rate is high as the accuracy is master-crafted right out of the factory. 

For the .22 caliber air rifle from Beeman, you get a maximum velocity of 740 FPS and the shooting sessions come with superb power. 

This powerful .22 air rifle follows a single-shot shooting and comes with a spring-piston mechanism. 

Shooters get a majestic rifle with hardwood Monte Carlo Stock.

Also, you get a raised cheekpiece to support ambidextrous customers. A checkered grip helps the shooter stick to the rifle at all times. 

The main reason to use the break barrel system is to help in the cocking mechanism. You no longer have to apply extra force as it is completely smooth. 

Beeman’s air rifle choice gives a standard dovetail to mount your optics.

Moreover, with an adjustable rear sight in place, your targets meet your sharp eyes easily. 

Let’s talk about the trigger and the safety aspects.

The rifle gives the users a two-stage trigger system to avoid any accidents.

Additionally, the entire safety system in place is automatic. 

Another thing you might be concerned about is the muzzle velocity and energy (or power) of this air rifle.

Typically, Beeman R9 .22 air rifles can reach over 17 FPE with an FPS between 650 to 750.

Thus, it is ideal for small-game hunting as well as target shooting. 

Recoil and noise are less.

Also, for the .22 caliber, you find many pellet types compatible. 

The air rifle weighs 7.3 lbs only and is lightweight for all users. 

Sometimes, shooters may sense vibration for the first few attempts. Fine-tuning will help correct this issue. 

Accuracy

CalibersPelletsDistancesGroups
.22Crosman Premiere Hollow Point 14.3 gr20 yardsdime size
.22Air Arms Diabolo Field 16 Gr25 yardsdime size
.177H&N Baracuda Match 10.65 gr10 yards0.16"
.177H&N Baracuda Match 10.65 gr20 yards0.17"
.177H&N Baracuda Match 10.65 gr30 yards0.49"
.22Predator GTO 11.75 Gr25 yards0.5"
.22Predator GTO 11.75 Gr50 yards1"
.22H&N Barracuda Hunter Extreme20 yards1/4"
.22RWS Meisterkugeln 14 gr 50 yardsdime size
.177Beeman Kodiak Match 10.65 gr60 yardsquarter size
.22H&N Field Target Trophy 14.66 gr25 yards0.5"
.177H&N Baracuda Match 10.65 gr25 yards0.4"
.22Beeman FTS Double Gold 14.66 Gr25 yardsone hole
.22JSB Exact pellet25 yardsdime size
.22RWS Hobby pellet30 metersdime size
.22JSB Diabolo Exact Jumbo Express 14.3 gr50 yardsquarter size
.177H&N Field Target Trophy 8.64 Gr25 yardsdime size
.177H&N Baracuda Match 10.65 Gr25 yardsdime size
.177RWS Supermag 9.3 gr25 yards1/2"
.177Crosman Premier Heavy 10.5 gr20 yardsdime size
.177Predator Polymag 8.0 gr25 yards1/4"
.177Beeman FTS 8.64 gr50 yards7/16"
.22RWS Meisterkugeln 14gr20 yards0.22"
.22JSB Hades 15.89 gr25 yards0.44"
.22H&N Terminator 16.36gr25 yards0.35"
.22H&N Terminator 16.36gr50 yards0.65"

Chrony tests

CalibersPelletsDistancesGroups
.22Crosman Premiere Hollow Point 14.3 gr20 yardsdime size
.22Air Arms Diabolo Field 16 Gr25 yardsdime size
.177H&N Baracuda Match 10.65 gr10 yards0.16"
.177H&N Baracuda Match 10.65 gr20 yards0.17"
.177H&N Baracuda Match 10.65 gr30 yards0.49"
.22Predator GTO 11.75 Gr25 yards0.5"
.22Predator GTO 11.75 Gr50 yards1"
.22H&N Barracuda Hunter Extreme20 yards1/4"
.22RWS Meisterkugeln 14 gr 50 yardsdime size
.177Beeman Kodiak Match 10.65 gr60 yardsquarter size
.22H&N Field Target Trophy 14.66 gr25 yards0.5"
.177H&N Baracuda Match 10.65 gr25 yards0.4"
.22Beeman FTS Double Gold 14.66 Gr25 yardsone hole
.22JSB Exact pellet25 yardsdime size
.22RWS Hobby pellet30 metersdime size
.22JSB Diabolo Exact Jumbo Express 14.3 gr50 yardsquarter size
.177H&N Field Target Trophy 8.64 Gr25 yardsdime size
.177H&N Baracuda Match 10.65 Gr25 yardsdime size
.177RWS Supermag 9.3 gr25 yards1/2"
.177Crosman Premier Heavy 10.5 gr20 yardsdime size
.177Predator Polymag 8.0 gr25 yards1/4"
.177Beeman FTS 8.64 gr50 yards7/16"
.22RWS Meisterkugeln 14gr20 yards0.22"
.22JSB Hades 15.89 gr25 yards0.44"
.22H&N Terminator 16.36gr25 yards0.35"
.22H&N Terminator 16.36gr50 yards0.65"

read review here

Features

  • Breakbarrel
  • Spring-piston
  • 11mm Dovetail rail
  • 2-stage adjustable Rekord trigger
  • Checkered hardwood stock
  • Includes open sights
  • 14.25″ Length of Pull
  • Fully-adjustable rear sight

Recommended uses:

  • Target shooting/plinking
  • Pest control/ small game hunting: squirrels, raccoons, chipmunks, possums, starlings, pigeons.

Pros and Cons

ProsCons
  • Well-made and nicely finished
  • Great blueing
  • Extremely accurate up to 50 yards
  • Great Rekord trigger
  • Easy to cock
  • Not hold sensitive
  • Not pellet picky
  • Great for possums and raccoons
  • Fiber optic sights would be nice

check price on midwayusa

Best for the money: Benjamin Marauder PCP

Who wouldn’t love a rifle that ticks all the boxes in terms of features?

One such rifle is the Benjamin Marauder Synthetic. 

This rifle has a velocity adjuster. However, the maximum velocity you get is up to 1000 FPS.

Change it according to your need and become the best at what you do. 

Ambidextrous people can easily use these rifles with a vertically adjustable comb and reversible bolt. Also, the accuracy is on point with the help of a choked barrel. 

Let’s have a quick look at the different pellets, respective velocities, and accuracy for this air rifle:

Accuracy

CalibersPelletsDistancesGroups
.25JSB Match Diabolo Heavies 33.95 Gr50 yardsdime size
.25JSB Match Diabolo Heavies 33.95 Gr30 yards3/8"
.177H&N Baracuda Match 10.65gr30 yards1/4"
.177JSB Match Diabolo Exact 8.44 Gr27 yardsone hole
.22JSB Diabolo Exact Jumbo Heavy 18.13 gr30 yards1/4"
.25JSB Match Diabolo Exact King 25.39 Gr40 yards1/4"
.22JSB Diablo 18.13 gr40 yardsdime size
.25JSB Exact King 25.4 Gr50 yardsquarter size
.22H&N Field Target 16.36 Gr10 yardsone hole
.22RWS Meisterkugeln 14.0 Gr10 yardsone hole
.177Crosman Premiers 10.5 gr30 yardsdime size
.25JSB Exact King 25.39 gr35 yardsone hole
.177JSB 10.3 gr50 yardsdime size
.22Crosman Premier 14.3 Gr50 yards0.5"
.22Crosman Premier Domed 14.3 Gr50 feetone hole
.22JSB Jumbo Heavy 18.13 gr50 yards0.6"
.22Crosman Premier Domed 14.3 Gr40 yards1/2"
.22Crosman Premier Ultra Magnum 14.3 gr48 yards0.45"
.177Crosman Premier 7.9 gr45 yards1/2"
.22Crosman Premier Domed 14.3 Gr20 yards0.16"
.22Crosman Premier Domed 14.3 Gr75 yards3/4"
.22Crosman Premier Domed 14.3 Gr100 yards1.5"
.25JSB Match Diabolo Exact King 25.39gr30 yards3/4"
.22Crosman Premier pointed 14.3gr22 yards1/16"
.25JSB Match Diabolo Exact King 25.39 Gr45 yardsdime size
.25JSB Match Diabolo Exact King 25.39 Gr25 yards3/8"
.25JSB Match Diabolo Exact King 25.39 Gr50 yardsdime size
.25JSB Match Diabolo Exact King 25.39 Gr45 yards1/4"
.22JSB Diabolo Exact Jumbo 14.35 gr43 yardsone hole
.25JSB Match Diabolo Exact King 25.39 Gr50 yardsquarter size
.25Air Arms Diabolo Field 25.4 gr50 yards0.74"
.25JSB Match Diabolo Exact King 25.39 Gr50 yards0.61"
.25JSB Match Diabolo Exact King 25.39 Gr100 yards3/4"
.22Air Arms Diabolo Field 16 gr50 yards0.57"
.22JSB Exact Jumbo 14.35 gr50 yards0.77"
.22Crosman Premier Dome 14.3gr50 yards0.62"
.22Crosman Premier Dome 14.3gr100 yards2.38"
.22Air Arms Diabolo Field 16 gr100 yards1.96"
.25JSB Match Diabolo Exact King 25.39 Gr50 yards3/4"
.22 Crosman Premier Hollow Point Pellets 14.3 Gr30 yards0.3"
.25JSB Match Diabolo Exact King 25.39 Gr30 yardsone hole
.25JSB Match Diabolo Exact King 25.39 Gr50 yards0.75"
.22JSB Match Diabolo Exact Jumbo Heavy 18.13gr30 yards1/4"
.22Crosman Premier 14.3 Gr35 yardsdime size
.22JSB Match Diabolo Exact Jumbo Heavy 18.13gr50 yards0.5"
.25JSB Match Diabolo Exact King 25.39 Gr55 yards0.5"
.25JSB Match Diabolo Exact King 25.39 Gr50 yardsone hole
.22Crosman Premier 14.3 Gr40 yardsone hole
.25JSB Match Diabolo Exact King 25.39 Gr35 yardsone hole
.177JSB Diabolo Exact Heavy 10.34 Gr48 yards 0.87
.25JSB Match Diabolo Exact King 25.39 Gr100 yards1.4"
.25JSB Match Diabolo Exact King 25.39 Gr50 yardsone hole
.25JSB Match Diabolo Exact King 25.39 Gr75 yards0.75"
.25Predator Polymag 26 Gr50 yards3/4"
.177Crosman Premier 10.5 Gr50 yards 0.75"
.25JSB Match Diabolo Exact King 25.39 Gr75 yards0.5"
.25Air Arms Diabolo Fields 25.4 gr50 yards0.74"
.25JSB Match Diabolo Exact King 25.39 Gr50 yards0.61"
.22Air Arms Diabolo Field 16gr50 yards0.57"

Chrony tests

CalibersPelletsFPSFPE
.177H&N Baracuda Match 10.65gr88718.61
.22JSB Jumbo Monster 25.39 gr81537.46
.22JSB Diablo 18.13 gr95036.34
.177JSB Diabolo Exact 8.44 Gr101019.12
.177Crosman Premiers 10.5 gr91519.52
.22JSB Jumbo Express 14.35 gr91026.39
.177JSB 10.3 gr89018.12
.177Crosman Premier Domed 10.5 Gr96021.49
.177Crosman Premier 7.9 gr105019.34
.22H&N Crow Magnum 18.21 Gr77524.29
.22Predator Polymag 15.89 gr81523.44
.22JSB Diabolo Exact Jumbo 14.35 gr91026.39
.22Crosman Premiere 14.3 gr88224.71
.25Air Arms Diabolo Field 25.4 gr87943.59
.25JSB Match Diabolo Exact King 25.39 Gr87443.08
.22Air Arms Diabolo Field 16 gr75720.36
.22JSB Exact Jumbo 14.35 gr79219.99
.22Crosman Premier Dome 14.3gr78619.62
.22Crosman Premier Dome 14.3gr101532.72
.25JSB Match Diabolo Exact King 25.39 Gr86041.71
.22JSB Diabolo Exact Jumbo Heavy 18.13 gr87530.83
.25JSB Exact Kings 25.39 grain83839.6
.22RWS Hobby 11.9 Gr92022.37
.177H&N Baracuda 10.65 gr90819.5
.22Crosman Premier Hollow Point 14.3 Gr84522.68
.25JSB Match Diabolo Exact King 25.39 Gr90045.68
.25Predator Polymag 26 Gr87444.11
.22H&N Baracuda Match 21.14 gr85334.16
.25Air Arms Diabolo Fields 25.4 gr88043.69
.25JSB Diabolo King 25.39 gr87543.18

read review here

This table shows that Benjamin Marauder is the best among the lot for accuracy as well.

From this information, it is one of the most accurate .22 rifles for small game hunting and target practice shots. 

You can also see the power or FPE that Benjamin Marauder Synthetic offers is excellent for both small-game hunting and medium-game hunting.

It can go up to 33 FPE, making it an ideal .22 air rifle for backyard pest control too. 

Moreover, with the shrouded barrel, the sound this gun gives out is extremely limited.

You get a 10-shot repeater feature and a two-stage trigger for added safety. 

The gun weighs 7.30 pounds, correct for the category of .22 air rifles.

Additionally, it is way lighter than the wood-stocked counterpart from the same makers.

Hence, you get to work around the rifle with ease. 

The gun works with a compressed air mechanism and hence it can hold up to 3000 psi.

However, the rifle comes pre-loaded with 2500 air fill. 

Coming to the things that users would love to change.

The cost plays a difference in going for other rifles when on a tight budget.

Also, many find the bolting action a tad bit hard. 

Finally, Benjamin Marauder is one of the best .22 air rifles in the market for pest control/ small game hunting and target practice purposes. 

Features

  • Benjamin Marauder air rifle – aka Synrod
  • 10-shot repeater with auto-indexing feature (.25 cal is an 8-shot repeater)
  • Uses compressed air: 2,000 to 3,000 psi (make adjustments as shown in the owner’s manual)
  • Can be adjusted for different velocities
  • Internal shroud makes this a VERY quiet gun
  • Choked barrel delivers superior accuracy
  • 2-stage adjustable match trigger…and the trigger is metal!
  • Raised aluminum breech for easier loading of circular magazine
  • 11mm dovetail (does not come with sights)
  • Ambidextrous synthetic stock with vertically adjustable comb (almost a full pound lighter than the wood-stocked rifle!)
  • Reversible bolt — switch from right to left side (with our special service)
  • Built-in air pressure gauge (manometer)
  • 215cc air reservoir
  • 7.30 lbs.* – is the gun only weight
  • 42.8″ long*

Recommended uses:

  • Pest control/small game hunting: squirrels, rabbits, pigeons, rats, prairie dogs, groundhogs, sparrows, starlings, armadillos.

Pros and Cons

ProsCons
  • Powerful and accurate
  • Ideal for small game hunting like rabbits, squirrels, chipmunks
  • High-power Compressed Air gun
  • The internal shroud makes the weapon quieter
  • The gun has a classical design and is manufactured with a sleek hardwood stock
  • Due to the length of 42.8 inches, it is easy to carry a gun on the shoulders while shooting
  • Reasonable price
  • The air rifle can be filled with an optional hand pump and tank
  • It offers .25 caliber for hunting bigger game
  • You have to be careful with the double feeds as the rifle can be a bit difficult to cock

check price on midwayusa

Best .22 Replica: Spring Field Amory M1A

The Springfield Armory M1A Underlever Pellet Rifle is an incredibly accurate air rifle that brings a faithful replica of its namesake firearm to the market.

Developed by Air Venturi, this masterfully designed air gun features a fixed barrel and weighs 9.9 lbs, mirroring the standard of excellence set by the National Match semi-automatic rifle.

Equipped with an adjustable rear peep sight for windage and elevation, you can expect unparalleled accuracy from your shots.

The left-hand side of the rifle boasts threaded holes for mounting a traditional M1A/M14 rail mount and allows you to customize your experience with optics like scopes and red dot sights.

The beavertail extended cocking lever makes pulling back a whopping 35 lbs of force much easier than expected, without detracting from the beauty of design all firearms enthusiasts know and love about Springfield Armory products.

Whether you’re looking for an impressive piece to show off in your collection or you’re searching for precision accuracy from every shot, look no further than the Springfield Armory M1A Underlever Pellet Rifle!

Accuracy

CalibersPelletsDistancesGroups
.22H&N Terminator 16.36 Gr50 ftnickel size
.22Crosman Premier 14.3 Gr25 yards0.75"
.22JSB Diabolo Exact Jumbo 15.89 Gr20 yards3/4"

Chrony tests

CalibersPelletsFPSFPE
.22JSB Diabolo Exact Jumbo 15.89 Gr71317.94
.22Crosman Premier 14.3 Gr81020.84
.22JSB Diabolo Exact Jumbo Heavy 18.13 gr65217.12
.22RWS Hobby 11.9 gr 85119.14
.22H&N Baracuda 15.89 Gr70317.44

read review here

Features

  • Spring-piston
  • Extendable Underlever for added leverage while cocking
  • Single-shot
  • Up to 1000 FPS in .177
  • Up to 800 FPS in .22 
  • Sliding breech cover exposes loading port during cocking cycle
  • Rifled steel barrel
  • Fixed Front Sight
  • Windage and Elevation Adjustable Rear Sight
  • Ambidextrous Hardwood Stock
  • Two stage trigger, non-adjustable
  • Manual Safety
  • Recoil pad with rubber insert
  • Anti-bear-trap safety mechanism
  • Faux bolt handle 
  • Package with softcase includes Springfield Armory soft sided rifle case (48 inches external length)

Recommended uses:

  • Target shooting/plinking
  • Pest control/small game hunting: squirrels, rabbits, raccoons.

Pros and Cons

ProsCons
  • Realistic look and feel
  • Stay true to the actual weight of the original M1A
  • Under lever cocking with the extension rod makes cocking somewhat easier
  • Accurate right out of the box
  • Easy to cock
  • Smooth and gentle firing cycle
  • It would be nice to have instructions on how to clean gun

Things to Consider Before Buying a .22 Air Rifle 

Knowing what elements make up the best .22 Air Rifle helps make buyers the right decision.

Thus, before jumping to the options, let’s look at the common traits any .22 Air Rifle should have.

Sound Level

A major point to note while buying air rifles is the decibel level it produces.

Whatever the need for using it, you do not want too much sound to wake up the entire neighborhood or alert the animals you’re trying to shoot.

Go for rifles that make a minimum sound. 

Moreover, many air rifles are on the market that creates negligible to no sound.

Air Rifles come within the range of 80 to 100 decibels.

For the record, the Benjamin Marauder is one of the quietest guns in the game with its shrouding technique employed. 

Go for similar guns if you find all other features match your need and taste. 

Ease of Use

The .22 air rifles weigh more than 7 pounds in general.

Carrying it around and ease of use is one feature to note when going for air rifles.

You do not want a bulky gun or a gun that needs frequent maintenance. 

Check for the material used in making the gun.

For example, does it have a wooden or plastic stock?

Is the gun made of metal?

Check for the specifications to find these answers while purchasing. 

Any rifle that gives trouble time and again is no good.

However, servicing is mandatory and depends upon the use.

Try to keep it in good shape at least once a year. 

Propulsion Type

Propulsion type means the system used inside the air rifle to power out the pellets. 

You can choose between accuracy or power and speed when going for the best .22 air rifle.

In the case of accuracy, you get a spring-powered piston.

Else, for better power, you can go for a nitro-powered piston. 

PCPs are also well-known for both accuracy and power. 

It all depends on the reason you are going for a .22 air rifle.

If it is for game-hunting, accuracy plays a crucial role.

Similarly, make your choice before you buy. 

(For more on 5 types of air rifles you need to know before buying, see this post.)

Velocity 

In terms of the .22 air rifle, the velocity and accuracy are inversely proportional.

Again, the use of the air rifle you get plays a crucial role here.

In terms of hunting, you may need more accuracy and hence go for .22 air rifles with lower velocity. 

Generally, higher velocity air rifles come with either gas-powered or nitro-powered pistons. 

Power (FPE)

When it comes to choosing air rifles, several people tend to overlook the rifle’s power or FPE.

Although the muzzle velocity or FPS is an important factor to consider, you also need to look for the rifle’s power, also known as muzzle energy or FPE. 

The muzzle energy states the effectiveness of an air rifle.

It depicts the amount of energy that could be transferred to the target.

Typically, the power or muzzle energy is dependent on two factors – the rifle’s FPS and the pellet’s weight. 

If you need to bring down any animal, you need a specific FPE with regard to your air rifle.

For instance, small-game animals might need an FPE between 10 to 25 whereas large-game animals might need an FPE above 50 too. 

Note: If you don’t know the FPE of an air rifle, you can calculate it by dividing the FPS of the gun by the pellet weight you’re planning to use. 

(What can you hunt with a .22 air rifle? See this post for more)

Frequently Asked Questions 

What are .22 Air rifles used for?

Air rifles are commonly used for pest control, small game hunting, or shooting targets.

Sometimes, air rifles are great for plinking.

Many air rifle competitions appear as official sports in the Olympics under different categories. 

Can a .22 air rifle kill a deer?

A .22 air rifle is not the perfect choice to kill a deer.

You need a minimum of .30 caliber to kill a deer. 

The .22 air rifle does not create much impact on large game animals nor kill them humanely.

How To Clean A .22 Air Rifle? 

The .22 Air rifle needs cleaning to maintain its performance and appearance.

You could purchase a gun cleaning kit along with your rifle package.

Follow these steps to have a good clean once in a while:

  • Avoid oiling the internal barrel or cleaning it to avoid damage. 
  • The external part of the gun or barrel should be wiped with a small amount of oil to protect against rust. 
  • Remove dust and dirt from scopes using a microfiber cloth. 
  • Do not expose the Woodstock to water as it might lead to damage. Remember to wipe clean the external finish after every use. 

How Loud Is A .22?

A .22 caliber air rifle can create noise up to 140 dB.

However, most new-age air rifles muffle the sound up to 80 dB.

It is better than the traditional ones.

The use of shrouded barrels reduces the sound levels in air rifles. 

What Are the Best .22 Pellets For Hunting?

Based on use and budget, the best .22 pellets are:

  • JSB Exact Match Jumbo Beast Diabolo
  • H&N Baracuda Match
  • H&N Hornet Pointed
  • Crosman LHP22 Hollow Points

Which is the Most Powerful .22 Ammo?

CCI Stringer’s 22 LR Ammo is currently the most powerful .22 Ammo in the market.

It comes with a 32-grain CPHP bullet that gives a muzzle velocity of 1640 FPS.

You can easily shoot a squirrel with this powerful ammo. 

How Many FPS Does a .22 Air Rifle Shoot?

The muzzle velocity is the speed at which the bullet leaves the rifle.

On that note, a .22 air rifle gives a velocity of 1125 FPS on average.

The speed will differ according to the rifle and parts used.

However, the maximum distance still lies around 150 meters for the .22 air rifle. 

Which is Better .177 or .22 Air Rifle?

The choice depends on the usage of the customer. .177 is much better for shooting small mammals.

Also, it is great for target shooting in the backyard or a shooting range.

The .22 air rifle works great for better game hunting and precision shooting ranges. 

The pellets that come out of .22 air rifles are with a slower velocity when compared to .177 air rifles.

Hence, opt for the one according to your need.

Which is the Best .22 Pellet For Raccoon Hunting?

H&N Hornet Pointed is the best pellet for a .22 air rifle to take raccoon targets easily.

The main point of using air rifles is to take down these animals in the most humane way possible.

These pellets do just that. 

Final Thoughts

I hope the list of the best .22 air rifles given above helps make your choice easier. 

Most of them have different features but are suitable commonly for hunting, striking cans, or target and pest control.

Choose the one depending on the major features like accuracy, weight, safety aspects, power, type of piston, etc. 

The choice you make will help fulfill your purpose easily. 

Best Distance for Sighting In an Air Rifle

0

Shooting with an air rifle always seems like a thrilling experience, but if you are a newbie then you have lots to learn.

One of the most vital steps is to learn how to zero in or sight in an air rifle. 

It’s surprising to learn that moderately experienced people also have little idea about this step

And generally miss the mark because of a lack of information. 

So, this guide will help you learn how you can zero your air rifle and show you what is the best distance for sighting in an air rifle.

Let’s get started. 

Why Do You Need To Zero Your Air Rifle Scope?

Zeroing your air rifle scope is the first step to securing your target.

You might have noticed that whenever you shoot, you always miss the target.

That’s because you are not zeroing the air rifle scope. 

Without doing this, you will never hit the target or be anywhere near it.

Zeroing helps you to hit the right spot.

This technique of zeroing is also known as sighting in.

It means that you align the sight with your air rifle and then hit the target.

If you have held an air rifle once or twice, you might have seen through the scope two concentric circles with a plus sign between them.

This is the sign of sighting in.

The middle point of the plus will help you zero in on the target and hit it properly. 

But an even more important aspect before you zero in is to secure the air rifle.

If you don’t secure it on a bench rest then, chances are while shooting, the rifle will become unstable and not hit the target. 

Additionally, it can even ricochet, so be careful.

This can happen irrespective of sighting in. 

Now, let’s see how to zero in an air rifle scope and check out some related questions.

How To Sight in a Pellet Gun Scope?

A pellet is a projectile that is shot from an air gun to hit a target, just like a bullet but less, you know… damaging. 

An air gun that fires pellets is known as a pellet gun.

Although it’s pretty easy to sight in a pellet gun scope yet people struggle the most in this step. 

So, I have a step-by-step guide for you to follow to make the perfect shot by sighting in the pellet gun scope. 

  1. Install the Scope 

The first and foremost thing you should do is install the scope.

Without the scope, you will only be shooting at a distance without any focus.

You will have to make sure that the rings and scope mount are in perfect alignment with your air rifle. 

Clean the surface and apply a thin layer of oil to it.

Position the scope forward to keep your eye safe from recoil.

Check the necessary adjustments before you place your air rifle for setting up. 

  1. Adjust Eye Distance 

You should have enough difference between the scope and your eye so that the rile does not recoil and hurt your eye.

Slight recoiling is always possible so, wear your protective equipment if you are just starting out. 

But the difference should not be much that you are not able to see the image distinctly or clearly.

Tune the scope and position yourself to not strain the eyes. 

  1. Set-Up 

The next and most important step is to set up your pellet gun scope at a balanced position.

With less movement, the chances of accuracy are high.

You all need to make sure that since you are just starting out, the distance should only be 10-15 feet. 

This is an optimal distance to hit the target.

Start with short distances and as you develop your game, increase the distance to challenge yourself.

Additionally, maximize the sight in to see the target clearly.

This will also help you to analyze and adjust to hit the right spot. 

  1. Take the First Shot

It’s always good to try and perfect your shot.

When you take the first shot, you will automatically know the issue at hand.

Whether the problem lies in sighting in or your hand movement or if the rifle is not in a balanced position. 

The first shot is the learning step in understanding how to sight in and aim. 

  1. Adjust the Cross-Hair

After the first shot, make the necessary adjustment.

Adjust the windage, elevation, and cross-hair without moving the gun.

The cross-hair refers to the two concentric circles through which we sight the target. 

Observe where you have hit as you’ll know through that if you have to move a little left or right. 

  1. Take the Second Shot 

After all the adjustments, take the second shot.

Now, you’ll be getting somewhere.

You’ll get the hang of the gun and the impact of the shot on you.

Try this a couple of times to understand the gun also. 

Sometimes, the gun feels comfortable in your hands but other times it doesn’t.

So with repeated shots, you will start understanding your gun a bit better too. 

  1. Increase the Distance 

Since, now you are capable of making a good shot, increase the distance.

Move the target back to 20 feet or 30 feet and again repeat the entire process. 

The long distances are not easy to nail and you may take some time to adjust to the new setting.

But with enough practice, you will definitely succeed. 

Recommended Distances to Zero Your Air Rifle Scope

The optimal distance to zero your air rifle scope is 20-30 yards.

But you should start off with 10 yards and then build your way up.

There is no fun in starting with the 30 yards if you have no experience as you will only waste the pellets. 

Starting from the ground and working your way up is the best thing in the shooting.

Additionally, the distance also depends upon the feet per second.

If the air riddle shoots around 800 f.p.s, then the optimal distance will be 20 yards.

But if it is around 900 FPS, then you can go ahead with 30 yards as well. 

In addition to this, the environment also plays a significant role.

If you are shooting within a closed range, then 20-25 yards is sufficient distance to zero your air rifle scope.

But if you are hunting then, the range increases to 40-50 yards. 

It’s best to see which distance suits you the best.

If you are comfortable with 10 yards, then you can continue within that range.

But if you want to challenge yourself or try something new, then any distance above 50 yards is a good option to try. 

The Best Distance to Zero .22 Air Rifle

The .22 air rifle is one of the most commonly used rifles in the world today.

You can use it for hunting or shooting sports and is the perfect air rifle for training.

These are not expensive and you can get them for about $150 to $300. 

Additionally, these don’t require heavy maintenance as there is no powder involved in the explosion, only compressed air.

This easy-to-handle rifle is great for beginners who are new to the hunting game. 

You can score a rabbit, squirrel, and small birds like quail.

Moreover, you can also go for some large birds such as geese, pheasants, ducks, partridges, etc.

(For more on how to choose the right air gun caliber for your game, see this post.)

Naturally, a .22 air rifle will go best with short to medium distances. 

You can also work with long distances such as 100 yards, but it will not be beneficial as chances are that the shot won’t be stable.

Nevertheless, if you are experienced, then you can totally work well with long ranges.

It won’t instantly kill the animal but will harm it enough to slow down its speed. 

So the best distance to zero .22 air rifle will be around 30 to 40 yards.

I usually hunt within the medium range, so 30 to 40 yards seems the best distance for a .22 air rifle.

But if you are planning to go for indoor shooting or long-range shooting then, you can zero in at 20 yards and 50 yards respectively. 

Although these are the recommended distances to sight in your air rifle you should definitely go for what is comfortable for you.

The views vary according to the forums where some are comfortable with 30, 35, 40, and even 45 yards. 

Since you are just a beginner, try different ranges.

Moreover, practice indoors first to get an idea of how the rifle feels and how you would like to handle it. 

Additionally, there is no recoil in the .22 air rifle which makes it one of the best air rifles to work with. 

(For more on the best .22 air rifle on the market, see this post)

Final Thoughts

For decades, people have been hunting and shooting shots as an activity.

This has only increased its love among the rifle community.

Working with an air rifle is an exhilarating experience but you need to have proper knowledge about zeroing in before you handle the rifle. 

Learn from an expert regarding air rifles, how you should take a shot, how to zero in, and how much time it will take to perfect the shot.

These lessons will help you in becoming an expert yourself!

Ravin R10 Review – Compact and Accurate 400 FPS Crossbow

0

Here’s our review of the Ravin R10 crossbow. Ravin presents rifle-like crossbows that are significantly smaller and narrower than crossbows of other brands. The R10 is the successor of the R9 Predator. We also reviewed the Ravin R20 and the R26.

We were very excited to put the Ravin R10 to the test and can already tell you that we had a lot of fun with the crossbow for this review and we will have a lot of fun with the crossbow in the coming years because the R10 is built to last.

In the package we found the Ravin R10 crossbow with Predator Dusk Camo, a 100 yard illuminated long-range scope, three Ravin arrows(300 grain) with nocks and 100 grain practice points, a detachable cocking handle, mounting bracket, and a Ravin user manual.

The crossbow comes in the exclusive to Ravin crossbows, Predator Dusk Camo, and is also available in Gunmetal grey camo.

Ravin R10 Crossbow Specs

Design and Construction

The Ravin R10 is significantly more compact compared to its predecessor, the R9 Predator. The R10 measures a total length of 33 inches, an axle to axle width of 10.5 inches uncocked, and only 6 inches when cocked. The Ravin R10 tips our scales at 6.8 pounds.

The Ravin R10 is a lightweight crossbow that is highly maneuverable, the crossbow is suited for run and gun situations and easy to handle in tight spaces such as hunting blinds,

Ravin R10 Front

Ravin is of course famous for its patented Helicoil technology. Crossbows with Helicoil have a number of design advantages, and it allows the Frictionless Flight system to work.

The R10 features Helicoil technology and the Frictionless Flight System. Helicoil allows the cams to rotate 340-degrees, generating higher speeds with better accuracy. With a traditional crossbow, the entire arrow rests on the rail.

The Helicoil system allows an arrow to float freely, eliminating energy loss due to friction. The Helicoil cams ensure that the cable barely touches the rails and there is no downward pressure on the cable. As a result, the cable is not slowed down and barely wears.

Scope

The Ravin scope is a high-end 100 yard crossbow scope that is made of high-quality materials. The scope features fully coated lenses with red and green illuminated reticles. The scope is crystal clear to look through and performs well. The Ravin scope is fog-free and waterproof and contains shock and kickback resistant technology.

Ravin R10 Scope Close Up

Cocking mechanism

The R10 is equipped with a built-in crank cocking mechanism, the so-called Versa-Draw cocking system. This cocking mechanism reduces the crossbow’s draw weight to a mere 12 pounds of force. The cocking handle is of course detachable.

The Versa-Draw cocking mechanism also ensures that the crossbow is cocked 100 percent evenly for an extra clean shot. Cocking by hand is not possible, because of this you are not able to release half-cocked.

Trigger

The Ravin R10 comes with Ravin’s Tac Trigger Fire System. It is a crisp 4 pound trigger that gives you control over the shot. Shooting with the Tac trigger system is not noiseless but very quiet and with little vibration. The trigger system contains anti-dry fire technology to prevent the crossbow from dry firing.

Range Test

The Ravin R10 is a fast and powerful crossbow that shoots arrows with speeds up to 400 feet per second and is capable of delivering 142 KE knockdown power.

We used the Ravin arrows(300 grain) to speed test the Ravin R10. On our chronograph, we measured speeds in the range of 360-380 feet per second.

The R10 is an extremely accurate crossbow. The superb stability of the crossbow combined with Helicoil technology and the excellent 100-yard scope make the R10 one of the most accurate crossbows available on the market today.

Ravin 10 Range Test Close up

WARNING: DO NOT USE NON-RAVIN ARROWS OR NOCKS WITH YOUR RAVIN CROSSBOW.

Assembly

The Ravin R10 comes fully assembled and with a Ravin crossbow manual. You only have to mount the scope, attach the side mount quiver, and accessory bracket. It takes a couple of shots to finetune the scope.

Install the scope

Tho install the scope first attach the bottom rings on the rail. Lay the scope into the bottom rings. Place the top rings on the bottom rings so the scope is surrounded. Lighty snug up the screws on the top rings so you can still freely move the scope in the rings. Adjust the scope until you find the furthest point forward to ensure maximum eye relief (at least 2 inches from your eye) that allows you to see a full field of view.

Remove the elevation turret cap and place a level on the elevation turret. Rotate the scope in the rings until it is level with your the crossbow limbs. Tighten the upper rings, alternating between front and back screws, while still keeping an eye on your scope levels. Keep slightly tightening and alternating from front to back until secure. Rotate the FPS selection dial to match the manufacturer’s advertised speed.

Attach the quiver

Attach the mounting bracket to the bottom of the Ravin R10. Screw the mounting bracket into the hole on the bottom of the Picatinny rail with the sloped surfaces on the mounting bracket pointing forward.

To attach the Quiver to the mounting bracket, press and hold the thumb release on the mounting bracket. Position the posts of the quiver in the holes on the mounting bracket with the hood facing forward. Release the thumb release to lock the Quiver in place.

Reverse the process to remove the quiver from your crossbow. The quiver can be mounted on either side of the mounting bracket. Most right-handed shooters prefer to locate the quiver on the right side.

Attaching and removing the cocking handle

To attach the Cocking Handle to the mounting bracket, press and hold the thumb release on the mounting bracket. Position the posts of the Handle in the holes on the mounting bracket with the Cocking Handle head facing forward. Release the thumb release to lock the Cocking Handle in place. Reverse the process to remove the Cocking Handle.

Recommended Accessories

Arrows & Broadheads

We recommend using 400 grain Ravin Arrows. These arrows are made from 100 percent pure carbon and offer quiet, hard-hitting performance. They feature brass inserts and aluminum nock bushings.

Combine the arrows with Ravin’s mechanical broadheads. These broadheads are optimised for crossbows with velocities of up to 450 feet per second.

Storage and Transportation

We recommend a Ravin R182 Hard-Shell crossbow case to properly store and carry the Ravin R10.

We recommend Ravin’s R260 padded crossbow shoulder sling. It is an adjustable 2 1/2-inch wide padded non-slip sling with a neoprene design.

Ravin R10 Accuracy

World Record Bulls: The Top 5 Typical Archery Elk

0

There are big bull elk. Then there are really big, world-record-class bull elk. The Pope and Young Club awards North America’s finest archery-killed wapiti by size in two categories: typical or symmetrical antlers and non-typical or unsymmetrical horns. The minimum score for a typical elk to qualify for the club is 260 inches.

Arizona claims seven of the top 10 Pope and Young typical world record bull elk records. Six of the seven largest archery-killed elk in the world were taken in Coconino County alone. Other P&Y records, including non-typicals, have come out of Greenlee, Navajo, and Graham Counties.

Coconino County accounts for approximately 20% of Arizona’s hunting opportunities. It’s the largest county in the state, with some 95% of the acreage open to the public as United States Forest Service land.

Why are there so many P&Y archery records from that area? First, Arizona has a warm climate, excellent habitat, tightly managed hunting, and a Goldilocks elk population: not too big or too small.

Second, the hunting seasons favor archery, big time. Early archery season covers most of the rut in Arizona, October is closed completely, and then late archery opens in November for another two weeks. Other western states like Montana, Idaho, New Mexico, and Colorado follow the same archery-preferred early seasons.

Third, getting drawn for an Arizona elk tag is about as likely as marrying for love then later finding out there’s money, too.

Let’s take a look at the top five typical archery killed world record American bull elk:

Related: So you Want to Shoot an Archery World Record?

No. 5 – The William Wright Bull

Score: 404”Location: Coconino County, ArizonaDate Taken: 9/15/1992Hunter: William Wright

Think back to 1992, when we striped our faces with black, brown, and green greasepaint, shot long arrows with Wasp Cam-Lok broadheads, and wore Treebark camo and boonie hats. That was the feel of bowhunting the year William Wright shot this impressive bull in Coconino County, Arizona.

Wright’s 404-inch bull is one of six record-setting archery bulls in the top 10 from that county. There’s no information on the story behind his elk — we just know it was the No. 1 bull in the world for eight years until Chuck Adams dropped a giant in Rosebud County, Montana.

Related: Speaking Elk: The 3 Elk Calls You Need to Hunt and Kill Big Bulls

No. 4 – The Chuck Adams Bull

Score: 409 2/8”Location: Rosebud County, MontanaDate Taken: 9/16/2000Hunter: Chuck Adams

With 200 Pope & Young record-class animals to his name, Chuck Adams is a bowhunting legend for good reason. Adams was the first to kill every North American P&Y big game species with a bow and arrow. The feat became known as the Super Slam, a term Adams coined after filling all 27 tags.

In 200, Adams was shooting Easton Full Metal Jacket arrows with a Hoyt bow when he arrowed his 409 2/8-inch bull in Rosebud County, Montana; and his legend went to another level. After unseating the Wright Bull, Adams’ bull held the No. 1 spot in the record books for six years. This special animal was also the 200th elk of his career.

Related: How to Speak Elk, Lesson 2: Understanding Every Funky Sound

No. 3 – The Jed Reidhead Bull

Score: 410 6/8”Location: Greenlee County, ArizonaDate Taken: 9/3/2013Hunter: Jed Reidhead

Jed Reidhead sits in the No. 3 spot in the record books with his 410 6/8-inch bull, killed in 2013. Reidhead connected with this bruiser in Greenlee County, Arizona. Located southeast of Coconino County and separated by Navajo and Apache Counties, Greenlee is a game-rich area with antelope, black bear, Merriam’s turkey, mountain lion, mule deer, bison, whitetail deer, and waterfowl. Days after notching his tag, Reidhead helped put a friend on a 370-class bull.

Related: Bowhunting Elk: 7 Last-Minute Efforts the Can Improve Your Chances

No. 2 – The Shaun Patterson Bull

Score: 412 1/8”Location: Coconino County, ArizonaDate Taken: 9/16/2005Hunter: Shaun Patterson

Another Coconino County bruiser erased Chuck Adams’ record in 2005 when Shaun Patterson, former Arizona State University and Green Bay Packers defensive lineman, shot this massive 8 x 8 typical bull. It was almost a record that didn’t happen.

Patterson said in an interview that he and his guides crawled to within 100 yards of this giant and started bugling. As the bull made his way toward them, a raghorn came out of the trees at 10 yards and busted them. Every elk vacated the premises. Relocating the bull and stalking back into range this time, Patterson made a solid shot, and the bull went down within 100 yards of where he was arrowed. The impressive animal taped out at 412 1/8 inches and earned Pope and Young glory. Today, this previous world record stands at No. 2.

Related: Elk Hunting on Public Land: How to Build a 3-Year Strategy for a New Area

No. 1 – The Steve Felix Bull

Score: 430 0/8″Location: Powder River, MontanaDate Taken: 9/10/2016Hunter: Stephan Felix

On a beautiful Montana morning in September 2016, 100 yards stood between Steve Felix and a jaw-dropping bull. The gold standard of elk — the pinnacle of the world’s finest typical archery bulls — took his sweet time bugling and feeding his way down a basin toward Felix. With a skinny, ragged-out tree marking the outside of his range, Felix waited an eternity before the giant finally followed a 310-class bull into Felix’s reach.

A well-placed 60-yard shot just behind the shoulder of this massive 430 0/8” bull (official score) was all it took. After a half-hour wait, he found the elk not far from where he’d shot it, and the rest is world-record elk history.

Read Next: How to Score a Bull Elk

4 Ways to Recover a Deer Without a Blood Trail

0

You know you made a solid shot but can’t find a drop of blood. Now what? It happens to everyone at least once. Whether you’re bowhunting or rifle hunting, going after mule deer or whitetail, every deer hunter knows this is a risk they take. For one reason or another you will eventually find yourself trying to track a deer that doesn’t seem to be bleeding, no matter how observant you were or how positive you were that you hit your target. You have to do everything you can to retrace your steps to avoid the risk of losing your deer, but how long do you look for blood or a downed deer before being able to confidently determine you actually missed? Well, there are ways to be especially thorough in your search to at least feel like you aren’t walking away from a freezer full of meat. It won’t be easy, but you can use these tips to hopefully get your buck.

Go back to the site of the shot

The first thing you need to do is get back to where you made your shot. Replay the moment in your mind. How was your shot placement? Did you hit it too far forward or too far back? How did the deer react? Did it hunch like a gut shot or bolt like a vital hit?

Once you have that image in your head, look at the ground for disruptions where you hit it. It should be torn up, and there will hopefully be a clear track of your wounded deer. Look for your arrow or immediate signs of blood, but don’t get too far from the shot site. One of the biggest mistakes a hunter can make when tracking a wounded deer is to rush it. I typically wait half an hour before searching for blood outside twenty yards.

Running the risk of bumping a wounded deer is never a good idea. Give the deer time to bed down, and they will likely expire in their first bed. One bump can give a deer enough adrenaline to run another 500 yards and possibly out of your life forever. Be patient.

Circle downwind

To clarify this statement, when deer are shot, it is an instinct for them to circle downwind, roughly 50 to 60 yards. This can be a great starting point to check for blood. If you lose track or can’t find it, start walking in a 40-yard circle from the last place you remember seeing it. Look for white hair sticking out or brown hair if it’s snowing. Move slowly and keep your eyes open for the deer, tracks, or any possible blood.

Look for water and bedding

If blood is scarce, there are other reliable places to search for a downed whitetail. After being shot, deer seek water to replace the fluids lost in their blood. Finding a primary water source, such as a flowing creek headed downhill from the site of the shot, is a great place to search for blood.

Another great place to search for a downed whitetail is in a core bedding area. After being shot, it’s natural that a deer will want to go to a site where they feel safe. If you have a good idea of where that deer was bedding, there’s a good chance that’s where it is headed. Give it time and cautiously approach the area from downwind, looking for signs of blood along the way.

Call the dogs and friends

If it is legal, get tracking dogs. They aren’t a guarantee, but their sense of smell is much better than yours and might get you closer or bring you right to the deer. If you can’t get tracking dogs, get friends to substitute as hunting dogs. Just don’t tell them that they are playing dog for you. Getting more eyes and more experience in the woods is always a good idea.

As we all know, making the perfect shot on a big game animal is tough, especially one that makes blood trailing completely easy. But we should always strive for such a shot and be able to adapt if it doesn’t happen the exact way we want it to.

Deer hunting doesn’t end after the trigger is pulled or the arrow is released. It’s the deer recovery tasks that can often spoil things. Although sometimes necessary, waiting to track a wounded animal until the following day can be agonizing, and finding zero red blood signs without a clue of the animal’s direction of travel, is never a situation we want to encounter.

Here’s hoping these tips contribute to your luck if you do.

READ MORE: The 10 Worst States for Deer Hunting

REGULATED vs UNREGULATED

0

So, which to choose? Although a regged PCP may seem the ideal, unregged PCPs have been around for many years and are still popular. Indeed, much R&D has been undertaken in the PCP world, so the simple ‘knock-open’ valve of old is a far cry from what we see on today’s airgun hardware. The Slingshot hammer/valve set-up used in some unregulated Brocock and Daystate PCPs is one such example of how far unregged PCP design has evolved. Nevertheless, characteristics of unregged and regged systems are an important consideration when choosing a PCP for your specific shooting needs.

UNREGGED PCP Between the first and last shots of an unregged PCP’s charge of air – its ‘usable’ range – the output will follow a power curve, peaking somewhere around the mid-point of the curve. While the duration of the peak depends solely on the rifle’s inherent design, this part of the curve is referred to as the ‘sweet spot’. It’s where the shot-to-shot consistency – and so the rifle’s accuracy – will be at its best. The longer the sweet spot, the better. Ideally, that is where you want to be doing most of your shooting (and where you should zero your scope). Of course, you can shoot either side of the sweet spot, but you may well see a slight change in the pellets’ POI. At relatively close ranges this probably isn’t a problem, but it may shift your pellets outside acceptable limits for hunting or competitive target shooting at longer distances. Therefore, with any unregulated PCP, it pays to familiarise yourself with the characteristics of its power curve so that you can compensate for POI shift if required.

Although an unregged PCP lets you shoot throughout its usable pressure range (200 down to 100 BAR in this example), the best consistency, power and accuracy will be obtained by shooting in its ‘sweet spot’ (165 down to 120 BAR in this example) For example, your rifle may fill to 200 BAR and then, 150 shots later, need a refill at 100 BAR. Let’s assume its sweet spot spans 65 of those 150 shots. Then it would be worth noting on the rifle’s manometer what pressure range relates to that 65-shot section – perhaps between 165 and 120 BAR. If the number of shots you get per charge of air doesn’t bother you, you could choose to fill the rifle only to 165 BAR each time, and always refill it at 120 BAR. Yes, the trade-off is that you’d be reducing the rifle’s shot count, but in return, you’d be getting an output performance on a par with a regged PCP. Plus, by starting at lower pressures, charging the rifle from a manual pump will be less effort, and you’ll get longer periods between scuba tank fill-ups.

REGGED PCP Where an air regulator is fitted to a PCP, air release is far more controlled for the entirety of the rifle’s charge and there is, therefore, no power curve. Effectively, a regged PCP offers a sweet spot that extends from the first to the last shots of the usable shot range. In some cases, because a regulator deals with air delivery more efficiently, the rifle also returns more shots between fill-ups. Generally, a regulator system incorporates a secondary air chamber (the plenum chamber) which is designed to operate at a constant pressure. This means that as the rifle’s air pressure drops, the main firing valve always delivers an exactly-metered volume/pressure of air. The benefit of this is that the rifle’s power output is the same, no matter where it is within its charge cycle. That said, it is important not to let the pressure in the rifle’s main air reservoir drop below that of the regulator’s operating pressure, else the regulator effectively becomes redundant in the airflow chain. Many gunmakers now incorporate an additional gauge on their regged PCPs to specifically indicate the regulator status, like on the Brocock Commander PCP. The regulated Brocock Commander has two manometers – one for its HuMa regulator’s fixed pressure (top) and one to show the pressure status of the rifle’s main air reservoir The regulated Brocock Commander has two manometers – one for its HuMa regulator’s fixed pressure (top) and one to show the pressure status of the rifle’s main air reservoir While ‘managing’ the power curve of an unregged PCP isn’t exactly a headache for most shooters, there’s no denying that the fill-and-forget operation of a regged PCP is more straightforward. However, regulated PCPs cost more than their unregged counterparts, so you have to weigh up their worth in your particular scenario. FT, HFT and benchrest competition shooters, who seek ultimate precision in every aspect of their sport, may be able to justify the outlay for a regged PCP, but for everyday shooting/hunting assignments, a good quality, unregged PCP is equally as good if you have a full understanding of its power curve. Yet never dismiss the addition of a PCP regulator as ‘just another thing to go wrong. That may have been the case when air gunsmiths were experimenting with them many decades ago. But just like knock-open systems have evolved, the PCP regulator has also graduated. Specialist regulator manufacturers have risen to the forefront of the airgun industry, with many gunmakers incorporating their proven designs in their regged PCPs. Daystate, for instance, has partnered with the world-renowned HuMa-Air to develop a metering system in their regulated HR Huntsman Regal, Renegade HR and Wolverine R air rifles.

Trout Fishing Rigs (9 Setups You Need To Know)

0

UPDATED 08 SEPTEMBER 2024

by Robert Ceran

Using the right fishing rig is essential for catching trout successfully, and knowing which rig to use for what conditions can make the difference between catching your limit or getting skunked.

There’s a perfect trout rig for almost every situation, and that’s why it’s so important to master rigging for trout, as this will allow you to choose exactly the right fishing rig for your purposes.

In this article I’ll cover the 9 best trout rigs, and will discuss what each of them is ideally suited for.

The best trout rigs (setup & fishing guide)

How to rig for trout

In order to rig for trout, you need to choose one of three basic types of rigs:

  • Rigs that present your bait suspended underneath a bobber or float
  • Rigs that present your bait close to the bottom with a weight
  • Rigs that enable you to cast and actively retrieve an artificial lure

While these three types of fishing rigs cover almost all trout fishing applications, they come in a variety of different shapes and forms, each of which is best suited for slightly different trout fishing setups.

So if you’re a beginner, chances are that you’re confused about all the different options of rigging for trout.

However, the great thing is that you can get started with just two or three of the most versatile trout fishing rigs, and then add more specialized rigs once you know what kind or rig works best for your pond, lake or stream.

Now let’s look at each of the most important trout rigs in more detail, to help you choose the best rig for your purposes.

And in case you’re also looking for the best bait to use with your trout fishing rigs, check out our article on what is the best bait for trout?

Trout fishing rigs with bobbers

Bobber rigs are among the most effective trout fishing set ups, and work especially well when fishing in shallow ponds and streams, as well as in shallow bays of bigger lakes, or basically in any situation where trout are active close to the water surface.

Now let’s look at the two main types of bobber rigging for trout.

Trout rig with fixed bobber

Fixed bobber rig for trout

This is one of the simplest trout rigs, and consists of a fixed bobber attached to the line, as well as a hook and sinker to weigh down the baited hook in the water.

The depth at which the bait is presented depends on the distance between the hook and the bobber.

How to tie it: Attach the bobber to the line, and then tie the end of the line to the hook. The most common type of bobber used for this fishing rig is a round red and white bobber, but you may want to choose a pencil shaped bobber instead, which offers less resistance when a trout takes the bait.

If you’re not sure how to rig a fishing line for trout, take a look at our article on what fishing line should you use for trout?

When to use it: This is a great fishing rig to use in shallow ponds and streams, as well as any situations where trout are feeding close to the surface. It’s very easy to set up and a lot of fun to fish with, which makes it an excellent choice for beginners who want to try trout fishing in a stocked pond.

But keep in mind that the maximum depth you can fish this rig corresponds to the length of your rod, since you can’t cast the fishing rig effectively if you set the bobber higher than that.

How to use it: The best way to use this fishing rig is to cast it out with a baited hook and wait for a trout to bite, which is indicated by the bobber being pulled down underwater.

When you see this, set the hook immediately, so the trout doesn’t have a chance to spit out the hook when it feels resistance on the line. This is the best setup for trout fishing in streams and rivers, where you can use it to drift your bait into the best locations that hold trout.

Slip bobber rig

Slip bobber rig

This is another commonly used trout rig, and should be part of every trout angler’s arsenal of fishing tools.

Using a slip bobber rig (aka sliding float rig) makes the fishing rig more compact and easier to cast with than a fixed bobber rig.

How to tie it: Tie a bobber stop on to your main line, and then thread the line through your bobber and tie the line to the hook. The best hook size depends on your bait, but generally lies somewhere between size 8 and 14.

If you’re unsure about choosing the right hook size for different trout line setups, take a look at our article on the best size hook for trout.

Attach a split shot or two to the line between the bobber and the hook. This stops the bobber from sliding down onto the hook and it also weighs down your bait, helping to present it at the right depth to the trout .

Keep in mind that some baits (like powerbait) float in the water, and you may need to add extra split shots to make the baited hook sink down to the desired depth.

When to use it: The slip bobber rig is the best choice when trout are feeding in midwater, and if you can’t reach them with either a fixed bobber rig or with a bottom fishing rig.

The great thing is that you can fish practically any depth with this fishing rig, as you just need to move the bobber stop up the line to whatever depth you want to set the bobber.

How to use it: Estimate the depth of the water you’ll be fishing in, and set the bobber stop to that depth. Then bait your hook and cast out your fishing rig to the desired spot and wait for a fish to grab the bait.

Bottom fishing rigs

Bottom fishing rigs are often the best choice when trout are found in deeper water, as they tend to feed close to the bottom most of the time. There are several options available to you in this rig category, so now let’s look at the most important ones.

Slip sinker rig

Slip sinker rig

This is the simplest bottom fishing rig around, and is the one most often taught to novice trout anglers. This rig has been in use for more than a century, and continues to perform well in many situations where trout hold close to the bottom.

How to tie it: Thread a 1/8 or 1/4 oz sliding sinker (either a bullet or egg sinker) onto your main line, and then tie the line to a barrel swivel. Attach a leader to the other end of the swivel, and tie your hook to the leader. Choose the type and size of hook depending on the type of bait you want to use.

When to use it: This rig is most commonly used in lakes where trout hold in water deeper than 5 or 10 feet. It’s a great rig to use from shore, since you can cast it relatively far, and cover a lot of water with it.

It’s important to use this fishing rig with floating bait, since you don’t want your baited hook lying on the bottom where trout won’t notice it. You can use it with either powerbait (which is designed to float), or worms injected with air to make them float.

How to use it: This is the most common bait rig used for trout fishing setups, and is usually fished passively. Most anglers cast it out to a promising fishing spot and then wait for a bite. If you do this, make sure to check your rig regularly to see if the bait is still on the hook, and also test different fishing spots.

Carolina rig

Carolina rig

This rig is very similar to the slip sinker rig, but unlike the slip sinker setup it is often fished actively with artificial lures instead of passively with bait, which is why we list the two options separately.

How to tie it: Start by threading your main line through a 1/8 to 1/4 oz sliding sinker. Next, thread the line through a plastic bead, and then tie it to a swivel or snap swivel. The bead stops the weight from banging into the swivel during retrieval, which protects the knot on the swivel from being damaged while fishing, and this is more important if you want to fish it actively.

When to use it: You can use this option anywhere where trout are feeding close to the bottom. It’s a great option to use when fishing in lakes, reservoirs and ponds, but you can also use it in rivers.

How to use it: While you can also use this fishing rig with a baited hook and fish it passively until a trout comes by and bites, the strength of the Carolina trout fishing rig lies in fishing it actively with a floating lure.

You can use a floating jig head with plastic lures such as trout magnets or power worms. After casting out, let your rig sink to the bottom, and then slowly retrieve it with a jigging movement.

Split shot rig

Split shot rig

This is basically a finesse version of the Carolina rig, and instead of a sliding sinker it uses one or more split shots attached to the line. Since trout can be finicky at times (especially when fishing in heavily fished waters), it’s always great to have some finesse techniques up your sleeve.

How to tie it: Tie your main line to a swivel or snap swivel, and then add one or two split shots to the line right above the swivel. Next, tie a 1 to 2 foot long fluorocarbon leader to the swivel, and then tie your hook to the other end of the leader.

Next, thread a soft plastic lure onto the hook, and your trout fishing line setup is good to go.

In most cases you’ll want to use a floating lure on this rig, which will result in presenting your lure right in the strike zone every time the split shots sink to the bottom.

When to use it: This rig is a great option if you notice that the trout are finicky. This is most often the case in heavily fished waters, and especially in clear water it can be advantageous to use a finesse rig that’s harder for the fish to spot. It’s also a great trout fishing set up for small creeks.

How to use it: Cast the rig out and let it sink to the bottom. Then slowly retrieve it with jigging movements of your rod tip. The main disadvantage of the split shot rig is that it can’t be cast as far as the Carolina rig, since it comes with less weight on the line. Because of this, it’s better to use it when fishing in smaller lakes, rivers and streams.

Drop shot rig

Drop shot rig

This is another great trout fishing rig setup for bottom fishing, and one of it’s key advantages is that it allows you to place your lure in the strike zone and keep it there for a long time. Similar to the two previous rigs, it’s most often used with soft plastic lures.

How to tie it: Start by tying your main line to a 4 or 5 foot fluorocarbon leader with a double uni knot, and then tie the end of your trout leader to a 1/8 to 1/4 drop shot weight.

Next, take a bait hook and place it facing upwards, and form a loop with the leader line about 1 foot above the drop shot weight.

Pass the loop through the eye of the hook from below, and then tie an overhand knot with the loop. Finally, pass the hook through the loop, wet the line, pull tight, and you’re ready to start fishing.

When to use it: While the drop shot rig was originally developed for vertical fishing in deep water from a boat, most bass anglers can tell you that this rig works equally well for fishing from shore, and can even be fished in very shallow water. It’s a great trout fishing setup for beginners fishing in lakes and rivers.

How to use it: Cast the rig out and slowly retrieve it by hopping the weight along the bottom, while jigging the lure up and down. If you figure out where the strike zone is, you can keep the drop shot fishing rig there, and simply wiggle the lure in place without moving the weight. That way you can keep your lure right in front of the fish for a long time, without having to retrieve it and cast again.

Lure rigs

While all of the fishing rigs discussed above can be used as trout fishing setups with either natural bait or artificial lures, some options for rigging for trout are only intended to be used with lures. Let’s take a look at the most important rigs of this type that you should know.

Spinner rig

Spinner rig

The spinner rig is the most commonly used lure fishing rigs for trout. It is most often used with spinners (such as a rooster tail or panther martin), but it can also be used when fishing with any other artificial lure designed for casting and retrieving.

How to tie it: Tie your main line to a swivel or snap swivel, and add one or two split shot weights just above the swivel. Next, tie a 2 to 4 foot fluorocarbon leader to the other eye of the swivel, and then tie your lure to the other end of the leader.

Depending on the size and weight of your lure, adjust the number of split shots to achieve the right depth during retrieval. The swivel prevents line twist of your main line, but if you’re using a lure that doesn’t generate twist, you can also tie the main line directly to the leader.

When to use it: This is one of the most versatile trout set ups, and can be used in almost any setting, from small streams to deep lakes. In most cases you should try to fish this rig in the middle of the water column, but can also go deeper than that if the trout are holding close to the bottom.

How to use it: Simply cast out the fishing rig and start retrieving. Depending on how deep you want to fish it, you can adjust your retrieve speed, and you can also experiment with letting the rig sink to the bottom before you start reeling it in. However, if you’re trout fishing over weed beds, make sure to keep your lure above the weeds.

If you’re interested in fishing with trout spinners, check out our complete guide to trout fishing with spinners.

Trout fishing rig setup with bobber and jig

Trout rig with bobber and jig

This is a great rainbow trout rig to use if you’re fishing over weeds, as you can fish it slowly without getting the jig snagged in the weeds.

How to tie it: Depending on the depth of the water, you can use either a fixed bobber or a slip bobber.

So start by setting up one of the two bobber rigs (as described above), and instead of tying a bait hook to the end of the line, tie a 1/16 or 1/8 oz jig head to the line. Next, you can bait the jig head with any of a wide variety of plastic lures, and you’re ready to start fishing.

When to use it: This is a great trout fishing setup for beginners when fishing over weed beds, and when want to keep your lure just above the weeds. You can achieve this by setting exactly the right depth with your bobber.

This trout rig setup is also great for drift fishing in streams and rivers, and again you should adjust the setting of your bobber to present the lure just above the bottom.

How to use it: If you’re trout fishing in a lake, cast out the fishing rig and let the jig sink as far as it can (at which point the bobber stands up straight). Then lift your rod tip to retrieve the fishing rig about 4 to 5 feet, and then pause to let the jig sink down again.

What this trout fishing setup achieves is that your jig will be slowly pulled up and then allowed to sink again. In the case of a plastic worm, this results in the worm wiggling through the water, which is highly attractive to most trout.

See also: How to rig when trolling for trout

Ned rig

Ned rig

The ned rig is most familiar to bass anglers, but few people know that it also works really well for catching trout. The key feature of the ned rig that makes it so effective when fishing for trout is that it is usually fished with a floating plastic tail, which is ideal for catching trout.

How to tie it: This is the simplest fishing rig to tie in this collection. If you’re using fluorocarbon as your main line, you can tie that directly to the mushroom jig head of the ned rig and you’re ready to start fishing. If you’re using braided line as your main line, it’s best to use a 2 to 4 foot fluorocarbon leader, since that’s much less visible in the water.

When to use it: You can use this rig whenever trout are feeding close to the bottom, and it works equally well in lakes, rivers, and streams. The only situation when you shouldn’t use this rig is if you’re fishing in a lake with a lot of vegetation on the bottom, which is likely to get your ned rig snagged.

How to use it: Cast it out and let it sink to the bottom, then retrieve it for 3 or 4 feet with a jigging motion, and let it settle on the the bottom again. Repeat this until you get a bite.

What are the best trout rigs?

The 3 best trout rigs are:

  • Slip bobber rig
  • Slip sinker rig
  • Spinner rig

Between them, these three setups cover all the three main types of rigging for trout, and if you can set each of them up and fish them effectively, you’re off to a great start.

The slip sinker rig is perfect for presenting a bait close to the bottom, which is the best depth to target trout in most situations.

The slip bobber rig, on the other hand, can be used to present a bait suspended underneath a bobber, which is great when fishing for trout that are active higher in the water column.

And the spinner rig is a great basic setup for active trout fishing with lures, which is an ideal way to cover a lot of water in search of hungry trout.

If you’re currently looking for a new trout rod, check out our article on what is the best rod for trout fishing?

What are the best trout bait rigs?

The 3 best trout bait rigs are:

  • Slip sinker rig
  • Slip bobber rig
  • Fixed bobber rig

Each of these fishing rigs is well suited for baiting your hook with natural baits like worms, maggots, minnows, corn, salmon eggs, or scented baits like powerbait.

In addition, all of them can be used for fishing passively, by casting out your fishing rig and then waiting for a trout to pass by and take the bait.

Trout worm rigs

The best rigging for trout to use with worms is either the slip sinker rig, or the slip bobber rig. The former rig is the ideal choice if you know that trout are feeding close to the bottom, and the latter rig is better if trout are feeding higher in the water column.

When using a slip sinker with a worm as bait, it’s important to make sure that your baited hook floats in the water, as trout will not eat it if it’s lying directly on the bottom. Traditionally, this has been done by injecting air into the worm with a worm syringe (which you can get in most tackle shops).

More recently, many anglers are fishing with floating jig heads baited with worms to make their bait presentation float in the water, and another great trick is to put a small marshmallow on the tip of your hook, which also makes it buoyant.

Finally, no matter which trout worm rig you use, it’s usually best not to use a whole nightcrawler on your hook, as this is too big to fit into the mouth of a trout. Instead, cut off a 1 or 2 inch piece of the worm, and thread it onto the hook.

The best hook type to use for this rig is a baitkeeper hook, which prevents the worm from sliding down the shank of the hook.

Minnow rigs

The best trout rig to use with minnows is either the slip bobber rig, or the fixed bobber rig. Your hook size should be between size 8 and 12 (depending on the size of the minnow). The best way to hook a minnow for trout is through the upper lip.

Small fish form a large part of the diet of many trout species, which is why they can be such a good bait.

Bobber rigs are great for fishing with live minnows, since you can easily spot a trout bite when the bobber goes down, and this allows you to delay your hook set long enough to give the trout a little extra time to get the minnow fully inside its mouth.

Which one of the two bobber fishing rigs you choose depends on the depth of the water you want to fish in, and on the depth at which trout are active.

When fishing with live minnows as trout bait, it’s important to weigh them down with split shots, so they stay at the right depth.

Salmon egg rig

The best trout rig setup to use with salmon eggs is one of the following:

  • Slip bobber rig
  • Fixed bobber rig
  • Drop shot rig

Your hook size should be between size 8 and 14, and if you use a larger hook, you can thread several salmon eggs onto your trout hook. No matter which fishing rig you choose, you need to cast very gently in order to avoid ripping the eggs off the hook during the casting process.

If you’re trout fishing in a lake or pond, the best choice is a bobber rig, as that allows you to present the salmon eggs suspended in the water. But if you’re trout fishing in a stream or river, you can use a bobber rig to drift the salmon eggs with the current.

Alternatively, you can also use a split shot rig to drift the salmon eggs right on top of the bottom of the stream. The latter approach is better for getting it right in front of the trout, but it’s harder to detect bites with this style of fishing.

Egg rigs also work very well for steelhead fishing, and it that’s something you’re into, check out our article on how do you rig for steelhead bank fishing?

Final remarks

This concludes our article on rigging for trout, and hopefully we’ve helped you find exactly the right rig for your fishing technique.

Different trout rigs are ideally suited for different trout fishing tactics – bait fishing, lure fishing, trout fishing from shore, trout fishing from a boat, as well as fishing in diverse bodies of water, ranging from small streams to big lakes.

Now that you understand the basics of what each of these fishing rigs is designed for, this should help you to choose the best trout setups to help you to catch more fish in your local trout fishery.

21 Homemade Deer Feeder Plans You Can Make On A Small Budget

0

If you enjoy watching wildlife, a homemade deer feeder will bring the wildlife closer to you to observe it with best practices. Fill the feeder with treats and you will be able to watch deer, turkey, and other animals feed and interact with one another.

A homemade deer feeder like one of our 21 listed below will attract a lot of attention and get many visitors. Deer are creatures of habit and will return over and over again to a food source.

These homemade deer feeder ideas that we have gathered for you will show you how to build a feeder on a small budget. You will be enabling the deer to eat healthier diets so they can reproduce and you will get the enjoyment of watching these majestic creatures.

1- PVC Homemade Deer Feeder

One 10-feet piece of PVC pipe can make two homemade deer feeders such as this one by Hub Pages. Use the PVC pipe that is 6-inches in diameter and you will create a large sized deer feeder that holds lots of corn. You won’t have to refill it often and the deer won’t get spooked by your presence or human scent.

What I like about this feeder, it is a budget friendly building project and these free plan will show you how to build this PVC feeder step by step. A pictorial guide and written instructions are included in this building manual that is in PDF format.

If you have PVC pipe leftover from another project the cost of this DIY project will be very good for a small budget.

PVC Pipe Deer Feeder, Image via: homemade deer feeders

2- Covered Deer Feeder

This covered deer feeder is easy to build and it will keep the feed dry until all of it has been eaten.

This is one of the best Deer feeder plans that we just love. The larger size and stand alone design makes this wild game feeder ideal for attracting various forms of wildlife. The wide bottom tray allows you to put corn, grain, salt lick, and hay in it at the same time. The more variety of food that is offered, the more variety of wildlife will show up to eat.

A covered homemade deer feeder by My Outdoor Plans like this one will keep the wildlife food protected from the weather so nothing will be wasted. You can fill the feeder with lots of treats and not have to worry about re-stocking it for several days. The deer and other wildlife will appreciate the covering that keeps their head dry while they eat.

These free plans provide step by step instructions so you can easily build one of these DIY deer feeders.

Covered Deer Feeder, Image via: myoutdoorplans

3- PVC Deer Feeder

Here is a budget friendly deer feeder that requires no carpentry skills to build. This homemade deer feeder is made from PVC pipe and attached to a tree with wire. It’s simple design, cheap to make, and deer will love it.

Make this homemade deer feeder using 2 inch diameter pvc pipe, hacksaw or PVC cutter, metal wire, rope, or string, two 2 inch pvc pipe caps, and pvc glue. This is a very simple DIY project that will only take a few minutes to build and cost less than $10. These free plans will show you how to make a cheap homemade deer feeder by Instructables so you can enjoy watching deer in their natural habitat.

You can create several of these if you have a large piece of property so you can get a good view of deer from different locations. These DIY deer feeders would also make a good gift for family and friends that live in a wooded area.

PVC Deer Feeder, Image via: instructables

4- Homemade Wooden Box Deer Feeder

This deer feeder plan, unlike previous ones we have discussed, will show you how to build a basic wooden box structure that has a storage bin on top. The storage bin is filled with food and as the deer eat from the bottom, fresh food drops down from the top. The removable lid on top makes filling the bin easy.

A salt lick or mineral block can be placed in the deer feeder such as this one by feltmagnet instead of corn or grain. All types of wildlife will be attracted to this wooden feeder box and for birds you may need a diy bird feeder. If you have some scrap lumber on hand the cost to build this will be almost nothing.

You can make this homemade deer feeder using the following parts cutting list Part A (sides): 18″ long by 8½” wide (quantity of two needed), Part B (back): 18″ long by 7½” wide, Part C (slanted front): 17″ long by 7½” wide,Part D (bottom): 7¾ long by 7½” wide,Part E (lid): 10″ long by 10½ ” wide,Part F (tray front): 9″ long by 2½ ” wide.

Wooden Box With Bin, Image via: feltmagnet

5- Barrel Deer Feeder

This barrel deer feeder is so easy and inexpensive to build and will attract a lot of attention from wildlife.

A plastic 55-gallon barrel and a few pieces of lumber can be used to create a long-lasting DIY deer feeder such as this one on YouTube. This video will take you through the building process so you can make one for your landscape.

The roof will keep most of the rain water out of the feeding trough, but drill a few holes in the bottom so rain water can drain through and not cause the grain to ruin. You can also place a trail camera on the side so you can capture up-close videos or pictures of the deer as they eat.

6- Five Gallon Bucker Feeder

A five gallon bucket can easily be transformed into a hanging deer feeder with this unique idea.

These plastic buckets are cheap and can be bought at any building supply center. A wooden dowel, piece of rope, and screw are the other component needed for this DIY project.

This homemade deer feeder by fivegallonideas can be made in 15-minutes. Fill it with corn or other grain, hang it up from a sturdy tree limb and the deer will arrive shortly afterward to feed. You don’t have to have carpentry skills or a big budget, just a bucket and a rope.

There are a few other designs that can be used to create a feeder with a five gallon bucket, but this is the simplest and cheapest. You may also like to make a DIY squirrel feeder to enjoy watching the habits of squirrels when you are close to them.

Five Gallon Bucker Feeder, Image via: fivegallonideas

7- Down Spout Deer Feeder And Food Recipe

An inexpensive down spout used for a home guttering system makes an ideal and cheap deer feeder by wikihow.

Place the large end of the spout at the top and add gutter connections to the bottom to create a narrow end so the grain won’t pour out. Attach the down spout to a tree with wire or screws and fill it with one of the recipes included with these free plans.

Corn, oats, and molasses make a tasty and wholesome treat for deer. Stale bread, honey, and molasses will also make an irresistible treat for deer. Making this feeder is cheap and the homemade recipes for deer food make keeping the feeder full inexpensive and easy too.

Down Spout Deer Feeder, Image via: wikihow.com

8- PVC Pipe Feeder

Simple and affordable to make, this DIY deer feeder by realtree is made from PVC pipe and will last for years.

These free plans include a video and written instructions so the build will go smoothly even if you have never built anything before. No cutting is required but you might need to use a drill.

Spray paint the finished deer feeder with camo paint and it will blend in with the surrounding landscape. The large PVC pipe won’t need to be re-filled daily so you can rest and enjoy watching the deer eat with minimal work or expense.

PVC Pipe Feeder, Image via: realtree

9- Hanging Deer Feeder

These free plans will show you how to recycle a five gallon bucket and a tin can into a new hanging deer feeder By diyjoy

The five gallon bucket holds the corn or grain and the tin can hangs from the bottom to catch the attention of the passing deer. When the deer come by to investigate and nudge the tin can, some of the feed inside the bucket will drop out.

When the deer discover they get free food each time they nudge the tin can they will come around often and stay a long time.

Recycle a five gallon bucket into Hanging DIY Feeder, Image via: diyjoy

10- Covered Deer Trough

It gets tough for deer and other wildlife to find enough food to survive during the winter and a deer feeder like this will help keep them well fed.

These free detailed plans will show you how to build a covered deer trough by myoutdoorplans that will help nourish the deer during the cold winter months. The large trough holds plenty of food so it will only need refilling every 5-6 days.

If you have basic carpentry skills and a small budget, download this PDF file that contains all the building plans. You can build this covered trough in one weekend and it will last for years.

Covered Deer Trough, Image via: myoutdoorplans.com

11- Gravity Feeder

Learn how to build a homemade deer feeder on youtube that uses gravity to keep the corn flowing downward.

A 55 gallon barrel, either plastic or metal, is used for this DIY project. The barrel is placed up on metal legs so the deer can go under the barrel feeder to get to the corn. A salt lick can be placed under it to provide an extra treat for the deer and other wildlife. A mineral block will also help keep the deer healthy.

12- Homemade Barrel Feeder

Here’s another idea for creating a DIY deer feeder on youtube with a 55-gallon barrel. This detailed YouTube video will show you how to recycle a metal 55-gallon barrel into a functional deer feeder. This is a great idea for a small budget project and it will provide plenty of corn for the deer.

The digital feeder kit that is attached to the bottom is affordable and available at hunting supply centers. It will release the corn as needed so it won’t be wasted when wildlife is not near the feeder.

If you have a metal barrel and some metal poles, the cost for building this barrel feeder will be very low. Plus you’ll be doing a good deed by recycling metal and feeding the wildlife.

13- Plastic Barrel Feeder

Learn how to build a gravity deer feeder in this YouTube video using a plastic barrel. The barrel feeder costs less than $20 to build and is great for a small budget.

The barrel feeder has a PVC pipe feeder on the bottom so the deer can easily access the corn or grain inside that is inside the barrel. The barrel can be suspended from a tree or it can be placed on wooden legs to get it off the ground.

The 55 gallon plastic barrel holds plenty of corn or grain to keep the deer well fed for several days. The cheap building costs leaves more money for you to spend on corn to put into the feeder.

Remember to put a few drainage holes in the bottom of the plastic barrel feeder to allow rain water to escape. Paint the plastic barrel camo so it will blend in with the surrounding landscape.

Gravity Feeder

Building a gravity feeder has never been easier! Get all the free instructions you will need for building a DIY deer feeder for your hunting land.

A PVC deer feeder in this YouTube video that works with gravity to keep the feed flowing will attract the deer and keep them coming back for more food. Build this gravity deer feeder on a small budget since the components are very inexpensive. A length of PVC pipe, a cap for the top, and an elbow joint are basically all that you will need to build this DIY deer feeder.

Many DIY enthusiasts will have these PVC pipe components on hand so building this efficient homemade deer feeder will be almost free.

This deer feeder is ideal for hunters who want to keep the deer in the area well fed without spending a lot of money on batteries. Even if you are not a deer hunter but just enjoy feeding and watching wildlife, this gravity feeder will be ideal.

Barrel Corn Feeder

Use a 55 gallon plastic barrel to create a corn feeder for deer. This homemade deer feeder on youtube will hold plenty of corn so you won’t have to return often to refill it.

If humans are in the area too often it will spook the deer and they will find another feeding location. Building a large barrel corn feeder like the one shown in this YouTube video will allow you to stay away from the feeding area so the deer won’t be spooked by the human scent.

This YouTube video will show you how to build a deer feeder using a plastic barrel and PVC pipe.

Automatic Deer Feeder

Making an automatic deer feeder like this one on youtube video will enable you to keep food in the selected area at all times. The deer will return again and again to feed because they know food will always be there for them.

This is ideal for hunters and wild life watchers. You can count on deer being in the area because they can count on food being there. Build it and fill it with corn and the deer will come.

This instructional YouTube video will provide the automatic deer feeder plans so you can get started building one this weekend. It is a budget friendly DIY project that won’t cost much to build. A 55 gallon plastic barrel and some left over lumber are the main components of this building project.

Covered Deer Feeder

Building this homemade deer feeder for your landscape will give you an incredible view of wild life from your back porch. Make this covered trough feeder to be the focal point of your backyard. It’s easy to build with lumber, plywood, and shingles.

This DIY deer feeder by howtospecialist is a covered trough that will attract deer and keep the food dry during rain or snow. The way the feeding trough is designed will give you a great view of the deer as they feed.

These detailed instructions will show you how to make a deer feeder that attracts deer, look good in your yard, be easy to fill and refill with corn, and keep the corn dry. This feeder is made from wood so you can paint it to match your house or paint it in camouflage colors to blend in with the surrounding landscape.

Covered Deer Feeder, Image via: howtospecialist

Wooden Deer Trough

Watch how to build a wooden deer trough on this YouTube video. Use leftover wood and build it to fit perfectly on your hunting land or to use it to make a deer blind. The covered trough is made from wood and will protect the food inside the trough while attracting the deer to come and eat.

This homemade deer feeder can be built on a small budget, especially if you have some leftover wood on hand from previous DIY projects. This covered feeder is sturdy and built to last for years. Coat the wood with a clear coat of water seal and that will help the wooden deer feeder last even longer.

More Deer

Bring more deer on your hunting land fast with this cheap and easy to build deer feeder.

Transform an ordinary 55 gallon plastic barrel into an efficient homemade deer feeder in just a few minutes in this youtube video. You may want to make several of these for your hunting land.

A 55 gallon barrel with a lid makes an ideal storage unit for deer corn. When you cut a few holes near the bottom to allow the corn to come out as needed the barrel becomes a cheap deer feeder.

This YouTube video will also show you how to paint the barrel in camouflage colors so it will bend in with the landscape.

Automatic Bucket Deer Feeder

If a 55 gallon barrel feeder is too big for your hunting land, how about a 5 gallon bucket deer feeder? Learn how to build a deer feeder in this YouTube video with a 5 gallon bucket and make it automatic.

This feeder is cheap and easy to build and will keep the deer coming back daily for more food. Ideal for a back yard view point or for placing in several prime locations around hunting land. The budget friendly cost and easy build will enable you to build many of these automatic bucket feeders. Suspending the deer feeder from a tree branch will also keep the raccoons and possums out of the corn.

PVC Pipe Deer Feeder

This is cheap, easy, and fast to build! PVC pipe makes a long lasting deer feeder that can hold a lot of corn and stand up to the weather conditions.

Take a length of 6 inch PVC pipe and easily transform it into a gravity diy deer feeder such as in this youtube video. The cheap cost will enable you to build several of these homemade deer feeders and place them around your hunting land. Leave the PVC pipe white or paint camo or green to blend in with the landscape.

Watch this detailed YouTube video to learn how to build a deer feeder using PVC pipe. One like this can be built in minutes and enjoyed for years.

Conlusion

So these are the ideas we have gathered around the internet to make it convenient for you to make your own custom design deer feeder. Now you have a lot of options to try starting from pvc pipe, bucket, hanging feeder and a 55 gallon drum. These feeders are made using one thing sure that is less wastage of feed and easy to refill. Hope you like the article!

“; n.innerHTML = “window._taboola = window._taboola || [];_taboola.push({mode:’thumbnails-rr’, container:’taboola-below-article-thumbnails’, placement:’below-article’, target_type: ‘mix’});”; insertAfter(t, e); insertAfter(n, t) }injectWidgetByMarker(‘tbmarker’);

Did whales really live in the Great Salt Lake? New film explores the infamous legend

0

Estimated read time: 3-4 minutes

SALT LAKE CITY — Filmmaker Joseph LeBaron had never heard the stories about whales living in the Great Salt Lake. In fact, the Utah native had rarely even spent much time at the lake.

That changed in 2015 when NPR radio host Doug Fabrizio reached out to see if LeBaron’s team would be interested in filming an interview with Dr. Lynne McNeill, a folklore specialist at Utah State University. The topic? An infamous article published in 1888 about whales being released into the Great Salt Lake.

Needless to say, LeBaron was intrigued.

“The article was about a scientist named James Wickham who came from England to try to start a whale oil fishery in the Great Salt Lake,” recalled LeBaron. “He apparently spent a couple of years off the coast of Australia to capture a breeding pair of whales, and then transported them to Utah by train, in giant tanks of water.”

LeBaron’s team decided that the project was going to require more effort than originally planned. The story was simply too big to capture in a three-minute edit. With their eyes now set on a short film, the filmmakers began scouting the Great Salt Lake.

“We quickly fell in love with the lake,” said LeBaron. “Even though the Great Salt Lake is so important to the state for many, many reasons, it had never felt like a destination place for me. Now I realize that it’s just so incredibly beautiful and wild and weird.”

The team soon realized it would be impossible to film on the lake, as declining levels made it too shallow. Each year, they’d go out to check the depth to see if “this was finally the year to film.” But the lake just got more and more shallow.

According to legend, whales were transplanted into the Great Salt Lake in the 1800s. A new short film examines this mystery. (Photo: Jacob Justice)

“It was really hard for us to see this beloved character disappearing before our eyes,” LeBaron said. “Ultimately, we got scrappy and were able to get the shots we needed. And through our newfound love of the lake, we grew into activists and saw an opportunity for this film to act as a call to conservation.”

LeBaron sought out an impact partner — FRIENDS of Great Salt Lake was the ideal match, as part of their mission is to increase public awareness and appreciation of the lake through education, research and the arts. Their partnership will culminate in a film premier for the completed short film, “Whales of the High Desert,” on Aug. 25. The event will feature live music and multiple food trucks at Industry SLC, 650 S. 500 West, in Salt Lake City.

Since Fabrizio was the impetus for the whole project when he first contacted LeBaron about the story nearly a decade ago, it’s only fitting that he’ll be emceeing a panel discussion at the premier about the film and conservation efforts for the Great Salt Lake. Panel members include Bonnie K. Baxter, director of the Great Salt Lake Institute at Westminster College; Lynne S. McNeill, professor of folklore at Utah State University; and, Holly Simonsen, programs director at FRIENDS of Great Salt Lake.

All proceeds from the event will go to FRIENDS of Great Salt Lake to support their ongoing conservation efforts. You can get details and reserve tickets by clicking here.

And if you’re wondering whether the mysterious story about whales in the Great Salt Lake is true — it’s worth noting that even the filmmakers and experts involved with the project have a hard time answering that question.

There’s no concrete evidence available to support the claim, which suggests it’s unlikely to have occurred. But the thrilling possibility that whales called the Great Salt Lake home, even briefly, has helped keep the legend alive all these years.

Photos

Most recent Great Salt Lake stories

Best Air Rifle Deals

Popular Posts

PCP vs CO2 Guns: Which One is Better?

0
The most talked-about debate between hunters and gun enthusiasts is what the best power source of a gun is.  The five main sources of power...

Air Gun 101: What You Should Know about Air Rifle Barrels Before Buying

0
Have you ever heard the phrase: “Imitation is the sincerest form of flattery”? The Chinese must have been very sincere in emulating this proverb. I...

Pump Air Rifles vs Break Barrel

0
Exploring the Pros and Cons: Pump Air Rifle vs Break Barrel - Unveiling the key differences and advantages between two popular air rifle mechanisms....