Home Blog Page 49

Should You Call to Late-Season Bucks?

0
Should You Call to Late-Season Bucks?

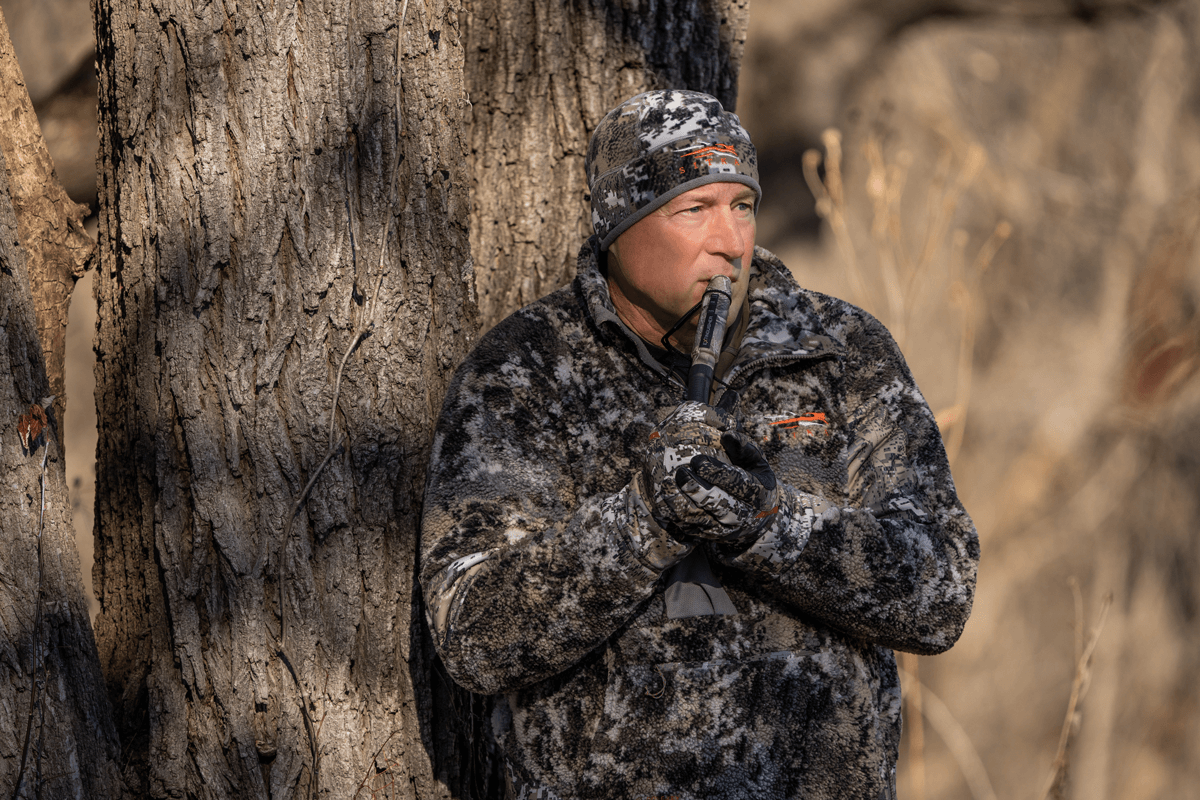
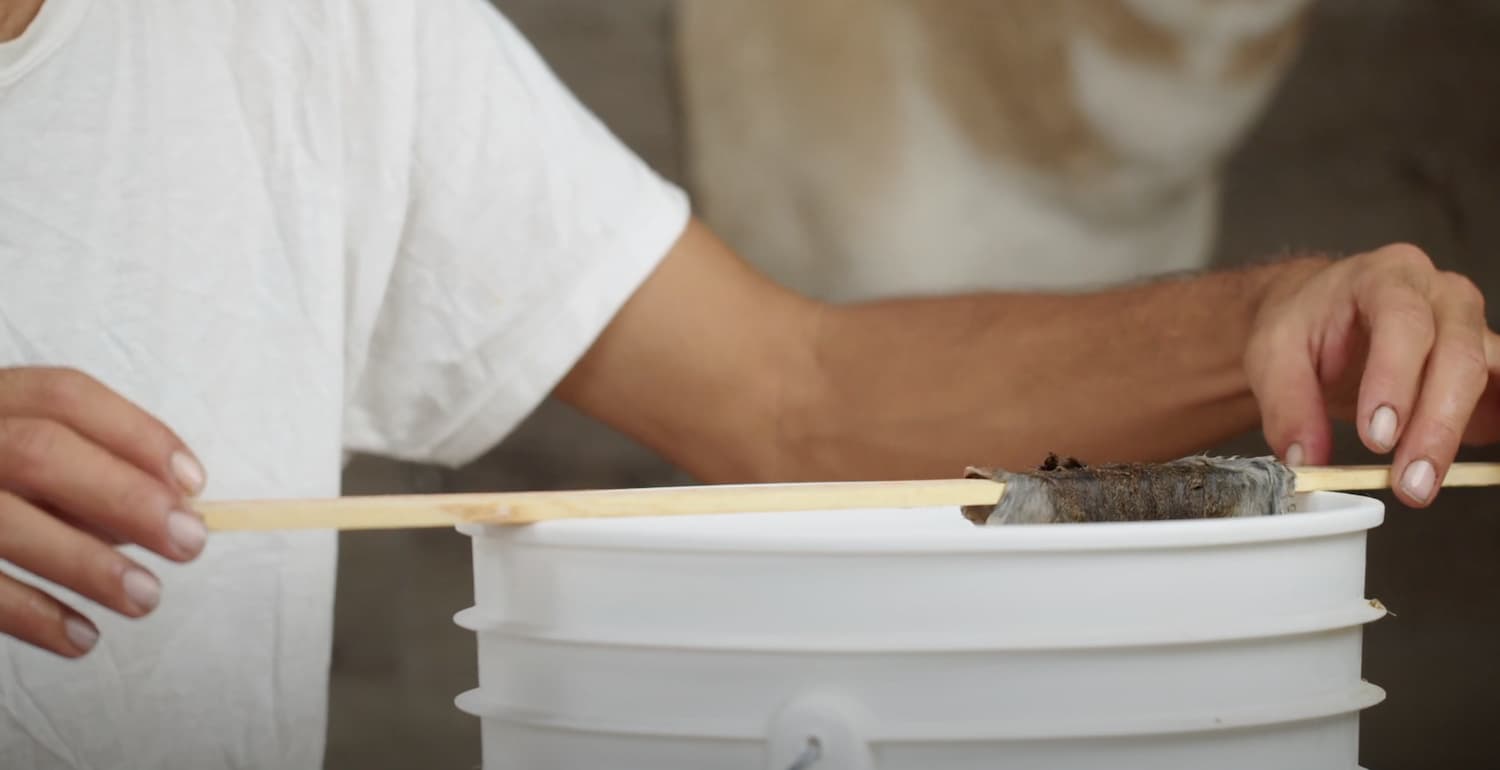
Don’t be afraid to use calls during the latter portions of deer season. However, when doing so, focus more on soft contact grunts and doe bleats. (Illusion Systems photo)

The rut is over. The majority of deer season is behind us. The late season is here, and soon, it’ll be a distant memory, too. But for now, we still have tags to fill. With dropping testosterone, and months of heavy hunting pressure, it’s a different game.

So, it begs the question, should you tap that late-season deer on the shoulder? Or completely stay off its radar? Well, it depends. But most of the time, it’s probably best to hit the mute button.

Late-Season Dynamics

Mike Dukart, CEO and owner of Illusion Systems, and J.J. Dukart, president of The Deer Society, are both seasoned whitetail hunters and experts in whitetail vocalization.

Naturally, it was a breath of fresh air when these guys — who make a living selling grunt tubes (and other deer gear) — advised caution on calling to pressured and late-season bucks. That kind of genuineness and honesty can be rare in business, and it immediately captured my attention.

Of course, most states’ gun seasons fall in November and December. That translates to a lot of applied hunting pressure throughout the last two months of the year. It takes a toll on deer, and these animals respond to that.

Bucks can be aggressive during the late season, too. However, it’s usually in the form of body language, not vocalizations. (Josh Honeycutt photo)

“In Minnesota, gun season opens up when they start becoming the most boisterous and active (pre-rut and rut),” Mike says. “All of this human pressure (and guns) that’s going on in their normal habitat completely changes their behavior. They get skittish. We don’t get to interact with them a whole lot because they’re overcalled and over-pressured. They go nocturnal. Seeing a deer and trying to naturally call or communicate with it is 100% harder once they start getting pressured.”

However, to minimize impact on their own grounds, Mike prefers to leave his hunting properties alone during times of heavy pressure. This gives deer a safe zone, because he’s certain that whitetails almost always filter into areas that offer less pressure. They also respond better to calling later in the year.

Alternate Forms of Communication

As deer transition into the post-rut and beyond, they become much less vocal and less outgoing. While deer were very extroverted throughout the rut, they’re becoming the introverted beings they always are after the breeding season ends, and after being hunted hard.

That doesn’t mean they aren’t communicating though. Mike and J.J. both agree that deer still convey messages to one another.

“I think scent and visual cues are some of the things that pick up during (and after) gun seasons,” J.J. says. “Once all of that pressure kicks in, from a communication standpoint, the more natural you can be the better. Deer have been on edge for weeks. Human scent is all over the woods. The rut is winding down. Their minds are a little clearer than they were a few weeks ago.”

In other words, it’s probably best to lay off the grunt-snort-wheezes, and other battle cry and war whoop vocalizations, too. Both Mike and J.J. notice other forms of communication really pick up after deer have been pressured.

“One of the things that I’ve been picking up on with trail cameras, and also just throughout the years, is the amount of communication via scent, scrapes and rubs,” Mike says. “This definitely increases and becomes the dominant way for them to communicate. Bucks pee on everything. They’re rubbing glands on everything they can find. They’re not only letting the does know they’re there but also letting the other bucks.”

Of course, the rut kickstarts this behavior. Testosterone levels are rising. Does are pushing away fawns. Every deer in the woods is freaking out and wondering what’s going on in the world, as the Dukarts put it.

Calling-Late-Season-Mock-Scrape.jpg
Deer communicate via scent year-round. Make some mock scrapes to hunt near and post trail cameras over. (Josh Honeycutt photo)

That said, by the late season, dropping testosterone, hunting pressure and lack of will to confront rival bucks causes these deer to get quieter. But they definitely still communicate via body language and scent.

“By smelling each other, they know exactly who it is,” Mike says. “So, if that buck comes in there and makes a rub or hits that scrape, other bucks know who it is, and if he isn’t from that area.”

These guys create situations to take advantage of this behavior. They make mock scrapes in key areas that are advantageous for hunting, or near cameras where they can gather intel.

Deer use posturing and other varieties of body language to transfer messages, too. Short of using a decoy — which isn’t a common late-season tactic — this isn’t actionable information for hunters though.

Making the Right Late-Season Call

The truth is that deer hunting isn’t black and white. It’s highly situational. You might see a deer during the late season that’s acting extremely aggressive. That’s generally the exception and not the rule, however. More times than not, it’s better to be passive in the vocalization department.

“I would call less frequently,” Mike says. “I wouldn’t challenge deer or put a lot of emotion into anything. Even if I did an estrus bleat, it wouldn’t be a crazy or wild one. If anything, I’d try to mimic that hunter mentality of the does coming back together with the fawns. There’s a little bit more communication going on there. Create an illusion of deer that a buck might want to come check out.”

Generally, that comes in the form of soft doe and fawn bleats, and subtle grunts. Don’t be very loud, though. Keep it quiet, and keep the frequency to a minimum. That’s normal behavior for this time of year.

J.J. Dukart poses with a great big buck. (The Deer Society photo)

Like Mike, J.J. highly encourages keeping things natural, such as light sparring or soft contact grunts. Given that the occasional adult doe or doe fawn might enter estrus late in the season, he even gives the nod to a few doe estrus bleats. He certainly stresses keeping the volume down, though.

“Start low enough that maybe they don’t hear you, and then work your way up,” J.J. says. “A lot of people call too loud and put deer on the defensive. It spooks and educates them.”

Calling aside, there are certain tactics that work better during the late season. Mike acknowledges this, and that’s pretty cool.

“At this time of year, as far as calling goes, I would try more to get deer patterned,” Mike says. “They’re settling into a place where they’re around food, and [where] they feel more comfortable. They’re going to [create] a pattern during the late season. I would focus more on that, and be aggressive on getting into position to get a shot at that deer than I would about trying to call a deer into a stand that’s been there all year long.”

Enough said.

SOLVED: What is the best shot size for Snow Geese?

0

The best snow goose loads are those that perform well across a wide range of conditions and provide knock down power to harvest birds cleanly. With snow goose hunting, these factors almost always come down to shot size selection.

The best shot size for snow geese is BBB steel shot. Why? Because a good patterning load of BBB steel shot contains enough pattern density and energy to consistently harvest snow geese at up to 50 yards or more. A 1.5 ounce load of BBB shot contains 91 pellets and enough energy density to retain at least 300 feet per second (FPS) out to 55 yards. My favorite load is the Kent 1 9/16 oz. BBB load.

In this guide, we’ll take a look at some of most popular shot sizes for geese and discuss what makes BBB steel shot the most effective.

Most Popular Shot Sizes for Snow Geese

Steel shot size selection for snow geese can range anywhere from #2 shot all the way up to T-shot. With such a wide range of shot sizes, it can be confusing when trying to determine which shot size is the best. The typical shot sizes for snow geese are #2’s, #1’s, BB shot, BBB shot, and T shot.

Shot Size/Pellets Per Ounce/Max Distance

  • #2 shot – 124 pellets – 40 yards
  • #1 shot – 102 pellets – 43 yards
  • BB shot – 72 pellets – 45 yards
  • BBB shot – 61 pellets – 50 yards (Best Shot Size)
  • T shot – 52 pellets – 55 yards

Snow geese aren’t the toughest of birds, so cleanly harvesting them doesn’t require large shot sizes. I’ve even used #4 shot on snow geese that were decoying close and it worked perfectly fine.

The problem with small shot though is that it doesn’t work well as an all-around pellet size. Most snow goose hunts require varying degrees of distance, angles, and other factors that work against your load the second it leaves your barrel.

Related: Need a new choke tube? Check out the list of the top performers here.

I’ve found BBB steel shot the best combination of pellet density and energy down range to cover just about any shot you should be taking within reason. It has the range for both decoying birds and those hanging up on the edge of the spread that won’t fully commit. BBB shot also has the energy to cleanly pass through snow geese resulting in less cripples and sailer’s that you have to waste time chasing.

Why BBB Steel Shot Is the Best Shot Size for Snow Geese

When you sit down and compare BBB steel shot to other shot sizes, the differences are noticeable.

  • BBB shot contains 61 pellets per ounce, or around 91 pellets for a 1.5 ounce load. This is plenty of pellets for a dense 40-50 yard pattern through an aftermarket choke.
  • Larger shot like BBB retain enough energy for shots around 50 yards or more allowing you to harvest more birds.
  • The energy density of large BBB pellets insures that birds will be harvest cleaner and reduce the amount of wounded birds.
  • BBB shot gives you the most opportunity to harvest snow geese as it’s ballistically superior for constantly changing hunting conditions.

Here is a great clip on how to pick the right pellet size for snow geese

Features to look for in the best snow goose shotgun shell loads:

  • Adequate pellet densities for the situation you’ll be hunting in. If you only shoot decoying snow geese, then the high pellet density loads of #1 shot will work well. For an all-around snow goose load, BBB’s work the best.
  • Shotgun shells above 1400fps work better. The best loads are 1600 fps or higher with steel shot.
  • Loads that pattern well with your shotgun.
  • Zinc coated pellets for corrosion resistance.
  • Sealed crimps to prevent water intrusion.
  • Hulls that cycle well with your shotgun. Some work better than others.
  • If you’re looking for the best snow goose ammo, check out our top picks here.

Popular 3 inch and 3.5 inch Waterfowl Ammo

About Pellet Sizes and Pellet Density When Choosing a Goose Load

Pellet size and density are both factors you should consider when choosing which snow goose load to shoot for the spring conservation season. An increase in pellet density will result in a decrease in pellet size and an increase in pattern density.

Example: If you normally shoot BB steel shot, you can switch to #4 Hevishot for a load that has similar ballistics in both range and pellet energy, while gaining 120 pellets.

Steel Shot Vs. High Density Shot – Which is better?

  • Steel Shot – Steel shot density is 7.9 g/cc and is the cheapest snow goose load you can buy. It works well for decoying birds, but lacks long range capabilities.
  • High Density Shot – High Density Shot comes in a wide range of materials and alloys that include Bismuth, Hevishot Alloy (Nickel, Tungsten, Iron), and Tungsten. High Density Shot is basically any shotgun pellet heavier than steel. Pellet densities range from 9 g/cc to 18 g/cc. High density pellets are the best shot type for long distance goose loads.

I’ve used both steel shot and high density loads for snow geese and my preference is high density. Why? Because the pattern density and range of heavier than lead loads is unmatched.

Steel shot is currently the lightest material used for harvesting waterfowl in the U.S. and it loses its energy really quickly down range. It also requires larger pellet sizes to retain energy, which decreases pattern density.

The best thing about steel shot is that it’s affordable and if you go through a ton of shells each season it’s more economical.

High density loads like Hevishot, Bismuth, and TSS are ballistically superior to steel in every way. Since the pellets weigh more, you can get the same ballistics out of smaller pellets, thus increasing your pattern density and putting more pellets on the birds.

High density loads pattern tighter, hold their pattern longer, and let you extend your range further out so you can cleanly harvest birds that hang up just out of range of steel shot. The major downside is cost, as Tungsten based loads are considerably more expensive than steel shot.

If money is no concern, high density shot makes for the best snow goose loads you can use. I’ve written about my top 10 tips for having a good snow goose hunt, and shooting high density loads is an important factor.

The Gaining Popularity of High Density Shot for Goose Hunting

When lead shot was outlawed for waterfowl hunting in the 1970’s, the only other option at the time was steel shot. Since then, shotgun shells for waterfowl have drastically improved to provide dependable loads that work well across a wide range of waterfowl hunting situations.

This year is no different, and the gaining popularity of high density loads for geese is now greater than ever. Between Hevishot, TSS, and Rio Bismuth shot, there’s a high density load that fits almost everyone’s budget and hunting needs.

As high density loads become even more popular, I expect the options to increase even further. High density loads are superior to steel shot in every way. Spend one season shooting it exclusively and it’s difficult to go back to steel shot.

But if you must shoot steel shot for snow geese, try BBB on your next hunt and see how it performs for you. I’ve shot many cases of it, as well as other steel shot sizes, and it is the best all-around pellet size I’ve found. If you want to try high density shot, try Hevishot #2’s for the best snow goose load ever made.

A quick chat with Field & Stream’s David E. Petzal

0

David E. Petzal is one of Field & Stream magazine’s shooting sports experts and is considered a top-rated writer in the field of guns, hunting, and shooting. That said, he leaves few topics untouched and has delighted his reader base for more than 50 years.

Petzal began at Field & Stream in 1972 as a managing editor. In ensuing years, he has held half a dozen different titles with the brand, and since 2006 has been strictly a writer, covering all manner of outdoor-related subjects, but specializing in guns and hunting.

He has pursued game all over North America, most of Africa, Europe, and New Zealand, and written about it extensively.

Petzal, who now hails from Cumberland, Maine, has written some popular books on guns, shooting, and hunting. The Total Gun Manual, co-written by Phil Bourjaily, is considered an essential read for anyone curious about different gun characteristics and for those wishing to improve their hunting and shooting skills.

Outdoor News: Describe your years growing up. Did you get to spend much time doing the outdoor sports that led to your career? Were you interested in journalism during the formative years or did that come after high school?

Petzal: I grew up on a farm in what was then an uncrowded part of New Jersey. We had a lot of land, and I roamed it every day after school, armed with either a Bear bow (60 pounds, much too heavy) or a Sheridan air rifle.

It was around the time I was 12 that I started reading Field & Stream, which was 25 cents at the soda shop. I was uninterested in writing about anything.

That didn’t come until much later when I got my first job on a magazine. I wrote a piece called, “A Bowhunter’s Guide to Rifle Shooting,” and when it came back in galley, and I saw my words in print, I was hooked.

Outdoor News: How would you describe your “paying your dues” period before joining Field & Stream?

Petzal: I paid my dues on that first job, on a little magazine titled Guns and Hunting. I was paid so little that I won’t tell your readers what it was, they wouldn’t believe me.

Bob Elman, the editor for whom I worked, was a master of both writing and magazine editing, and a perfectionist to boot.

If I made a mistake, the whole office knew about it, so I stopped making mistakes. I didn’t enjoy this, but I had the sense to realize that I was getting an education you could not buy. I stayed for 4 1⁄2 years, and stayed friends with Bob for the rest of his life.

Outdoor News: Your initial focus with Field & Stream was editor. Then you shifted into writing. How did that happen?

Petzal: There was never a decision as such. I started writing the Shooting Department every other month in 1981, and after a while I caught on with the readers and started writing about other subjects. And by the late 1990s, it dawned on everyone that I was now a writer as opposed to an editor, so I dropped the title of executive editor and became features editor.

Titles among editors is largely like virtue among whores. Your title doesn’t mean a lot unless you’re editor in chief.

Outdoor News: You focused on guns and hunting. Why the focus?

Petzal: I am damned if I know.

When I was 10 or 11, or something like that, I crawled up into the top of a closet and there, cased, was a Savage Model 99 and an M-1 Carbine that belonged to my uncle, who did a little hunting. It was like laying hold of a live electric cable. I was never the same.

Guns are the most interesting thing I know of. Same with hunting. I simply found everything about it fascinating. It’s not something you can explain rationally.

Outdoor News: Through your many years of gun journalism you’ve seen more that a few transitions from certain types of guns and ammo to others. Was this latest shift toward AR-style rifles something that was predicted? Or was it a surprise to those that have been involved in the shooting sports for many years?

Petzal: It was a surprise to me, sure enough. You have to remember that Colt began selling the first commercial ARs in 1965. They sent one of the very first to Larry Koller, who was the shooting editor of Guns and Hunting, and he loathed it and gave it to me.

I don’t think ARs really caught on until about the mid-1990s, which is a long time for something to go unnoticed. I think that very gradually, people became aware that, ergonomically, it was a couple of centuries ahead of everything else, and that you could build one (or have one built) to your own specs without spending a fortune.

I should add that I’ve seen more sheer BS printed and spoken about ARs than all other firearms combined, starting during Vietnam, when we were told that 5.56 bullets “tumbled through the air” on their way to the target.

Outdoor News: You are well known for writing some popular books on the shooting sports. If there was one piece of advice that you delivered to the readers of those books and you believed every shooter must know, what was it?

Petzal: For shooters, I’ll quote my late friend G. Sitton: “All the good shooters I know have the nervous systems of reptiles.”

Effective shooting is comprised of self-control, hand-eye coordination, and concentration, of which the most important factor is the first one. For hunters, it’s all about patience. Saxton Pope, the great bowhunter, wrote of his Yahi Indian friend Ishi that the bows Ishi made were not much good, but that Ishi had patience that was almost beyond comprehension, and that gave him all the odds he needed.

Outdoor News: During your long career you have hunted in regions of the world that many hunters only dream of. What was your favorite hunting destination and what species were you hunting?

Petzal: I love Africa above all else. When I was 10, I read a book by a professional hunter named Alexander Lake entitled Killers in Africa and I was hooked.

I enjoyed everything about Africa except tsetse flies, which are the worst insects in the world, but my favorite animal is the Cape buffalo. If you become bored on a Cape buffalo hunt, there’s something seriously the matter with you.

Outdoor News: What’s the future hold for David Petzal?

Petzal: What’s in store? Who knows? I’m grateful that I can still shoot, and still write. If I can keep it up, that’s all I can ask. Hardly anything I have ever done has worked out as I expected.

Do Eagles Eat Raccoons

0

Due to their status as natural predators, eagles are at the top of the food chain. To live, several eagle species will eat various birds and mammals. Are you curious to know that do eagles eat raccoons or not?

Yes, eagles eat raccoons. Eagles prey on raccoons because raccoons are one of the most likely hoofed mammals of eagles. A raccoon can be killed by an eagle attacking it from above, but raccoons are pretty resilient creatures in person.

This article will study the different types of eagles to know if they eat raccoons. So, keep reading the article further.

Eagle And Raccoon Relationship

Eagles and raccoons both have predator-prey-type relationships. In the wild, an adult eagle is without any other natural predators. However, hawks, owls, raccoons, wildcats, and other predatory creatures may feast on the eggs and chicks of eagles.

Although eagles also prey on raccoons, raccoons are one of the most likely mammalian predators of eagles. In reality, according to a few studies, the mother eagle is shown on the live broadcast bringing a young raccoon to the nest so that the eaglets can eat. Large owls and eagles will consume young raccoons.

What an eagle consumes is decided by its feet. It is apparent from one glance at an eagle’s foot that such birds are designed for hunting large prey. They are built to catch the target that would be out of reach for most other birds, thanks to their strong legs, feet, and pointed crampons.

Do Bald Eagles Eat Raccoons?

No, bald eagles do not eat raccoons. Depending on their habitat, some bald eagles mostly consume fish, while others primarily consume other birds like gulls and geese. However, rodents like rabbits, calves, and, yes, even cuddly kitties are rarely included on the menu.

Bald eagles can obtain fish, their main food source, nearby rivers, lakes, and marshes where they dwell. Nevertheless, as their numbers increase, bald eagles are extending their territory and even building nests in cities. Dove hunting, tortoises, bunnies, snakes, various small animals, and carrion are other things bald eagles eat.

Since bald eagles typically inhabit freshwater or coastal environments, fish is essentially their primary source of meat. Many people are shocked to learn that bald eagles have strict vegetarian inclinations; they enjoy pursuing trout, catfish, and sardines, but they will also consume crabs and other invertebrates.

Do Sea Eagles Eat Raccoons?

No, sea eagles don’t eat raccoons. White-bellied goose is the primary food source for the sea eagle’s aquatic wildlife, like fish, turtles, and sea snakes. However, it also eats birds and mammals but not raccoons. It is an adept hunter and will take on anything up to Swan’s size.

Sea eagles consume a wide range of prey. All along the water’s edge, sea eagles eat carrion, or dead prey, such as sheep and fish. Smaller birds are harassed, which causes them to drop any food they hold. Sea eagles can forage singly, in pairs, or as a wider family. They frequently take food from other birds because they are evil eaters.

While sea eagles dangle from a considerable height and then quickly descend to the sea, they fish differently, swooping low above the water before momentarily hovering and seizing the fish.

Do Snake Eagles Eat Raccoons?

Yes, snake eagles eat raccoons, but they prey on raccoons when they don’t find anything to eat. As its name suggests, the snake eagle, also known as the crested serpent-eagle, is primarily a snake hunter. It seems to favor tree snakes in particular. However, it doesn’t only eat snakes.

Ants, small raccoons, amphibians, toads, animals, worms, small birds, and giant earthworms will also be consumed. Even though they are not resistant to snake poison, these Eagles are among the numerous predators of snakes in the wild. They would pounce on snakes from above, capture them, and then trample them underfoot with their feet.

Eagles are voracious predators that consume snakes, raccoons, rodents, and other birds. Eagles are scavengers that eat animal flesh, and one of their preferred fares is snakes.

Does Crowned Eagle Eat Raccoon?

No, crowned eagles do not eat raccoons. The primary prey of Crowned Eagles are mammals, particularly hyraxes, vervet monkeys, and tiny antelope-like Blue Duiker. Studies carried out in the local municipality region reveal that Hadeda Ibis is also consumed.

The Crowned Hawk-eagle has the strength to kill an antelope that is up to six times its bulk which is just amazing. Despite its hunting prowess, it is not always required for it to take down such large prey.

Along with other mammals, it also eats smaller animals like vervet and blue monkeys, tiny dugongs, klipspringers, rocky kangaroo rats, and Sharpe’s grysbok.

Additionally, it eats reptiles like the Rock Monitor as well as sporadically birds. Crowned hawk eagles have been observed to successfully hunt huge primates like baby bonobos and teenage maned wolves.

How Does An Eagle Catch Raccoon?

Raccoons are typically caught and killed by eagles with their claws, after which the pieces are torn out and either eaten by the eagle or fed to the eaglets. Most eagles often store one to two tons of food in the crops, a storing area located just behind the eagle’s chin when food is abundant.

After spotting the raccoon, they dive at a progressive angle and snag it in a vice-like deadly grasp with their formidable talons. Raccoon, which can frequently weigh only half the weight of the eagle, is what they take off with. The prey is torn apart by the enormous, serrated beak.

Eagles don’t consume their prey before regurgitating it to their chicks as some other birds do. Instead, they just use their talons to carry the prey to the nests, shred it into pieces, and afterward offer it to their chicks to eat.

Conclusion

Eagles are adaptive hunters who hunt a variety of species using their exceptional sight, speed, and flying, as well as their powerful initial strikes. These predators almost hunt anything that an eagle can kill with a single, strong stroke from above.

If the prey is tiny enough, they will either bring it to their nests from there or consume a small amount of it there and carry the rest of it away.

Most eagles remain at the top of their particular food chains due to extremely sophisticated hunting techniques. The dominant hunter of its environment is almost always an adult eagle.

References

Henson SM, Desharnais RA, Funasaki ET, Galusha JG, Watson JW, Hayward JL. Predator-prey dynamics of bald eagles and glaucous-winged gulls at Protection Island, Washington, USA. Ecol Evol. 2019.

Elliser, C. R., Edison, C., MacIver, K., & Rust, L. B. (2022). Kleptoparasitic interactions by bald eagles (Haliaeetus leucocephalus) during marine mammal foraging events, Behaviour (published online ahead of print 2022).

Ekblad, C., Tikkanen, H., Sulkava, S. et al. Diet and breeding habitat preferences of White-tailed Eagles in a northern inland environment. Polar Biol 43, 2071-2084 (2020)

How To Preserve A Deer Tail – 6 Easy & Simple Steps!

0

Are you in need of tips on how to preserve a deer tail for your next project?

If you are looking to use it as a lure or any craft project, then our step by step guide will help you out. Discover this easy DIY guide to clean and preserve that precious deer tail. Beginning from the carcass and up to the slab, we’ll teach you everything you need to know.

Let’s get started!

How To Preserve A Deer Tail

Just a heads up – the tips on how to preserve a deer tail that you are about to read is focused more on the simple preservation of this material.

It does not involve tanning; instead, this is the step that you will start with before you tan the deer tail. By preserving the tail, you can get the fur perfectly set. Hence, you can prevent bugs from developing into the material.

Another reason why you would want to learn how to preserve a deer tail is to keep the material intact. Otherwise, it is most likely to get torn over time.

Are you all set to preserve that deer tail? Let’s get started with these tips:

1. Remove the tail.

Naturally you want to first remove the tail off the deer. Cut the tail off depending on the length that you prefer. Some folks snip it at the base of the deer’s buttocks but you can decide on how long you exactly want it to be.

For this step, you will need a pair of utility knife, pliers or razor. Be sure to get the bone out of the tail, or that hard portion. You can do this by slicing it right down the middle.

2. Start the cut.

Next step, you will now have to make your cut. With the tail no longer intact the bum of your deer, lay it flatly on a clean surface.

Keep the bottom portion up with the hairs separated. Then, cut precisely right along the entire length of the tail or over the bone.

You will want to make sure that the hair is parted while you cut to the top. This will help to prevent losing much of the fur or causing some damage to the tail’s overall appearance.

Once you have opened the tail, pick the bone out using your pliers. You need to be very careful with cutting the fat right from the bone’s base portion.

As you hold the hide down, gently pull the tail right off. In some cases, cutting the fat that sticks to the bone may be necessary. Do this as gently and as firmly as possible until the bone is completely out.

3. Clean the hide.

At this point, you are now ready to wash and clean the hide. You only need to use some dish soap diluted in warm water.

Fill up a basin with warm water and mild detergent. Next, submerge the tail carefully and rinse off blood or dirt that may be stuck in it.

Rub it gently with soap but be careful not to tear any piece. When you are done soaping it, you need to rinse it with lukewarm water until there is no more soap left on it.

4. Dry the tail thoroughly.

After you have cleaned the tail, it’s now time to dry it all off.

Lay it on a wax paper and grab your hair dryer to gently dry out the hair and skin. Be sure that it is completely dry.

You may also use some paper towels to further dry it. Sometimes, there’s some moisture left on the skin after using a hair dryer, so paper towels or some dry cloth would come in handy.

In case some fat remains intact, simply scrape this portion off with a serrated knife. But be very gentle and careful since you would not want to cut the skin.

6. Add borax to the tail.

You may be wondering why you need to use borax to the tail. Well, for the simple reason of protecting it from bacteria that might develop on the skin.

Since borax is antibacterial, it helps to apply it on the tail to fully preserve and protect it from damage.

With the tail laying flat and cut open, coat the inner portion with a thin layer of your borax. You may apply as much as necessary, which will coat the flesh that’s fully exposed.

But if you are preparing the deer tail for tanning, you may want to use non-iodized salt instead of borax. Apply a thick layer of non-iodized salt on the flesh until it is fully coated. Let it dry ad add a bit more salt as needed for this salt curing process.

An additional tip when preparing the material for tanning is by making sure all membrane and fat are removed. When you leave even the slightest hint of fat on the skin, this will give the tan an odd color while reducing pliability.

Let the tail coated with borax sit for a few days in a dry and cool place. You need to be certain that the skin is absolutely dry before you use it for your desired purpose.

Alternate Technique On How To Preserve A Deer Tail

Perhaps it doesn’t really matter as much without you if the tail is flexible or pliable. In this case, you may go for the dehydrator technique.

A food dehydrator is just what you need to really dry the material out. But at the same time, it will completely dry the flesh out, which may not be ideal for some people.

You can simply leave the tail in a food dehydrator for a few days. This will completely dry the material, yet you will no longer be able to reform it to the way you want without causing the hide to break.

What To Do With Preserved Deer Tail

what to do with preserved deer tail

Now that you have completed the process of preserving deer tail, you may be curious to find out what exactly you can do with it.

Well, if you are an angler, you can certainly use the deer tail on jigs. This is a fine material that is strong and durable, which is perfect for jigs to use on fishing.

But if you are not into angling, you can also use the hair of deer as a paintbrush. You will love the durability and steadiness of the tail and the brush works for your ceramic glaze.

And lastly, you can make small purses or dice bags for the tail. Just put the parts together and add a smooth lining or just leave it as is – leathery and all.

No matter what you decide to do with your preserved deer tail, it is sure to be a great project to work on with amazing results!

Final Thoughts

Preserving deer tail may initially seem to be a complex and intimidating process.

But by checking out our quick guide on how to preserve a deer tail, now you understand that it is actually quite simple and basic.

With only a few tools and some know-hows that we have just shared with you, the entire process should go as seamlessly as possible.

We hope this post has been helpful, and now, you are ready to start preserving deer tail for your next DIY project!

How To Tan a Squirrel Part 1: Fleshing, Salting, & Rehydrating

0

This article will go through the process, step-by-step, of how to flat tan a squirrel skin using the Advanced Tanning Solutions Tan-a-Fur Skin Kit. We are demonstrating on squirrels, but the process is similar for other fur skins.

The Tan-a-Fur Skin Kit includes everything you need to tan a life-size mountain lion, a medium bear, or several small animals. It’s a perfect kit for beginner or experienced home tanners and DIY taxidermists. You’ll get a professional-quality result with a simple, all-in-one experience.

The kit includes:

  • Fleshing/Shaving Tool
  • Degreaser
  • Pickle Tan
  • Fur Oil
  • Softening Stone
  • Silk Powder
  • Dust Mask
  • Non-Latex Disposable Gloves (2)

You will need table salt, bleach, baking soda, a plastic bucket, and hot water.

Before You Begin

The skinning process should already be done. We like to say, “treat it like you’re going to eat it.” Meaning, get your animal dressed, skinned, and on ice (both meat and hide/skin) as soon as possible after the animal is harvested. This will prevent bacteria from starting to grow which will cause hair slippage, specially with small game, like squirrels.

Step 1: Fleshing a Squirrel Skin

The following process is basically the same for any of your small critters with fur. Even though you’ve skinned your squirrel, there’s likely a little bit of membrane and flesh that remains attached to the skin. The first step is to remove as much of that as possible to achieve a soft and supple tan.

Since you’re making a flat skin, you won’t need to do any face turning. Face turning is the process of turning the face inside out to flesh that area. It also involves splitting the nose, ears, and lips and then turning the ears inside ou (for larger animals)t. This is done for taxidermy purposes if you were going to mount your tanned hide or fur skin.

Using the fleshing tool that comes in the kit, gently scrape, peel, and pull away all the little bits of flesh and fat that remain on your skin. Fleshing always works best when you go with the grain of the hair, so start at the head and work your way to the tail. Feel free to also use your fingers to pull off loose pieces. Use the pointed edges of the fleshing tool to get into tighter areas, like the tail, especially for smaller rodents, like squirrels.

☞ This type of fleshing is called “table fleshing.” The rounded edge you see on the tool is for pipe fleshing. With pipe fleshing, you would lay your skin over a pipe, stretch it tightly, and then use that rounded edge to scrape the flesh. That type of fleshing isn’t necessary with squirrels, but you can use pipe fleshing for beavers, raccoons, possums, and other greasier, fleshier animals.

Removing the musk glands

Removing the musk glands

Most fur-bearers have little sacs, called musk glands near the tail. They are oily, greasy, and don’t tan well so they need to be removed. Simply pull them away using the edge of your fleshing tool as shown.

How do you know when your hide is clean?

You’ll know your hide is clean when you see a blue color on the skin. If you see the blueing, it means there’s no flesh there to scrape off. But dark areas and white areas are flesh and fat — those need to be removed.

clean hide

Once you’ve removed all the flesh, the musk glands, and all the membrane from your hide and you’re happy with it, you’re ready to move on to the next step — salting.

Step 2: Salting a Squirrel Skin

salting a squirrel skin

The salting process removes all the fluids, oils, fat, and non-tannable proteins from your skin. It will dehydrate the skin and help to lock the fur in to prevent hair slippage — nobody wants a bald squirrel!

To salt the skin for a flat tan, flip the face open and add a generous amount of salt to this area then fold the lips in. Next, apply a heavy layer of fine table salt over the entire skin so you can work it into the edges. Make sure every bit of the flesh areas gets salted. If you’re worried about staining, use non-iodized salt.

salting the squirrel skin - face

Salting the tail

After you’ve salted the squirrel’s body and face, open the tail all the way down and apply salt to fill in the crease. Next, pinch the tail together, just to keep all the salt in the tail. After that, you’ll flip the tail so that it rests on top of the body. Finally, add additional salt to cover the tail, just to make sure the whole tail gets nice and dry.

salting the tail 1

salting the tail 2

Let your skins dry in salt overnight for about 12 hours. Larger fur skins need 24 hours to dry. The next day, shake off the excess salt and if the skin still feels damp, re-apply another layer of clean salt and let it sit again overnight.

shaking off excess salt

When your skin is dry, you’re ready to move on to the next step, rehydrating your squirrel skin.

Step 3: Rehydrating a Squirrel Skin

Now that your squirrel is dry salted, it’s time to rehydrate it. You rehydrate your hide by putting it in a rehydration bath that consists of the following items PER gallon of hot water. Since the squirrels are small we mixed just 1 gallon of rehydration solution, but larger skins will require a bigger bath:

  • ¾ cup of salt
  • 1 teaspoon of Advanced Tanning Solutions Degreaser (in the Tan-a-Fur Kit)
  • ½ teaspoon of bleach

Mix to dissolve the salt and let the bath cool to room temperature. Do NOT put skins in hot water as this will cause bacteria to grow resulting in hair slippage.

Shake off the loose, excess salt. Don’t grab any chunks of salt and pull them, you will risk pulling out fur with it. Instead, crush or pinch the salt, and it should fall off easily. This goes for the salt that’s packed into the tail and face area, too.

You’ll notice the hide is dry and stiff. Next, dunk your skin in the rehydrating bath, much like you were dunking a cookie in milk. When it starts to soften and bend, you can let your skin gently sink into the bath.

rehydrating squirrel skin

Soak your skin in the rehydration bath until it is soft and supple. You’ll notice some layering of color in the water as a result of the degreaser working as it pulls the dirt and blood out of the skin. The result will be a soft, fluffy fur rather than greasy fur.

After rehydrating

When the skins are relaxed, remove from the rehydration bath, give it a very gentle squeeze to remove excess liquid, and then hang it — fur side out — over a bucket to drip dry.

removing the skin from rehydrating bath

You can see the Degreaser working as it pulls the dirt and fluids out to the bottom of the rehydration bath.

hanging skin to drip dry

In about 15 minutes, your squirrel skin will be ready for pickling. To continue, see the next guide in our series How to Tan a Squirrel Part 2: Pickling and Shaving.

Step-By-Step Guide to Fixing Poor Arrow Flight

0
Step-By-Step Guide to Fixing Poor Arrow Flight

Every bow requires some degree of tuning to achieve maximum forgiveness and accuracy. Performing additional super-tuning steps, such as yoke-tuning or moving the cam’s position on the axle, can truly boost arrow-flight performance and your confidence as a bowhunter.

Question: My bow continues to paper-tune with a tail-left tear. I’ve tried moving my rest to the right, to the left, and I’ve adjusted the string-yoke harnesses as suggested by a friend. But I’m still getting a ragged tear and lousy broadhead flight. Can you help? — Alex D., via e-mail

Answer: Bows that don’t tune easy can be frustrating, and I’ve even had a few that wouldn’t tune at all! However, modern-day bows are manufactured with exceedingly close tolerances, so it’s a matter of making a few small adjustments to solve the problem. It could be as easy as resetting the cams, so they are synchronized and rotating plumb with the bowstring. Or you may have to move one or both cams to a different position along the axle by adding shims (small spacers) to one side of the cam and removing from the other.

Such steps are often referred to as “super-tuning,” but these actions simply place the bow’s powerstroke directly in line with the arrow. Shooting style varies, so although the bow may tune perfectly in a shooting machine, this may not be the case for a particular archer.

To perform these tuning steps, you need to have access to a quality press and some basic archery tools so you can work systematically until the flight issue is cured.

When tuning a bow, don’t skip the basics. With a persistent tear like yours, be sure to first check for fletching contact. Spray aerosol foot-powder across the arrow’s fletching area, then shoot it into a firm backstop. Any “smears” of the white powder indicate vane contact with the rest, cables, or riser — a common culprit of poor arrow flight. Also, don’t tune a bow without using several shafts to see if the tears remain the same. If spine varies from one arrow to the next (trust me, not every arrow is made the same), you’ll see various types of tears. Twisting the nock in one-quarter increments could also produce different tears.

Once the basics are covered, move on to synchronizing the cams. The cables should strike the cable stops at the exact same time. Next, assess each cam’s vertical position while at full draw. Cam lean is checked by using a bow-drawing device (or draw board) to allow an easy evaluation of how the cams are oriented. By laying an arrow across the surface of the cam, you can determine if the cam is in line with the bowstring. If the arrow points off-center to the left or right, then cam lean is present. If a draw board is not available, draw your bow and have a friend assess the cams’ positioning. To fix cam lean, adjust the string-yoke harness by twisting one side and untwisting the other, allowing the limb’s tip to equalize the load.

If the left tear persists, try moving your rest to the right, but oftentimes this only works for a very small left tear. Rest adjustments are better for “micro-tuning” groups downrange and adjusting the points of impact for fieldpoints and broadheads. Overall, it’s better to maintain the proper arrow centershot position as recommended by the bow’s manufacturer. This provides improved vane clearance and allows the arrow to stay in the center of the bow’s riser, limbs, and grip for optimum performance.

With large or persistent tears, shimming one or both cams will eventually eliminate the tear (I prefer to yoke-tune first). When repositioning the cam, always move it in the direction of the tear. Depending on your bow’s spacers, you may have to purchase new shims with varying thicknesses to make the necessary horizontal adjustments. Lancaster Archery and Last Chance Archery sell relatively inexpensive spacer kits and tools for this type of tuning.

There are several ways to tune a bow, but I believe paper-tuning is the most precise way to capture irregularities in arrow flight because it examines flight issues only a few feet from the bow. To improve paper-tuning even more, try using a bare shaft. To simulate the weight of vanes, wrap the rear of the shaft with a piece of electrical tape. The bare shaft will expose the smallest rips in paper so you can improve consistency downrange. Any small accuracy adjustments at this point are resolved by moving the rest or D-loop in 1⁄16″ or 3⁄32″ increments until maximum accuracy is achieved.

Do Deer Make Clicking Noises

0

you ever find yourself wondering why deer make certain noises? Have you ever heard a clicking sound coming from a deer? If so, you are not alone. In this blog post, we will explore the reasons why deer make strange noises, and specifically why they make clicking sounds. We will look at the possible scientific explanations, as well as some of the traditional beliefs surrounding deer vocalizations. the end of this post, you will have a better understanding of why deer make clicking noises and how to distinguish them from other vocalizations.

What Are The Clicking Noises? – Investigating The Different Sounds Deer Make

Have you ever heard a clicking noise while walking through a forest or field and wondered, “What are those clicking noises?” Well, you’re not alone! Many people are surprised to learn that deer can make a variety of sounds, and one of these is a clicking noise. While it may sound strange, these clicks are an important part of the deer’s communication and are used to signal danger or to let other deer know their location.

So the next time you hear the clicking noises, you’ll know that the deer in the area are communicating with each other!

How Deer Make Clicking Noises? – Exploring The Science Behind Deer Noises

Have you ever heard a clicking noise while out in the woods and wondered where it was coming from? It’s likely that it was a deer making the sound! Deer are known to make clicking noises that can travel through the air, and the science behind this phenomenon is fascinating. understanding the way deer make these sounds, we can gain insight into the behavior of these animals.

So, how do deer make clicking noises? It turns out that deer have an extra layer of soft tissue called the “phonatory apparatus” located in their larynx that vibrates and produces sound. This vibrating tissue is what creates the clicking noises that deer make.

The sound waves created by this vibration travel through the air, alerting other deer to their presence. This clicking noise is a form of communication for deer, and it can help them locate other deer and alert them to potential danger.

Why Deer Click? – Uncovering The Purpose Behind The Clicking

Have you ever been out in the wilderness and heard a strange clicking noise coming from the woods? If so, you may have been hearing the mysterious sound of a deer click. But what is the purpose behind this behavior? Let’s explore the reasons why deer make clicking noises and uncover the mystery of this fascinating behavior.

Deer clicks are a form of communication and are used to alert other deer of their presence. making clicking noises, deer can let other deer know that they are nearby and to stay away from the area.

Deer clicks can also help deer to navigate their environment and find their way back to their home range. Not only do deer use clicks to communicate with other deer, but they also use the sound to ward off potential predators. making clicking noises, deer can alert predators of their presence and alert other deer to potential danger. This form of communication is vital for the survival of deer and is an important part of their behavior in the wild. So, why do deer click? The answer is simple: deer clicks are a form of communication and are used to alert other deer of their presence, navigate their environment, and ward off potential predators. This fascinating behavior is an important part of the deer’s survival in the wild.

What Other Noises Deer Make? – Examining The Range Of Sounds Deer Create

Have you ever heard a deer in the wild and wondered what other noises they make? Deer are not typically known for making loud, boisterous sounds, but rather a range of quieter ones. From grunts and snorts to clicks and bleats, deer can make a variety of noises, each with its own distinct purpose.

While the most common sound made by deer is a loud snort or grunt, they can also make clicking noises. These clicks are generally used to communicate with other deer and can be heard from several yards away.

So, next time you find yourself in the woods, keep an ear out for what other noises deer make – you may just be surprised!

Fun Facts – Interesting Extras About Deer Sounds

Did you know that deer can make clicking noises? While most of us are familiar with the classic “moo” or “baa” of cows, deer are actually capable of producing a unique clicking sound that is distinct from other animals. This clicking noise is made by the deer’s larynx and is used as a way to communicate with other deer.

This sound is often used as a warning, or to alert other deer of potential danger. It’s an interesting sound that is often overlooked, but worth noting the next time you hear a rustling in the woods.

Frequently Asked Questions (FAQ)

1. Do Deer Make Clicking Noises?

Yes, deer make clicking noises, usually with their tongues. This is a form of communication between deer, usually used as a warning to other deer of potential danger.

2. What Does the Clicking Noise Sound Like?

The clicking noise made by deer is typically a loud, sharp, and high-pitched sound.

3. When Do Deer Make Clicking Noises?

Deer make clicking noises mostly when they feel threatened or are trying to alert other deer of a potential danger.

4. Are Deer Clicking Noises Loud?

Yes, deer clicking noises can be loud and can be heard from a great distance.

5. What Else Can Deer Do to Communicate?

In addition to clicks, deer also communicate with grunts, bleats, and other vocalizations. They also communicate through body language, such as posturing and tail movements.

Conclusion

In conclusion, deer do not make clicking noises. While it is true that some animals in the deer family, such as the muntjac, can make clicking sounds, this behavior is not common among deer. The clicking noises attributed to deer are most likely the result of another animal or an environmental noise.

The ‘Wyoming Kangaroo Release’ is Still the Best April Fools Joke Ever

0

The story of kangaroos being released into the Wyoming landscape fooled just about everyone.

On April 1, County10.com announced that the Wyoming Wild Game Department had “released the first of five planned batches of 90 Antilopine Kangaroos into the Wyoming outdoors.”

Project Sage Hopper, as it was dubbed, was meant to increase wildlife-viewing opportunities, while also providing greater hunting options for outdoorsmen and women. The well-written piece had plenty of quotable lines from wildlife officials, as well as links to all of the proper wildlife agencies.

The trouble with the story was that it was a hoax! A wonderful, convincing, magnificent hoax.

The story spread like wildfire across social media, with seemingly only a few astute readers catching onto the chicanery. The majority of people, from all of the comments I read on the various repostings of the story, seemed to have swallowed the tale hook, line and sinker.

Many folks expressed their confusion. “Why would they do this?” they asked.

More expressed their outrage and disgust with the wildlife agencies allegedly responsible for introducing a non-native species into the Wyoming environment.

I shared the story on my own page, Stumpjack Outdoors, and had to actually delete a couple of comments because they were over the top in the vulgarity and passionate anger they expressed.

Some folks decried Project Sage Hopper with declarations that the WWGD’s release of the first 90 kangaroos would surely destroy native animal populations, while others heralded the increased hunting opportunities that would result. Others wondered aloud whether or not the meat from the marsupials would be edible or how they would adapt to the harsh Wyoming winters.

It was truly a convincing hoax. My own wife paused as she read the article, being taken in for a moment. It was gloriously clever.

But alas, the pictures shown in the piece were not of kangaroos being released as part of a Wyoming migration initiative. They were of mule deer, with the featured image being photoshopped to show a kangaroo bounding away instead of an actual collared mule deer:

If people were sold on much of the content of the article a tip-off to the phoniness of it should have been in a final sentence, where the author declared that “A short-list for future proposed introductions include the koala, wallaby and the endangered Tasmanian Devil.”

If you were fortunate enough to also see a follow-up piece published later the same day by The Brine Shrimp, you would have read how the ill-mannered kangaroos were already wreaking havoc with the local population. The roos were allegedly engaged in drunken acts of vandalism, breaking and entering and other acts of mayhem.

The report stated:

Jed Cummings, a Coalville resident said “I went outside today to go to work and noticed broken glass on the ground by my truck. The kangaroos stole a few CDS from my collection. They were pretty selective about what they took. Men at Work, Midnight Oil, AC-DC, Keith Urban, Olivia Newton John and Crowded House CDs. They only took CDs made by Australian bands. That’s when I knew it was the damn kangaroos!”

It makes me smile to think of how beautifully conceived and executed this truly “fake news” piece was. It should make you smile too, even it temporarily fooled you.

Well done and hats off to whoever created this brilliant hoax.

Happy April Fools Day!

Like what you see here? You can read more great articles by David Smith at his Facebook page, Stumpjack Outdoors.

NEXT: RACCOON WILL CLEAN YOUR HOUSE FOR TREATS

WATCH

https://rumble.com/embed/u7gve.v3tp7h/

Where Is the Brisket on a Deer? (And How To Remove It)

0

Many people love meat because it’s a good source of protein. Do you need ideas on the tastiest meat dish for your lunch or special event? You’ll never go wrong with well-cooked deer brisket, as it has a spicy flavor when you serve it hot.

The brisket on a deer lies at the bottom of a deer’s chest, in front of the ribcage. Removing a deer’s brisket involves removing the shoulders, backstrap, and tenderloins and cutting through the cartilage.

The rest of this article will:

  • Delve deeper to explain where to find deer brisket.
  • Discuss whether you must sear a deer’s brisket.
  • How to remove brisket off a deer.
  • Where to find the best meat on a deer.
  • You’ll also learn the differences between venison backstrap and the tenderloin and what part of a deer is best for steaks.

Can You Get Brisket off a Deer?

Two Hunters Prepare to Skin, Dress and Process a Dead Deer

Though tough, brisket is one of the most delicious meats in mammals, including deer. While butchering a deer to get the brisket may seem like a painstaking process, it’s achievable with the right tools and skills.

You can get brisket off a deer even though it’s smaller and leaner than a cow’s brisket. Using a sharp knife, you should remove it by cutting off the meat between the forelimbs on the deer’s chest through the cartilage. Also, cut out all fat up to the backbone.

Since a deer’s brisket is smaller than other big animals, removing it is a challenge to most people. However, when you follow the right butchering procedure, you can get the brisket off the carcass.

You can make the best fajitas, burgers, or sausages with this piece of meat or trim and grill it under higher heat.

Related Best Knife for Processing Deer | Hint: You Need Two.

Should Brisket Be Seared?

Brisket should be seared because it is essential to build up the meat’s flavor. However, you need to prepare it adequately before searing it and let it slow-cook in the oven or pan. Slow cooking makes the meat tender and easier for you to slice it afterward.

Searing venison brisket is a common preparation method in most traditional dishes as it adds flavor to the meat. Searing involves cooking the meat’s surface under high temperatures until it caramelizes, otherwise known as forming a brown crust.

Adding some oil creates contact between the brisket and the cooking surface.

  • Before you sear the brisket, trim away the fat pad on the brisket’s outer surface. A large sharp knife will come in handy during this preparation step.
  • Then, marinate it using salt, pepper, or other spices a day before you cook it.

Moreover, it’s important to remember that deer meat is generally tough, and storing it for a couple of days enables the aging process, which will make the meat tender, including the brisket. Do this before starting your cooking process, and you’ll have tender briskets.

After aging, trimming off fat, and marinating the deer’s brisket, you can now sear it.

If you notice that there are still some grey spots on the meat after searing, it means one side of the brisket didn’t cook well. To avoid these spots, you should ensure that you flip both sides to burn evenly.

How To Remove Deer Brisket

You might be thinking about getting a professional butcher to remove the brisket from your deer, right? However, there’s an easier way to do this in the comfort of your home.

Removing a deer’s brisket is one of the final meat-cutting steps of butchering.

After you’re through with the major butchering procedure, you can remove the brisket in a slab using the flat of your knife. Cut the meat carefully against the lower-chest region, trimming off the cod fat and tallow.

To get to the deer’s brisket, you have to butcher cut major parts. Here are the steps:

  1. Cut and pull the shoulders from the torso of the deer to expose the cut zone which your knife will pass through.
  2. Pull the front leg away from the torso, and with your knife’s blade parallel to the ribcage, cut the hinge area.
  3. Remove the backstraps and the tenderloin, but trim away the excess fat layer first. To do this, find the hip bone and cut under this bone to the backbone on both sides. Loosen and get the meat off by ensuring that your knife is close to the bone.
  4. Cut through the ribs down to the backbone. You’ll find the brisket on the outer surface of the ribs. Cut it off while your knife’s blade is against the lower-front chest region and remove any cod fat.

Check out this YouTube video that shows the process of removing a brisket:

Where Is the Best Meat on a Deer?

After butchering a deer, you’ll want to get the most out of the process. Many people go for the bigger and popular venison chunks. But where’s the best meat on a deer?

The backstraps and tenderloins are the best meat cuts of a deer. These parts are tender and will give you a succulent and delicious meal. Other preferred parts include the hindquarters, rump, and chucks.

Backstraps and tenderloins are a favorite to most venison lovers as they are tender and easy to cook. The hindquarters have a variety of uses, as you can use them as steak, in stews, kebabs, or jerky.

There are many other recipes for preparing this dish that you can try out on your own.

Is Venison Backstrap the Same As Tenderloin?

Differentiating between the venison backstrap and tenderloin can be a bit confusing.

A backstrap isn’t the same as a tenderloin. The venison backstrap is the meat along a deer’s spine on the outer part of the backbone. However, tenderloin sits beneath the spine, inside the abdominal cavity along the backbone.

Tenderloin is about 10” to 12” (25.4 to 30.48 cm) smaller than the backstrap but very delicious.

What Part of a Deer Is Best for Steaks?

Cartoon Deer with Crosshairs on it

Are you a steak lover? Well, you can make the best steaks from some parts of venison.

The hindquarters of the deer is best for steaks. The top and bottom rounds have extensive muscles but also have tender sections. They produce the best steaks and cuts for other dishes. Venison hindquarters are large, with cuts for various uses.

You can get the best steak from these parts in young or older deer. However, the bottom rounds are more tender than the top ones.

Final Words

You can get brisket off a deer by following the correct butchering process all by yourself. It may not be a very easy cut to make, but it’s doable. Once you have the brisket, you can leave it for a few days to age and then prepare it for cooking by marinating first.

Searing the brisket is also a great idea as it helps to lock in the flavors.

For more, check out The 5 Best Ways to Preserve Meat in the Wild.

Best Air Rifle Deals

Popular Posts

Air Gun 101: How many types of Air Gun Sights are there and which...

0
The former American president, Joe Biden, was recently quoted saying: If you need more than ten rounds to hunt, you better stop that business and...

How Do Break Barrel Air Rifles Work?

0
A break barrel air rifle is a type of airgun where the barrel breaks open at a hinge point just above the breech. This...

Gas vs Spring Piston: Which One is Better?

0
Today, you can find 5 different types of air rifles available in the industry. They are: spring pistons, gas pistons, PCP air rifles, variable...