Turkey hunting was one of our favorite pastimes and we used to spend a ridiculous amount of time and energy simply getting ready for the hunting season to finally open. When it did, we would bundle up and head out in search of the perfect tom to dress our table. While we don’t get to go out too often anymore, we still highly recommend it.
In Ohio (as with many states) bag limits for wild turkey are ridiculously small, making this once-common game bird a delicacy each season. Even though this delicious meal is something we don’t get to eat every day, knowing the health benefits, nutrition, and safe handling of wild turkey meat is good information that might even make your next delicious roasted wild turkey taste better than it already does.
Just the Facts: Wild Turkey Meat vs Domestic Turkey
Wild turkeys feast on a varied diet that includes anything from seeds, acorns, and nuts to lizards, snails, and worms. This might not sound like the most appetizing feast to you and me, but for a turkey, the wild ones eat the best. Domestic turkey feed simply attempts to recreate the menu of wild turkey. The differences in diet are similar to what you find when looking at the nutrition of wild hogs vs domestic ones.
The biggest difference between wild turkey meat and domestic birds is in the fat content. Wild turkeys spend most of their lives moving from one place to another, flying up to roost in trees at night and avoid inevitable predators, giving these birds a more lean meat.
While domestic turkeys technically have more protein due to their controlled diet, they are also much higher in fat content because they don’t get as much exercise as their wild cousins.
According to the United States Department of Agriculture, 100 grams of turkey breast meat contains 29 grams of protein and 7 grams of fat. The same portion of wild turkey breasts offers 25 grams of protein but just 1 gram of fat. Darker meat from thighs and legs has even less fat but slightly less protein.
Both wild turkey meat and domestic turkey meat contain many important vitamins and nutrients so don’t worry about whether or not wild turkey is good for you. It’s more important to focus on learning the optimal way to cook the perfect wild turkey.
Best Ways to Cook Wild Turkey
Here is a little secret – one of the main reasons that wild turkey and regular turkey taste different is because of how they are cooked. Domestic turkey that you buy in the store is typically injected with salt water which adds weight and increases the juiciness, helping to prevent the finished bird from being too dry. Wild turkey, already significantly lower in fat, doesn’t have the benefit of brine injection and tends to dry out easily.
With that in mind, you will want to adjust how you cook wild turkey to get the best results. When done right, wild turkey is the most delicious of game birds.
The key to properly cooking wild turkey starts from the moment you kill the bird. It is important to field dress the bird as soon as possible. Start by removing the innards and crop. Don’t forget to remove the gland at the base of the tail while you are at it. Pluck the feathers while the bird is still warm. You’ll use short, swift tugs to remove the feathers a few at a time. If you wait until the bird has cooled, you’ll likely end up tearing the skin quite a bit and that is simply a waste. Thoroughly wash and dry the bird before putting it in the refrigerator. Like any game animal, you want to complete this process and get it in the cooler as quickly as possible.
Brining wild turkey is one common method to help prevent the bird from drying out while cooking. Brine allows you to add herbs and flavors that enhance the finished flavor. Cooking an unbrined wild turkey is a bit of a challenge, but the results are awesome. The trick is to use plenty of butter or olive oil to prevent drying out. As a bonus, butter and olive oil will help wild turkey taste good and finish tender. Make sure to check out our favorite brine recipe for smoked turkey.
Wild turkey can also be done in a slow cooker to help improve juiciness. It isn’t our favorite way to do it, but using a slow cooker will give you predictable results, especially when cooking wild turkey breast or skinny birds with strong muscles that taste dry.
No matter the cooking method you use when cooking turkey, you’ll need to aim for an internal temperature of at least 165 degrees. Take the measurement in the thickest part of the thighs. It is often best to separate the breasts from the whole bird when cooking because they will cook faster than other parts and can dry out. The cooking process you use should be carefully monitored to prevent overcooking.
What Does Wild Turkey Taste Like?
You are likely to hear lots of people tell you that wild turkey tastes nothing like store-bought birds. They are right, but that also doesn’t tell you much about what wild turkey actually tastes like.
Think of it like this – wild turkey tastes more like turkey gravy, whereas store-bought turkey tastes like a package of sliced turkey breast on sale at the grocery store.
Wild birds aren’t necessarily gamey like many types of wild meat, but it also depends on what the birds are eating.
Fall turkey and spring turkey also don’t taste the same, but fall is the best time to bag a bird for Thanksgiving turkey.
Wild turkey breast meat is darker than domestic breast meat and has a lot more intense flavor, in part because of the lack of injected brine. Wings are bigger because of the birds’ powerful flight abilities and the unique taste is simply better than a store-bought bird.
Ready to Try It This Season?
The chance to eat wild turkey doesn’t come around all that often, so you should treat the chance with respect. Wild bird was once one of the most common things that Americans ate, but these days, strict limits make the chance to savor these delicious game birds a unique opportunity.
But we’d say it’s totally worth the time and effort spent preparing for the hunting season, scouting our favorite spots, and gearing up for the hunt. A properly cooked wild turkey is one of life’s simple gifts that we believe should be savored and appreciated.
If you manage to bag one, don’t forget to try out Scott’s classic maple chipotle turkey recipe.
SALT LAKE CITY, Utah (ABC4) – The Utah Division of Wildlife Resources (DWR) has announced a statewide emergency closure to “shed hunting” in an effort to help wintering big game, particularly deer populations. The last time shed hunting was prohibited in Utah was 2017.
The antler gathering restrictions are effective Feb. 7 through April 30 across Utah, on both private and public lands, according to a press release.
DWR biologists have reportedly been monitoring the condition of the deer, as well as snow depths and winter temperatures, throughout Utah since early Dec.
These monitoring efforts include “body condition and health assessments,” conducted during the big game captures that take place each Dec. Biologists measure and record “overall deer condition, body fat levels and fawn weights” of the animals going into winter, the release states.
Biologists also place GPS collars on deer to monitor animal migrations and survival.
Data from these monitoring efforts and GPS tracking reportedly show that the extreme cold and increased snowpack across the state are starting to impact mule deer fawn survival rates, and may negatively impact the ability of the adult deer to survive the winter.
In these types of conditions, big game animals are weakened and highly vulnerable to repeated human-caused disturbances. The unnecessary expenditure of energy and stress associated with disturbance — like being repeatedly followed by someone gathering shed antlers — may significantly decrease the survival rates of big game animals, particularly deer, this winter. Closing the shed antler and horn gathering season will minimize a major source of disturbance in the areas and during the time periods when big game animals are the most exposed and vulnerable. Shed antler gathering is not the only winter activity with the potential to disturb wintering wildlife. We encourage everyone to be aware of wildlife during this vulnerable period and do their best to not disturb them.
Utah Division of Wildlife Resources Director J. Shirley
The release states these temporary restrictions also apply to looking for horns and antlers still attached to the skull plate of a deceased animal, in addition to naturally shed antlers.
DWR conservation officers will reportedly be conducting additional patrols this winter to enforce the restrictions and ensure that people aren’t disturbing wintering wildlife. “Violators may be cited,” according to the DWR.
The DWR has also implemented “emergency deer feeding” in parts of Rich, Summit and Cache counties. Biologists may also feed deer in additional locations, if emergency feeding criteria are met. However, deer feeding will reportedly not happen in areas where chronic wasting disease, a fatal, neurological illness among deer, elk, moose, etc., has been found.
Except for other emergency changes made since Jan 1, 2024, all other rules established in the 2024 Big Game Application Guidebook remain in effect.
“We know shed hunting is a popular pastime for many families in Utah, and we appreciate everyone’s understanding and cooperation in waiting to go gather antlers until after April 30,” DWR Big Game Coordinator Dax Mangus said. “These efforts will help reduce stress on Utah’s big game animals and increase their chances of surviving the winter.”
The DWR states they will continue to monitor the condition of deer and the winter conditions across the state and may lift the closures earlier than April 30, if conditions allow.
THE PRODIGY IS NO LONGER JUST A ’90S EDM BAND, AND 2011S JUST GOT MORE AFFORDABLE
It’s somewhat ironic that the eight years since STI’s patent expired on their hi-cap 2011 design have been the company’s most profitable, due in no small part to their rebranding as Staccato and making a serious play for the LE market by marketing raceguns to cops.
That business success has attracted others to the field, the latest being Springfield Armory, which aims to bring their manufacturing and marketing horsepower to the platform.
As one of the U.S.’s biggest 1911 vendors, Springfield’s decision to add a widebody option to the stable was an obvious one, but getting 2011s to run reliably seems for whatever reason to be more difficult than their single-stack brethren; this problem is exacerbated in calibers that don’t start with a .4.
We got hands-on with a couple of their preproduction models to see if they can pull it off.
LIFTING THE HOOD
Coming to market in early fall with two base models, a Government and Commander version, Springfield is giving the consumer just enough choices to make things interesting while hinting at what’s to come. Both guns ship with two magazines, a 17-round flush-fit, and an extended 20-rounder that complies with the USPSA 140mm limit, and both are ready for optics right out of the box.
You can have any color you want, so long as it’s polished DLC. Grip texture is aggressive enough to provide stiction, but won’t wear out your skin or shirt, should you choose to carry it.
To appeal to the maximum number of users, a system of optics mounting plates will accommodate most MRDS footprints, while preserving iron sights as a backup. Our test guns shipped with a Trijicon RMR on the 5-inch barreled version and one of Springfield’s Hex Dragonfly red dots on the 4.25.
This shares a mounting pattern with Burris and Vortex, so fans of those sights are already taken care of, and we’re told a Leupold-pattern plate will be available shortly.
Both mounting plates are beveled to blend the MRDS body into the slide rather than leave an unsightly overhang, and old-school users are taken care of with fixed front and rear, suppressor-height iron sights, and the front sporting a green fiber optic.
BUIS height appears to have been chosen so that even with red dots with a thick LED housing, such as the RMR, there’s just enough rear sight notch visible over the red dot to be useful without resorting to stratospherically tall irons.
The arse-end of the slide below your chosen sighting device is resolutely old-school and conforms to the Series 70 pattern, with thankfully no trace of a firing pin safety to mess up the classic 1911 trigger pull.
A standard extractor is fitted and correctly tensioned, while the firing pin stop is radiused appropriately for 9mm loads. On both guns, the ejection port is lowered and beveled — no voodoo here, just well-established 1911 gunsmithing.
Government size Prodigy
Forward cocking serrations mimic ones at the slide’s rear, and the usual ball cuts are almost completely absent, save for a vestigial notch that lines up with the almost full-length dust cover. This adds a noticeable amount of mass to the muzzle, which may or may not be your cup of Earl Grey, but there’s no denying the Prodigy’s slide-to-frame fit, which is as tight as many custom guns.
Both slide and frame rails are very well machined, with a silky-smooth action.
1911 purists will turn up their noses at the full-length, two-piece guide rod that’s retained by a reverse recoil spring plug, but they probably didn’t make it this far into the gun anyway, having been turned off by the lack of a “cause they don’t make a 46” caliber and polymer grip.
Their loss. Should anyone want to return to Browning’s original recoil spring design, there’s a slot in the slide to accept a barrel bushing, though this is probably to reduce the number of slide SKUs on hand, rather than an indication of future design intent.
Commander-sized Prodigy features a scaled-down frame with one Pic rail slot, so full-sized WMLs won’t fit. Note ridge at bottom of grip for future extended magwell.
The Prodigy’s barrel is massive, stainless, conventionally rifled with a 16 twist, and Nowlin ramped. One of the first tests we do on 1911s before hitting the range is check barrel to slide lockup, as without hand-fitting, it’s tough to ensure proper engagement between the barrel lug’s camming surface and the slide stop.
Some factories cheat by relying on the barrel link to push the barrel into battery, which works for a few hundred rounds but will eventually shoot loose, leading to sloppy lockup and vertical stringing on target. After hand-cycling the slide a few dozen times, we field stripped the pistols and found even wear on the slide stop across its mating surface, indicating that the barrel feet were making contact where they should.
Turning attention to the frame, controls are what you’d expect of a single-action handgun designed to span both competition and defensive roles. Ambi thumb safeties have zero play between the left and right levers, snicking into engagement with a positive click.
While the magazine release is slightly extended over a stock 1911, you’ll still have to rotate the gun in your hand to reach it, unless you wear a glove bigger than XXL, as the grip is slightly fatter than Browning’s original. That said, it’s nowhere near unmanageable, unless you think a G17 is unwieldy — the grip circumference is identical.
Using the same two-piece construction as an STI/Staccato/SVI means different grip modules can be added to the frame, should you get bored with the standard polymer lower. We have no idea if a steel 2011 grip will bolt straight up, as there’s considerable variation between existing frames in the marketplace, which may require the end user or their ’smith to be handy with a file. But if it does, SVI, Limcat, Cheely, Phoenix Trinity etc. will be happy to add about 7 ounces to the overall weight, while subtracting 600 bucks from your bank balance.
That said, it’ll probably be a while before you’ll want to swap anything, as all the usual modifications we typically do to a stock frame after it leaves the factory are already included — there’s a double undercut on the trigger guard, a soft-but-grippy stipple job and a perfectly executed, functional beavertail safety. Hinting at future accessories, there’s a rail at the grip’s lower edge, which is no doubt designed to secure a magwell in conjunction with the mainspring housing pin.
Compared to an older STI frame we had on hand, the Prodigy’s is approximately 2mm thicker through the dust cover area, adding non-reciprocating mass and burying the slide release, which is inlet into a machined pocket. This makes it slightly harder to engage for administrative handling but doesn’t affect the shooter’s ability to hit on a
reload with either the master or non-dominant thumb. In case you were wondering, the Commander-sized upper fits on the 5-inch frame, despite its 3/8-inch shorter recoil stroke, leaving room for a compensator should someone be so inclined. And we’d be surprised if a factory carry comp version weren’t high up on the agenda.
ROUNDS DOWNRANGE
Bottom line up front — yeah, they can shoot.
Once we made a slight adjustment to the red dot and dialed its brightness all the way down, standing unsupported at 50 yards, the Commander version turned in a 2.25-inch, five-shot group with 130PF reloads consisting of Montana Gold 121-grain JHPs over WSF powder.
We’ve shot pistol-caliber carbines that struggle to get that kind of accuracy, so for a 4.25-inch barreled handgun to achieve it in the first 20 rounds of a range session is an indication of its potential. In the next 300 rounds, we replicated that performance numerous times.
The 5-inch Prodigy didn’t quite achieve the same accuracy as its little brother with the ammo we had available, but it’s one of the softest-shooting handguns we’ve ever encountered, aided no doubt by the amount of heft in the hand.
With a little time to tune ammo to the gun, we’re pretty sure it would turn in similar groups, but deadlines limit the amount of tinkering we’re able to do.
We’d be interested to see what a steel grip frame does to further damp out recoil, because adding a SureFire X300U keeps the front end down during rapid fire.
Slide velocity is noticeably slower than the Commander version — you can feel the pistol pick up a round from the magazine if you concentrate hard — but we couldn’t outrun it no matter how hard we tried during Bill drills.
Are these handguns we’d take right out of the box and stick in a holster for daily carry? Hell no, but then we’d hesitate to do that with a Glock or SIG as well. The difference is that we’d expect the striker-fired guns to run 100 percent during a brief familiarization and break-in period, while the 1911-pattern pistols might stutter. And so it was.
We had two failures to feed in the short gun, both with hollow points, and both on the penultimate round from a magazine. These occurred during the first range session, after which it ran without a glitch, but we’d want to shoot a case of ammo through both Prodigy models before pronouncing them fit for duty — it’s just the nature of tight-fitting 1911s.
If you want the awesome trigger, shoot-the-balls-off-a-gnat accuracy, and overall shootabilty, then you’ll have to put in the time to gain confidence in the system.
Double-stack 1911s aren’t beginners’ guns. For anyone starting out, we continue to recommend a good striker-fired, polymer-framed service pistol of whatever flavor you like best. But when you’re ready for an upgrade, Springfield have made the cost of entry to the 2011 world much more affordable, and once you’ve shot them, you probably won’t want to shoot anything else.
SPECS
Springfield Armory Prodigy
Caliber: 9mm Para
Capacity: 17; 20 rounds
Barrel Length: 5; 4.25 inches
Overall Length: 8.5; 7.8 inches
Weight: 37; 33.3 ounces
MSRP: $1,499 without optic; $1,699 with Hex Dragonfly
If you’re pressed on time, here’s a quick list of the best varmint scope:
Nightforce SHV 5-20×56: Best For AR-15
Leupold VX-3i 6.5-20×50: Best for 223
Vortex Crossfire II 6-18×44: Best For 17 HMR
Athlon Argos BTR 6-24×50: Best Varmint Scope for the Money
Sightron SIII SS 6-24×50: Best For 22-250
1. Nightforce SHV 5-20×56: Best For AR-15
Every once in a while a really high-end company will listen to the masses and make a product that’s top of the line while still being affordable.
This is one of those times.
Nightforce is well known as the pinnacle of high-end precision scopes.
Their scopes are so tough that one literally took a bullet through the scope in the middle of combat and it kept working.
That’s a level of quality you’re just not going to see on a budget scope.
The average firearm owner is finally in luck though, because Nightforce has released the Nightforce SHV.
This is the perfect AR-15 varmint scope.
It’s got all of the quality, most of the features, and it’s a third of the price.
Keep reading and I’ll tell you exactly why you need to add this scope to your collection.
Glass Clarity & Reticle
The glass on this lens is pristine.
The clarity even when cranked up to 20x power is unbelievable.
The FOV is huge and the edge to edge images have incredible color contrast.
I’ve used this scope to look out to 1,000 yards and I could still see everything clearly like it was right in front of me.
The glass is fully multi-coated and thanks to that it has super high light transmissions.
Whether you’re shooting in full daylight, dawn, dusk, or anywhere in between you’ll be able to see everything you’re aiming at.
The Nightforce SHV comes with an etched SFP MOAR reticle which you can choose to have illuminated or not.
You want the illuminated option.
Without it, you’re not going to be able to see at 20x power at dawn or dusk.
With it though, it makes sighting and zeroing a breeze.
Some people aren’t fans of the extra hash marks on the MOAR reticle, and if you’re one of them you can get an IHR reticle on it instead.
Either way, if you’re shooting in low light often get the illuminated reticle.
It eliminates distortion due to low light conditions and it’s gonna make your life easier.
Eye Relief & Eye Box
The eye relief is 3.15”-3.54”.
That’s pretty standard and works well for me on my AR.
If you’re looking for an option with a little more room, check out these AR scopes
It’s got a generous eye box and the turrets are extremely adjustable to make it work for you.
Add to that the fast focus eyepiece it comes with and you’ve got a great scope on your hands.
Durability
This thing is a beast.
At 29.1oz it’s absolutely massive, so you’ll want to take that into account if you’re going to be lugging it around.
On the other hand, it’s extremely durable.
It’s made of a solid 30mm piece of aircraft-grade aluminum that’s reinforced with hardened bronze throughout it.
The walls of the scope are also 3x thicker than any of its competitors which helps reduce stress and improves thermal stability.
On top of that, it’s water, fog, and shockproof.
Literally whatever you can think to throw at this scope it’ll be able to withstand.
I had a sling malfunction while hauling my rifle on a hunt and my rifle dropped and landed right on the scope.
It took no damage.
Not a scratch, not a ding or dent, and it still held it’s zero when I shot it afterward.
For me that more than made up for its weight.
Elevation & Windage Knobs
The turrets are capped and have metal dials that allow for fingertip adjustments.
They move easily and click audibly and keep their position when they’re supposed to.
It also comes with a zero-set feature that allows a quick return to zero.
It doesn’t matter how many elevation adjustments you’ve made, it’ll return to your initial zero in a snap.
It took me three shots to get it perfectly zeroed, and I’ve never had an issue with it since.
I’ve shot it from 100-600 yards and the return to zero was spot on each time.
Parallax & Magnification
The magnification range is 5-20x, and it’s got a 56mm objective lens.
It’s the perfect scope for any kind of hunting you want to do.
I’ve used it to pick off varmints on my land, to take down 8pt bucks, and for target practice.
The clarity is as perfect at 20x as it is at 5x, and I’ve never had an issue with tunneling like I have with other scopes.
This scope comes with a side parallax adjustment knob to manually fix any parallax you might encounter.
It starts at 25 yards and goes to infinity, and it’s clearly marked with the distances
Mounting & Rings
It doesn’t come with rings or a mount, so you’ll need to order one separately.
I decided to stick with Nightorce and picked up their 1.125 Titanium Alloy Ring Set and it’s worked great for me.
I’ve also recently discovered how great ghillie suits are when hunting, so check out these suits if you’re interested.
Is the Nightforce SHV 5-20×56 worth it?
Without a doubt.
This is an insane amount of quality and features at what is a steal of a price for Nightforce.
Let’s Review:
5-20x magnification
Water, fog, & shockproof
Super clear at every power
Illuminated MOAR or IHR reticle
Capped turrets and hugely adjustable knobs
Great for varmints, hunting, or target practice
Incredible durability with aircraft-grade aluminum & hardened bronze
On top of all that is the Nightforce transferable limited lifetime warranty.
This is an incredible scope from an incredible company.
Don’t just take my word for it though, check out the Nightforce SHV for yourself.
2. Leupold VX-3i 6.5-20×50: Best for 223
If you want a scope that pairs perfectly with your 223, the Leupold VX-3i is the best.
In fact, its low light capabilities make it one of the best scopes around for hunting.
It has quickly become one of my all time favorite scopes.
Want to know why? Keep reading.
Glass Clarity & Reticle
With this scope you get crystal clear glass for optimum clarity.
Leupold uses their own lens coating, called DiamondCoat2, that cuts back on glare, protects from scratches, and lets in tons of light! This, by itself, provides you with an amazing sight picture.
Plus, they have the Twilight Max Light Management system, which gives you better clarity at dawn, dusk, or any low light conditions. You’ll get an average of 20 extra minutes of hunting time at the beginning and end of the day.
While it’s not a night vision scope, it’s the closest you’ll get in a regular scope.
If that’s not enough, this scope has a Fine Duplex CDS reticle.
CDS stands for Custom Dial System. What this allows you to do is customize it to your weapon and ammo. Then it calculates ballistics and holdovers for you, which means long range shots just became a piece of cake!
The fine duplex draws your eye right to the center of the target with thicker edges that melt into fine lines at the center, making target acquisition fast and easy.
Eye Relief & Eye Box
The eye relief on this scope is 3.7 at high magnification and 4.5 at low magnification.
For the most part, I find this to be more than adequate, but it can be a little tight at those super long ranges. It’s easy to manage with a good cheek weld though.
The nice, wide field of view from the eyebox allows you to cover a larger area, which makes this a great 223 varmint scope.
Durability
Leupold makes scopes that are rugged and highly durable and the VX-3i is no exception.
In fact, Leupold puts all their scopes through 5000 impacts with their recoil simulation machine, aptly named the Punisher, to ensure that their scopes will survive anything you can throw at it.
The aircraft quality aluminum that this scope is made from keeps it lightweight, while also being tough as nails.
The VX-3i also has Leupold’s proprietary gas blend and seals that safeguard the scope from water and keep it from fogging up.
On top of that, Leupold offers a lifetime warranty on this scope, so if you have any problems, they’ll take care of it for you.
Elevation & Windage Knobs
The elevation and windage turrets are ¼ MOA precision finger clicks.
They are easy to adjust and you get audible, solid clicks each time. The numbers on the dials are pretty big too, so they’re easy to see even if your eyesight isn’t so great.
What about zeroing?
I had mine zeroed in just a few shots. It was quick and painless.
Not only that, I’ve easily shot over 5000 rounds and have yet to readjust the zero. It’s held true for me.
Parallax & Magnification
With this scope you’ll get a variable magnification of 6.5-20x.
If you’re like me, you use your 223 for varmint hunting, which makes this scope perfect for those intermediate to long range targets.
If you’re looking for something that will help you with short to medium ranges, check out this list of the best 1-6x scopes.
What I love most about the VX-3i is that it has a side focus parallax adjustment. It’s easy to use and means you’ll never have to worry about distortion.
Mounting & Rings
While this doesn’t come with any type of mount, it does come with a bikini lens cover.
However, I didn’t really like that cover much and ended up buying the Alumina flip cover instead. It works much better and is easier to use.
For the mount, I purchased these Leupold Savage rings, but you can get whichever rings you prefer as long as they’re 30mm.
Is the Leupold VX-3i 6.5-20×50 worth it?
Varmint hunting with a 223 at dusk and dawn has never been easier than with this scope.
It has:
Clear glass
DiamondCoat2
Fine Duplex CDS reticle
Precision ¼ MOA turrets
6.5-20x variable magnification
Rugged, light-weight, durability
Side focus parallax adjustment
Twilight Max Light Management System
If you’re looking for the best scope for your 223, try the Leupold VX-3i 6.5-20×50. You won’t be disappointed.
3. Vortex Crossfire II 6-18×44: Best For 17 HMR
I don’t always use an HMR rifle, but it’s perfect for getting rid of varmints on my property.
In that case, I’m not going to use just any scope.
I want a 17 HMR scope that’s going to work perfectly with my HMR.
If you’re looking for something with more power check out these Ruger scopes.
But if you’re just wanting to do some close to mid-range hunting, then that’s where the Vortex Crossfire II comes in.
It’s a redesigned version of Vortex’s best selling rifle and you can pick it up for an incredible price.
The original was fantastic, but somehow they’ve managed to improve it even more.
Keep reading and I’ll tell you why the Vortex Crossfire II is the perfect scope for you.
Glass Clarity & Reticle
The lenses are fully multi-coated with an anti-reflective coating which gives you great light transmission and clarity.
That means this scope is perfect for low-light shooting and for catching varmints just before dawn.
It’s not the clearest glass on the market, but to find anything comparable you’ll be paying at least twice the amount.
For the insanely low price though the clarity and glass are pretty darn great.
I was able to shoot a coyote at 300 yards and it felt like it was only 50 yards away.
Once you start getting past 700 yards or so though tunneling became an issue for me.
I was able to adjust it, but it was still noticeable.
In short, use it for close to mid-range shooting and it’ll treat you right.
If you’re looking for a long-range scope, check out these scout scopes instead.
It comes with an illuminated Dead-Hold BDC reticle, which is fantastic once you get used to it.
It’s great for experienced shooters as it helps eliminate guesswork from holdover and windage corrections.
If you’re new to shooting, you may want to stick with a more basic reticle.
Eye Relief & Eye Box
The eye relief is 3.7-4.4”.
That’s perfect for most rifles, and I found it incredibly comfortable.
Combined with the fast-focus eyepiece and the generous eye box, I had no issues easily acquiring my targets.
Durability
This scope is made of a single solid piece of aircraft-grade aluminum which makes it incredibly durable.
I dropped it out of a blind one day on accident and I just knew it was gonna be wrecked.
When I retrieved it not only was it still intact and functioning, but it still held my zero perfectly.
It’s fog and shockproof, plus it’s nitrogen purged and O-ring sealed.
That means it’s 100% waterproof in any environment.
Vortex is known for the incredible durability of their scopes, and they back it with a lifetime warranty.
At this price, you’re not going to find another scope that’s anywhere close to this level of quality.
Elevation & Windage Knobs
The ¼ MOA turrets are capped and finger adjustable, so you don’t need any tools to get the job done.
They audibly click and easily reset to zero.
It only took me 3 shots to zero it, and it’s held that zero for over 500 rounds now.
Parallax & Magnification
It’s got a 6-18x magnification range with a 44mm objective lens.
The magnification changes are smooth and there are tons of adjustments you can make.
The Vortex Crossfire II comes with a parallax adjustment knob that starts at 10 yds and goes to infinity.
The tunneling I mentioned earlier at higher mags was easily and quickly fixed with that feature.
Mounting & Rings
No mounts or rings are included, so you’ll need to buy them.
I use the Game Reaper Marlin Medium Mount and it’s worked perfectly for me.
Is the Vortex Crossfire II 6-18×44 worth it?
For the price, there’s no other scope on the market that comes close.
When you factor in all its great features this scope is a steal.
Let’s look at the best features again:
6-18x mag
3.7-4.4” eye relief
Incredible durability
Water, fog, shockproof
Illuminated Dead-Hold BDC reticle
Fully multi-coated, anti-reflective lenses
Finger adjustable ¼ MOA capped turrets
As if all of that weren’t great enough, Vortex adds their amazing Lifetime Warranty.
If anything ever happens to your scope they’ll replace or repair it.
That’s a pretty solid statement for a company to put behind their products.
Go look at it for yourself. Check out the Vortex Crossfire II here.
4. Athlon Argos BTR 6-24×50: Best Varmint Scope for the Money
The Athlon Argos BTR 6-24×50 is the best budget friendly scope for varmint hunting.
In fact:
I bought this scope in a hurry because I needed something affordable and effective for hunting coyotes. Now it’s my go-to for varmint my ar 15.
Here’s why it works…
Glass Clarity & Reticle
For a sub-$400 optic, I wasn’t expecting much. But when I mounted it on my AR, I was blown away.
The glass is clear and crisp with plenty of light.
That glass quality struggled at higher magnifications (18x-24x), but only in comparison to top dollar scopes. For $300, I can’t complain.
The lenses are fully multicoated to reduce reflected light so no more worrying about advertising your position. The coating also increases light transmission which gives the optic its crisp image.
I went with the APMR MIL etched reticle. It’s also available in MOA.
The reason why I like this Christmas tree design is because it has a lot of windage and elevation lines. I don’t particularly like relying on turrets to line up my shots at distances out to 1000 yards.
When it comes to hunting, I like to move fast. With the APMR MIL, I could easily sight my scope from 100 to 1000 yards by knowing what each line corresponded to in yardage.
It also helped that the reticle was first focal plane, a feature normally only seen in top dollar scopes.
This means that the reticle shrinks and grows with your target as you zoom in or out, making target engagement quicker at low power while offering precise holdover positions in finer detail.
Finally, the reticle has a red LED illumination feature.
It’s no Trijicon, and thus not daylight bright to my standard, but it’s proved more than helpful at night.
In dark lighting conditions, the illumination is crisp and not overpowering, handy for hunting down the skunk in your neighborhood.
Eye Relief & Eye Box
For an otherwise versatile scope, the Argos BTR’s eye relief is its most limiting factor.
Only 3.3 inches of eye relief makes it tight for heavy recoiling calibers, but so long as you’re aware of it and practice good cheek weld, you’ll be fine. I’ve had no issues so far.
Overall, the eye box is generous. It does get a bit snug at those higher magnifications (18x-22x).
Durability
Despite the affordable price point, this scope isn’t cheaply made.
The scope body is single piece machined from 6061T6 aircraft grade aluminum meaning fewer moving parts and less points of failure so the scope can withstand serious recoil.
Not to mention that it’s completely waterproof, shockproof, and fogproof.
The factory argon purging removes any moisture from the tube which ensures that it remains fogproof with better thermal stability.
The lenses are also protected with a XPL coating to protect them from dirt, grease, and weather. Although I still use the included lens caps just in case.
I’d also like to add that the Argos BTR is the shortest, lightest rifle scope of this magnification on the market. I didn’t have to make any carrying adjustments or gym visits, the scope was ready to grab and go.
Elevation & Windage Knobs
The turrets are accurate and hold well, although they were a bit mushy until I removed some of the factory heavy grease.
Re-greasing the turrets was a quick ten-minute process that made a world of difference for me.
All it takes is wiping out the factory grease with a long cotton swab and re-greasing with some Halofun Green Slime Lubricant.
After that, the clicks were positive and audible. The hash marks on the turrets make adjustments quick, as well as returning to zero easily.
Speaking of, I was zeroed within 7 shots of getting on paper. It held zero, despite being dropped twice, heavy recoil, and a couple hundred rounds.
Parallax & Magnification
The 6x-24x magnification makes this optic versatile for multiple shooting disciplines.
At 55 yards, I took out a hog that I could only see through the scope.
The magnification from 6x – 20x is very clear. Above that, it does lose some clarity and become a bit blurry.
The side parallax adjustment knob is smooth to turn and accurate, good for adjustments from 10 yards to infinity.
Mounting & Rings
I use the GG&G Flt Accucam Mount W/30Mm Rings. They’re sturdy, adjustable, and lightweight, although a little pricey.
If you want to save some money for more ammo, I recommend the Burris PEPR 30mm Mount. It works just as well, but any 30 mm rings should do.
No products found.
I also recommend a lens shade for sunny conditions. The Athlon Sunshade (50mm) works well to reduce glare and sun reflection.
Is the Athlon Argos BTR 6-24×50 worth it?
If you’re looking for a scope that can fill a variety of shooting disciplines and needs, then I highly recommend the Athlon Argos BTR 6-24×50.
There isn’t another scope in its price range that can match its brightness, clarity, and durability.
Here’s why:
Durable build
Rapid zero adjustment
Fully multi-coated lenses
Athlon “Gold Medal” Warranty
If you need a reliable varmint scope but can’t justify dropping a couple grand on an optic, I recommend the Athlon Argos BTR 6-24×50.
5. Sightron SIII SS 6-24×50: Best For 22-250
Sightron is one of the less popular scope makers in the market, and that’s a shame.
Their scopes are extremely durable, high quality, and they come with a killer warranty.
Plus the clarity of their glass is on par with Nightforce lenses for less than half the price.
I personally use this one on my Remington as my go-to varmint rifle scope.
There are other scopes you could use for you .22-250, but the Sightron SIII SS is my favorite.
If you’re looking for a top of the line scope without the price tag, then keep reading.
Glass Clarity & Reticle
The glass on this scope is crystal clear.
We’re talking I can see out to 1600 yards like it’s right in front of me clear.
Whether I have it at 6x or 24x magnification, the image quality is exactly the same.
It’s got fully multi-coated anti-reflective lenses which allow for a huge amount of light transmission.
That means I can see as clearly at dawn as I can mid-day.
When I’m shooting coyotes before the sun comes up at 300 yards on my land that’s an amazing feature.
The sharpness and clarity of this scope far exceed its price point.
It’s got a MOA-2 glass etched reticle which is a perfect companion to the fast-focus eyepiece.
That combination makes for extremely fast target acquisition so you always know where your target is.
Eye Relief & Eye Box
It’s got 3.6-3.8” of eye relief.
On my .22 Remington, that’s perfect.
It gives me just enough room that I don’t feel crowded.
Even at the higher magnifications, it’s not cramped.
Durability
This is a very sturdy scope.
It’s made from a single 30mm tube of high-quality aircraft-grade aluminum.
It’s nitrogen-filled to prevent fogging at any temperature.
That’s a huge advantage when you’re hunting in the chill early morning.
Add to that the fact that it’s water and shockproof and you’ve got a scope that you can use in any situation, elevation, or climate.
It’s a little hefty at 24.3oz, but the added weight allows for the scope walls to be twice as thick as its competitors.
Even if it gets knocked around a bit, this scope is going to hold up.
I mainly use mine for varmint hunting, so if you’re planning on going hunting with an AR instead, you should take a look at these scopes.
Elevation & Windage Knobs
This scope comes with tactical turrets that are designed to withstand extreme weather conditions.
They’re not going to budge if they get accidentally tapped.
With that said, they’re still finger adjustable and fairly easy to rotate, but they’re a little harder to maneuver than others.
The elevation and windage knobs both adjust to 100 MOA.
That combined with the ExacTrack adjustment system makes it insanely customizable to whatever situation your shot requires.
It’s also a breeze to zero, it took me less than three shots.
The turrets are clearly marked, so it’s super easy to reset them to zero regardless of how many adjustments you make.
Parallax & Magnification
The magnification range is 6-24x with a 50mm objective lens.
It provides incredible range and clarity whether you’re varmint hunting or running a 3 gun competition. Speaking of competition, check out my best 3-gun scope guide.
This scope also has a side parallax adjustment which ranges from 40 yards to infinity.
I’ve never had an issue with it tunneling, but if you do it’s easily fixable.
Mounting & Rings
There aren’t any mounts or rings included, so make sure you grab one.
I recommend Midwest Industries QD Offset Mount. It works great for this scope and for varmint hunting.
Is the Sightron SIII SS 6-24×50 worth it?
It’s an amazing scope that offers a level of quality you normally only see for 2-3 times the price.
Let’s review:
6-24x mag range
Incredible durability
Water, fog, and shockproof
Glass etched MOA-2 reticle
Crystal clear up to 1600 yards
Nitrogen purged to eliminate fogging
Tactical turrets and ExacTrack windage & elevation system
While definitely not the cheapest scope on the market, I believe it’s well worth the asking price.
On top of everything else, Sightron offers a Lifetime Replacement Warranty which can’t be beaten.
Go check out the Sightron SIII SS for yourself.
Now It’s Your Turn
I hope you enjoyed my best varmint scopeguide.
Now I want to turn it over to you:
Which scope will you pick for your firearm?
Let me know by leaving a quick comment down below.
If you know anything about yellow perch fishing, you probably know that they aren’t exactly “trophy fish”. They’re small, unassuming little fish, but they’re some of the most popular gamefish in North America for good reason.
Yellow perch are found across the northern United States, fight hard for their size, and will bite just about anything. That, combined with the fact that they school up by the hundreds, means that catching a cooler full of them isn’t out of reach. They’re a great fish for beginners or seasoned anglers, and you can catch them with minimal gear and tackle.
And you should try, because they’re arguably the best freshwater fish for the dinner table. They have a mild, almost sweet flavor, and a firm, flaky texture. They’re great for grilling and frying alike, and next time you go out on a food-fish mission, yellow perch should be at the top of the list.
In this article, I’ll go over the basics of how to catch these tasty fish. I’ll include things like required gear, the best baits and lures, and tips and tactics for filling the cooler.
Yellow perch (species name Perca flavescens) are a common carnivorous freshwater fish. They inhabit lakes, streams, and ponds, and live on a fairly varied diet. This can include zooplankton, insects, crayfish, and even freshwater mussels.
These days, yellow perch are very widespread. In most of the places they can be found, however, they’ve been introduced; their native range only includes the midwest and the northeastern United States. They’ve been so successful because they can tolerate a huge variety of water conditions and are prolific spawners.
Perch fall into the “panfish” category; basically, just fish that are just small enough to fit in a frying pan. Along with other panfish such as crappie and bluegill, perch make amazing table fare and are some of the most common fish for fish frys.
There are many panfish species, but perch are very easy to identify. This is mostly because there’s almost nothing else that looks like them in the lakes where they live.
As is always the case when fishing, it’s important to know your target.
Yellow perch are yellowish-gold in color with six to nine dark vertical bars on their body (earning them the nickname “striped perch,” though that name also refers to a saltwater species). They also have two dorsal fins, and their foremost dorsal fin has very tall spines relative to its body.
Perch are small fish (6-12 inches long) and weigh less than a pound. In most states, the record catch is between 2 and 3 pounds, so they do get bigger, but not by much.
The only fish that perch look similar to are walleye and sauger (which are in the same family), but walleye and sauger are generally much longer and have a more mottled color pattern compared to the yellow perch’s distinctive black bars.
Perch are great beginner fish because you don’t need much to catch them. That said, here’s the basic tackle you’ll need to get going.
Just about any rod can be used for perch fishing. But you’ll have better luck if you choose one with these qualities:
6 foot to 7 1/2 foot spinning rod (longer is better for longer casts, but not necessary)
Light-Ultralight action (2-8 pound rating)
Graphite composition (not necessary, but graphite is much more sensitive than fiberglass)
There are tons of great rods that fall into this category. If you’re looking at getting a new one, you can’t go wrong with the Ugly Stik GX2 (buy on Amazon here). It’s a tough rod with plenty of sensitivity at a great price.
Any 1000 series or 2000 series spinning reel will work well for perch. You’ll be using very light line, so going much larger than a 2000 series can impede casting ability. If you plan on deep jigging (like over 100 feet deep), then a 3000 series reel would be a safer bet for more line capacity.
For a quality spinning reel at a great price, it’s hard to beat the Okuma Ceymar or Pfleuger President. Both are around 50 bucks on Amazon, and they’re super smooth and durable for the price.
4-6 pound test monofilament line is all you need for perch. They aren’t particularly line-shy, though, so if you happen to have heavier line already spooled up it should work just fine.
Perch can be caught with a variety of different rigs, so you don’t need everything at one time. That said, it is nice to have a variety of options on hand to switch up your presentation if the fish aren’t biting.
For hooks, a size 4-8 baitholder hook works well. Perch have big mouths for their size, and larger hooks are generally less likely to be swallowed, so I lean on the larger side.
Perch fishing with jigs can also be very productive. 1/32 oz, 1/16 oz, and 1/8 oz round jigheads can all work, but I usually use 1/16 oz. As for colors, perch aren’t picky. I regularly use pink or chartreuse, but unpainted jigheads often work just as well. It’s not a bad idea to have a few color options so you can change up for water conditions.
If using sinkers (such as with a bobber), split-shot is all you need. Just use a large enough weight to keep your bait down and you’ll be good to go. A good variety pack will have a few different sizes so you can adjust as necessary.
Getting a perch to bite is pretty easy. But the key to catching perch is finding them; if you aren’t right where the fish are, you aren’t going to catch any.
Perch can live in a huge variety of water conditions and inhabit lakes, ponds, and streams. That said, they are most commonly found in large, relatively clear lakes with sandy or gravel bottoms. They prefer cool water, too, with 60-70 degree summer temperatures being ideal.
Yellow perch are a schooling species, and usually school up with fish of similar size. When you find a school, the bite will often be red-hot. They can be caught year-round, but where you’ll find perch depends on the time of year, so it’s important to understand their seasonal behavior.
Because of their schooling behavior and relatively easy bite, perch are hugely popular among ice anglers. During the winter, they can be just about anywhere, but large fish and large schools of perch usually prefer deeper water.
Concentrate on areas with any kind of structure. That could be downed trees, rip-rap rocky bottoms, or even just a drop-off where water depth changes quickly (like at my best local spot). Perch feed just off the bottom, so that’s where your bait or lure should be as well. If you have ice electronics, that’s great; if not, keep moving until you find them (a powered gas or electric auger helps a lot here).
Springtime is spawning time for perch. Starting when the water hits about 45 degrees, they’ll move out of their deep wintertime haunts into shallow water. They love shallow marshes, sloughs, and bays, so if you have these in your area, try them first. If not, fish the shallowest areas you can find; perch regularly spawn in 3-5 feet of water.
When fishing the shallows, concentrate on structure. This can be downed trees, docks, or even rocky outcrops, but the best spring perch habitat is weed beds. Fish the top of short grass or the edges of taller weeds like bulrushes and cattails, and you’ll probably find perch.
Throughout spring and into summer, perch move into deeper water as the water temperature increases. You’ll continue to find them in fairly shallow water (5-10 feet deep) up until the water hits about 70 degrees, but beyond that, they can be anywhere.
Perch fishing in the summer is therefore much easier if you have a fish finder. You should be able to locate schools, and once you do it’s a matter of getting your bait in front of them. Keep your boat directly above the school (using a drift sock or anchor as necessary), and drop down to their depth and jig vertically.
Schools are constantly on the move, so any deeper part of the lake can hold fish on a given day. When it comes to perch, keep moving until you find them, then stay on them from there.
Perch fishing is great because you can often use whatever rig is the most fun for you. You can catch them on a huge variety of lures, including crankbaits (like Rapala’s), spinners and spoons, and jigheads with soft plastic lures. They’re all very simple to rig; just tie on whatever lure or bait you’re using and you’re good to go.
All that said, the most reliable way to catch perch is with live bait.
Perch will eat just about anything, but some of the best baits for perch include:
worms/nightcrawlers
maggots (for ice fishing especially)
Perch eyeballs
You can also use artificial baits, like:
Berkley Honeyworms
Berkley Gulp Minnows
Any of these will work as perch bait. In areas where allowed (check your local fishing regulations first), many anglers swear by perch eyeballs. Once you start catching them, you should have an abundant supply, so it’s worth trying out to see if it works for you.
When fishing the tops of weed beds, a simple bobber rig works best. Tie a #4 baitholder hook and suspend below a bobber so your bait is just above the weed line. Use a split shot 6-12 inches from the hook, and use just enough weight to keep your bait down, because the more action the bait has in the water, the better. Then rig the hook with a worm or your preferred bait, and cast out so your bait is above the weeds. Try different spots and leader lengths as necessary.
You can also fish weed beds very effectively with a drop shot rig (more on that rig here). It’ll keep your lure just above the top of the weed beds, but you can give it as much jigging action as you want to.
If you’re fishing deep water, use jigheads to get to the bottom. Use whatever size jighead is necessary to ensure your rig stays directly below you, and tip it with a worm or other bait. Then slowly jig vertically until you catch fish.
Alternatively (if you don’t have a fish finder), you can cast your jigheads as far as you can and then slowly bounce them along the bottom back towards you. Doing this in a circle around the boat can help you find the fish faster.
When it comes perch fishing with lures, you can use just about anything. But what you choose does depend on where you’re fishing. Some of my favorite perch lures are:
Rapala Shad Rap Crankbait
Rooster Tail Spinner
Miniature Spoons
Rapala Jigging Rap
Eagle Claw Marabou Jig
When fishing the shallows, small crankbaits or spinners work well. Cast and retrieve these over the tops of weed beds or along weed lines for the best fishing. You can also cast near docks or other large structure, but be careful not to get too close and snag up.
It’s important to note that perch are considered poor swimmers and accelerate very slowly compared to other fish. When retrieving your lures, keep this in mind and stick to slower speeds for the best results.
When fishing deep water, vertically jigging small soft plastics on jigheads, jigging spoons, or other jigging lures is the way to go. One lure loved by perch anglers is the Rapala Jigging Rap, which looks like a fish and moves erratically as it rises or falls. You pretty much can’t go wrong with this lure as long as you jig it vertically, but any jigging spoon or small soft plastic can work just as well.
All of the above will help you catch more perch, but keep these tips in mind for greater success and a freezer full of fish.
Perch will take anything, but using live bait always increases your chances of success. Even if you’re fishing a lure, tipping it with a maggot or a piece of worm helps immensely. That little bit of scent will make your whole presentation that much more enticing, and the perch won’t be able to resist it.
When jigging vertically, your goal is to be in the “perch zone”. The members of a school don’t all swim at exactly the same depth, though, so adding two or even three hooks further up your line means you’ll be in front of more fish at any given time.
Always make sure using multiple hooks is allowed in your area, but where allowed this tactic can be killer, and even result in catching two or more fish on a single drop.
Perch are notorious bait thieves. They don’t usually take and swallow like bass or trout; often they just nibble at the very tip. This leads to stolen baits, and a hook without bait just doesn’t catch fish.
Checking your baits often (and only using enough bait to cover the hook) ensures that you’re actively fishing as much as possible.
You can catch perch all day, but like many fish, they’re most active at dawn and dusk. Make sure that you’re on the water at these times for the hottest fishing and the best chance of success.
Overall, yellow perch are a fun and easy fish to catch. They’re great for kids because they fight hard for their size, and they’re amazing fried up for the dinner table. You just need to know where they like to be, put some bait in front of them, and you’re good to go. By using the tips in this article you should be well on your way to catching a mess of them, and hopefully having some fish tacos for dinner!
As a kid, we fished for largemouth bass in the summer. We’d catch the lion’s share of them around weed beds and shady docks. But every now and then I’d wake up early enough to tag along with the grownups to go smallmouth fishing. In the summer, our resident brown bass didn’t make many appearances after 8 a.m. But I can remember the sage advice from my mentors back then. Just wait until October, they’d say. That’s when the smallmouths really move in.
And they were right. Fall smallmouth trips were special times.
And they were right. Fall smallmouth trips were special times. Much of fishing remains a mystery to a youngster, and it’s the unknown factor that makes a great selling point. Now, as a more seasoned angler, I realize the smallmouth were there all along — just not in areas where we’d cross paths.
(Don’t Miss: The 3 Biggest Catfish Ever Caught)
But I also still believe in the power of autumn. I’ve fished for smallmouths all across the country and have found one solid rule: the colder it gets in the fall, the better they bite. Whether it’s water temps dropping to the 50s in Tennessee or ice forming on the Great Lakes, the decline in water temperature triggers a feeding spree among smallmouth bass.
Winter can be tough, and to survive and thrive, bass must put on as much weight as possible beforehand. In fact, studies have found that successful springtime spawns within smallmouth populations are often dependent on the previous fall’s feed.
Regardless, the fish are ready to eat, and we’re ready to be a part of that. We just need to get in the right areas.
Let’s start with the easiest and most obvious. Around much of the North, especially on bodies of water with a mix of rocks and vegetation, smallmouth bass are drawn to specific hard structures. Water temperatures are dropping, grass beds are dying off, and the remaining rocky areas attract solid food items like crawfish and perch. At times, a single large rock may hold a bruiser worthy of personal-best status. One of my largest bass, a fish eclipsing 7 pounds, came in this very scenario on a cold November day on New York’s Chautauqua Lake.
Here, it’s imperative to find the sweet spot. Big smallmouths are masters of their domain, and they know the best hunting grounds. Transitions, like where rocks meet sand or sand meets grass, are always best. Side-imaging depth-finders help, but many of these spots can be seen with a good pair of sunglasses on a nice day. Line up and make accurate casts, and repeat them — exactly – once fish are located.
It’s tough to beat a jig and plastic in this scenario. The best smallmouth options are a little lighter (around ¼ ounce) and more streamlined than a standard flipping jig. Stick to blacks and browns, and fish them on a long rod and 12-pound fluorocarbon. On particularly cold days, afternoons are best, once the rocks warm surrounding waters.
(Buy Alert: Gray Bass Long Sleeve Tee)
Tactic Two: Long Points
Across the Southeast, everything revolves around baitfish. Large shad schools tighten up and begin migrating to major creek arms on the country’s biggest reservoirs. Not surprisingly, bass follow. While largemouth bass have a reputation for getting in the skinniest of water, smallmouths in the same system usually remain in mid-depth, main lake areas. More comfortable as pack feeders than lone ambushers, smallmouths prefer to work schools of baitfish in groups.
Large points are great places to find these roving bands of bass. They key here is to first locate baitfish. Location will depend on the stage of the game: main lake in early fall, large creeks later on. Regardless, find the bait and you’ll find the bass. Look for large points with vast flats on top, and fish there early in the day with topwater baits. Nothing beats a walking bait for smallmouths. As the day progresses, bass will often move off the sides of points, especially if a creek channel intersects. If rocky or wood structure coincides, all the better. Deeper fish can be caught on cranks, jerkbaits, grubs and drop-shots. Occasionally, the topwater bite lasts all day. Remember to stay by the bait.
(Don’t Miss: Why You Suck at Throwing a Baitcaster)
Tactic Three: Bluff Banks
Our third strategy mimics the second. However, here, we want to find a place where schools of bass can pin baitfish. This is an incredible fishing opportunity when it presents itself. On many lakes with steep, bluff shorelines, smallmouths will hold on small shelves and rock piles waiting for baitfish to blow in. When that happens, the bass go berserk and massacre the minnows right up against the wall.
Again, it’s imperative to first find the baitfish, then find areas where wind or current will blow them against the bank. Even areas with strong winds producing noticeable waves against a bluff bank are still in play. Occasionally, a large sea-wall or the face of a dam will suffice. In any case, we’re looking for places where baitfish are being disoriented and facing a large object.
These spots are often snaggy, so a cast-and-retrieve bait is better than a bottom-bouncer. Swimbaits on a heavy jighead are great. Big bladed spinnerbaits come on strong once the water clouds up from wave action. At times, a Rat-L-Trap is all you need. Remember, this is an all-or-nothing method, so you’ll know right away if it’s working.
(Buy Alert: Red Fish Long Sleeve Tee)
Tactic Four: Great Lakes Basins
The big brown bass of the Great Lakes are a different breed. Sure, some come shallow in fall, but most stay deep and move deeper. In twenty-plus years of fishing the big waters, autumn was never underrated. Start your search where the best summer fishing occurred, and move deeper. Bass from adjacent structures will eventually meet up in one special area. Years ago, I coined these places Basin Zones, where the outside edges of summer structure meet vast, open water basins. On Lake St. Clair, this is often 18 feet of water; on Ontario is may be 50.
What we’re looking for here is the last piece of structure before the bottom drops to never-never land. Don’t begin casting until you mark significant numbers of fish. We’re looking for the motherlode here. The best presentations will be efficient deep-water methods. Drop-shot plastics remain number one, followed by metal blade baits and spoons. Underspins are becoming popular, as are solid-body swimbaits on jigheads weighing 3/4 ounce. The key is to get a bait down, even in the rough seas associated with fall fishing up north. Once you find them, the fish will do the rest.
(Don’t Miss: The Best Postspawn Crappie Fishing Tactics)
Tactic Five: Flats in the Desert
A quick review of recent smallmouth action reveals new fisheries in the West are coming on strong. Lakes like Havasu and Mead are producing eye-opening catches. Here, tactics mimic those of other parts of the country, with a desert twist. Clear waters and large striper populations put baitfish on high alert. When looking for smallmouths, sometimes the best play is to first find the stripers.
Striped bass are efficient open-water predators, likely due to their saltwater roots. Other species, notably largemouth and smallmouth bass, often feed in and around schools of stripers. Picking up the scraps can make for a good life.
Look for feeding action around shallow points and rocky flats. There, fish jerk baits and topwaters with a brisk, aggressive retrieve. If your catch includes nothing but stripers, slow down with a white hair jig fished in and around the school. Mike Guerra — an old friend living and fishing in Vegas — jigs a white hair jig around striper schools until temps cool to jacket weather, and he has some of his best smallmouth days when everyone thinks he’s striper fishing.
Sorry to let the cat out of the bag, Mike.
(Don’t Miss: Hundreds of Sharks Congregate in West Florida Canals)
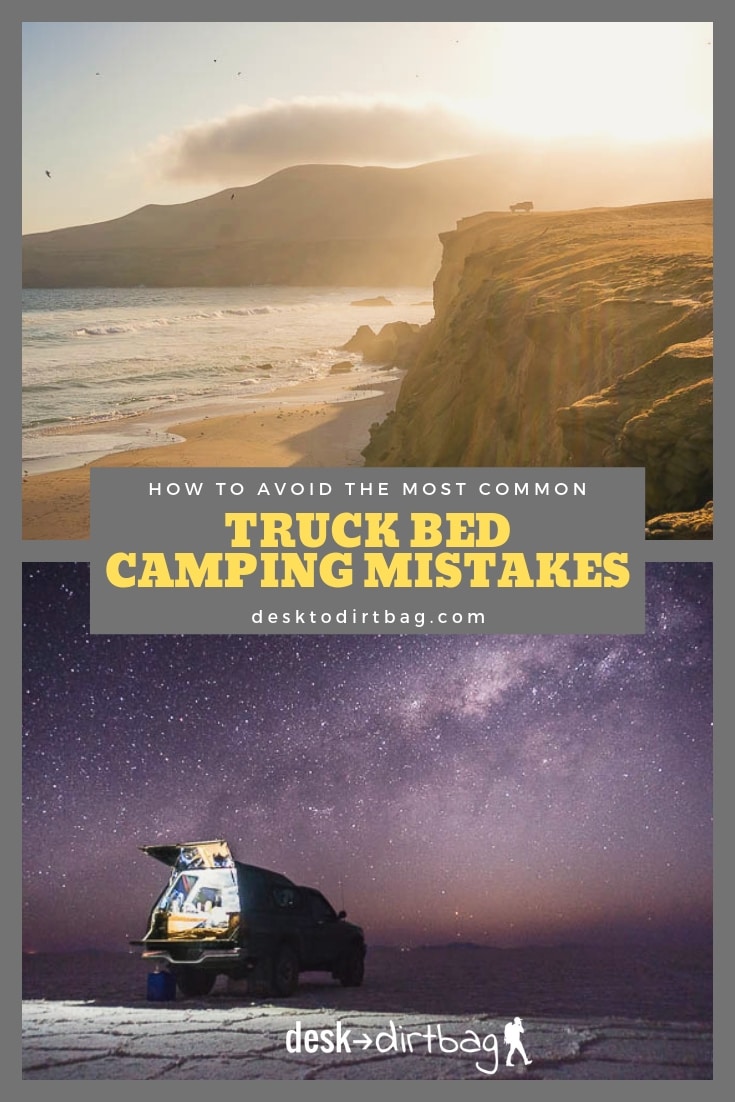
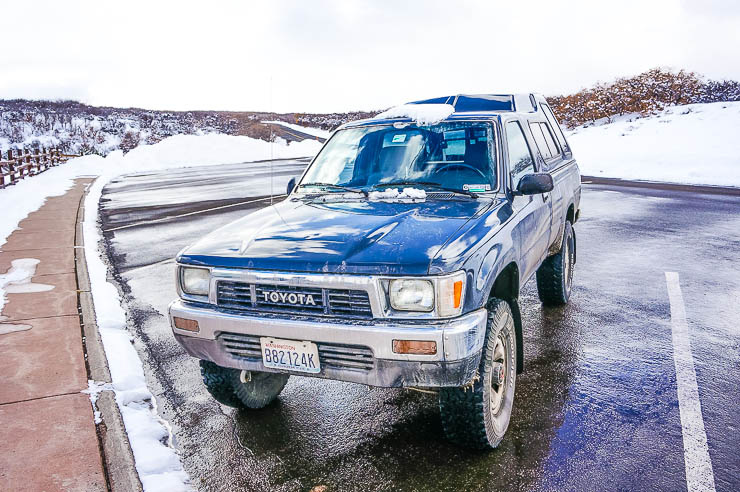
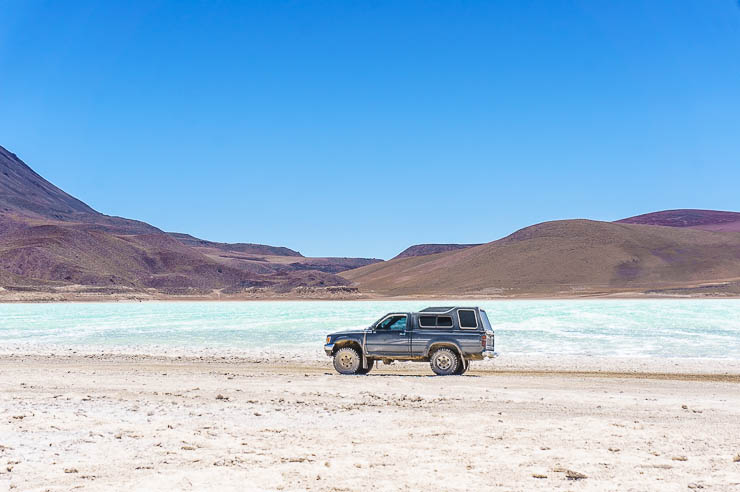
Truck bed camping can be a blast; indeed, I think it is one of the best ways to travel and get out there, but you have to do it the right way. Desk to Dirtbag has become the #1 site and resource about the whole truck bed camping movement and I have received thousands of emails over the years from readers asking for help and been tuned in to thousands of conversations in our Pickup Truck Camping group on Facebook. That’s all to say that I’ve seen virtually all the truck bed camping mistakes or fails that people make.
Heck, I’ve certainly even experienced a few of them myself over hundreds of nights and 10’s of thousands of miles. Not only have I embarked upon a great American road trip more than a few times, but I’ve also driven across all of Latin America with my ol’ truck. Needless to say, I’m very aware of the pros and cons of truck bed camping.
So, let’s get on with it, these are a few of the biggest truck bed camping fails that you should try to avoid, and which might completely ruin your trip.
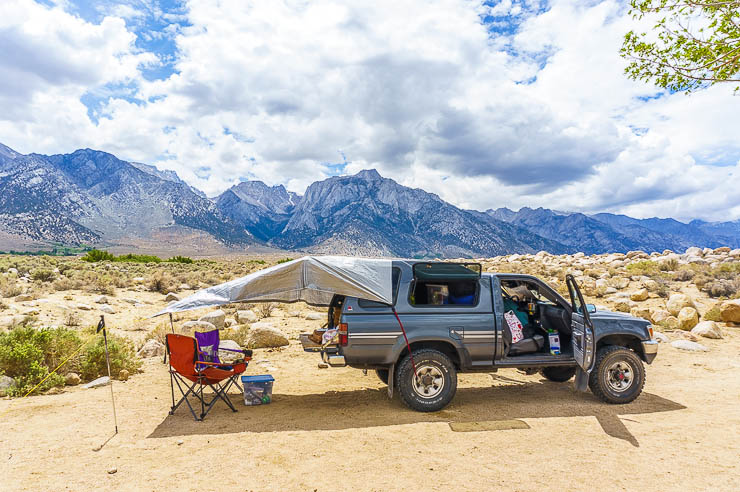
Part of truck bed camping is building out the back of your truck below the canopy into a cool and cozy space where you can have your own little home on wheels basically. This means gear storage, sleeping, a place for cooking (with ventilation, of course), and a number of other factors.
I did a LOT of research about truck bed camping before I built out the back, and I’ve seen the pretty photos of those super complex builds with the super fancy roll-out drawers, custom lighting, carpeted storage bins, and so much more.
This is a big mistake, in my honest opinion, for a number of reasons:
The more you over-engineer your truck bed camping setup, the heavier you are making your truck which will eat into your fuel economy for every mile your drive.
The more complex the setup, the more “permanent” these installations usually are, which means less flexibility as your needs change, and increased hassle if you need to remove the setup to use your truck like normal (or even just clean). My setup, for example, takes less than 10 minutes to either completely remove or install.
These more permanent setups with fancy slide-out drawers will also dramatically reduce your living space, which leads us directly into the next big mistake…
My setup may not be the most Instagram-worthy, but it is definitely one of the most adventure-worthy vehicles.
Building a Coffin on Wheels
In an ideal world, you’ll only be in your truck for sleeping and then maybe a few hours in total before bedtime and after waking up. This is why the small space of a truck bed camping setup is something that most people can cope with, even over long periods of time. The idea of truck camping has never been just sitting in your truck all the time and hanging out, but rather to use it as a base for all sorts of other amazing adventures.
Side Rant: Ever notice how VanLife people post more pictures of their vans rather than the adventures they should be having thanks to their home on wheels? That’s what we don’t want.
In the real world, however (especially on longer trips), you are bound to find yourself hunkered down in your truck for longer periods of time, perhaps due to a terribly rainy day or for some other reason.
This is where the overbuilt approach mentioned above becomes an even bigger mistake…
The standard truck bed camping approach is to build an elevated platform for gear storage underneath (those fancy sliding drawers and things) but this drastically cuts into your sleeping quarters.
Some people end up likening their truck camping setups to coffins on wheels… They are only big enough to shimmy into and sleep, especially if they have a standard canopy rather than the elevated canopy, as I recommend.
Imagine being stuck inside your little coffin all day without the ability to even sit up!
For that reason, I highly recommend doing the back-shelf approach or the transformer approach that I advocated, rather than the elevated platform approach.
Read more about two main approaches to truck bed camping and their pros & cons.
Not Weatherizing Your Canopy
There’s nothing like the great outdoors and sleeping under the stars, but the whole idea of truck bed camping is the ability to take shelter. That’s what your truck canopy is for. Throw it on top of your truck bed, and the rest will take care of itself, right? Wrong. You need to take precautions, otherwise, you might wake up one morning feeling very wet.
First, make sure your canopy properly fits your truck bed. That should go without saying, but you’d be surprised by some of the rigs you see out there. If your canopy is too small (or too large), or has gaps of light coming through, you need to figure out if it’s defective or unusable for your rig. Don’t ignore this.
If significant amounts of air can come through, so can water. Heat will leak out, too. Who wants to be cold and wet on their trip? The easiest quick and dirty test is to jump inside and get a friend to spray the canopy & truck bed points of contact with a hose from all different angles. Also, focus on the tailgate area for this test. It isn’t perfect because an ongoing torrential rainstorm will be the real test, but it should help you identify the biggest problem areas.
Once you have a canopy in working order, look for ways to ensure moisture never gets in from the outside. Invest in weatherizing truck canopy tape and use it to seal the edges where your canopy meets the bed walls. Pay special attention to the bulkhead, which is the area where the cab meets the bed. Many of my fellow truck campers have issues with water entering through this area, so take the time to waterproof it. I’ll emphasize that you should really take the time to do this, because having a dry space you can rely on is crucial when the weather is at its worst.
Properly sealing your canopy can also help eliminate dust from infiltrating the back which can be a big problem if you’re spending a lot of time off of the asphalt. I took the time to use that sticky foam weather sealant to identify these problem areas which dramatically reduced the amount of dust.
Do this test at night: with the help of a partner, you can have one person inside and another outside as one of you shines a bright flashlight to identify where light escapes (check with the light both from the outside-in and inside-out).
Not Having a Proper Sleep Setup
Do you think you’re one of those people that can fall asleep anywhere? That may be true, but that’s no reason to leave a quality night of sleep to chance. A restless night makes it harder to function during the day. It doesn’t make you look tougher if you’re crabby and fumbling around all day because you didn’t sleep well.
This was probably my biggest mistake when I first set out… I neglected to have a proper sleep setup because I was an experienced backpacker and mountaineer, accustomed to sleeping on little inflatable sleeping pads and squishing some clothes into a stuff sack for a pillow.
FAIL.
This is truck camping, you don’t need to go ultralight (although you shouldn’t go ultra-heavy either). My biggest recommendation is to get a quality truck bed mattress and a nice pillow.
You need a pillow you can actually use, not some worn-out thing from the back of your closet. And beware of memory foam pillows if you plan to sleep in the cold — those things turn hard as a rock (another lesson learned the hard way… literally).
Get some sort of sleeping surface too, so that you don’t lie awake feeling the ridges of your truck bed all night. It could be as simple as a sheet of plywood across the bottom of your truck bed which is basically what I use.
Find a sleeping bag that actually keeps you warm and fits your body. None of this needs to be ultra-expensive, but it does need to be functional. For the sleeping bag, at least, it is worth looking to the backpacking world for clues… You want something that is high quality but can still stuff down without taking up a bunch of room.
To cover the widest range of temperatures, I think that a 15-degree bag is the sweet spot. It will keep you warm inside your truck camping setup in all but the most frigid conditions… I’ve used mine when outside temps were in the single digits — inside the canopy obviously is warmer, and I also use appropriate winter clothes inside the sleeping bag. When it gets warmer, you can open the sleeping bag up and use it as a comforter.
If you’ll be in hot and humid conditions, be sure to just bring along a simple cotton sheet instead.
If you can manage to be a little more comfortable at night, it will make the rest of your adventure that much better.
Read more about choosing a truck bed mattress and sleep system.
Not Locking Up Your Valuables
You might always think the best of people, but that’s no reason not to protect yourself. On the other hand, it’s no good to spend the time away from your truck worrying about who’s going to steal what’s inside it. So, before your next trip, devise a way to keep your best stuff not just hidden, but inaccessible to anyone but you (and the people you’re traveling with).
Sure, you could just trust the lock on your canopy, but what good is that in a smash-and-grab situation? Instead, opt for a storage system that deters thieves with its complexity. You want to make it difficult enough for them to the point where it requires tools for them to get in since almost all of these thefts are crimes of opportunity.
If you’ve got the must undercover truck at the trailhead or in the parking lot, the thief is likely to go after the easy mark or the one that screams “I’ve got a bunch of expensive stuff inside” (yeah, again looking at the VanLife people).
One reason I love a truck bed camping setup as opposed to many others — even rooftop tents — is just how discrete it is. Most people think it is just a truck with a canopy, not a home on wheels. But canopies are also pretty easy to break into, so I wouldn’t trust hundreds or thousands of dollars of gear to some canopy locks.
It is this reason that the gear platform style of truck camping setup is often chosen because one can have a relatively protected area (if there are additional locks) so the bad guys can’t get in easily, even if they smash your window.
That’s also part of the reason I made the transformer setup, so I could lock my tailgate to the elevated platform, effectively complicated the life of anyone trying to quickly steal my gear while I’m gone. Hasp locks, in particular, work wonders with this setup when it comes to keeping your belongings protected because you can actually lock your whole tailgate to the elevated platform.
Regardless of which type of setup you choose, you should have another locked or protected storage space inside your truck bed camping setup.
Not Camping in a Suitable Area
A great way to completely derail your truck camping adventure is to hunker down for the night in a place you shouldn’t. This takes many forms… You can park too close to the road and leave your truck prone to accidents. You can get too far off the beaten path and get stuck in the mud. You can even plant yourself on someone’s private property and find yourself in trouble with the authorities.
There are easy ways around this. Campgrounds, of course, provide the most straightforward answer, of course, then you will have to pay to spend the night… You can expect that to run you $20 or more per night. That’s fine for a weekend adventure, but if you’re going full-time, that would amount to at least $600 per month.
That’s why so many truck campers turn to free camping in the USA. I’ve camped almost everywhere imaginable, from the middle of dry lake beds, Las Vegas casino parking garages, Wal-Marts, gas stations, and every in between… And that’s just in the United States, don’t get me started on the overlanding adventures through all of Latin America.
Thanks to the stealthiness of your truck, you’ve got plenty of options that are under the radar too… In urban or suburban areas, you might park in a Wal-Mart parking lot, in the lot of another 24-hour business like a gym or Denny’s restaurant. One of my back up plans is to park at an auto mechanic shop right between some old rigs waiting to be worked on.
Pro Tip: Getting a cheap gym membership is also a great way to have access to showers. Make sure to find a good national gym, like 24 Hour Fitness, with lots of different locations if you are planning to be living out of your truck and on the road.
Of course, those places aren’t why you’re getting out there, those are just options for “in-between” — the real draw is to find awesome places to camp in mother nature. My go-to is the many Federal lands that allow free and unfettered access to vehicle camping opportunities, namely the Forest Service or BLM lands.
Pro Tip: If you’re planning a national park road trip then be sure to pick up the America the Beautiful annual pass which will save you tons of money on park entrance fees. My tactic is usually to visit the parks during the daytime and then find nearby free camping.
The two best places to find free (or cheap) campsites across the country and beyond are freecampsites.net and iOverlander.com. These are the first places I go when I’m looking for an affordable place to spend the night in my truck.
Sometimes the free campsites are actually pretty awesome themselves — maybe not quite National Park caliber, but you’ll usually find some beautiful nature, maybe some hiking trails (certainly nearby), and maybe even a rustic bathroom.
Don’t let your taste for adventure cloud your judgment. Being in a safe and suitable spot for the night is the key to happy truck camping adventures. Trust me!
Not Thinking About Your Power Setup
Electricity is crucial when you’re out on the road, even if it just means keeping your camera, cellphone, and computer charged up and ready to go. One of the most unwise ideas you can have is thinking power issues can be addressed on-the-fly. You need to know how to get power from under your hood to the truck bed. Are you good with just having a cigarette lighter hooked up in the canopy and running on DC?
You also need to determine how you’ll maintain power throughout your trip. The needs for someone just charging their cellphone are going to be totally different than someone running a mini-fridge back there. At the most basic level, you can charge devices off your main starter battery, but you should monitor it carefully and idle your truck at least once every one to two hours.
Do you know how much power you’ll need to use in an average day? What are you going to do about your car battery? Will you need to hook up a second battery and an isolator? Answer all these questions before hitting the road, otherwise, you’ll stare a major truck camping fail right in the face.
I would highly recommend getting a second battery and isolator installed though, as that will bring the worry factor about killing your starter battery and stranding you somewhere to nil. This was a huge upgrade for me and highly recommended.
Read more about getting a dual battery setup and isolator.
Getting Bad Gear
While truck bed camping doesn’t have the weight limits that backpacking or mountaineering entails, it is still important to consider the overall quality of your gear, the amount of space it takes up, and yes, at least consider the weight factor.
For one, you will still be camping, so quality gear that will not break, leave you stranded, hungry, cold, miserable, etc., is important.
Two, space is still limited in the back so if you buy bulky, cheap gear, you might quickly find that your living quarters have been drastically reduced. High-quality camping gear, especially of the backpacking slant, tend to be much more portable than their cheap counterparts.
Three, weight is still a consideration… Overpacking with heavy or bulky gear is going to impact your fuel economy at best, and at worst, it could cause complications for your suspension (especially if you overbuilt the back as discussed above).
That’s why it is still important to try and buy the best gear you can and try to ensure that most or many things can be multi-functional.
I’ve put together a massive guide about all the gear that I use, so be sure to check out my recommended truck camping gear and accessories. Don’t neglect fundamentals of your truck either…
That means a high-quality canopy (I use the Leer 122, but any elevated topper will do) and even nice tires that offer high clearance (I use the BF Goodrich T/A KO2s and love ’em).
Read more: my favorite truck camping accessories
Become a Better Truck Bed Camper
These eight truck bed camping mistakes are certainly avoidable. It just takes a little forethought and common sense, really. Plus, you’ve got the advantage of learning from my mistakes or the mistakes that I’ve seen others making in my years of truck bed camping experience.
Honestly, truck bed camping is one of the best and most affordable ways to get out there, travel more, and find more adventure, so it’s something that I recommend to almost anyone (who will listen to me).
If you are looking to take your truck camping to the next level, don’t miss out on signing up for my free email course with more hard-earned truck camping knowledge:
Read Next: The Ultimate Road Trip Planning Guide
Share This
Did you enjoy this post about the biggest truck bed camping mistakes and fails? Take a second to share it on Pinterest, Facebook, or Twitter. Thanks!
While traditional catfish baits like chicken gizzards, shad and shrimp are all common and effective, do not overlook using regular minnows for catfish bait.
In fact, using minnows for catfish is a tactic that can be very effective in certain bodies of water, depending on the species of catfish and forage available.
Additionally, minnows are usually readily available at bait shops, or easy enough to catch your own.
Which species of catfish eat minnows?
Virtually all species of freshwater catfish will eat minnows, but I’ve had the most success targeting brown bullheads, yellow bullheads, channel catfish, and white catfish.
Flathead catfish love to eat other fish as their primary food source…and although sunfish are a better bait choice, shad, shiners or large minnows can also be very effective.
How to Catch Catfish with Minnows
To specifically target catfish with minnows as bait, you need to fish your baits on or near the bottom. A simple sinker/knocker rig consisting of a circle hook, leader, swivel, and sinker is effective and versatile.
In lakes and ponds, catfish will generally be found near structures and vegetation along the bottom, as they like to hide out and take cover for hours at a time.
See Also: The Best Time Of Day To Catch Catfish
If you are fishing a small area, you can chum the area first with dead minnows to help spread out the scent and attract nearby fish.
Then, cast out your catfish rigs along the bottom. Experiment with different depths to find where the catfish are located.
I like to cast one line in the deepest section, another in the middle depth area, and the last line along the bank or shoreline.
By keeping your minnows on the bottom, you’re less likely to get bites from sunfish, bass, and other fish you may not be targeting.
Which Minnows are Best for Catching Catfish?
Catfish are not too picky when it comes to living bait or fresh (dead bait). Fathead minnows and golden shiners are popular choices, as these are both naturally occurring forage and large enough to target catfish.
However, here in Florida, I’ve used a bundle of small crappie minnows or mosquitofish to target brown bullheads and channel catfish.
Just hook 3-4 minnows on a hook (similar to putting a few worms on a hook). Fish it on the bottom and wait!
PRO TIP: A great money-saving tip for catfish anglers is to ask bait and tackle shops about their dead minnows. They will often give them away for free, as they can’t sell them and do not want to deal with the smell and pests involved with throwing them in the garbage.
Related: How Many Minnows are in a Pound/Gallon/Scoop
How Do You Rig Minnows for Catfish?
One of the most common rigs to catch catfish using minnows is the classic Carolina rig. Be sure to use small gauge circle hooks (2/0-4/0 size is best) and just enough weight to keep your rig along the bottom of the water column.
The Carolina rig is often used by anglers fishing from docks or piers in still water. This bottom fishing rig works to keep the minnow at the bottom of the lake while keeping a natural motion.
This is a “set it and forget it” approach to catfishing, and multiple lines are often used at once. The more the better!
“Slip bobbers” or “float bobbers” also can be helpful tools when river fishing for catfish in rivers, where the current may be too strong to fish on the bottom.
The bobber allows the minnow to stay high enough to float in the current, making it a great target for waiting for catfish near drop-off areas of the river.
I still strongly suggest you keep your floats adjusted so that the minnows are along the bottom of the water column.
How To Hook Minnow When Targeting Catfish?
If I am using live minnows, I will hook them through the tail so they stay alive and flutter/swim while on the bottom. If I am using dead minnows I will usually hook them through the head, as this is the most secure location.
How To Keep Minnows On The Hook
The biggest reason why minnows come off the hook is that the hooks are the incorrect size, or they are cast off and the hooks rip out.
Try using small gauge wire hooks, and match the hook size with your bait and intended target.
For example, If I am trying to catch 1-3 pound brown bullheads, a simple 1/0 circle hook is sufficient.
Related: The Ultimate Catfish Bait Soap Recipe (EASY!)
Are Live or Dead Minnows Better For Catfish?
While live bait is hands down the best option for targeting most species of fish, fresh dead minnows can actually work better when targeting catfish. Catfish rely on smell more than any other sense to find food, and the scent of fresh dead minnow or shiner can release attract catfish.
This technique works particularly well when fishing in creeks and rivers, as the motion of the water will make it less apparent that the fish isn’t moving.
Releasing scent and oils into the water will draw in a variety of fish, working to chum the water while fishing.
Final Thoughts
So, should you use minnows exclusively for catfish bait?
No, that is not what I am suggesting…
But catfish are one of the few freshwater fish you can really experiment with different bait options.
I think you will find that some catfish respond to certain baits better than others, and that may vary from lake to lake.
Next time you are out crappie fishing with minnows for crappie, walleye, or bass…throw a few on a bottom rig and try for some catfish.
You may be surprised at what ya catch!
Related Posts
How To Use A Fish Stringer (Easy Explanation W/Tips)
How To Keep Minnows Alive Without an Aerator (7 Tips)
Why You Should Be Using Kool-Aid As Catfish Bait!
How to Catch Koi Fish (And Are They Edible?)
5 Effective Ways To Catch Minnows for Bait
Using Bluegill For Bass Bait? Don’t Miss These Tips!
Bowhunting turkeys is the ultimate challenge. Bowhunters are tasked with convincing a mature Tom to go against its natural breeding style and come within range, and then they have to make a clean and ethical shot while remaining undetected. Every single piece of equipment for a turkey hunter matters—especially the broadheads.
Turkey hunting is incredibly tough to start with. The birds have keen eyesight and a relatively small kill zone compared to common big-game animals pursued with compound bows, such as whitetail or elk.
Thus, the small game is going to require a deadly-sharp broadhead and ideally an impressive cutting diameter.
Our list is a mix of fixed blade broadheads and expanding mechanical broadheads, so there are options for beginners or different preferences on turkey hunting.
Be sure to check out our other turkey hunting tips to help nab a big gobbler this season. But for our top six picks for the best turkey broadheads that will get the job done, read on.
Rage’s dedication to broadhead design is clearly evident in the X-Treme. The Meat Hook cut-on-contact tip makes this broadhead extremely lethal, and the patented Shock Collar is a familiar and effective design.
Specs and Features:
2.125″ cutting diameter
Ferrule Alignment Technology
Meat Hook cut-on-contact tip
.035″ Thick stainless steel blades
2. NAP Gobbler Getter
newarchery.com
The Gobbler Getter by NAP has been around longer than most turkey broadheads on the current market and earned its reputation as “Ol’ Faithful.” The innovative blunted tip is what makes it stand out from most other broadheads. The trauma from that tip, which allows the broadhead to crush bones and stay in the kill zone as the expandable blades to do their job, is what makes these broadheads so effective on turkeys.
Specs and Features:
1.5″ cutting diameter
Blunted “turkey tip”
Diamize blades
3. Magnus Bullhead
While some broadheads are designed for more reliable and risk avoidant body shots, the Magnus Bullhead fixed blade broadheads opt for the more deadly head and neck shots, while mitigating some of that risk through their large and large cutting diameter. With incredibly durable .048″ thick razor blades, as well as a 2 ¾” cutting diameter, it’s easy to see why these broadheads are turkey slayers.
Specs and Features:
2 ¾” cutting diameter
.048″ thick, replaceable stainless steel blades
Straw and shield free
Replacement blades iIncluded
4. Xecutioner Turkey Necker
With a similar design to the Bullhead by Magnus, the Turkey Necker was designed for hunters that are looking for those meat saving neck shots. The four massive, razor-sharp blades ensure hunters can execute those shots ethically with peace of mind. Those thunder chickens don’t stand a chance.
Specs and Features:
4″ cutting diameter (160 grain head)
.060″ thick blades
4 heads per pack
Ferrule 7570 aluminum construction
5. Solid Turkey D-Cap
Relatively new to the scene, the turkey D-Cap broadhead is making a name for itself as one of the most dependable and deadly turkey hunting broadheads on the market today. This one is 200 grains, so it can be tricky to get used to for most archery hunters. It packs a powerful punch! The kinetic energy is unmatched, and with a 4″ cutting diameter, this thing is deadly in the spring woods.
Specs and Features:
4″ cutting diameter (200 grain head)
.060″ thick blades
Field point accuracy up to 50 yards
3 blade design
6. G5 Deadmeat
The Deadmeat by G5 Outdoors doesn’t typically standout as the ideal turkey broadhead, but initial looks can be deceiving. The SnapLock retention system is one of the most reliable systems on the broadhead market, and the .044″ thick blades are insanely sharp, while still producing a 1 ½” cutting diameter, which is somewhat conservative for these tough birds, but the results speak for themselves.
When it comes to historical duck calls, the Glodo name is recognized as being the “pinnacle” of all calls amongst collectors, especially those that collect vintage calls from Illinois and Tennessee. The Glodo name is also accompanied with much mystery and lore. The first mention of an overall Glodo duck call was in Nash Buckingham’s 1928 article, “The Neglected Duck Call” which read:
“Swamp angels and market hunters of that day, however mothered by apparent necessity, were using handmade calls not much different than today’s models. As in most contrivances, our best calls spring from those most early modes. The most noted of early calls was the Glodo, made, I think, by a Frenchman famed for his prowess with gun and call on a once well-known Southern Illinois marsh. My friend, Guy Ward, of Reelfoot Lake and trap shooting fame, is the proud possessor of an original Glodo. I have heard that as a reed producer and toner, Glodo’s experimental turn for metal manipulation was a little short of marvelous.”
Up until the 1980s, it was thought that Victor Jr. was the only call maker in the Glodo family to make calls. Through the vast and relentless research of Mr. Gerald Droge of Anna, Illinois, it is now known that many Glodo family members made calls.
It all started in 1840 when Victor Glodo Sr. immigrated to the United States from France. Victor Sr. landed in southern Illinois, outside of St. Louis, where he met a local woman, got married and started a family. His first son, Victor Glodo Jr., was born in 1845, and his second son, John Nicholas, was born in 1847. At some point in the late 1850s, Victor Sr. lost his wife. Soon after he packed up the two boys and moved to Degonia Township in Jackson County in southern Illinois. Degonia is located along the Mississippi River bottoms between Chester and Murphysboro, Illinois.
Victor Glodo Jr Duck Call from Reelfoot Lake Circa 1890’s
In July 1862, both Victor Sr. and Victor Jr. volunteered for service in the Union Army. Victor Sr. was honorably discharged a few months later after suffering a heat stroke and returned to Degonia. Victor Jr. remained in the service and returned home in 1871. Around the same time, Victor Sr. remarried, and his third son, Albert Henry Glodo was born. At this time they were all living down the road in Fountain Bluff where the Big Lake Marsh was located that was earlier mentioned in Nash Buckingham’s article. During this time, they were hunting ducks for the market and when they started to make duck calls.
It can be rather difficult trying to figure out which members of the Glodo family made individual calls that are attributed to them but a trained eye can say that a duck call was more than likely made by one of the family members.
Glodo Family call that is thought to be made by John Nicholas Glodo. Circa 1880s
It is not known for certain that Victor Sr. made calls but early records show that he worked as a carpenter and a blacksmith so one could infer that he probably did. It is known though that all three of Victor Sr.’s boys made calls. The calls made by Victor had rounded shoulders, a bulbous stopper, and had a copper reed. Victor made both smooth barrel and checkered calls. His calls were very well made considering that he made them all by hand using homemade carving tools.
The calls made by John Nicholas mostly had flat tops, copper reeds, and a checkering pattern much different than that of his brother Victor. It was stated in an early article of Forest and Stream that John Nicholas was selling calls for as much as $10 in the early 1890s. The calls thought to be made by Albert Henry were similar in design to that of John Nicholas’ but were a bit smaller in stature and the checkering pattern was a little more refined.
Glodo Family Duck Call. Circa 1880s
In 1888, the Big Lake Marsh where the family market hunted was drained. The once waterfowl rich area would now be farmed for row crops. To continue hunting for the market, Victor Jr. packed up and headed to Reelfoot Lake in northwest Tennessee, and John Nicholas headed for the Big Lake area of northeast Arkansas, near Blytheville, only later to return home.
During this timeframe, John Nicholas’ oldest son, William Albert, started to make duck calls as well as Albert Henry’s two boys, Joseph E. and Walter Albert. The calls thought to be made by William Albert are similar to the calls his dad made but are much more crude. Calls that are attributed to Walter Albert are shorter in stature and have raised panels. Some of his calls have some checkering on them and others do not. Calls attributed to Joseph E. are well made but rather plain in design. The family sold their calls at a general store in Raddle for $1 or $2 apiece. The last of the Glodo family known to have made calls was William Albert’s son, Arzia Emerson, who was born in 1902. Arzia carved things such as ducks, geese, and snakes into his calls.
Glodo Family Duck Call. Circa 1900s
Although Victor Jr. made duck calls while living in Illinois, it was at Reelfoot Lake where his legend and legacy became larger than life. It is known that Glodo lived in a tent camp on Starve Island where he market hunted and fished commercially. He seemed to have made quite an impression on the locals with his knowledge of the area, hunting ability, and for the duck calls that he was making. He was the person that introduced duck calls to the Reelfoot area, so it didn’t take long before the locals began to hound him for calls. The calls that Victor made while in Tennessee are a much more refined version of what he made while living in Illinois but the calls that he made in his later years of life show that his woodworking skills were diminishing. Around 1900, Victor moved off of Starve Island to an area now known as “Glodo Hollow” on the old Lake Road in Samburg. This is where he died in 1910.
Glodo Family Duck Call. Circa 1900s
His call making left a legacy in the Reelfoot area and set the standard for many area call makers after he passed. The two most noted call makers that used his design were Sundown Cochran and Tom Turpin. In a 1931 Field and Stream article, Turpin wrote:
“After getting the opinion of many of the most expert duck callers in the country, I decided that the best model is the call produced by Glodo, an old-timer of the jack-knife-school of artists, who made his calls at Reelfoot Lake some twenty years ago. Glodo’s model is on the same principle as the Beckhart and Faifer, both of which are good calls and should satisfy any hunter. I prefer the Glodo for certain features; I think the groove is better shaped, the general proportions better and the reed is wider and shorter”
Albert Henry Glodo Duck Call. Circa 1880s
Consider yourself lucky if you have a Glodo family made duck call in your collection as they are very rare and valuable. You can see early examples of Glodo family calls from my collection that are on display at the Ducks Unlimited Heritage Center in Memphis at Bass Pro Shops Pyramid until September 2022. I can be reached at [email protected] and @rkegraves on Instagram.
")
")
")
")
")


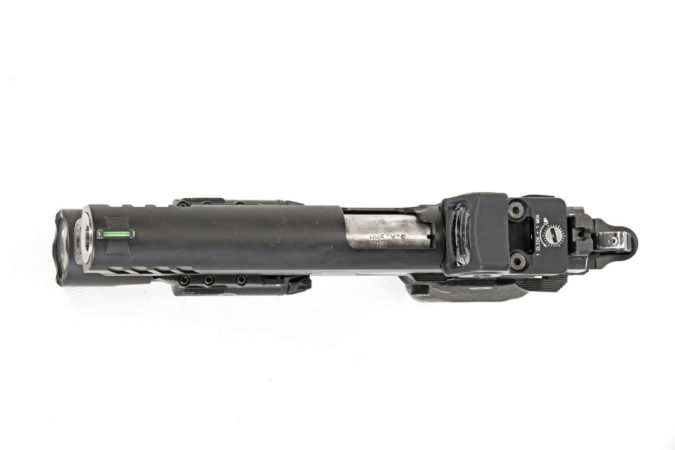


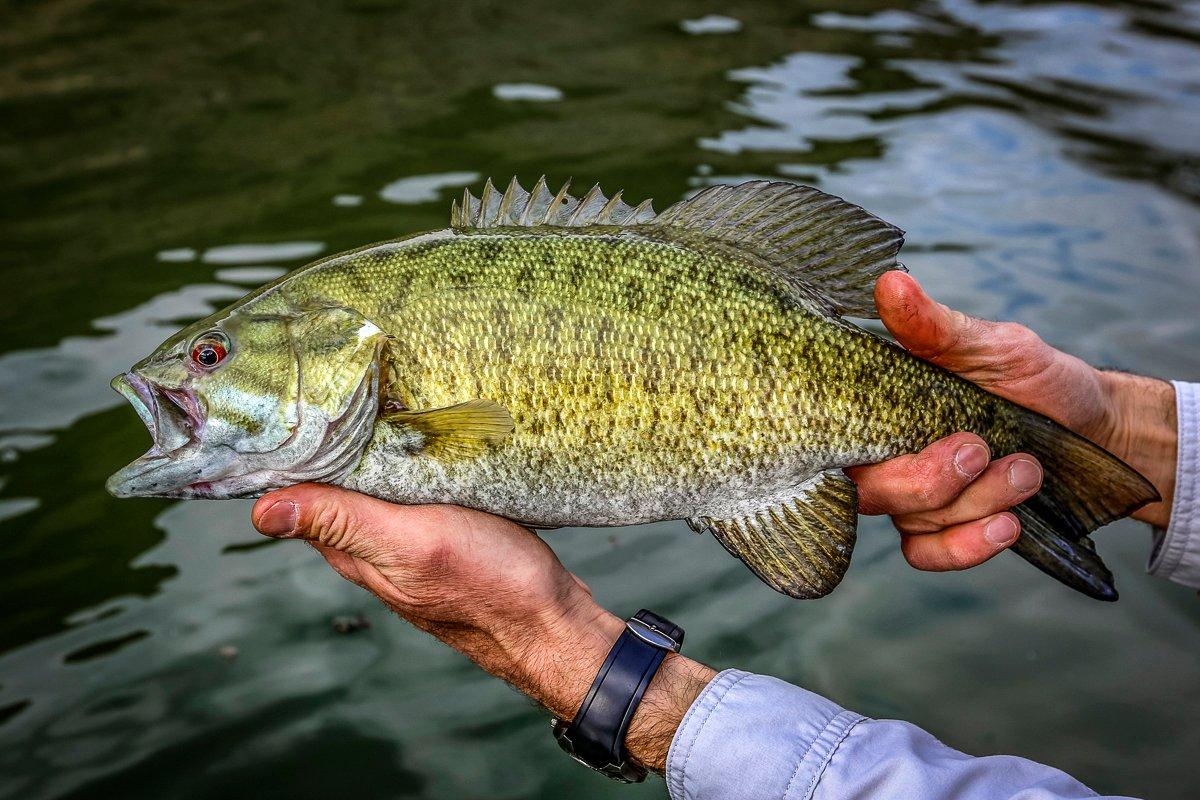
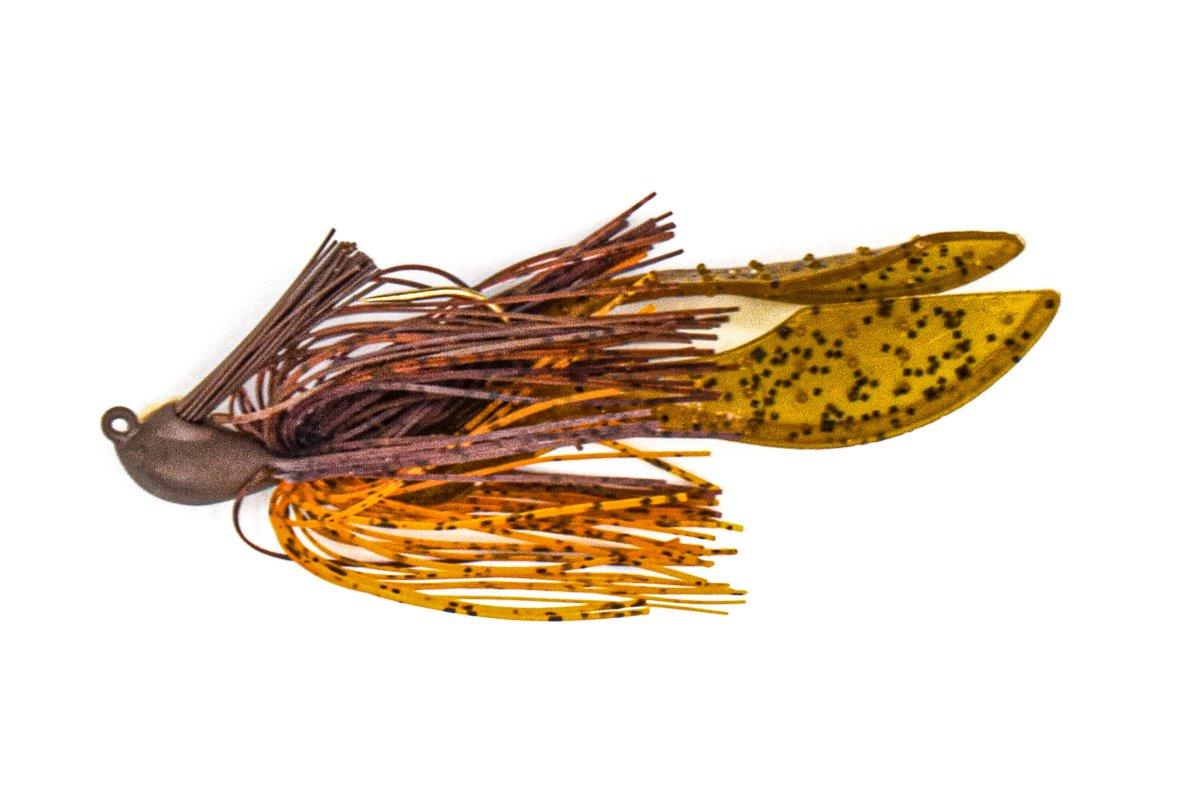
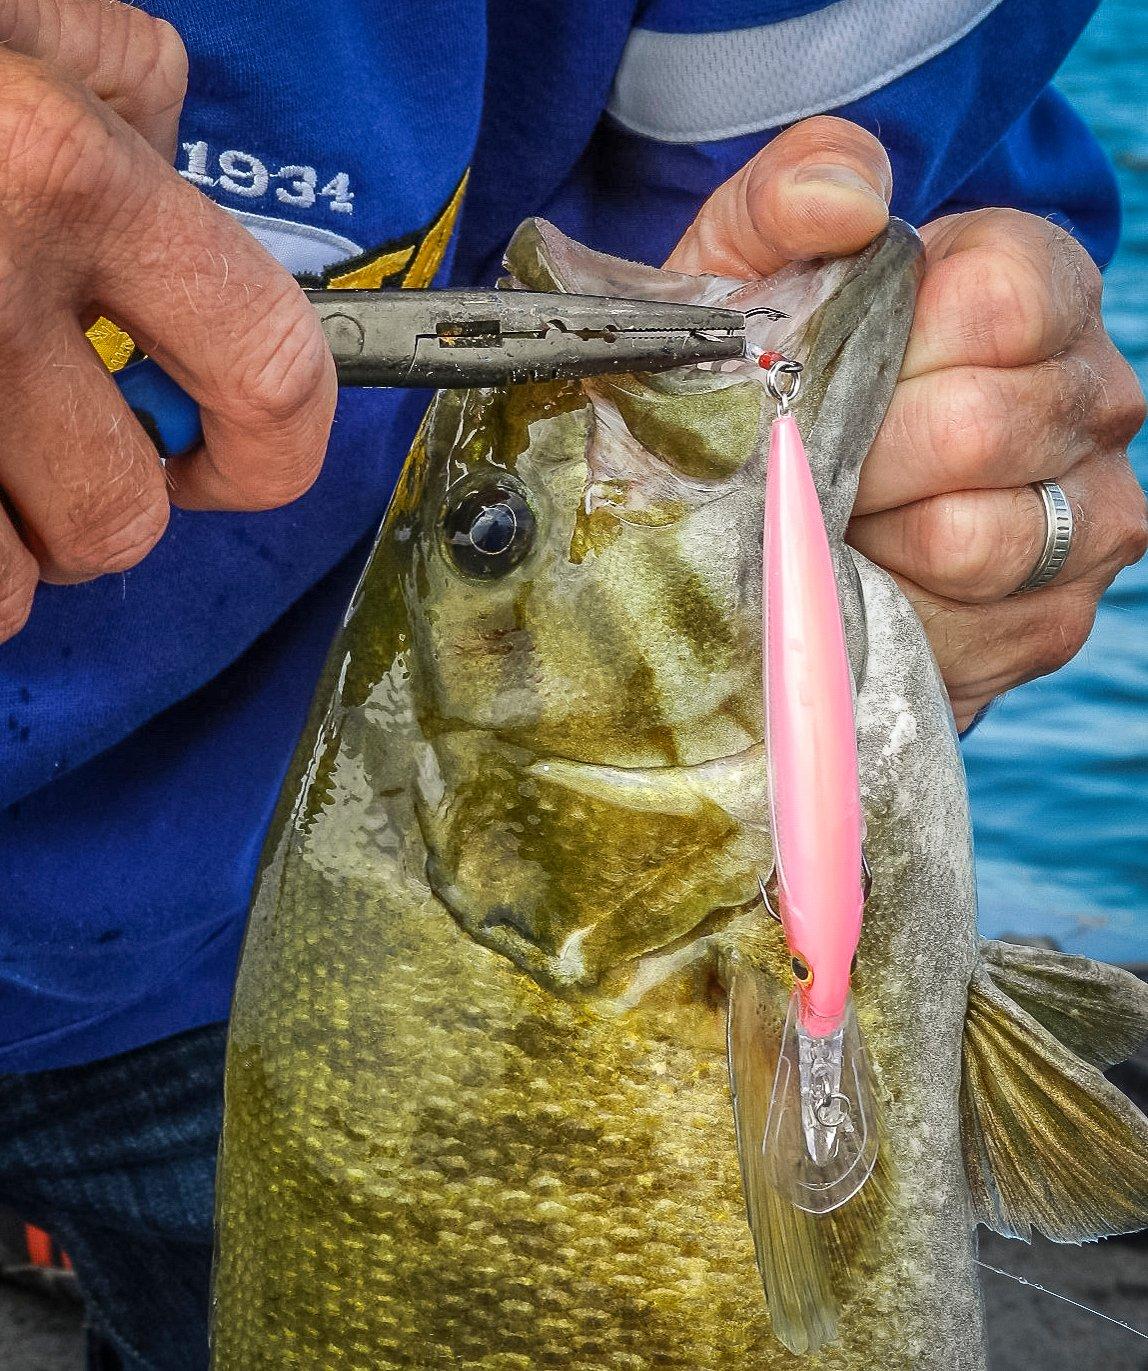
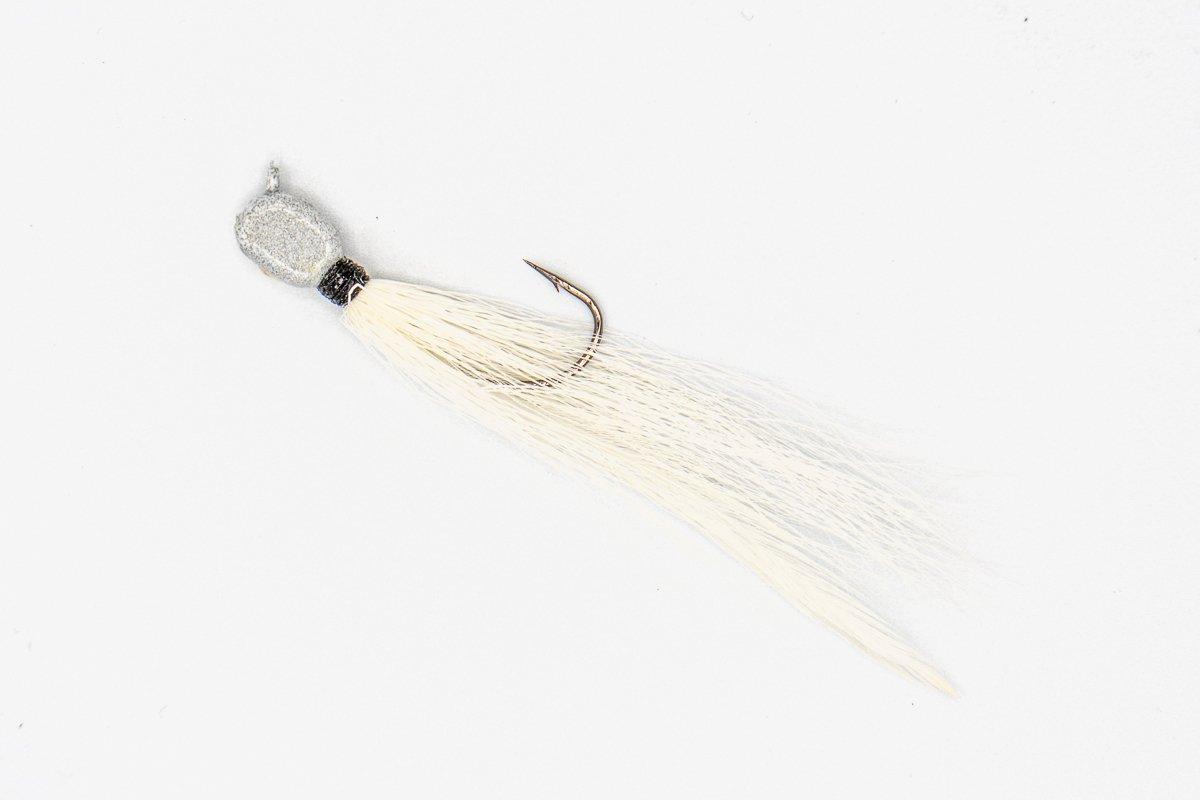
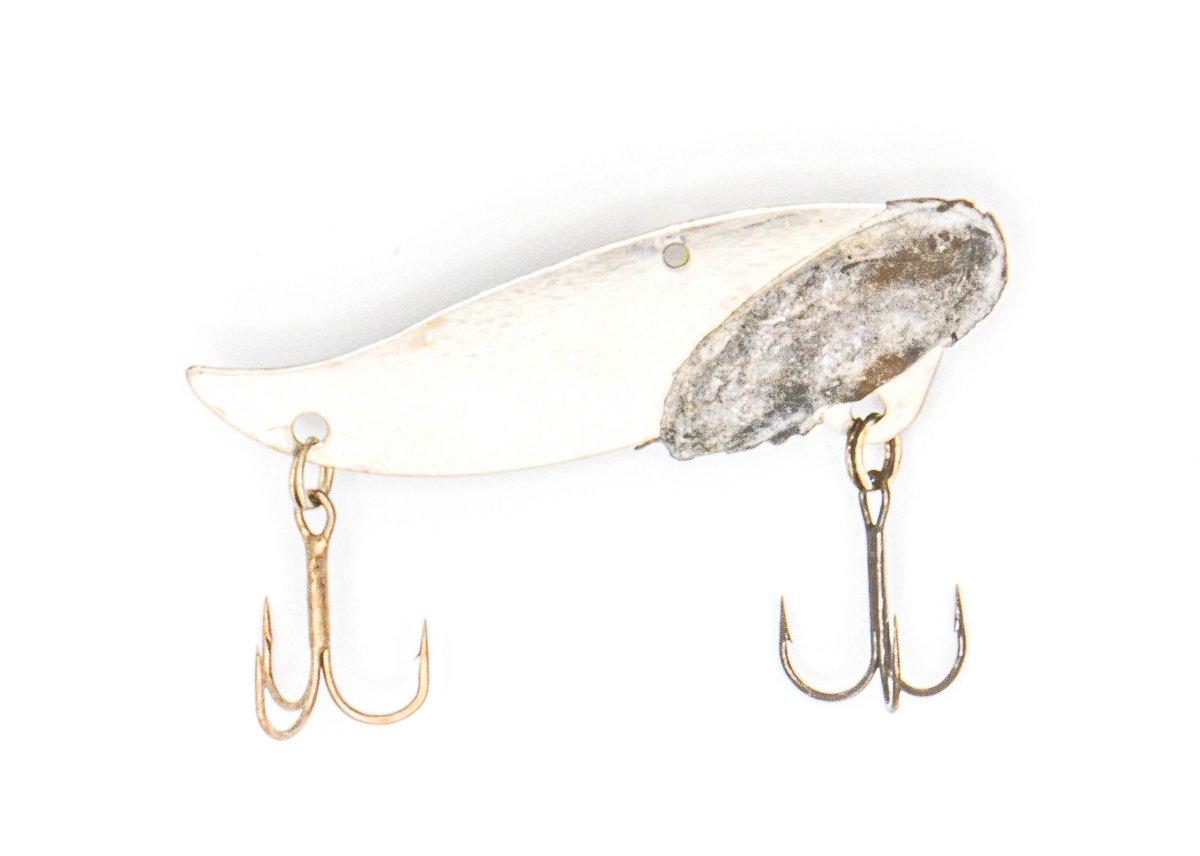
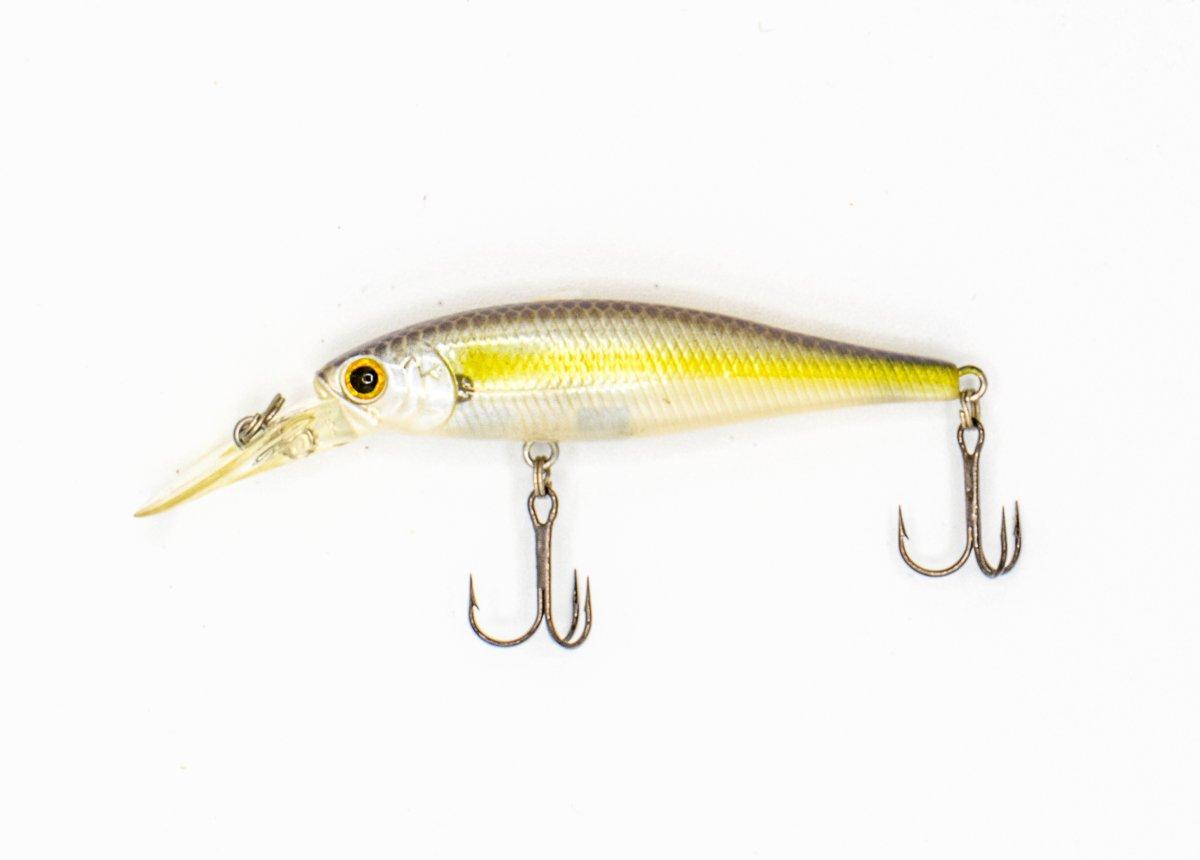

 Truck bed camping can be a blast; indeed, I think it is one of the best ways to travel and get out there, but you have to do it the right way. Desk to Dirtbag has become the #1 site and resource about the whole truck bed camping movement and I have received thousands of emails over the years from readers asking for help and been tuned in to thousands of conversations in our Pickup Truck Camping group on Facebook. That’s all to say that I’ve seen virtually all the truck bed camping mistakes or fails that people make.